Bonnie’s Sunday Dinner Pot Roast – Her Way: A Flavor-Packed Family Recipe

Bonnie's pot roast, Sunday pot roast, classic beef roast, slow-cooked pot roast, family dinner roast, flavorful pot roast

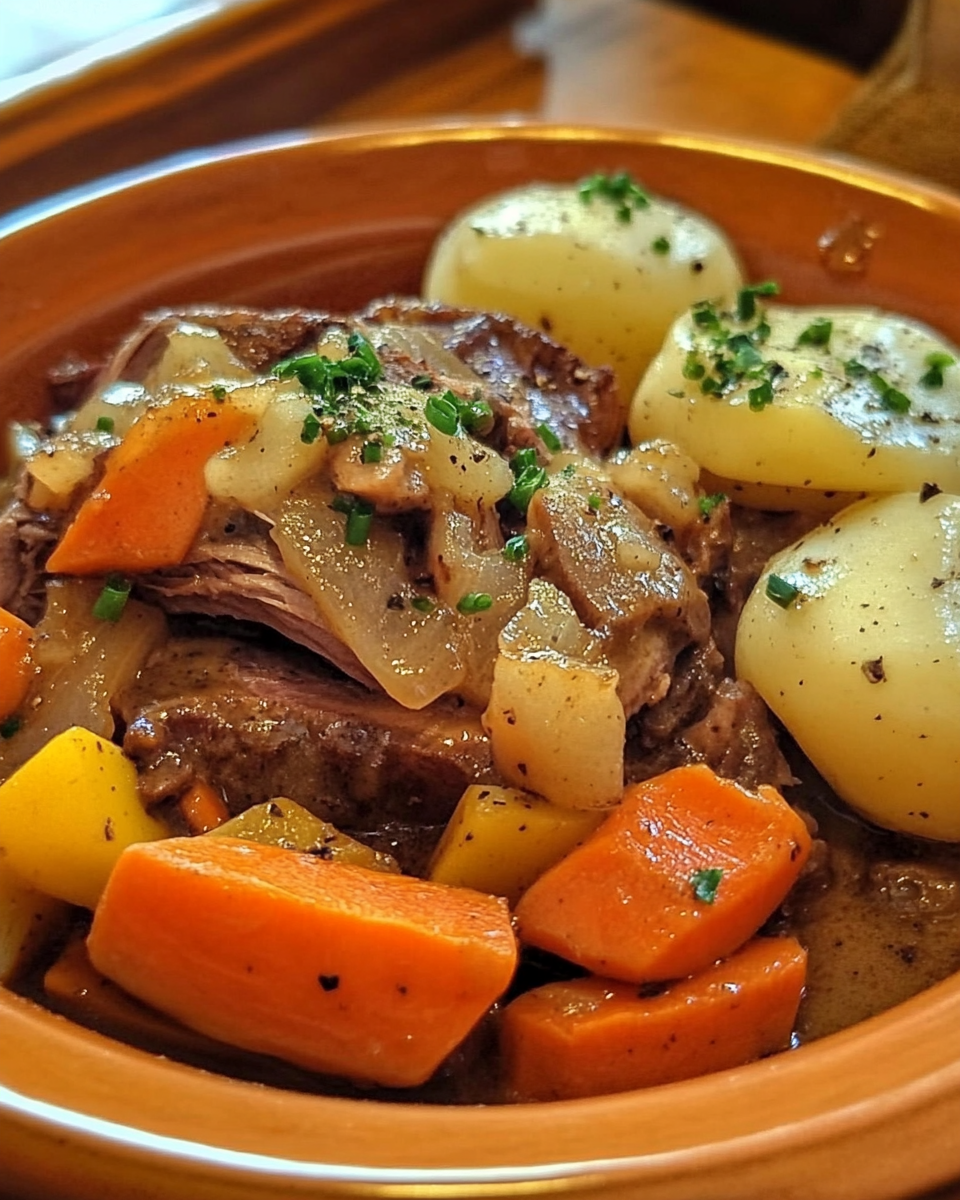
Bonnie’s Sunday Dinner Pot Roast – Her Way: A Hearty, Flavor-Packed Family Tradition

Sunday dinners are a time-honored tradition, and nothing brings the family together quite like a slow-cooked pot roast. Bonnie’s version of the classic pot roast stands out because of her special twists and techniques, making it a comforting, flavorful meal that will quickly become a favorite at your family’s dinner table. This recipe is perfect for those who want to enjoy a hearty, tender beef roast with vegetables that melt in your mouth.

For more delicious comfort food ideas, check out The Ultimate Comfort Food: Crockpot Potato Soup with Hashbrowns, which pairs perfectly with Bonnie’s pot roast.

What Makes Bonnie’s Pot Roast Unique?

Bonnie’s Sunday Dinner Pot Roast has all the elements of a classic roast, but with a few enhancements that elevate the dish. It starts with a well-marbled chuck roast that becomes fall-apart tender after hours of slow cooking. Her secret lies in the seasoning and the balance of flavors brought together by ingredients like red wine, garlic, and fresh herbs, creating a rich and savory gravy that brings out the best in the beef.

In addition to the unique flavors, Bonnie’s pot roast offers a wonderful contrast of textures – from the tender beef to the slightly caramelized onions and perfectly cooked potatoes. For an extra touch, Bonnie adds Worcestershire sauce and a splash of balsamic vinegar to brighten up the gravy.

Want to learn more about slow-cooked dinners? Check out Slow Cooker Magic: Unveiling the Ease of Crock Pot Baked Ziti for another cozy meal idea.

Ingredients for Bonnie’s Sunday Pot Roast

To recreate Bonnie’s famous pot roast, you’ll need the following ingredients:

  • Chuck roast (about 3-4 pounds): This cut is perfect for slow cooking, thanks to its marbling, which keeps it tender and juicy.
  • Red potatoes: These hold their shape during cooking, providing hearty chunks in every bite.
  • Carrots: Peeled and cut into large chunks to add a natural sweetness.
  • Onions: Use yellow or white onions for their mild sweetness.
  • Garlic: Adds depth to the overall flavor.
  • Beef broth: The base for the gravy.
  • Red wine (optional): Adds richness to the dish.
  • Worcestershire sauce: Brings umami and depth to the flavor.
  • Balsamic vinegar: For a slightly tangy, rich finish to the gravy.
  • Thyme and rosemary: Fresh herbs enhance the savory elements of the roast.
  • Olive oil: For browning the roast before slow cooking.
  • Salt and pepper: To taste.

Optional Ingredients

  • Bay leaves: For added aroma and flavor.
  • Crushed tomatoes: For a slightly acidic, tangy flavor in the gravy.
  • Mushrooms: Adds a meaty texture and earthiness to the dish.

Step-by-Step Instructions for Making Bonnie’s Pot Roast

1. Prepping the Meat and Vegetables

  • Begin by seasoning the chuck roast generously with salt and pepper.
  • Heat olive oil in a large skillet or Dutch oven over medium-high heat. Sear the roast on all sides until golden brown. This step locks in the juices and gives the meat a flavorful crust.

2. Building the Flavor Base

  • Once the roast is seared, remove it from the pan and set aside. In the same pan, add onions, garlic, and carrots, cooking them until they start to soften and caramelize. Add in the thyme and rosemary.

3. Deglazing and Adding Liquid

  • Deglaze the pan with red wine, scraping up any browned bits from the bottom. This adds incredible depth to the gravy. Then, stir in beef broth, Worcestershire sauce, and balsamic vinegar. Bring the mixture to a simmer.

4. Slow Cooking

  • Place the roast back in the pan (or transfer everything to a slow cooker). Add the potatoes and bay leaves. Cover and cook on low heat for 8 hours, or in a 325°F oven for about 3-4 hours, until the meat is fork-tender.

Pro Tips for Perfecting Bonnie’s Pot Roast

  • Brown the meat: Don’t skip this step! It creates a flavorful crust on the roast and helps develop the rich flavor of the gravy.
  • Cook low and slow: The key to a tender pot roast is patience. Let it cook slowly at a low temperature so the connective tissues in the meat break down, resulting in a melt-in-your-mouth texture.
  • Check the liquid: If the gravy reduces too much during cooking, add a little more beef broth to keep everything moist.

For another rich and flavorful comfort food recipe, explore No Peek Beef Tips: The Ultimate Comfort Food.

Serving Suggestions for Bonnie’s Pot Roast

This pot roast is perfect when paired with classic sides. Here are a few serving ideas:

  • Mashed Potatoes: Serve the roast with a side of creamy mashed potatoes to soak up the delicious gravy.
  • Roasted Vegetables: Add some roasted Brussels sprouts or green beans for a healthy, vibrant side.
  • Crusty Bread: A slice of crusty bread works wonders to mop up the last of the gravy.

Variations on Bonnie’s Sunday Pot Roast

1. Garlic Herb Pot Roast

  • Enhance the flavor by adding extra garlic cloves and a mix of herbs like parsley, sage, and oregano.

2. Spicy Pot Roast

  • For those who like a little heat, add red pepper flakes or diced jalapeños to the gravy.

3. Mushroom Pot Roast

  • Add mushrooms in the last hour of cooking to introduce an earthy, meaty flavor.

4. Instant Pot Version

  • If you’re short on time, cook the pot roast in an Instant Pot. Sear the meat, then pressure cook on high for 60-90 minutes with a natural release.

Nutritional Information

Here’s the approximate nutritional breakdown of Bonnie’s Sunday Dinner Pot Roast (per serving):

  • Calories: 450
  • Fat: 22g
  • Protein: 35g
  • Carbohydrates: 20g

How to Store, Reheat, and Freeze Pot Roast

  • Storage: Store leftovers in an airtight container in the refrigerator for up to 3 days.
  • Reheating: Gently reheat the pot roast in a pot over low heat, adding a splash of beef broth if needed to loosen the gravy.
  • Freezing: Freeze pot roast in portions for up to 3 months. Thaw overnight in the fridge before reheating.

FAQs About Bonnie’s Pot Roast

Can I make this pot roast in a slow cooker?

Yes, Bonnie’s recipe works beautifully in a slow cooker. Simply follow the instructions and set the slow cooker to low for 8 hours.

What can I add to make the gravy thicker?

You can thicken the gravy by making a slurry with cornstarch and cold water. Stir it into the gravy during the last 30 minutes of cooking.

Can I use other cuts of meat for this recipe?

Yes, you can substitute chuck roast with brisket or even a bottom round roast, but chuck roast is ideal for slow cooking because of its marbling.


External Links to Include:

  1. Anchor Text: “Classic Pot Roast Recipe”
    URL: https://www.allrecipes.com/recipe/16311/classic-pot-roast/
    Reason: A simple and straightforward version of pot roast for those looking to try a more classic method.
  2. Anchor Text: “Slow Cooker Pot Roast Recipe”
    URL: https://www.spendwithpennies.com/slow-cooker-pot-roast/
    Reason: Provides a slow cooker version for readers who prefer the convenience of using this method.
  3. Anchor Text: “How to Make Pot Roast Gravy”
    URL: https://www.simplyrecipes.com/how-to-make-gravy-from-pot-roast/
    Reason: Offers tips on how to make the perfect gravy to accompany your pot roast.

Bold and Spicy Cabbage Soup with Attitude Recipe

spicy cabbage soup, bold cabbage soup, hearty cabbage soup recipe, healthy cabbage soup, cabbage soup with spice, vegetable cabbage soup

Cabbage Soup with Attitude: A Bold, Flavorful Twist on a Classic Recipe

When the chill of the season sets in, there’s nothing quite like a bowl of hearty soup to warm you up. Enter cabbage soup with attitude—a recipe that takes the simplicity of cabbage soup and turns it into a bold, flavor-packed dish. This recipe is perfect for those who enjoy a bit of spice and extra flair in their meals.

If you’re looking for more soup ideas that bring comfort and flavor, check out Creamy Garlic Parmesan Chicken Soup for another delicious option to keep you cozy during cold weather.

What Makes Cabbage Soup with Attitude Different?

Cabbage soup is often regarded as a simple, even bland dish, traditionally low in calories and full of healthy ingredients. However, cabbage soup with attitude adds a vibrant kick by incorporating bold flavors, spices, and unique ingredients that set it apart from the typical cabbage soup. By adding spices like smoked paprika, cayenne pepper, and even a dash of V8 juice, this soup is transformed into a flavor explosion.

For more bold and creative recipes, take a look at Slow Cooker Mississippi Ribeye Steaks, another flavorful dish that’s sure to impress.

Ingredients You’ll Need

To make cabbage soup with attitude, gather the following ingredients:

  • Cabbage: Either green or purple cabbage will work, shredded finely.
  • Carrots, celery, and onions: Essential base vegetables that add sweetness and depth.
  • Garlic: Fresh minced garlic for that pungent kick.
  • Bell peppers: Red and green bell peppers to add brightness and crunch.
  • Crushed tomatoes: Brings richness to the soup.
  • Vegetable or chicken broth: Provides the flavorful base.
  • V8 Juice: Adds complexity with its blend of vegetables.
  • Spices: Smoked paprika, cumin, cayenne pepper, black pepper, and red pepper flakes for that “attitude.”
  • Olive oil: For sautéing the vegetables.

Optional ingredients:

  • Protein: Ground turkey, sausage, or beans for a heartier meal.
  • Herbs: Fresh cilantro or parsley for garnish.

Internal Link Opportunity:

For those who love hearty, comforting meals, check out Ham and Potato Casserole, a rich and filling dish perfect for dinner.


Step-by-Step Instructions for Cabbage Soup with Attitude

This soup is easy to make and requires only a few steps. Let’s dive into the process:

1. Sauté the Vegetables

  • In a large stockpot, heat olive oil over medium heat.
  • Add chopped onions, garlic, bell peppers, carrots, and celery. Sauté for about 5 minutes until they soften and the onions become translucent.

2. Add the Cabbage

  • Add shredded cabbage to the pot. Stir in cumin, smoked paprika, cayenne pepper, black pepper, and red pepper flakes. Cook for 2-3 minutes until the cabbage begins to soften.

3. Add Liquids and Tomatoes

  • Pour in the vegetable or chicken broth, followed by crushed tomatoes and a splash of V8 juice. Stir well to combine.

4. Simmer

  • Bring the soup to a boil, then reduce the heat and let it simmer for 30-40 minutes, stirring occasionally, until the cabbage is tender but not mushy.

5. Taste and Adjust Seasoning

  • Taste the soup and adjust seasoning as needed. Add more cayenne or smoked paprika for extra heat.

6. Optional Add-ins

  • If you want to add protein, this is the time to add browned sausage, ground turkey, or beans. Simmer for an additional 10 minutes.

Internal Link Opportunity:

If you love adding a twist to traditional meals, Spaghetti Stuffed Garlic Mozzarella Subs is another bold dish you should try for a unique dinner option.


Tips for Making the Best Cabbage Soup with Attitude

  • Use fresh ingredients: Fresh garlic, onions, and cabbage will ensure your soup is bursting with flavor.
  • Customize the heat level: Adjust the cayenne and red pepper flakes to your spice tolerance. If you prefer mild spice, reduce the amounts, or omit the cayenne pepper.
  • Don’t overcook the cabbage: For the perfect texture, cook the cabbage just until tender but still slightly crunchy.

Variations of Cabbage Soup with Attitude

You can easily tweak this recipe to suit your tastes or dietary preferences:

  • Vegan Cabbage Soup: Use vegetable broth and add beans for a protein boost.
  • Meaty Cabbage Soup: Add browned sausage or ground turkey to make it a filling main course.
  • Spicy Cabbage Soup: For extra heat, add a diced jalapeño or a dash of your favorite hot sauce.
  • Slow Cooker Version: Place all the ingredients in a slow cooker and cook on low for 6-8 hours for a hands-off approach.

Nutritional Information and Health Benefits

Cabbage soup is not only flavorful but also packed with nutrients:

  • Calories per serving: Approximately 150 calories.
  • Rich in fiber: Cabbage is high in fiber, making it great for digestion.
  • Vitamin-packed: Cabbage contains vitamins C and K, while carrots and bell peppers provide additional antioxidants.

Looking for more healthy, low-calorie options? Check out Homemade Chicken and Dumplings, another wholesome comfort food that’s light and nutritious.


How to Store, Reheat, and Freeze Cabbage Soup

  • Storing: Store in an airtight container in the fridge for up to 5 days.
  • Reheating: Reheat on the stovetop or microwave, adding a little extra broth if needed.
  • Freezing: This soup freezes beautifully. Divide into individual portions and freeze for up to 3 months. Thaw overnight in the refrigerator before reheating.

Serving Suggestions

  • With crusty bread: Pair with a slice of warm, crusty bread for dipping.
  • Topped with cheese: A sprinkle of shredded cheddar or Parmesan adds a creamy touch.
  • Serve with salad: A light side salad complements the bold flavors of the soup.

FAQs

Can I make this soup in a slow cooker?

Yes, this soup works well in a slow cooker. Simply add all the ingredients to the cooker and set on low for 6-8 hours.

Can I freeze cabbage soup?

Absolutely. Just be sure to cool it completely before freezing to prevent ice crystals from forming.

What can I serve with cabbage soup?

This soup pairs well with crusty bread, a light salad, or even a side of grilled cheese sandwiches.

Common Mistakes to Avoid

  • Overcooking the cabbage: Be careful not to cook the cabbage until it’s mushy. You want it tender with a slight bite.
  • Under-seasoning: The spices are key to giving this soup its “attitude.” Don’t skimp on the smoked paprika or cayenne pepper.

External Links to Include:

  1. Anchor Text: “Spicy Cabbage Soup Recipe”
    URL: https://www.allrecipes.com/recipe/220198/spicy-cabbage-soup/
    Reason: Offers a similar bold, spicy version of cabbage soup.
  2. Anchor Text: “Healthy Cabbage Soup”
    URL: https://www.spendwithpennies.com/cabbage-soup-recipe/
    Reason: Provides a healthy, easy-to-follow cabbage soup recipe.
  3. Anchor Text: “Flavorful Cabbage Soup Recipe”
    URL: https://www.tasteofhome.com/recipes/quick-cabbage-soup/
    Reason: This resource highlights a quick and flavorful cabbage soup recipe for busy days.

Conclusion

Cabbage soup with attitude is the perfect balance of bold flavors and wholesome ingredients. Whether you’re looking for a spicy twist on a classic or a hearty meal to keep you warm during the colder months, this soup is a must-try. Customize it to suit your taste and enjoy a bowl full of healthy, vibrant flavors!

Easy Homemade Peanut Butter Cups: A Simple and Delicious Treat

DIY peanut butter cups, peanut butter chocolate cups, homemade chocolate cups, easy peanut butter cups, vegan peanut butter cups

How to Make Homemade Peanut Butter Cups: A Delicious and Easy Recipe

There’s nothing quite like the combination of creamy peanut butter and rich chocolate. While store-bought peanut butter cups are a convenient treat, making your own homemade peanut butter cups is easier than you think. Plus, you have full control over the quality of ingredients and the ability to customize the flavor to suit your tastes.

In this guide, I’ll walk you through the simple steps of making peanut butter cups at home, with a few tips and variations to elevate this classic dessert. If you enjoy this recipe, you might also want to try Peanut Butter Blossoms or Salted Caramel Apple Cheesecake for more indulgent, peanut-buttery treats.

Ingredients for Homemade Peanut Butter Cups

To make this delightful treat, you’ll need just a few basic ingredients:

  • Chocolate: Dark, milk, or semi-sweet chocolate, based on your preference.
  • Peanut butter: Creamy or crunchy, depending on your texture preference.
  • Butter: Adds creaminess to the peanut butter mixture.
  • Powdered sugar: Sweetens the peanut butter filling.
  • Coconut oil (optional): Adds a glossy finish to the melted chocolate.
  • Salt: Enhances the flavor of the peanut butter filling.

If you like simple and creative recipes, consider this Chocolate Magic Shell Yogurt Cup recipe, which also plays with chocolate in a fun way.

Step-by-Step Instructions for Making Peanut Butter Cups

Making peanut butter cups at home is incredibly easy and requires minimal equipment. Here’s how you can create your own batch in no time:

1. Melt the Chocolate

  • Place the chocolate and a teaspoon of coconut oil in a microwave-safe bowl. Heat in 30-second intervals, stirring between each interval until smooth.
  • Alternatively, use a double boiler to melt the chocolate gently over low heat.

2. Prepare the Peanut Butter Filling

  • In a separate bowl, mix together peanut butter, butter, powdered sugar, and a pinch of salt until smooth. Adjust sweetness according to taste.

3. Assemble the Peanut Butter Cups

  • Line a muffin tin with paper cupcake liners or silicone molds.
  • Spoon about a tablespoon of melted chocolate into each liner, spreading it evenly to cover the bottom.
  • Add a dollop of peanut butter mixture on top of the chocolate, followed by another tablespoon of melted chocolate to cover the filling completely.
  • Smooth the top layer with the back of a spoon.

4. Chill the Cups

  • Place the muffin tin in the fridge or freezer for 30 minutes, or until the peanut butter cups are firm.

5. Optional: Decorate and Serve

  • For an extra touch, sprinkle the tops of the peanut butter cups with sea salt, chopped peanuts, or even a drizzle of melted caramel. Serve chilled and enjoy!

Internal Link Opportunity:

For a fun twist on your favorite chocolate treats, check out Easy Apple Cheesecake Tacos for another delicious dessert idea.


Tips for Making the Perfect Peanut Butter Cups

  • Use high-quality chocolate: The quality of chocolate directly affects the final taste. Opt for good-quality chocolate for a smoother, richer flavor.
  • Customize your filling: You can adjust the sweetness and saltiness of the peanut butter filling to match your taste preferences.
  • Chill between layers: If you want clearly defined layers of chocolate and peanut butter, make sure to chill the first layer of chocolate before adding the peanut butter filling.

Variations of Homemade Peanut Butter Cups

One of the great things about making your own peanut butter cups is that you can easily customize them. Here are some variations to try:

  • Dark Chocolate Peanut Butter Cups: Swap milk chocolate for dark chocolate for a more intense flavor.
  • Crunchy Peanut Butter Cups: Use crunchy peanut butter or add crushed peanuts to the filling for added texture.
  • Vegan Peanut Butter Cups: Use dairy-free chocolate and coconut oil to make vegan-friendly cups.
  • Almond Butter Cups: Replace peanut butter with almond butter for a nuttier, slightly different taste.
  • Mini Peanut Butter Cups: Use mini cupcake liners to make bite-sized peanut butter cups.

Looking for more creative recipes? Try Homemade KFC-Style Famous Bowl Casserole, a savory and comforting option that pairs perfectly with a sweet dessert like peanut butter cups.

Nutritional Information and Healthier Alternatives

Nutritional Breakdown (per serving):

  • Calories: 250
  • Fat: 15g
  • Carbohydrates: 20g
  • Protein: 4g

Healthier Options:

  • Use dark chocolate: Opting for dark chocolate can reduce the overall sugar content while increasing the antioxidants.
  • Lower the sugar: Replace powdered sugar with a natural sweetener like honey or stevia to cut down on the sugar.
  • Use natural peanut butter: Swap traditional peanut butter with natural, unsweetened peanut butter for a cleaner ingredient list.

Internal Link Opportunity:

If you love the mix of salty and sweet, you might also enjoy Dorito Chicken Casserole, another fun, indulgent recipe.


How to Store, Reheat, and Freeze Peanut Butter Cups

  • Store leftovers: Store peanut butter cups in an airtight container in the fridge for up to two weeks.
  • Freezing tips: These freeze beautifully. Wrap the peanut butter cups individually and freeze them for up to three months. Thaw in the fridge overnight before serving.

Serving Suggestions for Peanut Butter Cups

Peanut butter cups can be served in a variety of ways. Here are some ideas to make your dessert experience even more delightful:

  • With coffee or tea: The sweetness of the chocolate and the richness of the peanut butter pairs perfectly with a hot cup of coffee or tea.
  • As a dessert topping: Chop up the peanut butter cups and sprinkle them on top of ice cream, yogurt, or even pancakes.
  • Gifts for loved ones: Wrap homemade peanut butter cups in cellophane bags with a ribbon for a thoughtful, homemade gift.

FAQs

Can I use different nut butters?

Absolutely! You can substitute peanut butter with almond butter, cashew butter, or even sunflower seed butter for those with allergies.

Do peanut butter cups need to be refrigerated?

While they can be stored at room temperature, refrigerating them helps maintain their structure, especially if you live in a warmer climate.

Can I make sugar-free peanut butter cups?

Yes! Use sugar-free chocolate and replace the powdered sugar in the filling with a sugar substitute like stevia or monk fruit.

Common Mistakes to Avoid

  • Using low-quality chocolate: This can lead to a grainy texture and an inferior taste. Always use high-quality chocolate for the best results.
  • Overfilling the cups: Too much filling can cause the peanut butter to seep out. Be mindful of the portions.
  • Skipping the chilling step: Ensure each layer is properly chilled for well-defined layers and to avoid a melted mess.

External Links to Include:

  1. Anchor Text: “Easy Homemade Peanut Butter Cups”
    URL: https://minimalistbaker.com/easy-homemade-peanut-butter-cups/
    Reason: This guide provides a simple and straightforward method for making peanut butter cups, perfect for beginners.
  2. Anchor Text: “How to Make Homemade Peanut Butter Cups”
    URL: https://www.tasteofhome.com/recipes/homemade-peanut-butter-cups/
    Reason: Offers a step-by-step guide for making peanut butter cups with easy-to-follow instructions.
  3. Anchor Text: “Homemade Vegan Peanut Butter Cups”
    URL: https://www.loveandlemons.com/vegan-peanut-butter-cups/
    Reason: A vegan version of peanut butter cups, great for readers looking for dairy-free options.

Conclusion

Making homemade peanut butter cups is a fun, simple, and delicious way to satisfy your chocolate and peanut butter cravings. Not only are they easy to customize, but they also make great gifts or a quick snack. Try experimenting with different variations and fillings to make your homemade peanut butter cups truly unique!

Easy Apple Pie Filling Coffee Cake: A Sweet and Simple Treat

apple coffee cake, coffee cake with apple pie filling, easy apple coffee cake, cinnamon apple pie coffee cake, apple crumb coffee cake

Apple Pie Filling Coffee Cake: A Perfect Blend of Flavors for Any Occasion

If you’re looking for a dessert that combines the best of two worlds—coffee cake and apple pie—look no further than this Apple Pie Filling Coffee Cake. The moist cake base, layered with rich apple pie filling, and topped with a buttery crumble, creates the ultimate fall or anytime treat. This recipe is easy to make and perfect for a cozy breakfast or an impressive dessert.

For those who enjoy easy and delicious desserts, check out this No-Bake Pumpkin Cheesecake or Easy Apple Hand Pies for more fall-inspired treats that pair well with coffee and tea.

Key Ingredients for Apple Pie Filling Coffee Cake

To get started on this delicious cake, you’ll need the following ingredients:

  • Apple pie filling: The main source of the fruity sweetness.
  • All-purpose flour: Essential for a tender cake base.
  • Butter: Used for both the cake and the crumb topping.
  • Granulated sugar: Sweetens both the cake and the crumble.
  • Cinnamon: Adds warmth and enhances the apple flavors.
  • Eggs: Provides structure to the cake.
  • Baking powder: Ensures the cake rises and becomes fluffy.

If you love versatile breakfast options, you may also like this Sheet Pan Pancakes for an easy and delicious morning meal.

Step-by-Step Instructions for Apple Pie Filling Coffee Cake

Preparation Time:

15 minutes

Cook Time:

45 minutes

Instructions:

  1. Prepare the Crumble: In a small bowl, mix together flour, sugar, and cinnamon. Add melted butter and stir until crumbly. Set aside.
  2. Make the Cake Batter: In a separate bowl, cream together the butter and sugar until light and fluffy. Add the eggs one at a time, then stir in vanilla extract.
  3. Add the Dry Ingredients: In another bowl, mix the flour, baking powder, and a pinch of salt. Gradually add this mixture to the butter mixture, alternating with milk, until everything is combined.
  4. Layer the Cake and Filling: Spread half the batter into a greased baking pan. Add a layer of apple pie filling, then spread the remaining batter on top.
  5. Add the Crumb Topping: Sprinkle the crumble mixture evenly over the top of the cake.
  6. Bake: Bake in a preheated oven at 350°F (175°C) for 40-45 minutes, or until a toothpick inserted into the center comes out clean.
  7. Cool and Serve: Let the cake cool before slicing, then serve with a drizzle of caramel sauce or a dollop of whipped cream if desired.

Tips for the Perfect Apple Pie Filling Coffee Cake

  • Use homemade apple pie filling: If you have the time, homemade filling adds a fresh and tangy flavor to the cake.
  • Chill the cake before serving: Letting the cake chill for a few hours allows the flavors to meld together for a richer taste.
  • Don’t overmix: Mix the batter just until the ingredients are combined to avoid a dense cake.

Internal Link Opportunity:

For those who enjoy breakfast-style desserts, check out Breakfast Sausage Biscuits Gravy Casserole, which pairs perfectly with this coffee cake for a hearty meal.


Popular Variations of Apple Pie Filling Coffee Cake

This cake is incredibly versatile, and you can tweak it to suit your taste:

  • Cinnamon Streusel Apple Coffee Cake: Add an extra layer of cinnamon streusel for added crunch and flavor.
  • Cream Cheese Apple Coffee Cake: Add a layer of sweetened cream cheese between the cake and the apple pie filling for a tangy twist.
  • Gluten-Free Apple Pie Coffee Cake: Substitute the flour with a gluten-free blend to accommodate dietary restrictions.
  • Caramel Apple Coffee Cake: Drizzle caramel sauce over the cake before serving for an indulgent finish.
  • Pecan Apple Coffee Cake: Add chopped pecans to the crumb topping for an extra crunchy texture.

For more coffee cake ideas, try this Blue Ribbon Blueberry Coffee Cake for a fruity alternative.

Nutritional Information and Healthier Options

Nutritional Breakdown (per serving):

  • Calories: 350
  • Fat: 18g
  • Carbohydrates: 45g
  • Protein: 4g

Healthier Alternatives:

  • Substitute butter: Use coconut oil instead of butter for a healthier fat option.
  • Reduce sugar: Use a sugar substitute like stevia or monk fruit to lower the sugar content.
  • Use whole wheat flour: Swap out half of the all-purpose flour for whole wheat to add fiber.

How to Store, Reheat, and Freeze Apple Pie Filling Coffee Cake

  • Store leftovers: Keep the cake in an airtight container at room temperature for up to 3 days.
  • Reheat: To reheat, place slices in the microwave for 15-20 seconds or in a 300°F oven for 5-10 minutes.
  • Freeze: You can freeze individual slices or the whole cake. Wrap the cake tightly in plastic wrap and foil before freezing. Thaw in the fridge overnight and reheat before serving.

Internal Link Opportunity:

Want to freeze more baked goods? Try this Ultimate BBQ Pulled Pork Grilled Cheese, which freezes beautifully for later.


Serving Suggestions for Apple Pie Filling Coffee Cake

This cake can be enjoyed in several different ways:

  • With coffee or tea: Perfect for breakfast or an afternoon snack.
  • As a dessert: Serve warm with a scoop of vanilla ice cream or whipped cream.
  • For a fall brunch: This cake is an ideal addition to a fall-themed brunch spread.
  • With caramel drizzle: Enhance the apple flavors by drizzling caramel sauce over the top before serving.

FAQs

Can I use fresh apples instead of apple pie filling?

Yes, you can use fresh apples by cooking them down with sugar, cinnamon, and a little cornstarch to create a homemade pie filling.

Can I use a cake mix for the base?

Yes, a yellow or spice cake mix works great as a shortcut for the cake batter.

How do I keep the crumb topping crispy?

Make sure to use cold butter when making the crumb topping, and avoid overmixing. Chilling the cake after baking can also help maintain the crunchy texture.

Can I make this coffee cake gluten-free?

Yes, you can substitute the all-purpose flour with a gluten-free flour blend to make the cake gluten-free.

Common Mistakes to Avoid

  • Overmixing the batter: Overmixing can lead to a dense cake. Mix just until the ingredients are combined.
  • Not letting the cake cool: Allow the cake to cool completely before slicing to avoid it falling apart.
  • Skipping the crumb topping: The crumb topping is what gives this cake its signature texture and flavor, so don’t skip it!

External Links to Include:

  1. Anchor Text: “How to Make Homemade Apple Pie Filling”
    URL: https://www.culinaryhill.com/homemade-apple-pie-filling/
    Reason: A great resource for readers who want to make their own apple pie filling from scratch.
  2. Anchor Text: “Easy Apple Pie Coffee Cake Recipe”
    URL: https://www.allrecipes.com/recipe/239157/easy-apple-pie-coffee-cake/
    Reason: Offers a quick and easy recipe for coffee cake lovers.
  3. Anchor Text: “Apple Pie Coffee Cake with Cinnamon Streusel”
    URL: https://www.bakerstable.net/apple-pie-coffee-cake-with-cinnamon-pecan-streusel
    Reason: Provides another variation with an extra layer of streusel topping.

Conclusion

Apple Pie Filling Coffee Cake is the perfect way to enjoy the flavors of apple pie in an easy-to-make coffee cake. With its tender crumb, rich apple filling, and buttery topping, it’s a versatile dessert that works for any occasion, from breakfast to dessert. Don’t be afraid to experiment with the different variations or try it with other fruit fillings like cherries or peaches. Enjoy!

Perfect Pork Roast with Garlic and Herbs: A Flavorful Main Course

herb garlic pork roast, garlic and herb pork loin, roasted pork with garlic, pork roast recipe with herbs, easy garlic pork roast

Pork Roast with Garlic and Herbs: A Perfectly Savory Main Dish

There are few dishes as satisfying as a perfectly cooked pork roast, and when combined with the aromatic flavors of garlic and fresh herbs, it becomes a meal worthy of any occasion. Whether you’re preparing for a family dinner or a holiday feast, this pork roast with garlic and herbs recipe will impress with its juicy, tender texture and incredible flavor.

For those looking to enhance their repertoire of savory dishes, you may also want to try Slow Cooker Chicken and Gravy Over Noodles or The Ultimate Comfort Food: Crockpot Potato Soup with Hashbrowns to accompany this hearty pork roast.

Key Ingredients for Pork Roast with Garlic and Herbs

To achieve the perfect garlic and herb pork roast, you’ll need the following ingredients:

  • Pork roast: A 4-5 pound boneless pork loin or pork shoulder.
  • Fresh garlic: Minced for maximum flavor infusion.
  • Herbs: A mix of rosemary, thyme, and sage.
  • Olive oil: To help bind the herbs and garlic to the meat and to create a nice sear.
  • Salt and pepper: Basic but essential seasonings to bring out the pork’s natural flavors.
  • Lemon zest (optional): Adds a citrusy brightness.
  • Mustard (optional): For a subtle tang that complements the garlic and herbs.

Internal Link Opportunity:

For an additional herb-focused meal, check out Garlic Rosemary Steak and Potatoes Skillet, which also relies heavily on garlic and herbs to enhance a tender cut of meat.


Step-by-Step Instructions for Pork Roast with Garlic and Herbs

Preparation Time:

20 minutes

Cook Time:

2-3 hours (depending on the cut of pork)

Instructions:

  1. Prepare the Pork Roast: Start by trimming any excess fat from the pork roast. While some fat is good for keeping the roast juicy, too much can cause an overly greasy result.
  2. Create the Garlic Herb Rub: In a small bowl, mix together minced garlic, chopped fresh herbs (rosemary, thyme, and sage), a couple of tablespoons of olive oil, and salt and pepper. Optionally, you can add lemon zest or Dijon mustard to the rub for extra layers of flavor.
  3. Rub and Sear the Pork: Rub the garlic herb mixture generously over the entire surface of the pork roast, pressing it into every crevice. Heat a large skillet over medium-high heat and add a bit of olive oil. Sear the pork on all sides until it’s golden brown, about 2-3 minutes per side.
  4. Roast in the Oven: Preheat your oven to 350°F (175°C). Transfer the seared pork to a roasting pan and place it in the oven. Roast the pork until the internal temperature reaches 145°F (63°C) for pork loin, or 190°F (88°C) for a pork shoulder, which takes 2-3 hours depending on the cut.
  5. Rest and Slice: Once cooked, remove the pork from the oven and let it rest for 10-15 minutes before slicing. This helps the juices redistribute within the meat, ensuring every bite is tender and flavorful.

Internal Link Opportunity:

For more inspiration on roast dishes, try the Perfect Ribeye Steak Recipe, another dish that focuses on seasoning and cooking techniques to achieve a flawless main course.


Tips for the Best Garlic Herb Pork Roast

  • Use a Meat Thermometer: This is crucial to ensuring your pork is perfectly cooked. Pork should be cooked to 145°F (63°C) for loin or 190°F (88°C) for shoulder to ensure maximum tenderness.
  • Don’t Skip the Sear: Searing the roast helps lock in the juices and gives the outside a delicious golden crust.
  • Rest the Meat: Letting the roast rest before slicing ensures that the juices remain in the meat, making it moist and flavorful.

For another comforting dish with a crispy exterior, you might enjoy One-Pan Pork Chops and New Potatoes.

Variations of Pork Roast with Garlic and Herbs

One of the best parts of making pork roast with garlic and herbs is how versatile it can be. Here are a few variations you can try:

  • Stuffed Pork Roast: Slice the pork lengthwise and stuff it with a mixture of spinach, garlic, and cheese for an indulgent twist.
  • Slow-Cooked Pork Roast: Use a slow cooker instead of the oven to make this recipe even easier. Simply sear the pork as directed, then cook on low for 6-8 hours.
  • Pork Roast with Dijon Mustard: Add Dijon mustard to the herb rub for a tangy layer of flavor.
  • Herb-Crusted Pork Roast: Add breadcrumbs to the garlic and herb mixture to create a crispy herb crust on the outside.
  • Spicy Pork Roast: Incorporate red pepper flakes or cayenne pepper into the rub for a little heat.

Nutritional Information and Healthier Options

Nutritional Breakdown (per serving):

  • Calories: 400
  • Fat: 25g
  • Carbohydrates: 5g
  • Protein: 35g

Healthier Alternatives:

  • Opt for a Leaner Cut: Use pork loin instead of shoulder for a lower-fat option.
  • Reduce Oil: Use just a tablespoon of olive oil, or substitute with a low-calorie cooking spray.
  • Add Vegetables: Roasted root vegetables like carrots and parsnips can be cooked alongside the pork for a healthier, complete meal.

If you’re looking for a light yet flavorful side dish, consider pairing this roast with Honey Garlic Butter Roasted Carrots.


Frequently Asked Questions (FAQs)

Can I cook pork roast with the bone in?

Yes, bone-in pork roasts add extra flavor and moisture. The cooking time will be slightly longer, but the result is well worth the wait.

Should I cover the pork roast while cooking?

It’s a good idea to cover the pork roast with foil for the first half of cooking to keep it moist. Uncover it for the last 30 minutes to allow the outside to brown and crisp up.

What herbs pair well with pork?

Rosemary, thyme, sage, and oregano are all excellent herbs to use with pork. You can also experiment with parsley or marjoram for a different flavor profile.

How do I prevent pork roast from drying out?

The key to moist pork roast is not overcooking it. Use a meat thermometer to cook the pork to the correct internal temperature, and always let it rest before slicing.


Serving Suggestions for Pork Roast with Garlic and Herbs

This savory pork roast pairs beautifully with a variety of side dishes. Here are some serving suggestions:

  • Garlic Mashed Potatoes: The creamy texture of mashed potatoes is a perfect complement to the tender pork roast.
  • Roasted Vegetables: Serve with a medley of roasted carrots, parsnips, and Brussels sprouts for a complete meal.
  • Red Wine: A robust red wine such as Cabernet Sauvignon or Merlot pairs well with the rich flavors of garlic and herbs.
  • Crisp Salad: A simple green salad with a light vinaigrette can add freshness to the plate.

Conclusion: A Dish Worth Celebrating

Whether you’re cooking for a holiday meal or a Sunday dinner, pork roast with garlic and herbs is a dish that never fails to impress. The combination of garlic, fresh herbs, and perfectly cooked pork creates a meal that’s flavorful, satisfying, and sure to please everyone at the table.

Don’t forget to try similar comforting recipes like Smothered Pork Chops, which uses a creamy sauce for added comfort, or Sweetly Glazed Pork Loin, another classic pork dish enhanced by sweet and savory flavors.