Table of Contents
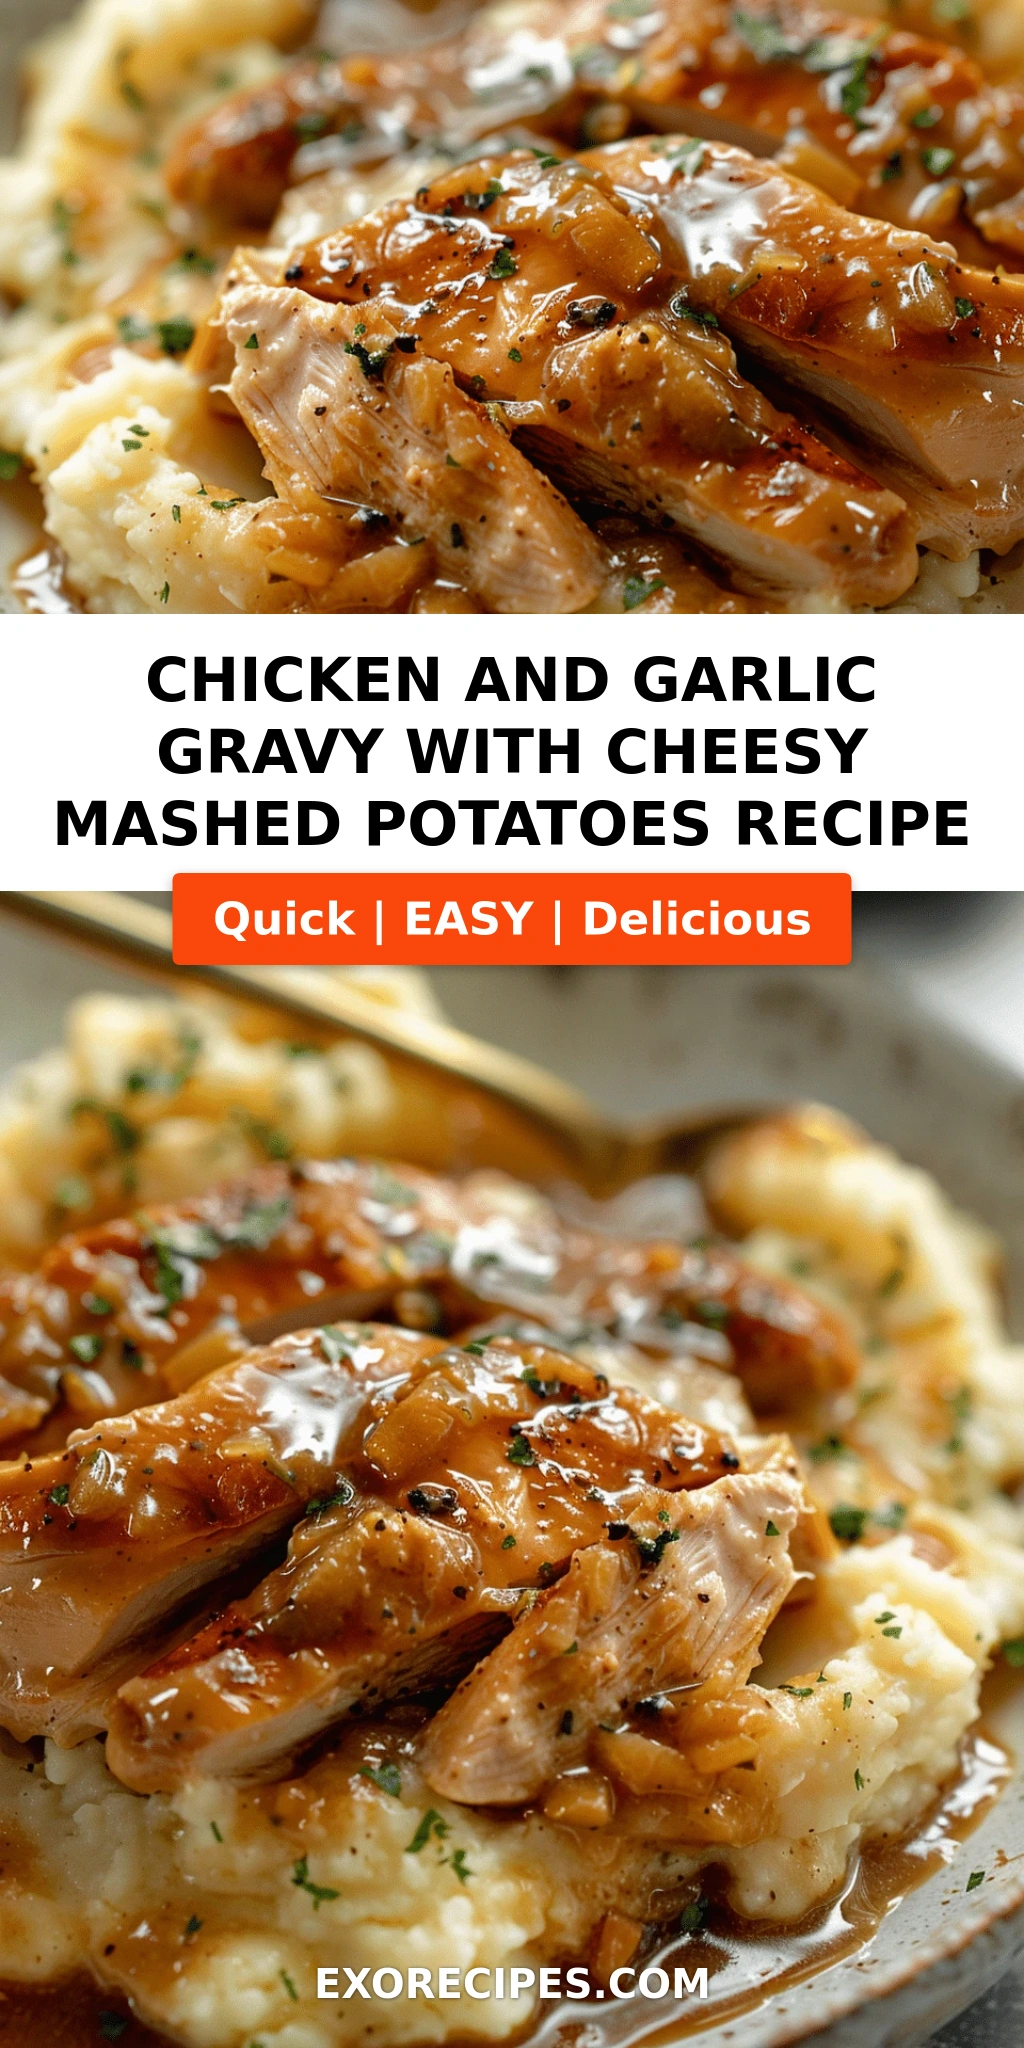
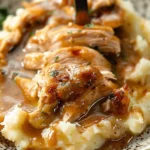
Chicken and Garlic Gravy with Cheesy Mashed Potatoes: The Ultimate Comfort Food Recipe – Juicy Chicken Meets Creamy, Cheesy Perfection
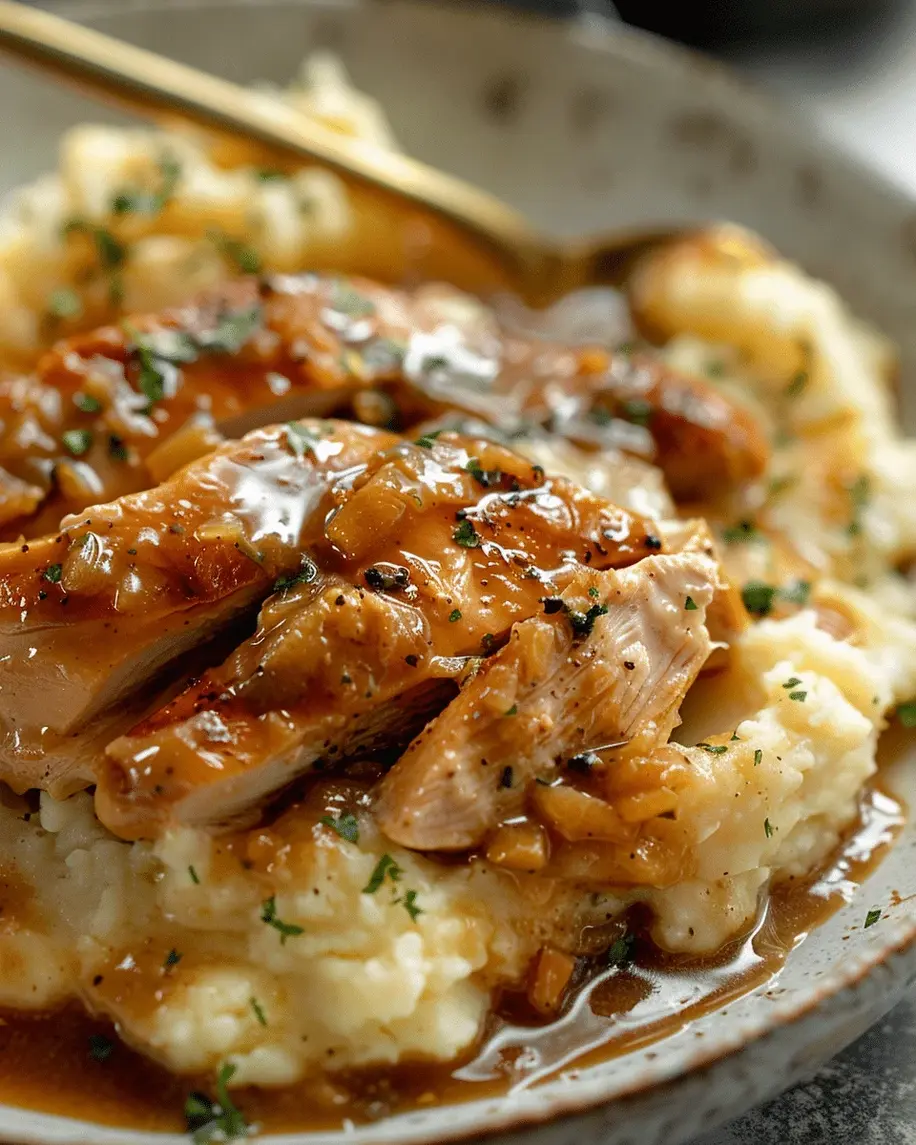
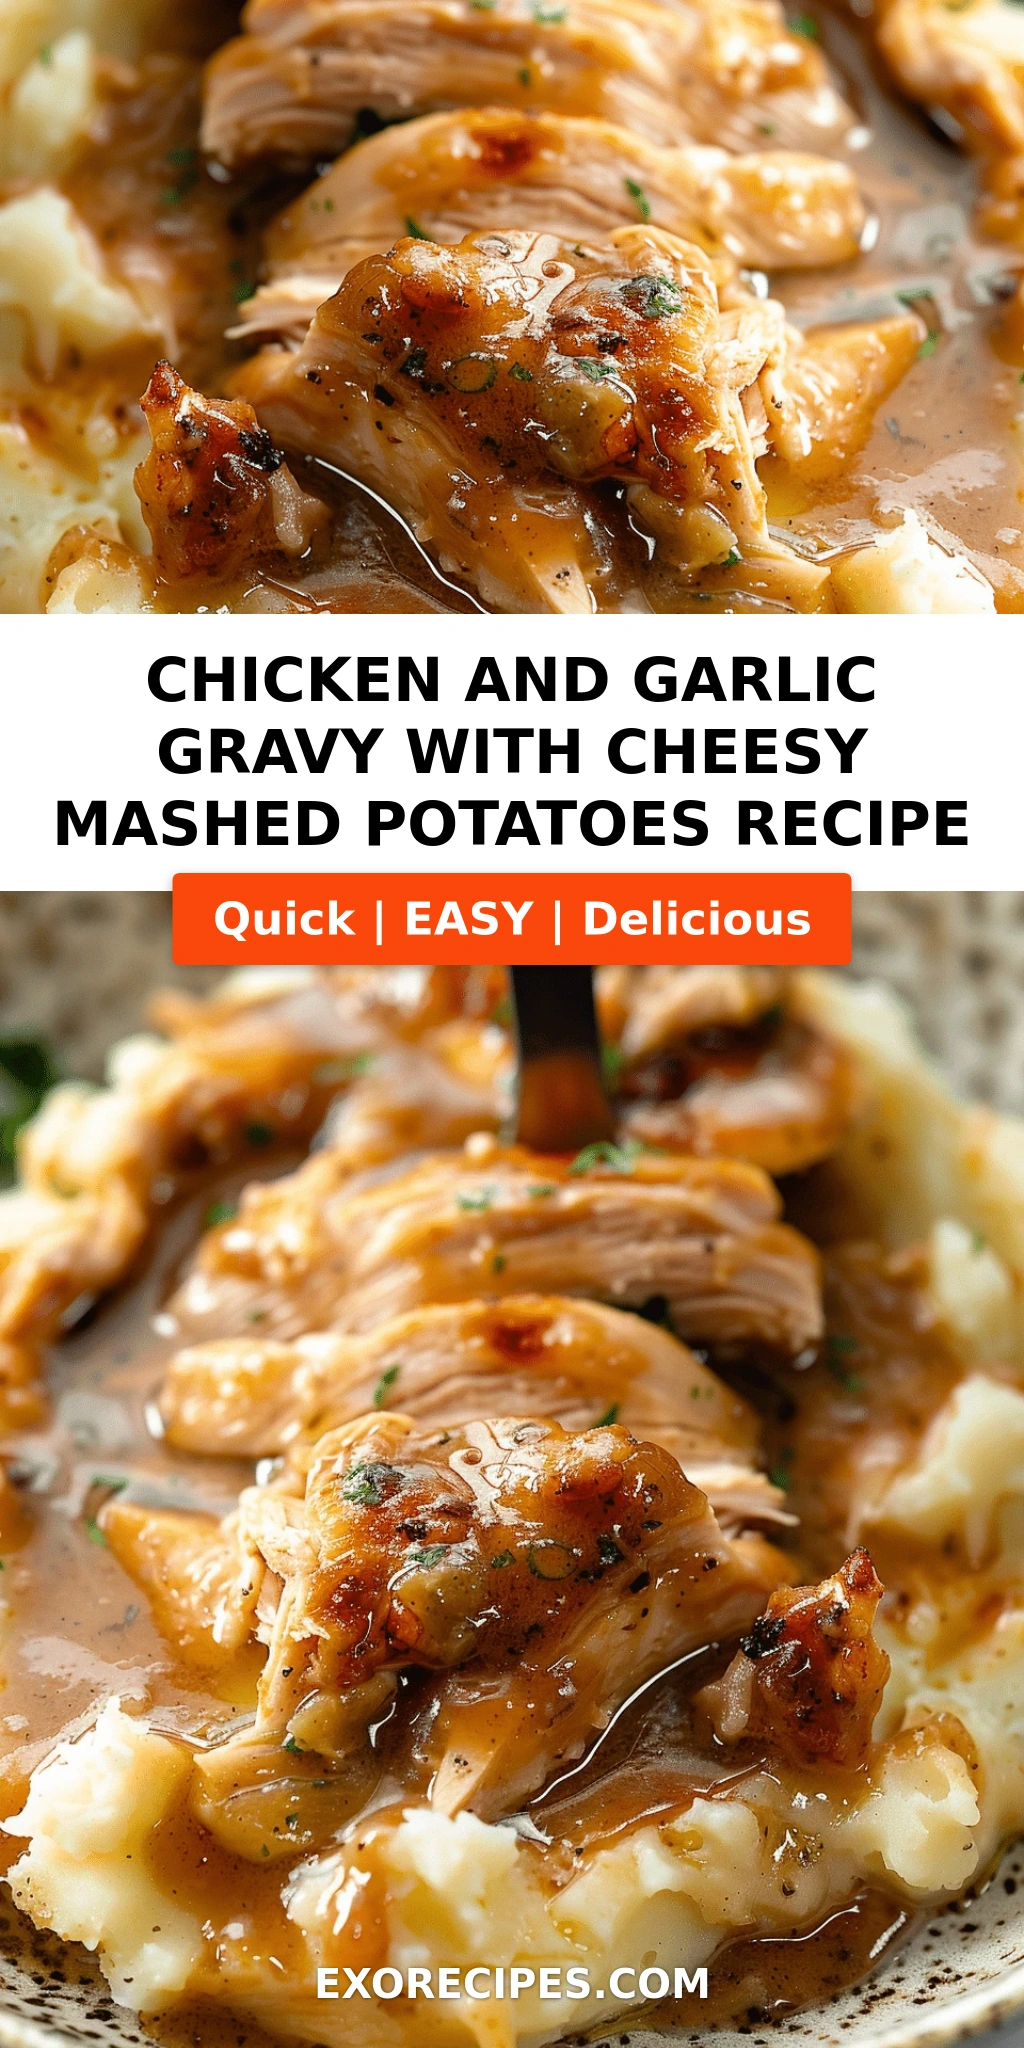
There are certain meals that feel like a warm hug on a chilly evening, and this chicken and garlic gravy recipe is exactly that. Growing up in Morocco, my mother would spend hours layering spices and simmering sauces until the whole house smelled like heaven. Years later, after training at Le Cordon Bleu in Paris and settling into my tiny but mighty kitchen here in New York City, I found myself craving that same deep, soulful comfort — but with a quicker, weeknight-friendly twist. This ultimate comfort food recipe is the result: juicy, golden chicken breasts swimming in a velvety garlic gravy, served over a mountain of creamy, cheesy mashed potatoes. It’s the kind of chicken and gravy dinner that makes everyone at the table go quiet — except for the occasional “more, please.”
Let me paint the picture for you. The chicken is seared until the outside is crisp and golden, locking in all those natural juices. Then, in the same skillet, butter meets minced garlic — and the fragrance alone will have you hovering over the stove. As the garlic softens, a sprinkle of flour thickens things up, and when the chicken broth and cream swirl in, the gravy transforms into something utterly luxurious: silky, savory, and laced with thyme. It coats the back of a spoon and clings to every slice of chicken. Then comes the base — mashed potatoes so rich and creamy they’re almost a dessert. Russet potatoes, butter, milk, sharp cheddar, and a dollop of sour cream come together in a fluffy cloud that soaks up every drop of that gorgeous gravy.
What makes this chicken and garlic gravy recipe stand apart from the countless others out there? Three things. First, I use a French technique called “mounting” the gravy with a touch of cream at the end for a glossy, restaurant-quality finish. Second, I sneak in a spoonful of sour cream in the mashed potatoes — a trick I picked up from a Parisian pastry chef that adds tang and keeps them ultra-creamy without being heavy. And third, I know exactly where home cooks stumble — lumpy gravy, dry chicken, or gluey potatoes — so I’ve designed every step to be foolproof. 💡 mia’s Pro Tip: The secret to a lump-free gravy is to whisk continuously while slowly streaming in the broth. No shortcuts, just patience — and you’ll be rewarded with a silky sauce every single time.
Why This Chicken and Garlic Gravy Recipe Is the Best
The Flavor Secret — This isn’t just any chicken and gravy dinner. I draw on my Moroccan roots and French training to build layers of flavor. The garlic is cooked just until fragrant — never burned — so it stays sweet and mellow. A splash of white wine (optional but encouraged) deglazes the pan, lifting all those browned bits from the chicken. And the thyme? It adds an earthy note that ties the whole dish together. The cheesy mashed potatoes aren’t an afterthought — they’re a canvas for the gravy, and the sharp cheddar brings a pop of color and tang that cuts through the richness.
Perfected Texture — From my years in Parisian kitchens, I learned that texture is everything. The chicken is cooked to exactly 165°F — juicy, never dry. The gravy is thickened with a classic roux and finished with cream for a velvety mouthfeel that coats without being gluey. The mashed potatoes are whipped until fluffy, then enriched with melted cheddar and sour cream. The result is a trio of textures — tender chicken, luscious gravy, and creamy potatoes — that makes every bite of this ultimate comfort food recipe worth savoring.
Foolproof & Fast — I’ve tested this easy comfort food dinner idea in my own NYC kitchen more times than I can count. It’s designed for a busy weeknight but tastes like a Sunday supper. The entire meal comes together in one skillet plus one pot — minimal cleanup, maximum flavor. Even if you’re new to making gravy from scratch, the step-by-step instructions with visual cues will guide you to a perfect result. No culinary degree required — just a love for good food.
Chicken and Garlic Gravy Ingredients
I pick up my chicken from the butcher at the Union Square Greenmarket — it’s fresher and the flavor really shines. The garlic I buy in bulk from a little Italian grocer in Brooklyn, and the cheddar comes from a dairy farm upstate. When I close my eyes and inhale these ingredients, I’m right back in my mother’s kitchen in Marrakech, where garlic and butter were the foundation of everything delicious. Here’s everything you need for this chicken and garlic gravy recipe.
Ingredients List
- 4 boneless, skinless chicken breasts (about 6 oz each)
- 1 teaspoon salt
- 1/2 teaspoon black pepper
- 1 teaspoon garlic powder
- 2 tablespoons olive oil
- 4 tablespoons butter
- 6 cloves garlic, minced
- 3 tablespoons all-purpose flour
- 2 cups chicken broth, preferably low-sodium
- 1/2 cup heavy cream
- 1/2 teaspoon dried thyme (or 1 teaspoon fresh thyme leaves)
- Salt and pepper to taste
- 2 pounds russet potatoes, peeled and cubed into 1-inch pieces
- 4 tablespoons butter
- 1/2 cup milk (whole milk preferred)
- 1 cup shredded cheddar cheese (sharp or medium)
- 1/2 cup sour cream
- Salt and pepper to taste
Ingredient Spotlight
Chicken Breasts — Look for breasts that are even in thickness so they cook uniformly. If they’re very thick, pound them to about 1/2 inch between two sheets of plastic wrap. This ensures juicy, evenly cooked chicken. For a richer flavor, you can substitute boneless, skinless chicken thighs — they’ll be even more forgiving and tender.
Russet Potatoes — These are the gold standard for fluffy, creamy mashed potatoes. They have a high starch content and low moisture, which means they mash up light and airy. Yukon Golds also work well and add a buttery color, but avoid waxy potatoes like red bliss for this recipe — they’ll turn out gluey rather than fluffy.
Sharp Cheddar — I recommend sharp or extra-sharp cheddar for this cheesy mashed potatoes recipe. It has a bold flavor that stands up to the garlic gravy without getting lost. Pre-shredded cheese often contains anti-caking agents that prevent smooth melting, so shred your own from a block — it melts like a dream and the texture is noticeably creamier.
Heavy Cream — This is what gives the garlic gravy its restaurant-quality silkiness. You can substitute half-and-half in a pinch, but the gravy will be slightly less luxurious. Avoid milk — it won’t provide the same richness and may curdle when simmered.
| Original Ingredient | Best Substitution | Flavor / Texture Impact |
|---|---|---|
| Chicken breast | Boneless skinless chicken thighs | Richer flavor, more forgiving, stays juicier |
| Russet potatoes | Yukon Gold potatoes | Slightly denser, naturally buttery color and flavor |
| Sharp cheddar | Gruyère or Gouda | Nutty, meltier, more sophisticated flavor profile |
| Heavy cream | Half-and-half (not milk) | Thinner gravy, less luscious but still good |
| Sour cream | Greek yogurt (full-fat) | Tangier, slightly thinner, still creamy |
How to Make Chicken and Garlic Gravy — Step-by-Step
Trust me — if you can sear chicken and stir a pot, you can absolutely nail this chicken and garlic gravy recipe. I’ve broken every step down with the exact visual cues and timing so you feel confident from start to finish. Let’s cook!
Step 1: Season and Sear the Chicken
Pat the chicken breasts dry with paper towels — this is crucial for a golden crust. Season both sides evenly with salt, pepper, and garlic powder. Heat olive oil in a large skillet over medium-high heat until it shimmers. Add the chicken and cook for 5–7 minutes per side, until golden brown and the internal temperature reaches 165°F. Transfer to a plate and cover loosely with foil to keep warm.
⚠️ Common Mistake to Avoid: Crowding the pan. If the chicken pieces are too close together, they’ll steam instead of sear. Cook in two batches if needed — your patience will be rewarded with a beautiful golden crust.
Step 2: Build the Garlic Gravy
Reduce the heat to medium. In the same skillet, melt the butter. Add the minced garlic and cook for 1 minute, stirring constantly, until fragrant — don’t let it brown. Whisk in the flour and cook for 2 minutes, stirring constantly to make a golden roux. Slowly pour in the chicken broth while whisking vigorously to prevent lumps. Bring to a simmer and cook for 3 minutes, until thickened and smooth. Stir in the heavy cream and dried thyme, then season with salt and pepper. Return the chicken to the skillet, spooning gravy over the top, and keep warm over low heat.
💡 mia’s Pro Tip: For an extra layer of flavor, add a splash of dry white wine (about 1/4 cup) after cooking the garlic and before adding the flour. Let it reduce by half — it deglazes the pan and adds incredible depth to the chicken and garlic gravy.
Step 3: Boil and Mash the Potatoes
Place the peeled and cubed russet potatoes in a large pot and cover with cold salted water. Bring to a boil over high heat, then reduce to a simmer and cook for 15 minutes, or until a fork pierces them easily with no resistance. Drain well in a colander and return the potatoes to the hot pot (off the heat) for 30 seconds to steam off excess moisture. Add the butter and milk, then mash with a potato masher or hand mixer until smooth and fluffy.
⚠️ Common Mistake to Avoid: Over-mashing can make potatoes gummy. Mash just until smooth, and use warm milk — cold milk will cool down the potatoes and make them gluey.
Step 4: Finish the Cheesy Mashed Potatoes
While the potatoes are still hot, stir in the shredded cheddar cheese and sour cream until completely melted and incorporated. Season with salt and pepper to taste. The cheese should be fully melted and the potatoes should be creamy, fluffy, and spoonable. Taste and adjust seasoning — potatoes need a surprising amount of salt, so don’t be shy.
💡 mia’s Pro Tip: For the smoothest cheesy mashed potatoes, grate your cheddar from a block and let it come to room temperature before stirring it in. Cold cheese can seize up and create lumps.
Step 5: Assemble and Serve
Spoon a generous portion of cheesy mashed potatoes onto each plate or into a shallow bowl. Place a chicken breast on top and ladle a generous amount of garlic gravy over everything. Garnish with a sprinkle of fresh parsley or chives if you have them — they add color and freshness. Serve immediately while everything is hot and luscious.
| Step | Action | Duration | Key Visual Cue |
|---|---|---|---|
| 1 | Sear chicken | 5–7 min per side | Golden brown crust, internal temp 165°F |
| 2 | Cook garlic roux | 3 min | Garlic fragrant, roux golden and bubbly |
| 3 | Simmer gravy | 3 min | Thickened, coats back of spoon |
| 4 | Boil potatoes | 15 min | Fork-tender with no resistance |
| 5 | Mash and mix | 3 min | Smooth, fluffy, cheese fully melted |
Serving & Presentation
I love serving this chicken and gravy dinner like a cozy restaurant plate at home. Start with a wide, shallow bowl — it shows off the layers beautifully. Use a large spoon or ice cream scoop to make a tidy mound of cheesy mashed potatoes in the center, then place the chicken breast right on top. Ladle the garlic gravy generously over the chicken and let it pool around the potatoes. A final sprinkle of freshly chopped parsley or chives adds a pop of green that makes the dish look as good as it tastes.
In my NYC kitchen, I often serve this with a simple side of steamed green beans or roasted broccoli — the bright, slightly charred vegetables cut through the richness of the gravy and potatoes. A crisp green salad with a lemony vinaigrette is another favorite. And if you’re feeling extra indulgent, warm dinner rolls on the side are never a bad idea. For a drink, a medium-bodied red like a Merlot or a smooth Zinfandel pairs beautifully, but a cold glass of buttermilk (a surprising Moroccan-inspired pairing!) is what I grew up with and still love.
💡 mia’s Pro Tip: For a restaurant-worthy presentation, warm the plates in a 200°F oven for 5 minutes before serving. The mashed potatoes and gravy stay hot longer, and the chicken doesn’t cool down too quickly. It’s a small step that makes a big difference.
| Pairing Type | Suggestions | Why It Works |
|---|---|---|
| Side Dish | Steamed green beans, roasted broccoli, or a crisp garden salad | Bright, fresh flavors cut through the richness; adds color and texture |
| Bread | Warm dinner rolls, crusty sourdough, or garlic bread | Perfect for sopping up every last drop of garlic gravy |
| Beverage | Merlot, Zinfandel, or a cold glass of buttermilk | Red wine complements the savory gravy; buttermilk is a tangy, cooling contrast |
| Garnish | Fresh parsley, chives, or a pinch of smoked paprika | Adds freshness, color, and a subtle smoky note that echoes the seared chicken |
Make-Ahead, Storage & Reheating
As a busy food blogger in NYC, I live by make-ahead strategies. This chicken and garlic gravy recipe is wonderfully forgiving for meal prep. I often cook the chicken and gravy on a Sunday, then reheat everything on a hectic Tuesday. The key is storing the components separately to maintain the best texture. Here’s my tried-and-true system for making this ultimate comfort food recipe work for your schedule.
| Method | Container | Duration | Reheating Tip |
|---|---|---|---|
| Refrigerator | Airtight container (chicken + gravy separate from potatoes) | Up to 4 days | Reheat chicken in gravy in a skillet over medium-low, covered. Reheat potatoes in a microwave or oven with a splash of milk. |
| Freezer | Freezer-safe container or zip-top bag (gravy only; freeze potatoes separately) | Up to 2 months | Thaw gravy in the fridge overnight. Reheat gently on the stove, whisking in a splash of broth or cream to restore consistency. Reheat potatoes in the microwave with extra butter and milk. |
| Make-Ahead | Prepare chicken + gravy up to step 7; prepare potatoes up to step 10 | Up to 2 days in advance | Store separately. Reheat chicken and gravy together, then warm potatoes just before serving. Assemble fresh for the best texture. |
When reheating the cheesy mashed potatoes, I’ve found the best method is to add a splash of milk (about 1–2 tablespoons per serving) and reheat them gently in a saucepan over low heat, stirring frequently. The microwave works in a pinch — use 30-second intervals and stir between each — but the stovetop gives you more control and a creamier result. For the chicken and gravy, a skillet over medium-low heat with the lid on is ideal. The gentle steam keeps the chicken moist while the gravy re-liquefies beautifully. If the gravy seems too thick after refrigeration, thin it with a splash of chicken broth or water as it warms.
⚠️ Common Mistake to Avoid: Don’t microwave the chicken and gravy together on high power — it can make the chicken rubbery and the gravy separate. Low and slow is the mantra for reheating this chicken and gravy dinner.
Variations & Easy Swaps
| Variation | Key Change | Best For | Difficulty Impact |
|---|---|---|---|
| Moroccan Spiced Chicken | Add 1 tsp cumin, 1/2 tsp cinnamon, 1/2 tsp turmeric to the chicken seasoning | Adventurous palates, North African flavor lovers | No change — just add spices to the rub |
| Gluten-Free Version | Replace flour with 2 tbsp cornstarch mixed with 2 tbsp cold water (slurry) | Gluten-free diets | Slightly easier — slurry thickens quickly |
| Dairy-Free / Vegan Twist | Use vegan butter, oat milk, dairy-free cheese shreds, and coconut cream | Dairy-free or vegan diets | Medium — check labels and adjust seasoning |
Moroccan Spiced Chicken Variation
This variation is a nod to my childhood. Mix 1 teaspoon ground cumin, 1/2 teaspoon cinnamon, and 1/2 teaspoon turmeric into the seasoning for the chicken. The warm spices pair beautifully with the garlic gravy and add an exotic depth that transforms this easy comfort food dinner idea into something truly memorable. The gravy itself can stay as-is — the spices in the chicken will infuse the pan fond and subtly flavor the sauce. Serve with a sprinkle of toasted sesame seeds and fresh cilantro for the full Moroccan experience.
Gluten-Free Version
To make this chicken and garlic gravy recipe gluten-free, skip the flour roux and instead whisk together 2 tablespoons of cornstarch with 2 tablespoons of cold water until smooth. After simmering the broth for a minute, slowly pour in the cornstarch slurry while whisking continuously. The gravy will thicken almost immediately. The texture will be slightly glossier and a touch less velvety than the flour version, but it’s still incredibly delicious. Use a gluten-free chicken broth and confirm all other ingredients are certified gluten-free.
Dairy-Free / Vegan Twist
For a dairy-free version, substitute the butter with a high-quality vegan butter, the milk with unsweetened oat milk, and the heavy cream with full-fat coconut cream from a can (the thick part only). Use your favorite dairy-free cheddar-style shreds — I’ve tested several and the ones that melt best are typically made with a coconut or potato starch base. The flavor will be different but still rich and satisfying. This variation is perfect for those with dairy sensitivities and still delivers that cozy, ultimate comfort food recipe feeling.
Can I use chicken thighs instead of chicken breasts for the chicken and garlic gravy?
Absolutely! Boneless, skinless chicken thighs are a fantastic substitute for chicken breasts in this chicken and garlic gravy recipe. They have a higher fat content, which makes them incredibly tender and forgiving — they’re much harder to overcook. Simply follow the same seasoning and searing steps. Thighs may need an extra 1–2 minutes per side to reach an internal temperature of 175°F (they’re best cooked a bit more than breasts). The gravy will pick up even more rich flavor from the extra juices. If using thighs, I recommend buying about 1.5 pounds to yield the same 4 servings.
What type of cheese melts best into mashed potatoes for this comfort food recipe?
For the creamiest, most flavorful cheesy mashed potatoes, I recommend sharp or extra-sharp cheddar cheese. It melts beautifully and has a bold flavor that stands up to the rich garlic gravy without getting lost. Other excellent melting cheeses include Gruyère (nutty and smooth), Gouda (smoky and creamy), or Monterey Jack (mild and ultra-melty). Avoid hard, dry cheeses like Parmesan or pecorino on their own — they don’t melt as smoothly and can make the potatoes grainy. Always shred your cheese from a block rather than using pre-shredded bags, which contain anti-caking agents that prevent smooth melting. For this ultimate comfort food recipe, sharp cheddar is my top pick every time.
How do I make garlic gravy from scratch without it becoming lumpy?
The key to a silky, lump-free garlic gravy is a technique called a roux combined with gradual liquid incorporation. Start by melting butter over medium heat and whisking in the flour — cook for about 2 minutes, stirring constantly, until the mixture is golden and bubbly. This cooks out the raw flour taste. Then, slowly pour in the chicken broth while whisking vigorously and constantly. The trick is to add the liquid in a thin, steady stream — if you dump it all at once, lumps will form. Keep whisking as the gravy comes to a simmer; it will thicken naturally. If you see any small lumps, switch to a wire whisk and beat them out — they’ll dissolve as the gravy cooks. For extra insurance, you can strain the finished gravy through a fine-mesh sieve, but if you follow this method, you won’t need to.
Can I prepare the cheesy mashed potatoes ahead of time and reheat them?
Yes, you can absolutely make the cheesy mashed potatoes ahead of time — they’re one of the best make-ahead components for this chicken and garlic gravy recipe. Prepare the potatoes through step 10, then let them cool completely. Transfer to an airtight container and refrigerate for up to 2 days. For the best texture when reheating, transfer the potatoes to a saucepan, add a splash of milk (about 2 tablespoons per serving), and warm over low heat, stirring frequently. You can also reheat them in the microwave in 30-second intervals, stirring between each. If the potatoes seem a little stiff, stir in an extra pat of butter or another splash of milk to restore creaminess. Avoid high heat, which can make them gluey. I often do this on a Sunday for an easy Monday dinner — it’s a game-changer for busy weeknights.
What can I use instead of heavy cream in the garlic gravy to make it lighter?
If you’re looking to lighten up the gravy without sacrificing too much texture, half-and-half is your best substitute for heavy cream. It has about half the fat content but still adds richness and a smooth consistency. Use the same amount — 1/2 cup. The gravy will be slightly thinner but still delicious. For an even lighter option, you can use whole milk mixed with 1 teaspoon of cornstarch (dissolved in a little cold water) to help restore some body. Avoid skim milk or non-dairy milk on their own, as they can curdle when simmered and won’t provide the same silky texture. This chicken and garlic gravy recipe is forgiving, so feel free to experiment based on your dietary needs.
How do I know when the chicken is fully cooked without a thermometer?
While a digital instant-read thermometer is the most reliable way to confirm doneness (165°F for breasts), you can also use visual and tactile cues. A perfectly cooked chicken breast will be firm to the touch but still have a slight give — it shouldn’t feel hard or rubbery. When you cut into the thickest part, the juices should run clear with no trace of pink. The meat should be opaque all the way through. For this chicken and garlic gravy recipe, I highly recommend investing in a simple thermometer — they’re inexpensive and take the guesswork out of cooking. Overcooked chicken is dry and tough, and undercooked chicken is unsafe, so a thermometer gives you confidence every time.
What sides go best with chicken and garlic gravy and cheesy mashed potatoes?
Since this chicken and gravy dinner is rich and comforting, I love pairing it with sides that add freshness and contrast. Steamed or roasted green beans with a squeeze of lemon are a classic choice — the acidity cuts through the creamy gravy and potatoes. Roasted broccoli or asparagus also work beautifully. A simple garden salad with a tangy vinaigrette (red wine vinegar, Dijon mustard, and olive oil) is another excellent option. For bread lovers, warm dinner rolls or crusty sourdough are perfect for soaking up every last drop of garlic gravy. If you want to keep things ultra-comforting, buttery corn on the cob or honey-glazed carrots round out the meal nicely.
Can I double the recipe to serve a larger crowd?
Absolutely! This chicken and garlic gravy recipe scales beautifully for a crowd. Simply double all the ingredients. For the chicken, cook it in batches to avoid overcrowding the pan — this ensures each piece gets a proper golden sear. The gravy can be made in the same skillet in a larger quantity; just keep whisking and be patient with the simmering time, as a larger volume may take a few extra minutes to thicken. The mashed potatoes can be made in a large pot — use a hand mixer if mashing by hand becomes too much of a workout. One note: if doubling, use a skillet with a larger surface area or a Dutch oven to give the chicken and gravy enough room. This is my go-to for family gatherings and holiday dinners.
How do I store leftovers of this chicken and gravy dinner?
Store the chicken and garlic gravy and the cheesy mashed potatoes in separate airtight containers in the refrigerator for up to 4 days. Keeping them separate prevents the potatoes from becoming soggy and the gravy from being absorbed. For best results, let both cool to room temperature before refrigerating (within 2 hours of cooking). When reheating, warm the chicken and gravy together in a covered skillet over medium-low heat, adding a splash of broth if needed to loosen the sauce. Reheat the potatoes gently on the stovetop or in the microwave with a splash of milk and an extra pat of butter to restore creaminess. I don’t recommend freezing the mashed potatoes, as they can become grainy when thawed — the gravy freezes well for up to 2 months, but the potatoes are best made fresh.
Can I add vegetables to this ultimate comfort food recipe?
Absolutely! Adding vegetables is a wonderful way to round out this dish and make it even more nourishing. I often add a cup of sliced mushrooms to the skillet after cooking the chicken — sauté them in the butter before adding the garlic. The mushrooms add an earthy depth to the garlic gravy. You can also stir in a handful of frozen peas or steamed broccoli florets just before serving, letting them warm through in the gravy. For the mashed potatoes, you can fold in roasted garlic, chopped chives, or even steamed cauliflower for a lighter twist. This chicken and garlic gravy recipe is incredibly versatile and welcomes your favorite seasonal vegetables with open arms.
Share Your Version!
I absolutely love hearing how this chicken and garlic gravy recipe turns out in your kitchen! Did you try the Moroccan spice twist? Did you go full cheesy indulgence with extra cheddar? Or did you invent something entirely new? Drop a star rating and a comment below — your feedback helps other home cooks discover what works. And if you snap a photo of your creation, tag me @exorecipes on Instagram or Pinterest. I share my favorites in my stories every week!
One question for you: what’s your go-to side dish with this chicken and gravy dinner? I’m always looking for new ideas and your answer might just inspire my next recipe. Thank you for cooking with me today.
From my NYC kitchen to yours — I hope this recipe brings as much warmth to your table as it does to mine. — mia 🧡
Love This Recipe? Save It to Pinterest!
If you enjoyed this Chicken and Garlic Gravy with Cheesy Mashed Potatoes recipe, don’t let it get lost in your browser tabs! 😄 Pin it now so you can find it again anytime — and explore hundreds more tried-and-tested recipes waiting for you on my Pinterest boards.
👉 Follow mia on Pinterest @chefrecipes2
📌 Pin this recipe · 🔁 Re-pin your favorites · 💬 Tag me when you make it — I love seeing your creations!
🍽️ Made This Recipe? I Want to See!
Tag @exorecipes on Instagram or Pinterest and use #exorecipes — your photo could be featured in my weekly roundup! 🎉
Chicken and Garlic Gravy with Cheesy Mashed Potatoes: The Ultimate Comfort Food Recipe
- Prep Time: 15 minutes
- Cook Time: 30 minutes
- Total Time: 45 minutes
- Yield: 4 1x
- Method: Main Course
- Cuisine: American
Description
This ultimate comfort food recipe features juicy chicken smothered in a rich garlic gravy, served over creamy cheesy mashed potatoes. Perfect for a cozy family dinner.
Ingredients
- For the Chicken:
- 4 boneless, skinless chicken breasts
- 1 teaspoon salt
- 1/2 teaspoon black pepper
- 1 teaspoon garlic powder
- 2 tablespoons olive oil
- For the Garlic Gravy:
- 4 tablespoons butter
- 6 cloves garlic, minced
- 3 tablespoons all-purpose flour
- 2 cups chicken broth
- 1/2 cup heavy cream
- 1/2 teaspoon dried thyme
- Salt and pepper to taste
- For the Cheesy Mashed Potatoes:
- 2 pounds russet potatoes, peeled and cubed
- 4 tablespoons butter
- 1/2 cup milk
- 1 cup shredded cheddar cheese
- 1/2 cup sour cream
- Salt and pepper to taste
Instructions
- Prepare the Chicken:
- 1. Season chicken breasts with salt, pepper, and garlic powder on both sides.
- 2. In a large skillet, heat olive oil over medium-high heat. Add chicken and cook for 5-7 minutes per side, until golden brown and cooked through. Remove from skillet and set aside.
- Prepare the Garlic Gravy:
- 3. In the same skillet, melt butter over medium heat. Add minced garlic and cook for 1 minute until fragrant.
- 4. Whisk in flour and cook for 2 minutes, stirring constantly.
- 5. Gradually pour in chicken broth, whisking constantly to prevent lumps. Bring to a simmer and cook until thickened, about 3 minutes.
- 6. Stir in heavy cream and dried thyme. Season with salt and pepper to taste.
- 7. Return chicken to the skillet, spooning gravy over the top. Keep warm.
- Prepare the Cheesy Mashed Potatoes:
- 8. Place cubed potatoes in a large pot and cover with salted water. Bring to a boil and cook until tender, about 15 minutes.
- 9. Drain potatoes and return to the pot. Add butter and milk, then mash until smooth.
- 10. Stir in shredded cheddar cheese and sour cream until melted and well combined. Season with salt and pepper.
- Serve:
- 11. Serve the chicken and garlic gravy over a generous portion of cheesy mashed potatoes.
Notes
For extra flavor, you can add a splash of white wine to the gravy after cooking the garlic. The cheesy mashed potatoes can be made ahead and reheated gently.
Nutrition
- Calories: 620
- Sugar: 4g
- Fat: 32g
- Carbohydrates: 38g
- Protein: 45g
k">
Tried This Recipe? Leave a Comment!
Did you make this recipe? I’d love to hear how it turned out! Please leave a comment and a rating below. Your feedback helps other home cooks and supports cheerychop.com!
For more delicious inspiration, follow me on Pinterest!