“`html
Table of Contents
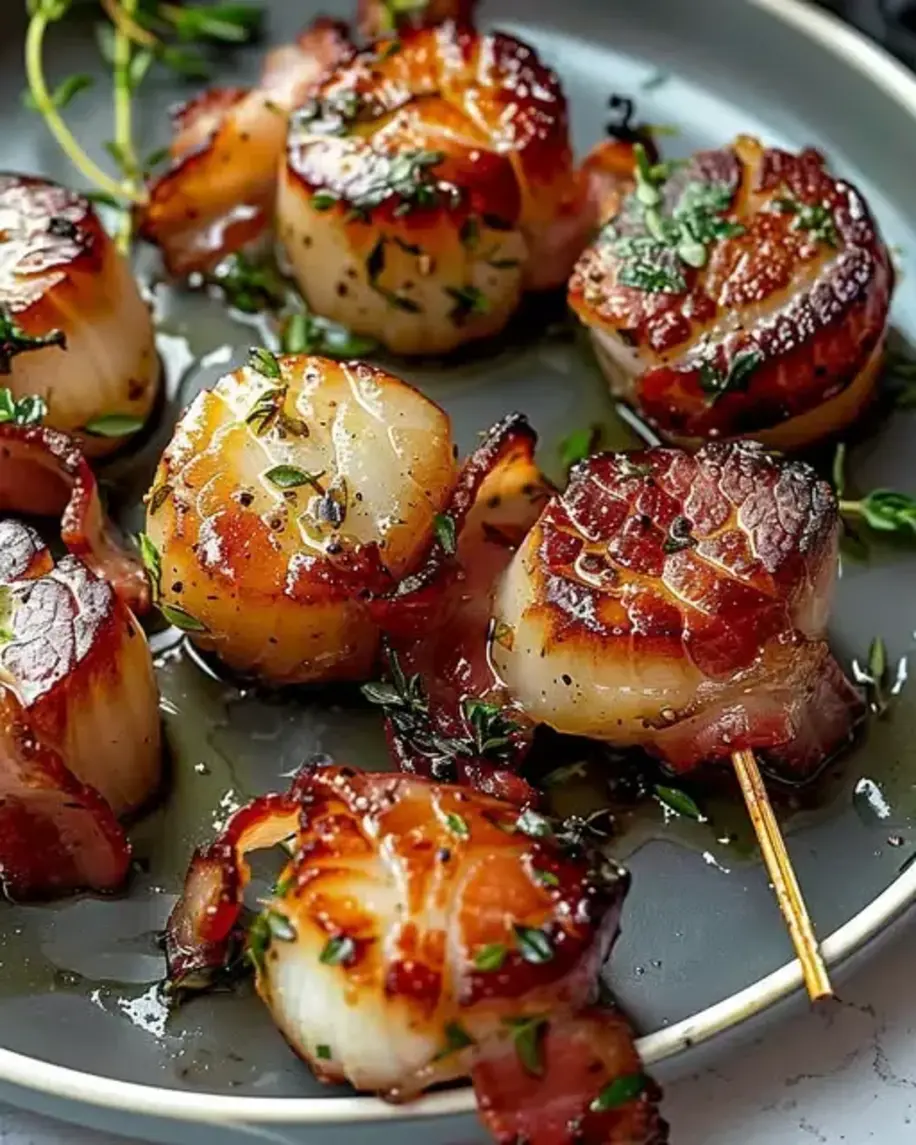
Air Fryer Bacon Wrapped Scallops: A Perfectly Crispy, Sweet and Savory Delight
I still remember the first time I made bacon wrapped scallops for a dinner party in my tiny Parisian apartment. My chef instructor had taught me the French technique of larder — wrapping lean protein in fat to baste it from the outside in. But I wanted to add a whisper of my Moroccan roots. So I brushed them with a maple glaze that reminded me of the sweet-and-savory tagines my mother made back home. These air fryer bacon wrapped scallops are the result: a perfectly crispy, sweet and savory delight that comes together in under 20 minutes. The air fryer makes them incredibly easy — no splattering oil, no turning on the oven, just golden, caramelized perfection every time.
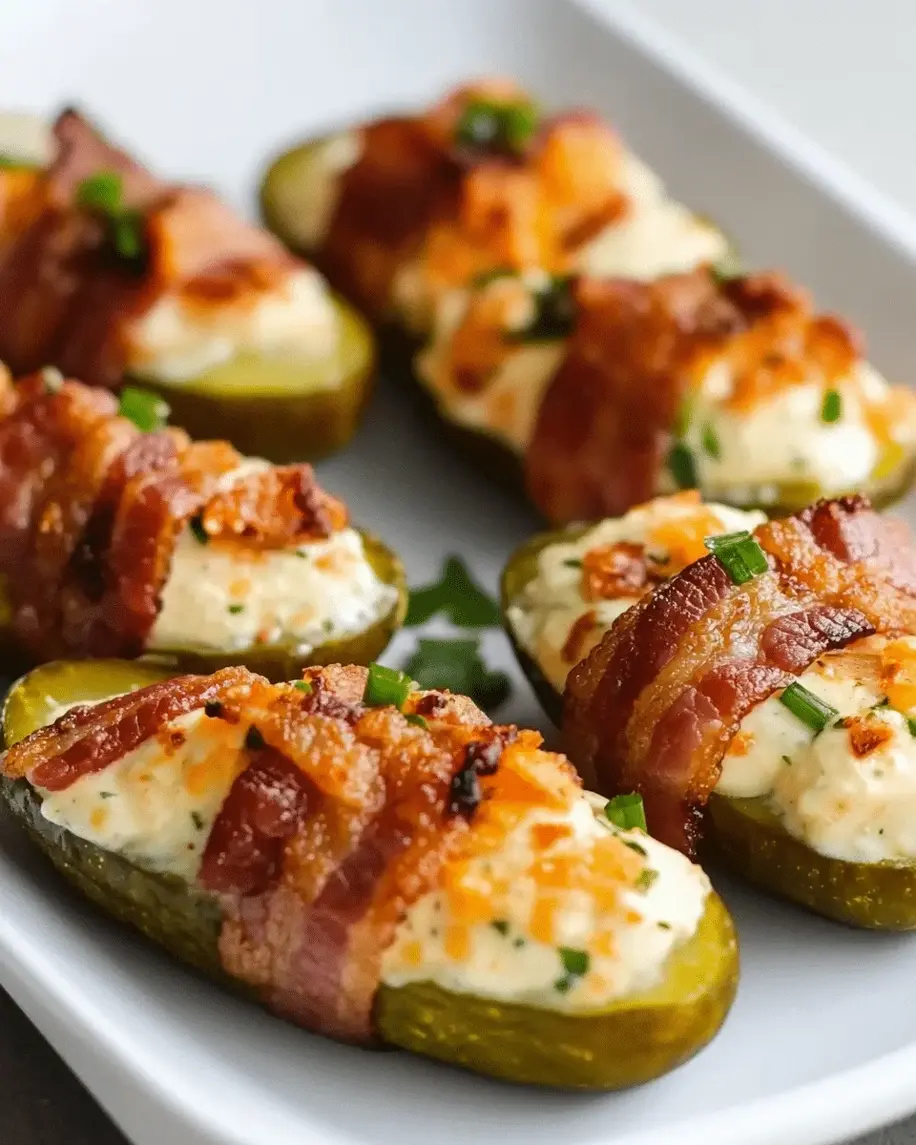
Picture this: Each tender sea scallop is hugged by a thin strip of bacon that turns shatteringly crisp in the air fryer. The maple and soy glaze caramelizes into a glossy, sticky coating that balances rich saltiness with a touch of sweetness. The texture is sublime — the scallops stay plump and juicy on the inside while the bacon becomes crunchy and candied at the edges. A hint of garlic powder and black pepper ties everything together. It’s the kind of bite that makes you close your eyes and savor the moment, whether you’re serving it as an appetizer at a holiday party or enjoying it as a weeknight dinner treat.
What sets my version apart is the glaze. I’ve tested countless combinations, and this maple-soy-garlic trio is the one that delivers the perfect balance without overpowering the scallops. I also insist on thin-cut bacon — trust me on this — and a soak for your toothpicks to prevent any fiery mishaps. 💡 mia’s Pro Tip: Pat the scallops completely dry before wrapping; moisture is the enemy of a good sear, even in an air fryer. And here’s a common mistake to avoid: overcrowding the basket. Give each scallop some breathing room so the hot air can circulate and crisp every side evenly.
Why This Air Fryer Bacon Wrapped Scallops Recipe Is the Best
The Flavor Secret: The magic lies in the simple yet powerful maple glaze. I learned the art of balancing sweet and savory in my mother’s kitchen in Morocco, where honey and salt often meet in the same dish. French training taught me precision — exactly 2 tablespoons of maple syrup to 1 tablespoon of soy sauce creates a glaze that clings without being cloying. The garlic powder adds depth without stealing the spotlight from the sea-sweet scallops.
Perfected Texture: My professional training in Paris drilled into me the importance of texture contrast. The air fryer at 400°F (200°C) creates the ideal environment for bacon to render its fat and become crispy while the scallop stays tender. Flipping halfway through ensures even browning. I’ve tested this at every temperature from 375°F to 425°F, and 400°F is the sweet spot — hot enough to crisp the bacon quickly without overcooking the delicate scallop inside.
Foolproof & Fast: This is one of those recipes that looks impressive but requires almost no skill. No fancy equipment, no complicated techniques. Just wrap, glaze, and air fry. It’s the kind of dish that makes you look like a hero at a party with minimal effort. I’ve taught this to absolute beginners in my NYC cooking workshops, and they nail it every time. If you can wrap a present, you can wrap a scallop.
Air Fryer Bacon Wrapped Scallops Ingredients
I source my sea scallops from the seafood counter at the Union Square Greenmarket in NYC — they’re dry-packed, never frozen, and taste like the ocean. The bacon? I usually grab a pack of thin-cut from the Brooklyn Butcher down the street. The memory of my mother’s spice counter in Morocco inspired the garlic powder and black pepper pairing. Every ingredient here is a bridge between my worlds: French precision, Moroccan warmth, and pure New York convenience.
Ingredients List
- 1 lb large sea scallops (about 12 scallops)
- 6 slices thin-cut bacon, cut in half crosswise
- 2 tablespoons maple syrup (preferably Grade A amber)
- 1 tablespoon soy sauce (or tamari for gluten-free)
- 1/2 teaspoon garlic powder
- 1/4 teaspoon black pepper
- Toothpicks (for securing) — wooden or bamboo
- Optional: flaky sea salt for finishing, lemon wedges for serving
Ingredient Spotlight
Sea Scallops: The star of the show. Look for “dry” scallops (not treated with sodium tripolyphosphate) — they sear and air-fry much better than wet-packed ones. They should smell sweet, not fishy. At the store, ask for large U-10 or U-12 scallops (under 10 or 12 per pound) for the most impressive size. If you can only find bay scallops, reduce cook time by 2–3 minutes.
Thin-Cut Bacon: This is non-negotiable for max crispiness. Thick-cut bacon won’t crisp up quickly enough in the air fryer before the scallop overcooks. I’ve tested both, and thin-cut is the clear winner. It also wraps more snugly around each scallop. If you’re vegetarian-curious (but not quite there yet), this is the bacon that’ll keep you hooked.
Maple Syrup: Real maple syrup, not pancake syrup. The flavor is deeper, more complex, and it caramelizes beautifully in the air fryer. I love Grade A amber for its balanced maple flavor. The sweetness cuts through the salty bacon and rich scallop perfectly. If you’re out of maple, honey or agave work — but the flavor will shift slightly.
| Original Ingredient | Best Substitution | Flavor / Texture Impact |
|---|---|---|
| Large sea scallops | Bay scallops (reduce cook time by 2–3 mins) | Smaller and sweeter; less dramatic presentation but equally delicious |
| Thin-cut bacon | Turkey bacon or prosciutto | Less fat = less crisp; prosciutto adds a delicate, salty crunch |
| Maple syrup | Honey or agave nectar | Honey adds floral notes; agave is milder and less complex |
| Soy sauce | Tamari (gluten-free) or coconut aminos | Tamari is slightly thicker; coconut aminos are sweeter and less salty |
How to Make Air Fryer Bacon Wrapped Scallops — Step-by-Step
I’ll walk you through each step like we’re cooking side by side in my NYC kitchen. This recipe is simple, but a few small details make all the difference between good and unforgettable.
Step 1: Prepare the Scallops
Pat each scallop dry with paper towels. This is the most important step — moisture prevents the bacon from crisping and can cause the glaze to steam off. Season lightly with a pinch of salt and pepper if you like, but go easy since the bacon and soy sauce bring plenty of salt. I usually skip extra salt and let the bacon do the work.
💡 mia’s Pro Tip: Use dry-packed scallops and pat them so dry that the paper towel comes away nearly clean. If you see moisture, keep blotting. Dry scallops = crispy bacon = happy dinner guests.
Step 2: Make the Maple Glaze
In a small bowl, whisk together 2 tablespoons maple syrup, 1 tablespoon soy sauce, 1/2 teaspoon garlic powder, and 1/4 teaspoon black pepper. That’s it. Set it aside — this will become your magic brush-on. The glaze will caramelize beautifully in the air fryer, creating a glossy, sticky finish that tastes like a fancy restaurant dish.
⚠️ Common Mistake to Avoid: Don’t use a thick glaze or sauce with sugar that burns easily. This maple-soy ratio is tested to caramelize without burning at 400°F. If you add extra sugar or honey, it may scorch before the bacon crisps.
Step 3: Wrap and Glaze
Take each half-slice of thin-cut bacon and wrap it around a scallop, overlapping the ends slightly. Secure with a toothpick that’s been soaked in water for at least 10 minutes (this prevents burning in the air fryer). Brush each wrapped scallop generously with the maple glaze on all sides. Work in batches if needed — don’t crowd them in the basket.
💡 mia’s Pro Tip: Soak your toothpicks in water for 10–15 minutes before using. In the air fryer’s intense heat, dry wood can scorch or even ignite. A quick soak prevents this and keeps your scallops looking gorgeous.
Step 4: Preheat and Arrange
Preheat your air fryer to 400°F (200°C) for 3–5 minutes. Place the bacon-wrapped scallops in a single layer in the basket, seam-side down if possible. Leave at least 1/2 inch between each scallop so the air can circulate. If your air fryer is small, cook in batches — overcrowding leads to steaming, not crisping.
⚠️ Common Mistake to Avoid: Don’t skip the preheat! A cold air fryer will gradually come up to temperature, but by then the bacon will have rendered slowly and the scallops will be overdone. Preheating ensures the bacon sears immediately, locking in juiciness.
Step 5: Air Fry
Air fry at 400°F for 8–10 minutes, flipping the scallops carefully with tongs halfway through (at about the 4-minute mark). The bacon should be deep golden and crisp, and the scallops should be opaque and firm to the touch. For food safety, the internal temperature should reach 130°F for scallops. If you like a more well-done approach, go to 8 minutes total — but no more than 10, or the scallops will turn rubbery.
💡 mia’s Pro Tip: Every air fryer runs a bit different. At 8 minutes, my Cosori produces perfectly crispy bacon and tender scallops. If your bacon isn’t as crisp as you’d like, give it 1–2 more minutes, but watch the scallops carefully. When the bacon is sizzling and the glaze is bubbling, you’re golden.
Step 6: Rest and Serve
Remove the toothpicks (they’ve done their job). Let the scallops rest for 2 minutes — this allows the juices to redistribute. Drizzle with any remaining glaze if you want an extra burst of flavor. Serve immediately while they’re hot and crispy. A squeeze of lemon over the top brightens everything beautifully.
⚠️ Common Mistake to Avoid: Don’t skip the rest! I know you’re hungry, but those 2 minutes let the bacon set and the scallop finish cooking gently. If you cut into them right away, the juices will run out onto the plate instead of staying in the scallop.
| Step | Action | Duration | Key Visual Cue |
|---|---|---|---|
| 1 | Pat scallops dry | 2 minutes | Paper towels come away nearly dry |
| 2 | Make glaze | 1 minute | Smooth, dark amber mixture |
| 3 | Wrap & glaze | 5 minutes | Bacon snug around scallop; toothpick secure |
| 4 | Preheat & arrange | 3–5 minutes | Single layer with space between each |
| 5 | Air fry | 8–10 minutes | Bacon deep golden; scallops opaque |
| 6 | Rest & serve | 2 minutes | Bacon stays crisp; scallops rest |
Serving & Presentation
I love serving these air fryer bacon wrapped scallops on a bed of microgreens or arugula with lemon wedges scattered around the platter. The peppery greens contrast beautifully with the sweet glaze, and a squeeze of fresh lemon cuts through the richness. For holiday parties, I arrange them on a wooden board with toothpicks removed and a small bowl of extra glaze for dipping. In the summer, I line them up on a platter with grilled lemon halves — it reminds me of the seaside dinners I shared with friends in Essaouira, Morocco.
For a main course, serve 4–6 scallops per person over a simple salad of shaved fennel, orange segments, and a light vinaigrette. The fennel’s anise note echoes the sweetness of the glaze, and the orange adds a bright pop that feels very NYC — fresh, seasonal, and sophisticated. I also love pairing them with roasted asparagus or a crisp white wine like Sauvignon Blanc. The goal is to let the scallops shine while surrounding them with flavors that complement rather than compete.
When I’m channeling my Parisian bistro days, I sprinkle a tiny pinch of flaky sea salt (like fleur de sel) over the scallops just before serving. The salt crystals add a delicate crunch and a burst of briny flavor that makes the sweet glaze sing. A dollop of crème fraîche on the side is a nod to my French training — it’s cool, tangy, and balances the smoky bacon beautifully.
| Pairing Type | Suggestions | Why It Works |
|---|---|---|
| Side Dish | Arugula salad, roasted asparagus, grilled lemon halves | Peppery greens and bright citrus cut the richness; asparagus adds earthy crunch |
| Sauce / Dip | Extra maple glaze, crème fraîche, sriracha aioli | Glaze reinforces the sweet-savory theme; crème fraîche cools; aioli adds heat |
| Beverage | Sauvignon Blanc, dry rosé, sparkling water with lemon | Crisp white wines cut through fat; sparkling water cleanses the palate |
| Garnish | Flaky sea salt, chopped chives, lemon zest, red pepper flakes | Salt enhances sweetness; chives add color; zest brightens; flakes add heat |
Make-Ahead, Storage & Reheating
Between my busy NYC schedule and catering pop-up dinners, I’m a big fan of recipes that work ahead. These air fryer bacon wrapped scallops can be prepped in advance and stored for later. Here’s how I handle it for my meal prep or party planning:
| Method | Container | Duration | Reheating Tip |
|---|---|---|---|
| Refrigerator | Airtight container lined with paper towels | Up to 2 days | Reheat in air fryer at 375°F for 3–4 minutes until hot and crisp |
| Freezer | Single layer in freezer bag, parchment between layers | Up to 1 month | Reheat from frozen at 400°F for 6–8 minutes (no thawing needed) |
| Make-Ahead | Covered baking dish with damp paper towel | Up to 6 hours in fridge (un-cooked) | Wrap & glaze up to 6 hours ahead; keep chilled; air fry just before serving |
To reheat, I never use the microwave — it turns the scallops rubbery and the bacon soft. Instead, pop them back in the air fryer at 375°F for 3–4 minutes (or 6–8 minutes from frozen). They come out almost as good as fresh, with the bacon crisping up again beautifully. If you’re reheating a large batch, spread them in a single layer and work in batches. I’ve done this for cocktail parties where I cook the first batch, then reheat quickly before the second round arrives.
Variations & Easy Swaps
| Variation | Key Change | Best For | Difficulty Impact |
|---|---|---|---|
| Moroccan Ras el Hanout | Add 1 tsp ras el hanout to the glaze | Warm, aromatic twist on the original | Easy (same effort) |
| Gluten-Free | Use tamari instead of soy sauce | Gluten-sensitive guests | Easy (no change in prep) |
| Spicy Sriracha | Add 1 tsp sriracha to the glaze | Heat lovers and game-day appetizers | Easy (same effort) |
Moroccan Ras el Hanout Variation
This is my personal favorite — a nod to my Moroccan heritage. Add 1 teaspoon of ras el hanout (a complex North African spice blend with cinnamon, cumin, coriander, and ginger) to the maple-soy glaze. The warm, fragrant spices elevate the scallops into something truly exotic. I sometimes serve these with a dollop of harissa-spiked yogurt for dipping. The combo is pure magic: sweet, savory, spicy, and cooling all at once. It’s the version I make when I’m feeling nostalgic for my mother’s kitchen.
Gluten-Free Variation
This recipe is naturally easy to make gluten-free. Simply swap the soy sauce for tamari (which is gluten-free) or coconut aminos. The flavor profile shifts slightly — tamari is a bit richer and less salty, while coconut aminos are sweeter and milder — but both work beautifully. The rest of the ingredients are naturally gluten-free. This is my go-to when I’m cooking for friends with celiac disease, and no one ever notices the swap.
Spicy Sriracha Variation
For those who love heat, stir 1 teaspoon of sriracha into the glaze. The spicy kick cuts through the bacon fat and pairs brilliantly with the sweet maple. I discovered this version during a Super Bowl party where my NYC friends wanted something with a punch. It was gone in minutes. You can also sprinkle red pepper flakes over the finished scallops for extra color and heat. Serve with a cooling dip like ranch or blue cheese to balance the fire.
How long do you cook bacon wrapped scallops in an air fryer to get them crispy?
Cook air fryer bacon wrapped scallops at 400°F (200°C) for 8–10 minutes, flipping halfway through at the 4-minute mark. At 8 minutes, the bacon should be deep golden and crispy while the scallops remain tender and juicy inside. If you prefer extra-crispy bacon, add 1–2 minutes but watch carefully — the scallops can overcook quickly beyond 10 minutes. The key is thin-cut bacon and a single layer in the basket. Every air fryer runs slightly different, so check at 8 minutes and adjust from there. For food safety, the internal temperature of the scallops should reach 130°F.
What is the best type of bacon to use for air fryer bacon wrapped scallops?
Thin-cut bacon is the absolute best choice for air fryer bacon wrapped scallops. It crisps up quickly at 400°F, matching the short cook time needed for tender scallops. Thick-cut bacon takes longer to render and crisp, which often leads to overcooked, rubbery scallops. I recommend standard thin-cut bacon from a good butcher — avoid “thick-cut” or “artisan” slices. If you prefer turkey bacon or prosciutto, keep in mind they’ll be less crispy but still delicious. Prosciutto adds a delicate, salty crunch that’s lovely for a lighter version.
Should you soak wooden toothpicks before securing bacon wrapped scallops in an air fryer?
Yes, you should always soak wooden toothpicks in water for at least 10–15 minutes before using them in an air fryer. Dry wood can scorch or even ignite in the intense circulating heat of the air fryer, especially at 400°F. Soaking the toothpicks prevents this by keeping them moist during cooking. I usually soak mine while I’m prepping the scallops and glaze — that way they’re ready to go when I start wrapping. After cooking, remove the toothpicks before serving. It’s a small step that makes a big difference in safety and presentation.
What dipping sauces go well with air fryer bacon wrapped scallops?
Several dipping sauces complement air fryer bacon wrapped scallops beautifully. The maple glaze itself makes a fantastic dip — just reserve some before brushing it on the scallops. A cool, tangy crème fraîche or Greek yogurt with a squeeze of lemon balances the smoky richness. For heat lovers, sriracha aioli or a spicy harissa yogurt adds a fiery kick. I also love a simple rémoulade or a garlic-butter sauce inspired by French bistros. If you’re serving them as an appetizer, consider a sweet chili sauce or a honey-mustard dip for a crowd-pleasing option.
Can I use frozen scallops for air fryer bacon wrapped scallops?
Yes, you can use frozen scallops, but you need to thaw them completely first. Place them in the refrigerator overnight or in a bowl of cold water for 20–30 minutes. Once thawed, pat them extremely dry with paper towels — frozen scallops release more water, so extra drying is crucial for crispy bacon. I recommend using dry-packed, fresh scallops for best results, but frozen works in a pinch. Just be thorough with the drying step and consider adding 1–2 minutes to the cook time if the scallops are still slightly moist.
How do I keep scallops from getting rubbery in the air fryer?
To keep scallops tender in the air fryer, follow three key rules: First, don’t overcook — 8–10 minutes at 400°F is the sweet spot, and check at 8 minutes. Second, use thin-cut bacon that crisps quickly so the scallop doesn’t sit in the heat too long. Third, pat the scallops completely dry before wrapping; excess moisture creates steam that toughens the meat. Finally, let the scallops rest for 2 minutes after cooking — they continue to gently cook from residual heat, so pulling them at 130°F internal temp ensures they stay tender and juicy.
Can I make these air fryer bacon wrapped scallops ahead of time?
Absolutely, and I do this often for parties. You can wrap the scallops with bacon, secure them with soaked toothpicks, and brush with the maple glaze up to 6 hours ahead. Keep them covered in the refrigerator on a baking sheet lined with parchment. When you’re ready to serve, simply air fry them straight from the fridge — no need to bring to room temperature. Cooked scallops can be stored in the fridge for up to 2 days and reheated in the air fryer at 375°F for 3–4 minutes. They also freeze beautifully for up to 1 month.
What’s the best way to arrange scallops in the air fryer basket?
Arrange the bacon wrapped scallops in a single layer with at least 1/2 inch of space between each one. This allows the hot air to circulate evenly, crisping the bacon on all sides. Place them seam-side down if possible — this helps the bacon stay wrapped and cook evenly. If your air fryer basket is small, cook in batches rather than overcrowding. Overcrowding traps steam, which makes the bacon soggy and the scallops tough. I usually cook 6 scallops at a time in a standard 6-quart air fryer, which gives perfect results every time.
Can I use a different sweetener instead of maple syrup?
Yes, you can substitute honey, agave nectar, or even brown sugar dissolved in a little warm water. Honey adds floral notes that pair nicely with scallops, while agave is milder and less complex. Brown sugar creates a deeper, molasses-like flavor that’s delicious but slightly heavier. Keep the ratio the same — 2 tablespoons of sweetener to 1 tablespoon of soy sauce. Note that honey and agave may caramelize faster than maple syrup, so check your scallops at 7–8 minutes instead of 8–10 to prevent burning.
What should I serve with bacon wrapped scallops for a complete meal?
For a complete meal, I love serving these scallops with a light arugula salad dressed with lemon vinaigrette and shaved Parmesan. The peppery greens and tangy cheese balance the sweet-savory glaze. Roasted asparagus or green beans add a fresh, crunchy side. For a starch option, try garlic mashed potatoes or a simple orzo pasta with herbs. If you’re keeping things low-carb, cauliflower rice or zucchini noodles work beautifully. As a beverage, a crisp Sauvignon Blanc or dry rosé elevates the whole meal. For a non-alcoholic option, sparkling water with lemon and fresh mint is refreshing and palate-cleansing.
Share Your Version!
I hope you fall in love with these air fryer bacon wrapped scallops the way I did in my tiny Paris kitchen, and the way I still do every time I make them in my New York City home. The combination of crispy bacon, tender scallops, and that sweet-savory maple glaze is truly special — and now it’s your turn to give it a try. I’d love to hear how they turn out for you! Did you try the Moroccan ras el hanout version? Did you add a spicy kick with sriracha? Or did you keep it classic?
Leave a star rating and a comment below — your feedback helps me create more recipes you’ll love. Share a photo of your beautiful scallops on Instagram or Pinterest and tag @exorecipes — I personally love seeing your creations and often feature them in my stories. And if there’s one question I want you to answer: What’s your favorite dipping sauce with these scallops? I’m always looking for new ideas to test in my kitchen!
From my NYC kitchen to yours — I hope this recipe brings as much warmth to your table as it does to mine. — mia 🧡
⭐️ Loved this recipe? Pin it for later & share the love!
Tag @exorecipes on Instagram or Pinterest — I can’t wait to see your crispy, golden scallops! 🧡
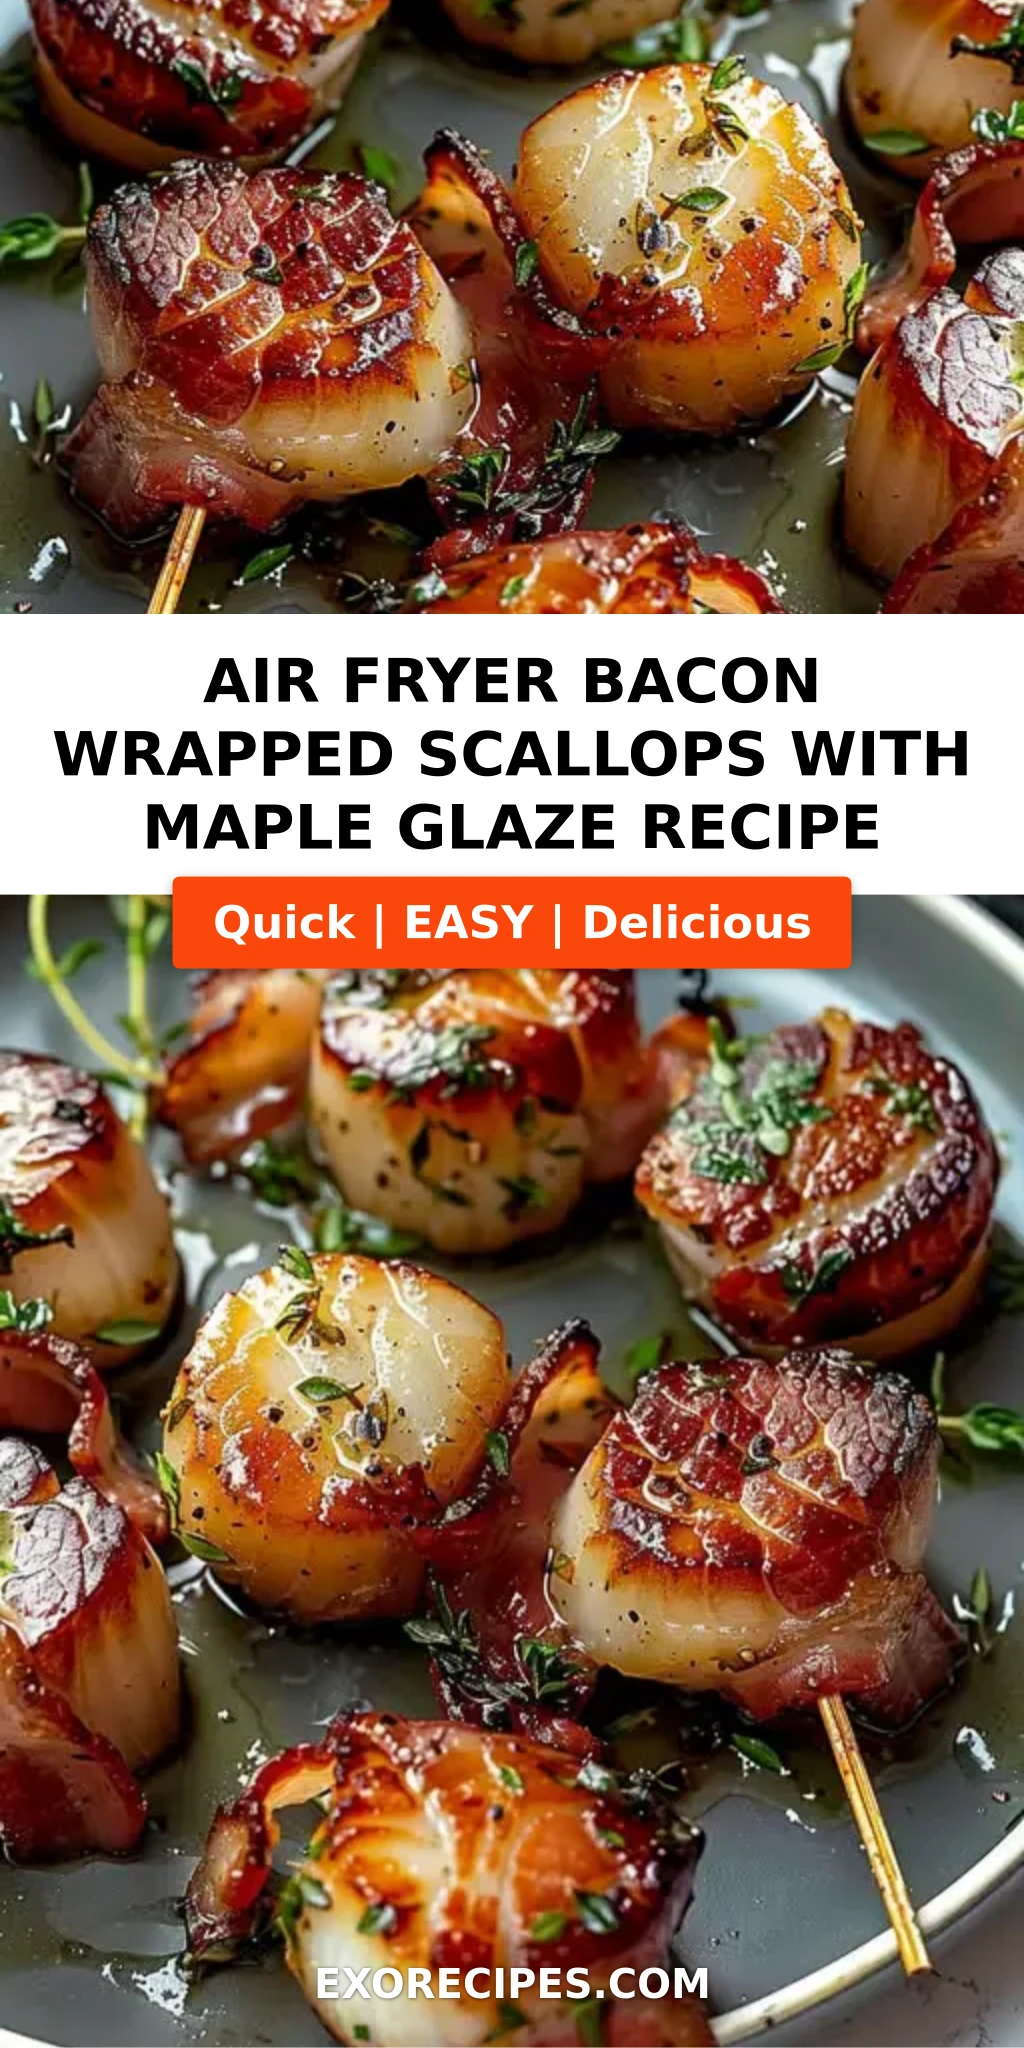
Love This Recipe? Save It to Pinterest!
If you enjoyed this Air Fryer Bacon Wrapped Scallops recipe, don’t let it get lost in your browser tabs! 😄 Pin it now so you can find it again anytime — and explore hundreds more tried-and-tested recipes waiting for you on my Pinterest boards.
👉 Follow mia on Pinterest @exorecipe
📌 Pin this recipe · 🔁 Re-pin your favorites · 💬 Tag me when you make it — I love seeing your creations!
“`
Print
Air Fryer Bacon Wrapped Scallops: A Perfectly Crispy, Sweet and Savory Delight
- Prep Time: 10 minutes
- Cook Time: 10 minutes
- Total Time: 20 minutes
- Yield: 4 1x
- Method: Appetizer
- Cuisine: American
Description
These air fryer bacon wrapped scallops are perfectly crispy on the outside and tender on the inside, with a sweet and savory flavor from the maple glaze.
Ingredients
- 1 lb large sea scallops (about 12 scallops)
- 6 slices thin-cut bacon, cut in half crosswise
- 2 tablespoons maple syrup
- 1 tablespoon soy sauce
- 1/2 teaspoon garlic powder
- 1/4 teaspoon black pepper
- Toothpicks (for securing)
Instructions
- Pat scallops dry with paper towels. Season lightly with salt and pepper (optional).
- In a small bowl, whisk maple syrup, soy sauce, garlic powder, and pepper.
- Wrap each scallop with a half slice of bacon and secure with a toothpick. Brush each wrapped scallop with the maple glaze.
- Preheat air fryer to 400°F (200°C). Arrange scallops in a single layer in the air fryer basket (work in batches if needed).
- Air fry for 8-10 minutes, flipping halfway through, until bacon is crisp and scallops are cooked through (internal temp 130°F).
- Remove toothpicks and serve immediately. Optionally drizzle with any remaining glaze.
Notes
For extra crispiness, use thin-cut bacon. Do not overcook scallops or they will become tough. Serve with lemon wedges if desired.
Nutrition
- Calories: 248
- Sugar: 7g
- Fat: 12g
- Carbohydrates: 9g
- Protein: 24g
k">
Tried This Recipe? Leave a Comment!
Did you make this recipe? I’d love to hear how it turned out! Please leave a comment and a rating below. Your feedback helps other home cooks and supports cheerychop.com!
For more delicious inspiration, follow me on Pinterest!