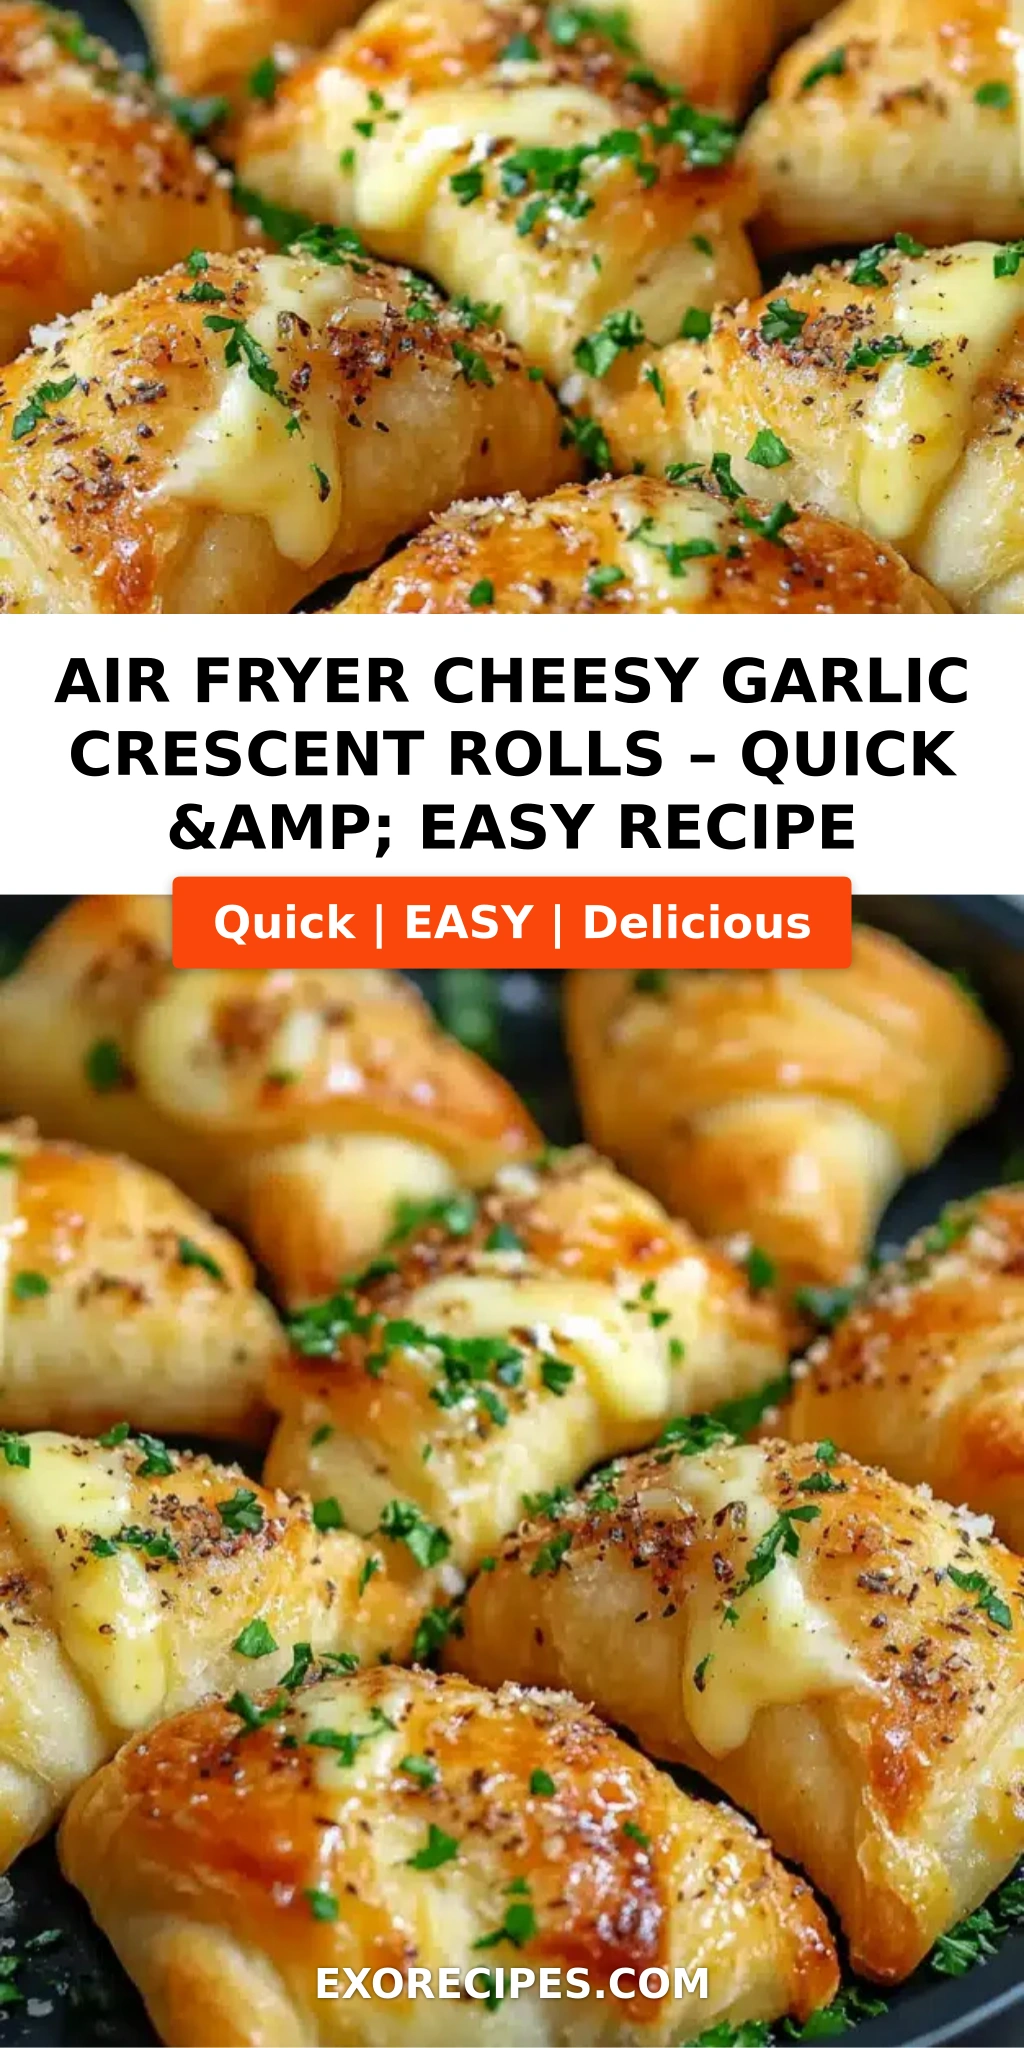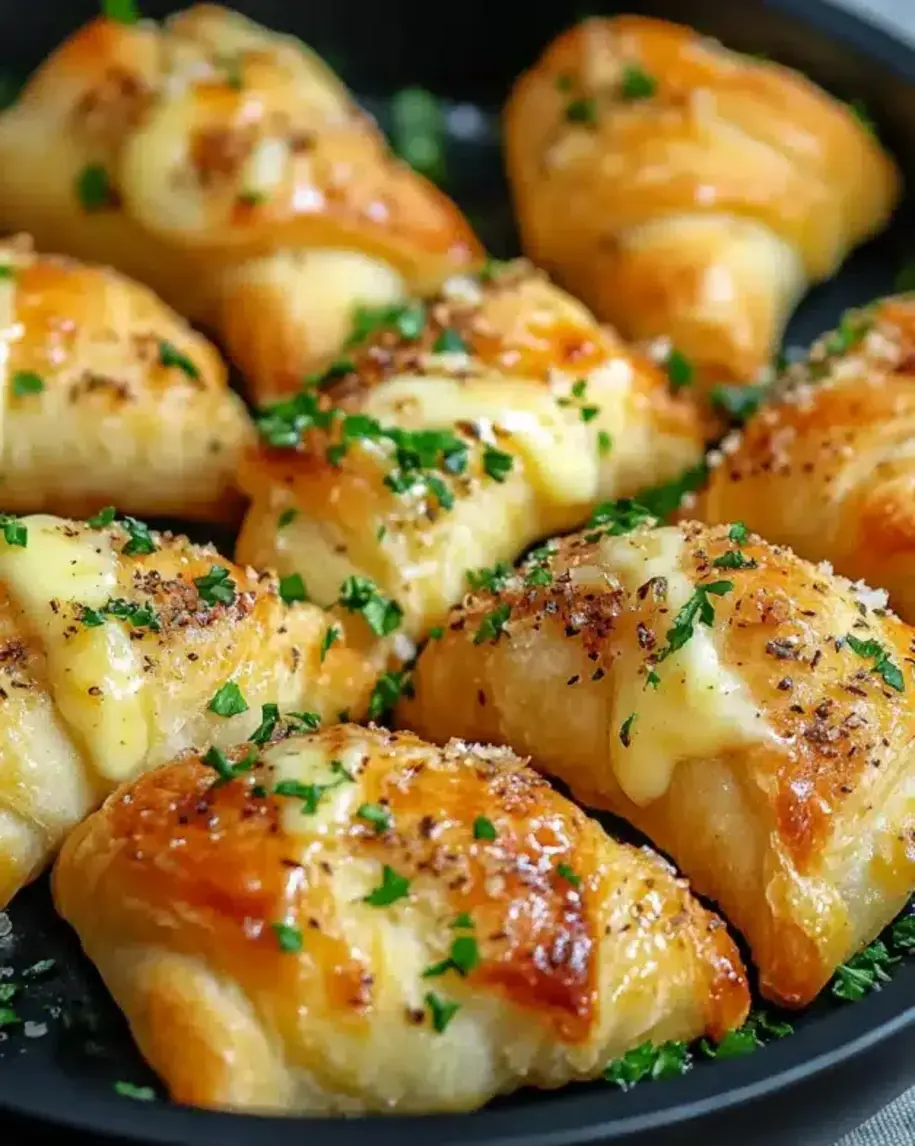
Air Fryer Cheesy Garlic Crescent Rolls – Perfectly Flaky, Golden, and Loaded with Melted Cheese

⚖️
Difficulty
Easy
⏲️
Prep Time
10 mins
🕒
Cook Time
7 mins
⏱️
Total Time
17 mins
🍽️
Servings
8 rolls

Growing up in Morocco, I watched my mother pull warm, golden bread from a clay oven every evening. The smell of melted butter and garlic drifting through our kitchen is a memory I carry everywhere — from my pastry training in Paris to my tiny NYC apartment. These air fryer cheesy garlic crescent rolls are my love letter to that moment: flaky, buttery, and packed with gooey cheese and fragrant garlic. What sets them apart is the triple-cheese blend — cream cheese for creaminess, mozzarella for stretch, and Parmesan for a salty bite — all wrapped in tender crescent dough and cooked to golden perfection in under 20 minutes.

When you bite into one of these cheesy garlic rolls air fryer style, the first thing you notice is the crackling flake of the dough. Then comes the warm, savory garlic that’s been kissed by melted butter, followed by that irresistible stretch of mozzarella. I always finish them with a sprinkle of dried parsley — a trick I learned from a Parisian pastry chef who said herbs should “wake up” at the last second. The air fryer creates a beautiful golden crust on the outside while keeping the center soft and molten. It’s the kind of food that makes everyone lean in a little closer to the table.

I’ve tested this easy air fryer appetizer over a dozen times at my home in Brooklyn, and I can tell you exactly what works. My version is designed to avoid the dreaded cheese leak (yes, there’s a technique!) and to deliver maximum garlic flavor without burning. You’ll see a 💡 mia’s Pro Tip on sealing the edges, and a common mistake to watch out for when it comes to preheating. Whether you’re a seasoned home cook or a total beginner, these rolls come out perfectly every time. I promise you’ll never reach for frozen garlic bread again.

Why This Air Fryer Cheesy Garlic Crescent Rolls Recipe Is the Best

The Flavor Secret: Most recipes rely on shredded cheese alone, but I add softened cream cheese to the mix. This not only keeps the filling luscious and spreadable, but it also prevents the cheese from turning stringy or oily. The cream cheese mellows the sharpness of the Parmesan and gives these rolls a luxurious, almost cheesecake-like richness. Growing up in Morocco, we often used soft cheese called jben in bread dough; this is my modern twist on that tradition. Combined with fresh minced garlic (never garlic powder — it burns easily in the air fryer) and a generous brush of melted butter, every bite is a perfectly balanced punch of savory goodness.

Perfected Texture: Air fryers are powerful little machines, but they can dry out delicate dough if not handled right. My technique — preheating to 350°F, placing the rolls seam-side down, and brushing with butter before cooking — ensures the dough puffs up beautifully while the inside stays soft and the cheese stays molten. I also recommend a light spritz of cooking spray on the basket for an extra-crisp bottom (a trick I picked up from a NYC food-truck chef). The result is a roll that shatters when you bite into it, then gives way to that creamy, garlicky center.

Foolproof & Fast: From fridge to plate in 17 minutes flat. There’s no rising, rolling, or complicated assembly. Just mix, wrap, and air fry. The recipe uses canned crescent dough, which means even a beginner can nail it on the first try. I’ve made this for Super Bowl parties, weeknight dinners, and lazy Sunday afternoons — it’s always the first thing to disappear. Plus, with our air fryer crescent rolls recipe approach, you don’t need to heat up a full oven. Perfect for small kitchens, busy schedules, or hot summer days. I promise it will become your go-to.

Air Fryer Cheesy Garlic Crescent Rolls Ingredients

I usually pick up my crescent dough and cheese from the Union Square Greenmarket or Fairway Market in Manhattan. There’s something about holding a can of dough that reminds me of the first time I made these in my tiny Paris kitchen — I had to use a toaster oven! The ingredients are simple, but quality matters. Here’s what you’ll need.

Ingredients List

  • 1 can (8 ounces) refrigerated crescent roll dough
  • 4 ounces cream cheese, softened
  • 1/2 cup shredded mozzarella cheese
  • 1/4 cup grated Parmesan cheese
  • 2 cloves garlic, minced
  • 1 tablespoon unsalted butter, melted
  • 1/2 teaspoon dried parsley
  • 1/4 teaspoon salt

Ingredient Spotlight

Cream Cheese: This is the magic ingredient that prevents a dry filling. Use block-style cream cheese, not whipped. Let it sit at room temperature for 15 minutes so it blends smoothly. If you’re dairy-free, you can substitute a vegan cream cheese (like Kite Hill), but the filling will be slightly less tangy.

Mozzarella: For the best stretch, use low-moisture, part-skim mozzarella from a block and shred it yourself. Pre-shredded cheese often contains anti-caking agents that affect melting. If you want a different flavor, try provolone or gouda — both melt beautifully.

Garlic: Fresh cloves are non-negotiable here. Garlic powder will taste bitter in the air fryer. I use a microplane to mince the garlic so it melts into the cheese filling. If you love roasted garlic, you can substitute 1 tablespoon of roasted garlic paste — that’s my go-to when I’m feeling fancy.

Original IngredientBest SubstitutionFlavor / Texture Impact
Cream cheeseNeufchâtel cheeseLower fat, still creamy; slightly less tangy
MozzarellaProvolone or GoudaMore pronounced flavor; still melts well
Refrigerated crescent doughPuff pastry (thawed)Much flakier but richer; adjust cook time +2 min
Dried parsleyFresh parsley (chopped) or chivesBrighter color and flavor; add after frying

How to Make Air Fryer Cheesy Garlic Crescent Rolls — Step-by-Step

Ready to turn those simple ingredients into golden, cheesy perfection? I’ve broken down every step with my personal tips from years of testing. Follow along and you’ll have a batch of the best cheesy garlic rolls air fryer can give you.

Step 1: Prepare the Cheese Filling

In a small bowl, combine the softened cream cheese, shredded mozzarella, grated Parmesan, minced garlic, and salt. Mix until smooth and evenly combined. It should be thick but spreadable — like a soft buttercream. If it’s too stiff, let it sit another 5 minutes at room temperature.

💡 mia’s Pro Tip: Use a rubber spatula to press the mixture against the sides of the bowl. This gets out any lumps and makes the filling perfectly silky.

Step 2: Assemble the Rolls

Unroll the crescent dough and separate it into the 8 pre-cut triangles. Place a generous tablespoon of the cheese mixture onto the wide end of each triangle. Don’t overfill — about 1 heaping tablespoon is perfect. Roll up starting from the wide end, tucking in the sides gently as you go to seal the filling inside. Place each roll seam-side down in the air fryer basket, leaving a little space between them.

⚠️ Common Mistake to Avoid: Spreading the filling all the way to the edges. Leave a 1/2-inch border so the dough can seal properly. If cheese touches the seam, it will leak out during cooking.

Step 3: Air Fry to Perfection

Brush the tops of the rolls with the melted butter and sprinkle with dried parsley. Preheat your air fryer to 350°F (175°C) for 3 minutes, then place the basket inside. Air fry for 5–7 minutes, until the rolls are deep golden brown and the cheese is visibly bubbling through the seams. Let them cool in the basket for 2 minutes before removing — this allows the cheese to set slightly and prevents burns.

💡 mia’s Pro Tip: For an extra-glossy finish, brush the baked rolls with a little more melted butter as soon as they come out. That restaurant-quality sheen is like magic.

StepActionDurationKey Visual Cue
1Mix filling2 minSmooth, no lumps
2Assemble rolls5 minSeam tightly pressed
3Brush & air fry5–7 minGolden brown, cheese bubbling
4Cool & serve2 minCheese slightly set

Serving & Presentation

These rolls are best served warm, straight from the air fryer. I like to arrange them on a wooden board — the kind I picked up at the Brooklyn Flea Market — and sprinkle a few extra flakes of sea salt over the top. The contrast of the flaky golden crust against the creamy interior is pure comfort. For a real Moroccan touch, place a small bowl of warm honey on the side; the sweet-salty combo is incredible.

In New York, I’ve served these at everything from casual game-day parties to holiday brunches. They pair beautifully with a simple tomato soup or a bright green salad. If you’re looking for a dipping sauce, marinara is classic, but try my harissa-spiced yogurt sauce (just mix 1/4 cup Greek yogurt with 1 teaspoon harissa paste and a squeeze of lemon). It’s a nod to my North African roots that my Parisian chef friends always love.

Pairing TypeSuggestionsWhy It Works
Side DishTomato soup, Caesar salad, roasted chickenThe cheesy richness balances acidity and savory flavors
Sauce / DipMarinara, harissa yogurt, garlic aioliDips add moisture and layer complementary flavors
BeverageSparkling water with lemon, light lager, ChardonnayCrisp drinks cut through the buttery richness
GarnishFresh parsley, flaky sea salt, paprika dustingAdds color, crunch, and a final flavor pop

Make-Ahead, Storage & Reheating

Living in NYC means I’m always juggling a packed schedule, so I often prep these rolls ahead of time. You can assemble the uncooked rolls on a tray, cover tightly with plastic wrap, and refrigerate for up to 2 days. When you’re ready, just brush with butter and air fry straight from the fridge — add 1 extra minute to the cook time. For longer storage, here’s what works.

MethodContainerDurationReheating Tip
RefrigeratorAirtight containerUp to 3 daysAir fry at 350°F for 2-3 minutes
FreezerFreezer bag, remove airUp to 2 monthsThaw in fridge overnight, then air fry 4-5 min
Make-AheadCovered tray in fridgeUp to 2 days before bakingAdd 1 minute to air fry time

I’ve found that reheating in the air fryer brings back that just-baked crispness far better than a microwave ever could. If you don’t have an air fryer, a 350°F oven for 5 minutes works, too. Avoid the microwave — it makes the dough rubbery. One more tip: never stack leftover rolls; always store them in a single layer to preserve their shape.

Variations & Easy Swaps

One of the best things about this air fryer crescent rolls recipe is how easily it adapts. Whether you’re craving a protein-packed version or need a dairy-free option, I’ve got you covered. These variations come straight from my kitchen experiments — some inspired by my mother’s Moroccan fillings, others by the vibrant flavors I find at the Union Square Greenmarket.

VariationKey ChangeBest ForDifficulty Impact
Pepperoni & ProvoloneAdd 2 tbsp chopped pepperoni, swap mozzarella for provoloneMeat lovers, game daySame
Harissa & CheeseAdd 1 tbsp harissa paste to filling, top with sesame seedsSpice lovers, brunchSame
Spinach & ArtichokeAdd 1/4 cup thawed frozen spinach (squeezed dry) + 2 tbsp chopped artichoke heartsVegetarians, partiesSame

Pepperoni & Provolone Rolls

For a heartier, pizza-inspired version, fold finely chopped pepperoni (about 2 tablespoons per batch) into the cheese mixture. Swap the mozzarella for provolone — it has a sharper bite that stands up to the meat. The pepperoni renders slightly in the air fryer, creating little crispy edges that are absolutely addictive. Serve with a side of warm marinara for dipping, and you’ve got a party appetizer that disappears in minutes. I like to use turkey pepperoni for a lighter option; it crisps up just as well.

Gluten-Free & Dairy-Free Version

To make these rolls gluten-free, look for a refrigerated gluten-free crescent dough (Pillsbury or Schar make good options). The dough is a bit more fragile, so handle it gently and chill the assembled rolls for 10 minutes before air frying. For dairy-free, substitute the cream cheese with a vegan cream cheese (I like Kite Hill), use a dairy-free mozzarella shred (Daiya works, but Miyoko’s melts better), and replace the butter with a plant-based butter. The texture will be slightly less flaky, but the flavor is still fantastic — my vegan friends in NYC approve.

Herb & Garlic Twist

When I’m feeling like channeling my Parisian pastry days, I add 1 teaspoon of herbes de Provence to the filling and swap the dried parsley for fresh chives on top. The lavender and thyme notes elevate the garlic beautifully. You can also stir in 2 tablespoons of sun-dried tomatoes (finely chopped) for a Mediterranean twist. This version pairs wonderfully with a crisp white wine — perfect for a summer evening on the fire escape (yes, that’s my NYC terrace!).

How do you keep the cheese from leaking out of crescent rolls in the air fryer?

To prevent cheese leaks, first make sure your cheese mixture isn’t too wet. Pat dry any extra moisture from ingredients like cheese or vegetables. When filling the triangles, leave a 1/2-inch border of dough around the wide end so the cheese stays inside. Roll tightly, tucking in the sides as you go, and press the dough lightly to seal. Placing the rolls seam-side down in the air fryer helps the weight keep the seal closed. Also, avoid overfilling — about one heaping tablespoon per roll is perfect. If you want extra insurance, you can pinch the dough along the seam before rolling. That technique has never failed me in my Paris kitchen or my NYC air fryer.

Can I use pre-made crescent roll dough for air fryer cheesy garlic rolls?

Absolutely — in fact, I recommend it. Pre-made refrigerated crescent roll dough (like Pillsbury) is the perfect shortcut for this quick appetizer. It’s already butter-laminated and portioned into triangles, which saves you lots of time. Just be sure to use a fresh can (check the expiration date) and keep it chilled until assembly. Warm dough becomes sticky and harder to work with. If you only have crescent dough sheets (not perforated triangles), you can cut them into triangles yourself. The results are identical. This is the same dough I use for my game-day recipes, and it always delivers flaky, golden layers that contrast beautifully with the creamy cheese filling.

What temperature and time should I set my air fryer for cheesy garlic crescent rolls?

I’ve tested many temperature and time combinations, and 350°F (175°C) for 5–7 minutes is the sweet spot. Preheat your air fryer for 3 minutes before adding the rolls to ensure even cooking. The exact time depends on your air fryer model and the size of your rolls. Start checking at 5 minutes — you’re looking for a deep golden-brown color and visible cheese bubbling at the seams. If they need more time, add 1 minute increments. For larger batches, do not overcrowd the basket; cook in a single layer with a little space between each roll. My own Cosori air fryer usually takes exactly 6 minutes. Always let them rest 2 minutes after cooking — that final step sets the cheese and makes the rolls easier to handle.

Can I add other ingredients like pepperoni or herbs to these cheesy garlic crescent rolls?

Yes! This recipe is a fantastic base for customization. For a pepperoni version, chop about 2 tablespoons of pepperoni very fine and mix it into the cheese filling. The pepperoni crisps up nicely in the air fryer and adds a pizza-like flavor. You can also add fresh herbs like rosemary or thyme (1/2 teaspoon for the whole batch) for an earthy twist. If you want a Mediterranean vibe, stir in 2 tablespoons of finely chopped sun-dried tomatoes or a handful of fresh spinach (squeezed dry). Just keep in mind that wet ingredients can cause leaking, so always pat them dry first. My favorite adaptation is a harissa-spiced version — I add 1 tablespoon of harissa paste to the cream cheese and sprinkle sesame seeds on top before air frying. It’s a nod to my Moroccan roots and always gets rave reviews.

Can I make these cheesy garlic crescent rolls ahead of time?

Absolutely. You can assemble the uncooked rolls up to 2 days ahead and store them covered in the refrigerator. When you’re ready, simply brush with butter, add the parsley, and air fry straight from the fridge — just add 1 minute to the cooking time. For longer storage, freeze the assembled (unbaked) rolls in a single layer on a baking sheet, then transfer them to a freezer bag. They’ll keep for up to 2 months. To bake from frozen, thaw overnight in the fridge, then follow the usual air fryer instructions. I often prep a double batch on Sunday for busy weeknights. The make-ahead option is a lifesaver when you’re entertaining in NYC — you can focus on your guests instead of last-minute prep.

Are these air fryer cheesy garlic crescent rolls gluten-free?

The standard recipe uses refrigerated crescent dough that contains wheat flour, so it is not gluten-free. However, you can easily adapt it. Look for a gluten-free crescent roll dough — brands like Pillsbury and Schar now offer gluten-free versions that work wonderfully. The dough tends to be a bit more delicate, so handle it gently and consider chilling the assembled rolls for 10 minutes before air frying to help them hold their shape. The filling itself is naturally gluten-free, so no changes are needed there. I’ve tested this substitution several times for friends with celiac disease, and the results are always golden, flaky, and delicious. Just be sure to check all other ingredient labels for hidden gluten.

What can I use instead of cream cheese in these rolls?

If you don’t have cream cheese, Neufchâtel cheese is the best substitute — it has a similar texture but slightly lower fat and a bit more tang. For a dairy-free option, use a vegan cream cheese like Kite Hill or Violife. You can also substitute a thick plain Greek yogurt or ricotta cheese in a pinch, but be aware that the filling will be a little less rich and may be more prone to leaking. If using yogurt or ricotta, strain them through a cheesecloth for 30 minutes to remove excess liquid. In my testing, labneh (strained yogurt) works surprisingly well — a trick I learned from a Middle Eastern market in Brooklyn. The filling won’t be as creamy as the original, but the tang is lovely with garlic and herbs.

How do I get my crescent rolls extra crispy in the air fryer?

For extra-crispy crescent rolls, start by spraying the air fryer basket lightly with cooking spray before placing the rolls in. This creates a slightly fried surface on the bottom. Also, brush the tops generously with melted butter before air frying — the butter helps the dough brown beautifully. If you want even more crunch, you can brush the rolls with an egg wash (one egg beaten with 1 tablespoon of water) instead of butter; egg wash gives a glossy, shatter-crisp finish. Finally, don’t overcrowd the basket. Air circulation is key for crispiness. If your air fryer has a rack, you can flip the rolls halfway through for even browning. These are the same techniques I use when I want that “fried without the oil” texture in my NYC test kitchen.

Can I use an oven instead of an air fryer?

Yes, you can bake these rolls in a conventional oven. Preheat your oven to 375°F (190°C). Place the assembled rolls on a parchment-lined baking sheet, brush with butter, and bake for 12–15 minutes, or until golden brown and the cheese is bubbly. The texture will be slightly less crispy on the bottom than an air fryer, but still delicious. For a more air-fryer-like result, use the convection setting if your oven has one. You can also place a wire rack on the baking sheet so heat can circulate underneath. I used this method in my Paris apartment before I owned an air fryer. The bake time is longer, but the rolls are just as satisfying. Serve them warm with the same dipping sauces.

Why did my crescent rolls turn out doughy in the center?

A doughy center is usually a sign of undercooking or overcrowding. Make sure your air fryer is preheated to 350°F and that the rolls are placed in a single layer without touching. If they’re too close together, the hot air can’t circulate properly, and the centers stay raw. Also, check that you’re not overfilling the rolls with too much cheese — a very thick filling can insulate the dough. I recommend using exactly 1 heaping tablespoon per roll. If you find your rolls doughy after the suggested time, try adding 1–2 minutes to the cook time. Every air fryer runs slightly differently; I keep a small oven thermometer inside mine to verify temperature. Finally, always let the rolls rest for 2 minutes out of the fryer — carryover cooking helps finish the center without burning the outside.

Share Your Version!

I’d love to see how your air fryer cheesy garlic crescent rolls turn out! Did you try a variation? Did the harissa version win over your family? Drop a comment and a star rating below — your feedback helps other home cooks discover what works. If you’re on Instagram or Pinterest, snap a photo and tag @exorecipes (or use #exorecipes). I personally reply to every tag and love hearing your kitchen stories. One question I’m always curious about: Did you try the special cheese-sealing technique I shared? Let me know in the comments!

From my NYC kitchen to yours — I hope this recipe brings as much warmth to your table as it does to mine. — mia 🧡

📌

Love This Recipe? Save It to Pinterest!

If you enjoyed this Air Fryer Cheesy Garlic Crescent Rolls recipe, don’t let it get lost in your browser tabs! 😄 Pin it now so you can find it again anytime — and explore hundreds more tried-and-tested recipes waiting for you on my Pinterest boards.

👉 Follow mia on Pinterest @chefrecipes2

📌 Pin this recipe · 🔁 Re-pin your favorites · 💬 Tag me when you make it — I love seeing your creations!

Print

clock clock iconcutlery cutlery iconflag flag iconfolder folder iconinstagram instagram iconpinterest pinterest iconfacebook facebook iconprint print iconsquares squares iconheart heart iconheart solid heart solid icon

Air Fryer Cheesy Garlic Crescent Rolls

  • Author: Chef Mia
  • Prep Time: 10 minutes
  • Cook Time: 7 minutes
  • Total Time: 17 minutes
  • Yield: 8 rolls 1x
  • Method: Appetizer, Side Dish
  • Cuisine: American

Description

These Air Fryer Cheesy Garlic Crescent Rolls are flaky, buttery, and loaded with melted cheese and garlic flavor. Perfect as a side dish or appetizer, ready in minutes.


Ingredients

Scale
  • 1 can (8 ounces) refrigerated crescent roll dough
  • 4 ounces cream cheese, softened
  • 1/2 cup shredded mozzarella cheese
  • 1/4 cup grated Parmesan cheese
  • 2 cloves garlic, minced
  • 1 tablespoon unsalted butter, melted
  • 1/2 teaspoon dried parsley
  • 1/4 teaspoon salt

Instructions

  1. Preheat air fryer to 350°F (175°C).
  2. In a small bowl, mix cream cheese, mozzarella, Parmesan, garlic, and salt until well combined.
  3. Unroll crescent roll dough and separate into 8 triangles.
  4. Place a spoonful of the cheese mixture onto the wide end of each triangle.
  5. Roll up each crescent roll starting from the wide end, tucking in the sides.
  6. Place rolls in air fryer basket in a single layer, seam side down.
  7. Brush tops with melted butter and sprinkle with parsley.
  8. Air fry for 5-7 minutes until golden brown and cheese is bubbly.
  9. Let cool for 2 minutes before serving.

Notes

For extra crispiness, spray the air fryer basket lightly with cooking spray. Serve warm with marinara sauce if desired.


Nutrition

  • Calories: 210
  • Sugar: 3g
  • Fat: 14g
  • Carbohydrates: 16g
  • Protein: 6g


Air Fryer Cheesy Garlic Crescent Rolls

ph">For more delicious inspiration, follow me on Pinterest!

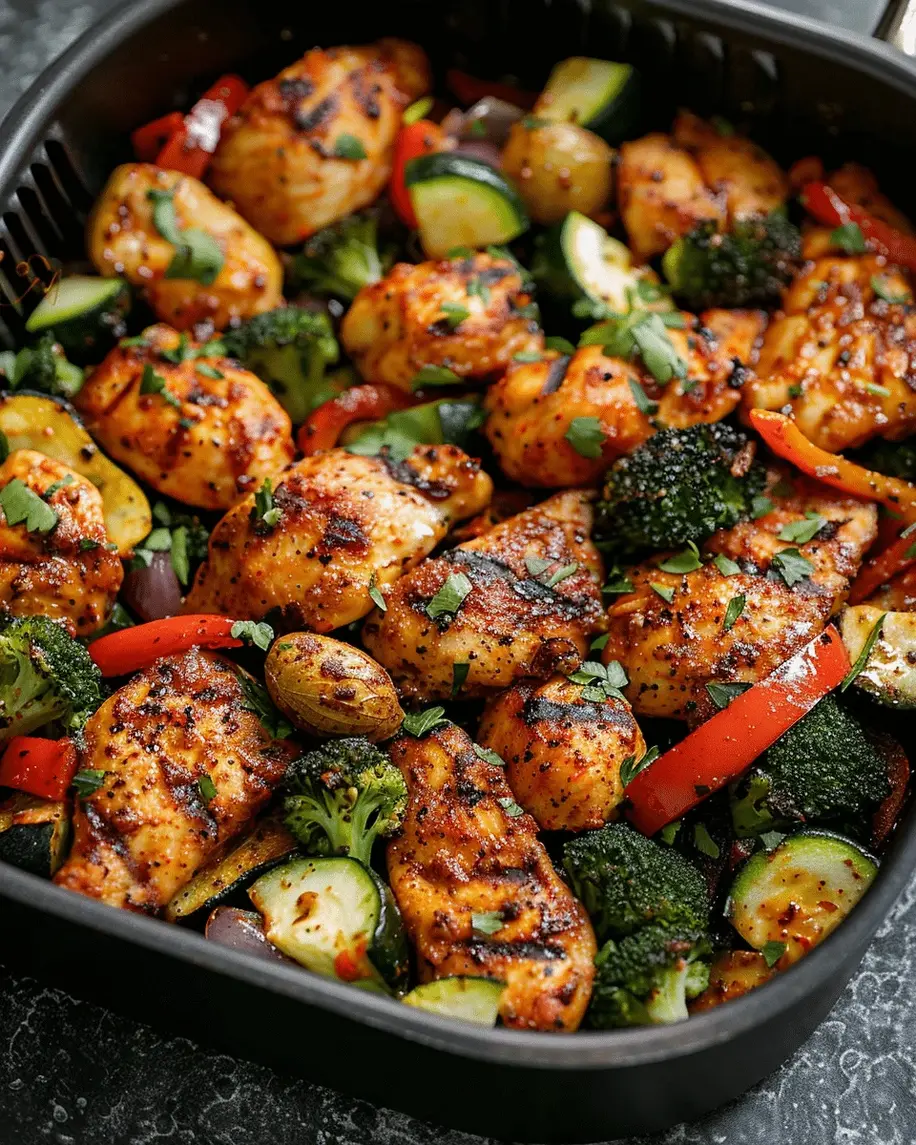
Air Fryer Cajun Chicken and Vegetables: A Flavor-Packed 15-Minute Meal You’ll Crave Weekly

⚖️
Difficulty
Easy
⏲️
Prep Time
5 mins
🕒
Cook Time
12 mins
⏱️
Total Time
17 mins
🍽️
Servings
4

I still remember the first time I made Air Fryer Cajun Chicken and Vegetables in my tiny NYC apartment. The smoky, spicy aroma of Cajun chicken air fryer recipe filled every corner, and my neighbor actually knocked to ask what I was cooking. That’s the power of a quick air fryer dinner that tastes like it simmered for hours. Growing up in Morocco, my mother would slow-cook spiced chicken with bell peppers and onions until the flavors melded into something magical. This air fryer chicken and veggies recipe captures that same soulfulness — in just 17 minutes. It’s my go-to 15 minute air fryer meal when I need something fast, healthy, and deeply satisfying after a long day of recipe testing.

The beauty of this dish lies in the contrast: juicy, tender chicken pieces with a spicy, herbaceous crust, alongside bell peppers and onions that caramelize at the edges while staying slightly crisp. The air fryer’s high-velocity circulation creates that coveted browning — what chefs call the Maillard reaction — in a fraction of the time a traditional oven would need. Every bite delivers a punch of smoky cayenne, garlic, paprika, and thyme, with the sweetness of the peppers balancing the heat. It’s the kind of quick air fryer dinner that makes you wonder why you ever bothered with takeout.

Over my years cooking professionally in Paris and now here in New York, I’ve learned that the best recipes are the ones you can actually make on a Tuesday night without a trip to three different specialty stores. This Cajun chicken air fryer recipe is exactly that — honest, bold, and completely doable. My version adds a slight edge: I toss the chicken and vegetables together and let them sit for just five minutes before air frying. That brief rest allows the Cajun seasoning to penetrate the meat rather than just sitting on the surface. 💡 mia’s Pro Tip: That five-minute marinating window is the single easiest way to elevate this dish from good to unforgettable. And the most common mistake? Overcrowding the basket, which steams everything instead of roasting it. We’ll get to that.

Why This Air Fryer Cajun Chicken and Vegetables Recipe Is the Best

The Flavor Secret. Most air fryer chicken and veggies recipes rely on a generic spice blend, but I developed this one using principles from both my Moroccan upbringing and my French culinary training. The Cajun seasoning I recommend — and the way I layer it — draws from the same philosophy my mother used with her ras el hanout: toast the spices briefly in a dry pan before mixing them with oil, and the flavors bloom exponentially. That extra 90 seconds unlocks a depth that makes this quick air fryer dinner taste like it came from a slow-simmered Louisiana kitchen. Plus, I add a pinch of smoked paprika alongside the classic Cajun blend for an extra layer of rustic, fire-kissed richness.

Perfected Texture. The trick to getting both perfectly cooked chicken and tender-crisp vegetables in one basket is all about piece size and placement. I cut the chicken into uniform 1-inch cubes and the bell peppers into roughly the same size. This isn’t random — it’s a technique I picked up during my saucier days in a Paris bistro, where every element of a dish was cut to cook in the same amount of time. The air fryer’s forced convection does the rest, creating a golden exterior on the chicken while the vegetables soften and char at the edges. No sogginess, no dry chicken — just a flawless air fryer chicken and veggies experience every time.

Foolproof & Fast. I’ve tested this 15 minute air fryer meal in four different air fryer models — basket-style, oven-style, and even a tiny compact one — and it works beautifully across the board. The recipe is forgiving enough for a beginner but nuanced enough to impress someone who cooks every night. With only 5 minutes of prep and 12 minutes of cooking, you get a complete dinner that’s high in protein, loaded with vegetables, and packed with bold flavor. It’s the kind of Cajun chicken air fryer recipe that becomes a weekly staple the moment you try it.

Air Fryer Cajun Chicken and Vegetables Ingredients

I source my bell peppers from the Union Square Greenmarket when they’re in season — the sweetness of farm-fresh peppers makes a real difference. The Cajun seasoning I either blend myself or buy from a spice shop in Chelsea Market. There’s something about the way the spices mingle that reminds me of the spice souks in Marrakech, where every stall has its own signature mix. Here’s everything you’ll need for this quick air fryer dinner.

Ingredients List

  • 1 lb boneless, skinless chicken breasts, cut into 1-inch pieces
  • 1 red bell pepper, chopped
  • 1 green bell pepper, chopped
  • 1 yellow onion, chopped
  • 2 tbsp olive oil
  • 1 tbsp Cajun seasoning
  • ½ tsp salt
  • ¼ tsp black pepper
  • Optional: fresh parsley for garnish

Ingredient Spotlight

Chicken Breasts. Boneless, skinless breasts are the lean canvas for this Cajun chicken air fryer recipe. Look for breasts that are similar in thickness so they cook evenly. If one end is much thicker than the other, butterfly it or pound it gently to about 1-inch thickness. For the best texture, avoid chicken that’s been injected with saline solution — it releases too much liquid during air frying and prevents browning. My favorite substitution is chicken thighs, which add extra juiciness and a richer flavor; they need just 1-2 extra minutes in the air fryer.

Cajun Seasoning. This is the heart of the dish. A good Cajun blend includes paprika, cayenne, garlic powder, onion powder, dried thyme, oregano, and black pepper. I recommend using a brand without added salt so you can control the sodium level yourself. If you want to make your own, mix 1 tbsp paprika, 1 tsp cayenne, 1 tsp garlic powder, 1 tsp onion powder, ½ tsp dried thyme, ½ tsp dried oregano, and ½ tsp black pepper. Store any extra in a jar — it’s wonderful on roasted potatoes, fish, or even popcorn.

Bell Peppers & Onion. These vegetables do double duty: they add sweetness, color, and texture while also keeping the chicken moist during cooking. Red bell peppers are sweeter than green, so using both gives you a nice complexity. Yellow onion adds a mild sharpness that mellows beautifully as it air fries. For a twist, try adding a chopped zucchini or summer squash in warmer months — I discovered this variation at a Brooklyn rooftop farmers market and it’s become a seasonal favorite.

Original IngredientBest SubstitutionFlavor / Texture Impact
Chicken BreastsBoneless chicken thighsRicher flavor, more juiciness; add 1-2 min cook time
Cajun SeasoningHomemade blend (paprika + cayenne + garlic powder + thyme + oregano)You control heat and salt; fresher, more aromatic finish
Bell PeppersZucchini or summer squashMilder flavor, softer texture; cut into similar 1-inch pieces
Olive OilAvocado oilHigher smoke point for browning; neutral flavor

How to Make Air Fryer Cajun Chicken and Vegetables — Step-by-Step

Making this quick air fryer dinner is almost too easy — but that’s exactly why you’ll come back to it week after week. Follow these steps, and you’ll have a restaurant-quality meal on the table in under 20 minutes.

Step 1: Season the Chicken and Vegetables

In a large mixing bowl, combine the chicken pieces, chopped bell peppers, and chopped onion. Drizzle with olive oil, then sprinkle the Cajun seasoning, salt, and black pepper evenly over everything. Use your hands or a spatula to toss until every piece is well coated. Let the mixture sit at room temperature for 5 minutes — this brief rest allows the seasoning to begin penetrating the chicken.

💡 mia’s Pro Tip: Use your hands to toss the mixture. You’ll feel if the seasoning is evenly distributed, and the gentle warmth of your hands helps the spices adhere better than a spoon ever could.

Step 2: Preheat the Air Fryer

Preheat your air fryer to 400°F (200°C) for 3 minutes. Most air fryers heat up quickly, but preheating is crucial for getting that initial sear on the chicken. If your air fryer doesn’t have a preheat function, simply run it empty at the target temperature for 3 minutes before adding the food.

⚠️ Common Mistake to Avoid: Skipping the preheat. Adding the chicken and vegetables to a cold air fryer basket lowers the temperature immediately, resulting in steamed, pale food instead of beautifully browned pieces.

Step 3: Arrange in a Single Layer

Place the seasoned chicken and vegetable mixture in the air fryer basket in a single, even layer. It’s important not to overcrowd — if the pieces are piled on top of each other, they’ll steam instead of roast. Depending on the size of your air fryer, you may need to cook in two batches. I usually do two batches for a standard 5.8-quart basket.

💡 mia’s Pro Tip: Leave a little space between each piece. If you see any overlapping, rearrange them. Crowded baskets are the number one reason air fryer recipes turn out soggy rather than crisp.

Step 4: Air Fry and Shake

Air fry at 400°F for 10-12 minutes, shaking the basket halfway through at the 5-6 minute mark. Shaking ensures even browning and prevents any pieces from sticking. The chicken is done when it reaches an internal temperature of 165°F and the vegetables are tender with lightly charred edges. For extra browning, add 1-2 minutes if needed.

⚠️ Common Mistake to Avoid: Forgetting to shake the basket. The hot air needs to circulate around every piece. Without shaking, the pieces on the bottom can steam while the top pieces brown too quickly.

Step 5: Garnish and Serve

Transfer the cooked chicken and vegetables to a serving platter. Garnish with fresh chopped parsley if desired. Serve immediately while the chicken is hot and juicy and the vegetables are at their peak tenderness.

💡 mia’s Pro Tip: Let the chicken rest for 2 minutes after air frying. This allows the juices to redistribute throughout the meat, making every bite more tender and flavorful.

StepActionDurationKey Visual Cue
1Season chicken and veggies5 min (rest time)All pieces evenly coated, no dry spots
2Preheat air fryer3 minAir fryer indicates it’s ready (beep or light)
3Arrange in basket1-2 minSingle layer with no overlapping pieces
4Air fry, shake halfway10-12 minChicken golden, veggies tender with charred edges
5Garnish and serve2 min (rest)Parsley brightens the dish, chicken rests briefly

Serving & Presentation

I love serving this Air Fryer Cajun Chicken and Vegetables straight from the basket onto a large, warm platter — it feels honest and inviting, the way my mother would bring a tagine to the table in Morocco. The deep red and green of the bell peppers against the golden-brown chicken is stunning on its own, but a sprinkle of fresh parsley adds a pop of green that makes it look like it came from a restaurant kitchen. For a true NYC twist, I sometimes serve it over a bed of fluffy jasmine rice with a wedge of lemon on the side — the brightness cuts through the smoky heat beautifully.

This quick air fryer dinner pairs wonderfully with crusty bread to soak up any juices, or with a simple side salad dressed in lemon vinaigrette. If I’m meal-prepping for the week, I portion it out with quinoa and roasted sweet potatoes — it’s a complete, balanced lunch that reheats like a dream. For a taste of Paris, a dollop of herbed yogurt sauce (Greek yogurt mixed with mint, garlic, and a pinch of salt) adds a cool, creamy contrast to the Cajun spice.

Pairing TypeSuggestionsWhy It Works
Side DishSteamed jasmine rice, quinoa, crusty bread, roasted sweet potatoesGrains and bread absorb the spiced juices; sweet potatoes complement the heat
Sauce / DipHerbed yogurt sauce, lemon tahini dressing, garlic aioliCool, creamy sauces balance the smoky-spicy Cajun flavor
BeverageCold beer (lager or pilsner), iced tea with lemon, crisp white wine like Sauvignon BlancRefreshing drinks cut through the richness and cool the palate
GarnishFresh parsley, lemon wedges, sliced green onions, chopped cilantroFresh herbs and citrus brighten the dish and add a pop of color

Make-Ahead, Storage & Reheating

I’m a big believer in cooking once and eating well all week — especially during busy NYC weeks when I’m juggling recipe development, farmers market runs, and dinner with friends. This Cajun chicken air fryer recipe is perfect for meal prep. You can chop the vegetables and chicken up to 2 days in advance, store them separately in the fridge, then toss with seasoning and air fry when you’re ready. The cooked leftovers also store beautifully, making this a wonderful candidate for make-ahead lunches.

MethodContainerDurationReheating Tip
RefrigeratorAirtight containerUp to 3 daysReheat in air fryer at 350°F for 3-4 minutes to restore crispness
FreezerFreezer-safe container or zip-top bagUp to 2 monthsThaw overnight in fridge, then reheat in air fryer at 350°F for 5 minutes
Make-AheadSeparate containers for chicken and vegetablesUp to 2 days in advanceToss with seasoning just before air frying for freshest flavor

When reheating, I always turn to the air fryer rather than the microwave. Microwaving can make the chicken rubbery and the vegetables limp. A quick 3-4 minute stint in the air fryer at 350°F brings back that gorgeous exterior texture and warms everything through evenly. If the vegetables look a little dry, I mist them with a spray of olive oil before reheating. For make-ahead prep, I chop everything on Sunday, store it in labeled containers, and then it takes just 15 minutes to get dinner on the table any night of the week.

Variations & Easy Swaps

One of the things I love most about this air fryer chicken and veggies recipe is how adaptable it is. Over the years, I’ve played with countless variations — some inspired by my Moroccan roots, some by French technique, and some by pure NYC curiosity when I find an unexpected ingredient at the market.

VariationKey ChangeBest ForDifficulty Impact
Shrimp & AndouilleReplace chicken with shrimp and add sliced andouille sausageSeafood lovers, Low-Country inspired mealsEasy (shrimp cooks in 6-8 minutes)
Moroccan SpicedSwap Cajun seasoning for ras el hanout + pinch of cinnamonNorth African flavor cravings, exotic twistEasy
Vegetarian / VeganReplace chicken with extra-firm tofu or chickpeasPlant-based meals, Meatless MondayEasy (tofu needs 12-14 minutes)

Shrimp & Andouille Variation

This variation is a nod to the Louisiana roots of Cajun cooking. Replace the chicken with 1 lb of large peeled shrimp and add 6 oz of sliced andouille sausage. The andouille releases its smoky, spicy oils as it cooks, coating the shrimp and vegetables in an extra layer of flavor. Cook at 400°F for 6-8 minutes — shrimp cook much faster than chicken, so keep a close eye. The result is a mini jambalaya-style meal that’s perfect for a Friday night dinner with a cold beer.

Moroccan Spiced Variation

This one is close to my heart. Substitute the Cajun seasoning with 1 tablespoon of ras el hanout — a fragrant Moroccan spice blend that typically includes cumin, coriander, ginger, turmeric, cinnamon, and cardamom. Add a pinch of cinnamon and a drizzle of honey to the olive oil for a sweet-spicy balance that reminds me of my mother’s kitchen in Marrakech. The chicken takes on a warm, aromatic flavor that pairs beautifully with the bell peppers. Serve with couscous and a sprinkle of toasted almonds for a complete North African-inspired meal.

Vegan Tofu & Chickpea Variation

For a plant-based version, replace the chicken with 1 block of extra-firm tofu (pressed and cubed) and 1 can of chickpeas (drained and patted dry). Toss with the same oil and Cajun seasoning mixture. Air fry at 400°F for 12-14 minutes, shaking halfway through. The tofu becomes wonderfully crisp on the outside while staying tender inside, and the chickpeas turn into little crunchy bites of goodness. This variation has become a staple in my NYC apartment for Meatless Monday dinners, and even my carnivore friends ask for seconds.

What temperature should I set my air fryer to for Cajun chicken and vegetables?

Set your air fryer to 400°F (200°C) for this Cajun chicken and vegetables recipe. This high temperature is essential for achieving that beautiful golden-brown crust on the chicken while quickly cooking the bell peppers and onions to tender perfection. The air fryer’s rapid circulation at 400°F mimics the effect of high-heat roasting, creating caramelized edges on the vegetables and a juicy interior in the chicken — all in about 10-12 minutes. Always preheat your air fryer for 3 minutes before adding the food to ensure even cooking from the start.

Can I use frozen vegetables for this air fryer Cajun chicken recipe?

Yes, you can use frozen vegetables, but there’s an important trick to getting the best results. Frozen bell peppers and onions contain more moisture than fresh, so they can make the chicken steam instead of roast. To avoid this, thaw the vegetables completely and pat them very dry with paper towels before tossing them with the oil and seasoning. Then reduce the cook time by about 2 minutes and check for doneness early. I personally prefer fresh vegetables for this Cajun chicken air fryer recipe because they caramelize better, but frozen works in a pinch — just don’t skip the drying step.

What can I substitute for Cajun seasoning in this chicken and vegetable dish?

If you don’t have Cajun seasoning, you can easily make your own blend with pantry spices. Mix together 1 teaspoon each of paprika, garlic powder, onion powder, and dried thyme, plus ½ teaspoon of cayenne pepper (adjust for heat preference), ½ teaspoon of dried oregano, and ¼ teaspoon of black pepper. This homemade version gives you the same smoky, earthy, slightly spicy profile that defines Cajun cooking. Alternatively, you can use blackened seasoning, creole seasoning, or even a mix of chili powder and smoked paprika in a pinch. Store any extra in a small jar — it’s wonderful on roasted vegetables, fish, or popcorn.

How do I prevent the chicken from drying out when air frying with vegetables?

The key to juicy chicken in this air fryer recipe is threefold. First, cut the chicken into uniform 1-inch pieces so they cook evenly — no tiny pieces that overcook while larger ones are still raw. Second, let the seasoned chicken and vegetables rest together for 5 minutes before air frying; this allows the salt and spices to begin tenderizing the meat. Third, don’t overcook — check for doneness at 10 minutes using an instant-read thermometer (165°F is your target). The vegetables also release moisture as they cook, which helps keep the chicken moist. If your air fryer runs hot, reduce the temperature to 375°F and add 2-3 minutes of cook time for gentler cooking.

Can I use chicken thighs instead of chicken breasts for this recipe?

Absolutely — boneless, skinless chicken thighs are a fantastic substitute for breasts in this Cajun chicken air fryer recipe. Thighs have a higher fat content, which makes them even more forgiving and juicy, especially if you tend to run a minute or two over on cook time. Simply cut them into 1-inch pieces just like you would the breasts, and add 1-2 extra minutes to the air fry time. The internal temperature should still reach 165°F, but thighs can go a bit higher without drying out. I actually prefer thighs for meal prep because they reheat more tenderly than lean breast meat.

Is this air fryer Cajun chicken and vegetables recipe healthy?

Yes, this recipe is a nutritional powerhouse. Each serving provides about 320 calories with 38 grams of protein, 10 grams of carbohydrates, and only 14 grams of fat. The chicken is a lean source of high-quality protein, while the bell peppers and onions deliver vitamins A and C, fiber, and antioxidants. The olive oil provides heart-healthy monounsaturated fats. Compared to traditional pan-frying or deep-frying, air frying uses significantly less oil while still achieving a satisfying texture. This makes it an excellent choice for anyone looking for a balanced, high-protein meal that supports weight management or muscle maintenance.

Can I add other vegetables to this air fryer Cajun chicken recipe?

Definitely! This recipe is very flexible when it comes to vegetables. Zucchini, yellow squash, broccoli florets, cauliflower, and asparagus all work beautifully. The key is to cut whatever you add into pieces that are roughly the same size as the chicken — about 1-inch chunks — so everything cooks at the same rate. Broccoli and cauliflower may need an extra minute or two, while zucchini and summer squash cook slightly faster. I love adding a handful of cherry tomatoes in the last 3 minutes of cooking; they burst and release their sweet acidity, creating a light sauce that coats the chicken and vegetables beautifully.

How do I clean my air fryer after cooking Cajun chicken and vegetables?

Cleaning your air fryer after this recipe is simple. First, unplug the unit and let it cool completely — about 15-20 minutes. Remove the basket and any inserts, and wash them in warm, soapy water using a non-abrasive sponge. The seasoned oil and Cajun spices can leave a slight residue, so a soak of 10 minutes helps loosen anything stuck. For the heating element and interior, wipe with a damp cloth or sponge — never submerge the main unit in water. If any seasoning has baked onto the basket, make a paste of baking soda and water, apply it to the spots, let it sit for 10 minutes, then scrub gently and rinse. Dry everything thoroughly before reassembling.

Can I make this Cajun chicken and vegetables recipe in an oven instead of an air fryer?

Yes, you can absolutely make this in a conventional oven. Preheat your oven to 425°F (220°C) and line a baking sheet with parchment paper or foil for easy cleanup. Spread the seasoned chicken and vegetables in a single layer on the sheet — make sure they’re not crowded. Roast for 18-22 minutes, stirring halfway through, until the chicken reaches an internal temperature of 165°F and the vegetables are tender with lightly browned edges. For extra browning, switch the oven to broil for the last 2 minutes. The texture won’t be quite as crisp as the air fryer version, but it’s still delicious and works perfectly for larger batches.

What is the best way to reheat leftover air fryer Cajun chicken and vegetables?

The best way to reheat leftovers is to use the air fryer itself — it restores that beautiful crisp exterior that makes this dish so satisfying. Preheat your air fryer to 350°F (175°C), place the leftovers in the basket in a single layer (work in batches if needed), and heat for 3-4 minutes, shaking halfway through. The chicken will be tender and juicy, and the vegetables will regain their slight char. If you don’t have an air fryer, reheat in a 375°F oven for about 8 minutes spread on a baking sheet. I don’t recommend the microwave, as it will make the chicken rubbery and the vegetables soggy. Leftovers stay good in the refrigerator for up to 3 days.

Share Your Version!

I truly believe the best recipes are the ones we make our own — and I’d love to hear how this Air Fryer Cajun Chicken and Vegetables turned out in your kitchen. Did you try one of the variations, or did you come up with your own twist? Maybe you added extra heat with some cayenne, or swapped in a vegetable you found at your local farmers market. Drop a star rating below and leave a comment — your feedback helps other home cooks discover what works, and it honestly makes my day to read about your creations.

If you snap a photo of your finished dish, tag me on Instagram or Pinterest @exorecipes — I love nothing more than seeing this quick air fryer dinner on tables around the world. And if you have a question about any step, just ask. I read every comment and I’m here to help you nail this recipe on your very first try.

From my NYC kitchen to yours — I hope this recipe brings as much warmth to your table as it does to mine. — mia 🧡

📌

Love This Recipe? Save It to Pinterest!

If you enjoyed this Air Fryer Cajun Chicken and Vegetables recipe, don’t let it get lost in your browser tabs! 😄 Pin it now so you can find it again anytime — and explore hundreds more tried-and-tested recipes waiting for you on my Pinterest boards.

👉 Follow mia on Pinterest @exorecipe

📌 Pin this recipe · 🔁 Re-pin your favorites · 💬 Tag me when you make it — I love seeing your creations!

Print

clock clock iconcutlery cutlery iconflag flag iconfolder folder iconinstagram instagram iconpinterest pinterest iconfacebook facebook iconprint print iconsquares squares iconheart heart iconheart solid heart solid icon

Air Fryer Cajun Chicken and Vegetables: A Flavor-Packed 15-Minute Meal Youll Crave Weekly

  • Author: Chef Mia
  • Prep Time: 5 minutes
  • Cook Time: 12 minutes
  • Total Time: 17 minutes
  • Yield: 4 1x
  • Method: Main Course
  • Cuisine: Cajun

Description

This flavorful air fryer Cajun chicken and vegetables recipe is a quick and easy weeknight dinner that comes together in just 15 minutes. Packed with protein and colorful veggies, it’s a healthy and delicious meal you won’t be able to stop making.


Ingredients

Scale
  • 1 lb boneless, skinless chicken breasts, cut into 1-inch pieces
  • 1 red bell pepper, chopped
  • 1 green bell pepper, chopped
  • 1 yellow onion, chopped
  • 2 tbsp olive oil
  • 1 tbsp Cajun seasoning
  • 1/2 tsp salt
  • 1/4 tsp black pepper
  • Optional: fresh parsley for garnish

Instructions

  1. In a large bowl, combine the chicken pieces, chopped bell peppers, and onion. Drizzle with olive oil and sprinkle with Cajun seasoning, salt, and pepper. Toss until evenly coated.
  2. Preheat the air fryer to 400°F (200°C) for 3 minutes.
  3. Place the chicken and vegetable mixture in the air fryer basket in a single layer. You may need to cook in batches to avoid overcrowding.
  4. Air fry for 10-12 minutes, shaking the basket halfway through, until the chicken is cooked through (internal temperature of 165°F) and the vegetables are tender.
  5. Garnish with fresh parsley if desired and serve immediately.

Notes

For best results, cut chicken and vegetables into uniform sizes to ensure even cooking. You can substitute chicken with shrimp or tofu for a different protein. Store leftovers in an airtight container in the refrigerator for up to 3 days.


Nutrition

  • Calories: 320
  • Sugar: 5g
  • Fat: 14g
  • Carbohydrates: 10g
  • Protein: 38g


Air Fryer Cajun Chicken and Vegetables: A Flavor-Packed 15-Minute Meal Youll Crave Weekly

k">

Tried This Recipe? Leave a Comment!

Did you make this recipe? I’d love to hear how it turned out! Please leave a comment and a rating below. Your feedback helps other home cooks and supports cheerychop.com!
For more delicious inspiration, follow me on Pinterest!

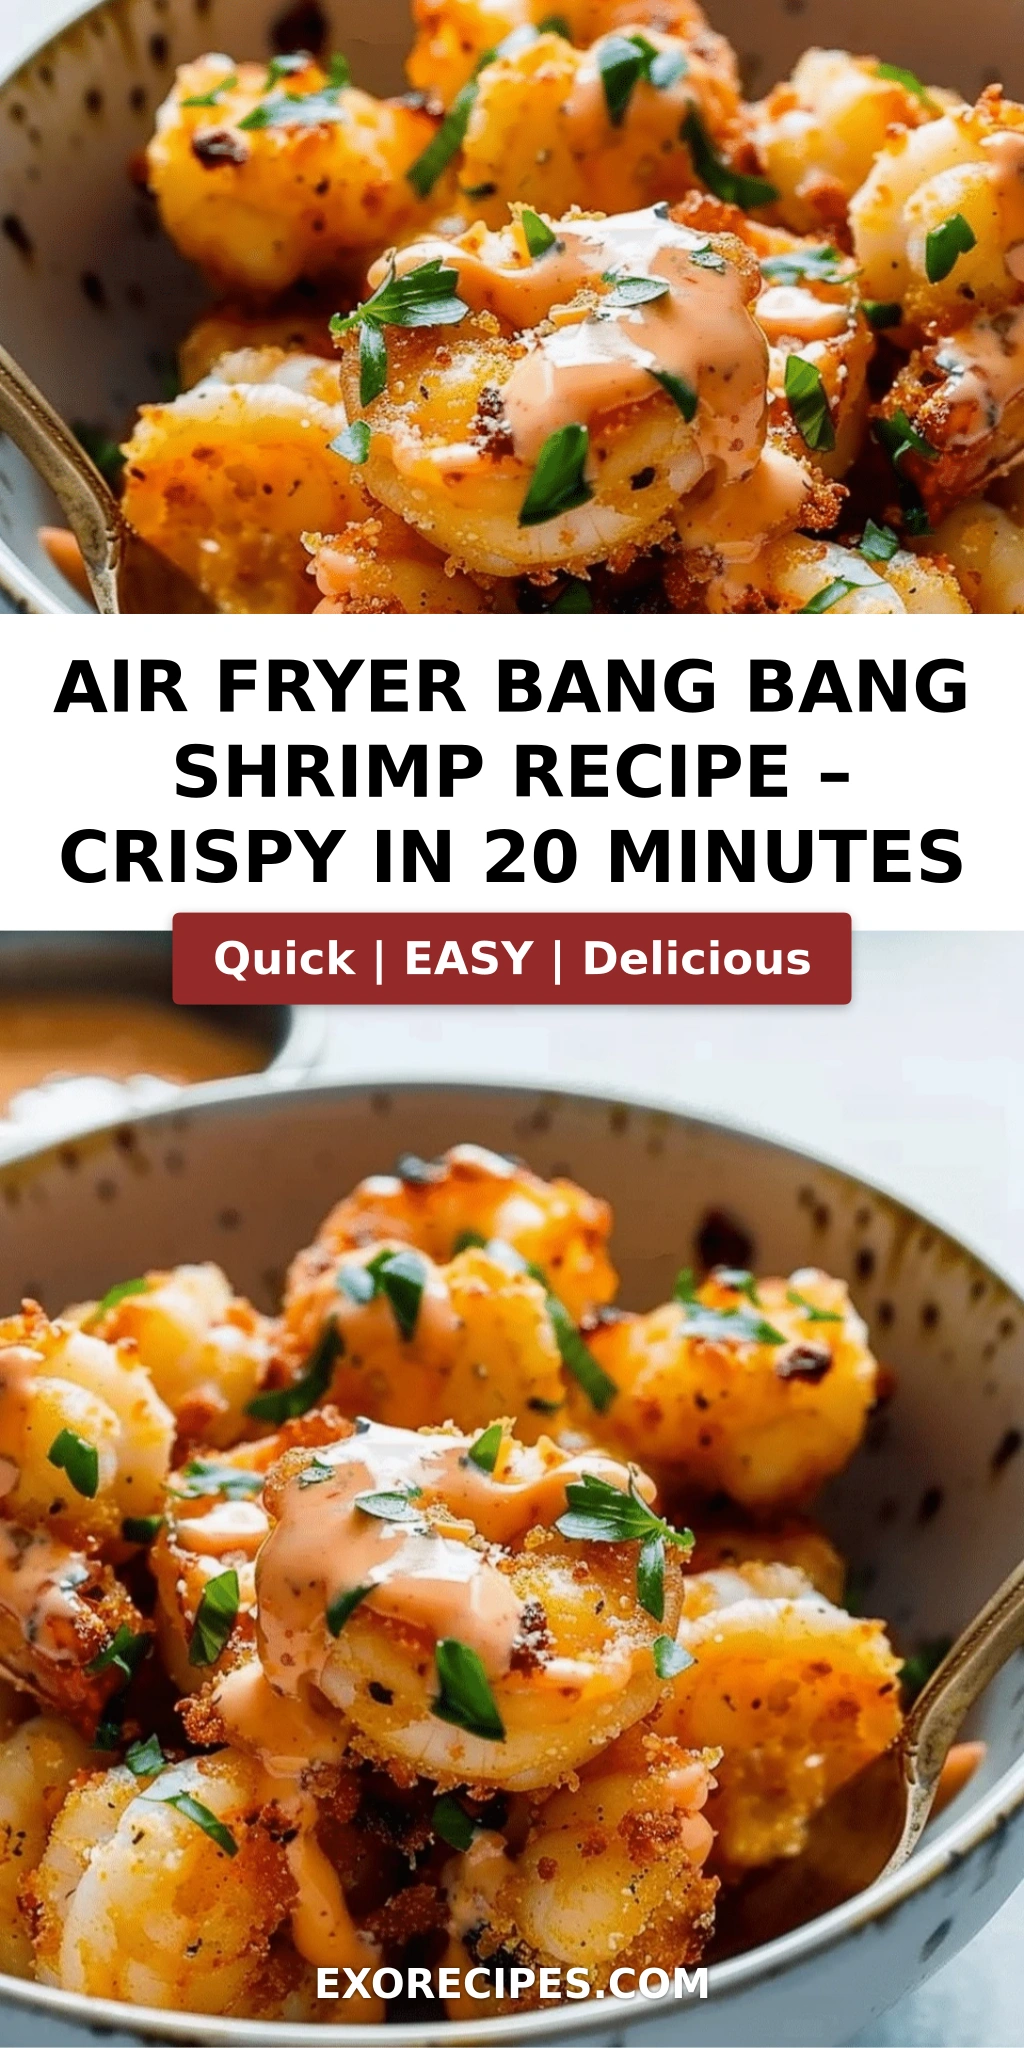
Air Fryer Bang Bang Shrimp: A Crispy, Flavorful Delight in Just 20 Minutes – Quick, Crunchy, and Irresistible

⚖️
Difficulty
Easy
⏲️
Prep Time
10 mins
🕒
Cook Time
8 mins
⏱️
Total Time
18 mins
🍽️
Servings
4

I’ll never forget the first time I tasted bang bang shrimp. It was at a tiny, bustling fusion spot in the East Village – a plate of crispy, golden shrimp drenched in a creamy, sweet-and-spicy sauce that made my eyes widen. Growing up in Morocco, my mother’s kitchen was all about bold contrasts: the warmth of cumin against the brightness of cilantro, the crunch of fried fish next to the silky smoothness of eggplant. That same philosophy of texture and flavor balance is exactly what makes this air fryer bang bang shrimp so brilliant. Now, with my French training in pastry and sauce work, I’ve refined a version that’s not only faster – just 20 minutes – but stays perfectly crunchy without a vat of oil. This crispy bang bang shrimp recipe is one of my most-requested weeknight dinners, and I know it will become a staple in your kitchen too.

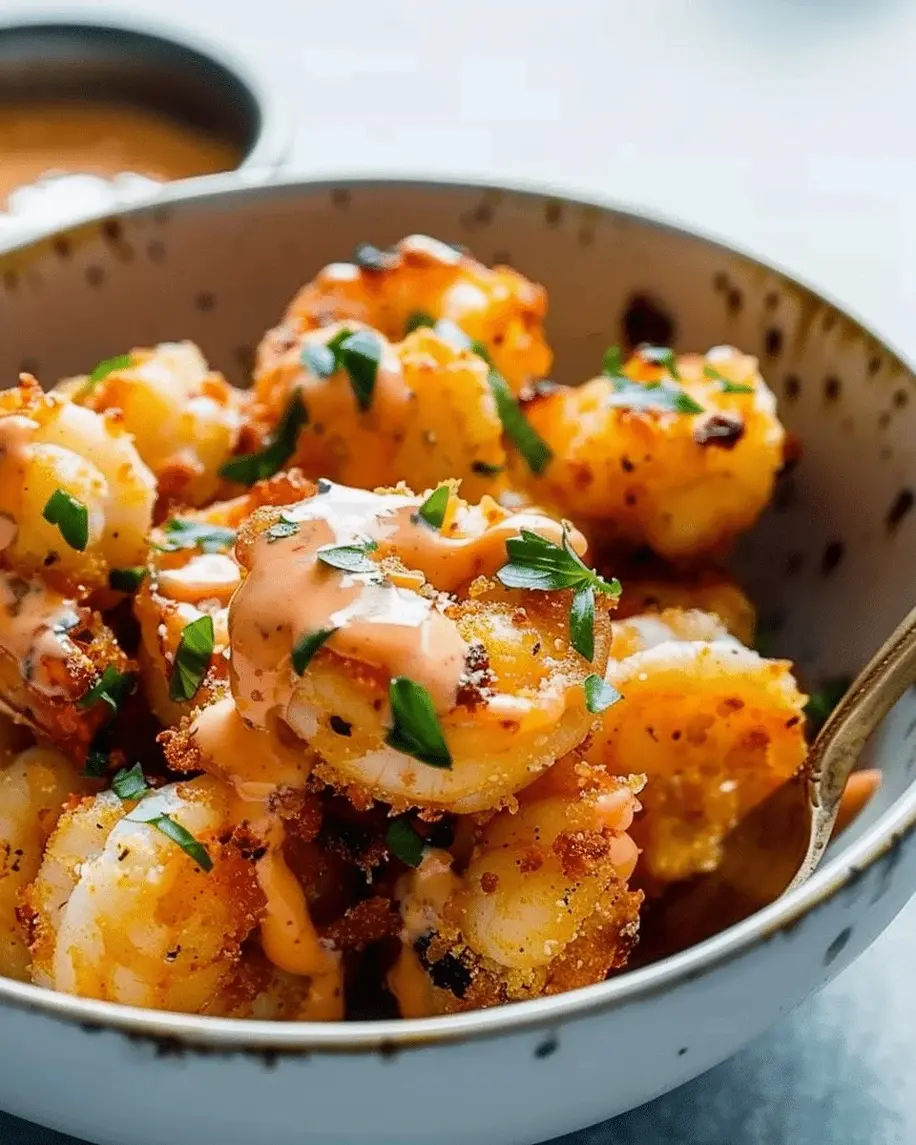
Imagine this: a mound of glistening orange-sauced shrimp, each one shatteringly crisp on the outside yet tender and juicy within. The sauce hits first – a seductive mix of creamy mayo, sweet chili glaze, and a punch of sriracha – then comes the crunch of panko that gives way to sweet, briny shrimp. A sprinkle of green onions and sesame seeds adds a pop of color and nuttiness. It’s the kind of dish that disappears in minutes. What I love is how the air fryer mimics deep-frying with a fraction of the mess: hot air circulates around every nook, turning the panko coating into a golden shell. It’s a technique I picked up from my days in a Parisian brasseries – the same principle behind their perfect pommes dauphine – but applied to a very American, very addictive appetizer.

Over the years, I’ve tested dozens of bang bang shrimp recipes, and this one stands apart because of a few key choices. First, I use a cornstarch base before the egg-and-panko dredge – that’s the secret to extra-lacy crunch. Second, I don’t drown the shrimp in sauce; I toss them just before serving so they stay crispy. And third, I balance the heat with a touch of rice vinegar for acidity. The result? A foolproof easy air fryer shrimp recipe that even beginners nail on the first try. I’ll walk you through every step, pointing out where most home cooks go wrong and sharing my chef-tested shortcuts. By the end, you’ll have a quick shrimp appetizer that rivals any restaurant’s. Let’s get cooking!

Why This Air Fryer Bang Bang Shrimp Recipe Is the Best

The Flavor Secret – This isn’t just any bang bang sauce. I’ve built it with the precision of a French mother sauce: a rich mayonnaise base (I prefer Duke’s or Kewpie for tang), a high-quality sweet chili sauce (Mae Ploy is my go-to), and a careful hand with sriracha so the heat doesn’t overwhelm. Adding a splash of rice vinegar and garlic powder gives it that restaurant-style depth. And because I toss the shrimp after they’re air-fried, the sauce clings without turning the crust soggy. It’s a lesson I learned in Paris: sauce should elevate, not smother.

Perfected Texture – The triple-coating method (cornstarch → egg → panko) is the same one I used for chicken katsu at a French-Japanese bistro in Brooklyn. The cornstarch acts like a dry glue, absorbing moisture from the shrimp and creating a thin, crackly layer. The panko – Japanese breadcrumbs – are larger and airier than standard breadcrumbs, so they stay crisp even after a brief toss in sauce. I also preheat the air fryer and spray the basket generously; this prevents sticking and ensures even browning. The result: shrimp that shatters when you bite into it.

Foolproof & Fast – From fridge to table in under 20 minutes. This recipe is designed for busy weeknights when you need something impressive fast. I’ve simplified the process so there’s no marinating, no deep-frying, and no fussy equipment. The air fryer does the heavy lifting, and with my pro tips – like patting shrimp bone-dry and not overcrowding the basket – you’ll get consistent results every time. Whether you’re a seasoned cook or a total beginner, this crispy bang bang shrimp recipe will become your new go-to.

Air Fryer Bang Bang Shrimp Ingredients

I love sourcing ingredients for this dish. The shrimp I get from the fish counter at my local NYC Whole Foods – wild-caught, 16/20 count, always fresh. The sweet chili sauce and sriracha come from a little Asian market in Chinatown that reminds me of the spice markets in Marrakech. And the panko? I keep a box in my pantry at all times – it’s the secret weapon for that addictive crunch. Here’s everything you’ll need.

Ingredients List

  • 1 lb large shrimp, peeled and deveined
  • 1/2 cup cornstarch
  • 1/2 teaspoon salt
  • 1/4 teaspoon black pepper
  • 2 large eggs, beaten
  • 1 cup panko breadcrumbs
  • Cooking spray (avocado or canola oil works best)
  • 1/2 cup mayonnaise
  • 3 tablespoons sweet chili sauce
  • 1 tablespoon sriracha (adjust to taste)
  • 1 teaspoon rice vinegar
  • 1/2 teaspoon garlic powder
  • 1 tablespoon chopped green onions (for garnish)
  • 1 tablespoon sesame seeds (optional, for garnish)

Ingredient Spotlight

Shrimp – The star of the show. Use large (16/20 count) or jumbo shrimp for the best meat-to-coating ratio. I always buy wild-caught for superior flavor. If using frozen, thaw completely and pat very dry – excess moisture is the enemy of crispiness. For a more sustainable option, look for US Gulf or farmed white shrimp from responsible sources.

Panko Breadcrumbs – These Japanese breadcrumbs are chunkier and flakier than regular breadcrumbs, creating a lighter, airier crust. You can find them in the Asian aisle of most grocery stores. For a gluten-free version, use gluten-free panko (I like Ian’s) – the texture is almost identical. Want extra crunch? Pulse panko in a food processor a few times to get finer crumbs that adhere better.

Sweet Chili Sauce – This is the backbone of the bang bang sauce. Look for a brand that’s thick, slightly translucent, and balanced in sweetness and heat (Mae Ploy is my favorite). You can substitute with a mix of 2 tbsp honey + 1 tbsp chili garlic sauce + 1 tsp rice vinegar, but the flavor won’t be quite as glossy or complex.

Sriracha – The original Huy Fong sriracha is the standard, but if you can’t find it, use any Asian chili garlic sauce or even a pinch of cayenne mixed with a little extra vinegar. For a milder sauce, reduce to 1/2 tablespoon or use a sweet chili sauce that’s already spicy. My kids love this dish with just a whisper of heat – I add extra sriracha to my own bowl after tossing.

Original IngredientBest SubstitutionFlavor / Texture Impact
MayonnaiseGreek yogurt (full-fat) + 1 tsp oilTangier, less rich; still creamy but thinner
Sweet chili sauceHoney + chili garlic sauce + rice vinegarSweeter, less complex; still spicy but more rustic
PankoCrushed pork rinds (for low-carb)Very crispy, but heavier; flavor is porky and less neutral
CornstarchPotato starch or rice flourSimilar crispiness; potato starch gives slightly thicker crust

How to Make Air Fryer Bang Bang Shrimp — Step-by-Step

Ready to create the most addictive shrimp of your life? Don’t worry – it’s simpler than you think. Follow these steps and you’ll have a platter of golden, saucy shrimp that will vanish in minutes. I’ve included my best pro tips and the common mistakes to dodge along the way.

Step 1: Make the Bang Bang Sauce

In a small bowl, whisk together 1/2 cup mayonnaise, 3 tablespoons sweet chili sauce, 1 tablespoon sriracha, 1 teaspoon rice vinegar, and 1/2 teaspoon garlic powder. Whisk until smooth and creamy. Taste and adjust heat – add more sriracha if you like it fiery. Set aside. This can be made up to 3 days ahead and refrigerated – the flavors meld beautifully.

💡 mia’s Pro Tip: For a smoother sauce, use a microplane to grate a small clove of garlic instead of garlic powder. It adds a fresh, pungent kick that brightens the whole dish.

Step 2: Prepare the Shrimp

Pat the shrimp dry with paper towels – this is crucial! Any moisture will make the coating slide off. In a shallow dish, combine 1/2 cup cornstarch, 1/2 teaspoon salt, and 1/4 teaspoon black pepper. Beat 2 large eggs in a second shallow dish. Place 1 cup panko breadcrumbs in a third dish. Set up your assembly line: shrimp → cornstarch → egg → panko.

⚠️ Common Mistake to Avoid: Don’t skip drying the shrimp! Even a few drops of water will make the cornstarch pasty instead of crisp. Use paper towels and press gently to absorb any liquid.

Step 3: Dredge the Shrimp

Working with one shrimp at a time, coat completely in the cornstarch mixture, shaking off excess. Dip into the egg, letting any extra drip off. Then place into the panko and press gently so the crumbs adhere on all sides. Place coated shrimp on a plate or baking sheet. Do all the shrimp before you start air frying – this prevents messing with timing.

💡 mia’s Pro Tip: Use one hand for dry ingredients and the other for wet – keeps your hands from getting clumpy and speeds up the process. I learned this trick during a busy Friday night service in Paris.

Step 4: Preheat the Air Fryer

Preheat your air fryer to 400°F (200°C). This takes about 3-5 minutes. While it’s heating, lightly spray the air fryer basket with cooking spray. I use avocado oil spray because it has a high smoke point and doesn’t add flavor. Do not skip this step – sticking is the #1 complaint with air-fried shrimp.

⚠️ Common Mistake to Avoid: Don’t overcrowd the basket! Arrange shrimp in a single layer with at least 1/2 inch between each. If needed, cook in batches. Crowding drops the temperature and makes them steam instead of crisp.

Step 5: Air Fry the Shrimp

Arrange the breaded shrimp in a single layer in the basket. Spray the tops lightly with cooking spray (this is what gives that golden, crunchy finish). Air fry for 6-8 minutes, flipping halfway through with tongs, until golden brown and cooked through. The shrimp should curl slightly and feel firm. Depending on your air fryer, you may need to rotate the basket at the halfway point.

💡 mia’s Pro Tip: If your air fryer runs hot, check at 5 minutes. Shrimp cook fast – overcooking turns them rubbery. The internal temperature should reach 120°F-125°F (they’ll rise to 135°F after resting).

Step 6: Toss and Serve

Remove the shrimp from the air fryer and place them in a large bowl. Drizzle with the bang bang sauce and toss gently to coat. If you’re serving a crowd, keep the sauce on the side so everyone can add as much as they like – the shrimp stay crisper that way. Transfer to a platter, garnish with chopped green onions and sesame seeds, and serve immediately.

⚠️ Common Mistake to Avoid: Don’t toss the shrimp in sauce until you’re ready to eat. The sauce softens the crust within 5 minutes. For make-ahead, store shrimp and sauce separately, then toss right before serving.

StepActionDurationKey Visual Cue
1Make sauce5 minsSmooth, creamy, orange tint
2Pat shrimp dry2 minsNo visible moisture on surface
3Dredge shrimp8 minsEvenly coated, no bald spots
4Air fry6-8 minsGolden brown, panko looks crisp
5Toss with sauce1 minEvenly coated, sauce clings

Serving & Presentation

When I serve this dish at home, I like to channel the energy of a Moroccan meze spread but with a New York edge. Pile the shrimp high on a white platter – the contrast of the orange sauce against the white plate is stunning. Sprinkle generously with green onions and a shower of sesame seeds. For a little extra flair, add a few lime wedges on the side; a squeeze of lime just before eating brightens all the flavors. This works beautifully as a finger-food appetizer for parties, or as a main course over steamed rice (my kids love it with coconut rice).

I also love turning these into lettuce wraps for a low-carb option. Use butter lettuce or iceberg, tuck in a few pieces of shrimp, add a drizzle of extra sauce and some shredded carrots. It’s a light, refreshing meal that feels indulgent. If you’re serving a crowd, double the recipe and keep the shrimp warm in the air fryer on the keep-warm setting (or at 200°F) while you cook batches. But honestly? They rarely last long enough to need warming!

Pairing TypeSuggestionsWhy It Works
Side DishCoconut rice, steamed jasmine rice, Asian slaw, or edamameThe rice soaks up the sauce; slaw adds crunch
Sauce / DipExtra bang bang sauce, sriracha mayo, sweet chili sauceLayering the same flavors in different forms
BeverageCold lager or pilsner, iced green tea, sparkling water with lime, or a light Sauvignon BlancCrisp, cold drinks cut through the creamy heat
GarnishChopped green onions, sesame seeds, lime wedges, fresh cilantro, or pickled red onionsAdds freshness, acidity, and visual pop

Make-Ahead, Storage & Reheating

Life in NYC means I’m often prepping meals ahead for busy weeknights. For this dish, the sauce can be made up to 3 days in advance, and you can bread the shrimp up to 8 hours before cooking (store them on a tray in the fridge, uncovered, to keep the coating dry). However, I strongly recommend air-frying just before serving for the best crunch. If you have leftovers, here’s how to handle them.

MethodContainerDurationReheating Tip
RefrigeratorAirtight container, separate from sauceUp to 2 daysReheat in air fryer at 350°F for 3-4 minutes until hot and crisp. Do not microwave – it will turn mushy.
FreezerFreeze breaded, uncooked shrimp on a baking sheet, then transfer to a freezer bagUp to 1 monthAir fry frozen at 400°F for 9-11 minutes, no need to thaw. Add 2 minutes to the cook time. Toss with fresh sauce after.
Make-AheadBreaded shrimp on a tray, covered loosely with plastic wrapUp to 8 hours before cookingKeep in the fridge, uncovered, so the panko stays dry. Air fry as directed, adding 1 minute if they’re cold from the fridge.

I’ve tested reheating many ways, and the air fryer is truly the only method that restores that initial crunch. If you don’t have one, you can reheat in a 400°F oven on a wire rack set over a baking sheet for about 5 minutes. The wire rack allows hot air to circulate underneath, preventing a soggy bottom. And please – do not microwave leftover bang bang shrimp! I learned that lesson the hard way during a late-night snack experiment. The sauce turns watery, the breading becomes glue-like, and all that beautiful texture disappears.

Variations & Easy Swaps

VariationKey ChangeBest ForDifficulty Impact
Coconut Bang Bang ShrimpAdd 1/4 cup unsweetened shredded coconut to panko mixtureAdding tropical sweetness and extra textureEasy (no extra steps)
Gluten-Free Bang Bang ShrimpUse gluten-free panko and ensure cornstarch is certified GFThose with celiac or gluten sensitivityEasy (simple substitution)
Spicy Mango Bang Bang ShrimpAdd 2 tablespoons mango puree to sauce and reduce sweet chili by 1 tablespoonA fruity twist for summer or when you want more sweetnessEasy (just blend extra ingredient into sauce)

Coconut Bang Bang Shrimp

This is a favorite in my house, especially during summer when I crave a taste of the islands. Add 1/4 cup unsweetened shredded coconut to the panko mixture and proceed as directed. The coconut toasts beautifully in the air fryer, adding a subtle sweetness and extra crunch. I like to finish with a drizzle of honey and a squeeze of lime for a sweet-and-sour punch. This variation reminds me of the coconut shrimp I used to buy from a street vendor in Marrakech – but with a modern air-fryer makeover.

Gluten-Free Bang Bang Shrimp

Making this recipe gluten-free is incredibly simple. Swap out regular panko for gluten-free panko (I’ve tested both Ian’s and Aleia’s brands – they work beautifully). The cornstarch is naturally gluten-free, but double-check your brand. The sauce is already gluten-free if you use gluten-free sriracha and sweet chili sauce (most major brands are, but read labels to be safe). The texture is nearly identical to the original – light, crispy, and satisfying. One of my best friends has celiac, and she raves about this version served over a bed of greens.

Spicy Mango Bang Bang Shrimp

For a burst of tropical fruitiness, stir 2 tablespoons of mango puree (from fresh or frozen mango) into the sauce and reduce the sweet chili sauce by 1 tablespoon to keep the balance. The mango adds a natural sweetness that plays wonderfully against the sriracha. I discovered this combo at a farmers market in Union Square when I had an abundance of ripe mangoes. It’s also delicious with a handful of diced fresh mango sprinkled over the finished dish. This variation has become my go-to for summer entertaining – it feels both indulgent and bright.

Can I use frozen shrimp for air fryer bang bang shrimp, or do I need to thaw them first?

Absolutely, you can use frozen shrimp – but you need to thaw them completely before breading. Partially frozen shrimp release too much moisture during cooking, which makes the coating soggy and prevents that signature crunch. The best way to thaw is to place the shrimp in a colander under cold running water for 5-7 minutes, then pat them extremely dry with paper towels. If you’re short on time, you can even thaw them overnight in the refrigerator. Once thawed and dried, proceed with the recipe exactly as written. Frozen shrimp often come pre-peeled and deveined, which saves prep time – just make sure to remove any tails if your recipe calls for it.

What is the best way to coat the shrimp to keep them crispy in the air fryer?

The triple-coating method is the key to ultimate crunch: start by patting the shrimp bone-dry, then coat them in a thin layer of cornstarch (seasoned with salt and pepper). This acts like a glue that absorbs any lingering moisture and creates a lacy crust. Next, dip them in beaten egg, letting the excess drip off. Finally, press them into panko breadcrumbs, making sure every surface is covered. The cornstarch layer is critical – it’s what makes the coating adhere and stay crisp even after tossing in sauce. Also, don’t skip spraying the breaded shrimp with oil before air frying; that helps the heat circulate and turns the panko golden. Work in small batches to avoid overcrowding, which would lower the temperature and steam the shrimp.

What can I use as a substitute for sriracha or Sriracha mayo in bang bang shrimp sauce?

If you don’t have sriracha, you’ve got several great options. You can use any Asian chili garlic sauce (like Sambal Oelek) – it’s a bit chunkier but delivers the same heat and garlic flavor. Another substitute is to mix 1/2 teaspoon cayenne pepper with 1 tablespoon tomato paste and 2 teaspoons rice vinegar; this mimics the heat and acidity of sriracha. For a milder sauce, simply increase the sweet chili sauce and add a pinch of paprika. If you’re avoiding spice altogether, skip the sriracha entirely and add an extra tablespoon of sweet chili sauce plus a dash of smoked paprika for color and depth. The sauce will be sweeter and less punchy, but still delicious – great for kids or those with sensitive palates.

How do I prevent the shrimp from sticking to the air fryer basket when making bang bang shrimp?

Sticking is one of the most common frustrations, but it’s easily avoidable. First, preheat your air fryer for at least 3 minutes so the basket is hot when you add the shrimp. Then, spray the basket generously with a high-heat cooking spray (avocado or canola oil works best – avoid non-stick sprays that contain lecithin, as they can become sticky). Arrange the breaded shrimp in a single layer with space between each piece – crowding causes them to steam and stick together. After placing the shrimp, spray the tops lightly with oil as well. Flip the shrimp halfway through using a thin spatula or tongs, and if you notice any stubborn spots, use a silicone spatula to gently release them. A well-seasoned or non-stick basket also helps, but the oil spray is your best friend.

Can I make bang bang shrimp without an air fryer? What other cooking methods work?

Yes! While the air fryer is my favorite for its speed and crispiness, you can absolutely make bang bang shrimp in a conventional oven or by shallow-frying. For baking: preheat your oven to 425°F, place the breaded shrimp on a wire rack set over a baking sheet (this allows air to circulate underneath), and bake for 10-12 minutes, flipping halfway. Spray with oil for best results. For shallow-frying: heat about 1/2 inch of neutral oil (like vegetable or canola) to 350°F in a heavy skillet and fry the shrimp in batches for 2-3 minutes per side until golden – drain on paper towels. Both methods work well, but the oven-baked version is slightly less crunchy than the air fryer, while frying will give you the closest texture to deep-fried without needing a big pot of oil.

How do I adjust the spice level in bang bang shrimp sauce for different taste preferences?

One of the best things about this recipe is how easy it is to adjust the heat. The base sauce has three main components: mayonnaise (for creaminess), sweet chili sauce (for sweetness and mild heat), and sriracha (for punch). To make it milder, reduce the sriracha to 1/2 teaspoon or omit it entirely – you’ll still get a lovely sweet-and-savory flavor from the sweet chili sauce. For more heat, increase the sriracha to up to 2 tablespoons, or add a pinch of cayenne pepper or red pepper flakes. You can also try using chili garlic sauce instead of sriracha – it’s chunkier but brings a deeper, fruitier heat. I recommend starting with the base recipe and then adjusting per serving: let people add extra sriracha or a sprinkle of crushed red pepper to their own portions.

Can I use other proteins instead of shrimp in this bang bang recipe?

Absolutely! The bang bang sauce and air fryer method work beautifully with many proteins. For chicken: cut boneless, skinless chicken breasts into bite-sized pieces and follow the same breading and cooking steps – just increase the air frying time to 10-12 minutes at 400°F. For tofu: use extra-firm tofu, press it dry, cut into cubes, and coat with the cornstarch-egg-panko method – air fry for 12-14 minutes, shaking halfway. For fish: use firm white fish like cod or tilapia, cut into chunks, and cook for 8-10 minutes. Even cauliflower works wonderfully – cut into florets, blanch for 2 minutes, dry well, then bread and air fry for 12-15 minutes. The sauce is the real star, so feel free to experiment based on what you have on hand.

What should I serve with bang bang shrimp to make it a complete meal?

Bang bang shrimp is versatile enough to star as an appetizer or a main course. For a complete meal, I love serving it over a bed of steamed jasmine rice or coconut rice – the grains soak up the extra sauce beautifully. An Asian-style slaw with shredded cabbage, carrots, and a lime dressing adds a fresh, crunchy contrast. For a low-carb option, try lettuce wraps or a big salad with mixed greens, cucumber, and avocado. If you’re serving a crowd, set up a bang bang shrimp bowl bar: offer rice, greens, chopped peanuts, shredded carrots, cilantro, and extra lime wedges so everyone can build their perfect plate. Pair with a cold beer or a crisp Sauvignon Blanc, and you’ve got a restaurant-quality meal at home.

How do I keep bang bang shrimp crispy if I’m making a large batch for a party?

Keeping that perfect crunch for a party requires a strategic approach. First, cook the shrimp in small batches and keep them warm on a wire rack in a 200°F oven – never pile them, or steam will ruin the crust. Second, toss the shrimp in sauce only right before serving; you can serve the sauce on the side for guests to add themselves. If you want to prep ahead, bread the shrimp up to 8 hours in advance and refrigerate them uncovered on a tray. When it’s time to serve, air fry in batches and toss each batch with a little sauce as soon as they come out. I also recommend setting up a “crispy station” with a few air fryer baskets if you have multiple air fryers, or enlisting a friend to help with the frying line. Your guests will thank you for the fresh-crisp shrimp!

Is it better to toss shrimp in bang bang sauce or serve the sauce on the side?

This really depends on your serving style and how quickly the shrimp will be eaten. If you’re serving immediately and everyone is at the table, go ahead and toss the shrimp in the sauce – it’s beautiful and every bite has that perfect coating. The key is to toss just before serving; within 5-7 minutes the breading will start to soften. For a party buffet or any situation where the shrimp will sit out for more than 10 minutes, I strongly recommend serving the sauce on the side. Arrange the air-fried shrimp on a platter and let guests drizzle or dip to their liking. This way the shrimp stay shatteringly crisp for up to 30 minutes. For the best of both worlds, I sometimes serve a small drizzle of sauce on the platter and offer extra on the side – that way you get the visual appeal and the option for guaranteed crunch.

Share Your Version!

Now it’s your turn to get in the kitchen and make this air fryer bang bang shrimp your own! I’d love to hear how it turned out – did you go all out with the spice, or did you add a fun twist like mango or coconut? Drop a star rating and a comment below – your feedback helps other readers and warms my heart. Snap a photo of your golden, saucy shrimp and tag me on Pinterest or Instagram @exorecipes – I love seeing your creations and often share my favorites in my stories. And if you have a question I didn’t answer here, ask away in the comments; I personally read every single one.

From my NYC kitchen to yours – I hope this recipe brings as much warmth to your table as it does to mine. — mia 🧡

📌

Love This Recipe? Save It to Pinterest!

If you enjoyed this Air Fryer Bang Bang Shrimp recipe, don’t let it get lost in your browser tabs! 😄 Pin it now so you can find it again anytime – and explore hundreds more tried-and-tested recipes waiting for you on my Pinterest boards.

👉 Follow mia on Pinterest @exorecipes

📌 Pin this recipe · 🔁 Re-pin your favorites · 💬 Tag me when you make it – I love seeing your creations!

Print

clock clock iconcutlery cutlery iconflag flag iconfolder folder iconinstagram instagram iconpinterest pinterest iconfacebook facebook iconprint print iconsquares squares iconheart heart iconheart solid heart solid icon

Air Fryer Bang Bang Shrimp: A Crispy, Flavorful Delight in Just 20 Minutes

  • Author: Chef Mia
  • Prep Time: 10 minutes
  • Cook Time: 8 minutes
  • Total Time: 18 minutes
  • Yield: 4 1x
  • Method: Appetizer
  • Cuisine: Asian

Description

Crispy air-fried shrimp tossed in a creamy, spicy bang bang sauce. Ready in 20 minutes, this easy appetizer or main dish is bursting with flavor.


Ingredients

Scale
  • 1 lb large shrimp, peeled and deveined
  • 1/2 cup cornstarch
  • 1/2 teaspoon salt
  • 1/4 teaspoon black pepper
  • 2 large eggs, beaten
  • 1 cup panko breadcrumbs
  • Cooking spray
  • 1/2 cup mayonnaise
  • 3 tablespoons sweet chili sauce
  • 1 tablespoon sriracha (or to taste)
  • 1 teaspoon rice vinegar
  • 1/2 teaspoon garlic powder
  • 1 tablespoon chopped green onions (for garnish)
  • 1 tablespoon sesame seeds (optional)

Instructions

  1. In a small bowl, whisk together mayonnaise, sweet chili sauce, sriracha, rice vinegar, and garlic powder. Set aside.
  2. Pat the shrimp dry with paper towels. In a shallow dish, combine cornstarch, salt, and pepper. Place beaten eggs in another shallow dish, and panko in a third dish.
  3. Dredge each shrimp in the cornstarch mixture, then dip in the egg, and coat with panko, pressing gently to adhere.
  4. Preheat the air fryer to 400°F (200°C). Lightly spray the air fryer basket with cooking spray.
  5. Arrange the breaded shrimp in a single layer in the basket (cook in batches if needed). Spray the tops of the shrimp with cooking spray.
  6. Air fry for 6-8 minutes, flipping halfway through, until golden and crispy.
  7. Remove the shrimp from the air fryer. Toss immediately with the prepared bang bang sauce, or serve the sauce on the side.
  8. Garnish with chopped green onions and sesame seeds, if desired. Serve hot.

Notes

For extra crunch, use panko breadcrumbs and ensure the shrimp are not overcrowded in the air fryer. Adjust sriracha to your preferred spice level. This dish is also delicious as a wrap or over rice.


Nutrition

  • Calories: 320 kcal
  • Sugar: 5 g
  • Fat: 18 g
  • Carbohydrates: 28 g
  • Protein: 20 g


Air Fryer Bang Bang Shrimp: A Crispy, Flavorful Delight in Just 20 Minutes

Air Fryer Bang Bang Chicken Skewers – Crispy, Spicy, and Ready in 25 Minutes

⚖️
Difficulty
Easy
⏲️
Prep Time
15 mins
🕒
Cook Time
10 mins
⏱️
Total Time
25 mins
🍽️
Servings
4

I still remember the first time I tasted Bang Bang Chicken—it was at a tiny food stall in Brooklyn’s Smorgasburg, and the contrast of crispy, juicy chicken with that creamy-spicy sauce was pure magic. Growing up in Morocco, my mother would make a similar dish using yogurt and harissa, but here in New York, I’ve remixed it into something completely new. These Air Fryer Bang Bang Chicken Skewers are my weeknight answer to that craving: crunchy, tender, and absolutely drenched in a five-minute Bang Bang sauce. The air fryer gives them that golden, panko-crusted finish without deep frying, so you get all the crunch with less mess. It’s the kind of easy chicken appetizer that disappears before you can answer the doorbell.

The magic of this recipe lies in the trifecta of textures: the cornstarch layer seals in the juices, the egg wash ensures the panko sticks, and the air fryer’s convection heat creates a crackling crust. Then comes the Bang Bang sauce—a luscious blend of mayonnaise, sweet chili sauce, sriracha, honey, and lime juice—every skewer becomes a perfect bite of sweet heat. I love the way the sauce pools around the chicken, turning each piece into a little jewel of flavor. One bite and you’ll taste the tang of lime, the warmth of chili, and the richness of the mayo, all clinging to that crunchy shell.

What sets my version apart is the French-trained technique of double dredging (cornstarch then egg then panko) that I learned in Paris—it gives an unbeatable light crunch. And because I’m always thinking about busy NYC weeknights, I’ve streamlined the method so you can go from fridge to table in under half an hour. 💡 mia’s Pro Tip: Soak your wooden skewers for at least 30 minutes to prevent burning—trust me, it makes a difference. And don’t skip the honey in the sauce; it balances the heat like a Moroccan charm.

Why This Air Fryer Bang Bang Chicken Skewers Recipe Is the Best

The Flavor Secret: I blend the creaminess of French mayonnaise with the sweet heat of Asian chili sauce—a marriage that feels like a perfect New York fusion. A touch of honey and fresh lime juice lifts the whole dish, just like the preserved lemons my mother used in her chicken tagine. Every ingredient has a job: the cornstarch creates a delicate barrier, the panko adds shattering crunch, and the Bang Bang sauce ties it all together with a silky, spicy finish.

Perfected Texture: My Paris pastry training taught me that layering matters. The cornstarch dries the chicken surface, letting the egg cling evenly, which then catches every flake of panko. Air frying at 375°F circulates hot air around each skewer, crisping the coating without drying out the meat. You get that deep-fried feel without the oil bath—perfect for a quick appetizer that feels indulgent but is actually light.

Foolproof & Fast: This recipe works for beginners and seasoned cooks alike. The steps are simple: chop, coat, skewer, air fry. Even if you’ve never held a skewer, the visual cues (golden brown, internal temp 165°F) make it easy. Plus, you can prep the sauce while the chicken cooks—multitasking made delicious. I’ve tested it with both chicken breast and thighs, and the method holds up beautifully every time.

Air Fryer Bang Bang Chicken Skewers Ingredients

I pick up my chicken from the Union Square Greenmarket when I can—farm-fresh and flavorful. The panko I buy in bulk at the Korean grocery on 32nd Street; it’s lighter and flakier than regular breadcrumbs. And the sweet chili sauce? I’ve tried a dozen brands, and I keep coming back to the one with the rooster on the label—it has the perfect balance of sugar and chili. Every ingredient in this list is chosen to maximize crunch and depth.

Ingredients List

  • 1 lb boneless skinless chicken breasts, cut into 1-inch cubes
  • 1/2 cup cornstarch
  • 2 large eggs, beaten
  • 1 cup panko breadcrumbs
  • 1/2 cup mayonnaise
  • 2 tablespoons sweet chili sauce
  • 1 tablespoon sriracha (adjust to taste)
  • 1 tablespoon honey
  • 1 teaspoon lime juice
  • Salt and pepper to taste
  • Wooden skewers, soaked in water for 30 minutes

Ingredient Spotlight

Panko Breadcrumbs: These Japanese-style breadcrumbs are larger and flakier than standard breadcrumbs, creating an exceptionally light and crispy crust. Swap with gluten-free panko for a celiac-friendly version, though the texture will be slightly denser. Look for them in the Asian aisle of any US grocery store.

Sweet Chili Sauce: This is the heart of the Bang Bang sauce. It’s thin, sweet, and mildly spicy. If you can’t find it, mix 2 tablespoons of honey with 1 teaspoon of red pepper flakes and a splash of vinegar—close but not identical. The real deal makes a difference.

Mayonnaise: Use full-fat, good-quality mayo (I prefer Duke’s or Hellmann’s) for the richest sauce. Light mayo will work, but the sauce will be less creamy. In a pinch, Greek yogurt can replace half the mayo for a tangier, lighter sauce.

Cornstarch vs. Flour: Cornstarch absorbs moisture better and creates a lighter coating. If you swap with all-purpose flour, the crust will be more dense and less crunchy. Stick with cornstarch for the signature air fryer texture.

Original IngredientBest SubstitutionFlavor / Texture Impact
Panko breadcrumbsGluten-free pankoSlightly less crispy, still very good
Sweet chili sauceHoney + red pepper flakes + vinegarLess glossy, spicier, still tasty
MayonnaiseGreek yogurt (half substitution)Tangier sauce, less creamy
Chicken breastChicken thighs, cubedJuicier, slightly richer flavor; adjust cook time by 1-2 minutes

How to Make Air Fryer Bang Bang Chicken Skewers — Step-by-Step

Don’t let the steps fool you—this recipe moves fast. Set up your breading station, get the air fryer preheating, and you’ll be dipping and crunching in no time.

Step 1: Set Up the Breading Station

Place cornstarch in a shallow bowl, beaten eggs in another, and panko in a third. Season the chicken cubes with salt and pepper. This assembly line will make the process smooth and mess-free.

💡 mia’s Pro Tip: Use one hand for wet ingredients and the other for dry—keeps the coating from clumping on your fingers.

Step 2: Coat and Skewer the Chicken

Dredge each chicken cube first in cornstarch, then dip into the beaten egg, and finally roll in panko, pressing gently so the crumbs stick. Thread 4–5 coated pieces onto each soaked skewer. Soaking the skewers prevents them from burning in the air fryer.

⚠️ Common Mistake to Avoid: Don’t overcrowd the skewers—leave a little space between pieces so hot air can circulate and crisp every side.

Step 3: Air Fry to Perfection

Preheat air fryer to 375°F (190°C). Lightly spray the basket with cooking spray. Place skewers in a single layer (work in batches if needed). Spray the tops of the skewers with oil. Air fry for 8–10 minutes, flipping halfway through, until golden brown and the internal temperature reaches 165°F.

💡 mia’s Pro Tip: Flip the skewers with tongs at the 5-minute mark—this ensures even browning on all sides.

Step 4: Whisk the Bang Bang Sauce

While the chicken cooks, make the sauce: whisk together mayonnaise, sweet chili sauce, sriracha, honey, and lime juice in a small bowl. Taste and adjust—add more sriracha for heat, more honey for sweetness.

⚠️ Common Mistake to Avoid: Don’t add the sauce too early—drizzle it right before serving so the coating stays crunchy.

Step 5: Glaze and Serve

Transfer the hot skewers to a platter. Drizzle generously with the Bang Bang sauce, or serve the sauce on the side for dipping. Garnish with sliced green onions and sesame seeds for a restaurant-style finish.

💡 mia’s Pro Tip: For an extra pop of color, add a sprinkle of black sesame seeds—they look stunning against the orange sauce.

StepActionDurationKey Visual Cue
1Set up breading station5 minutesThree bowls ready
2Coat and skewer chicken10 minutesEven panko coverage
3Air fry skewers8–10 minutesGolden brown, 165°F internal
4Whisk Bang Bang sauce3 minutesSmooth, creamy, orange color
5Drizzle and serve2 minutesSauce coats each skewer

Serving & Presentation

I love serving these skewers on a long wooden board lined with parchment—it reminds me of the street-food stalls in Morocco where everything is shared. Arrange them in a fan shape, then drizzle the Bang Bang sauce over the top in a zigzag pattern. Sprinkle with sliced green onions, toasted sesame seeds, and a few fresh cilantro leaves for a burst of green. For dipping, I sometimes add an extra bowl of the sauce on the side.

These chicken skewers are incredibly versatile: serve them as a show-stopping appetizer at parties, or make a meal by pairing with steamed jasmine rice and a crisp cucumber salad. The creaminess of the sauce cuts through the crunch, and every bite feels like a celebration. Easy chicken appetizer doesn’t get more impressive than this.

Pairing Guide: A cold beer (like a crisp lager) or a fruity Riesling balances the heat beautifully. For a boozy kick, try a spicy margarita—the lime in both drinks echoes the sauce.

Pairing TypeSuggestionsWhy It Works
Side DishSteamed jasmine rice, cucumber salad, grilled cornNeutral bases let the Bang Bang shine; veggies add freshness
Sauce / DipExtra Bang Bang sauce, ranch dressing, sweet soy glazeMore sauce = more joy; ranch cools the heat
BeverageCrisp lager, Riesling, spicy margaritaLager cuts fat; Riesling sweetens the heat; margarita echoes the lime
GarnishGreen onions, sesame seeds, cilantro, lime wedgesAdds color, crunch, and brightness

Make-Ahead, Storage & Reheating

My busiest NYC days mean I’m often meal-prepping on Sunday. These skewers are perfect for that: you can bread the chicken and keep it in the fridge (on skewers, covered) for up to 24 hours before air frying. The sauce can be made up to three days ahead. But for maximum crunch, I always recommend air frying fresh. Leftovers still work beautifully if you reheat them right.

MethodContainerDurationReheating Tip
RefrigeratorAirtight container (skewers removed)Up to 3 daysReheat in air fryer at 350°F for 4 minutes
FreezerFreezer-safe bag, remove as much air as possibleUp to 2 monthsAir fry from frozen at 375°F for 10–12 minutes
Make-AheadBreaded skewers on a tray, covered with plastic wrapUp to 24 hours in fridgeAdd 1–2 minutes to cook time if starting from cold

If you’re reheating leftovers, skip the microwave—it will turn the coating soggy. Instead, pop them back in the air fryer at 350°F for 3–4 minutes. The sauce is best added fresh after reheating, so keep it separate. For frozen skewers, you don’t even need to thaw—just increase the air fry time and enjoy crispy chicken in a pinch.

Variations & Easy Swaps

One of the joys of cooking is adapting a recipe to what you have on hand or to what’s in season. My Moroccan roots love a little spice experimentation, and my Paris training taught me that small tweaks can create entirely new dishes. Here are three variations to keep your chicken skewer game fresh all year.

VariationKey ChangeBest ForDifficulty Impact
Honey Harissa Bang BangAdd 1 tbsp harissa paste to the sauce, reduce sriracha to 1 tspNorth African twistSame difficulty
Spicy Peanut Sauce SkewersReplace Bang Bang sauce with peanut butter + soy + chili oilNut-lovers & Thai cravingsSame difficulty
Lemon Herb Chicken SkewersAdd lemon zest and oregano to panko, serve with tzatzikiMediterranean flavor profileSame difficulty

Honey Harissa Bang Bang

This is my personal favorite—a nod to the harissa my mother always kept in her pantry. Stir a tablespoon of rose harissa (or any good-quality harissa) into the sauce, and reduce the sriracha to just a teaspoon for balance. The smoky heat of the harissa transforms the sauce into something deeply complex. Serve with extra lime wedges to cut through the richness.

Gluten-Free / Dairy-Free Version

The recipe is naturally dairy-free, but for gluten-free, swap the panko with gluten-free panko (I like the Ian’s brand) and ensure your cornstarch is certified gluten-free. The texture will be slightly less shattering but still delicious. Also check the sweet chili sauce—some brands contain wheat. Simply use a gluten-free version; it tastes identical.

Spicy Peanut Sauce Skewers

When I’m craving Thai street food, I swap the Bang Bang sauce for a peanut sauce: whisk ¼ cup creamy peanut butter, 2 tablespoons soy sauce, 1 tablespoon rice vinegar, 1 teaspoon sriracha, and enough water to thin. The nutty coating clings beautifully to the crunchy chicken. Garnish with crushed peanuts and cilantro—this variation always gets devoured first.

How do you make the Bang Bang sauce for air fryer chicken skewers?

Whisk together 1/2 cup mayonnaise, 2 tablespoons sweet chili sauce, 1 tablespoon sriracha, 1 tablespoon honey, and 1 teaspoon lime juice. That’s it—takes less than 2 minutes. For a thinner consistency, add a splash of water or extra lime juice. Taste and adjust the heat: add more sriracha if you like it fiery, or more honey if you prefer sweeter. The sauce can be made up to 3 days ahead and stored in the fridge. It’s also fantastic as a dip for fries or spring rolls.

What temperature and cook time should I use for air fryer chicken skewers?

Preheat your air fryer to 375°F (190°C). Cook the skewers for 8–10 minutes, flipping them halfway through. The exact time depends on the size of your chicken cubes and the power of your air fryer. The chicken is done when it’s golden brown and crispy on the outside, and the internal temperature reaches 165°F (74°C) on an instant-read thermometer. For larger cubes (1.5 inches), add 2 minutes. If you’re cooking a full batch, work in a single layer to avoid overcrowding; this ensures even cooking.

Can I use chicken thighs instead of chicken breast for Bang Bang chicken skewers?

Absolutely! Chicken thighs are juicier and more forgiving than breasts. Cut boneless skinless thighs into 1-inch cubes and follow the same breading and cooking steps. Because thighs have a higher fat content, they may need an extra minute or two to reach 165°F. I actually prefer thighs when I’m making these for a party—they stay moist even if they sit out a bit. Just be sure to trim any large pieces of fat so the coating sticks evenly.

What can I serve with air fryer Bang Bang chicken skewers?

These skewers are super versatile. As an appetizer, serve them with a side of extra Bang Bang sauce, ranch dressing, or even a sweet soy glaze for dipping. For a complete meal, pair with steamed jasmine rice, a cool cucumber salad (with rice vinegar and sesame), or grilled vegetables like asparagus and bell peppers. A light coleslaw with lime dressing also works beautifully. For drinks, a cold lager or a crisp Riesling cuts the spice, while a spicy margarita echoes the lime in the sauce.

Can I bake these skewers instead of air frying?

Yes, you can. Bake the skewers on a wire rack set over a baking sheet at 400°F (200°C) for 15–18 minutes, flipping halfway through. Spray the skewers with cooking oil before baking to help them brown. The texture won’t be quite as crunchy as the air fryer version, but it’s still delicious. If you don’t have a wire rack, place them directly on a parchment-lined baking sheet and flip carefully to avoid sticking.

How do I keep the breading from falling off the chicken?

Start with dry chicken—pat the cubes with paper towels before seasoning. The cornstarch layer is key: it creates a dry surface that helps the egg adhere. After dipping in egg, let any excess drip off before rolling in panko. Press the breadcrumbs gently but firmly so they stick. Also, avoid moving the skewers too much during the first half of air frying. Once the coating sets (after about 4 minutes), you can flip them without worry.

Can I make Bang Bang chicken skewers in advance for a party?

Yes! You can bread the chicken and thread them onto skewers up to 24 hours ahead; keep them covered in the fridge. The sauce can be made up to 3 days in advance. When your guests arrive, simply air fry the skewers fresh—they only take 10 minutes. For a larger party, you can also air fry them in batches and keep them warm in a 200°F oven on a wire rack (not on a tray, or they’ll steam).

Is this recipe spicy? How can I adjust the heat?

The Bang Bang sauce has a medium heat level from the sriracha. To make it milder, reduce sriracha to 1/2 teaspoon and increase the honey. For extra heat, add another tablespoon of sriracha or a pinch of cayenne pepper. You can also serve the sauce on the side so each guest can control their own spice level. The chicken itself is mild—seasoned only with salt and pepper—so the heat comes entirely from the sauce.

What can I use instead of wooden skewers?

Metal skewers are a great reusable option—just be careful when handling them after air frying, as they get very hot. If you don’t have skewers at all, you can simply place the breaded chicken cubes directly in the air fryer basket and cook them as “nuggets.” Reduce the cook time to 7–8 minutes, and toss them in the Bang Bang sauce after cooking. They won’t be as photogenic, but they’ll taste exactly the same.

Can I use frozen chicken for this recipe?

I don’t recommend starting with frozen chicken because the excess moisture will prevent the coating from sticking. Always thaw chicken completely in the refrigerator overnight, then pat it very dry before cutting and breading. If you’re in a hurry, you can use thawed pre-cut chicken strips—just cut them into even cubes for consistent cooking.

Share Your Version!

I’d love to see how these Air Fryer Bang Bang Chicken Skewers turn out in your kitchen. Did you add extra sriracha? Try the harissa version? Serve them with rice? Drop a star rating and a comment below—your feedback helps other readers know what works. And if you’re on social media, snap a photo and tag @exorecipes — I always smile when I see your creations.

Before you go, I have one small favor: if you found this recipe helpful, please share it with a friend who loves easy chicken appetizers. Pin it, tweet it, tell your cooking buddy—the more, the merrier. And if you’re wondering how to get that perfect crunch every time, remember: soak your skewers, spray the tops with oil, and flip halfway. From my NYC kitchen to yours — I hope this recipe brings as much warmth to your table as it does to mine. — mia 🧡

📌

Love This Recipe? Save It to Pinterest!

If you enjoyed this Air Fryer Bang Bang Chicken Skewers recipe, don’t let it get lost in your browser tabs! 😄 Pin it now so you can find it again anytime — and explore hundreds more tried-and-tested recipes waiting for you on my Pinterest boards.

👉 Follow mia on Pinterest @chefrecipes2

📌 Pin this recipe · 🔁 Re-pin your favorites · 💬 Tag me when you make it — I love seeing your creations!

Print

clock clock iconcutlery cutlery iconflag flag iconfolder folder iconinstagram instagram iconpinterest pinterest iconfacebook facebook iconprint print iconsquares squares iconheart heart iconheart solid heart solid icon

Air Fryer Bang Bang Chicken Skewers

  • Author: Chef Mia
  • Prep Time: 15 minutes
  • Cook Time: 10 minutes
  • Total Time: 25 minutes
  • Yield: 4 servings 1x
  • Method: Appetizer / Main Course
  • Cuisine: Asian-inspired

Description

These air fryer bang bang chicken skewers are crispy, juicy, and coated in a spicy, creamy sauce. Perfect for a quick appetizer or main dish.


Ingredients

Scale
  • 1 lb boneless skinless chicken breasts, cut into 1-inch cubes
  • 1/2 cup cornstarch
  • 2 large eggs, beaten
  • 1 cup panko breadcrumbs
  • 1/2 cup mayonnaise
  • 2 tablespoons sweet chili sauce
  • 1 tablespoon sriracha (adjust to taste)
  • 1 tablespoon honey
  • 1 teaspoon lime juice
  • Salt and pepper to taste
  • Wooden skewers, soaked in water for 30 minutes

Instructions

  1. 1. In a shallow bowl, place cornstarch. In a second shallow bowl, place beaten eggs. In a third shallow bowl, place panko breadcrumbs.
  2. 2. Season chicken cubes with salt and pepper. Dredge each cube in cornstarch, then egg, then panko, pressing gently to adhere.
  3. 3. Thread coated chicken cubes onto soaked wooden skewers (about 4-5 pieces per skewer).
  4. 4. Preheat air fryer to 375°F (190°C). Lightly spray air fryer basket with cooking spray.
  5. 5. Place skewers in a single layer in the basket (work in batches if needed). Spray tops with cooking spray.
  6. 6. Air fry for 8-10 minutes, flipping halfway through, until golden brown and cooked through (internal temperature 165°F).
  7. 7. While chicken cooks, make sauce: whisk together mayonnaise, sweet chili sauce, sriracha, honey, and lime juice.
  8. 8. Drizzle sauce over cooked skewers or serve on the side.

Notes

For a gluten-free version, use gluten-free panko and cornstarch. Skewers can be baked at 400°F for 15-18 minutes if you don’t have an air fryer.


Nutrition

  • Calories: 385
  • Sugar: 8g
  • Fat: 18g
  • Carbohydrates: 28g
  • Protein: 28g


Air Fryer Bang Bang Chicken Skewers

ph">For more delicious inspiration, follow me on Pinterest!

“`html

Air Fryer Bacon Wrapped Scallops: A Perfectly Crispy, Sweet and Savory Delight

⚖️
Difficulty
Easy
⏲️
Prep Time
10 mins
🕒
Cook Time
10 mins
⏱️
Total Time
20 mins
🍽️
Servings
4

I still remember the first time I made bacon wrapped scallops for a dinner party in my tiny Parisian apartment. My chef instructor had taught me the French technique of larder — wrapping lean protein in fat to baste it from the outside in. But I wanted to add a whisper of my Moroccan roots. So I brushed them with a maple glaze that reminded me of the sweet-and-savory tagines my mother made back home. These air fryer bacon wrapped scallops are the result: a perfectly crispy, sweet and savory delight that comes together in under 20 minutes. The air fryer makes them incredibly easy — no splattering oil, no turning on the oven, just golden, caramelized perfection every time.

Picture this: Each tender sea scallop is hugged by a thin strip of bacon that turns shatteringly crisp in the air fryer. The maple and soy glaze caramelizes into a glossy, sticky coating that balances rich saltiness with a touch of sweetness. The texture is sublime — the scallops stay plump and juicy on the inside while the bacon becomes crunchy and candied at the edges. A hint of garlic powder and black pepper ties everything together. It’s the kind of bite that makes you close your eyes and savor the moment, whether you’re serving it as an appetizer at a holiday party or enjoying it as a weeknight dinner treat.

What sets my version apart is the glaze. I’ve tested countless combinations, and this maple-soy-garlic trio is the one that delivers the perfect balance without overpowering the scallops. I also insist on thin-cut bacon — trust me on this — and a soak for your toothpicks to prevent any fiery mishaps. 💡 mia’s Pro Tip: Pat the scallops completely dry before wrapping; moisture is the enemy of a good sear, even in an air fryer. And here’s a common mistake to avoid: overcrowding the basket. Give each scallop some breathing room so the hot air can circulate and crisp every side evenly.

Why This Air Fryer Bacon Wrapped Scallops Recipe Is the Best

The Flavor Secret: The magic lies in the simple yet powerful maple glaze. I learned the art of balancing sweet and savory in my mother’s kitchen in Morocco, where honey and salt often meet in the same dish. French training taught me precision — exactly 2 tablespoons of maple syrup to 1 tablespoon of soy sauce creates a glaze that clings without being cloying. The garlic powder adds depth without stealing the spotlight from the sea-sweet scallops.

Perfected Texture: My professional training in Paris drilled into me the importance of texture contrast. The air fryer at 400°F (200°C) creates the ideal environment for bacon to render its fat and become crispy while the scallop stays tender. Flipping halfway through ensures even browning. I’ve tested this at every temperature from 375°F to 425°F, and 400°F is the sweet spot — hot enough to crisp the bacon quickly without overcooking the delicate scallop inside.

Foolproof & Fast: This is one of those recipes that looks impressive but requires almost no skill. No fancy equipment, no complicated techniques. Just wrap, glaze, and air fry. It’s the kind of dish that makes you look like a hero at a party with minimal effort. I’ve taught this to absolute beginners in my NYC cooking workshops, and they nail it every time. If you can wrap a present, you can wrap a scallop.

Air Fryer Bacon Wrapped Scallops Ingredients

I source my sea scallops from the seafood counter at the Union Square Greenmarket in NYC — they’re dry-packed, never frozen, and taste like the ocean. The bacon? I usually grab a pack of thin-cut from the Brooklyn Butcher down the street. The memory of my mother’s spice counter in Morocco inspired the garlic powder and black pepper pairing. Every ingredient here is a bridge between my worlds: French precision, Moroccan warmth, and pure New York convenience.

Ingredients List

  • 1 lb large sea scallops (about 12 scallops)
  • 6 slices thin-cut bacon, cut in half crosswise
  • 2 tablespoons maple syrup (preferably Grade A amber)
  • 1 tablespoon soy sauce (or tamari for gluten-free)
  • 1/2 teaspoon garlic powder
  • 1/4 teaspoon black pepper
  • Toothpicks (for securing) — wooden or bamboo
  • Optional: flaky sea salt for finishing, lemon wedges for serving

Ingredient Spotlight

Sea Scallops: The star of the show. Look for “dry” scallops (not treated with sodium tripolyphosphate) — they sear and air-fry much better than wet-packed ones. They should smell sweet, not fishy. At the store, ask for large U-10 or U-12 scallops (under 10 or 12 per pound) for the most impressive size. If you can only find bay scallops, reduce cook time by 2–3 minutes.

Thin-Cut Bacon: This is non-negotiable for max crispiness. Thick-cut bacon won’t crisp up quickly enough in the air fryer before the scallop overcooks. I’ve tested both, and thin-cut is the clear winner. It also wraps more snugly around each scallop. If you’re vegetarian-curious (but not quite there yet), this is the bacon that’ll keep you hooked.

Maple Syrup: Real maple syrup, not pancake syrup. The flavor is deeper, more complex, and it caramelizes beautifully in the air fryer. I love Grade A amber for its balanced maple flavor. The sweetness cuts through the salty bacon and rich scallop perfectly. If you’re out of maple, honey or agave work — but the flavor will shift slightly.

Original IngredientBest SubstitutionFlavor / Texture Impact
Large sea scallopsBay scallops (reduce cook time by 2–3 mins)Smaller and sweeter; less dramatic presentation but equally delicious
Thin-cut baconTurkey bacon or prosciuttoLess fat = less crisp; prosciutto adds a delicate, salty crunch
Maple syrupHoney or agave nectarHoney adds floral notes; agave is milder and less complex
Soy sauceTamari (gluten-free) or coconut aminosTamari is slightly thicker; coconut aminos are sweeter and less salty

How to Make Air Fryer Bacon Wrapped Scallops — Step-by-Step

I’ll walk you through each step like we’re cooking side by side in my NYC kitchen. This recipe is simple, but a few small details make all the difference between good and unforgettable.

Step 1: Prepare the Scallops

Pat each scallop dry with paper towels. This is the most important step — moisture prevents the bacon from crisping and can cause the glaze to steam off. Season lightly with a pinch of salt and pepper if you like, but go easy since the bacon and soy sauce bring plenty of salt. I usually skip extra salt and let the bacon do the work.

💡 mia’s Pro Tip: Use dry-packed scallops and pat them so dry that the paper towel comes away nearly clean. If you see moisture, keep blotting. Dry scallops = crispy bacon = happy dinner guests.

Step 2: Make the Maple Glaze

In a small bowl, whisk together 2 tablespoons maple syrup, 1 tablespoon soy sauce, 1/2 teaspoon garlic powder, and 1/4 teaspoon black pepper. That’s it. Set it aside — this will become your magic brush-on. The glaze will caramelize beautifully in the air fryer, creating a glossy, sticky finish that tastes like a fancy restaurant dish.

⚠️ Common Mistake to Avoid: Don’t use a thick glaze or sauce with sugar that burns easily. This maple-soy ratio is tested to caramelize without burning at 400°F. If you add extra sugar or honey, it may scorch before the bacon crisps.

Step 3: Wrap and Glaze

Take each half-slice of thin-cut bacon and wrap it around a scallop, overlapping the ends slightly. Secure with a toothpick that’s been soaked in water for at least 10 minutes (this prevents burning in the air fryer). Brush each wrapped scallop generously with the maple glaze on all sides. Work in batches if needed — don’t crowd them in the basket.

💡 mia’s Pro Tip: Soak your toothpicks in water for 10–15 minutes before using. In the air fryer’s intense heat, dry wood can scorch or even ignite. A quick soak prevents this and keeps your scallops looking gorgeous.

Step 4: Preheat and Arrange

Preheat your air fryer to 400°F (200°C) for 3–5 minutes. Place the bacon-wrapped scallops in a single layer in the basket, seam-side down if possible. Leave at least 1/2 inch between each scallop so the air can circulate. If your air fryer is small, cook in batches — overcrowding leads to steaming, not crisping.

⚠️ Common Mistake to Avoid: Don’t skip the preheat! A cold air fryer will gradually come up to temperature, but by then the bacon will have rendered slowly and the scallops will be overdone. Preheating ensures the bacon sears immediately, locking in juiciness.

Step 5: Air Fry

Air fry at 400°F for 8–10 minutes, flipping the scallops carefully with tongs halfway through (at about the 4-minute mark). The bacon should be deep golden and crisp, and the scallops should be opaque and firm to the touch. For food safety, the internal temperature should reach 130°F for scallops. If you like a more well-done approach, go to 8 minutes total — but no more than 10, or the scallops will turn rubbery.

💡 mia’s Pro Tip: Every air fryer runs a bit different. At 8 minutes, my Cosori produces perfectly crispy bacon and tender scallops. If your bacon isn’t as crisp as you’d like, give it 1–2 more minutes, but watch the scallops carefully. When the bacon is sizzling and the glaze is bubbling, you’re golden.

Step 6: Rest and Serve

Remove the toothpicks (they’ve done their job). Let the scallops rest for 2 minutes — this allows the juices to redistribute. Drizzle with any remaining glaze if you want an extra burst of flavor. Serve immediately while they’re hot and crispy. A squeeze of lemon over the top brightens everything beautifully.

⚠️ Common Mistake to Avoid: Don’t skip the rest! I know you’re hungry, but those 2 minutes let the bacon set and the scallop finish cooking gently. If you cut into them right away, the juices will run out onto the plate instead of staying in the scallop.

StepActionDurationKey Visual Cue
1Pat scallops dry2 minutesPaper towels come away nearly dry
2Make glaze1 minuteSmooth, dark amber mixture
3Wrap & glaze5 minutesBacon snug around scallop; toothpick secure
4Preheat & arrange3–5 minutesSingle layer with space between each
5Air fry8–10 minutesBacon deep golden; scallops opaque
6Rest & serve2 minutesBacon stays crisp; scallops rest

Serving & Presentation

I love serving these air fryer bacon wrapped scallops on a bed of microgreens or arugula with lemon wedges scattered around the platter. The peppery greens contrast beautifully with the sweet glaze, and a squeeze of fresh lemon cuts through the richness. For holiday parties, I arrange them on a wooden board with toothpicks removed and a small bowl of extra glaze for dipping. In the summer, I line them up on a platter with grilled lemon halves — it reminds me of the seaside dinners I shared with friends in Essaouira, Morocco.

For a main course, serve 4–6 scallops per person over a simple salad of shaved fennel, orange segments, and a light vinaigrette. The fennel’s anise note echoes the sweetness of the glaze, and the orange adds a bright pop that feels very NYC — fresh, seasonal, and sophisticated. I also love pairing them with roasted asparagus or a crisp white wine like Sauvignon Blanc. The goal is to let the scallops shine while surrounding them with flavors that complement rather than compete.

When I’m channeling my Parisian bistro days, I sprinkle a tiny pinch of flaky sea salt (like fleur de sel) over the scallops just before serving. The salt crystals add a delicate crunch and a burst of briny flavor that makes the sweet glaze sing. A dollop of crème fraîche on the side is a nod to my French training — it’s cool, tangy, and balances the smoky bacon beautifully.

Pairing TypeSuggestionsWhy It Works
Side DishArugula salad, roasted asparagus, grilled lemon halvesPeppery greens and bright citrus cut the richness; asparagus adds earthy crunch
Sauce / DipExtra maple glaze, crème fraîche, sriracha aioliGlaze reinforces the sweet-savory theme; crème fraîche cools; aioli adds heat
BeverageSauvignon Blanc, dry rosé, sparkling water with lemonCrisp white wines cut through fat; sparkling water cleanses the palate
GarnishFlaky sea salt, chopped chives, lemon zest, red pepper flakesSalt enhances sweetness; chives add color; zest brightens; flakes add heat

Make-Ahead, Storage & Reheating

Between my busy NYC schedule and catering pop-up dinners, I’m a big fan of recipes that work ahead. These air fryer bacon wrapped scallops can be prepped in advance and stored for later. Here’s how I handle it for my meal prep or party planning:

MethodContainerDurationReheating Tip
RefrigeratorAirtight container lined with paper towelsUp to 2 daysReheat in air fryer at 375°F for 3–4 minutes until hot and crisp
FreezerSingle layer in freezer bag, parchment between layersUp to 1 monthReheat from frozen at 400°F for 6–8 minutes (no thawing needed)
Make-AheadCovered baking dish with damp paper towelUp to 6 hours in fridge (un-cooked)Wrap & glaze up to 6 hours ahead; keep chilled; air fry just before serving

To reheat, I never use the microwave — it turns the scallops rubbery and the bacon soft. Instead, pop them back in the air fryer at 375°F for 3–4 minutes (or 6–8 minutes from frozen). They come out almost as good as fresh, with the bacon crisping up again beautifully. If you’re reheating a large batch, spread them in a single layer and work in batches. I’ve done this for cocktail parties where I cook the first batch, then reheat quickly before the second round arrives.

Variations & Easy Swaps

VariationKey ChangeBest ForDifficulty Impact
Moroccan Ras el HanoutAdd 1 tsp ras el hanout to the glazeWarm, aromatic twist on the originalEasy (same effort)
Gluten-FreeUse tamari instead of soy sauceGluten-sensitive guestsEasy (no change in prep)
Spicy SrirachaAdd 1 tsp sriracha to the glazeHeat lovers and game-day appetizersEasy (same effort)

Moroccan Ras el Hanout Variation

This is my personal favorite — a nod to my Moroccan heritage. Add 1 teaspoon of ras el hanout (a complex North African spice blend with cinnamon, cumin, coriander, and ginger) to the maple-soy glaze. The warm, fragrant spices elevate the scallops into something truly exotic. I sometimes serve these with a dollop of harissa-spiked yogurt for dipping. The combo is pure magic: sweet, savory, spicy, and cooling all at once. It’s the version I make when I’m feeling nostalgic for my mother’s kitchen.

Gluten-Free Variation

This recipe is naturally easy to make gluten-free. Simply swap the soy sauce for tamari (which is gluten-free) or coconut aminos. The flavor profile shifts slightly — tamari is a bit richer and less salty, while coconut aminos are sweeter and milder — but both work beautifully. The rest of the ingredients are naturally gluten-free. This is my go-to when I’m cooking for friends with celiac disease, and no one ever notices the swap.

Spicy Sriracha Variation

For those who love heat, stir 1 teaspoon of sriracha into the glaze. The spicy kick cuts through the bacon fat and pairs brilliantly with the sweet maple. I discovered this version during a Super Bowl party where my NYC friends wanted something with a punch. It was gone in minutes. You can also sprinkle red pepper flakes over the finished scallops for extra color and heat. Serve with a cooling dip like ranch or blue cheese to balance the fire.

How long do you cook bacon wrapped scallops in an air fryer to get them crispy?

Cook air fryer bacon wrapped scallops at 400°F (200°C) for 8–10 minutes, flipping halfway through at the 4-minute mark. At 8 minutes, the bacon should be deep golden and crispy while the scallops remain tender and juicy inside. If you prefer extra-crispy bacon, add 1–2 minutes but watch carefully — the scallops can overcook quickly beyond 10 minutes. The key is thin-cut bacon and a single layer in the basket. Every air fryer runs slightly different, so check at 8 minutes and adjust from there. For food safety, the internal temperature of the scallops should reach 130°F.

What is the best type of bacon to use for air fryer bacon wrapped scallops?

Thin-cut bacon is the absolute best choice for air fryer bacon wrapped scallops. It crisps up quickly at 400°F, matching the short cook time needed for tender scallops. Thick-cut bacon takes longer to render and crisp, which often leads to overcooked, rubbery scallops. I recommend standard thin-cut bacon from a good butcher — avoid “thick-cut” or “artisan” slices. If you prefer turkey bacon or prosciutto, keep in mind they’ll be less crispy but still delicious. Prosciutto adds a delicate, salty crunch that’s lovely for a lighter version.

Should you soak wooden toothpicks before securing bacon wrapped scallops in an air fryer?

Yes, you should always soak wooden toothpicks in water for at least 10–15 minutes before using them in an air fryer. Dry wood can scorch or even ignite in the intense circulating heat of the air fryer, especially at 400°F. Soaking the toothpicks prevents this by keeping them moist during cooking. I usually soak mine while I’m prepping the scallops and glaze — that way they’re ready to go when I start wrapping. After cooking, remove the toothpicks before serving. It’s a small step that makes a big difference in safety and presentation.

What dipping sauces go well with air fryer bacon wrapped scallops?

Several dipping sauces complement air fryer bacon wrapped scallops beautifully. The maple glaze itself makes a fantastic dip — just reserve some before brushing it on the scallops. A cool, tangy crème fraîche or Greek yogurt with a squeeze of lemon balances the smoky richness. For heat lovers, sriracha aioli or a spicy harissa yogurt adds a fiery kick. I also love a simple rémoulade or a garlic-butter sauce inspired by French bistros. If you’re serving them as an appetizer, consider a sweet chili sauce or a honey-mustard dip for a crowd-pleasing option.

Can I use frozen scallops for air fryer bacon wrapped scallops?

Yes, you can use frozen scallops, but you need to thaw them completely first. Place them in the refrigerator overnight or in a bowl of cold water for 20–30 minutes. Once thawed, pat them extremely dry with paper towels — frozen scallops release more water, so extra drying is crucial for crispy bacon. I recommend using dry-packed, fresh scallops for best results, but frozen works in a pinch. Just be thorough with the drying step and consider adding 1–2 minutes to the cook time if the scallops are still slightly moist.

How do I keep scallops from getting rubbery in the air fryer?

To keep scallops tender in the air fryer, follow three key rules: First, don’t overcook — 8–10 minutes at 400°F is the sweet spot, and check at 8 minutes. Second, use thin-cut bacon that crisps quickly so the scallop doesn’t sit in the heat too long. Third, pat the scallops completely dry before wrapping; excess moisture creates steam that toughens the meat. Finally, let the scallops rest for 2 minutes after cooking — they continue to gently cook from residual heat, so pulling them at 130°F internal temp ensures they stay tender and juicy.

Can I make these air fryer bacon wrapped scallops ahead of time?

Absolutely, and I do this often for parties. You can wrap the scallops with bacon, secure them with soaked toothpicks, and brush with the maple glaze up to 6 hours ahead. Keep them covered in the refrigerator on a baking sheet lined with parchment. When you’re ready to serve, simply air fry them straight from the fridge — no need to bring to room temperature. Cooked scallops can be stored in the fridge for up to 2 days and reheated in the air fryer at 375°F for 3–4 minutes. They also freeze beautifully for up to 1 month.

What’s the best way to arrange scallops in the air fryer basket?

Arrange the bacon wrapped scallops in a single layer with at least 1/2 inch of space between each one. This allows the hot air to circulate evenly, crisping the bacon on all sides. Place them seam-side down if possible — this helps the bacon stay wrapped and cook evenly. If your air fryer basket is small, cook in batches rather than overcrowding. Overcrowding traps steam, which makes the bacon soggy and the scallops tough. I usually cook 6 scallops at a time in a standard 6-quart air fryer, which gives perfect results every time.

Can I use a different sweetener instead of maple syrup?

Yes, you can substitute honey, agave nectar, or even brown sugar dissolved in a little warm water. Honey adds floral notes that pair nicely with scallops, while agave is milder and less complex. Brown sugar creates a deeper, molasses-like flavor that’s delicious but slightly heavier. Keep the ratio the same — 2 tablespoons of sweetener to 1 tablespoon of soy sauce. Note that honey and agave may caramelize faster than maple syrup, so check your scallops at 7–8 minutes instead of 8–10 to prevent burning.

What should I serve with bacon wrapped scallops for a complete meal?

For a complete meal, I love serving these scallops with a light arugula salad dressed with lemon vinaigrette and shaved Parmesan. The peppery greens and tangy cheese balance the sweet-savory glaze. Roasted asparagus or green beans add a fresh, crunchy side. For a starch option, try garlic mashed potatoes or a simple orzo pasta with herbs. If you’re keeping things low-carb, cauliflower rice or zucchini noodles work beautifully. As a beverage, a crisp Sauvignon Blanc or dry rosé elevates the whole meal. For a non-alcoholic option, sparkling water with lemon and fresh mint is refreshing and palate-cleansing.

Share Your Version!

I hope you fall in love with these air fryer bacon wrapped scallops the way I did in my tiny Paris kitchen, and the way I still do every time I make them in my New York City home. The combination of crispy bacon, tender scallops, and that sweet-savory maple glaze is truly special — and now it’s your turn to give it a try. I’d love to hear how they turn out for you! Did you try the Moroccan ras el hanout version? Did you add a spicy kick with sriracha? Or did you keep it classic?

Leave a star rating and a comment below — your feedback helps me create more recipes you’ll love. Share a photo of your beautiful scallops on Instagram or Pinterest and tag @exorecipes — I personally love seeing your creations and often feature them in my stories. And if there’s one question I want you to answer: What’s your favorite dipping sauce with these scallops? I’m always looking for new ideas to test in my kitchen!

From my NYC kitchen to yours — I hope this recipe brings as much warmth to your table as it does to mine. — mia 🧡

📌

Love This Recipe? Save It to Pinterest!

If you enjoyed this Air Fryer Bacon Wrapped Scallops recipe, don’t let it get lost in your browser tabs! 😄 Pin it now so you can find it again anytime — and explore hundreds more tried-and-tested recipes waiting for you on my Pinterest boards.

👉 Follow mia on Pinterest @exorecipe

📌 Pin this recipe · 🔁 Re-pin your favorites · 💬 Tag me when you make it — I love seeing your creations!

“`

Print

clock clock iconcutlery cutlery iconflag flag iconfolder folder iconinstagram instagram iconpinterest pinterest iconfacebook facebook iconprint print iconsquares squares iconheart heart iconheart solid heart solid icon

Air Fryer Bacon Wrapped Scallops: A Perfectly Crispy, Sweet and Savory Delight

  • Author: Chef Mia
  • Prep Time: 10 minutes
  • Cook Time: 10 minutes
  • Total Time: 20 minutes
  • Yield: 4 1x
  • Method: Appetizer
  • Cuisine: American

Description

These air fryer bacon wrapped scallops are perfectly crispy on the outside and tender on the inside, with a sweet and savory flavor from the maple glaze.


Ingredients

Scale
  • 1 lb large sea scallops (about 12 scallops)
  • 6 slices thin-cut bacon, cut in half crosswise
  • 2 tablespoons maple syrup
  • 1 tablespoon soy sauce
  • 1/2 teaspoon garlic powder
  • 1/4 teaspoon black pepper
  • Toothpicks (for securing)

Instructions

  1. Pat scallops dry with paper towels. Season lightly with salt and pepper (optional).
  2. In a small bowl, whisk maple syrup, soy sauce, garlic powder, and pepper.
  3. Wrap each scallop with a half slice of bacon and secure with a toothpick. Brush each wrapped scallop with the maple glaze.
  4. Preheat air fryer to 400°F (200°C). Arrange scallops in a single layer in the air fryer basket (work in batches if needed).
  5. Air fry for 8-10 minutes, flipping halfway through, until bacon is crisp and scallops are cooked through (internal temp 130°F).
  6. Remove toothpicks and serve immediately. Optionally drizzle with any remaining glaze.

Notes

For extra crispiness, use thin-cut bacon. Do not overcook scallops or they will become tough. Serve with lemon wedges if desired.


Nutrition

  • Calories: 248
  • Sugar: 7g
  • Fat: 12g
  • Carbohydrates: 9g
  • Protein: 24g


Air Fryer Bacon Wrapped Scallops: A Perfectly Crispy, Sweet and Savory Delight

k">

Tried This Recipe? Leave a Comment!

Did you make this recipe? I’d love to hear how it turned out! Please leave a comment and a rating below. Your feedback helps other home cooks and supports cheerychop.com!
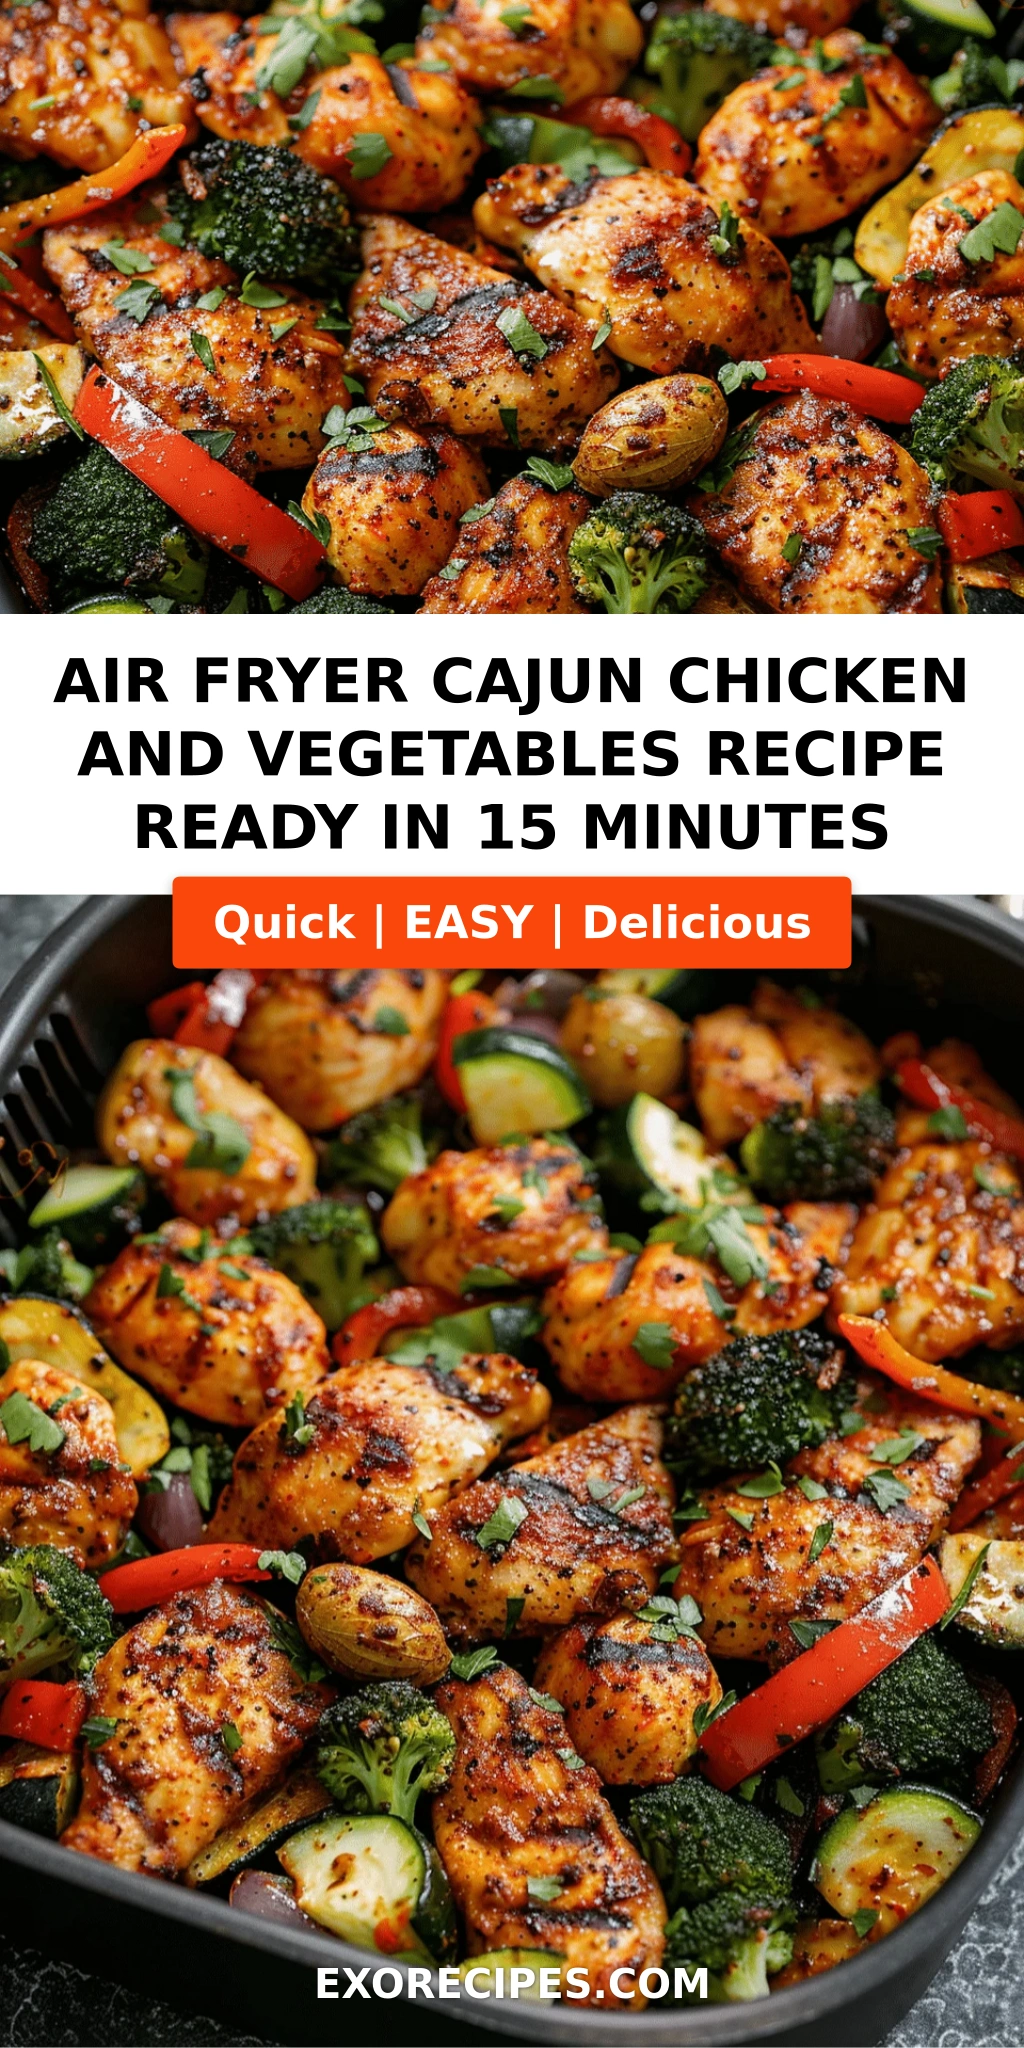
For more delicious inspiration, follow me on Pinterest!