Table of Contents
Air Fryer Garlic Parmesan Chicken Skewers: A Crispy, Flavor-Packed Favorite – Quick Weeknight Dinner Perfected
When I first moved to New York City from Paris, I missed the ease of Moroccan street food – skewers sizzling over charcoal, fragrant with garlic and spices. But my tiny Manhattan kitchen didn’t come with a grill. Enter the air fryer. These air fryer garlic parmesan chicken skewers are my love letter to those smoky, crispy memories, reinvented for a busy weeknight. The first time I made them, the whole building smelled like a trattoria – and my husband devoured four skewers before I could snap a picture.
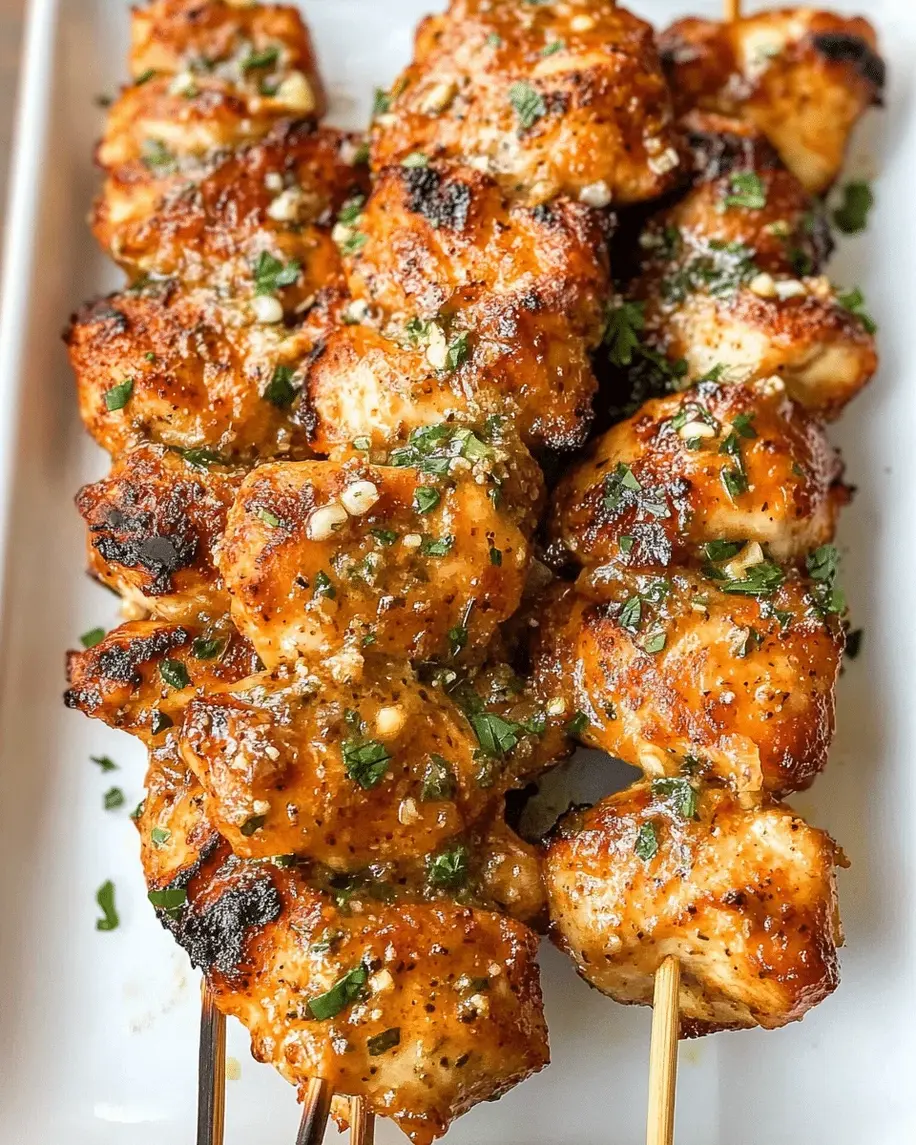
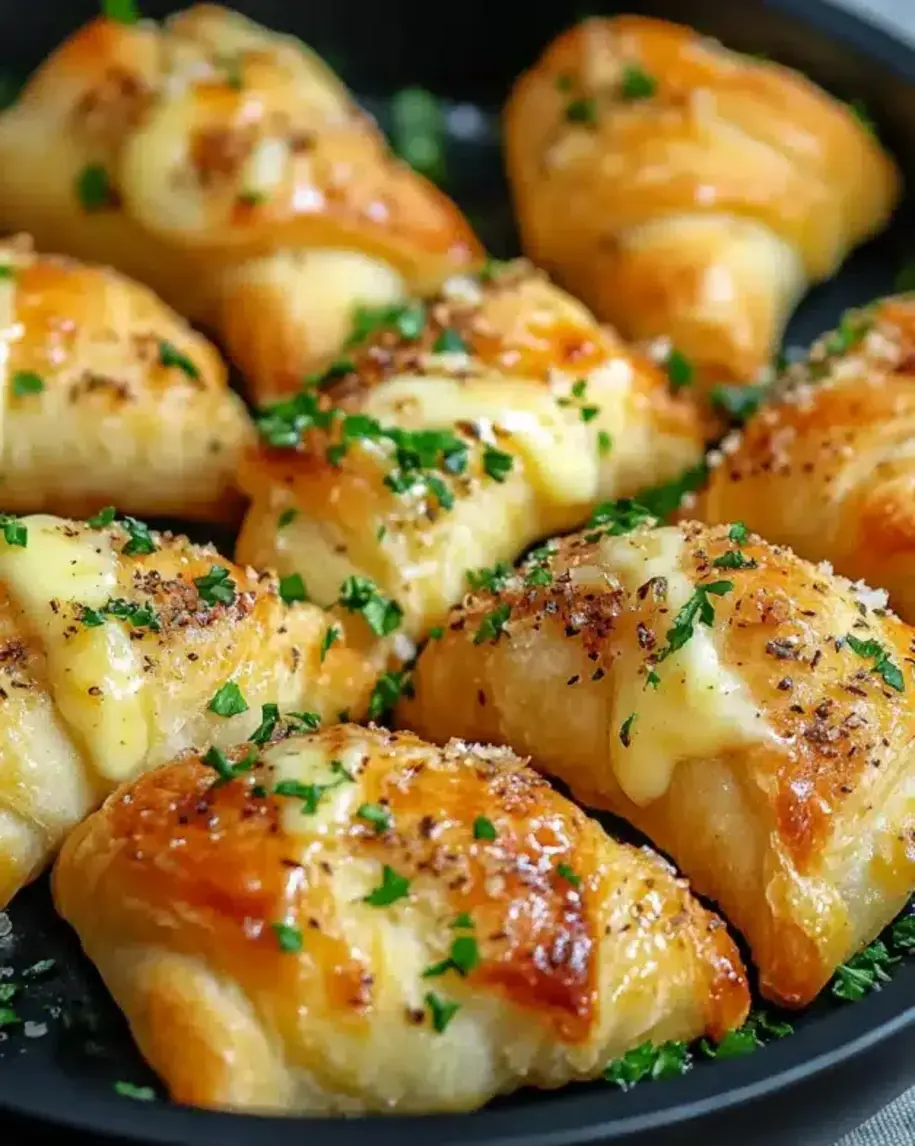
Picture this: golden-brown, crunchy edges giving way to juicy, tender chicken inside. The garlic and Parmesan create a savory crust that stays put, while the air fryer’s circulating heat ensures every bite is perfectly cooked. I add a whisper of smoked paprika and a squeeze of lemon – a trick I learned from a Parisian rotisserie chef – to brighten the richness. It’s the kind of dinner that feels indulgent but comes together in under 30 minutes.
What makes these crispy chicken skewers air fryer truly special is my three-step coating method: a light buttermilk soak, a seasoned breadcrumb and Parmesan mix, and a quick rest on a wire rack before frying. This locks in moisture and guarantees that breading stays put, not scattered in the bottom of the basket. I’ll also share a common mistake that ruins the crust – and how to avoid it. Trust me, once you try these garlic parmesan chicken recipe skewers, you’ll never oven-bake them again.
Why This Air Fryer Garlic Parmesan Chicken Skewers Recipe Is the Best
The Flavor Secret: My Moroccan roots taught me to layer flavors. I marinate the chicken in a garlic-heavy buttermilk and lemon mixture, then double-dip in a blend of panko, freshly grated Parmesan, and a pinch of Aleppo pepper (a nod to my spice cabinet from Paris). The result is a crust that’s deeply savory, with a subtle heat that builds without overpowering.
Perfected Texture: The air fryer mimics the dry heat of a wood-fired oven, creating an ultra-crisp exterior while the inside stays juicy. My Paris training taught me to pat the chicken dry after marinating – this step eliminates steam and ensures that satisfying crunch. Plus, preheating the air fryer is non-negotiable; it makes the difference between soggy and spectacular.
Foolproof & Fast: From prep to plate in about 30 minutes, these easy parmesan chicken skewers are perfect for a quick dinner or game-day appetizer. The recipe works with chicken breasts or thighs, and the skewers cook evenly in a single layer. No flipping required – just set the timer and let the air fryer work its magic.
Air Fryer Garlic Parmesan Chicken Skewers Ingredients
Every Saturday, I walk to the Union Square Greenmarket to pick up fresh chicken from a local farm. The smell of garlic and Parmesan from my bag always draws smiles from the vendors. Here’s what you’ll need to bring that market-fresh feeling home.
Ingredients List
- 1.5 lbs boneless skinless chicken breasts (about 3 medium), cut into 1½-inch cubes
- ½ cup buttermilk (or whole milk + 1 tsp lemon juice)
- 4 cloves garlic, minced
- 1 cup panko breadcrumbs
- ½ cup freshly grated Parmesan cheese (not the powdery kind)
- 2 tbsp olive oil
- 1 tsp smoked paprika
- ½ tsp salt
- ¼ tsp black pepper
- Optional: ¼ tsp cayenne or Aleppo pepper
- Wooden or metal skewers (if wooden, soak in water for 20 minutes)
- Fresh parsley and lemon wedges for garnish
Ingredient Spotlight
Chicken Breasts: They’re lean and cook quickly, but they can dry out if overcooked. Look for uniform-size cubes (about 1½ inches) to ensure even cooking. Substitution: boneless thighs add more moisture and forgiveness – just increase cook time by 2 minutes.
Buttermilk: The acid tenderizes the chicken and helps the breading cling. I always use real buttermilk (it’s thicker). In a pinch, mix ½ cup milk with 1 tablespoon lemon juice and let sit 5 minutes.
Panko & Parmesan: This duo is the key to crispy chicken skewers air fryer success. Panko gives crunch; Parmesan adds umami and helps browning. Grate your own Parmesan – pre-grated won’t melt as well.
| Original Ingredient | Best Substitution | Flavor / Texture Impact |
|---|---|---|
| Buttermilk | Milk + lemon juice | Slightly less tangy; still tenderizes |
| Panko breadcrumbs | Regular breadcrumbs or crushed cornflakes | Cornflakes give extra crunch; regular crumbs absorb more oil |
| Parmesan cheese | Asiago or Pecorino Romano | Asiago is milder; Pecorino is saltier – adjust salt accordingly |
| Smoked paprika | Regular paprika + ¼ tsp liquid smoke | Less smoky but still warm |
How to Make Air Fryer Garlic Parmesan Chicken Skewers — Step-by-Step
Making these air fryer chicken skewers is as satisfying as eating them. Follow these steps, and you’ll have a platter of golden, garlicky goodness in no time.
Step 1: Marinate the Chicken
In a bowl, whisk together buttermilk, minced garlic, and a pinch of salt. Add the chicken cubes, toss to coat, and refrigerate for at least 15 minutes (or up to 2 hours for deeper flavor). Don’t skip this – the acid tenderizes and helps the breading stick.
💡 mia’s Pro Tip: Use a glass or stainless steel bowl – plastic can hold onto garlic odors. And set a timer; over-marinating can make chicken mealy.
Step 2: Prepare the Breading
In a shallow dish, combine panko, grated Parmesan, smoked paprika, remaining salt, pepper, and cayenne if using. Drizzle in the olive oil and mix with your fingers until the crumbs are evenly moistened. This oil helps the crust brown beautifully.
⚠️ Common Mistake to Avoid: Don’t skip the oil! Dry breadcrumbs will not brown properly in the air fryer – you’ll end up with pale, dusty crust.
Step 3: Skewer and Bread
Thread 4-5 chicken cubes onto each skewer, leaving a little space between pieces so hot air can circulate. Pat the marinated chicken lightly dry with paper towels (this removes excess liquid that makes breading fall off). Then roll each skewer in the breadcrumb mixture, pressing gently to adhere. Place on a wire rack set over a baking sheet.
💡 mia’s Pro Tip: For extra-crispy skewers, let the breaded skewers rest on the rack for 5 minutes before cooking. This sets the coating.
Step 4: Air Fry
Preheat your air fryer to 375°F. Working in batches as needed (don’t overcrowd), place the skewers in the basket in a single layer. Cook for 10-12 minutes, flipping halfway through, until the internal temperature reaches 165°F and the coating is golden and crispy. For extra crunch, spray the skewers lightly with cooking spray before flipping.
⚠️ Common Mistake to Avoid: Overcrowding the basket causes steaming. If your air fryer is small, cook in two batches – it’s worth the extra 10 minutes.
Step 5: Rest and Serve
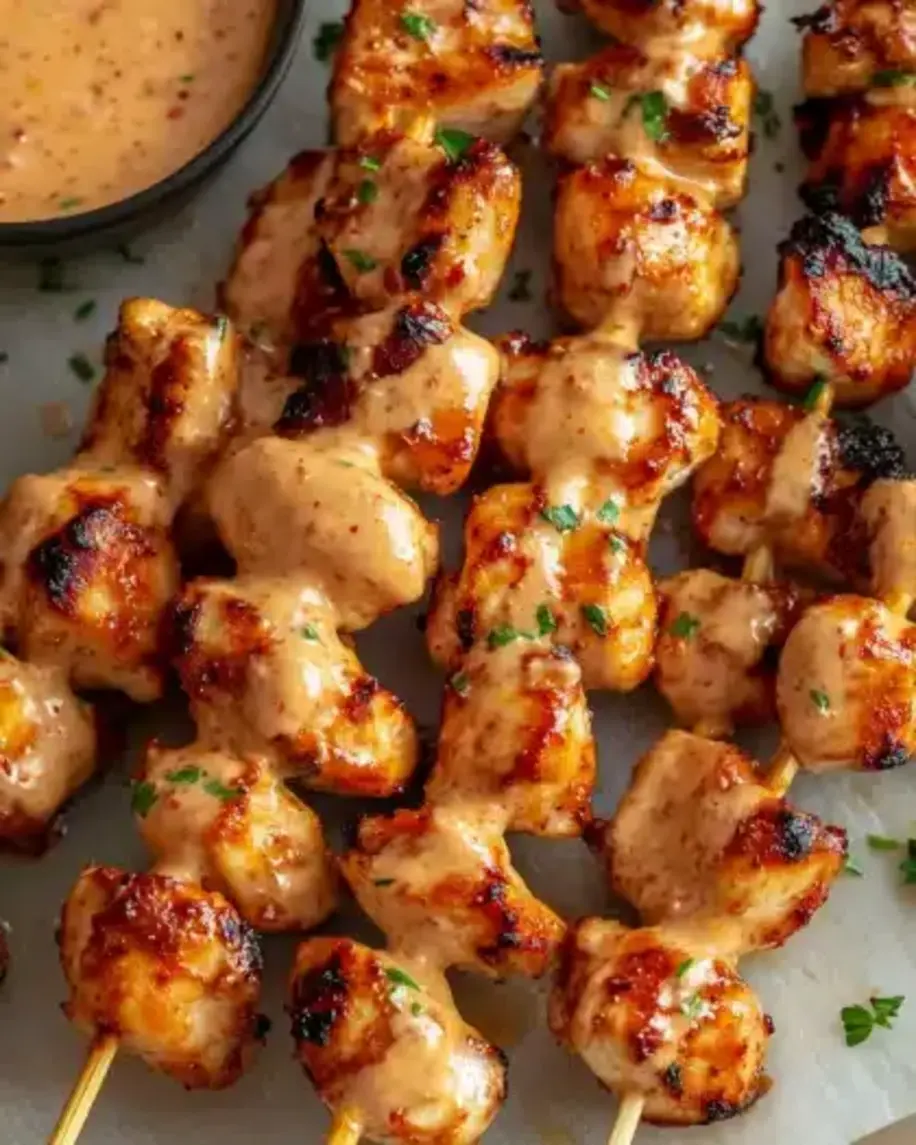
Let the skewers rest for 3 minutes on a clean rack (not on paper towels – it traps steam). Garnish with fresh parsley and a squeeze of lemon. Serve alongside a dipping sauce like garlic aioli, marinara, or herby yogurt.
💡 mia’s Pro Tip: If you don’t have fresh parsley, fresh basil or cilantro also work – each gives a different aromatic lift.
| Step | Action | Duration | Key Visual Cue |
|---|---|---|---|
| 1 | Marinate chicken | 15 min – 2 hrs | Chicken looks glossy, garlic specks visible |
| 2 | Mix breading | 5 min | Crumbs are uniformly coated with oil |
| 3 | Skewer & bread | 10 min | Even coating, no bare spots |
| 4 | Air fry | 10-12 min | Deep golden brown, internal temp 165°F |
| 5 | Rest & serve | 3 min | Crust stays crisp, juices settle |
Serving & Presentation
I love serving these skewers on a large wooden platter – it reminds me of the djemaa el-Fna food stalls in Marrakech. A sprinkle of fresh parsley and a dusting of extra Parmesan right at the end adds a restaurant-quality touch. For a main meal, pair with a crisp green salad tossed in lemon vinaigrette or roasted broccoli with a pinch of harissa (a nod to my North African pantry).
In my NYC apartment, I often serve these with a side of garlic-herb rice or warm pita and tzatziki sauce. The garlic-Parmesan flavor pairs beautifully with a chilled Sauvignon Blanc or a sparkling lemonade for a non-alcoholic option. For a fun appetizer, cut the skewers into single-bite pieces and serve with dipping cups of marinara and ranch.
The best part? The skewers stay crispy even after a few minutes off the heat – perfect for entertaining. Just arrange them on a platter and let guests grab and dip. I always set out extra lemon wedges because that brightness cuts through the richness beautifully.
| Pairing Type | Suggestions | Why It Works |
|---|---|---|
| Side Dish | Arugula salad, roasted potatoes, couscous | Light greens balance richness; potatoes soak up juices; couscous adds texture |
| Sauce / Dip | Garlic aioli, tzatziki, marinara sauce | Aioli doubles down on garlic; tzatziki adds coolness; marinara brings acidity |
| Beverage | Sauvignon Blanc, pale ale, lemon-mint iced tea | White wine cuts fat; beer refreshes; tea echoes the lemon |
| Garnish | Fresh parsley, lemon zest, extra Parmesan | Adds brightness, aroma, and a salty finish |
Make-Ahead, Storage & Reheating
As a busy NYC food blogger, meal prep is my survival trick. These air fryer chicken skewers are perfect for prepping ahead. I often make a double batch on Sunday and enjoy them throughout the week. Here’s how to store and reheat them without losing that coveted crispiness.
| Method | Container | Duration | Reheating Tip |
|---|---|---|---|
| Refrigerator | Airtight container with paper towel | Up to 4 days | Reheat in air fryer at 350°F for 4-5 min |
| Freezer | Freezer bag, remove excess air | Up to 3 months | Thaw overnight in fridge then air fry 5-6 min at 350°F |
| Make-Ahead | Skewer and bread, then refrigerate uncooked | Up to 24 hours in advance | Add 1-2 min to cook time if starting cold |
The key to reheating is to avoid the microwave at all costs – it turns the crust to mush. I pop leftover skewers back into the air fryer and spray them lightly with olive oil before restarting. They come out almost as good as fresh. For frozen skewers, I thaw them in the fridge overnight and follow the same reheat method. If you’re in a rush, you can air fry from frozen, but add 3-4 extra minutes and check the internal temperature.
Variations & Easy Swaps
One of the joys of being a chef is playing with flavors. Here are some of my favorite ways to change up these air fryer garlic parmesan chicken skewers based on the season, diet, or mood.
| Variation | Key Change | Best For | Difficulty Impact |
|---|---|---|---|
| Spicy Harissa Twist | Add 1 tbsp harissa paste to marinade | Those who love heat; North African flavor | Easy – no extra time |
| Gluten-Free Version | Use almond flour + crushed pork rinds | Gluten-free diets; keto-friendly | Easy – different texture but still crispy |
| Lemon-Herb Summer Skewers | Add zest of 1 lemon and 2 tbsp chopped fresh herbs (basil, oregano, thyme) to breading | Summer barbecues; lighter flavor profile | Easy – just mix into coating |
Spicy Harissa Twist
This is my Moroccan heart speaking. Stir a tablespoon of harissa paste into the buttermilk marinade – the smoky, spicy heat pairs beautifully with the garlic and Parmesan. I serve these with a cooling cucumber-mint yogurt dip. The harissa also adds a beautiful reddish hue to the crust. Start with less if you’re heat-sensitive; you can always add more next time.
Gluten-Free Version
For a gluten-free easy parmesan chicken skewers recipe, swap panko with a mix of almond flour and crushed pork rinds. The almond flour gives nuttiness, pork rinds add crunch – I tested this while cooking for a gluten-intolerant friend and she said it was even better than the original. Keep the Parmesan, but check that it’s labeled gluten-free.
Lemon-Herb Summer Skewers
When I stroll through the Chelsea Market and see fresh basil and oregano, I know it’s time for this variation. Add the zest of a lemon and two tablespoons of finely chopped fresh herbs to the breadcrumb mixture. The lemon brightens the dish, and the herbs make it feel garden-fresh. Reduce the Parmesan slightly to let the herbs shine. Perfect with a side of grilled vegetables.
How do you get the breading to stay on chicken skewers in an air fryer?
The secret to breading that stays put is threefold: First, pat the marinated chicken dry before coating – excess moisture creates steam that pushes breading off. Second, press the breading on gently and let the skewers rest for 5 minutes on a wire rack before cooking – this sets the crust. Finally, spray the skewers lightly with oil before air frying; the oil helps the breading adhere and brown without falling off. Avoid overcrowding the basket, and flip halfway through.
Can I use chicken thighs instead of breasts for air fryer garlic parmesan skewers?
Absolutely! Boneless skinless chicken thighs are more forgiving and juicy – they’re a great choice if you’re worried about dryness. Cut them into similar 1½-inch cubes, and follow the same recipe. Because thighs have a higher fat content, they may need 1-2 extra minutes of cook time. Check for an internal temperature of 175°F for thighs (they’re safe at 165°F, but the texture is better at 175°F). The garlic-Parmesan crust will still be perfectly crispy.
What temperature should I cook chicken skewers in an air fryer to keep them juicy?
I recommend 375°F for the perfect balance of crispiness and juiciness. At this temperature, the chicken cooks through in about 10-12 minutes without drying out. Higher temperatures (400°F+) can brown the breading too quickly while the inside remains undercooked. Lower temperatures (350°F) take longer and may produce a soggy crust. Always preheat your air fryer (3-5 minutes) for even cooking, and use an instant-read thermometer to verify the internal temp hits 165°F for breasts.
How do you reheat leftover air fryer chicken skewers without drying them out?
The air fryer itself is the best tool for reheating. Place leftover skewers in a 350°F air fryer for 4-5 minutes – no need to thaw if refrigerated. Spray them lightly with olive oil or cooking spray before reheating to restore moisture and crispiness. Avoid the microwave, which turns the crust chewy and the chicken rubbery. If the skewers seem dry, wrap them in a damp paper towel for 20 seconds before air frying – the steam will add a little moisture without ruining the crunch.
Can I make these air fryer garlic parmesan chicken skewers dairy-free?
Yes, with a few simple swaps. Replace buttermilk with unsweetened almond milk mixed with 1 tablespoon lemon juice. For the Parmesan, use a plant-based Parmesan alternative (look for one with a strong umami flavor) or nutritional yeast – nutritional yeast gives a cheesy, nutty taste without dairy. The texture will be slightly less brown but still crisp. I recommend adding an extra pinch of salt to compensate for the missing saltiness from Parmesan.
Why are my air fryer chicken skewers not crispy?
The most common reason is excess moisture. Did you pat the chicken dry after marinating? That step is crucial. Also, make sure your breading contains oil – mixing a tablespoon of olive oil into the panko-Parmesan mixture helps it crisp. Overcrowding the air fryer basket leads to steaming, not crisping, so cook in batches. Finally, don’t skip preheating. A hot air fryer instantly starts browning the coating. If all else fails, give the skewers a final spray of oil halfway through cooking.
Can I freeze the skewers before cooking?
Yes, and it’s a great meal-prep hack. Assemble the skewers completely – marinate, skewer, bread – and arrange them in a single layer on a parchment-lined baking sheet. Freeze until solid (about 2 hours), then transfer to a freezer-safe bag. When ready to cook, do not thaw. Air fry from frozen at 375°F for 14-16 minutes, flipping halfway, until golden and cooked through. The internal temperature should reach 165°F. You may need to add 3-4 minutes to the cook time.
What can I use instead of skewers?
No skewers? No problem. You can simply place the breaded chicken cubes directly into the air fryer basket in a single layer. They’ll cook in the same time (about 10-12 minutes at 375°F) and still get beautifully crispy. The only difference is the presentation – skewers make them easy to pick up and dip, and they cook a bit faster because the air circulates between pieces. If using loose cubes, give the basket a shake halfway through for even browning.
How do I know when the chicken skewers are done?
The most reliable method is using an instant-read thermometer. Insert it into the thickest piece of chicken on a skewer; it should read 165°F for breasts. Visually, the coating should be deep golden brown and the chicken will feel firm but slightly springy. If you don’t have a thermometer, cut into one piece – the juices should run clear, and there should be no pink in the center. Always let the skewers rest for 3 minutes before testing; the carryover heat can add 5°F.
Can I double this recipe for a party?
Absolutely! This recipe scales up beautifully. For a party, I recommend marinating and breading all the skewers in advance, then storing them in the fridge on the wire rack. Cook in batches – air fryers vary in size, but most can fit 6-8 skewers at a time. If you’re serving a crowd, keep cooked skewers warm in a 200°F oven on a baking sheet while you finish the remaining batches. Arrange on a large platter with dipping sauces and watch them disappear.
Share Your Version!
I absolutely love seeing how these skewers turn out in your kitchen! Did you try the harissa twist? Go gluten-free? Or maybe you discovered a genius dipping sauce? Drop a star rating – 5 stars if you loved it – and leave a comment below telling me about your experience. Your feedback helps other cooks and inspires me to create more recipes.
Snap a photo of your air fryer garlic parmesan chicken skewers and tag @exorecipes on Instagram or Pinterest. I personally read every comment and share my favorites in my stories. And if you’re wondering how to get the breading even crispier next time – just ask! From my NYC kitchen to yours — I hope this recipe brings as much warmth to your table as it does to mine. — mia 🧡
Love This Recipe? Save It to Pinterest!
If you enjoyed this Air Fryer Garlic Parmesan Chicken Skewers recipe, don’t let it get lost in your browser tabs! 😄 Pin it now so you can find it again anytime — and explore hundreds more tried-and-tested recipes waiting for you on my Pinterest boards.
👉 Follow mia on Pinterest @exorecipes
📌 Pin this recipe · 🔁 Re-pin your favorites · 💬 Tag me when you make it — I love seeing your creations!
Air Fryer Garlic Parmesan Chicken Skewers: A Crispy, Flavor-Packed Favorite
Instructions

Tried This Recipe? Leave a Comment!
Did you make this recipe? I’d love to hear how it turned out! Please leave a comment and a rating below. Your feedback helps other home cooks and supports cheerychop.com!
For more delicious inspiration, follow me on Pinterest!