Table of Contents
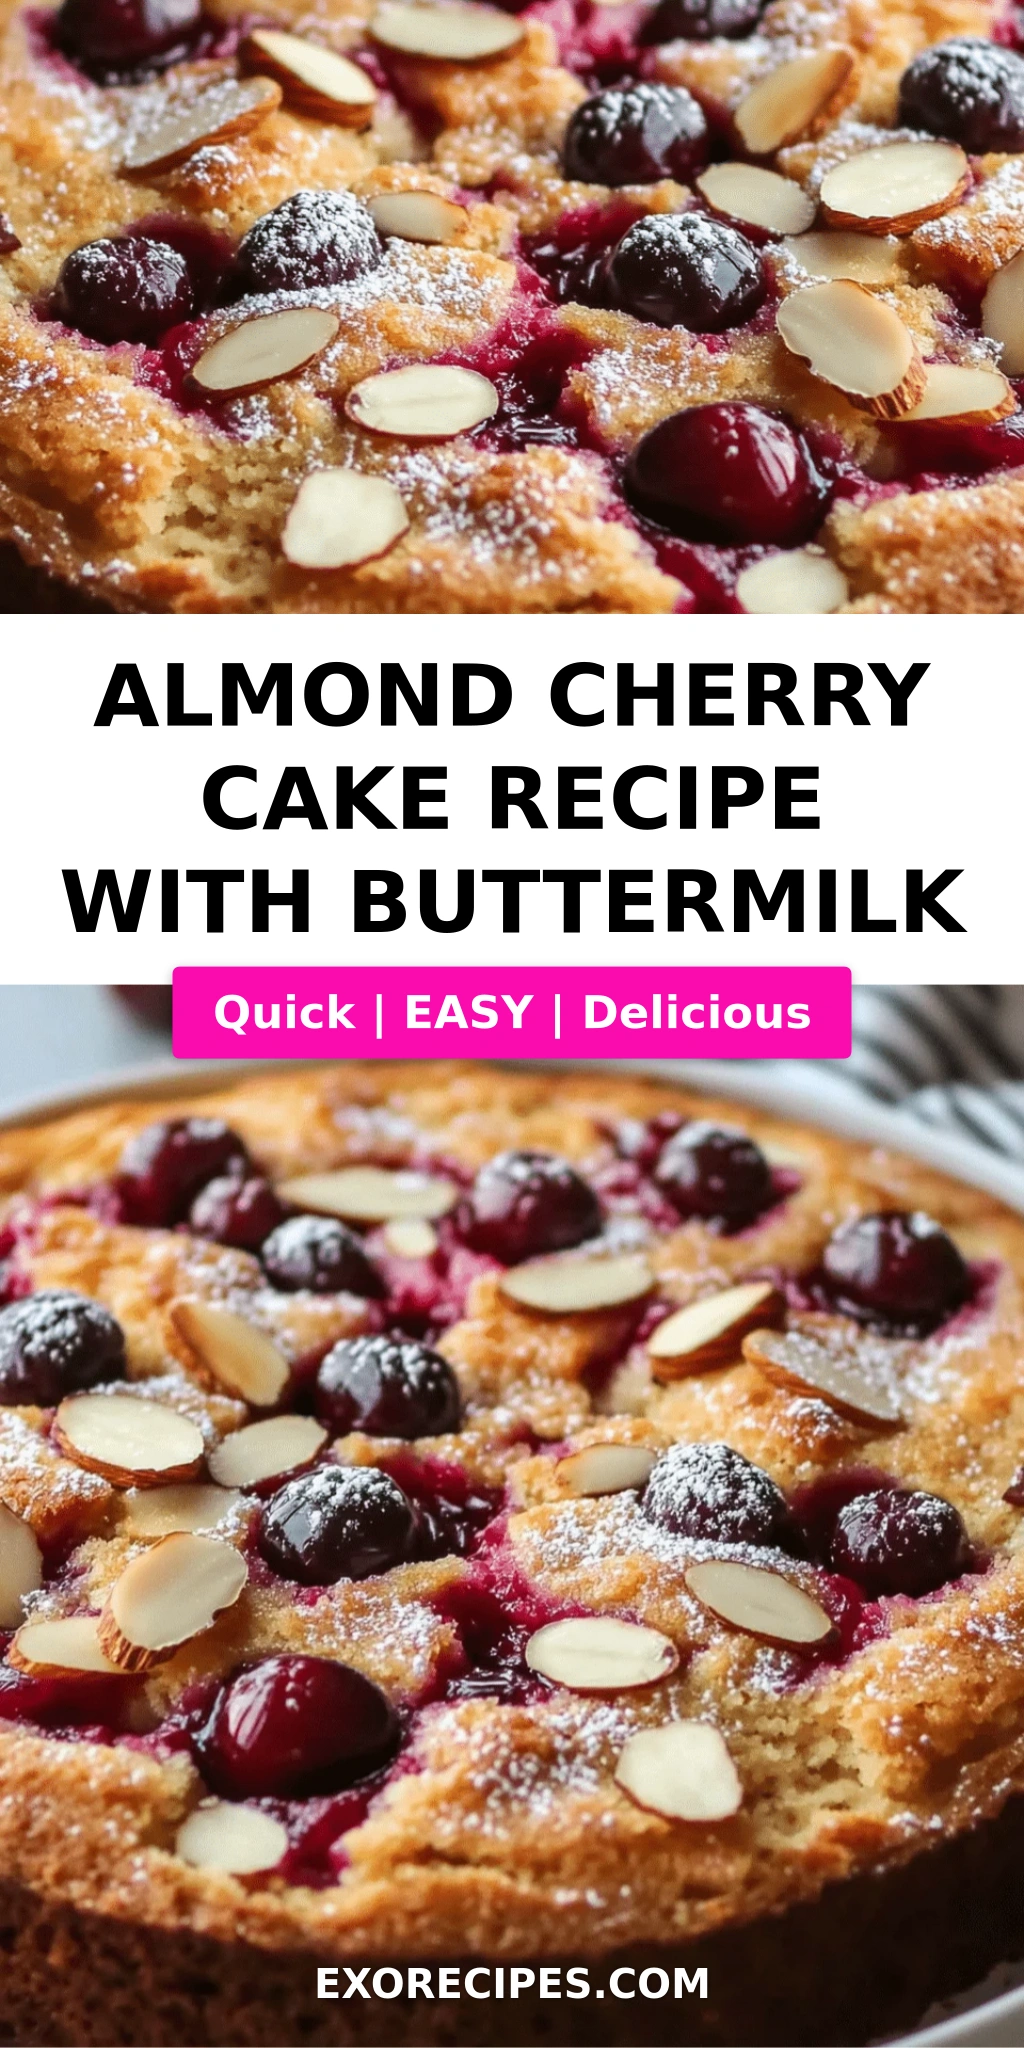
Almond Cherry Cake with Buttermilk – Moist, Tender & Bursting with Flavor
I still remember the first time I made an almond cherry cake in my tiny Parisian kitchen — the scent of toasted almonds mingling with sweet cherries drifting through the courtyard. That was years ago, before culinary school, before New York City became my home. But that cherry almond buttermilk cake taught me something I’ve never forgotten: the simplest ingredients, treated with care, create the most memorable desserts. This moist cherry almond cake recipe is the one I now bake for birthday brunches in my Brooklyn apartment. It’s the easy almond cherry cake recipe I turn to when I want to impress without spending all day in the kitchen. And because I believe in homemade cherry almond cake that anyone can master, I’m sharing every tip I’ve learned along the way.
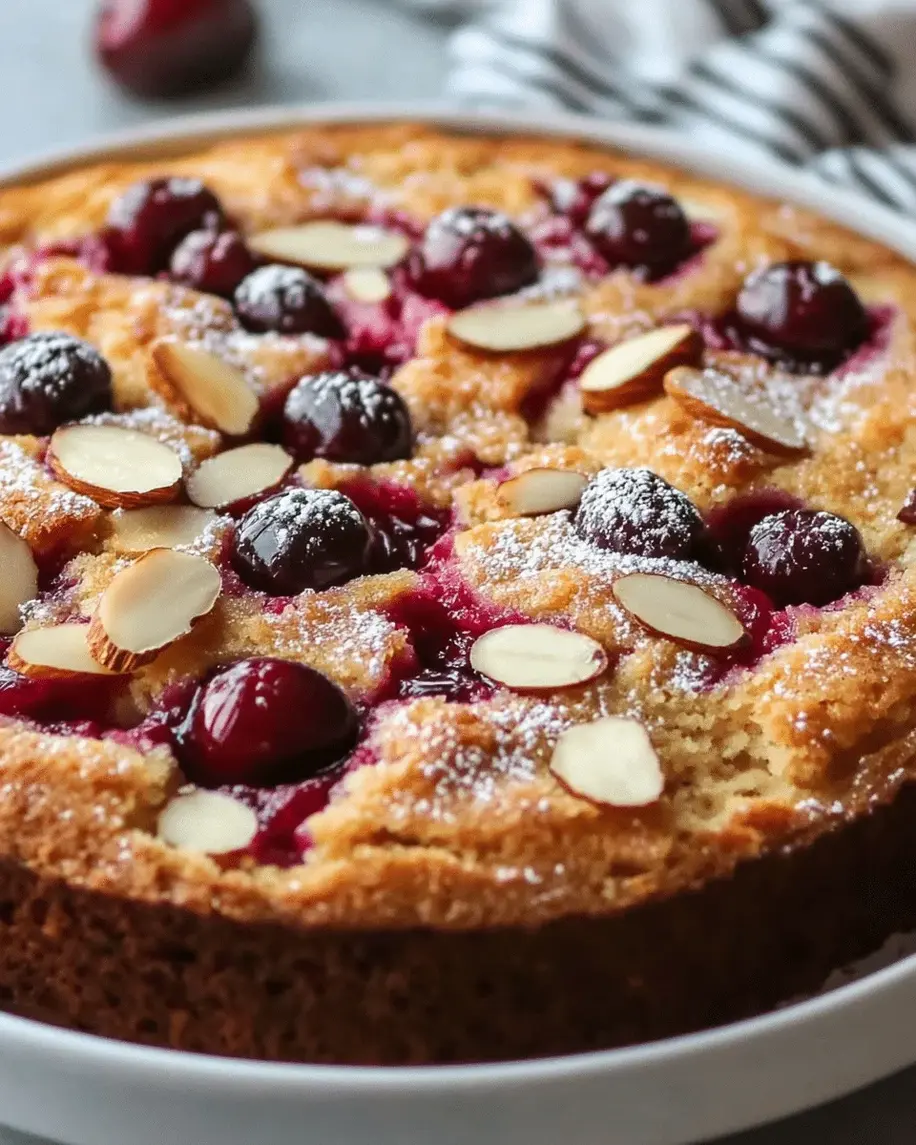
Picture this: a tender, golden crumb that’s moist from tangy buttermilk, dotted with juicy cherries that burst like little jewels in every bite, and topped with a delicate crunch of sliced almonds. The almond extract whispers through the background — never overpowering, just enough to make you lean in for another forkful. When you add the optional almond glaze, it cascades down the sides in creamy white ribbons, catching the light. This cake smells like Sunday morning in my mother’s Moroccan kitchen, where almonds and honey ruled the pastry table, but it tastes like the French patisseries I studied in — refined, balanced, and utterly satisfying.
What makes my version different? I trained in Paris under chefs who taught me that buttermilk is the secret to a tender crumb — it reacts with baking soda to create a soft, velvety texture that plain milk can’t match. I also insist on folding the cherries in by hand at the very end, so they stay intact and don’t bleed into the batter. And I’m sharing a pro tip I learned from my mother: a pinch of salt with the almonds heightens every sweet note. One common mistake I see is overmixing the batter after adding the flour — that develops gluten and makes the cake tough. I’ll show you exactly how to avoid that. This cherry almond buttermilk cake is my gift to you — from my kitchen to yours.
Why This Almond Cherry Cake Recipe Is the Best
The Flavor Secret — I grew up watching my mother toast almonds in a heavy pan over a low flame in Morocco, filling our home with a warm, nutty fragrance that meant something special was being made. In this almond cherry cake, I double down on that almond flavor: sliced almonds in the batter plus almond extract in both the cake and the glaze. The cherries provide a bright, tart counterpoint that keeps every bite interesting. It’s a flavor pairing that’s beloved from Parisian patisseries to New York farmer’s market stalls, and now it’s on your table.
Perfected Texture — Buttermilk is the unsung hero of this moist cherry almond cake. Its gentle acidity tenderizes the gluten strands, resulting in a crumb that’s soft, fine, and almost velvety. I learned this technique during my pastry training in Paris, where we used buttermilk in everything from scones to gâteaux. The trick is to alternate the dry ingredients with the buttermilk, starting and ending with the flour — this ensures the batter stays emulsified and bakes up evenly. The cherries stay suspended throughout, thanks to a light folding motion that I’ll walk you through step by step.
Foolproof & Fast — This easy almond cherry cake recipe comes together in one bowl with basic pantry staples. No stand mixer required — a hand mixer or even a sturdy whisk will do. I’ve tested this recipe with both fresh and frozen cherries, with and without the glaze, and it delivers every single time. Whether you’re a novice baker or a seasoned home cook, this homemade cherry almond cake will make you look like a pro. I’ve even included a make-ahead option so you can bake it a day ahead for your next gathering.
Almond Cherry Cake Ingredients
I source my cherries from the Union Square Greenmarket when they’re in season — those deep red, almost black varieties that stain your fingers with sweetness. In winter, I keep a bag of frozen dark sweet cherries in my freezer at all times. The buttermilk I buy from a small dairy upstate that delivers to my neighborhood co-op. And the almonds? I toast them myself in a dry skillet, just like my mother did. Each ingredient in this cherry almond buttermilk cake plays a specific role, and I want you to know exactly what to look for at your local grocery store.
Ingredients List
- 1 1/2 cups all-purpose flour
- 1 teaspoon baking powder
- 1/2 teaspoon baking soda
- 1/4 teaspoon salt
- 1/2 cup unsalted butter, softened
- 3/4 cup granulated sugar
- 2 large eggs
- 1 teaspoon vanilla extract
- 1/2 teaspoon almond extract
- 1/2 cup buttermilk
- 1 1/2 cups fresh or frozen pitted cherries, halved
- 1/4 cup sliced almonds
- For the glaze (optional):
- 1/2 cup powdered sugar
- 1-2 tablespoons milk
- 1/4 teaspoon almond extract
Ingredient Spotlight
Buttermilk — This is the backbone of the cake’s tender texture. Look for full-fat buttermilk in the refrigerated dairy section. If you can’t find it, make your own: add 1 tablespoon of lemon juice or white vinegar to 1/2 cup of whole milk, stir, and let it sit for 5 minutes until it thickens slightly. The acidity activates the baking soda and ensures a soft, fine crumb.
Cherries — Fresh or frozen both work beautifully. If using fresh, choose cherries that are firm, glossy, and deep red — Bings or Rainiers are excellent. If using frozen, do NOT thaw them before folding into the batter; frozen cherries hold their shape better and prevent the batter from turning gray. I’ve tested this dozens of times and frozen cherries actually deliver a more even distribution throughout the cake.
Almond Extract — This is where the magic happens. Use a good-quality pure almond extract, not imitation. It’s potent, so 1/2 teaspoon is plenty. If you love a stronger almond flavor (I do!), you can increase it to 3/4 teaspoon. The extract works in harmony with the sliced almonds to create that signature nutty profile that defines this almond cherry cake.
Sliced Almonds — I prefer natural (unblanched) sliced almonds with the skin on — they have more flavor and toast to a beautiful golden brown. You can also use slivered almonds or even chopped whole almonds. To toast them: spread on a baking sheet and bake at 350°F for 4-5 minutes, or until fragrant and lightly golden. Keep a close eye — they burn fast!
| Original Ingredient | Best Substitution | Flavor / Texture Impact |
|---|---|---|
| Buttermilk | Whole milk + 1 tbsp lemon juice (let sit 5 min) | Slightly less tangy but still tender; works in a pinch |
| Fresh Cherries | Frozen dark sweet cherries (do not thaw) | Evenly distributed; less bleeding; identical texture |
| Unsalted Butter | Coconut oil (solid, not melted) | Coconut flavor emerges; slightly denser crumb |
| All-Purpose Flour | Gluten-free 1:1 baking blend (with xanthan gum) | Slightly more delicate crumb; add 1 tsp extra baking powder |
| Almond Extract | 1/4 tsp almond oil OR 1 tsp amaretto liqueur | Milder almond note; amaretto adds subtle sweetness |
How to Make Almond Cherry Cake — Step-by-Step
Making this moist cherry almond cake is a beautiful, rhythmic process that takes less than an hour from start to finish. I’ve broken it down into simple steps with visual cues so you know exactly what to look for. Trust your senses — the smell, the look, the feel — and you’ll nail it every time.
Step 1: Prepare the Pan and Oven
Preheat your oven to 350°F (175°C). Grease a 9-inch round cake pan thoroughly with butter or non-stick spray, then dust with flour — tap out the excess. Alternatively, line the bottom with a circle of parchment paper for guaranteed release. Position the oven rack in the center so the cake bakes evenly.
💡 mia’s Pro Tip: Use a light-colored metal or glass pan for the most even browning. Dark non-stick pans can cause the edges to brown too quickly before the center is done.
Step 2: Whisk the Dry Ingredients
In a medium bowl, whisk together 1 1/2 cups all-purpose flour, 1 teaspoon baking powder, 1/2 teaspoon baking soda, and 1/4 teaspoon salt. Whisk for about 15 seconds — this aerates the flour and ensures the leaveners are evenly distributed. Set aside.
⚠️ Common Mistake to Avoid: Skipping the whisking step. If you don’t whisk, the baking powder and soda can clump together, leaving pockets of bitter-tasting leavener in your finished cake.
Step 3: Cream Butter and Sugar
In a large bowl, beat 1/2 cup softened unsalted butter with 3/4 cup granulated sugar using an electric mixer on medium-high speed for 2-3 minutes. You’re looking for a pale, fluffy mixture that looks like thick whipped cream. The butter should be soft but not melted — if it’s too cold, it won’t aerate properly.
💡 mia’s Pro Tip: Press your finger gently into the butter — it should leave an indent without sliding or feeling greasy. That’s the perfect temperature for creaming.
Step 4: Add Eggs and Extracts
Add the 2 large eggs one at a time, beating well after each addition — about 30 seconds per egg. Scrape down the sides and bottom of the bowl with a spatula to make sure everything is incorporated. Then mix in 1 teaspoon vanilla extract and 1/2 teaspoon almond extract.
⚠️ Common Mistake to Avoid: Adding both eggs at once. The batter can separate or curdle, resulting in a denser cake. Adding one at a time maintains the emulsion and keeps the batter silky.
Step 5: Alternate Dry Ingredients and Buttermilk
With the mixer on low speed, add the flour mixture in three additions, alternating with the 1/2 cup buttermilk, beginning and ending with the flour. Mix just until combined — stop as soon as the last streak of flour disappears. Overmixing at this stage develops gluten and makes the cake tough.
💡 mia’s Pro Tip: Use a rubber spatula for the final few stirs. It’s gentler than a mixer and lets you feel exactly when the batter comes together. A few small lumps are perfectly fine — they’ll bake out.
Step 6: Fold in Cherries and Almonds
Gently fold in 1 1/2 cups halved cherries and 1/4 cup sliced almonds using a spatula. Use a slow, sweeping motion — cut down through the center, across the bottom, and up the side, rotating the bowl as you go. Reserve about 1 tablespoon of almonds to sprinkle on top. The batter will be thick and studded with fruit.
⚠️ Common Mistake to Avoid: Over-folding. Fifteen to twenty folds is all you need. If you keep stirring, the cherries will break down and turn the batter pink, and the cake will lose those gorgeous jewel-like pockets of fruit.
Step 7: Bake
Pour the batter into the prepared pan and spread it evenly with the spatula. Sprinkle the reserved sliced almonds on top. Bake for 35-40 minutes, or until a toothpick inserted in the center comes out clean or with a few moist crumbs attached. The top should be golden brown and spring back lightly when touched.
💡 mia’s Pro Tip: Rotate the pan halfway through baking (at the 18-minute mark) to ensure even browning. Every oven has hot spots, and this simple step prevents a lopsided cake.
Step 8: Cool and Glaze
Let the cake cool in the pan on a wire rack for 10 minutes. Then run a thin knife around the edges, invert onto the rack, and cool completely — about 1 hour. If making the glaze, whisk together 1/2 cup powdered sugar, 1-2 tablespoons milk, and 1/4 teaspoon almond extract until smooth. Drizzle over the cooled cake using a spoon or a piping bag with a small tip.
⚠️ Common Mistake to Avoid: Glazing the cake while it’s still warm. The glaze will melt into a puddle instead of forming those lovely white ribbons. Patience pays off — wait until the cake is completely cool to the touch.
| Step | Action | Duration | Key Visual Cue |
|---|---|---|---|
| 1 | Prepare pan & oven | 5 min | Oven at 350°F; pan greased and floured |
| 2 | Whisk dry ingredients | 1 min | Uniform, aerated flour mixture |
| 3 | Cream butter & sugar | 2-3 min | Pale, fluffy, lightened in color |
| 4 | Add eggs & extracts | 2 min | Smooth, glossy batter |
| 5 | Alternate flour & buttermilk | 2 min | Thick, cohesive batter; no dry streaks |
| 6 | Fold in cherries & almonds | 1 min | Fruit evenly distributed; batter not pink |
| 7 | Bake | 35-40 min | Golden top; toothpick comes out clean |
| 8 | Cool & glaze | 1 hr+ | Completely cool; glaze drizzles in ribbons |
Serving & Presentation
I love serving this almond cherry cake on a simple white cake stand — the golden crumb and cherry-studded surface are beautiful enough on their own. For a casual brunch, I dust it with powdered sugar and serve it in thick wedges alongside a pot of strong coffee. For a more dressed-up occasion, I drizzle the almond glaze in zigzag patterns and scatter a few fresh cherries and toasted almond slivers on top. A dollop of lightly whipped cream or a scoop of vanilla bean ice cream turns it into an instant celebration.
Growing up in Morocco, we often served simple cakes like this with mint tea in small glasses — the sweetness of the cake balanced the herbal, slightly bitter tea. In Paris, I learned to plate desserts with precision: a slice of cake centered on the plate, a quenelle of crème fraîche alongside, and a drizzle of cherry syrup made from the leftover cherry juice. Here in New York, I’ve adapted both traditions — I pair this cake with a cold brew latte in summer or a spiced chai in winter. It’s endlessly versatile.
| Pairing Type | Suggestions | Why It Works |
|---|---|---|
| Side Dish | Fresh fruit salad, sautéed cherries, or no side needed | The cake is rich enough to stand alone; fruit adds freshness |
| Sauce / Dip | Whipped cream, crème fraîche, vanilla ice cream, or warm cherry compote | Creamy elements balance the tart cherries and nutty almonds |
| Beverage | Coffee, espresso, chai latte, cold brew, or Moroccan mint tea | Cake’s sweetness contrasts beautifully with bitter or spiced drinks |
| Garnish | Powdered sugar, fresh cherries, toasted almonds, edible flowers, or mint sprigs | Adds visual appeal and a touch of elegance for any occasion |
Make-Ahead, Storage & Reheating
As a busy NYC food blogger, I’m all about recipes that work with my schedule. This cherry almond buttermilk cake is one of those rare desserts that actually tastes better the day after baking — the flavors meld and deepen overnight. I often bake it on a Friday evening for Saturday brunch, and it’s always a hit. Here’s exactly how to store it for peak freshness.
| Method | Container | Duration | Reheating Tip |
|---|---|---|---|
| Refrigerator | Airtight container or wrapped tightly in plastic wrap | Up to 5 days | Microwave individual slices for 15-20 seconds; or bring to room temp |
| Freezer | Wrap in plastic wrap, then foil; place in freezer bag | Up to 3 months | Thaw overnight in fridge; warm in 300°F oven for 5-7 minutes |
| Make-Ahead | Bake fully, cool, store airtight at room temp (glaze day of serving) | Up to 2 days in advance | Add glaze just before serving for best presentation |
I’ve tested the freezer method extensively — wrap the completely cooled cake (unglazed) in a double layer of plastic wrap, then a layer of aluminum foil, and place it in a zip-top freezer bag. When you’re ready to enjoy it, thaw it in the refrigerator overnight. Reheat individual slices in a 300°F oven for 5-7 minutes — it brings back that just-baked tenderness. If the cake is glazed, freeze it on a baking sheet until the glaze is firm, then wrap it the same way. The glaze will stay intact.
Variations & Easy Swaps
One of the things I love most about this easy almond cherry cake recipe is how adaptable it is. Over the years, I’ve developed several variations that keep the cake exciting all year round. Whether you’re catering to dietary needs or just craving something different, there’s a version here for you.
| Variation | Key Change | Best For | Difficulty Impact |
|---|---|---|---|
| Chocolate Cherry Almond | Replace 1/4 cup flour with 1/4 cup cocoa powder; add 1/3 cup mini chocolate chips | Birthday parties, chocolate lovers, holiday dessert table | Easy — no extra steps |
| Gluten-Free Version | Use 1:1 gluten-free baking blend with xanthan gum; add 1 tsp extra baking powder | Gluten-free guests, celiac-friendly baking | Easy — simple swap |
| Peach Almond Summer Cake | Replace cherries with 1 1/2 cups fresh diced peaches; add 1/2 tsp cinnamon | Summer picnics, farmer’s market bounty, afternoon tea | Easy — identical method |
Chocolate Cherry Almond Version
This is my NYC-indulgence take on the original. Replace 1/4 cup of the flour with 1/4 cup unsweetened cocoa powder and fold in 1/3 cup mini chocolate chips along with the cherries. The chocolate deepens the cherry flavor in a way that reminds me of the black forest cakes I studied in Paris. A dusting of powdered sugar and a few fresh cherries on top makes it look spectacular — no glaze needed. I’ve served this at birthday parties and watched it disappear in minutes.
Gluten-Free Almond Cherry Cake
I developed this version for my friend who has celiac disease, and it’s become one of my most-requested recipes. Use a high-quality 1:1 gluten-free baking blend that contains xanthan gum (I recommend Bob’s Red Mill or King Arthur). Add an extra teaspoon of baking powder to help with rise. The texture is slightly more delicate than the original, but the buttermilk keeps it wonderfully moist. Let the batter rest for 10 minutes before baking — this allows the gluten-free flours to hydrate fully for a better crumb.
Peach Almond Summer Cake
In late summer, when peaches are at their peak at the Union Square market, I swap the cherries for 1 1/2 cups of diced fresh peaches. Add 1/2 teaspoon of cinnamon to the flour mixture — it pairs beautifully with the almond and peach. The baking time stays the same, but keep an eye on it at the 35-minute mark since peaches release more moisture than cherries. This version is exquisite with a dollop of mascarpone cheese sweetened with a little honey. It’s sunshine on a plate.
Can I use frozen cherries instead of fresh cherries in this almond cherry cake?
Absolutely — I actually use frozen cherries more often than fresh, especially when cherries aren’t in season. The key is to NOT thaw them before folding into the batter. Frozen cherries hold their shape better during mixing and baking, which means they distribute evenly throughout the cake without sinking to the bottom or turning the batter gray. I recommend using frozen dark sweet cherries — they’re pitted and ready to go. Measure them while still frozen, halve them if they’re large, and fold them in straight from the freezer. You may need to add 2-3 extra minutes to the baking time since the frozen fruit cools the batter slightly, so check with a toothpick at the 38-minute mark.
What can I substitute for buttermilk in this almond cherry cake recipe?
If you don’t have buttermilk on hand, you can make a quick substitute: add 1 tablespoon of fresh lemon juice or white vinegar to 1/2 cup of whole milk, stir gently, and let it sit for 5 minutes at room temperature. The milk will thicken slightly and develop a mild tang that mimics buttermilk beautifully. This substitution works perfectly in this almond cherry cake — I’ve tested it many times. For a dairy-free option, use 1/2 cup of plain unsweetened yogurt (dairy or plant-based) thinned with 2 tablespoons of water, or use 1/2 cup of full-fat coconut milk mixed with 1 tablespoon of lemon juice. The yogurt option produces a slightly denser but still tender crumb, while the coconut milk version adds a hint of coconut flavor that actually pairs nicely with the almonds.
How long should I bake this almond cherry cake for the perfect texture?
For a 9-inch round cake pan, bake at 350°F for 35-40 minutes. I recommend starting to check at 35 minutes by inserting a toothpick into the center of the cake — if it comes out clean or with just a few moist crumbs attached, it’s done. The top should be golden brown and spring back lightly when you press it with your fingertip. If the toothpick has wet batter on it, bake for another 3-4 minutes and check again. Every oven is different, so trust these visual cues more than the timer. If you’re using frozen cherries, your cake may need closer to 40 minutes because the frozen fruit lowers the batter temperature. I also recommend rotating the pan halfway through baking (at the 18-minute mark) for the most even rise and color.
Can I make this almond cherry cake with buttermilk ahead of time and freeze it?
Yes, this cake freezes beautifully! I do it all the time. For the best results, freeze the cake unglazed. Let it cool completely after baking, then wrap it tightly in a double layer of plastic wrap, followed by a layer of aluminum foil. Place it in a freezer-safe zip-top bag, press out the air, and seal. It will keep in the freezer for up to 3 months. When you’re ready to serve, thaw it overnight in the refrigerator, then bring it to room temperature on the counter for about an hour. If you want to serve it warm, pop individual slices in a 300°F oven for 5-7 minutes. Make the glaze fresh and drizzle it over the cake just before serving — frozen and thawed cake absorbs the glaze beautifully. I often bake two cakes at once: one for now and one for the freezer.
Why did my almond cherry cake sink in the middle?
A sunken center in this cake is usually caused by one of three things: overmixing the batter after adding the flour, opening the oven door too early in the baking process, or using leaveners that have expired. When you overmix, you develop gluten and knock the air out of the batter, causing the cake to rise weakly and then collapse. Open the oven door only after the cake has baked for at least 30 minutes — a sudden temperature drop can cause the center to fall. And always check that your baking powder and baking soda are fresh — test them by adding a little to warm water: baking powder should bubble immediately, and baking soda should fizz when mixed with vinegar. I also recommend using room-temperature eggs and buttermilk so the batter emulsifies properly.
Can I use almond flour instead of all-purpose flour in this recipe?
I don’t recommend substituting almond flour 1:1 for all-purpose flour in this recipe. Almond flour has a completely different structure — it’s high in fat and lacks gluten, so the cake would be very dense, greasy, and won’t rise properly. If you want to use almond flour, I suggest following a recipe specifically designed for it. However, you can replace up to 1/4 cup of the all-purpose flour with almond flour for a slightly nuttier flavor and more tender crumb. If you do this, reduce the butter by 1 tablespoon to compensate for the extra fat in the almond flour. The texture will be a bit more delicate, but it’s a lovely twist on the original. For a completely gluten-free version, use a 1:1 gluten-free baking blend as I describe in the variations section above.
How do I keep the cherries from sinking to the bottom of the cake?
This is one of the most common questions I get, and the solution is simple. First, toss the halved cherries in 1 tablespoon of the flour mixture before folding them into the batter — this gives them a little coating that helps them stay suspended. Second, use frozen cherries instead of fresh if you have that option; frozen cherries are firmer and less likely to sink. Third, fold the cherries in gently and minimally — just 15-20 folds until they’re distributed. Over-folding breaks them down and lets them fall. Finally, make sure your batter is thick enough before adding the cherries; if it’s too thin (which can happen if your butter was too warm or you overmixed), the cherries will sink. The batter should be thick and scoopable, not runny.
Can I bake this almond cherry cake in a different pan size?
Yes, you can adapt this recipe to other pan sizes, but you’ll need to adjust the baking time. For an 8-inch round pan, the cake will be taller and will need 40-45 minutes of baking time — check with a toothpick. For a 9×5-inch loaf pan, bake for 45-50 minutes — this is a lovely presentation for gift-giving. For 12 standard muffin cups, fill them 3/4 full and bake for 18-22 minutes; you’ll get beautifully domed almond cherry muffins. For a 9×13-inch sheet pan, the cake will be thinner and will bake in 22-26 minutes. Whatever pan you choose, make sure to grease and flour it well (or use parchment paper) and always test for doneness with a toothpick. The visual cues of golden edges and a springy top are your most reliable indicators.
What’s the best way to pit cherries for this cake?
The easiest method is to use a cherry pitter — it’s a small, inexpensive tool that pushes the pit out in one quick motion. I’ve had my OXO cherry pitter for years and it’s never let me down. If you don’t have a pitter, you can use a sturdy drinking straw: push it through the stem end of the cherry and the pit will pop out the other side. Another method is to place the cherry on the mouth of a glass bottle (like a beer bottle) and use a chopstick to push the pit through into the bottle — this is an old trick my mother taught me. Whichever method you use, wear an apron or dark clothes because cherry juice stains. And always pit cherries over a bowl to catch the juice — you can drizzle that juice over the finished cake or stir it into sparkling water for a refreshing drink.
How can I tell when this almond buttermilk cake is fully baked without a toothpick?
If you don’t have a toothpick handy, there are three reliable ways to check. First, gently press the center of the cake with your fingertip — if it springs back immediately and leaves no indent, it’s done. If your finger leaves a dent, it needs more time. Second, look at the edges: the cake should be pulling away slightly from the sides of the pan, and the top should be a deep golden brown. Third, listen to it — a fully baked cake will make a soft, muffled sound when you tap the top with your knuckle; an under-baked cake sounds wet and hollow. I use all three methods together for the most accurate read. And remember, the cake continues to bake slightly from residual heat after you pull it out of the oven, so a tiny bit of moistness on the toothpick is actually perfect — it ensures a tender, not dry, cake.
Share Your Version!
I absolutely love hearing from you — there’s nothing that makes my day like seeing a photo of your almond cherry cake fresh out of the oven. Did you add the glaze? Did you try the chocolate variation? Did your family fight over the last slice? Drop a comment below and let me know how it turned out. If you’re feeling extra generous, a 5-star rating helps other home cooks find this recipe and gives me the warm fuzzies.
Snap a photo of your creation and share it on Instagram or Pinterest — tag me @exorecipes so I can see your beautiful cake and feature it in my stories! I’d especially love to know: did you use fresh or frozen cherries? And what occasion did you bake it for — a birthday, a brunch, or just a Tuesday that needed a little sweetness? Your stories inspire me to keep creating recipes that bring joy to your table.
From my NYC kitchen to yours — I hope this recipe brings as much warmth to your table as it does to mine. — mia 🧡
Love This Recipe? Save It to Pinterest!
If you enjoyed this Almond Cherry Cake recipe, don’t let it get lost in your browser tabs! 😄 Pin it now so you can find it again anytime — and explore hundreds more tried-and-tested recipes waiting for you on my Pinterest boards.
👉 Follow mia on Pinterest @chefrecipes2
📌 Pin this recipe · 🔁 Re-pin your favorites · 💬 Tag me when you make it — I love seeing your creations!
🍒 Made this Almond Cherry Cake? Leave a ⭐⭐⭐⭐⭐ rating & share your tweaks below!
Tag @exorecipes on Instagram or Pinterest — I personally feature my favorites!
Almond Cherry Cake Recipe with Buttermilk Perfect for Every Occasion
- Prep Time: 15 minutes
- Cook Time: 35-40 minutes
- Total Time: 55 minutes
- Yield: 8 1x
- Method: Dessert
- Cuisine: American
Description
This almond cherry cake is moist, tender, and bursting with sweet cherries and nutty almond flavor. Made with buttermilk for extra tenderness, it’s perfect for birthdays, brunches, or any celebration.
Ingredients
- 1 1/2 cups all-purpose flour
- 1 teaspoon baking powder
- 1/2 teaspoon baking soda
- 1/4 teaspoon salt
- 1/2 cup unsalted butter, softened
- 3/4 cup granulated sugar
- 2 large eggs
- 1 teaspoon vanilla extract
- 1/2 teaspoon almond extract
- 1/2 cup buttermilk
- 1 1/2 cups fresh or frozen pitted cherries, halved
- 1/4 cup sliced almonds
- For the glaze (optional):
- 1/2 cup powdered sugar
- 1–2 tablespoons milk
- 1/4 teaspoon almond extract
Instructions
- Preheat your oven to 350°F (175°C). Grease and flour a 9-inch round cake pan or line with parchment paper.
- In a medium bowl, whisk together the flour, baking powder, baking soda, and salt. Set aside.
- In a large bowl, beat the softened butter and granulated sugar together with an electric mixer until light and fluffy, about 2-3 minutes.
- Add the eggs one at a time, beating well after each addition. Mix in the vanilla extract and almond extract.
- Gradually add the flour mixture to the butter mixture, alternating with the buttermilk, beginning and ending with the flour mixture. Mix just until combined; do not overmix.
- Gently fold in the halved cherries and sliced almonds (reserve a few almonds for topping if desired).
- Pour the batter into the prepared pan and spread evenly. Sprinkle the reserved almonds on top.
- Bake for 35-40 minutes, or until a toothpick inserted in the center comes out clean. Allow the cake to cool in the pan for 10 minutes, then transfer to a wire rack to cool completely.
- If making the glaze: whisk together powdered sugar, milk, and almond extract until smooth. Drizzle over the cooled cake.
Notes
If using frozen cherries, do not thaw them before folding into the batter to prevent excess moisture. The cake can be stored in an airtight container at room temperature for up to 3 days.
Nutrition
- Calories: 320
- Sugar: 30g
- Fat: 13g
- Carbohydrates: 48g
- Protein: 5g
k">
Tried This Recipe? Leave a Comment!
Did you make this recipe? I’d love to hear how it turned out! Please leave a comment and a rating below. Your feedback helps other home cooks and supports cheerychop.com!
For more delicious inspiration, follow me on Pinterest!