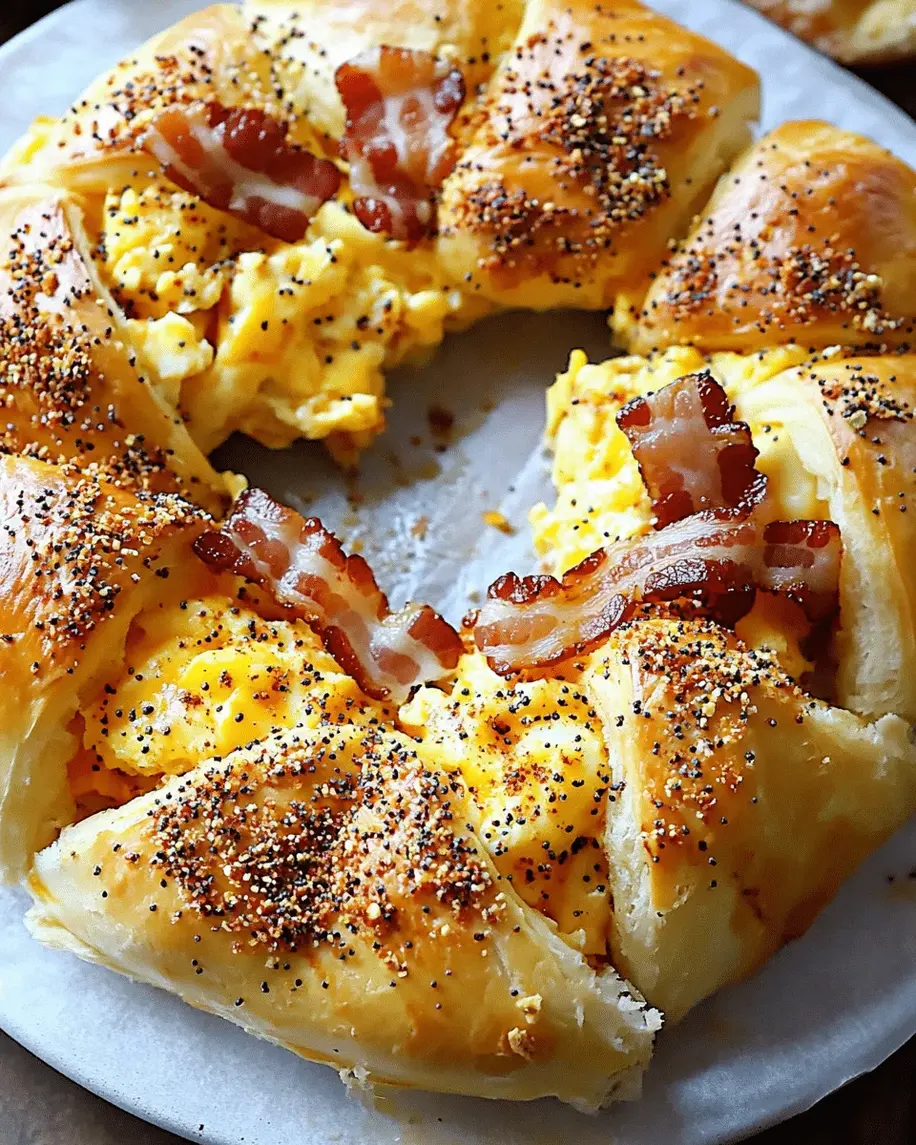
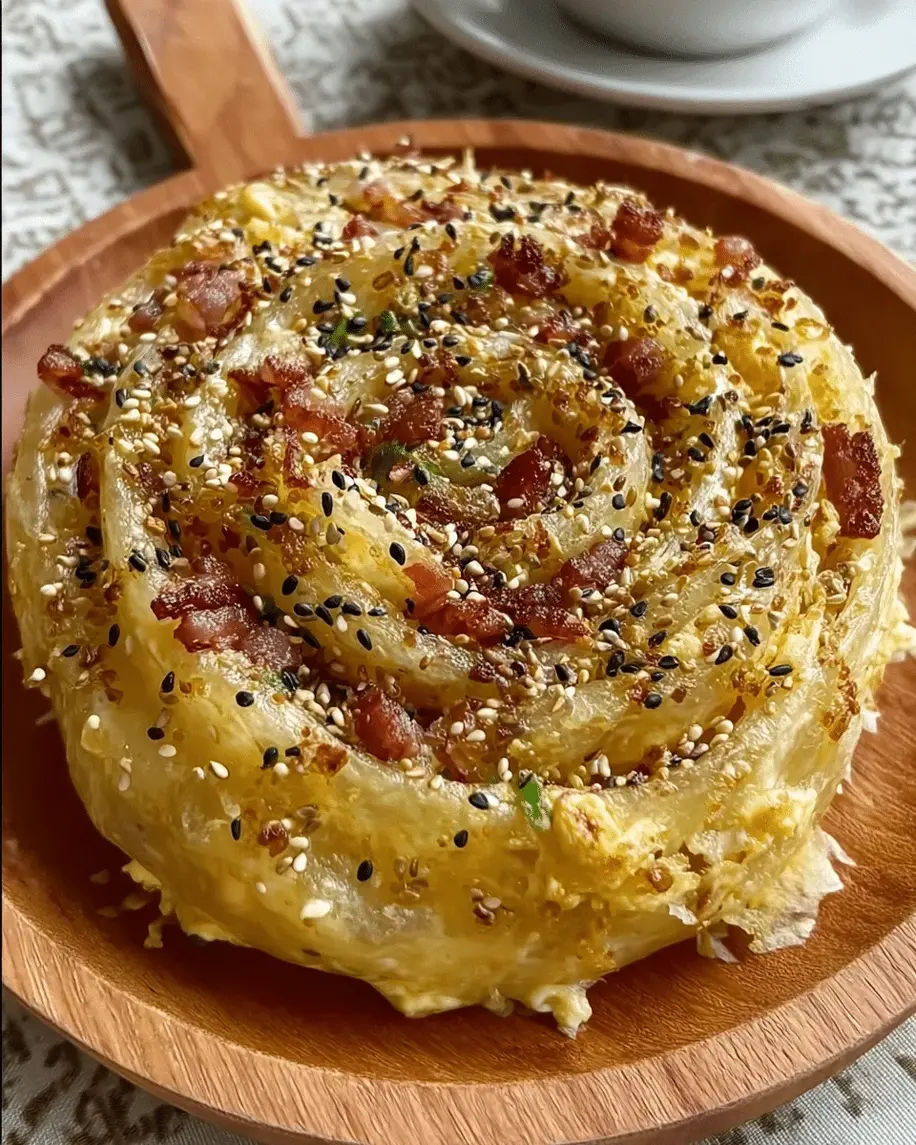
Creamy Crock Pot Chicken Chili Your Family Will Love

Easy Crock Pot Cream Cheese Chicken Chili – Creamy, Set-It-and-Forget-It Comfort

⚖️
Difficulty
Easy
⏲️
Prep Time
10 mins
🕒
Cook Time
420 mins
⏱️
Total Time
430 mins
🍽️
Servings
6

Growing up in Morocco, my mother’s kitchen was a symphony of slow-simmered tagines and fragrant spices. Years later, after training at Le Cordon Bleu in Paris and now living in New York City, I’ve learned that the best comfort food is the kind that lets you walk away and come back to something incredible. That’s exactly why this Easy Crock Pot Cream Cheese Chicken Chili has become my family’s most-requested meal. The secret? A block of cream cheese melted into a brothy, lightly spiced chili that turns silky and rich without any heavy cream. It’s the kind of white chicken chili recipe that makes you feel like you’ve been cooking all day – but really, you just tossed everything in and forgot about it.

When you lift the lid after six hours, the aroma hits you first: cumin, chili powder, and a hint of ranch seasoning mingling with sweet corn and tender chicken. The chili is thick enough to coat a spoon, with black beans that have softened into creamy bites. A dollop of sour cream and a sprinkle of fresh cilantro is all it needs. I love how the cream cheese doesn’t just add richness – it mellows the heat from the Rotel tomatoes, creating a balance that even my spice-averse kids devour. Every spoonful is like a warm hug on a chilly New York evening.

What sets my version apart is that I keep the cream cheese whole on top during cooking. This technique – inspired by French en cocotte cooking – lets the cream cheese gently melt into the chili without curdling, giving you a perfectly smooth texture every time. I’ll show you exactly how to avoid the common mistake of ending up with a grainy sauce, plus share my go-to substitution when you’re out of a certain ingredient. Whether you’re a seasoned cook or just starting your slow cooker journey, this recipe is foolproof. Trust me – you’re going to love it.

Why This Easy Crock Pot Cream Cheese Chicken Chili Recipe Is the Best

The Flavor Secret: The magic here lies in the combination of a full packet of ranch dressing mix with the warm southwest spices. Ranch adds buttermilk tang and a subtle herbiness that lifts the chili beyond typical white chicken chili. I learned this trick from a chef friend in Paris who uses dry buttermilk powder in cream sauces. The result is a chili that’s deeply savory with layers you can actually taste.

Perfected Texture: Instead of stirring in cream cheese at the end (which often leads to lumps), we let it melt low and slow on top of the chili. This gentle, continuous heat breaks down the cream cheese into a velvety cream that binds the beans, corn, and chicken together. It’s the same technique we used for safi-ya (a Moroccan white stew) – patience creates perfection.

Foolproof & Fast: You need just 10 minutes of prep – no sautéing, no browning, no pre-cooking chicken. Dump everything in, set the timer, and go about your day. Even if you’re a beginner, this slow cooker chicken chili will come out delicious. The hardest part is shredding the chicken, and I’ll show you the easiest way to do that.

Easy Crock Pot Cream Cheese Chicken Chili Ingredients

I pick up most of these ingredients at my local farmer’s market in Brooklyn – the sweet corn from upstate New York is incredible in summer. But even in the dead of winter, canned corn and pantry staples make this chili sing. This list is intentionally simple: you probably already have most of it.

Ingredients List

  • 1 (15 oz.) can black beans, drained and rinsed
  • 1 (15.25 oz.) can corn, undrained
  • 1 (10 oz.) can Rotel tomatoes (original or mild), undrained
  • 1 (1 oz.) packet ranch dressing mix (like Hidden Valley)
  • 1 tsp ground cumin
  • 1 Tbsp chili powder
  • 1 tsp onion powder
  • 1 (8 oz.) package light cream cheese, softened (full-fat works too)
  • 2 boneless, skinless chicken breasts (about 1 lb total)

Ingredient Spotlight

Rotel Tomatoes: These are key – a can of diced tomatoes with green chilies. They bring acidity and a gentle kick. For less heat, use “mild” Rotel. In a pinch, sub with 10 oz canned diced tomatoes + 1 small can diced green chiles.

Light Cream Cheese: I prefer light cream cheese here because it melts just as smoothly as full-fat but leaves the chili feeling lighter. Full-fat will work too – just expect a slightly richer, less brothy texture. Always let the cream cheese come to room temperature before adding it to the crock pot to help it melt evenly.

Ranch Dressing Mix: This is the unsung hero. It’s a blend of buttermilk powder, garlic, onion, dill, and parsley that deepens the savory notes. Don’t skip it – it’s what makes this chili taste like you simmered it for hours. If you must, sub with 1 tsp each garlic powder, onion powder, and dried dill plus ½ tsp salt.

Original IngredientBest SubstitutionFlavor / Texture Impact
Ranch dressing mixDIY mix (garlic powder + onion powder + dried dill + salt)Slightly less tangy but still savory
Black beansWhite beans (cannellini or Great Northern)Creamier texture, mild flavor
Cream cheese (light)Full-fat cream cheese or NeufchâtelRicher, thicker chili; may need extra liquid
Chicken breastsBoneless chicken thighsMore flavorful, shreds beautifully; slightly higher fat

How to Make Easy Crock Pot Cream Cheese Chicken Chili — Step-by-Step

I promise, this is the easiest chili you’ll ever make. Just follow these four simple steps and your house will smell amazing.

Step 1: Layer the Ingredients

Drain and rinse the black beans. Place the two chicken breasts at the bottom of your crock pot. Pour the undrained corn, undrained Rotel tomatoes, and the black beans on top of the chicken. Sprinkle the ranch dressing mix, cumin, chili powder, and onion powder evenly over everything. Stir gently with a spoon to combine – don’t worry if the chicken isn’t fully covered.

💡 mia’s Pro Tip: Always put the chicken on the bottom. It stays submerged in the liquid and cooks more evenly, plus it’s easier to shred later without fishing through beans.

Step 2: Add the Cream Cheese

Place the block of cream cheese right on top of the chili mixture – no need to cubes or soften it first (though room temperature helps). Spread the cream cheese out a little with a spatula if you like, but leaving it whole works perfectly. Cover with the lid and set your crock pot to LOW.

⚠️ Common Mistake to Avoid: Don’t stir the cream cheese in at the start! If you do, it can separate and turn grainy. Let it melt gently on top and stir it in at the very end.

Step 3: Cook Low and Slow

Cook on LOW for 6–8 hours. The chili will bubble gently, and the cream cheese will slowly sink and meld into the liquid. After about 4 hours, you can peek (quickly) to make sure there’s enough liquid – the corn and tomatoes provide plenty, so it should be fine.

💡 mia’s Pro Tip: If you’re in a hurry, you can cook on HIGH for 3-4 hours. The texture will be slightly less tender, but it still works. I always prefer low for that shreddable chicken.

Step 4: Shred and Finish

Once the timer goes off, carefully remove the chicken breasts to a cutting board. Use two forks to shred the meat – it should fall apart easily. Return the shredded chicken to the crock pot. Stir everything together until the cream cheese is fully incorporated and the chili is thick and creamy. Taste and adjust salt if needed (the ranch mix adds plenty).

⚠️ Common Mistake to Avoid: Don’t over-stir at this point – just fold until combined. Over-stirring can break down the beans too much and make the chili mushy.

StepActionDurationKey Visual Cue
1Layer ingredients & season5 minSpices evenly coating beans and tomatoes
2Add cream cheese1 minWhole block resting on top
3Cook low6-8 hoursCream cheese mostly melted; chicken shreds easily
4Shred chicken & stir5 minEvenly distributed, creamy orange-brown chili

Serving & Presentation

Ladle the chili into deep bowls – I love using the rustic ceramic ones I picked up at a flea market in Paris. The creamy, rusty-brown chili is beautiful on its own, but a few garnishes take it to the next level. A spoonful of sour cream or Greek yogurt adds tangy contrast, while chopped fresh cilantro brings a pop of green. For crunch, I often add crushed tortilla chips or sliced avocado.

In my New York kitchen, I love serving this with warm cornbread (made with a little honey) or crusty sourdough for dipping. My mother would have served it with fresh crusty bread from the Moroccan baker, but here in the city, a good baguette from Balthazar does the trick. The chili also pairs beautifully with a simple side salad dressed with lime vinaigrette.

When I’m feeling festive, I sprinkle shredded Monterey Jack cheese on top and let it melt into the steam. A few pickled jalapeños add brightness and heat if you like more spice. This is the kind of meal that feels both cozy and special – perfect for a busy weeknight or a lazy Sunday.

Pairing TypeSuggestionsWhy It Works
Side DishHoney cornbread, crusty sourdough, tortilla chipsSoaks up the creamy broth; adds texture contrast
Sauce / DipSour cream, salsa verde, quick cilantro sauceExtra tang and herb freshness cut the richness
BeverageLight lager, Pinot Noir, iced tea with mintA crisp or fruity drink balances the creamy chili
GarnishCilantro, shredded cheese, pickled jalapeños, avocadoAdds color, freshness, and layers of flavor

Make-Ahead, Storage & Reheating

This chili is a meal prep dream. I often double the batch and stash half in the fridge or freezer for those crazy New York weeks when I barely have time to breathe. The flavors actually deepen overnight, so it tastes even better the next day.

MethodContainerDurationReheating Tip
RefrigeratorAirtight glass container4-5 daysReheat in a pot over medium-low, adding a splash of chicken broth if thick.
FreezerFreezer-safe zip bag (flatten to save space)3 monthsThaw overnight in the fridge, then reheat gently. Stir in a little milk to restore creaminess.
Make-AheadCrock pot insert (refrigerated)Up to 2 days in advanceLet chili cool completely, then refrigerate. Reheat on low in crock pot for 1-2 hours or on stovetop.

My favorite reheating trick: if the chili seems a little thick after refrigeration, I add a splash of milk or chicken broth and stir over low heat. The cream cheese sometimes firms up, but it smooths out beautifully. Avoid microwaving on high – it can make the cream cheese grainy. Instead, warm in a saucepan or microwave at 50% power, stirring every 30 seconds.

Variations & Easy Swaps

VariationKey ChangeBest ForDifficulty Impact
Spicy SouthwestAdd 1 can green chiles + ½ tsp cayenneHeat loversEasy (same prep)
Dairy-FreeUse 8 oz coconut cream (canned) instead of cream cheeseDairy intolerance / vegan (if chicken swapped)Easy (may need to blend coconut cream)
Smoky ChipotleAdd 1-2 chipotle peppers in adobo sauce (minced)Smoky depthEasy (just stir in before cooking)

Spicy Southwest Variation

When I’m craving bold warmth, I add a can of diced green chiles and a pinch of cayenne to the base. The green chiles bring a grassy heat that pairs beautifully with the cream cheese. This version reminds me of the fiery harissa my mother would stir into winter stews. It’s still approachable – not blow-your-head-off, but definitely waking up your taste buds.

Dairy-Free Variation

For a dairy-free option, swap the cream cheese for a full-fat canned coconut cream (the thick white part, not the liquid). Add it at the same time as the cream cheese – it will melt into a creamy sauce that’s slightly sweeter and luscious. The coconut flavor is subtle and actually works wonderfully with the corn and cumin. I tested this at a friend’s dinner party and nobody guessed it wasn’t dairy.

Smoky Chipotle Variation

One of my favorite twists: stir one or two minced chipotle peppers in adobo sauce into the chili before cooking. The smoky, almost barbecue-like depth elevates the entire dish. This is what I make on game days – it’s hearty enough to stand up to cold beer and rowdy friends. I found the best chipotles at a bodega in Spanish Harlem, but they’re available in any large grocery store.

Can I use frozen chicken breasts in crock pot cream cheese chicken chili?

Yes, you can absolutely use frozen chicken breasts in this recipe. I do it all the time when I forget to thaw. Just add an extra hour or two to the cook time (cook on low for 7-9 hours instead of 6-8). Be sure the chicken reaches an internal temperature of 165°F. The texture will still be shreddable, but it may be a little firmer than thawed chicken. Don’t stack the frozen breasts – lay them flat on the bottom for even cooking. Also, the chili may be slightly more watery because the frozen meat releases extra liquid; that’s fine, just let it simmer uncovered for 15 minutes at the end to thicken.

What can I substitute for cream cheese in this crock pot chicken chili?

If you don’t have cream cheese, your best substitute is full-fat canned coconut cream (the thick layer on top of a can of full-fat coconut milk). Use about 8 ounces and add it the same way – place on top of the chili and let it melt. This works beautifully for a dairy-free version. Alternatively, you can use 1 cup of heavy cream stirred in at the end (but it won’t be as thick). Another option is Neufchâtel cheese, which is lighter than cream cheese but still creamy. Avoid Greek yogurt – it can curdle under long, slow heat. If you’re really in a pinch, a can of cream of chicken soup (undiluted) will add creaminess but will change the flavor significantly.

How long do you cook cream cheese chicken chili on low in a crock pot?

Cook cream cheese chicken chili on LOW for 6 to 8 hours. The exact time depends on your slow cooker – some run hotter than others. At 6 hours, the chicken will be tender and shreddable, and the cream cheese will have melted into a velvety sauce. If you go to 8 hours, the flavors will be more melded and the chili will be thicker. I usually aim for 7 hours. Avoid cooking longer than 8 hours on low, as the chicken can dry out and the beans may break down too much. If you’re using frozen chicken, add 1-2 hours. Always check that the internal temperature of the chicken is at least 165°F before shredding.

What do you serve with easy crock pot cream cheese chicken chili?

This chili is incredibly versatile. I love serving it with warm honey cornbread or crusty sourdough bread to sop up the creamy sauce. For a low-carb option, serve it over cauliflower rice or with roasted vegetables. Toppings are where you can get creative: shredded cheddar or Monterey Jack, sour cream, sliced avocado, pickled jalapeños, fresh cilantro, and crushed tortilla chips are all fantastic. For a complete meal, add a simple side salad with a lime vinaigrette. In my New York kitchen, I sometimes bake a batch of cornbread muffins and call it dinner. It also pairs wonderfully with a cold beer or a glass of chilled Sauvignon Blanc.

Can I use chicken thighs instead of breasts in this crock pot chili?

Absolutely – chicken thighs are actually my preference when I want extra juicy, shreddable meat. Boneless, skinless thighs work perfectly. The higher fat content keeps them tender even during long cooking. If you use thighs, the chili may be slightly richer. Cook on low for 7-8 hours; they may take a bit longer than breasts because of the fat. Shred just like you would breasts. One tip: trim any large pieces of fat before adding to the crock pot. Thighs also freeze beautifully, so this is a great option for meal prep.

Can I make this cream cheese chicken chili in an Instant Pot?

Yes, you can adapt this recipe for an Instant Pot. Press the “Sauté” function, then add the chicken and canned ingredients (without cream cheese). Cook on Manual (High Pressure) for 10 minutes for fresh chicken or 12 minutes for frozen. Do a quick release, remove the chicken to shred, then stir in the cream cheese until smooth. The texture will be slightly less thick than the slow-cooker version because the liquid won’t reduce as much. To thicken, you can simmer on Sauté for a few minutes or add a cornstarch slurry (1 Tbsp cornstarch mixed with 2 Tbsp water). Be careful not to over-pressure-cook or the cream cheese can separate.

Can I add other beans like pinto or kidney beans to this chili?

Sure! This recipe is very adaptable. You can substitute pinto beans, kidney beans, or even Great Northern beans for the black beans. Each will bring a slightly different texture and flavor. Pinto beans are creamy and mild, kidney beans are firmer and earthy, and Great Northern beans are buttery. If you’re using canned beans, just rinse and drain them. You can also do a mix of beans – half black, half pinto – for variety. Just keep the total amount to about 15 ounces to maintain the chili’s balance. No need to adjust the cooking time.

Is this cream cheese chicken chili gluten-free?

Most of the ingredients are naturally gluten-free – beans, corn, tomatoes, chicken, cream cheese, and spices are all safe. However, the ranch dressing mix often contains trace gluten as a thickening agent. To make it gluten-free, use a certified gluten-free ranch seasoning mix (like Primal Kitchen or Simply Organic) or make your own blend with buttermilk powder, dried dill, garlic powder, onion powder, and salt. Check your chili powder too – some blends may contain anti-caking agents with gluten. If you need to be strict, label-read everything. Otherwise, this chili is naturally very low in gluten.

Can I add vegetables like bell peppers or onions to the chili?

Absolutely – vegetables are a great addition. Chopped bell peppers (red or green), diced onions, or even zucchini add texture and nutrition. Add them at the very beginning along with the canned ingredients. For bell peppers and onions, 1 small each, diced, is perfect. They will soften beautifully during the long cook time. If you add zucchini, chop it into half-inch cubes – it will release water, so you might need to cook the chili uncovered for the last 30 minutes to thicken it up. Mushrooms are also lovely; they add an earthy umami that complements the cream cheese.

How do I thicken cream cheese chicken chili if it’s too thin?

If your chili turns out thinner than you like, don’t worry – it’s easy to fix. The most common cause is too much liquid from the canned vegetables or frozen chicken. First, try leaving the lid off your slow cooker on HIGH for 20-30 minutes to let steam evaporate. Second, you can mash a spoonful of the beans against the side of the pot to release their starch, which naturally thickens the chili. Third, make a cornstarch slurry – whisk 1 tablespoon cornstarch with 2 tablespoons cold water, stir it into the hot chili, and cook for 5 minutes. A final trick: stir in 2 tablespoons of cream cheese or a handful of shredded cheese. Avoid using flour unless you’re okay with a slightly pasty texture.

Share Your Version!

I’d love to see how this Easy Crock Pot Cream Cheese Chicken Chili turns out in your kitchen! Did you stay true to the recipe or add your own twist? Leave a star rating and tell me about it in the comments below – I read every single one and answer your questions within 48 hours. And don’t forget to snap a photo and tag me on Pinterest @exorecipe or Instagram @exorecipes – I always share my favorites in my stories!

Here’s a question for you: What’s your absolute favorite topping for creamy chili? For me, it’s a pile of pickled jalapeños and a drizzle of honey – the sweet-spicy combo is unbeatable. Drop your answer in the comments! From my NYC kitchen to yours – I hope this recipe brings as much warmth to your table as it does to mine. — mia 🧡

📌

Love This Recipe? Save It to Pinterest!

If you enjoyed this Easy Crock Pot Cream Cheese Chicken Chili recipe, don’t let it get lost in your browser tabs! 😄 Pin it now so you can find it again anytime — and explore hundreds more tried-and-tested recipes waiting for you on my Pinterest boards.

👉 Follow mia on Pinterest @exorecipe

📌 Pin this recipe · 🔁 Re-pin your favorites · 💬 Tag me when you make it — I love seeing your creations!

Print

clock clock iconcutlery cutlery iconflag flag iconfolder folder iconinstagram instagram iconpinterest pinterest iconfacebook facebook iconprint print iconsquares squares iconheart heart iconheart solid heart solid icon

Easy Crock Pot Cream Cheese Chicken Chili

  • Author: Chef Mia

Description

You will love this Easy Crock Pot Cream Cheese Chicken Chili Recipe! It’s my family’s favorite chili!


Ingredients

Scale
  • 1 15- oz. can black beans
  • 1 15.25- oz. can corn (undrained)
  • 1 10- oz. can Rotel tomatoes (undrained)
  • 1 package ranch dressing mix
  • 1 tsp. cumin
  • 1 Tbsp. chili powder
  • 1 tsp. onion powder
  • 1 8- oz package light cream cheese
  • 2 chicken breasts

Instructions

  1. Drain and rinse the black beans. Place chicken at the bottom of the crock pot, then pour out the whole can of corn (undrained), Rotel tomatoes, and black beans on top of chicken.
  2. Top with seasonings and ranch dressing mix. Stir together.
  3. Place cream cheese block on top. Cover with lid and cook on low for 6-8 hours.
  4. After the cooking time is over, take chicken breasts from crock pot and shred and add back to the chili. Stir together and enjoy!


Nutrition

  • Calories: 284 kcal
  • Sugar: 9 g
  • Fat: 11 g
  • Carbohydrates: 23 g
  • Protein: 20 g


Easy Crock Pot Cream Cheese Chicken Chili

ph">For more delicious inspiration, follow me on Pinterest!

Juicy Tri Tip (2 Ways) – Grill & Oven Perfection

Tri Tip (2 Ways) – The Best Tri Tip Recipe You’ll Ever Make

⚖️
Difficulty
Medium
⏲️
Prep Time
15 mins
🕒
Cook Time
25 mins
⏱️
Total Time
40 mins
🍽️
Servings
6–8

If you have never had tri tip, you haven’t lived! I’m going to show you how to cook tri tip on the grill or in the oven, and trust me — it’s SO easy and the flavor is unbeatable. Growing up in Morocco, my mother always taught me that the best meat dishes start with a great sear and a generous hand with seasoning. This tri tip recipe brings together everything I love about bold, simple cooking: a beautiful crust, a juicy center, and that deep beefy flavor that makes everyone at the table go quiet. Whether you choose the grill method or the oven method, you are getting a showstopper of a main dish.

The aroma of tri tip roasting or grilling is something else — that smoky, peppery, garlicky scent that fills your kitchen (or backyard) and makes people wander in asking, “What’s for dinner?” The outside develops a gorgeous deep brown crust from the spice rub and the sear, while the inside stays perfectly pink and tender. When you slice into it against the grain, the juices run out just enough to pool on the cutting board, and each bite is rich, savory, and satisfying. It’s the kind of meal that feels special — like Christmas dinner, which is exactly when we always had it growing up.

My version of this best tri tip recipe gives you two foolproof cooking methods: a high-heat grill sear followed by indirect grilling, and a hot-oven roast after a stovetop sear. Both deliver that perfect medium-rare finish with a fantastic crust. I learned the reverse sear principle during my training in Paris, and I’ve adapted it here for the home cook. Whether you’re a grilling enthusiast or an oven-roasting loyalist, I’ve got you covered. 💡 mia’s Pro Tip: The key to tenderness is letting the meat rest after cooking — and slicing against the grain. More on that below!

Why This Tri Tip Recipe Is the Best

The Flavor Secret. The spice rub is simple but perfectly balanced — garlic salt, Lawry’s seasoning salt, kosher salt, black pepper, a touch of sugar, garlic powder, and parsley. Each ingredient plays a role: the sugar helps the crust caramelize, the parsley adds a fresh herbal note, and the Lawry’s brings that classic savory depth. I learned the importance of a good rub from my mother’s kitchen in Morocco, where spice blends are an art form. This rub works beautifully on both the grill and oven versions.

Perfected Texture. The key is the two-zone cooking method — sear first over high heat to build that crust, then finish over gentle indirect heat (or in a moderate oven) so the interior cooks evenly without drying out. This is the same principle I use for prime rib and thick steaks. The result? A tri tip that is fork-tender, juicy, and perfectly pink from edge to center. No dry, overcooked ends — just beautiful, even doneness.

Foolproof & Fast. Unlike a brisket that needs hours and hours, tri tip cooks in about 25–30 minutes total. It’s forgiving, affordable, and feeds a crowd. Whether you’re hosting a backyard barbecue or a holiday dinner, this recipe delivers restaurant-quality results with home-cook effort. Plus, I give you both methods so you can choose based on your setup and mood.

Tri Tip Recipe Ingredients

I buy my tri tip from a local butcher here in NYC — the good marbling makes all the difference. If you can’t get to a butcher, a high-end grocery store will have mid-range cuts that work well. The spice blend is built from pantry staples, and I always use Diamond Crystal kosher salt (never table salt — it’s too harsh and salty). Let’s look at what you’ll need.

Ingredients List

  • 2 & 1/2 pound tri tip roast
  • 1 & 1/2 teaspoons garlic salt
  • 1 tablespoon Lawry’s seasoning salt
  • 1 & 1/2 teaspoons kosher salt (Diamond Crystal preferred)
  • 1 teaspoon black pepper
  • 1/2 teaspoon sugar
  • 2 teaspoons garlic powder
  • 1 tablespoon dried or fresh parsley
  • 1/4 cup olive oil (plus extra for searing in oven method)
  • Optional: 2 cups beef broth, 3 tablespoons flour, 2 tablespoons butter for pan sauce

Ingredient Spotlight

Tri Tip Roast. Also called a California cut or triangle roast, this cut comes from the bottom sirloin. It has great beef flavor but can be tough if overcooked. Look for good marbling — the little streaks of fat within the meat keep it moist and tender. Prime grade from a butcher is ideal, but Choice grade from a good grocery store works beautifully. The roast usually weighs 2–3 pounds and feeds 6–8 people with leftovers.

Lawry’s Seasoning Salt. This is a classic American seasoning blend that adds a savory, herbal, slightly garlicky flavor with a hint of sugar and paprika. It’s a pantry staple in many US kitchens and gives the rub a familiar, comforting taste. If you don’t have it, you can substitute with a mix of 2 teaspoons salt, 1/2 teaspoon paprika, 1/2 teaspoon onion powder, and a pinch of sugar.

Diamond Crystal Kosher Salt. I specify Diamond Crystal because its flaky, porous texture dissolves evenly and sticks to the meat better than Morton’s or table salt. It’s less salty by volume than other salts, so if you use Morton’s kosher salt, reduce the amount by about half. This small detail matters — it’s one of the first things I learned in Paris: salt carefully and choose your salt wisely.

Original IngredientBest SubstitutionFlavor / Texture Impact
Lawry’s Seasoning Salt2 tsp salt + 1/2 tsp paprika + 1/2 tsp onion powder + pinch sugarSlightly less sweet, more direct salt + paprika flavor
Diamond Crystal Kosher SaltMorton’s kosher salt (use half the volume)More intense saltiness per teaspoon; adjust carefully
Garlic Powder2 tsp granulated garlic or 4 tsp fresh minced garlic (in oil)Fresh garlic adds sharper, more pungent flavor; use within 1 hr
Dried Parsley2–3 tbsp fresh parsley, finely choppedBrighter, fresher herb flavor; add fresh parsley after cooking if desired
Olive OilAvocado oil or grapeseed oilNeutral flavor, similar fat content; avocado oil has higher smoke point

How to Make Tri Tip (2 Ways) — Step-by-Step

I’ve broken both the grill method and the oven method into clear, achievable steps. Choose your path — or read both and decide which suits your kitchen and your mood today.

Step 1: Choose and Prepare Your Meat

If you can, get your tri tip from a local butcher. They will have what is called “prime” cuts, which has more fat and marbling than you can find at the grocery store. It will take longer to cook because of all the fat, and that fat means flavor. If you buy your tri tip at the grocery store, go to a high-end store — they carry mid-range cuts. A discount store will have discount meat that isn’t marbled well and will shrink a lot more. Ask for a well marbled tri tip roast, or “California cut” or “triangle roast.” If they still don’t know, ask for the bottom sirloin butt (subprimal cut).

💡 mia’s Pro Tip: If you are grilling, trim the fat cap from the roast. If you are oven roasting, leave it on. The fat cap protects the meat in the dry oven heat and adds moisture.

Step 2: Make the Spice Rub and Marinate

In a small bowl, combine all the spices: garlic salt, seasoning salt, kosher salt (Diamond Crystal only — never table salt!), pepper, sugar, garlic powder, and parsley. Rub the spice mixture all over the roast with your hands. Place in a large ziplock bag, add 1/4 cup olive oil, seal the bag, and massage the oil into the meat. Refrigerate, turning a couple times, for about 8 hours. (If you only have an hour or even 15 minutes, you’ll still get a great roast — but longer marinating builds deeper flavor. You can leave it in the fridge for up to 3 days.)

⚠️ Common Mistake to Avoid: Don’t skip the marinating time entirely. Even 15 minutes helps the salt penetrate the surface. But if you can give it a few hours, the flavor really develops. Set a timer so you don’t forget it in the fridge for 4 days!

Step 3: Bring to Room Temperature

Remove the meat from the fridge 30 minutes before you plan to cook it. It should start cooking at room temperature. This ensures even cooking — a cold roast will sear on the outside but stay raw in the center.

💡 mia’s Pro Tip: Place the roast on a plate and discard the marinade (or save it to add to a pan sauce if you plan to make one). Pat the meat dry with paper towels before searing — a dry surface gives you a better crust.

Step 4 — Grill Method: Sear Over High Heat

Preheat your grill to high heat — give it a good 15–20 minutes to heat up. Grease the grill grates (or brush oil directly on the meat). Sear the roast over high heat for 2–3 minutes per side, until nicely browned. Keep the lid shut as much as you can. Turn off the heat on the side of the grill where the meat is — you’re cooking over INDIRECT heat now. Lower the other side of the grill to low heat. If cooking over charcoal, arrange the meat off to the side, not directly above the coals.

⚠️ Common Mistake to Avoid: Don’t move the meat around while searing. Let it sit undisturbed for the full 2–3 minutes so the crust can develop. If you try to flip too early, the meat will stick and tear.

Step 5 — Grill Method: Indirect Heat Finish

Grill without opening the lid for about 20–25 minutes, or about 10–15 minutes per pound, depending on how rare you want it. Rare is 135°F, medium-rare is 145°F. Use a meat thermometer inserted in the center of the roast to check the temperature.

💡 mia’s Pro Tip: For the most accurate reading, use an instant-read thermometer and insert it into the thickest part of the roast. Pull the meat off the heat about 3–5°F below your target temperature — it will continue to rise during resting.

Step 6 — Oven Method: Sear Then Roast

Preheat your oven to 400°F. Line a rimmed baking sheet with foil and place an oven-safe cooling rack on top. Heat a large skillet over medium-high heat with 2 tablespoons olive oil. When the oil shimmers, place the roast in the pan, fat side down. Sear for 3–4 minutes until a brown crust develops, then flip and sear the other side. Transfer the roast to the cooling rack on the baking sheet. Save the drippings and oil from searing for a pan sauce if you like.

⚠️ Common Mistake to Avoid: Don’t crowd the pan — the roast should have direct contact with the hot surface. If your skillet is too small, the meat will steam instead of sear, and you won’t get that deep brown crust.

Step 7 — Oven Method: Roast to Perfection

Put the roast in the oven and bake at 400°F for 20–30 minutes, or about 10–15 minutes per pound. Rare is 130–135°F, medium-rare is 135–145°F. Don’t cook it past 145°F — the meat doesn’t have enough fat for medium-well or well. Use a meat thermometer inserted into the center to check.

💡 mia’s Pro Tip: Every oven runs a little differently. Start checking the temperature at 18 minutes for a 2.5-pound roast. If you like your meat more on the rare side, pull it at 130°F and let it rest — it will coast up to about 135°F.

Step 8: Rest and Slice

Remove the roast from the grill or oven and place it on a rimmed serving platter. Cover well with foil and let rest for 10–15 minutes. This is non-negotiable! The juices need time to redistribute throughout the meat. Slice against the grain — look at the direction of the muscle fibers and cut perpendicular to them. This ensures every slice is tender, not chewy.

⚠️ Common Mistake to Avoid: Slicing with the grain is the #1 mistake people make with tri tip. The muscle fibers run in two different directions on a tri tip — find the grain, turn the roast, and slice across it. If you’re unsure, make a small cut to see the fiber direction before slicing the whole roast.

StepActionDurationKey Visual Cue
1Choose & prepare meat (butcher or grocery)10 minsWell-marbled roast, even shape
2Mix rub, coat meat, marinate8 hrs preferred (min 15 min)Meat fully coated, bag sealed
3Bring to room temperature30 minsNo longer cold to the touch
4Sear (grill or stovetop)2–4 mins per sideDeep brown crust, not burnt
5Cook via indirect heat (grill) or oven (400°F)20–30 minsInternal temp 130–145°F
6Rest under foil10–15 minsJuices pool on platter, temp rises 3–5°F
7Slice against the grain2 minsClean slices, visible muscle fibers cut crosswise

Serving & Presentation

I love serving tri tip on a large wooden cutting board or a rimmed platter so the juices can pool without running all over the table. Slice the entire roast against the grain and fan the slices out slightly for a gorgeous presentation. Sprinkle a little flaky sea salt and a few fresh parsley leaves on top for color and freshness. The traditional side dish for tri tip is Santa Maria Pinquito Beans — small pink beans cooked with bacon, garlic, and tomato — but any hearty side works beautifully.

In my NYC kitchen, I often pair this with a simple arugula salad dressed with lemon and olive oil, or roasted potatoes with garlic and rosemary. The rich, beefy flavor of the tri tip stands up beautifully to bold sides. If you made the pan sauce (from the drippings, beef broth, flour, and butter), drizzle a little over each slice — it takes the dish to another level. I learned sauce-making in Paris, and this quick pan sauce is one of my favorite tricks for elevating a weeknight meal.

💡 mia’s Pro Tip: For the pan sauce, save all the meat drippings and excess marinade. Add to a small saucepan with 2 cups beef broth. Bring to a boil. In a small bowl, combine 1/3 cup cold water and 3 tablespoons flour. Whisk until smooth, then slowly pour into the boiling broth. Simmer for 5–10 minutes until thickened. Stir in 2 tablespoons butter, season with salt and pepper, and serve over the sliced meat. It’s incredible.

Pairing TypeSuggestionsWhy It Works
Side DishSanta Maria Pinquito Beans, roasted potatoes, garlic bread, grilled vegetablesHearty sides balance the rich beef; beans are traditional, potatoes add crunch
Sauce / DipPan sauce (from drippings), chimichurri, horseradish cream, salsa verdeAdds moisture and brightness; chimichurri cuts richness, horseradish adds heat
BeverageZinfandel, Syrah, Malbec, or a dark lager / amber aleBold red wines complement the beef’s richness; dark beers echo the smoky char
GarnishFresh parsley, flaky sea salt, lemon wedges, grilled lemon halvesFresh herbs and citrus brighten the dish and add visual appeal

Make-Ahead, Storage & Reheating

Tri tip is wonderful for meal prep — I often cook two roasts at once and save one for quick lunches during the week. Since I’m always juggling recipe development and teaching here in NYC, having pre-cooked tri tip in the fridge is a lifesaver. The key is storing it properly so it stays moist and flavorful.

MethodContainerDurationReheating Tip
RefrigeratorAirtight container or wrap tightly in foil3–4 daysReheat gently in a low oven (300°F) with a splash of broth, covered, for 10–15 mins
FreezerWrap tightly in plastic wrap + foil, or vacuum seal2–3 monthsThaw overnight in fridge, then reheat in oven at 300°F with broth, covered
Make-AheadMarinate in ziplock bag in fridgeUp to 3 days in advanceRemove from fridge 30 mins before cooking; pat dry before searing

For reheating, the goal is to warm the meat without drying it out. I prefer the oven method — place the sliced meat in a baking dish, add a few tablespoons of beef broth or water, cover tightly with foil, and warm at 300°F for 10–15 minutes. Avoid the microwave if you can — it tends to toughen the meat and make it chewy. If you’re in a hurry, a hot skillet with a splash of broth works too, but watch it closely.

💡 mia’s Pro Tip: Leftover tri tip makes the best sandwiches! Slice it thin, pile it on a crusty roll with a smear of horseradish cream or chimichurri, and add some arugula. It’s my favorite lunch the next day.

Variations & Easy Swaps

VariationKey ChangeBest ForDifficulty Impact
Moroccan Spice RubAdd 1 tsp cumin, 1 tsp paprika, 1/2 tsp cinnamon, and 1/2 tsp ginger to the rubA warm, aromatic twist — perfect for fall or holiday dinnersEasy (same method, different spices)
Smoked Tri TipSmoke at 225°F for 45–60 mins until internal temp reaches 130°F, then sear hotDeep smoky flavor — ideal for backyard cooking enthusiastsMedium (requires smoker and temperature monitoring)
Reverse Sear (Oven + Cast Iron)Roast at 250°F for 30–40 mins to 125°F internal, then sear in hot cast iron 1 min per sideMaximum crust, perfectly even doneness — a chef’s favorite methodMedium (two-step process, careful temp monitoring)

Moroccan Spice Rub Variation

This is my personal favorite — a nod to my Moroccan roots. Add 1 teaspoon cumin, 1 teaspoon paprika, 1/2 teaspoon cinnamon, and 1/2 teaspoon ground ginger to the spice rub. The warmth of the cinnamon and cumin pairs beautifully with the beef, and the paprika adds a lovely color. It’s not traditional for tri tip, but it works wonderfully — especially in the oven method where the spices have time to meld. Serve it with couscous and roasted carrots for a full North African-inspired meal.

Smoked Tri Tip Variation

If you own a smoker, this is a game-changer. Set your smoker to 225°F with your favorite wood (hickory or oak work beautifully). Smoke the tri tip until the internal temperature reaches 125–130°F, which takes about 45–60 minutes. Then sear it over high heat on a grill or in a cast-iron skillet for 1–2 minutes per side to develop the crust. The result is a tri tip with a deep, smoky flavor throughout, a beautiful pink center, and a crackling crust. This is a fantastic option for weekend gatherings.

Reverse Sear Variation

The reverse sear is the technique I learned in Paris, and it’s perfect for tri tip. Instead of searing first and then roasting, you slow-roast the meat at a low temperature (250°F) until it’s about 10–15°F below your target, then sear it in a screaming-hot cast-iron skillet. This method gives you an incredibly even doneness from edge to center — no gray band around the outside. The crust is also superior because the surface is dry when it hits the hot pan. It takes a little more time, but the result is absolutely worth it.

What is the best way to cook tri tip to make it tender?

The best way to cook tri tip for tenderness is to use a two-zone cooking method: sear it over high heat first to develop a flavorful crust, then finish it over indirect heat (or in a moderate oven) until it reaches your desired internal temperature. For tri tip, medium-rare (135–145°F) is ideal — cooking it past 145°F will make it tough because the meat doesn’t have enough fat for well-done. Letting the meat rest for 10–15 minutes after cooking is also essential — it allows the juices to redistribute throughout the roast. And always slice against the grain! The muscle fibers in tri tip run in two directions, so take a moment to find the grain and cut perpendicular to it. This single step makes a huge difference in tenderness.

Can you cook tri tip in the oven instead of on a grill?

Absolutely! Cooking tri tip in the oven is not only possible, it’s one of my favorite methods — especially when the weather doesn’t cooperate for grilling. The oven method starts with a stovetop sear in a hot skillet to develop that beautiful brown crust, then the roast finishes in a 400°F oven for about 20–30 minutes (10–15 minutes per pound). For the best results, place the roast on a cooling rack set over a baking sheet so air circulates evenly around the meat. Use a meat thermometer to check doneness — rare is 130–135°F, medium-rare is 135–145°F. Don’t cook it past 145°F. The oven method produces a beautifully cooked tri tip with a lovely crust and a juicy, tender interior.

What are the two most popular ways to season a tri tip?

The two most popular ways to season tri tip are a simple salt-and-pepper dry rub and a more complex spice blend. The classic Santa Maria-style seasoning uses just salt, pepper, and garlic — it’s straightforward and lets the beef flavor shine. The second popular approach is a robust spice rub like the one in this recipe: garlic salt, Lawry’s seasoning salt, kosher salt, black pepper, sugar, garlic powder, and parsley. This blend adds layers of savory, herbal, and slightly sweet notes that create a beautiful crust when seared. Both approaches are delicious — the choice depends on whether you want the beef to be the star or you prefer a more seasoned, crust-forward experience. In my NYC kitchen, I often make both and let my guests decide which they prefer.

How long should you let tri tip rest after cooking?

You should let tri tip rest for at least 10–15 minutes after cooking. This resting period is crucial — it allows the juices that have been pushed to the center of the roast during cooking to redistribute evenly throughout the meat. If you slice into it too soon, all those flavorful juices will run out onto the cutting board, leaving you with dry, tough meat. To rest the meat properly, place it on a rimmed platter or cutting board, tent it loosely with aluminum foil, and let it sit undisturbed. During this time, the internal temperature will continue to rise by about 3–5°F — this is called carryover cooking. So if you pull the roast at 130°F for medium-rare, it will coast up to about 135°F while resting.

Should I trim the fat cap off tri tip before cooking?

It depends on your cooking method. If you are grilling the tri tip, I recommend trimming the fat cap — the direct high heat of the grill can cause the fat to flare up and burn, which gives the meat a bitter, acrid flavor. If you are oven roasting, leave the fat cap on. The fat protects the meat from the dry heat of the oven and slowly renders during cooking, basting the roast from the outside and adding moisture and flavor. In both cases, any remaining fat can be trimmed after cooking when you slice the meat. My advice: let the cooking method guide your decision — trim for the grill, leave it on for the oven.

What temperature should tri tip be for medium-rare?

For medium-rare tri tip, aim for an internal temperature of 135–145°F when measured with a meat thermometer inserted into the thickest part of the roast. Keep in mind that the temperature will rise by about 3–5°F during resting (carryover cooking), so I recommend pulling the roast off the heat at 130–135°F if you want it to land perfectly in the medium-rare zone. Rare tri tip is 130–135°F, medium-rare is 135–145°F, and I don’t recommend cooking it past 145°F — the meat doesn’t have enough internal fat to stay moist at medium-well or well-done levels. Use an instant-read thermometer for the most accurate reading, and check in a couple of spots to be sure.

Can I marinate tri tip for too long?

Yes, you can marinate tri tip for too long — but the window is generous. With this salt-based dry rub (which includes kosher salt, garlic salt, and seasoning salt), marinating for up to 3 days in the refrigerator is fine. Beyond that, the salt can begin to break down the meat’s protein structure too much, leading to a texture that is mushy or mealy rather than tender. The ideal marinating time is about 8 hours — this allows the salt and spices to penetrate the surface and flavor the meat without over-tenderizing. If you only have 15–30 minutes, you’ll still get a good result, but 8 hours is the sweet spot for maximum flavor development while preserving the meat’s natural texture.

What is the difference between tri tip and brisket?

Tri tip and brisket are both beef cuts, but they come from different parts of the animal and have very different cooking requirements. Tri tip comes from the bottom sirloin (the rear of the cow) and is a relatively tender, lean cut that cooks quickly — about 25–30 minutes for a whole roast. Brisket comes from the chest area and is a tough, heavily exercised muscle with lots of connective tissue that requires low-and-slow cooking for hours (often 8–12 hours) to break down the collagen and become tender. Tri tip is best cooked to medium-rare and sliced against the grain, while brisket is typically cooked to an internal temperature of around 200–205°F and shredded or sliced. They’re both delicious, but they require very different approaches in the kitchen.

Can I use a different cut of meat if I can’t find tri tip?

If you can’t find tri tip, the best substitute is a thick-cut sirloin steak or a petite sirloin roast. These cuts come from the same region of the cow and have a similar beefy flavor and texture. You can also use a top sirloin roast, though it will be slightly leaner and may cook a little faster. Another option is a flank steak or skirt steak, but these are much thinner and will cook in a fraction of the time — adjust your cooking time dramatically downward. If you’re committed to the full-roast experience, ask your butcher if they can order a tri tip for you — most butchers can get one, especially if you give them a couple of days’ notice. The unique shape and marbling of tri tip are worth seeking out.

How do I slice tri tip correctly?

Slicing tri tip correctly is one of the most important steps for a tender result. Tri tip has muscle fibers that run in two different directions — the roast is shaped like a triangle, and the grain changes direction partway through. Here’s the trick: look at the roast and identify the direction of the muscle fibers (they look like long lines running through the meat). Slice perpendicular to those fibers — that’s “against the grain.” Start slicing from the thin end, and when you notice the grain direction change (about halfway through the roast), rotate the roast and continue slicing against the new direction. The slices should be about 1/4 to 1/2 inch thick. Slicing against the grain shortens the muscle fibers, making each bite tender rather than chewy. This is the technique I use every time in my NYC kitchen, and it makes all the difference.

📌

Love This Recipe? Save It to Pinterest!

If you enjoyed this Tri Tip (2 Ways) recipe, don’t let it get lost in your browser tabs! 😄 Pin it now so you can find it again anytime — and explore hundreds more tried-and-tested recipes waiting for you on my Pinterest boards.

👉 Follow mia on Pinterest @exorecipe

📌 Pin this recipe · 🔁 Re-pin your favorites · 💬 Tag me when you make it — I love seeing your creations!

Print

clock clock iconcutlery cutlery iconflag flag iconfolder folder iconinstagram instagram iconpinterest pinterest iconfacebook facebook iconprint print iconsquares squares iconheart heart iconheart solid heart solid icon

Tri Tip (2 Ways)

  • Author: Chef Mia

Description

If you have never had tri tip, you haven’t lived! I will show you how to cook tri tip on the grill or in the oven, it’s SO easy and the flavor is unbeatable! We always had tri tip for Christmas dinner growing up, it’s an impressive main dish!


Ingredients

Scale
  • 2 & 1/2 pound tri tip roast
  • 1 & 1/2 teaspoons garlic salt
  • 1 tablespoon Lawry's seasoning salt
  • 1 & 1/2 teaspoons kosher salt (Diamond Crystal)
  • 1 teaspoon black pepper
  • 1/2 teaspoon sugar
  • 2 teaspoons garlic powder
  • 1 tablespoon dried or fresh parsley
  • 1/4 cup olive oil

Instructions

  1. If you can, get your tri tip from a local butcher. They will have what is called "prime" cuts, which has more fat and marbling than you can find at the grocery store. It will take longer to cook because of all the fat. (Fat=flavor)
  2. If you buy your tri tip at the grocery store, make sure that you go to a high-end grocery store. High-end grocery stores are going to have mid-range cuts of meat. A discount store is going to have discount meat, and it will not be marbled well. Your roast will shrink a lot more and it will take a shorter time to cook.
  3. Ask the butcher or grocery clerk for a well marbled tri tip roast, or "California cut" or a "triangle roast." If they still don't know what you mean, ask for the bottom sirloin butt (subprimal cut).
  4. In a small bowl, combine all the spices: garlic salt, seasoning salt, kosher salt (only kosher salt, never table salt, and preferably Diamond Crystal!), pepper, sugar, garlic powder, and parsley. 1 tablespoon of dried parsley is fine, you can use 2-3 tablespoons if you are using fresh parsley.
  5. If you are grilling, trim the fat cap from the roast. If you are oven roasting, leave it on.
  6. Rub the spice mixture all over the roast with your hands. Place in a large ziplock bag and add 1/4 cup olive oil. Seal the bag and massage the oil into the meat. Place in the fridge and marinate, turning a couple times, for about 8 hours. (This is ideal. If you only have an hour or even 15 minutes, guess what, you're still going to get a great roast. But the longer you marinate, the more flavor there will be. You can leave it in the fridge for up to 3 days.)
  7. Remove the meat from the fridge 30 minutes before you plan to cook it. It should start cooking at room temperature.
  8. Preheat your grill to high heat. Make sure you give it a good 15-20 minutes to heat up.
  9. Place the roast on a plate and discard the marinade (or save it to add to a pan sauce if you plan to make one).
  10. Grease the grill (or brush oil directly on the meat).
  11. Sear the roast over high heat for about 2-3 minutes, until it is nicely browned. Flip over (grease again if necessary) and sear the other side for 2-3 minutes. Keep the lid shut as much as you can.
  12. Turn off the heat on the side of the grill that your meat is on. We are cooking it over INDIRECT heat. Lower the other side of the grill to low heat. If you are cooking over charcoals, arrange the meat and charcoals so that the meat is off to the side, not cooking directly above the charcoal.
  13. Grill without opening the lid for about 20-25 minutes, or about 10-15 minutes per pound, depending on how rare you want it. Rare is 135 degrees F. Medium rare is 145 degrees F. Use a meat thermometer inserted in the center of the roast to check the temperature.
  14. Remove the roast from the grill, and place on a rimmed serving platter. Cover well with foil and let rest for 10-15 minutes.
  15. Slice against the grain and serve (see photos). Try this tri tip with its traditional side dish, Santa Maria Pinquito Beans!
  16. Remove the meat from the fridge 30 minutes before you plan to cook it. It should start cooking at room temperature.
  17. Preheat your oven to 400 degrees F.
  18. Line a rimmed baking sheet with foil and place an oven-safe cooling rack on top, and set aside.
  19. Heat a large skillet over medium high heat. Add 2 tablespoons olive oil. When the oil shimmers, place the roast in the pan, fat side down. Sear the roast for about 3-4 minutes, until a brown crust has developed. Flip and sear the other side.
  20. Place the roast on the cooling rack. Save the marinade and oil from searing for a pan sauce, if you choose to make one.
  21. Put the roast in the oven and bake at 400 degrees for about 20-30 minutes, or about 10-15 minutes per pound, depending on how rare you want it. Rare is 130-135 degrees F. Medium rare is 135-145 degrees F. Don't cook it past 145; the meat doesn't have enough fat for medium well or well. Use a meat thermometer inserted in the center of the roast to check the temperature.
  22. Remove the roast from the oven, and cover well with foil. Let rest for 10-15 minutes.
  23. Slice against the grain and serve (see photos). Try this tri tip with its traditional side dish, Santa Maria Pinquito Beans!
  24. Save all meat drippings* and excess marinade. Add to a small saucepan with 2 cups beef broth.* Bring to a boil. In a small bowl, combine 1/3 cup cold water and 3 tablespoons flour. Whisk until smooth, and then slowly pour into the boiling broth. Continue simmering for 5-10 minutes until thickened. Add 2 tablespoons butter, season with salt and pepper, and serve with meat.


Nutrition

  • Calories: 458 kcal
  • Sugar: 1 g
  • Fat: 28 g
  • Carbohydrates: 2 g
  • Protein: 47 g


Tri Tip (2 Ways)

Decadent Mississippi Mud Pie Recipe with Oreo Crust

Mississippi Mud Pie with Oreo Crust & Chocolate Mousse – A Decadent Southern Dessert

⚖️
Difficulty
Medium
⏲️
Prep Time
30 mins
🕒
Cook Time
45 mins
⏱️
Total Time
4 hrs 15 mins
🍽️
Servings
10

I still remember the first time I tasted a truly great Mississippi Mud Pie. It was at a tiny diner just off the Mississippi River during a road trip through the South — the kind of place where the coffee is black and the pies are deep, dark, and unapologetically rich. That first bite stopped me mid-conversation. The combination of a crunchy Oreo cookie crust, a dense fudgy brownie layer, silky chocolate mousse, and clouds of chocolate whipped cream was nothing short of life-changing. This Mississippi Mud Pie recipe is my tribute to that moment — and trust me, it delivers every bit of the drama and decadence you’d expect from a classic Southern dessert.

What makes this easy Mississippi Mud Pie so special is the way the layers work together. The Oreo crust is baked until firm and fragrant, then topped with a brownie-like filling that stays gloriously fudgy in the center. Over that goes a luscious chocolate mud pie mousse made from melted milk chocolate and airy whipped cream, all finished with a billowy chocolate whipped cream and crunchy baked Oreo crumbles. Every spoonful gives you crunch, creaminess, and deep chocolate flavor that lingers. It’s the kind of dessert that requires a fork, a napkin, and zero apologies.

I’ve tested this recipe more times than I can count — both in my NYC apartment kitchen and in my mother’s home in Morocco, where I’d sneak in a test batch between tagines. My version uses a clever baked Oreo crumble topping that stays crunchy even after the pie chills, and a French-style mousse technique that ensures the chocolate layer is impossibly light yet intensely flavored. One common mistake? Not baking the brownie layer long enough — don’t worry, I’ll tell you exactly how to nail it. Let’s dive into the best Mississippi Mud Pie recipe you’ll ever make.

Why This Mississippi Mud Pie Recipe Is the Best

The Flavor Secret: Most Mississippi Mud Pies rely on pudding mix or boxed brownie mix. Not mine. I start with a from-scratch fudgy brownie layer made with bittersweet chocolate, brown sugar, and a touch of vanilla — the same technique I learned at Le Cordon Bleu in Paris for making perfect chocolate fondant. The result is a deep, sophisticated chocolate flavor that pairs beautifully with the nostalgic Oreo crust. My Moroccan roots also inspired a pinch of salt in every layer — it’s the same principle we use in North African sweets to balance richness and keep you coming back for one more bite.

Perfected Texture: Texture is everything in a layered dessert, and this pie delivers four distinct experiences in every slice. The Oreo crust is pressed firmly and pre-baked so it stays crunchy. The brownie layer is baked to exactly 180°F — a tip I picked up from a pastry chef in Lyon — which gives you a set but still fudgy center. The chocolate mousse is folded by hand to keep it airy, and the crumble topping is tossed with cocoa powder and butter, then baked until crunchy. No soggy layers here — just pure textural harmony.

Foolproof & Fast: Despite how impressive this pie looks, it’s surprisingly beginner-friendly. The ingredients are all standard grocery store finds — Oreos, butter, chocolate, cream, eggs — and the steps are clearly broken down. I’ve designed this easy Mississippi Mud Pie so that even if you’ve never made a mousse or a brownie from scratch, you’ll end up with a dessert that looks like it came from a fancy bakery. Plus, it’s a no-fuss make-ahead recipe: you can assemble it entirely the day before, which makes it perfect for Thanksgiving, potlucks, or any celebration where you want to show up with something showstopping.

Mississippi Mud Pie Ingredients

There’s something comforting about gathering the ingredients for this Mississippi Mud Pie recipe. On a rainy Saturday in NYC, I love walking down to my local market on Bleecker Street to pick up fresh cream and chocolate — it reminds me of the souks in Marrakech where I’d buy spices and nuts with my mother. Every ingredient here plays a specific role, and I want you to feel confident choosing the best options at your own grocery store.

Ingredients List

  • 25 Oreo cookies (for the crust)
  • 6 Tablespoons salted butter, melted (for the crust)
  • 4 ounces bittersweet chocolate, chopped (for the brownie layer)
  • 3 Tablespoons salted butter, melted (for the brownie layer)
  • 3 Tablespoons vegetable oil
  • 2 Tablespoons unsweetened cocoa powder
  • 2/3 cup light brown sugar
  • 2 large eggs
  • 2 teaspoons vanilla extract
  • 1/4 teaspoon salt
  • 3 Tablespoons all-purpose flour
  • 8 Oreo cookies (for the crumble topping)
  • 2 Tablespoons powdered sugar
  • 1 Tablespoon Dutch-processed cocoa powder
  • Pinch of salt
  • 2 Tablespoons salted butter, melted (for the crumble)
  • 6 ounces milk chocolate, chopped (for the mousse)
  • 1 cup cold heavy cream (for the mousse)
  • 2 Tablespoons Dutch-processed cocoa powder (for the mousse)
  • 2 Tablespoons powdered sugar (for the mousse)
  • Pinch of salt (for the mousse)
  • 1 cup heavy cream (for the whipped cream topping)
  • 1/4 cup granulated sugar (for the whipped cream topping)
  • 3 Tablespoons unsweetened cocoa powder (for the whipped cream topping)

Ingredient Spotlight

Oreo Cookies: The star of the crust and the crumble topping. I use classic Oreos (not Double Stuf) because the filling-to-cookie ratio is perfect for binding the crust. For the crumble, the cookies get crushed into chunks, not fine crumbs, so you get those satisfying crunchy bits on top. You can substitute with any chocolate sandwich cookie, but the flavor won’t be quite the same — Oreos have that unmistakable cocoa-and-cream taste that makes this pie iconic.

Bittersweet Chocolate: This is the backbone of the brownie layer. I recommend a chocolate with 60-70% cacao content — it provides deep chocolate flavor without being overly sweet. Brands like Ghirardelli, Lindt, or Baker’s are excellent choices. If you only have semisweet chocolate (around 50% cacao), that works too — just reduce the brown sugar by 1 tablespoon to keep the sweetness balanced. Avoid chocolate chips, which often contain stabilizers that prevent smooth melting.

Dutch-Processed Cocoa Powder: I call for Dutch-processed cocoa in both the crumble and the mousse. Dutch-processed cocoa is treated with an alkali to neutralize acidity, which gives it a smoother, more mellow chocolate flavor and a darker, more dramatic color. Natural cocoa powder can be substituted in a pinch, but the flavor will be slightly more acidic and the color less intense. For the brownie layer, I use unsweetened natural cocoa powder — the difference is intentional, and both belong in your pantry.

Heavy Cream: This does double duty — it’s whipped into the chocolate mousse and also used for the chocolate whipped cream topping. Make sure your cream is very cold (straight from the fridge) for the best volume when whipping. I always buy heavy cream with at least 36% milk fat for the richest, most stable results. If you accidentally over-whip and start to see butter granules forming, don’t panic — just fold in a tablespoon of cold cream and gently whisk to smooth it out.

Original IngredientBest SubstitutionFlavor / Texture Impact
Oreo cookiesChocolate graham crackers + 2 Tbsp sugarLess sweet, more crumbly, slightly different flavor
Bittersweet chocolateSemisweet chocolate (reduce brown sugar by 1 Tbsp)Slightly sweeter, less deep chocolate flavor
Dutch-processed cocoa powderNatural unsweetened cocoa powderMore acidic flavor, lighter color, less smooth
Heavy cream (36% fat)Whipping cream (30% fat) or full-fat coconut cream (dairy-free)Less stable peaks with whipping cream; coconut adds flavor

How to Make Mississippi Mud Pie — Step-by-Step

I promise you — this Mississippi Mud Pie recipe is much simpler than it looks. I’ve broken it into clear steps with my best tips so you can follow along easily, whether you’re a seasoned baker or making your first layer dessert. Let’s start!

Step 1: Prepare the Oreo Crust

Preheat your oven to 325°F. Place 25 Oreo cookies in a food processor and pulse until you have fine, even crumbs. Alternatively, seal them in a heavy-duty zip-top bag and crush them with a rolling pin — a great arm workout! Transfer the crumbs to a medium bowl, pour in 6 tablespoons of melted salted butter, and stir with a fork until every crumb is moistened. Press the mixture firmly into the bottom and up the sides of a 9-inch standard pie plate. Use the bottom of a measuring cup to pack it down evenly — a well-packed crust is essential for clean slices later.

💡 mia’s Pro Tip: For a thinner, more even crust, press the crumbs only about 1/4 inch thick. If you like a thicker crust, use 30 Oreos and 7 tablespoons of butter. Either way, bake the crust for 12-15 minutes until it’s fragrant and set. Let it cool completely on a wire rack before adding the brownie layer.

Step 2: Make the Fudgy Brownie Layer

In a large microwave-safe bowl, combine 4 ounces chopped bittersweet chocolate, 3 tablespoons melted butter, 3 tablespoons vegetable oil, and 2 tablespoons unsweetened cocoa powder. Microwave in 20-second bursts, stirring thoroughly between each burst, until everything is completely melted and smooth. This usually takes about 60-80 seconds total. Whisk in 2/3 cup packed light brown sugar, 2 large eggs (one at a time), 2 teaspoons vanilla extract, and 1/4 teaspoon salt until the mixture is glossy and well combined. Finally, fold in 3 tablespoons of all-purpose flour with a rubber spatula — stir just until no streaks of flour remain. Over-mixing will make the brownie tough.

⚠️ Common Mistake to Avoid: Microwaving the chocolate too long at once can scorch it, turning it grainy and bitter. Always use 20-second bursts and stir well between each. If you prefer, you can melt the chocolate and butter together in a double boiler — it takes a few minutes more but gives you complete control.

Step 3: Bake the Brownie Layer

Pour the brownie batter into the cooled Oreo crust and spread it into an even layer with the spatula. Bake at 325°F for 25-30 minutes. The key doneness test is this: insert a toothpick into the center of the brownie layer — it should come out barely wet with a little batter clinging to it, not clean and not liquid. For the most accurate result, use an instant digital thermometer: the center should read 180°F. This temperature guarantees a fudgy, set texture without being under-baked. Let the pie cool completely on a wire rack — this takes about 1 hour.

💡 mia’s Pro Tip: The brownie layer will puff up slightly in the oven and settle as it cools. Don’t worry if it cracks — that’s perfectly normal and will be covered by the mousse and whipped cream. Patience is key here: if the brownie layer is even slightly warm when you add the mousse, the mousse will melt and lose its airy texture.

Step 4: Prepare the Oreo Crumbles

Place 8 Oreo cookies in a zip-top bag and pound them a few times with a rolling pin — you want a mix of small crumbs and bigger chunks. Transfer to a medium bowl and add 2 tablespoons powdered sugar, 1 tablespoon Dutch-processed cocoa powder, and a pinch of salt. Toss to combine evenly. Drizzle 2 tablespoons melted butter over the mixture and toss until every piece is coated. Spread the crumbles on a parchment-lined baking sheet and bake at 325°F for 10 minutes. Cool completely — they’ll become crunchy and intensely chocolatey.

⚠️ Common Mistake to Avoid: Don’t crush the cookies too fine for the topping — you want distinct crunchy pieces, not powder. Also, make sure the crumbles are completely cool before sprinkling them on the finished pie. Warm crumbles will melt the whipped cream and turn soggy.

Step 5: Make the Chocolate Mousse

Place 6 ounces chopped milk chocolate in a large microwave-safe bowl and melt in 20-second bursts, stirring well between each, until smooth. Set aside to cool for exactly 10 minutes — the chocolate should be between 90°F and 100°F. While the chocolate cools, make the chocolate whipped cream: in the bowl of a stand mixer fitted with the whisk attachment (or using a hand mixer), combine 1 cup cold heavy cream, 2 tablespoons Dutch-processed cocoa powder, 2 tablespoons powdered sugar, and a pinch of salt. Beat on medium-high speed until soft peaks form — the cream should hold its shape but still be billowy. Stir one-third of the whipped cream into the cooled melted chocolate until combined, then gently fold in the remaining whipped cream with a rubber spatula. Fold just until no white streaks remain — you want a light, airy mousse.

💡 mia’s Pro Tip: If the melted chocolate is too warm when you add the whipped cream, the cream will deflate and you’ll end up with a dense, pudding-like layer. I like to touch the bowl to my wrist — it should feel just barely warm, not hot. A digital thermometer is more reliable: 90-100°F is your sweet spot.

Step 6: Assemble and Chill

Spread the chocolate mousse evenly over the cooled brownie layer. Use an offset spatula or the back of a spoon to create gentle swirls — it doesn’t need to be perfect, as it will be covered. Transfer the pie to the refrigerator and chill for at least 3 hours, or overnight. This step is crucial — the mousse needs time to set so the pie slices cleanly. If you’re in a rush, 3 hours is the absolute minimum, but overnight gives you that gorgeous, photogenic slice.

⚠️ Common Mistake to Avoid: Don’t skip the chilling time! If you slice the pie before the mousse is fully set, the layers will slide and the mousse will be more like a pudding. Overnight chilling is ideal for the cleanest slices and the most developed flavor.

Step 7: Top with Chocolate Whipped Cream and Crumbles

In a clean large bowl, combine 1 cup heavy cream, 1/4 cup granulated sugar, and 3 tablespoons unsweetened cocoa powder. Beat with a whisk attachment on medium-high speed until stiff peaks form — the cream should hold its shape firmly when you lift the whisk. Spread the chocolate whipped cream over the chilled mousse layer, creating decorative peaks and swirls with your spatula. Sprinkle the cooled Oreo crumbles generously over the top. The contrast of dark cream, white filling, and crunchy chocolate bits is absolutely stunning.

💡 mia’s Pro Tip: For the most dramatic presentation, reserve about 2 tablespoons of the Oreo crumbles and sprinkle them on right before serving — they’ll stay extra crunchy. You can also add a few whole Oreo halves around the edge of the pie for a bakery-style finish. Serve chilled, straight from the fridge.

StepActionDurationKey Visual Cue
1Prepare Oreo crust15 minsFine, even crumbs pressed firmly into pan
2Make brownie batter10 minsSmooth, glossy, no flour streaks
3Bake brownie layer25-30 minsToothpick comes out barely wet; internal temp 180°F
4Prepare Oreo crumbles15 minsCrunchy, dark, fragrant
5Make chocolate mousse15 minsLight, airy, no white streaks
6Assemble & chill3 hrs minimumMousse is firm and set
7Top with cream & crumbles10 minsStiff peaks, generous crumble layer

Serving & Presentation

Serving this Mississippi Mud Pie is a moment to savor. I love bringing it to the table straight from the fridge — the contrast between the dark chocolate whipped cream, the crunchy Oreo topping, and the deep brown crust is absolutely showstopping. For the cleanest slices, use a sharp chef’s knife dipped in hot water and wiped dry between cuts. This pie is rich, so smaller slices go a long way — I usually serve it with a dollop of lightly sweetened whipped cream or a scoop of vanilla bean ice cream to balance the intensity. A few fresh raspberries on the side add a bright, tart note that cuts through the chocolate beautifully.

When I serve this at dinner parties in my NYC apartment, I like to plate each slice on a simple white plate and dust the plate with a little extra cocoa powder for drama. For holidays or special occasions, I arrange a ring of whole Oreos around the edge of the pie and tuck fresh mint sprigs between them. My mother, who has a sweet tooth from her years in Morocco, loves this pie with a side of mint tea — the herbal notes play wonderfully with the chocolate. It’s also incredible with a cold glass of milk, a strong cup of black coffee, or even a bourbon-spiked milkshake for an adult twist.

Pairing TypeSuggestionsWhy It Works
Side DishVanilla ice cream, fresh raspberries, mint leavesCreamy and tart elements balance the richness
Sauce / DipCaramel sauce, bourbon caramel, raspberry coulisAdds a sweet or tangy layer of flavor
BeverageCold milk, black coffee, bourbon-spiked milkshake, mint teaCuts through the richness, or amplifies it
GarnishCocoa powder, whole Oreos, fresh mint sprigs, raspberriesAdds visual drama and a pop of freshness

Make-Ahead, Storage & Reheating

One of the best things about this classic Southern dessert is how well it works as a make-ahead recipe. In my busy NYC life, I often make the entire pie the day before a party and simply add the whipped cream topping and crumbles a few hours before serving. The flavors actually deepen and meld overnight, making the pie even more delicious. Here’s everything you need to know about storing and prepping ahead.

MethodContainerDurationReheating Tip
RefrigeratorCovered pie plate or airtight containerUp to 4 daysServe cold — do not reheat
FreezerWrap tightly in plastic wrap + foilUp to 2 monthsThaw in fridge overnight, then add toppings
Make-AheadAssemble without whipped cream toppingUp to 2 days in advanceAdd whipped cream and crumbles just before serving

If you’re storing leftover pie, press a piece of plastic wrap directly onto the cut surface of the whipped cream to prevent it from absorbing fridge odors. The crumble topping will soften slightly after a day in the fridge — if you want it crunchy again, just sprinkle a fresh batch of cooled crumbles on top before serving. I don’t recommend microwaving this pie (the layers will separate), but if you absolutely want a warm element, try serving slices at room temperature for about 15 minutes — the mousse softens slightly and the brownie layer becomes even more fudgy.

Variations & Easy Swaps

One of my favorite things about this Mississippi Mud Pie recipe is how adaptable it is. Whether you’re cooking for someone with dietary restrictions or just want to try something new, these variations have all been tested in my kitchen — and they’re all absolutely delicious. Here’s a quick overview, followed by detailed versions.

VariationKey ChangeBest ForDifficulty Impact
Coffee-Infused Mud PieAdd 1 tsp espresso powder to brownie batterCoffee lovers, deeper chocolate flavorEasy — no extra steps
Gluten-Free Mud PieUse gluten-free Oreos + gf all-purpose flourGluten-sensitive guestsEasy — direct swap
Spiced Moroccan Mud PieAdd 1 tsp cinnamon + 1/2 tsp cayenne to brownie batterAdventurous palates, holiday tablesEasy — just add spices

Coffee-Infused Mud Pie

This is the variation I make most often for my NYC friends who love a little bitterness with their sweetness. Simply add 1 teaspoon of espresso powder to the brownie batter along with the flour. The coffee doesn’t make the pie taste like coffee — it enhances the chocolate flavor, making it deeper and more complex. I learned this trick from a pastry chef in Paris who added espresso to every chocolate dessert she made. If you don’t have espresso powder, you can substitute 1 tablespoon of very strong brewed coffee, but reduce the oil by 1 tablespoon to keep the batter from getting too thin.

Gluten-Free Mud Pie

I’ve made this version for friends with celiac disease, and it’s always a hit. Use gluten-free Oreos (the classic variety is naturally gluten-free in most countries, but check your local packaging) and substitute the 3 tablespoons of all-purpose flour with a gluten-free all-purpose flour blend that contains xanthan gum. The texture is slightly more tender than the original, but the flavor is identical. For the crumble topping, use the same gluten-free Oreos. I recommend Bob’s Red Mill 1-to-1 Baking Flour or King Arthur Measure for Measure — they behave almost exactly like regular flour in this recipe.

Spiced Moroccan Mud Pie

This one is a nod to my Moroccan heritage and absolutely stunning during the holiday season. Add 1 teaspoon of ground cinnamon and 1/2 teaspoon of cayenne pepper to the brownie batter. The cinnamon adds warmth and the cayenne gives a subtle, creeping heat that makes the chocolate taste even more intense. I also like to add a pinch of cardamom to the chocolate whipped cream for an extra layer of aromatic complexity. This version pairs beautifully with mint tea — just like my mother taught me.

What is the best way to make the crust for Mississippi Mud Pie?

The best way to make the crust for this Mississippi Mud Pie recipe is to use finely crushed Oreo cookies mixed with melted salted butter. I recommend using a food processor to get the finest, most even crumbs — this creates a crust that holds together beautifully when sliced. Press the mixture firmly into a 9-inch pie plate using the bottom of a measuring cup; this ensures the crust is compact and won’t crumble when you cut the pie. Bake the crust at 325°F for 12-15 minutes until it’s set and fragrant. Let it cool completely before adding the brownie layer — a warm crust can cause the brownie batter to seep and make the bottom soggy.

Can I substitute the coffee in Mississippi Mud Pie with something else?

Absolutely — and great news: this specific Mississippi Mud Pie recipe doesn’t actually use coffee at all! Some traditional recipes call for brewed coffee in the brownie layer to deepen the chocolate flavor, but my version achieves that same depth by using a combination of bittersweet chocolate, Dutch-processed cocoa powder, and a touch of salt. If you’re adapting a recipe that does include coffee, the best substitute is a combination of water and a pinch of espresso powder, or simply replace the coffee with an equal amount of milk or buttermilk. For a caffeine-free option, try using chicory root powder or a few drops of chocolate extract — both add complexity without the caffeine.

How long does Mississippi Mud Pie need to chill before serving?

This Mississippi Mud Pie needs to chill for at least 3 hours before serving, but I always recommend overnight chilling for the best results. The mousse layer needs time to set firmly so that the pie slices cleanly — if you cut it too soon, the mousse will be soft and the layers may slide around. The brownie layer also benefits from resting: its fudgy texture becomes even more pronounced as it sets in the fridge. For the cleanest, most photogenic slices, chill the pie for a full 8-12 hours. If you’re truly pressed for time, 3 hours is the absolute minimum, but the texture won’t be quite as perfect.

What is the difference between Mississippi Mud Pie and a traditional chocolate pie?

The main difference between Mississippi Mud Pie and a traditional chocolate pie is the number of layers and the texture. A classic chocolate pie typically has a single filling — like a chocolate custard or pudding — baked in a pastry crust. Mississippi Mud Pie, on the other hand, is a multi-layered dessert featuring an Oreo cookie crust, a fudgy brownie-like base, a light chocolate mousse, and a chocolate whipped cream topping, all finished with crunchy cookie crumbles. The name “mud pie” comes from the dessert’s dark, muddy appearance and its rich, decadent texture. It’s an over-the-top, showstopping dessert that originated in the Southern United States, while traditional chocolate pies are simpler and more restrained.

Can I make Mississippi Mud Pie without the Oreo crust?

Yes, you can absolutely make this Mississippi Mud Pie without an Oreo crust. The best substitute is a traditional graham cracker crust — use 1 1/2 cups of finely crushed graham crackers mixed with 6 tablespoons of melted butter and 2 tablespoons of granulated sugar. Press and bake the same way as the Oreo crust. You can also use a chocolate wafer cookie crust or even a shortbread crust for a less sweet base. Keep in mind that the Oreo crust contributes a distinct chocolate flavor and a slightly crunchy texture that’s iconic to this classic Southern dessert, so any substitution will change the final result. I always recommend sticking with the Oreo crust for the most authentic experience.

Is Mississippi Mud Pie served warm or cold?

Mississippi Mud Pie is traditionally served cold, straight from the refrigerator. The mousse and whipped cream layers need to be chilled to hold their structure, and the brownie layer develops a wonderfully dense, fudgy texture when cold. Serving it cold also allows you to cut clean, sharp slices that show off all the beautiful layers. That said, if you prefer a slightly softer texture, you can let the pie sit at room temperature for 15-20 minutes before serving — the mousse will soften and the brownie layer will become a bit more tender. I don’t recommend serving it warm, as the mousse will lose its airy texture and the layers may slide apart.

Can I freeze Mississippi Mud Pie for later?

Yes, Mississippi Mud Pie freezes beautifully! The best way to freeze it is to assemble the pie through the mousse layer (steps 1-6) and freeze it without the whipped cream topping and Oreo crumbles. Wrap the pie tightly in plastic wrap, then a layer of aluminum foil, and freeze for up to 2 months. When you’re ready to serve, thaw the pie in the refrigerator overnight, then add the chocolate whipped cream topping and the Oreo crumbles just before serving. If you freeze the pie with the whipped cream already on, the texture will be slightly grainy after thawing. The brownie layer and mousse freeze exceptionally well — I often keep a frozen pie on hand for last-minute guests!

What type of chocolate is best for Mississippi Mud Pie?

For the best Mississippi Mud Pie, I recommend using a combination of two types of chocolate: bittersweet chocolate (60-70% cacao) for the brownie layer and milk chocolate for the mousse. The bittersweet chocolate provides deep, intense chocolate flavor that balances the sweetness of the Oreo crust and the sugar in the other layers. The milk chocolate in the mousse creates a lighter, creamier texture that contrasts beautifully with the dense brownie layer. For the cocoa powders, use Dutch-processed cocoa in the mousse and crumble for a smooth, dark flavor, and natural unsweetened cocoa in the brownie layer for a more traditional chocolate taste. This combination creates the most complex and satisfying chocolate experience.

How do I get clean slices of Mississippi Mud Pie?

Getting clean slices of Mississippi Mud Pie is all about technique and patience. First, make sure the pie has chilled for at least 3 hours — overnight is even better. Use a long, sharp chef’s knife and dip it in hot water for a few seconds, then wipe it completely dry with a clean towel. Make your cut in one smooth, decisive motion — sawing back and forth will smear the layers. Wipe the knife clean and dip it in hot water again between each slice. For the most dramatic presentation, I like to cut the pie into 10 slices and plate each one with a small dollop of extra whipped cream and a fresh raspberry. A slightly chilled pie yields the cleanest cuts, so don’t let it sit out too long before slicing.

Can I add peanut butter to Mississippi Mud Pie?

Absolutely — peanut butter and chocolate are a classic combination, and this Mississippi Mud Pie recipe is a perfect canvas for it. My favorite way to incorporate peanut butter is to add a peanut butter swirl to the brownie layer: drop 4-5 tablespoons of creamy peanut butter in small dollops over the brownie batter before baking, then use a knife to gently swirl it into the batter. You can also add a layer of peanut butter mousse between the brownie and chocolate mousse layers by folding 1/3 cup of creamy peanut butter into the chocolate mousse before spreading it on. For a garnish, drizzle melted peanut butter over the finished pie. The salty, nutty flavor cuts through the richness beautifully — it’s a crowd-pleasing variation I make often.

Share Your Version!

I absolutely love seeing how this Mississippi Mud Pie turns out in your kitchen! If you make this recipe, please leave a star rating and a comment below — your feedback helps me and every other home baker who comes here looking for the perfect dessert. Tag me on Instagram or Pinterest @exorecipes when you share your creation — I personally read every comment and love seeing your photos! I’m especially curious: did you try one of the variations, or did you come up with your own twist? Let me know in the comments! From my NYC kitchen to yours — I hope this recipe brings as much warmth to your table as it does to mine. — mia 🧡

📌

Love This Recipe? Save It to Pinterest!

If you enjoyed this Mississippi Mud Pie recipe, don’t let it get lost in your browser tabs! 😄 Pin it now so you can find it again anytime — and explore hundreds more tried-and-tested recipes waiting for you on my Pinterest boards.

👉 Follow mia on Pinterest @exorecipe

📌 Pin this recipe · 🔁 Re-pin your favorites · 💬 Tag me when you make it — I love seeing your creations!

Print

clock clock iconcutlery cutlery iconflag flag iconfolder folder iconinstagram instagram iconpinterest pinterest iconfacebook facebook iconprint print iconsquares squares iconheart heart iconheart solid heart solid icon

Mississippi Mud Pie

  • Author: Chef Mia

Description

Rich and dark as the muddy Mississippi itself, this Mississippi Mud Pie recipe is any chocolate lover’s dream dessert with an Oreo cookie crust, a fudgy brownie-like base, chocolate mousse and chocolate whipped cream with Oreo crumbles sprinkled on top! It’s decadent and over-the-top in the best possible way!


Ingredients

Scale
  • 25 Oreo cookies
  • 6 Tablespoons salted butter (melted)
  • 4 ounces bittersweet chocolate (chopped)
  • 3 Tablespoons salted butter (melted)
  • 3 Tablespoons vegetable oil
  • 2 Tablespoons unsweetened cocoa powder
  • 2/3 cup light brown sugar
  • 2 large eggs
  • 2 teaspoons vanilla extract
  • 1/4 teaspoon salt
  • 3 Tablespoons all-purpose flour
  • 8 Oreo cookies
  • 2 Tablespoons powdered sugar
  • 1 Tablespoon dutch-processed cocoa powder
  • Pinch of salt
  • 2 Tablespoons salted butter (melted)
  • 6 ounces milk chocolate, (chopped)
  • 1 cup cold heavy cream
  • 2 Tablespoons dutch-processed cocoa powder
  • 2 Tablespoons powdered sugar
  • Pinch of salt
  • 1 cup heavy cream
  • 1/4 cup granulated sugar
  • 3 Tablespoons unsweetened cocoa powder

Instructions

  1. Preheat oven to 325°F. Finely crush Oreos into crumbs in a food processor or using a rolling pin and a heavy-duty ziplock bag.
  2. Add melted butter and stir until evenly moistened. Press into a 9-inch pie plate.
  3. Bake for 12-15 minutes until set.
  4. Heat chocolate, butter, oil, and cocoa powder in 20 second increments in the microwave, stirring between each burst of heat until completely melted.
  5. Add brown sugar, eggs, vanilla, and salt. Whisk well to combine.
  6. Stir in flour. Pour brownie batter into the prepared Oreo cookie crust.
  7. Bake 25-30 minutes just until a toothpick inserted into the brownie layer comes out barely wet with a little batter on it still. You can also test the brownie layer with an instant digital thermometer. It should read 180 degrees F when this layer is done so the pie will set up nice and fudgy.
  8. Roughly crush the cookies by pounding them a few times in a ziplock bag with a rolling pin.
  9. Add the powdered sugar, cocoa powder, and salt. Toss well.
  10. Drizzle the melted butter into the crushed cookie mixture and toss until evenly moistened. Spread the cookie pieces onto a baking sheet lined with parchment paper and bake for 10 minutes. Cool completely before sprinkling on top of the finished pie.
  11. Melt the chocolate in a large microwave-safe bowl by heating it for 20 second bursts and stirring well between each burst of heat. Once melted, let the chocolate cool for 10 minutes until about 90 to 100 degrees F.
  12. Meanwhile, beat cream, cocoa powder, powdered sugar, and salt the large bowl of a stand mixer fitted with the whisk attachment or with an electric mixer until soft peaks form.
  13. Stir 1/3 of the chocolate whipped cream into the cooled, melted chocolate. Then fold the remaining whipped cream into the chocolate mixture using a rubber spatula.
  14. Spread the chocolate mousse on top of the cooled brownie layer. Transfer the pie to the fridge and let it chill for at least 3 hours or overnight.
  15. Beat cream, sugar, and cocoa powder in a large bowl with a whisk attachment until stiff peaks form. Spread over the finished pie, then sprinkle with the crushed cookie pieces to finish.


Nutrition

  • Calories: 606 kcal
  • Sugar: 44 g
  • Fat: 41 g
  • Carbohydrates: 60 g
  • Protein: 6 g


Mississippi Mud Pie

High Protein Chicken Pot Pie Soup – Creamy & Hearty

High Protein Chicken Pot Pie Soup – Protein-Packed Comfort Without the Crust

⚖️
Difficulty
Easy
⏲️
Prep Time
15 mins
🕒
Cook Time
30 mins
⏱️
Total Time
45 mins
🍽️
Servings
6

There’s something magical about a bowl of creamy chicken pot pie soup, especially when it’s packed with protein and all the cozy flavors I grew up loving. I’m mia, a New York City–based chef who trained in Paris and learned the art of home cooking from my mother’s kitchen in Morocco. This High Protein Chicken Pot Pie Soup is my take on the classic without the heavy pie crust — swapping it for a velvety, protein-rich broth that still gives you that satisfying comfort. The first time I made this for my family, they couldn’t stop ladling seconds; it’s become the go-to weeknight dinner that feels like a warm hug.

Imagine a soup that’s thick and creamy, studded with tender shredded chicken, sweet carrots, and bright peas, all swimming in a fragrant broth with whispers of thyme and rosemary. The aroma fills your kitchen like a Parisian bistro on a rainy afternoon, but the heartiness comes straight from my Moroccan roots — where soups are always a meal in themselves. Each spoonful is velvety yet light, with a richness that comes from real cream and a touch of flour for body. You won’t miss the crust, I promise.

What sets this high protein chicken soup apart is a simple French technique I mastered in pastry school: the perfect roux-free thickening method that keeps the soup silky without added carbs. It’s a game changer for anyone looking for a healthy chicken pot pie that doesn’t skimp on flavor. I’ll share my pro tip for avoiding lumps, plus a common mistake that can turn your soup grainy. Whether you’re new to cooking or a seasoned home chef, this recipe is foolproof and fast — ready in under an hour.

Why This High Protein Chicken Pot Pie Soup Recipe Is the Best

The Flavor Secret — My mother always said the best soups start with a good base. I take that to heart by sweating the aromatics (onion, garlic, carrots, celery) until they’re sweet and tender. Then I add a pinch of dried rosemary and thyme, a nod to the Provençal herbs I used in Paris. The chicken broth is low-sodium so I can control the salt, and the shredded chicken breast adds lean protein without being dry. The result is a deeply savory, aromatic broth that tastes like it simmered for hours.

Perfected Texture — Instead of a roux, I whisk the flour directly into the cream before adding it to the soup. This foolproof technique from my French training ensures a lump-free, silky smooth consistency every time. The flour and cream blend seamlessly, thickening the soup as it simmers, without any pasty flavor. It’s the key to that luscious, velvety mouthfeel that makes this low carb chicken soup feel decadent yet light.

Foolproof & Fast — This recipe is designed for busy weeknights. With just 15 minutes of prep and 30 minutes of cooking, you’ll have a nourishing soup ready from scratch. I’ve streamlined every step — using pre-cooked chicken (rotisserie works wonderfully!) and frozen peas to cut down on work without sacrificing freshness. It’s the kind of meal that even a beginner can nail on the first try, and it’s versatile enough to adapt to whatever you have on hand.

High Protein Chicken Pot Pie Soup Ingredients

I love picking up my produce at the Union Square Greenmarket on Saturdays — the carrots are so sweet and the celery has that perfect crunch. When I’m back in my kitchen, this ingredient list comes together quickly. Most items are pantry staples, which is exactly what I aim for in a weeknight rescue meal.

Ingredients List

  • 1 tablespoon olive oil
  • 1 medium onion, diced
  • 2 cloves garlic, minced
  • 2 carrots, diced
  • 2 celery stalks, diced
  • 1 pound cooked chicken breast, shredded (about 2 cups)
  • 4 cups low-sodium chicken broth
  • 1 cup frozen peas
  • 1 teaspoon dried thyme
  • 1 teaspoon dried rosemary
  • 1 cup heavy cream or milk (for a lighter option)
  • 1/4 cup all-purpose flour
  • Salt and pepper to taste
  • Fresh parsley, chopped (for garnish)

Ingredient Spotlight

Chicken Breast: The star protein! I prefer shredded cooked breast because it’s lean, stays tender in the soup, and soaks up all those herby flavors. Pick up a rotisserie chicken to save time — just remove the skin and shred the meat. If you want extra protein, you can sub with turkey breast or even canned chickpeas for a vegan twist.

Heavy Cream: This gives the soup its signature richness. For a lighter version, whole milk works fine, but the soup will be less thick. I’ve also tested it with canned coconut milk for a dairy-free version — it adds a subtle sweetness that complements the rosemary beautifully.

All-Purpose Flour: The secret to a smooth thickener. You can also use cornstarch (mix 2 tbsp with 3 tbsp cold water) or arrowroot powder for a gluten-free option, though the texture will be slightly glossier. For a low-carb thickener, see my FAQ below.

Original IngredientBest SubstitutionFlavor / Texture Impact
Heavy creamCanned coconut milk (full fat)Slightly sweeter, dairy-free, still creamy
All-purpose flourAlmond flour + xanthan gumNutty flavor, thinner consistency; add 1/2 tsp xanthan gum per 1/4 cup almond flour
Chicken breastTurkey breast or chickpeasSimilar texture; chickpeas add earthiness and extra fiber
Chicken brothVegetable broth + 1 tsp soy sauceLighter flavor, add soy sauce for depth

How to Make High Protein Chicken Pot Pie Soup — Step-by-Step

Don’t be intimidated — this soup comes together like a breeze. Follow these steps and you’ll have a restaurant-quality bowl in no time.

Step 1: Sauté the Aromatics

In a large pot, heat 1 tablespoon of olive oil over medium heat. Add the diced onion, garlic, carrots, and celery. Cook, stirring occasionally, until the vegetables are softened and the onion is translucent — about 5 to 7 minutes. This builds the flavor foundation. Don’t rush it; you want the carrots to start releasing their natural sweetness.

💡 mia’s Pro Tip: If the vegetables start to brown too quickly, add a splash of water or broth to deglaze the pan. This prevents burnt bits and keeps the soup clean.

Step 2: Add Chicken and Broth

Stir in the shredded chicken, 4 cups of low-sodium chicken broth, frozen peas, and the dried thyme and rosemary. Bring the mixture to a gentle simmer — you should see small bubbles along the edges, not a rolling boil. This allows the flavors to meld without toughening the chicken. Let it simmer for about 5 minutes.

⚠️ Common Mistake to Avoid: Adding the cream mixture before the broth is hot can cause the flour to clump. Always bring the broth to a simmer first.

Step 3: Prepare the Cream Mixture

While the soup simmers, in a small bowl, whisk together the 1/4 cup all-purpose flour and 1 cup heavy cream (or milk). Whisk until the flour is fully dissolved and the mixture is smooth — no lumps allowed! This is the classic “slurry” technique I learned in Paris.

💡 mia’s Pro Tip: For a gluten-free option, use 2 tablespoons cornstarch mixed with 3 tablespoons cold water instead of the flour-cream mixture. Add it the same way.

Step 4: Simmer and Thicken

Gradually pour the cream mixture into the simmering soup, stirring constantly with a wooden spoon. Continue stirring for about 2 minutes to prevent any lumps from forming. Let the soup simmer for 10 to 15 minutes, stirring occasionally, until it thickens to your desired consistency. Season with salt and pepper to taste. Remember that the soup will thicken slightly more as it cools.

⚠️ Common Mistake to Avoid: Simmering too vigorously can break the sauce and make it grainy. Keep the heat at medium-low once the cream is added.

StepActionDurationKey Visual Cue
1Sauté aromatics5–7 minOnion is translucent, carrots begin to soften
2Add chicken and broth5 minGently simmering, peas start to float
3Prepare cream mixture1 minSmooth, no lumps
4Simmer and thicken10–15 minSoup coats the back of a spoon

Serving & Presentation

Ladle the soup into warm bowls and garnish with a generous sprinkle of fresh chopped parsley — it adds a pop of green and a fresh finish. I love serving this with a side of crusty sourdough (or keto bread if you’re low-carb) to soak up every last drop. For a Moroccan touch, add a pinch of smoked paprika on top just before serving; it gives a subtle warmth that my mother would approve of.

This soup is hearty enough to be a meal on its own, but it also pairs beautifully with a simple green salad dressed with lemon vinaigrette. On cold NYC nights, I sometimes float a few homemade “pie crust” crackers (made from almond flour) on top for that pot pie nostalgia without the carbs. If you’re serving it for guests, use shallow bowls and drizzle a little extra cream on top — it looks chefy and inviting.

Pairing TypeSuggestionsWhy It Works
Side DishArugula salad, roasted broccoli, cauliflower mashLight acidity balances the creamy soup; vegetables add texture and extra nutrients
BeverageDry white wine (Sauvignon Blanc), unsweetened iced tea, or sparkling water with lemonThe crispness cuts through the richness; non-alcoholic options keep it refreshing
GarnishFresh parsley, smoked paprika, a drizzle of cream, or crushed red pepperAdds color, aroma, and a hint of heat or smokiness

Make-Ahead, Storage & Reheating

As a busy NYC food blogger, I live by meal prep. This soup is a dream for that — it actually gets better after a day in the fridge as the flavors meld. I often make a double batch on Sunday so I have lunches for the week. Here’s my exact storage routine.

MethodContainerDurationReheating Tip
RefrigeratorAirtight container (glass preferred)Up to 5 daysReheat gently on stovetop over medium-low, adding a splash of broth or milk if too thick
FreezerFreezer-safe zip-top bags (lay flat) or rigid containersUp to 3 monthsThaw overnight in fridge, then reheat gently – add fresh parsley after reheating
Make-AheadPrepare without garnishes, cool completely, then refrigerateUp to 2 days in advanceReheat and adjust seasoning; add cream if needed to restore richness

When reheating, I always add a splash of milk or broth to loosen it up, because the soup thickens as it cools. Don’t microwave on high — it can cause the cream to separate. A gentle stovetop reheat is best.

Variations & Easy Swaps

VariationKey ChangeBest ForDifficulty Impact
Spicy Moroccan TwistAdd 1 tsp harissa paste + 1/2 tsp cuminThose who love heat and depthSame – just stir in with the broth
Gluten-Free / Dairy-FreeCornstarch for flour, coconut milk for creamDietary restrictionsSame – watch for coconut milk separation
Extra Veggie LoadedAdd diced zucchini, mushrooms, or spinach in the last 5 minutesBoosting veggie intakeSame – just toss in

Spicy Moroccan Twist

Growing up in Morocco, we always had harissa in the fridge. Stirring a teaspoon of harissa paste into the soup along with a pinch of cumin transforms this already comforting bowl into something with a gentle, smoky kick. The warmth of the harissa pairs beautifully with the creamy base and herbs. It’s one of my favorite ways to remix the leftovers.

Gluten-Free / Dairy-Free

For a gluten-free version, swap the flour for 2 tablespoons of cornstarch mixed with 3 tablespoons of cold water. For dairy-free, use full-fat canned coconut milk instead of heavy cream. I’ve tested this multiple times and the texture remains velvety, though the coconut milk adds a very faint sweetness. If you’re sensitive to coconut, try oat cream – it’s thicker and neutral.

Extra Veggie Loaded

When I pick up a bunch of summer squash from the farmers market, I love tossing in diced zucchini or yellow squash during the last 5 minutes of cooking. A handful of baby spinach stirred in until wilted adds color and iron. This is the perfect way to clean out the fridge and make the soup even more nutrient-dense.

Frequently Asked Questions

What is the best way to add protein to chicken pot pie soup without using dairy?

There are several excellent dairy-free protein boosters for this soup. First, you can increase the amount of chicken breast – using up to 1.5 pounds shredded chicken adds more protein without dairy. Second, stir in a scoop of unflavored collagen peptides or a scoop of unsweetened protein powder (plant-based or whey isolate works) dissolved in a bit of broth before adding. For a whole-food option, mix in some silken tofu or cooked lentils – they blend into the creamy broth seamlessly. Another trick is to replace the cream with blended canned white beans (cannellini) and extra broth; this adds creaminess and a protein boost from the legumes.

Can I make high protein chicken pot pie soup in a slow cooker or Instant Pot?

Absolutely! For a slow cooker, sauté the aromatics on the stovetop first, then add everything except the cream and flour mixture to the slow cooker. Cook on low for 4–6 hours or on high for 2–3 hours. About 30 minutes before serving, stir in the cream-flour slurry and cook on high, uncovered, until thickened. For the Instant Pot, use the sauté function for the aromatics, add chicken (raw, cut into chunks) and broth, then pressure cook on high for 10 minutes with natural release. Shred the chicken, then stir in the cream mixture and use the sauté function to simmer and thicken. Both methods work beautifully, though the stovetop version gives you the most control over thickness.

What are the best low-carb thickeners to use for a high protein chicken pot pie soup?

For a low-carb thickener, I recommend using xanthan gum or glucomannan powder. Both are extremely potent – you only need a small amount (about 1/4 teaspoon of xanthan gum per 4 cups of liquid) whisked vigorously to avoid clumps. Another option is to puree a small portion of the cooked vegetables (carrots, celery) with some broth and stir it back in; this keeps the carbs moderate but adds natural thickness. Almond flour mixed with a bit of water can also work, but it adds a nutty flavor and doesn’t thicken as strongly. Avoid cornstarch or regular flour if you’re strictly low-carb. In this recipe, if you’re keto, use the xanthan gum method and replace the heavy cream with full-fat coconut cream.

How can I substitute the pie crust topping for a high protein option in this soup?

My favorite high-protein alternative to a pie crust topping is a “crispy chicken skin” or cheese crisps. For a bread-like topping, make quick almond flour drop biscuits (almond flour, egg, cheese, a bit of baking powder) and bake or air-fry them separately, then float them on the soup. I sometimes make Parmesan crisps by baking small mounds of shredded Parmesan until golden and crunchy – they add protein and a salty, crispy texture. Another idea: top the soup with a dollop of Greek yogurt mixed with minced chives and a pinch of cayenne – it adds protein, creaminess, and a tangy contrast without the carbs.

Can I freeze this soup? How do I prevent it from separating?

Yes, you can freeze this soup! The key to preventing separation is to under-thicken it slightly before freezing. The cream and flour mixture can sometimes break when thawed if cooked too long. I recommend cooking the soup for only 5 minutes after adding the cream mixture – it will be a bit thinner than you like – then cooling completely and freezing in airtight containers for up to 3 months. When reheating, thaw overnight in the fridge and reheat gently over medium-low heat, stirring constantly. If it looks curdled, whisk in a teaspoon of Dijon mustard or a splash of fresh cream to bring it back together. Also, avoid freezing garnishes like parsley – add those fresh after reheating.

How do I make this soup dairy-free without losing creaminess?

To make a dairy-free version, replace the heavy cream with full-fat canned coconut milk (the kind in a can, not the carton). Use the thick cream part at the top. For the thickener, swap the flour with 2 tablespoons cornstarch mixed with 3 tablespoons cold water (or use 1/4 teaspoon xanthan gum whisked directly into the hot broth). The coconut milk gives a rich texture and a subtle sweetness that works beautifully with the herbs. If you’re not a fan of coconut flavor, you can use oat cream or cashew cream (soaked and blended cashews). Another trick is to puree a can of drained white beans with some broth and use that as the creamy base – it adds protein and creaminess without any dairy.

Can I use raw chicken instead of pre-cooked chicken?

Absolutely! If using raw chicken breast, cut it into small bite-sized pieces and add it to the pot after sautéing the aromatics. Cook the chicken pieces for about 5 minutes, stirring, until no longer pink on the outside. Then proceed with adding the broth and other ingredients. Simmer for the full 15 minutes after adding the cream mixture to ensure the chicken is cooked through and tender. The chicken will be very tender and flavorful because it cooks in the broth. Just be careful not to overcook; small pieces cook quickly. If using raw chicken thighs, they can be left larger and shredded after cooking, similar to the pre-cooked method.

What can I use instead of heavy cream to keep it low calorie?

For a lower-calorie option, replace heavy cream with whole milk or 2% milk. The soup will be less thick and rich, but still delicious. You can boost the creaminess by adding a bit of cornstarch slurry (1 tablespoon cornstarch per 1 cup of milk) to the milk before adding, or by blending 1/2 cup of the cooked vegetables (carrots and celery) with a splash of milk and stirring it back in. Another idea is to use evaporated skim milk – it’s thicker than regular milk but lower in fat. Greek yogurt (full-fat or low-fat) can also be stirred in at the very end, but be careful not to boil it or it will curdle – heat it gently to just warm.

Can I add more vegetables to this soup? Which ones work best?

Absolutely! This soup is a fantastic base for adding extra veggies. I love adding diced zucchini or yellow squash in the last 5 minutes of cooking – they soften quickly without turning mushy. Sliced mushrooms (cremini or button) can be sautéed along with the aromatics for an earthy depth. A handful of baby spinach or kale stirred in at the end until wilted adds color and nutrients. For a heartier version, add diced potatoes or cauliflower florets (if not low-carb). Green beans cut into 1-inch pieces also work well. Just keep the total volume of veggies in mind – if you add too many, you may need to increase the broth slightly to maintain the soup consistency.

How do I prevent the soup from becoming too thick when reheating?

This soup naturally thickens as it cools, so it’s common to find it has the consistency of a stew after refrigeration. The best trick is to reserve about 1/2 cup of extra chicken broth or milk when you store the soup. When reheating, add the liquid a little at a time until you reach your desired consistency. Reheat gently on the stovetop over medium-low heat, stirring frequently. If you’re using a microwave, stir halfway through and add liquid before microwaving. Another tip: undercook the soup slightly initially – simmer for only 10 minutes instead of 15 – so the flour has room to thicken more during storage. That way, after reheating, it’s perfectly creamy.

Share Your Version!

I’d love to hear how this High Protein Chicken Pot Pie Soup turned out for you! Did you try the Moroccan twist with harissa? Or did you go full dairy-free? Drop a star rating and a comment below — your feedback helps other readers and makes my day. Don’t forget to snap a photo of your bowl and tag me on Instagram or Pinterest @exorecipes — I’m always browsing the hashtag #exorecipes to see your beautiful creations. And here’s a fun question for you: What’s the one comfort food flavor you’d love to see turned into a high-protein bowl? Let me know in the comments!

From my NYC kitchen to yours — I hope this recipe brings as much warmth to your table as it does to mine. — mia 🧡

📌

Love This Recipe? Save It to Pinterest!

If you enjoyed this High Protein Chicken Pot Pie Soup recipe, don’t let it get lost in your browser tabs! 😄 Pin it now so you can find it again anytime — and explore hundreds more tried-and-tested recipes waiting for you on my Pinterest boards.

Follow mia on Pinterest @exorecipe

📌 Pin this recipe · 🔁 Re-pin your favorites · 💬 Tag me when you make it — I love seeing your creations!

Print

clock clock iconcutlery cutlery iconflag flag iconfolder folder iconinstagram instagram iconpinterest pinterest iconfacebook facebook iconprint print iconsquares squares iconheart heart iconheart solid heart solid icon

High Protein Chicken Pot Pie Soup

  • Author: Chef Mia

Description

A creamy and hearty chicken pot pie soup packed with protein, vegetables, and comforting flavors, perfect for a cozy meal.


Ingredients

Scale
  • 1 tablespoon olive oil
  • 1 medium onion, diced
  • 2 cloves garlic, minced
  • 2 carrots, diced
  • 2 celery stalks, diced
  • 1 pound cooked chicken breast, shredded
  • 4 cups low-sodium chicken broth
  • 1 cup frozen peas
  • 1 teaspoon dried thyme
  • 1 teaspoon dried rosemary
  • 1 cup heavy cream or milk
  • 1/4 cup all-purpose flour
  • Salt and pepper to taste
  • Fresh parsley, chopped (for garnish)

Instructions

  1. In a large pot, heat olive oil over medium heat.
  2. Add the diced onion, garlic, carrots, and celery, cooking until softened, about 5-7 minutes.
  3. Stir in the shredded chicken, chicken broth, peas, thyme, and rosemary. Bring to a simmer.
  4. In a small bowl, whisk together the flour and heavy cream until smooth.
  5. Gradually add the cream mixture to the pot, stirring constantly to avoid lumps.
  6. Simmer for an additional 10-15 minutes, until the soup thickens. Season with salt and pepper to taste.
  7. Serve hot, garnished with fresh parsley.


High Protein Chicken Pot Pie Soup

ph">For more delicious inspiration, follow me on Pinterest!

Chocolate Peanut Butter Cookies – Soft & Chewy

Chocolate Peanut Butter Cookies – Rich Chocolate Meets Creamy Peanut Butter

⚖️
Difficulty
Easy
⏲️
Prep Time
15 mins
🕒
Cook Time
8 mins
⏱️
Total Time
23 mins
🍽️
Servings
24 cookies

I still remember the first time I made chocolate peanut butter cookies in my tiny Paris apartment, trying to recreate the warmth of my mother’s Moroccan kitchen with the ingredients I could find at the local market. Back home in Marrakech, peanut butter was a rare treat, but here in New York City I can find the creamiest, most flavorful peanut butter at any corner market. These easy chocolate peanut butter cookies are my love letter to that blending of worlds—rich cocoa from France, creamy peanut butter from America, and a touch of brown sugar that reminds me of the sweet pastries my mother used to bake for Eid. The result? A cookie that’s chewy, fudgy, and absolutely irresistible.

Imagine pulling a tray of these homemade chocolate peanut butter cookies out of the oven: the deep chocolate aroma mingles with the nutty, buttery scent of peanut butter, and the crisscross pattern on top catches the light. When you take a bite, the edges are slightly crisp while the center stays soft and tender. The cocoa powder adds a bittersweet richness that perfectly balances the sweet, creamy peanut butter—no one ingredient overpowers the other. It’s the kind of cookie that disappears from the cooling rack within minutes, leaving crumbs and requests for the recipe.

What makes this chocolate peanut butter cookie recipe truly special is the technique I learned in Paris: using shortening instead of all butter. That tiny swap gives the cookies an extra-soft, chewy texture that stays fresh for days. 💡 mia’s Pro Tip: Don’t skip the milk—it hydrates the dough just enough to prevent cracking while rolling. I’ll walk you through every step, and I’ve even included a common mistake to avoid so your cookies come out perfect on the first try.

Why This Chocolate Peanut Butter Cookies Recipe Is the Best

The Flavor Secret: I learned in my mother’s kitchen that balance is everything. Here, the combination of creamy peanut butter, brown sugar, and high-quality unsweetened cocoa powder creates a deep, complex flavor. The brown sugar adds a subtle molasses note that amplifies the chocolate, while the peanut butter keeps it rich and satisfying. No artificial extracts needed.

Perfected Texture: French pastry training taught me that fat matters. By using shortening (regular or butter flavor) alongside the peanut butter, I get a cookie that spreads just enough without becoming thin or greasy. The result is a chewy, tender crumb with a slight crackle on top. The fork crimp isn’t just for looks—it ensures even baking and gives each cookie that classic peanut butter cookie identity.

Foolproof & Fast: This recipe comes together in one bowl (plus a small bowl for dry ingredients) and requires no chilling. From start to finish, you’re less than 30 minutes away from warm, homemade chocolate peanut butter cookies. The ingredient list is short, and everything is available in any US grocery store. Whether you’re a beginner or a seasoned baker, these cookies deliver every time.

Chocolate Peanut Butter Cookies Ingredients

When I shop for these ingredients at the Union Square Greenmarket or my local Whole Foods, I always look for fresh, natural peanut butter (no added sugar) and a good-quality cocoa powder. But don’t worry—standard grocery store brands work beautifully here. Below you’ll find the exact list, plus my tested swaps for common dietary needs.

Ingredients List

  • 1/2 cup shortening (regular or butter flavor)
  • 3/4 cup creamy peanut butter
  • 1 1/2 cups brown sugar (packed)
  • 3 tablespoons milk
  • 1 teaspoon vanilla extract
  • 1 large egg
  • 1 1/4 cups all-purpose flour
  • 1/2 cup unsweetened cocoa powder
  • 1 teaspoon baking soda
  • 1/2 teaspoon salt

Ingredient Spotlight

Peanut Butter: Creamy peanut butter is essential for the classic texture. Natural peanut butter (the kind that separates) works if you stir it very well first, but the added oil can make cookies spread more. For best results, use a commercial creamy peanut butter like Skippy or Jif—they’re tested for consistency. 💡 mia’s Pro Tip: If you only have crunchy peanut butter, the cookies will have a slight texture difference—great if you love a little crunch!

Cocoa Powder: Unsweetened cocoa powder is non-negotiable. Dutch-processed will produce a milder, darker chocolate flavor; natural cocoa (like Hershey’s) gives a more intense, slightly tangy chocolate taste. Both work, but I prefer natural cocoa for that classic American chocolate cookie flavor. Avoid sweetened cocoa mixes.

Shortening: Shortening is the secret to a softer cookie that doesn’t dry out. Butter can be substituted 1:1, but expect a slightly firmer, less chewy cookie with a more buttery flavor. I often use butter-flavored shortening to get the best of both worlds.

Brown Sugar: Light or dark brown sugar both work. Dark brown sugar adds more moisture and a deeper molasses flavor, making the cookies even fudgier. Pack it firmly into the measuring cup for accuracy.

Flour & Leaveners: All-purpose flour gives the perfect structure. The baking soda needs the acid from the brown sugar to react, so don’t substitute baking powder unless you adjust the recipe. Salt balances sweetness and enhances the chocolate.

Original IngredientBest SubstitutionFlavor / Texture Impact
ShorteningUnsalted butter (room temp)Slightly firmer, more buttery, less chewy
Creamy peanut butterCrunchy peanut butterAdds texture; flavor unchanged
All-purpose flourGluten-free 1:1 baking blendSlightly grainier; reduce milk by 1 tbsp
Brown sugarCoconut sugar (1:1)Less sweet, more caramel-like; cookies slightly denser

How to Make Chocolate Peanut Butter Cookies – Step-by-Step

Trust me, this process is so straightforward you’ll memorize it after one batch. I’ve included my chef-level tips and common pitfalls so you can bake with confidence.

Step 1: Prepare the Wet Mixture

Preheat your oven to 375°F. In a large mixing bowl, beat together the shortening, creamy peanut butter, packed brown sugar, milk, and vanilla extract with an electric mixer on medium speed until smooth and well combined—about 2 minutes. Add the egg and mix just until incorporated. Be careful not to over-beat once the egg goes in; you want a cohesive batter, not a fluffy one.

⚠️ Common Mistake to Avoid: Over-mixing the egg can incorporate too much air, making cookies puff up then deflate. Mix just until the yolk disappears.

Step 2: Combine Dry Ingredients

In a small mixing bowl, whisk together the all-purpose flour, unsweetened cocoa powder, baking soda, and salt. This ensures even distribution of the leavener and cocoa so no bitter pockets remain.

💡 mia’s Pro Tip: Sift the cocoa powder if it has lumps—it makes a noticeable difference in the dough’s smoothness.

Step 3: Mix Dry into Wet

Add the dry mixture to the wet mixture and stir by hand with a wooden spoon or spatula until just combined. The dough will be thick and slightly sticky. Don’t use the mixer for this step—it’s easy to overwork the flour, which leads to tough cookies.

⚠️ Common Mistake to Avoid: Scrape the bottom of the bowl—dry flour hides there. Make sure every streak of white is incorporated.

Step 4: Shape and Press

Scoop the dough onto an ungreased cookie sheet in 1 to 1½-inch balls. Place them about 2 inches apart. Use a fork dipped in granulated sugar (or lightly floured) to press down on each ball, creating the classic crisscross pattern. The sugar on the fork gives a sparkly top and extra crunch.

💡 mia’s Pro Tip: Dip the fork in sugar after every 2-3 cookies so it doesn’t stick. This also adds a delicate sugary crust.

Step 5: Bake and Cool

Bake at 375°F for 7-8 minutes, just until the edges are set and the centers look slightly underdone. The tops should be puffed but will settle as they cool. Let them rest on the cookie sheet for 2 minutes—this step is crucial for setting the structure. Then transfer to a wire cooling rack to cool completely.

⚠️ Common Mistake to Avoid: Overbaking is the #1 reason these cookies become dry. Pull them out when the edges are firm but the middle still looks a bit soft.

StepActionDurationKey Visual Cue
1Cream wet ingredients2 minsSmooth, homogeneous paste
2Whisk dry ingredients1 minEven color, no lumps
3Mix dry into wet1–2 minsThick, cohesive dough
4Shape and press5 minsUniform balls with clear crosshatch
5Bake & cool7–8 min + 2 min on sheetEdges set, centers still soft

Serving & Presentation

These easy chocolate peanut butter cookies are wonderful on their own, but I love serving them with a tall glass of cold milk—a classic NYC diner combo. For a more elevated presentation, sandwich two cookies with a scoop of vanilla ice cream for an ice cream cookie sandwich. Or crumble them over a bowl of chocolate pudding for extra texture.

When I bake these for friends in my Brooklyn brownstone, I arrange them on a large wooden board alongside fresh berries and a drizzle of melted dark chocolate. A sprinkle of flaky sea salt before serving instantly takes them from homemade to bakery-level. In the summer, I might add a touch of mint from my fire escape garden—it pairs beautifully with the chocolate and peanut butter.

Pairing TypeSuggestionsWhy It Works
Side DishVanilla ice cream, fresh strawberries, whipped creamCreamy contrast balances rich cocoa
Sauce / DipChocolate ganache, peanut butter sauce, caramelIntensifies the flavor duo
BeverageCold milk, latte, hot chocolate, black coffeeMilk cuts sweetness; coffee highlights chocolate
GarnishFlaky sea salt, chopped peanuts, chocolate drizzle, mint leavesSea salt boosts all flavors; peanuts add crunch

Make-Ahead, Storage & Reheating

These homemade chocolate peanut butter cookies are fantastic for meal prep. I often double the batch and freeze half so I’m never more than 10 minutes from warm cookies. On busy NYC days, I just take a few from the freezer and pop them in the microwave for 15 seconds—it’s like fresh-baked all over again.

MethodContainerDurationReheating Tip
RefrigeratorAirtight containerUp to 5 daysMicrowave 10–15 seconds or oven 300°F for 3–4 minutes
FreezerFreezer-safe bag or container, layers separated by parchmentUp to 3 monthsThaw at room temp 15 min, then 300°F oven for 5 min
Make-Ahead (dough)Covered bowl or wrapped log in fridgeUp to 2 days in advanceScoop and bake directly; no need to soften

For the best texture, always let cookies come to room temperature before serving if stored in the fridge. If they’ve been frozen, a quick 5-minute stint in a 300°F oven restores that just-baked chewiness. I often keep a stash in my freezer for last-minute guests—they never know they came from frozen!

Variations & Easy Swaps

VariationKey ChangeBest ForDifficulty Impact
White Chocolate & PeanutFold in 1/2 cup white chocolate chips + 1/4 cup chopped peanutsThose who love a sweeter, crunchier cookieNo change – easy
Gluten-Free VersionReplace flour with 1:1 gluten-free baking blend (with xanthan gum)Gluten-free dietary needsEasy – reduce milk by 1 tbsp
Moroccan Spice TwistAdd 1 tsp ground cinnamon + 1/4 tsp cayenne to dry mixAdventurous palates; pairs well with dark chocolateEasy

White Chocolate & Peanut Crunch

Fold in white chocolate chips and chopped roasted peanuts after mixing the dough. The white chocolate melts into creamy pockets, while the peanuts add a satisfying crunch that reminds me of the nutty street snacks in Marrakech. For a more French patisserie feel, use chopped salted pistachios instead of peanuts.

Gluten-Free Version

Substitute the all-purpose flour with a high-quality gluten-free 1:1 baking blend that contains xanthan gum (like Bob’s Red Mill or King Arthur). The cookies will be slightly more delicate, so handle the dough gently. Reduce the milk to 2 tablespoons because gluten-free flours absorb less liquid. Bake as directed—the texture stays remarkably close to the original.

Moroccan Spice Twist

Add ground cinnamon and a pinch of cayenne pepper to the dry ingredients. This is a trick I learned in my grandmother’s kitchen, where warm spices are used in everything from tagines to pastries. The cinnamon complements the chocolate, and the cayenne adds a gentle heat that lingers on the tongue. Serve with a glass of mint tea for a truly inspired pairing.

How do I make chocolate peanut butter cookies that aren’t too dry?

The key to moist, tender chocolate peanut butter cookies is twofold: don’t overbake, and use the right fat. Pull the cookies out of the oven when the edges are set but the centers still look soft and slightly raw. They’ll continue to cook on the hot sheet for the 2-minute resting period. Also, the shortening (rather than all butter) keeps them from drying out. If you substitute butter, consider adding an extra tablespoon of milk to maintain moisture.

Can I substitute creamy peanut butter for crunchy in chocolate peanut butter cookies?

Absolutely, and the swap is simple. Creamy peanut butter gives a smooth, uniform texture throughout the cookie. If you only have crunchy on hand, the result will be nuttier and have little bits of peanut in every bite. The flavor remains the same, but the texture changes slightly. No other adjustments are needed—just use the same amount. I actually love using crunchy for a more rustic feel.

How long should I bake chocolate peanut butter cookies for chewy results?

For perfectly chewy cookies, bake at 375°F for 7 to 8 minutes. Every oven is different, so start checking at 7 minutes. The edges should be firm and set, but the centers will still look underdone and puffy. Once you let them cool on the baking sheet for 2 minutes, they will set into a soft, chewy cookie. If you prefer crispier cookies, add 1–2 minutes of baking time, but watch carefully to avoid overbaking.

How do I store chocolate peanut butter cookies to keep them fresh?

Store completely cooled cookies in an airtight container at room temperature for up to 5 days. For longer storage, place them in a freezer-safe bag or container with parchment between layers, and freeze for up to 3 months. To bring back that fresh-from-the-oven texture, reheat frozen or refrigerated cookies in a 300°F oven for 5 minutes or microwave for 10–15 seconds. Avoid storing in humid areas, as moisture can make them soggy.

Can I use natural peanut butter in this recipe?

Yes, but with a small adjustment. Natural peanut butter (the kind that separates into oil and solids) has less stabilizer than commercial brands. Stir it very well before measuring. Because the oil content can vary, the dough may be slightly more oily or slack. If the dough seems too soft, add an extra tablespoon of flour. The cookies may spread a bit more, but the flavor is wonderful. For best results, I recommend using the creamy, no-stir kind for consistent texture.

Why do I need to press cookies with a fork? Can I skip it?

The fork press isn’t just for traditional looks—it helps the cookies bake evenly. Peanut butter cookie dough is dense, and pressing it down flattens the balls so the center bakes at the same rate as the edges. If you skip it, you’ll get puffy, unevenly baked cookies. The crisscross pattern also creates little ridges that brown nicely and add texture. I dip my fork in sugar to prevent sticking and add a sparkly finish.

Can I make these cookies without an electric mixer?

Yes, you can make them by hand with a sturdy wooden spoon and a bowl. The wet ingredients (shortening, peanut butter, brown sugar, milk, vanilla) will take a bit of elbow grease to cream together until smooth. Make sure there are no lumps of shortening. Once you add the egg, mix vigorously for about a minute. The dry ingredients can be stirred in just like the mixer method. The cookies will turn out perfectly—I’ve done it many times in my tiny Paris apartment with only a spoon!

How can I make these cookies vegan?

To veganize this chocolate peanut butter cookie recipe, replace the egg with a flax egg (1 tablespoon ground flaxseed + 3 tablespoons water, let sit for 5 minutes). Use a plant-based milk like oat or almond in place of dairy milk. The shortening is already vegan. For the peanut butter, check the label—most commercial brands are vegan. The cookies will be slightly less tender, but the taste remains delicious. Bake as directed; they may need 1 extra minute.

Share Your Version!

I’d love to see how these chocolate peanut butter cookies turn out in your kitchen! Did you try any of the variations, or did you stick with the classic version? Leave a star rating and a comment below to let me know. Tag @exorecipes on Instagram or Pinterest when you share your cookie photos—I always get so inspired by your bakes. And if you have a question about this recipe or a specific twist you’d like to try, just ask in the comments. I answer every single one.

From my NYC kitchen to yours — I hope this recipe brings as much warmth to your table as it does to mine. — mia 🧡

📌

Love This Recipe? Save It to Pinterest!

If you enjoyed this Chocolate Peanut Butter Cookies recipe, don’t let it get lost in your browser tabs! 😄 Pin it now so you can find it again anytime — and explore hundreds more tried-and-tested recipes waiting for you on my Pinterest boards.

👉 Follow mia on Pinterest @exorecipe

📌 Pin this recipe · 🔁 Re-pin your favorites · 💬 Tag me when you make it — I love seeing your creations!

Print

clock clock iconcutlery cutlery iconflag flag iconfolder folder iconinstagram instagram iconpinterest pinterest iconfacebook facebook iconprint print iconsquares squares iconheart heart iconheart solid heart solid icon

Chocolate Peanut Butter Cookies

  • Author: Chef Mia

Description

Chocolate Peanut Butter Cookies are the perfect blend of rich chocolate and peanut butter. You will love this delicious twist on the classic peanut butter cookie!


Ingredients

Scale
  • 1/2 cup shortening (regular or butter flavor)
  • 3/4 cup creamy peanut butter
  • 1 1/2 cups brown sugar (packed)
  • 3 tablespoons milk
  • 1 teaspoon vanilla extract
  • 1 large egg
  • 1 1/4 cups all-purpose flour
  • 1/2 cup unsweetened cocoa powder
  • 1 teaspoon baking soda
  • 1/2 teaspoon salt

Instructions

  1. Preheat oven to 375F.
  2. In a large mixing bowl, beat together the shortening, peanut butter, brown sugar, milk, and vanilla with an electric mixer until well blended. Add the egg and mix just until combined.
  3. In a small mixing bowl, whisk together the flour, cocoa powder, baking soda, and salt. Add the dry mixture to the wet mixture and stir until combined.
  4. Scoop the cookie dough onto an ungreased cookie sheet to form 1 to 1 ½ inch dough balls. Use a fork to press the dough down and create the traditional crisscross pattern on each cookie.
  5. Bake for 7-8 minutes at 375F just until set around the edges. Cool for 2 minutes on the cookie sheet, then transfer to a wire cooling rack to cool.


Nutrition

  • Calories: 113 kcal
  • Sugar: 10 g
  • Fat: 6 g
  • Carbohydrates: 14 g
  • Protein: 2 g


Chocolate Peanut Butter Cookies