Table of Contents
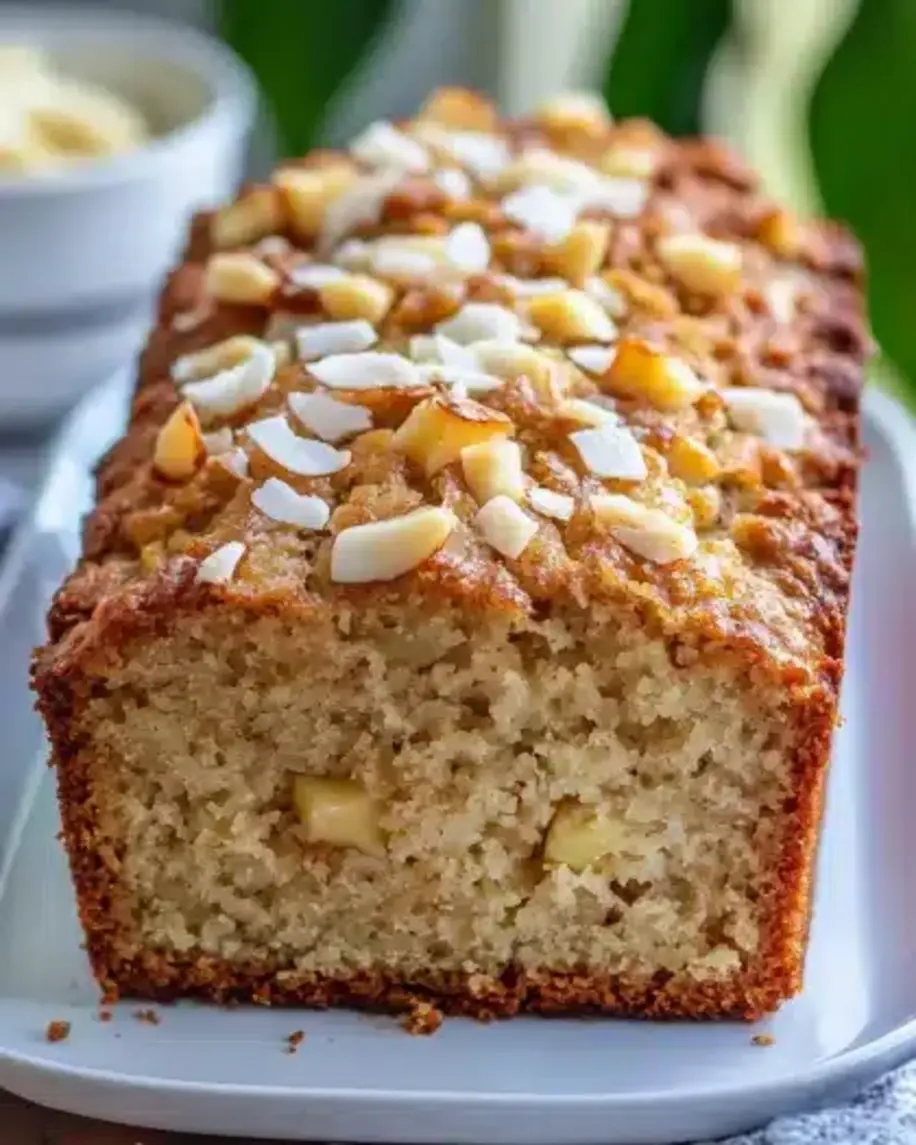
Banana Pineapple Coconut Bread: The Ultimate Tropical Loaf for Brunch or Snacks
I still remember the first time I made this Banana Pineapple Coconut Bread — it was a rainy Saturday in my tiny Paris apartment, and I was missing the bright, sunny flavors of my mother’s kitchen in Morocco. She would always say, “When in doubt, add fruit and coconut.” That advice has never let me down. This Tropical Loaf Recipe brings together everything I love about easy banana bread variations — it’s moist tender and bursting with the sweet tang of pineapple and the nutty richness of shredded coconut. It’s the kind of Coconut Pineapple Quick Bread that makes you feel like you’re on vacation even on a busy New York morning.
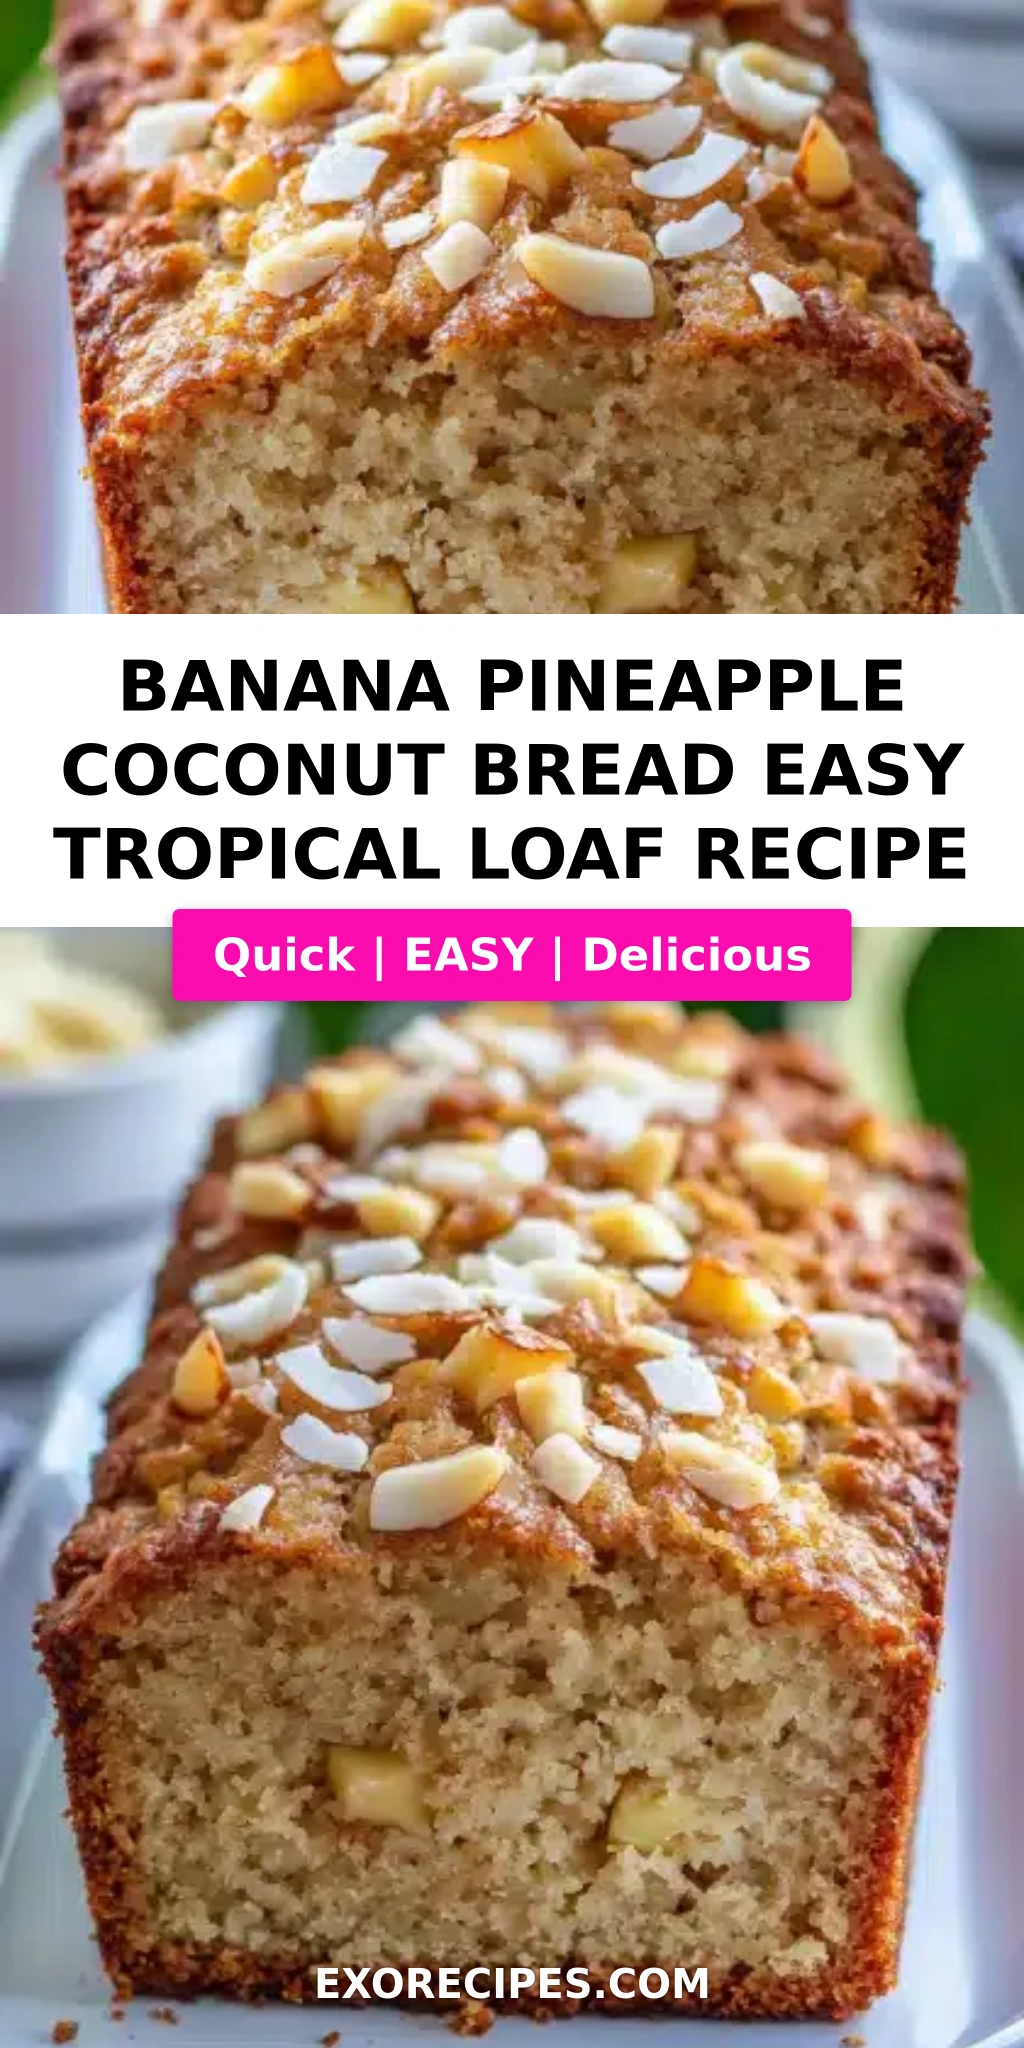
The first slice comes out of the pan with a golden crust that crackles under the knife, revealing a crumb so soft it practically melts. The aroma — bananas caramelizing in butter, pineapple releasing its tropical perfume, and coconut toasting gently in the oven — fills your entire kitchen. It’s the smell of weekend brunch, of lazy afternoons, of something made with love. With each bite you get little pockets of juicy pineapple and chewy coconut flakes, all wrapped in a tender banana bread base. It’s a Brunch Loaf Recipe that feels indulgent yet simple, like a tropical escape baked into every slice.
What sets my version apart is a technique I learned during my pastry training in Paris: draining the crushed pineapple well and toasting the shredded coconut beforehand. These two small steps make all the difference — they concentrate the flavors and keep the bread from becoming soggy. In this post I’ll share my tested method, a few chef-level tips, and one common mistake that can make your loaf dense instead of fluffy. Whether you’re new to baking or a seasoned pro this Banana Pineapple Coconut Bread will become your go-to for brunch snacks or an anytime treat.
Why This Banana Pineapple Coconut Bread Recipe Is the Best
The Flavor Secret. The magic of this Tropical Loaf Recipe lies in the balance of three fruits and the coconut. Bananas provide structure and natural sweetness, pineapple adds a bright acidic lift, and coconut brings a subtle nuttiness that rounds everything out. Growing up in Morocco I learned that the best dishes balance sweet and tart — and this bread does exactly that. I use well-ripened bananas (the spotty ones!) and canned crushed pineapple that’s been thoroughly drained so the flavors stay concentrated and vibrant.
Perfected Texture. French pastry school taught me that texture is everything. Overmixing a quick bread creates tunnels and toughness — but mix just until the flour disappears and you get a tender melt-in-your-mouth crumb. I also toast the shredded coconut before adding it to the batter, which brings out its oils and prevents it from turning gummy. The result is a Coconut Pineapple Quick Bread that’s moist without being heavy, with a delicate crumb that holds together beautifully when sliced.
Foolproof & Fast. This is one of those Easy Banana Bread Variations that truly anyone can make. No stand mixer required — just a bowl and a whisk. The ingredients are pantry staples you likely already have. And because the pineapple adds so much moisture this bread stays fresh longer than a standard banana bread. It’s a Brunch Loaf Recipe that works for beginners and experts alike and it’s nearly impossible to mess up if you follow my steps. 💡 mia’s Pro Tip: Use a kitchen scale to measure your bananas — 3 medium bananas should give you about 1 cup of mash for the perfect moisture balance.
Banana Pineapple Coconut Bread Ingredients
I often pick up my bananas from the Union Square Greenmarket in Manhattan — they’re always perfectly ripe. The shredded coconut I source from a little health food store near my apartment in Brooklyn, and the crushed pineapple I keep in my pantry year-round for quick baking projects. This combination of ingredients is simple but each one plays a specific role in creating the perfect tropical loaf.
Ingredients List
- 1 1/2 cups all-purpose flour
- 1 teaspoon baking soda
- 1/2 teaspoon salt
- 1/2 cup unsalted butter, softened
- 3/4 cup granulated sugar
- 2 large eggs
- 3 ripe bananas, mashed (about 1 cup)
- 1/2 cup crushed pineapple, drained (canned or fresh — see FAQ)
- 1/2 cup sweetened shredded coconut (plus extra for topping, optional)
- 1 teaspoon vanilla extract
Ingredient Spotlight
Bananas. The foundation of this bread. Use bananas that are heavily speckled with brown spots — they’re sweeter and easier to mash. Over-ripe bananas (completely brown but not moldy) work even better as they add deeper flavor and more moisture. In a pinch you can use frozen thawed bananas just drain off any excess liquid before mashing.
Crushed Pineapple. This is the secret to the tropical twist. Canned crushed pineapple is ideal because it’s consistent and convenient. Always drain it well — I press it through a fine-mesh sieve or squeeze it with my hands to remove as much liquid as possible. This prevents the bread from becoming soggy while still delivering that bright pineapple flavor. Fresh crushed pineapple works too but you need to drain it thoroughly.
Shredded Coconut. Sweetened shredded coconut gives the bread a tender chew and subtle sweetness. For the best texture toast it in a dry skillet over medium heat for 2-3 minutes until lightly golden — this deepens its flavor and keeps it from absorbing too much moisture from the batter. Unsweetened coconut works as a swap but the bread will be slightly less sweet and more textured.
Butter & Sugar. I use unsalted butter so I can control the salt level. Softened butter creams easily with sugar creating air pockets that help the bread rise. Granulated sugar provides structure and sweetness but you can substitute up to half with brown sugar for a more molasses-like depth. The creaming step is worth doing well — it takes only 2 minutes and makes a noticeable difference in the final texture.
| Original Ingredient | Best Substitution | Flavor / Texture Impact |
|---|---|---|
| All-purpose flour | Whole wheat pastry flour or gluten-free 1:1 blend | Slightly denser, nuttier flavor; GF blend yields near-identical texture |
| Unsalted butter | Coconut oil (refined, melted) or vegan butter | Coconut oil enhances tropical flavor; vegan butter works 1:1 |
| Granulated sugar | Brown sugar or coconut sugar | Brown sugar adds moisture and molasses notes; coconut sugar is less sweet with caramel undertones |
| Shredded coconut | Chopped macadamia nuts or toasted almonds | Adds crunch and nuttiness but loses the chewy coconut texture |
| Crushed pineapple | Mango puree (drained) or diced fresh mango | Sweeter, less acidic; still tropical and moist |
How to Make Banana Pineapple Coconut Bread — Step-by-Step
Follow these steps and you’ll have a perfect tropical loaf every time. I’ve included my chef-tested tips and the most common mistakes so you can bake with confidence.
Step 1: Preheat and Prepare
Preheat your oven to 350°F (175°C) and position a rack in the center. Grease a 9×5-inch loaf pan thoroughly with butter or nonstick spray, then dust it lightly with flour — this ensures the bread releases cleanly. I also line the bottom with a small strip of parchment paper for extra insurance.
💡 mia’s Pro Tip: Use a dark metal loaf pan if you have one — it conducts heat more evenly and gives you a beautifully golden crust. Glass pans work too but may require an extra 5-10 minutes of baking time.
Step 2: Whisk Dry Ingredients
In a medium bowl whisk together 1 1/2 cups all-purpose flour, 1 teaspoon baking soda, and 1/2 teaspoon salt. Whisking aerates the flour and distributes the leavening evenly so your bread rises uniformly. Set this bowl aside.
⚠️ Common Mistake to Avoid: Scooping flour directly with the measuring cup compacts it and adds up to 25% more flour, making your bread dry. Instead spoon the flour into your cup and level it off with a knife.
Step 3: Cream Butter and Sugar
In a large bowl beat 1/2 cup softened unsalted butter with 3/4 cup granulated sugar until light and fluffy — about 2 minutes with a hand mixer or 3 minutes by hand with a sturdy whisk. The mixture should look pale and feel aerated. Add the 2 large eggs one at a time beating well after each addition. This emulsification step is what gives the bread its tender crumb.
💡 mia’s Pro Tip: Make sure your butter is truly softened — it should yield when pressed with a finger but still hold its shape. Cold butter won’t cream properly and melted butter will make the bread dense.
Step 4: Add Wet Ingredients
Stir in the mashed bananas (about 1 cup), the drained crushed pineapple, 1/2 cup sweetened shredded coconut (toasted if you have time), and 1 teaspoon vanilla extract. Mix until evenly combined. The batter will look a little loose — that’s exactly right. The pineapple and bananas provide the moisture that keeps this bread tender for days.
⚠️ Common Mistake to Avoid: Adding the pineapple without draining it first introduces excess liquid that can make the bread heavy and soggy. Press the crushed pineapple firmly in a sieve or squeeze it in a clean kitchen towel to remove as much juice as possible.
Step 5: Combine Dry and Wet
Add the dry ingredients to the wet mixture and fold gently with a rubber spatula using broad sweeping motions. Mix only until you no longer see streaks of flour — about 10 to 12 folds. A few tiny lumps are fine. Overmixing at this stage develops gluten which makes the bread tough and creates tunnels.
💡 mia’s Pro Tip: Switch to a light hand the moment you add the flour. I count my folds aloud — it sounds silly but it keeps me from overmixing. Stop the moment the flour disappears.
Step 6: Bake
Pour the batter into the prepared pan and spread it into an even layer. If you like a crunchy top sprinkle an extra tablespoon of shredded coconut over the surface. Bake for 55 to 65 minutes, rotating the pan halfway through. The loaf is done when a toothpick inserted into the center comes out clean or with just a few moist crumbs attached. The top should be deep golden brown and feel springy to the touch.
⚠️ Common Mistake to Avoid: Opening the oven door repeatedly during baking causes temperature fluctuations that can make your loaf sink in the middle. Wait until at least 50 minutes have passed before you start testing for doneness.
Step 7: Cool
Cool the bread in the pan on a wire rack for 10 minutes. Then run a thin knife around the edges and turn the loaf out onto the rack to cool completely — at least 1 hour. Slicing while warm will cause the crumb to crumble and tear. Patience here pays off with clean beautiful slices.
💡 mia’s Pro Tip: For the absolute best texture wrap the completely cooled loaf in plastic wrap and let it rest overnight before slicing. The flavors meld and the crumb becomes even more tender. This is a trick I learned in pastry school and it works every time.
| Step | Action | Duration | Key Visual Cue |
|---|---|---|---|
| 1 | Preheat & prepare pan | 5 minutes | Oven at 350°F, pan greased and floured |
| 2 | Whisk dry ingredients | 2 minutes | Evenly combined, no lumps |
| 3 | Cream butter & sugar | 2-3 minutes | Pale, fluffy, increased in volume |
| 4 | Add wet ingredients | 2 minutes | Batter is loose and evenly mixed |
| 5 | Combine dry into wet | 30 seconds | No streaks of flour remain |
| 6 | Bake | 55-65 minutes | Toothpick clean, top golden and springy |
| 7 | Cool | 10 min in pan + 1 hr on rack | Loaf releases cleanly, completely room temperature |
Serving & Presentation
This Banana Pineapple Coconut Bread is beautiful on its own — a golden domed loaf with flecks of coconut and tiny specks of vanilla bean. I love to serve it on a wooden board with a dollop of Greek yogurt or a drizzle of honey alongside. For brunch I’ll arrange thick slices on a platter with fresh mango, pineapple spears, and a pitcher of iced coffee or mango lassi. It’s the kind of spread that makes people feel like they’re at a resort — even if you’re just in your own dining room.
Growing up in Morocco my mother would serve fruit breads with a side of warm mint tea and a small dish of honeyed butter. I’ve carried that tradition into my New York kitchen — I sometimes whip a little coconut cream with a touch of maple syrup to spread on each slice. It’s indulgent but worth it. For a simpler approach a light toasting in a skillet brings out the coconut’s nuttiness and makes the crust delightfully crisp.
| Pairing Type | Suggestions | Why It Works |
|---|---|---|
| Side Dish | Greek yogurt, fresh fruit salad, scrambled eggs, bacon | Balances sweetness with protein and tang; creates a complete brunch plate |
| Sauce / Dip | Honey butter, coconut cream drizzle, mango coulis, lime glaze | Enhances tropical notes; adds moisture and richness |
| Beverage | Iced coffee, chai latte, mango lassi, sparkling water with lime | Cools the palate; the acidity in coffee and lime cuts through the sweetness |
| Garnish | Toasted coconut flakes, edible flowers, pineapple wedge, mint sprig | Adds visual appeal and a fresh aromatic finish |
Make-Ahead, Storage & Reheating
Living in New York City means my schedule is always changing — I love that this Tropical Loaf Recipe can be made ahead and enjoyed throughout the week. I often bake two loaves at once: one for immediate enjoyment and one to store for busy mornings or unexpected guests. The bread actually tastes even better on the second day as the flavors meld and the crumb settles into a perfectly tender texture.
| Method | Container | Duration | Reheating Tip |
|---|---|---|---|
| Refrigerator | Plastic wrap tightly, then foil or airtight container | Up to 5 days | Microwave slice 15 seconds or warm in 300°F oven 5-7 minutes |
| Freezer | Plastic wrap + foil or freezer-safe bag | Up to 3 months | Thaw overnight in fridge or 2 hours at room temp; warm in 300°F oven 10 minutes |
| Make-Ahead | Bake fully, cool, wrap tightly | Up to 2 days in advance | Store wrapped at room temp; no reheating needed — serve at room temp or toasted |
For the best results when reheating I recommend using a toaster oven or a 300°F oven rather than a microwave, which can make the exterior rubbery. If you’re in a hurry the microwave works perfectly fine — just wrap the slice in a damp paper towel to add a little steam. For a special treat I’ll spread a thin layer of butter on a slice and toast it in a cast-iron skillet until golden — the butter caramelizes with the coconut and it’s absolutely divine.
Variations & Easy Swaps
| Variation | Key Change | Best For | Difficulty Impact |
|---|---|---|---|
| Gluten-Free Tropical Loaf | Substitute 1:1 gluten-free flour blend (with xanthan gum) | Those with gluten sensitivity | Easy — same method, check doneness at 50 minutes |
| Vegan Coconut Banana Bread | Use flax eggs (2 tbsp flax + 6 tbsp water) and coconut oil instead of butter | Plant-based eaters | Easy — let flax eggs gel 10 minutes before using |
| Mango Macadamia Twist | Replace pineapple with mango puree and coconut with chopped macadamia nuts | A fun switch-up for summer brunch | Easy — drain mango puree well; toast nuts before adding |
Gluten-Free Tropical Loaf
This variation is incredibly simple and produces a loaf that’s nearly indistinguishable from the original. Use a high-quality 1:1 gluten-free flour blend that contains xanthan gum — I’ve tested this with both Bob’s Red Mill and King Arthur blends and both worked beautifully. The texture is slightly more tender and a touch crumblier but the tropical flavors shine through just as brightly. Reduce the baking time by 5 minutes and start checking early since gluten-free batters can brown faster.
Vegan Coconut Banana Bread
To make this bread vegan I swap the butter for melted refined coconut oil and replace the eggs with flax eggs. The coconut oil reinforces the tropical profile and the flax eggs provide structure without any gummy texture. One important tip: let the flax eggs sit for at least 10 minutes to thicken before adding them to the batter. I also use a plant-based milk yogurt on the side for serving — it’s a small change that makes a big difference for anyone following a vegan lifestyle.
Mango Macadamia Twist
When summer hits New York City and mangoes are piled high at the Union Square market I love making this version. Replace the crushed pineapple with ripe mango puree (drain any excess liquid) and swap the shredded coconut for chopped macadamia nuts. The result is a distinctly Hawaiian-inspired loaf that’s rich, buttery, and utterly decadent. I add a pinch of cardamom — a nod to my Moroccan roots — which pairs unexpectedly well with the mango and nuts.
Can I use frozen pineapple or canned pineapple in banana pineapple coconut bread?
Yes you can use either! Canned crushed pineapple is my top recommendation because it’s consistent, available year-round, and has the perfect texture for baking. If you use frozen pineapple thaw it completely first then drain it very well — you’ll want to press out as much liquid as possible to avoid making the bread soggy. Fresh pineapple also works but needs to be crushed or finely chopped and drained. Whichever you choose the key step is draining: squeeze the pineapple in a clean kitchen towel or press it through a fine-mesh sieve until no liquid drips out. This keeps your Banana Pineapple Coconut Bread perfectly moist without being wet.
How do I make banana pineapple coconut bread more moist without it getting soggy?
The secret to extra moisture without sogginess is threefold. First use very ripe bananas — the ones with lots of brown spots — as they contain more natural moisture and sweetness. Second drain your crushed pineapple thoroughly before adding it to the batter; this prevents excess liquid from making the bread heavy. Third toast the shredded coconut in a dry skillet for 2-3 minutes before adding it to the batter — toasted coconut absorbs less moisture from the batter and stays pleasantly chewy rather than becoming soggy. I also recommend using room temperature eggs and butter which emulsify better and create a more tender crumb that holds moisture evenly throughout the loaf.
What can I substitute for shredded coconut in this tropical loaf recipe?
If you don’t have shredded coconut or prefer not to use it there are several great substitutions. Chopped macadamia nuts are my favorite swap — they add a buttery richness and a pleasant crunch that pairs beautifully with the banana and pineapple. Toasted almonds or pecans also work well though they’ll change the flavor profile slightly. For a coconut-like texture without the coconut try chopped dried mango or dried pineapple (both add chewy sweetness). If you’re avoiding coconut for allergy reasons simply omit it and add an extra 2 tablespoons of flour to balance the moisture. Each substitution will give you a slightly different but still delicious loaf.
How should I store banana pineapple coconut bread to keep it fresh for brunch or snacks?
This bread stores beautifully. For room temperature storage wrap it tightly in plastic wrap or place it in an airtight container and keep it at room temperature for up to 3 days. I prefer plastic wrap directly against the cut surface to prevent drying. For longer storage refrigerate the wrapped loaf for up to 5 days — just bring slices to room temperature or warm them before serving. For freezer storage wrap the cooled loaf in plastic wrap then a layer of foil or place it in a freezer-safe bag for up to 3 months. Thaw overnight in the refrigerator or for 2 hours at room temperature. The bread actually tastes even better the next day as the flavors meld together.
Can I add nuts or chocolate chips to this banana pineapple coconut bread?
Absolutely! This recipe is very adaptable. I love adding 1/2 cup of chopped walnuts or pecans for extra crunch and a touch of bitterness that balances the sweetness. Macadamia nuts are also fantastic and reinforce the tropical theme. For chocolate lovers 1/2 cup of semisweet or dark chocolate chips is a wonderful addition — the chocolate pairs surprisingly well with the banana and pineapple. If adding either fold them in gently at the end just before pouring the batter into the pan. You can also sprinkle a few nuts or chips on top of the batter for a decorative finish. No need to adjust the baking time.
Is this banana pineapple coconut bread suitable for making ahead for a brunch party?
Yes this is one of the best make-ahead brunch recipes I know. I recommend baking the loaf 1 to 2 days before your brunch — it actually improves with time as the flavors meld and the crumb becomes even more tender. Cool the bread completely then wrap it tightly in plastic wrap and store it at room temperature. On the day of your brunch you can serve it at room temperature or warm slices in a 300°F oven for 5-7 minutes. For a beautiful presentation slice the loaf just before serving and arrange the slices on a platter with fresh fruit and a dusting of powdered sugar. You can also freeze the loaf up to 3 months ahead.
Can I use whole wheat flour instead of all-purpose flour in this tropical loaf?
Yes you can substitute whole wheat flour but I recommend using whole wheat pastry flour rather than regular whole wheat flour for the best texture. Whole wheat pastry flour is made from soft wheat and has a lower protein content which results in a more tender crumb similar to all-purpose flour. If you use regular whole wheat flour the loaf will be denser and heartier with a more pronounced nutty flavor. I suggest starting by replacing half of the all-purpose flour with whole wheat flour to get a feel for the texture. You may need to add 1-2 tablespoons of milk or pineapple juice to the batter as whole wheat flour absorbs more moisture.
Why did my banana pineapple coconut bread sink in the middle?
A sunken middle is usually caused by one of a few common issues. The most frequent culprit is underbaking — if the center hasn’t set fully it will collapse as it cools. Always test with a toothpick inserted into the center it should come out clean or with just a few moist crumbs. Another cause is opening the oven door too early or too frequently which lets cold air in and disrupts the rise. Baking soda that’s past its prime can also cause sinking so check that your baking soda is fresh (it should fizz when mixed with vinegar). Finally overmixing the batter develops too much gluten which can cause a dense sunken center. Mix just until the flour disappears and no more.
Can I make this banana pineapple coconut bread in a different pan size?
Yes you can adapt this recipe for different pan sizes. For mini loaves divide the batter among 4 mini loaf pans (about 5×3 inches each) and bake for 35-45 minutes. For muffins fill greased muffin tins about 3/4 full and bake for 18-22 minutes — this yields about 12 muffins. For a 9-inch square cake pan spread the batter evenly and bake for 30-35 minutes checking for doneness with a toothpick. The key is to keep an eye on the visual cues: the top should be golden brown and springy to the touch and a toothpick should come out clean. Different pan materials (dark metal vs. glass vs. silicone) will also affect baking time so always start checking early.
What can I do if my banana pineapple coconut bread is too brown on top but still raw inside?
This is a common issue especially with ovens that run hot or have uneven heating. If you notice the top is browning too quickly while the center is still raw tent the loaf loosely with aluminum foil about 30 minutes into baking. The foil will reflect the heat and prevent the top from over-browning while allowing the center to continue cooking. I also recommend placing your loaf pan on the middle rack rather than the top third of the oven. For particularly finicky ovens you can reduce the temperature to 325°F and increase the baking time by 10-15 minutes — this gentler heat often produces a more evenly baked loaf with a perfectly golden crust.
Share Your Version!
I absolutely love hearing how this Banana Pineapple Coconut Bread turns out in your kitchen. Leave a star rating and a comment below — tell me what you added or swapped, or how you served it for brunch. Did you try the mango macadamia variation? Did you add chocolate chips? I read every single comment and I love learning from your creativity.
If you share a photo on Instagram or Pinterest please tag me @exorecipes — I want to see your beautiful tropical loaves! And here’s a question for you: what’s your favorite way to enjoy a slice — warm with butter, toasted with honey, or simply on its own with a cup of coffee? I’m curious to know. From my NYC kitchen to yours — I hope this recipe brings as much warmth to your table as it does to mine. — mia 🧡
Love This Recipe? Save It to Pinterest!
If you enjoyed this Banana Pineapple Coconut Bread recipe, don’t let it get lost in your browser tabs! 😄 Pin it now so you can find it again anytime — and explore hundreds more tried-and-tested recipes waiting for you on my Pinterest boards.
👉 Follow mia on Pinterest @exorecipe
📌 Pin this recipe · 🔁 Re-pin your favorites · 💬 Tag me when you make it — I love seeing your creations!
💬 Did you make this Tropical Loaf?
Tag @exorecipes on Instagram or Pinterest and use the hashtag #MiasTropicalLoaf — I can’t wait to see your creations! Drop a star rating below and let me know how it turned out. 🧡
Banana Pineapple Coconut Bread Easy Tropical Loaf for Brunch or Snacks
- Prep Time: 15 minutes
- Cook Time: 1 hour
- Total Time: 1 hour 15 minutes
- Yield: 10 1x
- Method: Dessert, Brunch
- Cuisine: American
Description
A moist and delicious tropical loaf combining ripe bananas, crushed pineapple, and shredded coconut. Perfect for brunch or a snack.
Ingredients
- 1 1/2 cups all-purpose flour
- 1 teaspoon baking soda
- 1/2 teaspoon salt
- 1/2 cup unsalted butter, softened
- 3/4 cup granulated sugar
- 2 large eggs
- 3 ripe bananas, mashed (about 1 cup)
- 1/2 cup crushed pineapple, drained
- 1/2 cup sweetened shredded coconut
- 1 teaspoon vanilla extract
Instructions
- Preheat oven to 350°F (175°C). Grease a 9×5-inch loaf pan.
- In a medium bowl, whisk together flour, baking soda, and salt.
- In a large bowl, beat butter and sugar until light and fluffy. Add eggs one at a time, beating well after each. Stir in mashed bananas, crushed pineapple, shredded coconut, and vanilla extract.
- Add dry ingredients to wet ingredients and mix until just combined. Do not overmix.
- Pour batter into prepared pan and spread evenly.
- Bake for 55-65 minutes, or until a toothpick inserted into center comes out clean.
- Cool in pan for 10 minutes, then turn out onto a wire rack to cool completely.
Notes
For extra coconut flavor, toast the shredded coconut before adding to the batter. Store leftovers wrapped in plastic wrap at room temperature for up to 3 days.
Nutrition
- Calories: 295
- Sugar: 24g
- Fat: 12g
- Carbohydrates: 44g
- Protein: 4g
Tried This Recipe? Leave a Comment!
Did you make this recipe? I’d love to hear how it turned out! Please leave a comment and a rating below. Your feedback helps other home cooks and supports cheerychop.com!
For more delicious inspiration, follow me on Pinterest!