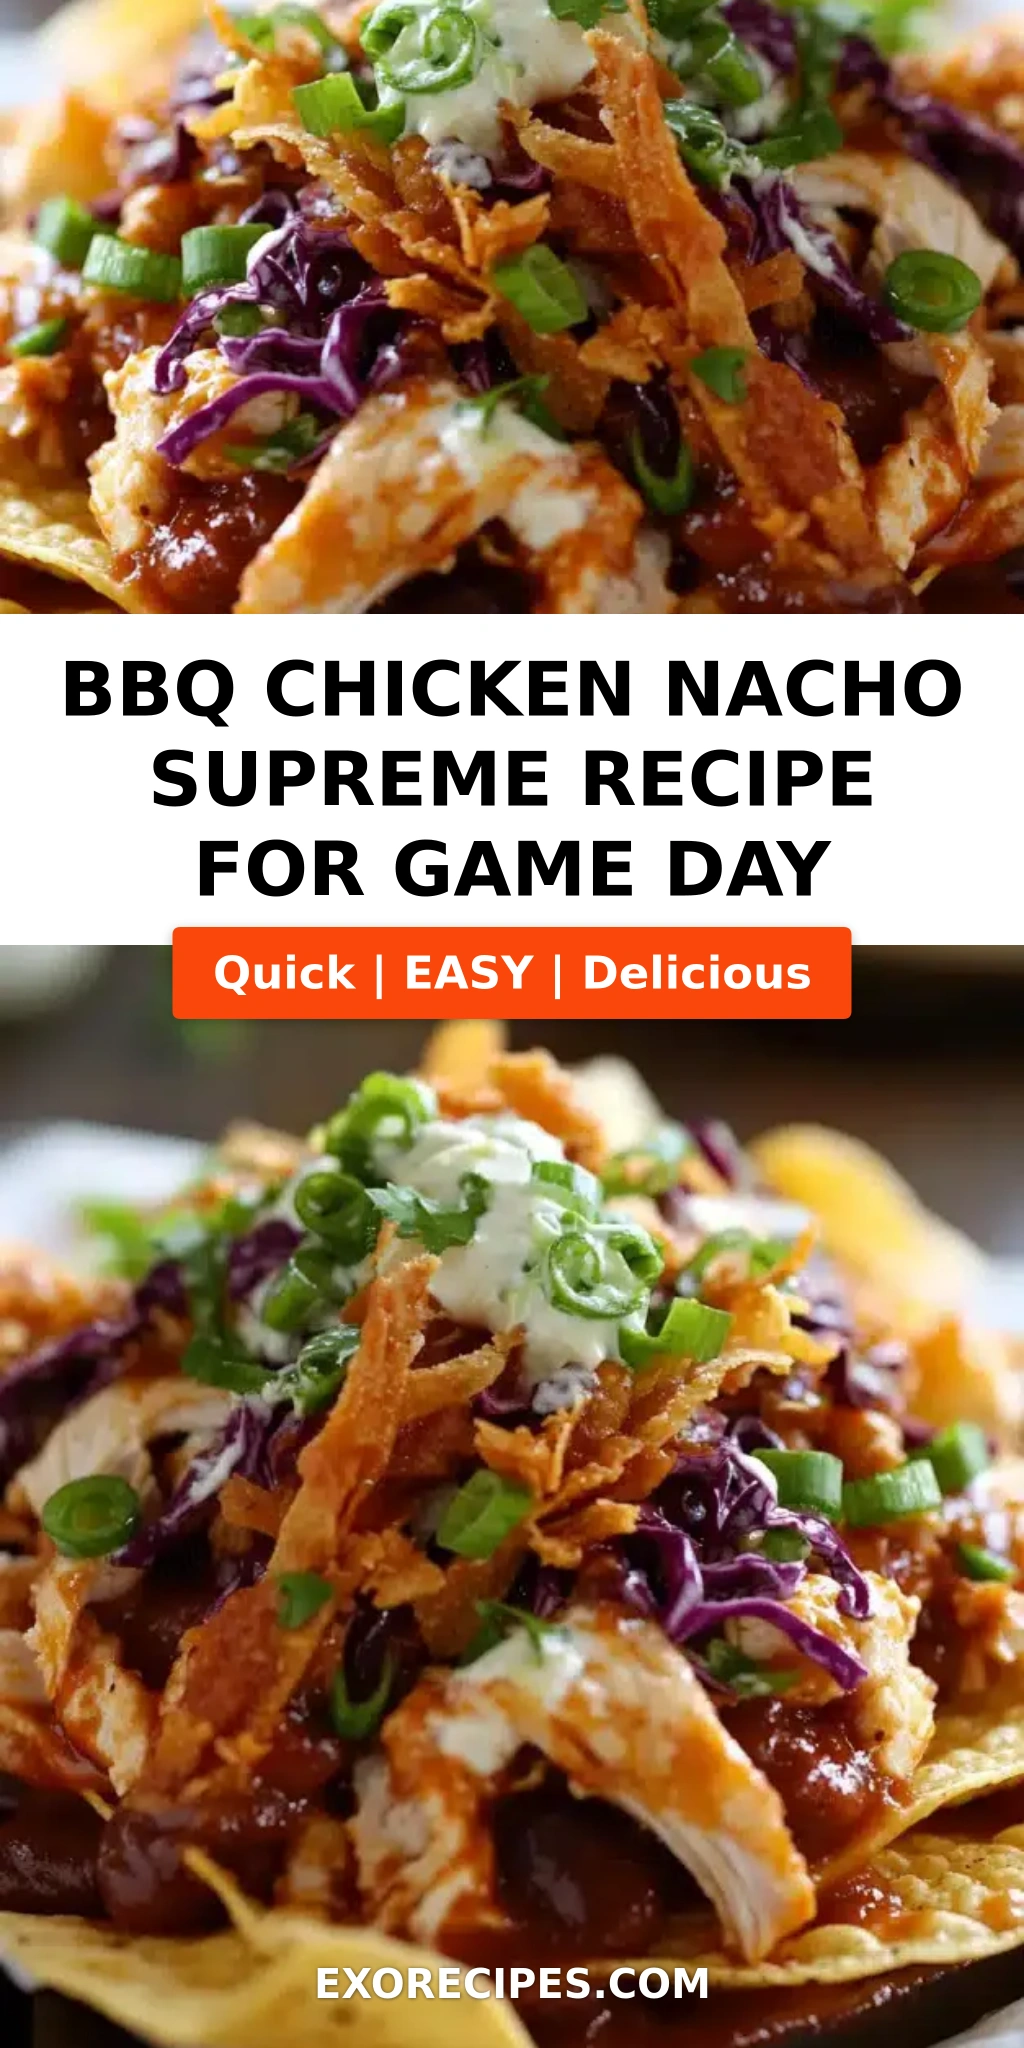
Baked Eggplant Parmesan with Fresh Mozzarella and Herb Topping: A Comforting Classic Made Better – The Lighter, Crispier, More Flavorful Way to Make It

⚖️
Difficulty
Medium
⏲️
Prep Time
30 mins
🕒
Cook Time
45 mins
⏱️
Total Time
1 hr 15 mins
🍽️
Servings
6

Every time I walk through the Union Square Greenmarket in the fall and see those glossy, deep-purple eggplants piled high at the farm stands, I’m transported straight back to my mother’s kitchen in Morocco. She would slice them thin, salt them with care, and fry them until they were golden and tender, layering them into tagines that filled our home with warmth. That memory is the heartbeat of this baked eggplant Parmesan recipe — a dish that honors the soul of the classic Italian-American favorite while making it lighter, brighter, and honestly, even more satisfying. With fresh mozzarella, a vibrant herb topping, and a crispy breaded crust that stays crunchy through the bake, this easy baked eggplant Parmesan is the kind of meal that feels like a hug on a plate. In this healthy eggplant Parmesan, I skip the heavy frying and use a smart oven-baking technique that delivers all the golden crunch without the grease, letting the quality of the ingredients — from the San Marzano tomatoes in the sauce to the milky fresh mozzarella — truly shine. This is the baked eggplant Parmesan recipe you’ll come back to again and again.

The first bite is pure comfort: a fork sinks through a crispy, golden-brown crust into silky, tender eggplant, then meets a layer of melted fresh mozzarella that stretches beautifully with every pull. The marinara is bright and garlicky, and the herb topping — a simple mix of fresh basil and parsley — adds a pop of green freshness that cuts through the richness. The aroma that fills your kitchen as this bakes is absolutely intoxicating: oregano and garlic mingling with the sweet scent of roasted eggplant and the nutty fragrance of Parmesan. I learned the art of building layers like this during my years training at Le Cordon Bleu in Paris, where we spent entire afternoons perfecting the balance of texture and flavor in dishes like timbales and gratins. That training taught me patience and technique, but it’s the spirit of my mother’s home cooking — generous, intuitive, never fussy — that guides how I build each layer here. Every slice is sturdy enough to hold its own yet tender enough to melt on your tongue.

What makes my version of classic eggplant Parmesan truly different is that I bake the breaded eggplant rounds on a sheet pan before assembling the casserole — a game-changer that guarantees every piece stays crispy, even under the sauce and cheese. No more soggy eggplant! I also finish the dish under the broiler for just a couple of minutes to get that puffed, blistered cheese top that everyone fights over. 💡 mia’s Pro Tip: Don’t skip the resting time after baking — letting the casserole sit for five minutes allows the layers to set so you get clean, beautiful slices instead of a soupy mess. Whether you’ve been making eggplant Parmesan for years or this is your very first time, this easy baked eggplant Parmesan recipe will give you confident, crowd-pleasing results every single time. From my NYC kitchen to yours — let’s make something beautiful together.

Why This Baked Eggplant Parmesan Recipe Is the Best

The flavor secret here is twofold: First, I use fresh mozzarella instead of the pre-shredded stuff. Fresh mozzarella has a higher moisture content and a creamy, milky flavor that melts into velvety pockets throughout the dish, while pre-shredded mozzarella is coated with anti-caking agents that prevent it from melting as smoothly and can make the dish grainy. Second, the herb topping — a generous mix of fresh basil and parsley scattered both between the layers and on top — adds a brightness that elevates this from heavy comfort food to something you could eat any night of the week. I grew up with my mother using fresh herbs from our garden in Morocco, and that habit of finishing dishes with a flourish of green is one I’ve never lost. The contrast between the rich, savory marinara and the cool, fragrant herbs is what keeps people coming back for seconds.

Texture is everything in a great eggplant Parmesan, and I’ve dialed in the technique to get it just right. The key is salting the eggplant slices before breading — this draws out excess moisture, concentrates the flavor, and prevents the breading from steaming off as it bakes. Then I give the breaded slices a quick bake on parchment-lined sheets until they’re golden and crisp on both sides. 💡 mia’s Pro Tip: Brush the breaded slices lightly with olive oil before baking — it helps them brown beautifully and adds a subtle fruity flavor that complements the tomato sauce. When you layer these crispy rounds into the casserole, they hold their structure even after baking with the sauce and cheese, so every bite has that satisfying crunch-tender contrast that makes this dish so beloved.

Foolproof and fast enough for a weeknight but impressive enough for company, this baked eggplant Parmesan recipe streamlines the process without cutting corners. The entire hands-on time is about 30 minutes, and the oven does the heavy lifting from there. I’ve tested this recipe with home cooks of all skill levels, and even beginners nail it on the first try. The ingredient list is straightforward — everything you need is available at any well-stocked US grocery store — and the steps are designed to build confidence. Whether you’re serving a crowd or meal-prepping for the week, this healthy eggplant Parmesan delivers consistent, delicious results that make you look like a pro. And if you’re looking for an easy baked eggplant Parmesan that doesn’t skimp on flavor, this is the one.

Baked Eggplant Parmesan Recipe Ingredients

I love sourcing my ingredients for this dish from the local markets around New York City. The eggplants I get from the farmers market in Brooklyn are so fresh they still have the morning dew on them, and the fresh mozzarella from the Italian deli in Greenwich Village is so creamy it practically begs to be sliced and eaten on the spot. But even if you’re shopping at your neighborhood grocery store, the key is choosing quality staples — a good jarred marinara, real Parmesan, and fresh herbs — because each ingredient plays a starring role in this baked eggplant Parmesan recipe. Let me walk you through what you’ll need and why each one matters.

Ingredients List

  • 2 large eggplants, sliced into 1/2-inch rounds
  • 1 teaspoon salt
  • 1 cup all-purpose flour
  • 3 large eggs, beaten
  • 1 1/2 cups Italian-seasoned breadcrumbs
  • 1/2 cup grated Parmesan cheese
  • 1 teaspoon garlic powder
  • 1 teaspoon dried oregano
  • 1/2 teaspoon black pepper
  • 3 cups marinara sauce
  • 8 ounces fresh mozzarella, sliced
  • 1/2 cup fresh basil leaves, chopped
  • 1/4 cup fresh parsley, chopped
  • 2 tablespoons olive oil

Ingredient Spotlight

Eggplant: The foundation of the whole dish. Choose medium-to-large eggplants that feel heavy for their size with smooth, glossy skin and no soft spots. Globe eggplants are perfect for this — they’re meaty and hold up well to slicing and breading. If you see them at the market, Italian heirloom varieties like Rosa Bianca are even sweeter and creamier. One medium eggplant yields about 12 to 14 rounds, which is perfect for a 9×13-inch baking dish. 💡 mia’s Pro Tip: If your eggplants are particularly large or seem very seedy, sprinkle them with salt and let them sit for 20 minutes before breading — this draws out bitter juices and ensures a silky texture.

Fresh Mozzarella: This is the star cheese in my version. Unlike low-moisture shredded mozzarella, fresh mozzarella comes packed in water or whey and has a soft, springy texture and a mild, milky flavor that melts into creamy pools. Look for balls that are firm but not hard, with no discoloration. For this recipe, I like to buy a full 8-ounce ball and slice it into 1/4-inch rounds — it feels more rustic and intentional than shreds. If you can’t find fresh mozzarella, you can substitute with low-moisture part-skim mozzarella, but the texture will be less creamy and more elastic.

Italian-Seasoned Breadcrumbs: These are your best friend for a quick, flavorful crust. The herbs and garlic already in the breadcrumbs add depth and save you from having to season the breading mix too heavily. I like to buy a brand that has a fine crumb for even coating, but panko-style Italian breadcrumbs work beautifully if you want extra crunch. For a gluten-free version, use gluten-free Italian-seasoned panko — it’s a simple swap that delivers nearly identical results.

Fresh Basil and Parsley: The herb topping is what makes this dish sing. Basil brings a sweet, peppery note that’s unmistakably Italian, while parsley adds a clean, grassy brightness that balances the richness of the cheese and sauce. I chop them together and sprinkle them between each layer and on top. Don’t even think about using dried herbs here — fresh herbs are non-negotiable for that vibrant, garden-fresh finish. If you’re in a pinch, you can use all basil or all parsley, but the combination is truly special.

Original IngredientBest SubstitutionFlavor / Texture Impact
Fresh MozzarellaLow-moisture shredded mozzarellaMore elastic, less creamy; still delicious but different mouthfeel
Italian-Seasoned BreadcrumbsGluten-free Italian pankoSlightly crunchier texture; flavor nearly identical
Fresh BasilFresh oregano or mintMore pungent or sweet; changes the herb profile noticeably
All-Purpose FlourGluten-free all-purpose blendSimilar binding; slightly different browning, but works well

How to Make Baked Eggplant Parmesan — Step-by-Step

Making this baked eggplant Parmesan recipe is a pleasure from start to finish — the rhythmic motion of breading, the scent of herbs filling your kitchen, the sight of that golden, bubbly casserole coming out of the oven. Trust the process and take your time with each step; your reward will be a dish that looks and tastes like it came from a rustic Italian trattoria. Here’s exactly how to do it.

Step 1: Prepare the Eggplant

Slice the eggplants into 1/2-inch rounds. Sprinkle both sides generously with salt and arrange them on a clean surface or a wire rack set over a baking sheet. Let them sit for 20 minutes — you’ll see tiny beads of moisture form on the surface. This step is crucial for drawing out excess water and any bitterness, ensuring the eggplant bakes up tender and flavorful. After 20 minutes, pat both sides dry with paper towels. 💡 mia’s Pro Tip: Don’t rinse the salt off — just pat dry. The salt that remains will season the eggplant from the inside out.

Step 2: Set Up Breading Station

Get three shallow bowls ready. Place the flour in the first. Beat the eggs in the second until smooth. In the third, combine the Italian-seasoned breadcrumbs, grated Parmesan, garlic powder, dried oregano, and black pepper. Stir to distribute everything evenly. 💡 mia’s Pro Tip: Use a fork to mix the breadcrumb mixture — it helps break up any clumps and ensures each slice gets a uniform coating.

Step 3: Bread the Eggplant

Working with one slice at a time, dredge the eggplant in the flour, shaking off any excess. Dip it into the beaten eggs, letting any extra drip off. Then press it firmly into the breadcrumb mixture, turning to coat both sides evenly. Place the breaded slices on a parchment-lined baking sheet in a single layer. ⚠️ Common Mistake to Avoid: Don’t skip the flour step — it helps the egg adhere and creates a barrier that keeps the eggplant from getting soggy during baking.

Step 4: Bake the Eggplant Slices

Preheat the oven to 375°F (190°C). Lightly brush the tops of the breaded eggplant slices with olive oil — this helps them turn golden and crisp. Bake for 15 minutes, then flip each slice with a spatula and bake another 10 minutes, until both sides are golden brown and the coating is crispy. 💡 mia’s Pro Tip: The eggplant should be firm-tender at this stage — not fully soft, but with a little give. It will finish cooking in the casserole.

Step 5: Layer the Casserole

Spread 1/2 cup of marinara sauce on the bottom of a 9×13-inch baking dish. Arrange half of the baked eggplant slices in a single layer over the sauce, overlapping slightly if needed. Spoon half of the remaining sauce over the eggplant, then layer half of the fresh mozzarella slices and half of the chopped basil and parsley. Repeat with the remaining eggplant, sauce, and cheeses, finishing with a final layer of mozzarella on top. ⚠️ Common Mistake to Avoid: Don’t overload the layers with sauce — too much liquid will make the eggplant soggy. You want just enough to coat each layer.

Step 6: Bake and Broil

Bake the assembled casserole uncovered for 20 minutes, until the sauce is bubbly and the cheese is melted and lightly golden. If you want a deeply browned, blistered cheese top, switch the oven to broil for 2-3 minutes — watch it closely so it doesn’t burn. 💡 mia’s Pro Tip: If your casserole dish is glass or ceramic, reduce the broil time to 1-2 minutes to avoid cracking.

Step 7: Rest and Serve

Let the baked eggplant Parmesan rest for 5 full minutes before cutting into it. This allows the layers to settle and the juices to redistribute, so each slice holds its shape on the plate. Sprinkle the remaining fresh herbs over the top just before serving — that final hit of green makes everything look and taste brighter. ⚠️ Common Mistake to Avoid: Cutting into the casserole too soon will result in a runny, shapeless serving. Patience is your friend here!

StepActionDurationKey Visual Cue
1Salt and dry eggplant20 minBeads of moisture on surface
2Bread slices~10 minFully coated, no flour patches
3Bake slices25 minGolden brown on both sides
4Layer casserole~5 minEven layers, sauce between each
5Bake casserole20 minBubbling edges, melted cheese
6Optional broil2-3 minBlistered, golden cheese top
7Rest before serving5 minLayers set; slices hold shape

Serving & Presentation

I love serving this baked eggplant Parmesan straight from the baking dish, placed on a wooden trivet at the center of the table so everyone can see those bubbly, golden layers. Use a wide metal spatula to lift out each portion — it helps keep the layers intact — and slide it onto warm dinner plates. I like to spoon a little extra marinara around each serving, then scatter a few fresh basil leaves and a pinch of flaky sea salt over the top for a finish that looks as good as it tastes. The contrast of the bright green herbs against the deep red sauce and molten white cheese is absolutely stunning.

In terms of pairings, this dish is incredibly versatile. A simple arugula salad with lemon vinaigrette cuts through the richness beautifully, or you can serve it with crusty bread to soak up every last bit of sauce. When I’m feeling nostalgic for my Paris days, I’ll pair it with a crisp green bean and almond salad — it’s the kind of French-accented side that makes the meal feel elegant. For a heartier meal, serve it alongside garlic bread or a side of roasted vegetables. And wine? A medium-bodied red like Chianti or Barbera is perfect, or a bright Pinot Noir if that’s what you have open.

For a truly memorable presentation, I sometimes garnish each serving with a drizzle of basil oil or a sprinkle of toasted pine nuts — both add a little extra texture and flavor that feels special. If you’re serving this for a holiday or dinner party, you can assemble it in individual gratin dishes for a restaurant-style presentation. However you serve it, this healthy eggplant Parmesan is the kind of dish that makes everyone at the table feel cared for.

Pairing TypeSuggestionsWhy It Works
Side DishArugula salad, garlic bread, roasted broccoliBright acidity and crunch balance the richness
Sauce / DipExtra marinara, basil oil, balsamic glazeAdds moisture and another layer of flavor
BeverageChianti, Barbera, Pinot Noir, or sparkling water with lemonAcid cuts through cheese; bubbles refresh the palate
GarnishFresh basil, flaky sea salt, toasted pine nutsAdds color, crunch, and a burst of freshness

Make-Ahead, Storage & Reheating

This baked eggplant Parmesan is a dream for meal prep, and as a busy NYC cook, I rely on make-ahead strategies to get dinner on the table without stress. You can bread and bake the eggplant slices up to two days in advance, then assemble and bake the casserole the day you plan to serve it. Or you can fully assemble the casserole (without baking) and refrigerate it for up to 24 hours — just add 10 minutes to the baking time if starting from cold. The flavors actually meld and deepen as it sits, making it even better the next day.

MethodContainerDurationReheating Tip
RefrigeratorAirtight container or baking dish covered with foilUp to 4 daysReheat in a 350°F oven for 15-20 min, covered
FreezerWrap tightly in foil, then place in a freezer bagUp to 3 monthsThaw overnight in fridge; reheat at 350°F for 25 min
Make-AheadAssembled but unbaked, covered in the baking dishUp to 24 hoursAdd 10 min to bake time; broil as directed

When reheating leftovers, I always use the oven rather than the microwave — the microwave makes the breading steam and turn soggy. Cover the dish with foil to prevent the cheese from burning, and reheat at 350°F for 15-20 minutes, then remove the foil for the last 5 minutes to crisp up the top. If the sauce seems a little thick after refrigeration, stir in a tablespoon of water or extra marinara before reheating to bring back that lush consistency. 💡 mia’s Pro Tip: I love making a double batch of the breaded eggplant slices and freezing them flat on a baking sheet before transferring to a freezer bag. Then I can pull out exactly as many as I need for a quick weeknight casserole — it’s like having a homemade frozen dinner ready to go.

Variations & Easy Swaps

One of the things I love most about this baked eggplant Parmesan recipe is how adaptable it is. Whether you’re cooking for someone with dietary restrictions, trying to use up what’s in your fridge, or just in the mood for something a little different, there’s a variation here for you. I’ve tested each of these swaps in my own kitchen, so you can feel confident making them.

VariationKey ChangeBest ForDifficulty Impact
Gluten-FreeUse gluten-free flour and gluten-free Italian pankoCeliac-friendly; parties with mixed dietsNo added difficulty
Dairy-Free / VeganReplace mozzarella with cashew ricotta, skip ParmesanDairy-free diets, vegan guestsMedium — homemade cashew ricotta needed
Moroccan Spice TwistAdd 1 tsp cumin and 1/2 tsp cinnamon to breadcrumbsAdventurous palates, fusion dinnersNo added difficulty

Gluten-Free Version

This is the easiest swap and one I’ve made countless times for friends with celiac disease. Simply substitute the all-purpose flour with a gluten-free all-purpose blend (I like Bob’s Red Mill 1-to-1) and use gluten-free Italian-seasoned panko in place of the breadcrumbs. The texture is nearly identical — the panko actually gets extra crispy in the oven — and the flavor is just as rich and savory. I’ve served this to gluten-free guests who didn’t even realize it was gluten-free until I told them. Just be sure to check that your marinara sauce is also gluten-free, as some brands add wheat-based thickeners.

Dairy-Free / Vegan Version

For a dairy-free or fully vegan version, I replace the fresh mozzarella with a creamy cashew ricotta. Soak 1 cup of cashews overnight, then blend them with 1/4 cup of water, 2 tablespoons of nutritional yeast, 1 tablespoon of lemon juice, and a pinch of salt until smooth and creamy. Omit the Parmesan from the breadcrumb mixture or use a vegan Parmesan alternative. The cashew ricotta adds a rich, nutty creaminess that mimics the texture of melted mozzarella beautifully. 💡 mia’s Pro Tip: For a quicker option, you can use a store-bought vegan mozzarella shred — just look for one that melts well, as some brands are more oil-based and don’t soften the same way.

Moroccan Spice Twist

This variation is a nod to my roots and one of my favorite ways to reinvent the dish. Add 1 teaspoon of ground cumin and 1/2 teaspoon of ground cinnamon to the breadcrumb mixture, and sprinkle a pinch of cayenne into the marinara for a gentle heat. The warm, earthy spices complement the sweetness of the roasted eggplant and the richness of the cheese in a way that feels both familiar and exciting. I sometimes serve this version with a dollop of harissa-spiked yogurt on the side for an extra layer of flavor. It’s the kind of dish that makes people pause and say, “What’s in this? It’s incredible.”

Share Your Version!

📌

Love This Recipe? Save It to Pinterest!

If you enjoyed this Baked Eggplant Parmesan with Fresh Mozzarella and Herb Topping recipe, don’t let it get lost in your browser tabs! 😄 Pin it now so you can find it again anytime — and explore hundreds more tried-and-tested recipes waiting for you on my Pinterest boards.

👉 Follow mia on Pinterest @exorecipe

📌 Pin this recipe · 🔁 Re-pin your favorites · 💬 Tag me when you make it — I love seeing your creations!

Print

clock clock iconcutlery cutlery iconflag flag iconfolder folder iconinstagram instagram iconpinterest pinterest iconfacebook facebook iconprint print iconsquares squares iconheart heart iconheart solid heart solid icon

Baked Eggplant Parmesan with Fresh Mozzarella and Herb Topping: A Comforting Classic Made Better

  • Author: Chef Mia
  • Prep Time: 30 minutes
  • Cook Time: 45 minutes
  • Total Time: 1 hour 15 minutes
  • Yield: 6 1x
  • Method: Main Course
  • Cuisine: Italian-American

Description

This baked eggplant Parmesan features layers of crispy breaded eggplant, fresh mozzarella, and a vibrant herb topping, offering a lighter twist on the classic comfort dish.


Ingredients

Scale
  • 2 large eggplants, sliced into 1/2-inch rounds
  • 1 teaspoon salt
  • 1 cup all-purpose flour
  • 3 large eggs, beaten
  • 1 1/2 cups Italian-seasoned breadcrumbs
  • 1/2 cup grated Parmesan cheese
  • 1 teaspoon garlic powder
  • 1 teaspoon dried oregano
  • 1/2 teaspoon black pepper
  • 3 cups marinara sauce
  • 8 ounces fresh mozzarella, sliced
  • 1/2 cup fresh basil leaves, chopped
  • 1/4 cup fresh parsley, chopped
  • 2 tablespoons olive oil

Instructions

  1. 1. Preheat oven to 375°F (190°C). Line two baking sheets with parchment paper.
  2. 2. Arrange eggplant slices on a clean surface and sprinkle with salt. Let sit for 20 minutes to draw out moisture. Pat dry with paper towels.
  3. 3. Set up breading station: place flour in one shallow bowl, beaten eggs in another, and mix breadcrumbs, Parmesan, garlic powder, oregano, and pepper in a third bowl.
  4. 4. Dredge each eggplant slice in flour, then dip in egg, and coat with breadcrumb mixture. Place on prepared baking sheets.
  5. 5. Lightly brush the breaded eggplant slices with olive oil. Bake for 15 minutes, flip, and bake another 10 minutes until golden and crispy.
  6. 6. Spread 1/2 cup marinara sauce on the bottom of a 9×13-inch baking dish. Layer half the baked eggplant slices over the sauce.
  7. 7. Top with half the remaining marinara sauce, half the fresh mozzarella, and half the chopped basil and parsley.
  8. 8. Repeat layers with remaining eggplant, sauce, and cheeses. Finish with a final layer of mozzarella.
  9. 9. Bake uncovered for 20 minutes until bubbly and cheese is melted. Broil for 2-3 minutes for a golden top if desired.
  10. 10. Let rest for 5 minutes, then sprinkle with remaining fresh herbs. Serve warm.

Notes

For a gluten-free version, substitute breadcrumbs with gluten-free panko and use gluten-free flour. Eggplant can be grilled instead of baked for a smoky flavor.


Nutrition

  • Calories: 380
  • Sugar: 12g
  • Fat: 18g
  • Carbohydrates: 38g
  • Protein: 20g


Baked Eggplant Parmesan with Fresh Mozzarella and Herb Topping: A Comforting Classic Made Better

k">

Tried This Recipe? Leave a Comment!

Did you make this recipe? I’d love to hear how it turned out! Please leave a comment and a rating below. Your feedback helps other home cooks and supports cheerychop.com!

For more delicious inspiration, follow me on Pinterest!

Baked Eggplant Parmesan Casserole: The Layered, No-Fry Secret to Perfection

⚖️
Difficulty
Medium
⏲️
Prep Time
45 mins
🕒
Cook Time
45 mins
⏱️
Total Time
90 mins
🍽️
Servings
8

I still remember the first time I made a Baked Eggplant Parmesan Casserole that didn’t turn into a soggy, greasy disappointment. I was standing in my tiny New York City kitchen, thinking back to my mother’s tagine in Morocco — how she’d salt vegetables to draw out bitterness and deepen flavor. That same simple technique became the foundation of my no-fry, oven-baked approach. This Easy Eggplant Parmesan recipe is the one I turn to again and again, whether I’m cooking for a weeknight dinner or a Sunday supper with friends. It’s a Vegetarian Casserole dish that even dedicated meat-eaters devour.

Each bite delivers a perfect contrast: the eggplant stays tender inside with a golden, crisp coating, while layers of rich marinara and melted mozzarella create that irresistible pull-apart cheese factor. I finish it with a generous shower of Parmesan and fresh basil — the aroma alone will have everyone hovering around the oven. What sets this Cheesy Eggplant Bake apart is the pre-baking step, a trick I learned during my pastry training in Paris, where we’d parcook components to ensure the final dish baked evenly without turning mushy.

After testing this dish dozens of times — for my family, for dinner parties, and for my blog readers — I can confidently say this is the most foolproof method out there. You don’t need to deep-fry anything, you don’t need fancy equipment, and you definitely don’t need to stress. I’ve packed this post with all my chef-tested tips so you can make a Healthy Eggplant Dinner that tastes like you spent hours in the kitchen — without the mess or the guilt. Let’s dive in!

Why This Baked Eggplant Parmesan Casserole Recipe Is the Best

The Flavor Secret: My Moroccan roots taught me that salting eggplant isn’t just about reducing bitterness — it transforms the texture entirely. When you salt the slices and let them rest, the moisture releases, and the flesh becomes dense and meaty. That means every layer of this Baked Eggplant Parmesan Casserole stays intact, absorbing just enough marinara without turning into a watery mess. Combined with a Parmesan-and-oregano breadcrumb coating, you get deep, savory flavor in every forkful.

Perfected Texture: Here’s where my Parisian training kicks in. Instead of frying, I bake the breaded eggplant slices until they’re golden and just set — this creates a firm crust that holds up beautifully during the second bake. The result? A casserole that slices cleanly, with distinct layers of tender eggplant, gooey cheese, and robust sauce. No mush, no sogginess, no sliding apart on your plate.

Foolproof & Fast: I’ve streamlined every step so that even a first-time cook can pull this off with confidence. The ingredient list is straightforward, the method is forgiving, and I’ve included visual cues at every stage. Whether you’re meal-prepping for the week or hosting a casual dinner party, this Easy Eggplant Parmesan recipe delivers consistent, crowd-pleasing results every single time.

Baked Eggplant Parmesan Casserole Ingredients

I source my eggplants from the Union Square Greenmarket in NYC when they’re in season — the Japanese and Italian varieties are my favorites for their thin skins and creamy flesh. In winter, I rely on the reliable globe eggplants from my local grocery store; they work beautifully, too. This ingredient list is simple and intentional, with every component earning its place.

Ingredients List

  • 2 large eggplants, sliced into 1/2-inch rounds
  • 1 teaspoon salt
  • 2 cups breadcrumbs
  • 1 cup grated Parmesan cheese, divided
  • 2 teaspoons dried oregano
  • 1 teaspoon garlic powder
  • 1/2 teaspoon black pepper
  • 3 large eggs, beaten
  • 3 cups marinara sauce
  • 2 cups shredded mozzarella cheese
  • 1/4 cup fresh basil, chopped (for garnish)

Ingredient Spotlight

Eggplant: The star of this dish. Look for heavy, glossy eggplants with firm, unblemished skin. Globe eggplants are the most common in US stores and work perfectly. The salting step is non-negotiable — it draws out excess moisture and any trace of bitterness, giving you that meaty, creamy texture that makes this casserole so satisfying.

Parmesan Cheese: I use a good-quality block of Parmigiano-Reggiano and grate it myself. Pre-shredded Parmesan often contains anti-caking agents that prevent it from melting smoothly. Freshly grated Parmesan melts into the sauce and breading with a nutty, salty depth that elevates the entire dish.

Marinara Sauce: You can absolutely use a high-quality store-bought marinara — look for one with no added sugar and a short ingredient list. My go-to is Rao’s or a local NYC brand. If you have time, a quick homemade sauce with canned San Marzano tomatoes, garlic, and olive oil takes this casserole to another level.

Original IngredientBest SubstitutionFlavor / Texture Impact
BreadcrumbsGluten-free breadcrumbs or almond flourSlightly less crisp; almond flour adds a nutty richness
Parmesan CheesePecorino Romano or nutritional yeast (for dairy-free)Pecorino is saltier and sharper; yeast adds umami without dairy
MozzarellaVegan mozzarella shreds or provoloneVegan versions melt well but brown differently; provolone adds a smoky tang
Marinara SauceCrushed tomatoes + Italian seasoning or arrabbiataArrabbiata adds heat; crushed tomatoes give a chunkier texture
EggsButtermilk or flax eggs (1 tbsp flaxmeal + 3 tbsp water per egg)Buttermilk adds tang; flax eggs are less binding, coating may be delicate

How to Make Baked Eggplant Parmesan Casserole — Step-by-Step

I’ve broken this down into clear, manageable steps so you can follow along with confidence. Trust me — once you see how easy this is, you’ll never go back to the greasy, deep-fried version.

Step 1: Salt and Sweat the Eggplant

Lay the eggplant slices on a baking sheet and sprinkle both sides generously with salt. Let them sit for 30 minutes — you’ll see beads of moisture form on the surface. Pat dry thoroughly with paper towels. This step is the single most important thing you can do to prevent a soggy casserole.

💡 mia’s Pro Tip: Don’t rinse the eggplant after salting — just pat it dry. You want to remove the moisture, not add it back. If you’re short on time, 20 minutes still makes a difference.

Step 2: Prepare the Breading Station

In a shallow bowl, combine 2 cups breadcrumbs, 1/2 cup Parmesan, oregano, garlic powder, and black pepper. In a second bowl, beat the 3 eggs until smooth. Set up an assembly line: eggplant slices → egg wash → breadcrumb mixture → baking sheet.

⚠️ Common Mistake to Avoid: Don’t press the breadcrumbs into the eggplant too hard — a gentle press is enough. Overpacking creates a dense crust that won’t crisp properly.

Step 3: First Bake the Eggplant

Place the breaded slices on a greased baking sheet in a single layer. Bake at 375°F for 15 minutes, flipping halfway through. The slices should be golden on both sides and just tender when pierced with a fork. This parcooking ensures they hold their shape during the final bake.

💡 mia’s Pro Tip: Don’t overcrowd the baking sheet — leave a little space between each slice so the steam can escape. If needed, use two sheets or bake in batches.

Step 4: Layer the Casserole

Spread a thin layer of marinara in the bottom of a 9×13-inch baking dish. Layer half the baked eggplant slices, then half the remaining marinara, half the mozzarella, and half the remaining Parmesan. Repeat the layers with the remaining eggplant, sauce, and cheeses.

⚠️ Common Mistake to Avoid: Don’t skimp on the bottom sauce layer — it prevents the eggplant from sticking and adds moisture as the casserole bakes.

Step 5: Final Bake

Bake uncovered for 25–30 minutes, until the sauce is bubbly and the cheese is melted and golden in spots. Let the casserole rest for 10 minutes before slicing — this allows the layers to settle and makes serving much cleaner.

💡 mia’s Pro Tip: For an extra-golden top, switch the oven to broil for the last 2–3 minutes. Watch it closely so the cheese doesn’t burn.

StepActionDurationKey Visual Cue
1Salt eggplant slices30 minBeads of moisture on surface
2Bread and bake eggplant15 minGolden coating, tender but firm
3Layer casserole10 minEven layers, sauce covering fully
4Bake casserole25–30 minBubbly edges, golden cheese top
5Rest before serving10 minCasserole firms up, less runny

Serving & Presentation

I love serving this Baked Eggplant Parmesan Casserole as the centerpiece of a cozy dinner. Let it rest those 10 minutes, then slice into generous squares using a sharp knife. I use a wide spatula to lift each portion carefully so the layers stay tall and beautiful. A final scatter of fresh basil and a dusting of extra Parmesan right before serving makes it look like it came from a trattoria.

Growing up in Morocco, we often served vegetable dishes with crusty bread to soak up every bit of sauce. In my NYC kitchen, I reach for a loaf of sourdough from my local bakery or a side of garlic bread. A simple arugula salad with lemon vinaigrette cuts through the richness perfectly — the peppery greens are a lovely contrast to the creamy cheese and tender eggplant.

For a true Italian-American feast, pair this with a glass of medium-bodied red like a Chianti or a Sangiovese. The acidity in the wine complements the marinara beautifully, while the tannins stand up to the cheese. If you’re keeping it alcohol-free, a sparkling water with lemon and fresh basil is my go-to.

Pairing TypeSuggestionsWhy It Works
Side DishCrusty sourdough, garlic bread, arugula saladSoaks up sauce; fresh greens balance richness
Sauce / DipExtra marinara, pesto drizzle, balsamic glazeAdds moisture and flavor complexity
BeverageChianti, Sangiovese, sparkling water with basilAcidity cuts through cheese; bubbles refresh
GarnishFresh basil, extra Parmesan, red pepper flakesBrightens flavor; adds heat and visual appeal

Make-Ahead, Storage & Reheating

As a busy NYC cook, I’m all about meals that work ahead of time. This casserole is a dream for meal prep — you can assemble it completely (without baking) up to two days in advance, then pop it in the oven when you’re ready. I’ve tested this multiple times, and the results are just as good as baking it immediately.

MethodContainerDurationReheating Tip
RefrigeratorAirtight container or covered baking dishUp to 5 daysReheat at 350°F for 15–20 min, covered
FreezerHeavy-duty foil pan or freezer-safe dishUp to 3 monthsThaw overnight, bake at 375°F for 30–35 min
Make-AheadAssemble in baking dish, cover, refrigerateUp to 2 days before bakingAdd 5–10 min to baking time if baking straight from fridge

When reheating leftovers, I prefer the oven over the microwave — it restores the crispness of the breading and melts the cheese evenly. Cover the dish with foil to prevent over-browning, and remove the foil for the last 5 minutes to re-crisp the top. If you’re in a hurry, the air fryer at 350°F for 5–7 minutes works beautifully for individual portions.

Variations & Easy Swaps

VariationKey ChangeBest ForDifficulty Impact
Moroccan SpicedAdd cumin, coriander, cinnamon to breadcrumbsWarm, aromatic twistEasy (same method)
Gluten-FreeUse gluten-free breadcrumbs or crushed rice crackersDietary restrictionsEasy (same method)
Zucchini & Eggplant MixReplace half the eggplant with zucchini roundsLighter, summer vegetable medleyEasy (reduce zucchini salting time)

Moroccan Spiced Eggplant Parmesan

This variation is a nod to my heritage. Add 1 teaspoon each of ground cumin, ground coriander, and a pinch of cinnamon to the breadcrumb mixture. The warm spices complement the sweetness of the marinara and the richness of the cheese in a way that feels cozy and unexpected. I love serving this with a dollop of harissa-spiked yogurt on the side for a creamy, spicy finish.

Gluten-Free Eggplant Bake

Swap the breadcrumbs with a gluten-free variety — I’ve had great success with crushed lentil-based crackers or gluten-free panko. The texture is slightly less crunchy but still satisfyingly crisp. For the coating to stick well, make sure the gluten-free breadcrumbs are finely ground. I also add an extra tablespoon of Parmesan to help with browning.

Zucchini & Eggplant Medley

In the summer, when my NYC farmers market is overflowing with zucchini, I love doing a half-and-half casserole. Slice the zucchini the same thickness as the eggplant, salt it for just 15 minutes (zucchini is more delicate), and pat dry. The combination gives you a lighter, more colorful dish with a wonderful mix of textures — the zucchini stays slightly firmer, while the eggplant melts in your mouth.

How do you prevent baked eggplant Parmesan from getting soggy?

The number one trick is salting the eggplant slices before breading. Lay the slices on a baking sheet, sprinkle both sides with salt, and let them sit for 30 minutes. You’ll see beads of moisture rise to the surface — that’s the excess water coming out. Pat them completely dry with paper towels before breading. This step removes both moisture and any bitterness, giving you firm, meaty eggplant that holds its texture during baking. Additionally, parcooking the breaded slices in the oven for 15 minutes before assembling the casserole creates a protective crust that resists sogginess. Avoid adding too much sauce — a thin layer between each component is all you need.

Can you use pre-made marinara sauce for eggplant Parmesan casserole?

Absolutely, and I do it all the time when I’m short on time. The key is choosing a high-quality jarred marinara with a clean ingredient list — look for one that uses olive oil, real garlic, and San Marzano tomatoes without added sugar or fillers. My personal favorites available in most US grocery stores are Rao’s Homemade, Carbone, and Victoria Fine Foods. If you want to doctor up a basic jar, sauté a clove of minced garlic in a tablespoon of olive oil for 30 seconds, then add the sauce and simmer for 5 minutes. A pinch of red pepper flakes or a few fresh basil leaves stirred in also elevates the flavor beautifully.

Should you peel eggplant before making baked eggplant Parmesan?

I recommend keeping the peel on for this casserole. The skin helps the eggplant slices hold their shape during the salting, breading, and baking process, preventing them from falling apart. It also adds a subtle texture contrast and contains a good amount of fiber and nutrients. If you’re using very large globe eggplants with thick, tough skin, you can peel them partially — I sometimes peel alternating strips to create a striped look that’s both practical and pretty. For Japanese or Italian eggplants, the skin is thin and tender, so there’s no need to peel at all.

How long do you bake eggplant Parmesan casserole at 350°F?

At 350°F, you’ll want to bake the assembled casserole for 30 to 35 minutes, uncovered, until the sauce is bubbly and the cheese is melted and golden. However, I actually prefer baking this casserole at 375°F for 25 to 30 minutes because the higher temperature gives the cheese a nicer golden crust while keeping the eggplant tender. If your recipe calls for 350°F — perhaps because you’re using a deeper dish or baking from cold — just add 5 to 10 minutes and check for doneness by looking for bubbling edges and a lightly browned top. Let it rest for 10 minutes after baking to set the layers.

Can I make eggplant Parmesan casserole ahead of time and freeze it?

Yes, this casserole freezes wonderfully. Assemble the casserole completely but do not bake it. Wrap the dish tightly with a layer of plastic wrap followed by a layer of aluminum foil, or transfer to a freezer-safe container. Freeze for up to 3 months. When you’re ready to enjoy it, thaw overnight in the refrigerator, then bake at 375°F for 30 to 35 minutes, removing the cover for the last 10 minutes to brown the cheese. You can also freeze baked leftovers in individual portions — just reheat in the oven or air fryer for best texture. The flavor actually deepens after freezing, making it even more delicious.

What is the best cheese to use for eggplant Parmesan?

A combination of mozzarella and Parmesan is the classic and best choice. Use whole-milk mozzarella for superior melt and creaminess — low-moisture part-skim works well too, but avoid fresh mozzarella in water as it releases too much liquid during baking. For the Parmesan, always grate it yourself from a block of Parmigiano-Reggiano. Pre-shredded cheeses contain anti-caking agents that prevent smooth melting. I use a 2:1 ratio of mozzarella to Parmesan, which gives you that perfect stretchy, gooey texture with a salty, nutty finish. For extra depth, you can substitute half the mozzarella with fontina or provolone.

Do I need to salt eggplant for eggplant Parmesan?

Yes, I strongly recommend salting eggplant for this dish, and here’s why: eggplants are like sponges — they hold a lot of water. When you salt them, osmosis draws that moisture out, concentrating the flavor and giving you a denser, meatier texture. Without salting, the eggplant releases water during baking, which thins out the sauce and makes the casserole watery. The salt also tames any bitterness, especially in larger globe eggplants. It’s a simple 30-minute step that requires almost no effort but makes a dramatic difference in the final dish. I consider it non-negotiable for the best results.

Can I bake the eggplant instead of frying it for a healthier version?

Absolutely — and this recipe is designed specifically as a baked, no-fry version! Baking the breaded eggplant slices at 375°F for 15 minutes (flipping halfway) gives you a beautiful golden crust without any oil beyond a light spritz on the baking sheet. The texture is lighter and the dish is much lower in fat compared to traditional fried eggplant Parmesan. I find that baked eggplant actually holds up better in the casserole because it doesn’t get weighed down by excess oil. For an even crispier result, place the baking sheet on the top rack of the oven and use a light mist of olive oil spray before baking.

What can I serve with eggplant Parmesan casserole for a complete meal?

This casserole is hearty enough to stand alone, but I love rounding it out with a few simple sides. A crisp green salad with lemon vinaigrette cuts through the richness — I use a mix of arugula and baby spinach with shaved Parmesan. Crusty bread is essential for soaking up every bit of sauce; a warm baguette or garlic bread works beautifully. For a low-carb option, serve it with roasted broccoli or sautéed spinach with garlic. If you’re feeding a crowd, add a simple pasta aglio e olio or a bowl of minestrone soup on the side. A medium-bodied red wine like Chianti or a Sangiovese completes the meal perfectly.

How do I store leftover eggplant Parmesan casserole?

Store leftover casserole in an airtight container in the refrigerator for up to 5 days. I recommend placing a piece of parchment paper directly on the surface of the leftovers before sealing the container — this prevents excess moisture from condensing on the cheese and making it soggy. For reheating, avoid the microwave if possible. Instead, reheat individual portions in the oven at 350°F for 12 to 15 minutes, or in an air fryer at 350°F for 5 to 7 minutes. The oven and air fryer restore the crispness of the breading and melt the cheese evenly. If you’re meal-prepping, you can also freeze portions in individual containers for up to 3 months.

Share Your Version!

I absolutely love hearing how my readers make this recipe their own. Did you try the Moroccan spice twist? Or maybe you went gluten-free and it turned out beautifully? Drop a star rating and a comment below — your feedback helps other home cooks discover what works, and it truly makes my day to see your results.

Snap a photo of your Baked Eggplant Parmesan Casserole and share it on Instagram or Pinterest. Tag me @exorecipes so I can see your beautiful creation and feature it in my stories. And if there’s a variation you’d love to see me develop — dairy-free, air-fryer, or something else — just ask in the comments. I’m always testing new ideas in my NYC kitchen, and your suggestions might just be my next post.

From my NYC kitchen to yours — I hope this recipe brings as much warmth to your table as it does to mine. — mia 🧡

📌

Love This Recipe? Save It to Pinterest!

If you enjoyed this Baked Eggplant Parmesan Casserole recipe, don’t let it get lost in your browser tabs! 😄 Pin it now so you can find it again anytime — and explore hundreds more tried-and-tested recipes waiting for you on my Pinterest boards.

👉 Follow mia on Pinterest @exorecipe

📌 Pin this recipe · 🔁 Re-pin your favorites · 💬 Tag me when you make it — I love seeing your creations!

Print

clock clock iconcutlery cutlery iconflag flag iconfolder folder iconinstagram instagram iconpinterest pinterest iconfacebook facebook iconprint print iconsquares squares iconheart heart iconheart solid heart solid icon

Baked Eggplant Parmesan Casserole: A Comforting, Flavorful Dish for Every Occasion

  • Author: Chef Mia
  • Prep Time: 45 minutes
  • Cook Time: 45 minutes
  • Total Time: 1 hour 30 minutes
  • Yield: 8 1x
  • Method: Main Course
  • Cuisine: Italian

Description

A comforting and flavorful baked eggplant parmesan casserole that layers crispy breaded eggplant with rich marinara sauce, melted mozzarella, and Parmesan cheese.


Ingredients

Scale
  • 2 large eggplants, sliced into 1/2-inch rounds
  • 1 teaspoon salt
  • 2 cups breadcrumbs
  • 1 cup grated Parmesan cheese, divided
  • 2 teaspoons dried oregano
  • 1 teaspoon garlic powder
  • 1/2 teaspoon black pepper
  • 3 large eggs, beaten
  • 3 cups marinara sauce
  • 2 cups shredded mozzarella cheese
  • 1/4 cup fresh basil, chopped (for garnish)

Instructions

  1. Preheat oven to 375°F (190°C).
  2. Arrange eggplant slices on a baking sheet and sprinkle with salt. Let sit for 30 minutes to draw out moisture, then pat dry with paper towels.
  3. In a shallow bowl, combine breadcrumbs, 1/2 cup Parmesan cheese, oregano, garlic powder, and black pepper.
  4. In another bowl, beat the eggs.
  5. Dip each eggplant slice first into the egg, then into the breadcrumb mixture, pressing gently to coat both sides.
  6. Place breaded eggplant slices on a greased baking sheet and bake for 15 minutes, flipping halfway, until golden and tender.
  7. In a 9×13-inch baking dish, spread a thin layer of marinara sauce.
  8. Layer half of the baked eggplant slices over the sauce, then top with half of the remaining marinara, half of the mozzarella, and half of the remaining Parmesan.
  9. Repeat layers with remaining eggplant, marinara, mozzarella, and Parmesan.
  10. Bake uncovered for 25-30 minutes, until bubbly and cheese is melted and golden.
  11. Let rest for 10 minutes, then garnish with fresh basil before serving.

Notes

For a gluten-free version, use gluten-free breadcrumbs. For extra flavor, add a pinch of red pepper flakes to the breadcrumb mixture.


Nutrition

  • Calories: 350
  • Sugar: 10g
  • Fat: 18g
  • Carbohydrates: 30g
  • Protein: 18g


Baked Eggplant Parmesan Casserole: A Comforting, Flavorful Dish for Every Occasion

ph">For more delicious inspiration, follow me on Pinterest!

“`html

Baked Eggplant Parmesan Casserole: A Classic Comfort Food Recipe – Crispy, Cheesy & Wholesome

⚖️
Difficulty
Medium
⏲️
Prep Time
20 mins
🕒
Cook Time
50 mins
⏱️
Total Time
70 mins
🍽️
Servings
8

I still remember the first time I made a truly great Baked Eggplant Parmesan Casserole. It was a rainy Sunday in my tiny NYC apartment, and I was craving the kind of warmth that only a classic comfort food casserole can deliver. Growing up in Morocco, my mother always layered vegetables with bold spices and slow-cooked sauces — a lesson in patience and flavor that I carry with me every time I step into the kitchen. This Baked Eggplant Parmesan Casserole is my love letter to that tradition, reimagined through the lens of my French culinary training and the produce I pick up at the Union Square Greenmarket. It’s hearty, vegetarian, and deeply satisfying.

Imagine this: fork-tender eggplant slices, each one breaded with a perfectly seasoned Italian-style crust and baked until golden, then nestled between layers of rich marinara, gooey mozzarella, and nutty Parmesan. The first bite gives you a gentle crunch, followed by a rush of tangy tomato and melted cheese. The eggplant itself becomes silky and luscious — almost creamy — while the top layer of cheese browns into a golden, bubbly crown. It’s the kind of dish that fills your kitchen with an aroma that says, “Something good is happening here.” Whether you’re serving it for a Sunday supper or a busy weeknight, this baked eggplant parmesan delivers on every level.

What sets my version apart? I bake the breaded eggplant instead of frying it — a technique I learned during my pastry days in Paris, where precision and lightness are everything. This method gives you all the crunch without the grease, and it makes the whole process so much easier. In this post, I’ll walk you through my foolproof breading station setup, share the one trick that keeps your casserole from turning soggy, and show you how to layer for maximum flavor in every bite. Plus, I’ll point out a common mistake that can make your eggplant parmesan heavy instead of heavenly. Let’s get cooking!

Why This Baked Eggplant Parmesan Casserole Recipe Is the Best

The Flavor Secret: My Baked Eggplant Parmesan Casserole gets its depth from a simple but powerful choice — I season the breadcrumb mixture with garlic powder, oregano, and a generous hit of Parmesan. That trifecta of flavor clings to every slice and builds as it bakes. 
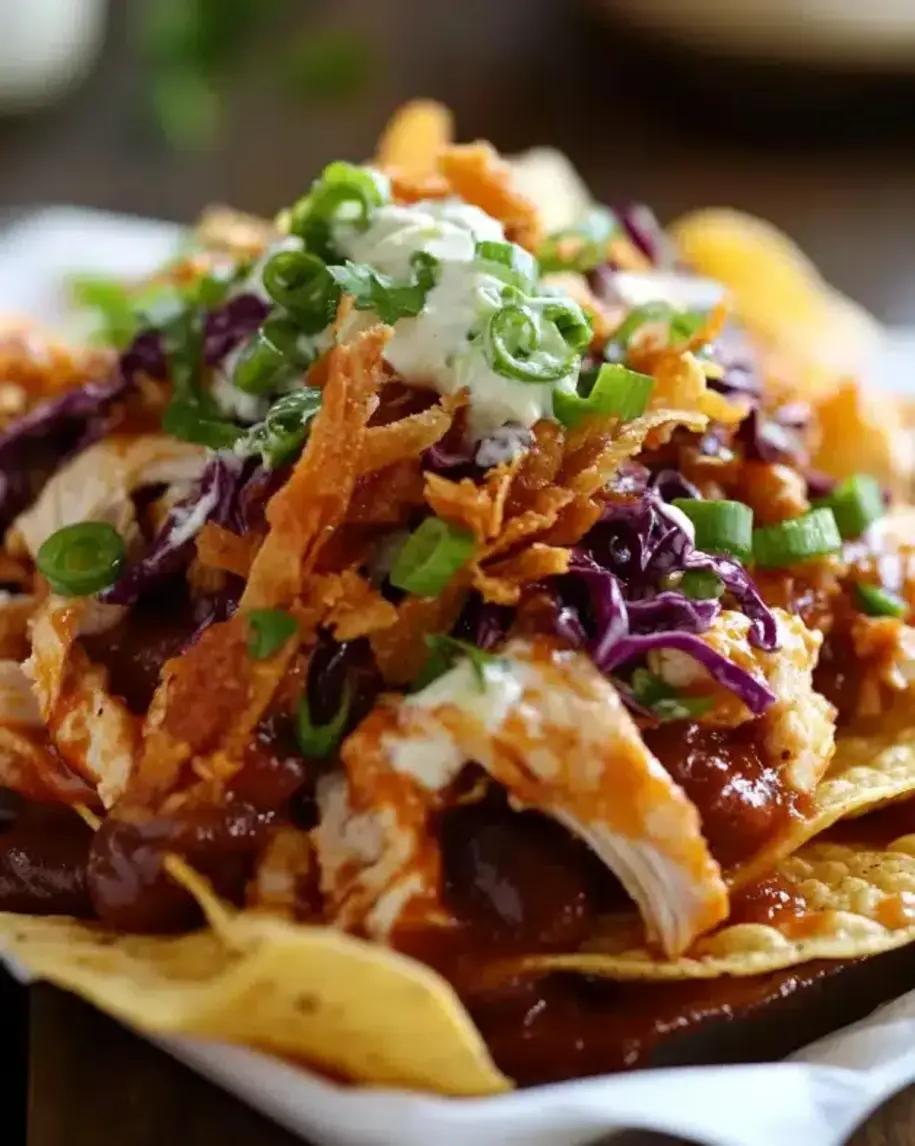
Growing up in Morocco, I learned that the best dishes are built from small, intentional layers. This recipe reflects that philosophy: each component — the sauce, the cheese, the eggplant — gets its moment to shine, and together they create a harmony that tastes both familiar and extraordinary.

Perfected Texture: Frying eggplant can make it heavy and greasy. Instead, I bake the breaded slices at 375°F until golden and tender — a technique I honed in Paris, where we always looked for ways to achieve crispness without excess oil. The result is eggplant that’s light yet satisfying, with a sturdy crust that holds up beautifully to the marinara and cheese. No sogginess, no heaviness — just perfectly layered comfort in every forkful.

Foolproof & Fast: Even if you’re new to cooking, this easy eggplant parmesan comes together without stress. The breading station is straightforward, the layering is forgiving, and the oven does most of the heavy lifting. I’ve tested this recipe for friends who “don’t cook” and they’ve all nailed it on the first try. Plus, you can prep the eggplant slices a day ahead — a lifesaver when you’re juggling a busy schedule.

Baked Eggplant Parmesan Casserole Ingredients

When I’m shopping for this classic comfort food casserole, I head straight to the produce aisle at my local market in NYC. I look for medium to large eggplants that feel heavy for their size, with smooth, glossy skin and no soft spots. In the summertime, I love grabbing eggplant from the farmers market — they’re sweeter and firmer, and they make all the difference in the final dish. Let me walk you through what you’ll need.

Ingredients List

  • 2 large eggplants (about 2 lbs total), sliced into 1/2-inch rounds
  • 1 cup all-purpose flour
  • 3 large eggs, beaten
  • 2 cups Italian-style breadcrumbs
  • 1/2 cup grated Parmesan cheese (for breading)
  • 1 teaspoon garlic powder
  • 1 teaspoon dried oregano
  • 1/2 teaspoon salt
  • 1/4 teaspoon black pepper
  • 4 cups marinara sauce (homemade or store-bought)
  • 2 cups shredded mozzarella cheese
  • 1/2 cup grated Parmesan cheese (for topping)
  • Fresh basil leaves, for garnish (optional)

Ingredient Spotlight

Eggplant: The star of the show. Choose eggplants that are firm and blemish-free. For this baked eggplant parmesan, slicing them into even 1/2-inch rounds ensures uniform cooking. No need to peel — the skin holds the slices together beautifully and adds a subtle textural contrast. If your eggplant is on the larger side, you can peel strips vertically for a decorative look.

Marinara Sauce: This is the backbone of your casserole. I use a high-quality store-bought marinara when I’m short on time — look for one with simple ingredients, no added sugar, and a bright tomato flavor. You can absolutely use homemade sauce if you have it; either way, the sauce brings acidity and moisture that balances the richness of the cheese and eggplant.

Mozzarella & Parmesan: The dream team of Italian-style casseroles. Use low-moisture mozzarella for the best melt — it stretches beautifully without releasing too much water. Parmesan adds a salty, nutty punch. I always grate my own Parmesan from a block; the pre-shredded stuff often contains anti-caking agents that prevent smooth melting.

Italian-Style Breadcrumbs: These are seasoned with herbs like oregano and parsley, which means they bring built-in flavor to the crust. If you only have plain breadcrumbs, add an extra teaspoon of dried oregano and a pinch of garlic powder to the mix. You can also use panko for a lighter, crunchier texture — just crush them slightly so they adhere better.

Original IngredientBest SubstitutionFlavor / Texture Impact
Italian-style breadcrumbsGluten-free breadcrumbs + 1 tsp Italian seasoningSlightly less crisp; adds herby flavor
Mozzarella (low-moisture)Fresh mozzarella, drained and choppedCreamier but more moisture; bake 5 min longer
Parmesan (grated)Pecorino Romano or Grana PadanoSaltier, more intense; use slightly less
Marinara sauceCrushed San Marzano tomatoes + 1 tsp dried basil + 1 clove garlic, simmered 10 minBrighter, less sweet; you control the salt

How to Make Baked Eggplant Parmesan Casserole — Step-by-Step

Let me walk you through each step. I’ve organized everything so it flows smoothly — from the breading station to the final golden bake. Trust me, the rhythm of this recipe is deeply satisfying.

Step 1: Prepare Your Breading Station

Preheat your oven to 375°F (190°C) and line two baking sheets with parchment paper. Set up three shallow dishes: one with the flour, one with the beaten eggs, and one with a mixture of breadcrumbs, 1/2 cup Parmesan, garlic powder, oregano, salt, and pepper. Arrange them in that order — flour, egg, breadcrumbs — so you can work in an assembly line.

💡 mia’s Pro Tip: Use one hand for the flour and the other for the egg and breadcrumbs. This keeps your fingers from getting caked with breading and makes the whole process much faster and cleaner.

Step 2: Bread the Eggplant Slices

Working one slice at a time, dip each eggplant round into the flour, shaking off the excess. Then dip it into the beaten egg, letting any extra drip off. Finally, press it into the breadcrumb mixture, coating both sides evenly. Place the breaded slices on the prepared baking sheets in a single layer, not touching.

⚠️ Common Mistake to Avoid: Don’t rush the flour step — it helps the egg stick and creates a barrier that prevents the eggplant from getting soggy. A thin, even coating of flour is key.

Step 3: Bake the Eggplant Slices

Bake the eggplant slices for 20 minutes, flipping them carefully with a spatula halfway through. They should be golden brown on both sides and tender when pierced with a fork. Remove from the oven and let them cool for a few minutes while you prepare the baking dish. The aroma at this point is incredible — you’ll be tempted to snack on them!

💡 mia’s Pro Tip: Don’t overcrowd the baking sheets. If the slices are too close together, they’ll steam instead of crisp. Use two sheets and rotate them halfway through baking for even browning.

Step 4: Layer the Casserole

Spread a thin layer of marinara sauce on the bottom of a 9×13-inch baking dish. Arrange half of the baked eggplant slices over the sauce, overlapping slightly if needed. Spoon half of the remaining marinara over the eggplant, then sprinkle half of the mozzarella and half of the remaining Parmesan. Repeat the layers with the rest of the eggplant, marinara, mozzarella, and Parmesan.

⚠️ Common Mistake to Avoid: Don’t skimp on the first layer of sauce — it keeps the bottom layer of eggplant from sticking and adds moisture to the casserole. A thin, even coating is all you need.

Step 5: Bake and Rest

Bake the casserole, uncovered, for 25–30 minutes, until the sauce is bubbly and the cheese is melted and golden in spots. Let it rest for 10 minutes before serving — this is essential for the layers to set so you get clean, beautiful slices. Garnish with fresh basil if you like, and serve warm.

💡 mia’s Pro Tip: For an extra-golden top, switch the oven to broil for the last 2–3 minutes. Watch it carefully — cheese can go from golden to burnt in seconds!

StepActionDurationKey Visual Cue
1Bread eggplant10 minEven, dry coating on each slice
2Bake slices20 minGolden brown, tender when pierced
3Layer casserole5 minEven layers, sauce covers eggplant
4Bake casserole25–30 minBubbly edges, golden cheese top
5Rest & serve10 minCasserole sets, slices cleanly

Serving & Presentation

This Baked Eggplant Parmesan Casserole is a meal in itself, but I love serving it with simple sides that let it shine. In my NYC kitchen, I often pair it with a crisp green salad dressed with lemon and olive oil — the acidity cuts through the richness of the cheese and sauce. A side of crusty bread is non-negotiable for sopping up every last bit of marinara from the plate.

For a heartier spread, serve this classic comfort food casserole alongside garlic bread or a bowl of al dente pasta — spaghetti or angel hair work beautifully. I also love adding a sprinkle of red pepper flakes or fresh basil right before serving for a pop of color and heat. When I’m feeling nostalgic for my mother’s table in Morocco, I’ll add a small dish of harissa on the side for anyone who wants a spicy kick.

Presentation-wise, let the casserole rest for those 10 minutes, then slice it into squares and lift them out with a wide spatula. The layers should hold together beautifully. Garnish with fresh basil leaves and a final dusting of Parmesan. Your dinner guests will think you spent all day in the kitchen — and you can smile knowing it came together with ease.

Pairing TypeSuggestionsWhy It Works
Side DishMixed green salad with lemon vinaigrette, garlic bread, roasted broccoliAcidity and crunch balance the rich, cheesy casserole
Sauce / DipExtra warm marinara, red pepper flakes, balsamic glaze drizzleAdds moisture, heat, or sweetness to each bite
BeverageMedium-bodied red wine (Chianti or Montepulciano), sparkling water with lemonWine cuts richness; bubbly water refreshes the palate
GarnishFresh basil, grated Parmesan, red pepper flakes, parsleyAdds freshness, color, and a final punch of flavor

Make-Ahead, Storage & Reheating

As someone with a busy NYC schedule, I’m a huge fan of make-ahead meals. This Baked Eggplant Parmesan Casserole is a dream for meal prep — you can assemble it entirely the day before and bake it when you’re ready. The flavors actually deepen and meld overnight, making it even more delicious. Here’s everything you need to know about storing, freezing, and reheating.

MethodContainerDurationReheating Tip
RefrigeratorAirtight container or covered baking dishUp to 3 daysReheat at 350°F for 15–20 min until hot and bubbly
FreezerHeavy-duty foil pan or freezer-safe dish, tightly wrappedUp to 3 monthsThaw overnight in fridge; reheat covered at 350°F for 25–30 min
Make-AheadAssemble in baking dish, cover, refrigerateUp to 24 hours in advanceAdd 5–10 min to bake time if starting from cold

To reheat individual portions, I use the oven or a toaster oven — the microwave works in a pinch but can make the breading a little soft. If you’re reheating from frozen, let the casserole thaw in the refrigerator overnight, then bake covered at 350°F until heated through. I often make two casseroles at once: one for dinner and one for the freezer. It’s the kind of foresight my mother would approve of — and it makes those busy weeknights feel like a gift.

One more thing: if you’ve stored leftovers in the fridge, let the dish come to room temperature for about 15 minutes before reheating. This helps it heat more evenly and prevents the cheese from seizing up. Trust me, it makes a difference.

Variations & Easy Swaps

One of the things I love most about this classic comfort food casserole is how easily it adapts. Whether you’re cooking for a specific diet or just want to change things up, these variations are all tested and delicious. I’ve included options for gluten-free, dairy-free, and flavor-forward twists that draw on my Moroccan-French background.

VariationKey ChangeBest ForDifficulty Impact
Moroccan SpicedAdd 1 tsp cumin + 1/2 tsp cinnamon to breadcrumbs; use harissa-spiked marinaraAdventurous palates, North African flairEasy (same method)
Gluten-FreeUse gluten-free breadcrumbs and 1:1 GF flour blendGluten-free dietsEasy (same method)
Summer VegetableAdd layers of roasted zucchini and bell peppersUsing up farmers market bountyMedium (extra prep)

Moroccan Spiced Eggplant Parmesan

This variation is close to my heart. Add 1 teaspoon of ground cumin and 1/2 teaspoon of cinnamon to the breadcrumb mixture. For the sauce, stir a spoonful of harissa paste into your marinara before layering. The warm spices complement the sweet richness of the eggplant beautifully, and the harissa adds a gentle, smoky heat. It’s a fusion of my Moroccan roots and this classic Italian dish — and it works brilliantly.

Gluten-Free & Dairy-Free Versions

For a gluten-free Baked Eggplant Parmesan Casserole, substitute gluten-free breadcrumbs and a gluten-free all-purpose flour blend in the breading station. The texture is slightly lighter but still satisfyingly crisp. For dairy-free, use a plant-based mozzarella shred that melts well (look for one with a stretchy texture) and a dairy-free Parmesan alternative. I’ve tested this with several brands and found that the key is to bake the casserole covered for the first 15 minutes to help the dairy-free cheese melt evenly before uncovering to brown.

Summer Vegetable Casserole

When I’m at the NYC farmers market in August, I can’t resist adding layers of roasted zucchini and bell peppers to this casserole. Slice a zucchini into 1/4-inch rounds and a bell pepper into strips, toss them with olive oil and salt, and roast at 400°F for 15 minutes before layering them in. The extra vegetables add sweetness, color, and texture, making the casserole even more substantial. You’ll need a slightly larger dish or a second layer — but trust me, it’s worth it.

Should you peel eggplant before making eggplant Parmesan casserole?

No, you do not need to peel the eggplant for this Baked Eggplant Parmesan Casserole. The skin is entirely edible and holds the slices together beautifully during breading and baking. It also adds a subtle textural contrast and a small amount of fiber and nutrients. If you prefer a more tender, uniform texture throughout, you can peel strips of skin lengthwise before slicing — this gives a decorative look while still leaving some skin for structure. For larger, older eggplants with thicker skin, you may want to peel them completely to avoid a tough texture.

How do you keep baked eggplant Parmesan from getting soggy?

The key to a non-soggy Baked Eggplant Parmesan Casserole is baking the breaded eggplant slices before layering them into the casserole. This step sets the crust and drives off excess moisture from the eggplant. I also recommend using low-moisture mozzarella cheese, which releases far less water than fresh mozzarella. Additionally, spread a thin layer of marinara on the bottom of the dish before adding the eggplant — this creates a barrier that prevents the slices from sitting in liquid. Finally, let the casserole rest for 10 minutes after baking so the layers can set and any excess liquid can be absorbed or evaporate.

Can I use pre-made marinara sauce for eggplant Parmesan casserole?

Absolutely — I do it all the time! Using a high-quality store-bought marinara sauce is perfectly fine for this easy eggplant parmesan. Look for a brand with simple ingredients: tomatoes, olive oil, garlic, onions, and herbs. Avoid sauces with added sugar or a long list of preservatives. Some of my favorite grocery store options include Rao’s Homemade, Victoria, and Newman’s Own. If you want to elevate a store-bought sauce, you can simmer it for 5 minutes with a pinch of red pepper flakes, a few fresh basil leaves, and an extra clove of garlic to make it taste more like homemade.

What is the best cheese to use for a classic eggplant Parmesan casserole?

For a classic Baked Eggplant Parmesan Casserole, the best cheese combination is low-moisture mozzarella for stretch and melt, plus Parmesan for salt and nuttiness. The mozzarella gives that iconic gooey pull when you lift a slice, while Parmesan adds a sharp, savory finish. Use whole-milk low-moisture mozzarella — it melts beautifully without releasing excess water. For the Parmesan, always grate it from a block; pre-shredded Parmesan often contains anti-caking agents that prevent smooth melting. You can substitute Pecorino Romano for a saltier, more intense flavor, or add provolone for extra creaminess.

Can I make eggplant Parmesan casserole ahead of time?

Yes, this classic comfort food casserole is perfect for making ahead. You can assemble the entire casserole up to 24 hours in advance, cover it tightly, and refrigerate it. When you’re ready to bake, add about 5–10 minutes to the baking time since you’re starting from cold. I actually find that the flavors meld and deepen overnight — the sauce penetrates the eggplant more fully, and the cheese settles into every crevice. You can also bake the eggplant slices a day ahead and store them in the refrigerator, then assemble and bake the next day. This is a great time-saver for holiday meals or busy weeknights.

How do I reheat leftover eggplant Parmesan casserole?

The best way to reheat leftover Baked Eggplant Parmesan Casserole is in the oven. Preheat your oven to 350°F, place the casserole in an oven-safe dish, cover it loosely with foil, and heat for 15–20 minutes until bubbly and hot throughout. If you want the top to stay golden, uncover it for the last 5 minutes. The microwave works in a pinch but can make the breading slightly soft. For individual portions, a toaster oven at 350°F for 10–12 minutes works beautifully. Let the casserole sit at room temperature for 10 minutes before reheating for more even warming.

Share Your Version!

I absolutely love hearing how this Baked Eggplant Parmesan Casserole turns out in your kitchen. Did you try one of the variations — maybe the Moroccan-spiced version or a gluten-free swap? Did you discover a new trick for getting the crispiest breading? Drop a star rating and a comment below to let me and the community know how it went. Your feedback helps other home cooks feel confident trying this recipe for the first time.

And if you snap a photo of your creation, tag me on Instagram or Pinterest @exorecipes — I love seeing your beautiful dishes and sharing them with our growing community. What’s one ingredient you’d add to this casserole to make it your own? I’m genuinely curious and always looking for new ideas to test in my NYC kitchen. From my kitchen to yours — I hope this recipe brings as much warmth to your table as it does to mine. — mia 🧡

📌

Love This Recipe? Save It to Pinterest!

If you enjoyed this Baked Eggplant Parmesan Casserole recipe, don’t let it get lost in your browser tabs! 😄 Pin it now so you can find it again anytime — and explore hundreds more tried-and-tested recipes waiting for you on my Pinterest boards.

👉 Follow mia on Pinterest @exorecipe

📌 Pin this recipe · 🔁 Re-pin your favorites · 💬 Tag me when you make it — I love seeing your creations!

“`

Print

clock clock iconcutlery cutlery iconflag flag iconfolder folder iconinstagram instagram iconpinterest pinterest iconfacebook facebook iconprint print iconsquares squares iconheart heart iconheart solid heart solid icon

Baked Eggplant Parmesan Casserole: A Classic Comfort Food Recipe

  • Author: Chef Mia
  • Prep Time: 20 mins
  • Cook Time: 50 mins
  • Total Time: 1 hr 10 mins
  • Yield: 8 1x
  • Method: Main Course
  • Cuisine: Italian

Description

This Baked Eggplant Parmesan Casserole is a classic comfort food recipe that layers breaded and baked eggplant with marinara sauce, mozzarella, and Parmesan cheese for a hearty, vegetarian main dish.


Ingredients

Scale
  • 2 large eggplants (about 2 lbs total), sliced into 1/2-inch rounds
  • 1 cup all-purpose flour
  • 3 large eggs, beaten
  • 2 cups Italian-style breadcrumbs
  • 1/2 cup grated Parmesan cheese
  • 1 teaspoon garlic powder
  • 1 teaspoon dried oregano
  • 1/2 teaspoon salt
  • 1/4 teaspoon black pepper
  • 4 cups marinara sauce (homemade or store-bought)
  • 2 cups shredded mozzarella cheese
  • 1/2 cup grated Parmesan cheese (for topping)
  • Fresh basil leaves, for garnish (optional)

Instructions

  1. Preheat oven to 375°F (190°C). Line two baking sheets with parchment paper.
  2. Set up a breading station: Place flour in a shallow dish. Beat eggs in a second shallow dish. In a third dish, combine breadcrumbs, 1/2 cup Parmesan, garlic powder, oregano, salt, and pepper.
  3. Dip each eggplant slice into flour, shaking off excess, then into egg, then into breadcrumb mixture, pressing to coat evenly. Place on prepared baking sheets.
  4. Bake eggplant slices for 20 minutes, flipping halfway through, until golden and tender. Remove from oven.
  5. Spread a thin layer of marinara sauce on the bottom of a 9×13-inch baking dish.
  6. Layer half of the baked eggplant slices over the sauce. Top with half of the remaining marinara, half of the mozzarella, and half of the remaining Parmesan.
  7. Repeat layers with remaining eggplant, marinara, mozzarella, and Parmesan.
  8. Bake casserole, uncovered, for 25-30 minutes until bubbly and cheese is melted and golden.
  9. Let rest for 10 minutes. Garnish with fresh basil if desired. Serve warm.

Notes

For a gluten-free version, use gluten-free breadcrumbs and flour. The eggplant slices can be prepared a day ahead and refrigerated. Leftovers keep well in the refrigerator for up to 3 days.


Nutrition

  • Calories: 320 kcal
  • Sugar: 12 g
  • Fat: 14 g
  • Carbohydrates: 35 g
  • Protein: 15 g


Baked Eggplant Parmesan Casserole: A Classic Comfort Food Recipe

ph">For more delicious inspiration, follow me on Pinterest!

Baked Creamy Corn Jalapeño Dip – The Ultimate Party Appetizer

⚖️
Difficulty
Easy
⏲️
Prep Time
10 mins
🕒
Cook Time
20-25 mins
⏱️
Total Time
30-35 mins
🍽️
Servings
8

Growing up in Morocco, my mother would make a simple corn and pepper dish that we ate with warm bread – humble, yet so deeply comforting. When I moved to New York City and began cooking professionally, I found myself craving that same warmth, but with a bit of New York attitude. This baked creamy corn jalapeño dip is my love letter to both worlds: the creamy, cheesy indulgence of an American party dip, with a whisper of North African warmth from a pinch of cumin and smoked paprika I sneak in. It’s the appetizer that disappears first at every gathering.

Imagine this: sweet corn kernels suspended in a velvety, tangy cream cheese base, studded with bright green jalapeños and melty Monterey Jack cheese. The first bite is pure comfort – rich and creamy – then comes the gentle heat from the jalapeños, waking up your taste buds. A golden, bubbly top gives way to a luscious, dippable center. I love how the corn pops with sweetness against the spicy, cheesy backdrop. The aroma that fills your kitchen is absolutely intoxicating – buttery, roasted, and inviting.

What sets my version apart is a technique I learned at Le Cordon Bleu in Paris: I sauté the corn briefly before mixing it in to deepen its flavor, and I always use a combination of cream cheese and sour cream for a lush, stable base that doesn’t separate. My secret spice blend – a pinch of cumin and smoked paprika – adds an earthy, subtle smokiness that makes this dip unforgettable. One of the most common mistakes I see is using pre-shredded cheese (it contains anti-caking agents that make the dip grainy). I’ll show you how to shred your own for the silkiest melt. This easy baked corn dip is foolproof and will be your go-to for game days, potlucks, and family dinners.

Why This Baked Creamy Corn Jalapeño Dip Recipe Is the Best

The flavor secret lies in a few smart moves: I briefly sauté the drained corn in a hot skillet until lightly charred. This caramelizes the natural sugars and brings out a nutty sweetness that canned corn otherwise lacks. Then I fold in a Moroccan-inspired touch – a quarter teaspoon each of ground cumin and smoked paprika – which gives the dip an unexpected warmth that complements the jalapeños beautifully without overwhelming them. This is the kind of subtle depth that makes people ask, “What’s in this?”

Perfected texture is all about the cheese and the baking method. I always grate my own Monterey Jack and cheddar from a block – it melts into a silky, stretchy matrix instead of turning clumpy. The cream cheese must be fully softened to room temperature before mixing so it incorporates evenly, preventing lumps. Baking at 375°F for exactly 22 minutes (in my oven) gives you a dip that’s bubbling at the edges, golden on top, and still scoopable – not baked dry. Watch for the edges to turn a deep golden brown; that’s your cue.

This spicy corn dip recipe is foolproof for beginners because it uses pantry staples and comes together in one bowl. The entire process is forgiving: you can adjust the heat by seeding more or fewer jalapeños, swap in frozen corn (thawed and patted dry), or even use Greek yogurt for a tangier, lighter dip. That’s the beauty – once you have the base down, you can make it your own. I’ve taught this to home cooks across NYC and everyone nails it on the first try.

Baked Creamy Corn Jalapeño Dip Ingredients

Every Sunday, I head to the Union Square Greenmarket and pick up fresh corn in summer, but when fall hits, I rely on good-quality canned corn. The jalapeños I buy from a little bodega near my apartment – they’re always firm and bright. This recipe is a celebration of simple, accessible ingredients that come together to create something special.

Ingredients List

  • 2 (15-ounce) cans whole kernel corn, drained
  • 1 (4-ounce) can chopped green chiles, drained
  • 1/2 cup mayonnaise
  • 1/2 cup sour cream
  • 4 ounces cream cheese, softened
  • 1 1/2 cups shredded Monterey Jack cheese, divided
  • 1/2 cup shredded cheddar cheese
  • 2-3 fresh jalapeños, seeded and minced (adjust to taste)
  • 1/4 cup chopped fresh cilantro
  • 1 teaspoon garlic powder
  • 1/2 teaspoon salt
  • 1/4 teaspoon black pepper
  • Optional: Tortilla chips or crackers for serving

Ingredient Spotlight

Corn: Canned whole kernel corn is the most convenient and gives consistent sweetness. Look for “no salt added” if you can. I prefer to drain it and then sauté in a dry pan for 4-5 minutes to get a bit of char, which enhances the flavor. Frozen corn works wonderfully – just thaw, pat dry, and skip the sauté step if you’re short on time.

Jalapeños: Fresh jalapeños provide a bright, grassy heat that pickled ones can’t match. For a milder dip, remove seeds and membranes completely. For a medium heat, leave a few seeds. Always wear gloves if you have sensitive skin! If jalapeños are too spicy for you, use half a bell pepper plus a pinch of cayenne.

Monterey Jack cheese: This cheese is the star – it’s exceptionally creamy and melts like a dream without becoming greasy. Grating your own from a block ensures the best texture. Pre-shredded cheese contains cellulose and other anti-caking agents that can make the dip gritty. If you need a substitute, mild cheddar, Colby Jack, or even mozzarella (for extra stretch) work well.

Original IngredientBest SubstitutionFlavor / Texture Impact
Canned cornFrozen corn (thawed & patted dry)Similar sweetness; may need a bit longer baking to evaporate moisture
MayonnaiseGreek yogurtTangier, slightly lighter; may reduce richness
Monterey Jack cheeseMild cheddar or Colby JackSlightly sharper flavor; still melts well, but may be a bit less creamy

How to Make Baked Creamy Corn Jalapeño Dip — Step-by-Step

Follow these simple steps and you’ll have a crowd-pleasing dip in just over half an hour. I’ll guide you with the same tips I share in my Brooklyn cooking classes.

Step 1: Prep the Corn

Preheat your oven to 375°F (190°C) and lightly grease a 1.5-quart baking dish. Drain the canned corn well. For extra flavor, heat a dry skillet over medium-high and add the corn. Cook, stirring occasionally, for 4-5 minutes until the corn begins to brown in spots. This step is optional but highly recommended – it deepens the sweetness and adds a subtle smoky note. Let it cool slightly.

💡 mia’s Pro Tip: If you’re using frozen corn, do not thaw it in the microwave – instead, let it sit in a colander at room temperature for 30 minutes, then pat dry with paper towels. This prevents excess water from making your dip runny.

Step 2: Mix the Dip Base

In a large bowl, combine the mayonnaise, sour cream, softened cream cheese, 1 cup of the Monterey Jack, cheddar, minced jalapeños, cilantro, garlic powder, salt, and pepper. Make sure the cream cheese is truly at room temperature – if it’s cold, it will leave lumps. Beat with a sturdy spoon or a hand mixer until smooth and unified. Fold in the drained green chiles and the sautéed corn. Stir until everything is evenly distributed.

⚠️ Common Mistake to Avoid: Overmixing can break down the cream cheese and make the dip greasy. Mix just until combined – it’s okay to see small pockets of cream cheese.

Step 3: Assemble and Bake

Transfer the mixture to the prepared baking dish and spread it into an even layer. Top with the remaining 1/2 cup of Monterey Jack cheese. Bake for 20-25 minutes, until the dip is hot and bubbly and the cheese on top is melted and lightly golden. I like to rotate the dish halfway through for even browning. The edges should be bubbling vigorously and the center should look set but still jiggly – it will firm up as it cools.

💡 mia’s Pro Tip: For a picture-perfect golden top, switch the oven to broil for the last 1-2 minutes. Watch it closely – it can burn in seconds! This gives that gorgeous restaurant-quality finish.

Step 4: Rest and Serve

Let the dip cool for at least 5 minutes before serving. This rest period allows the structure to set so it stays scoopable without being runny. Garnish with extra chopped cilantro or a few thin slices of fresh jalapeño for color. Serve warm with tortilla chips, crackers, or even warm pita bread.

⚠️ Common Mistake to Avoid: Serving immediately from the oven can result in a dip that’s too hot and thin. Be patient – those 5 minutes make all the difference in texture and safety!

StepActionDurationKey Visual Cue
1Sauté corn4-5 minsCorn begins to brown and pop
2Mix ingredients5 minsSmooth, creamy, no visible lumps
3Bake20-25 minsEdges bubbly, top golden, center set
4Rest5 minsDip firms up slightly; no longer steaming

Serving & Presentation

This dip is a star on its own, but the way you present it can take it from good to unforgettable. I like to serve it in a colorful ceramic dish that contrasts with the golden top – a deep turquoise or terra-cotta bowl is my go-to. Surround it with a mix of sturdy tortilla chips (the scoops are perfect), crunchy baguette slices, and fresh veggie sticks like bell peppers and cucumber for a lighter option.

For a touch of NYC flair, I sometimes add a drizzle of Mexican crema or a sprinkle of crumbled cotija cheese on top. A few fresh cilantro sprigs and a scatter of pickled red onions add brightness and acidity that cuts through the richness. Inspired by my Moroccan roots, I’ve even served this with warm, crispy khobz bread – it’s incredible.

This jalapeño corn dip appetizer pairs beautifully with a cold beer (a crisp lager or a pale ale) or a tart margarita. For a non-alcoholic option, a sparkling water with lime complements the heat. If you’re serving it as part of a larger spread, think beyond chips: use it as a topping for baked potatoes, spoon it over grilled chicken, or spread it on tacos.

Pairing TypeSuggestionsWhy It Works
Side DishGrilled chicken, steak, or roasted vegetablesAdds creamy, spicy contrast to lean proteins
Sauce / DipUse as nachos topping, taco drizzle, or quesadilla fillingVersatile enough to elevate many dishes
BeveragePale ale, Mexican lager, margarita, sparkling lime waterAcidity and carbonation cut through richness
GarnishCilantro, pickled onions, cotija cheese, cremaAdds freshness, acidity, and texture

Make-Ahead, Storage & Reheating

As a busy NYC working mom (and chef!), I rely on make-ahead options. This dip can be fully assembled a day in advance – just don’t add the top cheese until you’re ready to bake. Cover the dish tightly with plastic wrap and refrigerate. When you’re ready to bake, let it sit on the counter for 20 minutes to take the chill off, then sprinkle the cheese on top and bake as directed, adding 5-7 minutes to the baking time.

MethodContainerDurationReheating Tip
RefrigeratorAirtight container or covered baking dishUp to 4 daysReheat in 350°F oven for 10-15 mins, or microwave in 30-second bursts
FreezerFreezer-safe container or zip-top bagUp to 2 monthsThaw overnight in fridge; reheat at 350°F until bubbly (about 20 mins)
Make-AheadAssemble in baking dish, cover, refrigerateUp to 24 hours before bakingAdd cheese just before baking; add 5-7 mins to bake time

For reheating leftovers, the oven is best to restore the crispy top. If you’re in a hurry, the microwave works, but you’ll lose the golden crust. I like to sprinkle a little extra shredded cheese on top before reheating in the oven – it refreshes the dip’s appearance and texture.

Variations & Easy Swaps

One of the joys of this easy baked corn dip is how adaptable it is. Whether you’re feeding a crowd with different dietary needs or just want to experiment, here are my favorite variations – each one tested in my own kitchen.

VariationKey ChangeBest ForDifficulty Impact
Spicy Chorizo Corn DipAdd 1/2 cup crumbled cooked chorizoMeat lovers, heartier appetizerEasy (cook chorizo first)
Dairy-Free Creamy Corn DipUse vegan cream cheese, dairy-free sour cream, and shredded vegan cheddarDairy-free dietsEasy (check labels for melting)
Roasted Corn & Poblano DipReplace canned corn with fire-roasted corn and add 1 diced roasted poblanoSmokier, deeper flavorMedium (need to roast peppers)

Spicy Chorizo Corn Dip

This variation is a nod to my Paris training – I learned how to cook chorizo properly in a French bistro. Crumble 1/2 cup of fresh Mexican chorizo (remove the casing) and cook it in a skillet until browned and crispy. Drain the fat, then stir it into the dip mixture before baking. The spicy, smoky chorizo adds a meaty depth that turns this into a hearty main-course appetizer. It pairs beautifully with a cold Negra Modelo.

Dairy-Free Creamy Corn Dip

For my dairy-sensitive friends, I’ve perfected a version using Kite Hill vegan cream cheese and Forager Project sour cream. The key is to look for brands that melt well – some vegan cheeses become oily. I also add 1/4 cup of nutritional yeast for a cheesy flavor boost. The texture will be slightly less thick, but the flavor is outstanding. Serve with sturdy chips or vegetable sticks – I love using plantain chips from the NYC bodega.

Roasted Corn & Poblano Dip

Whenever I visit the Union Square Greenmarket in late summer, I pick up fresh corn and poblano peppers for this twist. Roast the poblano directly over a gas flame or under the broiler until charred, then peel, seed, and dice. Cut fresh corn kernels off the cob and sauté them until golden. The smoky, sweet, and slightly bitter poblano complements the creamy base and gives the dip a more complex, refined flavor that reminds me of street corn sold by the High Line.

How do you make baked creamy corn jalapeño dip less spicy?

To tame the heat in this baked creamy corn jalapeño dip, start by removing all seeds and white membranes from the jalapeños – that’s where most of the capsaicin lives. Use just the flesh (or use only 1 jalapeño instead of 3). You can also swap in a mild bell pepper for part of the jalapeño. Another trick: add an extra tablespoon of sour cream or cream cheese – the dairy helps neutralize heat. If you’re still worried, serve the dip with cool, creamy sides like additional sour cream or a yogurt-based sauce on the side. I do this when I’m serving kids or heat-sensitive guests.

Can you use frozen corn instead of fresh for this baked corn jalapeño dip?

Absolutely – frozen corn works beautifully in this baked corn jalapeño dip. In fact, many of my NYC friends prefer it because frozen corn is flash-frozen at peak sweetness and often tastes fresher than canned. To use it, thaw the corn fully (either in the fridge overnight or in a colander under cold running water), then pat it very dry with paper towels. Excess moisture can make the dip watery. I recommend giving the thawed corn a quick sauté in a hot skillet to evaporate any remaining moisture and add a bit of color. You can skip this step if you’re in a rush, but the dip will be slightly less flavorful.

What cheese works best for a creamy corn jalapeño dip that doesn’t get greasy?

Monterey Jack is my absolute top choice for this creamy corn jalapeño dip because it melts into a silky, smooth emulsion without separating or turning greasy. Its mild, buttery flavor also lets the corn and jalapeños shine. Other great options include low-moisture part-skim mozzarella (for stretchiness), mild cheddar (for a sharper flavor), or Colby Jack. Avoid high-fat cheeses like full-fat cheddar or aged gouda, which can release oil and make the dip greasy. Most importantly, always grate your cheese from a block – pre-shredded cheese has anti-caking powders that inhibit smooth melting.

How long should you bake creamy corn jalapeño dip to get a golden top?

For a perfectly golden top on your creamy corn jalapeño dip, bake at 375°F (190°C) for 20 to 25 minutes. The exact time depends on your oven and the depth of your dish. I start checking at 20 minutes – you’re looking for the edges to be bubbling vigorously and the top cheese to be melted and lightly browned in spots. If it’s pale but hot, you can switch the oven to broil for the last 1-2 minutes, watching closely so it doesn’t burn. A shallow dish gives more surface area and a browner top faster. Letting the dip rest for 5 minutes after baking helps the top set without losing its golden color.

Can I make this dip ahead of time for a party?

Yes, this dip is perfect for make-ahead parties! You can assemble the entire dip (without the top cheese) up to 24 hours in advance. Simply mix everything together, transfer it to the baking dish, cover tightly with plastic wrap, and refrigerate. When you’re ready to bake, let it sit at room temperature for about 20 minutes while preheating the oven, then add the remaining Monterey Jack cheese on top. Bake as directed, but expect to add 5-7 extra minutes to the baking time since the dip starts out cold. This method saves you time on party day and the flavors actually meld together even better overnight.

What can I use instead of mayonnaise in this dip?

If you want to avoid mayonnaise, you have several excellent options that still keep the dip creamy. Full-fat plain Greek yogurt is my top substitute – it adds a pleasant tang and lightens the dip slightly. You can also use an equal amount of sour cream (the dip will be a bit more tangy) or a combination of mashed avocado (for richness and a green hue) and a squeeze of lime. For a dairy-free version, use a vegan mayonnaise or a thick cashew cream. Keep in mind that substituting mayonnaise may affect the final richness and spreadability, but all of these work well in this baked dip.

Can I use pickled jalapeños instead of fresh?

Yes, you can use pickled jalapeños, and they’ll give the dip a different but still delicious flavor profile. Pickled jalapeños are much tangier and more acidic than fresh, so I recommend draining them well and even patting them dry to avoid making the dip too runny. Start with 1/4 cup of chopped pickled jalapeños and taste before adding more – they can be quite salty. The dip will have a brighter, more vinegary heat, which pairs nicely with the creamy base. If you’re making the dip for a crowd that prefers milder heat, pickled jalapeños are actually a great choice because the pickling process mellows them.

How do I prevent my baked dip from becoming watery?

A watery dip is usually the result of excess moisture from the corn or from not draining the green chiles well. To prevent this, make sure you drain the canned corn thoroughly – I even press it with a paper towel to absorb extra liquid. If using frozen corn, thaw and pat it very dry. The green chiles should also be drained and gently squeezed. Another culprit is overmixing, which can break down the cream cheese and cause separation. Finally, don’t overbake – the dip should be just set, not dried out. If your dip still looks watery after baking, let it cool for 5-10 minutes; it often thickens as it sits.

What should I serve with this jalapeño corn dip?

This jalapeño corn dip is incredibly versatile when it comes to dippers. Classic tortilla chips – either thick restaurant-style or scoop-shaped – are my top pick because they hold up to the creamy dip. Fresh vegetables like bell pepper strips, cucumber rounds, and jicama sticks add a refreshing crunch. For a low-carb option, use pork rinds or cheese crisps. I also love serving it with warm, crusty bread like a baguette or soft pita wedges. If you’re feeling fancy, use the dip as a filling for mini tacos or as a topping for loaded nachos. The possibilities are endless!

Can I add meat to this dip?

Absolutely – this baked creamy corn jalapeño dip takes well to a variety of meats. Cooked and crumbled Mexican chorizo is my favorite addition; its smoky, spicy seasoning complements the corn and cheese perfectly. You can also add shredded rotisserie chicken (about 1 cup) to make it heartier, or leftover taco meat. Cooked and diced bacon adds a wonderful smokiness and crunch. Just be sure to cook any meat fully before mixing it into the dip, and adjust the salt in the recipe accordingly since some meats are salty. If you add meat, you may need to bake the dip a few minutes longer to ensure everything is heated through.

Share Your Version!

I’d love to see how this baked creamy corn jalapeño dip turns out in your kitchen! Did you add extra cilantro? Did you make it extra spicy? Let me know in the comments below – it makes my day to hear your cooking stories. If you post a photo on Instagram or Pinterest, tag @exorecipes so I can share your creation with the community.

Here’s one more question to ponder: what’s your go-to dipper? I’m always looking for new ideas. Drop your answer in the comments – I read every single one. From my NYC kitchen to yours – I hope this recipe brings as much warmth to your table as it does to mine. — mia 🧡

📌

Love This Recipe? Save It to Pinterest!

If you enjoyed this Baked Creamy Corn Jalapeño Dip recipe, don’t let it get lost in your browser tabs! 😄 Pin it now so you can find it again anytime — and explore hundreds more tried-and-tested recipes waiting for you on my Pinterest boards.

👉 Follow mia on Pinterest @exorecipe

📌 Pin this recipe · 🔁 Re-pin your favorites · 💬 Tag me when you make it — I love seeing your creations!

Print

clock clock iconcutlery cutlery iconflag flag iconfolder folder iconinstagram instagram iconpinterest pinterest iconfacebook facebook iconprint print iconsquares squares iconheart heart iconheart solid heart solid icon

Baked Creamy Corn Jalapeño Dip

  • Author: Chef Mia
  • Prep Time: 10 minutes
  • Cook Time: 20-25 minutes
  • Total Time: 30-35 minutes
  • Yield: 8 servings 1x
  • Method: Appetizer
  • Cuisine: Mexican-American

Description

This creamy, spicy, and cheesy baked corn jalapeño dip is the perfect party appetizer. It’s easy to make and always a crowd-pleaser.


Ingredients

Scale
  • 2 (15-ounce) cans whole kernel corn, drained
  • 1 (4-ounce) can chopped green chiles, drained
  • 1/2 cup mayonnaise
  • 1/2 cup sour cream
  • 4 ounces cream cheese, softened
  • 1 1/2 cups shredded Monterey Jack cheese, divided
  • 1/2 cup shredded cheddar cheese
  • 23 fresh jalapeños, seeded and minced (adjust to taste)
  • 1/4 cup chopped fresh cilantro
  • 1 teaspoon garlic powder
  • 1/2 teaspoon salt
  • 1/4 teaspoon black pepper
  • Optional: Tortilla chips or crackers for serving

Instructions

  1. Preheat oven to 375°F (190°C). Lightly grease a 1.5-quart baking dish.
  2. In a large bowl, combine the drained corn, green chiles, mayonnaise, sour cream, cream cheese, 1 cup of Monterey Jack cheese, cheddar cheese, minced jalapeños, cilantro, garlic powder, salt, and pepper. Mix until well combined.
  3. Transfer the mixture to the prepared baking dish and spread evenly.
  4. Top with the remaining 1/2 cup Monterey Jack cheese.
  5. Bake for 20-25 minutes, until the dip is hot and bubbly and the cheese is melted and lightly golden.
  6. Let cool for 5 minutes before serving. Garnish with additional cilantro if desired. Serve warm with tortilla chips or crackers.

Notes

For a milder dip, remove the seeds and membranes from the jalapeños. For extra heat, leave some seeds in. You can also add a pinch of cayenne pepper. The dip can be made ahead and refrigerated; bake just before serving.


Nutrition

  • Calories: 350
  • Sugar: 4g
  • Fat: 28g
  • Carbohydrates: 18g
  • Protein: 10g


Baked Creamy Corn Jalapeño Dip

“`html

Baked Corned Beef and Sauerkraut Sliders: The Ultimate Party Appetizer – Buttery, Tangy, and Irresistible

⚖️
Difficulty
Easy
⏲️
Prep Time
10 mins
🕒
Cook Time
25 mins
⏱️
Total Time
35 mins
🍽️
Servings
6 (12 sliders)

Let me take you back to a chilly autumn afternoon in my mother’s kitchen in Marrakech. She was braising a brisket low and slow with cumin, coriander, and a whisper of cinnamon — a dish that filled our home with warmth and the kind of deep, savory aroma that lingers in your memory forever. Years later, after training in Paris and settling here in New York City, I found myself craving that same soul-satisfying comfort, but I wanted something quicker, more casual, and perfect for game-day gatherings. That’s how these Baked Corned Beef and Sauerkraut Sliders were born — a recipe that takes the spirit of a slow-cooked Reuben and transforms it into an easy, crowd-pleasing appetizer that comes together in just 35 minutes. The key difference? A luscious buttery topping infused with Dijon mustard and Worcestershire sauce that bakes into the buns, creating a golden, crispy crust that’s absolutely addictive.

Imagine pulling a baking dish from the oven and seeing a dozen soft slider buns glistening under a blanket of melted butter and poppy seeds. As you lift the foil, the steam carries the tangy scent of sauerkraut mingling with rich, salty corned beef and nutty Swiss cheese. The first bite is a symphony of textures: the top bun is crisp and buttery, the corned beef is tender and savory, the sauerkraut adds a bright, acidic pop, and the melted cheese pulls into long, glorious strands. That Dijon mustard in the butter topping? It cuts through the richness with a gentle heat, while the Worcestershire sauce adds an umami depth that makes everyone at the table reach for seconds. It’s the kind of dish that disappears before you’ve even sat down — and honestly, that’s the highest compliment a cook can receive.

Here at exorecipes.com, I’ve tested this recipe more times than I can count, tweaking the bake time, the ratio of mustard to butter, and even the type of buns. My version uses Hawaiian rolls for their subtle sweetness that plays beautifully against the tangy sauerkraut and salty beef, but I’ll share a tested substitution if you prefer something less sweet. I’ve also uncovered a common mistake that can leave your sliders soggy instead of perfectly crisp — and I’ll show you exactly how to avoid it. Whether you’re feeding a crowd on Super Bowl Sunday, hosting a casual dinner, or just looking for an easy weeknight meal that feels special, these easy corned beef sliders are about to become your new go-to. I’ll even share a trick from my Paris days for getting that topping to soak into every nook and cranny of the buns.

Why This Baked Corned Beef and Sauerkraut Sliders Recipe Is the Best

The Flavor Secret. Most Reuben slider recipes rely solely on Thousand Island dressing for tang, but I wanted something more nuanced. My buttery mustard topping — inspired by a technique I learned at Le Cordon Bleu in Paris — uses Dijon mustard for its sharp, clean heat and Worcestershire sauce for its deep umami complexity. Together with garlic and onion powder, they create a savory crust that complements the corned beef and sauerkraut without overwhelming them. This isn’t just a sauce; it’s a flavor infusion that bakes right into the bread, elevating every single bite.

Perfected Texture. The biggest challenge with baked sliders is keeping the buns soft on the inside while achieving a golden, crispy top. My solution is a two-stage baking process: first covered with foil to steam the buns and melt the cheese evenly, then uncovered to let the butter topping caramelize into a beautiful golden crust. This technique, which I refined during my years cooking in NYC bistros, ensures that every slider has a satisfying crunch on top but remains pillowy and tender inside. No sad, soggy bottoms here!

Foolproof & Fast. With just 10 minutes of prep and 25 minutes in the oven, these baked sauerkraut sliders are truly weeknight-friendly. But what makes them foolproof is the assembly method: by keeping the 12 rolls connected as a single slab, you eliminate the tedious work of assembling individual sliders. Everything layers in evenly, and the butter topping soaks into the buns uniformly. Whether you’re a seasoned cook or a complete beginner, this recipe delivers consistently perfect results every single time.

Baked Corned Beef and Sauerkraut Sliders Ingredients

When I’m shopping for these ingredients, I head straight to my favorite deli in Manhattan’s Upper West Side — the kind of place where the butcher knows your name and the corned beef is sliced fresh to order. There’s something about that connection to local food purveyors that reminds me of the souks in Marrakech, where every spice seller has a story to tell. But don’t worry — everything you need for these easy corned beef sliders recipe is readily available at any US supermarket.

Ingredients List

  • 12 slider buns (Hawaiian or potato rolls, kept connected as a slab)
  • 1 pound thinly sliced cooked corned beef (from the deli counter or leftover)
  • 8 slices Swiss cheese, halved
  • 1 cup sauerkraut, drained and squeezed dry
  • 1/2 cup (1 stick) unsalted butter, melted
  • 2 tablespoons Dijon mustard (smooth, not grainy)
  • 1 tablespoon poppy seeds (optional, but highly recommended)
  • 1 teaspoon Worcestershire sauce
  • 1/2 teaspoon garlic powder
  • 1/2 teaspoon onion powder

Ingredient Spotlight

Slider Buns. Hawaiian rolls are my first choice because their subtle sweetness balances the tangy sauerkraut and salty corned beef beautifully. Potato rolls work wonderfully too — they’re slightly denser and less sweet, making them perfect if you prefer a more savory base. I tested both extensively, and the key is that they stay soft and pillowy even after baking.

Corned Beef. For the best texture, I recommend asking your deli counter to slice the corned beef thin but not paper-thin — about 1/8-inch thick is ideal. This way, the meat layers nicely without becoming tough during baking. Leftover corned beef from a St. Patrick’s Day dinner is perfect here; just slice it thinly before using.

Sauerkraut. This is where many home cooks go wrong. You must drain the sauerkraut thoroughly and then squeeze it dry in a clean kitchen towel. Excess moisture will steam the buns from the inside, making them soggy before they even hit the oven. I like to use a refrigerated brand like Bubbies or Cleveland Kraut for the best crunch and tang.

Swiss Cheese. Emmental or Gruyère are both excellent choices — they melt beautifully and have a nutty, slightly sweet flavor that pairs perfectly with the corned beef and tangy butter topping. Pre-sliced from the deli works great, just make sure the slices are large enough to cover the buns.

Dijon Mustard. This is my secret weapon. The sharp, tangy heat of Dijon cuts through the richness of the butter and beef, adding a layer of complexity that makes these sliders unforgettable. Don’t use yellow mustard here — it’s too mild and lacks the depth that makes this recipe special.

Original IngredientBest SubstitutionFlavor / Texture Impact
Hawaiian rollsPotato rollsLess sweet, slightly denser; still soft and pillowy
Swiss cheeseGruyère or EmmentalNutty flavor, excellent melt; virtually identical result
Dijon mustardSpicy brown mustard + 1 tsp white wine vinegarLess smooth, more rustic; good tang but slightly different texture
Corned beefShaved pastramiMore peppery, smoky flavor; slightly spicier sliders
Poppy seedsCaraway seeds or sesame seedsCaraway adds rye bread notes; sesame adds nuttiness

How to Make Baked Corned Beef and Sauerkraut Sliders — Step-by-Step

Trust me when I say this is one of the easiest recipes in my collection. The trick is keeping the buns connected as a slab, which makes assembly a breeze and ensures every slider is perfectly uniform. Let me walk you through it.

Step 1: Preheat and Prepare

Preheat your oven to 350°F (175°C). Lightly grease a 9×13-inch baking dish with butter or nonstick spray. The dish should be just large enough to hold all 12 rolls snugly — this keeps them from spreading apart as they bake.

💡 mia’s Pro Tip: Use a metal or ceramic baking dish, not glass. Metal conducts heat better, giving you a more even golden crust on the bottom of the buns.

Step 2: Slice the Buns

Without separating individual rolls, slice the entire package of 12 rolls horizontally in half. A long serrated knife works best for this. Place the bottom halves in the prepared dish, cut side up. The buns should fit snugly in a single layer.

⚠️ Common Mistake to Avoid: Don’t separate the rolls before slicing! Keeping them connected ensures the filling stays evenly distributed and the sliders hold together beautifully when you serve them.

Step 3: Layer the Filling

Layer the corned beef evenly over the bottom buns, followed by the Swiss cheese halves. Spread the sauerkraut evenly over the cheese. Make sure the sauerkraut is well-distributed so every slider gets some of that tangy goodness.

💡 mia’s Pro Tip: If your corned beef slices are large, tear them into pieces that fit the buns rather than overlapping them too much. This creates a more even layer and prevents bites that are all meat.

Step 4: Top the Sliders

Place the top halves of the buns over the filling, cut side down. Press gently to help everything settle together.

Step 5: Make the Butter Topping

In a small bowl, combine melted butter, Dijon mustard, poppy seeds (if using), Worcestershire sauce, garlic powder, and onion powder. Whisk until smooth and fully combined. The mixture should look creamy and slightly emulsified.

⚠️ Common Mistake to Avoid: Don’t use cold butter or let the melted butter sit too long before whisking. The mustard and Worcestershire sauce incorporate best when the butter is freshly melted and still warm.

Step 6: Pour and Bake

Pour the butter mixture evenly over the tops of the buns, using a pastry brush or the back of a spoon to spread it into every crevice. Let it soak in for 2 minutes. Cover the dish tightly with foil and bake for 15 minutes.

💡 mia’s Pro Tip: Pour the butter mixture slowly in a zigzag pattern across the buns, then use a brush to coax it into the cracks between the rolls. This ensures every bite is infused with that savory, tangy flavor.

Step 7: Uncover and Finish

Remove the foil and bake for an additional 5–10 minutes, or until the tops are golden brown and the cheese is melted and bubbly. Keep an eye on them during the last few minutes — you want a deep golden color, not burnt edges.

⚠️ Common Mistake to Avoid: Don’t skip the foil-covered stage! Baking covered first steams the buns and melts the cheese gently, preventing the tops from browning too quickly while the cheese is still cold.

Step 8: Rest and Serve

Let the sliders cool in the dish for 5 minutes before separating them with a sharp knife or spatula. This resting time allows the cheese to set slightly, so the sliders hold together when you lift them out. Serve warm.

StepActionDurationKey Visual Cue
1Preheat oven & grease dish5 minsOven ready, dish lightly coated
2Slice buns horizontally2 minsClean cut through all 12 rolls
3Layer corned beef, cheese, sauerkraut5 minsEven layers, filling reaches edges
4Add top buns & butter topping3 minsTopping evenly coats all surfaces
5Bake covered15 minsSteam visible when foil lifted
6Uncover & bake until golden5–10 minsGolden brown tops, bubbly cheese at edges
7Rest & serve5 minsSliders hold shape when separated

Serving & Presentation

When I serve these sliders at my dinner parties in Brooklyn, I like to arrange them on a large wooden board, still warm from the oven, with little bowls of extra mustard and pickles on the side. The golden tops with their speckled poppy seeds look beautiful against the dark wood, and the aroma makes everyone gravitate toward the kitchen. For a casual Super Bowl spread, I’ll pile them on a platter with a pile of napkins and watch them disappear.

Growing up in Morocco, we always served savory dishes with a contrast of textures and temperatures — crunchy salads alongside warm tagines, fresh herbs scattered over rich stews. I bring that same philosophy here: the warm, buttery sliders pair beautifully with a crisp, cold slaw or a simple cucumber salad dressed with lemon and dill. The acidity cuts through the richness and keeps every bite exciting.

Pairing TypeSuggestionsWhy It Works
Side DishCrispy potato wedges, coleslaw, cucumber salad, roasted Brussels sproutsAdds crunch and freshness to balance the rich, cheesy sliders
Sauce / DipExtra Dijon mustard, Thousand Island dressing, spicy ketchup, remouladeAdds moisture and an extra layer of tangy or spicy flavor
BeverageCold lager, IPA, hard cider, sparkling water with lemonCrisp, cold drinks cut through the richness and cleanse the palate
GarnishFresh dill sprigs, pickled jalapeños, extra poppy seeds, microgreensAdds visual appeal and a pop of freshness or heat

Make-Ahead, Storage & Reheating

Living in New York City means my schedule is always packed — between recipe testing, farmers market runs, and teaching the occasional cooking class, I need recipes that work on my terms. These sliders are a lifesaver because they can be assembled ahead of time and baked just before serving. Here’s how I handle meal prep for my busiest weeks.

MethodContainerDurationReheating Tip
RefrigeratorAirtight container (baked sliders)Up to 3 daysReheat at 350°F for 8–10 mins, covered, to restore softness
FreezerWrap individually in foil, then place in freezer bagUp to 2 monthsReheat directly from frozen at 350°F for 15–18 mins
Make-AheadAssembled in dish, without butter topping, coveredUp to 8 hours in advanceAdd butter topping just before baking; add 5 mins to covered bake time

The make-ahead option is my secret weapon for dinner parties. I’ll assemble the sliders in the morning, cover the dish tightly with plastic wrap, and refrigerate. When guests are about to arrive, I whisk together the butter topping, pour it over, and pop the dish in the oven. The extra 5 minutes of covered baking time (20 minutes total instead of 15) accounts for the chill from the fridge, and the result is just as perfect as if I’d baked them immediately.

For reheating leftovers, I’ve found that the oven works far better than the microwave. Microwaving makes the buns rubbery and the cheese tough. Instead, place leftover sliders on a baking sheet, cover loosely with foil, and warm at 350°F for 8–10 minutes. The foil traps steam and revives the buns’ soft texture, while the direct heat re-crisps the top. It’s like having freshly baked sliders all over again.

Variations & Easy Swaps

One of the things I love most about cooking is the freedom to adapt a recipe to what you have on hand or what you’re craving. These party appetizer sliders are incredibly versatile, and over the years I’ve developed several variations that have become favorites in my own kitchen. Whether you’re cooking for someone with dietary restrictions or just looking to try something new, there’s a version here for you.

VariationKey ChangeBest ForDifficulty Impact
Spicy Reuben SlidersAdd sliced jalapeños + use pepper jack cheeseGame day, parties with a spicy food crowdEasy (no extra steps)
Turkey Reuben SlidersReplace corned beef with smoked turkey breastLighter option, post-holiday leftoversEasy
Vegetarian Reuben SlidersUse sliced portobello mushrooms + roasted beetsVegetarian guests, meatless MondayMedium (extra prep for mushrooms)

Spicy Reuben Sliders

For a version that brings the heat, I swap the Swiss cheese for pepper jack and add a layer of thinly sliced pickled jalapeños between the sauerkraut and the top buns. The creamy, spicy cheese and the vinegary kick of the jalapeños play beautifully with the tangy sauerkraut and rich corned beef. I like to finish these with a sprinkle of smoked paprika in the butter topping for an extra layer of warmth. It’s a variation that always gets rave reviews at my game-day gatherings.

Turkey Reuben Sliders

After Thanksgiving, I’m always looking for creative ways to use leftover turkey, and these sliders are a fantastic solution. Simply replace the corned beef with thinly sliced smoked turkey breast. The turkey is milder than corned beef, so I like to add a little extra Dijon mustard and a dash of smoked paprika to the butter topping to boost the savory flavor. The result is a lighter but still deeply satisfying slider that’s perfect for lunch or a casual dinner.

Vegetarian Reuben Sliders

For my vegetarian friends, I’ve developed a version that uses thick slices of roasted portobello mushrooms and roasted beets to mimic the earthy, savory depth of corned beef. The mushrooms are brushed with a mixture of soy sauce, Worcestershire sauce (or a vegetarian version), and smoked paprika before roasting, which gives them a meaty, umami-rich flavor. The beets add sweetness and a beautiful color. It’s a bit more prep work, but the result is genuinely delicious — even my meat-eating friends ask for seconds.

How long should I bake corned beef and sauerkraut sliders for them to get crispy on top?

For perfectly crispy tops, bake the sliders in two stages. First, cover the dish tightly with foil and bake at 350°F for 15 minutes — this steams the buns and melts the cheese evenly without burning the tops. Then remove the foil and bake for an additional 5 to 10 minutes. Keep an eye on them during the final stage; the tops should turn a deep golden brown with slightly darker edges. If you want extra crunch, you can broil them for 1–2 minutes after baking, but watch carefully because the butter topping can burn quickly under the broiler.

What type of bread works best for baked corned beef and sauerkraut sliders?

Hawaiian sweet rolls are my top choice because their subtle sweetness balances the tangy sauerkraut and salty corned beef beautifully. They also stay soft and pillowy after baking, which creates a lovely contrast with the crispy, buttery top. Potato rolls are an excellent second option — they’re slightly less sweet and a bit denser, making them perfect for those who prefer a more neutral, savory base. Whichever you choose, make sure the rolls are sold as a connected slab of 12, which makes assembly and slicing much easier. Avoid crusty or crusty rolls, as they won’t soften properly during baking.

Can I use leftover corned beef for these sliders instead of cooking it fresh?

Absolutely — leftover corned beef is actually one of the best ingredients for this recipe. If you’ve made corned beef for St. Patrick’s Day or a Sunday dinner, simply let it cool, then slice it thinly against the grain. The meat will already be perfectly tender and full of flavor from the initial cooking. If your leftover corned beef is in large chunks, I recommend slicing it as thinly as possible using a sharp knife or a deli slicer. Thin slices ensure the meat warms through evenly during the short bake time and layers nicely on the buns. This is a fantastic way to transform leftovers into a brand-new meal.

What cheese goes best on corned beef and sauerkraut sliders?

Swiss cheese is the classic choice and my personal recommendation for these sliders. Its nutty, slightly sweet flavor pairs perfectly with the tangy sauerkraut and rich corned beef, and it melts into those beautiful, stretchy strands that make every bite satisfying. Emmental and Gruyère are both excellent Swiss-style options that work equally well. If you want to experiment, provolone is a good substitute with a milder flavor and excellent melting properties, while pepper jack adds a spicy kick that works wonderfully for a variation. Avoid hard cheeses like aged cheddar or Parmesan, as they don’t melt as smoothly and can become greasy.

Can I make these sliders gluten-free?

Yes, you can make these sliders gluten-free with a few simple swaps. Look for gluten-free slider buns or Hawaiian-style rolls from brands like Udi’s or Schär — they’re widely available in most US grocery stores. Make sure the Worcestershire sauce you use is certified gluten-free (Lea & Perrins is gluten-free in the US). Also check that your corned beef is gluten-free; some deli meats can contain fillers or seasonings with gluten. The rest of the ingredients — sauerkraut, Swiss cheese, butter, Dijon mustard, and spices — are naturally gluten-free. The texture may be slightly different with gluten-free buns, but the flavor will still be fantastic.

How do I prevent the sliders from getting soggy?

Soggy sliders are usually caused by excess moisture from the sauerkraut. The key is to drain the sauerkraut thoroughly in a colander, then transfer it to a clean kitchen towel or several layers of paper towels and squeeze firmly to remove as much liquid as possible. You don’t need to squeeze it dry like a sponge, but it should feel noticeably drier than when it came out of the jar. Additionally, the covered baking stage steams the buns lightly, which is actually beneficial, but the uncovered stage allows the tops to crisp up. If your sliders still seem wet, try baking them uncovered for an extra 2–3 minutes next time.

Can I freeze baked corned beef and sauerkraut sliders?

Yes, these sliders freeze beautifully. Bake them according to the recipe, let them cool completely, then wrap each slider individually in foil or plastic wrap. Place the wrapped sliders in a freezer-safe bag or container and freeze for up to 2 months. To reheat, place the frozen sliders on a baking sheet, cover loosely with foil, and warm at 350°F for 15–18 minutes. The foil helps trap steam and prevents the buns from drying out. I recommend freezing them without any extra sauce or toppings, as those can make the buns soggy upon reheating. This makes them perfect for meal prep or last-minute entertaining.

What can I serve with these sliders for a complete meal?

These sliders are rich and satisfying on their own, but they pair wonderfully with lighter sides that add freshness and crunch. I love serving them with a crisp coleslaw dressed with apple cider vinegar and dill — the acidity cuts through the richness of the cheese and butter. A simple cucumber and red onion salad with lemon and mint is another favorite, inspired by the fresh salads my mother used to make in Morocco. For a heartier meal, roasted potato wedges or sweet potato fries are always a hit. And if you’re hosting a party, set out a bowl of pickles, olives, and extra mustard for guests to customize their sliders.

How do I reheat leftover sliders without drying them out?

The best way to reheat leftover sliders is in the oven. Preheat to 350°F, place the sliders on a baking sheet, and cover loosely with foil. Heat for 8–10 minutes, or until the cheese is melted and the buns are warm and soft. The foil traps moisture and prevents the bread from drying out, while the oven heat restores some of the crispness to the tops. Avoid the microwave — it makes the buns rubbery and the cheese tough. If you’re reheating a large batch, you can also use an air fryer at 325°F for 4–5 minutes, but check frequently to prevent burning.

Can I add Thousand Island dressing to these sliders?

Absolutely — Thousand Island dressing is a classic Reuben component, and it works beautifully here. Spread about 1 tablespoon of Thousand Island dressing on the inside of the top buns before placing them on the filling, or drizzle it over the corned beef before adding the cheese. The creamy, tangy-sweet dressing adds another layer of moisture and flavor that complements the corned beef and sauerkraut perfectly. If you want to go all-in on the Reuben theme, you can even mix a little Thousand Island into the butter topping for a hybrid approach. Just keep in mind that the dressing adds moisture, so make sure your sauerkraut is well-drained to avoid sogginess.

Share Your Version!

I absolutely love hearing how you make these Baked Corned Beef and Sauerkraut Sliders your own. Did you try the spicy version with pepper jack and jalapeños? Did your family go wild for the turkey variation after Thanksgiving? Maybe you discovered a new favorite side dish to serve alongside them. Whatever you did, I want to know! Drop a star rating and a comment below — your feedback helps other home cooks discover what works, and I read every single comment personally.

And if you share a photo on Instagram or Pinterest, be sure to tag @exorecipes so I can see your beautiful creation. There’s nothing that makes me happier than seeing my recipes come to life in your kitchens. One question I’d love for you to answer: what’s your favorite twist on a classic Reuben? I’m always looking for new ideas, and you might just inspire my next recipe!

From my NYC kitchen to yours — I hope this recipe brings as much warmth to your table as it does to mine. — mia 🧡

📌

Love This Recipe? Save It to Pinterest!

If you enjoyed this Baked Corned Beef and Sauerkraut Sliders recipe, don’t let it get lost in your browser tabs! 😄 Pin it now so you can find it again anytime — and explore hundreds more tried-and-tested recipes waiting for you on my Pinterest boards.

👉 Follow mia on Pinterest @exorecipe

📌 Pin this recipe · 🔁 Re-pin your favorites · 💬 Tag me when you make it — I love seeing your creations!

“`

Print

clock clock iconcutlery cutlery iconflag flag iconfolder folder iconinstagram instagram iconpinterest pinterest iconfacebook facebook iconprint print iconsquares squares iconheart heart iconheart solid heart solid icon

Baked Corned Beef and Sauerkraut Sliders: A Savory, Easy-to-Make Treat

  • Author: Chef Mia
  • Prep Time: 10 mins
  • Cook Time: 25 mins
  • Total Time: 35 mins
  • Yield: 6 1x
  • Method: Appetizer, Main Course
  • Cuisine: American

Description

These Baked Corned Beef and Sauerkraut Sliders are a savory, easy-to-make treat, perfect for parties or a quick dinner. Layers of corned beef, Swiss cheese, and sauerkraut are piled onto soft slider buns, then baked with a buttery, tangy topping until golden and bubbly.


Ingredients

Scale
  • 12 slider buns (Hawaiian or potato rolls)
  • 1 pound thinly sliced cooked corned beef
  • 8 slices Swiss cheese, halved
  • 1 cup sauerkraut, drained and squeezed dry
  • 1/2 cup butter, melted
  • 2 tablespoons Dijon mustard
  • 1 tablespoon poppy seeds (optional)
  • 1 teaspoon Worcestershire sauce
  • 1/2 teaspoon garlic powder
  • 1/2 teaspoon onion powder

Instructions

  1. Preheat oven to 350°F (175°C). Lightly grease a 9×13-inch baking dish.
  2. Without separating the buns, slice the entire package of 12 rolls horizontally in half. Place the bottom halves in the prepared dish.
  3. Layer the corned beef evenly over the bottom buns, followed by the Swiss cheese.
  4. Spread the sauerkraut evenly over the cheese.
  5. Place the top halves of the buns over the filling.
  6. In a small bowl, combine melted butter, Dijon mustard, poppy seeds (if using), Worcestershire sauce, garlic powder, and onion powder. Whisk until smooth.
  7. Pour the butter mixture evenly over the tops of the buns, allowing it to soak in.
  8. Cover the dish with foil and bake for 15 minutes. Remove foil and bake for an additional 5–10 minutes, or until the tops are golden and the cheese is melted.
  9. Let cool for 5 minutes before separating and serving warm.

Notes

For extra flavor, add a sprinkle of caraway seeds along with the poppy seeds. To make ahead, assemble the sliders (without the butter topping), cover, and refrigerate up to 8 hours. Add the butter mixture just before baking.


Nutrition

  • Calories: 420
  • Sugar: 6g
  • Fat: 26g
  • Carbohydrates: 28g
  • Protein: 22g


Baked Corned Beef and Sauerkraut Sliders: A Savory, Easy-to-Make Treat

ph">For more delicious inspiration, follow me on Pinterest!