Table of Contents
Beef Sausage, Sauerkraut & Blue Cheese Potato Bites – A Flavor-Packed Appetizer You’ll Crave Again and Again
Growing up in Morocco, my mother would serve little bites that packed big, bold flavors – merguez with roasted peppers, crunchy potatoes with preserved lemon. Now, as a professional cook trained in Paris and living in New York City, I’ve created these Beef Sausage, Sauerkraut & Blue Cheese Potato Bites that bring together the tangy heart of an Alsatian choucroute garnie and the creamy richness of blue cheese, all on a tender roasted potato. These beef sausage sauerkraut blue cheese potato bites are the ultimate blue cheese potato appetizer you’ll want at every party.
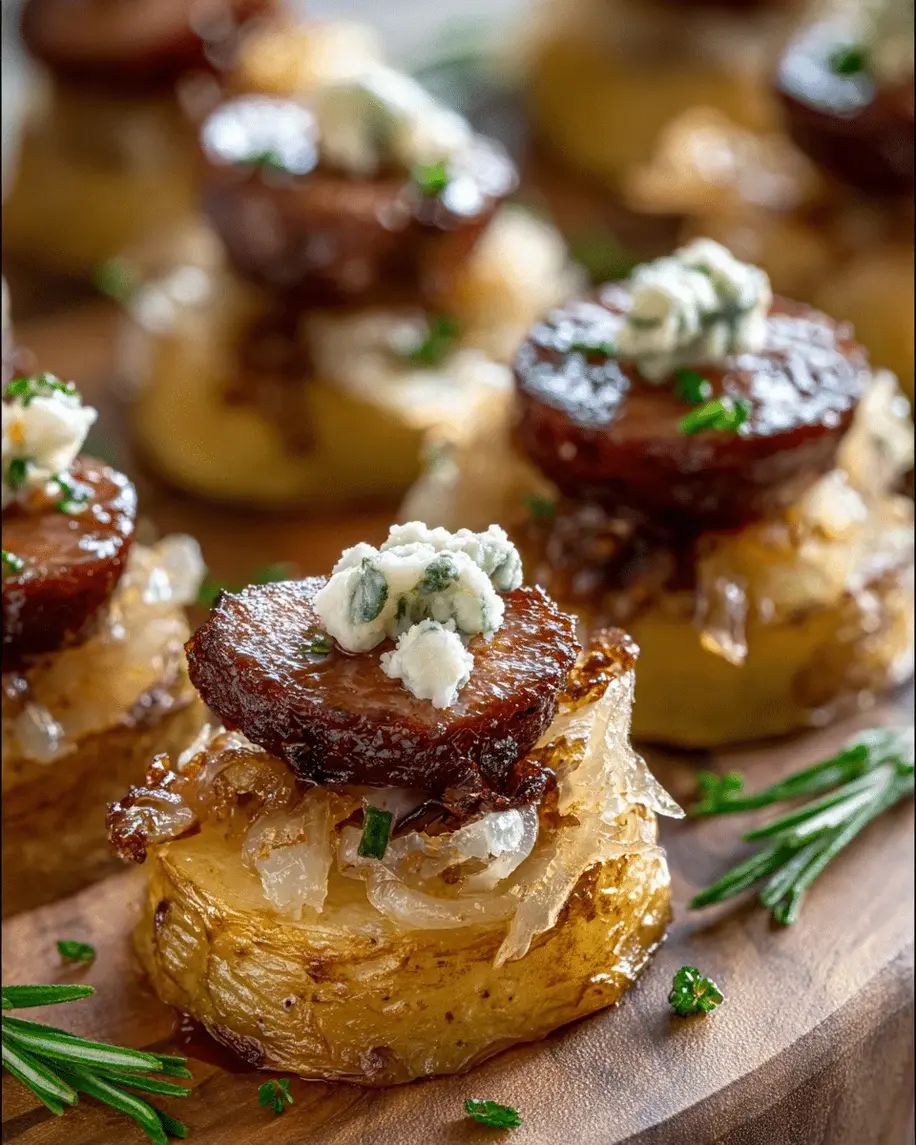
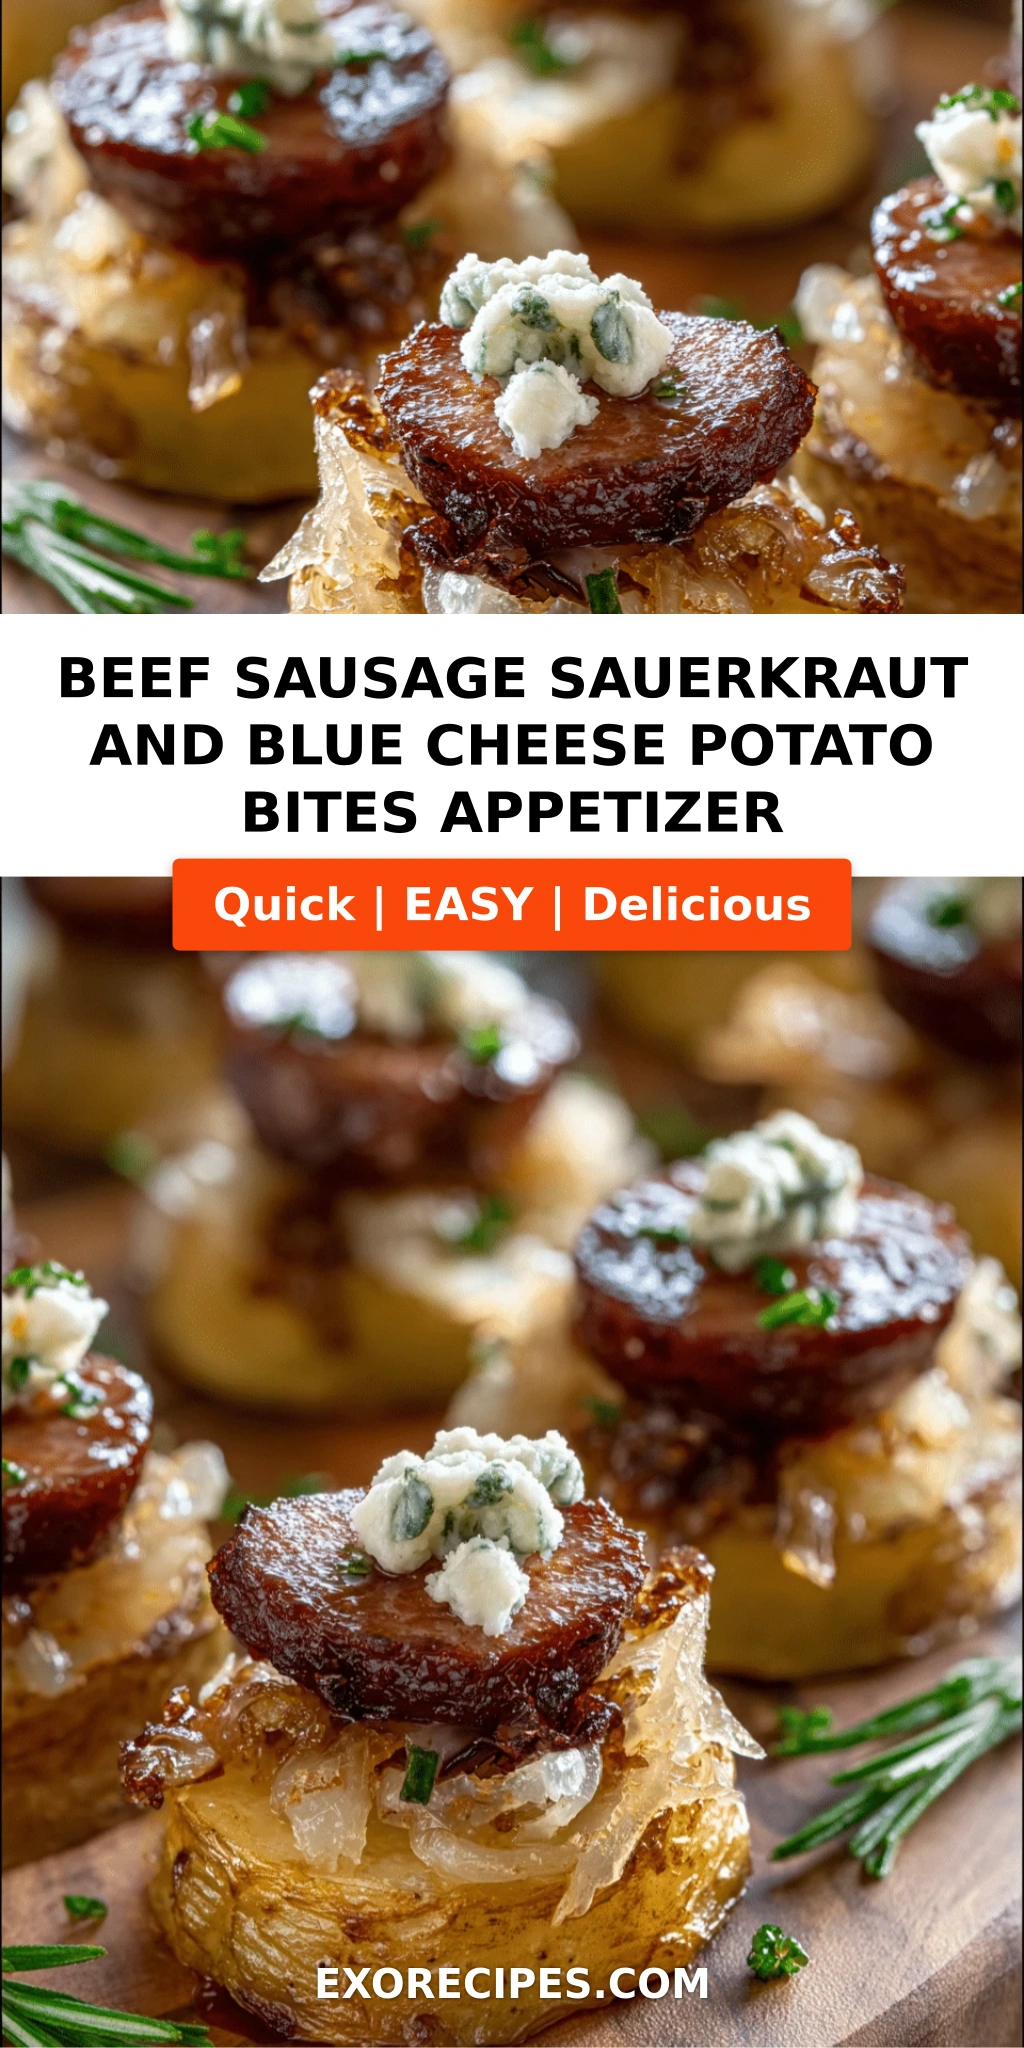
Picture this: a golden baby potato half, crisp on the outside and fluffy inside, topped with savory beef sausage crumbles, tangy sauerkraut that’s been kissed by the pan, and a generous sprinkle of creamy blue cheese that melts into every nook and cranny. The aroma – smoky sausage, earthy sauerkraut, and that funky blue cheese – fills your kitchen and makes everyone gravitate toward the baking sheet. Each bite is a contrast of textures: the potato gives way, the sausage is meaty, the kraut offers a slight crunch, and the blue cheese adds a velvety finish. This easy beef sausage appetizer is a crowd-pleaser that disappears in minutes.
I’ve tested this recipe countless times in my tiny NYC kitchen, and I’m sharing my best tips so you can nail it on your first try. The secret? Roasting the potatoes until they’re just tender, then topping and returning to the oven for a quick melt – that keeps them crisp. In this post, I’ll walk you through every step, share ingredient swaps, and reveal the one mistake that can make your potato bites soggy. Let’s cook!
Why This Beef Sausage Sauerkraut Blue Cheese Potato Bites Recipe Is the Best
The Flavor Secret – My unique angle is the three-layer approach: first, the sausage and sauerkraut are cooked together so the kraut absorbs the rendered fat and takes on a deeper, almost caramelized flavor. I learned this trick during my time at Le Cordon Bleu in Paris – it’s how the French transform humble ingredients into something extraordinary. Then the blue cheese adds a creamy, salty punch that ties everything together. The result is a savory potato bite recipe that’s balanced, rich, and utterly addictive.
Perfected Texture – Nothing ruins a potato appetizer faster than a soggy bottom. My technique: toss the halved baby potatoes in olive oil, salt, and pepper, then roast them cut-side down on a hot baking sheet. That direct contact caramelizes the cut surface, creating a golden crust. After topping, they only go back in the oven for five minutes – just enough to melt the cheese without steaming the potatoes. Every bite stays crisp.
Foolproof & Fast – With only seven ingredients and 40 minutes from start to finish, this is the perfect last-minute appetizer for game day, holiday parties, or even a weeknight treat. The steps are simple: roast, cook, assemble, melt. Even if you’re a beginner, you’ll pull off something that looks and tastes like you spent hours. Follow my instructions, and you’ll be the hero of the party.
Beef Sausage Sauerkraut Blue Cheese Potato Bites Ingredients
I always buy my beef sausage from a local butcher at the Union Square Greenmarket – it’s grass-fed and full of flavor. The sauerkraut I look for is refrigerated (not canned), often from a German deli in the East Village. Blue cheese? I use a good Point Reyes or Roquefort, depending on what’s at the shop. And baby potatoes? They’re a staple in my pantry – they’re quick and perfect for bite-sized appetizers.
Ingredients List
- 1 lb beef sausage, casings removed
- 2 cups sauerkraut, drained and chopped
- 4 oz blue cheese, crumbled
- 1 lb baby potatoes, halved
- 2 tbsp olive oil
- Salt and pepper to taste
- 2 tbsp fresh chives, chopped
Ingredient Spotlight
Beef Sausage – This is the heart of the dish. Look for a mild to medium-seasoned beef sausage (like a beef bratwurst or a simple Italian-style without fennel). Remove the casings before cooking. If you can’t find beef sausage, substitute with spicy Italian sausage for a kick, or a plant-based crumble for a vegetarian version. The flavor will change, but the structure works.
Sauerkraut – Use refrigerated sauerkraut from the deli section – it’s crunchier and less salty than canned. Drain it well and give it a rough chop. For a different twist, try kimchi (Korean fermented cabbage) – it adds heat and a whole new dimension. The tanginess is key.
Blue Cheese – A creamy blue like Gorgonzola dolce or a crumbly Roquefort both work beautifully. If blue cheese is too strong for you, use goat cheese or feta – they’ll still give you that tangy, creamy finish without the funk.
Baby Potatoes – I prefer Yukon Gold or red baby potatoes – they hold their shape and have a buttery texture. You can also use fingerlings or small Yukons cut into bite-size pieces. Avoid starchy russets; they’ll fall apart.
| Original Ingredient | Best Substitution | Flavor / Texture Impact |
|---|---|---|
| Beef sausage | Spicy Italian sausage or plant-based crumbles | Adds heat or replaces meat – adjust seasoning |
| Sauerkraut | Kimchi (drained and chopped) | Adds spicy, garlicky notes – less tangy |
| Blue cheese | Goat cheese or feta | Milder, less pungent – still creamy and tangy |
| Baby potatoes | Fingerling potatoes (halved lengthwise) | Slightly different shape but same texture |
| Chives | Green onions (scallions) or parsley | Milder or fresher flavor – still colorful |
How to Make Beef Sausage Sauerkraut Blue Cheese Potato Bites – Step-by-Step
Don’t worry, these sauerkraut sausage bites come together quickly. Just follow along; I’ll show you exactly how to get perfect results every time.
Step 1: Roast the Potatoes
Preheat your oven to 400°F (200°C). Toss the halved baby potatoes with 2 tablespoons olive oil, salt, and pepper. Spread them cut-side down on a baking sheet. Roast for 20 minutes, until the cut sides are golden brown and the potatoes are fork-tender. The key is not to overcrowd – if the potatoes are too close, they’ll steam instead of caramelize.
💡 mia’s Pro Tip: Use a metal baking sheet instead of a dark nonstick pan – it helps the potatoes get that even, crisp crust. If you only have a dark pan, reduce the temperature to 375°F and watch closely.
Step 2: Cook the Sausage and Sauerkraut
While the potatoes roast, heat a large skillet over medium heat. Add the beef sausage (casings removed) and cook, breaking it up with a wooden spoon, until browned and cooked through – about 6–8 minutes. Stir in the drained and chopped sauerkraut and cook for another 2 minutes, letting it mingle with the rendered fat and brown bits. The sauerkraut will soften slightly and absorb a ton of flavor.
⚠️ Common Mistake to Avoid: Don’t drain the sausage fat completely – you want a little to coat the sauerkraut. If you drain it all, the kraut will taste dry. Just leave a tablespoon or two in the pan.
Step 3: Assemble and Melt
Remove the potatoes from the oven and let them cool for 5 minutes – just enough so you don’t burn your fingers. Flip each potato half cut-side up. Spoon a generous teaspoon of the sausage-sauerkraut mixture onto each potato. Sprinkle crumbled blue cheese on top. Return to the oven for 5 minutes, until the cheese is melted and bubbly. Garnish with fresh chives and serve warm.
💡 mia’s Pro Tip: If you’re making these in advance for a party, complete the recipe through step 2 (cook the sausage mix), then refrigerate. When your guests arrive, roast the potatoes, assemble, and do the final 5-minute melt. They’ll be fresh and piping hot!
| Step | Action | Duration | Key Visual Cue |
|---|---|---|---|
| 1 | Roast potatoes cut-side down | 20 min | Golden brown cut surfaces; potatoes yield to a fork |
| 2 | Brown sausage then add sauerkraut | 8–10 min total | Sausage is no longer pink; sauerkraut looks glossy and slightly caramelized |
| 3 | Top potatoes, add cheese, bake | 5 min | Blue cheese is melted and just starting to bubble |
Serving & Presentation
These blue cheese potato appetizer bites are best served warm, straight from the oven. I like to arrange them on a large wooden board, scattered with extra chives for color. In my NYC apartment, they’re the first thing to disappear during game days or holiday gatherings. For a touch of Moroccan flair, I sometimes drizzle a little harissa oil over the top before serving – it adds a smoky heat that pairs beautifully with the blue cheese and sauerkraut.
Pair them with a crisp white wine like a Sauvignon Blanc, or a light lager. A side of crudité or a simple green salad balances the richness. If you want to make a meal of it, serve alongside a bowl of tomato soup or a big kale Caesar.
| Pairing Type | Suggestions | Why It Works |
|---|---|---|
| Side Dish | Mixed green salad, roasted carrots, or garlicky green beans | Adds freshness and lightness to the rich, savory bites |
| Sauce / Dip | Sour cream mixed with herbs, or a spicy aioli (harissa mayo) | Adds a cooling or spicy element – contrasts the tangy sauerkraut and funky blue cheese |
| Beverage | Sauvignon Blanc, dry Riesling, or a crisp pilsner | High acidity cuts through the fat; carbonation cleanses the palate |
| Garnish | Fresh chives, chopped parsley, Harissa oil drizzle | Adds color, freshness, and a flavor pop that brightens the dish |
Make-Ahead, Storage & Reheating
Between my blog, work, and life in New York, make-ahead meals are a lifesaver. These potato bites are perfect for prepping – here’s my tried-and-true method to keep them crispy and delicious even when you’re planning ahead.
| Method | Container | Duration | Reheating Tip |
|---|---|---|---|
| Refrigerator | Airtight container | Up to 3 days | Reheat in a 350°F oven for 8–10 minutes (not microwave – it’ll get soggy) |
| Freezer | Freezer-safe bag or container, layered with parchment | Up to 2 months | Bake frozen at 375°F for 15–18 minutes – no need to thaw |
| Make-Ahead | Refrigerate cooked sausage-sauerkraut mix (separate) and roast potatoes (separate) | Assemble and bake on the day – up to 2 days in advance | Let potatoes come to room temp before topping and baking for the final 5 minutes |
My best storage advice: never refrigerate already-assembled potato bites – the potatoes will absorb moisture from the kraut and get mushy. Instead, keep components separate: roasted potatoes in one container, sausage-kraut mix in another. When you’re ready, assemble and do that quick 5-minute melt. The result is nearly as good as fresh. For reheating leftover baked bites, use the oven or an air fryer at 350°F for a few minutes to restore crispness.
Variations & Easy Swaps
| Variation | Key Change | Best For | Difficulty Impact |
|---|---|---|---|
| Harissa & Lamb Twist | Use lamb sausage (or ground lamb), add 1 tbsp harissa to the skillet | Spicy, North African flavor lovers | Easy – same technique |
| Gluten-Free / Dairy-Free | Skip blue cheese, use dairy-free feta or omit; ensure sausage is GF | Dietary restrictions | Easy – just cheese swap |
| Apple & Fennel Sausage Bites | Sub sauerkraut with 1 cup shredded apple + ½ cup shaved fennel, sautéed | Fall gatherings, sweeter twist | Easy – cook apple-fennel mix separate until soft |
Harissa & Lamb Twist
This takes me back to my mother’s kitchen in Morocco. Replace the beef sausage with ground lamb or Merguez (if you can find it, remove casings). Cook as directed, but add 1 tablespoon of harissa paste along with the sauerkraut. The harissa’s smoky heat plays perfectly against the blue cheese. Finish with fresh cilantro instead of chives. This version is a showstopper for those who love bold, spicy flavors.
Gluten-Free / Dairy-Free Option
To make this recipe gluten-free, simply confirm your beef sausage is GF (most are). For dairy-free, omit the blue cheese completely – the sausage and sauerkraut are still incredibly flavorful. Alternatively, use a vegan blue cheese crumble or a tangy dairy-free feta. The texture will be slightly different but still delicious. I’ve served this to friends with dairy allergies, and they never missed the cheese.
Apple & Fennel Sausage Bites
For a fall-themed appetizer, skip the sauerkraut and instead sauté 1 cup finely diced apple (Honeycrisp or Granny Smith) and ½ cup shaved fresh fennel in a little butter until soft and caramelized, about 8 minutes. Stir into the cooked sausage. Top with blue cheese and proceed. The sweetness of the apple and the licorice note of fennel create a completely different, but equally crave-worthy, bite. I love serving these at Thanksgiving parties.
Share Your Version!
Now it’s your turn to bring these beef sausage sauerkraut blue cheese potato bites to your table. I’d love to see how they turn out! Leave a star rating and a comment below – tell me if you tried a variation or if you kept it classic. Did you use the harissa twist? Did your guests go wild? Snap a photo and tag me on Instagram or Pinterest @exorecipes – I love sharing your creations with our cooking community!
From my NYC kitchen to yours — I hope this recipe brings as much warmth to your table as it does to mine. — mia 🧡
Love This Recipe? Save It to Pinterest!
If you enjoyed these Beef Sausage, Sauerkraut & Blue Cheese Potato Bites, don’t let them get lost in your browser tabs! 😄 Pin it now so you can find it again anytime — and explore hundreds more tried-and-tested recipes waiting for you on my Pinterest boards.
👉 Follow mia on Pinterest @exorecipe
📌 Pin this recipe · 🔁 Re-pin your favorites · 💬 Tag me when you make it — I love seeing your creations!
⭐ Tried this recipe? Let me know! ⭐
Rate it, leave a comment, or share your photo on social media. I read every comment and can’t wait to see your version!
And don’t forget – what’s your favorite twist on these bites? I’m all ears (and taste buds)! – mia
Can I prepare these beef sausage and sauerkraut potato bites ahead of time and reheat them?
Yes, you can absolutely prepare these bites ahead of time for a party or busy weeknight. My recommended method is to keep the components separate: roast the potatoes and cook the sausage-sauerkraut mixture up to 2 days in advance, storing them in airtight containers in the fridge. When you’re ready to serve, let the potatoes come to room temperature (about 20 minutes), then assemble and pop them in a 400°F oven for 5 minutes to melt the cheese. This way, the potatoes stay crisp and the flavors are as fresh as ever. Avoid reheating fully assembled bites in the microwave – they’ll turn soggy. For best results, use the oven or an air fryer to restore that lovely crunch.
What type of beef sausage works best for this blue cheese potato appetizer recipe?
I recommend a mild to medium-seasoned beef sausage, such as a beef bratwurst or a simple Italian-style beef sausage without fennel (the fennel can compete with the sauerkraut and blue cheese). Look for high-quality sausages from a butcher or the fresh meat section – avoid pre-cooked or smoked sausages, as they won’t crumble properly. The key is to remove the casings before cooking so you get those perfect meaty crumbles. If you want a bit more heat, try a spicy Italian beef sausage, but remember it will change the flavor balance. For a leaner option, ground beef seasoned with garlic, salt, and pepper works in a pinch, though you’ll lose the rich sausage flavor.
Is there a good substitute for blue cheese if I want a milder flavor in these potato bites?
Absolutely! If blue cheese is too pungent for your taste, you have several milder alternatives that still give you a tangy, creamy result. Goat cheese (chèvre) is my top choice – it’s creamy, slightly tangy, and melts beautifully. Feta cheese, especially the creamy French or Bulgarian kind, works well too; it’s salty and adds a nice crumbly texture. For a completely neutral option, try shredded mozzarella or Monterey Jack, but you’ll lose the characteristic tang that makes this appetizer so special. Another creative swap: use a creamy gorgonzola dolce – it’s much milder than traditional blue cheese but still has that signature flavor. No matter what you choose, the result will still be delicious!
How do I keep the potato bites crispy when serving them at a party?
The secret to keeping these potato bites crispy is threefold: first, roast the potatoes cut-side down on a hot metal pan until deeply golden – that creates a crust that resists sogginess. Second, don’t assemble them too far in advance; the sauerkraut and cheese will start to release moisture onto the potatoes. For a party, I suggest roasting the potatoes and cooking the sausage-kraut mixture ahead, then assembling them just before baking for the final 5 minutes. If you’re serving them in batches, keep the uncooked assembled bites on the baking sheet at room temperature (no more than 30 minutes) and bake just before serving. Finally, if you need to hold them, place them on a wire rack over a baking sheet in a low oven (200°F) with the door slightly ajar to let steam escape – this keeps the bottoms from getting soggy.
Can I use a different type of potato for this recipe?
Yes, you can definitely use other potatoes! Baby Yukon Golds are my top pick because they’re buttery and hold their shape well. Red baby potatoes also work wonderfully – they have a slightly waxier texture that stays firm. If you can only find larger potatoes, cut them into 1-inch chunks (about the size of a halved baby potato). Avoid using starchy varieties like russets or Idaho potatoes – they tend to fall apart and become mushy when roasted. Fingerling potatoes are another excellent option; just halve them lengthwise for a uniform shape. Whichever you choose, make sure they’re all cut to a similar size and roast them cut-side down for that essential crispy crust.
What can I serve with these beef sausage potato bites as a main dish?
These bites are hearty enough to be a main dish, especially if you serve them with sides. I love pairing them with a simple arugula salad dressed with lemon vinaigrette – the bitterness and acidity cut through the richness. For a more substantial meal, add roasted vegetables like Brussels sprouts or asparagus alongside. You could also serve them over a bed of sautéed spinach or wilted greens. If you want to stretch the meal, consider a creamy tomato soup or a light beer and cheese soup (one of my favorites from my time in Alsace). And of course, a crusty baguette to soak up any leftover juices is always welcome!
How many calories are in each serving of these potato bites?
Each serving (about 4–5 potato bites, based on the recipe yield) contains approximately 350 calories. This breaks down to 18g of carbohydrates, 22g of fat, 18g of protein, and 2g of sugar. These numbers are an estimate based on the ingredients as listed. Keep in mind that the actual calorie count can vary depending on the brand of sausage, cheese, and the size of your potatoes. If you’re watching your intake, you can reduce the fat by using a leaner sausage or less cheese – but for a special appetizer, these bites are totally worth the indulgence!
Can I make these bites vegetarian or vegan?
Yes, you can easily adapt this recipe for a vegetarian or vegan diet. For vegetarian, use a high-quality plant-based sausage (like Beyond Meat or Impossible burger crumbles) and ensure your blue cheese is vegetarian-friendly (many blue cheeses use animal rennet, but some brands like Point Reyes are vegetarian). For vegan, use vegan sausage crumbles and a vegan blue cheese or feta alternative. The cooking technique remains the same – just be aware that plant-based sausages may need less cooking time and can be more delicate. I’ve tested this with a pea-protein based sausage, and it worked beautifully – just keep an eye on the moisture content to avoid sticking.

Beef Sausage, Sauerkraut & Blue Cheese Potato Bites A Flavor-Packed Appetizer Youll Crave Again and Again
- Prep Time: 15 minutes
- Cook Time: 25 minutes
- Total Time: 40 minutes
- Yield: 4 servings 1x
- Method: Appetizer
- Cuisine: American
Description
These savory potato bites combine beef sausage, tangy sauerkraut, and creamy blue cheese for an irresistible appetizer that will have everyone coming back for more.
Ingredients
- 1 lb beef sausage, casings removed
- 2 cups sauerkraut, drained and chopped
- 4 oz blue cheese, crumbled
- 1 lb baby potatoes, halved
- 2 tbsp olive oil
- Salt and pepper to taste
- 2 tbsp fresh chives, chopped
Instructions
- Preheat oven to 400°F (200°C).
- Toss baby potatoes with olive oil, salt, and pepper. Spread on a baking sheet and roast for 20 minutes, until tender.
- While potatoes roast, cook beef sausage in a skillet over medium heat, breaking it up, until browned. Stir in sauerkraut and cook for 2 minutes.
- Remove potatoes from oven and let cool slightly. Top each potato half with sausage-sauerkraut mixture and a sprinkle of blue cheese crumbles.
- Return to oven for 5 minutes, until cheese is melted. Garnish with chives and serve warm.
Nutrition
- Calories: 350
- Sugar: 2
- Fat: 22
- Carbohydrates: 18
- Protein: 18
k">
Tried This Recipe? Leave a Comment!
Did you make this recipe? I’d love to hear how it turned out! Please leave a comment and a rating below. Your feedback helps other home cooks and supports cheerychop.com!
For more delicious inspiration, follow me on Pinterest!