Brie and Roasted Grape Crostini Recipe – Easy Holiday Appetizer with Caramelized Grapes

⚖️
Difficulty
Easy
⏲️
Prep Time
10 mins
🕒
Cook Time
25 mins
⏱️
Total Time
35 mins
🍽️
Servings
6 servings

I still remember the first time I made these Brie and roasted grape crostini for a New Year’s Eve party in my tiny Brooklyn apartment. The combination of creamy, melted brie and sweet, caramelized grapes was an instant hit. Growing up in Morocco, my mother often served roasted fruit alongside savory dishes – a tradition I later refined during my pastry training in Paris. In NYC, I’ve learned that the best easy crostini appetizer balances texture and flavor, and this one does exactly that. The secret? Roasting the grapes with balsamic vinegar and fresh thyme at just the right temperature so they soften without bursting.

Imagine biting into a crisp, golden baguette slice topped with oozing brie and a warm, jammy grape that pops with sweet-tangy flavor. The honey drizzle adds a subtle floral sweetness, while thyme leaves bring an earthy, aromatic lift. The aroma – roasted grapes mingling with melted cheese – will fill your kitchen and draw everyone to the table. It’s the kind of appetizer that disappears in minutes, and your guests will beg for the recipe.

I’ve tested this baked brie appetizer more times than I can count, and I’m sharing my foolproof method so you can nail it every time. My tip: toss the grapes with a little olive oil and balsamic, then spread them in a single layer – no overcrowding – to ensure even caramelization without bursting. Avoid the common mistake of slicing the brie too thick, or it won’t melt evenly. Trust me, this version is designed for busy home cooks who want impressive results with minimal fuss.

Why This Brie and Roasted Grape Crostini Recipe Is the Best

The Flavor Secret: The combination of creamy brie and sweet roasted grapes is a classic French pairing, but I give it a twist by roasting the grapes with balsamic vinegar and fresh thyme. The vinegar enhances the natural sweetness and prevents the grapes from becoming overly mushy. This technique comes straight from my days at Le Cordon Bleu – it’s the difference between good and unforgettable.

Perfected Texture: Every element is built for contrast. The baguette slices are brushed with olive oil and toasted until golden, providing a sturdy crunch that holds up to the melted brie and soft grapes. I recommend slicing the baguette no thicker than ½ inch – too thin and they’ll burn, too thick and they won’t crisp properly. The brie is cut into small pieces so it melts quickly in the oven without becoming a puddle.

Foolproof & Fast: With just 35 minutes total time, this roasted grape crostini is ideal for last-minute entertaining. You can prep the grapes and toast the bread ahead, then assemble and melt the brie right before serving. It’s a stress‑free holiday appetizer idea that even beginner cooks can pull off. I’ve made it for everything from casual game nights to elegant dinner parties – it always works.

Brie and Roasted Grape Crostini Recipe Ingredients

Whenever I’m at the Union Square Greenmarket, I pick up a fresh baguette, a wheel of triple‑cream brie from a local dairy, and a bunch of red seedless grapes that look plump and shiny. These simple ingredients come together to create something truly special. Here’s everything you’ll need:

Ingredients List

  • 1 baguette, sliced into ½‑inch rounds
  • 2 cups red seedless grapes
  • 2 tablespoons olive oil, divided
  • 1 tablespoon balsamic vinegar
  • 1 teaspoon fresh thyme leaves
  • Salt and black pepper to taste
  • 8 ounces brie cheese, sliced into small pieces
  • 2 tablespoons honey (optional, for drizzling)
  • Fresh thyme sprigs for garnish

Ingredient Spotlight

Brie cheese: The star of this baked brie appetizer. Look for a brie that feels soft and yields slightly when pressed – that indicates it’s ripe and will melt beautifully. I prefer a double‑ or triple‑cream brie for extra richness. Substitution: Camembert works well, though it has a slightly earthier flavor and a firmer texture when melted.

Red seedless grapes: These are my top choice because they hold their shape during roasting and offer a natural sweetness that contrasts the savory brie. Choose grapes that are firm and attached to green stems; avoid any that are shriveled or leaking. Substitution: Black grapes are even sweeter and work nicely, or try halved figs for a seasonal twist.

Baguette: A good, crusty baguette is non‑negotiable. It should be fresh but not too soft; day‑old baguettes actually toast better. Slice on the bias for a larger surface area. Substitution: Gluten‑free baguettes or sturdy crackers (like water crackers) work, though the texture won’t be as crisp.

Fresh thyme: This herb adds an earthy, slightly floral note that ties the whole dish together. I always use fresh thyme from my windowsill herb garden. Substitution: Dried thyme (use ⅓ teaspoon) or fresh rosemary (finely chopped) can be used, but the flavor profile will shift.

Original IngredientBest SubstitutionFlavor / Texture Impact
Brie cheeseCamembertSlightly firmer when melted; earthier flavor
Red seedless grapesBlack grapes or halved figsBlack grapes are sweeter; figs add a honeyed chewiness
BaguetteGluten‑free baguette or sturdy crackersLess crunchy; may need extra toasting time
Fresh thymeDried thyme or fresh rosemaryDried is less intense; rosemary is more pine-like

How to Make Brie and Roasted Grape Crostini – Step by Step

Follow these simple steps, and you’ll have a gorgeous appetizer that looks and tastes like it came from a fancy NYC wine bar. I’ve included pro tips and common pitfalls so you can avoid any hiccups.

Step 1: Preheat and Prep

Preheat your oven to 400°F (200°C). While it heats, line two baking sheets with parchment paper or foil for easy cleanup.

💡 mia’s Pro Tip: Use two separate sheets – one for the grapes and one for the bread. This keeps the toast from getting soggy and ensures even roasting.

Step 2: Roast the Grapes

In a medium bowl, toss 2 cups of red seedless grapes with 1 tablespoon olive oil, 1 tablespoon balsamic vinegar, 1 teaspoon fresh thyme leaves, salt, and pepper. Spread them in a single layer on one baking sheet. Roast for 15‑20 minutes, until the grapes are soft and lightly caramelized but not bursting. Gently shake the pan halfway through.

⚠️ Common Mistake to Avoid: Overcrowding the grapes. If they’re piled on top of each other, they’ll steam instead of caramelize. Use a large enough pan so they have space.

Step 3: Toast the Baguette

While the grapes roast, arrange the baguette slices on the second baking sheet. Brush the tops with the remaining 1 tablespoon olive oil. Toast for 5‑7 minutes, until lightly golden and crisp. Keep an eye on them after 5 minutes – baguettes can go from golden to burned quickly.

💡 mia’s Pro Tip: For extra flavor, rub a cut garlic clove over the toasted bread while it’s still warm. It adds a subtle savory note that pairs perfectly with the brie.

Step 4: Melt the Brie

Remove the baguette pan from the oven. Top each toasted slice with a small piece of brie cheese (about ½ ounce each). Return to the oven for 2‑3 minutes, just until the cheese begins to soften and melt. Don’t leave them in too long or the brie will run off the bread.

⚠️ Common Mistake to Avoid: Slicing the brie too large. If the pieces are too big, they’ll melt over the edges and make a mess. Stick to small, thumbnail‑size pieces.

Step 5: Assemble and Serve

Remove both pans from the oven. Spoon a few roasted grapes over the melted brie on each crostini. Drizzle with honey if desired, and garnish with fresh thyme sprigs. Serve immediately while warm and gooey.

💡 mia’s Pro Tip: If you’re making these for a party, keep the toasted bread and roasted grapes separate until the last minute. Pop the brie‑topped bread in the oven for 2 minutes, then add the grapes and serve right away.

StepActionDurationKey Visual Cue
1Roast grapes15‑20 minGrapes are soft and wrinkled, skins intact
2Toast baguette5‑7 minGolden edges, firm to the touch
3Melt brie on bread2‑3 minCheese softens and begins to droop
4Assemble and serve1‑2 minGrapes sit on melted brie, honey glistens

Serving & Presentation

Arrange the crostini on a wooden board or a white platter for maximum visual impact. I like to place them in a single layer so the melted brie stays intact. Scatter a few extra roasted grapes and fresh thyme sprigs around the plate for a rustic, inviting look. These appetizers are best enjoyed warm, within 10 minutes of assembly.

In my NYC kitchen, I often serve these with a crisp green salad dressed in lemon vinaigrette to cut the richness. For a Moroccan twist, add a sprinkle of toasted sesame seeds or a pinch of cumin to the grapes before roasting. A glass of dry sparkling wine or a light Pinot Grigio makes an ideal pairing – the bubbles refresh the palate between bites.

Pairing TypeSuggestionsWhy It Works
Side DishArugula salad with lemon, shaved ParmesanPeppery greens cut the creamy cheese
Sauce / DipHoney drizzle, balsamic reductionEnhances the sweet‑savory balance
BeverageSparkling wine, dry Pinot Grigio, or a light roséAcidity and bubbles refresh the palate
GarnishFresh thyme sprigs, flaky sea salt, edible flowersAdds color, texture, and aroma

Make-Ahead, Storage & Reheating

I’m all about smart prep for busy NYC life. You can absolutely make parts of this easy crostini appetizer ahead. Roast the grapes and toast the baguette slices up to 2 days in advance, storing them separately in airtight containers at room temperature. The brie can be sliced and refrigerated until needed. Assemble and melt the cheese just before serving for the best texture.

MethodContainerDurationReheating Tip
RefrigeratorAirtight container, separate components2 daysRe‑toast bread for 2 min, warm grapes gently
FreezerNot recommended (brie texture suffers)N/ABrie becomes grainy when thawed
Make-AheadStore roasted grapes (RT), toasted bread (RT), sliced brie (fridge)Up to 2 daysAssemble and bake brie for 2‑3 min before serving

Leftover assembled crostini? They’re best eaten the same day, but you can refresh them in a 350°F oven for 3‑4 minutes – watch carefully so the bread doesn’t burn. The grapes will re‑warm nicely, and the brie will soften again. Avoid microwaving; it makes the bread chewy and the cheese rubbery.

Variations & Easy Swaps

I love experimenting with different flavors depending on the season or what I find at the farmers market. Here are three of my favorite variations for this roasted grape crostini recipe.

VariationKey ChangeBest ForDifficulty Impact
Crunchy Nut AdditionAdd toasted walnuts or pecansExtra texture and nutty flavorEasy
Gluten‑Free / Dairy‑FreeUse gluten‑free crackers + dairy‑free brie alternativeDietary restrictionsEasy (texture varies)
Spicy Honey DrizzleAdd chili flakes to honey, sub for plain honeyA sweet‑heat twistEasy

Variation 1: Crunchy Nut Addition

For extra texture, scatter a handful of toasted walnuts or pecans over the crostini before serving. The nuts add a satisfying crunch that contrasts the creamy brie and soft grapes. I often use this version for fall gatherings – it reminds me of the walnut trees my grandmother had in Morocco. Toast the nuts in a dry pan for 2‑3 minutes until fragrant, then chop roughly.

Variation 2: Gluten‑Free / Dairy‑Free

This baked brie appetizer can be adapted for dietary needs. Swap the baguette with your favorite gluten‑free crackers or thick slices of gluten‑free bread (toast them a bit longer). For dairy‑free, use a plant‑based brie alternative – many are made from cashew or almond milk and melt reasonably well. The texture will be slightly different, but the roasted grapes and honey still shine.

Variation 3: Spicy Honey Drizzle

I created this version one chilly NYC winter evening and it was an instant hit. Warm 2 tablespoons of honey with ¼ teaspoon red pepper flakes and a pinch of cinnamon. Drizzle over the assembled crostini (skip the plain honey). The heat cuts through the richness and adds a lovely warmth. It’s a fantastic holiday appetizer idea that surprises guests in the best way.

Frequently Asked Questions

What is the best way to roast grapes for brie crostini to prevent them from bursting?

To keep grapes from bursting, toss them gently with oil and balsamic vinegar, then spread them in a single layer on a baking sheet. Roast at 400°F (200°C) for 15–20 minutes, shaking the pan halfway. Avoid stirring too often – let them caramelize undisturbed. The key is not to overcrowd: if grapes are piled, steam builds up and makes them pop. Also, choose firm, seedless grapes and leave them whole.

Can I use a different type of cheese instead of brie for roasted grape crostini?

Absolutely. Camembert is the closest substitute – it has a similar creamy texture and mild flavor. For a stronger taste, try goat cheese (chèvre) or a soft‑ripened blue cheese like Gorgonzola Dolce. If you want a firmer cheese that still melts, use fontina or young Gouda. Each will change the character: goat cheese adds tang, blue adds funk, and Gouda brings a nutty sweetness. Just slice thinly so they melt quickly.

How far in advance can I assemble brie and roasted grape crostini before serving?

I recommend assembling only the components ahead, not the final crostini. The grapes can be roasted up to 2 days in advance and kept in an airtight container at room temperature. The baguette slices can be toasted and stored in a sealed bag at room temperature for 2 days. The brie can be sliced and refrigerated. Just before serving, top the bread with brie, bake for 2–3 minutes to melt, then add the grapes and honey. This ensures the bread stays crisp and the cheese is perfectly melted.

Should I serve brie and roasted grape crostini warm or at room temperature?

Serve these crostini warm for the best experience. The brie should be soft and slightly runny, the grapes warm and jammy, and the bread still crisp. Room temperature is fine if you’re serving a large spread, but the cheese will firm up and the bread may become chewy. To keep them warm for a party, arrange the assembled crostini on a platter and place it in a 200°F oven for up to 15 minutes – check that the bread doesn’t dry out.

Can I use frozen grapes for this recipe?

I don’t recommend frozen grapes for this recipe. Frozen grapes release a lot of water as they thaw and steam instead of caramelizing, which leads to a soggy texture and bland flavor. Stick with fresh seedless red or black grapes – they hold their shape and concentrate sweetness during roasting. If you only have frozen grapes, thaw them completely, pat very dry, and roast on a higher rack, but expect a less intense result.

How do I store leftover brie and roasted grape crostini?

Leftover assembled crostini are best eaten within a few hours. If you have leftovers, remove the grapes and brie from the bread (they’ll make the bread soft). Store the toasted bread in an airtight container at room temperature, and place the brie and grapes separately in the fridge. Reassemble and reheat in a 350°F oven for 3–4 minutes. Avoid microwaving – it ruins the texture of both bread and cheese.

Can I make this recipe vegan?

Yes! For a vegan version, use a high‑quality dairy‑free brie alternative (many are cashew‑based and melt well) or a creamy cashew cheese spread. Replace the honey with maple syrup or agave. Roast the grapes as directed. Use a crusty vegan baguette (most are accidentally vegan). The flavor profile will be slightly different but still delicious – the sweet roasted grapes and tangy vinegar remain the stars.

What wine pairs best with brie and roasted grape crostini?

A crisp, dry sparkling wine like Champagne, Prosecco, or Cava is my top choice – the bubbles cut through the creamy brie and refresh your palate. If you prefer still wine, a dry Riesling, Sauvignon Blanc, or a light Pinot Grigio works beautifully. For red wine fans, try a fruity Pinot Noir or a Beaujolais – they have enough acidity to balance the richness without overwhelming the subtle grape sweetness.

Can I use green grapes instead of red?

Yes, you can use green (white) seedless grapes, but expect a less intense caramelized flavor. Red grapes are naturally sweeter and have a deeper color that makes the finished dish more visually striking. If you use green grapes, consider adding a teaspoon of brown sugar to the roasting mixture to boost sweetness and encourage caramelization. The final taste will be slightly more tart, which some people actually prefer.

Is this recipe suitable for a holiday party buffet?

Absolutely! These holiday appetizer ideas are perfect for a buffet because they’re handheld, visually appealing, and easy to eat while mingling. To serve for a large crowd, set up a DIY station: platter of toasted baguette, roasted grapes in a bowl, sliced brie on the side, and honey in a small pitcher. Guests can assemble their own. Alternatively, make a big batch and keep them warm in a low oven – just don’t leave them too long or the bread will soften.

Share Your Version!

I’d love to hear how you made this Brie and roasted grape crostini your own! Did you add extra crunch with nuts? Spice it up with chili honey? Or maybe you discovered a perfect wine pairing? Drop a star rating and a comment below – your feedback helps other home cooks decide if this recipe is right for them.

Snap a photo of your creation and tag @exorecipes on Instagram or Pinterest – I always enjoy seeing your beautiful plates. One question for you: which variation are you most excited to try? Let me know!

From my NYC kitchen to yours — I hope this recipe brings as much warmth to your table as it does to mine. — mia 🧡

📌

Love This Recipe? Save It to Pinterest!

If you enjoyed this Brie and Roasted Grape Crostini recipe, don’t let it get lost in your browser tabs! 😄 Pin it now so you can find it again anytime — and explore hundreds more tried-and-tested recipes waiting for you on my Pinterest boards.

👉 Follow mia on Pinterest @exorecipe

📌 Pin this recipe · 🔁 Re-pin your favorites · 💬 Tag me when you make it — I love seeing your creations!

Print

clock clock iconcutlery cutlery iconflag flag iconfolder folder iconinstagram instagram iconpinterest pinterest iconfacebook facebook iconprint print iconsquares squares iconheart heart iconheart solid heart solid icon

Brie and Roasted Grape Crostini

  • Author: Chef Mia
  • Prep Time: 10 minutes
  • Cook Time: 25 minutes
  • Total Time: 35 minutes
  • Yield: 6 servings 1x
  • Method: Appetizer
  • Cuisine: French

Description

A delightful appetizer featuring creamy brie cheese and sweet roasted grapes on crispy baguette slices, perfect for entertaining.


Ingredients

Scale
  • 1 baguette, sliced into 1/2-inch rounds
  • 2 cups red seedless grapes
  • 2 tablespoons olive oil, divided
  • 1 tablespoon balsamic vinegar
  • 1 teaspoon fresh thyme leaves
  • Salt and black pepper to taste
  • 8 ounces brie cheese, sliced into small pieces
  • 2 tablespoons honey (optional, for drizzling)
  • Fresh thyme sprigs for garnish

Instructions

  1. Preheat oven to 400°F (200°C).
  2. In a bowl, toss grapes with 1 tablespoon olive oil, balsamic vinegar, thyme leaves, salt, and pepper. Spread on a baking sheet and roast for 15-20 minutes, until grapes are soft and slightly caramelized.
  3. Meanwhile, arrange baguette slices on a separate baking sheet. Brush with remaining olive oil. Toast in oven for 5-7 minutes, until lightly golden.
  4. Top each toasted baguette slice with a piece of brie cheese. Return to oven for 2-3 minutes, until cheese begins to melt.
  5. Remove from oven and spoon roasted grapes over the melted brie. Drizzle with honey if desired and garnish with fresh thyme sprigs. Serve warm.


Nutrition

  • Calories: 220
  • Sugar: 8g
  • Fat: 11g
  • Carbohydrates: 24g
  • Protein: 7g


Brie and Roasted Grape Crostini

Brie and Bacon Burger with Blueberry Jam: A Delicious Low-Carb Delight You’ll Love – Juicy, Keto-Friendly Indulgence

⚖️
Difficulty
Easy
⏲️
Prep Time
10 mins
🕒
Cook Time
20 mins
⏱️
Total Time
30 mins
🍽️
Servings
4

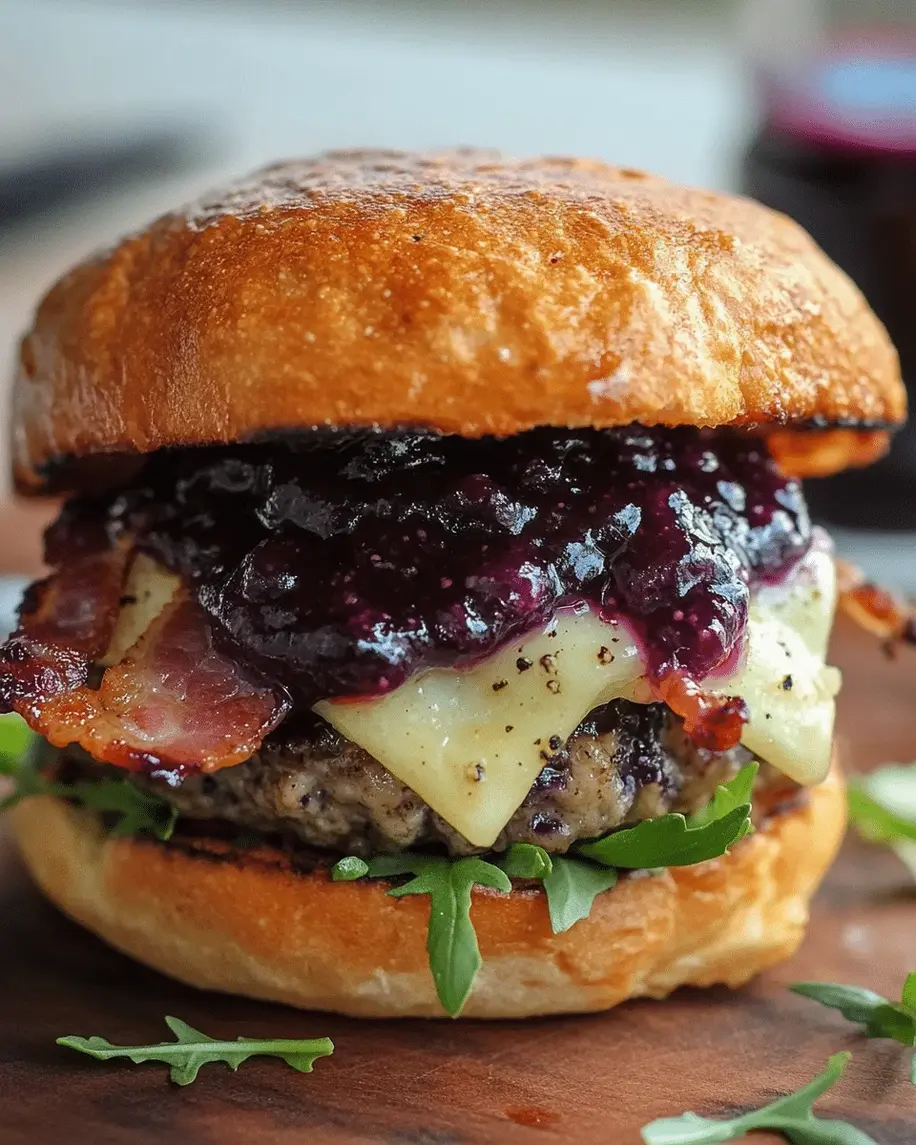
Growing up in Morocco, I never imagined I’d one day be crafting burgers in a New York City kitchen that blend my heritage with classic American comfort. This low carb brie bacon burger is exactly that — a beautiful collision of worlds. The idea came to me on a humid Saturday morning at the Union Square Greenmarket, where I spotted the most gorgeous blueberries and thought of my mother’s tangy-sweet preserves. What if I took that same spirit and turned it into a keto-friendly burger topping? And thus, this brie and bacon burger with blueberry jam was born — a low-carb delight that doesn’t sacrifice an ounce of flavor. Every bite is a conversation between savory, salty, and sweet, all wrapped in a crisp lettuce cradle.

Picture this — a perfectly seared beef patty with a caramelized crust, crowned with velvety melted brie that stretches with every bite. The bacon adds its signature smoky crunch, while the blueberry jam cuts through the richness with bright, fruity acidity. All of this is cradled in crisp lettuce leaves instead of a bun, keeping things light and keto-friendly. The jam itself is a revelation — cooked down with a touch of sweetener and apple cider vinegar, it becomes a glossy, spoonable jewel that ties everything together. The aroma alone — smoky bacon mingling with warm, fruity jam — will have everyone hovering around the grill before you’re done cooking.

I’ve tested this recipe at least a dozen times in my tiny NYC test kitchen, adjusting the sweetness of the jam, the thickness of the bacon, and the doneness of the beef. What I’m sharing with you today is the version that finally made me stop and say, “This is it.” The key is building layers — the savory beef, the funky brie, the salty bacon, and that sweet-tart jam all need to sing in harmony. I’ll also share my 💡 mia’s Pro Tip for getting the brie perfectly melted without overcooking your patty, plus the one mistake I see home cooks make when assembling keto burger recipes. This isn’t just another burger — it’s a low-carb burger topping masterpiece that will make you forget buns exist.

Why This Brie and Bacon Burger Recipe Is the Best

The Flavor Secret: What sets this burger apart is the blueberry jam. My mother in Morocco used to make a similar preserve with local figs and a hint of rose water. Here, I’ve adapted that technique using blueberries and a granulated sweetener like erythritol or monk fruit. The apple cider vinegar brightens everything and cuts through the richness of the brie and beef. This isn’t your typical burger topping — it’s a chef’s trick borrowed from French gastronomy, where fruit condiments are used to balance fatty meats. The sweet-tart jam is the hero that makes every bite unforgettable.

Perfected Texture: I learned in Paris that texture is just as important as flavor. The crispy bacon provides a sharp contrast to the creamy, molten brie. The beef patty is cooked to a perfect medium — juicy and tender with a caramelized crust from the high heat. The lettuce wrap adds a refreshing crunch instead of a soggy bun. The key technique? Letting the brie melt under a covered grill or skillet during the last minute of cooking. This traps the heat and creates that luscious, gooey layer without overcooking the meat. I’ve tested every variable — patty thickness, heat level, cheese timing — so you don’t have to.

Foolproof & Fast: This entire meal comes together in 30 minutes, making it perfect for a weeknight dinner or a weekend cookout. The blueberry jam takes just 5–7 minutes on the stove, and the burgers cook in under 10 minutes. Even if you’re new to low-carb cooking, this recipe is forgiving. The instructions are straightforward, and I’ve included visual cues so you know exactly when the jam is ready, when the patty is cooked, and when the brie is perfectly melted. Plus, with only 8g net carbs per serving, it’s a keto-friendly burger that feels indulgent but fits your macros.

Low Carb Brie Bacon Burger Ingredients

I source my ingredients from a mix of local NYC spots — the ground beef from the butcher in Chelsea Market, the brie from a fromagerie in the East Village, and the blueberries from the Union Square Greenmarket when they’re in season. But you can find everything you need at any well-stocked US grocery store. Here’s what you’ll need for this low carb brie bacon burger recipe:

Ingredients List

  • 1 lb ground beef (80/20) — the fat content is crucial for juiciness
  • 4 slices bacon — thick-cut preferred for maximum crunch
  • 4 oz brie cheese, sliced — remove rind if you prefer a milder flavor
  • 1/2 cup fresh or frozen blueberries — no need to thaw if frozen
  • 1 tbsp granulated sweetener (e.g., erythritol or monk fruit) — adjust to taste
  • 1 tbsp apple cider vinegar — adds brightness and helps the jam set
  • 1/4 tsp salt — for seasoning the patties and jam
  • 1/8 tsp pepper — freshly ground black pepper preferred
  • For serving: lettuce leaves (butter or romaine work great), tomato slices, red onion slices

Ingredient Spotlight

Ground Beef (80/20): The 20% fat content is non-negotiable for a juicy keto burger. Leaner blends (like 90/10) will result in dry, crumbly patties. The fat also helps the brie melt into the meat rather than sliding off. If you can find grass-fed beef, the flavor is even more robust — it’s worth the splurge for special occasions.

Brie Cheese: This is the star of the show. Look for a brie that’s ripe but still firm — it should yield slightly when pressed but not be runny. The creamy, buttery texture melts beautifully over the hot patty. If the rind is too strong for your taste, you can trim it off before slicing. I love using a double-crème brie for extra richness, but any good-quality brie will work.

Blueberries: Fresh or frozen both work perfectly. If using frozen, you don’t need to thaw them first — they’ll break down quickly in the saucepan. The natural pectin in blueberries helps the jam thicken without adding any thickeners. For a tarter jam, reduce the sweetener by half. For a deeper flavor, let the berries simmer an extra 2–3 minutes until they start to caramelize slightly.

Granulated Sweetener: Erythritol or monk fruit are my go-to choices for keto-friendly sweetness. They don’t spike blood sugar and they caramelize similarly to sugar. If you’re not strictly low-carb, you can use honey or maple syrup — but start with 1 tablespoon and adjust, as they’re sweeter and add more liquid.

Original IngredientBest SubstitutionFlavor / Texture Impact
Ground Beef 80/20Ground Lamb or Turkey (85/15)Lamb adds gaminess; turkey is leaner so add 1 tbsp oil
Brie CheeseCamembert or TaleggioCamembert is milder; Taleggio is more pungent with a creamier melt
BlueberriesRaspberries or BlackberriesRaspberries break down faster; blackberries have more seeds and a tarter flavor
Granulated SweetenerHoney or Maple Syrup (not keto)Honey adds floral notes; both add ~4g sugar per tbsp
Apple Cider VinegarRed Wine Vinegar or Lemon JuiceRed wine vinegar is milder; lemon juice adds citrus brightness

How to Make Brie and Bacon Burger — Step-by-Step

These steps are designed to be foolproof whether you’re using a grill outdoors or a cast-iron skillet indoors. I’ve included visual cues at every stage so you know exactly what to look for. Let’s get cooking!

Step 1: Preheat and Prepare

Preheat your grill to medium-high heat (about 375–400°F) or place a cast-iron skillet over medium-high heat on the stovetop. While the heat comes up, take your ground beef out of the refrigerator to let it temper slightly — this helps the patties cook more evenly. Remove the brie from the fridge as well; it should soften just a bit for easier slicing.

💡 mia’s Pro Tip: Let the ground beef sit at room temperature for no more than 15 minutes. Cold beef sears better and stays juicier than warm beef. If it’s too cold, the center won’t cook through before the outside burns.

Step 2: Make the Blueberry Jam

In a small saucepan, combine 1/2 cup blueberries, 1 tablespoon granulated sweetener, 1 tablespoon apple cider vinegar, and a pinch of salt. Cook over medium heat, stirring occasionally with a wooden spoon. The berries will start to release their juices after about 2–3 minutes. Continue cooking until the mixture thickens and the berries break down, about 5–7 minutes total. You’ll know it’s ready when the jam coats the back of the spoon and leaves a clear trail when you run your finger through it. Remove from heat and set aside to cool slightly — it will continue to thicken as it cools.

⚠️ Common Mistake to Avoid: Don’t walk away from the jam! Blueberries have natural sugars that can burn quickly once they break down. Stir frequently and lower the heat if you see the mixture sticking to the bottom of the pan. A burnt jam will taste bitter and ruin the sweet-tart balance.

Step 3: Cook the Bacon

Cook 4 slices of bacon in a skillet over medium heat until crispy, about 6–8 minutes total. Flip halfway through for even cooking. Transfer the bacon to a paper towel-lined plate to drain. Don’t discard the bacon fat — it’s liquid gold for another use (like roasting vegetables or frying eggs). The bacon should be crisp enough to snap when you break it, but not so brittle that it shatters.

💡 mia’s Pro Tip: For the crispiest bacon, start it in a cold skillet and let it heat up gradually. This renders the fat slowly and gives you a more even texture. If you’re in a rush, you can also cook the bacon on a sheet pan in a 375°F oven for 15 minutes — no flipping needed.

Step 4: Form and Season the Patties

Divide the ground beef into 4 equal portions (about 4 oz each). Gently shape each portion into a patty that’s about 3/4-inch thick — don’t overwork the meat or the patties will be dense and tough. Make a small indentation in the center of each patty with your thumb; this prevents the patties from puffing up into balls as they cook. Season both sides generously with salt and pepper.

⚠️ Common Mistake to Avoid: Don’t press down on the patties with a spatula while they cook! This squeezes out all the flavorful juices and leaves you with dry, tough burgers. Let the heat do the work — flip them once and only press gently to check doneness.

Step 5: Grill the Patties and Melt the Brie

Place the patties on the preheated grill or skillet. Cook for 4–5 minutes on the first side — you’ll see the edges start to brown and juices rise to the surface. Flip and cook for another 3–4 minutes for medium doneness (internal temperature of 145°F). In the last minute of cooking, top each patty with a slice of brie cheese. Cover the grill or skillet with a lid or foil to trap the heat. The brie will soften and melt into a creamy layer in about 60 seconds. Remove from heat immediately.

💡 mia’s Pro Tip: If your brie isn’t melting as quickly as you’d like, close the lid and turn off the heat. The residual heat will finish melting the cheese without overcooking the patty. For an extra-indulgent touch, add a second slice of brie on top of the first and let it double-melt.

Step 6: Assemble the Burgers

Place a large lettuce leaf on each plate — I like to double-layer the leaves for extra sturdiness. Top with a patty (with its melted brie), a slice of tomato, a slice of red onion, and 2 slices of bacon. Drizzle generously with the blueberry jam. For the best experience, use about 1 tablespoon of jam per burger. The lettuce acts as a bun alternative, keeping everything contained while adding freshness and crunch.

⚠️ Common Mistake to Avoid: Don’t overload the lettuce wrap! If you pile too many toppings, the lettuce will tear and you’ll end up eating it as a salad. Stick to one layer of toppings and fold the lettuce around the burger like a taco. If you need more structure, use two lettuce leaves overlapping each other.

Step 7: Serve Immediately

Serve the burgers right away while the brie is still warm and gooey. Place the extra blueberry jam on the side for dipping or drizzling. These burgers are best enjoyed fresh, as the lettuce wrap can become soggy if left to sit. Pair with a crisp side salad or keto-friendly sweet potato fries for a complete meal.

💡 mia’s Pro Tip: If you’re serving a crowd, keep the components separate and let everyone assemble their own burger. This way the lettuce stays crisp, the brie stays warm, and everyone can customize their toppings. It also makes for a fun interactive dinner!

StepActionDurationKey Visual Cue
1Preheat grill or skillet5–7 minsGrill grates are hot when water sizzles on contact
2Make blueberry jam5–7 minsJam coats spoon and leaves a clear trail
3Cook bacon6–8 minsBacon is browned and crispy, fat has rendered
4Form and season patties3–4 minsPatties are uniform thickness with center indent
5Grill patties and melt brie8–10 minsBrie is glossy and softened; patty reads 145°F internally
6Assemble burgers2–3 minsLettuce cradles patty with toppings visible
7Serve immediately0 minsBrie is warm and stretchy; jam glistens

Serving & Presentation

How you serve this brie and bacon burger makes all the difference. I like to plate each burger on a wooden board with the lettuce wrap folded like a taco — it feels rustic yet refined, like something you’d find at a Brooklyn gastropub. The key is to let the melted brie be the star: arrange the burger so the cheese is visible, glistening against the dark seared beef. Drizzle the blueberry jam in zigzag patterns over the top for a beautiful presentation that screams chef’s kiss.

For sides, I keep it simple and low-carb. A crisp arugula salad with a lemon vinaigrette cuts through the richness beautifully. Or try my Moroccan-inspired carrot salad — shredded carrots with cumin, lemon, and a touch of harissa. If you’re not strictly keto, these burgers are also incredible on a toasted brioche bun with a side of sweet potato fries. My NYC friends love when I serve them with a small bowl of extra blueberry jam for dipping — it’s a fun interactive element that makes dinner feel special.

For drinks, I recommend something that can stand up to the bold flavors. A dry rosé or a light Zinfandel pairs beautifully with the blueberry jam and brie. For a non-alcoholic option, try a sparkling water with a splash of cranberry and a sprig of rosemary — the herbal notes complement the bacon and beef. And if you’re eating this for brunch (which I fully support), a Bloody Mary with a bacon garnish is the ultimate pairing.

Pairing TypeSuggestionsWhy It Works
Side DishArugula salad, Moroccan carrot salad, keto sweet potato friesLight, acidic sides balance the rich, savory burger
Sauce / DipExtra blueberry jam, sriracha mayo, garlic aioliAdds moisture and a flavor boost to every bite
BeverageDry rosé, light Zinfandel, cranberry-rosemary spritzerFruity or acidic drinks complement jam and cut through fat
GarnishFresh blueberries, microgreens, edible flowersAdds color and a refined touch that impresses guests

Make-Ahead, Storage & Reheating

Living in NYC means my schedule is always packed — between food photography, recipe testing, and exploring new restaurants, I don’t always have time to cook from scratch every night. That’s why I love that this keto burger recipe is make-ahead friendly. The blueberry jam can be made up to a week in advance, and the patties can be prepped and stored in the fridge for quick assembly. Here’s how I store and reheat each component to maintain maximum flavor and texture.

MethodContainerDurationReheating Tip
RefrigeratorAirtight container, separate componentsUp to 3 daysReheat patty in a skillet over medium heat for 2 mins per side; add brie in the last minute
FreezerPatties stacked with parchment, in a freezer bagUp to 3 monthsThaw overnight in fridge, then cook per recipe; don’t freeze assembled burgers
Make-AheadJam in a jar; patties on a tray covered with plastic wrapJam: 1 week; Patties: 1 dayCook patties straight from fridge; add 1 min to cook time

A note from my experience: never reheat a fully assembled burger. The lettuce becomes limp and the jam loses its bright flavor. Instead, store each component separately — patties (with or without brie), bacon, jam, and lettuce — and reheat only the patty and bacon. The jam is delicious cold or at room temperature, and the lettuce should always be fresh. If you’re reheating the patty with brie already melted on it, cover the skillet with a lid to re-melt the cheese gently. I’ve tested this method a dozen times, and it works beautifully — the patty stays juicy and the brie gets gooey again without becoming oily.

Variations & Easy Swaps

One of the things I love most about this low carb brie bacon burger is how adaptable it is. Whether you’re feeding a crowd with different dietary needs or just want to mix things up, these variations are all tested and approved in my kitchen. Each one keeps the soul of the recipe intact while offering a fresh twist.

VariationKey ChangeBest ForDifficulty Impact
Spicy Moroccan TwistAdd harissa to the beef, swap blueberries for figsAdventurous palates, spice loversEasy — same cooking time
Dairy-Free OptionReplace brie with dairy-free cheese or skipDairy-free / vegan dietsEasy — no change to method
Seasonal Berry SwapUse strawberries in summer, cranberries in fallYear-round versatilityEasy — adjust sweetener as needed

Spicy Moroccan Twist

This variation is a nod to my Moroccan roots. Mix 1 tablespoon of harissa paste into the ground beef before forming the patties. The smoky, spicy heat of harissa complements the blueberry jam’s sweetness beautifully. Replace the blueberries with dried figs (reconstituted in warm water for 10 minutes, then chopped) for a jam that’s more complex and earthy. The fig jam pairs with the harissa in a way that’s pure North African magic — sweet, spicy, and deeply satisfying. I also like to add a sprinkle of cumin and cinnamon to the beef for extra warmth. This version is a showstopper at dinner parties and always sparks conversations about Moroccan cuisine.

Dairy-Free Option

If you’re dairy-free or vegan, you don’t have to miss out on this brie and bacon burger experience. Replace the brie with a high-quality dairy-free cheese that melts well — I recommend a cashew-based or coconut-oil-based option. Miyoko’s Creamery makes an excellent dairy-free brie alternative that melts beautifully and has a similar creamy texture. Alternatively, you can skip the cheese altogether and double up on the bacon and jam for a flavor-packed burger that doesn’t miss the dairy. The blueberry jam becomes even more prominent, and the bacon adds enough richness to compensate. For a vegan version, use plant-based bacon and a vegan cheese melt — just be mindful of the cook times, as plant-based options often cook faster.

Seasonal Berry Swap

One of the joys of living in NYC is the changing seasons at the Greenmarket. In summer, swap blueberries for fresh strawberries — hull and quarter them before cooking, and reduce the sweetener by half since strawberries are naturally sweeter. In fall, use fresh or frozen cranberries — they’re tarter, so increase the sweetener to 2 tablespoons and add a splash of orange juice for brightness. In winter, frozen mixed berries work beautifully; they break down into a jammy compote that’s perfect for this burger. Each seasonal variation brings its own character to the dish, and I love how the jam becomes a reflection of the time of year. My winter version with cranberries and a hint of orange zest is a holiday favorite in my house.

How do you make a low-carb bun for a brie and bacon burger?

You can make a low-carb bun alternatives that work beautifully with this brie and bacon burger. The simplest option is a lettuce wrap — use large, sturdy lettuce leaves like butter lettuce, romaine, or iceberg. For a more structured bun, try using portobello mushroom caps (grilled or baked until tender), which have a meaty texture that complements the beef. Another favorite is cloud bread, made from eggs and cream cheese — it’s light, fluffy, and has only about 1g of net carbs per serving. For store-bought options, look for keto-friendly buns made with almond flour or coconut flour at health food stores or online. Whichever you choose, toast it lightly to prevent sogginess from the jam and burger juices. The key is to match the structural integrity to the generous fillings — you want something that holds up to the juicy patty, melted brie, and bacon.

Can you use a different type of cheese instead of brie in this burger recipe?

Absolutely, you can substitute brie with other cheeses, and each will give the burger a distinct personality. Camembert is the closest substitute — it has a similar creamy texture and mild, earthy flavor that melts just as beautifully. Taleggio is a wonderful choice for a more pungent, funky flavor with an exceptional melting quality — it becomes almost liquid when heated. For a sharper profile, try aged gouda or gruyère, which melt well and add a nutty depth that pairs surprisingly well with blueberry jam. If you want something smoky, smoked gouda or provolone can complement the bacon. For a non-low-carb twist, blue cheese crumbles add a tangy kick that contrasts with the sweet jam. Just keep in mind that harder cheeses take longer to melt, so you may need to cover the patty for an extra 30 seconds to achieve that perfect creamy layer. Whatever cheese you choose, slice it thinly and add it during the last minute of cooking to avoid overcooking the patty.

What kind of blueberry jam is best for a low-carb burger topping?

For a low-carb blueberry jam that works perfectly as a burger topping, you want one that’s thick, glossy, and not overly sweet. The best option is to make your own using fresh or frozen blueberries, a granulated sweetener like erythritol or monk fruit, a splash of apple cider vinegar for brightness, and a pinch of salt to balance flavors. This homemade version is free from added sugars and preservatives, and you can control the consistency and sweetness level. If you’re buying store-bought, look for “no sugar added” or “keto-friendly” blueberry preserves — brands like ChocZero or Good Good make excellent options that are sweetened with monk fruit or allulose. Avoid regular jams that use high-fructose corn syrup or cane sugar, as they’ll add unnecessary carbs. The ideal consistency is spoonable but not runny — it should coat the back of a spoon and stay put on the burger without dripping everywhere. A good test is to dollop a small amount on a plate; if it holds its shape without spreading too much, it’s perfect for topping.

How long should you cook the bacon and brie for the perfect burger texture?

For the perfect texture, cook the bacon for 6 to 8 minutes over medium heat in a skillet, flipping halfway through, until it’s deep golden brown and crispy but not brittle. The bacon should snap when you break it but still have a slight pliability — this gives you that satisfying crunch without it shattering into pieces when you bite into the burger. As for the brie, it needs only about 60 seconds of covered heat on top of the cooked patty to reach that luscious, gooey consistency. Place the slice of brie on the patty during the last minute of cooking, then immediately cover the skillet or grill with a lid. The trapped heat softens the cheese to a creamy, spreadable texture without melting it completely off the patty. If you prefer your brie more melted and almost runny, leave the lid on for an additional 30 seconds. The key is to watch for the edges of the brie to become glossy and slightly puffed — that’s your cue that it’s ready. Never cook the brie directly on the heat source, as it will burn before it melts evenly.

Can I make this brie and bacon burger ahead of time for meal prep?

Yes, you can absolutely meal prep this brie and bacon burger, though I recommend keeping the components separate and assembling only when you’re ready to eat. The blueberry jam can be made up to a week in advance and stored in an airtight jar in the refrigerator — it actually develops more flavor as it sits. Form the beef patties and store them in the fridge for up to 2 days, separated by parchment paper to prevent sticking. Cook the bacon in advance and store it in a zip-top bag at room temperature for up to 2 days, or in the fridge for up to 5 days. For the freshest lettuce wraps, wash and dry the lettuce leaves and store them in a paper towel-lined container — they’ll stay crisp for 2 to 3 days. When you’re ready to eat, cook the patties fresh (they take less than 10 minutes), add the brie in the last minute, and assemble. This approach gives you the convenience of meal prep with the quality of a freshly cooked burger. I do this every week for my own lunches, and it works like a charm.

What sides go well with a low-carb brie and bacon burger?

There are plenty of delicious low-carb sides that pair beautifully with this brie and bacon burger. A crisp arugula salad with a lemon vinaigrette is my go-to — the peppery greens and bright acidity cut through the richness of the burger. Zucchini fries (coated in almond flour and parmesan, then baked or air-fried) are a fantastic keto-friendly alternative to traditional fries. For something heartier, try a cauliflower and broccoli salad with a creamy dressing — the crunch adds a nice contrast. If you’re serving a crowd, roasted asparagus with garlic and lemon is elegant and takes just 10 minutes in the oven. I also love a simple cucumber and tomato salad with red onion and a light vinaigrette; it’s refreshing, crunchy, and keeps the whole meal light. For a more indulgent option, keto coleslaw made with a sugar-free dressing is tangy and creamy — it echoes the jam’s sweet-tart profile. And if you want a starch fix without the carbs, roasted radishes are a surprisingly good potato substitute with a mild, peppery flavor.

Is this brie and bacon burger truly keto-friendly?

Yes, this brie and bacon burger is absolutely keto-friendly, with each serving containing just 8g of net carbohydrates. The recipe is designed specifically for low-carb and ketogenic diets. The burger patty itself is pure protein and fat, with zero carbs. The bacon adds flavor and fat without any sugars (just check the label to avoid bacon cured with sugar). The brie cheese is very low in carbs at less than 1g per ounce. The blueberry jam is the only source of significant carbs, and by using a granulated sweetener like erythritol or monk fruit instead of sugar, we keep the carb count low while still achieving that sweet, jammy texture. The lettuce wrap replaces the bun entirely, saving you roughly 20 to 30g of carbs per serving. At 550 calories, 38g of fat, and 40g of protein per serving, this burger fits comfortably within standard keto macros. It’s also gluten-free, grain-free, and sugar-free, making it suitable for a wide range of dietary preferences beyond just keto.

Can I grill this brie and bacon burger outdoors?

Absolutely, grilling this brie and bacon burger outdoors elevates the flavor even further with that irresistible smoky char. The high, dry heat of a grill creates a beautiful crust on the beef patty while keeping the inside juicy and pink. For the best results, preheat your grill to medium-high heat (around 375 to 400°F) and clean the grates thoroughly to prevent sticking. Cook the patties for 4 to 5 minutes on the first side, then flip and cook for another 3 to 4 minutes. In the last minute, add the brie slices and close the grill lid to melt the cheese — this traps the heat and creates that gooey layer just like a skillet would. Grill the bacon separately in a cast-iron pan on the grill or on a cooler section of the grates. The blueberry jam can be made indoors ahead of time, so the grill is just for the patties and bacon. One pro tip: make the lettuce wraps ahead of time so you can assemble the burgers right off the grill. The contrast between the smoky charred patty, the melted brie, the crispy bacon, and the cool, crisp lettuce is absolutely sublime.

How do I prevent the lettuce wrap from getting soggy?

Preventing a soggy lettuce wrap is all about technique and timing. First, choose sturdy lettuce varieties like butter lettuce, romaine hearts, or iceberg — these have thick, cup-shaped leaves that hold up well to moisture. Wash and thoroughly dry the leaves using a salad spinner or by patting them with paper towels; any excess water will accelerate sogginess. Double-layer your wrap: use two overlapping leaves to create a sturdier barrier. The most important step is to keep the components dry on the contact surface — pat the cooked patty gently with a paper towel to remove excess grease before placing it on the lettuce. Similarly, blot the bacon strips to remove surface fat. Place the tomato and onion slices on top of the patty rather than directly on the lettuce, so they don’t make direct contact. Finally, assemble the burger just before serving — don’t let it sit for more than a minute or two before eating. If you follow these steps, your lettuce wrap will remain crisp and fresh throughout the meal, providing that perfect crunch that makes low-carb burgers so satisfying.

Can I use frozen blueberries for the jam?

Yes, frozen blueberries work perfectly for the jam and you don’t even need to thaw them first. In fact, I often use frozen blueberries because they’re available year-round and tend to be more consistent in flavor and sweetness than fresh berries during certain seasons. When using frozen blueberries, add them directly to the saucepan straight from the freezer — they’ll release their juices as they heat up, just like fresh berries. The cooking time will be approximately the same (5 to 7 minutes), though you may need to add an extra minute or two to allow the excess moisture from the frozen berries to cook off. The texture of the jam will be slightly smoother because frozen berries break down more readily than fresh ones. If you want a chunkier jam, use fresh blueberries and mash them only lightly with the back of a spoon. For an even thicker consistency with frozen berries, let the jam simmer uncovered for the last minute of cooking to allow more liquid to evaporate. The flavor will be just as bright and delicious, with the added benefit of having a reliable, pantry-friendly ingredient on hand whenever you crave this burger.

Share Your Version!

I absolutely love hearing how this low carb brie bacon burger turns out in your kitchen! Did you stick with the classic blueberry jam, or did you try one of the variations — the spicy Moroccan twist with harissa and figs, or the dairy-free option with cashew cheese? Maybe you discovered a new favorite cheese pairing or a seasonal fruit swap that blew your mind. Drop a comment below and tell me all about it — your tweaks and discoveries inspire me just as much as my own experiments.

If you snap a photo of your creation, tag me on Instagram or Pinterest @exorecipes — I feature my favorites on my stories every month! I’d especially love to see how you styled your lettuce wrap and whether you went for the classic assembly or a creative presentation. And if you have any questions about substitutions, cook times, or meal prep, just ask in the comments — I read every single one and answer within 48 hours. From my NYC kitchen to yours — I hope this recipe brings as much warmth to your table as it does to mine. — mia 🧡

📌

Love This Recipe? Save It to Pinterest!

If you enjoyed this Brie and Bacon Burger with Blueberry Jam recipe, don’t let it get lost in your browser tabs! 😄 Pin it now so you can find it again anytime — and explore hundreds more tried-and-tested recipes waiting for you on my Pinterest boards.

👉 Follow mia on Pinterest @exorecipe

📌 Pin this recipe · 🔁 Re-pin your favorites · 💬 Tag me when you make it — I love seeing your creations!

Print

clock clock iconcutlery cutlery iconflag flag iconfolder folder iconinstagram instagram iconpinterest pinterest iconfacebook facebook iconprint print iconsquares squares iconheart heart iconheart solid heart solid icon

Brie and Bacon Burger with Blueberry Jam: A Delicious Low-Carb Delight Youll Love

  • Author: Chef Mia
  • Prep Time: 10 minutes
  • Cook Time: 20 minutes
  • Total Time: 30 minutes
  • Yield: 4 1x
  • Method: Main Course
  • Cuisine: American

Description

This Brie and Bacon Burger with Blueberry Jam is a mouthwatering low-carb delight. Juicy beef patties topped with melted brie, crispy bacon, and a tangy blueberry jam, all served on a lettuce wrap. Perfect for a keto-friendly indulgence.


Ingredients

Scale
  • 1 lb ground beef (80/20)
  • 4 slices bacon
  • 4 oz brie cheese, sliced
  • 1/2 cup fresh or frozen blueberries
  • 1 tbsp granulated sweetener (e.g., erythritol or monk fruit)
  • 1 tbsp apple cider vinegar
  • 1/4 tsp salt
  • 1/8 tsp pepper
  • For serving: lettuce leaves, tomato slices, red onion slices

Instructions

  1. 1. Preheat grill or skillet over medium-high heat.
  2. 2. In a small saucepan, combine blueberries, sweetener, apple cider vinegar, and a pinch of salt. Cook over medium heat, stirring occasionally, until blueberries break down and mixture thickens, about 5-7 minutes. Remove from heat and set aside to cool.
  3. 3. Cook bacon in a skillet until crispy. Drain on paper towels and set aside.
  4. 4. Form ground beef into 4 equal patties. Season with salt and pepper.
  5. 5. Grill or cook patties for 4-5 minutes per side for medium, or until desired doneness. In the last minute of cooking, top each patty with a slice of brie cheese, cover, and let melt.
  6. 6. Assemble burgers: Place a lettuce leaf on a plate, top with a patty with melted brie, add a slice of tomato and red onion, and 2 slices of bacon. Drizzle with blueberry jam.
  7. 7. Serve immediately, with extra blueberry jam on the side if desired.

Notes

This recipe is naturally low-carb and keto-friendly. You can substitute blueberries with raspberries or blackberries if preferred. Sweetener can be omitted for a tarter jam. For a non-low-carb version, serve on brioche buns.


Nutrition

  • Calories: 550
  • Sugar: 5g
  • Fat: 38g
  • Carbohydrates: 8g
  • Protein: 40g


Brie and Bacon Burger with Blueberry Jam: A Delicious Low-Carb Delight Youll Love

Brie and Bacon Burger with Blueberry Jam – A Sweet and Savory Sensation

⚖️
Difficulty
Easy
⏲️
Prep Time
15 mins
🕒
Cook Time
10 mins
⏱️
Total Time
25 mins
🍽️
Servings
4

I still remember the first time I tasted blueberry jam with a burger—it was at a small food stand in the Union Square Greenmarket, right here in New York City. The vendor was piling brie and crispy bacon onto a patty and topping it with a glossy, deep-purple jam made from plump local blueberries. One bite and I was hooked. That moment sparked a love affair with the sweet-savory combo that I knew I had to recreate in my own kitchen. This Brie and bacon burger is my homage: a gourmet burger recipe that balances creamy, smoky, and tangy notes in every single mouthful.

Close your eyes and imagine this: a juicy, perfectly seared beef patty, its edges charred and crisp, topped with meltingly soft Brie that oozes into every crevice. Then come two strips of thick-cut bacon, cooked until they shatter with each bite. A generous spoonful of blueberry jam, made with just a hint of balsamic and black pepper, adds a sweet-tart ribbon that cuts right through the richness. Fresh arugula brings a peppery bite, and the buttery brioche bun cradles it all. The aroma of grilled beef and melted cheese mingling with smoky bacon and fruity jam is pure magic.

This isn’t just another bacon cheeseburger. It’s a blueberry jam burger recipe that draws on my training in Paris 🥖—where I learned how to balance flavors like a true chef—and on the bold, unapologetic love of fusion you’ll find in NYC. My secret? Smoked paprika stirred into the blueberry jam. It deepens the sweetness and adds a whisper of heat that ties the whole burger together. 💡 mia’s Pro Tip: Don’t skip the brioche bun—it toasts beautifully and stands up to the juicy patty.

Why This Brie and Bacon Burger Recipe Is the Best

The Flavor Secret – The key to this gourmet burger with brie is the unexpected pairing of silky Brie with a blueberry jam that’s been amped up with smoked paprika and a splash of balsamic. I learned this technique in Paris: a little acidity and spice wake up creamy cheeses and keep every bite from feeling heavy.

Perfected Texture – Using 80/20 ground beef for the patties ensures they stay juicy on the grill. I apply a French touch: pressing a small dimple in the center of each patty so they cook flat, not puffy. The Brie is added in the last minute under a cover—just long enough to melt without becoming a puddle.

Foolproof & Fast – From start to finish, this bacon blue cheese burger alternative takes only 25 minutes. The steps are simple: season, grill, melt, jam, assemble. Even a beginner burger cook can nail the meltiness of the Brie by following my timing. This recipe delivers a restaurant-quality burger at home without any fuss.

Brie and Bacon Burger Ingredients

Every time I buy the ingredients for this burger at the Union Square market, I feel a little thrill. The Brie I get from a French cheese monger who knows exactly how ripe to cut it; the bacon from a smokehouse in Pennsylvania; the blueberries come from a farm upstate. You don’t need to travel far—your local grocery store has everything. Here is exactly what you need:

Ingredients List

  • 1 ½ pounds ground beef (80/20)
  • 4 brioche burger buns, split and toasted
  • 8 slices bacon, cooked until crispy
  • 8 ounces Brie cheese, sliced (rind on or off—your choice)
  • ½ cup blueberry jam (store-bought or homemade)
  • ½ cup arugula (fresh, washed and dried)
  • Salt and black pepper to taste

Ingredient Spotlight

Ground Beef (80/20) – The 20% fat is non-negotiable for a juicy burger. Leaner beef will be dry. I always choose freshly ground chuck from the butcher counter if possible.

Brie Cheese – Look for a double-cream Brie that feels springy when pressed. A young Brie melts beautifully without turning greasy. You can leave the rind on—it adds a subtle earthiness—or remove it for a purely creamy experience.

Blueberry Jam – Use a good-quality jam with visible fruit pieces. For an extra layer, stir in ¼ teaspoon smoked paprika and 1 teaspoon balsamic vinegar. It elevates the flavor to a whole new level.

Bacon – Thick-cut bacon is best. It stays meaty and gives a satisfying crunch. I cook mine in the oven at 400°F for 18 minutes for even crispiness.

Original IngredientBest SubstitutionFlavor / Texture Impact
Ground beef (80/20)Ground turkey (93/7) + 1 tbsp olive oilLeaner, but oil keeps it moist; less beefy flavor
Brie cheeseCamembert or triple-cream BrieVery similar; slightly more earthy
Blueberry jamFig jam or blackberry preserveSweeter with fig; more tart with blackberry
Brioche bunPotato roll or pretzel bunPotato roll is softer; pretzel bun adds salt and chew

How to Make Brie and Bacon Burger with Blueberry Jam – Step-by-Step

Don’t be daunted—this recipe comes together in less time than it takes to watch a sitcom. Follow each step, and you’ll have a burger that rivals any NYC gastropub.

Step 1: Prep the Patties

Divide the ground beef into 4 equal portions. Shape each into a patty about ¾ inch thick—slightly wider than your bun because they shrink as they cook. Press a small indent in the center of each patty with your thumb; this prevents them from puffing up into meatballs. Season both sides generously with salt and pepper.

💡 mia’s Pro Tip: For even juicier patties, work the beef as little as possible. Overhandling makes them tough.

Step 2: Grill the Patties

Preheat your grill or grill pan to medium-high heat (about 400°F). Place the patties on the grate and cook for 4–5 minutes per side for medium, or adjust for your preferred doneness. Flip only once to get a good sear.

⚠️ Common Mistake to Avoid: Don’t press down on the patties with a spatula! You’ll squeeze out the juices.

Step 3: Melt the Brie

In the last minute of cooking, place slices of Brie on top of each patty. Cover the grill or pan with a lid or foil to trap the heat and melt the cheese. This takes about 1 minute—keep an eye on it so the Brie softens without dripping off.

💡 mia’s Pro Tip: If you prefer extra creamy melted Brie, add the cheese right after flipping the patty and cover immediately for 4 minutes.

Step 4: Toast the Buns

While the patties finish, split the brioche buns and toast them cut-side down on the grill or in a skillet until golden brown (about 1–2 minutes). This gives them a buttery crunch that won’t get soggy from the jam and juices.

⚠️ Common Mistake to Avoid: Toasting too long can dry out the buns. Watch for a light golden color.

Step 5: Assemble

Spread a generous tablespoon of blueberry jam on the bottom half of each toasted bun. Place the patty with melted Brie on top of the jam. Lay 2 slices of crispy bacon on the cheese, then add a handful of arugula. Close with the top bun and serve immediately while the cheese is still oozing.

StepActionDurationKey Visual Cue
1Season and shape patties5 minPatties uniform ¾-inch thick
2Grill patties8–10 minDeep golden crust, juices rising
3Add Brie and cover1 minCheese visibly soft and glossy
4Toast buns1–2 minLight golden, buttery sheen
5Jam, patty, bacon, arugula, close2 minJam spread evenly, bacon crisp

Serving & Presentation

The Brie and bacon burger deserves to be the star of any casual dinner. I love serving it with a side of sweet potato fries or a light coleslaw with a vinegar dressing to cut the richness. In NYC, we’d pair it with a crisp pale ale or a dry cider—the bubbles and acidity are perfect for balancing the creamy Brie and sweet jam.

For a touch of French elegance, garnish the plate with a few extra fresh blueberries and a sprig of mint. It echoes the bergamot-scented gardens I remember from Morocco. The burger is best eaten right away, but if you’re entertaining, you can keep the cooked patties warm in a low oven while you toast the buns and assemble.

Pairing TypeSuggestionsWhy It Works
Side DishSweet potato fries, truffle fries, or arugula saladSweetness and crunch complement the burger
Sauce / DipSpicy mayo, balsamic reduction, or extra blueberry jamAdds zing or more bluberry sweetness
BeverageIPA, hard cider, or a fruity red like GrenacheCarbonation and bitterness cut fat; fruit notes echo jam
GarnishFresh blueberries, mint leaves, micro arugulaVisual pop and fresh flavor

Make-Ahead, Storage & Reheating

Living in NYC means busy weeknights. I often prep the patties and blueberry jam two days ahead, store them in the fridge, and cook fresh when I get home. The bacon I cook completely and then reheat in the microwave for 10 seconds. For storing leftovers (if there ever are any!), keep the components separate.

MethodContainerDurationReheating Tip
RefrigeratorAir-tight container, patties separate from buns3 daysReheat patty in skillet with lid, medium heat 2 min per side
FreezerWrap patties individually in plastic wrap, then foil3 monthsThaw overnight; reheat as above
Make-AheadPatties in fridge, jam in jar, bacon cooked2 days in advanceAssemble and grill patties fresh; toast buns at the end

If you have leftover cooked patties (without Brie), reheat them gently in a covered pan with a splash of broth to keep them moist. Add the Brie only after reheating, or it will become rubbery. The blueberry jam keeps in the fridge for up to a week—use it on toast, pancakes, or cheese boards.

Variations & Easy Swaps

VariationKey ChangeBest ForDifficulty Impact
Moroccan SpicedAdd 1 tsp ras el hanout to beef; replace arugula with cilantroWarm spice loversNo extra time
Gluten-FreeUse gluten-free buns or large lettuce wrapsGF dietsSame
Turkey Bacon & LightTurkey bacon, ground turkey (93/7), low-fat BrieLower calorieSame

Moroccan Spiced Variation

This is my favorite twist, inspired by my childhood in Morocco. Mix 1 teaspoon of ras el hanout into the ground beef before forming patties. The warm, aromatic blend of cumin, coriander, cinnamon, and cardamom pairs beautifully with the blueberry jam and Brie. Swap arugula for fresh cilantro leaves, and you’ll have a burger that tastes like a tagine in bun form.

Gluten-Free / Dairy-Free Version

For gluten-free, use a sturdy gluten-free bun or wrap the patty in large romaine or butter lettuce leaves. The dairy-free alternative: use a vegan Brie-style cheese (made from cashews) that melts similarly. It won’t be as gooey, but the flavor combination still shines. I’ve tested it for a friend’s dinner party—everyone loved it.

Balsamic Peach Variation

When peaches are in season at the NYC farmers market, I swap blueberry jam for a balsamic peach jam. Use the same smoked paprika trick. The peach’s sweetness is more floral, and the balsamic adds depth. Pair with a soft goat cheese instead of Brie for a tangy finish.

How do you make blueberry jam for a burger without using pectin?

To make a quick blueberry jam without pectin, simply simmer fresh or frozen blueberries with a little sugar and a squeeze of lemon juice. Cook them over medium heat, mashing occasionally, until the mixture thickens—about 10–15 minutes. The natural pectin in the blueberries and the lemon juice will help it set. I add a pinch of smoked paprika and a splash of balsamic vinegar to give it that gourmet twist. You can also reduce the cooking time for a looser jam that spreads easily on the bun. Store it in a jar in the fridge for up to a week.

Can I use a different cheese instead of brie on this bacon burger?

Absolutely. While brie gives a silky, buttery melt that’s hard to beat, you can substitute Camembert for a very similar experience—just slightly earthier. If you want something with more punch, try aged goat cheese or a creamy Gorgonzola. The blue cheese route turns this into a bacon blue cheese burger, which is a classic pairing with the sweet blueberry jam. For a non‐creamy option, sharp cheddar will work but won’t have the same luscious texture. Whichever you choose, make sure it melts well by slicing it thin and adding it during the last minute of grilling.

What is the best way to cook the bacon for a Brie and Bacon Burger?

Oven-baked bacon is my go-to method for even crispiness without constant flipping. Lay the slices on a parchment-lined baking sheet and bake at 400°F for 15–20 minutes, depending on thickness. Thick-cut bacon takes about 18 minutes. This leaves the bacon perfectly flat and shatteringly crisp—ideal for stacking on burgers. You can also pan-fry it if you prefer a slightly chewier texture. Whichever method you choose, cook it just before you grill the patties so it stays hot and crispy. Pro tip: pat the cooked bacon with a paper towel to remove excess grease.

How do you prevent the brie from sliding off the burger while eating?

I’ve had my share of runaway brie slices, so I developed a trick: spread a thin layer of blueberry jam on the bottom bun—it acts like glue. Also, don’t overload the burger with huge hunks of cheese. Thin slices (about ⅛ inch) melt faster and stay put. When you add the patty with melted brie, gently press it into the jam. Finally, use a toothpick to secure the burger if you’re serving it on a bun that’s deep enough. For extra insurance, let the burger rest for 30 seconds after assembly so the cheese firms up slightly.

Can I make the blueberry jam ahead of time?

Definitely! In fact, I always make my blueberry jam a day or two in advance. It gives the flavors time to meld, especially the smoked paprika and balsamic notes. Simply cool the jam completely, then transfer it to a sealed jar and store it in the refrigerator for up to a week. You can also freeze it for up to three months. When you’re ready to use it, let it come to room temperature or gently warm it in a microwave for about 15 seconds so it spreads easily. Making it ahead saves time on burger night and deepens the flavor.

What ground beef fat percentage is best for a gourmet burger?

I recommend 80/20 (80% lean, 20% fat) as the gold standard for a juicy, flavorful burger. The fat renders as the patty cooks, keeping it moist and adding richness that stands up to the brie and jam. Anything leaner (like 90/10) can produce a dry burger, especially when cooked to medium or above. If you can only find leaner beef, mix in a tablespoon of olive oil or finely chopped bacon to boost the fat content. Remember not to overwork the meat, and always season just before grilling for the best texture.

Can I grill this burger indoors?

Yes—use a cast-iron grill pan or a heavy skillet. Heat it over medium-high heat until it’s smoking hot (about 5 minutes). Cook the patties the same way as on an outdoor grill, 4–5 minutes per side. The key is to not crowd the pan; cook in batches if necessary. To get those beautiful grill marks, leave the patty untouched for the full first side. For melting the brie, cover the pan with a lid or a piece of foil for the last minute. An indoor grill will still deliver excellent results, even without the smoky charcoal flavor.

How do I toast brioche buns without burning them?

Brioche buns are rich and tend to burn quickly due to their sugar and butter content. I toast them cut-side down on a dry grill or skillet over medium heat for just 60–90 seconds. Watch closely: they should turn a light golden brown with a few darker spots. You can also brush the cut sides very lightly with melted butter or oil to encourage even browning. If using an oven, place them under the broiler for about a minute—keep an eye on them. Toast them right before assembling so they stay warm and crispy.

Is arugula necessary? What can I use instead?

Arugula adds a peppery, slightly bitter bite that cuts through the richness of the brie and bacon. But if you don’t have it, baby spinach or watercress are excellent substitutes. Spinach is milder, while watercress brings a similar peppery kick. You could also skip the greens entirely and use pickled red onions or sliced jalapeños for a tangy or spicy crunch. For a fresher take, try thinly sliced fennel or shaved cucumber. The goal is to add some freshness and a contrasting texture to the juicy burger.

How many calories are in one Brie and Bacon Burger?

One burger made with the listed ingredients comes to approximately 720 calories. That includes the beef, brioche bun, bacon, brie, and blueberry jam. The nutritional breakdown is roughly 42 grams of fat, 42 grams of protein, 38 grams of carbohydrates, and 18 grams of sugar. Of course, these numbers vary if you use substitutions (like turkey bacon or leaner beef). This burger is a treat—perfect for a weekend indulgence. Pair it with a side salad instead of fries to lighten the meal, or split the burger with someone for a smaller portion.

Share Your Version!

I’d love to see how this Brie and bacon burger turns out in your kitchen! Snap a photo before you dig in and tag me @exorecipes on Instagram or Pinterest. Leave a comment below with a star rating—tell me if you tried the Moroccan-spiced version or went all-in with the classic. Your feedback helps me tweak recipes for you.

From my NYC kitchen to yours — I hope this recipe brings as much warmth to your table as it does to mine. — mia 🧡

📌

Love This Recipe? Save It to Pinterest!

If you enjoyed this Brie and Bacon Burger with Blueberry Jam recipe, don’t let it get lost in your browser tabs! 😄 Pin it now so you can find it again anytime — and explore hundreds more tried-and-tested recipes waiting for you on my Pinterest boards.

👉 Follow mia on Pinterest @chefrecipes2

📌 Pin this recipe · 🔁 Re-pin your favorites · 💬 Tag me when you make it — I love seeing your creations!

Print

clock clock iconcutlery cutlery iconflag flag iconfolder folder iconinstagram instagram iconpinterest pinterest iconfacebook facebook iconprint print iconsquares squares iconheart heart iconheart solid heart solid icon

Brie and Bacon Burger with Blueberry Jam

  • Author: Chef Mia
  • Prep Time: 15 minutes
  • Cook Time: 10 minutes
  • Total Time: 25 minutes
  • Yield: 4 1x
  • Method: Main Course
  • Cuisine: American

Description

Burgers topped with creamy Brie, smoky bacon, and a sweet-tart blueberry jam for an irresistible flavor combination.


Ingredients

Scale
  • 1 1/2 pounds ground beef (80/20)
  • 4 brioche burger buns, split and toasted
  • 8 slices bacon, cooked until crispy
  • 8 ounces Brie cheese, sliced
  • 1/2 cup blueberry jam
  • 1/2 cup arugula
  • Salt and black pepper to taste

Instructions

  1. Preheat grill or grill pan to medium-high heat.
  2. Divide ground beef into 4 equal patties, season generously with salt and pepper.
  3. Grill patties for 4-5 minutes per side for medium, or to desired doneness.
  4. In the last minute of cooking, top each patty with Brie slices and cover to melt.
  5. Spread blueberry jam on the bottom half of each toasted bun.
  6. Place patty with melted Brie on the jam, then top with 2 slices of bacon and a handful of arugula.
  7. Close burger with top bun and serve immediately.

Notes

For extra flavor, mix a pinch of smoked paprika into the blueberry jam. You can also use turkey bacon for a lighter option.


Nutrition

  • Calories: 720
  • Sugar: 18 g
  • Fat: 42 g
  • Carbohydrates: 38 g
  • Protein: 42 g


Brie and Bacon Burger with Blueberry Jam

Bread Pudding with Vanilla Sauce: The Ultimate Comfort Dessert – A Custard-Soaked Classic Made Perfect

⚖️
Difficulty
Easy
⏲️
Prep Time
15 mins
🕒
Cook Time
50 mins
⏱️
Total Time
65 mins
🍽️
Servings
8

I still remember the first time I made a proper Bread Pudding with Vanilla Sauce — I was in my tiny Paris apartment, a few blocks from Le Cordon Bleu, feeling homesick for my mother’s kitchen in Morocco. She would make a similar dish with leftover khobz (Moroccan bread) and a drizzle of orange blossom syrup. That night in Paris, I swapped the syrup for a French-style crème anglaise and something clicked. This easy bread pudding recipe became my bridge between two worlds. Now, living in New York City, it’s the dessert I turn to when I need warmth, nostalgia, and something deeply satisfying. The combination of a perfectly baked custard-soaked bread with a rich, pourable vanilla sauce is pure comfort in a bowl.

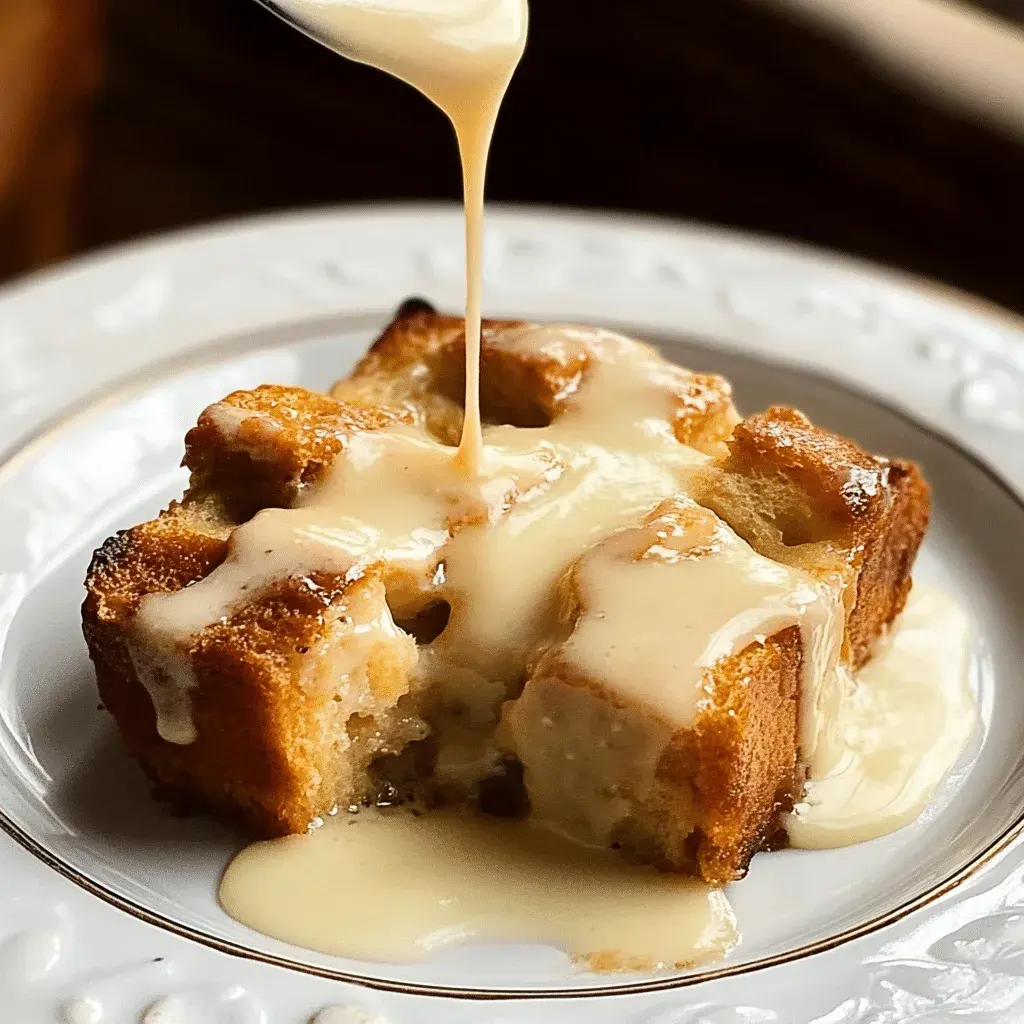
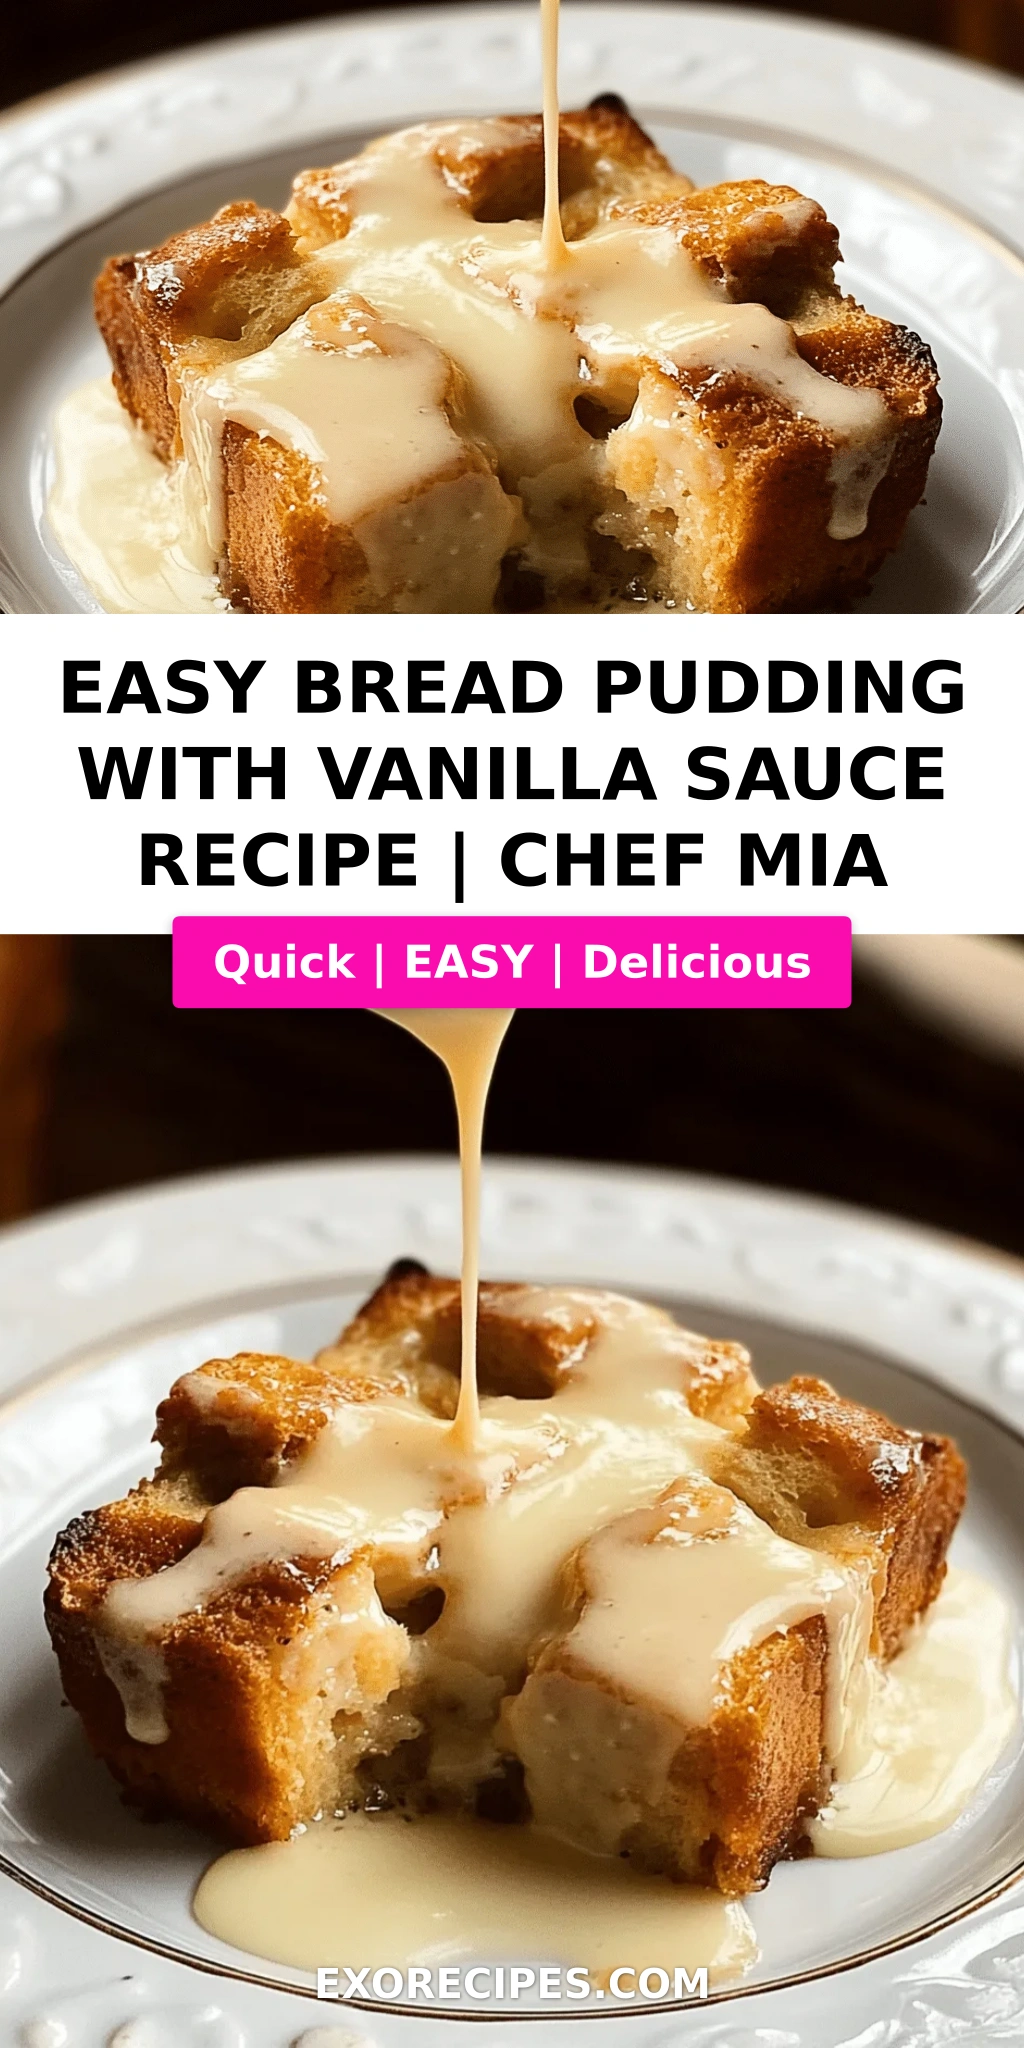
Imagine cutting into a golden square of bread pudding — the top is slightly crisp, almost caramelized, and beneath that lies a soft, tender custard that holds the bread together in the most beautiful way. Each bite carries the warmth of cinnamon and nutmeg, balanced by the sweetness of the custard and the deep vanilla notes of the sauce. The aroma fills your kitchen with the kind of scent that makes everyone wander in and ask, “What’s baking?” The texture is key: not too wet, not too dry — just a luscious, creamy crumb that feels like a hug on a cold day. That’s what this classic bread pudding dessert delivers every single time.

What sets this best bread pudding apart is the technique I developed over years of testing — a gentle custard pour, a 10-minute rest so every bread cube absorbs the liquid evenly, and a water-bath-free baking method that still gives you that silky custard texture. I also make a simple vanilla sauce from scratch that takes under 10 minutes and uses everyday ingredients. In this post, I’ll share my 💡 mia’s Pro Tip for avoiding soggy bread pudding (it’s all about the bread you choose), plus the one common mistake I see home cooks make with the custard ratio. Whether you’re new to baking or a seasoned home cook, this classic bread pudding dessert with homemade vanilla sauce will become your new go-to.

Why This Bread Pudding with Vanilla Sauce Recipe Is the Best

The Flavor Secret. I use a combination of whole milk and heavy cream for the custard — the milk keeps it light, while the cream adds the richness that makes this dessert feel indulgent without being heavy. The vanilla sauce is made with real butter, sugar, cream, and vanilla extract, simmered together until it thickens into a glossy, pourable sauce that soaks into the warm pudding. This isn’t just a topping — it’s the soul of the dish. My Moroccan grandmother taught me to layer flavors, and that’s exactly what happens here: the cinnamon and nutmeg warm from within, the custard cradles the bread, and the sauce ties it all together.

Perfected Texture. The trick to achieving that ideal custard texture — creamy, set, but still tender — is the ratio of eggs to liquid. I use three large eggs for two and a half cups of liquid (milk and cream combined), plus a gentle oven temperature of 350°F. That slow, even heat allows the custard to set without curdling or becoming rubbery. My Paris training taught me that patience with temperature control is what separates a good bread pudding from a great one. The result? A slice that holds its shape on the plate but practically melts in your mouth.

Foolproof & Fast. This easy bread pudding recipe requires no special equipment, no water bath, and no complicated techniques. The most advanced step is whisking — and you can do that by hand in under two minutes. The vanilla sauce comes together in one saucepan. From start to finish, you’re looking at just over an hour, and most of that is hands-off oven time. It’s the kind of recipe you can make on a Sunday afternoon or throw together for a weeknight dinner party. I’ve tested it with beginner bakers in my NYC cooking workshops, and every single one has nailed it on the first try.

Bread Pudding with Vanilla Sauce Ingredients

I shop for my bread at the farmer’s market in Union Square — a good brioche or challah from one of the artisan bakeries there works beautifully. In Morocco, my mother would use day-old khobz, which has a denser crumb but soaks up custard like a dream. For this recipe, you want a bread that’s sturdy enough to hold its shape but soft enough to absorb the custard without turning to mush. Here’s everything you’ll need for this best bread pudding recipe, plus the homemade vanilla sauce.

Ingredients List

  • 6 cups stale bread, cut into 1-inch cubes (brioche, challah, French bread, or day-old sourdough)
  • 2 cups whole milk
  • 1 cup heavy cream
  • 3 large eggs
  • 3/4 cup granulated sugar
  • 1/4 cup brown sugar, packed
  • 2 teaspoons vanilla extract
  • 1 teaspoon ground cinnamon
  • 1/2 teaspoon ground nutmeg
  • 1/4 teaspoon salt
  • 1/2 cup raisins (optional)
  • For the Vanilla Sauce:
    • 1/2 cup unsalted butter
    • 1 cup granulated sugar
    • 1/2 cup heavy cream
    • 2 teaspoons vanilla extract

Ingredient Spotlight

Bread. The bread is the backbone of this dish. Day-old or slightly stale bread is ideal because it absorbs the custard without disintegrating. Fresh bread can become too mushy. I prefer brioche or challah for their richness, but a good French bread or even sourdough works beautifully — sourdough adds a subtle tang that contrasts nicely with the sweet custard. In a pinch, you can use pre-cubed stuffing bread from the store, but look for a brand without too many added herbs.

Heavy Cream. The heavy cream in both the custard and the sauce provides the luxurious mouthfeel that makes this dessert feel special. If you need to lighten it, you can substitute half-and-half for the cream in the custard — but keep the cream in the sauce for the best texture. At my NYC cooking classes, I always tell students: don’t skimp on the cream for the sauce — it’s what gives it that silky, pourable consistency.

Eggs. Eggs are the thickening agent for the custard. Three large eggs provide the perfect structure for a 9×13-inch dish. If your eggs are extra-large, use 2 1/2; if they’re medium, use 4. The eggs should be at room temperature so they blend evenly into the milk mixture without scrambling. I always take my eggs out of the fridge 20 minutes before starting the recipe.

Original IngredientBest SubstitutionFlavor / Texture Impact
Brioche / ChallahDay-old French bread or sourdoughSlightly less rich, but still tender; sourdough adds a mild tang
Heavy Cream (custard)Half-and-half or whole milk (omit cream, use all milk)Less rich, slightly thinner custard; still creamy but lighter
Granulated SugarCoconut sugar or light muscovadoSlightly deeper, caramel-like sweetness; same texture
Vanilla ExtractVanilla bean paste or 1 whole vanilla bean (split and scraped)More intense vanilla flavor with visible specks; more aromatic
RaisinsDried cherries, chopped dried apricots, or omit entirelyCherries add tartness; apricots add a honey-like sweetness

How to Make Bread Pudding with Vanilla Sauce — Step-by-Step

Follow these steps and you’ll have a golden, custard-perfect Bread Pudding with Vanilla Sauce that tastes like it came from a cozy bakery. I’ve included my chef-tested cues so you know exactly what to look for at each stage.

Step 1: Prepare the Bread and Dish

Preheat your oven to 350°F (175°C). Grease a 9×13-inch baking dish with butter or non-stick spray. Cut your day-old bread into 1-inch cubes — you should have about 6 cups loosely packed. Spread the cubes evenly in the prepared dish. If using raisins, sprinkle them over the bread now so they distribute evenly as the custard soaks in.

💡 mia’s Pro Tip: If your bread isn’t stale enough, spread the cubes on a baking sheet and toast them at 300°F for 8–10 minutes. This dries them out just enough to absorb the custard without getting mushy.

Step 2: Make the Custard

In a large bowl, whisk together the whole milk, heavy cream, eggs, granulated sugar, brown sugar, vanilla extract, cinnamon, nutmeg, and salt. Whisk until the sugars are fully dissolved and the mixture is smooth and pale — about 30 seconds. The brown sugar should be completely incorporated with no clumps. This is your custard base, and it should smell fragrant with vanilla and warm spices.

⚠️ Common Mistake to Avoid: Don’t over-whisk the eggs — you’ll incorporate too much air, which can cause the custard to puff up in the oven and then collapse. Whisk just until the mixture is smooth.

Step 3: Assemble and Soak

Pour the custard mixture evenly over the bread cubes in the baking dish. Use a spatula to gently press down on the bread, ensuring every cube gets soaked. Let it sit at room temperature for 10 minutes — this resting time is crucial. The bread will absorb the liquid, becoming soft and heavy. If you skip this step, the top of your pudding may be dry while the bottom is too wet.

💡 mia’s Pro Tip: After the 10-minute rest, press down one more time with the spatula. You’ll see the custard rise up around the bread — that’s how you know it’s fully saturated.

Step 4: Bake to Golden Perfection

Place the dish in the preheated oven and bake for 45–50 minutes. The top should be golden brown and slightly puffed. To test for doneness, insert a knife into the center — it should come out clean or with just a few moist crumbs, not wet custard. The edges will be set and pulling slightly away from the dish. Let the pudding cool for 10 minutes on a wire rack before serving.

⚠️ Common Mistake to Avoid: If your top is browning too quickly (after 30 minutes), tent the dish loosely with foil for the remaining bake time. Every oven runs a little differently.

Step 5: Make the Vanilla Sauce

While the pudding bakes, make the homemade vanilla sauce. In a small saucepan over medium heat, melt the unsalted butter. Whisk in the sugar and heavy cream, then bring the mixture to a gentle boil — you’ll see small bubbles around the edges. Reduce the heat to low and simmer for 2–3 minutes, whisking constantly. The sauce will thicken slightly. Remove from heat and stir in the vanilla extract. The sauce will continue to thicken as it cools slightly.

💡 mia’s Pro Tip: For an extra-smooth sauce, strain it through a fine-mesh sieve before serving. This catches any sugar crystals that didn’t fully dissolve. Serve the sauce warm — it’s the perfect contrast to the warm pudding.

StepActionDurationKey Visual Cue
1Cut bread into 1-inch cubes; place in greased dish5 minutesBread cubes are uniform in size
2Whisk milk, cream, eggs, sugars, vanilla, spices, salt2 minutesSmooth, pale liquid with no sugar granules
3Pour custard over bread; press and rest10 minutes restBread cubes are saturated and heavy
4Bake at 350°F45–50 minutesGolden top; knife inserted comes out clean
5Make vanilla sauce (while pudding bakes)8 minutesSauce thickens and coats the back of a spoon
6Cool, drizzle with sauce, and serve10 minutesPudding is warm, sauce is pourable

Serving & Presentation

Serving this classic bread pudding dessert is my favorite part — it’s the moment all those warm, comforting aromas come together on the plate. I like to serve it in wide, shallow bowls so the vanilla sauce can pool around the edges. Use a large spoon or spatula to lift out a square, making sure to get a good amount of the caramelized top and the soft custard underneath. Drizzle generously with the warm vanilla sauce — let it cascade over the top and soak into the sides.

For garnishes, I keep it simple but thoughtful. A light dusting of powdered sugar adds a touch of elegance, and a few fresh berries — raspberries or sliced strawberries — add a bright, tart contrast to the rich custard. If I’m feeling nostalgic for my Paris days, I’ll add a dollop of lightly sweetened crème fraîche or whipped cream. In the colder months, a sprinkle of extra cinnamon or a drizzle of caramel sauce on top of the vanilla sauce makes it even more indulgent. This easy bread pudding recipe is also wonderful with a scoop of vanilla bean ice cream — the temperature contrast is divine.

In my NYC kitchen, I often serve this after a Sunday dinner with friends. It pairs beautifully with a cup of strong coffee or a glass of dessert wine. For a holiday table, you can dress it up with a few mint sprigs and a dusting of edible gold dust — but honestly, it’s just as perfect served straight from the dish with a spoon. That’s the beauty of this best bread pudding recipe: it’s fancy enough for company, but simple enough for a quiet night in.

Pairing TypeSuggestionsWhy It Works
Side DishFresh berries, citrus segments, or a light fruit compoteBright acidity cuts through the rich custard and sweet sauce
Sauce / DipWhipped cream, crème fraîche, caramel sauce, or extra vanilla sauceAdds creaminess and another layer of flavor
BeverageCoffee, espresso, black tea, or dessert wine like SauternesWarm beverages balance the sweetness; wine complements the vanilla
GarnishPowdered sugar, cinnamon dusting, fresh mint, or edible flowersAdds visual appeal and a light aromatic touch

Make-Ahead, Storage & Reheating

One of the things I love most about this classic bread pudding dessert is how well it works for meal prep and entertaining. As a busy NYC food blogger, I often make it a day ahead for dinner parties — the flavors actually deepen overnight. Here’s everything you need to know about storing, freezing, and reheating this easy bread pudding recipe so it tastes just as good as the day you baked it.

MethodContainerDurationReheating Tip
RefrigeratorCovered dish or airtight containerUp to 5 daysReheat in a 300°F oven for 10–12 minutes, or microwave individual portions for 45 seconds
FreezerWrap tightly in plastic wrap, then foil, or use a freezer-safe containerUp to 3 monthsThaw overnight in the fridge, then reheat at 300°F for 15 minutes covered, then 5 minutes uncovered
Make-AheadAssemble in the baking dish, cover, and refrigerateUp to 24 hours in advanceBake directly from the fridge — add 5–10 minutes to the bake time

For the best texture when reheating, I recommend using the oven rather than the microwave. The oven gently warms the pudding through without making the bread soggy or the custard rubbery. If you’re reheating the vanilla sauce, do it on the stovetop over low heat, whisking constantly. Add a splash of milk or cream if it’s too thick. The sauce can also be stored in the fridge for up to a week — just reheat it gently before serving.

One more thing: if you’re making this best bread pudding recipe ahead for a party, I suggest baking it fully, then reheating just before serving. The texture is more consistent than if you bake it from a cold start. And always — always — make extra vanilla sauce. People will want more.

Variations & Easy Swaps

This classic bread pudding dessert is wonderfully adaptable. Over the years, I’ve played with countless variations — some inspired by my Moroccan roots, others by seasonal finds at the Union Square farmer’s market. Here are three of my favorite ways to change it up, along with a quick-reference table so you can customize with confidence.

VariationKey ChangeBest ForDifficulty Impact
Moroccan-Spiced Bread PuddingAdd 1 tsp ras el hanout and 1/2 tsp cardamom; swap raisins for chopped datesA unique, aromatic twist with warm North African flavorsEasy — no extra steps, just add spices
Chocolate Lover’s Bread PuddingFold 1/2 cup dark chocolate chips into the bread; add 2 tbsp cocoa powder to the custardAn indulgent, rich dessert for chocolate fansEasy — just mix in chocolate ingredients
Apple-Cinnamon Bread PuddingLayer 2 cups of thinly sliced apples (tossed with 1 tbsp sugar and 1/2 tsp cinnamon) between the bread cubesA fall-inspired version with tender, spiced fruitEasy — requires one extra layer

Moroccan-Spiced Bread Pudding

This variation is close to my heart — it takes me back to my mother’s kitchen in Marrakech, where warm spices like ras el hanout and cardamom were staples. Simply add 1 teaspoon of ras el hanout and 1/2 teaspoon of ground cardamom to the custard mixture along with the cinnamon and nutmeg. Replace the raisins with 1/2 cup of chopped Medjool dates. The result is a bread pudding with an exotic, floral warmth that pairs beautifully with the vanilla sauce. I love serving this version with a dollop of labneh or Greek yogurt for a tangy contrast.

Chocolate Lover’s Bread Pudding

For a truly indulgent treat, fold 1/2 cup of dark chocolate chips (or roughly chopped dark chocolate) into the bread cubes before pouring the custard. Add 2 tablespoons of unsweetened cocoa powder to the custard mixture, whisking it in with the other dry ingredients. The chocolate melts into the custard as it bakes, creating pockets of rich, gooey chocolate throughout the pudding. Use a good-quality chocolate with 60–70% cacao for the best flavor. This variation is a hit with kids and adults alike — and it still works beautifully with the vanilla sauce, though you can also serve it with a dusting of powdered sugar or a scoop of ice cream.

Apple-Cinnamon Bread Pudding

When fall arrives in New York City, I head to the Union Square greenmarket for Honeycrisp or Granny Smith apples. Thinly slice 2 medium apples and toss them with 1 tablespoon of sugar and 1/2 teaspoon of cinnamon. Layer half of the bread cubes in the dish, then add the apples in an even layer, then top with the remaining bread. Pour the custard over everything and proceed as directed. The apples soften during baking, adding tender, juicy pockets of fruit that contrast with the custard-soaked bread. This version is wonderful with a caramel drizzle instead of — or in addition to — the vanilla sauce.

Share Your Version!

Now it’s your turn to bring this Bread Pudding with Vanilla Sauce into your kitchen. I hope this recipe becomes as beloved in your home as it is in mine — whether you’re making it for a quiet weeknight dessert, a holiday gathering, or just because you need a little comfort. I’d love to hear how it turns out for you. Drop a star rating and a comment below to let me know — did you try one of the variations? Did you add your own twist? Your feedback helps other home cooks discover the best version of this classic bread pudding dessert.

And if you share a photo on Pinterest or Instagram, tag me at @exorecipes — I absolutely love seeing your creations. It’s the next best thing to sharing a slice with you in person. If you have any questions about the recipe, the substitutions, or the technique, just leave a note in the comments. I read every single one and I’m always here to help.

From my NYC kitchen to yours — I hope this recipe brings as much warmth to your table as it does to mine. — mia 🧡

📌

Love This Recipe? Save It to Pinterest!

If you enjoyed this Bread Pudding with Vanilla Sauce recipe, don’t let it get lost in your browser tabs! 😄 Pin it now so you can find it again anytime — and explore hundreds more tried-and-tested recipes waiting for you on my Pinterest boards.

👉 Follow mia on Pinterest @exorecipe

📌 Pin this recipe · 🔁 Re-pin your favorites · 💬 Tag me when you make it — I love seeing your creations!

What is the best type of bread to use for bread pudding to avoid it getting too soggy?

The best breads for bread pudding are day-old or slightly stale breads with a sturdy crumb that can absorb the custard without breaking down. My top picks are brioche, challah, French bread, and sourdough. Brioche and challah add richness because they’re made with eggs and butter, while French bread and sourdough offer a firmer texture that holds up well. The key is to use bread that’s at least a day old — fresh bread tends to turn mushy. If your bread is fresh, cut it into cubes and toast them at 300°F for 8–10 minutes to dry them out. Avoid overly soft sandwich bread, which can disintegrate into the custard and leave you with a gummy texture.

Can I make bread pudding with vanilla sauce ahead of time and reheat it?

Absolutely — this is one of the reasons I love this easy bread pudding recipe for entertaining. You can fully bake the bread pudding, let it cool, cover it tightly, and refrigerate for up to 5 days. To reheat, place it in a 300°F oven for 10–12 minutes, or microwave individual portions for 45 seconds. The vanilla sauce can be made ahead and stored in the fridge for up to a week — reheat it gently on the stovetop with a splash of milk or cream to restore its pourable consistency. I often make the pudding and sauce a day ahead for dinner parties, and it tastes even better as the flavors meld overnight.

What can I substitute for eggs in bread pudding if I want a custard without eggs?

If you need an egg-free custard, you have a few good options. The most reliable substitute is cornstarch: whisk 3 tablespoons of cornstarch with 1/4 cup of the milk until smooth, then add it to the remaining milk and cream mixture. This mimics the thickening power of the eggs. Another option is to use 1/2 cup of unsweetened applesauce for every 3 eggs — it adds moisture and a subtle sweetness, though the texture will be slightly denser. For a vegan version, I’ve had success using 1/4 cup of silken tofu blended until smooth, plus 1 tablespoon of flaxseed meal mixed with 3 tablespoons of water (let it sit for 5 minutes to gel). The texture will be a bit more tender and less firm, but still delicious.

How do I make a simple vanilla sauce from scratch without heavy cream?

You can make a delicious vanilla sauce without heavy cream by using a combination of butter, milk, and a thickening agent. In a small saucepan, melt 1/2 cup of unsalted butter over medium heat. Whisk in 1 cup of granulated sugar and 2/3 cup of whole milk (instead of cream). Bring to a gentle boil, then reduce the heat and simmer for 3–4 minutes, whisking constantly. In a small bowl, mix 2 teaspoons of cornstarch with 1 tablespoon of cold water to make a slurry, then whisk it into the sauce. Cook for another minute until it thickens slightly. Remove from heat and stir in 2 teaspoons of vanilla extract. The sauce will be a bit lighter than the cream version but still rich and flavorful.

Can I use gluten-free bread for this bread pudding recipe?

Yes, you can use gluten-free bread, and I’ve tested it with several varieties. The key is to choose a gluten-free bread that’s sturdy and has a neutral flavor — something like a gluten-free French loaf or artisan-style bread works better than soft sandwich-style gluten-free bread. Because gluten-free bread tends to be drier and more fragile, you may need to reduce the resting time after pouring the custard to about 5 minutes instead of 10. Also, consider adding an extra egg to help the custard set more firmly. I recommend against using very seedy gluten-free breads, as the seeds can make the texture gritty. Otherwise, the recipe works beautifully — just handle the baked pudding gently when serving, as it may be slightly more delicate than the traditional version.

How do I know when my bread pudding is fully baked?

The best way to test for doneness is to insert a knife or a toothpick into the center of the pudding — it should come out clean or with just a few moist crumbs clinging to it, not wet custard. The top should be golden brown and slightly puffed, and the edges will be set and pulling away from the sides of the dish. If you gently shake the dish, the center should jiggle just slightly — like a cheesecake — but not slosh. Bake at 350°F for 45–50 minutes, and check at the 40-minute mark if your oven runs hot. Remember that the pudding will continue to set as it cools, so don’t overbake it. A perfectly baked bread pudding is golden, fragrant, and firm yet tender when you cut into it.

Can I add liquor or bourbon to the vanilla sauce?

Absolutely — adding a splash of liquor to the vanilla sauce elevates this classic bread pudding dessert into something truly special. I love adding 2 tablespoons of bourbon or dark rum to the sauce after removing it from the heat (stir it in with the vanilla extract). The warmth of the alcohol complements the vanilla and the spices beautifully. For a more sophisticated flavor, try adding 2 tablespoons of Grand Marnier or brandy. If you’re serving this to kids or prefer an alcohol-free version, you can use 1/2 teaspoon of rum extract or bourbon vanilla extract instead. Just keep in mind that if you add alcohol, you don’t need to cook it off — the residual heat from the sauce will warm it through without evaporating all the flavor.

What should I do if my bread pudding is too dry after baking?

A dry bread pudding usually means the bread-to-custard ratio was off or the pudding was overbaked. To fix it, try making an extra batch of the vanilla sauce and pouring a generous amount over the warm pudding — let it sit for 5–10 minutes so the sauce can soak in. For future bakes, make sure you’re using the full 6 cups of bread cubes and the full amount of custard liquid, and that you’re pressing the bread down firmly after the 10-minute rest so it absorbs everything evenly. You can also add an extra 1/4 cup of milk to the custard if your bread seems particularly dry. If the top is browning too quickly before the center is set, tent the dish with foil for the last 15–20 minutes of baking. And always check for doneness at the 45-minute mark — every oven is different.

Can I make this recipe dairy-free or vegan?

Yes, this classic bread pudding dessert can be adapted to be dairy-free or vegan with a few thoughtful swaps. For a dairy-free version, substitute the whole milk with unsweetened oat milk or almond milk, and replace the heavy cream with full-fat coconut cream or a dairy-free cream alternative. Use a plant-based butter in the sauce. For a fully vegan version, replace the 3 eggs with 3 tablespoons of flaxseed meal mixed with 9 tablespoons of water (let it sit for 5 minutes to gel), or use 1/2 cup of silken tofu blended smooth. The texture will be slightly denser and more tender, but still delicious. Use a good-quality vegan butter and coconut cream for the vanilla sauce. I’ve tested this with oat milk and flax eggs and it works beautifully — just be sure to let the pudding rest for the full 10 minutes so the flax can thicken properly.

Why did my vanilla sauce turn out too thin or too thick?

The consistency of the vanilla sauce depends on how long you simmer it and the ratio of ingredients. If your sauce is too thin, return it to the stove and simmer for another 2–3 minutes, whisking constantly — the longer it simmers, the more water evaporates and the thicker it gets. You can also make a cornstarch slurry (1 teaspoon cornstarch mixed with 1 tablespoon cold water) and whisk it in. If the sauce is too thick, simply whisk in a splash of milk or cream until it reaches your desired consistency. The sauce will also thicken as it cools, so it’s better to remove it from the heat when it’s still slightly thinner than your ideal texture. Store the sauce in the fridge and reheat gently, adding a little milk if needed to restore the pourable consistency.

Print

clock clock iconcutlery cutlery iconflag flag iconfolder folder iconinstagram instagram iconpinterest pinterest iconfacebook facebook iconprint print iconsquares squares iconheart heart iconheart solid heart solid icon

Bread Pudding with Vanilla Sauce: The Ultimate Comfort Dessert

  • Author: Chef Mia
  • Prep Time: 15 minutes
  • Cook Time: 50 minutes
  • Total Time: 1 hour 5 minutes
  • Yield: 8 1x
  • Method: Dessert
  • Cuisine: American

Description

This classic bread pudding is made with soft, custard-soaked bread, baked to golden perfection, and drizzled with a rich vanilla sauce. A comforting dessert that’s easy to make and loved by all.


Ingredients

Scale
  • 6 cups stale bread, cut into 1-inch cubes
  • 2 cups whole milk
  • 1 cup heavy cream
  • 3 large eggs
  • 3/4 cup granulated sugar
  • 1/4 cup brown sugar, packed
  • 2 teaspoons vanilla extract
  • 1 teaspoon ground cinnamon
  • 1/2 teaspoon ground nutmeg
  • 1/4 teaspoon salt
  • 1/2 cup raisins (optional)
  • For the Vanilla Sauce:
  • 1/2 cup unsalted butter
  • 1 cup granulated sugar
  • 1/2 cup heavy cream
  • 2 teaspoons vanilla extract

Instructions

  1. Preheat oven to 350°F (175°C). Grease a 9×13-inch baking dish.
  2. Place bread cubes in the prepared baking dish. Sprinkle raisins evenly over the bread if using.
  3. In a large bowl, whisk together milk, heavy cream, eggs, granulated sugar, brown sugar, vanilla extract, cinnamon, nutmeg, and salt until well combined.
  4. Pour the custard mixture evenly over the bread cubes. Press down lightly with a spatula to ensure all bread is soaked. Let sit for 10 minutes.
  5. Bake for 45-50 minutes, or until the top is golden brown and the custard is set. A knife inserted into the center should come out clean.
  6. While the pudding bakes, make the vanilla sauce: In a small saucepan over medium heat, melt the butter. Stir in sugar and heavy cream, then bring to a gentle boil. Reduce heat and simmer for 2-3 minutes, stirring constantly. Remove from heat and stir in vanilla extract.
  7. Let the bread pudding cool for 10 minutes before serving. Drizzle with warm vanilla sauce and serve.

Notes

For best results, use day-old or slightly stale bread. You can substitute half-and-half for the heavy cream if desired. The vanilla sauce can be made ahead and reheated gently.


Nutrition

  • Calories: 420
  • Sugar: 38g
  • Fat: 19g
  • Carbohydrates: 58g
  • Protein: 8g


Bread Pudding with Vanilla Sauce: The Ultimate Comfort Dessert

k">

Tried This Recipe? Leave a Comment!

Did you make this recipe? I’d love to hear how it turned out! Please leave a comment and a rating below. Your feedback helps other home cooks and supports cheerychop.com!

For more delicious inspiration, follow me on Pinterest!
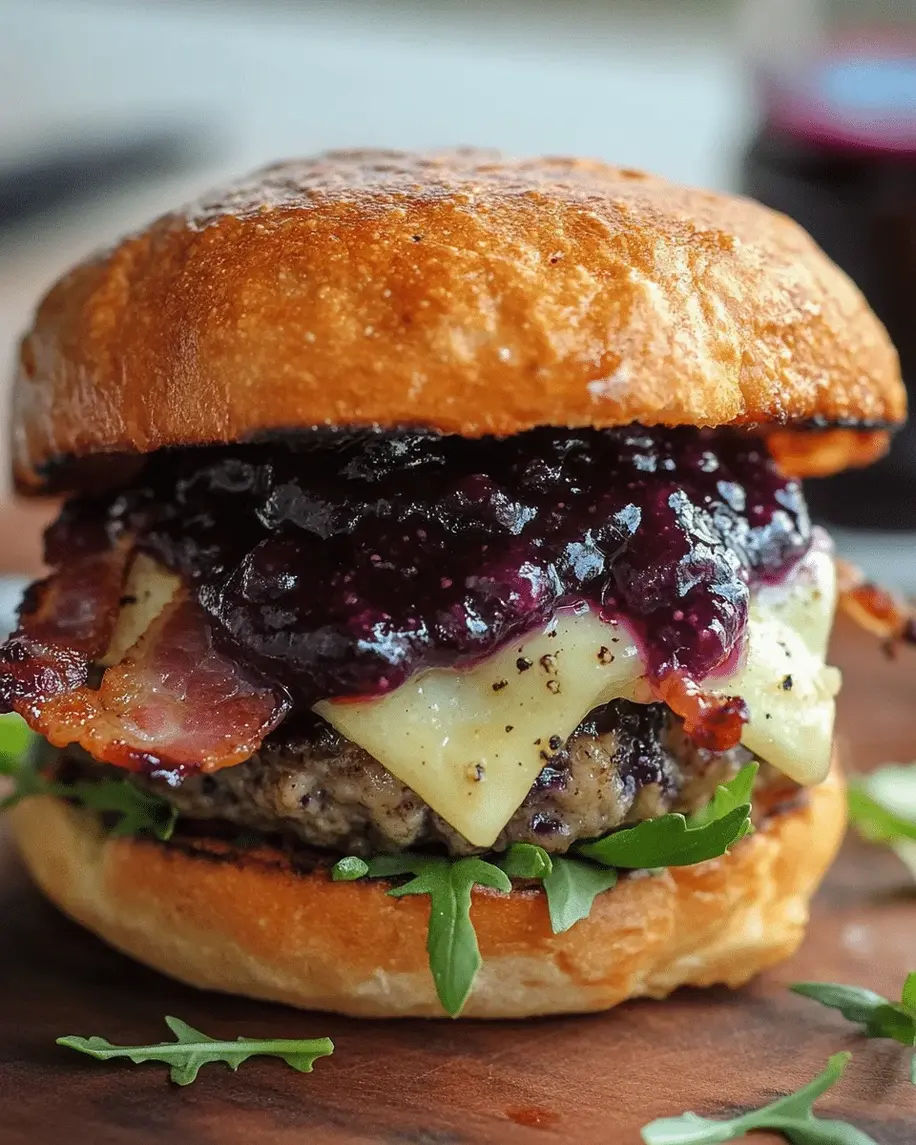
“`html

Brazilian Creamy Coconut Chicken That Feels Like Pure Comfort – A One-Pot Wonder You’ll Make on Repeat

⚖️
Difficulty
Easy
⏲️
Prep Time
15 mins
🕒
Cook Time
30 mins
⏱️
Total Time
45 mins
🍽️
Servings
4

Growing up in Morocco, my mother’s kitchen was a symphony of slow-simmered tagines and fragrant spice blends. But it wasn’t until I trained at Le Cordon Bleu in Paris that I truly understood how a simple sauce — when built with patience and purpose — could transform humble ingredients into something deeply soulful. This Brazilian creamy coconut chicken is exactly that kind of dish: a one-pot wonder that feels like a warm hug in a bowl. This Brazilian coconut chicken recipe is my love letter to bold, comforting food that doesn’t require hours of fuss.

Picture tender pieces of chicken simmering in a velvety coconut milk sauce, kissed with smoked paprika and a hint of cayenne. The crushed tomatoes add a gentle tang that balances the richness, while fresh cilantro and a squeeze of lime brighten every spoonful. The aroma alone — sweet coconut, warm cumin, and garlic blooming in olive oil — will have everyone wandering into the kitchen asking, “What’s for dinner?” It’s the kind of creamy coconut chicken that makes you close your eyes on the first bite.

What I love most about this Brazilian chicken stew is how effortlessly it comes together. In my NYC kitchen, where time is always precious, this recipe has become my go-to for busy weeknights and lazy Sundays alike. My version layers a French-trained understanding of sauce-building with the bold, pantry-friendly spirit of Brazilian home cooking. I’m going to share my favorite pro tip for getting the silkiest texture — plus one common mistake that can make your sauce separate. Trust me, once you make this easy comfort chicken recipe, it will earn a permanent spot in your dinner rotation.

Why This Brazilian Creamy Coconut Chicken Recipe Is the Best

The Flavor Secret: The magic lies in building the sauce in layers. I start by browning the chicken until it’s deeply golden — that caramelized crust adds a savory depth that no amount of seasoning can replicate. Then I bloom the smoked paprika and cumin in the pan juices before adding the liquids. This technique, which I learned in Paris, wakes up the spices and makes their flavors bloom. The result is a creamy coconut chicken that tastes like it simmered all day, even though it’s ready in under an hour.

Perfected Texture: The key to a luscious, non-separating coconut sauce is using full-fat coconut milk and simmering gently — never boiling. I also add the cilantro and lime juice off the heat so their brightness stays vibrant. This Brazilian chicken stew has a sauce that coats the back of a spoon like velvet, with tender chicken that practically melts in your mouth.

Foolproof & Fast: Even if you’re new to cooking, this recipe is forgiving. Everything happens in one pot, the ingredient list is straightforward, and the steps are simple. Whether you use chicken breasts or thighs, this coconut milk chicken recipe turns out juicy and flavorful every time. It’s the kind of easy comfort chicken recipe that builds confidence in the kitchen.

Brazilian Coconut Chicken Recipe Ingredients

I picked up the bell peppers and cilantro at the Union Square Greenmarket this morning, and the smell of fresh limes instantly took me back to the spice souks of Marrakech. For this creamy coconut chicken, every ingredient plays a role — here’s what you’ll need and why each one matters.

Ingredients List

  • 1 ½ pounds boneless, skinless chicken breasts or thighs, cut into bite-sized pieces
  • Salt and black pepper to taste
  • 2 tablespoons olive oil
  • 1 large onion, chopped
  • 4 cloves garlic, minced
  • 1 red bell pepper, chopped
  • 1 can (14 oz) crushed tomatoes
  • 1 can (14 oz) coconut milk (full-fat for best creaminess)
  • 1 teaspoon smoked paprika
  • 1 teaspoon ground cumin
  • ½ teaspoon cayenne pepper (optional, for heat)
  • ½ cup chopped fresh cilantro
  • Juice of 1 lime
  • Cooked white rice or quinoa, for serving

Ingredient Spotlight

Coconut Milk: Full-fat coconut milk is non-negotiable for the creamiest texture. The fat content emulsifies with the tomatoes to create a luscious, velvety sauce. Light coconut milk will work in a pinch, but the sauce will be thinner and less luxurious. Look for brands without added guar gum if you can — I love Chaokoh or Aroy-D for their pure, rich flavor.

Smoked Paprika: This is the spice that gives the dish its warm, almost bacony depth. It’s different from regular paprika — the smoking process adds a layer of complexity that makes the Brazilian coconut chicken recipe feel deeply comforting. I buy mine from a spice shop in Chelsea Market, but any good-quality smoked paprika from the grocery store works beautifully.

Chicken: Boneless, skinless thighs yield the juiciest, most forgiving result — they stay tender even if you simmer them a few minutes longer. Breasts work well too; just keep an eye on the cook time so they don’t dry out. Either way, cutting the chicken into uniform bite-sized pieces ensures even cooking in this creamy coconut chicken.

Original IngredientBest SubstitutionFlavor / Texture Impact
Coconut milk (full-fat)Light coconut milk + 2 tbsp cashew creamSlightly thinner, still creamy, less coconut flavor
Smoked paprika1 tsp sweet paprika + ½ tsp liquid smokeSimilar depth, slightly different smoky note
Chicken thighsChicken breasts (reduce simmer to 12-15 mins)Leaner, less rich, can dry out if overcooked
Crushed tomatoes1½ cups diced fresh tomatoes + 1 tbsp tomato pasteBrighter, slightly chunkier sauce

How to Make Brazilian Creamy Coconut Chicken — Step-by-Step

Trust me — this comes together faster than you think. Follow these steps and you’ll have a pot of pure comfort ready in 45 minutes.

Step 1: Season and Brown the Chicken

Season the chicken pieces generously with salt and black pepper. Heat the olive oil in a large skillet or Dutch oven over medium-high heat. Add the chicken in a single layer — work in batches if needed — and cook until golden brown on all sides, about 5-7 minutes. Remove the chicken from the pan and set it aside on a plate.

💡 mia’s Pro Tip: Don’t crowd the pan! If you add too much chicken at once, it will steam instead of brown. That golden crust is pure flavor — take the time to get it right.

Step 2: Sauté the Aromatics

In the same pan (with all those beautiful browned bits), add the onion and cook for 2-3 minutes until softened. Add the garlic and red bell pepper, cooking for another 2 minutes until fragrant. The smell alone will tell you you’re on the right track.

⚠️ Common Mistake to Avoid: Scraping the pan too clean. Those browned bits are pure umami — let them loosen naturally as you stir the onions. A wooden spoon is your best friend here.

Step 3: Build the Sauce

Pour in the crushed tomatoes and coconut milk. Stir in the smoked paprika, cumin, and cayenne pepper (if using). Bring the sauce to a gentle simmer — you should see small bubbles around the edges, not a rolling boil.

💡 mia’s Pro Tip: Bloom the spices in the pan for about 30 seconds before adding the liquids. This wakes up their essential oils and makes the sauce exponentially more flavorful. A trick straight from my Paris training.

Step 4: Simmer to Perfection

Return the chicken to the pan, nestling it into the sauce. Reduce the heat to low, cover, and let simmer for 15-20 minutes, stirring occasionally, until the chicken is cooked through and the sauce has thickened to your liking. The sauce should coat the back of a spoon.

⚠️ Common Mistake to Avoid: Simmering too high. High heat can cause the coconut milk to separate and curdle. Keep it low and gentle — patience rewards you with a silky, emulsified sauce.

Step 5: Finish and Serve

Remove from heat and stir in the fresh cilantro and lime juice. This off-heat addition keeps the herbs bright and the citrus zesty. Serve immediately over cooked white rice or quinoa to soak up every last drop of that glorious sauce.

StepActionDurationKey Visual Cue
1Season & brown chicken5-7 minsDeep golden crust on all sides
2Sauté aromatics4-5 minsOnion translucent, garlic fragrant
3Build the sauce3 minsSpices bloomed, sauce gently simmering
4Simmer chicken15-20 minsSauce thickened, chicken tender
5Finish & serve2 minsCilantro stirred in, lime juiced

Serving & Presentation

I love serving this Brazilian creamy coconut chicken over a bed of fluffy jasmine rice — the grains soak up the sauce like tiny sponges, and every forkful is pure bliss. For a lighter option, try it with quinoa or even cauliflower rice. A side of sautéed greens, like collard greens or spinach with garlic, adds a nice peppery contrast that cuts through the richness beautifully.

When I’m feeling nostalgic for Morocco, I’ll sprinkle a handful of toasted slivered almonds and a few extra cilantro leaves on top — it’s a touch my mother always added to her tagines. A lime wedge on the side lets everyone adjust the brightness to their taste. This is the kind of dish that feels special enough for company but is easy enough for a Tuesday night in your NYC apartment.

Pairing TypeSuggestionsWhy It Works
Side DishJasmine rice, quinoa, farro, or crusty breadAbsorbs the creamy sauce perfectly
VegetableSautéed collard greens, roasted broccoli, or green beansAdds freshness and a slight bitterness to balance richness
BeverageCrisp Sauvignon Blanc, light lager, or coconut water with limeAcidity and fizz cut through the creamy coconut
GarnishFresh cilantro, toasted coconut flakes, lime wedges, chili flakesAdds texture, brightness, and visual appeal

Make-Ahead, Storage & Reheating

I’m a big fan of meal prep — especially in my busy NYC life. This Brazilian chicken stew is one of those recipes that tastes even better the next day, after the flavors have had time to meld. I often make a double batch on Sunday and enjoy it for lunches throughout the week.

MethodContainerDurationReheating Tip
RefrigeratorAirtight glass containerUp to 3 daysReheat gently on stovetop over medium-low, adding a splash of water or coconut milk if needed
FreezerFreezer-safe zip-top bag or containerUp to 2 monthsThaw overnight in fridge, then reheat gently. Do not microwave on high — it can break the sauce
Make-AheadCook fully, cool, and refrigerateUp to 2 days in advanceAdd fresh cilantro and lime after reheating for brightest flavor

A note from experience: when reheating, avoid the microwave if you can — it tends to heat unevenly and can make the coconut sauce separate. Instead, reheat in a skillet over medium-low heat, stirring occasionally. If the sauce has thickened too much in the fridge, add a tablespoon of water or coconut milk to bring it back to life. And always add a fresh squeeze of lime at the end — it wakes up the flavors like nothing else.

Variations & Easy Swaps

VariationKey ChangeBest ForDifficulty Impact
Moroccan Spiced VersionAdd 1 tsp ras el hanout, ½ tsp turmeric, swap cilantro for parsleyNorth African flavor loversEasy
Dairy-Free / Gluten-FreeNaturally both — no changes neededDietary restrictionsNo change
Spicy Brazilian Coconut ChickenAdd 1-2 chopped bird’s eye chilies or 1 tsp chili pasteHeat seekersEasy

Moroccan Spiced Version

Growing up in Morocco, ras el hanout was the backbone of so many dishes. To give this Brazilian coconut chicken recipe a North African twist, I add a teaspoon of ras el hanout and a pinch of turmeric along with the smoked paprika. The floral, aromatic notes of the ras el hanout — with hints of cinnamon, coriander, and cardamom — pair beautifully with the creamy coconut. Finish with fresh parsley instead of cilantro, and you’ll have a dish that bridges two continents in the most delicious way.

Dairy-Free / Gluten-Free — Naturally!

One of the best things about this creamy coconut chicken recipe is that it’s naturally free of both dairy and gluten. The coconut milk provides all the richness you need without a drop of cream, and there’s no flour or wheat anywhere in the ingredient list. It’s a wonderful option for anyone with dietary restrictions — and you’d never guess it’s “free” of anything because it tastes so indulgent.

Spicy Brazilian Coconut Chicken

If you like heat, this variation is for you. I learned to love spice from my father, who would add fresh chilies to everything. For this version, I add one or two finely chopped bird’s eye chilies (or a teaspoon of sambal oelek) along with the garlic. The cayenne pepper already brings a gentle warmth, but the fresh chilies take it to another level. It’s the kind of heat that builds slowly and makes you reach for another spoonful.

Share Your Version!

I hope this Brazilian creamy coconut chicken brings as much comfort to your table as it does to mine. There’s something truly magical about a one-pot meal that fills your home with incredible aromas and leaves everyone at the table smiling. If you make it, I’d love to hear how it turned out — drop a star rating and a comment below, or tag me in your photos on Pinterest or Instagram.

What’s your favorite way to make this creamy coconut chicken your own? Did you try the Moroccan spice twist or go for extra heat? Let me know in the comments — I read every single one and love hearing about your kitchen adventures. From my NYC kitchen to yours — I hope this recipe brings as much warmth to your table as it does to mine. — mia 🧡

What is the secret to making Brazilian creamy coconut chicken extra tender?

The secret lies in two things: choosing the right cut of chicken and not overcooking it. Boneless, skinless chicken thighs are naturally more forgiving and stay juicy because they have a higher fat content. If you use breasts, keep a close eye on the simmer time — 15 minutes is usually plenty. The second secret is browning the chicken well before simmering. That caramelized crust locks in moisture and adds a deep savory flavor that makes the whole dish taste richer. Finally, always let the chicken rest in the sauce off the heat for a few minutes before serving — this allows the juices to redistribute throughout the meat.

Can I substitute coconut milk with something else in this Brazilian chicken recipe?

Coconut milk is the heart of this Brazilian chicken stew, but if you absolutely need a substitute, you can use full-fat coconut cream mixed with water (about ¾ cup cream + ¼ cup water) for a richer result. For a non-coconut option, try heavy cream mixed with a splash of chicken broth — though the flavor profile will shift significantly. Keep in mind that nothing quite replicates the unique sweetness and body of coconut milk. If you’re simply out of coconut milk, a can of unsweetened coconut cream blended with a little water works beautifully and actually gives an even creamier texture.

How long should I cook Brazilian creamy coconut chicken for the best flavor?

For the best flavor, simmer the chicken in the sauce for 15 to 20 minutes once it’s returned to the pan. This is enough time for the chicken to cook through and for the flavors of the smoked paprika, cumin, garlic, and coconut milk to meld together beautifully. If you have a bit more time, you can let it simmer uncovered for the last 5 minutes to thicken the sauce slightly. However, don’t simmer for more than 25 minutes total — the chicken can start to dry out, and the coconut milk may begin to separate if heated too long. The sweet spot is a gentle 18-minute simmer covered, then 2 minutes uncovered at the end.

What side dishes pair well with Brazilian coconut chicken for a complete meal?

This creamy coconut chicken pairs beautifully with so many sides. White rice is the classic choice — especially jasmine or basmati, which soak up the sauce perfectly. Quinoa or farro are excellent whole-grain alternatives. For vegetables, I love sautéed collard greens with garlic, roasted broccoli, or a simple green salad with lime vinaigrette. The slight bitterness of greens balances the richness of the coconut sauce. Black beans or black-eyed peas also make a wonderful side, adding protein and fiber. For a truly Brazilian-inspired meal, serve with farofa (toasted cassava flour) or simple steamed plantains. And don’t forget extra lime wedges!

Can I make this creamy coconut chicken recipe in a slow cooker?

Yes, you can adapt this Brazilian chicken stew for a slow cooker, but with a few adjustments. First, always brown the chicken and sauté the aromatics on the stovetop before adding them to the slow cooker — this step is non-negotiable for deep flavor. Then transfer everything to the slow cooker and cook on low for 4-5 hours or on high for 2-3 hours. Add the cilantro and lime juice just before serving. Note that the sauce may be thinner than the stovetop version; you can thicken it by removing the lid for the last 30 minutes of cooking or by stirring in a cornstarch slurry.

Is this Brazilian coconut chicken recipe spicy? Can I make it mild?

This recipe is mildly warm thanks to the smoked paprika and optional cayenne pepper, but it’s not overwhelmingly spicy. The coconut milk and crushed tomatoes mellow out the heat significantly. To make it completely mild, simply omit the cayenne pepper and use sweet paprika instead of smoked paprika. The dish will still be wonderfully flavorful and comforting — just without any heat. For those who want more spice, you can add fresh chilies, chili flakes, or a dash of hot sauce at the end. I love having this flexibility so everyone at the table can enjoy it their way.

What’s the best way to store and reheat leftovers of this Brazilian chicken stew?

Leftovers of this creamy coconut chicken store beautifully. Let the stew cool completely, then transfer it to an airtight container and refrigerate for up to 3 days. For longer storage, freeze it in a freezer-safe bag or container for up to 2 months. The best way to reheat is on the stovetop over medium-low heat, stirring occasionally. Add a splash of water or coconut milk if the sauce has thickened too much. Avoid microwaving on high power — it can cause the coconut milk to separate. Always add a fresh squeeze of lime juice after reheating to bring back the brightness.

Can I use frozen chicken for this easy comfort chicken recipe?

I recommend thawing the chicken completely before cooking for the best texture and even browning. If you cook frozen chicken directly, it will release too much water and steam instead of browning, which means you’ll lose that golden crust that adds so much flavor. To safely thaw, place the chicken in the refrigerator overnight, or use the cold water method (sealed bag submerged in cold water, changing the water every 30 minutes). Once thawed, pat the chicken dry with paper towels before seasoning and browning — this is a crucial step for getting that beautiful sear.

What can I use instead of cilantro in this coconut milk chicken recipe?

If you’re not a fan of cilantro (and I know that’s a real thing for some people — it’s genetic!), you have several great options. Fresh parsley is the best substitute — flat-leaf Italian parsley works wonderfully and adds a similar fresh, green note. Fresh basil, especially Thai basil, also pairs beautifully with coconut and lime. For a different but delicious twist, try fresh mint — it sounds unexpected, but it works surprisingly well with the smoky, creamy flavors. Start with half the amount and adjust to your taste. The key is to add the herb off the heat to preserve its freshness.

How can I make this Brazilian chicken recipe dairy-free and still creamy?

The great news is that this recipe is naturally dairy-free! The creaminess comes entirely from full-fat coconut milk, so there’s no need for any dairy substitutes. To keep it dairy-free, simply avoid adding butter or cream — which this recipe doesn’t call for anyway. If you want an extra velvety texture, you can blend a few spoonfuls of the sauce with an immersion blender before adding the chicken back in. This emulsifies the sauce further and makes it even silkier. The coconut milk provides plenty of richness on its own, and the crushed tomatoes add just enough acidity to balance everything perfectly.

📌

Love This Recipe? Save It to Pinterest!

If you enjoyed this Brazilian Creamy Coconut Chicken recipe, don’t let it get lost in your browser tabs! 😄 Pin it now so you can find it again anytime — and explore hundreds more tried-and-tested recipes waiting for you on my Pinterest boards.

👉 Follow mia on Pinterest @exorecipe

📌 Pin this recipe · 🔁 Re-pin your favorites · 💬 Tag me when you make it — I love seeing your creations!

“`

Print

clock clock iconcutlery cutlery iconflag flag iconfolder folder iconinstagram instagram iconpinterest pinterest iconfacebook facebook iconprint print iconsquares squares iconheart heart iconheart solid heart solid icon

Brazilian Creamy Coconut Chicken That Feels Like Pure Comfort

  • Author: Chef Mia
  • Prep Time: 15 minutes
  • Cook Time: 30 minutes
  • Total Time: 45 minutes
  • Yield: 4 servings 1x
  • Method: Main Course
  • Cuisine: Brazilian

Description

This Brazilian-inspired creamy coconut chicken is rich, comforting, and full of flavor. It’s a one-pot wonder that is perfect for a cozy dinner.


Ingredients

Scale
  • 1 ½ pounds boneless, skinless chicken breasts or thighs, cut into bite-sized pieces
  • Salt and black pepper to taste
  • 2 tablespoons olive oil
  • 1 large onion, chopped
  • 4 cloves garlic, minced
  • 1 red bell pepper, chopped
  • 1 can (14 oz) crushed tomatoes
  • 1 can (14 oz) coconut milk (full-fat for best creaminess)
  • 1 teaspoon smoked paprika
  • 1 teaspoon ground cumin
  • ½ teaspoon cayenne pepper (optional, for heat)
  • ½ cup chopped fresh cilantro
  • Juice of 1 lime
  • Cooked white rice or quinoa, for serving

Instructions

  1. Season the chicken pieces with salt and black pepper.
  2. Heat the olive oil in a large skillet or Dutch oven over medium-high heat. Add the chicken and cook until golden brown on all sides, about 5-7 minutes. Remove chicken from the pan and set aside.
  3. In the same pan, add the onion and cook for 2-3 minutes until softened. Add the garlic and red bell pepper, cooking for another 2 minutes.
  4. Pour in the crushed tomatoes and coconut milk. Stir in the smoked paprika, cumin, and cayenne pepper. Bring to a simmer.
  5. Return the chicken to the pan, reduce heat to low, cover, and let simmer for 15-20 minutes, stirring occasionally, until the chicken is cooked through and the sauce has thickened.
  6. Remove from heat and stir in the fresh cilantro and lime juice.
  7. Serve immediately over cooked white rice or quinoa.

Notes

For a dairy-free and gluten-free meal, this recipe is naturally free of both. Feel free to add a splash of lime juice at the end for extra brightness. Leftovers can be stored in the refrigerator for up to 3 days.


Nutrition

  • Calories: 485
  • Sugar: 6g
  • Fat: 32g
  • Carbohydrates: 16g
  • Protein: 34g


Brazilian Creamy Coconut Chicken That Feels Like Pure Comfort

k">

Tried This Recipe? Leave a Comment!

Did you make this recipe? I’d love to hear how it turned out! Please leave a comment and a rating below. Your feedback helps other home cooks and supports cheerychop.com!

For more delicious inspiration, follow me on Pinterest!