“`html
Table of Contents
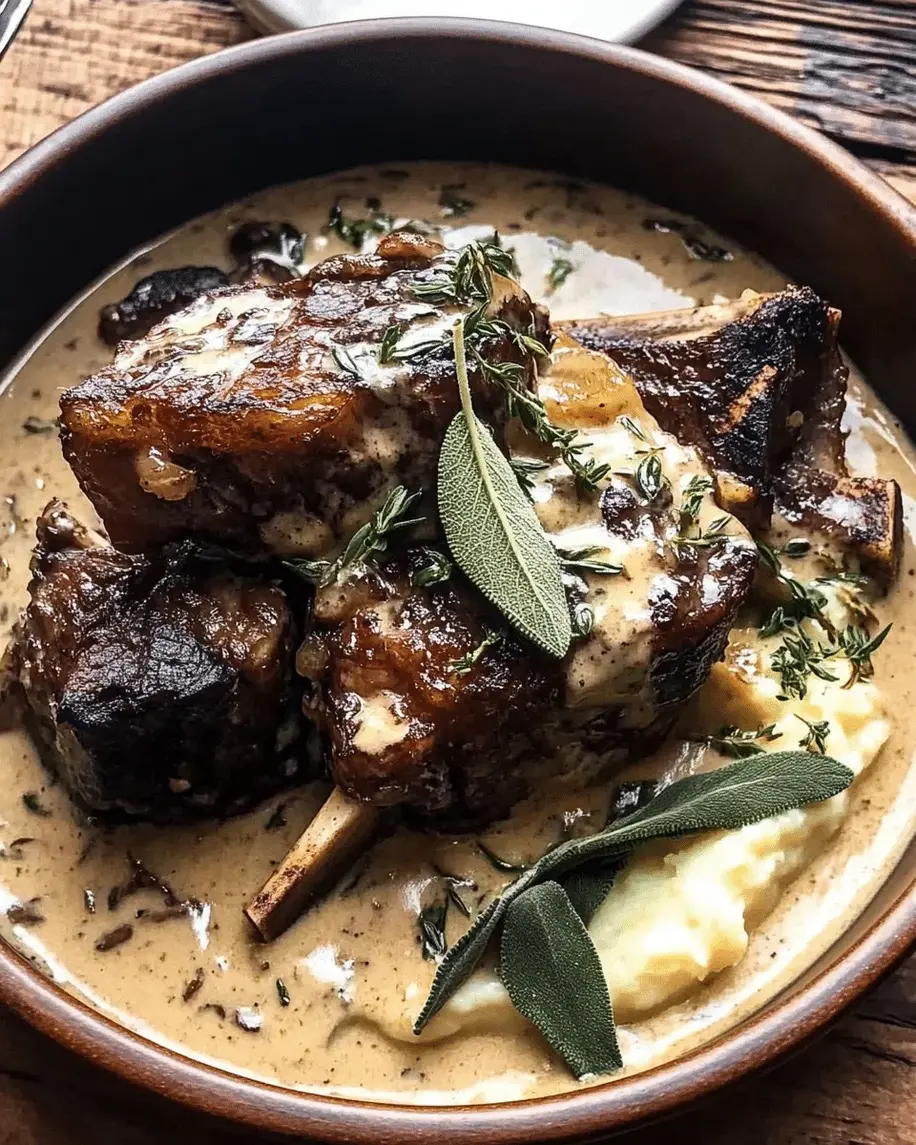
Brazilian Creamy Coconut Chicken That Feels Like Pure Comfort – A One-Pot Wonder You’ll Make on Repeat
Growing up in Morocco, my mother’s kitchen was a symphony of slow-simmered tagines and fragrant spice blends. But it wasn’t until I trained at Le Cordon Bleu in Paris that I truly understood how a simple sauce — when built with patience and purpose — could transform humble ingredients into something deeply soulful. This Brazilian creamy coconut chicken is exactly that kind of dish: a one-pot wonder that feels like a warm hug in a bowl. This Brazilian coconut chicken recipe is my love letter to bold, comforting food that doesn’t require hours of fuss.
Picture tender pieces of chicken simmering in a velvety coconut milk sauce, kissed with smoked paprika and a hint of cayenne. The crushed tomatoes add a gentle tang that balances the richness, while fresh cilantro and a squeeze of lime brighten every spoonful. The aroma alone — sweet coconut, warm cumin, and garlic blooming in olive oil — will have everyone wandering into the kitchen asking, “What’s for dinner?” It’s the kind of creamy coconut chicken that makes you close your eyes on the first bite.
What I love most about this Brazilian chicken stew is how effortlessly it comes together. In my NYC kitchen, where time is always precious, this recipe has become my go-to for busy weeknights and lazy Sundays alike. My version layers a French-trained understanding of sauce-building with the bold, pantry-friendly spirit of Brazilian home cooking. I’m going to share my favorite pro tip for getting the silkiest texture — plus one common mistake that can make your sauce separate. Trust me, once you make this easy comfort chicken recipe, it will earn a permanent spot in your dinner rotation.
Why This Brazilian Creamy Coconut Chicken Recipe Is the Best
The Flavor Secret: The magic lies in building the sauce in layers. I start by browning the chicken until it’s deeply golden — that caramelized crust adds a savory depth that no amount of seasoning can replicate. Then I bloom the smoked paprika and cumin in the pan juices before adding the liquids. This technique, which I learned in Paris, wakes up the spices and makes their flavors bloom. The result is a creamy coconut chicken that tastes like it simmered all day, even though it’s ready in under an hour.
Perfected Texture: The key to a luscious, non-separating coconut sauce is using full-fat coconut milk and simmering gently — never boiling. I also add the cilantro and lime juice off the heat so their brightness stays vibrant. This Brazilian chicken stew has a sauce that coats the back of a spoon like velvet, with tender chicken that practically melts in your mouth.
Foolproof & Fast: Even if you’re new to cooking, this recipe is forgiving. Everything happens in one pot, the ingredient list is straightforward, and the steps are simple. Whether you use chicken breasts or thighs, this coconut milk chicken recipe turns out juicy and flavorful every time. It’s the kind of easy comfort chicken recipe that builds confidence in the kitchen.
Brazilian Coconut Chicken Recipe Ingredients
I picked up the bell peppers and cilantro at the Union Square Greenmarket this morning, and the smell of fresh limes instantly took me back to the spice souks of Marrakech. For this creamy coconut chicken, every ingredient plays a role — here’s what you’ll need and why each one matters.
Ingredients List
- 1 ½ pounds boneless, skinless chicken breasts or thighs, cut into bite-sized pieces
- Salt and black pepper to taste
- 2 tablespoons olive oil
- 1 large onion, chopped
- 4 cloves garlic, minced
- 1 red bell pepper, chopped
- 1 can (14 oz) crushed tomatoes
- 1 can (14 oz) coconut milk (full-fat for best creaminess)
- 1 teaspoon smoked paprika
- 1 teaspoon ground cumin
- ½ teaspoon cayenne pepper (optional, for heat)
- ½ cup chopped fresh cilantro
- Juice of 1 lime
- Cooked white rice or quinoa, for serving
Ingredient Spotlight
Coconut Milk: Full-fat coconut milk is non-negotiable for the creamiest texture. The fat content emulsifies with the tomatoes to create a luscious, velvety sauce. Light coconut milk will work in a pinch, but the sauce will be thinner and less luxurious. Look for brands without added guar gum if you can — I love Chaokoh or Aroy-D for their pure, rich flavor.
Smoked Paprika: This is the spice that gives the dish its warm, almost bacony depth. It’s different from regular paprika — the smoking process adds a layer of complexity that makes the Brazilian coconut chicken recipe feel deeply comforting. I buy mine from a spice shop in Chelsea Market, but any good-quality smoked paprika from the grocery store works beautifully.
Chicken: Boneless, skinless thighs yield the juiciest, most forgiving result — they stay tender even if you simmer them a few minutes longer. Breasts work well too; just keep an eye on the cook time so they don’t dry out. Either way, cutting the chicken into uniform bite-sized pieces ensures even cooking in this creamy coconut chicken.
| Original Ingredient | Best Substitution | Flavor / Texture Impact |
|---|---|---|
| Coconut milk (full-fat) | Light coconut milk + 2 tbsp cashew cream | Slightly thinner, still creamy, less coconut flavor |
| Smoked paprika | 1 tsp sweet paprika + ½ tsp liquid smoke | Similar depth, slightly different smoky note |
| Chicken thighs | Chicken breasts (reduce simmer to 12-15 mins) | Leaner, less rich, can dry out if overcooked |
| Crushed tomatoes | 1½ cups diced fresh tomatoes + 1 tbsp tomato paste | Brighter, slightly chunkier sauce |
How to Make Brazilian Creamy Coconut Chicken — Step-by-Step
Trust me — this comes together faster than you think. Follow these steps and you’ll have a pot of pure comfort ready in 45 minutes.
Step 1: Season and Brown the Chicken
Season the chicken pieces generously with salt and black pepper. Heat the olive oil in a large skillet or Dutch oven over medium-high heat. Add the chicken in a single layer — work in batches if needed — and cook until golden brown on all sides, about 5-7 minutes. Remove the chicken from the pan and set it aside on a plate.
💡 mia’s Pro Tip: Don’t crowd the pan! If you add too much chicken at once, it will steam instead of brown. That golden crust is pure flavor — take the time to get it right.
Step 2: Sauté the Aromatics
In the same pan (with all those beautiful browned bits), add the onion and cook for 2-3 minutes until softened. Add the garlic and red bell pepper, cooking for another 2 minutes until fragrant. The smell alone will tell you you’re on the right track.
⚠️ Common Mistake to Avoid: Scraping the pan too clean. Those browned bits are pure umami — let them loosen naturally as you stir the onions. A wooden spoon is your best friend here.
Step 3: Build the Sauce
Pour in the crushed tomatoes and coconut milk. Stir in the smoked paprika, cumin, and cayenne pepper (if using). Bring the sauce to a gentle simmer — you should see small bubbles around the edges, not a rolling boil.
💡 mia’s Pro Tip: Bloom the spices in the pan for about 30 seconds before adding the liquids. This wakes up their essential oils and makes the sauce exponentially more flavorful. A trick straight from my Paris training.
Step 4: Simmer to Perfection
Return the chicken to the pan, nestling it into the sauce. Reduce the heat to low, cover, and let simmer for 15-20 minutes, stirring occasionally, until the chicken is cooked through and the sauce has thickened to your liking. The sauce should coat the back of a spoon.
⚠️ Common Mistake to Avoid: Simmering too high. High heat can cause the coconut milk to separate and curdle. Keep it low and gentle — patience rewards you with a silky, emulsified sauce.
Step 5: Finish and Serve
Remove from heat and stir in the fresh cilantro and lime juice. This off-heat addition keeps the herbs bright and the citrus zesty. Serve immediately over cooked white rice or quinoa to soak up every last drop of that glorious sauce.
| Step | Action | Duration | Key Visual Cue |
|---|---|---|---|
| 1 | Season & brown chicken | 5-7 mins | Deep golden crust on all sides |
| 2 | Sauté aromatics | 4-5 mins | Onion translucent, garlic fragrant |
| 3 | Build the sauce | 3 mins | Spices bloomed, sauce gently simmering |
| 4 | Simmer chicken | 15-20 mins | Sauce thickened, chicken tender |
| 5 | Finish & serve | 2 mins | Cilantro stirred in, lime juiced |
Serving & Presentation
I love serving this Brazilian creamy coconut chicken over a bed of fluffy jasmine rice — the grains soak up the sauce like tiny sponges, and every forkful is pure bliss. For a lighter option, try it with quinoa or even cauliflower rice. A side of sautéed greens, like collard greens or spinach with garlic, adds a nice peppery contrast that cuts through the richness beautifully.
When I’m feeling nostalgic for Morocco, I’ll sprinkle a handful of toasted slivered almonds and a few extra cilantro leaves on top — it’s a touch my mother always added to her tagines. A lime wedge on the side lets everyone adjust the brightness to their taste. This is the kind of dish that feels special enough for company but is easy enough for a Tuesday night in your NYC apartment.
| Pairing Type | Suggestions | Why It Works |
|---|---|---|
| Side Dish | Jasmine rice, quinoa, farro, or crusty bread | Absorbs the creamy sauce perfectly |
| Vegetable | Sautéed collard greens, roasted broccoli, or green beans | Adds freshness and a slight bitterness to balance richness |
| Beverage | Crisp Sauvignon Blanc, light lager, or coconut water with lime | Acidity and fizz cut through the creamy coconut |
| Garnish | Fresh cilantro, toasted coconut flakes, lime wedges, chili flakes | Adds texture, brightness, and visual appeal |
Make-Ahead, Storage & Reheating
I’m a big fan of meal prep — especially in my busy NYC life. This Brazilian chicken stew is one of those recipes that tastes even better the next day, after the flavors have had time to meld. I often make a double batch on Sunday and enjoy it for lunches throughout the week.
| Method | Container | Duration | Reheating Tip |
|---|---|---|---|
| Refrigerator | Airtight glass container | Up to 3 days | Reheat gently on stovetop over medium-low, adding a splash of water or coconut milk if needed |
| Freezer | Freezer-safe zip-top bag or container | Up to 2 months | Thaw overnight in fridge, then reheat gently. Do not microwave on high — it can break the sauce |
| Make-Ahead | Cook fully, cool, and refrigerate | Up to 2 days in advance | Add fresh cilantro and lime after reheating for brightest flavor |
A note from experience: when reheating, avoid the microwave if you can — it tends to heat unevenly and can make the coconut sauce separate. Instead, reheat in a skillet over medium-low heat, stirring occasionally. If the sauce has thickened too much in the fridge, add a tablespoon of water or coconut milk to bring it back to life. And always add a fresh squeeze of lime at the end — it wakes up the flavors like nothing else.
Variations & Easy Swaps
| Variation | Key Change | Best For | Difficulty Impact |
|---|---|---|---|
| Moroccan Spiced Version | Add 1 tsp ras el hanout, ½ tsp turmeric, swap cilantro for parsley | North African flavor lovers | Easy |
| Dairy-Free / Gluten-Free | Naturally both — no changes needed | Dietary restrictions | No change |
| Spicy Brazilian Coconut Chicken | Add 1-2 chopped bird’s eye chilies or 1 tsp chili paste | Heat seekers | Easy |
Moroccan Spiced Version
Growing up in Morocco, ras el hanout was the backbone of so many dishes. To give this Brazilian coconut chicken recipe a North African twist, I add a teaspoon of ras el hanout and a pinch of turmeric along with the smoked paprika. The floral, aromatic notes of the ras el hanout — with hints of cinnamon, coriander, and cardamom — pair beautifully with the creamy coconut. Finish with fresh parsley instead of cilantro, and you’ll have a dish that bridges two continents in the most delicious way.
Dairy-Free / Gluten-Free — Naturally!
One of the best things about this creamy coconut chicken recipe is that it’s naturally free of both dairy and gluten. The coconut milk provides all the richness you need without a drop of cream, and there’s no flour or wheat anywhere in the ingredient list. It’s a wonderful option for anyone with dietary restrictions — and you’d never guess it’s “free” of anything because it tastes so indulgent.
Spicy Brazilian Coconut Chicken
If you like heat, this variation is for you. I learned to love spice from my father, who would add fresh chilies to everything. For this version, I add one or two finely chopped bird’s eye chilies (or a teaspoon of sambal oelek) along with the garlic. The cayenne pepper already brings a gentle warmth, but the fresh chilies take it to another level. It’s the kind of heat that builds slowly and makes you reach for another spoonful.
Share Your Version!
I hope this Brazilian creamy coconut chicken brings as much comfort to your table as it does to mine. There’s something truly magical about a one-pot meal that fills your home with incredible aromas and leaves everyone at the table smiling. If you make it, I’d love to hear how it turned out — drop a star rating and a comment below, or tag me in your photos on Pinterest or Instagram.
What’s your favorite way to make this creamy coconut chicken your own? Did you try the Moroccan spice twist or go for extra heat? Let me know in the comments — I read every single one and love hearing about your kitchen adventures. From my NYC kitchen to yours — I hope this recipe brings as much warmth to your table as it does to mine. — mia 🧡
What is the secret to making Brazilian creamy coconut chicken extra tender?
The secret lies in two things: choosing the right cut of chicken and not overcooking it. Boneless, skinless chicken thighs are naturally more forgiving and stay juicy because they have a higher fat content. If you use breasts, keep a close eye on the simmer time — 15 minutes is usually plenty. The second secret is browning the chicken well before simmering. That caramelized crust locks in moisture and adds a deep savory flavor that makes the whole dish taste richer. Finally, always let the chicken rest in the sauce off the heat for a few minutes before serving — this allows the juices to redistribute throughout the meat.
Can I substitute coconut milk with something else in this Brazilian chicken recipe?
Coconut milk is the heart of this Brazilian chicken stew, but if you absolutely need a substitute, you can use full-fat coconut cream mixed with water (about ¾ cup cream + ¼ cup water) for a richer result. For a non-coconut option, try heavy cream mixed with a splash of chicken broth — though the flavor profile will shift significantly. Keep in mind that nothing quite replicates the unique sweetness and body of coconut milk. If you’re simply out of coconut milk, a can of unsweetened coconut cream blended with a little water works beautifully and actually gives an even creamier texture.
How long should I cook Brazilian creamy coconut chicken for the best flavor?
For the best flavor, simmer the chicken in the sauce for 15 to 20 minutes once it’s returned to the pan. This is enough time for the chicken to cook through and for the flavors of the smoked paprika, cumin, garlic, and coconut milk to meld together beautifully. If you have a bit more time, you can let it simmer uncovered for the last 5 minutes to thicken the sauce slightly. However, don’t simmer for more than 25 minutes total — the chicken can start to dry out, and the coconut milk may begin to separate if heated too long. The sweet spot is a gentle 18-minute simmer covered, then 2 minutes uncovered at the end.
What side dishes pair well with Brazilian coconut chicken for a complete meal?
This creamy coconut chicken pairs beautifully with so many sides. White rice is the classic choice — especially jasmine or basmati, which soak up the sauce perfectly. Quinoa or farro are excellent whole-grain alternatives. For vegetables, I love sautéed collard greens with garlic, roasted broccoli, or a simple green salad with lime vinaigrette. The slight bitterness of greens balances the richness of the coconut sauce. Black beans or black-eyed peas also make a wonderful side, adding protein and fiber. For a truly Brazilian-inspired meal, serve with farofa (toasted cassava flour) or simple steamed plantains. And don’t forget extra lime wedges!
Can I make this creamy coconut chicken recipe in a slow cooker?
Yes, you can adapt this Brazilian chicken stew for a slow cooker, but with a few adjustments. First, always brown the chicken and sauté the aromatics on the stovetop before adding them to the slow cooker — this step is non-negotiable for deep flavor. Then transfer everything to the slow cooker and cook on low for 4-5 hours or on high for 2-3 hours. Add the cilantro and lime juice just before serving. Note that the sauce may be thinner than the stovetop version; you can thicken it by removing the lid for the last 30 minutes of cooking or by stirring in a cornstarch slurry.
Is this Brazilian coconut chicken recipe spicy? Can I make it mild?
This recipe is mildly warm thanks to the smoked paprika and optional cayenne pepper, but it’s not overwhelmingly spicy. The coconut milk and crushed tomatoes mellow out the heat significantly. To make it completely mild, simply omit the cayenne pepper and use sweet paprika instead of smoked paprika. The dish will still be wonderfully flavorful and comforting — just without any heat. For those who want more spice, you can add fresh chilies, chili flakes, or a dash of hot sauce at the end. I love having this flexibility so everyone at the table can enjoy it their way.
What’s the best way to store and reheat leftovers of this Brazilian chicken stew?
Leftovers of this creamy coconut chicken store beautifully. Let the stew cool completely, then transfer it to an airtight container and refrigerate for up to 3 days. For longer storage, freeze it in a freezer-safe bag or container for up to 2 months. The best way to reheat is on the stovetop over medium-low heat, stirring occasionally. Add a splash of water or coconut milk if the sauce has thickened too much. Avoid microwaving on high power — it can cause the coconut milk to separate. Always add a fresh squeeze of lime juice after reheating to bring back the brightness.
Can I use frozen chicken for this easy comfort chicken recipe?
I recommend thawing the chicken completely before cooking for the best texture and even browning. If you cook frozen chicken directly, it will release too much water and steam instead of browning, which means you’ll lose that golden crust that adds so much flavor. To safely thaw, place the chicken in the refrigerator overnight, or use the cold water method (sealed bag submerged in cold water, changing the water every 30 minutes). Once thawed, pat the chicken dry with paper towels before seasoning and browning — this is a crucial step for getting that beautiful sear.
What can I use instead of cilantro in this coconut milk chicken recipe?
If you’re not a fan of cilantro (and I know that’s a real thing for some people — it’s genetic!), you have several great options. Fresh parsley is the best substitute — flat-leaf Italian parsley works wonderfully and adds a similar fresh, green note. Fresh basil, especially Thai basil, also pairs beautifully with coconut and lime. For a different but delicious twist, try fresh mint — it sounds unexpected, but it works surprisingly well with the smoky, creamy flavors. Start with half the amount and adjust to your taste. The key is to add the herb off the heat to preserve its freshness.
How can I make this Brazilian chicken recipe dairy-free and still creamy?
The great news is that this recipe is naturally dairy-free! The creaminess comes entirely from full-fat coconut milk, so there’s no need for any dairy substitutes. To keep it dairy-free, simply avoid adding butter or cream — which this recipe doesn’t call for anyway. If you want an extra velvety texture, you can blend a few spoonfuls of the sauce with an immersion blender before adding the chicken back in. This emulsifies the sauce further and makes it even silkier. The coconut milk provides plenty of richness on its own, and the crushed tomatoes add just enough acidity to balance everything perfectly.
Love This Recipe? Save It to Pinterest!
If you enjoyed this Brazilian Creamy Coconut Chicken recipe, don’t let it get lost in your browser tabs! 😄 Pin it now so you can find it again anytime — and explore hundreds more tried-and-tested recipes waiting for you on my Pinterest boards.
👉 Follow mia on Pinterest @exorecipe
📌 Pin this recipe · 🔁 Re-pin your favorites · 💬 Tag me when you make it — I love seeing your creations!
⭐ Did you make this recipe? I’d love to hear from you!
Leave a star rating and comment below — your feedback helps me create more recipes you’ll love. Tag @exorecipes on Instagram with your photos. What did you serve with your Brazilian creamy coconut chicken? 👩🍳🧡
“`
Print

Brazilian Creamy Coconut Chicken That Feels Like Pure Comfort
- Prep Time: 15 minutes
- Cook Time: 30 minutes
- Total Time: 45 minutes
- Yield: 4 servings 1x
- Method: Main Course
- Cuisine: Brazilian
Description
This Brazilian-inspired creamy coconut chicken is rich, comforting, and full of flavor. It’s a one-pot wonder that is perfect for a cozy dinner.
Ingredients
- 1 ½ pounds boneless, skinless chicken breasts or thighs, cut into bite-sized pieces
- Salt and black pepper to taste
- 2 tablespoons olive oil
- 1 large onion, chopped
- 4 cloves garlic, minced
- 1 red bell pepper, chopped
- 1 can (14 oz) crushed tomatoes
- 1 can (14 oz) coconut milk (full-fat for best creaminess)
- 1 teaspoon smoked paprika
- 1 teaspoon ground cumin
- ½ teaspoon cayenne pepper (optional, for heat)
- ½ cup chopped fresh cilantro
- Juice of 1 lime
- Cooked white rice or quinoa, for serving
Instructions
- Season the chicken pieces with salt and black pepper.
- Heat the olive oil in a large skillet or Dutch oven over medium-high heat. Add the chicken and cook until golden brown on all sides, about 5-7 minutes. Remove chicken from the pan and set aside.
- In the same pan, add the onion and cook for 2-3 minutes until softened. Add the garlic and red bell pepper, cooking for another 2 minutes.
- Pour in the crushed tomatoes and coconut milk. Stir in the smoked paprika, cumin, and cayenne pepper. Bring to a simmer.
- Return the chicken to the pan, reduce heat to low, cover, and let simmer for 15-20 minutes, stirring occasionally, until the chicken is cooked through and the sauce has thickened.
- Remove from heat and stir in the fresh cilantro and lime juice.
- Serve immediately over cooked white rice or quinoa.
Notes
For a dairy-free and gluten-free meal, this recipe is naturally free of both. Feel free to add a splash of lime juice at the end for extra brightness. Leftovers can be stored in the refrigerator for up to 3 days.
Nutrition
- Calories: 485
- Sugar: 6g
- Fat: 32g
- Carbohydrates: 16g
- Protein: 34g

k">
Tried This Recipe? Leave a Comment!
Did you make this recipe? I’d love to hear how it turned out! Please leave a comment and a rating below. Your feedback helps other home cooks and supports cheerychop.com!
For more delicious inspiration, follow me on Pinterest!