“`html
Table of Contents
Braised Short Ribs in Creamy Herb Sauce – A Hearty, Flavorful Comfort Food
I still remember the first time I made braised short ribs in my tiny Paris apartment — a cold, drizzly evening that begged for something deeply comforting. I had just learned the French technique of braising at culinary school, but I couldn’t help sneaking in a whisper of warmth from my mother’s kitchen in Morocco: a touch of fresh herbs, a splash of cream, and the patience to let time do the work. This braised short ribs recipe with its luscious creamy herb sauce short ribs is the marriage of those two worlds — French technique and North African soul. It’s the kind of hearty comfort food dinner that fills your home with an aroma that says, “Stay a while.” Every bite promises meat so tender it practically falls off the bone, wrapped in a velvety herb-kissed sauce that you’ll want to spoon over everything on your plate.
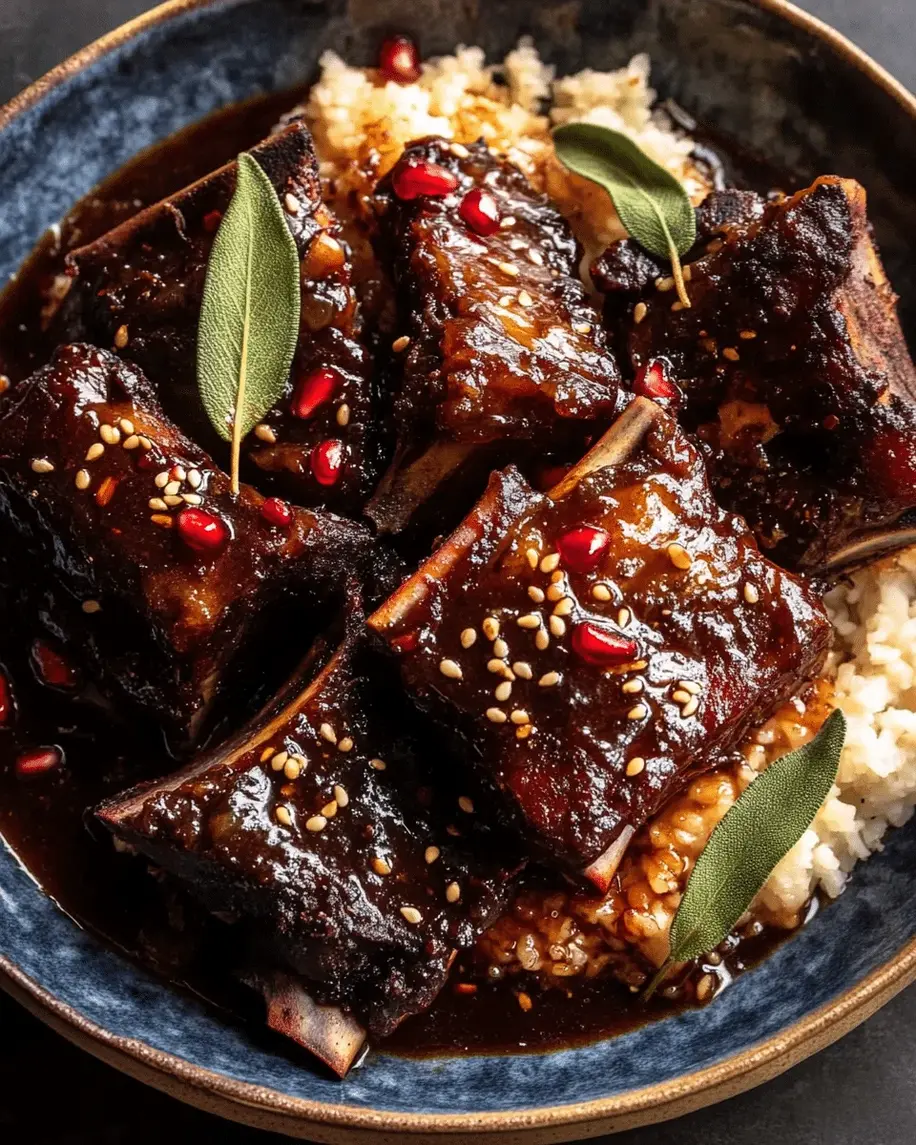
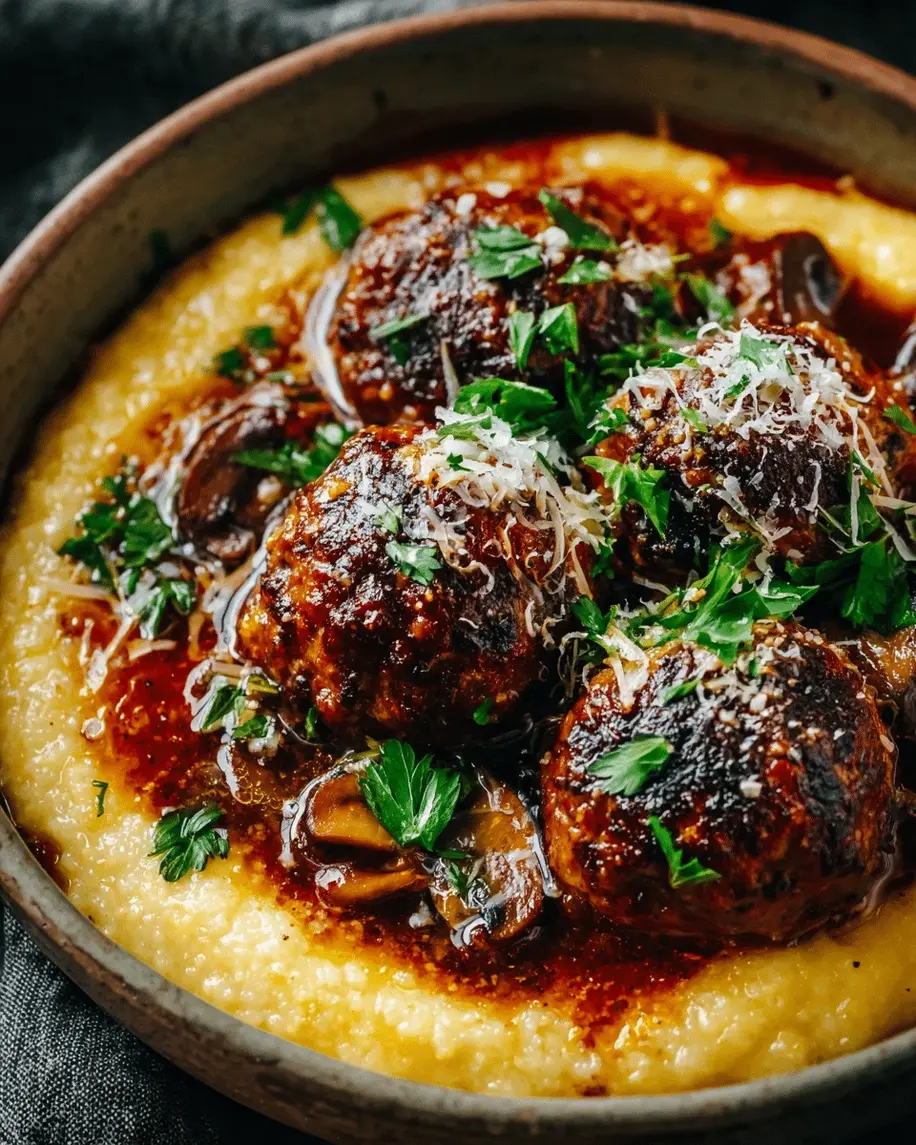
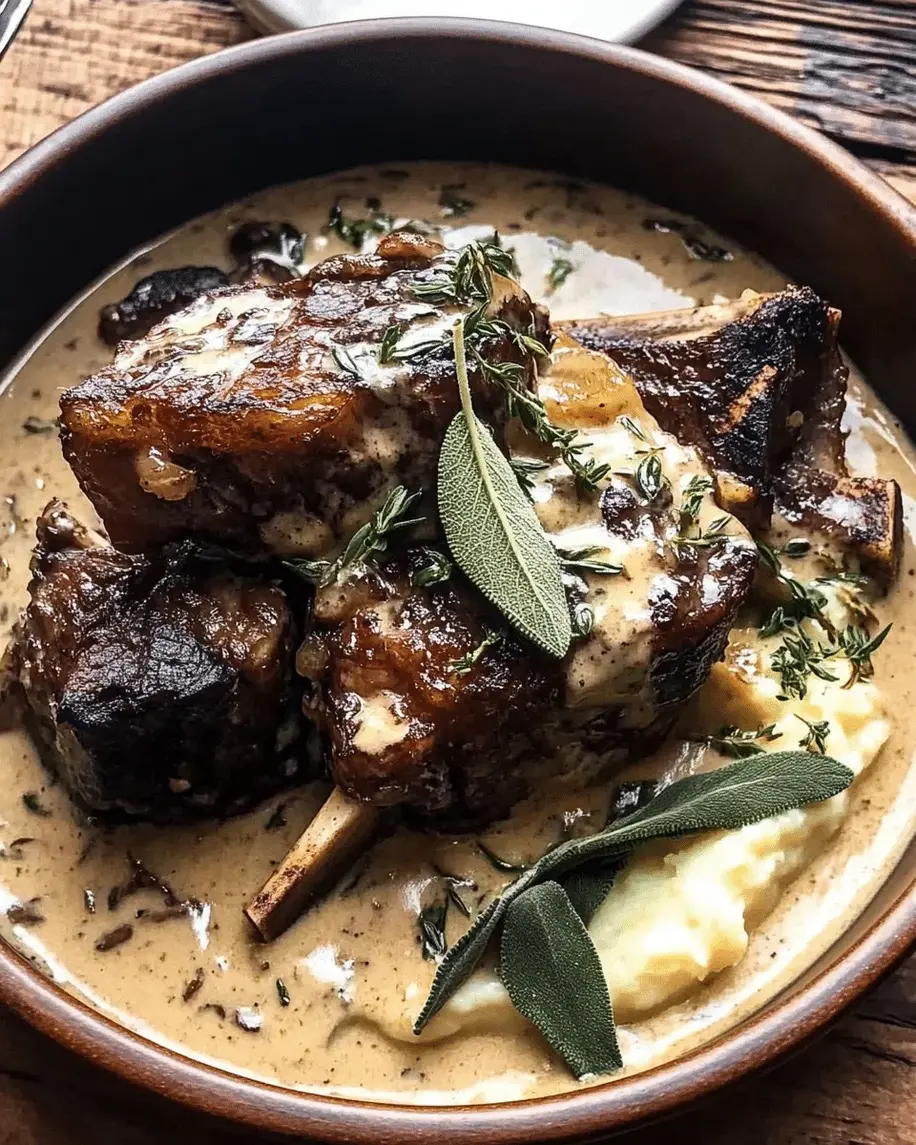
Imagine this: a thick, bone-in short rib, its surface seared to a deep mahogany, sitting in a pool of pale cream sauce flecked with green parsley, thyme, and rosemary. The first cut reveals meat that surrenders without a fight — juicy, rich, and infused with the earthy sweetness of caramelized onions and carrots, the brightness of fresh herbs, and the gentle tang of red wine. The sauce itself is a marvel — creamy but not heavy, with a complexity that comes from slow braising. It coats the meat like a warm blanket, and when you drag a piece of crusty bread through it, you understand why this dish has earned its place as a true fall off the bone short ribs classic. My husband always says it smells like Sunday dinner, even on a Tuesday.
What makes my version different? Most braised short rib recipes lean heavily on tomatoes or a thin wine broth. I wanted something richer, more indulgent — a sauce that felt like a hug. So I add heavy cream halfway through the braise, letting it meld with the beef juices and aromatics without curdling. The result is a silky, luxurious sauce that still lets the beef shine. And here’s a secret: the key to easy braised short ribs that taste like you spent all day? A proper sear and a low, slow oven. No constant stirring, no fuss — just patience and a few smart techniques. I’ll show you exactly how to get that fork-tender texture every time, plus the one mistake most home cooks make that turns a creamy sauce grainy. Let’s get cooking.
Why This Braised Short Ribs Recipe Is the Best
The Flavor Secret: The creamy herb sauce is the star here — and it’s not an afterthought. By adding the cream during the braise rather than at the end, the dairy gently emulsifies with the beef broth and wine, creating a sauce that’s silky, stable, and deeply flavorful. The fresh herbs — parsley, thyme, rosemary — aren’t just garnishes; they simmer into the sauce, releasing their essential oils and infusing every bite with garden-fresh brightness. This is a technique I learned in Paris: building a sauce layer by layer, coaxing out depth from each ingredient rather than relying on a single heavy pour.
Perfected Texture: Bone-in short ribs are my non-negotiable choice for this dish. The bone adds collagen as it braises, which thickens the sauce naturally and gives the meat that melt-in-your-mouth quality. I sear the ribs in batches — never crowding the pot — to develop a deep brown crust that adds a roasted, almost smoky note to the final dish. Then the oven does the rest: 2 to 2½ hours at 350°F, just enough time for the connective tissue to break down into pure tenderness. The result is meat that yields to the slightest pressure from your fork.
Foolproof & Fast (for a braise): I know “braised short ribs” can sound intimidating, but this recipe is genuinely approachable. There’s no complicated roux, no tricky deglazing — just good ingredients and a reliable method. The active prep time is only 20 minutes; the oven does the heavy lifting. And because the sauce is cream-based rather than tomato-based, there’s less risk of acidity overpowering the dish. Even if you’re a beginner, you can nail this on your first try. Serve it with mashed potatoes or crusty bread, and you’ve got a meal that feels like a celebration.
Braised Short Ribs Recipe Ingredients
Every time I make this dish, I think about my mother’s souk in Marrakech — the way she’d choose each ingredient with intention, from the fattiest cut of lamb to the brightest bunch of cilantro. In New York, I find my short ribs at the Union Square farmers market, where the butcher knows my name and the herbs smell like they were picked that morning. For this creamy herb sauce short ribs recipe, quality matters, but you don’t need anything fancy. Here’s what to grab:
Ingredients List
- 4 pounds bone-in beef short ribs
- Salt and freshly ground black pepper
- 2 tablespoons olive oil
- 1 large onion, chopped
- 2 carrots, chopped
- 2 celery stalks, chopped
- 4 cloves garlic, minced
- 2 tablespoons tomato paste
- 1 cup red wine (such as Cabernet Sauvignon)
- 2 cups beef broth
- 1 cup heavy cream
- 1/4 cup chopped fresh parsley
- 2 tablespoons chopped fresh thyme
- 1 tablespoon chopped fresh rosemary
- 2 bay leaves
Ingredient Spotlight
Bone-In Beef Short Ribs: This is the non-negotiable cut for fall off the bone short ribs. The bone keeps the meat moist during the long braise and adds collagen that thickens the sauce. Look for ribs that are meaty, with good marbling — about 1½ to 2 inches thick. At the store, ask for “English-cut” short ribs (cut parallel to the bone) for the best presentation. If you can only find boneless, reduce the braising time by about 30 minutes, but the sauce will be slightly less rich.
Heavy Cream: This is what transforms a standard braise into a creamy herb sauce short ribs dream. Use full-fat heavy cream (36% milk fat) for the best texture and stability. Half-and-half or light cream will work in a pinch but may separate or curdle at high heat. The cream gets added early in the braise and simmers gently, melding with the beef broth and wine into a velvety sauce that clings to the meat.
Red Wine: A dry, medium-bodied red like Cabernet Sauvignon, Merlot, or a Côtes du Rhône adds acidity and depth that balances the richness of the cream. You don’t need an expensive bottle — just one you’d enjoy drinking. The alcohol cooks off, leaving behind a complex, fruity note. If you prefer not to use wine, substitute an additional cup of beef broth plus 2 tablespoons of balsamic vinegar for acidity.
Fresh Herbs (Parsley, Thyme, Rosemary): Fresh herbs are essential for this dish — dried just won’t deliver the same vibrant flavor. The parsley adds a clean, grassy note; thyme brings earthiness; rosemary contributes a piney, aromatic warmth. Together they perfume the sauce without overwhelming the beef. Strip the rosemary leaves from the stem before chopping, as the stems are tough. If you have only dried herbs, use 1 teaspoon each of dried thyme and dried rosemary, and 2 teaspoons of dried parsley — but add them early so they have time to rehydrate.
| Original Ingredient | Best Substitution | Flavor / Texture Impact |
|---|---|---|
| Bone-in beef short ribs | Boneless beef chuck, cut into 3-inch chunks | Less collagen; braise 30 min less. Sauce will be thinner — add 1 tsp gelatin. |
| Heavy cream | Full-fat coconut milk (canned, not boxed) | Dairy-free, slightly coconut flavor — pair with coriander and lime zest for a twist. |
| Red wine | Beef broth + 2 tbsp balsamic vinegar | Less complex, but still acidic and rich. Add ½ tsp cocoa powder for depth. |
| Fresh thyme | 1 tsp dried thyme (add early) | Slightly muted, earthy flavor — still works well. |
How to Make Braised Short Ribs in Creamy Herb Sauce — Step-by-Step
Trust me when I say this is one of those recipes that looks and tastes far more impressive than the effort it requires. Follow these steps, and you’ll have a restaurant-worthy braised short ribs recipe that feels like a warm embrace on a plate.
Step 1: Sear the Short Ribs
Preheat your oven to 350°F. Pat the short ribs dry with paper towels — moisture is the enemy of a good sear. Season them generously on all sides with salt and freshly ground black pepper, using about 1 teaspoon of salt per pound. Heat 2 tablespoons of olive oil in a large Dutch oven over medium-high heat until it shimmers. Working in batches (don’t crowd the pot!), sear the ribs for 3–4 minutes per side, until a deep golden-brown crust forms. Transfer each batch to a plate. This crust is the foundation of flavor for the entire dish.
💡 mia’s Pro Tip: If the ribs stick to the pot, they’re not ready to flip. Let them cook another 30–60 seconds until they release naturally. A good sear builds that deep, meaty flavor that makes this hearty comfort food dinner unforgettable.
Step 2: Sauté the Vegetables
Reduce the heat to medium. Add the chopped onion, carrots, and celery to the pot — they’ll sizzle in the remaining fat. Cook, stirring occasionally, for about 5 minutes until the vegetables are softened and the onion is translucent. Add the minced garlic and 2 tablespoons of tomato paste, stirring constantly for 1 minute more. The tomato paste will darken slightly and become fragrant; this deepens the umami profile of the sauce.
⚠️ Common Mistake to Avoid: Don’t rush this step. Undercooked vegetables won’t release their sweetness, and raw garlic can taste harsh. Let the mixture cook until the tomato paste turns a rusty brown — that’s the signal that it’s ready.
Step 3: Deglaze with Wine
Pour in 1 cup of red wine, using a wooden spoon to scrape up all the browned bits from the bottom of the pot — that’s pure flavor. Bring the wine to a simmer and let it reduce by about half, which takes roughly 3 minutes. You should see the liquid thicken slightly and the alcohol smell cook off, leaving behind a rich, fruity aroma. This step is crucial for adding acidity that balances the cream later.
💡 mia’s Pro Tip: Use a wine you’d drink — not “cooking wine.” A decent Cabernet Sauvignon or Merlot adds layers of dark fruit and a touch of tannin that stands up beautifully to the beef and cream. If the wine smells good in the glass, it’ll taste good in the pot.
Step 4: Build the Braising Liquid
Return the seared short ribs to the pot, nestling them into the vegetable mixture. Add 2 cups of beef broth, 1 cup of heavy cream, the chopped parsley (save a little for garnish), thyme, rosemary, and 2 bay leaves. Gently stir the liquid around the ribs — don’t disturb the meat too much. Bring the whole mixture to a gentle simmer (you’ll see small bubbles at the edges), then cover the pot with its lid.
⚠️ Common Mistake to Avoid: Don’t let the liquid boil vigorously once the cream is added. High heat can cause the dairy to separate and turn grainy. A gentle simmer is all you need. The low, slow oven heat will do the rest.
Step 5: Braise in the Oven
Transfer the covered Dutch oven to the preheated oven. Braise for 2 to 2½ hours. The meat is ready when it’s fork-tender — meaning you can pierce it with a fork and it offers almost no resistance. The bone should wiggle slightly but remain attached. Halfway through, you can peek and add a splash of broth if the liquid has reduced too much, but the cover should keep most of the moisture inside.
💡 mia’s Pro Tip: For the best fall off the bone short ribs, cook to the longer end of the range — 2½ hours. If you’re using a convection oven, check at 2 hours. The meat should look like it’s practically melting off the bone when you lift it with tongs.
Step 6: Finish and Serve
Remove the pot from the oven and take out the bay leaves. If the sauce seems thin, place the pot on the stovetop over medium heat and simmer uncovered for 5–10 minutes, stirring occasionally, until it thickens to your liking. Taste the sauce and adjust seasoning with more salt and pepper if needed. Transfer the short ribs to a serving platter and spoon the creamy herb sauce generously over the top. Garnish with the reserved fresh parsley and serve hot.
💡 mia’s Pro Tip: Let the ribs rest in the sauce for 5 minutes before serving — this allows the meat to reabsorb some of the liquid, making each bite even more succulent. And don’t skip the garnish — fresh parsley adds a pop of color and a final hit of brightness that wakes up the whole dish.
| Step | Action | Duration | Key Visual Cue |
|---|---|---|---|
| 1 | Sear ribs in batches | 3–4 min per side | Deep mahogany crust forms |
| 2 | Sauté vegetables + tomato paste | 5 min + 1 min | Onion translucent, paste rust-brown |
| 3 | Deglaze with red wine | ~3 min | Liquid reduced by half, no alcohol smell |
| 4 | Add broth, cream, herbs, bay leaves | 2 min | Gentle simmer around edges |
| 5 | Braise covered in oven | 2–2½ hrs | Fork pierces meat with no resistance |
| 6 | Rest, garnish, serve | 5 min rest | Meat pulls easily from bone |
Serving & Presentation
When I serve this braised short ribs recipe, I like to treat each plate like a little canvas. Place one or two short ribs in the center of a shallow bowl or rimmed plate, then spoon the creamy herb sauce generously over and around them — let it pool slightly, almost like a creamy gravy. A final sprinkle of fresh parsley adds a vibrant green contrast against the pale sauce and deep brown meat. For a touch of elegance, I sometimes add a few sprigs of fresh thyme or a light crack of black pepper on top.
In my NYC kitchen, I pair this dish with creamy mashed potatoes (the sauce mingles with them beautifully) or thick slices of crusty sourdough for soaking up every last drop. A simple side of roasted carrots or sautéed green beans adds color and balance. For a Moroccan-French twist that reminds me of home, serve it with a side of pearl couscous tossed with lemon zest and toasted almonds — the nuttiness plays wonderfully with the creamy sauce. This is a hearty comfort food dinner that begs for cozy sweaters, good conversation, and second helpings.
| Pairing Type | Suggestions | Why It Works |
|---|---|---|
| Side Dish | Mashed potatoes, crusty bread, pearl couscous, polenta | Soaks up the creamy sauce; soft texture contrasts the meat. |
| Sauce / Dip | Extra sauce from pot, a drizzle of balsamic glaze | Enhances richness; balsamic adds sweet-tangy contrast. |
| Beverage | Cabernet Sauvignon, Malbec, dark beer (stout), sparkling water with lemon | Wine’s tannins cut fat; stout adds roastiness that complements the beef. |
| Garnish | Fresh parsley, thyme sprigs, cracked black pepper, flaky sea salt | Adds color, freshness, and final layer of flavor. |
Make-Ahead, Storage & Reheating
One of the best things about this braised short ribs recipe is that it tastes even better the next day — the flavors have time to meld and deepen. I often make a double batch on Sunday so I have dinner ready for a busy Monday. Here’s how I store and reheat it in my tiny NYC kitchen without losing any of that creamy, tender magic.
| Method | Container | Duration | Reheating Tip |
|---|---|---|---|
| Refrigerator | Airtight container, ribs submerged in sauce | Up to 4 days | Reheat gently on stovetop over low heat, covered. Add a splash of broth if sauce thickened. |
| Freezer | Freezer-safe container or zip-top bag, flat to save space | Up to 3 months | Thaw overnight in fridge. Reheat in a covered pot at 325°F for 20–25 min, or stovetop on low. |
| Make-Ahead | Prepare fully, cool, store in fridge | Up to 2 days in advance | Reheat gently; the sauce may need a whisk to re-emulsify. |
One thing I’ve learned from years of meal-prepping in New York: always let the braised short ribs cool completely in the sauce before refrigerating. This keeps the meat moist and prevents the sauce from separating. When reheating, low and slow is your friend — high heat can make the cream sauce break. If the sauce looks a little thin after reheating, stir in a teaspoon of cornstarch mixed with a tablespoon of cold water, then simmer for a minute to thicken. And if you’re reheating in the microwave (we all have those nights), do it in 30-second bursts at 50% power, stirring between intervals.
For the best texture, I recommend removing the ribs from the bones before freezing — the meat will be easier to portion and reheat evenly. But if you’re a bone-in purist like me, go ahead and freeze them whole. Just make sure they’re fully submerged in the sauce to prevent freezer burn. This easy braised short ribs method truly is the gift that keeps on giving.
Variations & Easy Swaps
This braised short ribs recipe is wonderfully adaptable. Here are three variations I’ve tested in my own kitchen — each one brings a different personality to the dish while keeping that creamy, tender soul intact.
| Variation | Key Change | Best For | Difficulty Impact |
|---|---|---|---|
| Moroccan Spiced Variation | Add 1 tsp cumin, ½ tsp cinnamon, ½ tsp paprika; swap parsley for cilantro | Adventurous palates, North African flavor lovers | Easy — just add spices with the tomato paste |
| Dairy-Free / Lighter Version | Replace heavy cream with full-fat coconut milk or cashew cream | Dairy-free, lighter calorie option | Easy — watch for curdling; use low heat |
| Red Wine & Mushroom Twist | Add 8 oz sliced cremini mushrooms with the vegetables; use ½ cup extra wine | Earthy flavor, umami boost | Easy — just sauté mushrooms with the veggies |
Moroccan Spiced Variation
This version honors my roots. When I add 1 teaspoon of cumin, ½ teaspoon of cinnamon, and ½ teaspoon of sweet paprika along with the tomato paste, the creamy herb sauce transforms into something warm and exotic — like a tagine in cream form. Swap the parsley for fresh cilantro (stem and all) and finish with a sprinkle of toasted sesame seeds. The cinnamon might sound unusual, but it plays beautifully with the beef and cream, adding a subtle sweetness without being dessert-like. Serve this with fluffy couscous and a side of harissa for heat. It’s the hearty comfort food dinner I grew up dreaming of.
Dairy-Free / Lighter Version
For a dairy-free option that still feels luxurious, replace the heavy cream with one can of full-fat coconut milk (the kind in a can, not the boxed drinking variety). The coconut flavor is mild and complements the herbs nicely — especially if you lean into the thyme and rosemary. If you want a lighter version that’s still creamy, try cashew cream: soak ½ cup raw cashews in hot water for 20 minutes, then blend with ¾ cup water until smooth. Use it in place of the heavy cream. The sauce will be slightly less thick, so simmer uncovered for an extra 5 minutes to concentrate the flavor. This variation has become a favorite among my readers who are watching their dairy intake but still crave that creamy herb sauce short ribs experience.
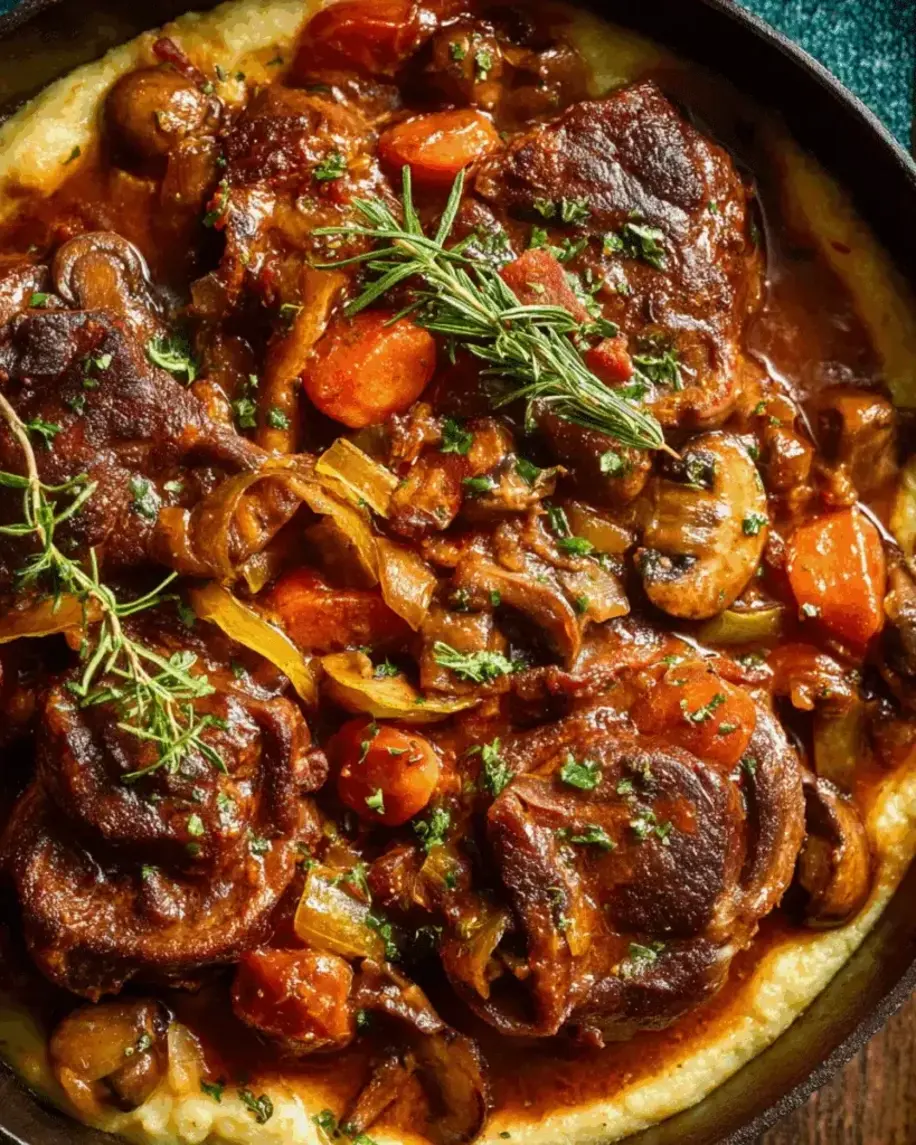
Red Wine & Mushroom Twist
On a chilly Saturday in NYC, I love wandering through the Union Square greenmarket and grabbing a mix of cremini and oyster mushrooms. For this variation, slice 8 ounces of cremini mushrooms and sauté them along with the onions, carrots, and celery in Step 2. The mushrooms release their earthy moisture and soak up the tomato paste and wine, adding a deep umami note that makes the dish even more savory. I also increase the red wine to 1½ cups and let it reduce a bit more before adding the broth. This version pairs beautifully with creamy polenta — the cornmeal’s sweetness balances the earthy mushrooms. It’s a fall off the bone short ribs experience that feels like a hug from the inside out.
What is the best cut of meat for braised short ribs in a creamy herb sauce?
The best cut is bone-in beef short ribs, specifically English-cut (cut parallel to the bone, about 1½ to 2 inches thick). The bone adds collagen during braising, which thickens the sauce naturally and keeps the meat incredibly moist. Look for ribs with good marbling—the fat renders during the long cook, infusing the creamy herb sauce with rich, beefy flavor. If you can only find boneless short ribs, reduce the cooking time by about 30 minutes, and consider adding a teaspoon of unflavored gelatin to the sauce to compensate for the lost collagen. For this braised short ribs recipe, bone-in truly makes a difference in both texture and taste.
Can I make creamy herb sauce for braised short ribs without heavy cream?
Absolutely. You can substitute full-fat canned coconut milk for a dairy-free version—it adds a subtle sweetness that pairs well with thyme and rosemary. Another excellent option is cashew cream: soak ½ cup raw cashews in hot water for 20 minutes, then blend with ¾ cup water until smooth. Use it in place of the heavy cream. The sauce will be slightly thinner, so simmer uncovered for an extra 5 minutes to concentrate the flavor. For a lighter dairy option, try half-and-half or whole milk mixed with 1 tablespoon of cornstarch, but be aware that the sauce won’t be as thick and velvety as the original. Each substitution will change the flavor profile slightly, but the result will still be a delicious creamy herb sauce short ribs experience.
How long should I braise short ribs to make them tender for this recipe?
For bone-in beef short ribs, braise at 350°F for 2 to 2½ hours. The meat is ready when you can pierce it with a fork and it offers almost no resistance—the bone should wiggle slightly but remain attached. I recommend checking at the 2-hour mark: if the meat pulls away from the bone easily, it’s done. If it still feels firm, give it another 20–30 minutes. Every oven runs slightly differently, so use tenderness as your guide rather than the clock alone. For a hearty comfort food dinner that truly delivers that fall off the bone short ribs texture, aim for the longer end of the range, especially if your ribs are on the thicker side.
What herbs work best in a creamy sauce for braised short ribs?
Fresh parsley, thyme, and rosemary are my go-to trio for this creamy herb sauce short ribs recipe. Parsley adds a clean, slightly peppery freshness; thyme brings an earthy, lemony note that cuts through the richness; rosemary contributes a piney, aromatic warmth that pairs beautifully with beef. Bay leaves are essential too—they add a subtle floral depth that you’ll miss if you skip them. If you want to experiment, fresh oregano or tarragon can work in place of thyme for a different flavor profile. Avoid dried herbs if possible—they lack the brightness that makes this sauce sing. For an easy swap, use 1 teaspoon each of dried thyme and dried rosemary if fresh isn’t available, but add them early so they have time to rehydrate.
Can I make this braised short ribs recipe in a slow cooker or Instant Pot?
Yes, you can adapt this braised short ribs recipe for both appliances. For a slow cooker: sear the ribs and sauté the vegetables on the stovetop first, then transfer everything to the slow cooker. Cook on low for 8 hours or on high for 4–5 hours. For an Instant Pot: use the sauté function for searing and cooking vegetables, then pressure cook on high for 45 minutes with a natural release. In both cases, the creamy herb sauce may need thickening at the end—simmer uncovered for 10 minutes or stir in a cornstarch slurry. The oven method gives the deepest flavor and richest sauce, but the slow cooker and Instant Pot versions are great for busy weeknights when you still want that hearty comfort food dinner feeling.
How do I prevent the cream sauce from curdling or separating?
Curdling happens when dairy is exposed to high heat or acidic conditions too quickly. To keep your creamy herb sauce short ribs silky, follow these tips: always add the cream to a gently simmering liquid, not a boiling one. Use full-fat heavy cream (at least 36% milk fat)—lower-fat dairy is more prone to separating. Stir the cream in gradually while the pot is off the heat, then return it to a gentle simmer. Avoid vigorous boiling once the cream is added. If your sauce does start to look grainy, whisk in a teaspoon of cold heavy cream or a splash of beef broth to help bring it back together. I learned this trick in Paris, and it’s saved many a sauce in my kitchen.
What should I serve with braised short ribs in creamy herb sauce?
This hearty comfort food dinner pairs beautifully with creamy mashed potatoes—the sauce mingles with them in the most satisfying way. Crusty sourdough or a French baguette is perfect for soaking up every last drop of the creamy herb sauce. For a lighter side, try roasted carrots or sautéed green beans with lemon zest. If you want to lean into the French-Moroccan fusion, serve it with pearl couscous tossed with toasted almonds and parsley. Polenta is another excellent choice—its creamy texture echoes the sauce. For beverages, a Cabernet Sauvignon or a dark stout beer complements the richness of the dish beautifully.
Can I freeze braised short ribs with the creamy herb sauce?
Yes, this braised short ribs recipe freezes wonderfully. Let the ribs cool completely in the sauce, then transfer everything to a freezer-safe container or zip-top bag. Make sure the ribs are fully submerged in the sauce to prevent freezer burn. Freeze for up to 3 months. To reheat, thaw overnight in the refrigerator, then warm gently on the stovetop over low heat, covered. You may need to add a splash of beef broth or water if the sauce has thickened too much after thawing. If you’re meal-prepping, I recommend removing the meat from the bones before freezing—it makes portioning and reheating much easier. The flavor actually deepens after freezing, so this easy braised short ribs recipe is perfect for batch cooking.
How do I thicken the creamy herb sauce if it’s too thin?
If your sauce is thinner than you’d like after braising, there are two easy fixes. First, remove the ribs and simmer the sauce uncovered on the stovetop over medium heat for 5–10 minutes—this will reduce and concentrate the liquid, naturally thickening it. Stir occasionally to prevent sticking. If it’s still not thick enough, whisk together 1 tablespoon of cornstarch with 2 tablespoons of cold water until smooth, then stir it into the simmering sauce. Cook for 1–2 minutes until thickened. This cornstarch slurry method is foolproof and won’t alter the flavor of your creamy herb sauce short ribs. Avoid using flour, as it can make the sauce taste pasty and dull the herb flavors.
Can I use dried herbs instead of fresh in this braised short ribs recipe?
You can use dried herbs in a pinch, but fresh herbs truly make a difference in this creamy herb sauce short ribs recipe. Fresh parsley, thyme, and rosemary add brightness and aromatic oils that dried herbs simply can’t replicate. If you must use dried, use about 1 teaspoon each of dried thyme and dried rosemary (instead of 2 tablespoons fresh thyme and 1 tablespoon fresh rosemary), and 2 teaspoons of dried parsley (instead of ¼ cup fresh). Add the dried herbs early in the cooking process so they have time to rehydrate and release their flavor. Bay leaves are always used dried in this recipe, so those are fine. For the best result, I recommend seeking out fresh herbs—they’re widely available in any US grocery store and really elevate this braised short ribs recipe to something special.
Share Your Version!
I absolutely love hearing how this braised short ribs recipe turns out in your kitchen. Did you try the Moroccan spiced variation? Or maybe you made it dairy-free with coconut milk? Drop a star rating and a comment below — your feedback helps other home cooks decide if this is the right hearty comfort food dinner for their table. I read every single comment and I answer questions personally, so don’t be shy!
Snap a photo of your creamy herb sauce short ribs and share it on Instagram or Pinterest — tag me @exorecipes so I can see your beautiful creation. I’d especially love to know: what did you serve on the side? Did your family go back for seconds? Your stories are what make this food community so special. From my NYC kitchen to yours — I hope this recipe brings as much warmth to your table as it does to mine. — mia 🧡
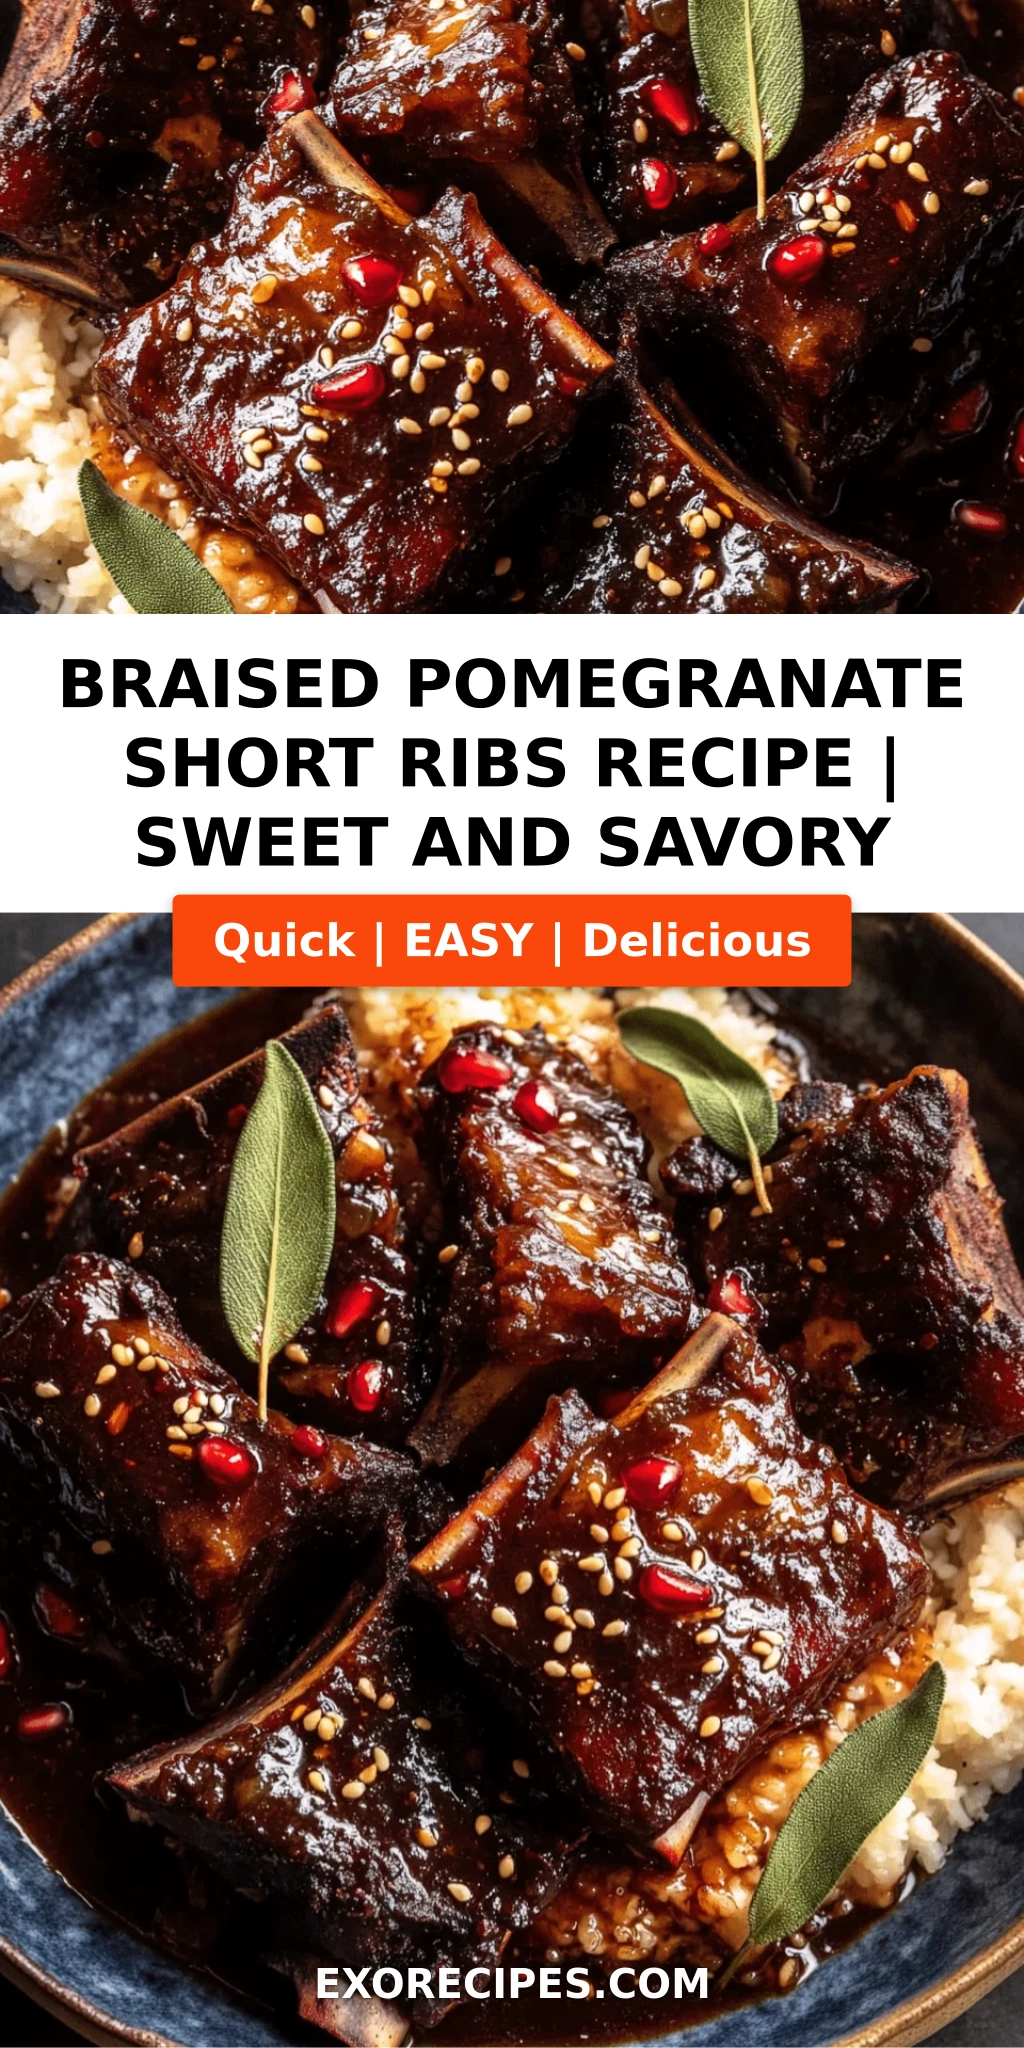
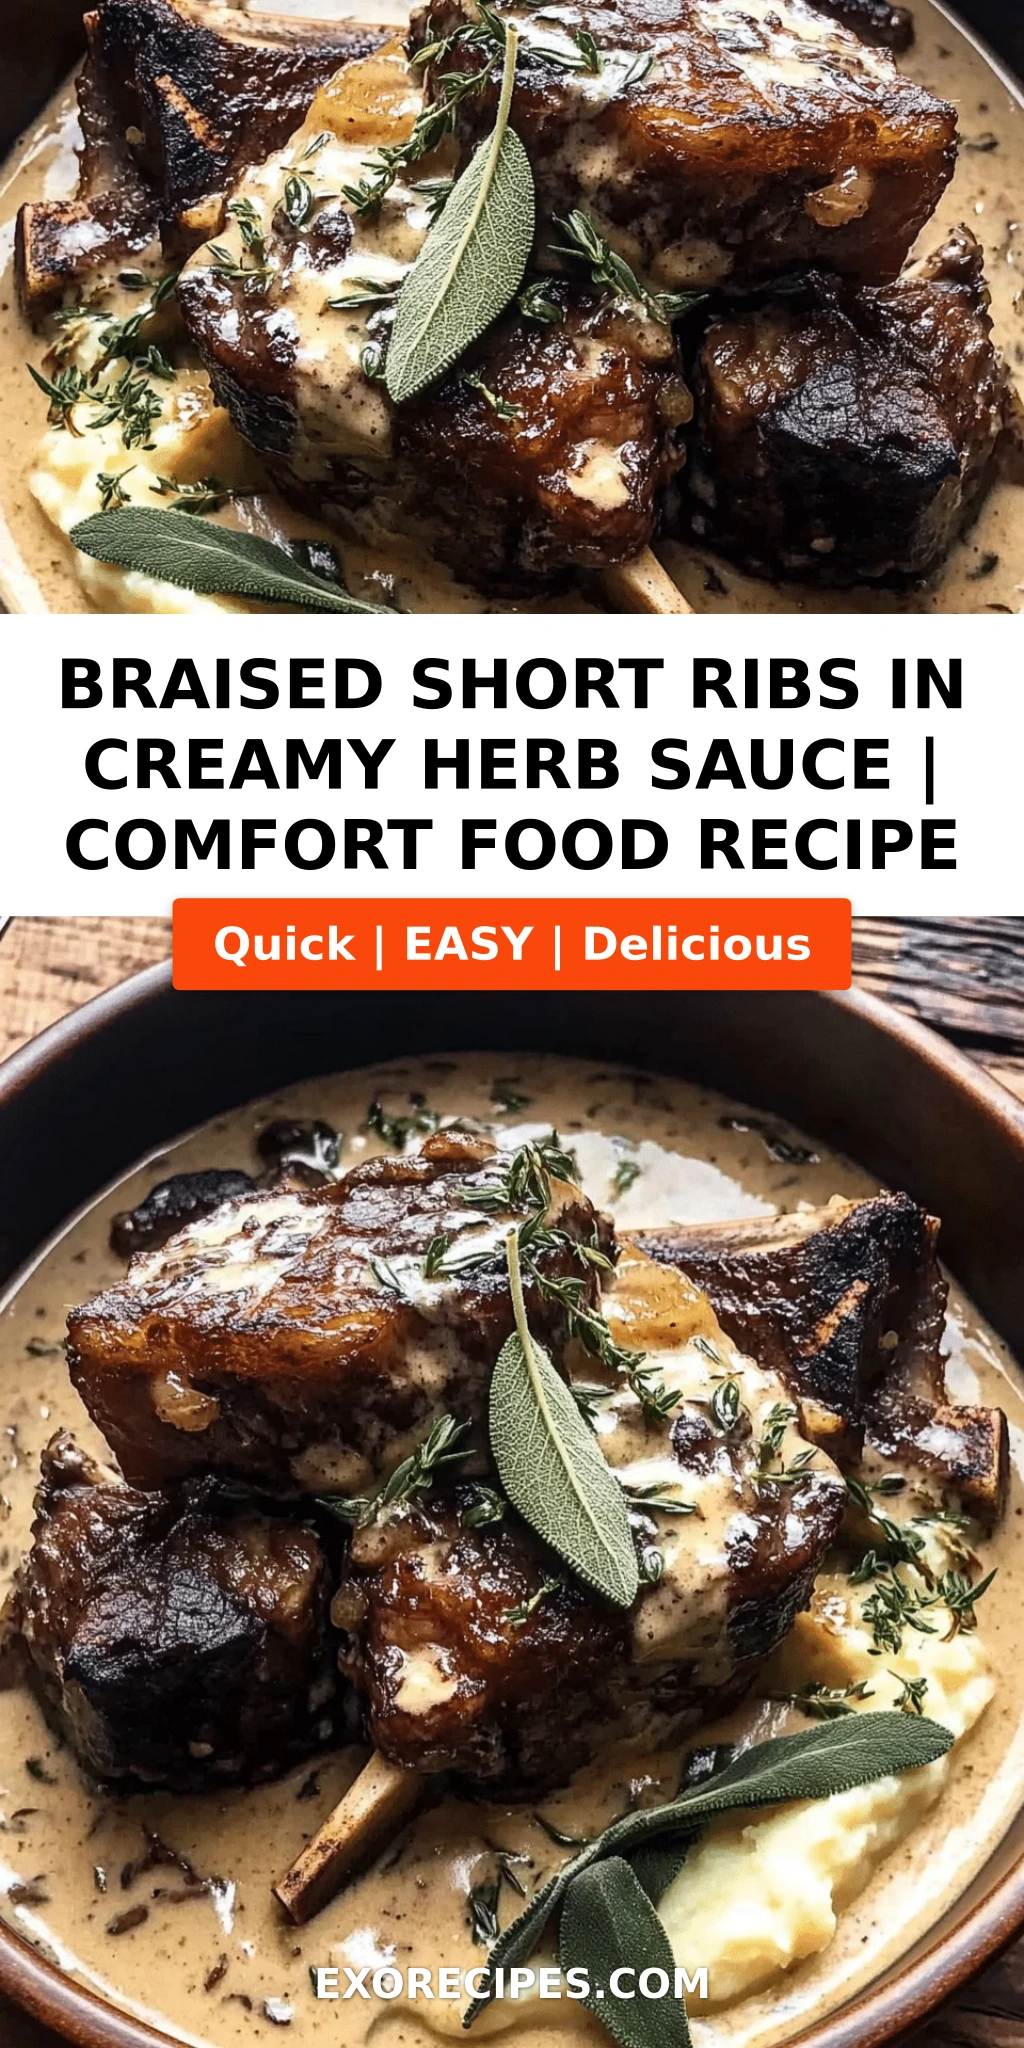
Love This Recipe? Save It to Pinterest!
If you enjoyed this Braised Short Ribs in Creamy Herb Sauce recipe, don’t let it get lost in your browser tabs! 😄 Pin it now so you can find it again anytime — and explore hundreds more tried-and-tested recipes waiting for you on my Pinterest boards.
👉 Follow mia on Pinterest @exorecipe
📌 Pin this recipe · 🔁 Re-pin your favorites · 💬 Tag me when you make it — I love seeing your creations!
🗣️ Did you make this recipe?
I’d love to hear how it turned out! Leave a rating below, share a comment, or tag me on social media. Your feedback helps other home cooks discover their next favorite hearty comfort food dinner.
“`
Print
Braised Short Ribs in Creamy Herb Sauce: A Hearty, Flavorful Comfort Food
- Prep Time: 20 minutes
- Cook Time: 2 hours 30 minutes
- Total Time: 2 hours 50 minutes
- Yield: 6 servings 1x
- Method: Main Course
- Cuisine: American
Description
Tender braised short ribs in a rich, creamy herb sauce – the ultimate comfort food for a cold evening.
Ingredients
- 4 pounds bone-in beef short ribs
- Salt and freshly ground black pepper
- 2 tablespoons olive oil
- 1 large onion, chopped
- 2 carrots, chopped
- 2 celery stalks, chopped
- 4 cloves garlic, minced
- 2 tablespoons tomato paste
- 1 cup red wine (such as Cabernet Sauvignon)
- 2 cups beef broth
- 1 cup heavy cream
- 1/4 cup chopped fresh parsley
- 2 tablespoons chopped fresh thyme
- 1 tablespoon chopped fresh rosemary
- 2 bay leaves
Instructions
- Preheat oven to 350°F (175°C).
- Season short ribs generously with salt and pepper.
- In a large Dutch oven, heat olive oil over medium-high heat. Sear ribs in batches until browned on all sides, about 3-4 minutes per batch. Transfer to a plate.
- Add onion, carrots, and celery to the pot; cook until softened, about 5 minutes. Add garlic and tomato paste; cook 1 minute more.
- Pour in red wine, scraping up browned bits. Bring to a simmer and cook until reduced by half, about 3 minutes.
- Return ribs to pot. Add beef broth, heavy cream, parsley, thyme, rosemary, and bay leaves. Bring to a simmer.
- Cover and transfer to oven. Braise for 2–2½ hours, until meat is tender and falling off the bone.
- Remove bay leaves. Transfer ribs to a serving platter; spoon sauce over top. Serve hot.
Notes
For a thicker sauce, simmer uncovered on the stovetop for 5–10 minutes after braising. Pairs well with mashed potatoes or crusty bread.
Nutrition
- Calories: 720 kcal
- Sugar: 6 g
- Fat: 55 g
- Carbohydrates: 12 g
- Protein: 42 g
k">
Tried This Recipe? Leave a Comment!
Did you make this recipe? I’d love to hear how it turned out! Please leave a comment and a rating below. Your feedback helps other home cooks and supports cheerychop.com!
For more delicious inspiration, follow me on Pinterest!