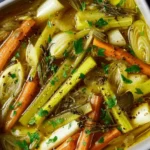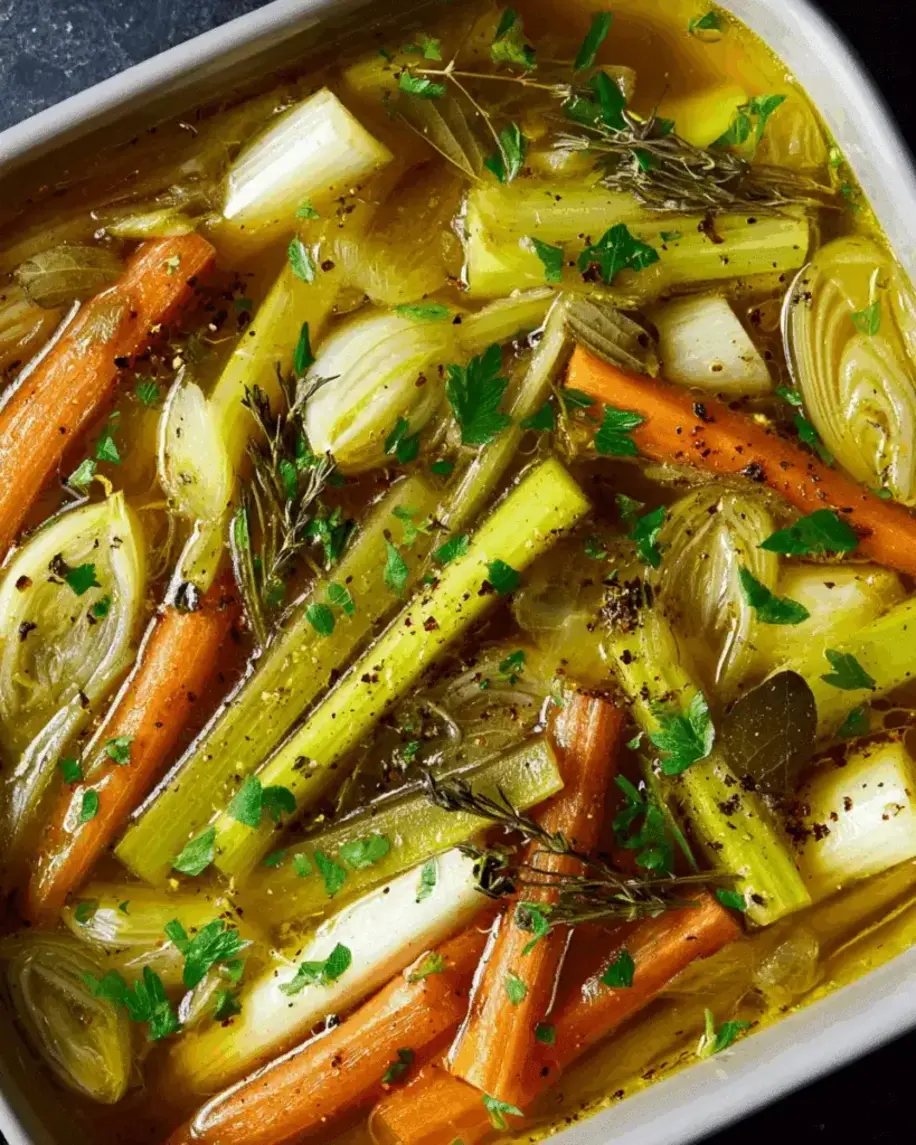
Braised Celery with Onions and Herbs – A Rustic Oven-Baked Comfort Dish

⚖️
Difficulty
Easy
⏲️
Prep Time
15 mins
🕒
Cook Time
45 mins
⏱️
Total Time
60 mins
🍽️
Servings
4

Every time I walk through the Union Square Greenmarket in early autumn, I see those beautiful, rugged bunches of celery and think of my mother’s kitchen in Morocco. She would take the humblest vegetables and transform them into something deeply comforting, often with a slow simmer and a little spice. This braised celery recipe is my take on that memory — an oven baked celery dish that turns a simple side into the star of the table. The rustic celery and onions mingle with fresh herbs and a whisper of cumin, creating a dish that’s both familiar and exotic. I learned the technique of low, slow braising at Le Cordon Bleu in Paris, but the soul of this recipe is pure North African warmth.

Imagine tender celery ribs, still holding their shape but surrendering to the fork, bathed in a silky onion and herb broth. The onions melt into sweetness as they cook, while the herbs – I use thyme, rosemary, and a little parsley – perfume the whole dish. A splash of white wine and a dusting of cumin give it a subtle complexity that will have you wondering why you haven’t tried celery with herbs recipe like this before. The top gets a golden, caramelized crust from a final uncovered stint in the oven. It smells like Sunday dinner: warm, earthy, and inviting.

As a trained chef, I’ve braised everything from short ribs to artichokes, and trust me, this easy celery side dish is proof that great cooking doesn’t require expensive ingredients. The secret? Cutting the celery on a bias to keep it from getting watery, and letting the oven do the work. I’ll share my tried-and-true method, plus a common mistake that home cooks make that leads to mushy celery. Whether you’re serving it alongside a Sunday roast or as a light vegetarian main, this dish will become a staple.

Why This Braised Celery Recipe Is the Best

The Flavor Secret – Most braised celery dishes rely on a simple butter-and-stock approach. I add a pinch of ground cumin (a nod to my Moroccan roots) and a touch of lemon zest at the end to brighten the richness. The combination of caramelized onions, fresh herbs, and that warm spice lifts this oven baked celery dish into something truly special. My Paris-trained palate insists on balance: the cumin doesn’t overpower, it deepens.

Perfected Texture – The key to a great rustic celery and onions braise is texture. You want the celery to be tender but not falling apart, and the onions to be jammy without turning to mush. My technique of starting on the stovetop and finishing uncovered in the oven gives you that beautifully colored, slightly chewy top layer while the bottom stays lusciously saucy. It’s a classic chef’s trick I learned in the kitchens of Paris.

Foolproof & Fast – Don’t let “braised” scare you. This is an easy celery side dish that even a beginner can pull off. There’s no constant stirring, no complicated skills. Just a bit of chopping, a quick sauté, and then the oven takes over. You can prep everything in advance, and the results are consistently impressive. That’s the magic of a good braise.

Braised Celery Recipe Ingredients

I love buying celery at the farmers market, but any grocery store celery works beautifully. For this celery with herbs recipe, I recommend looking for bunches with tight, crisp stalks and fresh green leaves — the leaves are edible and add a lovely herbaceous note. When I was growing up, my mother would send me to the souk to pick the freshest bunches, and I’d always sneak a leaf or two to munch on the way home.

Ingredients List

  • 1 large bunch celery (about 10–12 stalks), leaves reserved
  • 2 medium yellow onions, thinly sliced
  • 3 tablespoons unsalted butter
  • 2 tablespoons olive oil
  • 3 cloves garlic, minced
  • 1 teaspoon ground cumin
  • 1/2 teaspoon salt (plus more to taste)
  • 1/4 teaspoon black pepper
  • 1/2 cup dry white wine (or vegetable broth for alcohol-free)
  • 1 cup low-sodium vegetable or chicken broth
  • 2 sprigs fresh thyme
  • 1 sprig fresh rosemary
  • 2 tablespoons fresh parsley, chopped (plus more for garnish)
  • 1 teaspoon lemon zest (optional)

Ingredient Spotlight

Celery – The star of the show. Look for celery that is firm and free of blemishes. The inner stalks are more tender and sweeter, while the outer ones have more fiber – I use a mix. Pro tip: save the leaves for garnish; they’re packed with flavor.

Ground Cumin – This is my secret weapon. A warm, earthy spice that pairs beautifully with celery and onions. If you don’t have it, you can use coriander or a pinch of smoked paprika, but the flavor profile will change slightly. I always buy whole cumin seeds and grind them fresh for maximum aroma.

White Wine – The acidity from the wine cuts through the richness and adds depth. A crisp Sauvignon Blanc or Pinot Grigio works well. For a non-alcoholic version, use an extra 1/2 cup of broth plus a tablespoon of lemon juice.

Original IngredientBest SubstitutionFlavor / Texture Impact
Unsalted butterVegan butter or coconut oilSlightly different richness, still creamy
White wineExtra broth + 1 tbsp lemon juiceLess complex, but still bright
Fresh thyme1/2 tsp dried thymeLess aromatic but still herbal

How to Make Braised Celery with Onions and Herbs — Step-by-Step

Ready to make the simplest, most flavorful oven baked celery dish? Follow these steps and you’ll have a side dish that steals the show.

Step 1: Prepare the Celery

Trim the root end and leaves from the celery bunch. Separate the stalks and wash them well. Cut the stalks on a diagonal into 2-inch pieces. Cut any very thick stalks in half lengthwise so they cook evenly. Reserve a handful of the inner yellow leaves for garnish.

💡 mia’s Pro Tip: Cutting on a bias increases surface area and helps the celery absorb the braising liquid without becoming mushy. It also looks more elegant on the plate.

Step 2: Sauté the Aromatics

Preheat your oven to 375°F (190°C). In a large ovenproof skillet or Dutch oven, melt the butter with the olive oil over medium heat. Add the sliced onions and cook for 6–8 minutes, stirring occasionally, until soft and lightly golden. Add the minced garlic and cumin, and cook for another minute until fragrant.

⚠️ Common Mistake to Avoid: Don’t let the garlic burn. It will turn bitter. Stir constantly and add it for just the last minute of sautéing.

Step 3: Oven Braise

Add the cut celery to the pan, then pour in the white wine and broth. Stir in the salt, pepper, and the fresh thyme and rosemary sprigs. Bring the liquid to a simmer on the stovetop, then cover the pan and transfer to the preheated oven. Bake for 30 minutes. Remove the lid, stir gently, and continue baking uncovered for another 15 minutes, until the celery is tender and the top is lightly golden. Remove the herb sprigs, stir in the lemon zest (if using) and chopped parsley.

💡 mia’s Pro Tip: For a beautiful caramelized top, turn on the broiler for the last 2 minutes of cooking. Watch carefully to avoid burning.

StepActionDurationKey Visual Cue
1Prepare celery5 minsEven diagonal cuts
2Sauté aromatics8–10 minsOnions golden, garlic fragrant
3Add wine and broth2 minsLiquid comes to simmer
4Oven braise (covered)30 minsSteam rising, celery tender
5Uncover and finish15 minsTop golden, sauce thickened

Serving & Presentation

This easy celery side dish is incredibly versatile. I love to serve it as a side to roasted chicken or pan-seared fish — the bright, herbaceous notes cut through the richness beautifully. For a vegetarian main, spoon it over creamy polenta or Parmesan risotto. The silky texture of the braised celery pairs wonderfully with grains like farro or quinoa.

When I make this for Sunday supper in my NYC apartment, I garnish with a few reserved celery leaves, a sprinkle of flaky sea salt, and a drizzle of extra-virgin olive oil. A little lemon zest on top adds a fresh pop of color and flavor. My family in Morocco would serve this alongside lamb tagine, but here in New York, I often bring it to holiday dinners as a lighter alternative to heavy casseroles.

Pairing TypeSuggestionsWhy It Works
Side DishRoasted chicken, grilled fish, pork chopsHerb flavor complements proteins
Sauce / DipYogurt-tahini sauce, gremolataAdds creaminess and texture
BeverageSauvignon Blanc, Pinot Grigio, lemon spritzerAcidity mirrors the wine in the dish
GarnishReserved celery leaves, lemon zest, flaky saltBrightens flavor, adds visual appeal

Make-Ahead, Storage & Reheating

This braised celery is a lifesaver for busy weeknights. I often make a double batch on Sunday and use it throughout the week. The flavors actually deepen after a day in the fridge, making it even more delicious.

MethodContainerDurationReheating Tip
RefrigeratorAirtight glass containerUp to 4 daysReheat in a skillet over medium-low, adding a splash of broth if needed.
FreezerFreezer-safe bag or container (flatten to save space)Up to 3 monthsThaw in fridge overnight, then reheat in a covered pan at 350°F for 10-15 mins.
Make-AheadRefrigerate unbaked, coveredUp to 2 days aheadBake as directed, adding 5 extra minutes if starting cold.

One tip from my NYC meal-prep routine: If you freeze this, the texture of the celery softens further, but the flavor becomes incredibly concentrated. It’s wonderful stirred into soups or used as a topping for crostini.

Variations & Easy Swaps

VariationKey ChangeBest ForDifficulty Impact
Moroccan Spice LiftAdd 1/2 tsp each coriander and paprika, plus 1/4 tsp cinnamonExtra warmth and depthEasy
Dairy-Free & VeganUse olive oil instead of butter, vegetable broth instead of chickenVegan dinnersEasy
Spring Green HerbsReplace rosemary with tarragon, add 1 cup fresh peas in final 10 minsLighter, fresher flavorEasy

Moroccan Spice Lift

For an even bolder North African twist, add ground coriander, paprika, and a whisper of cinnamon along with the cumin. This combination is something my mother used in almost every vegetable dish. The warmth of cinnamon with celery is unexpected and utterly delicious. Serve alongside couscous or roasted lamb for a meal that transports you to Marrakech.

Dairy-Free & Vegan

To make this plant-based, simply replace the butter with a high-quality extra-virgin olive oil and use vegetable broth. The dish remains rich and silky. I tested this version for a NYC vegan pop-up dinner, and guests raved about how comforting it felt. The olive oil adds a fruity note that complements the herbs beautifully.

Spring Green Herbs

Come spring, I swap the rosemary for fresh tarragon, which has a delicate anise flavor that pairs wonderfully with the sweet onions. I also fold in a handful of frozen peas during the last ten minutes of uncovered baking. It makes the dish feel brighter and lighter — perfect for Easter dinner or a spring brunch. I found this idea from a French bistro technique I learned in Paris.

What is the best way to prepare celery for braising to avoid it becoming too watery?

The key to preventing watery braised celery lies in two steps: first, cut the celery on a bias into pieces about 2 inches long. This exposes more surface area, allowing the natural moisture to evaporate rather than pool at the bottom of the pan. Second, cook the celery uncovered for the final part of the braise. In this recipe, after the initial covered phase, I remove the lid and let the oven do its magic, caramelizing the top and concentrating the juices. Also, avoid using too much liquid — just enough to come about a third of the way up the celery. Starting with a hot pan and sautéing the onions first also helps reduce excess moisture.

Can I use dried herbs instead of fresh for the rustic oven-baked celery dish?

Absolutely, you can substitute dried herbs, but you’ll lose a bit of the fresh vibrancy. Dried herbs are more concentrated, so use about one-third of the amount called for fresh. For example, instead of 2 sprigs of fresh thyme (about 1 teaspoon of leaves), use 1/2 teaspoon of dried thyme. I recommend adding dried herbs at the beginning of the braise so they have time to rehydrate and release their flavors. If you have fresh herbs growing on a windowsill, I encourage you to use them — the bright, green notes are one of the stars of this celery with herbs recipe.

How long should I braise celery and onions in the oven for the best texture?

For perfectly tender yet still structured celery, I recommend a total oven time of 45 minutes. The first 30 minutes should be covered to steam and soften the celery and onions gently. Then uncover for the final 15 minutes at 375°F (190°C). This allows the liquid to reduce slightly and the natural sugars in the onions and celery to caramelize, creating a beautiful golden hue and deeper flavor. If you like your celery very soft (like me when I’m craving ultimate comfort), you can extend the covered time by 10 minutes. But for a side dish that still has a pleasant bite, stick to 30 covered + 15 uncovered.

What can I serve with braised celery and onions as a main or side dish?

This easy celery side dish is incredibly versatile. As a side, it pairs beautifully with roasted chicken, grilled steak, or pan-seared salmon — the herb-accented broth complements most proteins. For a vegetarian main, serve it over creamy polenta, cheesy grits, or a bowl of fluffy quinoa. I also love to spoon leftovers (if there are any!) into a warm pita with a dollop of yogurt. In Morocco, we’d serve something similar alongside lamb tagine or as a part of a larger meze spread. Don’t forget crusty bread to soak up all the delicious juices.

Can I make this braised celery recipe gluten-free?

Yes, this recipe is naturally gluten-free! There’s no flour or wheat-based thickener used. The sauce thickens from the natural pectin in the celery and onions, plus the reduction in the oven. Just make sure your broth is certified gluten-free if you’re sensitive — some store-bought broths may contain traces of gluten. I always use certified gluten-free broth and wines, and it works perfectly. It’s one less thing to worry about when you want a comforting, rustic side dish.

What kind of onions work best for this oven baked celery dish?

Yellow onions are my go-to for braising because they caramelize beautifully, turning sweet and tender without falling apart. White onions are a good substitute if that’s what you have, but they are a bit more pungent and will need slightly longer cooking. Red onions will work in a pinch but can turn an unappetizing gray color; I’d avoid them for this dish. Sweet onions like Vidalia are fine, but because they have higher sugar content, they may burn more easily during the sauté stage — keep the heat moderate and stir often.

Can I use the celery leaves in the braise or just for garnish?

Absolutely! Celery leaves are full of flavor and are often thrown away unfairly. I like to add a few of the inner, tender leaves to the braise during the last five minutes of cooking; they wilt into the sauce and add an extra layer of herbal freshness. The more robust outer leaves are best reserved for garnish or for making pesto. In this recipe, I save a small handful of the yellow-green inner leaves to sprinkle on top with the parsley. It’s a small touch that makes a difference.

Why is my braised celery still crunchy after the recommended cooking time?

There are a few possible reasons: first, your celery may have been very thick and fibrous. For large stalks, I recommend cutting them in half lengthwise so they cook faster. Second, the oven temperature might be off — invest in an oven thermometer to be sure. Third, the dish may not have been covered tightly enough during the first 30 minutes. Losing too much steam can slow down the cooking. If you find your celery is still too crunchy, simply return the pan to the oven covered for another 10-15 minutes. The braise method is forgiving.

Can I add other vegetables to this rustic celery and onions dish?

Yes, this dish is great for adding other hearty vegetables. Carrots cut into similar-sized pieces work beautifully and sweeten the braise. Sliced fennel would echo the anise notes of the tarragon variation. Even chunks of potato can be added — just parboil them first so they don’t overwhelm the cooking time. In the fall, I sometimes add cubed butternut squash. Remember to adjust the braising liquid slightly if you add extra vegetables; you may need a splash more broth to keep everything moist.

Is it possible to prepare this dish on the stovetop instead of the oven?

You can, but the oven gives a more even heat and allows for that beautiful caramelized top. To adapt for stovetop, after sautéing the aromatics and adding liquid, bring to a simmer, cover, and cook on low heat for about 35 minutes. Then remove the lid and simmer for another 10-15 minutes, stirring occasionally, until the liquid reduces slightly. The texture will be a bit softer and you’ll miss the slight browning on top, but the flavor will still be wonderful. I recommend the oven method for the best rustic finish.

Share Your Version!

I love hearing how my recipes turn out in your kitchen! If you try this braised celery recipe, please leave a star rating and a comment below to let me know how it went. Did you try one of the variations? Did you serve it with something unexpected? Your feedback helps other cooks find confidence to try.

Snap a photo of your beautiful oven baked celery dish and share it on Instagram or Pinterest — make sure to tag me @exorecipes so I can see your creation! I love when you put your own spin on rustic celery and onions. And here’s a question for you: what’s the one herb you think would put this over the top? I’d love to know what you’d add!

From my NYC kitchen to yours — I hope this recipe brings as much warmth to your table as it does to mine. — mia 🧡

📌

Love This Recipe? Save It to Pinterest!

If you enjoyed this Braised Celery with Onions and Herbs recipe, don’t let it get lost in your browser tabs! 😄 Pin it now so you can find it again anytime — and explore hundreds more tried-and-tested recipes waiting for you on my Pinterest boards.

👉 Follow mia on Pinterest @exorecipe

📌 Pin this recipe · 🔁 Re-pin your favorites · 💬 Tag me when you make it — I love seeing your creations!

Print

clock clock iconcutlery cutlery iconflag flag iconfolder folder iconinstagram instagram iconpinterest pinterest iconfacebook facebook iconprint print iconsquares squares iconheart heart iconheart solid heart solid icon

Braised Celery with Onions and Herbs A Rustic Oven-Baked Comfort Dish

  • Author: Chef Mia

Instructions


    Braised Celery with Onions and Herbs A Rustic Oven-Baked Comfort Dish

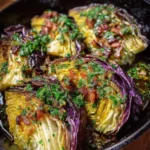
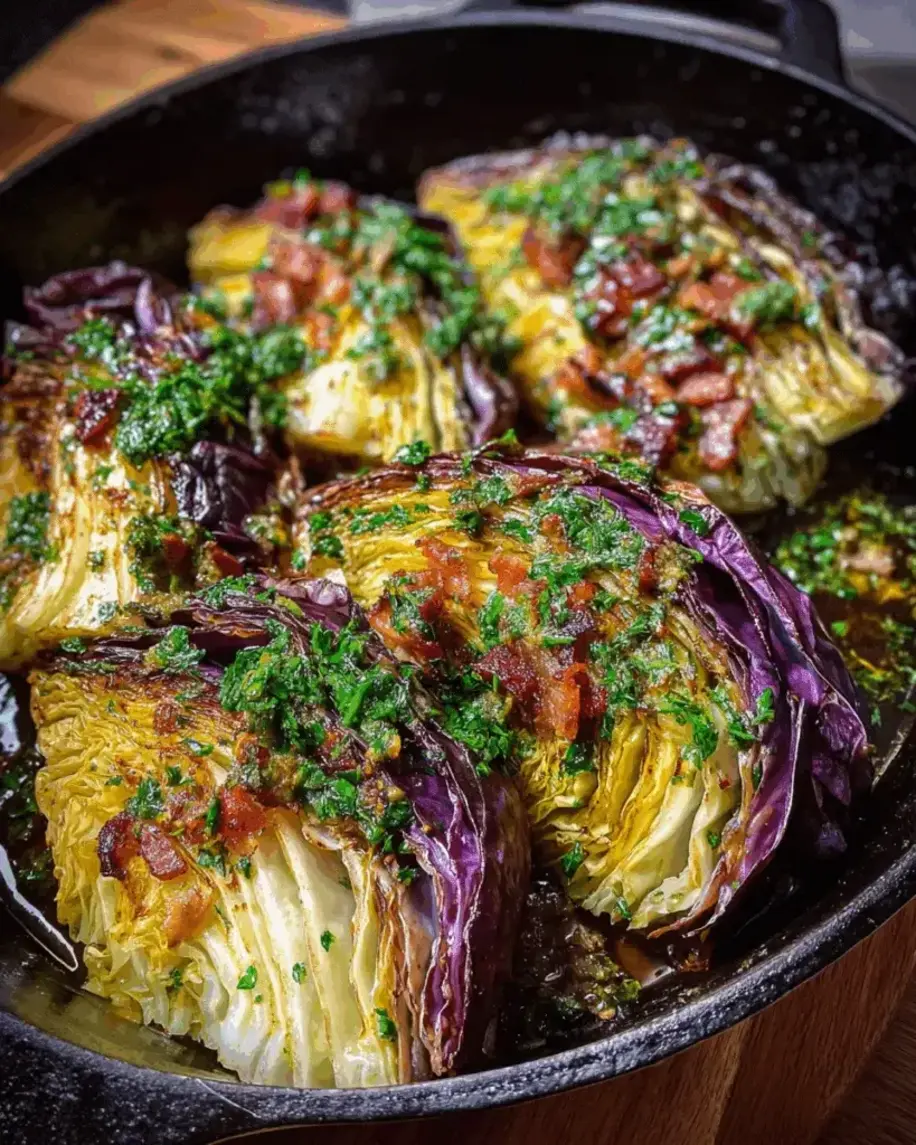
    Braised Cabbage with Bacon, Garlic, and Zesty Herb Gremolata – A Side Dish That Steals the Show

    ⚖️
    Difficulty
    Easy
    ⏲️
    Prep Time
    15 mins
    🕒
    Cook Time
    35 mins
    ⏱️
    Total Time
    50 mins
    🍽️
    Servings
    4

    I still remember the first time I made braised cabbage with bacon in my tiny Paris kitchen during culinary school. My Moroccan mother always cooked cabbage slowly with olive oil and garlic, but my French chef taught me to render bacon first and deglaze with broth. That smoky, tender cabbage became my go-to comfort dish. Now in New York City, I love serving it with a bright gremolata — the zesty herb finish wakes up every bite. This braised cabbage with bacon recipe is my love letter to those three worlds.

    Imagine wedges of green cabbage slowly simmering in a savory bath of bacon fat and garlic, turning buttery and sweet. The crispy bacon bits add a salty crunch, while the gremolata — a punchy mix of parsley, lemon zest, and garlic — cuts through the richness like a ray of sunshine. The aroma alone will draw everyone to the table. Every forkful is tender yet firm, thanks to a careful braise that respects the cabbage’s structure.

    This cabbage with bacon recipe is foolproof for any home cook. I tested it countless times to get that perfect texture — cooked through but never mushy. The secret? A controlled simmer and not overcrowding the pan. I’ll share my pro tips along the way, plus the one mistake I see most often (hint: it involves the broth). Whether you’re new to braising or a seasoned cook, this dish will become a staple.

    Why This Braised Cabbage with Bacon Recipe Is the Best

    The Flavor Secret: The magic here is layering — first bacon fat, then garlic, then cabbage, then broth. That triple smokiness from the bacon infuses every wedge. The gremolata (a classic French-Italian condiment) is my twist: I add a pinch of red pepper flakes for a little heat, just like my mother used to do with dried chili in Morocco. It elevates the entire dish from simple side to showstopper.

    Perfected Texture: Braising is all about low and slow. I sear the cabbage wedges until golden on both sides before adding liquid — that browning locks in flavor and prevents sogginess. Then I cover the pot and let it steam gently. The result is cabbage that’s tender through the core but still holds its shape. A common mistake is to rush this step; patience pays off.

    Foolproof & Fast: From prep to table in 50 minutes, this recipe is weeknight-friendly yet impressive enough for guests. You don’t need any special equipment — just a Dutch oven or heavy pot with a lid. The gremolata comes together in minutes while the cabbage braises. Plus, it’s naturally gluten-free and can be made vegetarian with a simple swap.

    Braised Cabbage with Bacon Ingredients

    I like to shop at the Union Square Greenmarket on Saturday mornings — the green cabbages are always heavy and crisp. For the bacon, I head to a local butcher that carries thick-cut applewood-smoked slices. And the fresh parsley and lemons? Right from my window box when summer’s in full swing. Each ingredient plays a crucial role, so picking the best matters.

    Ingredients List

    • 1 head green cabbage (about 2 pounds), cored and cut into 8 wedges
    • 4 slices thick-cut bacon, chopped
    • 4 cloves garlic, thinly sliced
    • ½ cup chicken or vegetable broth
    • Salt and freshly ground black pepper, to taste
    • For the Gremolata:
    • ½ cup fresh parsley, finely chopped
    • 2 tablespoons fresh lemon zest
    • 1 clove garlic, minced
    • 2 tablespoons extra-virgin olive oil
    • 1 teaspoon red pepper flakes (optional)

    Ingredient Spotlight

    Green Cabbage: The star — look for a tight, heavy head with crisp outer leaves. Avoid cabbages with wilted or browning layers. Savoy cabbage can also work; it’s more tender and will braise a few minutes faster.

    Thick-Cut Bacon: I prefer applewood or hickory-smoked for deeper flavor. Standard thin bacon works but yields less rendered fat and less crunch. For a smoky vegetarian version, use smoked paprika and olive oil.

    Fresh Parsley: Flat-leaf (Italian) parsley is less bitter than curly and chops beautifully. You can substitute cilantro for a more Moroccan-Mexican twist — it’s surprisingly delicious.

    Lemon Zest: Use a microplane or fine grater for the most fragrant zest. Avoid the white pith — it’s bitter. Meyer lemons add a lovely floral note if you can find them.

    Original IngredientBest SubstitutionFlavor / Texture Impact
    Thick-cut baconSmoked turkey bacon + 1 tbsp olive oilLess fat, slightly drier, still smoky
    Green cabbageSavoy cabbageMore tender, cooks 5 min faster
    Chicken brothVegetable broth + 1 tsp soy sauceAdds umami without meat
    Fresh parsleyFresh cilantroBright, citrusy, more assertive
    Lemon zestLime zest + ½ tsp apple cider vinegarTangy, tropical, slightly sharper

    How to Make Braised Cabbage with Bacon — Step-by-Step

    Ready? This process is simple and rewarding. Let me walk you through each step with my chef-tested tips.

    Step 1: Render the Bacon

    Cook the chopped bacon in a large Dutch oven or heavy pot over medium heat until crisp, about 5–7 minutes. Stir occasionally for even browning. Use a slotted spoon to transfer the bacon to a paper towel-lined plate, leaving the rendered fat in the pot.

    💡 mia’s Pro Tip: Don’t rush this step — low and slow renders more fat and gives you crispy, not burnt, bacon. If the fat starts smoking, lower the heat.

    Step 2: Sauté the Garlic

    Add the sliced garlic to the hot fat and cook, stirring constantly, for 30 seconds until fragrant. Be careful not to let it brown — burnt garlic turns bitter.

    ⚠️ Common Mistake to Avoid: Adding garlic too early or on high heat. It should sizzle gently, not pop. If your garlic browns in seconds, the pan is too hot.

    Step 3: Sear the Cabbage

    Arrange the cabbage wedges in a single layer in the pot (work in batches if needed). Cook, turning once, until lightly browned on both sides, about 4–5 minutes per side. A nice golden crust adds depth.

    💡 mia’s Pro Tip: Use tongs to flip each wedge gently. If they don’t fit all at once, sear in two batches; overcrowding steams instead of browns.

    Step 4: Braise

    Pour in the broth, season with salt and pepper, and bring to a simmer. Cover the pot, reduce heat to low, and braise until the cabbage is tender when pierced with a knife, about 20–25 minutes. Check at 20 minutes — you want it tender but not falling apart.

    ⚠️ Common Mistake to Avoid: Lifting the lid often — this releases steam and slows cooking. Let the cabbage braise undisturbed for at least 15 minutes.

    Step 5: Make the Gremolata

    While the cabbage braises, combine the parsley, lemon zest, minced garlic, olive oil, and red pepper flakes (if using) in a small bowl. Mix well. Set aside — the flavors will meld as it sits.

    💡 mia’s Pro Tip: Chop the parsley just before using to keep it bright. If you add the olive oil too early, it can become soggy — best to dress right before serving.

    Step 6: Assemble and Serve

    Transfer the braised cabbage to a platter, sprinkle the reserved bacon over the top, and generously spoon the gremolata over everything. Serve warm. The contrast of hot cabbage and cool, zesty gremolata is pure magic.

    ⚠️ Common Mistake to Avoid: Adding the gremolata too early — the heat will wilt the parsley. Spoon it on right before serving for the freshest pop of flavor.

    StepActionDurationKey Visual Cue
    1Cook bacon5–7 minBacon is deep golden and crisp
    2Cook garlic30 secGarlic is fragrant and softened, not browned
    3Sear cabbage4–5 min per sideGolden-brown edges, cabbage slightly softened
    4Braise20–25 minKnife slides through core easily
    5Make gremolata5 minBright green, well combined
    6Serve2 minPlatter garnished with bacon and gremolata

    Serving & Presentation

    I love serving this gremolata cabbage on a large wooden board — the browned wedges look rustic and inviting. Sprinkle the crispy bacon and spoon the gremolata right in the middle so each person can take as much as they like. A final drizzle of extra-virgin olive oil and a few lemon zest curls make it pop.

    This side dish pairs beautifully with roasted chicken, seared pork chops, or a simple white fish like cod. In the fall, I serve it alongside a roast beef or braised short ribs — the acidity of the gremolata cuts through the richness perfectly. My Moroccan mother would have served it with lamb tagine; in NYC, it’s a staple at my Friendsgiving table.

    Pairing TypeSuggestionsWhy It Works
    Side DishRoasted chicken, grilled pork chops, pan-seared salmonSmoky cabbage and bright gremolata complement mild proteins
    Main CourseAdd cooked lentils or chickpeas for a hearty vegetarian bowlBecomes a complete, plant-based meal with protein and fiber
    BeverageCrisp Sauvignon Blanc, dry Riesling, or a light wheat beerAcidity in wine echoes the gremolata; beer cuts the richness
    GarnishExtra lemon zest, flaky sea salt, fresh parsley leavesAdds color, freshness, and a final pop of flavor

    Make-Ahead, Storage & Reheating

    Living in a tiny NYC apartment taught me to meal-prep smartly. This braised cabbage side dish is one of my favorites to make ahead — it actually gets better as the flavors meld overnight. Just wait to add the gremolata until you serve.

    MethodContainerDurationReheating Tip
    RefrigeratorAirtight container, cabbage separate from gremolataUp to 4 daysReheat in a covered skillet with 1 tbsp broth over medium-low for 5–7 min
    FreezerFreezer-safe bag or containerUp to 3 monthsThaw overnight in fridge, then reheat as above; texture will be softer
    Make-AheadBraise cabbage, cool, refrigerate2 days in advanceMake gremolata fresh day of — it loses brightness after 2 days

    When reheating, I like to add a splash of broth to refresh the braising liquid. The cabbage will soften a bit more but still be delicious. If you’re serving a crowd, you can braise the cabbage a day ahead, then reheat gently while you prepare the gremolata. Just remember: never microwave the gremolata — the parsley will wilt instantly. Spoon it on cold right before serving.

    Variations & Easy Swaps

    One of the beauties of bacon garlic cabbage is how adaptable it is. Here are three of my favorite ways to change it up — each tested in my own kitchen.

    VariationKey ChangeBest ForDifficulty Impact
    Vegetarian & VeganOmit bacon, use olive oil + smoked paprikaPlant-based dinnersEasy, no change in technique
    Spicy Moroccan TwistAdd 1 tsp cumin + ½ tsp cinnamon to broth, use cilantro-mint gremolataExotic flavor loversMedium – new spice blend
    Apple & FennelAdd 1 sliced apple and 1 sliced fennel bulb with the cabbageFall / holiday tableEasy – just more slicing

    Vegetarian & Vegan Version

    This is my go-to when I want a lighter meal. Swap the bacon for 2 tablespoons of olive oil and add 1 teaspoon smoked paprika to the broth. The paprika mimics the smoky depth of bacon beautifully. Use vegetable broth and increase the garlic to 5 cloves for extra punch. The gremolata is naturally vegan – just use a good quality olive oil. I tested this version for my sister, who’s vegan, and she now requests it every week.

    Spicy Moroccan Twist

    Inspired by my mother’s kitchen in Marrakech, this version warms you from the inside. Stir 1 teaspoon ground cumin and ½ teaspoon ground cinnamon into the broth before braising. For the gremolata, replace the parsley with a mix of fresh cilantro and mint (equal parts), and add a pinch of saffron if you have it. The scent alone will transport you to a North African souk. Serve it with grilled merguez sausage for a complete experience.

    Apple & Fennel Variation

    When fall hits NYC, I love adding seasonal produce to this dish. After searing the cabbage, add 1 cored and sliced Granny Smith apple and 1 thinly sliced fennel bulb to the pot. The apple’s tartness and fennel’s anise notes complement the bacon beautifully. Braise as directed – the apple will soften into a chunky sauce that coats the cabbage. This version is fantastic with roast pork or alongside a Thanksgiving turkey.

    How long should I braise cabbage with bacon to get it tender without it becoming mushy?

    For perfectly tender yet firm cabbage, braise for 20 to 25 minutes after searing. The key is to keep the heat low and the pot covered. Check at the 20-minute mark by piercing a wedge through the core with a knife — it should slide in easily but the wedge should still hold its shape. If you braise longer than 30 minutes, the outer leaves may start to fall apart. Also, make sure your cabbage wedges are uniform in size so they cook evenly. Using thick-cut bacon adds enough fat to keep the cabbage moist without washing out its natural texture.

    What is the best substitute for bacon in braised cabbage to keep it flavorful?

    The best substitute for bacon is smoked turkey bacon plus a tablespoon of olive oil for the fat. If you want to keep it vegetarian, use 2 tablespoons of olive oil and add 1 teaspoon of smoked paprika to the broth — that gives you the smoky flavor without any meat. Another excellent option is to use diced pancetta (which is essentially unsmoked Italian bacon) or even a few slices of prosciutto, though those will be saltier. For a plant-based alternative, I’ve also tried liquid smoke (just a few drops) mixed with vegetable broth, and it works surprisingly well.

    Can I make braised cabbage with bacon and gremolata ahead of time and reheat it?

    Yes, absolutely! This dish is great for meal prep. Braise the cabbage up to 2 days ahead, let it cool in the cooking liquid, then refrigerate in an airtight container. Reheat it gently in a covered pan with a splash of broth over medium-low heat for about 5 to 7 minutes. The gremolata, however, should be made fresh the day you serve — it loses its bright color and punchy flavor after a day. If you need to save time, you can chop the parsley and zest the lemon up to a day ahead but keep them separate, then combine with olive oil just before serving.

    What fresh herbs work best in the zesty gremolata for this cabbage recipe?

    Classic gremolata uses fresh flat-leaf parsley, which is clean and slightly peppery. For this cabbage dish, I love adding a pinch of fresh mint or basil for a hint of sweetness. In summer, I swap half the parsley for fresh cilantro — it gives a bright, almost citrusy note that pairs beautifully with the lemon zest. If you want an earthy twist, try a little fresh thyme or oregano (about 1 teaspoon finely chopped). Just avoid dried herbs; they lack the fresh pop that makes gremolata special.

    Can I use red cabbage instead of green cabbage in this braised cabbage with bacon recipe?

    Yes, red cabbage works well, but it will change the color and flavor slightly. Red cabbage is more robust and can be a bit earthier with a slightly longer cooking time — you may need to braise for 30 minutes instead of 20 to 25. It also tends to turn the cooking liquid a vivid purple, which looks stunning. One thing to keep in mind: red cabbage is less sweet than green, so you might want to add a teaspoon of brown sugar or a splash of apple cider vinegar to balance the acidity. The gremolata will still brighten it nicely.

    How do I prevent the gremolata from wilting when I serve it over hot cabbage?

    The trick is to add the gremolata at the very last moment — spoon it on just before bringing the dish to the table. If you serve the cabbage on a platter, you can also serve the gremolata in a small bowl on the side so each person adds their own. This keeps the herbs bright and the lemon zest fragrant. Also, make sure your parsley is thoroughly dried after washing; any excess moisture will make the gremolata soggy faster. For best results, I chop the herbs and zest, then add the olive oil right before serving.

    Can I make this braised cabbage dish dairy-free? Are there any hidden dairy ingredients?

    This recipe as written is naturally dairy-free! There is no milk, cream, butter, or cheese in the ingredients. The only fat comes from bacon and olive oil. The gremolata is also dairy-free — it’s simply herbs, garlic, lemon zest, and olive oil. If you’re serving it with a main dish, just make sure your accompaniments (like mashed potatoes or bread) are dairy-free as needed. That said, always check your bacon labels — some brands add sugar or smoke flavoring, but they rarely contain dairy.

    What should I serve with braised cabbage with bacon and gremolata for a complete meal?

    This side dish pairs beautifully with a wide range of mains. For a protein-focused meal, try roast chicken, pan-seared pork chops, grilled steak, or baked salmon. The smoky cabbage and bright gremolata cut through rich meats perfectly. For a lighter option, serve it alongside a simple white fish like cod or tilapia. Vegetarians can turn it into a main by adding a scoop of cooked lentils or chickpeas and serving with crusty bread to sop up the braising juices. I also love it with roasted potatoes or a creamy polenta for a hearty winter plate.

    How do I store leftover gremolata, and how long does it keep?

    Store leftover gremolata in an airtight container in the refrigerator for up to 2 days. The lemon zest and garlic will lose some brightness after that, and the herbs may darken. To keep it fresher longer, store the chopped parsley and lemon zest separately from the olive oil and garlic, and combine just before using. The oil can be stored at room temperature (if you’ll use it within a day) or in the fridge. If the gremolata has been sitting on hot cabbage, it’s best to discard any leftovers — the heat and moisture will quickly make it soggy.

    Is this braised cabbage with bacon recipe keto-friendly? What are the carbs per serving?

    Yes, this recipe can fit into a keto diet if you adjust the serving size. One serving (1/4 of the recipe) contains about 18 grams of carbohydrates, most of which come from the cabbage. On a strict keto plan (20g net carbs per day), that’s still reasonable if you account for other meals. To reduce carbs, you can use less cabbage — say, 1½ pounds — and still serve 4 people with smaller wedges. The bacon, olive oil, and broth are all keto-friendly. The gremolata adds only a negligible amount of carbs from the herbs and lemon zest.

    Share Your Version!

    I can’t wait to see how you make this braised cabbage with bacon your own! Did you try the Moroccan twist? Or maybe you added apple and fennel for a fall treat? Whatever you do, let me know in the comments below — I read every single one. And if you’re on Instagram or Pinterest, snap a photo of your dish and tag @exorecipes. I love seeing your creations pop up in my feed.

    Before you go, here’s one last question for you: What’s the one vegetable you think wouldn’t work braised, but you’re now curious to try? Leave your answer in the comments — I might just test it out in my NYC kitchen!

    From my NYC kitchen to yours — I hope this recipe brings as much warmth to your table as it does to mine. — mia 🧡

    📌

    Love This Recipe? Save It to Pinterest!

    If you enjoyed this Braised Cabbage with Bacon, Garlic, and Zesty Herb Gremolata recipe, don’t let it get lost in your browser tabs! 😄 Pin it now so you can find it again anytime — and explore hundreds more tried-and-tested recipes waiting for you on my Pinterest boards.

    👉 Follow mia on Pinterest @exorecipe

    📌 Pin this recipe · 🔁 Re-pin your favorites · 💬 Tag me when you make it — I love seeing your creations!

    Print

    clock clock iconcutlery cutlery iconflag flag iconfolder folder iconinstagram instagram iconpinterest pinterest iconfacebook facebook iconprint print iconsquares squares iconheart heart iconheart solid heart solid icon

    Braised Cabbage with Bacon, Garlic, and Zesty Herb Gremolata

    • Author: Chef Mia
    • Prep Time: 15 minutes
    • Cook Time: 35 minutes
    • Total Time: 50 minutes
    • Yield: 4 1x
    • Method: Side Dish
    • Cuisine: American

    Description

    This braised cabbage dish is a comforting and flavorful side, featuring tender cabbage cooked with smoky bacon and garlic, then topped with a bright, zesty herb gremolata for a fresh finish.


    Ingredients

    Scale
    • 1 head green cabbage (about 2 pounds), cored and cut into 8 wedges
    • 4 slices thick-cut bacon, chopped
    • 4 cloves garlic, thinly sliced
    • 1/2 cup chicken or vegetable broth
    • Salt and freshly ground black pepper, to taste
    • For the Gremolata:
    • 1/2 cup fresh parsley, finely chopped
    • 2 tablespoons fresh lemon zest
    • 1 clove garlic, minced
    • 2 tablespoons extra-virgin olive oil
    • 1 teaspoon red pepper flakes (optional)

    Instructions

    1. Cook the bacon in a large Dutch oven or heavy pot over medium heat until crisp, about 5-7 minutes. Remove bacon with a slotted spoon and set aside, leaving the rendered fat in the pot.
    2. Add the sliced garlic to the pot and cook, stirring, for 30 seconds until fragrant.
    3. Arrange the cabbage wedges in a single layer in the pot (work in batches if needed). Cook, turning once, until lightly browned on both sides, about 4-5 minutes per side.
    4. Pour in the broth, season with salt and pepper, and bring to a simmer. Cover the pot, reduce heat to low, and braise until the cabbage is tender, about 20-25 minutes.
    5. While the cabbage braises, make the gremolata: In a small bowl, combine the parsley, lemon zest, minced garlic, olive oil, and red pepper flakes (if using). Mix well.
    6. To serve, transfer the braised cabbage to a platter, sprinkle the reserved bacon over the top, and generously spoon the gremolata over everything. Serve warm.

    Notes

    For a vegetarian version, omit the bacon and use olive oil to brown the cabbage, then use vegetable broth. Gremolata can be made ahead and refrigerated for up to 2 days.


    Nutrition

    • Calories: 280
    • Sugar: 8g
    • Fat: 18g
    • Carbohydrates: 18g
    • Protein: 10g


    Braised Cabbage with Bacon, Garlic, and Zesty Herb Gremolata

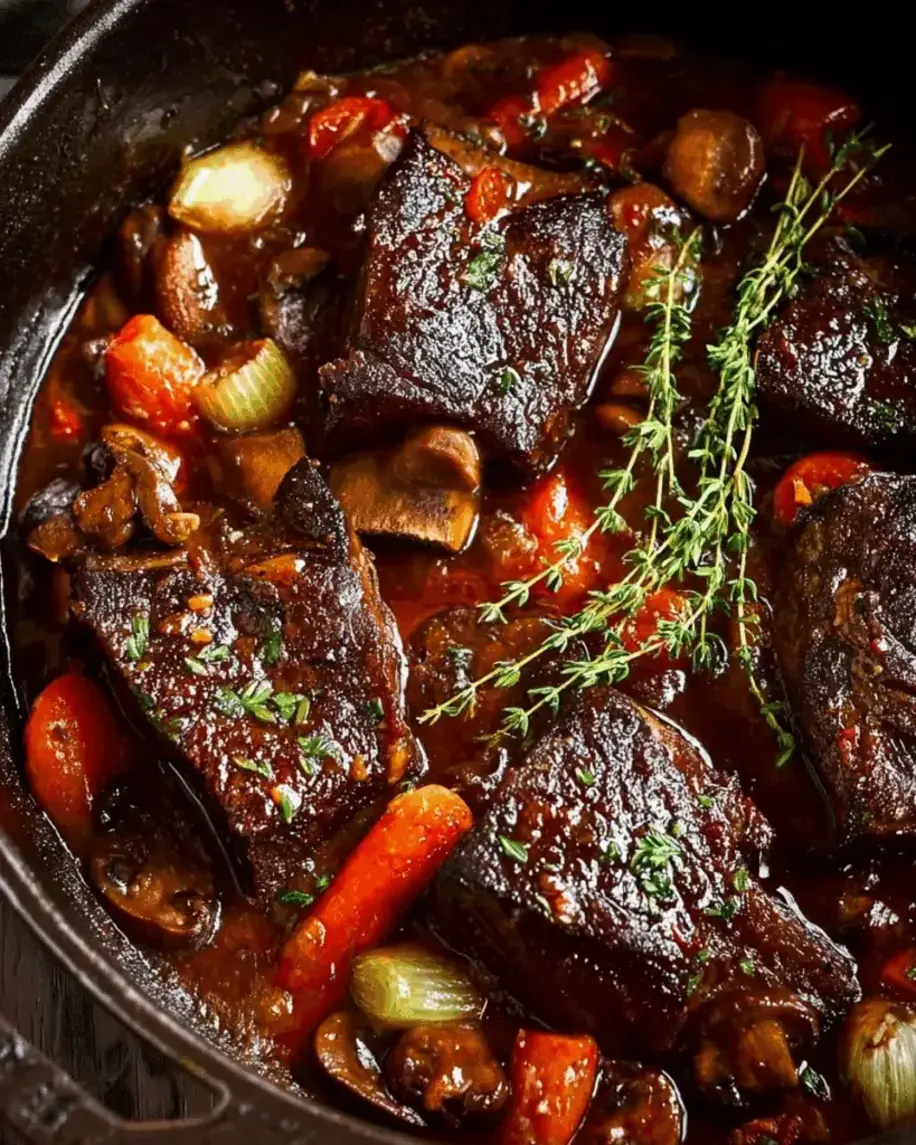
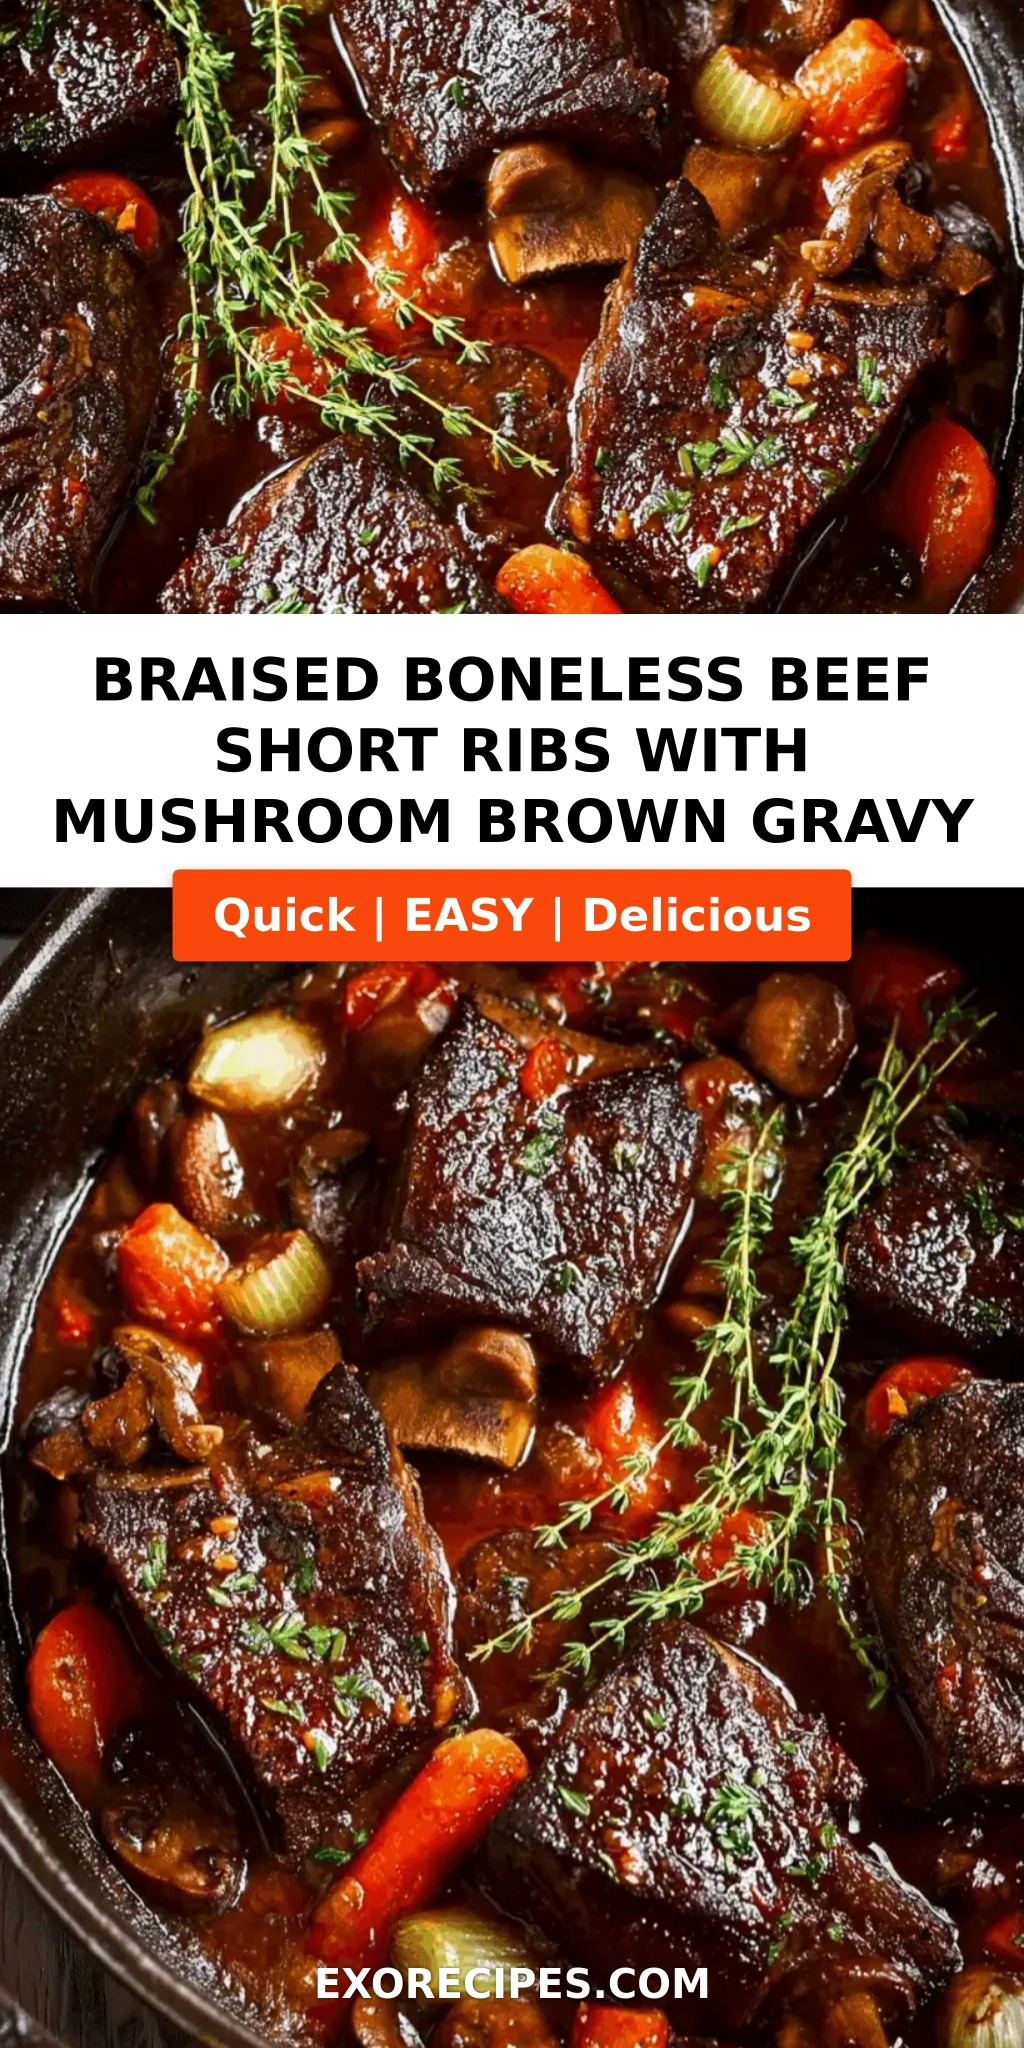
    Braised Boneless Beef Short Ribs with Mushroom Brown Gravy – The Ultimate Comfort Food

    ⚖️
    Difficulty
    Medium
    ⏲️
    Prep Time
    15 mins
    🕒
    Cook Time
    180 mins
    ⏱️
    Total Time
    195 mins
    🍽️
    Servings
    4

    Growing up in Morocco, I learned that the best braised dishes start with patience and a deep, dark fond on the bottom of the pot. My mother would coax incredible flavor from humble cuts of meat using just onions, spices, and time. Years later, in a Parisian kitchen, my chef taught me the French technique of layering umami – tomato paste, wine, and mushrooms – to build an almost mythical gravy. Now, living in New York City, I’ve combined both worlds to create these braised boneless beef short ribs with a mushroom brown gravy that is pure winter magic. Every bite delivers fork-tender beef swirled in a velvety, earthy sauce that clings to your spoon. This is the beef short ribs recipe you’ll make on a snowy Sunday when all you want is warmth.

    Let me paint the scene: the beef short ribs, seared to a deep mahogany crust, release their rich fat into the pot. Mushrooms sizzle and brown, soaking up every bit of that beefy goodness. A splash of red wine – optional but highly recommended – deglazes the pan, lifting the caramelized bits into the liquid. Then comes beef broth, fresh thyme, and bay leaves, and the whole pot goes into a slow oven. For the next three hours, your home fills with the most incredible aroma – meaty, savory, a little sweet from the onion, and profoundly comforting. The gravy turns silky and dark, studded with tender mushroom slices. As a trained cook, I can tell you this is easy braised beef at its finest: minimal hands-on work, maximum reward.

    What sets my version apart? It’s the combination of two techniques I treasure: the Moroccan habit of browning the meat very slowly to develop a deep crust, and the French method of crushing the fond with tomato paste before adding liquid. The result is a gravy so rich you’ll want to eat it with a spoon. I’ll share my best tips for searing without burning the fond, and a common mistake that can make your gravy bitter. Trust me – once you make these short ribs with gravy, you’ll never go back to a plain braise again. Ready to fill your kitchen with something spectacular?

    Why This Braised Boneless Beef Short Ribs Recipe Is the Best

    The Flavor Secret: My secret lies in the double-layer umami technique. First, I sear the beef short ribs until they form a dark, sticky crust – this is the foundation of the gravy. Then, after sweating the mushrooms, I add a generous spoonful of tomato paste and cook it for a full minute until it deepens in color and smells almost sweet. This step, taught to me in Paris, “fries” the paste and eliminates any tinny taste, while reinforcing the savory backbone. The mushroom gravy for beef becomes something extraordinary – earthy, meaty, and with just enough acidity to balance the richness.

    Perfected Texture: Achieving fork-tender meat without falling apart into shreds is an art. I braise at 325°F (163°C) – low enough to break down collagen over 2.5 to 3 hours, but high enough to keep the meat moist and intact. The boneless short ribs are cut from the chuck, which has wonderful marbling. As they cook, the fat renders into the gravy, making it naturally thick and luscious. I also recommend leaving the pot uncovered for the last 20 minutes to slightly reduce the liquid and concentrate the flavor – a trick I picked up from a French grandmother in her tiny Paris apartment.

    Foolproof & Fast: Despite its elegant result, this is easy braised beef that even a beginner can master. The ingredients are simple, the oven does most of the work, and the steps are forgiving. My NYC schedule is hectic, so I often prep everything the night before. I’ve tested this recipe with home cooks in my cooking classes in Brooklyn, and every single person nailed it. You don’t need a fancy Dutch oven – any heavy pot with a tight lid works. And if you’re short on time, you can even do the braise in a slow cooker on low for 6 hours (see Variations). That’s the beauty of this dish: it’s elegant enough for a dinner party, but easy enough for a Tuesday night.

    Braised Boneless Beef Short Ribs Ingredients

    I buy my boneless beef short ribs from the Union Square Greenmarket in NYC – the grass-fed ones from a local farm have the best flavor and marbling. In Moroccan souks, I learned to trust my butcher; here, I look for well-marbled pieces about 2 inches thick. For the mushrooms, cremini or baby bellas are my go-to because they have more flavor than white buttons. And the fresh thyme? I grow it on my tiny fire escape – nothing beats snipping it just before cooking.

    Ingredients List

    • 2 lbs boneless beef short ribs
    • 1 tsp salt
    • 1/2 tsp black pepper
    • 2 tbsp olive oil
    • 1 large onion, diced
    • 3 cloves garlic, minced
    • 8 oz mushrooms, sliced (cremini or baby bella)
    • 2 tbsp tomato paste
    • 1/2 cup red wine (optional but recommended – use a dry red like Cabernet Sauvignon or Merlot)
    • 2 cups beef broth (low-sodium preferred)
    • 2 sprigs fresh thyme
    • 2 bay leaves

    Ingredient Spotlight

    Boneless Beef Short Ribs: The hero of the dish. Choose ribs from the chuck section; they have the best marbling for braising. Look for pieces that are thick and uniform so they cook evenly. If you can’t find boneless, bone-in short ribs work too – just add 30 minutes to the cooking time. A good substitution is beef chuck roast cut into 2-inch chunks – it’s slightly leaner but still tender after braising.

    Mushrooms: Cremini mushrooms provide that deep, woodsy flavor that makes the mushroom gravy for beef so addictive. White button mushrooms can be used, but they have less flavor – add a teaspoon of dried porcini powder (or rehydrated porcini) to boost umami. Shiitake mushrooms are also wonderful; they add a slightly smokier note. Never use canned mushrooms – they’re too watery and lack texture.

    Red Wine: The alcohol burns off during cooking, leaving behind acidity and depth that cut through the fat. I prefer a full-bodied dry red like Malbec or Zinfandel. If you don’t cook with wine, substitute an equal amount of beef broth plus 1 tablespoon of balsamic vinegar – the vinegar mimics the wine’s acidity and adds a touch of sweetness.

    Tomato Paste: This is the secret weapon for a rich brown gravy. It adds umami and color. I always buy tomato paste in a tube rather than a can – it lasts longer and is easier to use small amounts. If you only have canned, use 2 tablespoons and cook it for an extra minute to caramelize. For a substitute, try 2 tablespoons of tomato sauce plus 1/2 teaspoon of sugar, but note it won’t have the same concentrated flavor.

    Original IngredientBest SubstitutionFlavor / Texture Impact
    Boneless Beef Short RibsBeef Chuck Roast (2-inch cubes)Slightly leaner but still tender; gravy may be a bit less rich
    Cremini MushroomsShiitake or White Button + 1 tsp dried porcini powderSmokier or more delicate; porcini powder boosts umami
    Red WineBeef Broth + 1 tbsp balsamic vinegarLess complex but still bright; balsamic adds sweetness
    Tomato Paste2 tbsp tomato sauce + 1/2 tsp sugarLess concentrated; gravy may be slightly thinner and less savory

    How to Make Braised Boneless Beef Short Ribs with Mushroom Gravy – Step-by-Step

    Don’t be intimidated by the long cook time – the actual hands-on work is under 20 minutes. Let me walk you through each step with the visual cues I look for in my own kitchen.

    Step 1: Season and Sear the Beef

    Pat the short ribs dry with paper towels – moisture is the enemy of browning. Season generously with salt and pepper all over. Heat the olive oil in a large Dutch oven over medium-high heat until it shimmers. Carefully place the ribs in a single layer, leaving space between them. Sear for 3–4 minutes per side without moving them, until a deep brown crust forms. The sound should be a steady sizzle, not sputtering. Work in batches if needed – overcrowding lowers the temperature. Remove the seared ribs to a plate and set aside.

    💡 mia’s Pro Tip: Don’t rush the sear. If the meat sticks, it’s not ready to flip – let it cook another minute. A proper dark crust is non-negotiable for a rich gravy.

    Step 2: Sweat the Aromatics

    Pour off all but 2 tablespoons of fat from the pot (leave the browned bits – that’s flavor). Reduce heat to medium. Add the diced onion and cook, stirring occasionally, until softened and translucent, about 3 minutes. Add the minced garlic and cook for 30 seconds until fragrant. The bottom of the pot should still have some fond – that’s good. We’ll deglaze later.

    ⚠️ Common Mistake to Avoid: Letting the garlic burn. Garlic cooks very quickly; add it after the onion is soft, and stir constantly. Burnt garlic makes the gravy bitter.

    Step 3: Brown the Mushrooms

    Add the sliced mushrooms to the pot. Increase heat to medium-high and cook, without stirring too often, until they release their liquid and that liquid evaporates, then the mushrooms start to brown, about 5 minutes. You’ll see the pan go from steamy to dry and the mushrooms developing a golden color. This is where the umami multiplies.

    💡 mia’s Pro Tip: Don’t salt the mushrooms during this step. Salt draws out more moisture, making it harder to brown. Add salt later in the braise.

    Step 4: Build the Gravy Base

    Stir in the tomato paste and cook for 1 minute, stirring constantly, until it darkens and smells slightly sweet. Pour in the red wine (if using) and scrape up all the browned bits from the bottom of the pot with a wooden spoon. Let the wine reduce by half, about 2 minutes. This deglazing step is essential – it incorporates all that fond into the gravy.

    ⚠️ Common Mistake to Avoid: Not reducing the wine enough. If the wine is too raw, the gravy will taste sharp. Wait until it’s syrupy and the alcohol smell is gone.

    Step 5: Braise

    Return the seared short ribs to the pot, nestling them into the mushroom mixture. Add the beef broth, thyme sprigs, and bay leaves. Bring to a gentle simmer on the stovetop, then cover and transfer to a preheated 325°F (163°C) oven. Braise for 2.5 to 3 hours, until the meat is fork-tender – meaning a fork slides in with little resistance but the meat holds its shape. Check halfway through; if the liquid seems low, add a splash of broth or water.

    💡 mia’s Pro Tip: For the last 20 minutes, remove the lid. This thickens the gravy and deepens the color. If you want a thicker gravy, you can also make a cornstarch slurry (1 tablespoon cornstarch mixed with 2 tablespoons cold water) and stir it in while the pot is on the stovetop after braising.

    Step 6: Finish and Serve

    Remove the pot from the oven. Discard the thyme sprigs and bay leaves. Taste the gravy and adjust seasoning with additional salt and pepper if needed. The short ribs are ready – they should be meltingly tender but not falling apart into shreds. Serve over mashed potatoes, egg noodles, or creamy polenta. Spoon the mushroom gravy generously over the top.

    ⚠️ Common Mistake to Avoid: Forgetting to taste the gravy before serving. The salt level can vary depending on the broth you used. Always taste and adjust at the end.

    StepActionDurationKey Visual Cue
    1. SearBrown beef on all sides3-4 min per sideDeep brown crust that easily releases from pan
    2. SweatCook onion + garlic3-4 minOnion translucent, garlic fragrant, fond remains
    3. Brown mushroomsCook mushrooms until moisture evaporates and they brown5 minPan goes from steamy to dry; mushrooms turn golden
    4. Build gravyAdd tomato paste, deglaze with wine3 minPaste darkens; wine reduces to a syrupy consistency
    5. BraiseOven braise at 325°F2.5–3 hoursMeat is fork-tender, gravy dark and slightly thickened
    6. FinishDiscard herbs, adjust seasoning5 minGravy coats the back of a spoon

    Serving & Presentation

    The perfect plate for these braised boneless beef short ribs starts with a generous bed of creamy mashed potatoes – I like Yukon Golds whipped with butter and half-and-half. The gravy pools around the potatoes and soaks into every forkful. For a lighter option, serve over wide egg noodles or creamy polenta. I also love a side of roasted carrots or green beans with a squeeze of lemon to cut the richness.

    Garnish is where I bring a touch of my French training: a sprinkle of fresh thyme leaves, a pinch of flaky sea salt (like Maldon), and a few cracks of black pepper. In Moroccan style, sometimes I add a spoonful of preserved lemon zest or a handful of fresh cilantro – it adds a bright, unexpected note. For a dinner party, plate each short rib individually with a generous ladle of gravy, and serve the extra in a gravy boat.

    Pairing TypeSuggestionsWhy It Works
    Side DishMashed potatoes, egg noodles, creamy polentaAbsorb the gravy and complement the richness
    Sauce / DipExtra gravy, horseradish creme fraicheHorseradish cuts the fat; creme fraiche adds tang
    BeverageFull-bodied red wine (Zinfandel, Malbec), dark beer (stout)Wine echoes the wine in the gravy; stout adds roasty notes
    GarnishFresh thyme, flaky sea salt, fresh parsley, preserved lemon zestBrightens the dish and adds texture

    Make-Ahead, Storage & Reheating

    As a busy NYC food blogger, I rely on make-ahead meals. These short ribs taste even better the next day – the flavors meld overnight. I often braise them on a Sunday and reheat during the week for an instant comfort dinner. Here’s how to store and reheat properly so they taste as good as day one.

    MethodContainerDurationReheating Tip
    RefrigeratorAirtight containerUp to 4 daysReheat in a covered pot on low stovetop, adding a splash of broth if needed. Avoid microwave – it can dry the meat.
    FreezerFreezer-safe bag or containerUp to 3 monthsThaw overnight in refrigerator. Reheat in a 325°F oven for 30 minutes or on stovetop over low heat, covered.
    Make-AheadLeave in the Dutch ovenUp to 3 days in advanceComplete the recipe, cool, then refrigerate. The fat will solidify on top – scrape it off before reheating for a leaner gravy.

    When reheating, I prefer the stovetop over the microwave. Place the ribs and gravy in a covered skillet or pot over low heat, stirring occasionally. If the gravy has thickened too much, thin with a little beef broth or water. The meat will remain tender. For the best texture, reheat gently – don’t boil. If reheating from frozen, I like to place the entire container in a bowl of warm water for 15 minutes before transferring to a pot.

    Variations & Easy Swaps

    This recipe is versatile enough to adapt to different diets and cravings. Here are my three favorite variations, each tested in my NYC kitchen.

    VariationKey ChangeBest ForDifficulty Impact
    Moroccan-InspiredAdd 1 tsp cumin, 1/2 tsp cinnamon, and 1/4 tsp saffron; replace wine with brothThose who love warm spices and North African flavorsEasy
    Gluten-Free / Dairy-FreeThicken gravy with cornstarch slurry (1 tbsp cornstarch + 2 tbsp water); skip wine or use dry sherryGluten-free or dairy-free diets; still rich and satisfyingEasy
    Slow Cooker VersionSear on stovetop, then transfer to slow cooker; cook on low for 6 hoursBusy weekdays – set it and forget itEasy

    Moroccan-Inspired Variation

    This is my homage to my mother’s kitchen. Add 1 teaspoon of ground cumin, 1/2 teaspoon of cinnamon, and a pinch of saffron threads soaked in a tablespoon of warm water along with the tomato paste. Omit the wine and increase the beef broth by 1/2 cup. The spices transform the gravy into something warm and exotic – perfect with couscous or saffron rice. Saffron is expensive, so substitute a pinch of turmeric if needed, though the flavor will be earthier.

    Gluten-Free / Dairy-Free Variation

    To make this recipe gluten-free and dairy-free, simply skip the wine (or use a gluten-free dry sherry) and thicken the gravy with a cornstarch slurry at the end. In a small bowl, mix 1 tablespoon of cornstarch with 2 tablespoons of cold water until smooth. After removing the herbs, bring the pot to a gentle simmer on the stovetop and stir in the slurry. Cook for 1–2 minutes until the gravy thickens. Serve with mashed potatoes made with dairy-free butter and unsweetened oat milk – it’s just as creamy and delicious.

    Slow Cooker Version

    For the easiest version of this easy braised beef, sear the ribs and cook the aromatics exactly as instructed on the stovetop, then transfer everything to a slow cooker. Add the broth, thyme, and bay leaves. Cook on low for 6 hours (or high for 4 hours). The meat will be incredibly tender, though the gravy won’t reduce as much – you can thicken it with the cornstarch slurry or by simmering it uncovered on the stovetop for 10 minutes after the meat is done. This is my go-to for busy weeknights when I want the flavor of a long braise without hovering over the oven.

    What is the best way to sear boneless beef short ribs before braising them?

    The best way to sear boneless beef short ribs is to start with dry meat. Pat the ribs thoroughly with paper towels – any moisture creates steam and prevents browning. Season with salt and pepper just before searing. Heat a heavy pan (cast iron or Dutch oven) over medium-high heat with a high-smoke-point oil like olive or avocado oil. Place the ribs in a single layer, making sure not to overcrowd – work in batches if needed. Let them cook undisturbed for 3–4 minutes until a deep, dark crust forms. Flip and repeat on all sides. The meat should release easily from the pan when properly browned. This crust is the foundation of your gravy’s flavor.

    Can I substitute the mushrooms with another vegetable in the brown gravy?

    Yes, you can substitute mushrooms, but keep in mind that mushrooms are key to the umami depth of the mushroom gravy for beef. If you need a replacement, try roasted eggplant (diced and roasted before adding) – it adds a similar earthy, savory quality. Another option is caramelized onions – cook 2 large onions slowly until deeply browned, and add them along with the broth. They’ll provide sweetness and a brown color, but the gravy will lack the meaty umami that mushrooms contribute. For a more umami-rich substitute, add 1 tablespoon of soy sauce or tamari (for gluten-free) along with the broth. Neither will exactly replicate the mushroom flavor, but both will give you a delicious gravy.

    How long should I braise boneless beef short ribs to make them tender?

    Boneless beef short ribs need to braise for 2.5 to 3 hours at 325°F (163°C) to become perfectly fork-tender. The exact time depends on the thickness of the pieces and the marbling. After 2 hours, start checking: insert a fork into the thickest part of a rib – it should slide in with little resistance, but the meat should still hold its shape. If it’s still tough, continue braising and check every 20 minutes. Don’t rush the process; the collagen needs time to break down into gelatin, which gives the meat its melting texture and enriches the gravy. If using a slow cooker, cook on low for 6–8 hours for best results.

    What is the ideal serving suggestion for braised beef short ribs with mushroom gravy?

    The ideal serving is to place a generous portion of creamy mashed potatoes (or egg noodles) on a warm plate, then arrange one or two short ribs on top. Ladle the mushroom gravy generously over the meat and potatoes, making sure to include some mushroom slices. For a fresh finish, garnish with fresh thyme leaves, a pinch of flaky sea salt, and a few cracks of black pepper. A side of roasted green beans or a simple arugula salad with lemon vinaigrette adds brightness to balance the richness. This pairing turns the dish into a complete, satisfying meal – perfect for a cozy dinner or a special occasion.

    Can I make this recipe without red wine?

    Absolutely. The wine adds acidity and depth, but you can easily omit it. Replace the 1/2 cup of wine with an equal amount of beef broth plus 1 tablespoon of balsamic vinegar or red wine vinegar. The vinegar provides the necessary acidity to balance the richness of the meat and mushrooms. You could also use a splash of apple cider vinegar or a squeeze of lemon juice added at the end of cooking. If you want a non-alcoholic option that still mimics wine’s complexity, try substituting with unsweetened pomegranate juice or even a bit of strong coffee – both add a fruity or roasted note that plays well with the beef and mushroom gravy.

    How do I thicken the mushroom gravy if it’s too thin?

    If your gravy is thinner than you’d like after braising, there are a few easy fixes. The simplest is to remove the meat and simmer the gravy uncovered on the stovetop for 10–15 minutes until it reduces and thickens slightly. For a quicker method, make a cornstarch slurry: mix 1 tablespoon of cornstarch with 3 tablespoons of cold water until smooth, then stir it into the simmering gravy and cook for 1–2 minutes until thickened. Alternatively, you can mash a few of the cooked mushroom slices and stir them back into the gravy – their natural pectin helps thicken and adds texture. Avoid adding flour directly, as it can clump without proper whisking.

    Can I use bone-in short ribs instead of boneless?

    Yes, you can substitute bone-in short ribs. They will add even more flavor to the gravy from the marrow. There’s no need to adjust the seasoning or other ingredients, but you will need to extend the braising time by about 30–45 minutes, as bones slow down heat transfer. Bone-in ribs are also typically larger, so you may need to sear them in more batches. Once cooked, you can serve them with the bone in or remove the meat from the bones before serving – the meat will easily fall off when tender. Keep in mind that the yield will be slightly less, as the bone adds weight.

    What’s the difference between braising and stewing short ribs?

    Braising and stewing are both moist-heat cooking methods, but they differ in the amount of liquid used. Braising uses just enough liquid – usually about halfway up the meat – to create steam while the top of the meat cooks in the oven. The meat is typically seared first and cooked in a covered pot, and the result is a concentrated sauce. Stewing, on the other hand, uses enough liquid to fully submerge the meat, which is cut into smaller, uniform pieces. For this recipe, braising is ideal because it keeps the short ribs whole and develops a rich, thick gravy rather than a thin broth. Both methods produce tender meat, but braising gives you that iconic, saucy finish.

    Can I add other vegetables to the pot while braising?

    Absolutely. Adding vegetables like carrots, celery, and parsnips along with the onions creates a more complete one-pot meal. Cut them into large chunks (about 1-inch pieces) so they don’t disintegrate during the long braise. Add them after you’ve sweated the onions and garlic but before adding the mushrooms – they’ll soften as the meat cooks. You can also add pearl onions or small potatoes, though potatoes may turn mushy if cooked for the full 3 hours, so consider adding them halfway through. The vegetables will absorb the gravy’s flavor and become incredibly tender. Just remember to adjust the salt and pepper at the end, as vegetables absorb seasoning.

    How do I prevent the beef from becoming dry and stringy?

    Preventing dry, stringy beef comes down to two things: proper searing and not overcooking. First, sear the meat until it develops a deep brown crust – this locks in juices and adds flavor. Then, braise at a low temperature (325°F) and don’t exceed 3 hours. Boneless short ribs are rich in connective tissue that breaks down into gelatin, keeping the meat moist. However, if you cook them too long or at too high a temperature, the muscle fibers can contract and squeeze out moisture, leaving you with stringy meat. The key is to test for doneness regularly: when a fork slides in easily, it’s done. Also, always let the meat rest in the gravy for 10 minutes after removing from the oven – this allows the juices to redistribute.

    Share Your Version!

    I’d love to see how these braised boneless beef short ribs turn out in your kitchen! Did you try the Moroccan variation? Or add a secret ingredient that took the gravy to the next level? Leave a star rating and a comment below – your feedback helps other home cooks discover this recipe and gives me ideas for future posts. Tag me on Instagram or Pinterest @exorecipes when you share your photo – I personally repost my favorites in my stories.

    Here’s a fun challenge: What’s one thing from your cultural background that you’d add to this gravy? I’d love to hear your creative twists. From my NYC kitchen to yours — I hope this recipe brings as much warmth to your table as it does to mine. — mia 🧡

    📌

    Love This Recipe? Save It to Pinterest!

    If you enjoyed this Braised Boneless Beef Short Ribs with Mushroom Brown Gravy recipe, don’t let it get lost in your browser tabs! 😄 Pin it now so you can find it again anytime — and explore hundreds more tried-and-tested recipes waiting for you on my Pinterest boards.

    👉 Follow mia on Pinterest @exorecipe

    📌 Pin this recipe · 🔁 Re-pin your favorites · 💬 Tag me when you make it — I love seeing your creations!

    Print

    clock clock iconcutlery cutlery iconflag flag iconfolder folder iconinstagram instagram iconpinterest pinterest iconfacebook facebook iconprint print iconsquares squares iconheart heart iconheart solid heart solid icon

    Braised Boneless Beef Short Ribs with Mushroom Brown Gravy

    • Author: Chef Mia
    • Prep Time: 15 minutes
    • Cook Time: 3 hours
    • Total Time: 3 hours 15 minutes
    • Yield: 4 1x
    • Method: Main Course
    • Cuisine: American

    Description

    Tender braised boneless beef short ribs in a rich mushroom brown gravy, slow-cooked to perfection. A comforting and elegant dish.


    Ingredients

    Scale
    • 2 lbs boneless beef short ribs
    • 1 tsp salt
    • 1/2 tsp black pepper
    • 2 tbsp olive oil
    • 1 large onion, diced
    • 3 cloves garlic, minced
    • 8 oz mushrooms, sliced
    • 2 tbsp tomato paste
    • 1/2 cup red wine (optional)
    • 2 cups beef broth
    • 2 sprigs fresh thyme
    • 2 bay leaves

    Instructions

    1. Season the short ribs with salt and pepper.
    2. Heat olive oil in a large Dutch oven over medium-high heat. Sear the ribs on all sides until browned, about 3-4 minutes per side. Remove and set aside.
    3. In the same pot, add onion and garlic; cook until softened, about 3 minutes. Add mushrooms and cook until they release their liquid and start to brown, about 5 minutes.
    4. Stir in tomato paste and cook for 1 minute. Pour in red wine, scraping up any browned bits, and let reduce by half, about 2 minutes.
    5. Return the ribs to the pot. Add beef broth, thyme sprigs, and bay leaves. Bring to a simmer.
    6. Cover and transfer to a preheated 325°F (163°C) oven. Braise for 2.5 to 3 hours, until the meat is fork-tender.
    7. Remove the pot from the oven. Discard thyme sprigs and bay leaves. Taste the gravy and adjust seasoning with additional salt and pepper if needed.
    8. Serve the short ribs with the mushroom gravy over mashed potatoes or noodles.

    Notes

    For a gluten-free version, use cornstarch slurry (1 tbsp cornstarch mixed with 2 tbsp cold water) to thicken the gravy if desired.


    Nutrition

    • Calories: 520 kcal
    • Sugar: 3 g
    • Fat: 34 g
    • Carbohydrates: 8 g
    • Protein: 42 g


    Braised Boneless Beef Short Ribs with Mushroom Brown Gravy

    ph">For more delicious inspiration, follow me on Pinterest!
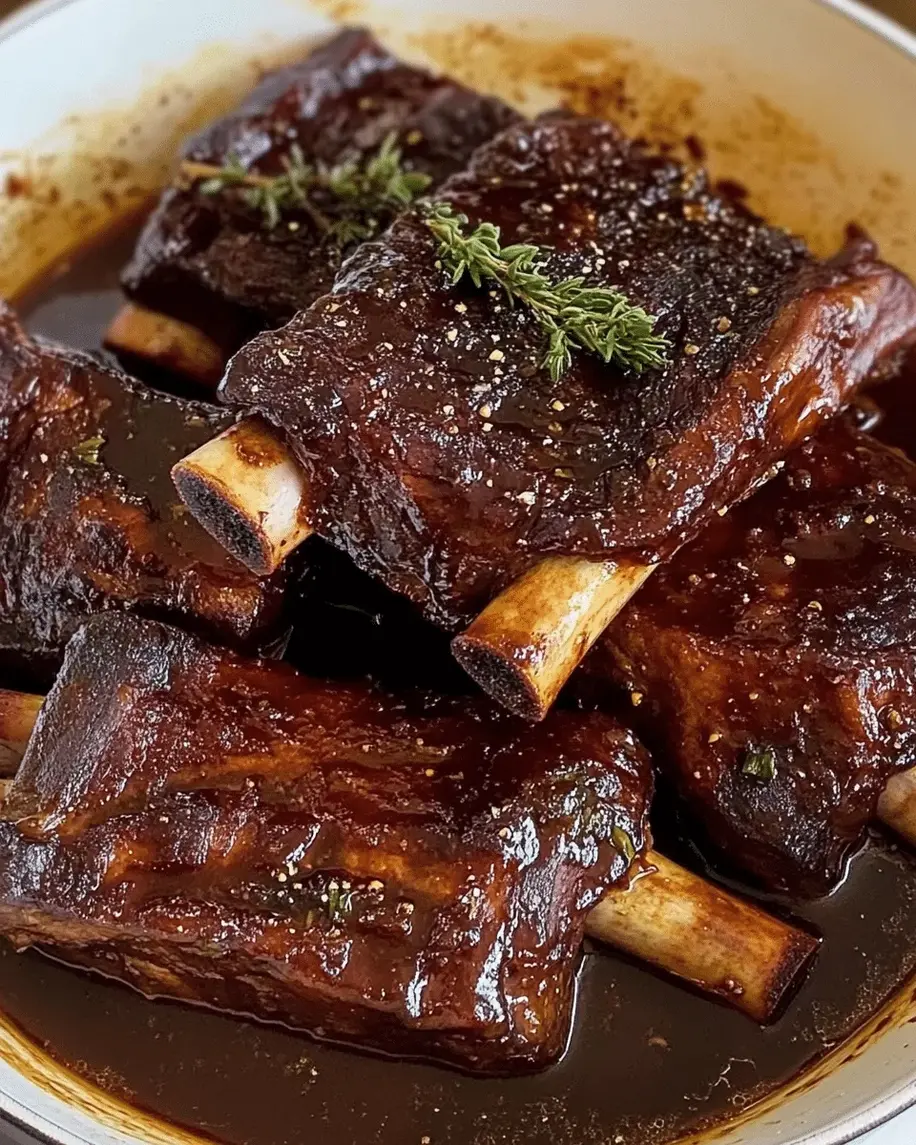
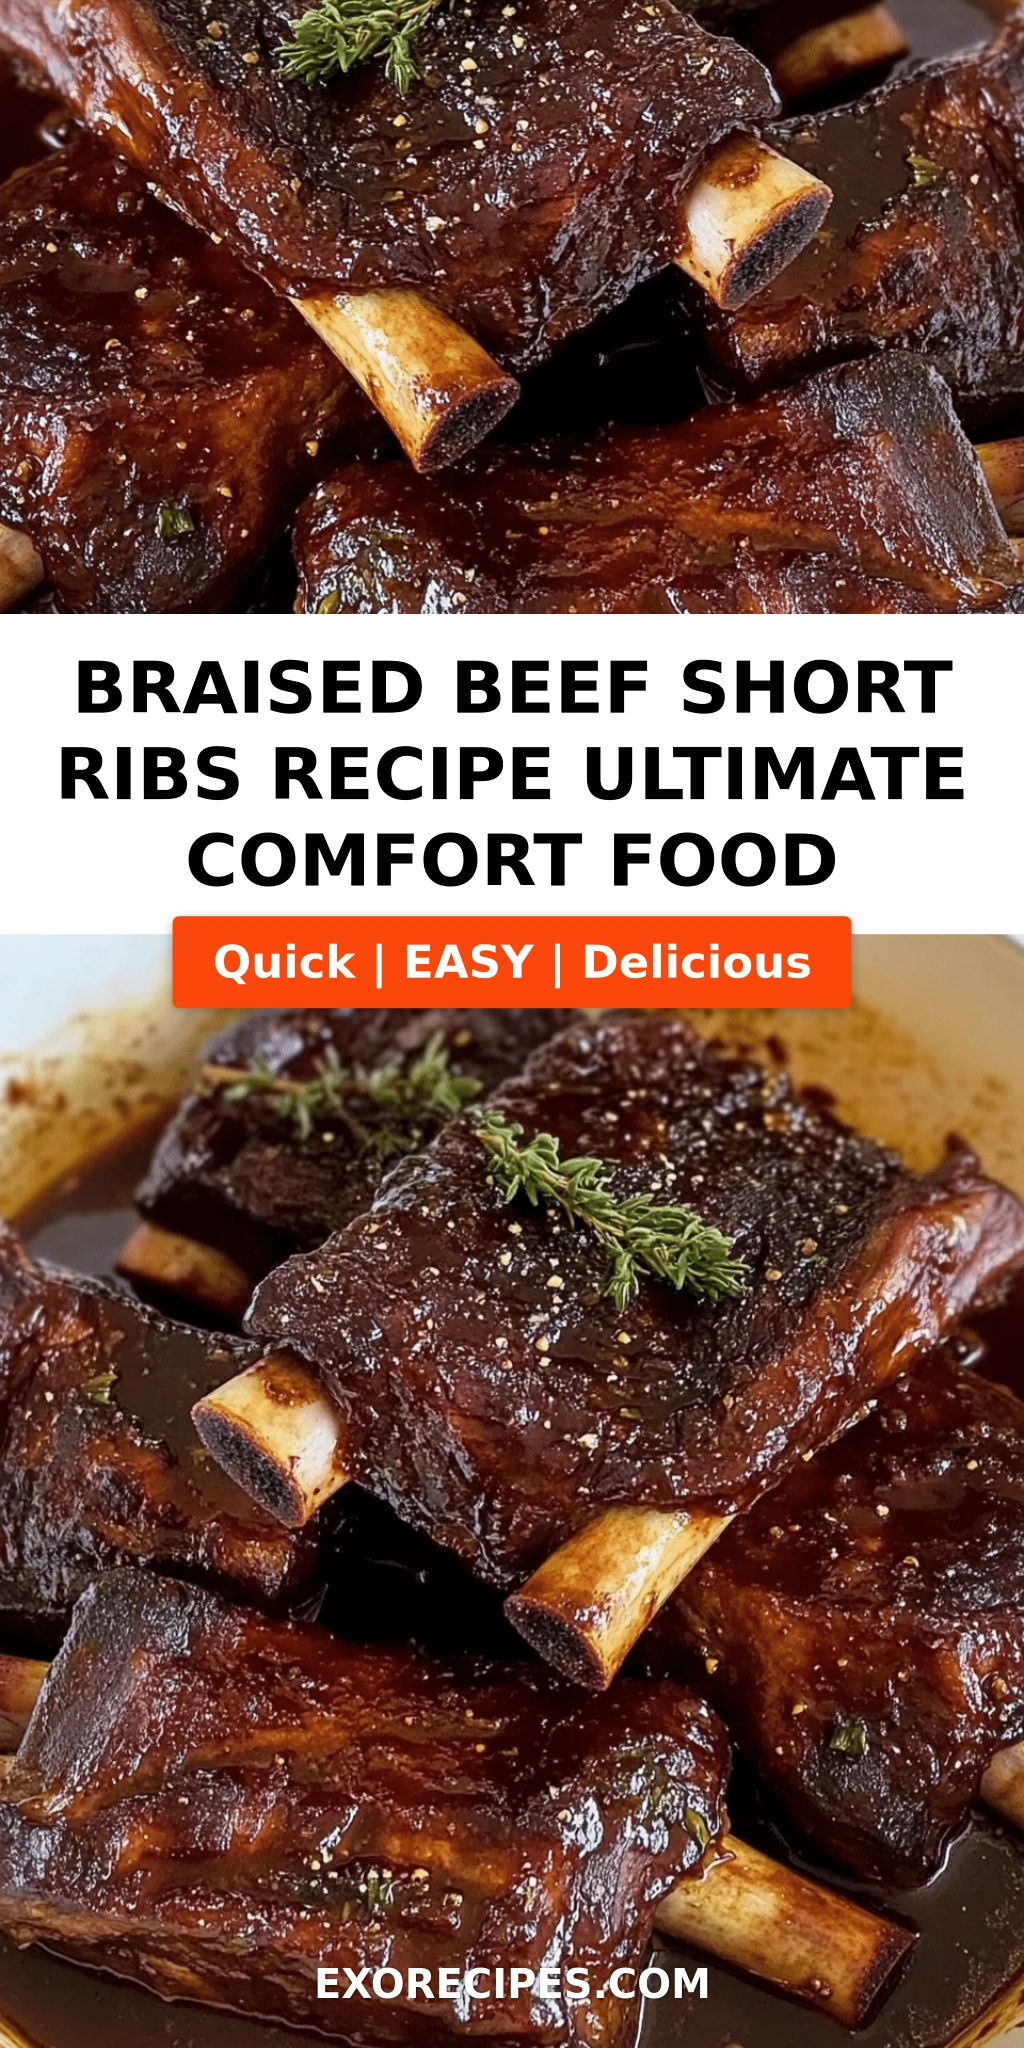
    Braised Beef Short Ribs Recipe The Ultimate Comfort Food – A Moroccan-French Twist on a Classic

    ⚖️
    Difficulty
    Medium
    ⏲️
    Prep Time
    20 mins
    🕒
    Cook Time
    180 mins
    ⏱️
    Total Time
    200 mins
    🍽️
    Servings
    6

    There are some recipes that feel like a warm hug on a cold day, and this braised beef short ribs recipe is exactly that. I still remember the first time I made short ribs the way my French chef instructor taught me in Paris — low and slow, with a deeply caramelized fond and a splash of red wine that filled the entire kitchen with the most intoxicating aroma. But being mia, I couldn’t resist adding a touch of my Moroccan heritage: a whisper of ras el hanout, the warm North African spice blend my mother used in her tagines. The result? A truly unforgettable comfort food beef short ribs dish that marries the best of both worlds — rich, velvety French technique with the fragrant, soulful warmth of Morocco. This is the kind of meal that makes you slow down, breathe deep, and savor every single bite.

    Picture this: after hours in the oven, the short ribs become impossibly tender — so tender they fall off the bone at the slightest touch of a fork. The braising liquid transforms into a glossy, deeply savory sauce with layers of flavor: the sweetness of caramelized onions, the earthiness of carrots and celery, the boldness of red wine, and the subtle, exotic warmth of cumin, cinnamon, and coriander from the ras el hanout. Each bite is a cascade of textures — the crisp, caramelized exterior giving way to buttery, melt-in-your-mouth meat. The aroma alone will draw your family to the kitchen, hovering near the pot, asking, “Is it done yet?” And when you finally serve it, spooning that luscious sauce over creamy mashed potatoes or a bed of soft polenta, you’ll know it was worth every minute of the wait.

    What sets my version apart is not just the Moroccan-French fusion, but the precision and care in every step. I’ve tested this recipe dozens of times — tweaking the searing time, adjusting the oven temperature, and finetuning the ratio of wine to broth — until I achieved that perfect balance of rich, savory, and aromatic. I’ll walk you through the exact technique for getting a deep, dark sear (the secret to maximum flavor), how to build a braising liquid that sings, and the ideal cooking time for fall-off-the-bone short ribs every single time. Whether you’re a braising beginner or a seasoned cook looking for a new twist, this recipe is designed to work beautifully. And yes, I’ll also show you how to pull it off in a Dutch oven — because not everyone has a slow cooker, and honestly, the Dutch oven gives you better control and a richer result. Let’s get started, my friend!

    Why This Braised Beef Short Ribs Recipe Is the Best

    The Flavor Secret: The unique angle here is my Moroccan-French braising approach. After browning the ribs to a deep mahogany, I deglaze the pan with a bold red wine and stir in a tablespoon of ras el hanout — a fragrant blend of cumin, cinnamon, coriander, ginger, and a hint of clove. This isn’t your average beef short rib recipe. The warm, aromatic spices elevate the richness of the beef without overwhelming it, creating a complexity that will have everyone asking, “What’s your secret?” I learned this balance during my years cooking in Paris, where I trained in classic French sauce work, but the spice blend is pure Morocco — a tribute to my mother’s kitchen in Marrakech.

    Perfected Texture: Achieving fall-off-the-bone tenderness is about two things: a proper sear and the right cooking temperature. I crank the heat to get a deep, even crust on every side of the short ribs — that crust is pure flavor. Then I transfer everything to a 325°F oven and let it braise low and slow for three hours. The collagen in the ribs breaks down into gelatin, giving the meat that luscious, buttery texture and enriching the sauce until it coats the back of a spoon. No dry meat here, I promise.

    Foolproof & Fast to Prep: While the oven does the heavy lifting, the active prep time is only about 20 minutes. This is the kind of recipe that looks and tastes like you spent all day in the kitchen, but the truth is, once everything’s in the Dutch oven, you’re free to relax, pour a glass of wine, and let the magic happen. It’s comfort food that anyone can master — trust me, if you can brown meat and chop vegetables, you can make this.

    Braised Beef Short Ribs Recipe Ingredients

    I love sourcing my short ribs from the Union Square Greenmarket in NYC, where the butchers know their meat and are happy to recommend the best cut. The key is getting bone-in, English-cut short ribs — they have a generous meat-to-bone ratio and stay beautifully moist during the long braise. If you can’t find them at your local market, any well-marbled bone-in short rib will do. Here’s everything you’ll need:

    Ingredients List

    • 4 lbs bone-in beef short ribs (English-cut, about 8 pieces)
    • 2 tbsp olive oil
    • 2 large yellow onions, diced
    • 4 cloves garlic, minced
    • 2 carrots, diced
    • 2 celery stalks, diced
    • 2 tbsp tomato paste
    • 2 cups dry red wine (Cabernet Sauvignon or Merlot)
    • 3 cups low-sodium beef broth
    • 2 tbsp all-purpose flour (optional, for thickening)
    • 2 sprigs fresh rosemary
    • 4 sprigs fresh thyme
    • 2 bay leaves
    • 1 tbsp ras el hanout (or substitute: 1 tsp cumin + ½ tsp cinnamon + ½ tsp coriander + ¼ tsp ginger)
    • 1½ tsp kosher salt, plus more to taste
    • 1 tsp black pepper

    Ingredient Spotlight

    Beef Short Ribs (Bone-In): The bone adds immense flavor and helps keep the meat moist during the long braise. Look for ribs with a good amount of marbling — the fat renders down and keeps the meat tender. If you can only find boneless short ribs, reduce the cooking time by about 30 minutes and check for tenderness earlier.

    Red Wine: Don’t skimp on the wine — it’s the backbone of the braising liquid. A Cabernet Sauvignon or Merlot with good structure works beautifully. If you don’t drink wine, substitute with an equal amount of beef broth plus 2 tablespoons of balsamic vinegar for acidity.

    Ras El Hanout: This is my secret weapon. It’s a Moroccan spice blend that typically includes cumin, cinnamon, coriander, ginger, cardamom, and a touch of clove. It adds warmth and complexity without heat. Find it at specialty spice shops or Middle Eastern markets — or make your own blend at home.

    Tomato Paste: A small amount adds depth and a subtle sweetness that balances the wine and spices. It also helps thicken the sauce as it reduces.

    Original IngredientBest SubstitutionFlavor / Texture Impact
    Bone-in beef short ribsBoneless beef chuck, cut into 4-inch piecesLess rich; reduce cook time by 30 mins
    Red wine (Cab/Merlot)Beef broth + 2 tbsp balsamic vinegarLess complexity; still good acidity
    Ras el hanout1 tsp cumin + ½ tsp cinnamon + ½ tsp coriander + ¼ tsp gingerClose match; slightly less aromatic
    Fresh rosemary & thyme1 tsp dried rosemary + 1 tsp dried thymeMore muted; add early in braise

    How to Make Braised Beef Short Ribs — Step-by-Step

    Trust me, this recipe is simpler than it sounds. Follow these steps, and you’ll have restaurant-quality braised short ribs that will wow your family and friends.

    Step 1: Prep and Sear the Short Ribs

    Preheat your oven to 325°F. Pat the short ribs dry with paper towels — this is crucial for a good sear. Season generously on all sides with salt and pepper. Heat the olive oil in a large Dutch oven over medium-high heat until it shimmers. Working in two batches to avoid crowding, sear the short ribs for 3–4 minutes per side, until deeply browned and crusty. Transfer to a plate and set aside. Don’t rush this step — the fond (those browned bits on the bottom of the pot) is pure flavor.

    💡 mia’s Pro Tip: For the deepest sear, make sure the oil is hot before adding the ribs. If the ribs stick to the pot, they’re not ready to flip — let them cook another minute until they release naturally.

    Step 2: Sauté the Aromatics

    Reduce the heat to medium. Add the diced onions, carrots, and celery to the pot and cook, stirring occasionally, for 6–7 minutes until softened and lightly golden. Add the garlic and cook for 1 minute more, until fragrant. Stir in the tomato paste and cook for 2 minutes — this deepens its flavor and removes any raw taste.

    ⚠️ Common Mistake to Avoid: Don’t let the garlic burn — it turns bitter. Keep the heat at medium and stir frequently.

    Step 3: Deglaze and Build the Braising Liquid

    Pour in the red wine, scraping up the browned bits from the bottom of the pot with a wooden spoon. Let the wine simmer for 4–5 minutes, until reduced by about half. Add the beef broth, rosemary, thyme, bay leaves, and ras el hanout. Stir to combine.

    💡 mia’s Pro Tip: Use a wooden spoon to scrape up every last bit of the fond — that’s where the deepest, richest flavor lives. If you skip this step, you’re leaving flavor behind.

    Step 4: Braise Low and Slow

    Return the seared short ribs to the pot, nestling them into the liquid so they’re mostly submerged (the tops can be slightly exposed). Bring the liquid to a gentle simmer on the stovetop, then cover the pot with a tight-fitting lid and transfer to the preheated oven. Braise for 2½ to 3 hours, until the meat is fork-tender and nearly falling off the bone.

    ⚠️ Common Mistake to Avoid: Peeking too often! Every time you open the lid, heat escapes, extending the cooking time. Resist the urge — let the oven do its job.

    Step 5: Rest and Serve

    Carefully remove the pot from the oven. Transfer the short ribs to a platter and tent loosely with foil. Let the braising liquid rest for 5 minutes, then skim off any excess fat from the surface. If you prefer a thicker sauce, whisk 2 tablespoons of flour with ¼ cup cold water into a slurry and stir it into the simmering liquid on the stovetop for 2–3 minutes. Season with salt and pepper to taste. Return the short ribs to the sauce to warm through before serving.

    💡 mia’s Pro Tip: For an ultra-smooth sauce, strain the braising liquid through a fine-mesh sieve before thickening. You’ll lose the vegetables, but you’ll gain a silky, elegant sauce worthy of a special occasion.

    StepActionDurationKey Visual Cue
    1Sear short ribs8–10 mins (two batches)Deep brown crust on all sides
    2Sauté aromatics8–10 minsOnions translucent, garlic fragrant
    3Deglaze with wine4–5 minsWine reduced by half, fond released
    4Braise in oven2½–3 hoursMeat fork-tender, nearly falling off bone
    5Rest, skim, thicken, serve10–15 minsSauce coats back of a spoon

    Serving & Presentation

    This dish is pure comfort on a plate, and how you serve it makes all the difference. I like to spoon a generous amount of the braising liquid onto a warmed plate, then place one or two short ribs right in the center. The meat should be so tender that it begins to separate from the bone as you transfer it — that’s the sign of a perfect braise. Garnish with fresh thyme leaves or a sprinkle of flaky sea salt and a few cracks of black pepper. A side of creamy mashed potatoes or soft polenta is the classic choice — they soak up that luscious sauce like a dream. If you want to channel my Parisian training, serve it with a side of haricots verts (thin French green beans) simply sautéed in butter and garlic.

    For a touch of my Moroccan roots, I sometimes serve these short ribs over a bed of fluffy couscous tossed with toasted almonds, dried apricots, and fresh cilantro. The sweet and nutty flavors play beautifully against the rich, spiced beef. In the winter, I pair it with a rustic root vegetable mash — parsnips, carrots, and potatoes boiled together and mashed with a splash of cream. No matter what you choose, this comfort food beef short ribs recipe is the kind of meal that turns an ordinary weeknight into a celebration. Invite some friends over, light a candle, and pour a glass of the same red wine you used in the braise — it’s the perfect pairing.

    One of my favorite memories is serving this dish at a small dinner party in my NYC apartment during a snowstorm. The windows were frosted, the wine was flowing, and the braised short ribs were the star of the evening. Everyone fell silent for a moment after the first bite — that’s the power of truly great comfort food. It brings people together, warms them from the inside out, and creates memories that linger long after the last forkful.

    Pairing TypeSuggestionsWhy It Works
    Side DishCreamy mashed potatoes, soft polenta, or buttered egg noodlesSoaks up the rich sauce perfectly
    Sauce / DipExtra braising liquid, horseradish cream, or gremolataBrightens and cuts through the richness
    BeverageCabernet Sauvignon, Merlot, or a dark stout beerEchoes the wine in the braise; tannins complement the meat
    GarnishFresh thyme, flaky sea salt, lemon zest, or chopped parsleyAdds brightness and fresh color

    Make-Ahead, Storage & Reheating

    This braised beef short ribs recipe is a dream for meal prep — the flavors actually deepen and improve after a day or two in the fridge. I often make a double batch on a Sunday, enjoy it for dinner, and save the rest for busy weeknights when I need a stunning meal with zero effort. Here’s how to store and reheat like a pro:

    MethodContainerDurationReheating Tip
    RefrigeratorAirtight container, meat submerged in sauceUp to 5 daysReheat gently on stovetop over medium-low, covered, for 10–15 mins
    FreezerFreezer-safe container or zip-top bag, remove as much air as possibleUp to 3 monthsThaw overnight in fridge; reheat in a covered pot on the stovetop over medium-low
    Make-AheadBraise fully, cool, refrigerate in the potUp to 2 days in advanceReheat covered at 325°F for 25–30 mins, or until warmed through

    When reheating, the key is to go low and slow — just like the original braise. If you’re reheating on the stovetop, add a splash of beef broth or water if the sauce has thickened too much. For the oven, cover the dish tightly with foil to prevent the meat from drying out. And here’s a trick I learned in Paris: let the short ribs rest in the warm sauce for 5 minutes after reheating before serving — it allows the meat to reabsorb some moisture and become even more tender.

    One important note: always remove the bay leaves and herb sprigs before storing — they can become bitter over time. And if you’re freezing, consider freezing the sauce separately from the meat for the best texture. When you’re ready to enjoy, combine them and reheat together. This method keeps the meat from becoming mushy and ensures every bite is as good as the first.

    Variations & Easy Swaps

    VariationKey ChangeBest ForDifficulty Impact
    Classic French Red WineOmit ras el hanout; add extra thyme, a strip of orange zest, and 2 tbsp cognacTraditionalists, special occasionsSame — medium
    Gluten-FreeSkip the flour slurry; instead, reduce the braising liquid by simmering uncovered for 10–15 mins after braisingGluten-free dietsSame — easy
    Spiced Moroccan (Harissa)Add 1–2 tbsp harissa paste with the tomato paste; use ½ cup less wine, ½ cup more brothSpice lovers, adventurous eatersSame — medium

    Classic French Red Wine Variation

    For a more traditional French approach, skip the ras el hanout and add an extra sprig of thyme, a strip of orange zest (removed with a vegetable peeler), and a splash of cognac or brandy after deglazing. This version is the one I learned in culinary school in Paris — it’s elegant, deeply savory, and pairs beautifully with a full-bodied Bordeaux. The orange zest adds a subtle brightness that lifts the richness of the meat and wine. It’s a gorgeous option for a holiday dinner or a romantic date night at home.

    Gluten-Free Version

    This recipe is naturally gluten-free if you skip the flour slurry. Instead of thickening with flour, simply simmer the braising liquid uncovered for 10–15 minutes after removing the short ribs. The sauce will reduce and concentrate, becoming naturally thick and glossy. You can also whisk in a teaspoon of cornstarch mixed with two teaspoons of cold water if you prefer a more traditional gravy-like consistency. The flavor is just as rich and satisfying — I’ve tested this version countless times for my gluten-sensitive friends in NYC, and they always ask for seconds.

    Spiced Moroccan Harissa Variation

    If you love bold, spicy flavors, stir in 1–2 tablespoons of harissa paste along with the tomato paste. Harissa is a North African chili paste that adds a smoky, fruity heat that pairs beautifully with the beef and ras el hanout. I like to use a mild harissa for a gentle warmth or a fiery one for a real kick — my mother would approve of either. Reduce the wine by ½ cup and add an extra ½ cup of beef broth to balance the heat. Serve this version with a dollop of cool, creamy yogurt or labneh to mellow the spice. It’s become a favorite among my NYC dinner party guests — they love the unexpected heat.

    What is the best cut of beef for braised short ribs to ensure they are tender?

    The best cut for braised short ribs is bone-in, English-cut short ribs, which come from the chuck or plate section of the cow. These cuts have abundant marbling and connective tissue that break down into gelatin during the long, slow braise, giving you that iconic fall-off-the-bone tenderness. Look for ribs that are about 3–4 inches long with a good amount of meat on top of the bone — avoid thin, lean cuts as they can dry out. If you can only find boneless short ribs, chuck roast cut into large pieces works well too, though you’ll lose some of the rich, bone-in flavor. Always choose well-marbled meat for the most succulent result.

    Can I braise beef short ribs in a Dutch oven instead of a slow cooker?

    Absolutely — in fact, I strongly recommend using a Dutch oven for braising short ribs. A Dutch oven distributes heat evenly and retains moisture beautifully, which is exactly what you need for a perfect braise. The main advantage over a slow cooker is that you can sear the meat and build the sauce all in one pot on the stovetop before transferring it to the oven, which means deeper flavor and fewer dishes. I use a 5.5-quart enameled cast-iron Dutch oven for this recipe. If you use a slow cooker, you’ll need to sear the ribs in a separate skillet first, then transfer everything to the slow cooker and cook on low for 7–8 hours. The Dutch oven method gives you better control over the browning and a richer final dish.

    How long should I cook braised beef short ribs for the ultimate fall-off-the-bone texture?

    For the ultimate fall-off-the-bone texture, braise your short ribs at 325°F for 2½ to 3 hours. The exact time depends on the size of the ribs and your oven, but the key visual cue is that the meat should be fork-tender — meaning you can insert a fork into the thickest part with no resistance, and the meat begins to separate from the bone. At 2½ hours, check by gently pulling on the bone — if it slides out easily, they’re done. If not, give them another 15–20 minutes. Cooking them much longer than 3 hours can cause the meat to become stringy and dry, so check around the 2-hour mark to be safe. Patience is rewarded here: the long, gentle cooking is what transforms tough connective tissue into buttery, melt-in-your-mouth beef.

    What is the best red wine to use for braising short ribs to enhance the flavor?

    The best red wine for braising short ribs is a dry, full-bodied red with good structure and moderate tannins — think Cabernet Sauvignon, Merlot, or a Côtes du Rhône. These wines have enough depth to stand up to the richness of the beef and the bold spices in the braising liquid. I recommend using a wine that you’d enjoy drinking alongside the finished dish, because the flavor concentrates as it reduces. Avoid wines that are too oaky or tannic, like a young Napa Cabernet, as they can become bitter during the long braise. My personal favorite is a Merlot from the right bank of Bordeaux — it’s smooth, fruity, and adds a velvety quality to the sauce. And never use “cooking wine” — it’s usually salty and thin. A good, affordable bottle in the $10–$15 range is all you need.

    Should I sear the short ribs before braising?

    Yes, searing is a non-negotiable step for the best flavor. Searing the short ribs at high heat creates a deep, caramelized crust through the Maillard reaction, which adds layers of savory, umami-rich flavor that simply can’t be achieved any other way. Those browned bits that stick to the bottom of the pot — called fond — are the building blocks of your braising liquid. When you deglaze with wine, that fond dissolves into the sauce, giving it incredible depth. Without searing, your sauce will taste flat and one-dimensional. Take your time with this step: pat the ribs dry, season generously, and sear in batches to avoid steaming. Four to five minutes per side over medium-high heat should give you a beautiful, dark crust.

    Can I make braised beef short ribs ahead of time?

    Yes, and I actually recommend it! Braised short ribs taste even better the next day because the flavors have time to meld and deepen. You can braise the ribs fully, then cool them in the pot, cover, and refrigerate for up to 2 days before serving. When you’re ready to eat, skim off the hardened fat from the surface, then reheat gently on the stovetop over medium-low heat or in a 325°F oven for 25–30 minutes, covered. The short ribs will be just as tender — if not more so — than the day you made them. This make-ahead ability makes the recipe perfect for entertaining: you can do all the work in advance and simply reheat before your guests arrive, leaving you stress-free to enjoy the evening.

    What can I serve with braised beef short ribs for a complete meal?

    Braised beef short ribs pair beautifully with a wide range of sides. The classic choice is creamy mashed potatoes — the smooth, buttery texture is perfect for soaking up the rich sauce. Soft polenta, buttered egg noodles, or a rustic root vegetable mash are also wonderful options. For a lighter side, try roasted carrots with honey and thyme, or sautéed haricots verts with garlic and lemon. I also love serving it with couscous tossed with toasted almonds and dried apricots, which adds a touch of sweetness and a nod to my Moroccan heritage. Don’t forget a green salad with a bright vinaigrette to cut through the richness — a simple arugula salad with lemon juice and olive oil works beautifully.

    How do I thicken the braising liquid for short ribs?

    There are several ways to thicken the braising liquid, depending on your preference and dietary needs. The simplest method is to simmer the liquid uncovered for 10–15 minutes after removing the short ribs — this reduces and concentrates the sauce naturally. For a thicker, more gravy-like consistency, whisk 2 tablespoons of all-purpose flour with ¼ cup cold water into a smooth slurry, then stir it into the simmering liquid and cook for 2–3 minutes until thickened. Alternatively, you can use a cornstarch slurry (1 tablespoon cornstarch mixed with 2 tablespoons cold water) for a gluten-free option. If you want a silky, refined sauce, strain the liquid through a fine-mesh sieve before thickening — you’ll lose the vegetables but gain a smooth, elegant finish perfect for special occasions.

    Can I freeze braised beef short ribs?

    Absolutely — braised beef short ribs freeze beautifully for up to 3 months. The key is to cool the ribs completely in the braising liquid before freezing. I recommend storing the meat and sauce together in a freezer-safe container or heavy-duty zip-top bag, removing as much air as possible to prevent freezer burn. For the best texture, consider freezing the sauce separately from the meat — the meat stays more tender when it’s not sitting in solid frozen liquid. When you’re ready to enjoy, thaw overnight in the refrigerator, then reheat gently on the stovetop over medium-low heat, covered, stirring occasionally. Add a splash of beef broth or water if the sauce has thickened too much. The flavor will still be deeply rich and satisfying — like a homemade meal waiting in your freezer for a busy night.

    Why do my braised short ribs come out tough instead of tender?

    If your braised short ribs are tough, the most common culprit is undercooking. Short ribs contain a lot of connective tissue and collagen, which need time to break down into gelatin — this process takes at least 2½ to 3 hours at 325°F. If the ribs are cooked at too high a temperature, the meat can become dry and tough before the collagen has a chance to break down. Make sure your oven temperature is accurate (use an oven thermometer if you’re unsure) and that the braising liquid is at a gentle simmer, not a vigorous boil. Another factor could be the cut of meat — lean, thin short ribs won’t have enough marbling to become tender. Always choose well-marbled, bone-in short ribs and cook them low and slow for the most reliable results.

    Share Your Version!

    This braised beef short ribs recipe is one of those dishes that always brings a smile to my face — and I hope it does the same for you. When you make it, I’d love to hear how it turned out. Did you add your own twist? Did you try the harissa version? Or maybe you served it with something unexpected that worked beautifully? Drop a comment below and let me know — your feedback helps other home cooks discover new ideas and gives me so much joy as a creator.

    If you snap a photo of your creation, tag me on Pinterest @chefrecipes2 — I love seeing your beautiful dishes and sharing them with our community. And if you’re looking for more cozy, soul-nourishing recipes like this one, be sure to explore my other posts. There’s a whole world of flavor waiting for you, from Moroccan tagines to French bistro classics, all made with love in my NYC kitchen. Thank you for being here — you’re the reason I do what I do.

    From my NYC kitchen to yours — I hope this recipe brings as much warmth to your table as it does to mine. — mia 🧡

    Rate This Recipe!

    Did you love this comfort food beef short ribs recipe? 🌟 Click a star below to rate it and help others discover how amazing braised short ribs can be. Your support means everything to me!

    📌

    Love This Recipe? Save It to Pinterest!

    If you enjoyed this Braised Beef Short Ribs Recipe, don’t let it get lost in your browser tabs! 😄 Pin it now so you can find it again anytime — and explore hundreds more tried-and-tested recipes waiting for you on my Pinterest boards.

    👉 Follow mia on Pinterest @chefrecipes2

    📌 Pin this recipe · 🔁 Re-pin your favorites · 💬 Tag me when you make it — I love seeing your creations!


    Print
    clock clock iconcutlery cutlery iconflag flag iconfolder folder iconinstagram instagram iconpinterest pinterest iconfacebook facebook iconprint print iconsquares squares iconheart heart iconheart solid heart solid icon

    Braised Beef Short Ribs Recipe The Ultimate Comfort Food

    • Author: Chef Mia

    Instructions


      Braised Beef Short Ribs Recipe The Ultimate Comfort Food

      Braised Beef Osso Buco with Stout and Caramelized Onions: A Comfort Food Classic

      ⚖️
      Difficulty
      Medium
      ⏲️
      Prep Time
      25 mins
      🕒
      Cook Time
      150 mins
      ⏱️
      Total Time
      175 mins
      🍽️
      Servings
      4

      I still remember the first time I made osso buco in my tiny Parisian kitchen, the rich aroma of slow-braised beef filling every corner of my apartment. Back then, I was a young culinary student learning classical French techniques, but my heart carried the soulful, slow-cooking wisdom of my mother’s kitchen in Morocco. This Braised Beef Osso Buco with Stout and Caramelized Onions is the dish I make now in my New York City home when I need a deep, comforting hug in a bowl. The stout beer adds a malty, slightly bitter richness that cuts through the sweetness of the caramelized onions, while the beef shanks become butter-tender after hours of gentle simmering. It’s the kind of braised beef dish that fills your home with anticipation and your table with warmth.

      Imagine this: a fork-tender beef shank, its marrow-rich bone at the center, nestled in a velvety sauce the color of dark caramel. The onions have cooked down until they’re jammy and sweet, their natural sugars coaxed out by patience and heat. The stout lends a deep, roasted complexity, while crushed tomatoes and aromatics round everything out with brightness and body. Every bite is layered — first the rich, beefy flavor, then the subtle bitterness of the beer, followed by a hint of thyme and the gentle sweetness of caramelized onions. It’s the kind of comfort food beef recipe that transports you, whether you’re sitting down to dinner after a long day or hosting friends on a chilly weekend.

      What makes this osso buco recipe different from the classic Italian version? I’ve swapped veal shanks for beef — which gives you a heartier, more robust flavor — and built the braising liquid around stout beer rather than white wine. The caramelized onions are the real star here; they take time, yes, but they create a sauce so luscious you’ll want to eat it with a spoon. 💡 mia’s Pro Tip: Let this braised osso buco rest overnight in the fridge before serving — the flavors deepen beautifully, and the sauce thickens to perfection. One common mistake I see is rushing the onion caramelization; take the full 20–25 minutes, and you’ll be rewarded with pure magic.

      Why This Braised Beef Osso Buco Recipe Is the Best

      The Flavor Secret. Most osso buco recipes rely solely on white wine and tomatoes, but I wanted something deeper, something that reminded me of the dark, spiced tagines of my childhood. The stout beer — I use Guinness or a local NYC porter — adds roasted malt notes and a gentle bitterness that balances the sweetness of the onions. It’s an unexpected twist that makes this comfort food beef recipe unforgettable. My French training taught me to layer flavors, and starting with deeply caramelized onions before adding the stout creates a foundation that’s unmatched.

      Perfected Texture. Beef shanks are tougher than veal, which means they need time. But that’s exactly why they’re perfect for braising. The connective tissue breaks down into gelatin, creating a sauce that clings to the meat like velvet. I sear the shanks until they’re deeply browned — a technique I learned in Paris — and then let them simmer low and slow for 2 to 2.5 hours. The result is meat that’s so tender it falls off the bone, with a sauce that’s naturally thickened and glossy.

      Foolproof & Fast(ish). Don’t let the long cooking time scare you. This braised beef osso buco recipe is actually quite forgiving. Once everything’s in the pot, the oven does the work. It’s the perfect weekend project that fills your home with an incredible aroma, and it’s nearly impossible to overcook. A little more time only makes it better. I’ve tested this recipe with home cooks in my NYC cooking workshops, and everyone walks away feeling like a pro.

      Braised Beef Osso Buco Ingredients

      I pick up my beef shanks from the Union Square farmers market in NYC — the grass-fed ones from a local farm have so much flavor. The onions, garlic, and fresh thyme come from my favorite bodega on the corner. Every ingredient in this osso buco with stout recipe is chosen for a reason, and I’ll walk you through each one so you know exactly what to look for.

      Ingredients List

      • 4 beef osso buco slices (about 1.5 inches thick)
      • 2 tablespoons olive oil
      • 2 large onions, thinly sliced
      • 4 cloves garlic, minced
      • 2 tablespoons tomato paste
      • 1 cup stout beer (such as Guinness)
      • 1 cup beef broth
      • 1 cup crushed tomatoes
      • 2 carrots, diced
      • 2 celery stalks, diced
      • 2 sprigs fresh thyme
      • 2 bay leaves
      • Salt and freshly ground black pepper to taste
      • 2 tablespoons all-purpose flour (optional, for thickening)

      Ingredient Spotlight

      Beef Osso Buco Slices. The cross-cut shank from the leg, with the marrow bone right in the center. Look for slices about 1.5 inches thick so they hold up during braising. The marrow adds richness to the sauce as it cooks. If your butcher sells them thinner, ask them to cut thicker ones. I buy mine from a halal butcher in Astoria who cuts them fresh — the quality makes a huge difference.

      Stout Beer. This is my signature twist. Guinness is the easiest to find, but any stout or porter works. The roasted barley flavor complements the beef and caramelized onions beautifully. Don’t use IPAs or hoppy beers — they’ll turn the sauce bitter in the wrong way. If you can’t do alcohol, I’ll share a substitution below.

      Onions. Yellow onions are ideal here — they have the perfect balance of sweetness and bite. You need two large ones, and they’ll cook down significantly. The caramelization step is non-negotiable; it’s where the deep, sweet flavor comes from that makes this comfort food beef recipe so special.

      Fresh Thyme and Bay Leaves. These aromatics are classic for a reason. Thyme adds an earthy, slightly floral note, while bay leaf gives a subtle tea-like bitterness that balances the richness. Always use fresh thyme if you can — dried works in a pinch but use half the amount.

      Tomato Paste. Don’t skip this! Cooking the tomato paste for a couple of minutes before adding liquid deepens its flavor and removes any raw acidity. It’s a small step that makes a big difference in the final sauce.

      Original IngredientBest SubstitutionFlavor / Texture Impact
      Beef osso buco slicesVeal shanks or bone-in short ribsVeal is more delicate; short ribs are richer and fattier
      Stout beerDark ale, porter, or non-alcoholic stoutLighter flavor but still malty; non-alcoholic works well
      Crushed tomatoesDiced tomatoes (blended slightly) or tomato puréeSlightly chunkier or smoother texture, similar flavor
      Beef brothChicken broth or mushroom brothLess beefy depth; mushroom broth adds umami
      All-purpose flour (thickener)Cornstarch slurry (1 tbsp cornstarch + 2 tbsp water)Gluten-free; slightly glossier finish

      How to Make Braised Beef Osso Buco — Step-by-Step

      This braised beef osso buco recipe comes together in a few key stages. Trust the process, don’t rush the caramelization, and you’ll be rewarded with the most tender, flavorful beef shanks you’ve ever made.

      Step 1: Sear the Beef Shanks

      Pat the beef osso buco slices dry with paper towels — moisture is the enemy of a good sear. Season generously on all sides with salt and freshly ground black pepper. Heat the olive oil in a large Dutch oven over medium-high heat until it shimmers. Add the beef slices in a single layer (work in batches if needed) and sear until deeply browned, about 3-4 minutes per side. Don’t rush this step; a deep brown crust equals deep flavor. Remove the shanks to a plate and set aside.

      💡 mia’s Pro Tip: For the best crust, let the beef sit at room temperature for 20 minutes before searing. Cold meat lowers the pan temperature and steams instead of browning.

      Step 2: Caramelize the Onions

      Reduce the heat to medium. Add the thinly sliced onions to the pot — don’t worry if it looks crowded, they’ll cook down significantly. Stir occasionally, scraping up any browned bits from the bottom. Cook for 20-25 minutes until the onions are soft, deeply golden, and jammy. Add the minced garlic and cook for 1 minute more, just until fragrant. The aroma at this stage is incredible — sweet, savory, and full of promise.

      ⚠️ Common Mistake to Avoid: Stirring too often prevents proper browning. Let the onions sit for a few minutes between stirs so they develop those deep caramelized patches.

      Step 3: Build the Braising Liquid

      Stir in the tomato paste and cook for 2 minutes, stirring constantly. This step deepens the tomato flavor and removes any raw edge. Pour in the stout beer, using a wooden spoon to scrape up all the browned bits (called “fond”) from the bottom of the pot — that’s pure flavor. Let the beer simmer for 2 minutes to cook off some of the alcohol and concentrate the flavor. Add the beef broth, crushed tomatoes, diced carrots, and celery. Drop in the thyme sprigs and bay leaves.

      💡 mia’s Pro Tip: If you’re using a particularly bitter stout, add ½ teaspoon of brown sugar to balance the bitterness. I learned this trick from a brewer friend in Brooklyn.

      Step 4: Braise to Perfection

      Return the seared beef shanks to the pot, nestling them into the liquid so they’re mostly submerged. Bring the liquid to a gentle boil, then reduce the heat to low. Cover the pot and let it simmer gently for 2 to 2.5 hours. The liquid should barely bubble — a few small bubbles rising to the surface is perfect. After about 2 hours, check the meat: it should be very tender and practically falling off the bone. If it’s still a bit firm, give it another 30 minutes.

      ⚠️ Common Mistake to Avoid: Boiling the braising liquid instead of simmering will toughen the meat. Keep the heat low — a gentle simmer is all you need.

      Step 5: Finish and Serve

      Once the beef is tender, remove the bay leaves and thyme sprigs. If you’d like a thicker sauce, mix the flour with 2 tablespoons of water to make a slurry, stir it into the pot, and cook for an additional 5 minutes until thickened. Taste and adjust the seasoning with salt and pepper. Serve the osso buco with the rich sauce spooned over the top, garnished with fresh parsley if desired.

      💡 mia’s Pro Tip: For the most incredible texture, let the braised osso buco cool completely and refrigerate overnight. The fat solidifies on top for easy removal, and the flavors meld into something truly magical. Reheat gently before serving.

      StepActionDurationKey Visual Cue
      1Sear beef shanks6-8 min totalDeep mahogany crust on both sides
      2Caramelize onions20-25 minDeep golden, jammy, reduced by half
      3Build braising liquid5 minLiquid is dark, aromatic, with fond fully incorporated
      4Braise covered2-2.5 hoursMeat pulls easily from bone, sauce is thickened
      5Finish & serve5 minSauce coats spoon, seasoning balanced

      Serving & Presentation

      This braised beef osso buco is a showstopper at the table. I like to serve each shank on a bed of creamy polenta or mashed potatoes — they soak up the rich, beer-infused sauce beautifully. For a lighter option, try it over soft polenta or buttered egg noodles. A sprinkle of fresh parsley and a grating of lemon zest (a classic gremolata-inspired touch) brighten the dish and cut through the richness.

      Growing up in Morocco, my mother would serve slow-cooked meats with crusty bread for sopping up every last drop of sauce. I do the same here — a good sourdough or a crusty baguette is essential. On the side, I love a simple arugula salad with lemon vinaigrette or roasted asparagus with olive oil and sea salt. The freshness balances the deep, savory notes of the osso buco with stout.

      In my NYC cooking classes, I always tell students: this is a dish that looks and tastes like you spent all day in the kitchen, but really, the oven does most of the work. Present it straight from the Dutch oven at the table, and let everyone watch as you lift the lid and release that incredible aroma. It’s a moment that never gets old.

      Pairing TypeSuggestionsWhy It Works
      Side DishCreamy polenta, mashed potatoes, buttered egg noodlesAbsorb the rich sauce; creamy texture contrasts the tender meat
      Sauce / DipThe braising liquid itself, gremolata (lemon, garlic, parsley)Gremolata cuts richness with brightness and herbal notes
      BeverageSame stout used in cooking, malty ale, full-bodied red wineEchoes the malty, roasted notes; wine adds complementary tannins
      GarnishFresh parsley, lemon zest, flaky sea salt, fresh thyme leavesAdds color, freshness, and a bright finish to a deep dish

      Make-Ahead, Storage & Reheating

      This comfort food beef recipe is a dream for meal prep. I often make it on a Sunday, let it cool, and store it in the fridge for an easy dinner during a busy NYC workweek. The flavors actually improve after a day or two — the stout and caramelized onions meld together into something even more complex. Here’s exactly how I store and reheat it.

      MethodContainerDurationReheating Tip
      RefrigeratorAirtight container, beef submerged in sauceUp to 4 daysReheat gently on stovetop over low heat, covered, for 10-15 min
      FreezerFreezer-safe container or heavy-duty zip bagUp to 3 monthsThaw overnight in fridge, then reheat gently on stovetop
      Make-AheadDutch oven or storage container with lidUp to 2 days in advanceCool completely, refrigerate, skim fat, then reheat. Flavor is even better!

      When reheating, add a splash of beef broth or water if the sauce has thickened too much. I always reheat on the stovetop over low heat, covered, stirring occasionally. The microwave works in a pinch, but the stovetop gives you better control and preserves the texture of the meat. 💡 mia’s Pro Tip: If you’ve frozen the osso buco, let it thaw slowly in the refrigerator overnight. Reheat gently, and add a tiny splash of stout or broth to refresh the sauce.

      One of my favorite things about this braised beef osso buco recipe is that it’s even better the next day. The overnight rest allows the flavors to marry, and the sauce thickens naturally. I often make it on a Saturday, refrigerate it, and serve it on Sunday for an effortless but impressive dinner. The fat solidifies on top, which makes it easy to remove if you want a leaner sauce.

      Variations & Easy Swaps

      This osso buco with stout recipe is wonderfully adaptable. Here are three of my favorite variations, each tested in my own kitchen. Whether you want a taste of Morocco, a gluten-free option, or a faster cooking method, I’ve got you covered.

      VariationKey ChangeBest ForDifficulty Impact
      Moroccan-Spiced Osso BucoAdd ras el hanout, saffron, and preserved lemonAdventurous eaters, North African flavor loversEasy — same braising method, different spices
      Gluten-Free VersionUse cornstarch slurry instead of flour; ensure stout is GFGluten-free dietsEasy — simple swap
      Slow Cooker / Instant PotUse slow cooker (low 8 hrs) or Instant Pot (pressure cook 45 min)Busy weeknights, hands-off cookingEasy — adjust liquid and timing

      Moroccan-Spiced Osso Buco

      This variation is closest to my heart. Add 1 teaspoon of ras el hanout, a pinch of saffron threads soaked in warm water, and ½ cup of dried apricots or prunes along with the tomatoes. At the end, stir in a tablespoon of preserved lemon peel. The result is a stunning fusion of my Moroccan heritage and classic French braising technique. The sweetness of the dried fruit and the floral notes of saffron and ras el hanout complement the stout beautifully. Serve with couscous instead of polenta for an authentic North African touch.

      Gluten-Free Version

      This osso buco with stout recipe is naturally gluten-free if you make two small swaps. First, ensure your stout beer is certified gluten-free (many brands now offer GF options). Second, skip the flour slurry and use a cornstarch slurry instead: mix 1 tablespoon of cornstarch with 2 tablespoons of cold water, stir it into the sauce at the end, and cook for 2-3 minutes until thickened. The texture is slightly glossier than the flour version, and the flavor is identical. I’ve tested this many times for my gluten-sensitive friends in NYC, and it’s always a hit.

      Slow Cooker or Instant Pot Version

      For a hands-off approach, sear the beef and caramelize the onions on the stovetop as directed, then transfer everything to a slow cooker. Cook on low for 8 hours or on high for 4-5 hours. For the Instant Pot, sear and caramelize using the sauté function, then pressure cook on high for 45 minutes with a natural release. The sauce may be thinner with the pressure cooker, so use the cornstarch slurry at the end. This is my go-to method on busy days when I’m testing recipes for the blog and need dinner ready without fuss.

      What is the best cut of beef to use for osso buco if I can’t find veal shanks?

      Beef osso buco slices are actually my preferred choice — they’re more flavorful and hearty than veal shanks. Look for cross-cut beef shanks from the leg, about 1.5 inches thick, with the marrow bone intact. The marrow adds richness to the sauce as it braises. If your butcher doesn’t have pre-cut osso buco slices, ask them to cut beef shanks crosswise into thick pieces. You can also use bone-in short ribs as a substitute, though they’ll be fattier and slightly different in texture. The braising time remains about 2 to 2.5 hours for beef — veal would cook faster at around 1.5 hours.

      Can I substitute the stout with another type of beer or broth in this recipe?

      Absolutely! While stout beer gives this braised beef osso buco its signature malty richness, you have options. A dark porter or a brown ale work beautifully — they offer similar roasted notes without being too bitter. If you prefer not to use beer, substitute with an equal amount of beef broth plus 1 tablespoon of balsamic vinegar or molasses to mimic the depth and sweetness of stout. For a non-alcoholic version, use non-alcoholic stout or dark beer, which is widely available now. Avoid IPAs or hoppy beers, as they’ll make the sauce unpleasantly bitter. I’ve tested all these substitutions in my NYC kitchen, and each delivers a delicious result.

      How long should I braise the beef osso buco to get it tender and falling off the bone?

      For beef osso buco, plan on braising for 2 to 2.5 hours at a gentle simmer. The meat is ready when it’s fork-tender and practically falls off the bone with a gentle nudge. Start checking at the 2-hour mark — insert a fork into the thickest part; if it twists easily and the meat begins to separate, it’s done. If it still offers resistance, give it another 20-30 minutes. The key is maintaining a low, gentle simmer — not a boil, which can toughen the meat. This comfort food beef recipe is very forgiving, so a little extra time only makes it better. I always aim for the 2.5-hour mark for the most tender result.

      What are the best side dishes to serve with braised beef osso buco and caramelized onions?

      Creamy polenta is my top recommendation — it soaks up the rich, beer-infused sauce beautifully and provides a soft, buttery base for the tender beef. Mashed potatoes are a close second, especially if you like a classic comfort food pairing. For something lighter, buttered egg noodles or a simple risotto work wonderfully. On the vegetable side, I love roasted asparagus, sautéed green beans, or a crisp arugula salad with lemon vinaigrette to cut through the richness. And don’t forget crusty bread for sopping up every last drop of sauce — it’s non-negotiable in my house! In my NYC kitchen, I often serve this with a side of roasted carrots for extra color and sweetness.

      Can I make this osso buco with stout recipe in advance?

      Yes, and I actually recommend it! This braised beef osso buco is one of those rare dishes that tastes even better the next day. Make it a day or two ahead, let it cool completely, and refrigerate it in the pot or an airtight container. The overnight rest allows the flavors of the stout, caramelized onions, and aromatics to meld beautifully. The fat will solidify on top, making it easy to remove if you want a leaner sauce. Reheat gently on the stovetop over low heat, covered, for 15-20 minutes, adding a splash of broth if needed. This make-ahead quality makes it perfect for entertaining or busy weeknights.

      What if I don’t have a Dutch oven? Can I still make this recipe?

      Absolutely! A Dutch oven is ideal because it holds heat evenly and has a tight-fitting lid, but you have options. A large heavy-bottomed pot with a lid works well — just make sure it’s oven-safe if you plan to braise in the oven. You can also use a large skillet for searing and caramelizing, then transfer everything to a slow cooker or a deep baking dish covered tightly with foil. If using the stovetop method, just keep the heat very low and check occasionally to ensure the liquid isn’t boiling. I’ve made this comfort food beef recipe in a rented cabin with just a cast-iron skillet and foil — it still turned out incredible.

      Do I need to remove the fat from the sauce before serving?

      That’s entirely up to you! The fat from the beef shanks and marrow adds richness and body to the sauce, so I usually leave some in. If you’ve made the osso buco ahead and refrigerated it, the fat will solidify on top, making it easy to lift off with a spoon. I recommend removing most of it for a cleaner, more elegant sauce, but leaving a little for flavor and mouthfeel. If you’re serving the dish immediately after braising, you can skim the surface with a spoon or use a fat separator. For this braised beef osso buco recipe, I typically leave about a tablespoon of fat in the sauce for its silky texture.

      Can I add other vegetables to the braise?

      Definitely! The carrots and celery in this recipe are a classic mirepoix base, but you can add other vegetables too. Mushrooms — cremini or shiitake — are a fantastic addition; add them with the onions and let them brown before continuing. Parsnips, turnips, or fennel bulb can replace some of the carrots for a different flavor profile. If you want a chunkier sauce, add diced potatoes or sweet potatoes about 30 minutes before the end of cooking. In my NYC kitchen, I sometimes add a handful of pearl onions along with the regular onions for extra sweetness and texture. Just keep the total vegetable volume similar so the liquid ratios stay balanced.

      Why are my caramelized onions taking longer than 25 minutes?

      Caramelizing onions is all about patience and heat management. If your onions are taking longer than 25 minutes, a few factors could be at play. Your heat might be too low — medium heat is ideal, as it allows browning without burning. If the pan is too crowded, the onions will steam instead of brown; use a wide pot so they have room. The age and moisture content of the onions also matter — fresher, more hydrated onions take longer. Don’t rush by turning up the heat, or you’ll get burnt, bitter onions. If they’re browning unevenly, stir more frequently. 💡 mia’s Pro Tip: A pinch of salt helps draw out moisture and speeds up caramelization. This step is worth every minute for this comfort food beef recipe.

      Can I use this recipe for a dinner party? How do I scale it?

      This braised beef osso buco recipe is perfect for a dinner party — it’s impressive, deeply flavorful, and mostly hands-off. For a party of 8, simply double the ingredients and use a larger Dutch oven or two pots. Sear the beef in batches to avoid overcrowding, and keep the same cooking time — the braise doesn’t need to be adjusted for quantity. The caramelized onions will take the same 20-25 minutes regardless of volume. I’ve served this at dinner parties in my NYC apartment with creamy polenta and a bold red wine, and it always gets rave reviews. Make it a day ahead to reduce stress on the day of your party — the flavor improves, and you’ll have more time to enjoy your guests.

      📌

      Love This Recipe? Save It to Pinterest!

      If you enjoyed this Braised Beef Osso Buco recipe, don’t let it get lost in your browser tabs! 😄 Pin it now so you can find it again anytime — and explore hundreds more tried-and-tested recipes waiting for you on my Pinterest boards.

      Follow mia on Pinterest @exorecipe

      📌 Pin this recipe · 🔁 Re-pin your favorites · 💬 Tag me when you make it — I love seeing your creations!

      Print

      clock clock iconcutlery cutlery iconflag flag iconfolder folder iconinstagram instagram iconpinterest pinterest iconfacebook facebook iconprint print iconsquares squares iconheart heart iconheart solid heart solid icon

      Braised Beef Osso Buco with Stout and Caramelized Onions: A Comfort Food Classic

      • Author: Chef Mia
      • Prep Time: 25 minutes
      • Cook Time: 2 hours 30 minutes
      • Total Time: 2 hours 55 minutes
      • Yield: 4 servings 1x
      • Method: Main Course
      • Cuisine: Italian-inspired

      Description

      A hearty, slow-cooked beef osso buco braised in stout beer with deeply caramelized onions, perfect for a comforting dinner.


      Ingredients

      Scale
      • 4 beef osso buco slices (about 1.5 inches thick)
      • 2 tablespoons olive oil
      • 2 large onions, thinly sliced
      • 4 cloves garlic, minced
      • 2 tablespoons tomato paste
      • 1 cup stout beer (such as Guinness)
      • 1 cup beef broth
      • 1 cup crushed tomatoes
      • 2 carrots, diced
      • 2 celery stalks, diced
      • 2 sprigs fresh thyme
      • 2 bay leaves
      • Salt and freshly ground black pepper to taste
      • 2 tablespoons all-purpose flour (optional, for thickening)

      Instructions

      1. Pat the beef osso buco slices dry and season generously with salt and pepper.
      2. Heat olive oil in a large Dutch oven over medium-high heat. Sear the beef slices until deeply browned on both sides, about 3-4 minutes per side. Remove and set aside.
      3. Reduce heat to medium. Add the sliced onions and cook, stirring occasionally, until deeply caramelized, about 20-25 minutes. Add the garlic and cook for 1 minute more.
      4. Stir in the tomato paste and cook for 2 minutes.
      5. Pour in the stout beer, scraping up any browned bits from the bottom of the pot. Let it simmer for 2 minutes.
      6. Add the beef broth, crushed tomatoes, diced carrots, celery, thyme, and bay leaves. Return the beef to the pot, nestling it into the liquid.
      7. Bring to a gentle boil, then reduce heat to low. Cover and simmer for 2 to 2.5 hours, until the beef is very tender and falling off the bone.
      8. If a thicker sauce is desired, mix the flour with 2 tablespoons of water to make a slurry, stir into the pot, and cook for an additional 5 minutes.
      9. Remove the bay leaves and thyme sprigs. Adjust seasoning with salt and pepper.
      10. Serve the osso buco with the rich sauce, garnished with fresh parsley if desired.

      Notes

      For an extra depth of flavor, let the braised osso buco cool and refrigerate overnight, then reheat gently before serving. The stout adds a malty richness that pairs beautifully with the caramelized onions.


      Nutrition

      • Calories: 520 kcal
      • Sugar: 8 g
      • Fat: 28 g
      • Carbohydrates: 18 g
      • Protein: 42 g


      Braised Beef Osso Buco with Stout and Caramelized Onions: A Comfort Food Classic

      ph">For more delicious inspiration, follow me on Pinterest!