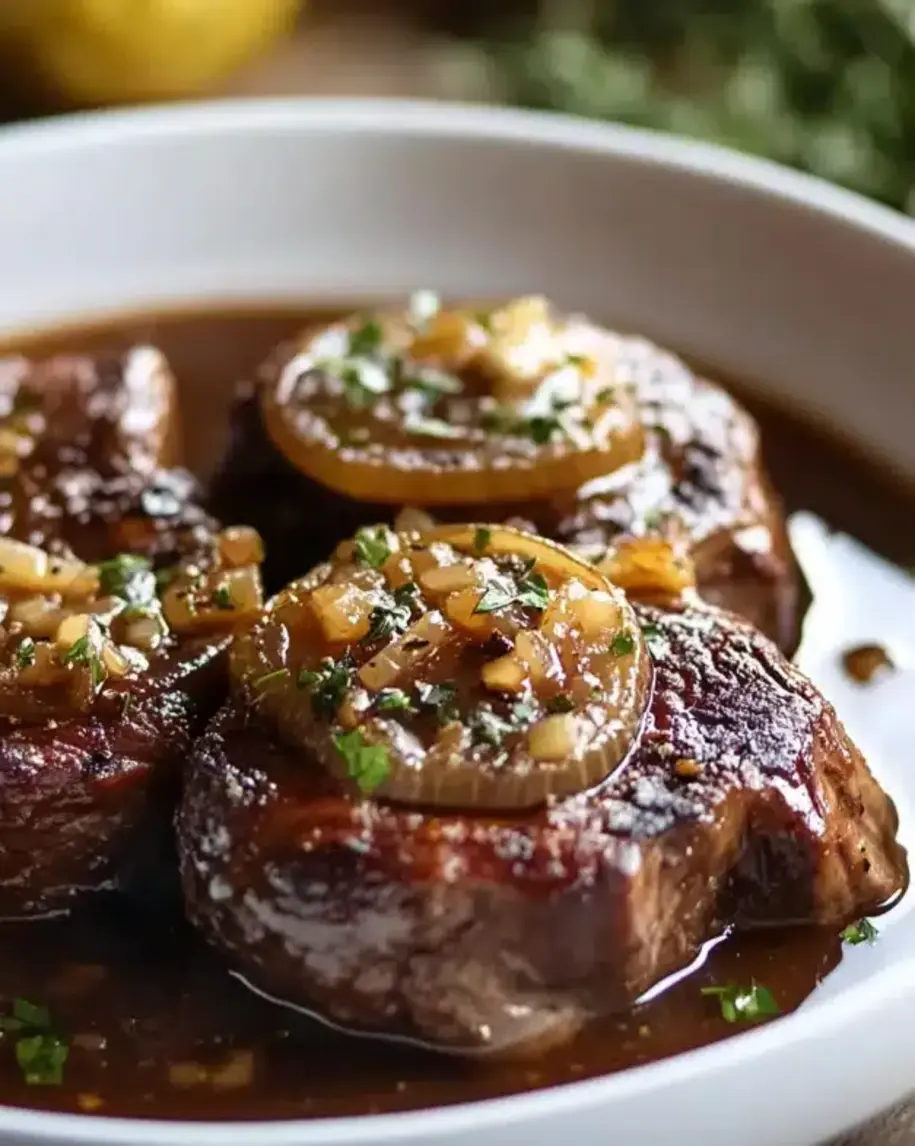
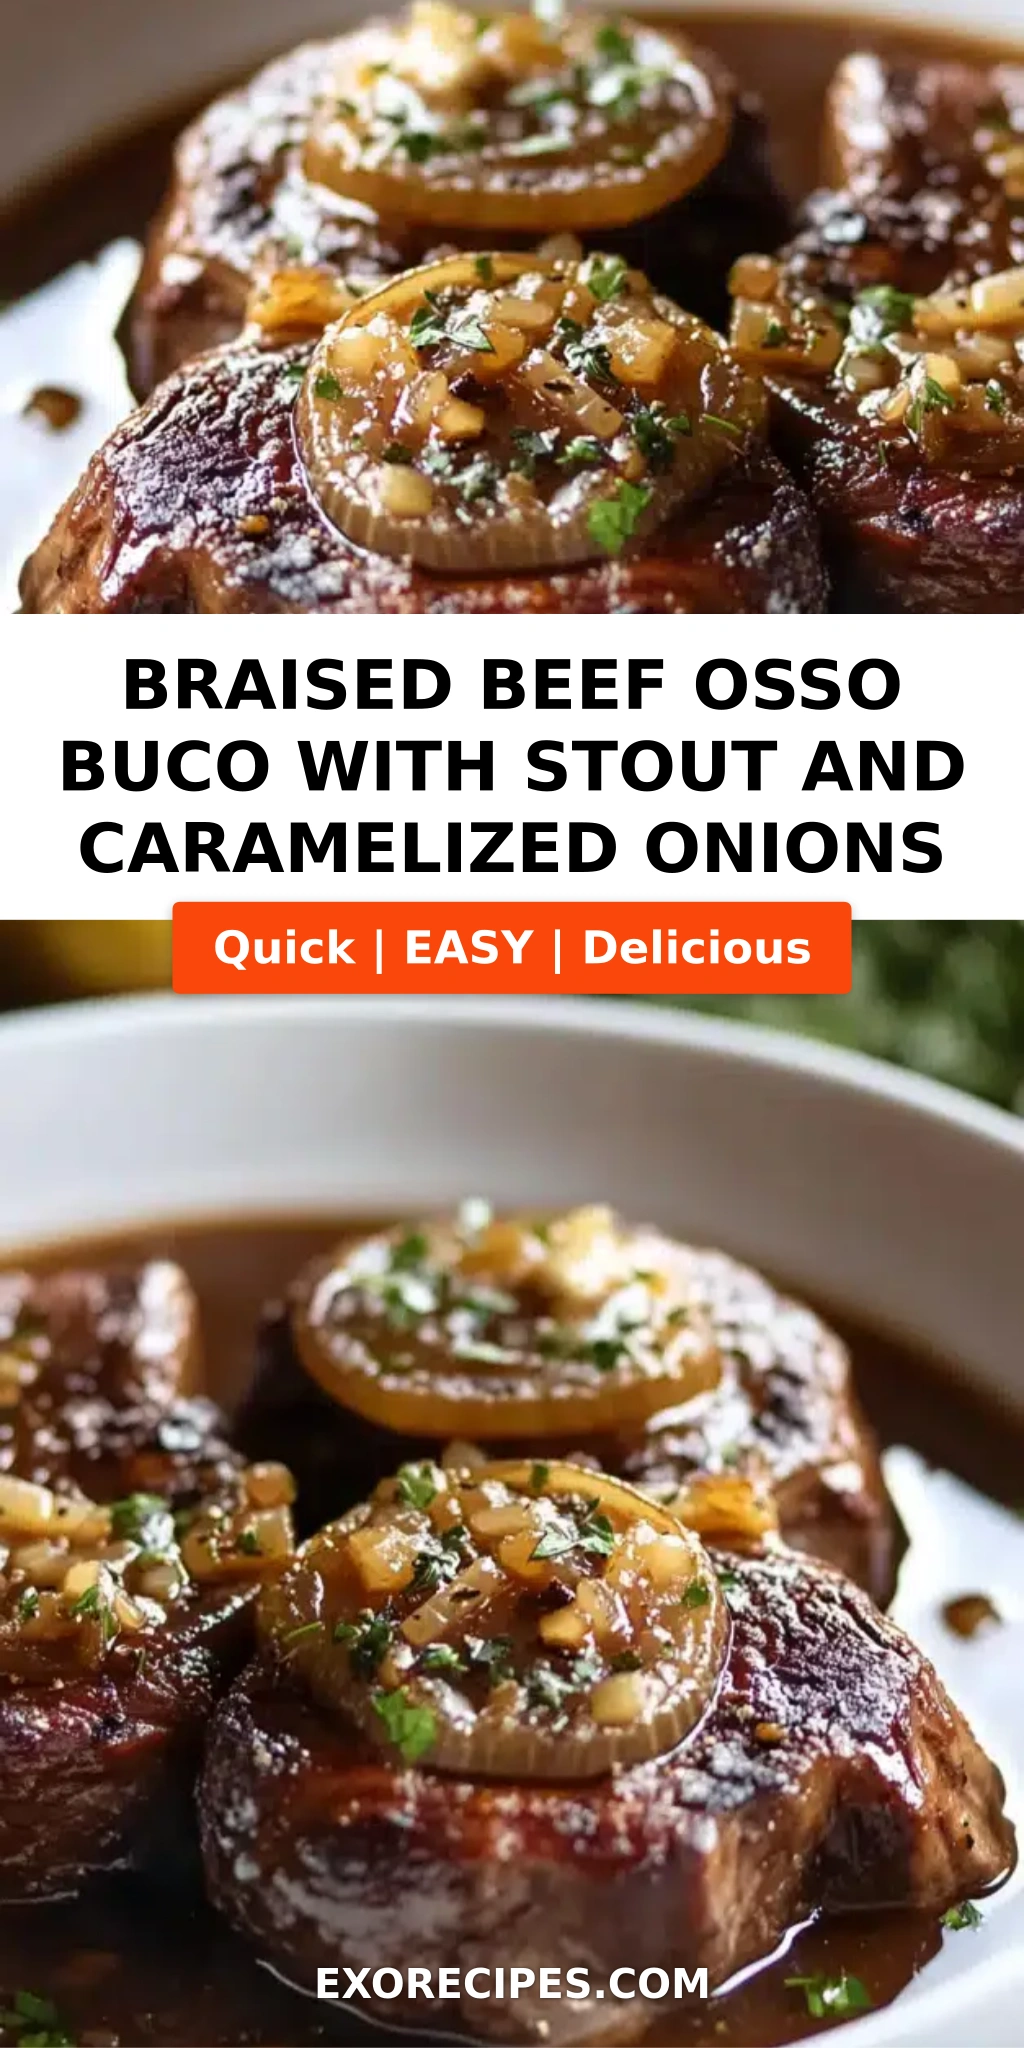
Beef and Broccoli Noodle Soup with Garlic, Ginger & Chili – A Spicy, Comforting Bowl of Bold Flavors

⚖️
Difficulty
Easy
⏲️
Prep Time
15 mins
🕒
Cook Time
20 mins
⏱️
Total Time
35 mins
🍽️
Servings
4

Growing up in Morocco, I learned that the best soups aren’t just food — they’re a hug in a bowl. My mother would spend hours layering spices, building depth with every pinch of cumin and dash of cinnamon. Years later, training at Le Cordon Bleu in Paris taught me the precision behind those instincts: how a proper sear builds flavor, how timing makes vegetables sing, and how a single aromatic can transform an entire dish. This Beef and Broccoli Noodle Soup with garlic, ginger, and chili is the bridge between those two worlds — a quick, weeknight-friendly soup that tastes like it simmered all day. It’s my answer to cold New York evenings when I want something deeply savory, lightly spicy, and packed with tender beef and vibrant broccoli.

Imagine a steaming bowl of rich, aromatic broth, tinted amber from soy and touched with the warmth of fresh ginger and garlic. Slivers of red chili float on the surface, promising gentle heat that builds with every spoonful. The beef is seared until caramelized on the edges, then returned to the broth just long enough to stay melt-in-your-mouth tender. Broccoli florets soften into the broth, absorbing all those savory notes, while rice noodles — slippery and satisfying — make every bite feel complete. A sprinkle of green onion and fresh cilantro on top adds freshness that cuts through the richness. It’s bold, it’s comforting, and it comes together in under 40 minutes.

What sets this spicy beef noodle soup apart is how I treat the beef. Instead of boiling it directly in the broth — which can make it tough — I sear it first in a hot pan, then add it back only at the end. That technique, straight from my French training, locks in flavor and guarantees tenderness. I also build the aromatic base the way I learned in my mother’s kitchen: letting garlic, ginger, and chili bloom in oil before adding any liquid. It’s a small step that makes a huge difference. 💡 mia’s Pro Tip: Slice your beef against the grain and freeze it for 15 minutes before cutting — it makes thin, even slices so much easier. And the most common mistake? Overcooking the noodles. Cook them just until al dente, because they’ll soften more in the hot broth.

Why This Beef and Broccoli Noodle Soup Recipe Is the Best

The Flavor Secret — The magic here is in the layering. Garlic, ginger, and chili are sautéed until fragrant before any liquid touches the pot, creating a deep aromatic base that infuses every drop of broth. I add a touch of brown sugar to balance the heat and soy, a trick I picked up from a Vietnamese street vendor in Paris. It doesn’t make the soup sweet — it rounds out the edges and makes the umami pop. This ginger garlic beef soup has a complexity that tastes like it simmered for hours, even though it’s ready in 35 minutes.

Perfected Texture — I sear the beef in batches over medium-high heat so it browns deeply without steaming. That caramelized crust adds a layer of savory flavor that you simply don’t get from boiling. The broccoli goes in just long enough to soften but still hold its shape — about 4 minutes — so every floret is tender but not mushy. And the noodles? I cook them separately in the broth itself, so they absorb flavor without becoming sticky or clumpy. Every component is timed to reach its peak texture at exactly the same moment.

Foolproof & Fast — This recipe is designed for busy home cooks. There’s no complicated technique, no exotic equipment, and no long simmer. You use one pot, a cutting board, and about 35 minutes from start to finish. I’ve tested this homemade beef noodle soup with beginner cooks in my NYC cooking classes, and everyone nails it on the first try. The ingredient list is straightforward — everything is available at any US grocery store — and the instructions are written so you can follow along even if you’re juggling kids, a work call, or a hungry family.

Beef and Broccoli Noodle Soup Ingredients

I love shopping for these ingredients at the Union Square Greenmarket in Manhattan, where I find the freshest ginger, garlic, and chilies. The broccoli there is always crisp and sweet, perfect for this soup. And the beef sirloin? I get it from a butcher in Chelsea Market who knows exactly how to slice it thin for me. If you’re shopping at a regular supermarket, don’t worry — every ingredient here is easy to find. Here’s exactly what you’ll need.

Ingredients List

  • 1 tablespoon vegetable oil
  • 1 pound beef sirloin, thinly sliced
  • 4 cloves garlic, minced
  • 1 tablespoon fresh ginger, grated
  • 2 red chili peppers, sliced (or to taste)
  • 6 cups beef broth
  • 2 cups water
  • 3 tablespoons soy sauce
  • 1 tablespoon fish sauce (optional)
  • 1 teaspoon brown sugar
  • 2 cups broccoli florets
  • 8 ounces rice noodles or egg noodles
  • 2 green onions, sliced (for garnish)
  • Fresh cilantro (for garnish)

Ingredient Spotlight

Beef Sirloin: This cut is lean but tender when sliced thin and seared quickly. Look for bright red color with fine marbling. If you can’t find sirloin, flank steak or ribeye work beautifully — just trim excess fat. Freeze for 15 minutes before slicing for paper-thin pieces that cook in seconds.

Fresh Ginger & Garlic: These are the aromatic backbone of the soup. Fresh ginger should feel firm with smooth skin — no wrinkling. Garlic should be plump and heavy for its size. Pre-minced jars work in a pinch but fresh gives a brighter, more pungent flavor that makes this Asian beef and broccoli soup truly shine.

Red Chili Peppers: I use fresh red chilies like Fresno or red jalapeño for their fruity heat and vibrant color. Thai bird chilies are spicier — use half if you’re sensitive. For a milder version, remove the seeds and membranes. You can also use 1 teaspoon red pepper flakes in a pinch.

Rice Noodles: These soak up broth without getting mushy, making them ideal for this soup. I prefer medium-width flat rice noodles (like pad Thai noodles) or thin vermicelli. Egg noodles are a great alternative if you want a chewier texture — just adjust the cooking time based on the package directions.

Broccoli Florets: Fresh broccoli adds a sweet, earthy contrast to the spicy broth. Choose bunches with tight, dark green florets and firm stalks. Frozen broccoli works too — add it frozen directly to the broth, but expect a slightly softer texture.

Original IngredientBest SubstitutionFlavor / Texture Impact
Beef SirloinFlank steak, ribeye, or thinly sliced chicken breastFlank is leaner and slightly chewier; ribeye is richer and more tender; chicken is milder and lighter.
Soy SauceTamari (gluten-free) or coconut aminosTamari is almost identical in flavor; coconut aminos are slightly sweeter and less salty.
Rice NoodlesEgg noodles, soba noodles, or zucchini noodlesEgg noodles are chewier; soba adds nutty flavor; zucchini noodles are low-carb but less hearty.
Fish Sauce (optional)Worcestershire sauce or a splash of extra soy sauceFish sauce adds unique umami depth; Worcestershire is tangier; extra soy is simpler but saltier.
Red Chili Peppers1 tsp red pepper flakes, sriracha, or chili oilFlakes add heat without fresh chili flavor; sriracha adds sweetness and vinegar; chili oil adds richness.

How to Make Beef and Broccoli Noodle Soup — Step-by-Step

This recipe moves quickly, so I like to have all my ingredients prepped and measured before I start — that’s a habit from my Paris days. Trust me, once you start cooking, everything comes together fast. Let’s walk through each step.

Step 1: Sear the Beef

Heat 1 tablespoon vegetable oil in a large pot over medium-high heat until it shimmers. Add the sliced beef in a single layer — don’t overcrowd the pot. Sear for 1–2 minutes per side until deep golden brown. The beef should be caramelized on the outside but still slightly pink in the center. Remove the beef with a slotted spoon and set it aside on a plate. This initial sear locks in juices and creates that rich, savory flavor base for the ginger garlic beef soup.

💡 mia’s Pro Tip: Pat the beef dry with paper towels before searing. Moisture is the enemy of browning — dry beef means a better crust and deeper flavor.

Step 2: Build the Aromatic Base

In the same pot, reduce the heat to medium. Add the minced garlic, grated ginger, and sliced red chili peppers. Cook for 1–2 minutes, stirring constantly, until the kitchen fills with that incredible fragrance. Be careful not to burn the garlic — it should become golden and aromatic, not bitter. This step mirrors what my mother taught me in Morocco: always let aromatics bloom in oil before adding liquid. It’s the foundation of this Asian beef and broccoli soup.

⚠️ Common Mistake to Avoid: Adding garlic and ginger to cold oil or overheating them. Start with medium heat and stir continuously — burnt garlic turns bitter and ruins the broth.

Step 3: Create the Broth

Pour in 6 cups beef broth and 2 cups water, then stir in 3 tablespoons soy sauce, 1 tablespoon fish sauce (if using), and 1 teaspoon brown sugar. Increase the heat to high and bring the mixture to a rolling boil. The brown sugar balances the saltiness and heat, creating a well-rounded broth that coats every noodle. Give it a taste here — it should be savory, slightly sweet, and gently spicy. Adjust the soy or chili to your preference before adding the vegetables.

💡 mia’s Pro Tip: Use a low-sodium beef broth so you can control the salt level with the soy sauce. If your broth tastes flat, add a splash of fish sauce or a pinch more brown sugar to deepen the umami.

Step 4: Cook Broccoli and Noodles

Once the broth is boiling, add 2 cups of broccoli florets and 8 ounces of rice noodles or egg noodles. Stir gently to separate the noodles, then cook according to the package directions — typically 4–6 minutes for rice noodles. The broccoli should be bright green and tender when pierced with a fork, and the noodles should be al dente. Remember, the noodles will continue to soften in the hot broth even after you turn off the heat, so slightly undercook them if you prefer a firmer texture.

⚠️ Common Mistake to Avoid: Overcooking the noodles. Check them a minute before the package suggests. Mushy noodles can’t be fixed, so pull them as soon as they’re tender but still have a slight bite.

Step 5: Combine and Finish

Return the seared beef to the pot, along with any juices that accumulated on the plate. Let everything heat through for 1–2 minutes — just long enough to warm the beef without overcooking it. The beef should be tender and juicy, not chewy. Taste the broth one last time and adjust the seasoning with more soy sauce or chili if needed.

Step 6: Ladle and Garnish

Ladle the soup into deep bowls, making sure each serving gets a good portion of beef, broccoli, and noodles. Top with sliced green onions and fresh cilantro. Serve immediately while the broth is steaming hot. The garnishes add freshness and color that make this homemade beef noodle soup look as good as it tastes.

💡 mia’s Pro Tip: For an extra pop of flavor, drizzle a teaspoon of chili oil or sesame oil over each bowl just before serving. It adds a beautiful sheen and a final layer of aroma.

StepActionDurationKey Visual Cue
1Sear beef slices2–4 minutes totalDeep golden-brown crust on both sides
2Sauté aromatics1–2 minutesGarlic turns golden, ginger becomes fragrant
3Boil broth5–7 minutes to boilBroth reaches a rolling boil
4Cook broccoli & noodles4–6 minutesBroccoli is bright green and tender; noodles are al dente
5Return beef & heat through1–2 minutesBeef is warmed through, still tender

Serving & Presentation

I love serving this soup in deep, wide bowls that let the broth steam up and hit your nose before the spoon even reaches your mouth. Garnish generously with sliced green onions and fresh cilantro — don’t be shy with them. The green against the amber broth is stunning, and the freshness cuts through the richness of the beef and the heat of the chili. For a final touch, I sometimes add a wedge of lime to each bowl; a quick squeeze brightens all the flavors in a way that reminds me of the fresh lemon my mother always added to her Moroccan harira.

This soup is a complete meal on its own, but it pairs beautifully with simple sides. I often serve it with a side of crispy spring rolls or garlicky Chinese greens for extra crunch and texture. In my NYC cooking classes, I recommend a light cucumber salad dressed with rice vinegar and sesame oil to balance the heat. For beverages, a cold ginger beer or a crisp lager cuts through the spice perfectly. If you’re in the mood for something warm, a cup of jasmine tea is a lovely, soothing companion.

Pairing TypeSuggestionsWhy It Works
Side DishCrispy spring rolls, garlicky Chinese greens, cucumber saladAdds crunch and freshness that contrast with the warm, brothy soup.
Sauce / DipChili oil, hoisin sauce, soy-vinegar dipAdds customizable heat, sweetness, or tanginess to each bite.
BeverageGinger beer, crisp lager, jasmine tea, cold sakeCarbonation and coolness cut the spice; tea complements the aromatic ginger.
GarnishGreen onions, cilantro, lime wedge, sesame seedsAdds freshness, color, and a pop of brightness to every spoonful.

Make-Ahead, Storage & Reheating

I live by meal prep, especially in my busy NYC life. This Beef and Broccoli Noodle Soup is actually perfect for making ahead, but there’s one trick: store the broth, beef, and vegetables separately from the noodles. If you leave the noodles in the broth overnight, they’ll absorb all the liquid and turn mushy. I prep everything up to step 4, then cool and refrigerate the broth mixture and the cooked beef separately. When I’m ready to eat, I reheat the broth, cook fresh noodles, and assemble. It takes 5 minutes and tastes like it’s freshly made.

MethodContainerDurationReheating Tip
RefrigeratorAirtight container (broth + beef separate from noodles)Up to 4 daysReheat broth on stove, cook fresh noodles, then combine.
FreezerFreezer-safe container or zip-top bag (broth + beef only, no noodles)Up to 3 monthsThaw overnight in fridge, reheat on stove, add fresh broccoli and noodles.
Make-AheadStore broth + beef in fridge; prep vegetables in a separate bagUp to 2 days in advanceWhen ready, boil broth, add veggies and noodles, finish with beef.

When reheating, I always bring the broth to a gentle simmer on the stovetop — never the microwave, which can make the beef tough. If the broth has thickened from the noodles absorbing liquid, add a splash of water or extra broth to loosen it up. For the best texture, cook fresh noodles each time you serve. I know it sounds like extra work, but it takes just 4 minutes and makes a world of difference. This way, every bowl of spicy beef noodle soup tastes as vibrant and satisfying as the first one.

Variations & Easy Swaps

One of my favorite things about this recipe is how adaptable it is. I’ve made versions with everything from leftover roast beef to extra vegetables from my CSA box. Below are three of my go-to variations, each with a slightly different personality. Whether you’re craving something lighter, gluten-free, or with a Moroccan twist, there’s an option here for you.

VariationKey ChangeBest ForDifficulty Impact
Chicken & Bok ChoySubstitute chicken breast for beef and bok choy for broccoliLighter, leaner, and weeknight-friendlyEasy — same technique, no added difficulty
Gluten-FreeUse tamari instead of soy sauce and rice noodles or gluten-free noodlesThose avoiding glutenEasy — simple swaps, no technique change
Moroccan-SpicedAdd 1 tsp cumin, 1/2 tsp cinnamon, and 1/4 tsp turmeric to the aromaticsWarming, exotic flavor with North African rootsEasy — just add spices, no extra steps

Chicken & Bok Choy Version

For a lighter take, swap the beef for boneless, skinless chicken breast — slice it thin and sear just like the beef. Substitute bok choy for broccoli; it cooks in about the same time and adds a mild, slightly sweet flavor. I love this version on nights when I want something hearty but not heavy. The chicken stays tender and juicy, and the bok choy adds a lovely crunch. It’s a staple in my NYC winter meal rotation, especially when I’m craving Asian beef and broccoli soup but want to change things up.

Gluten-Free Version

This is one of the most common requests from my readers, and it’s incredibly easy. Use tamari instead of soy sauce — it tastes almost identical and is brewed without wheat. For the noodles, choose 100 percent rice noodles or any gluten-free noodle brand. Double-check your beef broth too; some store-bought brands contain wheat. Pacific Foods and Imagine make excellent gluten-free beef broths. Everything else in the recipe is naturally gluten-free, so with these two swaps, the entire homemade beef noodle soup becomes safe and delicious for gluten-sensitive guests.

Moroccan-Spiced Version

This one is close to my heart. When I make it for myself, I add 1 teaspoon of ground cumin, 1/2 teaspoon of cinnamon, and 1/4 teaspoon of turmeric to the aromatics in step 2. The cumin adds an earthy warmth, the cinnamon brings a subtle sweetness that plays beautifully with the chili, and the turmeric gives the broth a beautiful golden hue. It’s a nod to the soups my mother made in Morocco — familiar, comforting, and deeply flavorful. I love serving this version with a dollop of harissa on the side for extra heat. It transforms the spicy beef noodle soup into something entirely new and personal.

How do you make beef tender for beef and broccoli noodle soup?

The key to tender beef is threefold: choose the right cut, slice it properly, and don’t overcook it. Beef sirloin, flank steak, or ribeye are all great options — they’re naturally tender when handled right. Slice the beef against the grain into thin strips about 1/4-inch thick. For easier slicing, pop the beef in the freezer for 15 minutes before cutting. The most important step is the sear: cook the beef over medium-high heat for just 1–2 minutes per side until browned, then remove it from the pot. Add it back only at the end to heat through for 1–2 minutes. This prevents the beef from simmering too long and becoming tough. Searing locks in the juices and creates a flavorful crust that makes every bite of this ginger garlic beef soup satisfying.

What type of noodles work best in beef and broccoli noodle soup?

Rice noodles are my top recommendation — they absorb the broth beautifully without becoming soggy, and their neutral flavor lets the garlic, ginger, and chili shine. Medium-width flat rice noodles (like pad Thai noodles) or thin vermicelli both work wonderfully. If you prefer a chewier texture, egg noodles are an excellent alternative, though they’ll absorb more liquid and may soften faster. For a low-carb option, zucchini noodles or shirataki noodles work in a pinch, but they won’t soak up the broth the same way. Whatever noodle you choose, cook them just until al dente — they’ll continue to soften in the hot broth. This is especially important for this Asian beef and broccoli soup, where noodle texture can make or break the dish.

Can I use frozen broccoli instead of fresh in this soup?

Absolutely — frozen broccoli works perfectly in this recipe. Add it directly from the freezer to the boiling broth without thawing. Frozen broccoli will cook slightly faster than fresh, usually in about 3–4 minutes instead of 4–6. The texture will be a bit softer than fresh broccoli, but it still holds its shape and absorbs the broth’s flavors well. One tip: don’t overcook frozen broccoli, or it can become mushy. I actually keep a bag of frozen broccoli in my New York freezer for nights when I’m too busy to shop. It’s a convenient swap and still delivers plenty of nutrients and color to this homemade beef noodle soup. Just look for florets without added sauces or seasonings.

How long should you simmer beef and broccoli noodle soup for the best flavor?

This soup comes together quickly because the flavor is built through searing and blooming aromatics, not long simmering. Once you’ve added the broth, bring it to a rolling boil, then reduce to a simmer for about 5 minutes before adding the broccoli and noodles. The total simmer time is around 10–12 minutes from start to finish. The beef is seared separately and added back at the end to prevent it from toughening. If you’re looking for even deeper flavor, you can simmer the broth with a piece of ginger, a garlic clove, and a chili pepper for 20 minutes before straining, but it’s not necessary for this recipe. The beauty of this spicy beef noodle soup is that it delivers rich, complex flavor in under 35 minutes.

Can I make this beef and broccoli noodle soup ahead of time?

Yes, with one important tip: store the broth, beef, and vegetables separately from the noodles. If you combine them, the noodles will absorb the broth and turn mushy within a few hours. I recommend preparing the broth with the broccoli and beef, cooling it completely, and refrigerating it in an airtight container for up to 4 days. When you’re ready to serve, reheat the broth on the stove, cook fresh noodles separately, and then combine everything in bowls. You can also freeze the broth mixture (without noodles) for up to 3 months. This make-ahead approach is a lifesaver on busy weeknights and still delivers a delicious homemade beef noodle soup every time.

Is this beef and broccoli noodle soup gluten-free?

As written, the recipe uses soy sauce, which contains wheat, and rice noodles, which are naturally gluten-free. To make the entire soup gluten-free, simply substitute tamari or coconut aminos for the soy sauce — both are excellent gluten-free alternatives with a similar flavor profile. Also, double-check your beef broth brand, as some contain wheat-based ingredients. Pacific Foods and Imagine are reliable gluten-free broth options. All other ingredients — beef, broccoli, garlic, ginger, chili, fish sauce, brown sugar, and rice noodles — are naturally gluten-free. With these simple swaps, this ginger garlic beef soup becomes a safe and satisfying meal for anyone avoiding gluten.

What protein can I use instead of beef in this soup?

This soup is incredibly versatile when it comes to protein. Thinly sliced chicken breast or thighs work beautifully — sear them just like the beef. For a seafood twist, add shrimp during the last 2 minutes of cooking, or use flaked white fish like cod or tilapia added at the very end. Tofu is an excellent vegetarian option: use extra-firm tofu, press it dry, cube it, and pan-fry until golden before adding to the broth. For a plant-based version, try soy curls or seitan, which mimic the texture of meat. Each protein brings its own character to the soup, but the aromatic broth of garlic, ginger, and chili complements them all. This Asian beef and broccoli soup adapts to whatever protein you have on hand.

How do I store leftover beef and broccoli noodle soup?

Store leftover soup in an airtight container in the refrigerator for up to 4 days, but remove the noodles first if possible. The noodles will continue to absorb broth and become soft over time. If you’ve already combined everything, the soup will still be safe to eat — the noodles will just be very tender. For the best texture, reheat the broth on the stovetop over medium heat rather than in the microwave, which can make the beef tough. If the broth has thickened, add a splash of water or beef broth to thin it out. You can freeze the broth and beef portion for up to 3 months, but skip freezing the noodles. This method helps maintain the quality of your homemade beef noodle soup for future meals.

Can I add other vegetables to this soup?

Absolutely — this soup is a great canvas for extra vegetables. Bok choy, snow peas, and bell peppers are fantastic additions that cook quickly in the broth. Mushrooms, especially shiitake or cremini, add an earthy umami that complements the beef beautifully. If you want to stretch the soup further, add shredded carrots, bean sprouts, or sliced bamboo shoots. Just keep in mind that heartier vegetables like carrots or bell peppers should be sliced thinly so they cook in the same 4–6 minute window as the broccoli. I often add what I have in my CSA box from the Union Square market — this spicy beef noodle soup changes with the seasons, and that’s exactly what I love about it.

What makes this soup spicy and how can I adjust the heat level?

The heat in this soup comes from fresh red chili peppers, which add both spice and a fruity, slightly smoky flavor. Fresno peppers and red jalapeños are my go-to choices — they’re moderately spicy with a clean heat. For a milder soup, remove the seeds and membranes from the chilies before slicing, or use just one chili instead of two. For a spicier version, add an extra chili or include the seeds. You can also stir in a teaspoon of chili oil, sriracha, or red pepper flakes at the end for a final kick. I always recommend starting with less chili and tasting the broth before adding more — you can increase heat easily, but you can’t take it out. This ginger garlic beef soup is meant to be customizable, so adjust it to your comfort level.

📌

Love This Recipe? Save It to Pinterest!

If you enjoyed this Beef and Broccoli Noodle Soup recipe, don’t let it get lost in your browser tabs! 😄 Pin it now so you can find it again anytime — and explore hundreds more tried-and-tested recipes waiting for you on my Pinterest boards.

👉 Follow mia on Pinterest @exorecipe

📌 Pin this recipe · 🔁 Re-pin your favorites · 💬 Tag me when you make it — I love seeing your creations!

Print

clock clock iconcutlery cutlery iconflag flag iconfolder folder iconinstagram instagram iconpinterest pinterest iconfacebook facebook iconprint print iconsquares squares iconheart heart iconheart solid heart solid icon

Beef and Broccoli Noodle Soup with Garlic, Ginger & Chili

  • Author: Chef Mia
  • Prep Time: 15 minutes
  • Cook Time: 20 minutes
  • Total Time: 35 minutes
  • Yield: 4 1x
  • Method: Main Course
  • Cuisine: Asian-inspired

Description

A comforting and spicy soup with tender beef, broccoli, and noodles, infused with garlic, ginger, and chili.


Ingredients

Scale
  • 1 tablespoon vegetable oil
  • 1 pound beef sirloin, thinly sliced
  • 4 cloves garlic, minced
  • 1 tablespoon fresh ginger, grated
  • 2 red chili peppers, sliced (or to taste)
  • 6 cups beef broth
  • 2 cups water
  • 3 tablespoons soy sauce
  • 1 tablespoon fish sauce (optional)
  • 1 teaspoon brown sugar
  • 2 cups broccoli florets
  • 8 ounces rice noodles or egg noodles
  • 2 green onions, sliced (for garnish)
  • Fresh cilantro (for garnish)

Instructions

  1. Heat vegetable oil in a large pot over medium-high heat. Add beef slices and sear until browned on both sides. Remove beef and set aside.
  2. In the same pot, add garlic, ginger, and chili peppers. Cook for 1-2 minutes until fragrant.
  3. Pour in beef broth and water. Add soy sauce, fish sauce (if using), and brown sugar. Bring to a boil.
  4. Add broccoli florets and noodles. Cook according to noodle package directions until tender, about 4-6 minutes for rice noodles.
  5. Return the cooked beef to the pot and heat through for 1-2 minutes.
  6. Ladle soup into bowls. Garnish with green onions and fresh cilantro. Serve hot.

Notes

Adjust chili quantity to your spice preference. For a gluten-free version, use tamari instead of soy sauce and gluten-free noodles.


Nutrition

  • Calories: 450
  • Sugar: 6g
  • Fat: 15g
  • Carbohydrates: 45g
  • Protein: 32g


Beef and Broccoli Noodle Soup with Garlic, Ginger & Chili

ph">For more delicious inspiration, follow me on Pinterest!

Beef and Barley Soup with Mushrooms: A Hearty Hug in a Bowl – Comforting, Rich & So Satisfying

⚖️
Difficulty
Medium
⏲️
Prep Time
20 mins
🕒
Cook Time
2 hours
⏱️
Total Time
2 hours 20 mins
🍽️
Servings
8

I still remember the first time I made this beef and barley soup in my tiny NYC apartment. It was a freezing January evening, and the wind was howling outside my kitchen window. I had just returned from the Union Square farmers market with a bag of cremini mushrooms and a beautiful piece of beef chuck. As the soup began to simmer, the most incredible aroma filled every corner of my home — rich, earthy, and deeply comforting. It reminded me of the slow-cooked tagines my mother used to make in our kitchen in Morocco, where patience and love were always the secret ingredients. This hearty beef soup recipe is everything I crave on a cold day: tender beef, chewy barley, and a broth so flavorful it wraps around you like a warm blanket.

Let me paint you a picture: imagine a deep, mahogany-colored broth infused with the savory essence of seared beef and earthy mushrooms. Each spoonful is a harmony of textures — the hearty chew of pearl barley, the melt-in-your-mouth tenderness of slow-simmered beef chuck, and the soft bite of carrots and celery. The mushrooms bring an umami depth that makes this mushroom barley soup taste like it’s been cooking all day (and honestly, the low-and-slow simmer is key). A whisper of thyme and rosemary adds an aromatic lift, while the diced tomatoes lend a subtle brightness that balances the richness. I love how the barley absorbs the broth as it cooks, plumping up into little pearls of goodness that make every bite satisfying.

What sets my version apart is a technique I learned during my pastry training in Paris: I sear the beef in batches to build a deep, caramelized fond on the bottom of the pot, then deglaze with a splash of broth before adding the vegetables. That fond is pure flavor gold — it’s the foundation of a truly unforgettable broth. I also toast the barley briefly in the pot before adding the liquid, which gives it a nutty depth that you don’t get if you just dump it in. This beef soup with mushrooms is one of those recipes that looks humble but tastes absolutely luxurious. Whether you’re a seasoned cook or a beginner, I promise this winter soup recipe will become a staple in your home. 💡 mia’s Pro Tip: For the most flavorful result, choose a good-quality beef broth — it makes all the difference!

Why This Beef and Barley Soup Recipe Is the Best

The Flavor Secret: This isn’t just another beef soup — it’s a lesson in layering flavors. I start by searing the beef until deeply browned, creating that rich fond on the pot. Then I cook the mushrooms until they release their liquid and begin to caramelize, concentrating their earthy flavor. The barley gets a quick toast in the residual heat, unlocking a nutty aroma that infuses the entire broth. It’s the same technique I use when making a classic French pot-au-feu, and it works beautifully here. Every ingredient is treated with intention, so the final soup tastes complex and deeply satisfying — never flat or watery.

Perfected Texture: Texture is everything in a hearty beef soup, and I’ve dialed this one in perfectly. The beef chuck is cut into 1-inch cubes and simmered low and slow until it’s fork-tender but still holds its shape. The pearl barley is cooked just until chewy — not mushy — so it retains that satisfying bite that makes this soup feel like a meal. The mushrooms are sliced and sautéed until golden, adding a meaty, tender texture that complements the beef beautifully. And the vegetables — carrots and celery — are diced small enough to soften into the broth while still offering a gentle pop of texture. Every spoonful is a perfect balance of tender, chewy, and soft.

Foolproof & Fast (for a slow-simmered soup): I know a 2-hour simmer sounds like a commitment, but the active work is only about 20 minutes. Once everything is in the pot, you just let it bubble away on the stove while you go about your day. This is the kind of recipe that makes you look like a hero with very little effort. It’s also incredibly forgiving — you can use quick-cooking barley if you’re short on time, or swap in a different cut of beef. I’ve tested this recipe more times than I can count, and I promise it works every single time. It’s one of those winter soup recipes that feels both rustic and refined, and it’s absolutely perfect for meal prep.

Beef and Barley Soup Ingredients

I love sourcing my ingredients for this hearty beef soup recipe from my local NYC markets — the cremini mushrooms from the greenmarket, the beef chuck from my neighborhood butcher, and the pearl barley from the bulk bins at the co-op. There’s something so grounding about selecting each component with care, knowing it will all come together in one beautiful pot. When I was growing up in Morocco, my mother would take me to the souk to pick out vegetables and spices for her slow-cooked dishes, and that ritual of choosing ingredients with intention has stayed with me. Every item in this list has a purpose, and together they create a symphony of flavors that will warm you from the inside out.

Ingredients List

  • 1 lb beef chuck, cut into 1-inch cubes
  • 2 tbsp olive oil
  • 1 large onion, chopped
  • 3 cloves garlic, minced
  • 8 oz cremini mushrooms, sliced
  • 2 carrots, peeled and diced
  • 2 celery stalks, diced
  • 1 cup pearl barley
  • 8 cups beef broth
  • 1 can (14.5 oz) diced tomatoes
  • 2 bay leaves
  • 1 tsp dried thyme
  • 1 tsp dried rosemary
  • Salt and pepper to taste
  • 2 tbsp fresh parsley, chopped (for garnish)

Ingredient Spotlight

Beef Chuck: This is my go-to cut for beef soup with mushrooms. It has just the right amount of marbling, which renders during the long simmer and keeps the meat tender and flavorful. When shopping at a US grocery store, look for beef chuck that has good fat distribution — that marbling is what makes it stay moist. If you can’t find beef chuck, a good substitute is boneless short ribs or bottom round, though you may need to simmer a bit longer. I don’t recommend using sirloin or lean cuts, as they tend to dry out and become tough.

Cremini Mushrooms: These earthy little gems are the heart of this mushroom barley soup. They have a deeper, more robust flavor than white button mushrooms, and they hold their shape beautifully during cooking. When selecting cremini at the market, look for firm, dry mushrooms with closed caps — that’s a sign of freshness. If you can find them, a mix of cremini and shiitake mushrooms adds even more umami complexity. I’ve also tested this with portobello mushrooms (diced), and they work well too, though the texture is a bit more substantial.

Pearl Barley: This is the grain that gives this hearty beef soup recipe its signature chew and body. Pearl barley has had the hull and bran removed, so it cooks more quickly and has a tender, creamy texture while still holding its shape. You can find it in the grain aisle of any US supermarket. If you want to experiment, hulled barley (which still has the bran) will take longer to cook and have a nuttier flavor — just adjust your cooking time accordingly. Quick-cooking barley is also an option if you’re short on time, but I prefer the texture of pearl barley for this dish.

Beef Broth: The broth is the backbone of this entire dish, so quality matters. I recommend using a reduced-sodium beef broth so you can control the salt level yourself. If you have the time, homemade beef stock is absolutely incredible here — but a good store-bought brand like Swanson or Kitchen Basics works perfectly. For a deeper flavor, you can stir in a teaspoon of tomato paste or a dash of Worcestershire sauce along with the broth. In a pinch, you can use beef bone broth for an even richer, more collagen-rich base.

Original IngredientBest SubstitutionFlavor / Texture Impact
Beef ChuckBoneless Short RibsRicher, more marbling; slightly longer cook time.
Cremini MushroomsShiitake or Baby BellaDeeper umami; shiitake are more earthy.
Pearl BarleyFarro or Brown RiceFarro is chewier; brown rice is lighter.
Beef BrothBone Broth or Veggie BrothBone broth is richer; veggie broth is lighter.

How to Make Beef and Barley Soup — Step-by-Step

Trust me, the process is simple and the result is deeply rewarding. Let me walk you through each step so you can create a pot of this winter soup recipe that tastes like it’s been simmering for hours (because it has, but with very little hands-on work).

Step 1: Sear the Beef

Heat the olive oil in a large pot or Dutch oven over medium-high heat until it shimmers. Pat the beef cubes dry with paper towels — this is crucial for good browning. Working in batches so you don’t crowd the pot, add the beef cubes and sear until deeply browned on all sides, about 5 minutes total per batch. Use tongs to turn the pieces, and don’t rush this step: the browned bits that stick to the bottom of the pot are pure flavor. Remove the beef with a slotted spoon and set it aside on a plate.

⚠️ Common Mistake to Avoid: Crowding the pot. If you add all the beef at once, the temperature drops and the meat steams instead of searing. Work in 2-3 batches for the deepest, most flavorful browning.

Step 2: Sauté the Aromatics

Reduce the heat to medium. Add the chopped onion to the same pot (with all those browned bits still in there) and cook, stirring occasionally, for 3 minutes until softened. Add the minced garlic and cook for 30 seconds until fragrant. Then add the sliced cremini mushrooms, diced carrots, and diced celery. Cook for 5 minutes, stirring occasionally, until the mushrooms have released their liquid and started to brown around the edges. The aroma at this point is absolutely incredible — earthy, savory, and so inviting.

💡 mia’s Pro Tip: Let the mushrooms cook undisturbed for a minute or two before stirring. This allows them to develop a nice golden crust, which adds even more umami flavor to the soup.

Step 3: Build the Broth

Stir in the pearl barley and let it toast for about 1 minute, stirring constantly — this brings out its nutty flavor. Pour in the beef broth and the can of diced tomatoes (with their juices), and use a wooden spoon to scrape up all those delicious browned bits from the bottom of the pot. Return the seared beef to the pot, then add the bay leaves, dried thyme, and dried rosemary. Season with a generous pinch of salt and a few grinds of black pepper. Stir everything together to combine.

⚠️ Common Mistake to Avoid: Forgetting to scrape the fond (browned bits) from the bottom of the pot. Those bits are packed with flavor from the seared beef — don’t leave them behind! Use a wooden spoon and a splash of broth to deglaze the pot thoroughly.

Step 4: Simmer to Perfection

Bring the soup to a boil over high heat, then immediately reduce the heat to low. Cover the pot and let it simmer gently for 1.5 to 2 hours, stirring occasionally to prevent the barley from sticking to the bottom. The soup is ready when the beef is fork-tender and the barley is cooked through but still pleasantly chewy. If the soup gets too thick for your liking, you can add a splash of water or extra broth during cooking. Taste and adjust the seasoning with more salt and pepper as needed.

💡 mia’s Pro Tip: Check the soup after 1 hour and 15 minutes — different stoves vary, and you want the barley to be tender but not mushy. The beef should shred easily with a fork when it’s perfectly done.

Step 5: Finish and Serve

Remove the bay leaves from the pot and discard them. Give the soup one final stir and adjust the seasoning with salt and pepper if needed. Ladle the steaming soup into deep bowls, making sure each serving gets a generous portion of beef, barley, and vegetables. Garnish generously with fresh chopped parsley for a pop of color and freshness. Serve hot, with crusty bread or a side salad if desired. Each bowl is a hug in edible form — rich, comforting, and deeply satisfying.

⚠️ Common Mistake to Avoid: Serving the soup immediately if you prefer a thicker consistency. Letting the soup rest for 10 minutes off the heat allows the barley to absorb more broth and thickens the soup naturally. If you want it even thicker, stir in a cornstarch slurry (1 tbsp cornstarch mixed with 2 tbsp water) during the last 10 minutes of cooking.

StepActionDurationKey Visual Cue
1Sear the Beef5 min per batchDeep brown crust on all sides
2Sauté Aromatics8 minOnions translucent, mushrooms golden
3Build the Broth5 minBarley toasts, fond dissolves
4Simmer1.5–2 hoursBeef fork-tender, barley plumped
5Finish & Serve5 minParsley garnish, steaming hot

Serving & Presentation

This hearty beef soup recipe is a meal in itself, but the way you serve it can elevate the entire experience. I love ladling the soup into deep, wide bowls so you can see all the beautiful components — the tender beef, the plump barley, the earthy mushrooms, and the colorful carrots and celery. A generous sprinkle of fresh parsley on top adds a bright, herbal note that cuts through the richness. In my NYC kitchen, I often serve this soup with a thick slice of crusty sourdough bread for dipping, or a simple green salad with a lemony vinaigrette to balance the heartiness.

When I want to channel my Parisian training, I sometimes finish the soup with a drizzle of extra-virgin olive oil and a few cracks of black pepper right before serving — it adds a luxurious sheen and a peppery kick. For a touch of Moroccan flair, I might sprinkle a pinch of smoked paprika or cumin over the top, which echoes the warm spices my mother used in her cooking. This winter soup recipe is also wonderful served with a side of roasted vegetables or a simple grilled cheese sandwich for the ultimate comfort meal. However you choose to serve it, this mushroom barley soup is guaranteed to bring warmth and smiles to your table.

Pairing TypeSuggestionsWhy It Works
Side DishCrusty sourdough, roasted Brussels sprouts, simple green saladAdds crunch and freshness; bread soaks up the broth.
Sauce / DipHorseradish crema, garlic aioli, balsamic glazeAdds tangy or spicy contrast to the rich broth.
BeverageFull-bodied red wine (Syrah), dark beer (stout), sparkling water with lemonRed wine complements the beef; beer adds maltiness.
GarnishFresh parsley, chives, grated Parmesan, drizzle of olive oilAdds freshness, color, and a final layer of flavor.

Make-Ahead, Storage & Reheating

As a busy NYC food blogger and mom, I live for make-ahead meals, and this beef soup with mushrooms is one of the best. It actually tastes even better the next day, after the flavors have had time to meld together in the refrigerator. I often make a big batch on Sunday and enjoy it for lunches throughout the week. The barley absorbs some of the broth as it sits, so the soup thickens beautifully overnight — just add a splash of broth or water when reheating to bring it back to your preferred consistency.

MethodContainerDurationReheating Tip
RefrigeratorAirtight container4–5 daysReheat gently on the stovetop over medium-low heat, adding a splash of broth or water to thin.
FreezerFreezer-safe container or zip-top bagUp to 3 monthsThaw overnight in the fridge, then reheat on the stovetop. The barley may soften slightly but flavor remains excellent.
Make-AheadCooked and cooled in the pot2–3 days in advanceCook fully, cool completely, then refrigerate. Reheat and adjust seasoning before serving.

When reheating, I prefer the stovetop over the microwave because it’s gentler and helps the flavors redevelop. If the soup has thickened too much, just stir in a little beef broth or water until it reaches your desired consistency. Don’t forget to taste and adjust the seasoning after reheating — flavors can mellow in the fridge, and a pinch of salt or a crack of pepper can bring everything back to life. This winter soup recipe is truly one of those dishes that keeps on giving, and I love knowing I have a batch ready to go in the fridge or freezer for busy days.

Variations & Easy Swaps

VariationKey ChangeBest ForDifficulty Impact
Moroccan-SpicedAdd cumin, coriander, and a pinch of cinnamonAromatic, North African twistEasy — just add spices
Gluten-FreeSwap barley for brown rice or quinoaGluten-intolerant dietsEasy — adjust cook time
Slow Cooker VersionSear beef then transfer to slow cookerSet-it-and-forget-it convenienceEasy — longer cook time

Moroccan-Spiced Version

This one is close to my heart, as it takes me right back to my mother’s kitchen in Morocco. Simply add 1 teaspoon of ground cumin, 1/2 teaspoon of ground coriander, and a pinch of cinnamon along with the dried herbs in step 3. The warm, aromatic spices complement the earthy mushrooms and rich beef beautifully, creating a soup that’s both comforting and exotic. I also like to add a handful of cooked chickpeas and a squeeze of lemon juice at the end for even more Moroccan flair. It’s a simple change that transforms this mushroom barley soup into something truly special, and it always gets rave reviews from my dinner guests in NYC.

Gluten-Free Version

If you need a gluten-free option, swapping the pearl barley is easy and delicious. I’ve tested this with both brown rice and quinoa, and I actually love the results. Brown rice gives the soup a slightly nuttier, chewier texture — use 1 cup of long-grain brown rice and increase the simmer time to about 45 minutes to 1 hour (check the rice package for guidance). Quinoa cooks much faster, so add it during the last 20 minutes of simmering, using 3/4 cup of rinsed quinoa. Both options absorb the broth beautifully and create a satisfying, hearty soup that’s completely gluten-free. The flavor profile stays true to the original, and the soup freezes just as well.

Slow Cooker Version

For those days when you want to come home to a ready-made meal, this slow cooker adaptation is a game-changer. Sear the beef on the stovetop as directed in step 1, then transfer it to your slow cooker. Sauté the aromatics and mushrooms in the same pot, then add them to the slow cooker along with the broth, tomatoes, barley, and seasonings. Cook on low for 7-8 hours or on high for 4-5 hours, until the beef and barley are tender. I recommend adding the barley during the last 2 hours if you prefer it to retain a bit more texture. This version is perfect for busy weekdays, and the results are just as deeply flavorful as the stovetop version. 💡 mia’s Pro Tip: For the slow cooker version, use a bit less broth (about 7 cups) since there’s less evaporation.

What is the best type of beef to use for beef and barley soup with mushrooms?

For this hearty beef soup, I recommend using beef chuck. It has excellent marbling, which renders during the long simmer and keeps the meat incredibly tender and flavorful. Beef chuck is also relatively affordable and widely available at US grocery stores. If you can’t find chuck, boneless short ribs are a great substitute — they’re even more marbled and produce a supremely rich broth. However, avoid lean cuts like sirloin or round steak, as they tend to dry out and become tough during the extended cooking time. The key is to choose a cut with enough fat and connective tissue to break down into tender, succulent pieces over the 1.5- to 2-hour simmer.

Can I substitute pearl barley with quick-cooking barley in this soup?

Absolutely, you can use quick-cooking barley as a substitute, but there are a few things to keep in mind. Quick-cooking barley is essentially pearl barley that has been parboiled and dried, so it cooks much faster — usually in about 10–15 minutes. This means you should add it later in the cooking process, during the last 20 minutes of simmering, to prevent it from becoming mushy. The texture will be slightly less chewy than pearl barley, but it still works well. If you’re short on time, this is a perfectly fine swap. That said, I personally prefer the toothsome, hearty texture of traditional pearl barley for this mushroom barley soup — it holds up better during the long simmer and absorbs the broth more gradually, resulting in a richer overall dish.

How long should I simmer beef and barley soup to get it tender?

For perfectly tender beef and fully cooked barley, you should simmer this soup for 1.5 to 2 hours. The exact time depends on the size of your beef cubes and the specific cut you’re using. Beef chuck typically becomes fork-tender after about 1 hour and 45 minutes of gentle simmering. I recommend checking at the 1 hour and 15 minute mark — the beef should shred easily with a fork, and the barley should be plump and tender but still have a pleasant chew. If the beef is still tough, continue simmering and check every 15 minutes. Remember to keep the heat on low and cover the pot to maintain a gentle bubble, and stir occasionally to prevent the barley from sticking to the bottom. Patience is rewarded with the most comforting winter soup recipes!

Can I freeze beef and barley soup with mushrooms for later?

Yes, this beef soup with mushrooms freezes beautifully! In fact, I often make a double batch so I can stash some in the freezer for busy weeks. The soup will keep in a freezer-safe container for up to 3 months. I recommend letting it cool completely before transferring to containers or zip-top bags. When reheating, thaw overnight in the refrigerator, then warm gently on the stovetop over medium-low heat. The barley will absorb some of the broth during freezing and thawing, so you’ll likely need to add a splash of beef broth or water when reheating to restore the consistency. The flavor remains excellent — if anything, the long rest deepens the savory notes. This is one of the best make-ahead winter soup recipes for meal prep.

Can I make this beef and barley soup in an Instant Pot or pressure cooker?

Yes, this hearty beef soup recipe adapts well to a pressure cooker. Use the sauté function to sear the beef and cook the aromatics, then add all ingredients except the barley. Pressure cook on high for 25 minutes, then allow a natural release for 10 minutes before manually releasing. Open the lid, stir in the barley, and cook on the sauté setting for another 15–20 minutes until the barley is tender. Alternatively, you can cook the barley separately and stir it in at the end. The pressure cooker version is faster but still yields a deeply flavorful broth. Just be careful not to overcook the barley, as it can become mushy under pressure. This is a fantastic option when you’re craving this mushroom barley soup in less than an hour.

How can I make this beef soup with mushrooms dairy-free or vegan?

To make this soup vegan, simply omit the beef and use a rich vegetable broth instead of beef broth. For the protein, I recommend adding a can of drained chickpeas or a cup of cooked lentils along with the broth — they provide a hearty texture and absorb the flavors beautifully. You can also add extra mushrooms, such as shiitake or oyster, for more umami depth. To keep it dairy-free, this recipe is already dairy-free as written! The barley provides a wonderful chewy texture, and the vegetables and mushrooms offer plenty of savory satisfaction. I’ve served this vegan version to friends and they didn’t miss the meat at all. It’s proof that this beef and barley soup recipe is incredibly adaptable.

What can I use instead of barley in beef soup with mushrooms?

If you don’t have barley on hand, there are several excellent substitutes that work well in this hearty beef soup. Farro is my top pick — it has a similar chewy texture and nutty flavor, and it holds up beautifully during simmering. Brown rice is another great option; it’s widely available and adds a wholesome, slightly nutty taste. For a gluten-free alternative, quinoa works wonderfully and cooks much faster (add it during the last 20 minutes). You can also use hulled barley, which is less processed than pearl barley and has an even nuttier flavor, though it requires a longer cooking time. Whatever you choose, adjust the liquid and cooking time accordingly. The soup will still be deliciously satisfying.

How do I thicken beef and barley soup if it’s too thin?

If your soup is thinner than you’d like, there are a few easy ways to thicken it. The most straightforward method is to mash some of the barley and vegetables against the side of the pot with a wooden spoon — this releases their starches and naturally thickens the broth. Alternatively, you can stir in a cornstarch slurry (1 tablespoon cornstarch mixed with 2 tablespoons cold water) during the last 10 minutes of cooking; let it simmer until the soup reaches your desired consistency. Another trick is to remove a cup of the cooked barley and vegetables, blend them until smooth, and stir the purée back into the pot. This adds body without altering the flavor. Remember that the soup will also thicken as it sits, so it might be perfect after a few hours in the fridge.

What are the best mushrooms to use for mushroom barley soup?

Cremini mushrooms are my top choice for this mushroom barley soup because they offer a deep, earthy flavor and a firm texture that holds up well during simmering. They’re also readily available in most US grocery stores. For even more depth, I love mixing cremini with shiitake mushrooms, which have a rich, almost woodsy flavor. If you want to get really creative, try adding a handful of dried porcini mushrooms — rehydrate them in warm water for 20 minutes, then add both the mushrooms and the strained soaking liquid to the pot. This intensifies the umami factor significantly. White button mushrooms work in a pinch, but they have a milder flavor and softer texture. The key is to use mushrooms that are fresh and firm, with closed caps for the best results.

Can I add other vegetables to this beef and barley soup with mushrooms?

Absolutely! This hearty beef soup recipe is very flexible when it comes to vegetables. Along with the carrots and celery, I sometimes add diced parsnips or turnips for a slightly sweet, earthy flavor. A cup of chopped kale or spinach stirred in during the last 10 minutes adds a boost of color and nutrients. For a touch of sweetness, diced sweet potato or butternut squash works beautifully with the savory broth. If you want to add potatoes, use waxy varieties like Yukon Gold, which hold their shape better than russets. Just keep in mind that the total volume of vegetables should not exceed about 2 cups to maintain the soup’s balance. Feel free to experiment with whatever you have in your fridge — this winter soup recipes is wonderfully forgiving.

Share Your Version!

I absolutely love hearing how this recipe turns out in your kitchen! Did you add a special twist, like a pinch of smoked paprika or a handful of fresh spinach? Did you try the Moroccan-spiced variation or the slow cooker version? Drop a comment below and let me know — I read every single one and I’m always inspired by your creativity. If you’re on Instagram or Pinterest, tag @exorecipes when you share a photo of your beef and barley soup. I love seeing your beautiful bowls of comfort! And if you have a moment, please leave a star rating — it helps other readers discover this recipe and lets me know what you think. Your feedback truly makes my day.

From my NYC kitchen to yours — I hope this recipe brings as much warmth to your table as it does to mine. — mia 🧡

📌

Love This Recipe? Save It to Pinterest!

If you enjoyed this Beef and Barley Soup with Mushrooms recipe, don’t let it get lost in your browser tabs! 😄 Pin it now so you can find it again anytime — and explore hundreds more tried-and-tested recipes waiting for you on my Pinterest boards.

👉 Follow mia on Pinterest @exorecipe

📌 Pin this recipe · 🔁 Re-pin your favorites · 💬 Tag me when you make it — I love seeing your creations!

Print

clock clock iconcutlery cutlery iconflag flag iconfolder folder iconinstagram instagram iconpinterest pinterest iconfacebook facebook iconprint print iconsquares squares iconheart heart iconheart solid heart solid icon

Beef and Barley Soup with Mushrooms: A Hearty Hug in a Bowl

  • Author: Chef Mia
  • Prep Time: 20 minutes
  • Cook Time: 2 hours
  • Total Time: 2 hours 20 minutes
  • Yield: 8 1x
  • Method: Main Course
  • Cuisine: American

Description

This beef and barley soup with mushrooms is a comforting, hearty meal perfect for cold days. The rich broth, tender beef, earthy mushrooms, and chewy barley create a satisfying bowl of goodness.


Ingredients

Scale
  • 1 lb beef chuck, cut into 1-inch cubes
  • 2 tbsp olive oil
  • 1 large onion, chopped
  • 3 cloves garlic, minced
  • 8 oz cremini mushrooms, sliced
  • 2 carrots, peeled and diced
  • 2 celery stalks, diced
  • 1 cup pearl barley
  • 8 cups beef broth
  • 1 can (14.5 oz) diced tomatoes
  • 2 bay leaves
  • 1 tsp dried thyme
  • 1 tsp dried rosemary
  • Salt and pepper to taste
  • 2 tbsp fresh parsley, chopped (for garnish)

Instructions

  1. In a large pot or Dutch oven, heat olive oil over medium-high heat. Add beef cubes and sear until browned on all sides, about 5 minutes. Remove beef and set aside.
  2. In the same pot, add onion and garlic; cook until softened, about 3 minutes. Add mushrooms, carrots, and celery; cook for another 5 minutes, stirring occasionally.
  3. Stir in barley, then pour in beef broth and diced tomatoes. Add the browned beef back to the pot, along with bay leaves, thyme, and rosemary. Season with salt and pepper.
  4. Bring to a boil, then reduce heat to low. Cover and simmer for 1.5 to 2 hours, until beef is tender and barley is cooked through. Stir occasionally.
  5. Remove bay leaves. Adjust seasoning with salt and pepper. Ladle into bowls and garnish with fresh parsley. Serve hot.

Notes

For a thicker soup, you can add a cornstarch slurry (1 tbsp cornstarch mixed with 2 tbsp water) during the last 10 minutes of cooking. The soup also freezes well for up to 3 months.


Nutrition

  • Calories: 350
  • Sugar: 6g
  • Fat: 12g
  • Carbohydrates: 35g
  • Protein: 28g


Beef and Barley Soup with Mushrooms: A Hearty Hug in a Bowl

BBQ Ham and Swiss Sliders with Caramelized Pineapple-Onion Topping – A Flavor Explosion in Every Bite

⚖️
Difficulty
Easy
⏲️
Prep Time
15 mins
🕒
Cook Time
25 mins
⏱️
Total Time
40 mins
🍽️
Servings
12 sliders

I still remember the first time I made these BBQ ham and Swiss sliders for a game day gathering in my tiny NYC apartment. The smell of caramelizing pineapple and onion filled every corner, and by the time I pulled the baking dish out of the oven, my neighbors were knocking on the door asking what I was cooking. That sweet and savory aroma — the tangy BBQ glaze mingling with melted Swiss and salty ham — is pure magic. Growing up in Morocco, my mother taught me that the best dishes balance sweet, salty, and tangy in every single bite. These ham and Swiss slider recipe gems do exactly that.

Picture this: soft Hawaiian rolls cradling layers of thinly sliced deli ham and gooey Swiss cheese, all topped with a caramelized pineapple-onion mixture that’s been slowly cooked until it’s jammy and golden. Then comes the final touch — a glossy BBQ glaze brushed over the tops, baked until the buns are lightly crisp and the cheese pulls into perfect, stretchy strands. The contrast between the savory ham, the nutty Swiss, and that sweet-tangy pineapple topping is absolutely addictive. Each slider is a little tower of flavor, texture, and pure comfort.

What sets my version apart is the caramelized pineapple-onion topping — it’s not just a garnish, it’s the heart of the recipe. I learned the technique of slow-caramelizing fruit with vinegar during my pastry training in Paris, and I’ve adapted it here to create a topping that’s both bright and deeply savory. Plus, I’ve tested every detail to make sure these sliders stay perfectly moist without turning soggy. So whether you’re feeding a crowd on Super Bowl Sunday or just want a weeknight dinner that feels like a party, these sweet and savory sliders are your answer.

Why This BBQ Ham and Swiss Sliders Recipe Is the Best

The flavor secret here is the caramelized pineapple-onion topping. I take fresh pineapple and yellow onion and cook them down with brown sugar and apple cider vinegar until they’re sticky, golden, and intensely flavored. This isn’t just a sweet topping — the vinegar cuts through the richness of the ham and cheese, while the caramelization adds a deep, almost savory note that makes these sliders unforgettable. My Moroccan roots taught me that fruit belongs in savory dishes, and this topping is proof.

Texture is everything in a great slider, and I’ve perfected the method. Instead of assembling and baking immediately, I brush the tops with a BBQ-butter glaze before baking — this creates a beautifully golden, slightly crisp crown on each bun while the inside stays soft. The key is baking just long enough to melt the cheese without drying out the ham. I also recommend toasting the bottom buns lightly in the oven for two minutes before layering, which creates a barrier that keeps the sliders from getting soggy.

These sliders are foolproof and fast, which is exactly what I need on a busy NYC weeknight. You can prep the caramelized topping in advance (it keeps beautifully in the fridge), assemble the sliders in minutes, and have dinner on the table in under 30 minutes. Even first-time cooks will nail this recipe — the steps are straightforward, the ingredients are easy to find at any US grocery store, and the result is always impressive. Plus, they’re endlessly customizable, so you can make them your own.

BBQ Ham and Swiss Sliders Ingredients

I love picking up fresh Hawaiian rolls from the bakery section at my local NYC market — they’re sweet, soft, and perfect for sliders. The ham I usually get from the deli counter, sliced just thin enough to layer easily but thick enough to hold its own against the bold toppings. And the pineapple? I always go for fresh, because the natural sweetness caramelizes so much better than canned. This ingredient list is simple, but each component plays a crucial role in creating that perfect sweet and savory balance.

Ingredients List

  • 12 slider buns (such as Hawaiian rolls)
  • 1 lb thinly sliced deli ham
  • 6 slices Swiss cheese, halved
  • 1 tablespoon olive oil
  • 1 large yellow onion, thinly sliced
  • 1 cup fresh pineapple, finely chopped
  • 2 tablespoons brown sugar
  • 1 tablespoon apple cider vinegar
  • 1/2 cup BBQ sauce
  • 2 tablespoons melted butter
  • 1 teaspoon garlic powder
  • 1 teaspoon Dijon mustard

Ingredient Spotlight

Hawaiian Rolls — These sweet, fluffy rolls are the foundation of the best Hawaiian sliders with ham. Their subtle sweetness complements the savory ham and tangy BBQ glaze perfectly. Look for them in the bakery section of most US grocery stores. If you can’t find them, brioche slider buns are an excellent substitute — they’re similarly soft and buttery.

Deli Ham — I recommend honey ham or brown sugar ham for extra sweetness that plays beautifully with the caramelized pineapple. Ask the deli counter to slice it medium-thin — not so thin that it disappears, but thin enough to layer evenly. For a smokier flavor, try black forest ham.

Fresh Pineapple — Fresh pineapple is crucial here because it caramelizes more evenly and has a brighter flavor than canned. When chopping, aim for small, uniform pieces about 1/4 inch so they cook down evenly. If fresh isn’t available, use canned pineapple chunks (drained well) and reduce the brown sugar slightly.

Swiss Cheese — Swiss cheese brings a nutty, slightly sweet flavor that melts beautifully without becoming greasy. For the best melt, use sliced Swiss from the deli counter rather than pre-packaged slices. If you’re looking for a substitute, provolone or white cheddar both work wonderfully.

BBQ Sauce — Use your favorite store-bought BBQ sauce or make your own. I prefer a sweet and smoky Kansas City-style sauce for these sliders. The sauce gets mixed with melted butter and brushed on top, creating a glossy, caramelized crust as it bakes.

Original IngredientBest SubstitutionFlavor / Texture Impact
Hawaiian RollsBrioche slider bunsRicher, slightly less sweet, still soft
Deli HamSmoked turkey or roast beefLess sweet, more savory/smoky
Fresh PineappleCanned pineapple (drained), or mangoMango is less tangy, sweeter; canned is softer
Swiss CheeseProvolone, white cheddar, or mozzarellaProvolone melts similarly; cheddar is sharper
BBQ SauceSweet chili sauce + ketchup + smoked paprikaMore tangy, less smoky — still delicious

How to Make BBQ Ham and Swiss Sliders — Step-by-Step

Trust me, this recipe comes together faster than you’d expect — and the results are absolutely stunning. Let me walk you through each step with the tips I’ve learned from making these sliders dozens of times in my own kitchen.

Step 1: Caramelize the Pineapple-Onion Mixture

Heat olive oil in a large skillet over medium heat. Add the sliced yellow onion and cook, stirring occasionally, until softened — about 5 minutes. Then add the finely chopped fresh pineapple, brown sugar, and apple cider vinegar. Continue cooking, stirring frequently, until the mixture turns deep golden and jammy, about 8 to 10 minutes. You’ll know it’s ready when the liquid has mostly evaporated and the pineapple is sticky and translucent.

💡 mia’s Pro Tip: Don’t rush this step. Low and slow is the secret to deep caramelization. If you see the pan getting too dry, add a splash of water — but keep stirring so the sugars don’t burn.

Step 2: Prepare the Slider Buns

Slice the 12 slider buns in half horizontally through the middle, keeping the tops and bottoms intact as whole pieces. Grease a 9×13-inch baking dish lightly with butter or nonstick spray. Place the bottom halves in the dish, fitting them snugly. If you want extra-crispy bottoms, pop the dish in the oven for 2 minutes while you prep the layers.

⚠️ Common Mistake to Avoid: Slicing the buns unevenly. Use a long serrated knife and a gentle sawing motion to keep the tops and bottoms even in thickness so they bake uniformly.

Step 3: Layer the Ham and Cheese

Layer the thinly sliced deli ham evenly over the bottom buns, folding the slices slightly to create even coverage. Then place the halved Swiss cheese slices over the ham, overlapping them slightly so every slider gets cheesy goodness in every bite.

💡 mia’s Pro Tip: For the best melt, let the cheese come to room temperature for 10 minutes before layering. Cold cheese takes longer to melt and can create uneven spots.

Step 4: Add the Topping and Glaze

Spread the caramelized pineapple-onion mixture evenly over the cheese layer. Place the top buns on the sliders. In a small bowl, whisk together the BBQ sauce, melted butter, garlic powder, and Dijon mustard. Brush this glaze generously over the tops of the buns, making sure to coat every surface for that beautiful golden finish.

⚠️ Common Mistake to Avoid: Using too much glaze. You want a thin, even coating — too much liquid can make the tops soggy instead of crispy. Reserve any extra glaze to serve on the side if desired.

Step 5: Bake and Serve

Bake in the preheated oven at 350°F (175°C) for 12 to 15 minutes, until the cheese is fully melted and the tops are golden and slightly crisp. Remove from the oven and let rest for 2 minutes before using a spatula to separate the sliders. Serve warm, and watch them disappear.

💡 mia’s Pro Tip: For extra-glossy tops, brush a thin layer of honey over the buns in the last 2 minutes of baking. It adds a beautiful sheen and a touch more sweetness.

StepActionDurationKey Visual Cue
1Caramelize pineapple-onion13–15 minDeep golden, jammy, translucent
2Slice and prep buns2 minEven halves, snug in dish
3Layer ham and cheese3 minEven ham coverage, cheese overlapping
4Add topping and glaze3 minGlossy, evenly coated tops
5Bake12–15 minGolden tops, melted cheese, bubbling edges

Serving & Presentation

These sliders are at their absolute best served warm, straight from the oven. I like to arrange them on a large wooden board or a white platter so the golden tops and melted cheese really stand out. Sprinkle a few fresh parsley or cilantro leaves over the top for a pop of color, and serve with extra BBQ sauce on the side for dipping. The combination of the sweet glaze, savory ham, and caramelized pineapple is a showstopper at any gathering.

When I make these for game day or a casual dinner party, I always pair them with a bright, crunchy coleslaw or a simple green salad dressed with lemon vinaigrette. The acidity cuts through the richness perfectly. For a heartier spread, serve them alongside sweet potato fries or crispy potato wedges. And if you want to channel my Parisian training, add a small dish of cornichons and whole-grain mustard on the side — the tangy pickles are a brilliant contrast.

In my NYC apartment, I’ve served these sliders everywhere from cozy weeknight dinners to rooftop parties. They’re endlessly versatile and always a hit. I also love that they’re easy to customize — set out a few extra toppings like pickled jalapeños, crispy bacon bits, or sliced avocado so guests can build their own perfect slider.

Pairing TypeSuggestionsWhy It Works
Side DishColeslaw, sweet potato fries, green saladAcidic, crunchy sides balance richness
Sauce / DipExtra BBQ sauce, honey mustard, ranchAdds moisture and complementary flavors
BeverageIced tea, lemonade, light lager, hard ciderRefreshing, crisp drinks cut through richness
GarnishFresh parsley, cilantro, sliced jalapeño, pickled onionsAdds color, freshness, and a flavor pop

Make-Ahead, Storage & Reheating

I love making these sliders ahead of time — they’re perfect for busy weeks when I need a quick meal or a crowd-pleasing dish for a party. The caramelized pineapple-onion topping can be made up to 3 days in advance and stored in an airtight container in the fridge. You can also assemble the sliders completely (without baking) and refrigerate them for up to 24 hours. When you’re ready to serve, just brush on the glaze and bake as directed, adding 3 to 5 minutes to the baking time since they’ll start cold.

MethodContainerDurationReheating Tip
RefrigeratorAirtight containerUp to 3 daysReheat in oven at 325°F for 8–10 min
FreezerWrap tightly in foil then ziplock bagUp to 2 monthsThaw overnight in fridge; bake at 325°F for 12–15 min
Make-AheadAssembled in baking dish, coveredUp to 24 hours in fridgeAdd glaze just before baking; add 3–5 min to bake time

For reheating, I always use the oven rather than the microwave to keep the buns from turning soggy. If you’re reheating just one or two sliders, an air fryer works beautifully — 325°F for about 4 minutes yields a perfectly warm, slightly crisp slider. One more tip: if your sliders have been in the fridge, let them sit at room temperature for 10 minutes before reheating so they warm through evenly.

Variations & Easy Swaps

VariationKey ChangeBest ForDifficulty Impact
Spicy SouthwestAdd diced jalapeño & smoked paprikaKick lovers, game dayEasy (no extra steps)
Tropical TwistAdd diced mango & lime zest to toppingSummer parties, brunchEasy
Smoky BaconAdd crispy bacon crumblesIndulgent treat, game dayEasy (pre-cook bacon)

Spicy Southwest Variation

For a kick that wakes up your taste buds, add one finely diced jalapeño (seeds removed if you prefer mild heat) to the caramelizing pineapple-onion mixture. Also stir in 1/2 teaspoon smoked paprika along with the garlic powder in the glaze. The heat from the jalapeño and the smokiness from the paprika transform these sliders into a completely different experience — they’re still sweet and savory, but with a bold, Southwestern edge. I first tried this variation when I was experimenting with spices from the spice market near my childhood home in Morocco, and it worked beautifully.

Tropical Twist Variation

For a brighter, more tropical flavor, replace half the pineapple with finely chopped fresh mango and add the zest of one lime to the caramelizing mixture. The mango adds a floral sweetness that pairs beautifully with the ham, while the lime zest lifts the whole dish. This version is especially wonderful in the summer when mangoes are at their peak at the Union Square Greenmarket here in NYC. I also like to add a squeeze of fresh lime juice over the sliders just before serving.

Smoky Bacon Variation

Because everything is better with bacon. Cook 6 slices of bacon until crispy, then crumble them over the cheese before adding the pineapple-onion topping. The salty, smoky crunch from the bacon adds another layer of texture and flavor that makes these sliders even more irresistible. This is my go-to for game day — it’s indulgent, satisfying, and always the first platter to empty. A tip from my Paris training: cook the bacon until it’s just shy of fully crisp so it finishes crisping up in the oven.

What type of ham works best for BBQ ham and Swiss sliders?

For the best texture and flavor, I recommend honey ham or brown sugar ham from the deli counter. These varieties have a subtle sweetness that complements the caramelized pineapple and BBQ glaze beautifully. Ask your deli to slice the ham medium-thin — about 1/8 inch thick — so it’s substantial enough to hold its own against the bold toppings but still layers easily on the buns. If you prefer a smokier flavor, Black Forest ham is an excellent choice and adds a nice depth to the sweet and savory balance. Avoid pre-packaged ham slices that are paper-thin, as they tend to disappear when baked.

Can I prepare the caramelized pineapple-onion topping ahead of time?

Absolutely — this is one of my favorite make-ahead tricks! The caramelized pineapple-onion topping can be prepared up to 3 days in advance and stored in an airtight container in the refrigerator. In fact, I often make a double batch because it’s so useful to have on hand. The flavors actually deepen and meld together even more after a day or two in the fridge. When you’re ready to assemble the sliders, simply let the topping come to room temperature for about 15 minutes, or warm it gently in the microwave for 20 seconds so it spreads easily over the cheese.

How do I keep the sliders from getting soggy when baking?

Soggy sliders are a common frustration, but I’ve got two foolproof tricks. First, lightly toast the bottom halves of the buns in the oven for 2 minutes before adding the ham — this creates a barrier that prevents moisture from soaking into the bread. Second, make sure your caramelized pineapple-onion topping has cooked down enough so most of the liquid has evaporated; it should be jammy, not watery. Finally, brush the glaze on top only — don’t pour it between the layers — and use a thin, even coating. These three steps guarantee perfectly tender, never-soggy sliders every time.

What can I substitute for Swiss cheese in this slider recipe?

Swiss cheese brings a nutty, slightly sweet flavor and excellent melt, but there are several great substitutes. Provolone is my top pick — it melts just as beautifully and has a similarly mild, buttery flavor. White cheddar adds a sharper, more pronounced cheese taste that still pairs well with the sweet toppings. For a creamier melt, use mozzarella (low-moisture, not fresh). If you want to keep the nutty note, try Gruyère or Jarlsberg, which are both in the Swiss family but with more complex flavor. Each substitute will change the character slightly, but all will work beautifully.

Can I use canned pineapple instead of fresh for the caramelized topping?

Yes, you can use canned pineapple in a pinch, but fresh pineapple gives you a better result. Fresh pineapple has more natural pectin and less added liquid, which helps it caramelize into a thick, jammy consistency. If you’re using canned, choose pineapple chunks packed in juice (not syrup) and drain them very well — pat them dry with a paper towel if needed. You may also need to cook the mixture an extra 2 to 3 minutes to evaporate the excess moisture. The flavor will still be delicious, but you’ll lose a bit of the bright, fresh acidity that fresh pineapple provides.

Are these sliders suitable for freezing?

Yes, these sliders freeze very well, which makes them perfect for meal prep. The best way to freeze them is to assemble the sliders completely (without the glaze) in a baking dish, wrap tightly with foil, then place the dish in a freezer bag. They’ll keep for up to 2 months. When you’re ready to bake, thaw overnight in the refrigerator, brush on the glaze, and bake as directed, adding 3 to 5 minutes to the baking time. I’ve done this many times for busy weeks — just pull them out, bake, and you have a hot, satisfying meal with almost no effort.

What can I serve with these sliders for a complete meal?

These sliders are hearty enough to stand alone, but they pair beautifully with a few simple sides. For a classic game day spread, serve them with crispy sweet potato fries, onion rings, or a crunchy coleslaw with a tangy vinaigrette. If you want something lighter, a green salad with lemon dressing or a simple cucumber and tomato salad works wonderfully. I also love serving them with a side of baked beans or corn on the cob for a summery vibe. And don’t forget extra dipping sauces — honey mustard, ranch, and extra BBQ sauce are always a hit.

How do I reheat leftover sliders without them drying out?

The best way to reheat leftover sliders is in the oven at 325°F for 8 to 10 minutes, or in an air fryer at 325°F for 4 to 5 minutes. Cover loosely with foil for the first half of reheating to trap steam, then remove the foil for the last few minutes to crisp the tops. Avoid the microwave — it will make the buns tough and chewy. If your sliders have been refrigerated, let them sit at room temperature for 10 minutes before reheating so they warm through evenly. I often add a tiny splash of water to the baking dish before covering with foil to create steam that keeps everything moist.

Can I make these sliders gluten-free?

Absolutely — these sliders are easy to make gluten-free. Simply substitute the Hawaiian rolls with your favorite gluten-free slider buns or dinner rolls. Look for a soft, slightly sweet variety so you retain that signature texture. Also check your BBQ sauce label, as some brands contain gluten; many are naturally gluten-free, but it’s always good to verify. All other ingredients — ham, Swiss cheese, fresh produce, butter, and spices — are naturally gluten-free. The recipe works exactly the same way; just be mindful of the baking time, as gluten-free buns can brown faster.

How many sliders does this recipe yield, and can I double it?

This recipe yields 12 sliders, which is perfect for a party or a family dinner with leftovers. Yes, you can easily double the recipe — just use two 9×13-inch baking dishes or one large half-sheet pan. If doubling, you’ll need to cook the caramelized pineapple-onion topping in batches to avoid overcrowding the skillet, which would prevent proper caramelization. The baking time remains the same for a single batch, but if you’re baking two dishes at once, you may need to add 3 to 5 minutes and rotate the pans halfway through for even browning.

Share Your Version!

I absolutely love hearing how these sliders turn out in your kitchen. Did you add a spicy kick with jalapeño? Try a tropical twist with mango? Or maybe you discovered a new favorite cheese swap? Drop a comment below and let me know — your feedback helps other home cooks discover new ways to make this recipe their own. And if you snap a photo, tag me on Instagram or Pinterest @exorecipes — I always share my favorites!

If you loved these BBQ ham and Swiss sliders, I’d be so grateful if you left a 5-star rating below. It takes just a second and it means the world to me. Your star ratings help other home cooks find recipes that are truly tried, tested, and loved. And if you have any questions about the recipe — whether it’s about substitutions, make-ahead tips, or serving suggestions — just ask in the comments. I read every single one and answer personally.

From my NYC kitchen to yours — I hope this recipe brings as much warmth to your table as it does to mine. — mia 🧡

📌

Love This Recipe? Save It to Pinterest!

If you enjoyed this BBQ Ham and Swiss Sliders with Caramelized Pineapple-Onion Topping recipe, don’t let it get lost in your browser tabs! 😄 Pin it now so you can find it again anytime — and explore hundreds more tried-and-tested recipes waiting for you on my Pinterest boards.

👉 Follow mia on Pinterest @exorecipe

📌 Pin this recipe · 🔁 Re-pin your favorites · 💬 Tag me when you make it — I love seeing your creations!

Print

clock clock iconcutlery cutlery iconflag flag iconfolder folder iconinstagram instagram iconpinterest pinterest iconfacebook facebook iconprint print iconsquares squares iconheart heart iconheart solid heart solid icon

BBQ Ham and Swiss Sliders with Caramelized Pineapple-Onion Topping A Flavor Explosion in Every Bite

  • Author: Chef Mia
  • Prep Time: 15 minutes
  • Cook Time: 25 minutes
  • Total Time: 40 minutes
  • Yield: 12 sliders 1x
  • Method: Appetizer, Main Course
  • Cuisine: American

Description

Sweet and savory sliders with ham, Swiss cheese, and a caramelized pineapple-onion topping, brushed with BBQ glaze.


Ingredients

Scale
  • 12 slider buns (such as Hawaiian rolls)
  • 1 lb thinly sliced deli ham
  • 6 slices Swiss cheese, halved
  • 1 tablespoon olive oil
  • 1 large yellow onion, thinly sliced
  • 1 cup fresh pineapple, finely chopped
  • 2 tablespoons brown sugar
  • 1 tablespoon apple cider vinegar
  • 1/2 cup BBQ sauce
  • 2 tablespoons melted butter
  • 1 teaspoon garlic powder
  • 1 teaspoon Dijon mustard

Instructions

  1. Preheat oven to 350°F (175°C).
  2. In a skillet over medium heat, add olive oil and cook the sliced onion until softened, about 5 minutes.
  3. Add chopped pineapple, brown sugar, and apple cider vinegar to the skillet. Cook, stirring frequently, until caramelized, about 8–10 minutes. Set aside.
  4. Slice the slider buns in half horizontally and place the bottom halves in a greased 9×13-inch baking dish.
  5. Layer the ham evenly over the bottom buns, then top with the halved Swiss cheese slices.
  6. Spread the caramelized pineapple-onion mixture over the cheese.
  7. Place the top buns on the sliders.
  8. In a small bowl, mix the BBQ sauce, melted butter, garlic powder, and Dijon mustard. Brush the mixture over the tops of the buns.
  9. Bake for 12–15 minutes, until the cheese is melted and the tops are golden.
  10. Serve warm.

Notes

For a spicier kick, add a dash of hot sauce to the BBQ glaze. Sliders can be assembled ahead and baked just before serving.


Nutrition

  • Calories: 320
  • Sugar: 12g
  • Fat: 14g
  • Carbohydrates: 32g
  • Protein: 18g


BBQ Ham and Swiss Sliders with Caramelized Pineapple-Onion Topping A Flavor Explosion in Every Bite

ph">For more delicious inspiration, follow me on Pinterest!

BBQ Chicken Tostadas Recipe – Crispy, Smoky, and Ready in 25 Minutes

⚖️
Difficulty
Easy
⏲️
Prep Time
15 mins
🕒
Cook Time
10 mins
⏱️
Total Time
25 mins
🍽️
Servings
4

Growing up in Morocco, my mother would make crispy flatbreads topped with whatever was in the kitchen – often leftover chicken, herbs, and a drizzle of spicy oil. Years later, after training in Paris and now living in New York City, I’ve taken that same instinct and given it a bold American BBQ twist. These BBQ chicken tostadas are the result: a quick, weeknight-friendly recipe that brings together smoky, tangy chicken, creamy avocado, and a crunch that will make you forget all about takeout.

Imagine a crisp corn shell that shatters with the first bite, giving way to a layer of warm black beans and sweet corn, then tender shredded chicken coated in a sticky, smoky-sweet barbecue sauce. A blanket of melted cheese and diced red onion adds savory depth, and the cool slices of avocado and a dollop of sour cream balance every bite. Fresh cilantro brings a pop of green and a hint of herbal freshness. This isn’t just an easy dinner – it’s a flavor journey from my mother’s kitchen in Marrakech to a Brooklyn rooftop.

I’ve tested this BBQ chicken tostadas recipe dozens of times to make sure it’s foolproof for even the busiest weeknights. The secret? Using store-bought tostada shells (or frying your own) and a simple technique that keeps them from going soggy. I’ll share a pro tip for crisping the shells twice, and a common mistake that almost everyone makes when assembling tostadas – trust me, you’ll want to avoid that one.

Why This BBQ Chicken Tostadas Recipe Is the Best

The Flavor Secret: I don’t just toss chicken in any BBQ sauce. I caramelize it briefly in a hot skillet after mixing to deepen the smoky flavor, a trick I learned from my time in Paris – it’s like a quick gastrique but with American BBQ soul. The result is a sticky, almost candied coating that clings to each shred.

Perfected Texture: Tostadas often get soggy when toppings release liquid. My solution: pre-bake the shells at 375°F for just 3 minutes before adding any wet ingredients, then bake assembled tostadas only long enough to melt the cheese. The shells stay shatter‑crisp while the fillings stay hot and gooey. That double‑crisp technique is a game‑changer.

Foolproof & Fast: With a total time of 25 minutes, this easy BBQ chicken tostadas recipe is perfect for beginners. The instructions are simple – mix, spread, top, bake – and the ingredients are all supermarket‑friendly. Even if you’ve never made tostadas before, you’ll nail it on the first try.

BBQ Chicken Tostadas Recipe Ingredients

I love picking up fresh corn tortillas from the Mexican grocer on Queens Boulevard, and my BBQ sauce is always a smoky Kansas‑City style from the farmers market. But even the simplest pantry ingredients work perfectly – here’s what you’ll need.

Ingredients List

  • 4 tostada shells (or 6‑inch corn tortillas)
  • 2 cups cooked shredded chicken (rotisserie or poached)
  • 1/2 cup BBQ sauce
  • 1 avocado, sliced
  • 1/2 cup corn kernels (canned or frozen, thawed)
  • 1/2 cup black beans, rinsed and drained
  • 1/4 cup red onion, diced
  • 1/4 cup fresh cilantro, chopped
  • 1/2 cup shredded cheese (cheddar or Mexican blend)
  • 1/2 cup sour cream
  • Salt and pepper to taste

Ingredient Spotlight

Shredded Chicken: The backbone of this dish. I prefer using a rotisserie chicken from the deli – it’s already seasoned and saves time. To avoid dry chicken, pick a bird with moist, evenly browned skin. If cooking from raw, poach boneless thighs in salted water for 12 minutes, then shred.

BBQ Sauce: Go for a thick, tomato‑based sauce with a hint of molasses. My favorite is a Kansas‑City style – sweet, smoky, and a little tangy. For a spicier kick, use a chipotle‑infused BBQ sauce. Avoid watery sauces or they’ll soak the shells.

Tostada Shells: Store‑bought shells are a huge timesaver. Look for ones that are uniformly thin and crispy – I like the brand “El Milagro.” If you prefer homemade, fry 6‑inch corn tortillas in 1/4 inch of oil at 350°F for about 90 seconds per side. Drain on paper towels and season lightly with salt.

Avocado: You want a Hass avocado that yields slightly to gentle pressure. Slice just before serving to prevent browning. If your avocado is too firm, mash it into a quick guac with lime and salt – it still works beautifully.

Original IngredientBest SubstitutionFlavor / Texture Impact
Shredded chickenJackfruit (young green, canned)Similar shredded texture, absorbs BBQ flavor well, milder overall
BBQ sauceHoney + chipotle + ketchupSweeter, smokier, slightly thinner – add a pinch of cornstarch
Corn tortillasFlour tortillas (see FAQ)Chewier, less crunchy; better for soft tacos
Sour creamGreek yogurt + lime zestTangier, lighter, slightly thicker – excellent
Shredded cheeseVegan shreds (Daiya or Violife)Melts well, slightly different mouthfeel, still delicious

How to Make BBQ Chicken Tostadas — Step-by-Step

Follow these five simple steps and you’ll have restaurant‑worthy tostadas on the table in under half an hour.

Step 1: Prepare the Chicken

In a medium bowl, combine the shredded chicken with 1/2 cup BBQ sauce. Toss until every strand is coated. For extra depth, heat a non‑stick skillet over medium‑high, add the sauced chicken, and cook for 1–2 minutes, stirring constantly, until the sauce glazes and thickens. This caramelization is the secret to that rich, sticky flavor.

💡 mia’s Pro Tip: Use leftover rotisserie chicken – shred it while still warm so it absorbs the sauce better. If the chicken is cold, microwave it for 30 seconds before mixing.

Step 2: Crisp the Shells

Preheat your oven to 375°F. Place the tostada shells (or tortillas) on a baking sheet in a single layer. Bake for 3 minutes, flipping halfway. This pre‑toast dries out any moisture and guarantees a shatter‑crisp base.

⚠️ Common Mistake to Avoid: Skipping the pre‑toast. If you add wet toppings directly onto raw or soft tortillas, they’ll absorb liquid and turn chewy. Always pre‑crisp!

Step 3: Assemble the Layers

Spread about 2 tablespoons of black beans and 2 tablespoons of corn onto each tostada shell. Divide the BBQ chicken evenly among the shells, then sprinkle each with shredded cheese and diced red onion.

💡 mia’s Pro Tip: For even melting, use a microplane to grate the cheese – it melts faster and covers every nook. And don’t overload; keep toppings below the edge to avoid spillage.

Step 4: Bake to Perfection

Bake the assembled tostadas at 375°F for 5 minutes, or until the cheese is bubbly and melted. Keep a close eye – oven times vary. The shells should look golden around the edges.

⚠️ Common Mistake to Avoid: Baking too long. More than 6 minutes can over‑dry the chicken and turn the shells tough. Set a timer!

Step 5: Top and Serve

Remove from the oven and immediately add fresh avocado slices, a generous sprinkle of cilantro, and a dollop of sour cream. Serve hot, while the shells are still crackling.

💡 mia’s Pro Tip: For that restaurant finish, squeeze a little lime juice over the top and add a pinch of flaky sea salt. It brightens all the flavors.

StepActionDurationKey Visual Cue
1Mix chicken with BBQ sauce and caramelize2 minSauce glistens and thickens on chicken
2Pre‑toast shells3 minShells feel dry and sound crisp when tapped
3Assemble layers3 minEvenly distributed, cheese covers chicken
4Bake5 minCheese bubbly, edges golden
5Add fresh toppings and serve2 minAvocado bright green, cilantro fresh

Serving & Presentation

Arrange two tostadas per plate, slightly overlapping, with a small bowl of extra sour cream or salsa verde on the side. I love serving these with a simple side of Mexican street corn – grilled corn slathered with mayo, cotija cheese, and chili powder – or a tangy jicama and mango slaw. For drinks, an ice‑cold Mexican beer or a smoky mezcal margarita pairs beautifully.

When I host friends in my tiny NYC apartment, I set up a tostada bar: warm shells, the BBQ chicken, and bowls of toppings. Everyone builds their own, and the crunch–creaminess factor always gets them talking. A dash of hot sauce and a sprinkle of pepitas (pumpkin seeds) takes it over the top.

For a Moroccan touch, I sometimes swap the sour cream for a drizzle of harissa‑yogurt – a nod to my mother’s kitchen. It’s not traditional for tostadas, but the spicy, creamy kick works like a charm.

Pairing TypeSuggestionsWhy It Works
Side DishMexican street corn, jicama slaw, black bean soupBright, crunchy sides contrast the rich tostadas
Sauce / DipExtra sour cream, salsa verde, chipotle mayoAdds moisture and heat – each dip brings a new dimension
BeverageMexican lager, mezcal margarita, horchataCrisp, cold drinks cut through the smoky, cheesy weight
GarnishLime wedges, cilantro, pickled jalapeños, radish slicesFreshness and acidity balance the rich toppings

Make-Ahead, Storage & Reheating

Between recipe development and my busy NYC schedule, I’ve mastered make‑ahead for this recipe. Prepare the BBQ chicken and black bean‑corn mixture up to 2 days in advance. Store them separately in airtight containers in the fridge. When you’re ready, just crisp the shells and assemble – dinner is minutes away.

MethodContainerDurationReheating Tip
RefrigeratorAirtight container (components separate)Up to 4 daysReheat chicken in skillet with splash of water; assemble fresh
FreezerFreezer‑safe bag (chicken only)Up to 3 monthsThaw overnight in fridge; reheat in skillet or microwave
Make-AheadCovered bowl for chicken + bean-corn mix2 days in advanceAssemble just before serving; bake for 5 min

To reheat leftover assembled tostadas (if you have any!), pop them in a 350°F oven for 3–4 minutes – the shells will crisp up again. Avoid the microwave unless you don’t mind soft shells. For a quick lunch, chop up leftover tostadas and toss them into a taco salad – it’s divine.

Variations & Easy Swaps

One of the things I adore about this easy BBQ chicken tostadas recipe is how flexible it is. Here are three variations I’ve tested in my own kitchen. Each one brings a different personality to the table.

VariationKey ChangeBest ForDifficulty Impact
Spicy Chipotle TwistMix 1 tbsp chipotle in adobo into the BBQ sauceHeat lovers; game day crowdSame – just an ingredient swap
Gluten-Free OptionUse certified gluten‑free tostada shells + GF BBQ sauceCeliac & gluten‑sensitive guestsSame – check labels
Summer Mango SalsaTop with fresh mango salsa instead of avocadoBrunch, picnic, lighter dinnersSlightly more prep (dice mango)

Spicy Chipotle Twist

Blend 1 tablespoon of chipotle peppers in adobo into the BBQ sauce before mixing with the chicken. This adds a smoky, earthy heat that reminds me of the harissa my mother used to stir into stews. The chipotle also thickens the sauce, giving it a deeper color. I serve these with a cooling crema made from sour cream and a squeeze of lime.

Gluten-Free Option

Most corn tostada shells are naturally gluten‑free, but always check the label. For the BBQ sauce, I recommend Sweet Baby Ray’s original or Stubb’s – both are certified gluten‑free. The rest of the ingredients are already safe. This version tastes exactly like the original, so your gluten‑sensitive guests can enjoy without compromise.

Summer Mango Salsa Variation

Dice one ripe mango, half a red bell pepper, and a small jalapeño. Toss with a squeeze of lime and a pinch of salt. Use this instead of avocado slices for a bright, fruity topping. The sweetness of the mango plays beautifully with the smoky BBQ chicken – it’s a combination I discovered at a farmers market in Brooklyn. This version is fantastic for outdoor gatherings.

How do you keep BBQ chicken tostadas from getting soggy?

The key is to pre‑crisp your shells and avoid over‑assembling them with wet ingredients. I always bake the tostada shells (or corn tortillas) at 375°F for 3 minutes before adding any toppings – this dries out any moisture. Then, after assembling, bake for only 5 minutes to melt the cheese, no longer. Also, drain the black beans well and pat them dry with a paper towel. If you’re using extra‑wet ingredients like salsa, serve it on the side instead of layering it on top.

Can I use flour tortillas instead of corn tortillas for tostadas?

You can, but the result will be different. Flour tortillas are softer and don’t crisp up the way corn tortillas do because they contain more moisture and fat. If you bake or fry them, they become chewy rather than shatter‑crisp. For a closer match, use corn tortillas – they’re what give tostadas their signature crunchy texture. If you only have flour tortillas, try toasting them in a dry pan until very dry and slightly browned, but expect a more pliable, taco‑like shell.

What toppings go best with BBQ chicken tostadas?

Classic toppings include creamy avocado slices, fresh cilantro, diced red onion, and a dollop of sour cream to balance the smoky BBQ sauce. For texture, add shredded lettuce or pickled radishes. For heat, pickled jalapeños or a drizzle of chipotle crema work wonders. I also love adding crumbled cotija cheese and a squeeze of lime right before serving. The beauty of tostadas is that you can customize them – think of it as a flavor canvas.

How long should you bake or fry the tortillas for crispy tostadas?

For baking, place corn tortillas on a baking sheet at 375°F for about 8 minutes, flipping halfway, until they’re crisp and lightly golden. For frying, heat 1/4 inch of oil to 350°F and fry each tortilla for 60–90 seconds per side – drain on paper towels. I prefer baking as it’s hands‑free and less messy. The tortillas should make a sharp cracking sound when you break one. Let them cool completely before topping to avoid condensation.

Can I make BBQ chicken tostadas ahead of time for a party?

Yes, but assemble them just before serving to maintain crispness. Prepare the BBQ chicken, black bean‑corn mixture, and toppings up to 2 days in advance and store them separately. Pre‑crisp the shells and keep them in an airtight container at room temperature for up to 24 hours. When guests arrive, set up a tostada bar and let everyone build their own. This is my go‑to strategy for game days – everything is ready, and the shells stay perfectly crunchy.

Is this BBQ chicken tostadas recipe healthy?

Each serving has about 420 calories with 28g protein, 35g carbs, and 22g fat – it’s a balanced meal that fits into a moderate diet. You can lighten it by using Greek yogurt instead of sour cream, reducing the cheese, or swapping avocado for a light salsa. The tostada shells are usually baked, not fried, so they’re lower in fat than traditional fried versions. If you’re watching sodium, look for low‑sodium BBQ sauce and rinse the black beans thoroughly.

What can I use instead of BBQ sauce for the chicken?

If you’re out of BBQ sauce or want a different flavor profile, try a mix of ketchup (1/2 cup) plus 2 tablespoons brown sugar, 1 tablespoon apple cider vinegar, and 1 teaspoon smoked paprika. This homemade substitute gives the same sweet‑smoky tang. For a spicy version, add chipotle powder. For a more Mexican twist, use a can of enchilada sauce reduced with a little honey – it’s not BBQ but it’s delicious on tostadas.

Can I use leftover turkey or pork instead of chicken?

Absolutely. Shredded leftover turkey or pulled pork work beautifully in this easy BBQ chicken tostadas recipe. Turkey has a similar texture to chicken, while pork adds extra richness – especially if it’s already sauced. Just warm the protein with the BBQ sauce as directed. This is a great way to repurpose holiday leftovers or extra carnitas from taco night. Adjust seasoning if the meat is already heavily seasoned.

What do you serve with BBQ chicken tostadas for a complete meal?

For a full dinner, pair the tostadas with a simple side of refried beans or a black bean and corn salad. A crisp green salad with avocado and lime vinaigrette balances the richness. For drinks, a cold Mexican beer or a tart hibiscus iced tea is refreshing. If you’re feeling indulgent, add a side of Mexican rice – it rounds out the meal and soaks up any extra sauce from the tostadas.

How do you shred chicken easily for tostadas?

The fastest method is to use a stand mixer with the paddle attachment on low speed – it shreds a whole rotisserie chicken in about 15 seconds without any effort. No mixer? Use two forks to pull the chicken apart while it’s still warm – cold chicken shreds unevenly. You can also pulse cooked chicken in a food processor, but be careful not to overdo it or you’ll end up with paste. Shredded chicken stores well in the fridge for meal prep.

Share Your Version!

I’d love to see how these BBQ chicken tostadas turn out in your kitchen! Did you add a special twist? Use a spicy chipotle version? Or maybe you discovered a new favorite topping combination? Drop a star rating and a comment below – your feedback helps other home cooks find the perfect recipe.

Snap a photo of your tostadas and share it on Instagram or Pinterest with the hashtag #exorecipes – tag me @exorecipes so I can see your creation. I’m always curious: what’s your go‑to BBQ sauce for this easy BBQ chicken tostadas recipe? Let me know in the comments!

From my NYC kitchen to yours — I hope this recipe brings as much warmth to your table as it does to mine. — mia 🧡

📌

Love This Recipe? Save It to Pinterest!

If you enjoyed this BBQ Chicken Tostadas recipe, don’t let it get lost in your browser tabs! 😄 Pin it now so you can find it again anytime — and explore hundreds more tried‑and‑tested recipes waiting for you on my Pinterest boards.

👉 Follow mia on Pinterest @exorecipe

📌 Pin this recipe · 🔁 Re‑pin your favorites · 💬 Tag me when you make it — I love seeing your creations!

Print

clock clock iconcutlery cutlery iconflag flag iconfolder folder iconinstagram instagram iconpinterest pinterest iconfacebook facebook iconprint print iconsquares squares iconheart heart iconheart solid heart solid icon

BBQ Chicken Tostadas

  • Author: Chef Mia
  • Prep Time: 15 minutes
  • Cook Time: 10 minutes
  • Total Time: 25 minutes
  • Yield: 4 1x
  • Method: Main Course
  • Cuisine: Mexican

Description

Crispy tostadas topped with smoky BBQ chicken, creamy avocado, and fresh salsa.


Ingredients

Scale
  • 4 tostada shells
  • 2 cups cooked shredded chicken
  • 1/2 cup BBQ sauce
  • 1 avocado, sliced
  • 1/2 cup corn kernels
  • 1/2 cup black beans, rinsed and drained
  • 1/4 cup red onion, diced
  • 1/4 cup fresh cilantro, chopped
  • 1/2 cup shredded cheese (cheddar or Mexican blend)
  • 1/2 cup sour cream
  • Salt and pepper to taste

Instructions

  1. Mix shredded chicken with BBQ sauce in a bowl until well coated.
  2. Warm tostada shells in a dry skillet or oven until crisp.
  3. Spread a layer of black beans and corn on each tostada shell.
  4. Top with BBQ chicken, cheese, and red onion.
  5. Bake at 375°F for 5 minutes to melt cheese.
  6. Remove from oven and top with avocado, cilantro, and a dollop of sour cream.
  7. Serve immediately.

Notes

You can use rotisserie chicken for a shortcut. For extra heat, add sliced jalapeños.


Nutrition

  • Calories: 420 kcal
  • Sugar: 12 g
  • Fat: 22 g
  • Carbohydrates: 35 g
  • Protein: 28 g


BBQ Chicken Tostadas

ph">For more delicious inspiration, follow me on Pinterest!

BBQ Chicken Sliders with Fresh Cilantro Slaw – Easy & Crowd-Pleasing

⚖️
Difficulty
Easy
⏲️
Prep Time
15 mins
🕒
Cook Time
25 mins
⏱️
Total Time
40 mins
🍽️
Servings
12 sliders

I still remember the first time I made these BBQ chicken sliders for a game-day party in my tiny New York City kitchen. My mom back in Morocco would laugh—she always says I put too much thought into finger food. But that’s the thing about these sliders: they’re easy, but they deliver serious flavor. Juicy shredded chicken in a tangy-sweet barbecue sauce, piled onto soft buns and topped with a fresh, zesty cilantro slaw. It’s the perfect marriage of comfort and crunch, and I’ve yet to meet someone who can eat just one. These BBQ chicken sliders have become my go‑to for summer cookouts, casual get‑togethers, and even weeknight dinners when I want something fun without a lot of fuss.

Let me describe the experience. The chicken is poached until tender then shredded, soaks up every drop of that smoky‑sweet sauce. The slaw brings a bright, herbaceous pop—fresh cilantro, crunchy cabbage, a creamy tang from mayo and apple‑cider vinegar. When you bite into a slider, the soft bun yields to the saucy chicken and then you hit that crisp, cool slaw. It’s a textural symphony that keeps you coming back. I love how the heat from the barbecue sauce contrasts with the coolness of the slaw. And the aroma? It fills your kitchen with the scent of caramelized sauce and fresh herbs—exactly what a party should smell like.

What makes my version special? I trained in Paris, so I always look for ways to elevate simple food without complicating it. Here, the secret is poaching the chicken in broth instead of water—adds a subtle savory depth. And the slaw? I borrowed the dressing technique from a classic Moroccan salad (my mother’s secret is a tiny bit of honey to balance the vinegar). The result is a cilantro coleslaw that’s creamy but light, tangy but sweet. I’ll share a pro tip to keep the slaw from getting watery, and a common mistake people make when assembling sliders that leads to soggy bottoms. Trust me—you’ll want to avoid that. Let’s dive in.

Why This BBQ Chicken Sliders Recipe Is the Best

The Flavor Secret: The combination of a rich, finger‑lapping barbecue sauce with a fresh cilantro slaw that adds brightness and acidity is unbeatable. I use a store‑bought sauce (Stubb’s or Sweet Baby Ray’s are my NYC go‑tos) and boost it with brown sugar and garlic powder for extra depth. The slaw isn’t just an afterthought—it’s the star that cuts the richness and keeps every bite exciting. This balance comes from my French training: always contrast textures and temperatures.

Perfected Texture: The chicken is poached gently in broth—never boiled—so it remains incredibly moist and shreds like a dream. Then it simmers in the sauce just long enough to absorb flavor without drying out. The slaw stays crunchy because we toss it with the dressing just before serving (I’ll show you the timing trick). And toasting the buns with a little butter creates a barrier that keeps them from getting soggy—a tip I picked up from a grill master at a Brooklyn street fair.

Foolproof & Fast: Even if you’re a beginner, this recipe is forgiving. The poached chicken is hard to overcook, the sauce is stir‑and‑pour, and the slaw requires only a whisk and a bowl. It all comes together in 40 minutes. Plus, you can use leftover rotisserie chicken to cut the time even further. These easy sliders are truly a win for any skill level.

BBQ Chicken Sliders Ingredients

I source my chicken from the Butcher’s Market up on 9th Avenue—they have the best boneless breasts. For the cabbage, I grab a pre‑shredded coleslaw mix from the Union Square Greenmarket when I’m in a hurry, but I always add extra carrots and fresh cilantro from the bodega near my apartment. Every ingredient here is easy to find in any American grocery store.

Ingredients List

  • For the Chicken:
  • 2 lbs boneless skinless chicken breasts
  • 1 cup chicken broth
  • 1 ½ cups barbecue sauce (your favorite brand)
  • 1 tablespoon brown sugar
  • 1 teaspoon garlic powder
  • 1 teaspoon onion powder
  • Salt and pepper to taste
  • For the Cilantro Slaw:
  • 3 cups shredded green cabbage (or coleslaw mix)
  • ½ cup shredded carrots
  • ½ cup fresh cilantro, chopped
  • ¼ cup mayonnaise
  • 1 tablespoon apple cider vinegar
  • 1 tablespoon honey
  • ½ teaspoon salt
  • ¼ teaspoon black pepper
  • For Serving:
  • 12 slider buns
  • Butter for toasting buns (optional)

Ingredient Spotlight

Chicken breasts: The lean protein base. Look for uniform thickness so they poach evenly. If you can’t find boneless skinless breasts, you can use boneless thighs—they’re juicier but need a few extra minutes of poaching. For a shortcut, use leftover rotisserie chicken (shredded, skin removed); just skip the poaching step and go straight to the sauce.

Barbecue sauce: This is the flavor backbone. I prefer a sweet‑smoky Kansas City‑style sauce (like Sweet Baby Ray’s Original). Avoid watery sauces—they won’t coat the chicken well. For a spicy version, add a teaspoon of chipotle hot sauce or use a spicy BBQ variety. My Moroccan twist? Stir in a teaspoon of harissa paste for smoky heat.

Cabbage & cilantro: Green cabbage gives the best crunch. Coleslaw mix works fine if you’re short on time. Fresh cilantro is non‑negotiable—it’s the soul of this slaw. If you’re one of those people who thinks cilantro tastes soapy (it’s genetic, I know), substitute with fresh parsley and a handful of chopped mint for a similar freshness.

Mayonnaise: Use a full‑fat mayo for the creamiest dressing. Light mayo works but the texture will be a little thinner. For a dairy‑free option, use vegan mayo (like Just Mayo). I tested it—still delicious.

Original IngredientBest SubstitutionFlavor / Texture Impact
Chicken breastsBoneless chicken thighsMore moist, slightly richer taste
Barbecue sauce (store‑bought)Homemade BBQ sauce (ketchup + brown sugar + vinegar)You control sweetness and tang
Green cabbageNapa cabbage or savoy cabbageSlightly more tender, still crunchy
MayonnaiseGreek yogurt (for lighter dressing)Tangier, less rich; add extra oil if needed
Fresh cilantroFresh parsley + mintStill fresh, no soapiness; mint adds coolness

How to Make BBQ Chicken Sliders — Step-by-Step

Follow these steps, and you’ll have a platter of irresistible sliders in no time. I’ve included my pro tips to guarantee perfection, plus a common mistake to avoid.

Step 1: Poach the Chicken

Place 2 lbs chicken breasts and 1 cup chicken broth in a large skillet or Dutch oven. Bring to a gentle simmer over medium heat—don’t boil. Reduce heat to low, cover, and cook 15–20 minutes until the thickest part reaches 165°F and the chicken is fork‑tender. Remove from the pan and let cool slightly.

💡 mia’s Pro Tip: For extra flavor, add a bay leaf and a few black peppercorns to the broth while poaching.

Step 2: Make the Slaw

While the chicken poaches, whisk together ¼ cup mayo, 1 tbsp apple cider vinegar, 1 tbsp honey, ½ tsp salt, and ¼ tsp pepper in a small bowl. In a large bowl, toss 3 cups shredded cabbage, ½ cup shredded carrots, and ½ cup chopped cilantro. Pour the dressing over and toss well. Set aside (refrigerate if making ahead).

⚠️ Common Mistake to Avoid: Don’t dress the slaw too early—if you toss more than 2 hours ahead, the cabbage will release water and turn soggy. Dress it up to 1 hour before serving for best crunch.

Step 3: Shred the Chicken

Using two forks, shred the cooled chicken into bite‑sized pieces. (See FAQ below for easier methods.)

💡 mia’s Pro Tip: For extra‑tender shreds, let the chicken rest 5 minutes after poaching before you start pulling.

Step 4: Combine with Sauce

Return the shredded chicken to the skillet. Add 1½ cups barbecue sauce, 1 tbsp brown sugar, 1 tsp garlic powder, and 1 tsp onion powder. Stir over medium‑low heat until bubbly and the chicken is evenly coated, about 5–7 minutes. Season with salt and pepper to taste.

⚠️ Common Mistake to Avoid: Don’t simmer the chicken too long—overcooking can make it dry. Stop as soon as the sauce is hot and clinging to the meat.

Step 5: Toast the Buns

Split 12 slider buns and butter the cut sides (optional but recommended). Toast on a griddle or in a skillet over medium heat until golden, about 1–2 minutes.

💡 mia’s Pro Tip: Use a cast‑iron skillet—it gives the buns a beautiful even crust and helps prevent sogginess.

Step 6: Assemble

Place a generous scoop of BBQ chicken on each bottom bun. Top with a spoonful of cilantro slaw. Cap with the top bun and press gently. Serve immediately.

⚠️ Common Mistake to Avoid: Don’t overstuff the sliders—you want a balance of chicken and slaw in every bite. Too much filling makes them messy.

StepActionDurationKey Visual Cue
1Poach chicken15–20 minMeat is opaque, internal temp 165°F
2Make slaw10 minCabbage is evenly coated
3Shred chicken5 minPulls apart easily with forks
4Combine with sauce5–7 minSauce is bubbling and coats chicken
5Toast buns1–2 minGolden brown marks on cut sides
6Assemble sliders5 minStacked, slaw on top, buns closing

Serving & Presentation

I love serving these sliders on a big wooden board, piled high with extra slaw on the side and a stack of napkins. For a game day spread, pair them with crispy sweet potato fries and a cold beer. In the summer, I’ll add a bowl of watermelon slices—the sweetness complements the tangy BBQ. For a Moroccan‑inspired twist, serve with a side of harissa‑spiced roasted carrots.

To make them look as good as they taste, I like to garnish with a few whole cilantro leaves on top of each slider. A drizzle of extra barbecue sauce over the chicken before adding the slaw adds a glossy finish. If you’re hosting a party, cut each slider in half with a sharp knife and arrange them on a platter—they’re easier to grab and look beautiful.

Pairing TypeSuggestionsWhy It Works
Side DishSweet potato fries, corn on the cob, coleslaw (double slaw!)Crunchy, sweet contrasts the savory, saucy chicken
Sauce / DipExtra BBQ sauce, ranch dressing, chipotle mayoAdds moisture and customizable heat/creaminess
BeverageCold lager, iced tea, lemonade, or a crisp Sauvignon BlancCuts richness, refreshes palate
GarnishExtra cilantro leaves, sliced jalapeños, pickled red onionsAdds color, heat, or acidity to brighten the bite

Make-Ahead, Storage & Reheating

Living in NYC means I’m always meal‑prepping. These sliders are perfect because you can prep components ahead. I often poach and shred the chicken on Sunday, then store it in the sauce in the fridge. The slaw dressing can be made three days in advance (just keep it separate from the cabbage). Assemble fresh right before serving for best texture.

MethodContainerDurationReheating Tip
RefrigeratorAirtight containerUp to 4 daysReheat chicken in a skillet with a splash of water or extra BBQ sauce over medium heat until hot. Toast buns fresh.
FreezerFreezer‑safe container or bagUp to 3 monthsThaw overnight in fridge. Reheat in skillet, adding a little broth or water to loosen sauce. Do not freeze assembled sliders.
Make-AheadSeparate containers: chicken + sauce, slaw dressing, shredded cabbageChicken: up to 4 days; slaw dressing: up to 1 week; cabbage: up to 2 daysToss slaw just before serving for maximum crunch.

For the best leftover experience, I avoid microwaving the chicken directly—it can get rubbery. Instead, reheat in a non‑stick skillet over medium heat, adding a tablespoon of water or extra sauce. The slaw is best fresh, but if you have leftover dressed slaw, use it within 24 hours and expect it to be softer—still tasty! Buns should always be toasted fresh; store leftover buns in the freezer and toast straight from frozen.

Variations & Easy Swaps

These sliders are a blank canvas for creativity. Here are my favorite ways to shake things up, inspired by my Moroccan roots and NYC food scene.

VariationKey ChangeBest ForDifficulty Impact
Spicy Harissa SlidersAdd 1–2 tbsp harissa paste to the BBQ sauceThose who love heat and North African flavorsEasy (just stir in)
Smoky Chipotle SlidersReplace ½ cup BBQ sauce with chipotle‑pepper sauceSmoky‑spicy loversEasy
Gluten‑Free SlidersUse gluten‑free slider buns (or lettuce wraps)Gluten‑sensitive guestsEasy (swap buns)

Spicy Harissa Sliders

Growing up in Morocco, harissa was a pantry staple. Stir a generous tablespoon of harissa paste into the barbecue sauce before adding the chicken. It adds a deep, smoky heat with a hint of cumin and coriander. This version is fantastic if you like a spicy kick—it pairs beautifully with the cooling cilantro slaw.

Smoky Chipotle Sliders

Swap half the barbecue sauce for chipotle pepper sauce (like Tabasco Chipotle) or blend a few canned chipotles in adobo into the sauce. The smokiness dials up the barbecue feel and adds a mild heat. I tested this at a backyard grill party in Brooklyn—everyone asked for the recipe. Serve with a squeeze of lime on top.

Gluten‑Free / Lettuce Wrap Option

For a low‑carb or gluten‑free meal, skip the buns and use large, sturdy lettuce leaves (romaine or butter lettuce). Pile the BBQ chicken and slaw into the leaves and fold like a taco. The crunch of the lettuce replaces the bun texture beautifully. This is my go‑to when I’m at the Union Square farmers market and want something light yet satisfying.

What is the best way to shred the chicken for BBQ chicken sliders?

The easiest method is to use two forks after the chicken has rested for a few minutes. Hold the chicken steady with one fork and pull the meat apart with the other. For larger batches, an electric hand mixer on low speed works surprisingly well—just place the cooked chicken in a deep bowl and pulse a few times until shredded. Another quick trick: if you have a stand mixer, use the paddle attachment on low speed to shred the meat in about 30 seconds. Whichever method you choose, make sure the chicken is moist and slightly warm for the best texture.

Can I use a different type of cabbage for the cilantro slaw?

Absolutely. Green cabbage is classic for its crunch and neutral flavor, but Napa cabbage (also called Chinese cabbage) gives a more tender, slightly sweeter slaw. Savoy cabbage, with its crinkly leaves, works well too—it’s a bit more delicate. If you want a shortcut, a bag of coleslaw mix (usually green and red cabbage with carrots) is perfect. Just add extra fresh cilantro, because the mix usually doesn’t include herbs.

How long should I cook the chicken for BBQ sliders to keep it moist?

Poach the chicken breasts in broth for 15–20 minutes over gentle heat—do not boil. The internal temperature should reach 165°F. If you overcook, the chicken will be dry. After poaching, let it rest for 5 minutes before shredding; this allows the juices to redistribute. When you later simmer the shredded chicken in the BBQ sauce, keep it on medium‑low for only 5–7 minutes—just until the sauce is bubbly and coats the meat. That’s enough to infuse flavor without drying it out.

What are good buns to use for BBQ chicken sliders so they don’t get soggy?

Choose soft but sturdy slider buns. Potato rolls (like Martin’s) are my top pick—they’re slightly sweet and fluffy but hold up well. Brioche buns are buttery and rich but can get a bit fragile when saucy, so toast them thoroughly. For extra protection, always toast the cut sides with a little butter until golden brown. That crisp surface acts as a moisture barrier, keeping the buns from turning soggy even after the sliders sit for a few minutes.

Can I make the cilantro slaw ahead of time?

You can, but with a trick. Prepare the dressing and store it in a jar in the fridge for up to a week. Shred the cabbage and carrots and keep them in a separate sealed bag or container with a paper towel to absorb moisture—they’ll stay crunchy for 2 days. Toss everything together no more than 1 hour before serving. If you dress the slaw too early, the cabbage releases water and the slaw becomes watery and limp.

Can I use leftover rotisserie chicken for these sliders?

Yes, absolutely—it’s one of my favorite shortcuts. Shred the meat from a rotisserie chicken (remove skin and bones) and skip the poaching step. You’ll need about 3–4 cups of shredded chicken. Proceed directly to step 4: warm the shredded chicken in the barbecue sauce mixture for about 5–7 minutes until heated through and well coated. This cuts the total time by almost 15 minutes, and the rotisserie chicken adds extra flavor from the seasoned skin.

How do I keep the sliders from falling apart when I serve them?

Three key steps: First, don’t overfill—about ¼ cup of chicken and a heaping tablespoon of slaw per slider is plenty. Second, toast the buns well; the crunch helps keep everything in place. Third, assemble the sliders just before serving, not all at once. If you’re serving a crowd, set up a build‑your‑own station so each person can assemble their own and eat immediately. This also prevents sogginess and keeps the slaw crunchy.

Can I make this recipe dairy‑free?

Yes, easily. The only dairy is in the optional butter for toasting buns. Use a dairy‑free butter substitute (like Miyoko’s) or skip the butter and toast the buns in a dry skillet or toaster oven. The slaw uses mayonnaise—choose a vegan mayo (Just Mayo or Hellmann’s Vegan) for a fully dairy‑free version. The barbecue sauce and other ingredients are typically dairy‑free, but always check the label to be sure.

What can I substitute for the cilantro in the slaw?

If cilantro tastes like soap to you (a genetic trait), replace it with an equal amount of fresh flat‑leaf parsley. For a more herbaceous twist, add a few tablespoons of fresh mint or dill. The slaw will still be bright and fresh, just with a different herb profile. I’ve also used chopped fresh basil in summer—it pairs surprisingly well with the barbecue sauce.

How can I make the sliders spicier?

There are several easy ways. Stir a teaspoon of hot sauce (Frank’s RedHot or Cholula) into the barbecue sauce along with the chicken. Add a pinch of cayenne pepper or crushed red pepper flakes. Or, for a deeper heat, mix in a tablespoon of chipotle pepper in adobo that you’ve minced. You can also top the sliders with sliced jalapeños or a drizzle of sriracha mayo before adding the top bun. The cool cilantro slaw will balance the heat beautifully.

Share Your Version!

I hope you love these BBQ chicken sliders as much as I do. They’re everything I want in a recipe: fast enough for a weeknight, delicious enough for a party, and endlessly adaptable. If you try them, please leave a star rating and a comment below—tell me what twist you added! Did you go harissa, chipotle, or keep it classic with the fresh cilantro slaw?

Tag me in your photos on Instagram or Pinterest @exorecipe—I absolutely love seeing your creations. And if you have a question I didn’t answer above, drop it in the comments. I read every single one and I’ll get back to you personally.

From my NYC kitchen to yours — I hope this recipe brings as much warmth to your table as it does to mine. — mia 🧡

📌

Love This Recipe? Save It to Pinterest!

If you enjoyed this BBQ Chicken Sliders with Fresh Cilantro Slaw recipe, don’t let it get lost in your browser tabs! 😄 Pin it now so you can find it again anytime — and explore hundreds more tried-and-tested recipes waiting for you on my Pinterest boards.

👉 Follow mia on Pinterest @exorecipe

📌 Pin this recipe · 🔁 Re-pin your favorites · 💬 Tag me when you make it — I love seeing your creations!

Print

clock clock iconcutlery cutlery iconflag flag iconfolder folder iconinstagram instagram iconpinterest pinterest iconfacebook facebook iconprint print iconsquares squares iconheart heart iconheart solid heart solid icon

BBQ Chicken Sliders with Fresh Cilantro Slaw

  • Author: Chef Mia
  • Prep Time: 15 minutes
  • Cook Time: 25 minutes
  • Total Time: 40 minutes
  • Yield: 12 sliders 1x
  • Method: Appetizer, Main Course
  • Cuisine: American

Description

These BBQ Chicken Sliders are the perfect game day or summer party food. Juicy shredded chicken is tossed in tangy barbecue sauce, piled onto soft slider buns, and topped with a bright, crunchy cilantro slaw. Easy, delicious, and always a hit.


Ingredients

Scale
  • For the Chicken:
  • 2 lbs boneless skinless chicken breasts
  • 1 cup chicken broth
  • 1 1/2 cups barbecue sauce (your favorite brand)
  • 1 tablespoon brown sugar
  • 1 teaspoon garlic powder
  • 1 teaspoon onion powder
  • Salt and pepper to taste
  • For the Cilantro Slaw:
  • 3 cups shredded green cabbage (or coleslaw mix)
  • 1/2 cup shredded carrots
  • 1/2 cup fresh cilantro, chopped
  • 1/4 cup mayonnaise
  • 1 tablespoon apple cider vinegar
  • 1 tablespoon honey
  • 1/2 teaspoon salt
  • 1/4 teaspoon black pepper
  • For Serving:
  • 12 slider buns
  • Butter for toasting buns (optional)

Instructions

  1. 1. In a large skillet or Dutch oven, combine the chicken breasts and chicken broth. Bring to a simmer over medium heat, then reduce heat to low, cover, and poach for 15-20 minutes until the chicken is cooked through and easily shreds.
  2. 2. While the chicken cooks, prepare the slaw. In a medium bowl, combine the shredded cabbage, carrots, and chopped cilantro. In a separate small bowl, whisk together the mayonnaise, apple cider vinegar, honey, salt, and pepper. Pour the dressing over the cabbage mixture and toss to coat. Set aside.
  3. 3. Remove the cooked chicken from the skillet and let it cool slightly. Shred the chicken using two forks.
  4. 4. Return the shredded chicken to the skillet. Pour in the barbecue sauce, brown sugar, garlic powder, and onion powder. Stir to combine and heat over medium-low heat until the sauce is bubbly and the chicken is well coated, about 5-7 minutes. Season with salt and pepper to taste.
  5. 5. If desired, split the slider buns and lightly butter the cut sides. Toast them on a griddle or in a pan until golden brown.
  6. 6. To assemble, place a generous scoop of BBQ chicken on the bottom half of each bun. Top with a spoonful of cilantro slaw. Place the top bun on and press gently. Serve immediately.

Notes

You can also use leftover rotisserie chicken or pre-cooked shredded chicken to save time. Adjust the amount of barbecue sauce to your preference. For a spicier kick, add a dash of hot sauce to the chicken mixture. The slaw can be made up to a day in advance and kept refrigerated.


Nutrition

  • Calories: 320
  • Sugar: 18g
  • Fat: 10g
  • Carbohydrates: 35g
  • Protein: 25g


BBQ Chicken Sliders with Fresh Cilantro Slaw

k">

Tried This Recipe? Leave a Comment!

Did you make this recipe? I’d love to hear how it turned out! Please leave a comment and a rating below. Your feedback helps other home cooks and supports cheerychop.com!

For more delicious inspiration, follow me on Pinterest!