Table of Contents
Chicken and Veggie Puff Pastry Pockets: A Delicious, Easy Recipe for All Occasions – Golden, Flaky, and Perfectly Stuffed
Growing up in Morocco, my mother would make these little hand pies called briouats – crispy pastry triangles filled with spiced chicken and vegetables. Today, as a professional cook in New York City, I’ve reimagined that comfort in the form of these chicken and veggie puff pastry pockets. The flaky, buttery layers of puff pastry wrap a savory filling of tender chicken, sweet bell peppers, and peas – all with a hint of cumin and garlic. This is my go-to easy puff pastry dinner idea for busy weeknights when I want something that feels special but takes almost no effort.
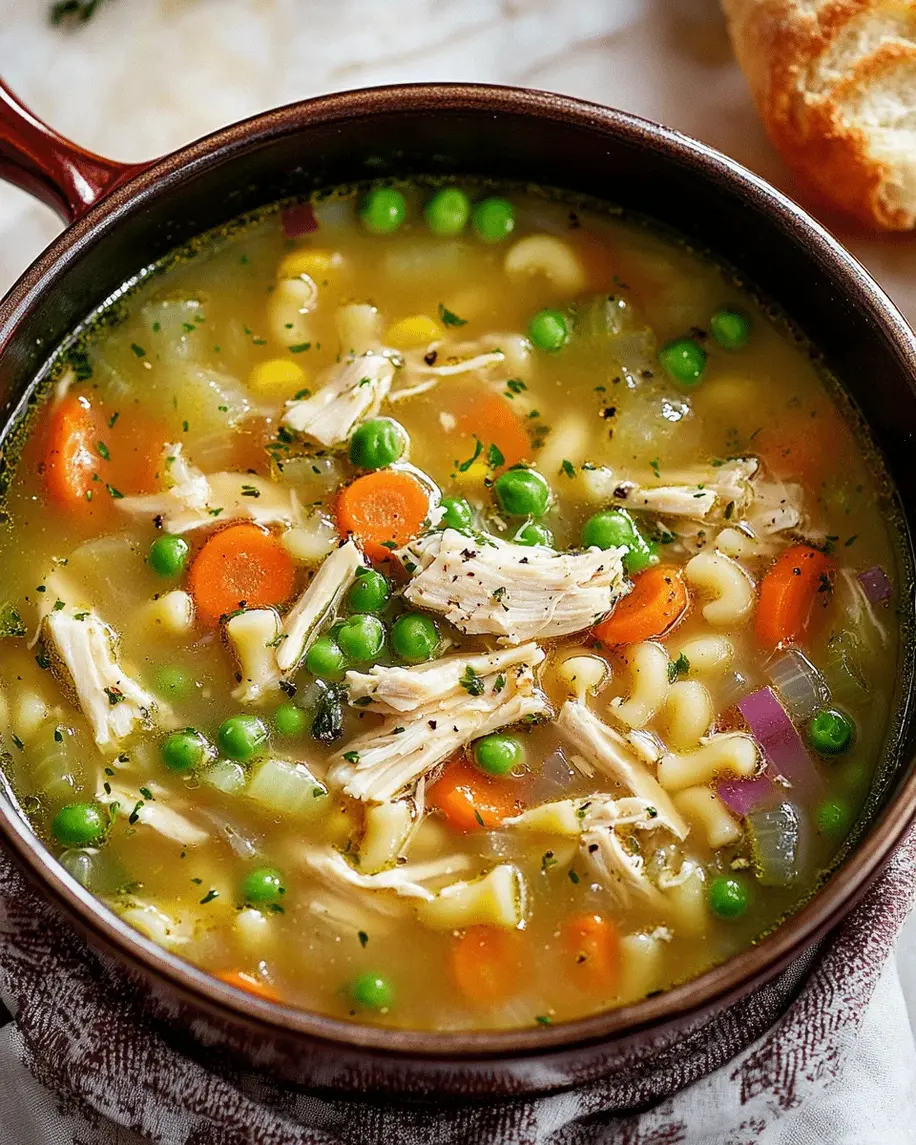
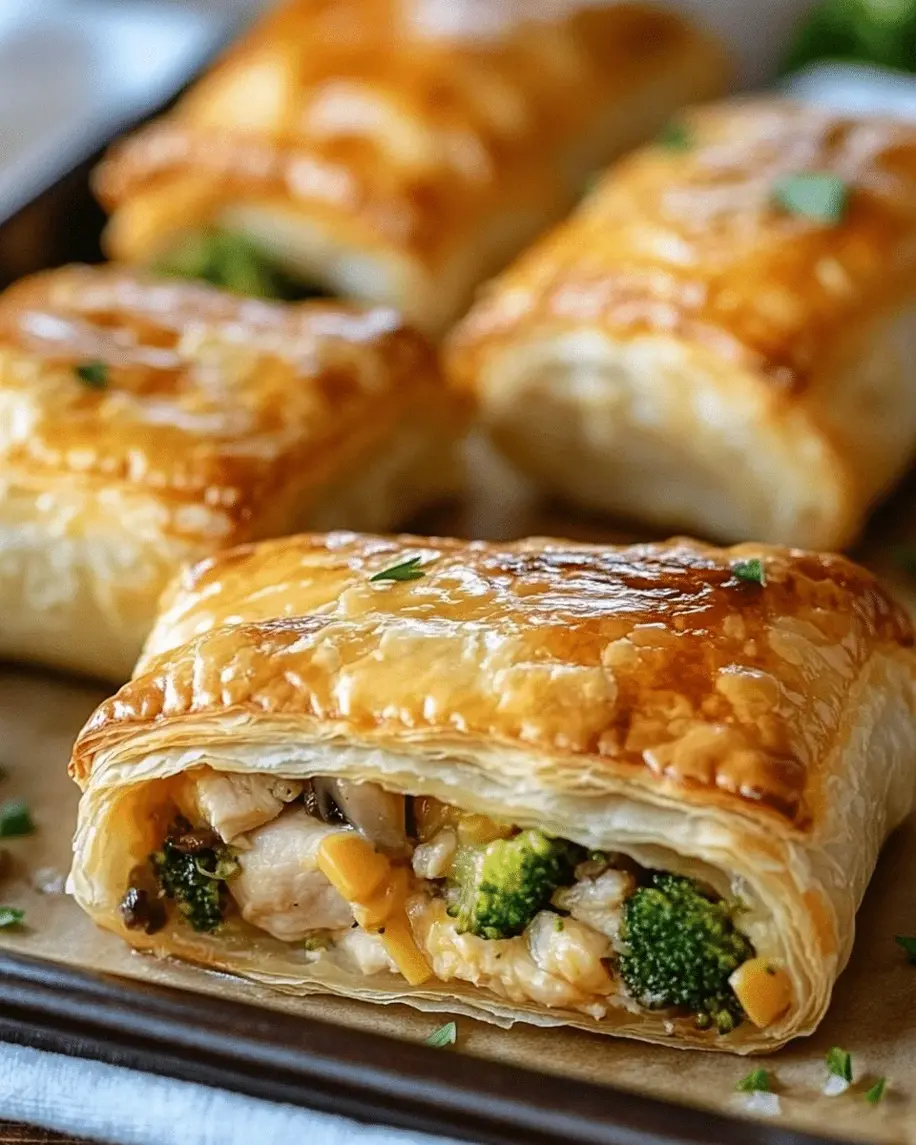
Imagine pulling a golden, puffed pocket from the oven – the aroma of butter and roasted vegetables fills your kitchen. The first bite cracks through the delicate crust, releasing a warm, juicy filling with just the right amount of cheese pull. The bell peppers add a pop of color and sweetness, the peas a little pop of green, and the chicken keeps everything hearty. I learned the French technique of docking pastry while training in Paris, and I use it here to ensure the bottom stays crisp – no soggy bottoms, ever.
What I love most about this recipe is how foolproof it is. You don’t need to be a pastry chef (I am one, but you don’t have to be!). The secret is in the simple assembly and a few tricks I’ll share – like cooling the filling completely before stuffing, and using an egg wash for that glossy, deep-golden finish. Plus, this is a quick weeknight puff pastry meal that works with whatever veggies you have on hand. Whether you’re cooking for your family or meal-prepping for the week, these pockets are a lifesaver.
Why This Chicken and Veggie Puff Pastry Pockets Recipe Is the Best
The Flavor Secret: I bring a touch of my Moroccan heritage by adding a pinch of ground cumin and turmeric to the filling. It’s subtle enough for picky eaters but gives the pockets a warm, earthy depth that elevates them beyond a simple chicken-and-veggie mix. This is the kind of flavor twist that makes people ask, “What’s in this?”
Perfected Texture: After years of testing, I’ve learned that pre-cooking the vegetables to remove excess moisture is the key to a crisp pastry. I sauté the onions, bell peppers, and peas until just tender, then let them cool completely. This step, combined with docking the pastry (pricking with a fork), ensures the bottom stays flaky and never soggy – a classic French technique I mastered in Paris.
Foolproof & Fast: Using frozen puff pastry saves time without sacrificing quality. The filling comes together in under 15 minutes, and assembly is as simple as spooning, folding, and sealing. Even if you’ve never worked with puff pastry before, you’ll get perfect pockets every time. It’s truly one of the best easy puff pastry dinner ideas for beginners and pros alike.
Chicken and Veggie Puff Pastry Pockets Recipe Ingredients
I love buying my vegetables at the Union Square Greenmarket – the bell peppers are always so sweet and colorful. The puff pastry I get from the frozen aisle at Whole Foods; it’s reliable and buttery. And the chicken? Leftover roast chicken from Sunday dinner or a rotisserie bird from the deli – either works beautifully.
Ingredients List
- 1 sheet frozen puff pastry (half of a 17.3-oz package), thawed
- 1 cup cooked shredded chicken (rotisserie chicken works great)
- ½ cup diced bell peppers (any color – I like a mix of red and yellow)
- ½ cup diced yellow onion
- ½ cup frozen peas (no need to thaw)
- ½ cup shredded mozzarella cheese (or cheddar for a sharper flavor)
- 1 large egg, beaten (for egg wash)
- 2 tablespoons olive oil
- 1 clove garlic, minced
- ½ teaspoon ground cumin
- ¼ teaspoon ground turmeric
- Salt and black pepper, to taste
- Optional: sesame seeds or everything bagel seasoning for topping
Ingredient Spotlight
Puff Pastry: The star of the show – it’s what gives these pockets their signature flaky layers. I use Pepperidge Farm or Dufour brand for the best rise and butter flavor. Make sure to thaw it in the fridge overnight (never at room temperature) so the butter stays cold. Substitution: If you’re dairy-free, there are excellent plant-based puff pastries now available; just know they may be a little less flaky but still delicious.
Cooked Chicken: Rotisserie chicken is brilliant here because it’s already seasoned and moist. If using raw chicken, poach or sauté it with a little salt and pepper before shredding. The chicken provides the hearty protein base – without it, the pockets would feel like veggie-only turnovers (which you can certainly make by doubling the vegetables).
Bell Peppers & Peas: These add sweetness, color, and texture. Bell peppers release water when cooked, so I always sauté them first to evaporate moisture – that’s my pro tip for a non-soggy pocket. Peas add a pop of green and a tender bite. Frozen peas are perfect; don’t overcook them. You could substitute with diced zucchini or corn, but adjust the cooking time accordingly.
| Original Ingredient | Best Substitution | Flavor / Texture Impact |
|---|---|---|
| Puff Pastry | Phyllo Dough (use 3 layers with butter between) | Less flaky, more shatter-crisp; different eating experience |
| Cooked Chicken | Canned or leftover turkey | Slightly drier; add an extra tablespoon of olive oil or a splash of broth |
| Mozzarella | Cheddar, provolone, or dairy-free cheese shreds | Cheddar gives a sharper flavor; dairy-free melts less but still works |
| Bell Peppers | Chopped zucchini or mushrooms (sauté first to remove moisture) | Zucchini stays tender; mushrooms add earthy umami |
How to Make Chicken and Veggie Puff Pastry Pockets — Step-by-Step
Making these pockets is easier than you think. Follow these steps, and you’ll have a batch of golden, satisfying pockets that taste like a million bucks.
Step 1: Prepare the Filling
Heat 2 tablespoons of olive oil in a skillet over medium heat. Add the onion and bell peppers, and sauté for 4–5 minutes until softened. Add the minced garlic and cook for 30 seconds more. Stir in the shredded chicken, frozen peas, cumin, turmeric, salt, and pepper. Cook for 2 minutes until everything is well combined and the peas are heated through. Remove from heat and let the filling cool completely – this is crucial. If the filling is warm, it will melt the butter in the puff pastry and make it soggy.
💡 mia’s Pro Tip: Spread the filling on a plate to cool faster. You can even pop it in the fridge for 10 minutes while you prep the pastry.
Step 2: Prepare the Pastry
On a lightly floured surface, unfold the thawed puff pastry sheet. Use a rolling pin to gently roll it out just slightly – you want a 12×12-inch square. Cut the sheet into 6 equal rectangles (about 6×4 inches each). With a fork, prick each rectangle all over (this is called docking) – it prevents the pastry from puffing up too much in the center.
⚠️ Common Mistake to Avoid: Don’t skip the docking! Without it, the pastry will form large air bubbles and the pockets might burst.
Step 3: Assemble the Pockets
Place about 2 heaping tablespoons of the cooled filling onto one half of each rectangle, leaving a ½-inch border. Sprinkle a little mozzarella on top. Fold the other half over to cover the filling, pressing the edges firmly to seal. Use a fork to crimp the edges – this gives a beautiful decorative look and seals the pocket. Cut two small slits on top of each pocket to allow steam to escape.
💡 mia’s Pro Tip: If the pastry feels too sticky, refrigerate the assembled pockets for 10 minutes before brushing with egg wash. Cold pastry bakes flakier.
Step 4: Egg Wash and Bake
Preheat the oven to 400°F. Line a baking sheet with parchment paper. Arrange the pockets on the sheet, spaced at least an inch apart. Brush the tops with the beaten egg wash – this gives that gorgeous golden-brown crust. Sprinkle with sesame seeds or everything bagel seasoning if desired. Bake for 20–25 minutes, until the pastry is puffed and deep golden brown. Let cool on the pan for 5 minutes before serving – the filling will be very hot.
⚠️ Common Mistake to Avoid: Overcrowding the pan. The pockets need airflow to crisp up all around. Use two sheets if necessary.
| Step | Action | Duration | Key Visual Cue |
|---|---|---|---|
| 1 | Sauté filling | 8 minutes | Onions translucent, peppers slightly softened |
| 2 | Dock and cut pastry | 5 minutes | Evenly spaced fork marks |
| 3 | Fill and seal pockets | 5 minutes | Fork-crimped edges, two slits on top |
| 4 | Bake | 20–25 minutes | Deep golden brown, puffed up |
Serving & Presentation
I love serving these pockets with a fresh side salad – a simple arugula and lemon vinaigrette cuts through the buttery richness beautifully. Or, for a heartier meal, pair them with roasted sweet potatoes or a bowl of tomato soup. When I entertain in my NYC apartment, I arrange the pockets on a wooden board with a small bowl of harissa-spiked yogurt (a nod to my Moroccan roots) for dipping.
Garnish with fresh parsley or chives for a pop of green. If you’re serving them as appetizers, cut each pocket in half on the diagonal – they look so elegant. The contrast of the shatteringly flaky crust and the warm, savory filling is always a crowd-pleaser.
| Pairing Type | Suggestions | Why It Works |
|---|---|---|
| Side Dish | Mixed green salad, roasted broccoli, or sweet potato fries | Light sides balance the richness; sweet potato adds a nice sweet-savory contrast |
| Sauce / Dip | Harissa yogurt, honey mustard, or garlic aioli | The tangy or spicy dip cuts the buttery pastry |
| Beverage | Dry Riesling, iced tea, or a crisp lager | Acidic or bubbly drinks refresh the palate |
| Garnish | Fresh parsley, chives, sesame seeds, or flaky sea salt | Adds color, crunch, and a professional finish |
Make-Ahead, Storage & Reheating
As a busy New Yorker, I often meal-prep these pockets on Sunday. They reheat beautifully and make the perfect grab-and-go lunch. Here’s how I store them to keep that flaky texture intact.
| Method | Container | Duration | Reheating Tip |
|---|---|---|---|
| Refrigerator | Airtight container, lined with paper towels | Up to 3 days | Reheat in a 350°F oven for 8–10 minutes, or air fryer at 350°F for 5 minutes |
| Freezer | Freezer-safe bag, remove as much air as possible | Up to 3 months | Bake from frozen at 400°F for 25–30 minutes (no need to thaw) |
| Make-Ahead | Assemble pockets, refrigerate unbaked on a baking sheet | Up to 24 hours in advance | Bake straight from the fridge, add 2–3 minutes to the baking time |
For the best results, never microwave these pockets – the microwave makes the pastry soggy. Instead, reheat in the oven or air fryer to restore that flaky crunch. And if you’re freezing, I recommend baking them first, cooling completely, then freezing. That way you just need to reheat rather than bake from scratch.
Variations & Easy Swaps
| Variation | Key Change | Best For | Difficulty Impact |
|---|---|---|---|
| Moroccan Spiced | Add 1 tsp ras el hanout, ¼ cup golden raisins, and swap mozzarella for feta | Sweet-savory lovers, adventurous eaters | Same difficulty |
| Vegetarian / Vegan | Replace chicken with 1 can (15 oz) drained chickpeas, use dairy-free cheese or nutritional yeast | Meat-free Mondays, vegan guests | Same difficulty |
| Cheesy Broccoli & Chicken | Substitute bell peppers with ½ cup chopped broccoli florets (blanched) and add extra cheddar | Kids, broccoli lovers | Same difficulty |
Moroccan Spiced Variation
This variation takes me straight back to my mother’s kitchen in Marrakech. Instead of cumin and turmeric, use 1 teaspoon of ras el hanout – a fragrant North African spice blend. Add ¼ cup golden raisins to the filling for pops of sweetness, and swap the mozzarella for crumbled feta. The result is a pocket that’s exotic, slightly sweet, and utterly delicious. Serve with a side of harissa yogurt for dipping.
Vegetarian / Vegan Variation
For a plant-based version, replace the chicken with a can of chickpeas (rinsed and roughly mashed). The chickpeas hold the filling together nicely. Use dairy-free mozzarella shreds (I like Violife) or a sprinkle of nutritional yeast for cheesiness. The rest of the steps stay the same. This is a hearty, protein-packed option that even meat-eaters will enjoy.
Cheesy Broccoli & Chicken Variation
If you’re feeding little ones or just love broccoli, try this twist. Swap the bell peppers for ½ cup finely chopped broccoli florets that have been blanched for 2 minutes and squeezed dry. Increase the mozzarella to ¾ cup and add a handful of shredded cheddar. The broccoli adds a subtle earthy flavor and extra nutrients. This variation is a fantastic way to sneak greens into a kid-friendly meal.
How do you keep the puff pastry from getting soggy when making chicken and veggie pockets?
The number one trick is to cool the filling completely before assembling. Hot filling melts the butter in the pastry, leading to a soggy bottom. I also recommend pre-cooking the vegetables to release excess moisture – especially bell peppers and onions. Let them cool on a plate, then drain any liquid before mixing with the chicken. Additionally, docking the pastry (pricking it all over with a fork) allows steam to escape and prevents the pastry from becoming dense. Finally, brush the outside with egg wash – it forms a barrier that helps the crust stay crisp. Trust me, these steps are game-changers.
Can I use rotisserie chicken for this puff pastry pocket recipe?
Absolutely! Rotisserie chicken is my go-to shortcut for this recipe. It’s already cooked, seasoned, and wonderfully moist. Just shred the meat (discard the skin and bones) and you’re good to go. Rotisserie chicken saves you time and adds a nice depth of flavor from the roasting. If you have leftover roasted chicken from Sunday dinner, that works perfectly too. Just make sure to chop or shred it into small, even pieces so the filling is consistent.
What vegetables work best in chicken puff pastry pockets?
I love using bell peppers (any color), yellow onion, and frozen peas – they provide sweetness, color, and a pop of green. Other great options include finely diced zucchini (sauté to remove moisture), mushrooms (also sauté to release water), corn kernels, or even chopped spinach (squeeze dry after wilting). Avoid watery vegetables like raw tomatoes or cucumber, as they’ll make the filling wet. The key is to pre-cook any vegetable that releases a lot of water. Stick to firm, low-moisture vegetables for the best texture.
How long do you bake chicken and veggie puff pastry pockets and at what temperature?
Bake the pockets in a preheated 400°F oven for 20–25 minutes, until the pastry is puffed and deep golden brown. I always recommend using an oven thermometer to ensure accurate temperature – ovens can run hot or cold. If you’re baking from frozen, add 5–8 minutes to the time (still at 400°F). The pockets are done when they are golden all over and the filling is bubbling hot (you can test with an instant-read thermometer – it should read at least 165°F). Let them rest on the baking sheet for 5 minutes before serving – the filling will be dangerously hot.
Can I make these pockets ahead of time and freeze them?
Yes, they freeze beautifully! You can freeze them either baked or unbaked. For unbaked pockets: assemble them completely, place on a baking sheet lined with parchment, and freeze until solid. Transfer to a freezer bag. When ready to bake, brush with egg wash (add an extra splash of water to help it stick) and bake from frozen at 400°F for 25–30 minutes. For baked pockets: cool completely, then freeze in a single layer before bagging. Reheat in a 350°F oven for 10 minutes or in an air fryer at 350°F for 5–6 minutes. This is one of the best easy puff pastry dinner ideas for meal prep.
What can I use instead of puff pastry?
If you don’t have puff pastry, you can use refrigerated pie crust (the kind in the roll) – it will be less flaky but still very tasty. Phyllo dough is another option: use 3–4 layers, brushing each with melted butter, then cut and fill. Bake at 375°F for 18–20 minutes. Phyllo gives a shatteringly crisp texture. You can also make a simple dough using 2 cups flour, 1/2 cup butter, 1/2 cup cold water – but that obviously takes more effort. For a gluten-free version, use a gluten-free puff pastry or a gluten-free pie crust.
Can I add other cheeses to the filling?
Absolutely! The recipe calls for mozzarella because it melts beautifully and has a mild flavor that lets the spices shine. But you can experiment: cheddar adds a sharper, more distinct taste; provolone gives a subtle smokiness; feta (especially in the Moroccan variation) adds tangy creaminess; goat cheese crumbles would also be lovely. Just avoid very soft cheeses like brie (too much moisture) or hard cheeses like Parmesan alone (won’t melt well). A mix of mozzarella and cheddar is my favorite all-purpose combo.
Is this recipe suitable for kids?
Yes, kids absolutely love these pockets! The flaky pastry and the mild, creamy chicken-and-cheese filling are a hit with little ones. You can adjust the vegetables to suit your child’s preferences – my kids adore the cheesy broccoli version. The pockets are also great for lunchboxes (reheat them in the morning, pack in a thermos). If your child is sensitive to spices, reduce the cumin and turmeric to just a pinch, or omit them entirely. The pockets will still be delicious. Plus, they’re easy for small hands to hold and eat.
Can I use other proteins instead of chicken?
Definitely! This recipe is very adaptable. Cooked ground turkey, beef, or pork would work well – just sauté the meat with the onions and drain any excess fat before mixing with the vegetables. Shredded rotisserie turkey is also delicious (especially around Thanksgiving!). For a seafood twist, try canned or leftover salmon (flaked) – pair it with dill and a little lemon zest. If you’re making the vegetarian version, chickpeas, black beans, or crumbled tofu (pressed and sautéed) are excellent alternatives. The cooking time remains the same.
How do I prevent the pockets from bursting open in the oven?
There are a few simple tricks. First, don’t overfill the pockets – about 2 heaping tablespoons per pocket is perfect. Second, seal the edges firmly by pressing with a fork; this also creates a decorative edge. Third, cut two small slits on top of each pocket to let steam escape – if steam builds up inside, it can burst the pastry. Fourth, make sure the filling is not too wet – well-cooked and cooled filling reduces internal steam. Finally, chill the assembled pockets for 10–15 minutes before baking – cold pastry holds its shape better and the butter stays firm, giving a better rise.
Share Your Version!
I’d love to see how your chicken and veggie puff pastry pockets turn out! Did you try the Moroccan spiced variation? Did your kids gobble up the broccoli version? Leave a star rating and a comment below – your feedback helps other readers decide what to cook tonight. And don’t forget to snap a photo and tag me on Instagram or Pinterest with @exorecipes – I always re-share your beautiful creations!
If you have a question I didn’t cover in the FAQ, just drop it in the comments. I personally read every single one and will answer as soon as I can. From my NYC kitchen to yours – I hope this recipe brings as much warmth to your table as it does to mine. — mia 🧡
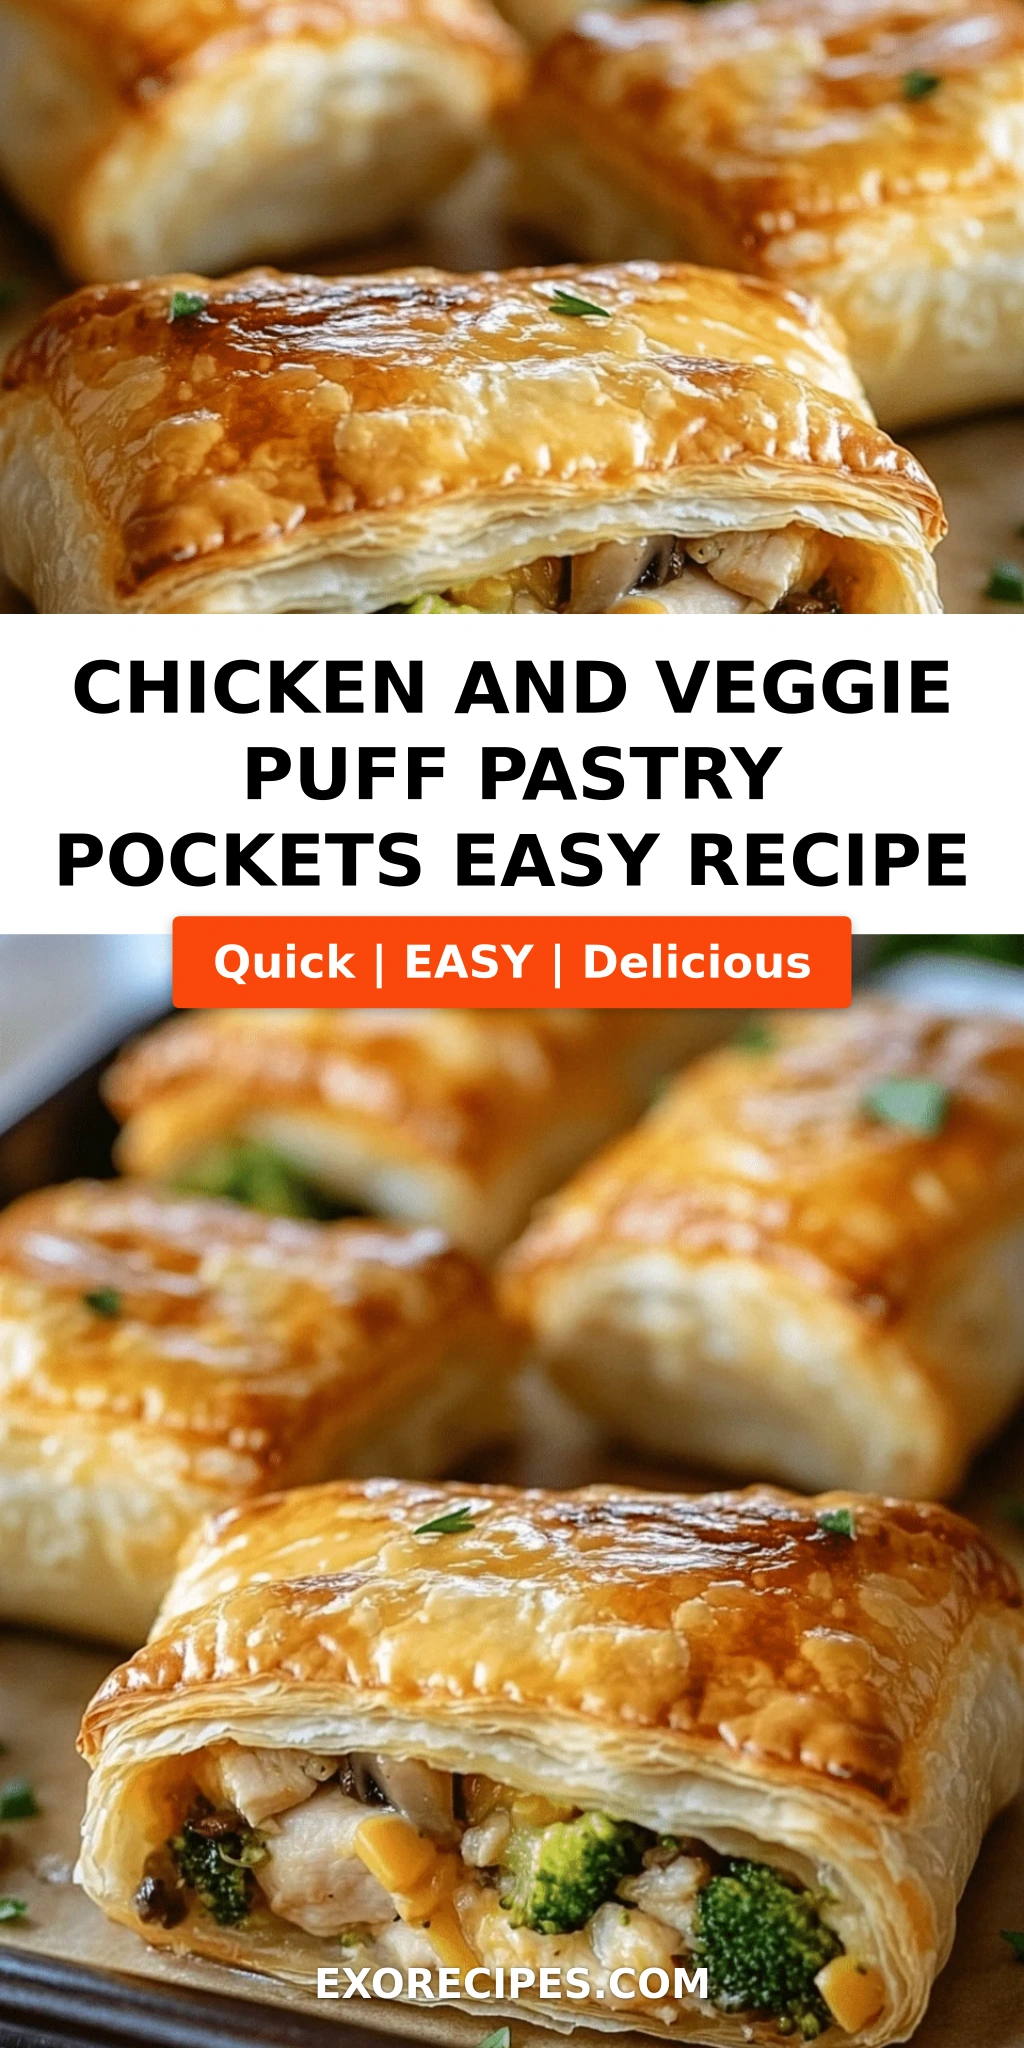
Love This Recipe? Save It to Pinterest!
If you enjoyed this Chicken and Veggie Puff Pastry Pockets recipe, don’t let it get lost in your browser tabs! 😄 Pin it now so you can find it again anytime — and explore hundreds more tried-and-tested recipes waiting for you on my Pinterest boards.
👉 Follow mia on Pinterest @exorecipe
📌 Pin this recipe · 🔁 Re-pin your favorites · 💬 Tag me when you make it — I love seeing your creations!

Chicken and Veggie Puff Pastry Pockets: A Delicious, Easy Recipe for All Occasions
Instructions
Tried This Recipe? Leave a Comment!
Did you make this recipe? I’d love to hear how it turned out! Please leave a comment and a rating below. Your feedback helps other home cooks and supports cheerychop.com!
For more delicious inspiration, follow me on Pinterest!