“`html

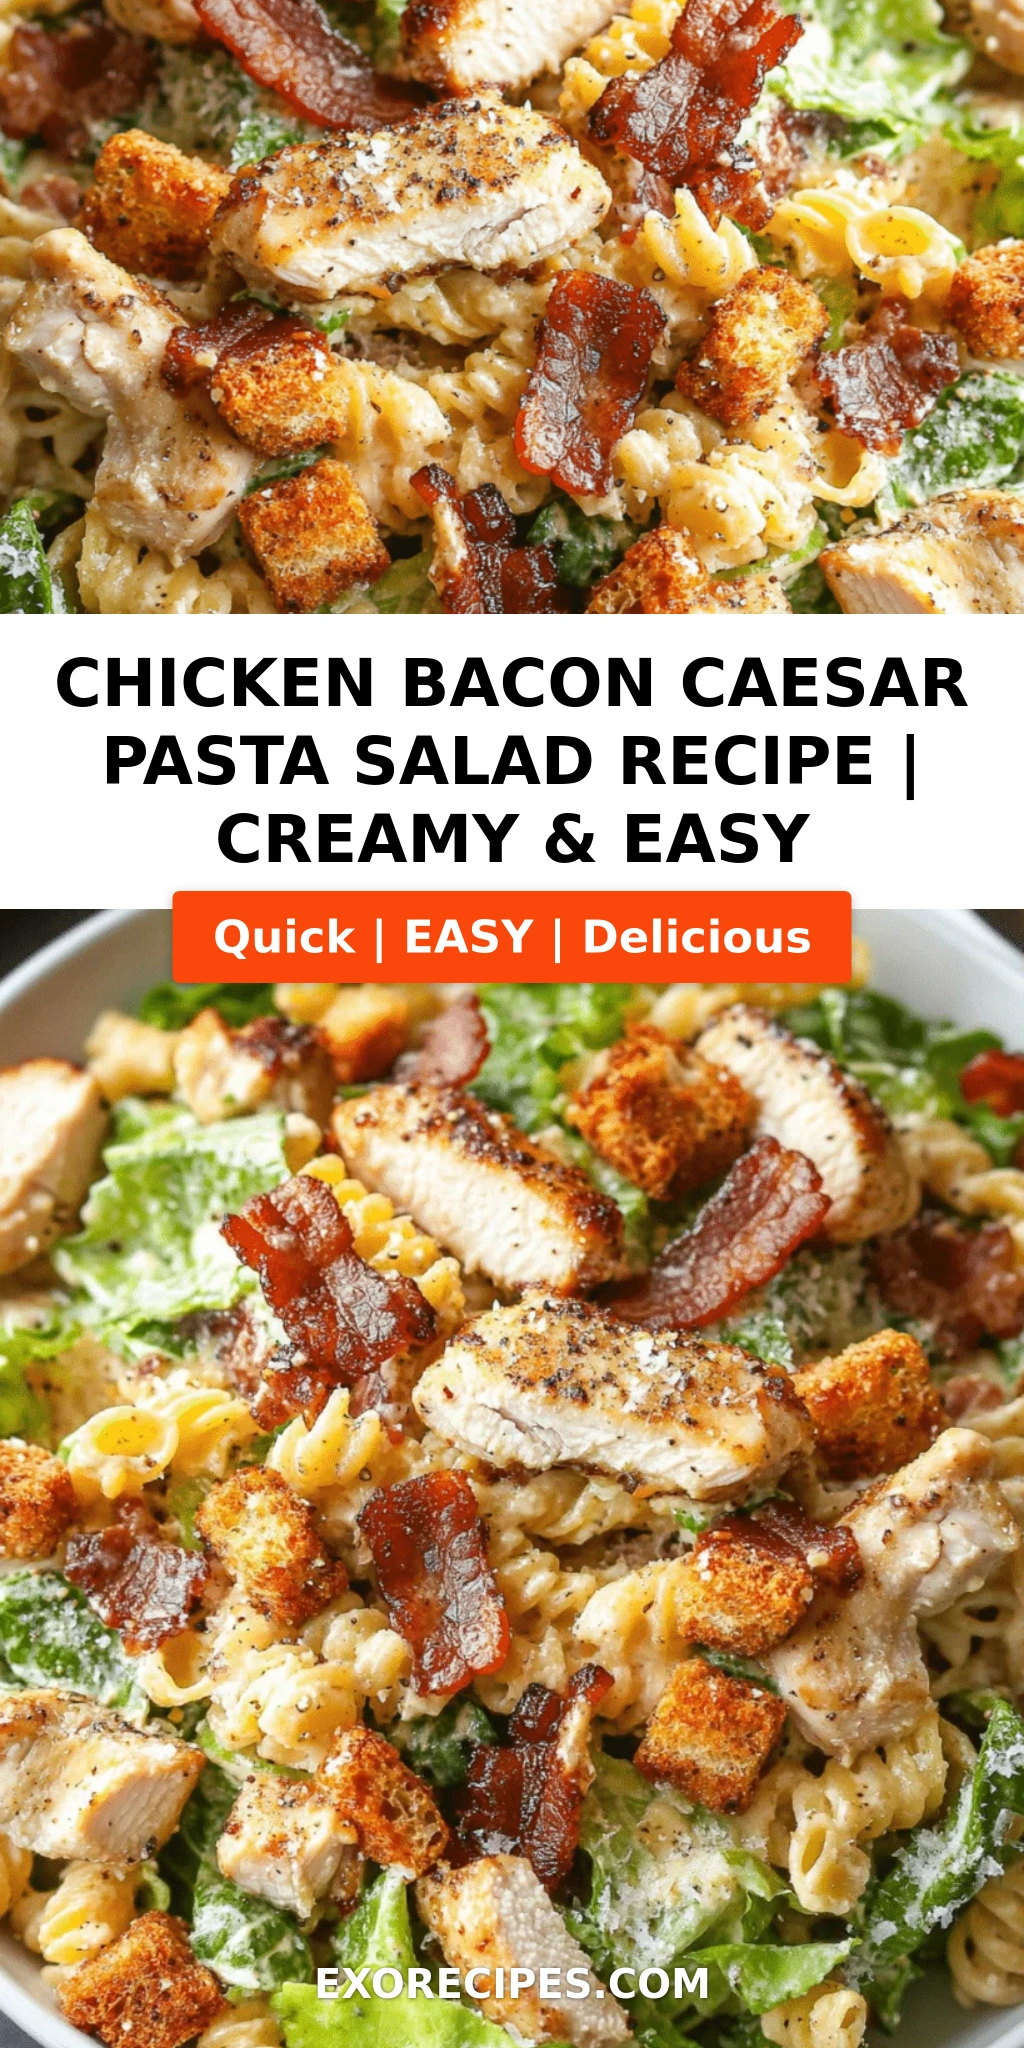
Chicken Bacon Ranch Pull-Apart Rolls Recipe: A Delicious Twist on Comfort Food – Quick, Cheesy & Irresistible!

⚖️
Difficulty
Easy
⏲️
Prep Time
15 mins
🕒
Cook Time
25 mins
⏱️
Total Time
40 mins
🍽️
Servings
8 servings

I still remember the first time I made these Chicken Bacon Ranch Pull-Apart Rolls. It was a chilly Sunday evening in my tiny NYC apartment, and I was craving something deeply comforting — the kind of dish that feels like a hug on a plate. Growing up in Morocco, my mother made these gorgeous layered breads stuffed with spiced meats and herbs, always pulled apart at the table with family. Years later, in Paris, I learned how a simple béchamel or a well-balanced vinaigrette could elevate even the humblest ingredients. And now, here in New York, I’ve combined all of that into this easy comfort food recipe that feels both familiar and fresh. These chicken bacon ranch appetizer rolls are my love letter to weeknight dinners that don’t skimp on flavor.

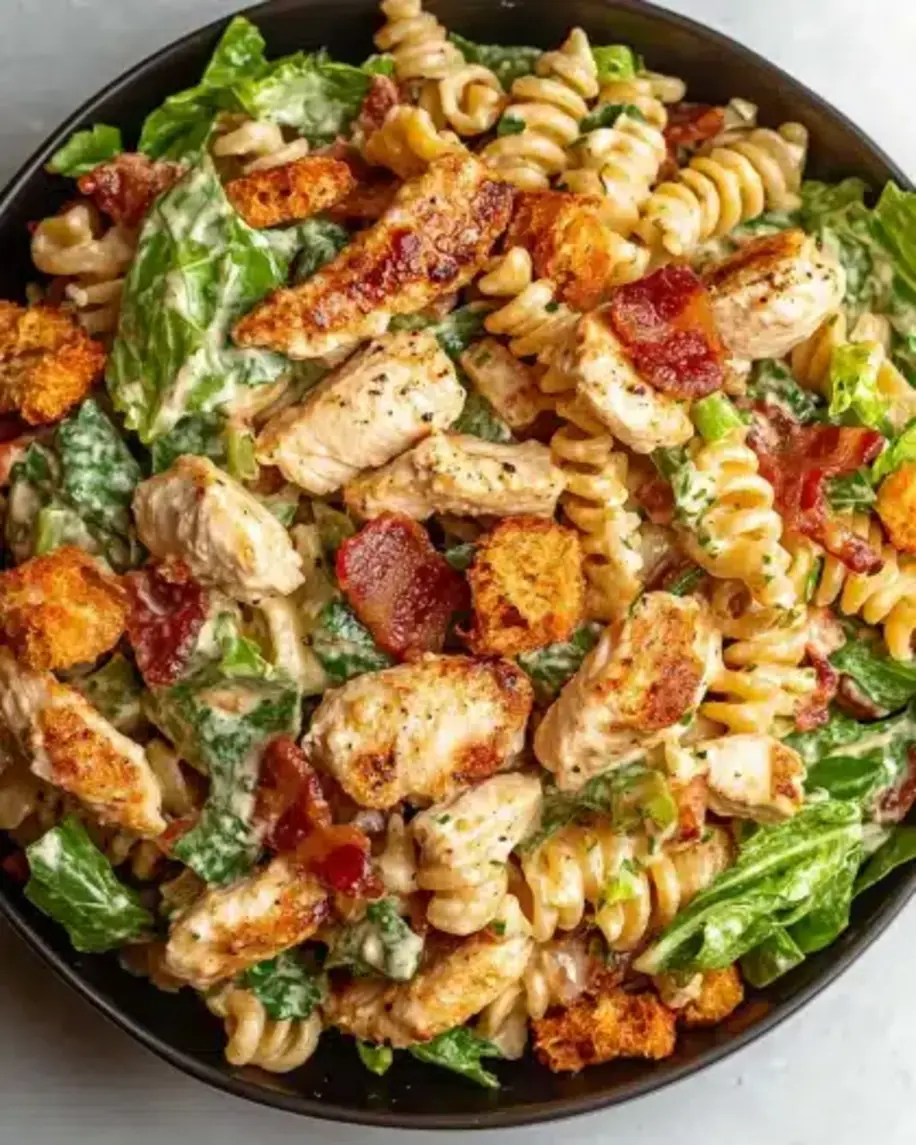
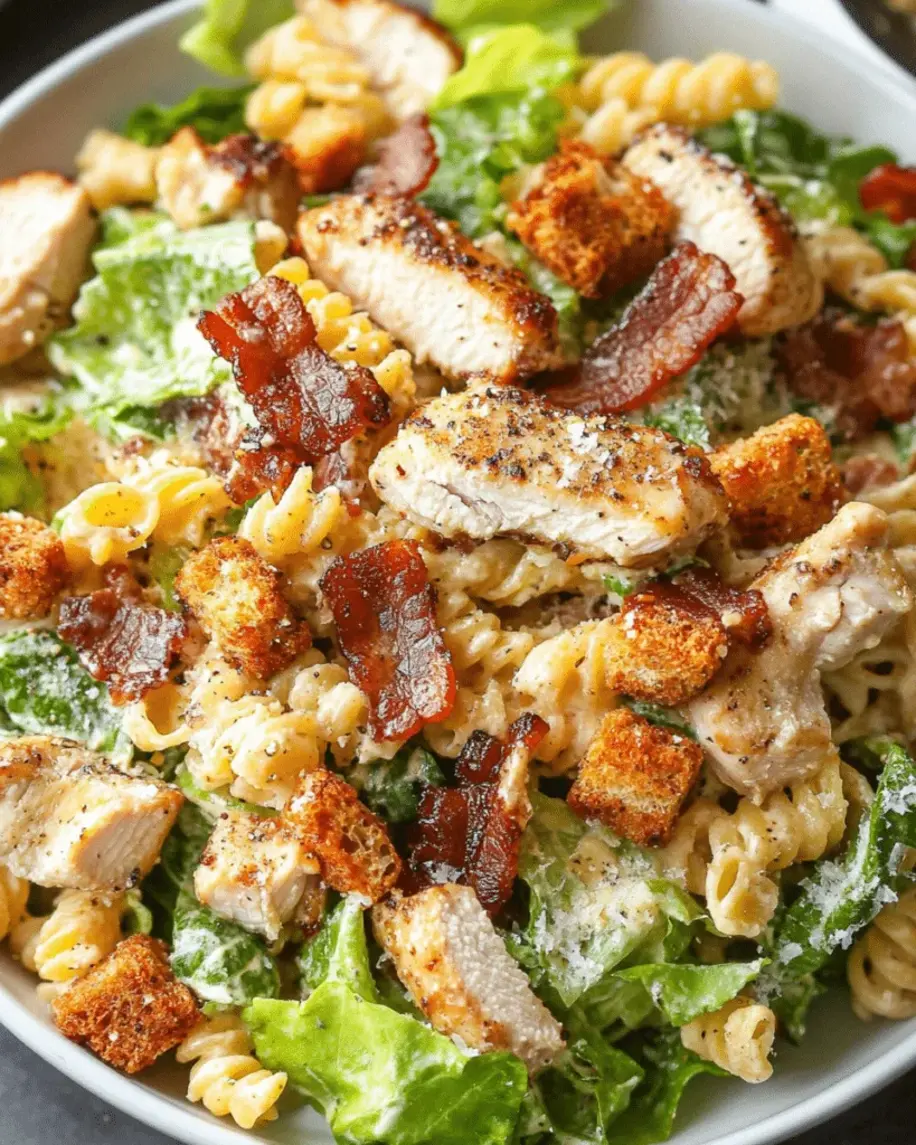
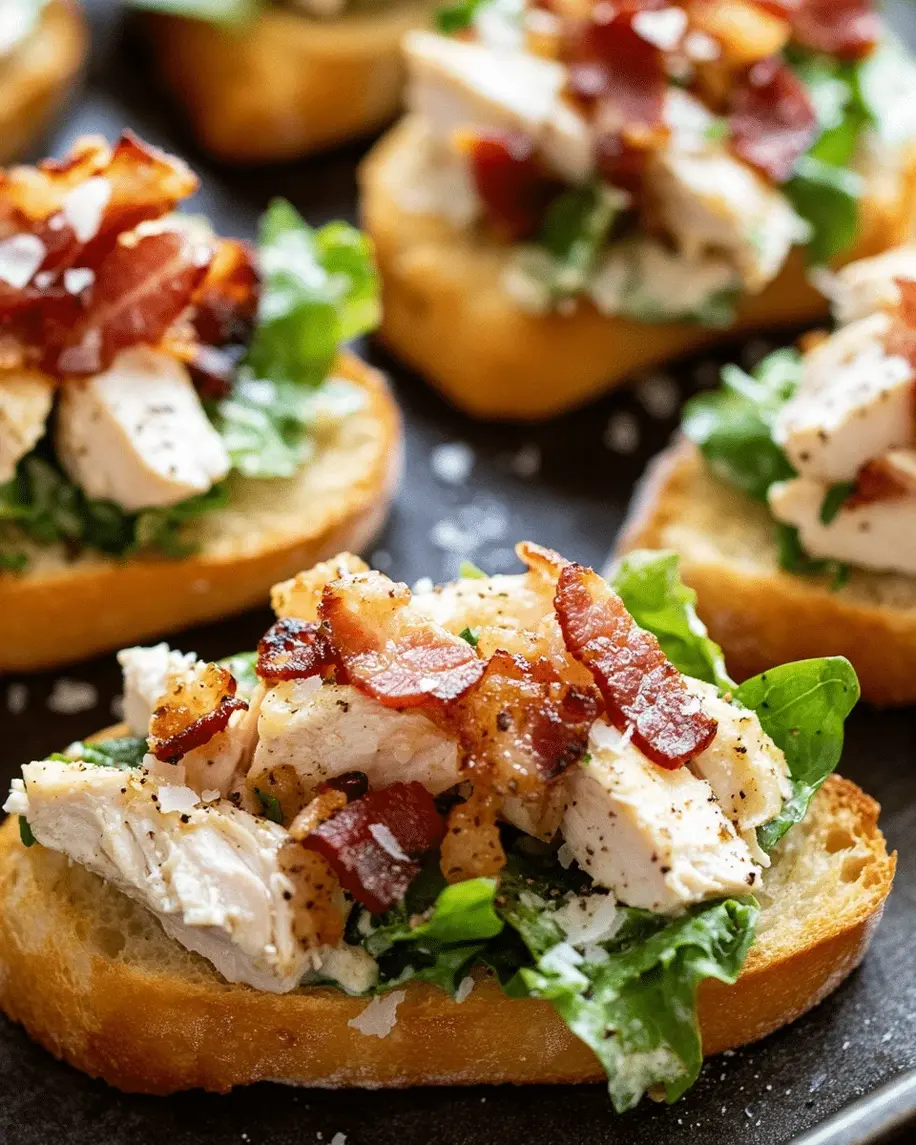
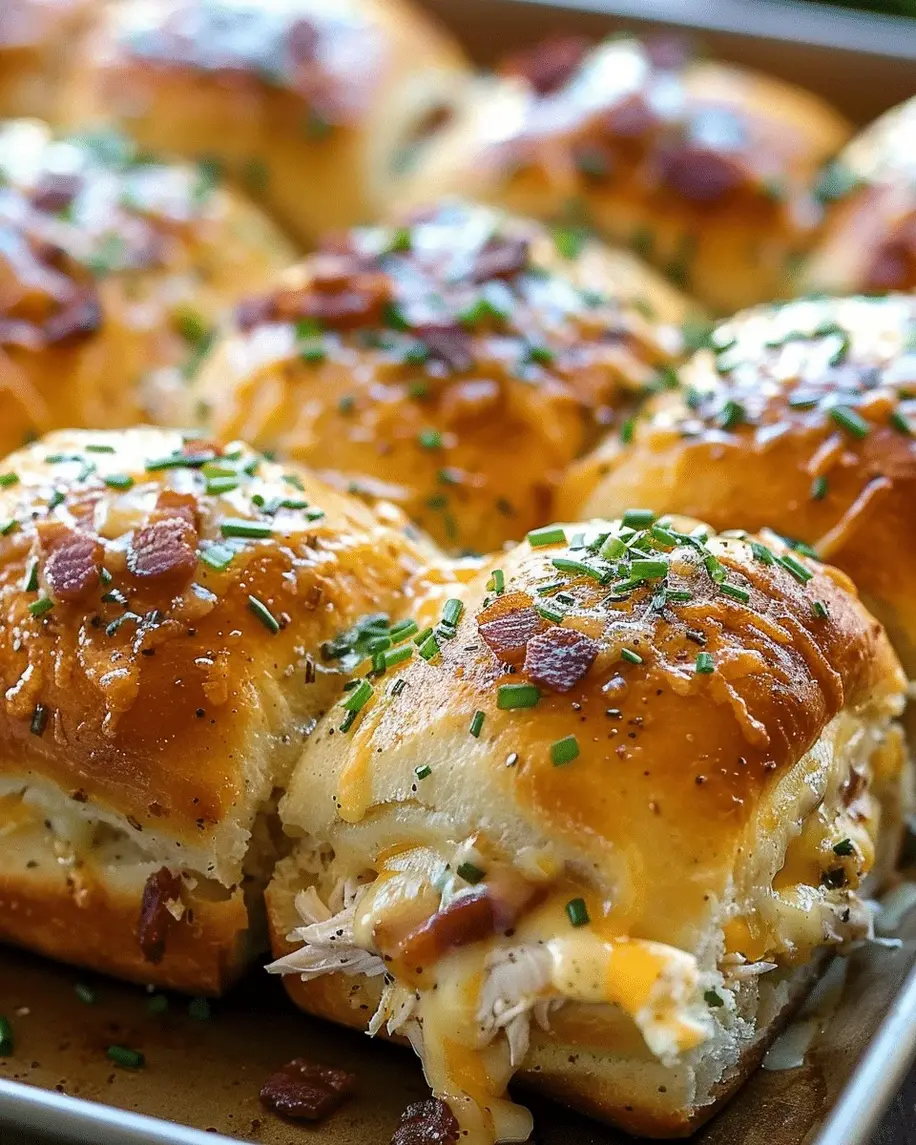
Imagine this: you pull apart a warm, golden biscuit, and a ribbon of melted mozzarella stretches between your fingers. The aroma of crispy bacon and tangy ranch fills your kitchen. Each bite delivers tender shredded chicken, smoky bacon, and that creamy, herby ranch dressing we all crave, all cradled in a soft, buttery roll that’s been baked until the edges are crisp and the center is gooey. The garlic butter brushed on top adds a final layer of savory richness, while the parsley gives it a fresh, bright note. It’s the kind of dish that disappears in minutes — and honestly, that’s the highest compliment any cook can get.

What sets this pull apart rolls recipe apart is how effortlessly it comes together using refrigerated biscuit dough, a trick I picked up from a busy line cook in Paris who swore by smart shortcuts. I’ve tested every ratio: the perfect amount of ranch to keep the biscuits tender without making them soggy, the ideal blend of mozzarella and cheddar for maximum stretch and flavor, and a baking time that gives you a golden crust with a soft, pull-apart center. 💡 mia’s Pro Tip: Tossing the biscuit pieces with the filling while they’re still cold helps the dough hold its shape during baking. Avoid overmixing or you’ll end up with dense rolls — I learned that the hard way during my first NYC dinner party!

Why This Chicken Bacon Ranch Pull-Apart Rolls Recipe Is the Best

The flavor secret here is the balance of smoky, tangy, creamy, and savory. I use a full half-cup of ranch dressing not just as a flavoring, but as a gentle moisture agent that keeps the biscuit pieces tender as they bake. In my Paris training, I learned that a sauce should never overpower — it should weave through a dish like a quiet melody. That’s exactly what the ranch does here. It binds the chicken and bacon without drowning them, while the two cheeses create a golden crust on top and a luscious, stringy interior.

Texture is everything in a pull-apart recipe, and I’ve perfected it through trial and error. By cutting each biscuit into quarters, you get more surface area for the filling to cling to, and the pieces bake into individual nuggets that pull apart effortlessly. The garlic butter drizzle isn’t just for flavor — it helps the tops brown evenly and adds a slight crunch to the edges. The key is baking just long enough that the center is fully cooked and the cheese is bubbly, but not so long that the biscuits dry out. I watch for the edges to turn deep golden and the cheese to brown in spots.

This recipe is foolproof and fast, which is exactly what I need after a long day of recipe testing. Using refrigerated biscuit dough eliminates the need for yeast, proofing, or rolling — you can go from fridge to oven in under 15 minutes. It’s the kind of easy comfort food recipe that works for a busy weeknight dinner, a game-day snack, or a potluck where you want to impress without stress. Even beginner cooks nail this on the first try, and the cleanup is minimal — one bowl, one dish, done.

Chicken Bacon Ranch Pull-Apart Rolls Ingredients

I source my ingredients from different corners of New York City — the chicken from a butcher in Chelsea Market, the bacon from a smokehouse in Brooklyn, and the biscuit dough from my local grocery in the East Village. It reminds me of the spice market in Marrakech, where I’d gather components from different stalls for one dish. Each ingredient here plays a specific role, and choosing quality makes a real difference.

Ingredients List

  • 1 can (16.3 oz) refrigerated biscuit dough (8 count) — the shortcut that makes this so quick
  • 2 cups cooked chicken, shredded — rotisserie chicken works beautifully here
  • 6 slices bacon, cooked and crumbled — for that essential smoky crunch
  • 1/2 cup ranch dressing — use your favorite brand or homemade
  • 1 cup shredded mozzarella cheese — for that irresistible stretch
  • 1/2 cup shredded cheddar cheese — adds sharpness and color
  • 2 tablespoons butter, melted — for brushing on top
  • 1 teaspoon garlic powder — not too strong, just enough to perfume the butter
  • 1 teaspoon dried parsley — for a pop of color and a hint of freshness
  • Optional: chopped green onions for garnish, or a pinch of red pepper flakes for heat

Ingredient Spotlight

Biscuit Dough: This is the backbone of your pull apart rolls recipe. Look for the big, flaky layer variety — they separate into distinct pieces better than the smaller “buttermilk” style. If you can find the southern-style grands, even better. Store-brand works well too, just avoid the extra-flaky version as it can fall apart during mixing.

Ranch Dressing: Ranch is the flavor anchor here. I recommend a thick, creamy ranch — not a thin vinaigrette-style one. Hidden Valley is the classic choice, but a refrigerated brand from the deli section tends to be richer. If you want to go homemade, whisk together buttermilk, mayo, garlic powder, onion powder, dill, and parsley.

Mozzarella and Cheddar: This cheese duo is carefully chosen. Mozzarella brings the stretch and mild creaminess, while cheddar adds a sharp tang that cuts through the richness. Pre-shredded cheese works in a pinch, but freshly shredded melts more smoothly and doesn’t contain anti-caking agents that can affect texture.

Original IngredientBest SubstitutionFlavor / Texture Impact
Refrigerated biscuit doughHomemade buttermilk biscuit dough (from scratch)Flakier and more buttery, but adds 30 min prep time
Ranch dressingGreek yogurt + ranch seasoning mix (1 packet + 1/2 cup yogurt)Tangier, lighter, slightly less creamy but still delicious
Cheddar cheesePepper Jack or Colby JackPepper Jack adds heat; Colby Jack is milder and creamier
Shredded chickenCanned chicken (drained) or pulled porkCanned chicken is softer; pulled pork adds smoky sweetness
BaconTurkey bacon or smoked sausage (crumbled)Turkey bacon is leaner and less smoky; sausage adds a different spice profile

How to Make Chicken Bacon Ranch Pull-Apart Rolls — Step-by-Step

Trust me, if you can shred chicken and open a can of biscuits, you can make these rolls. I’ve walked dozens of friends through this recipe over the phone, and every single one has texted me a photo of their golden, bubbly dish with a string of cheese stretching across the frame. Let’s get started.

Step 1: Preheat and Prepare

Preheat your oven to 375°F (190°C). Grease a 9×13-inch baking dish or a 10-inch cast iron skillet with butter or nonstick spray. I prefer a cast iron skillet because it holds heat evenly and gives the edges a beautiful golden crust. If you’re using a glass baking dish, reduce the temperature by 10°F and keep an eye on the bottom browning.

💡 mia’s Pro Tip: Place the greased dish in the oven while it preheats for 3 minutes. A hot pan helps the bottoms of the rolls start cooking immediately, preventing soggy centers.

Step 2: Cut the Biscuits

Open the can of refrigerated biscuit dough and separate the 8 biscuits. Using a sharp knife or kitchen shears, cut each biscuit into 4 quarters. Place all the pieces into a large bowl. The smaller pieces create more surface area for the filling to cling to, ensuring every bite is packed with flavor.

⚠️ Common Mistake to Avoid: Don’t cut the biscuits too small — 8 pieces each is the sweet spot. If you cut them into 6 or 8 pieces per biscuit, they can dry out during baking.

Step 3: Mix the Filling

In a separate medium bowl, combine the shredded chicken, crumbled bacon, ranch dressing, shredded mozzarella, and shredded cheddar. Stir until everything is evenly coated and the cheeses are distributed throughout. The mixture should be moist but not soupy — if it looks too wet, add an extra tablespoon of cheddar to tighten it up.

💡 mia’s Pro Tip: Use rotisserie chicken and shred it while still warm — it mixes more evenly and absorbs the ranch flavor better. Cold chicken tends to clump.

Step 4: Combine and Coat

Add the chicken mixture to the bowl with the biscuit pieces. Using a rubber spatula or your hands (lightly oiled), gently toss and fold the mixture until every biscuit quarter is coated with the filling. Be careful not to overmix or press down on the biscuits — you want them to stay light and separate.

⚠️ Common Mistake to Avoid: Overmixing will break down the biscuit dough and make the rolls dense and tough. Use a gentle folding motion — just until everything looks evenly distributed.

Step 5: Transfer to Dish

Transfer the coated biscuit mixture into your prepared baking dish or skillet. Spread it into an even layer, making sure the pieces are in a single, even layer with a few gaps for air to circulate. Don’t press them down — let them sit naturally so they bake into individual, pull-apart nuggets.

💡 mia’s Pro Tip: Arrange a few extra pieces of cheese on top before baking — they’ll melt into golden, crispy spots that everyone will fight over.

Step 6: Add the Butter Topping

In a small bowl, mix the melted butter with garlic powder and dried parsley. Drizzle this mixture evenly over the top of the rolls. The butter will soak into the tops and edges, creating a golden, aromatic crust as it bakes. If you like a little heat, add a pinch of red pepper flakes to the butter.

💡 mia’s Pro Tip: Use a pastry brush to spread the butter mixture more evenly. Pouring it all in one spot can leave some rolls dry and others overly greasy.

Step 7: Bake to Perfection

Bake for 20-25 minutes, until the rolls are deep golden brown on top and the filling is bubbly around the edges. The internal temperature should reach at least 165°F if you’re using a thermometer. If the tops are browning too quickly but the center isn’t done, tent loosely with foil for the last 5 minutes.

⚠️ Common Mistake to Avoid: Underbaking is the most common issue — the center may look done but the biscuit dough needs the full time to cook through. If the top is golden but the center is still doughy, give it 3-4 more minutes.

Step 8: Serve and Enjoy

Let the dish rest for 3-5 minutes after pulling it from the oven. This allows the cheese to set slightly so the rolls hold together when you pull them apart. Serve warm, straight from the dish, with extra ranch dressing on the side for dipping. Pull apart and watch the cheese stretch — that’s the moment it all comes together.

⚠️ Common Mistake to Avoid: Don’t skip the rest time — if you serve immediately, the filling will be too runny and the rolls will collapse. Three minutes is all you need.

StepActionDurationKey Visual Cue
1Preheat oven and grease dish5 minButter sizzles when dish is hot
2Cut biscuits into quarters2 min32 even pieces (8 biscuits x 4)
3Mix chicken, bacon, ranch, cheese3 minAll ingredients evenly coated, not soupy
4Toss biscuit pieces with filling2 minEach piece lightly coated, no bare spots
5Transfer to baking dish1 minEven layer, not pressed down
6Drizzle butter topping1 minEven golden sheen on all tops
7Bake20-25 minDeep golden edges, bubbly center, cheese browned in spots
8Rest and serve3-5 min restCheese sets, rolls hold together when pulled

Serving & Presentation

These bacon ranch dinner rolls are best served straight from the oven, still warm and bubbly. I like to bring the cast iron skillet right to the table — it keeps the rolls warm and gives a rustic, communal feel that reminds me of family meals in Morocco where everyone gathered around a single dish. Place a small bowl of extra ranch dressing in the center for dipping, and scatter chopped fresh parsley or green onions over the top for color.

For a complete meal, I pair these rolls with a crisp green salad dressed with a bright lemon vinaigrette — the acidity cuts through the richness of the cheese and bacon. In the summer, I serve them alongside grilled corn on the cob or a simple tomato cucumber salad. In the winter, a bowl of tomato soup or a creamy broccoli cheddar soup makes the perfect companion. This chicken bacon ranch appetizer also shines at parties: arrange the rolls on a large platter with toothpicks and watch them disappear.

When I make these for game day or a casual get-together, I set up a small “topping bar” with extra crumbled bacon, sliced jalapeños, sour cream, and hot sauce so everyone can customize their serving. It’s a fun, interactive way to serve, and it always gets people talking. One of my favorite memories is serving these at a rooftop barbecue in Brooklyn — the smell drifted down the block, and I had neighbors stopping by to ask what I was making.

Pairing TypeSuggestionsWhy It Works
Side DishCrisp green salad with lemon vinaigrette, grilled corn on the cob, roasted broccoliFresh acidity and crunch balance the rich, cheesy rolls
Sauce / DipExtra ranch dressing, chipotle mayo, sour cream with chivesCool, creamy dips complement the warm, savory rolls
BeverageIced tea with lemon, crisp lager beer, sparkling water with limeClean, crisp drinks cut through richness without competing
GarnishFresh parsley, sliced green onions, crumbled bacon bits, red pepper flakesAdds freshness, color, and a final layer of texture

Make-Ahead, Storage & Reheating

Between recipe testing for the blog and running errands across the city, I rely on make-ahead strategies to keep my weeknights manageable. These Chicken Bacon Ranch Pull-Apart Rolls are actually quite forgiving when it comes to prep and storage, which is one of the reasons I make them so often. Whether you’re prepping for a party or just want leftovers for lunch, here’s how to handle them.

MethodContainerDurationReheating Tip
RefrigeratorAirtight container or tightly covered baking dishUp to 4 daysReheat in a 350°F oven for 8-10 min, covered with foil to prevent drying
FreezerFreezer-safe ziplock bag or airtight container (portioned)Up to 2 monthsThaw overnight in the fridge, then reheat at 350°F for 12-15 min
Make-AheadAssemble in baking dish, cover, and refrigerate unbakedUp to 24 hours in advanceAdd 5-7 min to the bake time if baking straight from the fridge

For reheating, I strongly recommend using the oven rather than the microwave. The microwave will make the biscuits soggy and the cheese rubbery, while the oven restores the golden crust and bubbly interior. If you’re in a hurry, an air fryer at 325°F for 4-5 minutes works beautifully — just keep an eye on it so the edges don’t burn. When I pack these for my husband’s lunch, I reheat them in a toaster oven and wrap them in foil with a small vent to let steam escape.

If you plan to make these ahead for a party, assemble everything in the baking dish, cover tightly with plastic wrap or foil, and refrigerate for up to 24 hours. When you’re ready to bake, remove the dish from the fridge while the oven preheats (about 15 minutes), then bake as directed, adding a few extra minutes if needed. The biscuits will still rise beautifully, and the flavors will have melded even more overnight.

Variations & Easy Swaps

One of the things I love most about this easy comfort food recipe is how adaptable it is. Over the years, I’ve tested dozens of variations — some inspired by my Moroccan roots, others by what looks good at the Union Square farmers market on a Saturday morning. Here are my favorite ways to change it up.

VariationKey ChangeBest ForDifficulty Impact
Spicy SouthwestAdd 1 tsp chili powder, 1/2 cup corn, 1/4 cup chopped pickled jalapeñosGame day, partiesEasy (no extra steps)
Mediterranean HerbReplace ranch with 1/2 cup tzatziki, add 1/4 cup chopped sun-dried tomatoes and 1 tsp dried oreganoLighter dinner, brunchEasy
BBQ Pulled ChickenSwap ranch for 1/2 cup BBQ sauce, use smoked gouda instead of cheddarSummer cookouts, potlucksEasy
Vegetarian Mushroom & SpinachReplace chicken with 2 cups sautéed mushrooms + 1 cup wilted spinachMeatless Monday, vegetarian guestsEasy (adds 5 min sauté time)

Spicy Southwest Variation

This is my go-to for Super Bowl parties and game days. I add a teaspoon of chili powder to the chicken mixture, a half-cup of frozen corn (thawed and drained), and a quarter-cup of chopped pickled jalapeños. The corn adds sweetness to balance the heat, and the jalapeños bring a vinegary kick that cuts through the cheese. I top the baked rolls with a drizzle of chipotle crema — just mix sour cream with adobo sauce from a can of chipotles. It’s a crowd-pleaser that disappears minutes after I set it out.

Gluten-Free & Dairy-Free Adaptation

For gluten-free guests, swap the refrigerated biscuit dough for a gluten-free canned biscuit dough (look for brands like Schär or Trader Joe’s gluten-free version). The texture will be slightly more tender and less flaky, but they still pull apart beautifully. For dairy-free, use vegan mozzarella and cheddar shreds — Daiya and Violife melt well — and replace the ranch dressing with a dairy-free ranch (many store-bought brands are accidentally vegan). Use olive oil instead of butter for the topping. I’ve tested this combination for a friend with celiac, and she said it was the best thing I’ve made for her all year.

Moroccan Spiced Twist

This variation is closest to my heart. I replace the ranch dressing with 1/2 cup of labneh (strained yogurt) mixed with a teaspoon of ras el hanout, a half-teaspoon of cumin, and a pinch of cinnamon. The chicken gets tossed with the same spices before mixing. I swap the cheddar for crumbled feta and add 1/4 cup of chopped fresh cilantro. The result is a pull-apart roll that tastes like the spice markets of Marrakech — warm, aromatic, and utterly unique. I serve these with a side of harissa yogurt for dipping. Every time I make this version, I’m transported back to my mother’s kitchen.

Can I use a different type of cheese instead of cheddar in chicken bacon ranch pull-apart rolls?

Absolutely — cheddar can be swapped with many other cheeses. Pepper Jack adds a nice spicy kick, Colby Jack is milder and creamier, and Gouda (smoked or regular) brings a rich, slightly sweet flavor that pairs beautifully with bacon. For a more tangy profile, try crumbled feta or goat cheese, though keep in mind that these will change the texture slightly. If you use a very soft cheese like Brie, reduce the amount to 1/3 cup and skip the cheddar entirely. The key is to keep the total cheese volume the same — about 1.5 cups total — so the rolls stay moist and bind together well.

How do you keep the pull-apart rolls from getting soggy when baking them?

Soggy rolls usually come from too much moisture in the filling or overcrowding in the dish. To avoid this, make sure your chicken is well-drained (pat it dry with paper towels if needed) and your ranch dressing is thick — not watery. Don’t overmix the biscuit pieces with the filling, and spread them in a single, even layer with small gaps for steam to escape. Baking in a cast iron skillet helps because it conducts heat evenly and crisps the bottoms. Also, preheating the greased dish for 3 minutes before adding the mixture gives the bottoms a head start on cooking, which prevents sogginess. If you’re using a glass dish, reduce the temperature by 10°F and bake 2-3 minutes longer.

Can I make chicken bacon ranch pull-apart rolls ahead of time and reheat them?

Yes, you can both assemble them ahead and reheat leftovers. To assemble ahead, prepare the recipe completely up to the point of baking, cover the dish tightly with plastic wrap or foil, and refrigerate for up to 24 hours. When ready to bake, remove from the fridge while the oven preheats and add 5-7 minutes to the bake time. For fully baked leftovers, store in an airtight container in the refrigerator for up to 4 days or freeze for up to 2 months. The best reheating method is in a 350°F oven covered with foil for 8-10 minutes — this restores the crispy edges and bubbly cheese. Avoid the microwave, as it makes the biscuits chewy and the cheese rubbery.

What can I substitute for ranch dressing mix in this recipe?

If you don’t have ranch dressing on hand, there are several great substitutes. For a homemade version, mix 1/2 cup of buttermilk with 1/2 cup of mayonnaise and add 1 teaspoon garlic powder, 1 teaspoon onion powder, 1 teaspoon dried dill, and a pinch of salt and pepper. This creates a creamy, tangy base very close to bottled ranch. Alternatively, use 1/2 cup of Greek yogurt mixed with the same spices for a lighter, tangier option. In a pinch, a combination of 1/2 cup of sour cream and 1 tablespoon of dried onion soup mix works surprisingly well. Just remember that these substitutions will slightly change the flavor profile, so taste and adjust the seasoning before adding to the chicken mixture.

Can I use homemade biscuit dough instead of canned for these pull-apart rolls?

Absolutely, homemade biscuit dough works wonderfully and gives you a flakier, more buttery result. Use your favorite buttermilk biscuit recipe — one that uses cold butter cut into flour and buttermilk as the liquid. Roll the dough to about 1/2-inch thickness and cut into 1-inch squares, then proceed with the recipe as written. Keep in mind that homemade dough may absorb slightly more moisture than canned, so you might want to add an extra tablespoon of ranch dressing or a splash of milk to the filling. The bake time may also increase by 3-5 minutes since homemade biscuits are denser. I’ve made this version many times, and while it takes a bit more effort, the texture is truly outstanding.

Is this recipe suitable for a crowd or party appetizer?

Yes, these Chicken Bacon Ranch Pull-Apart Rolls are perfect for a crowd. The recipe as written serves 8 as a main dish or 12-16 as an appetizer. For a large party, you can easily double the recipe — use two 9×13-inch dishes or a large 11×15-inch roasting pan. I often make a double batch for game days and potlucks, and they’re always the first dish to empty. To keep them warm for serving, place the dish on a warming tray or in a 200°F oven for up to 30 minutes after baking, covered loosely with foil. Set out with small plates, napkins, and extra ranch dressing for dipping. If you’re serving them as an appetizer, cut larger rolls in half to make more manageable portions.

What’s the best way to shred chicken for this recipe?

The best and easiest method is to use a stand mixer with the paddle attachment — add warm cooked chicken breasts or thighs to the bowl and mix on low speed for 30-45 seconds. It shreds evenly without tearing and takes almost no effort. If you don’t have a stand mixer, use two forks to pull the chicken apart while it’s still warm (cold chicken shreds less easily and tends to clump). For the fastest option, pick up a rotisserie chicken from the grocery store — it’s already perfectly cooked and shreds like a dream. Whichever method you choose, aim for small, even shreds so every bite of the pull-apart rolls gets a little bit of chicken.

Can I add vegetables to this recipe for extra nutrition?

Definitely — this recipe welcomes vegetables beautifully. I often add a half-cup of finely chopped spinach (fresh or thawed and squeezed dry), a quarter-cup of diced bell peppers, or a half-cup of sautéed mushrooms. If you want to keep the rolls from becoming watery, make sure to cook off any excess moisture from vegetables before adding them. For example, sauté mushrooms until they release their liquid and it evaporates, and blot spinach dry with paper towels. Roasted red peppers (from a jar, drained and chopped) add sweetness and color without extra moisture. My favorite combination is adding sautéed bell peppers and onions — it gives the rolls a fajita-like vibe that pairs perfectly with the ranch and bacon.

How do I prevent the cheese from burning on top before the rolls are cooked through?

This is a common concern, and the solution is simple. If you notice the top cheese browning too quickly while the center of the rolls still needs more time, tent the dish loosely with aluminum foil for the remaining 5-7 minutes of baking. The foil reflects heat and slows down browning while the interior continues to cook. Another trick is to arrange the cheese slightly lower in the dish — mix most of it into the filling and reserve just a handful to sprinkle on top. This way, the cheese on top is a thin layer that browns lightly without burning, and the cheese inside stays melty and gooey. I also recommend using freshly shredded cheese rather than pre-shredded, as it melts more evenly and is less likely to burn in spots.

Can I use chicken thighs instead of breast for this recipe?

Chicken thighs are an excellent choice for this recipe and many people actually prefer them. Thigh meat is darker, juicier, and more flavorful than breast meat, which means the rolls will be even more moist and savory. The higher fat content in thighs also helps keep the filling tender during baking. The only adjustment you may need to make is to shred the thighs a bit finer, as they can be more fibrous than breast meat. I recommend boneless, skinless thighs for convenience — cook them in a skillet with a little oil and salt until they reach 165°F, then shred while warm. If you’re using leftover roasted chicken thighs, remove the skin before shredding to prevent the filling from becoming greasy.

Share Your Version!

Now it’s your turn to make these Chicken Bacon Ranch Pull-Apart Rolls your own. Whether you stick with the classic version or try one of my variations — especially that Moroccan-spiced twist — I genuinely want to hear how it turns out. Drop a star rating and a comment below to let me and the community know what you thought. Did you use a different cheese? Add extra spice? Make it dairy-free? Your tweaks might inspire someone else’s dinner tonight.

Snap a photo of your golden, pull-apart creation and share it on Instagram or Pinterest with the hashtag #exorecipes — I love scrolling through and seeing your beautiful dishes. Tag me @exorecipes so I can feature your version in my stories. And if you hit a snag or have a question I didn’t answer in the FAQ, just ask in the comments. I check every single one and answer personally. After all, cooking is about connection — between ingredients, techniques, and the people around the table.

From my NYC kitchen to yours — I hope this recipe brings as much warmth to your table as it does to mine. — mia 🧡

📌

Love This Recipe? Save It to Pinterest!

If you enjoyed this Chicken Bacon Ranch Pull-Apart Rolls recipe, don’t let it get lost in your browser tabs! 😄 Pin it now so you can find it again anytime — and explore hundreds more tried-and-tested recipes waiting for you on my Pinterest boards.

👉 Follow mia on Pinterest @chefrecipes2

📌 Pin this recipe · 🔁 Re-pin your favorites · 💬 Tag me when you make it — I love seeing your creations!

“`

Print

clock clock iconcutlery cutlery iconflag flag iconfolder folder iconinstagram instagram iconpinterest pinterest iconfacebook facebook iconprint print iconsquares squares iconheart heart iconheart solid heart solid icon

Chicken Bacon Ranch Pull-Apart Rolls Recipe: A Delicious Twist on Comfort Food

  • Author: Chef Mia
  • Prep Time: 15 minutes
  • Cook Time: 25 minutes
  • Total Time: 40 minutes
  • Yield: 8 servings 1x
  • Method: Appetizer, Main Course
  • Cuisine: American

Description

These Chicken Bacon Ranch Pull-Apart Rolls are a fun and delicious twist on comfort food, packed with savory chicken, crispy bacon, and creamy ranch flavor, all nestled in soft, pull-apart rolls.


Ingredients

Scale
  • 1 can (16.3 oz) refrigerated biscuit dough (8 count)
  • 2 cups cooked chicken, shredded
  • 6 slices bacon, cooked and crumbled
  • 1/2 cup ranch dressing
  • 1 cup shredded mozzarella cheese
  • 1/2 cup shredded cheddar cheese
  • 2 tablespoons butter, melted
  • 1 teaspoon garlic powder
  • 1 teaspoon dried parsley

Instructions

  1. Preheat oven to 375°F (190°C). Grease a 9×13-inch baking dish or a 10-inch cast iron skillet.
  2. Cut each biscuit into quarters and place in a large bowl.
  3. In a separate bowl, combine shredded chicken, crumbled bacon, ranch dressing, mozzarella, and cheddar cheese.
  4. Add the chicken mixture to the biscuit pieces and gently toss to coat evenly.
  5. Transfer the mixture to the prepared baking dish, spreading evenly.
  6. In a small bowl, mix melted butter with garlic powder and parsley. Drizzle over the top.
  7. Bake for 20-25 minutes, until golden brown and bubbly.
  8. Serve warm, pulling apart rolls.

Notes

For extra flavor, try adding chopped green onions or using homemade ranch seasoning. You can also substitute rotisserie chicken for convenience.


Nutrition

  • Calories: 380
  • Sugar: 4g
  • Fat: 24g
  • Carbohydrates: 22g
  • Protein: 18g


Chicken Bacon Ranch Pull-Apart Rolls Recipe: A Delicious Twist on Comfort Food

ph">For more delicious inspiration, follow me on Pinterest!

Creamy Chicken Bacon Ranch Pasta Salad with Crisp Romaine and Croutons – The Only Recipe You’ll Ever Need

⚖️
Difficulty
Easy
⏲️
Prep Time
15 mins
🕒
Cook Time
20 mins
⏱️
Total Time
35 mins
🍽️
Servings
6 servings

Growing up in Morocco, my mother’s kitchen was a symphony of fresh herbs, warm spices, and slow-cooked comfort. When I moved to New York City after my culinary training in Paris, I brought those memories with me — but I also embraced the bold, crowd-pleasing flavors that make American potlucks so wonderful. This Chicken Bacon Ranch Pasta Salad is the perfect example: it’s a dish that feels both familiar and fresh, with a tangy creamy dressing, smoky bacon, and the crisp surprise of romaine and croutons stirred in at the last minute. The first time I made it for a rooftop barbecue in Brooklyn, everyone asked for the recipe — and I knew I had to share it with you.

Imagine this: tender rotini pasta cradling shredded chicken and salty bacon bits, all coated in a velvety ranch-mayo blend that clings to every swirl. Cherry tomatoes add little bursts of sweetness, while sharp cheddar brings a subtle tang. But the real magic happens right before serving — the cool crunch of romaine lettuce and the golden crispy croutons turn this into a pasta salad that’s part salad, part pasta, and 100% irresistible. It’s the kind of dish that disappears from the bowl, and you’ll catch people going back for seconds with a sheepish grin.

As a trained chef, I’m always looking for ways to elevate the classics without making them fussy. My version of this beloved creamy bacon ranch pasta salad uses a simple trick: I chill the cooked pasta thoroughly and toss it with the dressing while it’s still slightly cold, so the flavors lock in and the pasta doesn’t get gummy. I also fold in the lettuce and croutons at the very end so they stay perfectly crisp — no sad, soggy salad here. 💡 mia’s Pro Tip: For the best texture, use homemade ranch dressing with fresh herbs — it’s a game-changer! And avoid the common mistake of over-dressing; you can always add more, but you can’t take it away.

Why This Chicken Bacon Ranch Pasta Salad Recipe Is the Best

The Flavor Secret. My training in Paris taught me the power of balance — and here, it’s about the interplay of creamy, tangy, smoky, and fresh. The ranch dressing forms the backbone, but by adding a touch of mayonnaise, I get a richer, more stable emulsion that coats every piece of pasta without feeling heavy. A pinch of black pepper and a squeeze of lemon (if you’re feeling fancy) brighten everything up. It’s the same principle I use in Moroccan salads: never let one flavor dominate.

Perfected Texture. The biggest hurdle with any pasta salad is mushiness. My technique? Cook the pasta al dente, then rinse it under cold water until it’s completely cool — this stops the cooking immediately and washes off excess starch. Then I toss it with the dressing while the pasta is still cool, so the dressing clings without making the pasta sticky. The romaine and croutons are added at the last possible minute, ensuring every bite has that satisfying crunch. It’s a chef’s trick that makes all the difference.

Foolproof & Fast. This recipe is perfect for beginners and busy cooks alike. You can use leftover rotisserie chicken (a lifesaver on hectic weeknights) or cook chicken breasts in the same pot you used for the pasta — just shred it and you’re done. The entire process, from boiling water to final toss, takes under 35 minutes. And because the base (pasta, chicken, bacon, cheese) can be prepped a day ahead, this creamy bacon ranch pasta salad is my go-to for meal prep and summer gatherings.

Chicken Bacon Ranch Pasta Salad Ingredients

I love sourcing my ingredients from the Union Square Greenmarket in NYC — the crisp romaine there is unbeatable. But any well-stocked grocery store will do. Below is everything you need, plus my notes on the stars of the show.

Ingredients List

  • 8 oz rotini pasta (or similar short pasta)
  • 2 cups cooked chicken, shredded or diced
  • 6 strips bacon, cooked and crumbled
  • 1 cup cherry tomatoes, halved
  • 1/2 cup shredded cheddar cheese
  • 1/2 cup ranch dressing (store-bought or homemade)
  • 1/4 cup mayonnaise
  • 2 cups crisp romaine lettuce, chopped
  • 1 cup croutons
  • Salt and black pepper to taste

Ingredient Spotlight

Ranch Dressing — The soul of this dish. I recommend a full-fat dressing for the best flavor and creamy texture. If you want to make your own, whisk together buttermilk, sour cream, mayo, fresh dill, parsley, garlic powder, onion powder, and a pinch of cayenne. Store-bought works perfectly too — just look for a brand without added sugar.

Bacon — Thick-cut applewood-smoked bacon adds the most flavor and stays crunchy longer. Cook it until deep golden, then drain on paper towels. You can also use turkey bacon for a lighter version, but the smoke flavor won’t be as intense.

Romaine Lettuce — The crunchy hearts are best. Avoid the darker outer leaves which can be bitter. Chop into bite-sized pieces and add only when serving to prevent wilting.

Croutons — Homemade are incredible: cube day-old sourdough, toss with olive oil, garlic powder, and dried oregano, then bake at 375°F until golden. But pantry-style croutons work great — just check they’re not too hard or artificially flavored.

Chicken — Leftover rotisserie chicken is my NYC shortcut. If cooking fresh, season with salt, pepper, and a little garlic powder, then pan-sear and shred. Chicken thighs add more moisture, but breasts are leaner — both work.

Original IngredientBest SubstitutionFlavor / Texture Impact
Ranch dressingButtermilk + sour cream + herbsTangier, lighter, more herb-forward
BaconTurkey bacon or vegetarian baconLess smoky, lighter, slightly chewier
RomaineIceberg lettuce or chopped kaleIceberg: very crisp, neutral; kale: heartier, more earthy
Cheddar cheeseMonterey Jack or Pepper JackMonterey: mild, creamy; Pepper Jack: spicy kick
Rotini pastaFusilli, bowtie (farfalle), or penneSimilar shape; farfalle holds dressing well

How to Make Chicken Bacon Ranch Pasta Salad — Step-by-Step

Follow these simple steps, and you’ll have a crowd-pleasing pasta salad that stays crisp and creamy every time. I’ve added my chef’s insights to help you avoid common pitfalls.

Step 1: Cook and Cool the Pasta

Bring a large pot of salted water to a rolling boil. Add 8 oz rotini pasta and cook according to package directions until al dente — usually about 8–10 minutes. Drain immediately in a colander and rinse under cold running water for 30–60 seconds, stirring with your hand, until the pasta is cool to the touch. Shake off excess water and set aside.

💡 mia’s Pro Tip: Don’t overcook the pasta! Al dente means it should still have a slight bite. Overcooked pasta will turn mushy when tossed with dressing. Rinsing not only cools it but also removes surface starch, preventing clumping.

Step 2: Prep the Bacon and Chicken

While the pasta cooks, cook 6 strips of bacon in a large skillet over medium heat until crisp, about 6–8 minutes. Transfer to paper towels to drain, then crumble into pieces. For the chicken, if you don’t have leftovers, season two boneless, skinless chicken breasts with salt and pepper, then cook in the same skillet (after removing bacon) for 5–6 minutes per side until golden and cooked through. Let rest 5 minutes, then shred or dice.

⚠️ Common Mistake to Avoid: Don’t overcrowd the pan when cooking bacon — it will steam instead of crisp. Cook in batches if needed.

Step 3: Combine Base Ingredients

In a very large mixing bowl, combine the cooled pasta, shredded chicken, crumbled bacon, halved cherry tomatoes, and shredded cheddar cheese. Toss gently with a wooden spoon or spatula to distribute everything evenly.

💡 mia’s Pro Tip: Make sure all ingredients are at room temperature or slightly cool — adding warm chicken or bacon will make the dressing separate and the pasta sink.

Step 4: Make and Add the Dressing

In a small bowl, whisk together 1/2 cup ranch dressing and 1/4 cup mayonnaise until smooth. Pour the dressing over the pasta mixture and toss until every piece is well coated. Season with salt and black pepper to taste — start with 1/4 teaspoon each and adjust.

⚠️ Common Mistake to Avoid: Adding all the dressing at once if you’re unsure — you can always add more. An over-dressed pasta salad becomes greasy and loses its fresh appeal. Reserve a couple of tablespoons to add before serving if needed.

Step 5: Fold in Romaine and Croutons — At Serve Time

Just before you’re ready to serve, gently fold in 2 cups of chopped romaine lettuce and 1 cup of croutons. You can either mix them through or, for the prettiest presentation, add them on top as a crunchy garnish. Serve immediately.

💡 mia’s Pro Tip: If you’re serving later, keep the romaine and croutons separate and add them at the last moment. Otherwise, the lettuce will wilt and the croutons will soften — which defeats the whole point of this fresh, crunchy salad.

StepActionDurationKey Visual Cue
1Cook & cool pasta10–12 minPasta tender but firm, cool to the touch
2Prep bacon & chicken12–15 minBacon deep golden, chicken no longer pink
3Combine base ingredients2 minEven distribution of chicken, bacon, tomatoes, cheese
4Make dressing & toss3 minAll pasta and pieces creamy-coated
5Fold in romaine & croutons1 minBright green lettuce and golden croutons visible

Serving & Presentation

This chicken bacon ranch pasta salad is incredibly versatile. Serve it as a main course for a light summer dinner, or as a side dish at your next BBQ, picnic, or potluck. I love piling it into a big wooden bowl (the one I brought from Marrakech) and topping it with a few extra croutons and a sprinkle of fresh parsley or chives for color.

In my NYC kitchen, I often make this for Sunday meal prep. I portion it into containers (without the lettuce and croutons) so I can add the fresh elements each morning. It’s a lifesaver on busy weekday mornings — just grab a container, toss in some crunchy romaine and a handful of croutons, and lunch is ready.

Pair it with a simple side like grilled corn, garlic bread, or a chilled cucumber soup. For drinks, a crisp Sauvignon Blanc or a cold IPA cuts through the creaminess beautifully.

Pairing TypeSuggestionsWhy It Works
Side DishGrilled corn on the cob, garlic bread, coleslawAdds sweetness, crunch, and acidity; balances creamy richness
Sauce / DipExtra ranch dressing, blue cheese dip, hot sauceAmplifies creamy/tangy flavors; hot sauce adds heat
BeverageSauvignon Blanc, IPA, lemonadeWine’s acidity cuts cream; IPA’s bitterness contrasts; lemonade refreshes
GarnishFresh parsley, chives, extra cracked black pepperAdds color, freshness, and a subtle herbaceous note

Make-Ahead, Storage & Reheating

One of the best things about this ranch pasta salad with romaine is how well it keeps — as long as you follow a few smart storage rules. I often prep the base on Sunday for busy NYC weeks. Here’s my tested system:

MethodContainerDurationReheating Tip
RefrigeratorAirtight container (without lettuce/croutons)Up to 2 daysNo reheating needed; serve cold. Add lettuce & croutons fresh.
FreezerFreezer-safe container (without dressing, lettuce, or croutons)Up to 2 monthsThaw overnight in fridge, then toss with fresh dressing and add-ons.
Make-AheadLarge bowl covered with plastic wrapUp to 1 day in advanceKeep dressing separate, add romaine and croutons right before serving.

💡 mia’s Pro Tip: If you’re planning to make this ahead for a party, prep the pasta-chicken-bacon-cheese mixture and the dressing separately. Refrigerate both. When ready to serve, toss together, then add the romaine and croutons. The salad will taste freshly made, and the crunch will be perfect.

This salad is served cold — don’t reheat it! If you have leftovers, just enjoy them straight from the fridge. The flavors actually meld overnight, and it becomes even more delicious (minus the initial crunch, which is why you always add lettuce and croutons fresh).

Variations & Easy Swaps

I love experimenting with this recipe — it’s a canvas for whatever you have in the fridge. Here are three variations I’ve tested in my own kitchen:

VariationKey ChangeBest ForDifficulty Impact
Southwest RanchAdd black beans, corn, diced red onion, and a squeeze of limeSummer BBQs, fiesta themeEasy
Greek-InspiredSwap ranch for Greek yogurt + lemon + dill; add kalamata olives and cucumberLighter, brunch, Mediterranean dietEasy (no bacon, less fat)
Spicy BuffaloToss chicken in buffalo sauce, use blue cheese dressing instead of ranch, add sliced celeryGame day, spicy food loversEasy

Southwest Ranch Variation

Inspired by the bold flavors of the American Southwest, I stir in 1 cup of drained canned black beans, 1 cup of frozen (thawed) corn, 1/2 cup diced red onion, and the juice of half a lime. The lime zest and cilantro add a fresh lift. This version is even more filling — perfect for a vegetarian main if you skip the bacon.

Gluten-Free / Dairy-Free Variation

For a gluten-free version, use your favorite gluten-free pasta (I love brown rice rotini) and certified gluten-free croutons. To make it dairy-free, swap the ranch dressing with a dairy-free ranch (many brands now offer almond- or cashew-based versions), use vegan mayonnaise, and omit or replace the cheddar cheese with a plant-based shred. The texture remains creamy and satisfying — I’ve tested this with my lactose-intolerant friends and they couldn’t tell the difference.

Seasonal Flavor Twist: Autumn Apple Ranch

When fall hits the Union Square market, I add 1 diced crisp apple (like Honeycrisp) and 1/4 cup dried cranberries. The sweetness and tartness play beautifully with the smoky bacon and creamy ranch. A pinch of cinnamon in the dressing (yes, trust me) adds a warm undertone. This is my favorite way to transition the salad from summer to cooler months.

Can I make Chicken Bacon Ranch Pasta Salad ahead of time without the lettuce getting soggy?

Absolutely — and I highly recommend doing it! The key is to keep the romaine and croutons separate until you’re ready to serve. You can prepare the pasta, chicken, bacon, tomatoes, cheese, and dressing mixture up to two days in advance. Store it all in an airtight container in the fridge. When you’re ready to eat, simply fold in the chopped romaine and croutons. That way, every bite stays wonderfully crisp. I do this all the time for busy weekdays and summer parties — it’s my go-to make-ahead hack.

What can I substitute for ranch dressing in this pasta salad?

If you don’t have ranch dressing on hand, you can make a quick homemade version by whisking together 1/2 cup buttermilk, 1/4 cup sour cream, 1/4 cup mayonnaise, and a teaspoon each of dried dill, parsley, garlic powder, and onion powder. For a dairy-free option, use a plant-based mayonnaise and unsweetened almond milk with a splash of apple cider vinegar. Another delicious swap is a creamy Caesar dressing (it adds a garlicky, cheesy twist) or even a blue cheese dressing for a bolder flavor. Each substitution will change the character of the salad, but all work beautifully.

How long does it take to cook the pasta and cool it for this recipe?

From boiling water to fully cooled pasta, expect about 12–15 minutes. Bring a large pot of salted water to a rolling boil (about 5 minutes), then cook the rotini for 8–10 minutes until al dente. Immediately drain and rinse under cold running water for at least 30 seconds, stirring to cool the pasta evenly. I like to shake the colander well to remove excess water. This quick chilling stops the cooking process and removes excess starch, so the pasta won’t clump. You can also spread the pasta on a baking sheet in the fridge for 5 minutes if you’re in a rush.

What type of bacon works best for this Chicken Bacon Ranch Pasta Salad?

I recommend thick-cut, applewood-smoked bacon for the best flavor and texture. It stays crispy longer after being crumbled into the salad, and its smoky sweetness complements the ranch dressing beautifully. Regular-cut bacon works too, but it tends to crumble finer and may not hold its crunch as well. You can also use turkey bacon or vegetarian bacon for a lighter version, though the smoky flavor will be less pronounced. Whichever you choose, be sure to cook it until deep golden and drain it well on paper towels before crumbling.

Can I use a different pasta shape for this salad?

Absolutely — any short pasta shape works well. My top picks are fusilli (for its spiral crevices that hold dressing), farfalle (bowties), or penne. The key is to choose a shape that can support the creamy dressing and mix-ins. Avoid long strands like spaghetti or linguine, as they don’t integrate as easily and become clumpy. If you’re using a shape with a shorter cook time, be extra careful not to overcook — al dente is non-negotiable for a great pasta salad.

Is this salad served hot or cold?

This chicken bacon ranch pasta salad is served cold — right out of the refrigerator. The creamy dressing thickens slightly as it chills, making it even more luscious. However, if you prefer a room-temperature salad (say, for a picnic), you can let it sit out for 15–20 minutes before serving. Just remember: never reheat this salad, as the pasta will become mushy and the lettuce will wilt. Enjoy it chilled for the best texture and flavor.

Can I add other vegetables to this pasta salad?

Yes! This recipe is very adaptable. Some of my favorite additions include diced red bell pepper (for sweetness and color), thinly sliced red onion (for a sharp bite), chopped cucumber (keep it crunchy by adding at the end), and fresh corn kernels (raw or grilled). For a touch of Moroccan influence, I sometimes add a handful of fresh mint or cilantro — it’s a nod to my childhood and it pairs surprisingly well with ranch. Just keep in mind that watery vegetables (like cucumber) should be added right before serving to avoid diluting the dressing.

How can I make this recipe healthier?

There are several easy swaps to lighten up this chicken bacon ranch pasta salad without sacrificing flavor. Use low-fat or Greek yogurt-based ranch dressing (or make your own with Greek yogurt), reduce the mayonnaise to 2 tablespoons, and choose turkey bacon or chicken bacon. You can also increase the ratio of vegetables to pasta — double the romaine, tomatoes, and add extra chopped celery or bell peppers. For the pasta, try a legume-based or whole wheat pasta for more fiber. The salad will still be incredibly satisfying and creamy.

Share Your Version!

I hope this Creamy Chicken Bacon Ranch Pasta Salad becomes a staple in your kitchen the way it has in mine. Whether you’re serving it for a family dinner, a weekend picnic, or a quick make-ahead lunch, I’d love to see how it turns out for you.

Drop a star rating and a comment below — tell me what variation you tried or any ingredient swaps you loved. Snap a photo and share it on Instagram or Pinterest with the tag @exorecipes — I personally browse through every tag and appreciate your support! And if there’s one question you want me to answer about this recipe, ask away in the comments — I read every single one.

From my NYC kitchen to yours — I hope this recipe brings as much warmth to your table as it does to mine. — mia 🧡

📌

Love This Recipe? Save It to Pinterest!

If you enjoyed this Chicken Bacon Ranch Pasta Salad recipe, don’t let it get lost in your browser tabs! 😄 Pin it now so you can find it again anytime — and explore hundreds more tried-and-tested recipes waiting for you on my Pinterest boards.

👉 Follow mia on Pinterest @exorecipe

📌 Pin this recipe · 🔁 Re-pin your favorites · 💬 Tag me when you make it — I love seeing your creations!

Print

clock clock iconcutlery cutlery iconflag flag iconfolder folder iconinstagram instagram iconpinterest pinterest iconfacebook facebook iconprint print iconsquares squares iconheart heart iconheart solid heart solid icon

Chicken Bacon Ranch Pasta Salad with Crisp Romaine and Croutons

  • Author: Chef Mia
  • Prep Time: 15 minutes
  • Cook Time: 20 minutes
  • Total Time: 35 minutes
  • Yield: 6 servings 1x
  • Method: Main Course or Side Dish
  • Cuisine: American

Description

This Chicken Bacon Ranch Pasta Salad is a hearty, creamy, and flavorful dish with crisp romaine, crunchy croutons, tender chicken, and smoky bacon, all tossed in a tangy ranch dressing.


Ingredients

Scale
  • 8 oz rotini pasta (or similar short pasta)
  • 2 cups cooked chicken, shredded or diced
  • 6 strips bacon, cooked and crumbled
  • 1 cup cherry tomatoes, halved
  • 1/2 cup shredded cheddar cheese
  • 1/2 cup ranch dressing (store-bought or homemade)
  • 1/4 cup mayonnaise
  • 2 cups crisp romaine lettuce, chopped
  • 1 cup croutons
  • Salt and black pepper to taste

Instructions

  1. Bring a large pot of salted water to a boil. Cook pasta according to package directions until al dente. Drain and rinse under cold water to cool.
  2. In a large bowl, combine the cooled pasta, shredded chicken, crumbled bacon, cherry tomatoes, and shredded cheddar cheese.
  3. In a small bowl, whisk together the ranch dressing and mayonnaise. Pour over the pasta mixture and toss until well coated.
  4. Season with salt and black pepper to taste.
  5. Just before serving, gently fold in the chopped romaine lettuce and croutons, or serve them on top for extra crunch.

Notes

For a lighter version, use low-fat ranch dressing and mayonnaise. Add diced avocado or chopped red onion for extra flavor and texture. Store leftovers in the refrigerator for up to 2 days, but add lettuce and croutons only when serving to maintain crispness.


Nutrition

  • Calories: 480 kcal
  • Sugar: 3 g
  • Fat: 28 g
  • Carbohydrates: 32 g
  • Protein: 24 g


Chicken Bacon Ranch Pasta Salad with Crisp Romaine and Croutons

Chicken Bacon Ranch Casserole: Your Ultimate Comfort Food Fix

⚖️
Difficulty
Easy
⏲️
Prep Time
15 mins
🕒
Cook Time
30 mins
⏱️
Total Time
45 mins
🍽️
Servings
6 servings

I still remember the first time I made a chicken bacon ranch casserole for a group of friends in my tiny New York kitchen. The aroma of bacon and cheese drifted out the window, and within minutes neighbors were peeking in. That’s the power of truly creamy chicken casserole — it brings people together like nothing else. Growing up in Morocco, my mother would layer fragrant spices and tender meats, but this American classic became my NYC comfort blanket. My version blends my Parisian training (hello, perfect roux-free creamy sauce) with the bold, familiar flavors we all crave. This chicken bacon ranch recipe is my ultimate easy casserole dinner — and it will become yours too.

Picture this: fork-tender chicken, smoky bacon bits, a velvety ranch-infused sauce clinging to every noodle, all topped with a bubbly golden crown of cheddar. The first bite is pure richness — creamy yet bright from the ranch seasoning, salty crunch from the bacon, and a satisfying chew from the egg noodles. The casserole bakes until it’s bubbling at the edges and the cheese forms a slightly crisp crust. It’s the kind of dish that fills your kitchen with a golden, buttery scent that says “home.” I love adding a sprinkle of fresh parsley at the end — it adds a pop of green that reminds me of the herb gardens in Paris.

I’ve tested this recipe at least a dozen times to get it just right. The secret is using a combination of cream of chicken soup and sour cream for an ultra-creamy base without any lumps, and baking long enough for the flavors to meld without drying out. I’ll show you exactly how to keep the bacon crispy (yes, it’s possible!) and how to adjust the richness to your liking. One common mistake is overbaking — I’ll give you the perfect visual cue to pull it out at the peak of deliciousness.

Why This Chicken Bacon Ranch Casserole Recipe Is the Best

The Flavor Secret: My twist? I add a splash of milk to the sauce — it sounds simple, but it prevents the casserole from turning into a heavy paste. The ranch seasoning blends with the sour cream to create a tangy-savory depth that’s not overpowering. I learned this balancing trick during my pastry days in Paris: even savory dishes benefit from a touch of dairy to smooth out bold flavors. The bacon is cooked until super crispy and stirred in after the casserole bakes, so every bite retains that irresistible crunch.

Perfected Texture: Overcooked noodles are the enemy of any comfort food casserole. I undercook the egg noodles by one minute — they finish cooking in the oven and stay tender but not mushy. The sauce clings to each strand perfectly. I also drain the noodles very well (sometimes even pat them with a paper towel) to avoid diluting the creamy coating.

Foolproof & Fast: This recipe comes together in 15 minutes of hands-on time. If you have leftover chicken or a rotisserie bird, you’re more than halfway there. It’s a lifesaver on busy weeknights when you need an easy casserole dinner that delivers big flavor with minimal fuss. Plus, it’s a crowd-pleaser for potlucks and family dinners.

Chicken Bacon Ranch Casserole Ingredients

I always grab my ingredients from the Union Square farmers market when I can — the quality shines through. For the ranch mix, I prefer the organic packets found at most NYC bodegas; they have a cleaner salt profile. The cheddar? I spend a little extra on sharp Vermont cheddar — it melts like a dream.

Ingredients List

  • 2 cups cooked chicken, shredded or cubed
  • 6 slices bacon, cooked and crumbled
  • 1 (10.5 oz) can cream of chicken soup
  • 1 cup sour cream
  • 1 packet (1 oz) ranch dressing mix
  • 2 cups shredded cheddar cheese, divided
  • 1 (12 oz) package egg noodles, cooked and drained
  • 1/2 cup milk
  • Salt and pepper to taste
  • Fresh parsley for garnish (optional)

Ingredient Spotlight

Chicken: The backbone of this dish. I use shredded rotisserie chicken for convenience, but poached breasts work too. Poach gently in salted water until just cooked — about 15 minutes — then shred. You want moist, not overdone protein.

Bacon: Smoke matters. Thick-cut bacon provides more robust flavor and stays crunchier. Always cook bacon until deep golden — not just limp — then crumble. Reserve a tablespoon of drippings to sauté veggies if you’re adding them (like broccoli).

Ranch Dressing Mix: This is the magic dust. Stick with the dry packet, not bottled dressing. The concentrated herbs (dill, parsley, onion, garlic) give the casserole that unmistakable ranch tang. If you’re sensitive to sodium, use a low-sodium version or make your own blend.

Cheddar Cheese: Sharp cheddar adds boldness without being greasy. Pre-shredded cheese contains anti-caking agents that can make the sauce grainy — I highly recommend shredding a block yourself. It melts into a silky blanket.

Original IngredientBest SubstitutionFlavor / Texture Impact
Cream of chicken soupHomemade béchamel + chicken bouillonLighter, less salty; still creamy
Sour creamPlain Greek yogurt (full fat)Slightly tangier, still creamy; may curdle if overheated
Cheddar cheeseMonterey Jack, Colby, or MozzarellaMilder flavor, great melt — use 1.5 cups for same richness
Egg noodlesPenne, fusilli, or gluten-free pastaHearty texture; adjust bake time if pasta is larger

How to Make Chicken Bacon Ranch Casserole — Step-by-Step

This chicken bacon ranch casserole comes together in six simple steps. Follow these and you’ll have a perfect golden dish every time.

Step 1: Preheat and Grease

Preheat your oven to 350°F (175°C). Grease a 9×13-inch baking dish with butter or nonstick spray. Make sure every nook is coated — this prevents sticking and makes cleanup a breeze.

💡 mia’s Pro Tip: Use a glass or ceramic dish for even heat distribution. Metal pans can cause the edges to brown too quickly.

Step 2: Make the Creamy Sauce

In a large bowl, combine the cream of chicken soup, sour cream, ranch dressing mix, milk, and 1 cup of shredded cheddar cheese. Whisk until smooth and fully blended. The mixture should be thick but pourable — if too thick, add a splash more milk.

⚠️ Common Mistake to Avoid: Don’t use low-fat sour cream or soup — they have stabilizers that can make the sauce watery or grainy. Full-fat gives the best texture.

Step 3: Combine Chicken, Bacon, and Noodles

Add the cooked chicken, crumbled bacon (reserve a tablespoon for garnish if desired), and cooked egg noodles to the bowl. Gently fold with a rubber spatula until every noodle is coated and the chicken and bacon are evenly distributed.

💡 mia’s Pro Tip: Undercook the noodles by 1 minute less than package directions. They’ll finish cooking in the oven and stay firm.

Step 4: Assemble and Top with Cheese

Transfer the mixture to the prepared baking dish and spread into an even layer. Sprinkle the remaining 1 cup of shredded cheddar cheese evenly over the top. For an extra golden crust, you can add a light dusting of paprika or black pepper.

⚠️ Common Mistake to Avoid: Don’t press down the mixture too hard — you want some air pockets for even baking and a lighter texture.

Step 5: Bake

Place the dish on the middle rack and bake for 25–30 minutes, or until bubbly around the edges and the cheese topping is melted and lightly golden. The internal temperature should reach 165°F if using leftover chicken.

💡 mia’s Pro Tip: If the top starts browning too quickly, loosely cover with foil for the last 10 minutes. For a crunchier top, switch to broil for the last 2 minutes — watch closely.

Step 6: Rest and Garnish

Remove from the oven and let rest for 5 minutes. This allows the sauce to set so slices hold together. Garnish with fresh parsley and the reserved crispy bacon if you set some aside. Serve warm.

⚠️ Common Mistake to Avoid: Cutting into the casserole immediately can make it soupy. Patience pays off — 5 minutes is all it takes.

StepActionDurationKey Visual Cue
1Preheat oven & grease dish5 minOven ready, dish coated evenly
2Make the creamy sauce3 minSmooth, no lumps
3Combine all ingredients5 minNoodles fully coated
4Assemble & top with cheese3 minEven layer of cheese
5Bake25–30 minBubbly edges, golden top
6Rest & garnish5 minSet, not runny

Serving & Presentation

I love serving this chicken bacon ranch casserole straight from the baking dish — it’s rustic and inviting. Scoop generous portions onto warm plates and finish with a sprinkle of fresh parsley and a few extra crumbles of bacon. A side of steamed green beans or a crisp garden salad with vinaigrette cuts through the richness beautifully. For a true NYC twist, serve with garlic bread on the side — the crunch is divine.

When I’m feeling nostalgic for my Parisian café days, I add a tiny handful of fresh arugula on top just before serving — its peppery bite lifts the whole dish. And if I’m hosting, I’ll set out small bowls of hot sauce and extra ranch dressing for people to customize. This casserole also works amazingly as a leftover lunch — I’ve been known to sneak a cold spoonful straight from the fridge!

Pairing TypeSuggestionsWhy It Works
Side DishSteamed broccoli, roasted asparagus, Caesar saladFresh, green flavors balance the creamy richness
Sauce / DipExtra ranch dressing, sriracha mayo, blue cheese dipAdds tangy heat or extra creaminess
BeverageIced tea, lemonade, crisp lager, or Sauvignon BlancAcidity and fizz cut through the fat
GarnishFresh parsley, chopped chives, crispy bacon bits, paprika dustAdds color, freshness, and extra crunch

Make-Ahead, Storage & Reheating

I often prep this chicken bacon ranch casserole on a Sunday afternoon for busy workweeks. Assemble everything (minus the top cheese) in the baking dish, cover, and refrigerate for up to 24 hours. When ready to bake, add the remaining cheese and bake as directed — you may need an extra 5–10 minutes if starting cold. For leftovers, this casserole gets even better as the flavors meld.

MethodContainerDurationReheating Tip
RefrigeratorAirtight container or covered dish3–4 daysReheat in oven at 350°F for 15 min, or microwave in 30-sec bursts, stirring midway
FreezerFreezer-safe container or zip-top bag (remove as much air as possible)2 monthsThaw overnight in fridge, then reheat covered in oven at 350°F for 20 min, uncover last 5 min
Make-AheadAssembled in dish (without top cheese), coveredUp to 24 hours in fridgeAdd cheese just before baking; add 5–10 min to total bake time

When reheating in the microwave, cover the dish with a damp paper towel to prevent the noodles from drying out. For that fresh-from-the-oven texture, I always prefer the oven or toaster oven. If freezing, I portion it into individual containers so I can grab a single serving for lunch.

Variations & Easy Swaps

VariationKey ChangeBest ForDifficulty Impact
Spicy SouthwestAdd 1 diced jalapeño, 1 tsp cumin, use pepper jack cheeseThose who love heat and smoky flavorsEasy (no extra steps)
Gluten-FreeUse gluten-free pasta and cream of chicken soup (certified GF)Celiac or gluten sensitivityEasy (simple swap)
Veggie-PackedAdd 1 cup steamed broccoli florets and 1/2 cup diced bell peppersExtra nutrition and colorEasy (add with noodles)

Spicy Southwest Variation

I love adding a little Moroccan-inspired warmth to this casserole by stirring in a diced jalapeño (seeds removed for less heat, or kept for a real kick) and a teaspoon of ground cumin. Swap the cheddar for pepper jack cheese. The result is a smoky, spicy twist that pairs perfectly with a cold beer. My friends in NYC always request this version for game day.

Gluten-Free / Dairy-Free Variation

To make this chicken bacon ranch casserole gluten-free, use a certified gluten-free cream of chicken soup and your favorite gluten-free pasta (I like brown rice fusilli — cook it al dente). For dairy-free, substitute the sour cream with a plain unsweetened coconut yogurt or cashew cream, and use a dairy-free shredded cheese (violife or miyoko’s work well). The texture will be slightly less creamy but still delicious.

Veggie-Packed Variation

A handful of steamed broccoli or frozen peas adds color and nutrients without overpowering the flavor. I often toss in whatever I find at the Union Square greenmarket — roasted zucchini or sautéed mushrooms also work beautifully. This is my go-to when I want to sneak extra vegetables into a comforting meal. Simply fold them in with the noodles.

Can I use a different type of cheese instead of cheddar in Chicken Bacon Ranch Casserole?

Absolutely! While sharp cheddar is my top choice for its bold flavor and excellent melt, you can swap it for Monterey Jack, Colby, or a mix of mozzarella and provolone. For a smoky twist, try Gouda or smoked cheddar. Just keep in mind that softer cheeses like mozzarella may make the top a bit stringier, while aged cheeses like Parmesan can be saltier — adjust your ranch seasoning accordingly. I recommend sticking with a cheese that melts well to keep that creamy texture.

How do I keep the bacon crispy in Chicken Bacon Ranch Casserole?

The key to keeping bacon crispy is to add it in two stages. First, cook the bacon until very crisp and crumble it. Mix about two-thirds into the casserole before baking, and reserve the remaining third to sprinkle on top after it comes out of the oven. The reserved bacon stays crunchy because it doesn’t get baked into the moist sauce. Also, make sure to drain the bacon well on paper towels before crumbling — any extra grease will soften it later.

What can I substitute for cream of chicken soup in this casserole?

You can make a quick homemade substitute by melting 2 tablespoons of butter, whisking in 2 tablespoons of flour, then gradually adding 1 cup of chicken broth and 1/2 cup of milk. Cook until thickened, then season with salt, pepper, and a pinch of garlic powder. This gives you more control over salt and consistency. Alternatively, use cream of mushroom soup or a can of condensed chicken broth thickened with a cornstarch slurry (1 tbsp cornstarch + 2 tbsp cold water).

How long should I bake Chicken Bacon Ranch Casserole at 350°F?

Bake the casserole for 25 to 30 minutes in a preheated 350°F oven. The exact time depends on the depth of your dish and whether you’re using room-temperature ingredients or starting from cold. You’ll know it’s done when the edges are bubbly, the cheese on top is melted and golden, and the center is hot throughout — a quick poke with a spoon should show steam rising. If you assembled the casserole ahead and stored it in the fridge, add 5–10 extra minutes.

Can I make Chicken Bacon Ranch Casserole without sour cream?

Yes, you can replace sour cream with plain Greek yogurt (full-fat yields the best texture) or with a mixture of cream cheese thinned with a little milk. Greek yogurt will give a slightly tangier flavor, while cream cheese makes the sauce extra rich and thick. If you’re dairy-free, unsweetened coconut yogurt or a blended silken tofu work, though the flavor profile will shift. Just be careful not to overheat any yogurt-based substitute, as it can curdle — bake just until bubbly.

What is the best pasta to use for Chicken Bacon Ranch Casserole?

Egg noodles are classic because their wide ribbons hold onto the creamy sauce beautifully. But you can use any short pasta — penne, fusilli, cavatappi, or rotini — for a heartier texture. If you’re gluten-free, brown rice fusilli or chickpea pasta work well. Just be sure to cook the pasta just until al dente (1 minute less than package directions) since it will continue cooking in the oven. Overcooked pasta will turn mushy.

Can I add vegetables to Chicken Bacon Ranch Casserole?

Definitely! Steamed broccoli florets, frozen peas, diced bell peppers, or sautéed mushrooms all add color and nutrition without overwhelming the flavor. I recommend avoiding watery vegetables like zucchini unless you sauté them first to remove excess moisture. Fold the veggies in with the noodles and chicken before baking. For the best texture, cut them into bite-sized pieces so they incorporate evenly. This is a great way to use up leftover vegetables from your fridge.

How can I make this casserole lighter or less calorie-dense?

To lighten up this chicken bacon ranch casserole, use low-fat sour cream and reduced-fat cream of chicken soup. Substitute turkey bacon for regular bacon (cook until crispy) and use a 50/50 blend of sharp cheddar and part-skim mozzarella to cut fat while keeping flavor. Increase the ratio of vegetables to pasta — add extra broccoli or spinach. You can also replace half the egg noodles with cauliflower florets (parboiled) for a lower-carb version. The taste remains satisfying, just a bit less indulgent.

What is the secret to a creamy (not dry) casserole?

The secret is a combination of moisture sources: cream of chicken soup, sour cream, and a splash of milk. Use full-fat versions for the best consistency. Never overcook the pasta — cook it al dente, because it absorbs liquid in the oven. Also, don’t skimp on the sour cream; its acidity helps balance the richness. Finally, avoid overbaking — remove the casserole the moment it’s bubbly and golden. Overbaking dries out the sauce and makes the texture pasty.

Can I freeze Chicken Bacon Ranch Casserole?

Yes, this casserole freezes exceptionally well. Let it cool completely, then portion into freezer-safe containers or wrap the entire baking dish tightly with plastic wrap and foil. Freeze for up to 2 months. Thaw overnight in the refrigerator before reheating. To reheat, place in a 350°F oven (covered) for about 20 minutes, then uncover for the last 5 minutes to crisp up the top. The texture remains creamy; just note that if you used potatoes or certain veggies, they may soften slightly.

📌

Love This Recipe? Save It to Pinterest!

If you enjoyed this Chicken Bacon Ranch Casserole recipe, don’t let it get lost in your browser tabs! 😄 Pin it now so you can find it again anytime — and explore hundreds more tried-and-tested recipes waiting for you on my Pinterest boards.

👉 Follow mia on Pinterest @exorecipe

📌 Pin this recipe · 🔁 Re-pin your favorites · 💬 Tag me when you make it — I love seeing your creations!

Print

clock clock iconcutlery cutlery iconflag flag iconfolder folder iconinstagram instagram iconpinterest pinterest iconfacebook facebook iconprint print iconsquares squares iconheart heart iconheart solid heart solid icon

Chicken Bacon Ranch Casserole: Your Ultimate Comfort Food Fix

  • Author: Chef Mia
  • Prep Time: 15 minutes
  • Cook Time: 30 minutes
  • Total Time: 45 minutes
  • Yield: 6 servings 1x
  • Method: Main Course
  • Cuisine: American

Description

This creamy, cheesy chicken bacon ranch casserole is the ultimate comfort food, featuring tender chicken, crispy bacon, and a rich ranch-flavored sauce baked to perfection.


Ingredients

Scale
  • 2 cups cooked chicken, shredded or cubed
  • 6 slices bacon, cooked and crumbled
  • 1 (10.5 oz) can cream of chicken soup
  • 1 cup sour cream
  • 1 packet (1 oz) ranch dressing mix
  • 2 cups shredded cheddar cheese, divided
  • 1 (12 oz) package egg noodles, cooked and drained
  • 1/2 cup milk
  • Salt and pepper to taste
  • Fresh parsley for garnish (optional)

Instructions

  1. Preheat oven to 350°F (175°C). Grease a 9×13-inch baking dish.
  2. In a large bowl, combine the cream of chicken soup, sour cream, ranch dressing mix, milk, and 1 cup of shredded cheddar cheese. Stir until well blended.
  3. Add the cooked chicken, crumbled bacon, and cooked egg noodles to the bowl. Mix until everything is evenly coated.
  4. Transfer the mixture to the prepared baking dish and spread evenly. Top with the remaining 1 cup of shredded cheddar cheese.
  5. Bake for 25-30 minutes, or until bubbly and golden on top.
  6. Remove from oven, let rest for 5 minutes, then garnish with fresh parsley if desired. Serve warm.

Notes

For a lighter version, you can use low-fat sour cream and reduced-fat cream of chicken soup. Turkey bacon can be substituted for regular bacon. Add steamed broccoli or peas for extra veggies.


Nutrition

  • Calories: 520
  • Sugar: 3g
  • Fat: 32g
  • Carbohydrates: 32g
  • Protein: 28g


Chicken Bacon Ranch Casserole: Your Ultimate Comfort Food Fix

ph">For more delicious inspiration, follow me on Pinterest!

“`html

Chicken Bacon Caesar Pasta Salad: A Flavorful Comfort Dish for Every Occasion – The Ultimate Creamy Caesar Pasta Salad

⚖️
Difficulty
Easy
⏲️
Prep Time
15 mins
🕒
Cook Time
20 mins
⏱️
Total Time
35 mins
🍽️
Servings
6

Growing up in Morocco, my mother would toss leftover roasted chicken with fresh herbs, lemon, and a whisper of cumin to create something magical from simple ingredients. Years later, after training at a culinary school in Paris and now cooking in my New York City kitchen, I’ve taken that same resourceful spirit and poured it into this Chicken Bacon Caesar Pasta Salad. It’s the kind of dish that bridges cultures and cravings — creamy, crunchy, smoky, and so satisfying. Every time I make this creamy Caesar pasta salad, I think about how my mom would approve of the way it brings people together around a single bowl, no matter the occasion.

Imagine fork-twirling al dente rotini coated in velvety Caesar dressing, each bite carrying tender shreds of chicken, the salty pop of crisp bacon, and the bright burst of cherry tomatoes. The Parmesan melts into the dressing, creating a sauce that clings to every crevice of the pasta. There’s a whisper of garlic and anchovy in the background — classic Caesar soul — but the real star here is the textural harmony: soft, crunchy, juicy, and creamy all at once. The parsley adds a fresh green note that lifts the whole bowl, making it feel vibrant even on a gray NYC afternoon.

What sets this Caesar pasta salad recipe apart from the rest is my chef-trained approach to balancing flavors and textures. I’ve tested it a dozen times to ensure the dressing doesn’t overwhelm but rather enhances every ingredient. 💡 mia’s Pro Tip: For the best results, chill the salad for at least 30 minutes before serving — this allows the flavors to marry and the pasta to absorb just enough dressing without turning soggy. And please, don’t skip rinsing the pasta under cold water after cooking; it stops the cooking instantly and removes excess starch, which is the number one mistake home cooks make when preparing chicken bacon pasta salad. This easy pasta salad dinner comes together in under 35 minutes and feeds a crowd with zero fuss.

Why This Chicken Bacon Caesar Pasta Salad Recipe Is the Best

The Flavor Secret: This isn’t your average Chicken Bacon Caesar Pasta Salad — it’s the one I’ve perfected over years of hosting potlucks, weeknight dinners, and summer picnics in NYC. My secret? I use a high-quality Caesar dressing (or make my own with anchovy paste, garlic, lemon, and good olive oil) and I add the Parmesan in two stages: half tossed into the salad and half sprinkled on top. This creates layers of cheesy, savory flavor that hit your palate at different moments. My Moroccan roots taught me to build flavor in layers, and this salad is a testament to that philosophy.

Perfected Texture: The biggest challenge with any creamy Caesar pasta salad is keeping the pasta from becoming mushy while still allowing it to absorb the dressing. I solved this by cooking the pasta one minute less than the package directions, then shocking it under cold running water. This locks in a firm, bouncy texture that holds up beautifully even after hours of sitting. The bacon stays crunchy because I add it just before serving, and the cherry tomatoes provide little juice bombs that keep every forkful exciting. This is a textural experience, not just a salad.

Foolproof & Fast: Whether you’re a seasoned cook or a total beginner, this easy pasta salad dinner is virtually impossible to mess up. The ingredients are forgiving, the method is straightforward, and the result is restaurant-quality. I’ve made this for busy weeknights when I needed something on the table fast, and I’ve also served it at fancy gatherings where guests asked for the recipe. It scales effortlessly from 2 servings to 20, and it tastes even better the next day — if it lasts that long. Trust me, this is the recipe you’ll turn to again and again.

Chicken Bacon Caesar Pasta Salad Ingredients

I source my ingredients from the Union Square Greenmarket when I can — the chicken from a local farm, the tomatoes from a nearby stall, and the Parmesan from a little Italian shop in Chelsea Market. There’s something special about using fresh, high-quality components in a dish this simple. Every ingredient earns its place in this bowl, and I want you to feel confident shopping for each one.

Ingredients List

  • 8 oz (225 g) rotini or penne pasta
  • 2 cups cooked chicken, shredded or diced
  • 6 slices bacon, cooked and crumbled
  • 1 cup cherry tomatoes, halved
  • 1/2 cup Caesar dressing
  • 1/4 cup shredded Parmesan cheese
  • 1/4 cup chopped fresh parsley (optional)
  • Salt and black pepper to taste

Ingredient Spotlight

Pasta (Rotini or Penne): The shape matters more than you think. Rotini’s corkscrew grooves grab onto the dressing and hold every bit of flavor, while penne’s ridges do similar work. In a pinch, farfalle or cavatappi also work beautifully. The key is to cook it al dente — one minute less than the box says — so it stays firm in the salad.

Cooked Chicken: I use leftover roasted chicken or shredded rotisserie chicken for convenience and deep flavor. If I’m starting from scratch, I season boneless skinless chicken breasts with salt, pepper, and garlic powder, then pan-sear them until golden and cooked through. The chicken should be tender and juicy, not dry — shredding it helps the dressing coat every piece.

Bacon: Thick-cut bacon is my preference because it stays crunchy longer and delivers a more satisfying smoky hit. Cook it until deeply golden and crisp, then crumble it into pea-sized pieces. For a lighter option, turkey bacon works but won’t be as rich. I always add the bacon right before serving to preserve its crunch.

Caesar Dressing: This is the heart of the salad. I recommend a full-flavored Caesar dressing made with anchovy, garlic, and real Parmesan. If you’re using store-bought, look for a refrigerated brand in the produce section — it’s usually more authentic. A lighter dressing (like a Caesar vinaigrette) will work but will change the creamy texture the salad is known for.

Original IngredientBest SubstitutionFlavor / Texture Impact
Rotini / Penne PastaFarfalle, Cavatappi, or Gluten-Free PastaSlightly different bite; gluten-free may be softer — cook 2 min less
Cooked ChickenGrilled Chicken, Rotisserie Chicken, or Canned Chicken (drained)Grilled adds smokiness; canned is softer but still works
BaconTurkey Bacon, Prosciutto Crisps, or Smoked Paprika + OilTurkey bacon is leaner; prosciutto adds delicate salt; paprika mimics smoky flavor
Caesar DressingGreek Yogurt + Anchovy + Garlic + Lemon, or Light Caesar DressingYogurt version is tangier and lighter; still creamy but less rich
Parmesan CheesePecorino Romano, Grana Padano, or Nutritional YeastPecorino is saltier; nutritional yeast adds cheesy flavor for dairy-free

How to Make Chicken Bacon Caesar Pasta Salad — Step-by-Step

Trust me, this is one of the easiest, most rewarding recipes you’ll make all week. Just follow these simple steps and you’ll have a bowl of creamy, crunchy, irresistible Chicken Bacon Caesar Pasta Salad ready to enjoy.

Step 1: Cook the Pasta

Bring a large pot of generously salted water to a rolling boil. Add 8 oz of rotini or penne and cook according to package directions until al dente — usually 8–10 minutes. Drain the pasta in a colander and immediately rinse under cold running water for about 30 seconds, stirring with your hand to cool it evenly. This stops the cooking process and removes excess starch, which keeps the pasta from clumping and becoming gummy.

⚠️ Common Mistake to Avoid: Overcooking the pasta. Mushy pasta ruins the texture of this salad. Set a timer and taste a piece a minute before the recommended time — it should be firm to the bite but not hard in the center.

Step 2: Prepare the Chicken and Bacon

While the pasta cooks, cook 6 slices of bacon in a skillet over medium heat until crispy, about 6–8 minutes. Transfer to a paper towel-lined plate to drain, then crumble into small pieces. For the chicken, if using rotisserie or leftover roasted chicken, shred or dice 2 cups. If cooking fresh chicken, season two boneless skinless breasts with salt and pepper and pan-sear in a bit of olive oil for 5–6 minutes per side until golden and cooked through. Let rest for 5 minutes, then dice or shred.

💡 mia’s Pro Tip: For extra flavor, toss the warm shredded chicken with a tablespoon of Caesar dressing before adding it to the salad. This infuses every piece with that signature tangy, savory taste.

Step 3: Combine All Ingredients

In a large mixing bowl, combine the cooled pasta, shredded chicken, crumbled bacon, and 1 cup of halved cherry tomatoes. Use a spatula to gently fold everything together until evenly distributed. The tomatoes should stay intact — they’ll release their juices into the salad as it chills, adding a lovely acidity that balances the creamy dressing.

⚠️ Common Mistake to Avoid: Adding the bacon too early. If you mix the bacon in before chilling, it will soften and lose its crunch. Sprinkle it on top or fold it in just before serving for the best texture.

Step 4: Add Dressing and Seasonings

Pour 1/2 cup of Caesar dressing over the salad. Toss gently but thoroughly until every piece of pasta, chicken, and tomato is coated. Add 1/4 cup of shredded Parmesan cheese and the optional 1/4 cup of chopped fresh parsley. Season with salt and black pepper to taste — go easy on the salt since the bacon, Parmesan, and dressing all bring saltiness. Toss once more to incorporate.

💡 mia’s Pro Tip: Start with 1/3 cup of dressing, toss, then add more if needed. You can always add, but you can’t take away. The pasta will absorb some dressing as it chills, so the salad should look slightly more dressed than you think ideal at this stage.

Step 5: Chill and Serve

Cover the bowl with plastic wrap or a lid and refrigerate for at least 30 minutes. This resting time is crucial — it allows the flavors to meld and the pasta to absorb the dressing. When you’re ready to serve, give the salad a good stir, taste and adjust seasoning if needed, and transfer to a serving platter. Garnish with extra Parmesan, a sprinkle of parsley, and a few reserved bacon crumbles on top. Serve cold or at room temperature.

⚠️ Common Mistake to Avoid: Skipping the chill time. I know it’s tempting to dig in right away, but the salad needs at least 30 minutes in the fridge to reach its full potential. Trust the process — your patience will be rewarded.

StepActionDurationKey Visual Cue
1Cook pasta al dente, rinse cold8–10 minPasta is firm to the bite, cool to touch
2Cook bacon, prepare chicken10–12 minBacon deep golden, chicken golden brown
3Combine pasta, chicken, bacon, tomatoes2 minEven distribution, tomatoes intact
4Add dressing, Parmesan, parsley, season2 minEvery piece glistens with dressing
5Chill and serve30+ minSalad is cold, flavors melded

Serving & Presentation

I love serving this Chicken Bacon Caesar Pasta Salad in a wide, shallow white bowl that lets all the colors shine — the golden pasta, the deep red of the tomatoes, the green flecks of parsley, and the crispy bacon scattered on top. For a casual weeknight dinner, I’ll scoop it into individual bowls with a side of garlic bread or crusty baguette. When I’m hosting a summer barbecue or a potluck in my NYC neighborhood, I present it on a large platter with extra Parmesan shaved over the top and a few whole cherry tomatoes arranged around the edges for a pop of color. It’s also fantastic alongside grilled steak, roasted chicken, or a simple green salad if you want to round out the meal. For a touch of Moroccan flair that reminds me of home, I sometimes add a sprinkle of toasted almonds or a pinch of smoked paprika on top — it adds warmth and a subtle nuttiness that complements the Caesar dressing beautifully.

This salad is incredibly versatile in how it fits into a menu. Serve it as a main dish for lunch or a light dinner, or as a hearty side at your next gathering. It travels well, which makes it a go-to for picnics in Central Park or potluck dinners with friends. I’ve even packed it for beach days — just keep it in a cooler and add the bacon right before serving. The flavors actually deepen and improve over a few hours, so don’t be afraid to make it in advance. Pair it with a crisp Sauvignon Blanc or a sparkling lemonade, and you’ve got a meal that feels both comforting and special.

Pairing TypeSuggestionsWhy It Works
Side DishGrilled Steak, Roasted Chicken, Grilled SalmonThe creamy tangy salad balances rich meats perfectly
Sauce / DipExtra Caesar Dressing, Balsamic Glaze, Garlic AioliAdds moisture and a flavor boost for each bite
BeverageSauvignon Blanc, Chardonnay, Sparkling LemonadeAcidic wines cut through creaminess; lemonade adds refreshing fizz
GarnishShaved Parmesan, Croutons, Toasted Almonds, Smoked PaprikaAdds crunch, visual appeal, and an extra layer of flavor

Make-Ahead, Storage & Reheating

As a busy New York City food blogger and cook, I rely on make-ahead recipes like this one to keep my weeknights sane. This Chicken Bacon Caesar Pasta Salad is a dream for meal prep — it actually tastes better the next day once the flavors have had time to get cozy. Here’s everything you need to know about storing, freezing, and prepping ahead so you can enjoy this salad anytime with zero stress.

MethodContainerDurationReheating Tip
RefrigeratorAirtight container3–4 daysServe cold or at room temp — no reheating needed
FreezerFreezer-safe zip-top bag or containerUp to 2 monthsThaw overnight in fridge; stir in a splash of dressing before serving
Make-AheadLarge bowl covered with plastic wrapUp to 1 day in advanceAssemble without bacon and croutons; add both just before serving

The key to make-ahead success with this creamy Caesar pasta salad is to keep the crunchy elements separate until serving. If you’re prepping for a party, combine the pasta, chicken, tomatoes, dressing, and Parmesan a day ahead and refrigerate. Just before serving, stir in the crumbled bacon and any croutons you want to add. If the salad seems a little dry after sitting, a tablespoon or two of extra dressing or a splash of milk will bring it back to life. And please don’t reheat this salad — it’s meant to be enjoyed cold or at room temperature. If you’ve stored it in the fridge, just let it sit on the counter for 15 minutes before serving to take the chill off and let the flavors shine.

Variations & Easy Swaps

One of the things I love most about this Chicken Bacon Caesar Pasta Salad is how easily it adapts to different tastes and dietary needs. Whether you’re gluten-free, dairy-free, or just looking to switch things up with seasonal ingredients, I’ve tested these variations so you can make this recipe your own without any guesswork.

VariationKey ChangeBest ForDifficulty Impact
Moroccan Spiced VersionAdd 1 tsp ras el hanout + 1/2 tsp cumin to dressingAdventurous eaters, North African flavor loversEasy — just stir in spices
Gluten-Free / Dairy-Free VersionUse gluten-free pasta + dairy-free Caesar + vegan ParmesanGluten-free and dairy-free householdsEasy — simple swaps
Summer Garden TwistAdd 1/2 cup corn kernels + 1/2 cup diced cucumber + fresh basilSummer picnics, farmers market haulsEasy — just add vegetables

Moroccan Spiced Version

This variation is a little love letter to my childhood. Whisk 1 teaspoon of ras el hanout and 1/2 teaspoon of ground cumin into the Caesar dressing before tossing the salad. The warm, floral spices add a gorgeous complexity that pairs beautifully with the smoky bacon and creamy dressing. I also like to swap the parsley for fresh cilantro and add a handful of toasted slivered almonds for crunch. It’s unexpected, utterly delicious, and a wonderful conversation starter at any gathering. My mother would be so proud to see her spices travel all the way to a NYC pasta salad.

Gluten-Free / Dairy-Free Version

This easy pasta salad dinner is easily adapted for gluten-free and dairy-free diets. Use your favorite gluten-free pasta — I like chickpea or brown rice pasta for their hearty texture — and cook it one minute less than the package directs since gluten-free pasta tends to soften faster. For the dressing, use a dairy-free Caesar (many brands now make excellent versions with cashew or coconut cream base) and swap the Parmesan for nutritional yeast or a dairy-free Parmesan alternative. The result is a salad that’s just as creamy and satisfying, and honestly, even my non-dairy-free friends go back for seconds. It’s become a staple in my NYC apartment for when I’m cooking for friends with dietary restrictions.

Summer Garden Twist

When summer hits and the farmers market in Union Square overflows with produce, I love to bulk up this creamy Caesar pasta salad with fresh vegetables. Add 1/2 cup of fresh corn kernels (raw or lightly grilled), 1/2 cup of diced English cucumber, and a handful of torn fresh basil leaves. The corn adds sweetness and pop, the cucumber brings refreshing crunch, and the basil ties everything together with its aromatic warmth. This version feels lighter and brighter, perfect for hot days when you want something satisfying but not heavy. I sometimes swap the bacon for prosciutto crisps in this version for a more delicate salty note.

How do you make Chicken Bacon Caesar Pasta Salad ahead of time without the pasta getting soggy?

The secret to a make-ahead Chicken Bacon Caesar Pasta Salad that stays perfectly textured is a two-step approach. First, cook the pasta one minute less than the package directions and rinse it thoroughly under cold water to stop the cooking and remove excess starch. This keeps the pasta firm. Second, assemble the salad completely but leave out the bacon and any croutons — add those just before serving. Store the salad in an airtight container in the refrigerator for up to 24 hours. When you’re ready to serve, stir in a tablespoon or two of fresh Caesar dressing to revive the creaminess, then top with the reserved crispy bacon and croutons. This method ensures every bite is as fresh and crunchy as if you made it that moment.

What type of pasta works best for a Chicken Bacon Caesar Pasta Salad?

For the best Caesar pasta salad recipe, I recommend short, sturdy pasta shapes with plenty of ridges or crevices to catch and hold the creamy dressing. Rotini is my top choice because its corkscrew shape grips the dressing beautifully, but penne, farfalle (bow ties), and cavatappi (cellentani) are also excellent options. Avoid long, delicate pasta like spaghetti or angel hair, as they tend to clump and don’t hold the dressing as well. If you’re using gluten-free pasta, opt for a shape like fusilli or penne made from chickpea or brown rice flour — they hold up better than rice-based pastas. Whatever shape you choose, always cook it al dente and rinse with cold water to maintain that perfect bite.

Can I substitute the Caesar dressing with something lighter in this pasta salad?

Absolutely — you can lighten up this chicken bacon pasta salad without sacrificing flavor. My favorite lighter alternative is a Greek yogurt Caesar dressing: mix 1/2 cup plain Greek yogurt with 1 tablespoon anchovy paste (or minced anchovies), 1 clove minced garlic, 2 tablespoons lemon juice, 1 tablespoon olive oil, and 2 tablespoons grated Parmesan. This version is tangy, creamy, and significantly lower in fat and calories. Another option is a Caesar vinaigrette made by whisking together 3 tablespoons olive oil, 2 tablespoons lemon juice, 1 teaspoon Dijon mustard, 1 minced garlic clove, and 1 teaspoon anchovy paste. It’s thinner than the classic but still packs that signature Caesar punch. Keep in mind that lighter dressings may not cling to the pasta as thickly, so you might want to toss the salad a bit more gently and add a touch more seasoning to compensate.

Should the chicken and bacon be warm or cold when mixing into the pasta salad?

For the best texture and food safety, both the chicken and bacon should be at room temperature or slightly warm — not hot — when you mix them into the salad. If you add hot chicken or bacon to the cold pasta and dressing, it can cause the dressing to thin out and become watery, and it may also raise the temperature of the salad, which is meant to be served cold or at room temperature. I recommend cooking the chicken and bacon first, letting them rest on a cutting board for 5–10 minutes before shredding or crumbling. This allows them to cool slightly while still retaining their juiciness and crispness. If you’ve prepped them ahead of time and they’re cold from the fridge, let them sit at room temperature for 15 minutes before tossing. The goal is a harmonious salad where every ingredient is at a similar temperature so the dressing coats evenly and the flavors meld beautifully.

Can I add croutons to this Chicken Bacon Caesar Pasta Salad?

Yes,croutons are a wonderful addition to this creamy Caesar pasta salad for extra crunch and texture. I recommend adding them just before serving so they stay crisp rather than absorbing moisture and becoming soft. Homemade croutons are easy to make: cube a few slices of sourdough or French bread, toss with olive oil, garlic powder, and a pinch of salt, then bake at 375°F for 8–10 minutes until golden. If using store-bought, look for Caesar or garlic-flavored croutons to complement the dressing. For a gluten-free option, use gluten-free bread cubes or even crushed gluten-free crackers. Keep in mind that croutons will soften over time, so if you’re making the salad ahead, store them separately and sprinkle on top right before serving.

How long does Chicken Bacon Caesar Pasta Salad last in the refrigerator?

Properly stored in an airtight container, this Chicken Bacon Caesar Pasta Salad will stay fresh and delicious for 3 to 4 days in the refrigerator. The flavors actually continue to meld and deepen over the first 24 to 48 hours, making it a fantastic make-ahead option. However, the texture of the bacon will soften over time, so I recommend storing the bacon separately and adding it only when you’re ready to eat. If you’ve already mixed everything together and the bacon has softened, you can revive the crunch by sprinkling a few fresh bacon bits on top just before serving. The pasta will continue to absorb the dressing as it sits, so if the salad seems dry on day two or three, stir in a splash of milk or an extra tablespoon of Caesar dressing to bring back the creamy consistency.

Is this Chicken Bacon Caesar Pasta Salad served hot or cold?

This Chicken Bacon Caesar Pasta Salad is traditionally served cold or at room temperature — it’s a pasta salad, after all, not a hot pasta dish. After assembling the salad, I recommend chilling it for at least 30 minutes to allow the flavors to meld and the dressing to fully coat every ingredient. When you’re ready to serve, you can take it straight from the fridge or let it sit at room temperature for 10–15 minutes to take the chill off. The cold temperature keeps the bacon crunchy, the tomatoes firm, and the dressing thick and luscious. That said, if you prefer a warmer salad, you can serve it immediately after mixing (without chilling), but the flavors won’t be as deeply integrated and the texture won’t be quite as cohesive. For the best experience, go cold or room temperature.

Can I use a different protein instead of chicken in this Caesar pasta salad?

Absolutely — this Caesar pasta salad recipe is incredibly versatile when it comes to protein swaps. Grilled shrimp is a fantastic option: season with salt, pepper, and a squeeze of lemon, then grill or pan-sear for 2–3 minutes per side until pink and slightly charred. Diced grilled steak or sliced steak tips add a rich, beefy flavor that pairs wonderfully with the creamy Caesar dressing. For a vegetarian version, try crispy chickpeas (tossed with olive oil and roasted at 400°F for 20 minutes) or cubed extra-firm tofu that’s been pan-seared until golden and seasoned with garlic and smoked paprika. Canned tuna (drained and flaked) is another quick, pantry-friendly protein that works surprisingly well. Whatever protein you choose, let it cool to room temperature before mixing to keep the dressing from thinning out. Each swap will give the salad a completely new personality while keeping the beloved Caesar soul intact.

What can I serve with Chicken Bacon Caesar Pasta Salad for a complete meal?

This easy pasta salad dinner is hearty enough to stand on its own as a main dish, but if you want to round out the meal, I have a few favorite pairings. For a simple weeknight dinner, serve it alongside grilled chicken or steak (extra protein for the meat lovers at your table) and a side of roasted vegetables like asparagus or zucchini. A bowl of tomato soup or a crisp green salad with lemon vinaigrette makes a lovely starter or side. For summer entertaining, pair it with grilled corn on the cob, a fruit salad, or crusty garlic bread to soak up any extra dressing. If you’re serving it as a side dish, it’s wonderful with baked salmon, roasted pork tenderloin, or even a hearty vegetable lasagna. And for drinks, a chilled Sauvignon Blanc, a light beer, or sparkling water with lemon are all excellent choices that complement the creamy, tangy flavors without overpowering them.

How do I keep the bacon crispy in Chicken Bacon Caesar Pasta Salad?

Keeping bacon crispy in any chicken bacon pasta salad is all about timing and technique. The most important rule is to never mix the bacon into the salad until just before serving. If you add it during the assembly and then chill the salad for hours, the moisture from the dressing and vegetables will soften the bacon into chewy bits. Instead, cook the bacon until deep golden and very crisp, let it drain on paper towels, and store it in a separate container at room temperature (or in the fridge if preparing more than a few hours ahead). When you’re ready to serve, crumble or chop the bacon and sprinkle it over the top of the tossed salad. This way, every person gets a generous portion of crunchy, smoky bacon with each scoop. If you have leftovers, the bacon will soften overnight — but you can refresh it by crisping a few fresh slices and adding them to the leftover salad the next day. It’s a small extra step that makes a world of difference in texture.

Share Your Version!

I absolutely love hearing how this Chicken Bacon Caesar Pasta Salad turns out in your kitchen — whether you stick to the classic version or put your own spin on it with a Moroccan spice twist, extra vegetables, or a lighter dressing. Every time you make it, you’re adding your own story to this recipe, and that’s the most beautiful thing about cooking. If you enjoyed this creamy Caesar pasta salad, please leave a ⭐ star rating and a comment below to let me know how it went. Your feedback helps other home cooks find and trust this recipe, and it truly makes my day to read about your successes. Don’t forget to snap a photo of your creation and share it on Instagram or Pinterest — tag me @exorecipes so I can see your beautiful bowl and possibly feature it in my stories! And if you have a question I didn’t answer here, drop it in the comments and I’ll get back to you as soon as I can. This recipe is meant to be shared, adapted, and celebrated, so go ahead and make it your own.

From my NYC kitchen to yours — I hope this recipe brings as much warmth to your table as it does to mine. — mia 🧡

📌

Love This Recipe? Save It to Pinterest!

If you enjoyed this Chicken Bacon Caesar Pasta Salad recipe, don’t let it get lost in your browser tabs! 😄 Pin it now so you can find it again anytime — and explore hundreds more tried-and-tested recipes waiting for you on my Pinterest boards.

👉 Follow mia on Pinterest @exorecipe

📌 Pin this recipe · 🔁 Re-pin your favorites · 💬 Tag me when you make it — I love seeing your creations!

“`

Print

clock clock iconcutlery cutlery iconflag flag iconfolder folder iconinstagram instagram iconpinterest pinterest iconfacebook facebook iconprint print iconsquares squares iconheart heart iconheart solid heart solid icon

Chicken Bacon Caesar Pasta Salad: A Flavorful Comfort Dish for Every Occasion

  • Author: Chef Mia
  • Prep Time: 15 minutes
  • Cook Time: 20 minutes
  • Total Time: 35 minutes
  • Yield: 6 1x
  • Method: Main Course
  • Cuisine: American

Description

This Chicken Bacon Caesar Pasta Salad combines tender chicken, crispy bacon, and al dente pasta tossed in a creamy Caesar dressing. Perfect for potlucks, picnics, or a hearty side dish.


Ingredients

Scale
  • 8 oz (225 g) rotini or penne pasta
  • 2 cups cooked chicken, shredded or diced
  • 6 slices bacon, cooked and crumbled
  • 1 cup cherry tomatoes, halved
  • 1/2 cup Caesar dressing
  • 1/4 cup shredded Parmesan cheese
  • 1/4 cup chopped fresh parsley (optional)
  • Salt and black pepper to taste

Instructions

  1. Cook pasta according to package directions until al dente. Drain and rinse under cold water to cool.
  2. In a large bowl, combine cooled pasta, chicken, bacon, and cherry tomatoes.
  3. Pour Caesar dressing over the salad and toss gently to coat.
  4. Add Parmesan cheese and parsley, then season with salt and pepper to taste.
  5. Chill for at least 30 minutes before serving. Serve cold or at room temperature.

Notes

For extra crunch, add croutons just before serving. Substitute grilled chicken for a healthier option.


Nutrition

  • Calories: 450 kcal
  • Sugar: 3 g
  • Fat: 26 g
  • Carbohydrates: 28 g
  • Protein: 24 g


Chicken Bacon Caesar Pasta Salad: A Flavorful Comfort Dish for Every Occasion

k">

Tried This Recipe? Leave a Comment!

Did you make this recipe? I’d love to hear how it turned out! Please leave a comment and a rating below. Your feedback helps other home cooks and supports cheerychop.com!

For more delicious inspiration, follow me on Pinterest!

Chicken Bacon Caesar Crostini: Your New Go-To Party Favorite – Perfectly Crispy Appetizer

⚖️
Difficulty
Easy
⏲️
Prep Time
15 mins
🕒
Cook Time
10 mins
⏱️
Total Time
25 mins
🍽️
Servings
24 crostini

I still remember the first time I made these Chicken Bacon Caesar Crostini for a New Year’s Eve party in my tiny Brooklyn kitchen. My mom back in Morocco would always say, “The best food is the food that brings people together.” And these little bites? They do exactly that. With a perfectly crispy baguette base, creamy Caesar-spiked chicken, salty bacon, and a shower of Parmesan, this Chicken Bacon Caesar Crostini recipe has become my most-requested appetizer. It’s the kind of easy party crostini that disappears in minutes — and everyone asks for the recipe before they’ve even finished chewing.

The secret lies in the contrast: the crunch of the toasted bread against the velvety Caesar dressing, the smoky bacon bits catching on your tongue, the bright pop of lemon that cuts through the richness. I learned the importance of balance during my pastry days in Paris — even a simple crostini needs acidity and salt in perfect harmony. The garlic, the Parmesan, the fresh parsley on top — every element has a role. When you bite into one of these crispy Caesar crostini appetizers, you get a little bit of everything, and that’s what makes them so addictive.

After testing this recipe for dozens of dinner parties, cocktail hours, and even Super Bowl gatherings, I’ve dialed in the method so it’s foolproof. The key? Toasting the baguette slices first to create a barrier that prevents sogginess — a technique I picked up from a seasoned caterer in the French Alps. And if you’re wondering about substitutions or make-ahead tips, I’ve got you covered. Stick with me, and I’ll show you how to make these bacon chicken crostini that will make you the hero of your next gathering.

Why This Chicken Bacon Caesar Crostini Recipe Is the Best

The Flavor Secret — I didn’t just throw chicken and dressing on bread. I start with quality Caesar dressing (homemade or store-bought, I’ll share my fave brand later), then amp it up with fresh lemon juice and minced garlic. That little extra zing is what separates a good crostini from a great one. Coming from a Moroccan home where we layer flavors like spices in a tagine, I instinctively knew this dish needed brightness. The bacon adds the savory depth that makes these Caesar crostini bites utterly crave-worthy.

Perfected Texture — The biggest challenge with any crostini is keeping the base crisp after adding toppings. My solution? A two-stage bake. First, toast the baguette slices alone until golden and dry. Then top with the chicken mixture and bake just long enough to heat through — no more than 5 minutes. This keeps the bread sturdy and shatteringly crisp while the topping stays warm and creamy. It’s a technique I refined after watching Manhattan’s best bartenders prep bar snacks — they know a soggy base ruins everything.

Foolproof & Fast — With a total time of just 25 minutes, this easy party crostini is practically effortless. You can use rotisserie chicken (a lifesaver for busy weeknights), and most of the ingredients are pantry staples. The recipe scales easily — double it for a crowd, halve it for a quiet night in. Even if you’re a beginner, you’ll nail it on the first try because each step has clear timing and visual cues.

Chicken Bacon Caesar Crostini Recipe Ingredients

I like to source my baguette from a French bakery on the Lower East Side — it has that perfect crust-to-crumb ratio. For bacon, I’m partial to thick-cut applewood-smoked. And the Caesar dressing? I often make a quick version with anchovy paste, Dijon, and good olive oil, but a high-quality store-bought one works beautifully. Let’s talk about what you’ll need.

Ingredients List

  • 1 baguette, sliced into 1/2-inch rounds
  • 2 tablespoons olive oil
  • 1 cup cooked chicken, shredded or diced
  • 4 slices bacon, cooked and crumbled
  • 1/3 cup Caesar dressing
  • 1/4 cup grated Parmesan cheese
  • 1 tablespoon lemon juice
  • 1 clove garlic, minced
  • Fresh parsley, chopped (for garnish)
  • Extra Parmesan shavings (for topping)

Ingredient Spotlight

Baguette: The cornerstone of any crispy Caesar crostini appetizer. Look for a fresh baguette with a firm crust and airy interior — day-old works even better because it’s drier and toasts up crunchier. Substitution: Ciabatta or sourdough rounds work if you prefer a different shape, but expect a slightly denser bite.

Caesar Dressing: The creamy heart of the recipe. I recommend a dressing with anchovy and real Parmesan — brands like Ken’s or Girard’s are reliable. For a lighter version, swap half the Caesar for Greek yogurt — you’ll lose some umami but keep the creaminess.

Bacon: Smoky, salty, and crispy. Thick-cut gives you better texture and more presence. Substitution: Pancetta or prosciutto crisped in a skillet for a more delicate flavor.

Parmesan: Freshly grated from a block, please — pre-shredded doesn’t melt as smoothly. The nuttiness of aged Parmesan is irreplaceable. Substitution: Pecorino Romano for a sharper, saltier kick.

Original IngredientBest SubstitutionFlavor / Texture Impact
BaguetteCiabatta or sourdoughDenser crumb, slightly less crunch
Caesar dressingGreek yogurt + anchovy paste + garlicTangier, lighter, less rich
BaconPancetta or crispy prosciuttoLess smoky, more delicate crisp
ParmesanPecorino Romano or Grana PadanoSharper, saltier, melt consistency similar
ChickenRotisserie chicken or leftover turkeyConvenient, no flavor loss

How to Make Chicken Bacon Caesar Crostini — Step-by-Step

Don’t worry — this recipe is simpler than you think. I’ll guide you through each step with chef-level tips to ensure your bacon chicken crostini turn out perfect every time.

Step 1: Toast the Baguette

Preheat oven to 400°F (200°C). Arrange baguette slices in a single layer on a baking sheet. Brush each slice lightly with olive oil. Toast for 5–7 minutes, until the edges are golden and the bottoms are firm. The bread should be dry and crisp — this is your barrier against sogginess.

💡 mia’s Pro Tip: For extra crunch, flip the slices halfway through toasting. This ensures both sides dry out evenly.

Step 2: Mix the Chicken Filling

In a medium bowl, combine the cooked chicken, crumbled bacon, Caesar dressing, grated Parmesan, lemon juice, and minced garlic. Stir until well mixed. Taste and adjust — if you want more tang, add another squeeze of lemon. If you love heat, a pinch of red pepper flakes works wonders.

⚠️ Common Mistake to Avoid: Don’t oversaturate the chicken with dressing. You want the mixture to hold together but not be soupy — excess liquid will make the crostini soggy during the final bake.

Step 3: Assemble the Crostini

Spoon a generous teaspoon of the chicken mixture onto each toasted baguette slice. Spread it slightly but don’t flatten. Top with extra Parmesan shavings — use a vegetable peeler for thin, pretty curls.

💡 mia’s Pro Tip: If you’re making these ahead for a party, stop at this point. Cover and refrigerate the assembled crostini for up to 4 hours. Bake just before serving.

Step 4: Bake and Finish

Return the baking sheet to the oven and bake for 3–5 minutes, until the filling is heated through and the Parmesan shavings are lightly melted. Keep an eye on them — you want the cheese to soften, not brown. Remove from oven, garnish with chopped fresh parsley, and serve immediately.

⚠️ Common Mistake to Avoid: Overbaking will dry out the chicken and make the bread hard. The crostini are ready when the filling is hot to the touch and the cheese just begins to melt.

StepActionDurationKey Visual Cue
1Toast baguette slices5–7 minGolden edges, firm bottom
2Mix chicken filling3 minUniform, creamy consistency
3Assemble crostini5 minEven topping, visible Parmesan curls
4Final bake & garnish3–5 minFilling hot, cheese softened

Serving & Presentation

I love serving these Chicken Bacon Caesar Crostini on a long wooden board straight from the oven — the warmth keeps the cheese luscious. Arrange them in neat rows (or a casual scatter) and finish with a final dusting of fresh parsley and a few extra Parmesan shavings. They’re gorgeous as a passed appetizer or on a buffet table alongside other finger foods.

For a Moroccan-inspired twist, I sometimes add a sprinkle of smoked paprika and a drizzle of harissa honey — a nod to my roots. In NYC, I’ve served them with a side of chilled lemon wedges and chilled Prosecco. The bright bubbles cut through the richness beautifully. If you’re pairing with a cocktail, a classic martini or a crisp gin and tonic works wonders.

Pairing TypeSuggestionsWhy It Works
Side DishArugula salad, roasted cherry tomatoes, marinated olivesFresh greens and acidity balance the rich crostini
Sauce / DipExtra Caesar dressing, balsamic glaze, tzatzikiEnhances creaminess or adds a tangy contrast
BeverageProsecco, Sauvignon Blanc, Bombay Sapphire martiniCrisp drinks cut through richness
GarnishFresh parsley, lemon zest, micro greens, edible flowersAdds color and freshness

Make-Ahead, Storage & Reheating

Between recipe development and catering events in NYC, I’ve learned a thing or two about prepping these crostini without sacrificing quality. You can absolutely assemble them a few hours ahead — the key is to keep the base crisp by toasting the bread first and not letting the assembled crostini sit too long before baking.

MethodContainerDurationReheating Tip
RefrigeratorAirtight container, layers separated by parchment1–2 daysBake at 375°F for 5-7 min until hot and crisp
FreezerFreeze assembled (untopped) on a tray, then transfer to bagUp to 2 monthsBake from frozen at 400°F for 10-12 min; add Parmesan shavings halfway
Make-AheadAssemble on baking sheet, cover with plastic wrapUp to 4 hours in fridgeRemove wrap, bake directly; add fresh parsley after

From my experience, these crostini are best enjoyed warm and fresh from the oven. If you have leftovers, reheat them in the oven (not the microwave) to revive the crunch. The chicken filling may dry out slightly, so a quick spritz of lemon juice before serving helps bring back moisture.

Variations & Easy Swaps

VariationKey ChangeBest ForDifficulty Impact
Spicy Harissa CaesarAdd 1–2 tsp harissa paste to chicken mixtureThose who love heat and North African flavorsEasy
Gluten-Free / Low-CarbReplace baguette with cucumber rounds or zucchini slicesKeto, gluten-free, lighter optionEasy
Mediterranean TwistSwap bacon for sun-dried tomatoes, add kalamata olivesVegetarian-ish, briny flavor loversEasy

Spicy Harissa Caesar

This is my absolute favorite riff, inspired by the Moroccan kitchen of my childhood. Stir 1–2 teaspoons of harissa paste (the mild or hot version, depending on your tolerance) into the chicken mixture before assembling. The smokiness of the harissa plays beautifully with the bacon and Caesar dressing, and a final drizzle of honey over the baked crostini adds a sweet heat that will wow your guests. In NYC, I serve these at cocktail parties and they disappear faster than the original.

Gluten-Free / Low-Carb Option

To keep these easy party crostini on the lighter side, replace the baguette slices with thick cucumber rounds or grilled zucchini planks. Pat the cucumber dry before assembling to prevent wateriness. The topping is naturally gluten-free and low-carb, so you get all the flavor without the bread. For an even heartier base, try roasted sweet potato rounds — they add a subtle sweetness that balances the Caesar dressing.

Mediterranean Twist

For a vegetarian version (or simply a change of pace), skip the bacon and fold in chopped sun-dried tomatoes, kalamata olives, and a handful of fresh basil. The briny, tangy elements mimic the umami of bacon without the meat. I often use this variation when catering for a diverse crowd — it’s just as rich and satisfying. Serve with a side of tzatziki for dipping.

What is the best way to keep the crostini from getting soggy when adding the Caesar dressing?

The absolute best way is to toast your baguette slices until they are completely dry and golden before adding any topping. This creates a crisp barrier that resists moisture from the dressing. I recommend brushing the slices lightly with olive oil and baking at 400°F for 5–7 minutes, flipping halfway. Also, avoid overdressing the chicken mixture — it should be creamy but not runny. If you’re making ahead, store the toasted bread separately from the filling and assemble just before baking.

Can I use a different type of cheese instead of Parmesan for this chicken bacon Caesar crostini recipe?

Absolutely. While Parmesan gives that classic nutty, salty flavor, you can substitute with Pecorino Romano (sharper and saltier), Grana Padano (milder and creamier), or even Asiago for a slightly tangy note. If you want a milder melt, try Fontina or mozzarella — but keep in mind they will change the texture and won’t provide the same sharp bite. For the best results, grate your cheese from a block rather than using pre-shredded, which often contains anti-caking agents that can affect melting.

How far in advance can I assemble chicken bacon Caesar crostini before serving at a party?

You can assemble these crostini up to 4 hours ahead of serving if you keep them refrigerated. The key is to toast the baguette slices first (let them cool completely), then top with the chicken mixture and Parmesan shavings, and cover the baking sheet tightly with plastic wrap. When you’re ready to serve, bake straight from the fridge for 5–7 minutes at 400°F — add a minute or two to ensure the filling is hot. I don’t recommend assembling more than 4 hours ahead because the bread can start to soften from the topping’s moisture.

What is a good substitute for bacon if I want to make this crostini recipe lighter?

Turkey bacon is the most common lighter swap — it crisps up nicely and has about half the fat. For a vegetarian option, try smoked tempeh crumbled and pan-fried until crispy, or use chopped sun-dried tomatoes for a chewy, umami-rich alternative. Another trick I love is using crispy roasted chickpeas: toss canned chickpeas with olive oil and smoked paprika, roast at 400°F for 25 minutes, then crumble them over the top. You get that crunchy texture without any meat.

Can I make Chicken Bacon Caesar Crostini completely vegetarian?

Yes, and it’s delicious! Simply omit the chicken and bacon and replace them with a combination of hearty vegetables. I often use finely chopped roasted mushrooms (portobello or cremini) for a meaty texture, plus sun-dried tomatoes for umami and capers for brine. You can also add white beans or chickpeas for protein. Keep the Caesar dressing as is — or use a vegetarian version if you prefer to skip anchovies. The cooking method stays the same, and the result is just as satisfying.

What’s the best way to reheat leftover Chicken Bacon Caesar Crostini?

The oven is your best friend here. Place leftover crostini on a baking sheet and reheat at 375°F for 5–7 minutes. This restores the crunch of the bread without drying out the topping. Avoid the microwave — it will turn the bread rubbery and the chicken mixture will become waterlogged. If the crostini seem dry after reheating, a light squeeze of fresh lemon juice brightens them right up. I usually make exactly the number I need, but if I have extras, I store them in an airtight container in the fridge for up to 2 days.

How can I add more flavor to the chicken mixture for these Caesar crostini?

Oh, there are so many ways! My go-to is adding a teaspoon of anchovy paste or a few finely chopped anchovy fillets — it deepens the umami without tasting fishy. You can also stir in a tablespoon of capers (rinsed and chopped), a pinch of red pepper flakes for heat, or a teaspoon of Dijon mustard for tang. Freshly cracked black pepper is essential. If you want a herbaceous note, fold in chopped fresh chives, parsley, or even a little dill. The base recipe is a canvas — feel free to paint it with your favorite flavors.

Can I use store-bought Caesar dressing for this recipe?

Absolutely, and I do it all the time when I’m short on time. Look for a quality brand that contains real Parmesan and anchovy — Ken’s Steak House and Girard’s are both excellent choices. If the dressing is very thick, you can thin it with a teaspoon of lemon juice or milk. I recommend tasting it first and adjusting the salt and lemon in the recipe accordingly. Store-bought dressings vary in acidity, so you might want to add an extra squeeze of lemon to mimic my version’s brightness.

What other bread can I use besides a baguette for this crostini recipe?

Ciabatta, sourdough, and French bread work beautifully. Slice them into similar 1/2-inch rounds or bite-sized pieces. Sourdough adds a tangy flavor that complements the Caesar dressing nicely. If you use a denser bread like ciabatta, you may need to toast it an extra minute or two to get it fully crisp. Avoid soft sandwich bread — it won’t hold up under the topping. Gluten-free baguettes are an option too; just watch them closely as they can burn faster.

How do I make the crostini ahead and keep them crisp for a large party?

For large parties, I recommend a two-pronged approach: toast the baguette slices up to a day in advance and store them in an airtight container at room temperature. Prepare the chicken mixture (without the bread) and refrigerate it separately. Up to 4 hours before serving, assemble the crostini on baking sheets and refrigerate uncovered (or lightly covered) to allow the bread to stay as dry as possible. Bake them in batches right before your guests arrive. This method ensures each batch comes out perfectly crispy and hot.

Share Your Version!

I’d love to see how these Chicken Bacon Caesar Crostini turn out in your kitchen! Did you add a personal twist — maybe some jalapeño, smoked paprika, or a different cheese? Drop a comment below and tell me all about it. If you snap a photo, tag me on Instagram or Pinterest @exorecipes — I always reshare my followers’ creations. And if you’re feeling generous, leave a star rating and help other home cooks find this easy party crostini recipe.

From my NYC kitchen to yours — I hope this recipe brings as much warmth to your table as it does to mine. — mia 🧡

📌

Love This Recipe? Save It to Pinterest!

If you enjoyed this Chicken Bacon Caesar Crostini recipe, don’t let it get lost in your browser tabs! 😄 Pin it now so you can find it again anytime — and explore hundreds more tried-and-tested recipes waiting for you on my Pinterest boards.

👉 Follow mia on Pinterest @chefrecipes2

📌 Pin this recipe · 🔁 Re-pin your favorites · 💬 Tag me when you make it — I love seeing your creations!

Print

clock clock iconcutlery cutlery iconflag flag iconfolder folder iconinstagram instagram iconpinterest pinterest iconfacebook facebook iconprint print iconsquares squares iconheart heart iconheart solid heart solid icon

Chicken Bacon Caesar Crostini: Your New Go-To Party Favorite

  • Author: Chef Mia
  • Prep Time: 15 minutes
  • Cook Time: 10 minutes
  • Total Time: 25 minutes
  • Yield: 24 crostini 1x
  • Method: Appetizer
  • Cuisine: American-Italian

Description

These Chicken Bacon Caesar Crostini are the ultimate party appetizer—crisp bread topped with creamy Caesar chicken, crispy bacon, and fresh Parmesan.


Ingredients

Scale
  • 1 baguette, sliced into 1/2-inch rounds
  • 2 tablespoons olive oil
  • 1 cup cooked chicken, shredded or diced
  • 4 slices bacon, cooked and crumbled
  • 1/3 cup Caesar dressing
  • 1/4 cup grated Parmesan cheese
  • 1 tablespoon lemon juice
  • 1 clove garlic, minced
  • Fresh parsley, chopped (for garnish)
  • Extra Parmesan shavings (for topping)

Instructions

  1. Preheat oven to 400°F (200°C). Arrange baguette slices on a baking sheet, brush with olive oil, and toast for 5-7 minutes until golden.
  2. In a bowl, combine cooked chicken, crumbled bacon, Caesar dressing, grated Parmesan, lemon juice, and minced garlic. Mix well.
  3. Spoon the chicken mixture onto each toasted baguette slice.
  4. Top with extra Parmesan shavings and bake for another 3-5 minutes until heated through.
  5. Garnish with fresh parsley and serve warm.

Notes

For extra flavor, try adding a pinch of black pepper or red pepper flakes to the chicken mixture. You can also use rotisserie chicken for convenience.


Nutrition

  • Calories: 120
  • Sugar: 1g
  • Fat: 7g
  • Carbohydrates: 10g
  • Protein: 6g


Chicken Bacon Caesar Crostini: Your New Go-To Party Favorite