“`html
Table of Contents
Cheesy Ravioli Bake: Your Go-To Comfort Meal for Busy Nights – The Ultimate No-Boil Casserole
Walking through the damp, bustling streets of New York City in late autumn, my mind often drifts back to the tiny, steam-filled kitchen in my mother’s home in Morocco. She made comfort food that wrapped around you like a warm blanket, often using simple ingredients to create something truly magical. Here in my Brooklyn apartment, I crave that same deep, soul-warming satisfaction, but my schedule as a food blogger and mom rarely allows for hours of simmering and stirring. This cheesy ravioli bake was born from that very real need for a quick weeknight dinner recipe that doesn’t compromise on flavor or that “hug in a bowl” feeling. It’s the perfect easy ravioli casserole that bridges my Moroccan roots, my French culinary training, and the vibrant, fast-paced energy of NYC.
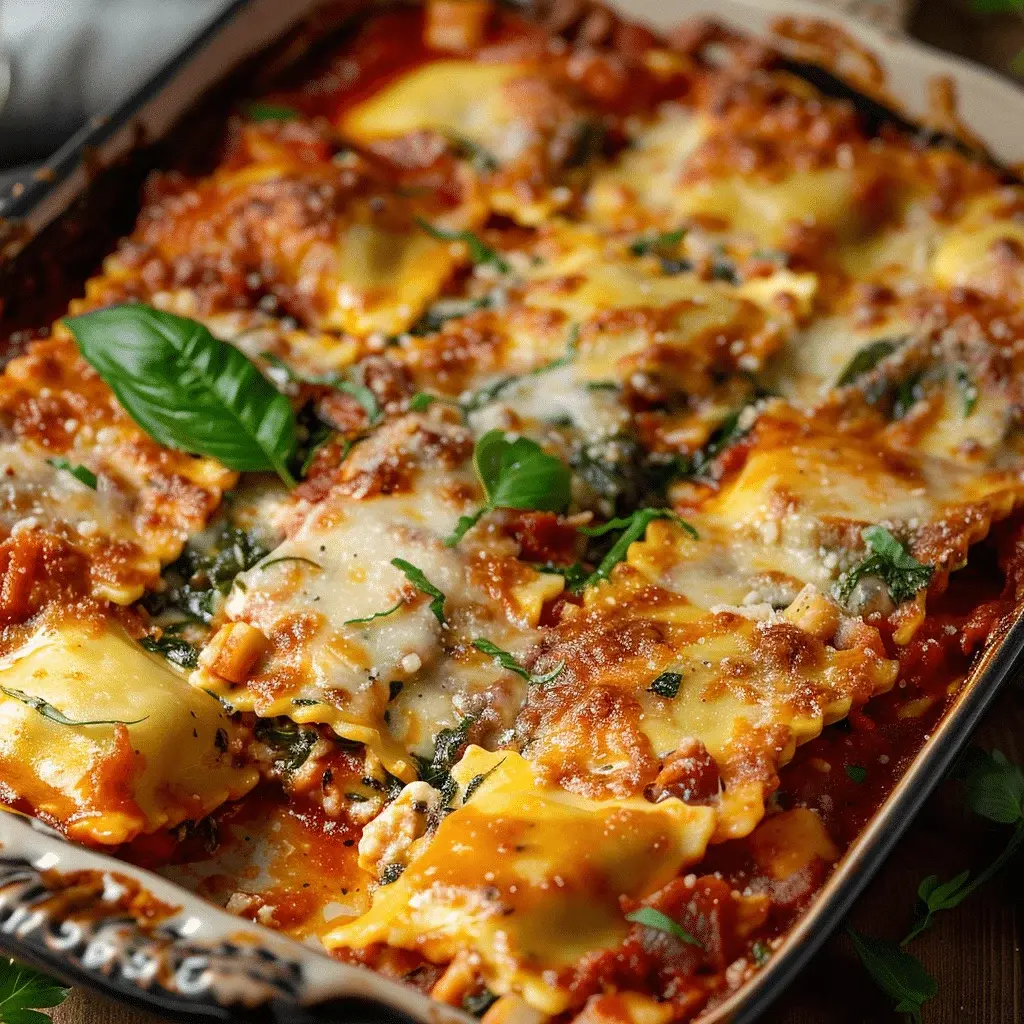
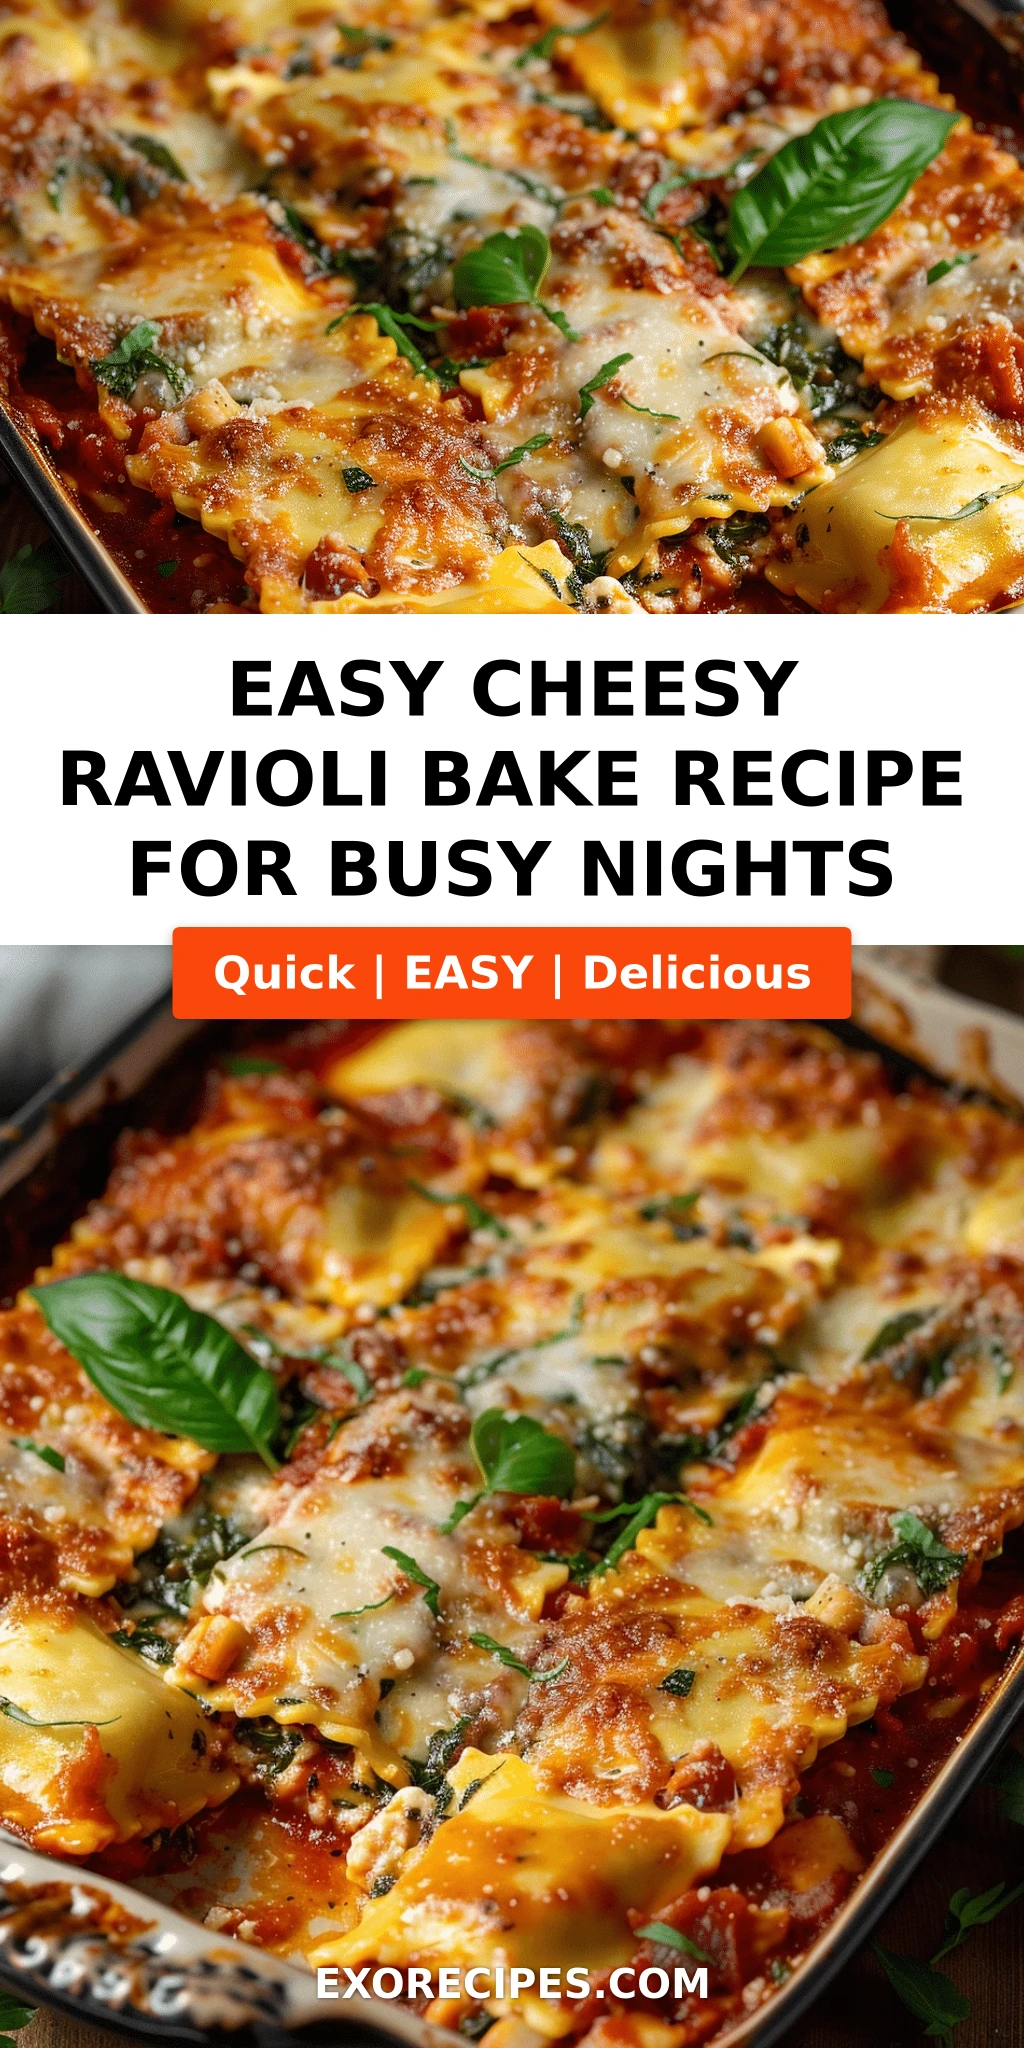
Imagine pulling a bubbling, golden casserole from the oven on a hectic Tuesday evening. The aroma of garlic, basil, and rich marinara sauce instantly fills your apartment, washing the stress of the day away. Underneath that perfectly browned, gloriously blistered crust of mozzarella and Parmesan lies tender, pillowy ravioli, each one enveloped in a luscious, savory sauce that has thickened and concentrated beautifully during baking. The contrast between the crispy, caramelized cheese edges and the soft, creamy pasta center is nothing short of magical—it’s pure, unadulterated comfort food pasta bake perfection. It’s the kind of meal that makes everyone at the table fall silent for a few moments, completely lost in the deliciousness.
My classical French training at Le Cordon Bleu Paris taught me the critical importance of layering flavors and textures, a technique that transforms even the simplest baked ravioli with cheese into a culinary masterpiece. There is a specific trick to layering the frozen ravioli and the cheese to ensure every single bite has the perfect sauce-to-cheese ratio—no dry corners or bland centers allowed. Plus, I’ll share my professional secret for achieving that irresistible, golden-brown cheese crust without overcooking the pasta. Stick with me, and I promise this will become your new favorite go-to recipe. Let me show you why this is the only baked ravioli recipe you’ll ever need.
Why This Cheesy Ravioli Bake Recipe Is the Best
The Flavor Secret
The magic of this cheesy ravioli bake lies in the beautiful simplicity of its high-quality ingredients and the transformative power of the oven. Unlike stovetop versions where flavors can remain separate, baking allows the marinara, the cheese, and the seasonings to meld and deepen into a cohesive, savory symphony. The low, slow covered baking steams the ravioli to perfection while the sauce thickens, and the final uncovered blast creates a complex, nutty flavor from the browning cheese that you just can’t get any other way. It’s proof that a truly spectacular comfort meal doesn’t need to be complicated.
Perfected Texture
No mushy pasta here, I promise! The frozen ravioli cooks perfectly in the sauce, absorbing just enough liquid to become wonderfully tender while maintaining a gentle, satisfying bite—what the French call “al dente.” The key is the precise layering and the foil cover. The steam created inside the dish gently cooks the ravioli evenly, while the sauce stays rich and concentrated. The final, foil-free baking period allows the top layer of mozzarella to transform into a glorious, crispy crust that provides the perfect textural contrast to the soft pasta pillows underneath. It’s a foolproof method for a perfect texture every single time.
Foolproof & Fast
As a busy mom and professional cook, I know the value of a recipe that works flawlessly on the first try. This is that recipe. With just 10 minutes of hands-on prep, it’s practically a masterclass in “set it and forget it” cooking. There’s no boiling water to drain, no delicate stirring, and no elaborate techniques. Just simple, honest layering. That’s why it has become the ultimate quick weeknight dinner recipe in my home and, I suspect, it will become the star of your busy weeknight rotation too. It’s the perfect, low-stress dish for beginner cooks and seasoned chefs alike.
Cheesy Ravioli Bake Ingredients
One of the things I love most about this easy ravioli casserole is the incredibly approachable ingredient list. I can grab everything I need from my local bodega or the Union Square Greenmarket on my way home from an event. It’s the ultimate pantry-friendly meal that feels entirely indulgent.
Ingredients List
- 1 (25-ounce) bag frozen cheese ravioli
- 1 (24-ounce) jar marinara sauce
- 2 cups shredded mozzarella cheese
- 1/2 cup grated Parmesan cheese
- 1 teaspoon garlic powder
- 1 teaspoon dried basil
- 1/2 teaspoon salt
- 1/4 teaspoon black pepper
- Fresh basil for garnish (optional)
Ingredient Spotlight
Frozen Ravioli: The star of the show! The quality of the ravioli matters here. I prefer a brand like Rana or Celentano, which you can find in any NYC grocery store. Stay away from “fresh” refrigerated ravioli for this specific no-boil method, as they can turn mushy. Frozen is key for the perfect texture.
Marinara Sauce: This is your flavor backbone. Use a high-quality jarred sauce with a clean ingredient list. My personal go-tos are Rao’s Homemade or Victoria. If I have 15 minutes, I’ll whip up a quick version using San Marzano tomatoes, garlic, and olive oil. Avoid super watery sauces, as they can make the casserole soggy.
Mozzarella & Parmesan: This classic duo provides the ultimate melt and flavor. Always buy a block of low-moisture mozzarella and shred it yourself. Pre-shredded cheese contains cellulose and starches that prevent it from melting into that glorious, gooey consistency we all crave. The Parmesan adds a salty, nutty kick that balances the richness of the mozzarella beautifully.
| Original Ingredient | Best Substitution | Flavor / Texture Impact |
|---|---|---|
| Frozen Cheese Ravioli | Gluten-Free Frozen Ravioli | Slightly denser texture, but holds up well to baking. |
| Marinara Sauce | Vodka Sauce or Arrabbiata Sauce | Vodka adds creaminess; Arrabbiata adds a spicy kick. |
| Mozzarella Cheese | Provolone or Monterey Jack | Provolone is sharper; Jack melts beautifully and is milder. |
| Parmesan Cheese | Pecorino Romano or Grana Padano | Pecorino is saltier and more pungent; Grana Padano is nuttier. |
How to Make Cheesy Ravioli Bake — Step-by-Step
Trust me on this one—it’s so simple, but following these small details will guarantee a perfect, bubbly, golden casserole every single time. Let’s get cooking!
Step 1: Preheat and Prep
Preheat your oven to 375°F (190°C). Lightly grease a 9×13-inch baking dish with a little olive oil or non-stick spray. This prevents the ravioli from sticking and makes for easy cleanup.
💡 mia’s Pro Tip: Use a metal or ceramic baking dish. Glass dishes can sometimes cause the bottom to brown too quickly before the center is cooked through.
Step 2: Build the First Layer
Spread a thin, even layer of marinara sauce (about 1/2 cup) on the bottom of the prepared dish. This creates a “sauce blanket” that prevents the ravioli from sticking and kick-starts the flavor.
⚠️ Common Mistake to Avoid: Don’t skip this layer! If you put the ravioli directly on the dish, they will stick and burn before the cheese melts.
Step 3: Add the Ravioli
Arrange half of the frozen cheese ravioli in a single, even layer over the sauce. It’s okay if they touch, but try not to overlap them too much, as this can cause them to cook unevenly.
Step 4: Layer the Cheese and Sauce
Top the ravioli with half of the remaining marinara sauce, half of the shredded mozzarella, and half of the grated Parmesan. Sprinkle with half of the garlic powder, dried basil, salt, and pepper.
💡 mia’s Pro Tip: For the best cheese pull, make sure the mozzarella is generously distributed all the way to the edges of the dish. The edges get the most heat and will become those delicious, crispy, caramelized bits everyone fights over!
Step 5: Repeat the Layers
Repeat the layers with the remaining ravioli, sauce, cheeses, and seasonings. Make sure the top layer is well covered in cheese and sauce.
Step 6: Cover and Bake
Cover the dish tightly with aluminum foil. Bake in the preheated oven for 30 minutes. The foil traps steam, which gently cooks the ravioli through without boiling them.
⚠️ Common Mistake to Avoid: If the foil isn’t sealed tightly, the steam will escape, and the ravioli may end up chewy or undercooked. Make sure the edges are crimped well.
Step 7: Uncover and Brown
Carefully remove the foil. Return the dish to the oven and bake for an additional 10–15 minutes, until the cheese is completely melted, bubbly, and golden brown in spots. This is where the magic happens.
💡 mia’s Pro Tip: For an extra crispy, browned top, switch the oven to broil for the last 1-2 minutes. Watch it very carefully to prevent burning!
Step 8: Rest and Serve
Remove from the oven and let it stand for at least 5 minutes before serving. This is a crucial step! Allowing the casserole to rest lets the sauce thicken and the layers set, so it doesn’t turn into a soupy mess when you scoop into it.
⚠️ Common Mistake to Avoid: Cutting into a piping hot casserole will result in a watery, loose texture. The resting period is essential for a perfect, structured serving.
| Step | Action | Duration | Key Visual Cue |
|---|---|---|---|
| 1 | Preheat Oven & Grease Dish | 5 mins | Oven ready, dish lightly oiled. |
| 2 | Layer Sauce, Ravioli, Cheese | 10 mins | Even layers, dish is full. |
| 3 | Cover & Bake | 30 mins | Sauce is bubbling through the foil. |
| 4 | Uncover & Brown | 10-15 mins | Cheese is melted, golden, and bubbly. |
| 5 | Rest & Serve | 5 mins | Casserole is set, not jiggly. |
Serving & Presentation
Serving this baked ravioli with cheese is its own little ceremony in my house. I like to use a large, flat spatula to scoop out generous portions, ensuring every serving has a perfect cross-section of all the beautiful layers—ravioli, sauce, and that glorious melted cheese crust. For an elegant touch, I place each serving on a warm plate, which keeps the dish hot until the last bite.
A simple garnish can elevate this dish from a simple weeknight dinner to something truly special. I always finish it with a scattering of fresh, torn basil leaves—a habit I picked up from the markets in Paris. A final drizzle of good-quality extra-virgin olive oil and a pinch of red pepper flakes for a little heat is my signature move. The bright green of the basil against the deep red and gold of the casserole is a feast for the eyes.
| Pairing Type | Suggestions | Why It Works |
|---|---|---|
| Side Dish | Crusty Garlic Bread, Simple Arugula Salad w/ Lemon | Garlic bread soaks up extra sauce; peppery arugula cuts through the richness. |
| Sauce / Dip | Warm Marinara for dipping, Pesto drizzle | Extra marinara for crispy edge pieces; pesto adds a fresh herbaceous punch. |
| Beverage | Chianti Classico, Sangiovese, or a Negroni | High acidity in the wines cuts the fat; the cocktail’s bitterness balances the sweet marinara. |
| Garnish | Fresh Basil, Red Pepper Flakes, Grated Parmesan | Basil adds freshness; chili flakes add heat; extra Parmesan adds salty umami. |
Make-Ahead, Storage & Reheating
Tuesdays are notoriously brutal in our household. That’s why I almost always assemble this entire cheesy ravioli bake on Monday evening, pop it in the fridge, and simply slide it into the oven when I walk in the door the next day. It’s the ultimate lifesaver for busy families.
| Method | Container | Duration | Reheating Tip |
|---|---|---|---|
| Refrigerator | Airtight container or covered baking dish | 3-4 days | Reheat individual portions in a 350°F oven or air fryer for 10-15 mins to restore crispiness. |
| Freezer | Assembled unbaked in a freezer-to-oven dish, tightly wrapped | 2 months | Thaw overnight in the fridge. Bake as directed, adding 10-15 mins to the covered time. |
| Make-Ahead | Assembled in the baking dish | 1 day in advance | Perfect for prep. Add 5-10 mins to the initial covered bake time. You may need a splash of water if the sauce has thickened. |
From my experience, the absolute best way to reheat leftovers is in the oven or an air fryer. The microwave will work, but it tends to make the ravioli soggy and the cheese rubbery. A quick reheat in a 350°F oven will revive that beautiful, bubbly texture and keep the edges perfectly crisp.
Variations & Easy Swaps
One of the things I adore most about this easy ravioli casserole is how easily it adapts to what you have in your fridge or what you’re craving. It’s a canvas for creativity! Here are some of my favorite riffs on this comfort food pasta bake.
| Variation | Key Change | Best For | Difficulty Impact |
|---|---|---|---|
| Meat Lover’s Ravioli Bake | Add 1 lb cooked Italian sausage or ground beef | Hearty appetites, protein-packed dinner | Easy (requires browning meat) |
| Rustic Veggie & Spinach Bake | Add sautéed mushrooms, zucchini, spinach | Getting more veggies in, vegetarian meal | Easy (requires quick veggie sauté) |
| Creamy Alfredo Limone Bake | Swap marinara for Alfredo sauce + lemon zest | Lighter flavor, creamy texture cravings | Easy |
Meat Lover’s Cheesy Ravioli Bake
For a heartier version that will satisfy the biggest appetites, brown 1 pound of spicy or sweet Italian sausage (removed from its casing) or ground beef with a clove of garlic until it’s beautifully browned and crumbled. Drain the excess fat, and layer the cooked meat between the ravioli layers. The rendered fat from the sausage infuses the sauce with an incredible depth of flavor that will have everyone coming back for seconds.
Rustic Vegetable & Spinach Ravioli Bake
This is my go-to when I want to lighten things up a bit. Roughly chop mushrooms, zucchini, and a bell pepper. Sauté them in olive oil with a pinch of salt until they release their moisture and start to caramelize. Wilt in a few handfuls of fresh spinach at the very end. Layer this colorful mixture into your ravioli bake. The earthy flavors of the vegetables are a perfect match for the rich cheese and tangy marinara. Sometimes I even add a teaspoon of harissa (a nod to my Moroccan roots) to the veggies for a subtle, smoky warmth.
Creamy Alfredo Limone Ravioli Bake
If you’re in the mood for something extra luxurious, swap the marinara sauce for a high-quality jarred Alfredo sauce. The trick here is to add the zest and juice of one lemon and some steamed broccoli florets to the layers. The lemon’s bright acidity cuts through the richness of the Alfredo sauce, creating a perfectly balanced, decadent dish. This version is pure comfort, a technique I mastered while perfecting creamy sauces in Paris.
Frequently Asked Questions
Can I use frozen ravioli for a cheesy ravioli bake without boiling it first?
Yes, absolutely! In fact, using frozen ravioli without boiling it first is the cornerstone of this easy ravioli casserole recipe. The foil-covered baking process creates steam that gently hydrates and cooks the frozen ravioli perfectly from scratch, eliminating an entire pot of boiling water and a colander to wash. This no-boil method is what makes it such a quick weeknight dinner recipe. Just make sure to use frozen, not fresh, ravioli for the best texture.
What is the best cheese to use for a cheesy ravioli bake?
For the ultimate baked ravioli with cheese, you can’t beat the classic combination of low-moisture mozzarella and Parmesan. Low-moisture mozzarella melts into that wonderfully gooey, stringy, and golden brown texture we all love. Parmesan adds a salty, nutty, and umami-rich depth that perfectly complements the mild mozzarella. I highly recommend buying a block of each and shredding them yourself for the best melt and flavor.
How long should I bake cheesy ravioli to get it perfectly bubbly?
The total baking time for this comfort food pasta bake is approximately 45 minutes. The crucial method is to bake it covered with foil for the first 30 minutes at 375°F. This traps steam and cooks the frozen ravioli through. Then, you remove the foil and continue baking for another 10-15 minutes. This uncovered period allows the cheese to melt completely, bubble, and form that beautiful, golden-brown crust that makes the dish so irresistible.
Can I add ground beef or sausage to a cheesy ravioli bake for extra protein?
Definitely! Adding cooked ground beef or Italian sausage is one of the most popular variations of this recipe. Simply brown the meat of your choice in a skillet over medium-high heat until it is fully cooked and nicely crumbled. Drain off any excess fat before layering it into the casserole. This transforms the dish into a heartier main course that is even more satisfying for big appetites.
Can I make this cheesy ravioli bake gluten-free?
Yes, making this recipe gluten-free is very easy! Simply substitute the regular frozen cheese ravioli with a high-quality gluten-free frozen ravioli. Many brands now make delicious gluten-free ravioli using rice flour or other gluten-free grains. Cook the casserole exactly as directed. The gluten-free ravioli holds up perfectly to the no-boil, baked method, giving you all the comfort of the original dish without the gluten.
Can I use homemade ravioli in this casserole?
You certainly can, but there is one important caveat. Fresh, homemade ravioli will cook much faster than frozen store-bought ravioli, so you risk ending up with mushy pasta. If you absolutely want to use fresh ravioli, I recommend par-freezing them for about 30 minutes before assembling the casserole. This helps them hold their shape and texture better during the longer baking time required for the dish to bubble and brown.
Why does my ravioli casserole come out watery or soupy?
A watery casserole is usually the result of one of two things: a thin, watery marinara sauce or not letting the casserole rest after baking. Always use a high-quality, thick jarred sauce. Avoid sauces that have water or wine as a primary ingredient. The second issue is skipping the resting time. The 5-minute rest after baking is non-negotiable. It allows the starches from the pasta to absorb the excess liquid, setting the casserole into a beautiful, scoopable dish.
Can I use ricotta cheese in a cheesy ravioli bake?
Yes, adding dollops of whole-milk ricotta cheese is a fantastic way to add extra creaminess and richness to this baked ravioli with cheese. Simply add small spoonfuls of ricotta between the ravioli layers along with the mozzarella and Parmesan. For an even better flavor, mix the ricotta with a beaten egg, a pinch of salt, some lemon zest, and chopped parsley before adding it. This creates a lighter, soufflé-like texture as it bakes.
What can I use instead of marinara sauce?
You have so many delicious options! A creamy Alfredo sauce creates a decadent “white” ravioli bake. An Arrabbiata sauce will give your casserole a spicy, fiery kick. For something even more unique, try a roasted red pepper sauce or a simple garlic and olive oil (aglio e olio) base. Each sauce will completely transform the flavor profile of your casserole, making it a completely new dish every time.
How do I get the cheese extra crispy on top?
For that extra-crispy, crackly cheese crust that everyone fights over, there are two tricks. First, make sure the top layer of cheese extends all the way to the very edges of the baking dish, where the heat is most intense. Second, during the last 2-3 minutes of baking, switch your oven to the “broil” setting. Watch it like a hawk! The intense top heat will bubble and brown the cheese into a perfect, crispy crown for your ravioli.
Share Your Version!
I absolutely love seeing how this dish comes to life in your own kitchens! Did you go all-in with the meat lover’s version, or did you add a little Moroccan flair with some harissa-roasted veggies? Snap a photo of your beautiful creation, share it on Instagram, and tag me @exorecipes. Your twists and feedback are what make this community so vibrant and inspiring.
Don’t forget to leave a star rating and a comment below letting me know how it turned out! What did your family say? What variation did you try? I read every single one, and your questions and ideas often inspire my next recipe. From my NYC kitchen to yours—I hope this recipe brings as much warmth to your table as it does to mine. — mia 🧡
Did you try this Cheesy Ravioli Bake?
Tag @exorecipes on Instagram and use the hashtag #exorecipes to be featured!
Love This Recipe? Save It to Pinterest!
If you enjoyed this Cheesy Ravioli Bake recipe, don’t let it get lost in your browser tabs! 😄 Pin it now so you can find it again anytime — and explore hundreds more tried-and-tested recipes waiting for you on my Pinterest boards.
👉 Follow mia on Pinterest @exorecipe
📌 Pin this recipe · 🔁 Re-pin your favorites · 💬 Tag me when you make it — I love seeing your creations!
“`
Print

Cheesy Ravioli Bake: Your Go-To Comfort Meal for Busy Nights
- Prep Time: 10 minutes
- Cook Time: 45 minutes
- Total Time: 55 minutes
- Yield: 6 1x
- Method: Main Course
- Cuisine: Italian-American
Description
This easy cheesy ravioli bake is the ultimate comfort meal for busy weeknights. Layered with frozen cheese ravioli, marinara sauce, and a blend of mozzarella and Parmesan, it bakes into a bubbly, golden casserole that everyone will love.
Ingredients
- 1 (25-ounce) bag frozen cheese ravioli
- 1 (24-ounce) jar marinara sauce
- 2 cups shredded mozzarella cheese
- 1/2 cup grated Parmesan cheese
- 1 teaspoon garlic powder
- 1 teaspoon dried basil
- 1/2 teaspoon salt
- 1/4 teaspoon black pepper
- Fresh basil for garnish (optional)
Instructions
- Preheat oven to 375°F (190°C). Lightly grease a 9×13-inch baking dish.
- Spread a thin layer of marinara sauce on the bottom of the prepared dish.
- Arrange half of the frozen ravioli in a single layer over the sauce.
- Top with half of the remaining marinara sauce, half of the mozzarella, and half of the Parmesan. Sprinkle with half of the garlic powder, basil, salt, and pepper.
- Repeat layers with the remaining ravioli, sauce, cheeses, and seasonings.
- Cover the dish with aluminum foil and bake for 30 minutes.
- Remove the foil and bake for an additional 10–15 minutes, until the cheese is melted and bubbly and the ravioli are tender.
- Let stand for 5 minutes before serving. Garnish with fresh basil if desired.
Notes
For a meatier version, add a layer of cooked Italian sausage or ground beef between the ravioli layers. You can also use frozen spinach or mushroom ravioli for a different flavor.
Nutrition
- Calories: 458
- Sugar: 8g
- Fat: 22g
- Carbohydrates: 39g
- Protein: 24g
Tried This Recipe? Leave a Comment!
Did you make this recipe? I’d love to hear how it turned out! Please leave a comment and a rating below. Your feedback helps other home cooks and supports cheerychop.com!