“`html
Table of Contents
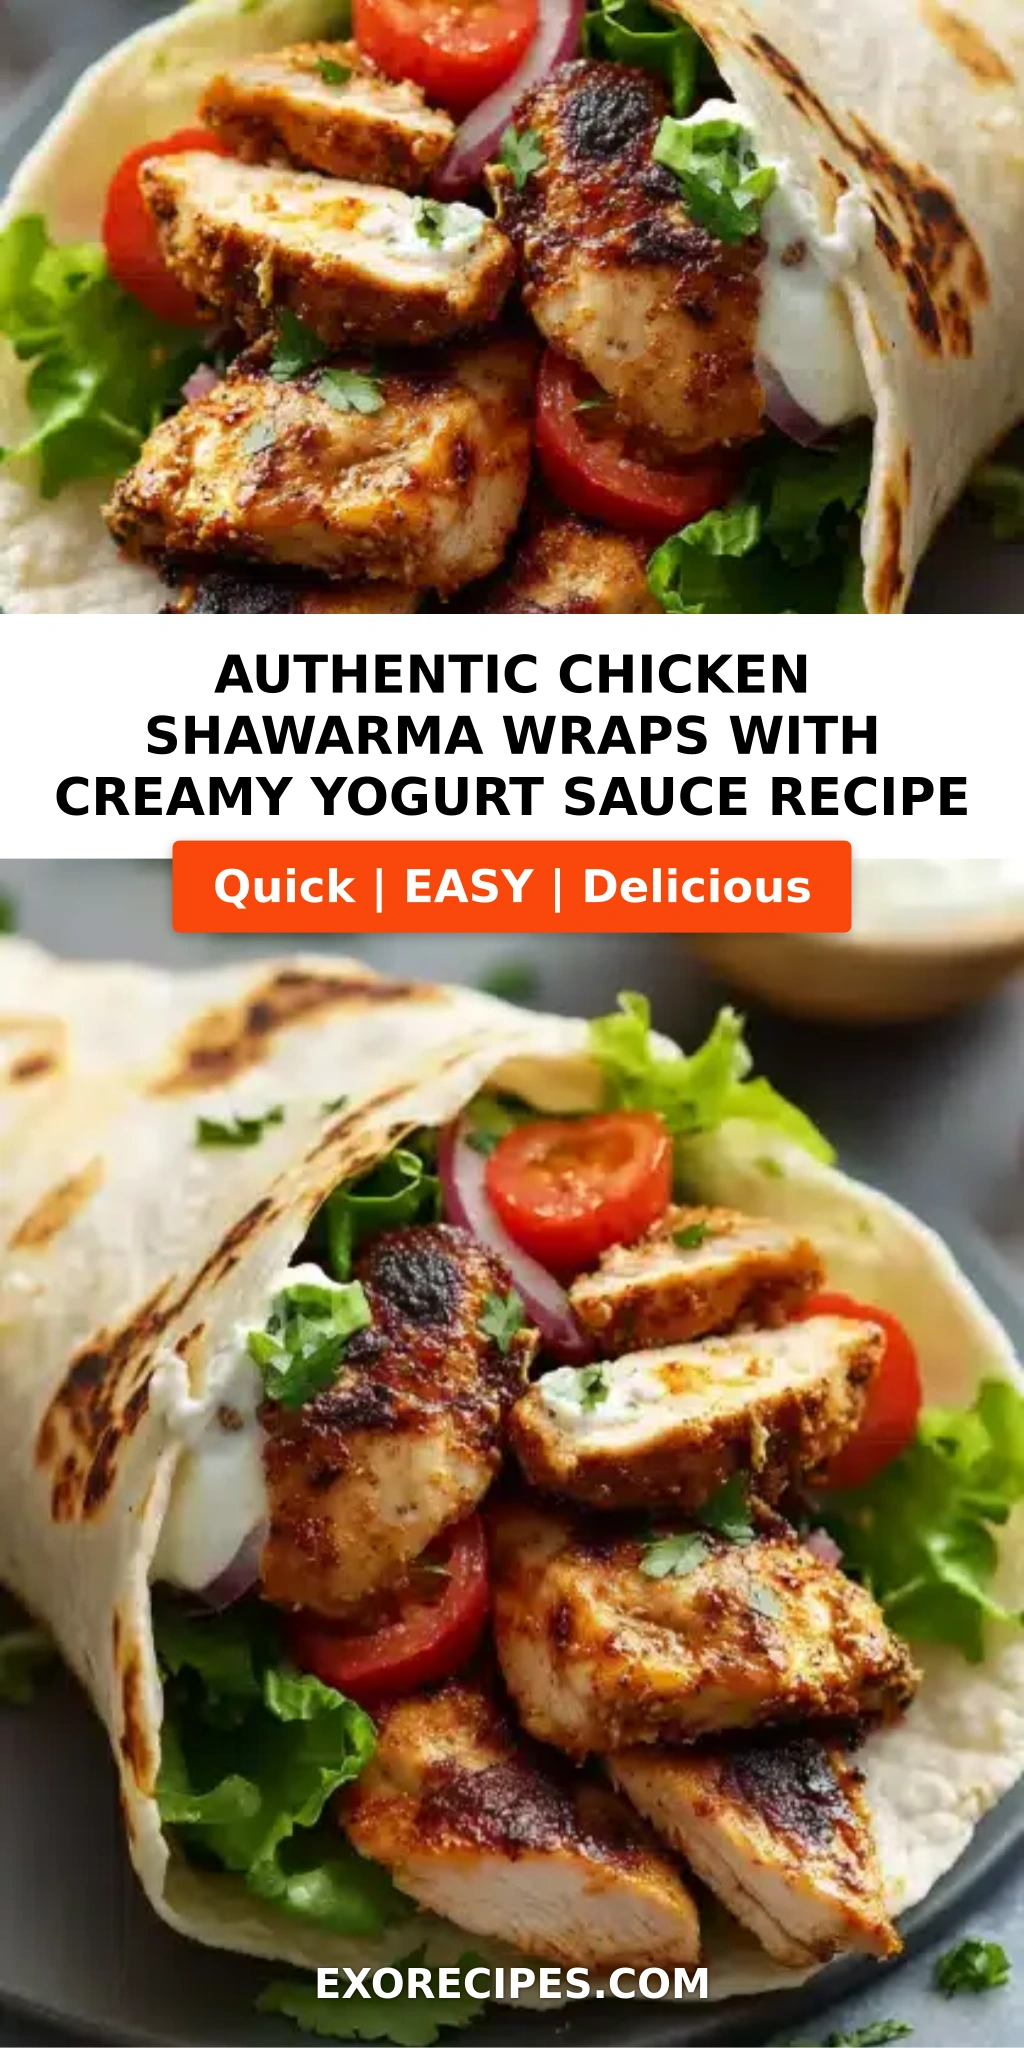
Authentic Chicken Shawarma Wraps with Creamy Yogurt Sauce: Your Ultimate Flavor Adventure
I still remember the first time I tasted a truly perfect chicken shawarma wrap. It was at a tiny, bustling market stall in Marrakech, where the scent of warm spices mingled with the hum of the city. My mother, a wizard with North African flavors, had always made her own version at home, but this street-side bite was a revelation. Now, living in New York City, I chase that same balance of charred, juicy chicken and creamy, tangy sauce every time I make this authentic chicken shawarma wraps recipe. It’s a flavor adventure I’m so excited to share with you.
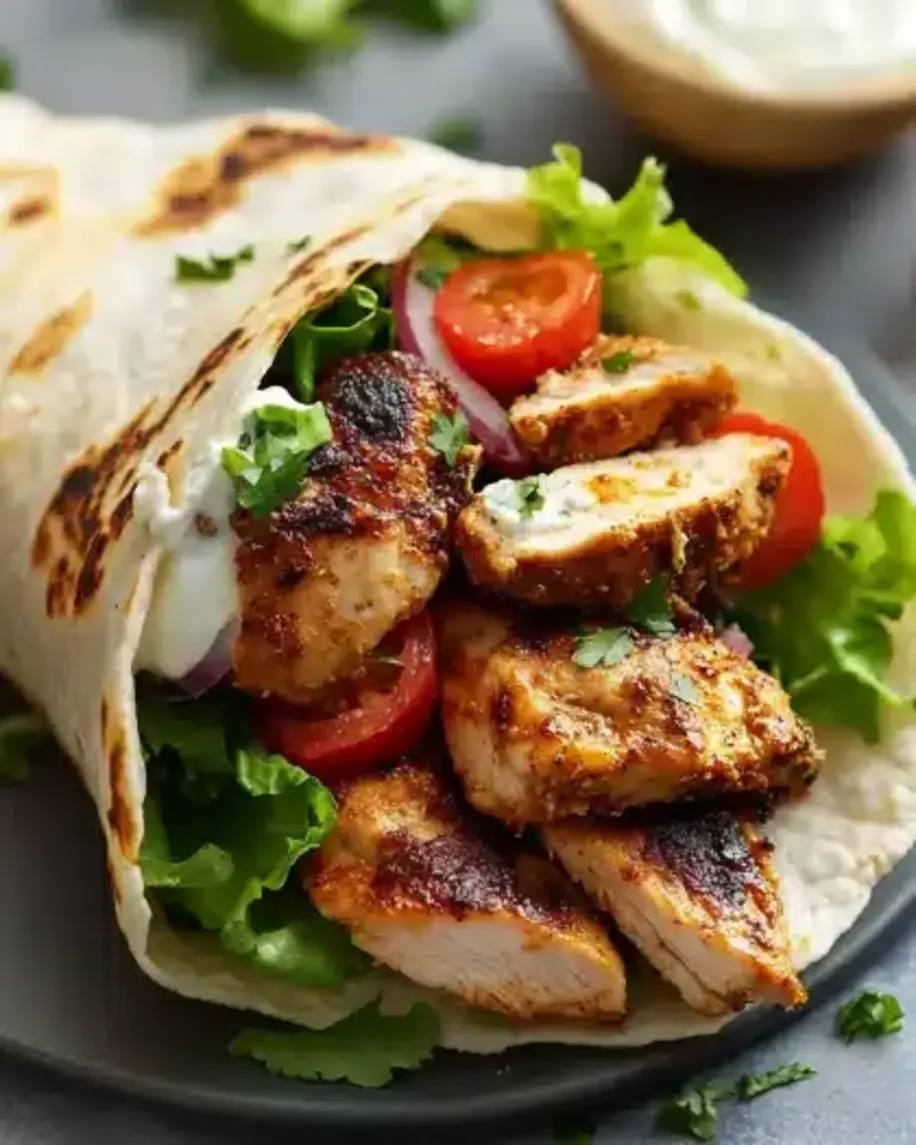
The magic of a shawarma wrap lies in its contrasts. You have the warm, aromatic blend of cumin, coriander, and a hint of cinnamon coating the chicken, paired with the golden-brown char from a screaming hot grill. Then comes the creamy yogurt sauce for shawarma — cool, tangy, and enriched with tahini — cutting through the richness of the meat. Add the crunch of fresh cucumbers, the sharp bite of red onion, and the sweetness of ripe tomatoes, all tucked into a soft, warm pita. It’s a symphony of textures and tastes that transports me home with every bite.
My version bridges my Moroccan heritage and French culinary training in a way that’s both approachable and deeply flavorful. The secret to this homemade shawarma wraps recipe is twofold: a generous marinating time and a creamy yogurt sauce that doubles as both a marinade helper and a finishing drizzle. I’ve tested this method countless times in my tiny NYC kitchen, and I promise it delivers that authentic, street-food-style result. Whether you’re a seasoned cook or a curious beginner, this recipe will make you feel like a true Middle Eastern chef. Let’s dive into the details, and I’ll show you exactly how to master it.
Why This Chicken Shawarma Wraps Recipe Is the Best
The Flavor Secret: It’s all about the blend of warm spices and the creamy yogurt sauce. Unlike many recipes that rely solely on a dry rub, my marinade uses olive oil and lemon juice to carry the cumin, coriander, smoked paprika, turmeric, cinnamon, and cardamom deep into the chicken. The yogurt sauce, made with Greek yogurt and tahini, adds a nutty, tangy finish that makes this chicken shawarma wraps recipe truly authentic and unforgettable.
Perfected Texture: High heat cooking is essential for shawarma. I use a cast-iron skillet or grill to get a deep char on the outside while keeping the inside juicy and tender. Letting the chicken rest for 5 minutes after cooking, then slicing it thinly against the grain, ensures every bite is melt-in-your-mouth tender. This technique, honed during my time at culinary school in Paris, makes all the difference.
Foolproof & Fast: This homemade shawarma wraps recipe is designed for real life. The active cooking time is just 15 minutes, and the steps are simple enough for a weeknight dinner, yet impressive enough for guests. I’ve broken down every step to avoid common mistakes, so you get perfect results every time. It’s a flavor-packed meal that brings the bustling streets of the Middle East right to your table.
Chicken Shawarma Wraps Recipe Ingredients
I love sourcing my ingredients from the local markets here in New York City. For the best flavor, look for fresh, high-quality spices, and don’t be afraid to ask your butcher for boneless skinless chicken thighs. The ingredients for this authentic chicken shawarma recipe are simple, but each one plays a crucial role in building layers of flavor.
Ingredients List
For the Chicken Shawarma:
- 1.5 lbs boneless skinless chicken thighs
- 3 tablespoons olive oil
- 2 tablespoons lemon juice
- 3 cloves garlic, minced
- 1 teaspoon ground cumin
- 1 teaspoon ground coriander
- 1 teaspoon smoked paprika
- ½ teaspoon ground turmeric
- ½ teaspoon ground cinnamon
- ½ teaspoon ground cardamom
- Salt and black pepper to taste
For the Creamy Yogurt Sauce:
- 1 cup plain Greek yogurt
- 2 tablespoons tahini
- 1 tablespoon lemon juice
- 1 clove garlic, minced
- ½ teaspoon salt
- ¼ teaspoon black pepper
For Serving:
- 4 large pita breads or flatbreads
- Sliced tomatoes
- Sliced cucumbers
- Sliced red onion
- Fresh parsley or cilantro
Ingredient Spotlight
Chicken Thighs: I always use boneless, skinless thighs for shawarma. They have a higher fat content than breasts, which means they stay incredibly juicy and flavorful during high-heat cooking. Look for thighs that are uniform in thickness for even cooking. If you prefer white meat, you can use breasts, but be careful not to overcook them.
Greek Yogurt: This is the base of our creamy yogurt sauce for shawarma. I recommend full-fat Greek yogurt for the richest, tangiest flavor. It thickens beautifully and creates a sauce that clings to the chicken and vegetables. It also helps tenderize the chicken if used as part of the marinade.
Tahini: Made from toasted sesame seeds, tahini adds a nutty, slightly bitter depth to the yogurt sauce. It’s a key ingredient that sets this sauce apart from a simple garlic yogurt. Look for well-stirred, runny tahini for the best texture and flavor.
Spices (Cumin & Coriander): These are the heart of any authentic chicken shawarma recipe. Freshly ground spices make a world of difference. Toast whole seeds in a dry pan until fragrant, then grind them yourself for a vibrant, aromatic punch that pre-ground spices can’t match.
| Original Ingredient | Best Substitution | Flavor / Texture Impact |
|---|---|---|
| Chicken Thighs | Chicken Breast | Less fat, slightly drier, but still delicious if not overcooked. |
| Greek Yogurt | Coconut Yogurt (dairy-free) | Thinner sauce, slight coconut flavor, still tangy. |
| Tahini | Almond Butter | Nutty flavor, slightly thicker, less earthy. |
| Pita Bread | Large Flour Tortillas | Less authentic, but great for folding. Slightly chewier. |
How to Make Chicken Shawarma Wraps — Step-by-Step
Trust me, this is easier than you think! Follow these simple steps, and you’ll have an authentic, restaurant-quality meal in no time. I’ve included my personal pro tips and common mistakes to avoid along the way.
Step 1: Marinate the Chicken
In a large bowl, whisk together 3 tablespoons olive oil, 2 tablespoons lemon juice, 3 minced garlic cloves, 1 teaspoon cumin, 1 teaspoon coriander, 1 teaspoon smoked paprika, ½ teaspoon turmeric, ½ teaspoon cinnamon, ½ teaspoon cardamom, and a generous pinch of salt and black pepper. Add 1.5 lbs of chicken thighs and turn to coat thoroughly. Cover and refrigerate for at least 2 hours, or overnight for the best flavor.
💡 mia’s Pro Tip: For the most intense flavor, score the chicken thighs lightly with a knife before marinating. This allows the spices to penetrate deeper into the meat!
Step 2: Make the Yogurt Sauce
While the chicken marinates, prepare the creamy yogurt sauce for shawarma. In a small bowl, combine 1 cup plain Greek yogurt, 2 tablespoons tahini, 1 tablespoon lemon juice, 1 minced garlic clove, ½ teaspoon salt, and ¼ teaspoon black pepper. Mix well until smooth and creamy. Refrigerate until ready to use. This sauce can be made a day ahead.
⚠️ Common Mistake to Avoid: Don’t use non-fat or low-fat Greek yogurt. The sauce will be watery and lack the rich, creamy texture needed to balance the warm spices.
Step 3: Cook the Chicken
Heat a grill or large cast-iron skillet over medium-high heat. Add the marinated chicken thighs in a single layer (cook in batches if needed). Cook for 5-7 minutes per side, until deeply charred and cooked through. The internal temperature should reach 165°F. The high heat creates that authentic shawarma crust!
💡 mia’s Pro Tip: Get your pan screaming hot before adding the chicken. You want that sizzle! A good char adds layers of smoky flavor you can’t get any other way.
Step 4: Rest and Slice
Remove the chicken from the heat and let it rest on a cutting board for 5 minutes. This step is crucial for locking in the juices. After resting, slice the chicken thinly against the grain. Slicing against the grain ensures every bite is tender, not chewy.
⚠️ Common Mistake to Avoid: Skipping the rest! If you slice the chicken immediately, all the flavorful juices will spill out onto the board, leaving you with dry meat. Patience is key!
Step 5: Warm the Pita
Warm the pita breads on the same grill or in a dry skillet for about 30 seconds per side. This makes them pliable and easier to roll without cracking. You can also wrap them in foil and warm them in a 350°F oven for 5 minutes.
💡 mia’s Pro Tip: Stack your warm pitas inside a clean kitchen towel. This traps steam, keeping them soft and flexible while you assemble the wraps!
Step 6: Assemble the Wraps
Lay a warm pita flat on a plate. Spread a generous amount of the creamy yogurt sauce down the center of the pita. Add a layer of sliced chicken, followed by sliced tomatoes, cucumbers, red onion, and a sprinkle of fresh parsley or cilantro. Roll the pita up tightly, tucking in the sides like a burrito, and serve immediately.
| Step | Action | Duration | Key Visual Cue |
|---|---|---|---|
| 1 | Marinate Chicken | 2+ hrs | Chicken is fully coated in spice paste. |
| 2 | Make Yogurt Sauce | 5 mins | Smooth, creamy, pale beige color. |
| 3 | Cook Chicken | 10-14 mins | Deep charred marks, juices run clear. |
| 4 | Rest & Slice Chicken | 5 mins | Juices reabsorb, slicing creates thin strips. |
| 5 | Warm Pita | 30 sec/side | Soft, lightly toasted, puffed slightly. |
| 6 | Assemble Wraps | 2 mins | Tight roll, ingredients secure inside. |
Serving & Presentation
I love serving these wraps with extra creamy yogurt sauce on the side for dipping, along with a sprinkle of fresh herbs and a wedge of lemon. The bright, tangy flavors cut through the richness of the chicken and yogurt. For a complete meal, I often set up a small mezze spread with olives, pickled turnips, and a simple cucumber tomato salad.
When I’m hosting friends in my NYC apartment, I like to arrange the sliced chicken, warm pita, and toppings on a large platter family-style. It encourages everyone to build their own perfect shawarma wrap, which is always a hit. It reminds me of the bustling food markets in Morocco, where community and food go hand in hand.
| Pairing Type | Suggestions | Why It Works |
|---|---|---|
| Side Dish | Fattoush salad, Tabbouleh, Hummus | Adds freshness, crunch, and creamy texture to balance the wrap. |
| Sauce / Dip | Extra yogurt sauce, Hot sauce, Tahini | Enhances moisture and adds customizable heat or nuttiness. |
| Beverage | Mint lemonade, Ayran (salted yogurt drink) | Cool, refreshing flavors that slice through the rich spices. |
| Garnish | Fresh mint, Pickled turnips, Chili flakes | Adds a pop of color, acidity, or heat to brighten the dish. |
Make-Ahead, Storage & Reheating
As a busy food blogger and cook in New York City, meal prep saves my week. This homemade shawarma wraps recipe is fantastic for making components ahead. I often marinate the chicken and prepare the yogurt sauce a day or two in advance. Once cooked, the leftovers are just as delicious if stored and reheated properly.
| Method | Container | Duration | Reheating Tip |
|---|---|---|---|
| Refrigerator | Airtight container | 3-4 days | Reheat in a hot skillet for 2-3 mins per side. |
| Freezer | Freezer-safe bag | 2-3 months | Thaw overnight in fridge, then reheat in a skillet. |
| Make-Ahead | Separate containers | 2 days in advance | Assemble wraps fresh for best texture. |
When reheating leftover chicken, avoid the microwave if possible, as it can make the meat rubbery. I highly recommend reheating the sliced chicken in a hot, dry cast-iron skillet over medium-high heat for about 2–3 minutes per side. This revives the crispy charred edges without drying it out. You can also reheat it in an air fryer at 375°F for 3–4 minutes for a similar effect!
Variations & Easy Swaps
One of the best things about this chicken shawarma wraps recipe is how easily it adapts to different tastes and dietary needs. Whether you’re looking for a spicy kick or a lighter option, I’ve got you covered. These variations have all been tested in my own kitchen and are absolutely delicious.
| Variation | Key Change | Best For | Difficulty Impact |
|---|---|---|---|
| Spicy Harissa Shawarma | Add 2 tbsp harissa to the marinade | Heat lovers, North African flair | Easy |
| Low-Carb / Lettuce Wrap | Swap pita for large lettuce leaves | Keto, gluten-free, lighter meal | Easy |
| Mushroom Shawarma | Replace chicken with portobello mushrooms | Vegetarian, hearty texture | Easy |
Spicy Harissa Shawarma
For those who crave heat, this variation is a game-changer. Simply stir 2 tablespoons of harissa paste into the marinade, along with a pinch of cayenne pepper. Harissa, a North African chili paste, adds a smoky, fiery depth that pairs beautifully with the warm spices. I love using this version when I’m craving a taste of my Moroccan roots.
Low-Carb Lettuce Wraps
This version is perfect for a lighter meal or for those on a keto or gluten-free diet. Instead of pita, use large, sturdy romaine or butter lettuce leaves to wrap the chicken and toppings. The creamy yogurt sauce acts as an adhesive, keeping everything intact. It’s incredibly refreshing and lets the flavor of the chicken shine.
Mushroom Shawarma (Vegetarian)
I was blown away by how well this works! Slice large portobello mushrooms thickly and marinate them in the same shawarma spice mix. Grill or pan-sear them until tender and charred. The meaty texture of mushrooms stands up perfectly to the bold spices, making this a satisfying vegetarian option that even meat-lovers will enjoy.
What is the secret to getting the authentic flavor in chicken shawarma at home?
The secret to authentic chicken shawarma flavor lies in a generous combination of warm Middle Eastern spices, a long marinating time, and high-heat cooking. The spices — cumin, coriander, smoked paprika, turmeric, cinnamon, and cardamom — are the foundation. Allowing the chicken to marinate in this spice blend with olive oil and lemon juice for at least 2 hours, ideally overnight, lets the flavors penetrate deeply. Finally, cooking over very high heat creates the signature charred, smoky crust that defines authentic shawarma. Don’t skip the rest before slicing, either, as it locks in all those flavorful juices!
Can I use Greek yogurt instead of plain yogurt for the creamy sauce in chicken shawarma wraps?
Absolutely! In fact, I highly recommend using full-fat plain Greek yogurt for the creamy yogurt sauce for shawarma. Greek yogurt is thicker and tangier than regular plain yogurt, which makes the sauce incredibly creamy and allows it to cling beautifully to the chicken and vegetables. It also provides a richer texture that balances the warm spices perfectly. If you only have regular plain yogurt, you can strain it through a cheesecloth or paper towel for about 30 minutes to thicken it up before using.
How long should I marinate the chicken for the best shawarma taste?
For the best flavor in this chicken shawarma wraps recipe, you should marinate the chicken for at least 2 hours. However, for truly authentic, deeply infused flavor, I always recommend marinating overnight for 8 to 12 hours. The longer marinating time allows the spices, garlic, and lemon juice to penetrate the chicken thighs fully, resulting in a much more complex and robust taste. Just make sure to keep it covered in the refrigerator. If you’re in a hurry, even 1 hour will add flavor, but 2+ hours makes a noticeable difference.
What is the best way to warm or toast the pita bread for chicken shawarma wraps?
The best way to warm pita for homemade shawarma wraps is to heat it in a dry cast-iron skillet or directly on a grill over medium-high heat for about 30 seconds per side. This method gives the pita a slight char and makes it warm and pliable without becoming hard. You can also wrap the pitas in aluminum foil and warm them in a 350°F oven for 5-8 minutes. Whichever method you choose, stack the warm pitas inside a clean kitchen towel to trap steam and keep them soft while you assemble.
Can I use chicken breast instead of thighs for this shawarma recipe?
Yes, you can substitute boneless skinless chicken breasts for the thighs. However, keep in mind that chicken breasts are leaner and can dry out more easily. To ensure they stay juicy, cook them only until they reach an internal temperature of 165°F, and let them rest before slicing. I also recommend pounding thicker breasts to an even thickness before marinating to ensure they cook evenly. Thighs are more forgiving and flavorful, but breasts will work beautifully if handled carefully.
How do I make chicken shawarma in an air fryer?
Making this authentic chicken shawarma recipe in an air fryer is quick and easy! After marinating, place the chicken thighs in a single layer in the air fryer basket. Cook at 380°F for 12-15 minutes, flipping halfway through, until the internal temperature reaches 165°F and the outside is crispy and charred. Let the chicken rest for 5 minutes, then slice it thinly. The air fryer does a fantastic job of replicating the high-heat convection of a traditional shawarma spit.
Can I freeze the marinated chicken for later use?
Definitely! Freezing the chicken in its marinade is a great meal prep strategy. Place the chicken and all the marinade in a freezer-safe zip-top bag, squeeze out the air, seal it, and freeze for up to 3 months. When you’re ready to cook, thaw the bag overnight in the refrigerator. The chicken will continue to marinate as it thaws, resulting in incredibly tender and flavorful meat for your homemade shawarma wraps.
What is the best way to reheat leftover chicken shawarma?
The best way to reheat leftover shawarma chicken is in a hot cast-iron skillet over medium-high heat. Add the sliced chicken to the dry pan and cook for 2-3 minutes per side, until it’s heated through and the edges get crispy again. You can also use an air fryer at 375°F for 3-4 minutes. I recommend avoiding the microwave, as it tends to steam the chicken and make it rubbery, which takes away from the beautiful texture you worked hard to create.
Can I make the creamy yogurt sauce dairy-free?
Yes, you can easily make a dairy-free version of the creamy yogurt sauce for shawarma! Substitute the Greek yogurt with a thick, plain dairy-free yogurt made from coconut, almond, or soy. To achieve the same creamy consistency, I recommend using a coconut or cashew-based yogurt that is unsweetened and unflavored. You may need to strain it slightly if it’s very thin. The tahini and lemon juice will still provide the signature tangy, nutty flavor that pairs so well with the shawarma spices.
What traditional side dishes go well with Middle Eastern chicken wraps?
This chicken shawarma wraps recipe pairs wonderfully with a variety of traditional Middle Eastern sides. A simple fattoush salad with crispy pita chips and a tangy sumac dressing is a refreshing choice. Creamy hummus and baba ganoush are perfect for dipping, while pickled turnips add a vibrant pop of color and acidity. For a heartier meal, you can serve the wraps alongside a warm bowl of lentil soup. These sides complement the warm spices and creamy sauce beautifully.
Share Your Version!
I absolutely love hearing how this recipe turns out in your kitchen! Your feedback and creativity are what make this community so special. If you tried this recipe, please leave a star rating and a comment below — I read every single one!
Snap a photo of your beautifully assembled chicken shawarma wraps and share it on Instagram or Pinterest. Be sure to tag @exorecipes so I can see your creation and share it with our amazing foodie family. And I’m dying to know: what’s your favorite Middle Eastern comfort food? Let me know in the comments! From my NYC kitchen to yours — I hope this recipe brings as much warmth to your table as it does to mine. — mia 🧡
Love This Recipe? Save It to Pinterest!
If you enjoyed this Authentic Chicken Shawarma Wraps with Creamy Yogurt Sauce recipe, don’t let it get lost in your browser tabs! 😄 Pin it now so you can find it again anytime — and explore hundreds more tried-and-tested recipes waiting for you on my Pinterest boards.
👉 Follow mia on Pinterest @exorecipe
📌 Pin this recipe · 🔁 Re-pin your favorites · 💬 Tag me when you make it — I love seeing your creations!
“`
Print
Authentic Chicken Shawarma Wraps with Creamy Yogurt Sauce: Your Ultimate Flavor Adventure
- Prep Time: 15 minutes
- Cook Time: 15 minutes
- Total Time: 2 hours 30 minutes (includes marinating)
- Yield: 4 1x
- Method: Main Course
- Cuisine: Middle Eastern
Description
This authentic chicken shawarma recipe features warm spices, juicy marinated chicken, and a creamy yogurt sauce, all wrapped in soft pita bread for a flavor-packed meal.
Ingredients
- For the Chicken Shawarma:
- 1.5 lbs boneless skinless chicken thighs
- 3 tablespoons olive oil
- 2 tablespoons lemon juice
- 3 cloves garlic, minced
- 1 teaspoon ground cumin
- 1 teaspoon ground coriander
- 1 teaspoon smoked paprika
- 1/2 teaspoon ground turmeric
- 1/2 teaspoon ground cinnamon
- 1/2 teaspoon ground cardamom
- Salt and black pepper to taste
- For the Creamy Yogurt Sauce:
- 1 cup plain Greek yogurt
- 2 tablespoons tahini
- 1 tablespoon lemon juice
- 1 clove garlic, minced
- 1/2 teaspoon salt
- 1/4 teaspoon black pepper
- For Serving:
- 4 large pita breads or flatbreads
- Sliced tomatoes
- Sliced cucumbers
- Sliced red onion
- Fresh parsley or cilantro
Instructions
- 1. In a large bowl, whisk together olive oil, lemon juice, minced garlic, cumin, coriander, paprika, turmeric, cinnamon, cardamom, salt, and pepper.
- 2. Add chicken thighs to the bowl, turning to coat thoroughly. Cover and marinate in the refrigerator for at least 2 hours, or overnight for best flavor.
- 3. While the chicken marinates, prepare the yogurt sauce: In a small bowl, combine Greek yogurt, tahini, lemon juice, minced garlic, salt, and pepper. Mix well and refrigerate until ready to use.
- 4. Heat a grill or large skillet over medium-high heat. Cook the chicken thighs for 5-7 minutes per side, until charred and cooked through (internal temperature reaches 165°F).
- 5. Remove chicken from heat and let rest for 5 minutes, then slice thinly against the grain.
- 6. Warm the pita breads on the grill or in a dry skillet for about 30 seconds per side.
- 7. Assemble the wraps: Spread a generous amount of yogurt sauce on each pita, add sliced chicken, tomatoes, cucumbers, red onion, and fresh herbs.
- 8. Roll up the pita tightly, tucking in the sides, and serve immediately.
Notes
For extra flavor, you can add a pinch of cayenne pepper to the marinade. The yogurt sauce can be made a day ahead and stored in the refrigerator. Leftover chicken keeps well for up to 3 days.
Nutrition
- Calories: 550
- Sugar: 5g
- Fat: 28g
- Carbohydrates: 35g
- Protein: 38g
Tried This Recipe? Leave a Comment!
Did you make this recipe? I’d love to hear how it turned out! Please leave a comment and a rating below. Your feedback helps other home cooks and supports cheerychop.com!
For more delicious inspiration, follow me on Pinterest!