Table of Contents
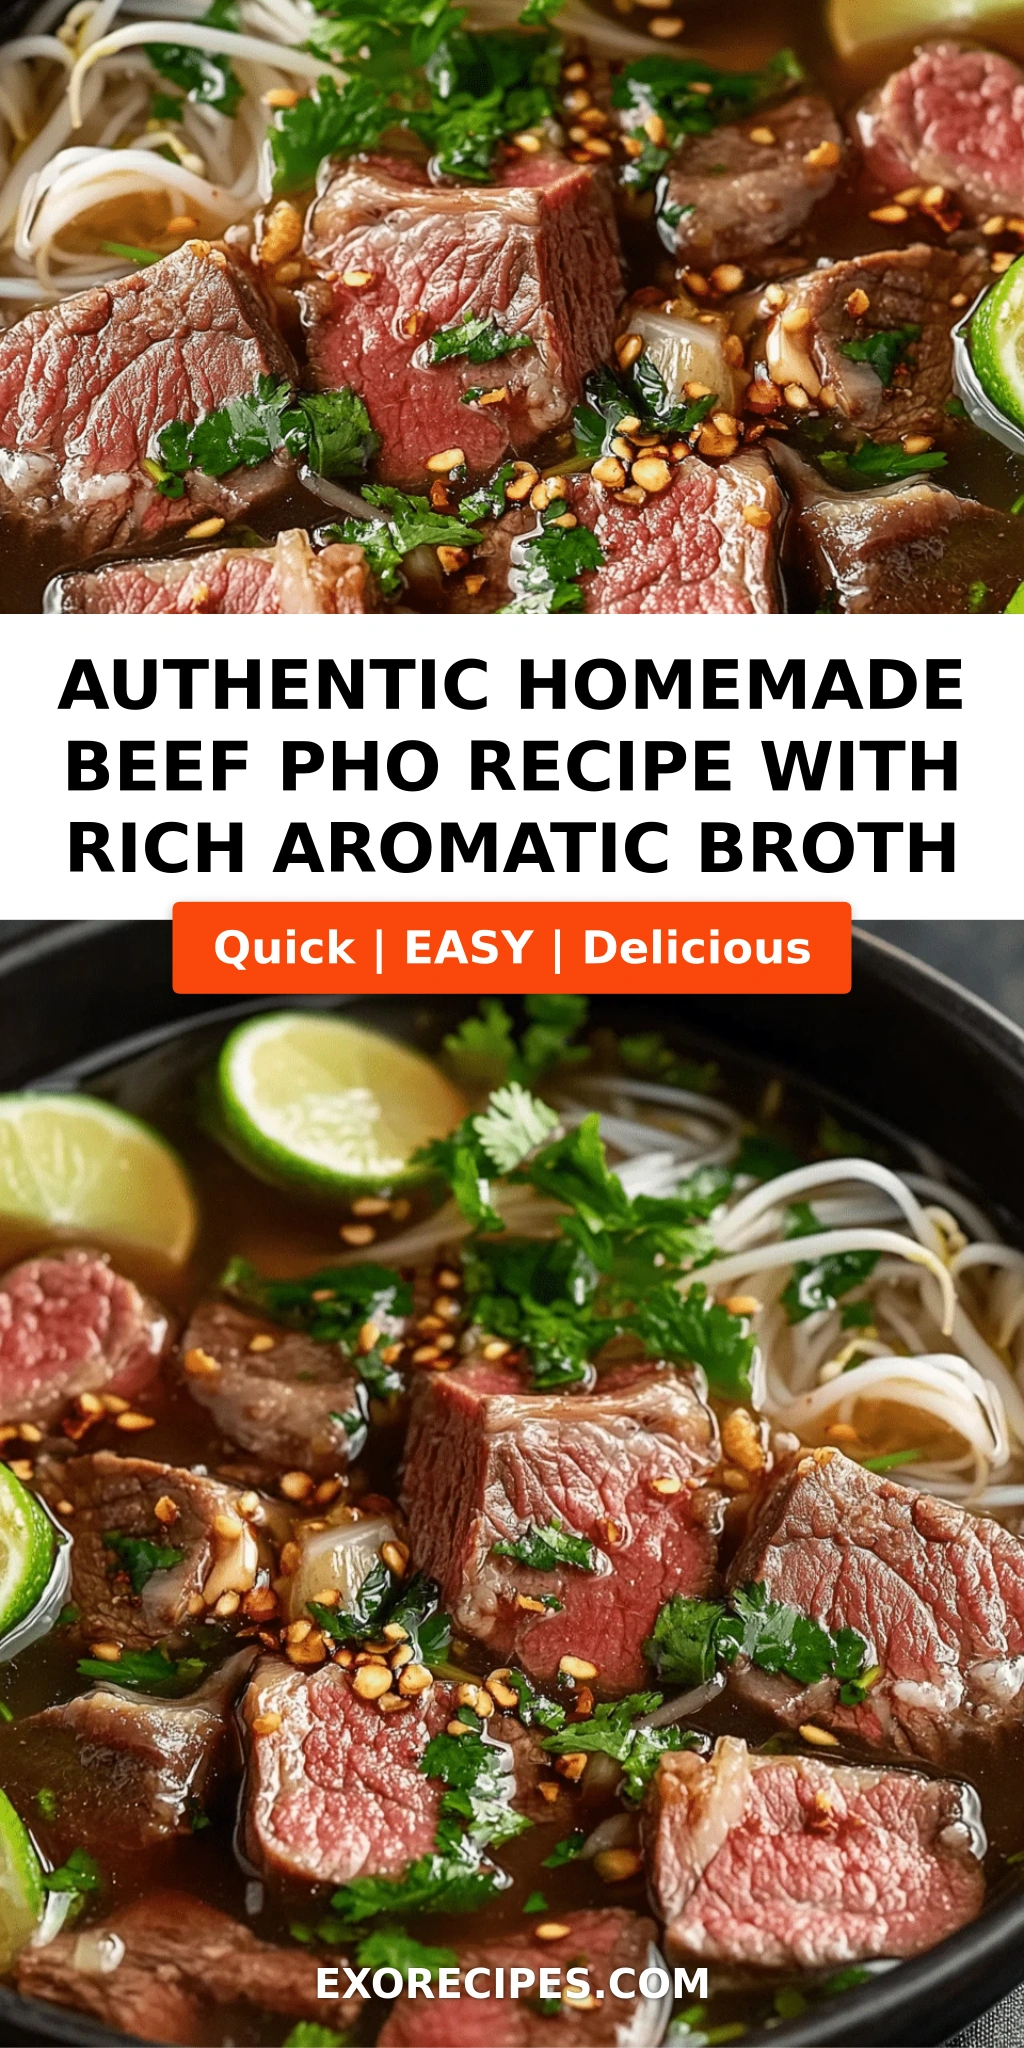
Authentic Homemade Beef Pho – The Secret to a Rich, Clear Broth at Home
Growing up in my mother’s kitchen in Morocco, I learned that the best soups are built on patient, loving hands. The same is true for this Authentic Homemade Beef Pho – a Vietnamese classic that has become a weekend ritual in my New York City home. The key to that glorious, clear broth? It’s all in the charring of the aromatics and the long, gentle simmer. No pressure cooker, no shortcuts – just time and respect for the ingredients.
Imagine the first spoonful: a fragrant steam carrying tones of star anise and charred ginger, the deep beefy richness of marrow bones, and the bright pop of fresh herbs and lime. The noodles are silky, the beef slices cook instantly in the hot broth, and every bite is a balance of savory, sweet, and aromatic. That’s the bowl I want to teach you to make today.
I’ve adapted this pho bo recipe from years of tasting at hole-in-the-wall pho shops in NYC’s Chinatown and from my own French-trained technique for stock-making. The result? A broth that’s deeply flavorful, beautifully clear, and totally achievable in your home kitchen. I’ll share my pro tips on getting that perfect char, avoiding a cloudy broth, and the one mistake most home cooks make. Let’s dive in.
Why This Authentic Homemade Beef Pho Recipe Is the Best
The Flavor Secret: The soul of this Vietnamese beef pho recipe lies in the charred onion and ginger. When you blister them under the broiler or over a flame, they develop a smoky, slightly sweet depth that no amount of powdered spices can mimic. Combined with the toasted star anise, cloves, and cinnamon, you get a broth that’s complex yet clean – a hallmark of great pho. My mother’s tagine-making taught me the power of slow-caramelized alliums, and I bring that same reverence to this pho base.
Perfected Texture: After years of testing, I’ve found that using beef knuckle or marrow bones creates a rich, gelatinous broth that clings to the noodles beautifully. The key is to blanch the bones first to remove impurities, then simmer them low and slow. This technique, learned during my pastry days in Paris, ensures a crystal-clear broth rather than a murky one. The beef sirloin slices are sliced paper-thin and cooked tableside by the hot broth – a dramatic, delicious touch.
Foolproof & Fast: I know that 4+ hours sounds like a lot, but the active work is only 20 minutes. The stove does the rest. This pho bo recipe is designed for a leisurely weekend or a meal-prep hero — make the broth on Sunday, and you’ll have restaurant-quality pho all week. No special equipment needed, just a big pot and a little patience.
Authentic Homemade Beef Pho Ingredients
I buy my beef bones from a butcher at the Union Square Greenmarket in NYC — they’re always happy to save me knuckles and marrow bones. The spices I get from a little Vietnamese market in the East Village. Each ingredient plays a role; here’s what you’ll need.
Ingredients List
- 2 pounds beef bones (knuckle or marrow)
- 1 pound beef sirloin, thinly sliced (ask your butcher to slice it for hot pot)
- 1 large onion, halved
- 4 inches ginger, halved lengthwise
- 5 star anise
- 4 cloves
- 1 cinnamon stick
- 1 tablespoon coriander seeds
- 1 tablespoon fennel seeds
- 2 tablespoons fish sauce (Red Boat brand is my go-to)
- 1 tablespoon sugar
- 1 teaspoon salt
- 8 ounces rice noodles (pho noodles)
- Toppings: bean sprouts, Thai basil, lime wedges, hoisin sauce, sriracha, sliced chili peppers
Ingredient Spotlight
Beef Bones: The foundation of the broth. Knuckle and marrow bones are rich in collagen, which gives the broth body and silkiness. If you can’t find them, use beef shank or oxtail — both add flavor and gelatin. Avoid meaty ribs; they make the broth cloudy. 💡 mia’s Pro Tip: Ask your butcher to cut the bones into 3-4 inch pieces so they fit in your pot and release maximum flavor.
Star Anise & Cinnamon: These warm spices are non-negotiable. Star anise lends that licorice-like perfume that defines pho’s aroma. Cinnamon adds sweetness without sugar. Toast them in a dry skillet until fragrant — this wakes up their essential oils. If you only have ground spices, use 1/2 teaspoon each, but whole spices are far superior.
Fish Sauce: The salinity backbone. A good fish sauce should be amber-colored and smell briny but not overwhelmingly pungent. I use Red Boat fish sauce for its clean flavor. If you’re avoiding fish, you can substitute soy sauce or tamari, but the flavor profile will shift — think Vietnamese-inspired rather than authentic.
Rice Noodles: Look for dried “pho” noodles, typically flat and about 1/8-inch wide. The best brands are from Vietnam. Don’t overcook them; they should be chewy, not mushy. I follow the package directions and drain them as soon as they’re tender.
| Original Ingredient | Best Substitution | Flavor / Texture Impact |
|---|---|---|
| Beef knuckle/marrow bones | Beef shank or oxtail | Richer, slightly fattier broth; still gelatinous |
| Star anise | 1/2 tsp anise extract (add at end) | Less depth, more one-dimensional licorice |
| Fish sauce | Soy sauce + a dash of anchovy paste | Less umami, slightly saltier; not authentic |
| Rice noodles | Thin dried vermicelli or even ramen noodles | Different chew; vermicelli is thinner, ramen is eggy |
How to Make Authentic Homemade Beef Pho — Step-by-Step
Don’t be intimidated by the long simmering time. The hands-on work is quick, and the stove does the heavy lifting. Here’s your roadmap to the perfect bowl.
Step 1: Char the Aromatics
Preheat your broiler to high. Place the halved onion and ginger on a baking sheet, cut side up. Broil for 5-10 minutes, until the surfaces are deeply blackened and blistered. Alternatively, if you have a gas stove, hold each piece directly over a burner flame with tongs for 2-3 minutes per side. You want a good char — that’s where the smoky magic lives.
💡 mia’s Pro Tip: Don’t be shy with the char. The blacker the better — just don’t burn it to ash. The caramelized sugars will add incredible depth to the broth.
Step 2: Toast the Spices
In a dry skillet over medium heat, add the star anise, cloves, cinnamon stick, coriander seeds, and fennel seeds. Toast for 1-2 minutes, shaking the pan frequently, until you smell their fragrance and they start to darken slightly. Remove from heat immediately to avoid burning.
⚠️ Common Mistake to Avoid: Burnt spices become bitter. If you see smoke, pull them off the heat. The toasting should be gentle — just until aromatic.
Step 3: Prepare the Bones
Place beef bones in a large stockpot and cover with cold water. Bring to a boil over high heat. Once boiling, let them bubble for 5 minutes. Drain the bones in a colander and rinse thoroughly under cold water to remove any scum and impurities. This step is crucial for a clear broth.
💡 mia’s Pro Tip: Use tongs to scrub the bones under running water. You want them completely clean of any gray scum before you start fresh.
Step 4: Simmer the Broth
Return the cleaned bones to the pot. Add 4 quarts fresh cold water, the charred onion and ginger, the toasted spice bundle (tie in cheesecloth if you like), fish sauce, sugar, and salt. Bring to a boil, then reduce heat to a gentle simmer. Cover partially and let it simmer for 4-6 hours. Every hour, skim off any fat or foam that rises to the surface with a ladle. The broth should never boil vigorously — a gentle bubble is all you need.
⚠️ Common Mistake to Avoid: Boiling the broth too hard will emulsify the fat and make it cloudy. Keep it at a low simmer — just an occasional bubble breaking the surface.
Step 5: Strain and Season
After simmering, strain the broth through a fine-mesh sieve lined with cheesecloth into a clean pot. Discard the solids. Taste the broth and adjust seasoning with additional fish sauce, sugar, or salt if needed. Keep the broth warm over low heat while you prepare the noodles.
Step 6: Cook Noodles and Assemble
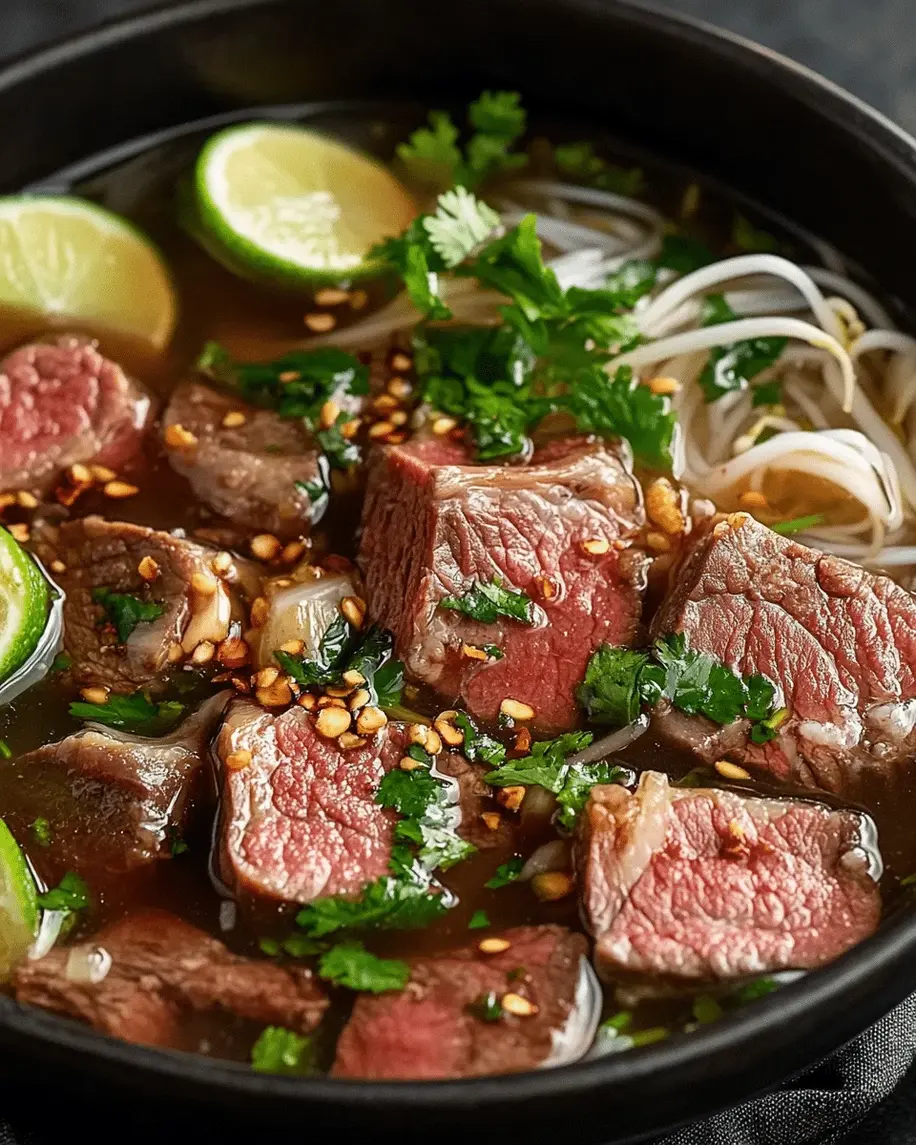
Cook the rice noodles according to package directions — usually in boiling water for 4-6 minutes until tender but still chewy. Drain and divide among six large soup bowls. Arrange the raw beef slices in a single layer on top of the noodles. Ladle the piping hot broth over the beef — the heat will cook it instantly to a perfect medium-rare.
💡 mia’s Pro Tip: For the thinnest slices, partially freeze the sirloin for 30 minutes before slicing. Use a sharp knife to cut crosswise into 1/8-inch thick pieces. Or ask your butcher to slice it for hot pot.
Step 7: Serve with Garnishes
Set out small bowls of bean sprouts, Thai basil leaves, lime wedges, hoisin sauce, sriracha, and sliced chili peppers. Let everyone customize their bowl. The traditional way is to add a squeeze of lime, a handful of basil and sprouts, and a drizzle of hoisin and sriracha to taste.
| Step | Action | Duration | Key Visual Cue |
|---|---|---|---|
| 1 | Char onion & ginger | 5-10 min | Blackened, blistered skin |
| 2 | Toast spices | 1-2 min | Fragrant, slightly darkened |
| 3 | Blanch bones | 5 min | Scum rises, water turns gray |
| 4 | Simmer broth | 4-6 hrs | Gentle bubbles, fat rises |
| 5 | Strain | 5 min | Clear, amber liquid |
| 6 | Cook noodles | 4-6 min | Tender, chewy, separates easily |
| 7 | Assemble & serve | 2 min per bowl | Beef turns pink then brown instantly |
Serving & Presentation
In my NYC kitchen, I serve this pho in deep, wide bowls — the kind that let you see the layers: noodles on the bottom, raw beef on top, then a torrent of steaming broth that turns the meat into silken ribbons. I always set the table with a platter of garnishes — the bright green of Thai basil, the crunch of bean sprouts, the zing of lime. It’s a communal experience, just like the tagine nights of my childhood in Morocco.
For a truly authentic touch, add a few drops of sriracha and a swirl of hoisin sauce to each bowl before pouring the broth — that sweet-spicy contrast is pure Hanoi street food magic. And never forget the chili peppers. A little heat wakes up all the other flavors.
| Pairing Type | Suggestions | Why It Works |
|---|---|---|
| Side Dish | Crispy spring rolls, fresh summer rolls | Crunchy contrast to the silky noodles |
| Sauce / Dip | Nuoc cham (lime, fish sauce, garlic, chili) | Bright, tangy kick to dip meats or spring rolls |
| Beverage | Vietnamese iced coffee, jasmine tea, crisp lager | Coffee’s bitterness cuts richness; tea is classic; beer refreshes |
Make-Ahead, Storage & Reheating
As a busy working mom in New York, meal prep is my lifeline. This pho broth is a dream for that: make it on Sunday, store it properly, and enjoy it all week. The key is to keep the broth separate from the noodles and garnishes until serving.
| Method | Container | Duration | Reheating Tip |
|---|---|---|---|
| Refrigerator | Airtight glass jar or plastic container | 4-5 days | Reheat on stovetop over medium heat; bring to a gentle boil |
| Freezer | Freezer-safe zip bags (lay flat) | Up to 3 months | Thaw in fridge overnight; reheat on stovetop |
| Make-Ahead | Noodles cooked separately, drained and tossed with a little oil | 1 day in advance | Dip noodles into hot broth to reheat; don’t microwave them |
When reheating, always heat the broth to a rolling boil before pouring over noodles and fresh beef. Never microwave the broth — it can separate and lose clarity. If you’ve stored the noodles, quickly blanch them in boiling water for 30 seconds before assembling. The beef should always be sliced fresh right before serving; don’t store it pre-sliced or it will discolor and dry out.
Variations & Easy Swaps
| Variation | Key Change | Best For | Difficulty Impact |
|---|---|---|---|
| Chicken Pho (Pho Ga) | Replace beef bones with a whole chicken or chicken carcasses; use chicken breast instead of sirloin | Lighter broth, quicker cooking (2 hours) | Easier |
| Vegetarian Pho | Use vegetable stock, roasted mushrooms, and kombu; add miso for depth | Plant-based version | Easier (no bone blanching) |
| Spicy Beef Pho | Add 2-3 dried Thai chilies to the broth during simmering; use sriracha as a condiment | Heat lovers | Same |
Chicken Pho (Pho Ga)
Growing up, my mother would make a similar clear broth with chicken for our harira soup during Ramadan. For pho ga, the key is using a good quality chicken and charring the ginger and onion just the same. You’ll simmer the chicken for only 1.5-2 hours before removing the meat (shred it and add back to bowls). The resulting broth is lighter but still deeply aromatic – perfect for a cold day in NYC when you want something soothing but not heavy.
Vegetarian Pho
When my farmers market haul includes an abundance of mushrooms, I make vegetarian pho. I roast shiitakes and creminis until deeply browned, then use them as the base along with kombu and a head of roasted garlic. A tablespoon of white miso stirred in at the end gives that umami punch that mimics the beef broth. It’s a different bowl, but every bit as soul-warming.
Spicy Beef Pho
For those who like heat, add dried Thai chilies or even a spoonful of gochujang to the broth during the last hour of simmering. I learned this trick from a Vietnamese cook in Paris who always added a few bird’s eye chilies to her pot. The chili heat doesn’t overpower; it weaves through the star anise and cinnamon, making the broth even more complex. Serve with extra chili oil on the side.
What is the best cut of beef to use for authentic homemade beef pho?
For the broth, the best cuts are beef knuckle or marrow bones because they are rich in collagen, which gives the broth body and a silky mouthfeel. For the raw beef served in the bowl, use boneless sirloin or ribeye — ask your butcher to slice it paper-thin for you (1/8-inch thick is ideal). The thin slices cook instantly in the hot broth, becoming tender and pink. Avoid using chuck or stew meat, as they are too tough and won’t cook properly in the quick pour-over method.
How do you achieve a clear and flavorful broth for beef pho?
Clarity and flavor come from three key steps: First, blanch the bones — boil them for 5 minutes, drain, and rinse thoroughly to remove impurities that cause cloudiness. Second, keep the simmer gentle — a low, lazy bubble (not a rolling boil) prevents the fat from emulsifying into the broth. Third, skim regularly — use a ladle to remove any foam or fat that rises during the first hour of simmering. The result is a crystal-clear, deeply beefy broth that looks as good as it tastes.
Can I make beef pho without a pressure cooker or slow cooker?
Absolutely. In fact, this recipe is designed for a regular stockpot on the stove. No special equipment is needed. The secret is time: simmer the bones for at least 4 hours (ideally 5-6) at the lowest possible heat. A pressure cooker can speed things up (about 1-1.5 hours at high pressure), but the stovetop method allows you to skim and taste as you go, which I find gives more control. A slow cooker works too — set it on low for 8-10 hours. Both yield excellent results; I include stovetop as the primary method because it’s what most home cooks have.
What are the essential toppings and garnishes for serving beef pho?
For a proper bowl of pho, you need a mix of fresh herbs, crunchy vegetables, and sauces. The essentials are: fresh bean sprouts (crunch and sweetness), Thai basil leaves (anise-like flavor that complements the broth), lime wedges (bright acidity), fresh chili peppers (heat), and a squeeze of hoisin sauce and sriracha on the side. Some people also add sliced jalapeños, mint leaves, or a dollop of sambal oelek. The garnishes are not optional — they transform the broth and make each bite different. Serve them on a platter so everyone can customize their bowl.
Can I use ground spices instead of whole for pho broth?
You can, but the flavor will be noticeably weaker and cloudier. Whole spices release flavor slowly and can be strained out cleanly. Ground spices tend to float and make the broth murky, and they lose their potency faster during a long simmer. If you only have ground, use about half the amount and add them in a spice bag so you can remove them after 30 minutes. But for the best results, I always recommend whole star anise, cloves, cinnamon sticks, and seeds. They’re easy to find at any Asian grocery store or online.
How do I store leftover beef pho properly?
Always store the broth separately from the noodles and garnishes. The broth can be refrigerated in an airtight container for 4-5 days or frozen for up to 3 months. Noodles should be stored separately in the fridge (tossed with a little oil to prevent sticking) and used within a day. Never store assembled pho — the noodles will turn to mush and the beef will get tough. To reheat, bring the broth to a rolling boil on the stovetop, pour over fresh blanched noodles and raw beef, then add fresh garnishes. That’s the only way to get that just-made taste.
Why is my pho broth cloudy?
Cloudy broth is usually the result of one of two things: either you didn’t blanch the bones properly, or you boiled the broth too vigorously. Blanching (the initial boil and rinse) removes the surface proteins that would otherwise emulsify and cloud the broth. After that, the simmer must be very gentle — no more than an occasional bubble breaking the surface. If you see a rolling boil, turn the heat down immediately. Also, avoid stirring the broth while it simmers, as that can disturb the settled impurities. If your broth is already cloudy, don’t worry – it will still taste good, but next time follow the blanching and low-simmer steps.
What fish sauce is best for pho?
I recommend Red Boat fish sauce for its clean, balanced flavor and lack of additives. It’s made from just anchovies and salt, and it’s aged for over a year, which gives it a deep, complex umami. If you can’t find Red Boat, look for brands like Three Crabs or Viet Huong – they’re widely available and work well. Avoid cheap fish sauces that have a harsh, chemical smell. A good fish sauce should smell briny and oceanic, not overpoweringly “fishy”. It’s the backbone of the broth’s salinity, so it’s worth investing in a quality bottle.
Can I make beef pho gluten-free?
Yes, this recipe is naturally gluten-free as written. Rice noodles (pho noodles) are made from rice flour and water, so they’re gluten-free. Fish sauce is typically gluten-free (check labels, some brands add wheat). All the spices and fresh ingredients are gluten-free. The only potential source of gluten would be if you add soy sauce instead of fish sauce or use a bottled hoisin sauce that contains wheat. To be safe, use a certified gluten-free hoisin sauce (like San-J) or make your own. This is a great option for anyone with celiac disease or gluten sensitivity.
How do I get the beef to be tender in pho?
The beef in pho is not cooked for a long time – it’s sliced extremely thin and then “cooked” by the hot broth poured over it. To get that tender, almost melt-in-your-mouth texture, you need to slice the raw sirloin or ribeye as thin as possible – about 1/8 inch thick. The easiest way is to partially freeze the meat for 30 minutes, then use a very sharp knife to cut across the grain. If your slices are too thick, they’ll be chewy. Ask your butcher to slice it for hot pot, or use a mandoline (carefully!) at home. The thinness is the secret.
Share Your Version!
I’d love to see how your Authentic Homemade Beef Pho turns out! Drop a comment below and let me know if you tried any of the variations, or if you discovered a new twist. Did you char your aromatics over a gas flame? Did you add extra chili? Your feedback helps other readers and makes this recipe even better. Tag me on Instagram @exorecipes or save this recipe to your Pinterest board — it really helps a small food blogger like me keep sharing these recipes.
From my NYC kitchen to yours — I hope this recipe brings as much warmth to your table as it does to mine. — mia 🧡
Love This Recipe? Save It to Pinterest!
If you enjoyed this Authentic Homemade Beef Pho recipe, don’t let it get lost in your browser tabs! 😄 Pin it now so you can find it again anytime — and explore hundreds more tried-and-tested recipes waiting for you on my Pinterest boards.
👉 Follow mia on Pinterest @exorecipe
📌 Pin this recipe · 🔁 Re-pin your favorites · 💬 Tag me when you make it — I love seeing your creations!
Did you make this recipe? I’d love to hear about your experience! Please rate it below and leave a comment. Your star rating helps other home cooks find the best pho recipe. 🌟
Authentic Homemade Beef Pho A Flavorful Journey to Vietnam
- Prep Time: 20 minutes
- Cook Time: 4 hours 30 minutes
- Total Time: 4 hours 50 minutes
- Yield: 6 1x
- Method: Main Course
- Cuisine: Vietnamese
Description
This authentic homemade beef pho recipe will take you on a flavorful journey to Vietnam with its rich, aromatic broth and tender slices of beef.
Ingredients
- 2 pounds beef bones (knuckle or marrow)
- 1 pound beef sirloin, thinly sliced
- 1 large onion, halved
- 4 inches ginger, halved lengthwise
- 5 star anise
- 4 cloves
- 1 cinnamon stick
- 1 tablespoon coriander seeds
- 1 tablespoon fennel seeds
- 2 tablespoons fish sauce
- 1 tablespoon sugar
- 1 teaspoon salt
- 8 ounces rice noodles (pho noodles)
- Toppings: bean sprouts, Thai basil, lime wedges, hoisin sauce, sriracha, sliced chili peppers
Instructions
- Step 1: Char the onion and ginger. Place onion and ginger on a baking sheet and broil for 5-10 minutes until charred. Alternatively, hold directly over a gas flame with tongs until charred.
- Step 2: Toast the spices. In a dry skillet over medium heat, toast star anise, cloves, cinnamon stick, coriander seeds, and fennel seeds for 1-2 minutes until fragrant.
- Step 3: Prepare the broth. Place beef bones in a large pot and cover with cold water. Bring to a boil, then drain and rinse bones to remove impurities. Return bones to pot.
- Step 4: Add 4 quarts fresh water, charred onion and ginger, toasted spices, fish sauce, sugar, and salt. Bring to a boil, then reduce heat and simmer for 4-6 hours, skimming fat occasionally.
- Step 5: Strain the broth through a fine mesh sieve into a clean pot. Discard solids. Keep broth warm over low heat.
- Step 6: Cook the noodles according to package directions. Drain and divide among bowls.
- Step 7: Arrange raw beef slices on top of noodles. Ladle hot broth over the beef to cook it.
- Step 8: Serve with bean sprouts, Thai basil, lime wedges, hoisin sauce, sriracha, and chili peppers on the side.
Notes
For the most authentic flavor, use beef knuckle or marrow bones and simmer the broth for at least 4 hours. The charring of onion and ginger is essential for that deep, smoky flavor. Leftover broth can be frozen for up to 3 months.
Nutrition
- Calories: 450
- Sugar: 5g
- Fat: 18g
- Carbohydrates: 45g
- Protein: 28g
Tried This Recipe? Leave a Comment!
Did you make this recipe? I’d love to hear how it turned out! Please leave a comment and a rating below. Your feedback helps other home cooks and supports cheerychop.com!
For more delicious inspiration, follow me on Pinterest!