Table of Contents
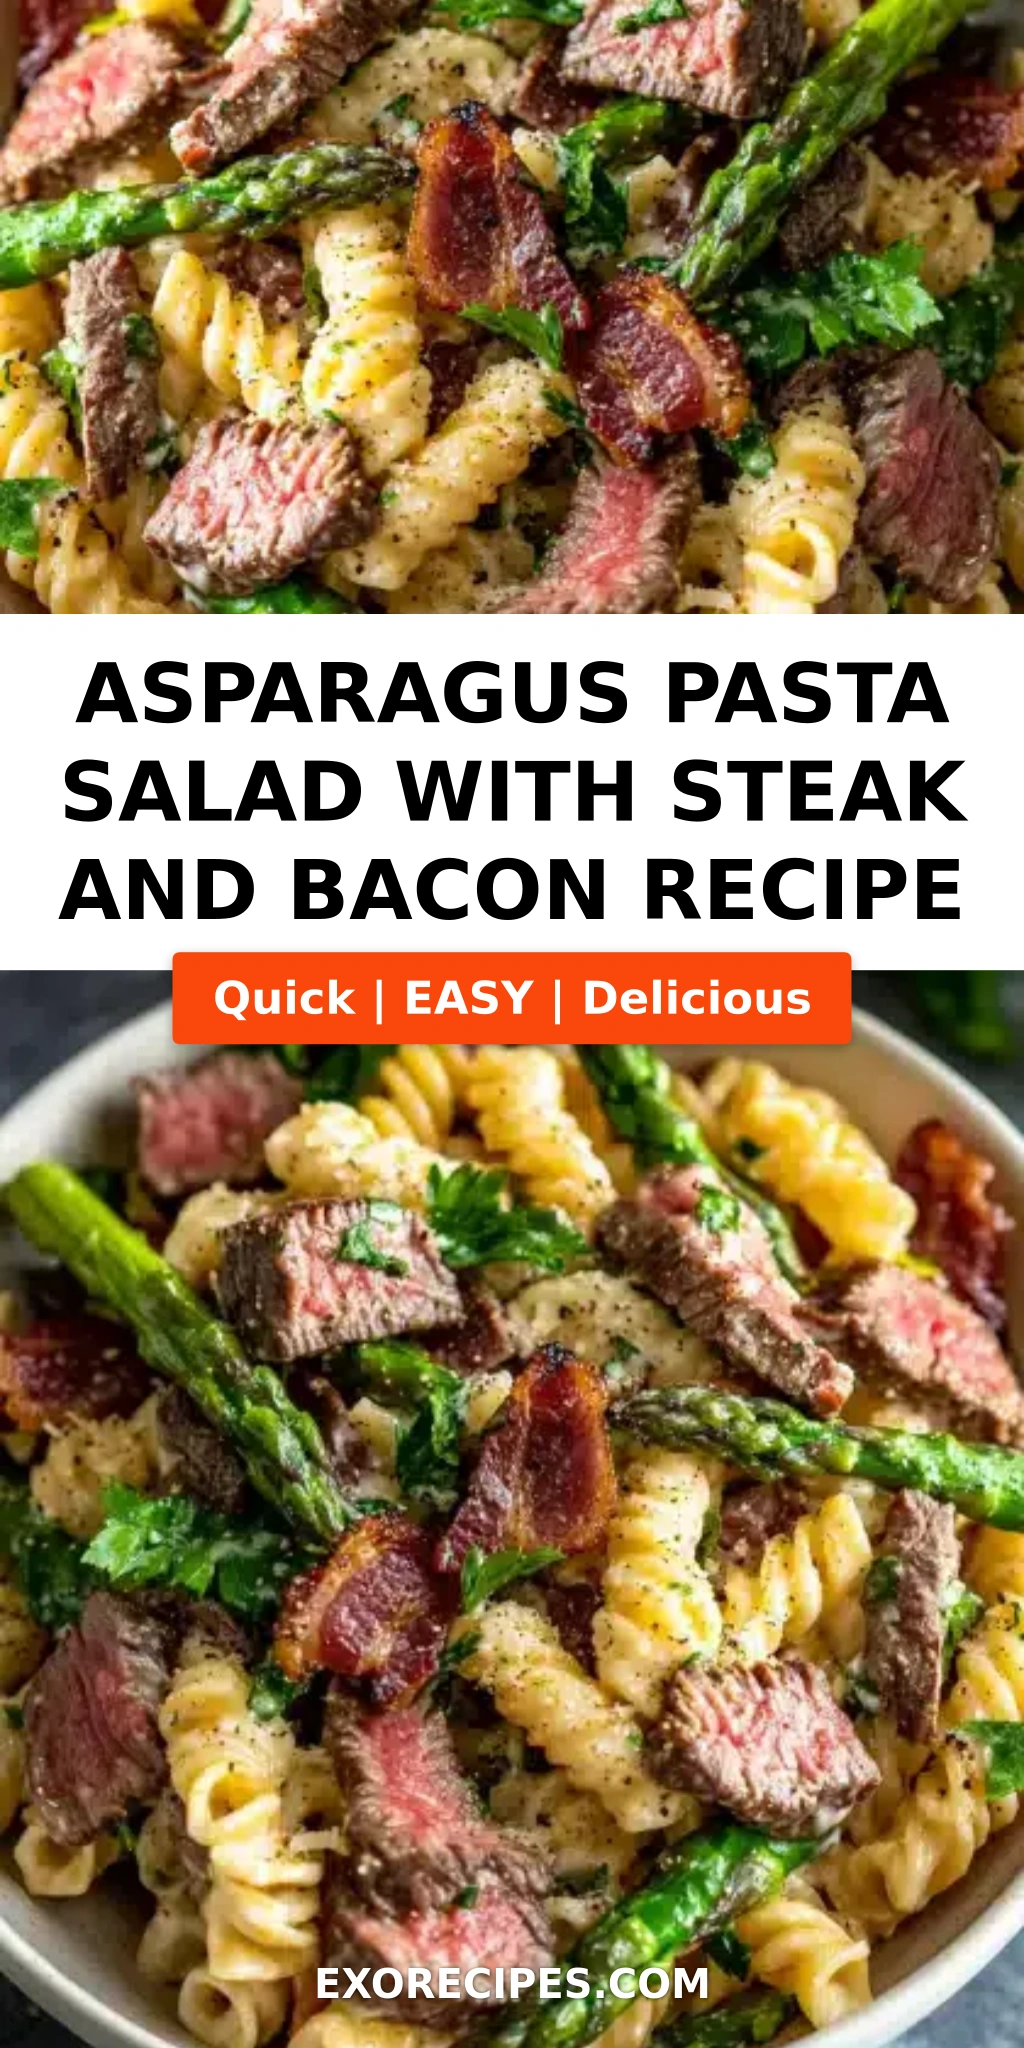
Asparagus Pasta Salad with Steak and Bacon – A Hearty, Flavor-Packed Meal You’ll Crave
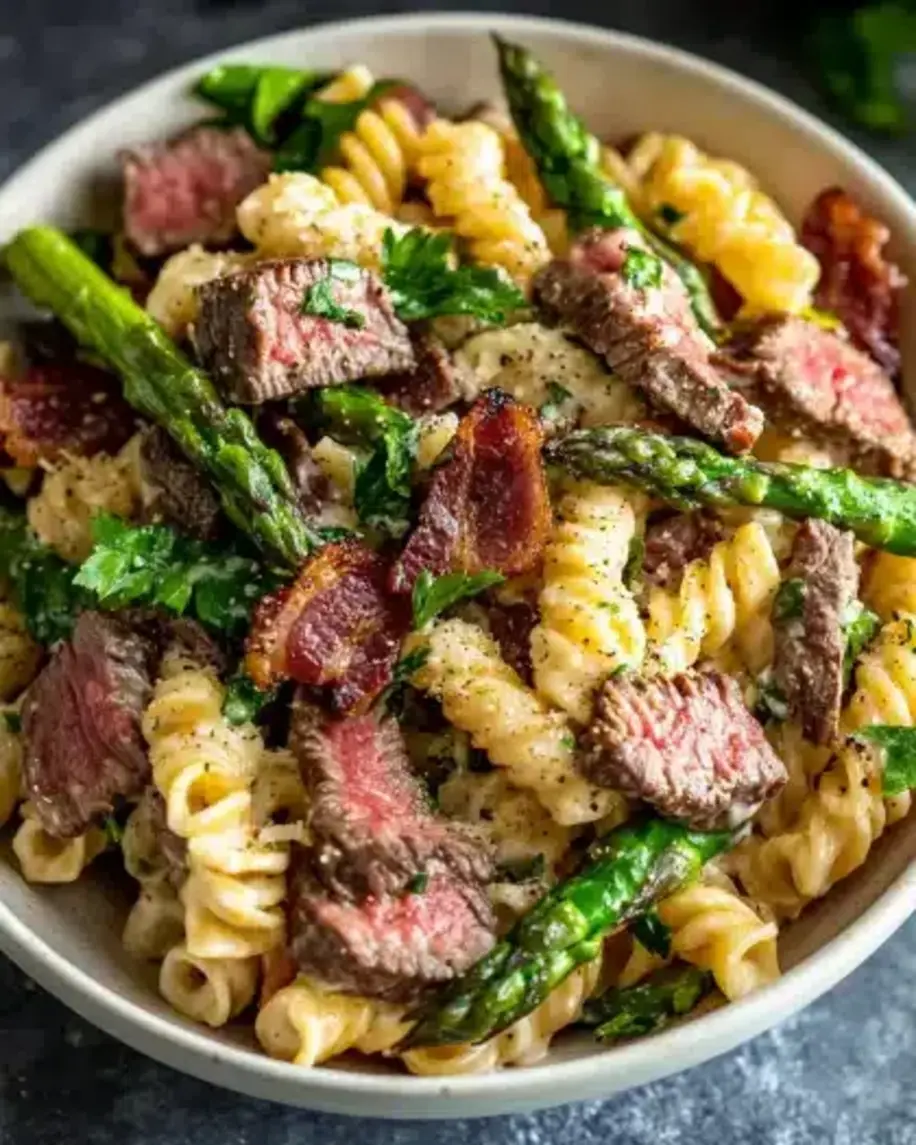
I still remember the first time I made this asparagus pasta salad with steak and bacon for a summer gathering on my rooftop in Brooklyn. My neighbor, a retired butcher from Long Island, took one bite and said, “Mia, this is the kind of salad that makes you forget it’s a salad.” That’s exactly what I was going for. This hearty pasta salad recipe brings together tender slices of sirloin, crispy bacon, bright green asparagus, and a tangy, creamy dressing that ties every bite together. It’s a main-course salad that satisfies like a steak dinner but feels lighter and brighter — perfect for warm-weather entertaining or a weeknight meal that feels special.
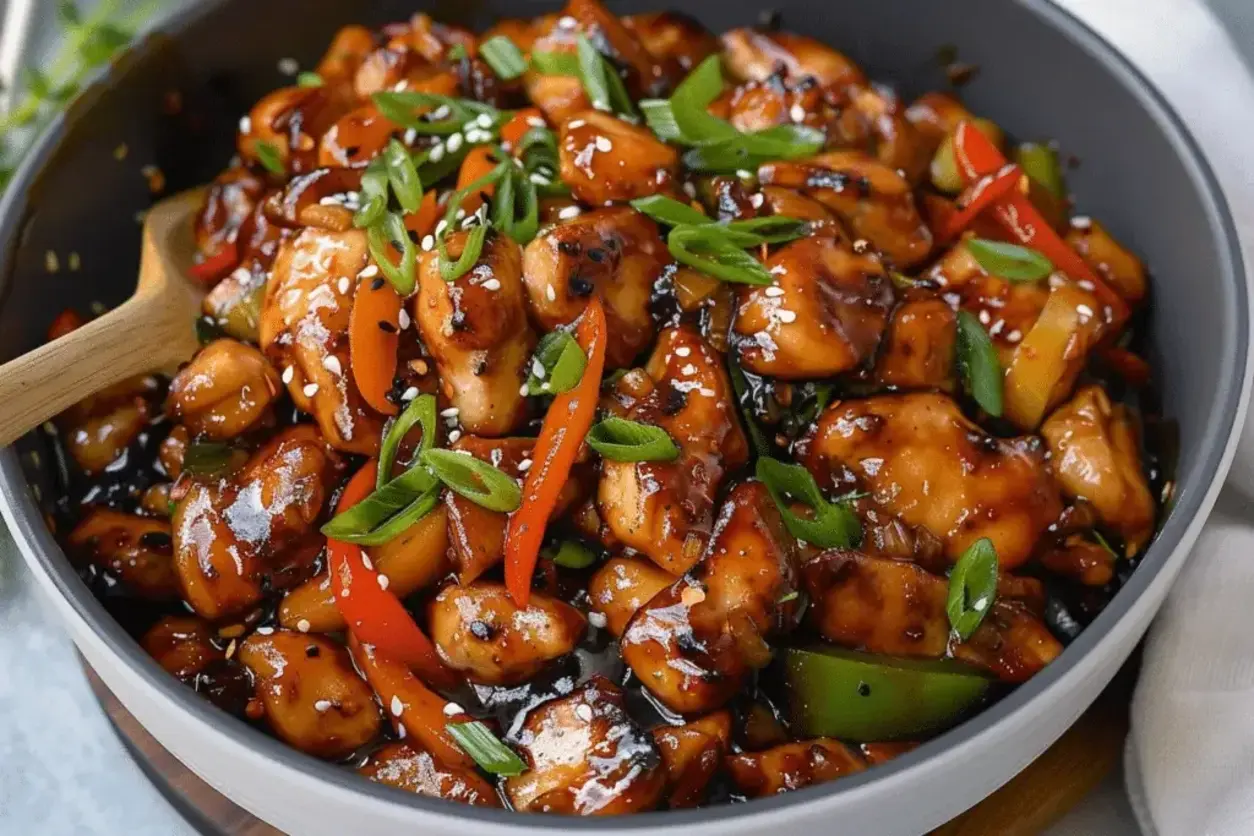
Picture this: al dente rotini cradling the creamy dressing in every spiral, juicy steak slices with that perfect sear, salty bacon crumbles that add crunch in every forkful, and tender-crisp asparagus that still has that fresh snap. The dressing — a blend of mayonnaise, sour cream, red wine vinegar, and Dijon mustard — coats everything beautifully without weighing it down. There’s a whisper of garlic, a hint of Parmesan, and a pop of fresh parsley that keeps each bite bright. It’s the kind of dish that tastes even better the next day, after the flavors have had time to get to know each other in the fridge.
My training at Le Cordon Bleu in Paris taught me that the best dishes are built on technique and quality ingredients. For this steak and bacon pasta salad, I use a simple pan-sear method for the steak that delivers a gorgeous crust and juicy interior, and I blanch the asparagus just long enough to take the raw edge off while keeping it vibrant. One mistake I see home cooks make is overcooking the pasta or the asparagus — both should have bite. I’ll walk you through every step so you can nail this hearty pasta salad recipe on your first try. From my kitchen in New York City to yours, let’s make something beautiful.
Why This Asparagus Pasta Salad with Steak and Bacon Recipe Is the Best
The Flavor Secret. This isn’t your average pasta salad. The combination of umami-rich steak, smoky bacon, and bright, grassy asparagus creates a depth of flavor that most cold salads simply don’t have. I add a pinch of salt and a hit of red wine vinegar to the dressing, which cuts through the richness and keeps the whole dish balanced. Growing up in Morocco, my mother taught me that acidity is the secret to making rich foods feel light — and that principle carries through in everything I make, from tagines to this hearty pasta salad.
Perfected Texture. As a trained chef, I obsess over texture. The pasta is cooked to al dente, then rinsed with cold water to stop the cooking and remove excess starch. The asparagus is blanched for exactly two minutes, then shocked in ice water to lock in that brilliant green color and crisp-tender bite. The steak is rested for a full five minutes before slicing so the juices stay in the meat, not on the cutting board. Every component is treated with care so that when you take a bite, everything works in harmony.
Foolproof & Fast. Despite how impressive this salad looks and tastes, it’s surprisingly approachable. The ingredients are all easy to find at any US grocery store — I pick up my asparagus and fresh parsley at the Union Square Greenmarket, and the steak and bacon from my local butcher in the East Village. The steps are straightforward, and the whole thing comes together in about 40 minutes of active time. Plus, it’s make-ahead friendly, which is a lifesaver for busy home cooks.
Asparagus Pasta Salad with Steak and Bacon Ingredients
I love how simple and honest this ingredient list is. When I shop for this steak and bacon pasta salad, I head to the farmers market first for the asparagus and parsley — there’s nothing like the flavor of just-picked asparagus in late spring. The steak I source from a local butcher who dry-ages his beef, and the bacon I look for is thick-cut and applewood-smoked. Every ingredient has a job to do, and when you start with quality, the final dish sings.
Ingredients List
- 1 lb sirloin steak
- 1 lb bacon
- 1 lb asparagus, trimmed and cut into 1-inch pieces
- 1 lb rotini or fusilli pasta
- 1/2 cup mayonnaise
- 1/4 cup sour cream
- 2 tablespoons red wine vinegar
- 1 tablespoon Dijon mustard
- 1 clove garlic, minced
- 1/2 teaspoon salt
- 1/4 teaspoon black pepper
- 1/4 cup chopped fresh parsley
- 1/4 cup grated Parmesan cheese
Ingredient Spotlight
Sirloin Steak: This cut is my go-to for this salad because it’s tender, flavorful, and more affordable than ribeye or filet. Look for steaks with good marbling — those thin white streaks of fat running through the meat — which keep the steak juicy as it cooks. If you can’t find sirloin, flank steak or skirt steak are excellent substitutes, though they benefit from a slightly shorter cooking time. When I’m in a pinch, I’ve even used leftover grilled steak from a weekend barbecue, and it works beautifully.
Asparagus: Fresh, bright green asparagus is the star vegetable here. When selecting asparagus at the store, look for spears that are firm, straight, and have tightly closed tips. The thickness doesn’t matter much — thin spears cook faster, thick spears have a meatier texture. I trim the woody ends by holding each spear near the bottom and bending gently until it snaps naturally. That’s where the tender part begins. One tested swap: green beans or broccolini work well if asparagus is out of season.
Bacon: Thick-cut bacon adds the most satisfying crunch and a smoky depth that complements the steak beautifully. I cook mine until deep golden and crispy, then drain it well on paper towels before crumbling. For a lighter option, try turkey bacon or even a plant-based bacon — just cook it a bit longer to get that crispness. Canadian bacon or pancetta are also fantastic swaps that bring a more refined, less smoky flavor to this bacon pasta salad.
Pasta: Rotini or fusilli are my top choices because their spirals and ridges catch the creamy dressing and hold onto it with every bite. I recommend cooking the pasta to al dente — one minute less than the package directs — because it will continue to absorb dressing as it chills. Short pasta shapes like farfalle, penne, or cavatappi also work wonderfully. Avoid long, delicate pasta like spaghetti or angel hair, which won’t hold up to the chunky mix of steak, bacon, and asparagus.
| Original Ingredient | Best Substitution | Flavor / Texture Impact |
|---|---|---|
| Sirloin Steak | Flank or Skirt Steak | Slightly chewier, more beefy flavor |
| Bacon | Turkey Bacon or Pancetta | Less smoky, lighter texture; pancetta adds a cured depth |
| Asparagus | Green Beans or Broccolini | Similar crunch; broccolini is slightly more bitter |
| Sour Cream | Greek Yogurt (plain, full-fat) | Tangier, slightly less rich — excellent for lighter version |
| Rotini Pasta | Fusilli or Farfalle | Similar holding power; farfalle has a different shape but works well |
How to Make Asparagus Pasta Salad with Steak and Bacon — Step-by-Step
I’ve broken this down into simple, manageable steps so you can cook with confidence. Trust the process — each step builds on the last to create a salad that’s balanced, beautiful, and deeply satisfying.
Step 1: Cook the Pasta
Bring a large pot of salted water to a rolling boil — use about 1 tablespoon of salt per 4 quarts of water. Add the rotini and cook according to package directions until al dente, typically 7-9 minutes. Drain the pasta in a colander, then rinse thoroughly with cold running water to stop the cooking process and remove surface starch. Shake the colander well to drain excess water, then set aside.
💡 mia’s Pro Tip: Cook the pasta one minute less than the package suggests. The pasta will continue to absorb moisture from the dressing as it chills, so starting with a firmer bite ensures it won’t become mushy by the next day.
Step 2: Sear the Steak
Pat the sirloin steak dry with paper towels — this is crucial for a good sear. Season generously on both sides with salt and pepper. Heat a heavy skillet (cast iron is ideal) over medium-high heat until it’s smoking hot. Add a drizzle of olive oil, then lay the steak in the pan. Cook for 4-5 minutes per side for medium-rare, or until the internal temperature reaches 130°F. Use tongs to flip and also sear the fat cap on the side for extra flavor. Transfer the steak to a cutting board and let it rest for at least 5 minutes before slicing.
⚠️ Common Mistake to Avoid: Slicing the steak immediately after cooking forces all the juices out onto the board, leaving dry meat. Always rest your steak for 5-7 minutes to let the juices redistribute.
Step 3: Crisp the Bacon
While the steak rests, cook the bacon in the same skillet (or a separate one). Place bacon strips in a cold skillet, then turn the heat to medium. Cook, flipping occasionally, until deep golden and crispy, about 6-8 minutes total. Transfer to a paper-towel-lined plate to drain and cool. Once cool enough to handle, crumble or chop into bite-sized pieces.
💡 mia’s Pro Tip: Save 1-2 tablespoons of the rendered bacon fat and whisk it into the dressing for an extra layer of smoky, savory flavor. It’s a trick I learned from a chef friend in Paris who adds bacon fat to everything from vinaigrettes to mashed potatoes.
Step 4: Blanch the Asparagus
Bring a small pot of salted water to a boil. Add the trimmed and cut asparagus pieces and cook for exactly 2 minutes — they should turn bright green and be tender but still have a slight snap. Immediately transfer the asparagus to a bowl of ice water (an ice bath) to stop the cooking. Let it sit for 2 minutes, then drain well and pat dry with a clean kitchen towel or paper towels.
⚠️ Common Mistake to Avoid: Skipping the ice bath is a big no-no. If you don’t shock the asparagus, residual heat will continue cooking it, turning it limp and dull green. The ice bath locks in color and crunch.
Step 5: Make the Dressing
In a small bowl, combine the mayonnaise, sour cream, red wine vinegar, Dijon mustard, minced garlic, salt, and pepper. Whisk until smooth and creamy. Taste and adjust — you might want an extra splash of vinegar for more tang, or a pinch more salt to brighten the flavors. Set aside while you assemble the rest.
💡 mia’s Pro Tip: Let the dressing sit for 10-15 minutes before tossing it with the salad. This allows the garlic to mellow and the flavors to meld, giving you a more rounded, cohesive taste.
Step 6: Assemble the Salad
In a large mixing bowl, combine the cooked and cooled pasta, sliced steak, crumbled bacon, blanched asparagus, chopped parsley, and grated Parmesan cheese. Pour the dressing over the top and toss gently with a large spatula or wooden spoon until everything is evenly coated. Be careful not to overmix — you want the steak to stay in nice slices and the asparagus to remain intact.
Step 7: Chill and Serve
Cover the bowl with plastic wrap or a lid and refrigerate for at least 1 hour. This resting time is essential — it allows the pasta to absorb the dressing and the flavors to marry. When you’re ready to serve, give the salad a gentle stir, taste, and adjust seasoning if needed. Garnish with a little extra parsley and Parmesan on top for presentation.
⚠️ Common Mistake to Avoid: Serving the salad straight from the fridge without letting it sit for 5-10 minutes at room temperature. Chilled dressing can taste flat — letting it warm slightly brings the flavors back to life.
| Step | Action | Duration | Key Visual Cue |
|---|---|---|---|
| 1 | Cook pasta | 7-9 min | Al dente — tender but firm bite |
| 2 | Sear steak | 4-5 min per side | Deep golden brown crust |
| 3 | Cook bacon | 6-8 min | Deep golden and crispy |
| 4 | Blanch asparagus | 2 min | Bright green, slightly tender |
| 5 | Make dressing | 5 min | Smooth, creamy, well blended |
| 6 | Assemble | 5 min | Everything evenly coated |
| 7 | Chill | 1 hr minimum | Flavors melded, pasta slightly softened |
Serving & Presentation
This asparagus steak salad is a showstopper on any table. I love serving it in a wide, shallow bowl or on a large platter so all the colorful components — the green asparagus, the golden pasta, the deep brown steak slices, and the crispy bacon crumbles — are visible. A final sprinkle of fresh parsley and a light dusting of Parmesan cheese on top adds a restaurant-quality touch. For a dinner party, I sometimes add a handful of cherry tomato halves for an extra pop of color and sweetness.
In terms of pairings, this hearty pasta salad recipe is substantial enough to be a complete main course, but it also plays beautifully alongside other dishes. In the summer, I serve it with a chilled cucumber soup or a simple green salad with lemon vinaigrette. In cooler months, it’s wonderful with a bowl of roasted tomato soup or even as a side to grilled chicken or fish. My husband loves it with a glass of crisp Sauvignon Blanc, while I prefer a cold IPA — the bitterness cuts through the richness of the steak and bacon beautifully.
The way I like to plate this for guests is to mound the salad in the center of the platter, then fan the steak slices artfully on top rather than mixing them all in. This keeps the steak as the hero of the dish and ensures every person gets a nice piece of meat on their first serving. A few extra bacon crumbles and a drizzle of the dressing on top make it look intentional and beautiful.
| Pairing Type | Suggestions | Why It Works |
|---|---|---|
| Side Dish | Cucumber soup, green salad, roasted tomato soup | Light sides balance the hearty pasta and steak |
| Sauce / Dip | Extra dressing on the side, chimichurri, ranch | Adds moisture and extra flavor for those who want it |
| Beverage | Sauvignon Blanc, cold IPA, lemonade with mint | Acidity and bubbles cut through the richness |
| Garnish | Fresh parsley, Parmesan shavings, cherry tomatoes | Adds color, freshness, and visual appeal |
Make-Ahead, Storage & Reheating
This bacon pasta salad is a dream for meal prep. I often make it on a Sunday evening for easy lunches throughout the week. The flavors actually improve after a day or two in the fridge, as the dressing soaks into the pasta and the steak marinates ever so slightly. Here’s everything you need to know about storing and reheating so your salad stays at its best.
| Method | Container | Duration | Reheating Tip |
|---|---|---|---|
| Refrigerator | Airtight container | Up to 3 days | Serve cold or let sit at room temp 10 min |
| Freezer | Freezer-safe container | Up to 2 months | Thaw in fridge overnight; add fresh parsley before serving |
| Make-Ahead | Airtight container | 1-2 days in advance | Assemble but add bacon and parsley just before serving to keep crunch |
If you plan to make this salad ahead for a party, here’s my best strategy: assemble everything except the bacon, parsley, and Parmesan. Store the salad base in the fridge, and keep the bacon crumbles, chopped parsley, and grated cheese in separate containers. When you’re ready to serve, add those final three ingredients and toss gently. This keeps the bacon crispy and the parsley bright. For the best texture, I don’t recommend reheating this salad — it’s designed to be served cold or at room temperature. If you’re like me and enjoy a slightly warm version, you can microwave a single serving for about 30 seconds, just enough to take the chill off without cooking the steak or wilting the asparagus.
Variations & Easy Swaps
Over the years, I’ve played with this recipe in so many ways — testing new ingredients, swapping proteins, and adapting it for different diets. Whether you’re cooking for a crowd with dietary restrictions or just want to try something new, these variations are all tested and approved from my kitchen to yours.
| Variation | Key Change | Best For | Difficulty Impact |
|---|---|---|---|
| Moroccan Spice Twist | Add ras el hanout + harissa to dressing | Adventurous palates, North African flavor lovers | Easy |
| Lighter / Greek Yogurt Swap | Replace sour cream with Greek yogurt | Lighter meals, calorie-conscious | Easy |
| Summer Berry & Herb | Add strawberries or blueberries + basil | Summer entertaining, fresh and bright | Easy |
Moroccan Spice Twist
This variation is close to my heart — it brings the flavors of my childhood in Morocco right into this hearty pasta salad recipe. Whisk 1 teaspoon of ras el hanout (a warm, aromatic Moroccan spice blend) into the dressing, and drizzle in 1-2 teaspoons of harissa paste for a gentle heat. The cumin, coriander, and cinnamon notes in the ras el hanout pair beautifully with the steak and bacon. I also like to add a handful of chopped dried apricots for a touch of sweetness that echoes the souks of Marrakech. This version is incredible served with a side of warm flatbread.
Lighter / Greek Yogurt Swap
If you’re looking for a lighter take on this bacon pasta salad, swap the sour cream for an equal amount of plain full-fat Greek yogurt. The yogurt adds a tangy creaminess while significantly reducing the fat and calories. I’ve tested this swap dozens of times, and the texture remains luxuriously creamy — just be sure to use full-fat yogurt, as non-fat versions can separate and become watery. You can also reduce the mayonnaise by half and bulk up the dressing with extra yogurt for an even lighter option. The flavor stays bright and satisfying, and no one will guess it’s a lighter version.
Summer Berry & Herb
In the peak of summer, when the Union Square Greenmarket is overflowing with berries, I love adding a fruity twist to this asparagus steak salad. Fold in 1 cup of halved fresh strawberries or blueberries and swap the parsley for fresh basil. The sweetness of the berries plays against the savory steak and bacon in the most delightful way, and the basil adds an aromatic freshness that ties everything together. This variation is best served within a few hours of assembling, as the berries can release moisture if left too long. It’s a showstopper for Fourth of July gatherings or summer barbecues.
How do you cook the steak for the asparagus pasta salad to keep it tender and juicy?
The key to tender, juicy steak for this asparagus pasta salad with steak and bacon starts with the right cut and technique. Pat the sirloin steak dry with paper towels, season generously with salt and pepper, and let it come to room temperature for about 20 minutes before cooking. Sear it in a hot cast-iron skillet over medium-high heat for 4-5 minutes per side for medium-rare. The most important step is resting the steak for at least 5 minutes after cooking — this allows the juices to redistribute throughout the meat rather than running out onto the cutting board. Slice thinly against the grain for the most tender bite possible. I also recommend using a meat thermometer to remove guesswork: 130°F for medium-rare, 140°F for medium.
What can I substitute for bacon in this asparagus pasta salad recipe?
There are several excellent substitutes for bacon in this steak and bacon pasta salad, depending on your dietary needs or what you have on hand. Turkey bacon is a popular lighter option — cook it until extra crispy since it has less fat. Pancetta, which is Italian cured pork belly, brings a more refined, less smoky flavor and crisps up beautifully. For a vegetarian version, try smoked tempeh strips or coconut bacon, which offers a smoky, crunchy texture without any meat. Canadian bacon (which is more like ham) is another option, though it won’t get as crispy. If you’re simply out of bacon, you can skip it entirely and add an extra pinch of smoked paprika to the dressing to mimic that smoky depth.
Can I make this asparagus pasta salad with steak and bacon ahead of time?
Absolutely — this asparagus pasta salad with steak and bacon is actually one of those dishes that tastes better when made ahead! I recommend assembling the salad up to 1-2 days in advance, but with one important strategy: keep the bacon, parsley, and Parmesan cheese separate and add them just before serving. This ensures the bacon stays crispy and the herbs remain bright. The rest of the salad — pasta, steak, asparagus, and dressing — can be combined and refrigerated in an airtight container. When you’re ready to serve, let the salad sit at room temperature for 10-15 minutes, then add the reserved bacon, parsley, and Parmesan, and toss gently. The flavors will have melded beautifully overnight, making for a truly delicious meal.
What type of pasta works best for a hearty steak and asparagus salad?
For a hearty steak and bacon pasta salad, you want a short pasta shape with plenty of nooks and crannies to hold the dressing. Rotini and fusilli are my top choices because their spirals and ridges catch the creamy dressing beautifully and hold onto it with every bite. Cavatappi (sometimes called cellentani) is another excellent option — those corkscrew shapes are perfect for trapping dressing and small pieces of bacon and asparagus. Farfalle (bow-tie pasta) works well too, though it doesn’t hold dressing quite as well. I recommend cooking the pasta to al dente, about one minute less than the package directs, since it will continue to absorb dressing as it chills. Avoid long, thin pasta shapes like spaghetti or linguine — they won’t stand up to the chunky mix of steak, bacon, and vegetables.
Can I use frozen asparagus instead of fresh for this recipe?
You can use frozen asparagus, but fresh is strongly recommended for the best texture and flavor in this asparagus pasta salad. Frozen asparagus tends to be softer and more watery after thawing, which can dilute the dressing and make the salad less vibrant. If frozen is all you have, thaw it completely in the refrigerator, pat it very dry with paper towels, and skip the blanching step — frozen asparagus is already blanched before freezing. Add it directly to the salad without cooking. The texture will be more tender and less firm than fresh, but the flavor will still be good. For the brightest green color and best snap, stick with fresh asparagus when it’s in season.
How do I prevent the pasta salad from becoming too dry after refrigeration?
Pasta salads naturally absorb dressing as they sit, so a little prevention goes a long way. First, reserve about 1/4 cup of the dressing separately and add it just before serving if the salad seems dry. Second, cook the pasta to al dente — slightly undercooked pasta absorbs less dressing initially and holds its texture better. Third, toss the warm pasta with a tablespoon of olive oil before adding the dressing; this creates a light barrier that slows absorption. Finally, when storing, press a piece of plastic wrap directly onto the surface of the salad before covering the container — this prevents a skin from forming and keeps the top layer from drying out. If your salad does become dry, a splash of milk or a dollop of extra mayonnaise stirred in will revive the creaminess.
Can I leave out the steak and make this a vegetarian pasta salad?
Yes, this hearty pasta salad recipe works beautifully as a vegetarian dish! Simply skip the steak and double the bacon (or use a vegetarian bacon alternative) to maintain the smoky, savory flavor profile. For extra protein and heartiness, add 1 cup of chickpeas or cannellini beans — they absorb the dressing wonderfully and add a creamy texture. You can also toss in some grilled mushrooms (portobello or cremini) for that meaty, umami quality that steak typically provides. If you’re keeping the bacon but omitting the steak, consider adding an extra vegetable like roasted red peppers or artichoke hearts to round out the dish. The dressing and asparagus base are so flavorful that you won’t miss the meat at all.
What is the best way to trim asparagus for this salad?
Trimming asparagus is simple once you know the trick. The woody end of each spear naturally breaks at the point where the tender part begins. Take one spear and hold it near the bottom with both hands, then gently bend it until it snaps — discard the woody end. Line up the remaining spears with this trimmed one and cut them all at the same spot using a chef’s knife. For this steak and asparagus salad, I then cut the trimmed spears into 1-inch pieces, which gives you nice bite-sized pieces that are easy to eat with the pasta and steak. If you prefer thinner pieces, you can slice thicker spears lengthwise before cutting into pieces. No need to peel the asparagus — the skin is tender and adds fiber and color.
Share Your Version!
I absolutely love hearing how this recipe turns out in your kitchen. When you make this asparagus pasta salad with steak and bacon, snap a photo and tag me on Instagram or Pinterest — I’m @exorecipes everywhere. Leave a star rating and a comment below to tell me what you think, what swaps you tried, or how you served it. Did you add the Moroccan spice twist? Did you make it for a party? I read every comment and I love learning from your kitchen adventures.
If there’s one thing I hope you take away from this recipe, it’s that a hearty, satisfying salad can be so much more than a bowl of greens. With quality ingredients, a few simple techniques, and a little love, you can create something that feels both special and approachable. Whether you’re meal-prepping for the week, feeding your family on a busy Tuesday, or impressing friends at a summer cookout, this steak and bacon pasta salad delivers every time.
From my NYC kitchen to yours — I hope this recipe brings as much warmth to your table as it does to mine. — mia 🧡
Love This Recipe? Save It to Pinterest!
If you enjoyed this Asparagus Pasta Salad with Steak and Bacon recipe, don’t let it get lost in your browser tabs! 😄 Pin it now so you can find it again anytime — and explore hundreds more tried-and-tested recipes waiting for you on my Pinterest boards.
👉 Follow mia on Pinterest @exorecipe
📌 Pin this recipe · 🔁 Re-pin your favorites · 💬 Tag me when you make it — I love seeing your creations!
💬 What’s your favorite way to enjoy this hearty pasta salad?
Share your thoughts, questions, or a photo of your creation below — I’d love to hear from you!
Asparagus Pasta Salad with Steak and Bacon A Flavorful, Hearty Salad Youll Love
- Prep Time: 20 minutes
- Cook Time: 20 minutes
- Total Time: 40 minutes plus chilling
- Yield: 8 1x
- Method: Main Course
- Cuisine: American
Description
A hearty and flavorful pasta salad with tender steak, crispy bacon, fresh asparagus, and a tangy dressing.
Ingredients
- 1 lb sirloin steak
- 1 lb bacon
- 1 lb asparagus, trimmed and cut into 1-inch pieces
- 1 lb rotini or fusilli pasta
- 1/2 cup mayonnaise
- 1/4 cup sour cream
- 2 tablespoons red wine vinegar
- 1 tablespoon Dijon mustard
- 1 clove garlic, minced
- 1/2 teaspoon salt
- 1/4 teaspoon black pepper
- 1/4 cup chopped fresh parsley
- 1/4 cup grated Parmesan cheese
Instructions
- Cook pasta according to package directions until al dente. Drain and rinse with cold water.
- Season steak with salt and pepper. Grill or pan-sear over medium-high heat to desired doneness (about 4-5 minutes per side for medium-rare). Let rest 5 minutes, then slice thinly against the grain.
- Cook bacon in a skillet until crisp. Drain on paper towels, then crumble.
- Blanch asparagus in boiling salted water for 2 minutes, then plunge into ice water. Drain and set aside.
- In a small bowl, whisk together mayonnaise, sour cream, red wine vinegar, Dijon mustard, garlic, salt, and pepper.
- In a large bowl, combine cooked pasta, steak slices, bacon, asparagus, dressing, parsley, and Parmesan cheese. Toss gently to coat.
- Taste and adjust seasoning. Refrigerate for at least 1 hour before serving for best flavor.
Notes
For a lighter version, substitute Greek yogurt for sour cream. This salad can be stored in an airtight container in the refrigerator for up to 3 days.
Nutrition
- Calories: 520
- Sugar: 4g
- Fat: 26g
- Carbohydrates: 45g
- Protein: 28g
Tried This Recipe? Leave a Comment!
Did you make this recipe? I’d love to hear how it turned out! Please leave a comment and a rating below. Your feedback helps other home cooks and supports cheerychop.com!
For more delicious inspiration, follow me on Pinterest!