Table of Contents
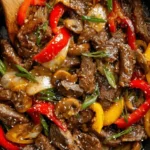
Asian BBQ Beef Stir-Fry with Orange Zest – Bold Weeknight Flavor
I still remember the first time I added orange zest to an Asian beef stir-fry recipe—it was a rainy Tuesday in my tiny Paris kitchen, and I was homesick for the bright citrus notes my mother used in Moroccan tagines. That spark of inspiration turned into this Asian BBQ Beef Stir-Fry with Orange Zest, a dish that marries the bold, smoky tang of BBQ with the fresh pop of orange. Growing up in Morocco, I learned that a single aromatic can transform a dish. Here in New York, I bring that same principle to quick weeknight cooking: this quick Asian BBQ beef recipe delivers complex flavor in just 25 minutes.
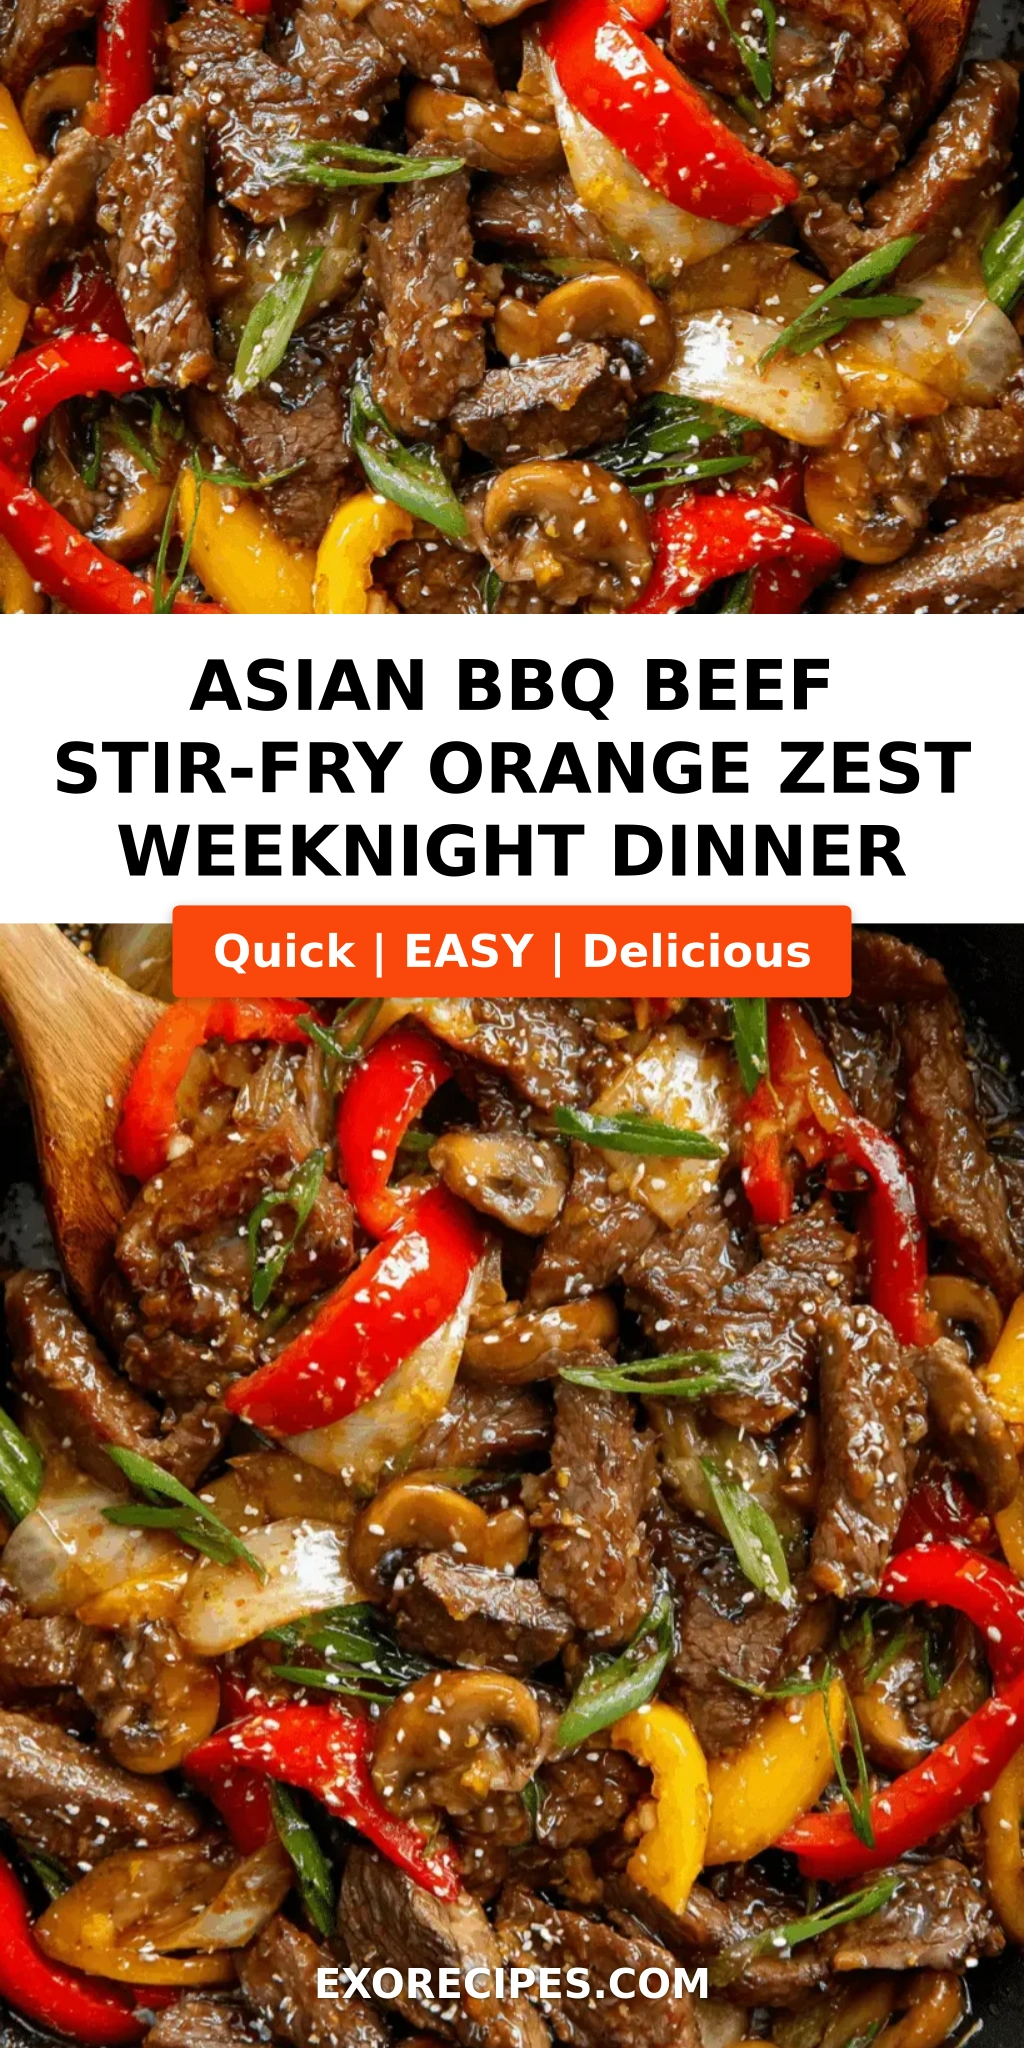
Imagine tender strips of beef sirloin, seared to a caramelized crust, then tossed with vibrant bell peppers and crisp snap peas in a glossy, orange-kissed BBQ sauce. The aroma alone—sticky sweet, savory, with a hint of heat—will pull your family to the table before you even call them. Each bite offers a contrast: the juicy beef, the crunch of vegetables, and that bright orange finish that cuts through the richness. It’s the kind of weeknight beef stir-fry that feels like a special occasion but comes together faster than takeout.
What sets this version apart? It’s the orange zest—not just juice, but the fragrant oils from the peel that elevate the entire dish. My training at Le Cordon Bleu taught me the power of balancing acid and sweet, and here I use orange marmalade and zest to create a sauce that’s both bold and nuanced. I’ll also share a pro tip for keeping beef tender even with a thick sauce (hint: it’s all about the cornstarch coating and the order of cooking). Whether you’re a stir-fry novice or a seasoned pro, you’ll love how foolproof this method is.
Why This Asian BBQ Beef Stir-Fry Recipe Is the Best
The Flavor Secret: The combination of Asian BBQ sauce (with its molasses-like depth) and orange marmalade creates a sticky, tangy glaze that clings to every piece of beef. I add freshly grated orange zest at the end for a burst of essential oils that the marmalade alone can’t provide. This is a trick I borrowed from my mother’s orange-blossom water technique—a little floral pop that wakes up the whole dish.
Perfected Texture: Tender beef in a stir-fry is all about the sear. By coating the beef in soy sauce and cornstarch, then searing in batches over high heat, you create a crust that traps juices. The cornstarch also acts as a barrier, preventing the sauce from making the beef soggy. In Paris, I learned to respect the Maillard reaction; here, I apply it to a weeknight dinner.
Foolproof & Fast: This recipe uses one wok or skillet, requires no special equipment, and comes together in under half an hour. The steps are simple enough for any home cook, yet the result tastes like a restaurant-quality Asian stir-fry with orange. Plus, I’ve tested it with different proteins and vegetables, so you can adapt it to whatever you have on hand.
Asian Beef Stir-Fry Recipe Ingredients
I source most of my ingredients from the Union Square Greenmarket or local Asian grocery stores in New York. For beef, I look for well-marbled sirloin or flank steak—ask your butcher to slice it thinly across the grain. The orange zest should come from a bright, firm orange; organic is best since you’re using the peel. The snap peas remind me of the fresh peas my mother would shell in the courtyard in Marrakech.
Ingredients List
- 1 lb beef sirloin, thinly sliced
- 2 tablespoons soy sauce
- 1 tablespoon cornstarch
- 2 tablespoons vegetable oil
- 1 red bell pepper, sliced
- 1 yellow bell pepper, sliced
- 1 cup snap peas
- 3 cloves garlic, minced
- 1 tablespoon fresh ginger, grated
- For the Sauce:
- 1/4 cup Asian BBQ sauce
- 2 tablespoons orange marmalade
- 1 tablespoon rice vinegar
- 1 teaspoon orange zest
- 1/4 teaspoon red pepper flakes
- 2 green onions, sliced (for garnish)
Ingredient Spotlight
Beef Sirloin: This cut is lean yet tender when sliced thin and quickly cooked. Look for bright red meat with fine marbling. If you can’t find sirloin, flank steak or skirt steak work beautifully—just be sure to slice against the grain for maximum tenderness.
Asian BBQ Sauce: Not all BBQ sauces are equal. Look for brands like Lee Kum Kee or a homemade version with hoisin, soy, and a touch of honey. The sauce should be thick and slightly sweet. Substitution: mix 2 tbsp hoisin + 1 tbsp soy + 1 tsp brown sugar.
Orange Marmalade & Zest: Marmalade adds sweetness and a slight bitterness from the peel. The zest is non-negotiable for that bright aroma. If you don’t have marmalade, use apricot jam + a splash of orange juice, but you’ll miss some complexity.
Snap Peas: These provide a sweet crunch. Substitute with snow peas or green beans if needed. For a more colorful dish, add a handful of baby corn or broccoli florets.
| Original Ingredient | Best Substitution | Flavor / Texture Impact |
|---|---|---|
| Beef Sirloin | Flank steak or skirt steak (thinly sliced) | Slightly more chew; still tender if sliced thin |
| Asian BBQ Sauce | 2 tbsp hoisin + 1 tbsp soy + 1 tsp brown sugar | Less smoky but equally savory |
| Orange Marmalade | Apricot jam + 1 tbsp orange juice | Less bitter, more fruity; still works |
| Snap Peas | Snow peas or green beans | Similar crunch; green beans need slightly longer cooking |
How to Make Asian BBQ Beef Stir-Fry — Step-by-Step
This quick Asian BBQ beef dish comes together in just a few steps. Follow these instructions and you’ll have a restaurant-quality meal on your table in no time.
Step 1: Marinate the Beef
In a medium bowl, toss the sliced beef with soy sauce and cornstarch. Let it marinate for 10 minutes while you prep the vegetables. This coating not only seasons the beef but also helps create a protective barrier that locks in moisture during high-heat searing.
💡 mia’s Pro Tip: For extra-tender beef, add a pinch of baking soda to the marinade (just 1/4 teaspoon). This is a classic Chinese restaurant trick that works wonders!
Step 2: Whisk the Sauce
In a small bowl, combine the Asian BBQ sauce, orange marmalade, rice vinegar, orange zest, and red pepper flakes. Whisk until smooth. Set aside. The marmalade should be fully dissolved; if it’s too thick, microwave for 10 seconds.
⚠️ Common Mistake to Avoid: Don’t add the sauce too early or it will burn. Keep it separate until the very end.
Step 3: Sear the Beef
Heat 1 tablespoon of vegetable oil in a large wok or heavy skillet over high heat until shimmering. Add half the beef in a single layer (don’t overcrowd). Sear for 2 minutes per side until a deep brown crust forms. Transfer to a plate and repeat with remaining beef.
💡 mia’s Pro Tip: Use a cast iron skillet if you don’t have a wok—it retains heat better than nonstick for that perfect caramelization.
Step 4: Stir-Fry the Vegetables
In the same wok, add the remaining 1 tablespoon oil. Add sliced bell peppers and snap peas. Stir-fry over high heat for 3 minutes, tossing constantly, until they are crisp-tender and slightly charred at the edges.
⚠️ Common Mistake to Avoid: Overcooking the vegetables until they’re mushy. They should still have a bite—the residual heat will cook them a little more when you combine everything.
Step 5: Add Aromatics
Add minced garlic and grated ginger to the wok. Stir-fry for 30 seconds until fragrant. Be careful not to let the garlic burn—it can turn bitter very quickly.
💡 mia’s Pro Tip: Grate your ginger on a microplane so it melts into the sauce. If you only have powdered ginger, use 1/2 teaspoon.
Step 6: Combine and Coat
Return the seared beef to the wok. Pour the prepared sauce over everything. Toss vigorously to coat all ingredients. Cook for 1 minute until the sauce thickens and clings to the beef and vegetables. The sauce should become glossy and sticky.
⚠️ Common Mistake to Avoid: Don’t cook the sauce longer than 1 minute—it can become too thick and gummy. The sauce should coat the back of a spoon easily.
Step 7: Garnish and Serve
Transfer to a serving platter or divide among plates. Sprinkle with sliced green onions. Serve immediately over steamed jasmine rice or noodles.
💡 mia’s Pro Tip: For a restaurant-style presentation, drizzle a little sesame oil and sprinkle sesame seeds on top before serving.
| Step | Action | Duration | Key Visual Cue |
|---|---|---|---|
| 1 | Marinate Beef | 10 min | Beef evenly coated, not dripping |
| 2 | Whisk Sauce | 2 min | Smooth, no lumps |
| 3 | Sear Beef | 4 min total | Deep brown crust, edges caramelized |
| 4 | Stir-Fry Veggies | 3 min | Bright colors, slight char |
| 5 | Add Aromatics | 30 sec | Fragrant, garlic not browning |
| 6 | Combine & Coat | 1 min | Sauce thickens, glossy |
| 7 | Garnish | 1 min | Green onions bright green on top |
Serving & Presentation
This Asian beef stir-fry recipe begs to be served over a bed of fluffy jasmine rice or chewy lo mein noodles. I like to pile the beef and vegetables in the center of a large platter, then scatter the green onions and a few extra orange zest shreds on top for color. The sauce should pool slightly but not be watery—it’s meant to cling.
Growing up in Morocco, we often served stews with couscous, but here in New York, I’ve found that steamed rice is the perfect canvas for this bold sauce. A side of quick-pickled cucumbers or a simple Asian cucumber salad adds a refreshing crunch that balances the richness. For a touch of heat, I sometimes serve with sambal oelek or chili crisp on the side.
My Paris training taught me that presentation matters—even for a weeknight dinner. Use a white plate to let the colors pop. Garnish with a few cilantro leaves if you have them, and a lime wedge on the side. The brightness of the lime echoes the orange zest beautifully.
| Pairing Type | Suggestions | Why It Works |
|---|---|---|
| Side Dish | Steamed jasmine rice, soba noodles, or cauliflower rice | Neutral base soaks up the bold sauce |
| Sauce / Dip | Chili crisp, sambal oelek, extra orange zest + soy | Adds heat or brightness to individual taste |
| Beverage | Iced green tea, crisp lager, or Sauvignon Blanc | Cuts through the richness, refreshes palate |
| Garnish | Sliced green onions, sesame seeds, cilantro, lime wedges | Adds freshness, texture, and visual appeal |
Make-Ahead, Storage & Reheating
As a busy New York cook, I often make extra of this weeknight beef stir-fry to have for lunch the next day. The flavors actually deepen overnight! Here’s how to store and reheat it properly so the beef stays tender and the vegetables remain vibrant.
| Method | Container | Duration | Reheating Tip |
|---|---|---|---|
| Refrigerator | Airtight glass container | 3 days | Reheat in a skillet over medium-high with a splash of water to rehydrate sauce |
| Freezer | Freezer-safe zip bag (remove air) | 2 months | Thaw overnight in fridge; reheat in skillet, adding a bit more soy or water |
| Make-Ahead | Prepare sauce and marinate beef separately | Up to 1 day in advance | Keep beef and vegetables raw; stir-fry just before serving |
When reheating, avoid microwaving if possible—it can make the beef tough and the vegetables soggy. Instead, use a hot skillet or wok. Add a tablespoon of water or chicken broth to the pan to help loosen the sauce, then toss until everything is hot and sizzling. The orange flavor may mellow a bit; you can freshen it up with a little extra zest right before serving.
Variations & Easy Swaps
One of the things I love about this quick Asian BBQ beef recipe is how adaptable it is. Whether you’re avoiding gluten, want more vegetables, or just feel like switching up the protein, here are three tested variations.
| Variation | Key Change | Best For | Difficulty Impact |
|---|---|---|---|
| Chicken or Tofu | Substitute beef with boneless chicken thighs or firm tofu | Lighter protein preference | Same effort; tofu needs extra pressing |
| Gluten-Free | Use tamari instead of soy sauce; check BBQ sauce labels | GF diet | Minimal change |
| Extra Veggie | Add broccoli, baby corn, or mushrooms | More vegetables for a lighter meal | Slightly longer cooking time for dense veg |
Chicken or Tofu Variation
For a chicken version, use boneless, skinless chicken thighs—they stay juicier than breasts. Slice them the same way as beef and follow the same marinating and searing steps. For tofu, press extra-firm tofu for 20 minutes, cube it, then toss in cornstarch and pan-fry until golden before adding to the stir-fry. The sauce works beautifully with either substitution, and the orange zest still shines.
Gluten-Free Variation
To make this Asian stir-fry with orange gluten-free, swap the soy sauce for tamari or coconut aminos. Be sure to check your Asian BBQ sauce—many brands contain wheat. I prefer a homemade GF version: mix 2 tbsp hoisin (GF variety) with 1 tbsp tamari and 1 tsp honey. The flavor stays bold and the texture remains sticky and delicious.
Extra Veggie Variation
On days when I come home from the Union Square Greenmarket with a bag full of broccoli and mushrooms, I add them to this stir-fry. Slice broccoli florets thinly so they cook quickly, and quarter cremini mushrooms. Add them with the bell peppers and snap peas. The extra vegetables make the dish more substantial without complicating the process—just be sure not to overcrowd the wok.
What is the best cut of beef to use for an Asian BBQ stir-fry?
For an Asian beef stir-fry recipe like this one, the best cut is beef sirloin because it’s tender, affordable, and slices neatly. Flank steak and skirt steak are also excellent choices—they have more flavor but require slicing very thin against the grain to ensure tenderness. Avoid tougher cuts like chuck or brisket unless you marinate them for several hours. I always tell my readers to look for well-marbled meat and ask their butcher to slice it for stir-fry (about 1/4-inch thick). The thin slices cook in seconds, staying juicy and tender.
Can I substitute orange juice for orange zest in this stir-fry recipe?
You can substitute orange juice, but the flavor will be different. Orange zest provides intense, fragrant essential oils from the peel that juice alone cannot replicate. If you’re in a pinch, use 1 tablespoon of fresh orange juice plus a little extra marmalade to boost the orange flavor. However, I strongly recommend using zest if possible—it’s what gives this orange zest beef stir-fry its signature pop. I keep a few oranges in my fridge at all times just for this reason.
How do I keep the beef tender when stir-frying with a thick BBQ sauce?
The key is to coat the beef in cornstarch and soy sauce before cooking, which creates a protective layer that locks in moisture and prevents the sauce from penetrating too deeply. Second, sear the beef quickly over high heat and remove it from the pan before adding the sauce. Finally, add the sauce only at the end and toss for just one minute—overcooking the beef in the sauce can make it tough. This technique is why my quick Asian BBQ beef always stays tender, even with a sticky, thick glaze.
What vegetables pair well with an Asian BBQ beef stir-fry for a weeknight meal?
Bell peppers and snap peas are my top picks because they cook quickly and add both color and crunch. Broccoli florets (cut small), snow peas, baby corn, and mushrooms also work beautifully. For a heartier meal, add shredded cabbage or bok choy. The key is to cut vegetables into uniform sizes so they cook evenly. This weeknight beef stir-fry is forgiving—use whatever you have in your crisper drawer. I often raid my NYC farmers market haul and never get the same combination twice.
Can I make this Asian BBQ beef stir-fry ahead of time?
Absolutely! You can prep the sauce and marinate the beef up to a day in advance. Store them separately in the fridge. When you’re ready to cook, the stir-fry will come together in under 10 minutes. Leftovers also keep well for up to three days in an airtight container. Reheat in a skillet with a splash of water to restore the sauce’s consistency. The orange flavor may mellow slightly, so I like to add a pinch of fresh zest right before serving.
What can I use instead of Asian BBQ sauce?
If you don’t have Asian BBQ sauce, you can make a quick substitute by mixing 2 tablespoons hoisin sauce, 1 tablespoon soy sauce, 1 teaspoon brown sugar, and a splash of rice vinegar. This combination gives you the same sweet-savory base. For a smoky twist, add a few drops of liquid smoke. Many stores carry Thai BBQ sauce or Korean BBQ sauce, which also work well. Just be sure to adjust the sweetness to your taste—some store-bought sauces are very sweet.
Is this stir-fry spicy? How can I adjust the heat?
This Asian beef stir-fry recipe has a mild heat from the red pepper flakes. If you want more spice, increase the flakes to 1/2 teaspoon or add a drizzle of sriracha or chili crisp to the sauce. For a milder version, simply omit the pepper flakes entirely. The orange and BBQ flavors are bold enough on their own. I usually serve chili crisp on the table so everyone can customize their own bowl—that way, the dish stays family-friendly.
Can I use frozen vegetables for this stir-fry?
Yes, you can use frozen stir-fry vegetables, but fresh will give you better texture and flavor. If using frozen, don’t thaw them first—add them directly to the hot wok (they will release moisture, so you may need to cook an extra 1-2 minutes to evaporate it). I prefer a mix of frozen bell peppers, snap peas, and broccoli. Just be aware that frozen vegetables won’t have the same crisp-tender crunch as fresh, but they’re a great time-saver for busy evenings.
What type of rice pairs best with an Asian BBQ beef stir-fry?
Jasmine rice is my top recommendation because its floral aroma complements the orange and BBQ flavors. Basmati rice also works, but it has a nuttier profile. For a low-carb option, cauliflower rice is excellent—just stir-fry it separately with a little garlic and soy sauce. If you’re serving noodles, I suggest fresh lo mein or udon noodles. Whichever you choose, the key is to have a neutral base that soaks up the sticky sauce without overpowering it.
How do I prevent the orange marmalade from burning in the pan?
Because marmalade has a high sugar content, it can burn quickly if left over high heat too long. The secret is to add the sauce only after you’ve returned the beef to the pan, and then toss constantly for just 60 seconds. Make sure your heat is medium-high (not screaming hot) when you add the sauce. If you notice it starting to stick, add a tablespoon of water or rice vinegar to loosen it. This method ensures a glossy, caramelized finish without any bitter burnt spots.
Share Your Version!
I hope you love this Asian BBQ Beef Stir-Fry with Orange Zest as much as I do! If you make it, please leave a star rating and a comment below—I read every single one and love hearing how you’ve made it your own. Did you add extra vegetables? Swap the protein? Use a different citrus? Tell me all about it!
Don’t forget to snap a photo of your creation and share it on Instagram or Pinterest tagging @exorecipes. I love seeing your beautiful dishes! And if you have a burning question about this recipe or any other, drop it in the comments and I’ll answer personally. From my NYC kitchen to yours — I hope this recipe brings as much warmth to your table as it does to mine. — mia 🧡
Love This Recipe? Save It to Pinterest!
If you enjoyed this Asian BBQ Beef Stir-Fry with Orange Zest Bold Weeknight Flavor recipe, don’t let it get lost in your browser tabs! 😄 Pin it now so you can find it again anytime — and explore hundreds more tried-and-tested recipes waiting for you on my Pinterest boards.
👉 Follow mia on Pinterest @chefrecipes2
📌 Pin this recipe · 🔁 Re-pin your favorites · 💬 Tag me when you make it — I love seeing your creations!
Asian BBQ Beef Stir-Fry with Orange Zest Bold Weeknight Flavor
- Prep Time: 15 minutes
- Cook Time: 10 minutes
- Total Time: 25 minutes
- Yield: 4 1x
- Method: Main Course
- Cuisine: Asian
Description
A bold and quick Asian-inspired stir-fry featuring tender beef strips, colorful vegetables, and a tangy orange-infused BBQ sauce. Perfect for a weeknight dinner bursting with flavor.
Ingredients
- 1 lb beef sirloin, thinly sliced
- 2 tablespoons soy sauce
- 1 tablespoon cornstarch
- 2 tablespoons vegetable oil
- 1 red bell pepper, sliced
- 1 yellow bell pepper, sliced
- 1 cup snap peas
- 3 cloves garlic, minced
- 1 tablespoon fresh ginger, grated
- For the Sauce:
- 1/4 cup Asian BBQ sauce
- 2 tablespoons orange marmalade
- 1 tablespoon rice vinegar
- 1 teaspoon orange zest
- 1/4 teaspoon red pepper flakes
- 2 green onions, sliced (for garnish)
Instructions
- In a medium bowl, toss the sliced beef with soy sauce and cornstarch. Let marinate for 10 minutes.
- In a small bowl, whisk together the Asian BBQ sauce, orange marmalade, rice vinegar, orange zest, and red pepper flakes. Set aside.
- Heat vegetable oil in a large wok or skillet over high heat. Add the beef in a single layer and sear for 2 minutes per side until browned. Remove beef and set aside.
- In the same wok, add bell peppers and snap peas. Stir-fry for 3 minutes until crisp-tender.
- Add garlic and ginger, stirring for 30 seconds until fragrant.
- Return the beef to the wok. Pour the sauce over everything and toss to coat. Cook for 1 minute until heated through.
- Serve immediately, garnished with sliced green onions.
Notes
For extra heat, add more red pepper flakes or a drizzle of sriracha. Serve over steamed jasmine rice or noodles.
Nutrition
- Calories: 380
- Sugar: 12 g
- Fat: 18 g
- Carbohydrates: 22 g
- Protein: 32 g
Tried This Recipe? Leave a Comment!
Did you make this recipe? I’d love to hear how it turned out! Please leave a comment and a rating below. Your feedback helps other home cooks and supports cheerychop.com!