“`html

Cheesy Taco Sliders with Ground Beef – The Ultimate Easy Party Snack

⚖️
Difficulty
Easy
⏲️
Prep Time
15 mins
🕒
Cook Time
25 mins
⏱️
Total Time
40 mins
🍽️
Servings
12 sliders

There is something magical about a tray of warm, cheesy taco sliders fresh from the oven — the way the melted cheese stretches with every pull, the aroma of toasted buns brushed with buttery taco seasoning, and the rich, savory scent of seasoned ground beef that fills your entire kitchen. I first fell in love with sliders during my years at culinary school in Paris, where we learned the art of the perfect bite: balanced, bold, and beautiful. But this recipe? It has my heart because it brings together everything I love about Mexican-American comfort food with a touch of New York energy — fast, bold, and endlessly shareable. These cheesy taco sliders are the easy party snack you have been searching for, and I promise they will disappear before halftime.

Imagine sinking your teeth into a soft, buttery Hawaiian sweet roll that has been toasted to a gentle golden crisp on top, with a layer of juicy, taco-spiced ground beef tucked beneath a blanket of gooey Mexican blend cheese, all finished with a creamy, tangy swirl of sour cream, mayo, and salsa. The optional crushed tortilla chips? They add that little crunch that makes every bite sing. These sliders are messy in the best way — the kind of food that brings people together around the table, reaching for seconds before they have even finished their first. Whether you are hosting a game day party, a birthday gathering, or just a weeknight dinner that feels like a celebration, this taco sliders appetizer is the one that steals the show.

What sets my version apart is a technique I picked up in a tiny pastry shop in the 9th arrondissement of Paris: brushing the tops with seasoned butter before baking. It creates a shiny, flavorful crust that seals in moisture and adds an extra layer of taco goodness. I have tested this ground beef sliders recipe countless times in my own NYC kitchen — tweaking the seasoning, adjusting the bake time, and perfecting the ratio of cheese to beef so that every slider is perfectly balanced. One common mistake I see is overloading the buns with wet ingredients, which makes them soggy. I will show you exactly how to avoid that and get the perfect texture every time. Let us dive in, friend.

Why This Cheesy Taco Sliders Recipe Is the Best

The Flavor Secret. The combination of rich, seasoned ground beef, creamy sauce, and buttery taco-seasoned tops baked to golden perfection on sweet Hawaiian rolls is pure magic. I learned in Paris that layering flavors is an art — each component here builds on the last, from the cumin and chili notes in the taco seasoning to the tangy salsa and sour cream that cuts through the richness. It is bold, satisfying, and absolutely crowd-pleasing.

Perfected Texture. The key is the butter topping. Brushing the buns with melted butter mixed with extra taco seasoning before baking gives them a beautiful golden crust with a slight crunch, while the inside stays pillowy soft. The crushed tortilla chips add a subtle crunch in the middle — a trick I borrowed from a Moroccan street food stall in Marrakech, where layers of texture are everything.

Foolproof & Fast. With only 15 minutes of prep and a handful of everyday ingredients, this recipe is designed for busy home cooks. Whether you are a beginner or a seasoned pro, the step-by-step process is straightforward and forgiving. Plus, it scales beautifully — double the batch for a larger crowd with zero extra effort.

Cheesy Taco Sliders Ingredients

I love picking up fresh ingredients for these sliders at the Union Square Greenmarket in NYC — the smell of fresh cilantro and the sight of ripe tomatoes always reminds me of the souks in Marrakech. For the best results, choose high-quality ground beef (80/20 is ideal for flavor) and use a good Mexican blend cheese that melts beautifully. Here is everything you will need:

Ingredients List

  • 1 lb ground beef (80/20 recommended)
  • 1 packet (1 oz) taco seasoning
  • 1/2 cup water
  • 12 slider buns (Hawaiian sweet rolls recommended)
  • 2 cups shredded Mexican blend cheese
  • 1/4 cup mayonnaise
  • 1/4 cup sour cream
  • 1/4 cup salsa
  • 1/2 cup crushed tortilla chips (optional, for crunch)
  • 1/4 cup melted butter
  • 1 tablespoon taco seasoning (extra, for topping)
  • Optional toppings: shredded lettuce, diced tomatoes, sliced jalapeños, chopped cilantro

Ingredient Spotlight

Ground Beef (80/20): The 20% fat content ensures juicy, flavorful sliders. If you use leaner beef (90/10), add a tablespoon of olive oil to the skillet to prevent dryness. For a lighter option, ground turkey works well — just add an extra tablespoon of taco seasoning to boost flavor.

Hawaiin Sweet Rolls: Their soft, slightly sweet texture is the perfect canvas for savory fillings. King’s Hawaiian is my go-to. If unavailable, brioche slider buns are an excellent substitute — they add richness and hold up well to baking.

Mexican Blend Cheese: This pre-shredded mix typically includes cheddar, Monterey Jack, asadero, and queso quesadilla. It melts beautifully and has a mild, creamy flavor. For a sharper kick, substitute with extra-sharp cheddar or pepper Jack for heat.

Original IngredientBest SubstitutionFlavor / Texture Impact
Ground Beef (80/20)Ground Turkey + 1 tbsp olive oilMilder flavor, slightly drier — add extra seasoning
Hawaiian Sweet RollsBrioche slider bunsRicher, more buttery — equally soft and sturdy
Mexican Blend CheesePepper Jack or sharp cheddarMore heat (Pepper Jack) or sharper tang (cheddar)
Sour CreamGreek yogurt (plain, full-fat)Tangier, slightly thicker — equally creamy
Tortilla Chips (crushed)Panko breadcrumbs + pinch of cuminLess crunch, but adds subtle texture and spice

How to Make Cheesy Taco Sliders — Step-by-Step

Trust me, this ground beef sliders recipe is as easy as it gets. Follow these steps and you will have a tray of golden, cheesy perfection ready in about 40 minutes.

Step 1: Preheat and Prep the Dish

Preheat your oven to 350°F (175°C). Lightly grease a 9×13-inch baking dish with butter or non-stick spray. This ensures the buns don not stick and the bottoms get a gentle crisp.

💡 mia’s Pro Tip: Use a metal or ceramic baking dish — glass dishes retain more moisture and can make the bottoms of the buns slightly soggy.

Step 2: Cook the Ground Beef

Place a large skillet over medium-high heat. Add the ground beef and cook, breaking it apart with a wooden spoon, until it is fully browned — about 5 to 6 minutes. Drain any excess fat (leave about 1 tablespoon in the pan for flavor).

⚠️ Common Mistake to Avoid: Do not over-crowd the pan. If you are doubling the recipe, cook the beef in two batches so it browns properly instead of steaming.

Step 3: Season the Beef

Sprinkle the entire packet of taco seasoning over the browned beef, then add 1/2 cup of water. Stir well and let it simmer for 2 to 3 minutes until the sauce thickens and coats the meat. Remove from heat and set aside.

💡 mia’s Pro Tip: Let the seasoned beef cool for 2 minutes before assembling — this prevents the buns from getting too soggy from the hot moisture.

Step 4: Assemble the Bottom Layer

Take the entire pack of slider buns and slice them in half horizontally, keeping them connected as a single sheet. Place the bottom half in the greased baking dish. Spread the cooked ground beef evenly over the bottom buns, making sure every bite gets some meat.

⚠️ Common Mistake to Avoid: Do not press the beef down too hard — you want a light, even layer so the cheese can melt around it.

Step 5: Build the Cheesy Center

Sprinkle 1 1/2 cups of shredded Mexican blend cheese evenly over the beef. In a small bowl, mix the mayonnaise, sour cream, and salsa until smooth. Spread this creamy mixture over the cheese layer. If you are using crushed tortilla chips, sprinkle them on top now, followed by the remaining 1/2 cup of cheese.

💡 mia’s Pro Tip: For the creamiest texture, let the sour cream and mayo come to room temperature before mixing — it spreads more evenly and bakes into a velvety layer.

Step 6: Top and Brush

Place the top half of the slider buns over the filling. In a separate small bowl, mix the melted butter with 1 tablespoon of taco seasoning. Brush this mixture generously over the tops of the buns, making sure every bun gets coated.

⚠️ Common Mistake to Avoid: Do not skip the butter topping — it is what gives these sliders their iconic golden, flavorful crust. Use a pastry brush for even coverage.

Step 7: Bake and Serve

Cover the dish with foil and bake for 15 minutes. Remove the foil and bake for an additional 5 to 7 minutes, until the tops are golden brown and the cheese is bubbly around the edges. Let the sliders rest for 5 minutes before slicing into individual portions. Serve with your favorite toppings.

💡 mia’s Pro Tip: For an extra-crispy top, switch the oven to broil for the last 1 to 2 minutes (watch closely to prevent burning).

StepActionDurationKey Visual Cue
1Preheat oven & grease dishDish is lightly coated, oven ready
2Brown ground beef5–6 minNo pink remains; meat is crumbly
3Add taco seasoning & water2–3 minSauce thickens, coats the beef
4Assemble bottom buns & beef2 minEven meat layer over buns
5Add cheese, creamy sauce, chips3 minLayers are visible and even
6Top buns & brush with butter2 minTops are evenly glossy
7Bake (covered + uncovered)20–22 minGolden tops, bubbly cheese edges

Serving & Presentation

I love serving these sliders straight from the baking dish — it feels casual and inviting, the way my mother used to serve tagine in Morocco, with everyone gathering around and digging in together. Arrange the sliders on a large wooden board or a platter lined with parchment paper, and let guests top their own with shredded lettuce, diced tomatoes, sliced jalapeños, and a generous sprinkle of fresh cilantro. A dollop of extra sour cream or guacamole on the side takes them over the top.

For a party spread, pair these taco sliders with a bowl of black bean dip, fresh pico de gallo, and a tray of sliced bell peppers and jicama sticks. In NYC, I love serving them alongside a crisp, citrusy slaw with lime and cilantro — the acidity cuts through the richness beautifully. And of course, a cold Mexican lager or a spicy margarita never hurts.

Pairing TypeSuggestionsWhy It Works
Side DishBlack bean dip, pico de gallo, lime-cilantro slawAdds freshness, acidity, and contrast to rich sliders
Sauce / DipGuacamole, chipotle crema, extra salsaEnhances creaminess and adds smoky heat
BeverageMexican lager, spicy margarita, iced horchataRefreshing, cuts richness, complements spices
GarnishFresh cilantro, pickled jalapeños, radish slicesBrightens the plate and adds fresh flavor

Make-Ahead, Storage & Reheating

Between my busy NYC schedule and hosting friends on weekends, I rely on make-ahead meals that still taste incredible. These sliders are perfect for prepping ahead — you can assemble them the night before and bake just before serving. Leftovers store beautifully, too, making this a recipe that keeps on giving.

MethodContainerDurationReheating Tip
RefrigeratorAirtight containerUp to 3 daysOven at 350°F for 8–10 min, covered with foil
FreezerWrap individually in foil then bagUp to 2 monthsThaw overnight, then oven at 350°F for 12–15 min
Make-AheadAssembled in dish, covered, refrigeratedUp to 24 hours in advanceAdd 5 min to covered bake time if starting cold

When reheating, the oven is your best friend — it restores the buns’ gentle crisp and melts the cheese back to gooey perfection. The microwave works in a pinch, but the buns will be softer. For a quick fix, I sometimes reheat individual sliders in an air fryer at 350°F for 4 minutes — they come out wonderfully crispy on top and warm all the way through.

Variations & Easy Swaps

One of the things I love most about this taco sliders appetizer is how endlessly adaptable it is. Whether you are feeding a vegetarian friend, avoiding gluten, or just craving something different, these variations have you covered. I have tested every single one in my own kitchen — and they all deliver big on flavor.

VariationKey ChangeBest ForDifficulty Impact
Chicken Taco SlidersGround chicken instead of beefLighter protein, poultry loversNo change in difficulty
Gluten-Free / Low-CarbGluten-free buns or large lettuce wrapsGluten-sensitive, low-carb dietsSlightly more delicate assembly
Spicy Black Bean & CornBlack beans, corn, and queso frescoVegetarian, meatless MondayNo change in difficulty

Chicken Taco Sliders

Swap the ground beef for 1 pound of ground chicken. Add 1 tablespoon of olive oil to the skillet since chicken is leaner. Season exactly the same way with taco seasoning and water. The result is a lighter, slightly milder slider that pairs beautifully with a fresh cilantro-lime crema. This version reminds me of the delicate chicken tagine my mother made with preserved lemons — gentle, fragrant, and comforting.

Gluten-Free / Low-Carb Option

Use your favorite gluten-free slider buns (I like the ones from Trader Joe’s or a local NYC bakery). For a low-carb version, use large, sturdy lettuce leaves like romaine or butter lettuce as wraps. Assemble the sliders in a baking dish lined with parchment, and reduce the bake time by 5 minutes since the buns are more delicate. The filling stays the same — all the taco flavor, none of the gluten.

Spicy Black Bean & Corn Sliders

For a vegetarian twist that still feels hearty, replace the beef with 1 can of drained black beans (mashed slightly) and 1 cup of corn kernels. Sauté with 1 tablespoon of olive oil, then season with taco seasoning and water as directed. Add a pinch of cayenne for heat. Top with crumbled queso fresco instead of shredded cheese for a authentic Mexican touch. This version is bright, colorful, and always a hit at parties.

What is the best way to keep cheesy taco sliders from getting soggy?

The absolute best way to prevent soggy sliders is to control the moisture in your fillings. First, drain the cooked ground beef thoroughly after browning — excess grease is a common culprit. Second, let the seasoned beef cool for 2 to 3 minutes before spreading it over the buns so the steam does not soften them. Third, place the creamy sauce (mayo, sour cream, salsa) on top of the cheese, not directly on the buns, so the cheese acts as a barrier. Finally, brushing the tops with butter and baking covered then uncovered creates a protective crust that keeps the buns from absorbing too much moisture.

Can I use a different type of cheese instead of cheddar for these taco sliders?

Absolutely — this recipe is very forgiving when it comes to cheese. While I recommend a Mexican blend for its meltability and mild flavor, you can absolutely use other cheeses. Pepper Jack adds wonderful heat and creaminess, making each slider a little spicier. Sharp cheddar gives a bolder, tangier flavor that cuts through the richness of the beef. Monterey Jack melts beautifully and has a mild, buttery taste. A smoked Gouda would also work beautifully, adding a subtle smokiness that pairs well with taco seasoning. Just avoid pre-shredded cheeses that contain anti-caking agents — they do not melt as smoothly. Shred your own for the best results.

How long should I bake cheesy taco sliders for the perfect melt?

For the perfect melt, bake the sliders covered with foil at 350°F for 15 minutes — this traps steam and gently melts the cheese all the way through without drying out the buns. Then remove the foil and bake for another 5 to 7 minutes. This second uncovered stage allows the tops to turn golden brown and the cheese at the edges to become bubbly and slightly crisp. If you want an even more golden, slightly crunchy top, switch the oven to broil for the final 1 to 2 minutes. Watch carefully, as broiler times vary. Total oven time is about 20 to 22 minutes for perfectly melted, gooey, golden sliders.

What can I serve with cheesy taco sliders for a party spread?

These sliders are the star of any party table, but they pair beautifully with a variety of sides and dips. I love serving them with a big bowl of black bean dip or refried beans, fresh pico de gallo, guacamole, and a tangy lime-cilantro slaw. For crunch, add tortilla chips with a smoky chipotle salsa. A tray of fresh vegetables like bell pepper strips, jicama sticks, and cucumber rounds balances the richness. For drinks, a cold Mexican lager, spicy margarita, or even a pitcher of horchata keeps things festive. And do not forget the extra toppings — shredded lettuce, diced tomatoes, pickled jalapeños, and fresh cilantro let guests customize their sliders.

Can I make these cheesy taco sliders ahead of time for a party?

Yes, you can assemble the sliders up to 24 hours in advance, which makes them perfect for entertaining. Follow the recipe all the way through brushing the tops with butter, then cover the dish tightly with plastic wrap or foil and refrigerate. When you are ready to bake, add 5 extra minutes to the covered baking time to account for the cold dish. You can also fully bake the sliders, let them cool, and refrigerate for up to 3 days. Reheat in a 350°F oven, covered, for about 10 minutes. I do this all the time for my NYC get-togethers — it takes the stress out of party prep.

What type of ground beef is best for taco sliders?

I recommend using 80/20 ground beef (80% lean, 20% fat) for these sliders. The fat content keeps the meat juicy and flavorful, which is essential for a satisfying bite. If you use leaner beef like 90/10 or 93/7, the meat can turn out dry and crumbly — but you can fix that by adding a tablespoon of olive oil to the skillet before cooking. Ground chuck is another excellent choice because it has a good meat-to-fat ratio and rich flavor. For the best texture, avoid pre-frozen beef that has been thawed, as it tends to release more water and steam instead of browning properly.

Can I freeze cheesy taco sliders for later?

Yes, these sliders freeze beautifully, which makes them a fantastic make-ahead meal. For best results, bake the sliders completely, let them cool to room temperature, then wrap each slider individually in aluminum foil. Place the wrapped sliders in a freezer-safe zip-top bag or airtight container, and they will keep for up to 2 months. To reheat, thaw overnight in the refrigerator, then warm them in a 350°F oven, still wrapped in foil, for 12 to 15 minutes. If you are in a hurry, you can reheat directly from frozen — just add 5 to 7 minutes to the oven time. The buns stay soft and the cheese remains gooey.

How do I keep the slider buns from getting too hard on top?

The key to soft-but-golden tops is the butter brush and the covered baking step. Brushing the buns with a mixture of melted butter and taco seasoning adds flavor and moisture while helping them brown. Baking covered with foil for the first 15 minutes traps steam, which keeps the buns soft and prevents them from drying out. Only during the final uncovered 5 to 7 minutes do the tops get golden. If you find your buns are still too hard, reduce the uncovered bake time by 2 minutes, or tent loosely with foil for the last few minutes. Every oven runs a little differently, so check at the 5-minute mark.

Share Your Version!

I would love to see how these cheesy taco sliders turn out in your kitchen! Did you add extra jalapeños for heat? Did you try the black bean variation? Or maybe you discovered a new topping combination that your whole family loved — drop a comment below and let me know. Your insights help other home cooks try new things and build confidence in the kitchen. And if you snap a photo of your slider tray, tag me on Instagram or Pinterest at @exorecipes — I feature my favorites in my stories every week.

If this easy party snack recipe brought a little warmth to your table, please leave a star rating and share it with a friend who loves great food. From my NYC kitchen to yours — I hope this recipe brings as much warmth to your table as it does to mine. — mia 🧡

📌

Love This Recipe? Save It to Pinterest!

If you enjoyed this Cheesy Taco Sliders with Ground Beef recipe, do not let it get lost in your browser tabs! 😄 Pin it now so you can find it again anytime — and explore hundreds more tried-and-tested recipes waiting for you on my Pinterest boards.

👉 Follow mia on Pinterest @exorecipe

📌 Pin this recipe · 🔁 Re-pin your favorites · 💬 Tag me when you make it — I love seeing your creations!

“`

Print

clock clock iconcutlery cutlery iconflag flag iconfolder folder iconinstagram instagram iconpinterest pinterest iconfacebook facebook iconprint print iconsquares squares iconheart heart iconheart solid heart solid icon

Cheesy Taco Sliders with Ground Beef Easy Party Snack Recipe

  • Author: Chef Mia
  • Prep Time: 15 minutes
  • Cook Time: 25 minutes
  • Total Time: 40 minutes
  • Yield: 12 sliders 1x
  • Method: Appetizer, Main Course
  • Cuisine: Mexican-American

Description

These cheesy taco sliders with ground beef are the perfect easy party snack. Loaded with seasoned beef, melty cheese, and all your favorite taco toppings, they’re baked on soft slider buns until golden and gooey.


Ingredients

Scale
  • 1 lb ground beef
  • 1 packet (1 oz) taco seasoning
  • 1/2 cup water
  • 12 slider buns (Hawaiian sweet rolls recommended)
  • 2 cups shredded Mexican blend cheese
  • 1/4 cup mayonnaise
  • 1/4 cup sour cream
  • 1/4 cup salsa
  • 1/2 cup crushed tortilla chips (optional, for crunch)
  • 1/4 cup melted butter
  • 1 tablespoon taco seasoning (extra, for topping)
  • Optional toppings: shredded lettuce, diced tomatoes, sliced jalapeños, chopped cilantro

Instructions

  1. Preheat oven to 350°F (175°C). Lightly grease a 9×13-inch baking dish.
  2. In a large skillet over medium-high heat, cook ground beef breaking it apart until browned. Drain excess fat.
  3. Add 1 packet taco seasoning and 1/2 cup water. Stir and simmer for 2-3 minutes until thickened. Remove from heat.
  4. Slice the entire pack of slider buns in half horizontally (keeping them connected). Place the bottom half in the prepared baking dish.
  5. Spread the cooked ground beef evenly over the bottom buns.
  6. Sprinkle 1 1/2 cups of shredded cheese over the beef.
  7. In a small bowl, mix mayonnaise, sour cream, and salsa. Spread this mixture over the cheese layer.
  8. If using, sprinkle crushed tortilla chips on top.
  9. Add the remaining 1/2 cup cheese over the chips.
  10. Place the top half of the slider buns on top.
  11. In another small bowl, mix melted butter and 1 tablespoon taco seasoning. Brush this mixture over the tops of the buns.
  12. Cover with foil and bake for 15 minutes. Remove foil and bake for an additional 5-7 minutes until tops are golden and cheese is bubbly.
  13. Let cool for 5 minutes. Slice into individual sliders and serve with desired toppings.

Notes

For extra flavor, you can toast the buns lightly before assembling. Leftover sliders can be stored in an airtight container in the refrigerator for up to 3 days. Reheat in the oven or microwave.


Nutrition

  • Calories: 380
  • Sugar: 7 g
  • Fat: 22 g
  • Carbohydrates: 28 g
  • Protein: 18 g


Cheesy Taco Sliders with Ground Beef Easy Party Snack Recipe

Cheesy Stuffed Meatloaf Recipe That Melts Hearts and Cheese Alike – The Ultimate Comfort Food

⚖️
Difficulty
Medium
⏲️
Prep Time
20 mins
🕒
Cook Time
60 mins
⏱️
Total Time
1h 20m
🍽️
Servings
6-8

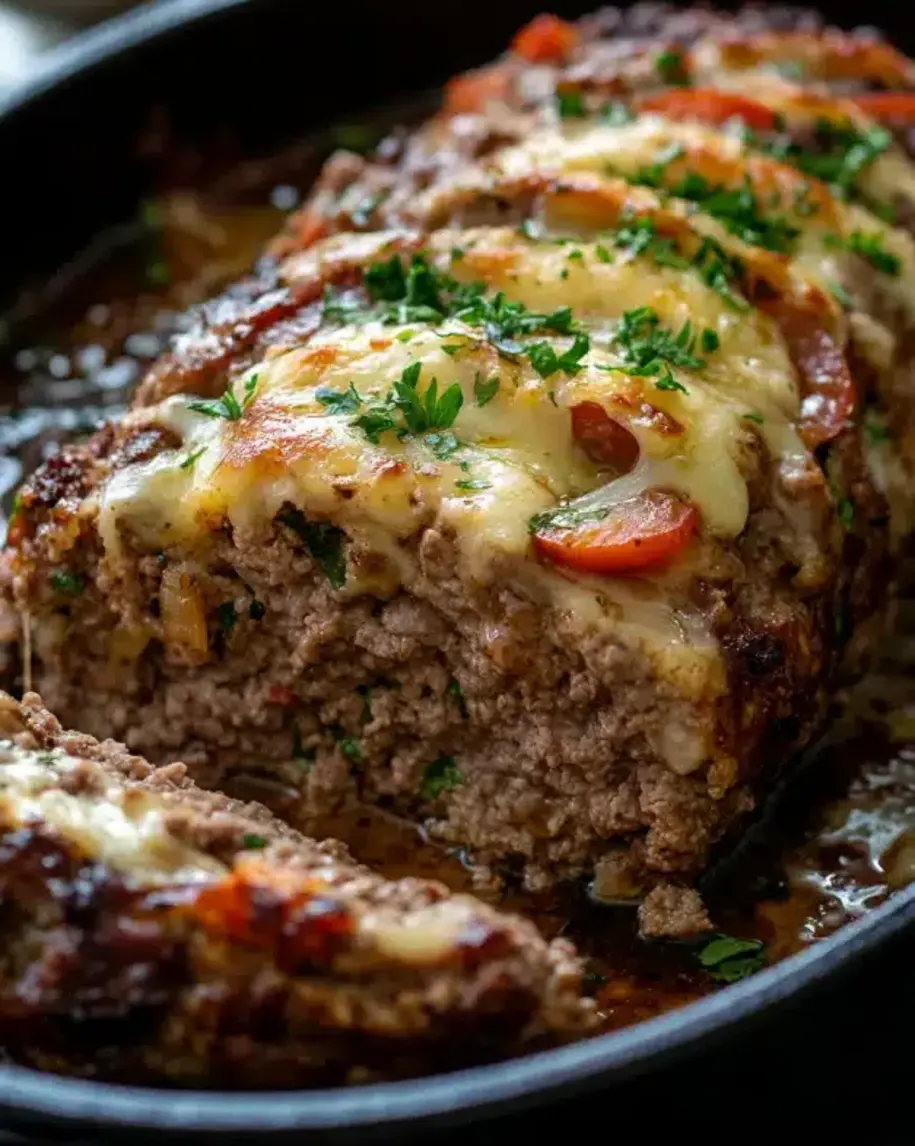
Let me take you back to a rainy autumn afternoon in my tiny Parisian kitchen. I was a young culinary student, homesick for the warmth of my mother’s kitchen in Morocco, where her kefta meatloaf was always the star of Friday dinners. One afternoon, I decided to blend two worlds: the rich, herby Moroccan spicing I grew up with and the French love affair with cheese. That day, the first cheesy stuffed meatloaf was born – and trust me, it’s the best meatloaf recipe you’ll ever try. This isn’t just a dinner; it’s a love letter written in ground beef and mozzarella.

Imagine slicing into a perfectly golden loaf, only to see a river of molten mozzarella and Parmesan streaming onto your plate. The aroma alone – garlic, oregano, and a whisper of Worcestershire – will have everyone hovering around the oven. The tangy brown sugar and ketchup glaze caramelizes into a sticky, glossy coating that contrasts beautifully with the savory, tender meat. This cheesy meatloaf isn’t dry or crumbly; it’s impossibly moist thanks to a milk-soaked breadcrumb panade, a trick I learned from a Parisian chef who insisted on “pain perdu” for every meatball.

I’ve tested this easy meatloaf recipe a hundred times, tweaked every ratio, and I can promise you this: the cheese stays inside. No leaks, no empty pockets. My secret? A proper roll technique I borrowed from a jelly roll demonstration at the Cordon Bleu. In a few minutes, you’ll master it too. Ready for the best cheesy stuffed meatloaf recipe that will melt hearts and cheese alike? Let’s get to it.

Why This Cheesy Stuffed Meatloaf Recipe Is the Best

The flavor secret? I layer spices both inside the meat and in the glaze. The oregano and parsley sing with the beef, while the brown sugar and Worcestershire in the glaze create a sweet-savory depth that reminds me of Moroccan charmoula – a tangy marinade my mother used for lamb. It’s that North African-French fusion that makes this recipe unforgettable.

Texture is everything in a stuffed meatloaf with cheese. Many recipes end up with dried-out meat and rubbery cheese. I use a bread-and-milk panade (soaking breadcrumbs in milk before mixing) to guarantee juiciness. The milk proteins bind moisture, while the egg provides structure. The cheese layer is placed just slightly off-center so the roll traps it securely – no blowouts.

And it’s foolproof. Even if you’ve never rolled meatloaf before, my step-by-step instructions and visual cues make this an easy meatloaf recipe anyone can master. Plus, it’s ready in about an hour and a half, most of which is hands-off oven time. The best meatloaf recipe for weeknights or Sunday suppers? This is it.

Cheesy Stuffed Meatloaf Ingredients

I love shopping for these ingredients at the Union Square Greenmarket in NYC – the grass-fed beef from a local farm makes all the difference. But every ingredient here is easy to find at any US grocery store. I’ve also included swaps for dietary needs. Let me walk you through each one so you know exactly what to grab and why.

Ingredients List

  • 1 1/2 pounds ground beef (80/20 for best moisture)
  • 1/2 cup breadcrumbs (plain or panko)
  • 1/2 cup milk (whole or 2%)
  • 1 large egg, beaten
  • 1/2 cup finely chopped onion
  • 2 cloves garlic, minced
  • 1 teaspoon salt
  • 1/2 teaspoon black pepper
  • 1 teaspoon dried oregano
  • 1 teaspoon dried parsley
  • 1 1/2 cups shredded mozzarella cheese
  • 1/4 cup grated Parmesan cheese
  • 1/2 cup ketchup
  • 2 tablespoons brown sugar
  • 1 tablespoon Worcestershire sauce

Ingredient Spotlight

Ground beef: I recommend 80/20 (lean-to-fat ratio). The fat renders during baking, keeping the meatloaf moist. Grass-fed beef adds a deeper, almost nutty flavor. Substitution: ground turkey works, but add 1-2 tablespoons olive oil to prevent dryness.

Mozzarella cheese: This is your melty hero. Low-moisture mozzarella (the block kind, not fresh) melts slowly and doesn’t make the meatloaf soggy. Substitution: provolone or Gouda – both melt beautifully with a slightly different flavor.

Breadcrumbs + milk (panade): This classic French technique ensures a tender, never-dry crumb. The milk softens the breadcrumbs, which then release moisture into the meat during cooking. Substitution: gluten-free breadcrumbs or crushed pork rinds for keto.

Glaze ingredients: Ketchup, brown sugar, Worcestershire – this trio creates a sticky-sweet tangy glaze that caramelizes on top. Substitution: use barbecue sauce for a smoky twist.

Parmesan cheese: Adds umami depth that complements the mozzarella. Substitution: Asiago or Pecorino Romano.

Original IngredientBest SubstitutionFlavor / Texture Impact
Ground beef (80/20)Ground turkey + 1 tbsp olive oilLeaner, slightly drier – oil restores moisture
MozzarellaProvolone or GoudaSimilar melt, slightly sharper taste
BreadcrumbsGluten-free breadcrumbs or crushed pork rindsGF version; pork rinds give keto option with crunch
Ketchup glazeBBQ sauce + 1 tsp apple cider vinegarSmokier, slightly tangier

How to Make Cheesy Stuffed Meatloaf — Step-by-Step

Let’s roll! I’ll walk you through each stage, with insider tips I’ve picked up over thousands of meatloaves. The key is gentle hands – don’t overmix or handle the meat too much.

Step 1: Preheat and Prep

Preheat your oven to 375°F (190°C). Line a baking sheet with parchment paper – I like using a rimmed half-sheet pan for easy cleanup. The parchment prevents sticking and makes sliding the meatloaf off effortless.

💡 mia’s Pro Tip: Use a dark metal baking sheet if you have one – it helps the bottom brown evenly.

Step 2: Mix the Meatloaf Base

In a large bowl, combine the ground beef, breadcrumbs, milk, beaten egg, chopped onion, minced garlic, salt, pepper, oregano, and parsley. Use your hands to mix gently – just until everything is incorporated. Overmixing will make the meatloaf dense.

⚠️ Common Mistake to Avoid: Squeezing the meat tightly or kneading it. You want a light, almost fluffy mixture.

Step 3: Flatten and Fill

Transfer the meat mixture onto the prepared baking sheet. Using your hands or a spatula, flatten it into a 10×8-inch rectangle, roughly 3/4 inch thick. Don’t worry about perfect edges – we’ll tidy them during rolling. Sprinkle the shredded mozzarella and Parmesan evenly over the surface, leaving a 1-inch border on all sides.

💡 mia’s Pro Tip: Press the cheese lightly into the meat so it doesn’t slide off when you roll.

Step 4: Roll and Seal

Starting from one of the short ends, carefully roll the meat up like a jelly roll (or a Swiss roll). Use a bench scraper or your fingers to lift the edge and tuck the filling inside. Continue rolling, peeling the meat away from the parchment as you go. Pinch the seam and both ends firmly to seal the cheese inside.

⚠️ Common Mistake to Avoid: Rolling too tightly – it can split the meat. Keep it gentle but snug.

Step 5: Glaze First Layer

In a small bowl, whisk together ketchup, brown sugar, and Worcestershire sauce. Spread half of this glaze over the top and sides of the rolled meatloaf. Reserve the rest for later.

💡 mia’s Pro Tip: Brush the glaze right to the ends – that’s where caramelization gets the most love.

Step 6: Bake and Second Glaze

Bake uncovered for 45 minutes. Then remove the pan from the oven and spread the remaining glaze evenly over the top. Return to the oven and bake for another 10–15 minutes, until the internal temperature reaches 160°F (71°C). The glaze will deepen into a sticky, glossy mahogany.

⚠️ Common Mistake to Avoid: Skipping the second glaze layer – it’s what gives that irresistible caramelized crust.

Step 7: Rest and Slice

Let the meatloaf rest on the baking sheet for 10 minutes before slicing. This allows the juices to redistribute and the cheese to set slightly, so you get clean, picture-perfect slices without losing the cheesy filling.

💡 mia’s Pro Tip: Use a sharp serrated knife to slice – it cuts through the crust without tearing the meat.

StepActionDurationKey Visual Cue
1Preheat & line pan5 minsOven reaches 375°F
2Mix meatloaf base5 minsUniform color, no streaks
3Flatten & add cheese5 minsRectangle 10×8 inches even
4Roll & seal5 minsSeam pinched, cheese enclosed
5First glaze2 minsEven coating all over
6Bake + second glaze55–60 minsInternal temp 160°F, deep golden
7Rest & slice10 minsCheese pulls but holds shape

Serving & Presentation

I love serving this cheesy stuffed meatloaf on a large wooden board, sliced into thick rounds so everyone can see that glorious cheese pull. A sprinkle of fresh parsley and a drizzle of extra glaze over the top add a vibrant finish. In my NYC apartment, I pair it with roasted asparagus and garlic mashed potatoes – the perfect comfort plate.

If you’re hosting a dinner party, try a side of herbed couscous (a nod to my Moroccan roots) or a crisp arugula salad with lemon vinaigrette to cut the richness. The meatloaf itself is hearty enough that a light side is all you need. For a true New York twist, serve it on toasted brioche buns with caramelized onions – hello, meatloaf sandwich!

💡 mia’s Pro Tip: Let the meatloaf rest the full 10 minutes before slicing. If you slice too early, the cheese will ooze out and the meat will crumble. Patience pays off.

Pairing TypeSuggestionsWhy It Works
Side DishMashed potatoes, roasted carrots, garlic green beansCreamy or earthy sides balance tangy glaze
Sauce / DipExtra glaze, sriracha mayo, horseradish creamAdds heat or tang to complement cheese
BeverageBold red wine (Zinfandel), dark lager, iced tea with lemonAcidity and tannins cut through fat
GarnishFresh parsley, microgreens, extra glaze drizzleAdds color and freshness

Make-Ahead, Storage & Reheating

As a busy NYC food blogger, I’m a huge fan of make-ahead dinners. This cheesy stuffed meatloaf is perfect for meal prep. You can assemble it the night before, refrigerate (unbaked), and pop it in the oven when you get home. Just add 10 minutes to the bake time because the meat will be cold.

MethodContainerDurationReheating Tip
RefrigeratorAirtight container (sliced or whole)3-4 daysReheat slices in oven at 350°F for 10 min, covered
FreezerWrap tightly in plastic wrap + foil2-3 monthsThaw in fridge overnight, then reheat as above
Make-AheadUnbaked, on parchment, covered in fridgeUp to 24 hoursAdd 10 min to bake time; apply glaze just before baking

If you’re reheating leftover slices, I recommend the oven rather than the microwave. Place slices on a baking sheet, cover loosely with foil, and warm at 350°F for about 8-10 minutes. The cheese will remelt beautifully. Pro tip: If the glaze seems a little dry, brush on a tiny bit of ketchup before reheating.

Variations & Easy Swaps

This recipe is endlessly adaptable. Here are three of my favorite variations, inspired by my travels and kitchen experiments.

VariationKey ChangeBest ForDifficulty Impact
Mediterranean Lamb & FetaGround lamb, feta + spinach, mint, cuminGreek or Middle Eastern flavorsEasy (same technique)
Gluten-Free & Dairy-FreeGluten-free breadcrumbs, dairy-free cheese shredsAllergies or dietary preferencesMedium (panade adjustment)
BBQ Cheddar BaconCheddar + cooked bacon bits, BBQ glazeSmoky, savory indulgenceEasy (add bacon)

Mediterranean Lamb & Feta Variation

Swap the ground beef for ground lamb, replace mozzarella and Parmesan with crumbled feta and chopped spinach, and add 1 teaspoon cumin and a pinch of cinnamon to the meat. The result is a North African-meets-Greek stuffed meatloaf that reminds me of my mother’s lamb kefta. Serve with tzatziki on the side.

Gluten-Free & Dairy-Free Version

Use certified gluten-free breadcrumbs (oat-based are great) and a dairy-free mozzarella shred – I’ve had success with Miyoko’s. The panade can be made with unsweetened almond milk instead of dairy milk. The texture will be slightly less tender, still delicious. Let it rest a little longer before slicing to set the dairy-free cheese.

BBQ Cheddar Bacon Variation

A New York diner classic reimagined! Replace the mozzarella with shredded sharp cheddar, fold 4 strips of cooked crumbled bacon into the meat mixture, and swap the ketchup glaze for your favorite smoky BBQ sauce (I like one with a little chipotle). This version is pure indulgence – perfect for game day.

What is the best type of cheese to use for a stuffed meatloaf so it melts perfectly without leaking out?

The best cheese for a stuffed meatloaf is low-moisture mozzarella. It melts beautifully but doesn’t become watery or greasy, which helps prevent leaks. Fresh mozzarella (the kind in water) has too much moisture and can make the meatloaf soggy, causing the cheese to seep out. I also love mixing in a sharp cheese like Parmesan or aged cheddar for flavor – both have low moisture too. For a truly gooey center, use a combination of 1 cup shredded low-moisture mozzarella and ¼ cup grated Parmesan. The Parmesan adds savory depth while the mozzarella provides the melt.

How long should you cook a cheesy stuffed meatloaf and at what oven temperature?

Bake a cheesy stuffed meatloaf at 375°F (190°C) for approximately 55 to 65 minutes total. I recommend a two-stage glaze method: bake for 45 minutes, then brush on the remaining glaze and bake for another 10-15 minutes. The internal temperature should reach 160°F (71°C) on an instant-read thermometer. If your meatloaf is larger or you’re using a different protein (like turkey), you may need to adjust the time. Always let the meatloaf rest 10 minutes after baking – the internal temperature will rise another 5°F, and resting helps the cheese set.

Can I prepare cheesy stuffed meatloaf ahead of time and refrigerate it before baking?

Yes, absolutely! You can assemble the stuffed meatloaf completely (without baking) up to 24 hours in advance. Keep it covered on the baking sheet in the refrigerator. When you’re ready to bake, brush on the glaze just before putting it in the oven. Because the meat will be cold, add about 10 minutes to the total bake time, and check that the internal temperature reaches 160°F. This make-ahead method is perfect for busy weeknights or holiday prep – it saves time and actually allows the flavors to meld even more.

What can I use as a substitute for breadcrumbs in a cheesy stuffed meatloaf recipe?

There are several excellent substitutes for breadcrumbs in meatloaf. For a gluten-free option, use gluten-free breadcrumbs or crushed pork rinds (pork dust gives a keto-friendly binder). Rolled oats work well – use quick oats for a finer texture. You can also use crushed crackers (like saltines or Ritz), crushed potato chips, or even cooked rice (use ½ cup cooked rice instead of ½ cup breadcrumbs). Each sub affects texture slightly: oats make it a bit heartier, crackers add a buttery note, and pork rinds keep it very moist. Always add the liquid (milk) as the recipe calls for – it softens the binder.

Why does my stuffed meatloaf fall apart when I slice it?

The most common reason stuffed meatloaf falls apart is that it wasn’t rested long enough after baking. Always let the meatloaf rest for 10 minutes – this allows the proteins to relax and the cheese to firm up slightly. Another cause is overmixing the meat mixture, which breaks down the proteins and makes the loaf crumbly. Mix just until combined. Finally, if the meatloaf is undercooked (internal temp below 160°F), it won’t hold together. Use a thermometer for accuracy. If slicing, use a sharp serrated knife and cut gently, not sawing back and forth.

Can I use ground turkey or chicken instead of beef for a stuffed meatloaf?

Yes, you can substitute ground turkey or chicken, but the texture and moisture will be different. Poultry is leaner, so the meatloaf can turn out dry. To compensate, add 2 tablespoons of olive oil or a grated zucchini (squeeze out excess water) to the mixture. Also increase the milk in the panade to ⅔ cup. Cook poultry meatloaf to an internal temperature of 165°F (74°C), which is higher than beef, so monitor carefully. The cheese stuffing still works beautifully with poultry – I like using a mix of mozzarella and crumbled goat cheese for extra creaminess.

How do I prevent the cheese from leaking out of the meatloaf during baking?

To prevent cheese leakage, follow these steps: First, leave a 1-inch border around the meat rectangle when you spread the cheese. Second, roll the meat tightly but not too tight – pinch the seam and ends securely. Third, place the meatloaf seam-side down on the baking sheet. The weight of the meat seals the seam during baking. Fourth, use low-moisture cheese (not fresh mozzarella). Finally, don’t overstuff – 1½ cups total cheese is plenty for this recipe. If you see tiny leaks, don’t panic; they’ll caramelize in the pan and still taste amazing.

Can I add vegetables or herbs to the meatloaf filling?

Absolutely! Adding vegetables and herbs to the cheese layer or mixing them into the meat is a great way to boost flavor and nutrition. I love adding ½ cup sautéed mushrooms, ¼ cup chopped sun-dried tomatoes, or a handful of fresh spinach (wilted and squeezed dry) along with the cheese. Fresh herbs like basil, thyme, or rosemary also work beautifully. Just make sure any added vegetables are cooked and drained of excess moisture – wet vegetables will release steam and make the meatloaf loose. For a Mediterranean twist, try feta, olives, and roasted red peppers in the center.

What should I serve with cheesy stuffed meatloaf for a complete meal?

Cheesy stuffed meatloaf pairs wonderfully with simple, hearty sides that complement its rich flavors. My go-to is creamy garlic mashed potatoes and a crisp green salad with lemon vinaigrette. Roasted vegetables like asparagus, broccoli, or carrots add color and balance. For a starchier option, try buttered egg noodles or a wild rice pilaf. If you want to lean into the Italian flavors, serve with a side of marinara sauce for dipping. And don’t forget crusty bread to soak up any extra glaze and melted cheese from the plate!

How do I store leftover cheesy stuffed meatloaf and reheat it without drying out?

Store leftover meatloaf in an airtight container in the refrigerator for up to 4 days. For longer storage, wrap tightly in plastic wrap and foil and freeze for up to 3 months. The best way to reheat without drying out is in the oven. Place slices on a baking sheet, cover loosely with foil, and warm at 350°F for 8-10 minutes (from fridge) or 15-18 minutes (from frozen, thawed first). The foil traps steam and keeps the meat moist. Avoid the microwave if possible – it can make the meat tough and the cheese rubbery. If you must microwave, do it at 50% power in 30-second bursts.

Share Your Version!

I hope this cheesy stuffed meatloaf recipe becomes a beloved staple in your kitchen, just as it has in mine. Whether you stick with the classic mozzarella-Parmesan filling or try one of my variations, I can’t wait to hear how it turns out. Did your family fight over the last slice? Did you discover a new favorite cheese combo? Drop a comment and star rating below – your feedback helps other home cooks find the best meatloaf recipe too.

And if you snap a photo of that ooey-gooey cheese pull, share it on Instagram or Pinterest and tag @exorecipes. I love seeing your creations! One question for you: what’s the one side dish you always serve with meatloaf? Let me know in the comments – I might feature your idea in a future post. 💬🧡

From my NYC kitchen to yours — I hope this recipe brings as much warmth to your table as it does to mine. — mia 🧡

📌

Love This Recipe? Save It to Pinterest!

If you enjoyed this Cheesy Stuffed Meatloaf recipe, don’t let it get lost in your browser tabs! 😄 Pin it now so you can find it again anytime — and explore hundreds more tried-and-tested recipes waiting for you on my Pinterest boards.

👉 Follow mia on Pinterest @exorecipe

📌 Pin this recipe · 🔁 Re-pin your favorites · 💬 Tag me when you make it — I love seeing your creations!

Print

clock clock iconcutlery cutlery iconflag flag iconfolder folder iconinstagram instagram iconpinterest pinterest iconfacebook facebook iconprint print iconsquares squares iconheart heart iconheart solid heart solid icon

Cheesy Stuffed Meatloaf Recipe That Melts Hearts and Cheese Alike

  • Author: Chef Mia
  • Prep Time: 20 minutes
  • Cook Time: 1 hour
  • Total Time: 1 hour 20 minutes
  • Yield: 6-8 servings 1x
  • Method: Main Course
  • Cuisine: American

Description

A moist and savory meatloaf stuffed with gooey melted cheese, wrapped in a tangy glaze, and baked to perfection.


Ingredients

Scale
  • 1 1/2 pounds ground beef
  • 1/2 cup breadcrumbs
  • 1/2 cup milk
  • 1 large egg, beaten
  • 1/2 cup finely chopped onion
  • 2 cloves garlic, minced
  • 1 teaspoon salt
  • 1/2 teaspoon black pepper
  • 1 teaspoon dried oregano
  • 1 teaspoon dried parsley
  • 1 1/2 cups shredded mozzarella cheese
  • 1/4 cup grated Parmesan cheese
  • 1/2 cup ketchup
  • 2 tablespoons brown sugar
  • 1 tablespoon Worcestershire sauce

Instructions

  1. Preheat oven to 375°F (190°C). Line a baking sheet with parchment paper.
  2. In a large bowl, combine ground beef, breadcrumbs, milk, egg, onion, garlic, salt, pepper, oregano, and parsley. Mix until just combined.
  3. On the prepared baking sheet, flatten the meat mixture into a 10×8-inch rectangle.
  4. Sprinkle mozzarella and Parmesan cheeses evenly over the meat, leaving a 1-inch border.
  5. Carefully roll the meat up from the short end, like a jelly roll, sealing the edges and ends to enclose the cheese.
  6. Place seam-side down on the baking sheet.
  7. In a small bowl, whisk together ketchup, brown sugar, and Worcestershire sauce. Spread half of the glaze over the meatloaf.
  8. Bake for 45 minutes. Spread remaining glaze over the top and bake for another 10-15 minutes, until internal temperature reaches 160°F (71°C).
  9. Let rest for 10 minutes before slicing. Serve warm.

Notes

For extra cheesy goodness, use a mix of cheddar and mozzarella. Letting the meatloaf rest before slicing helps keep it moist.


Nutrition

  • Calories: 380
  • Sugar: 10 g
  • Fat: 22 g
  • Carbohydrates: 18 g
  • Protein: 28 g


Cheesy Stuffed Meatloaf Recipe That Melts Hearts and Cheese Alike

k">

Tried This Recipe? Leave a Comment!

Did you make this recipe? I’d love to hear how it turned out! Please leave a comment and a rating below. Your feedback helps other home cooks and supports cheerychop.com!

For more delicious inspiration, follow me on Pinterest!
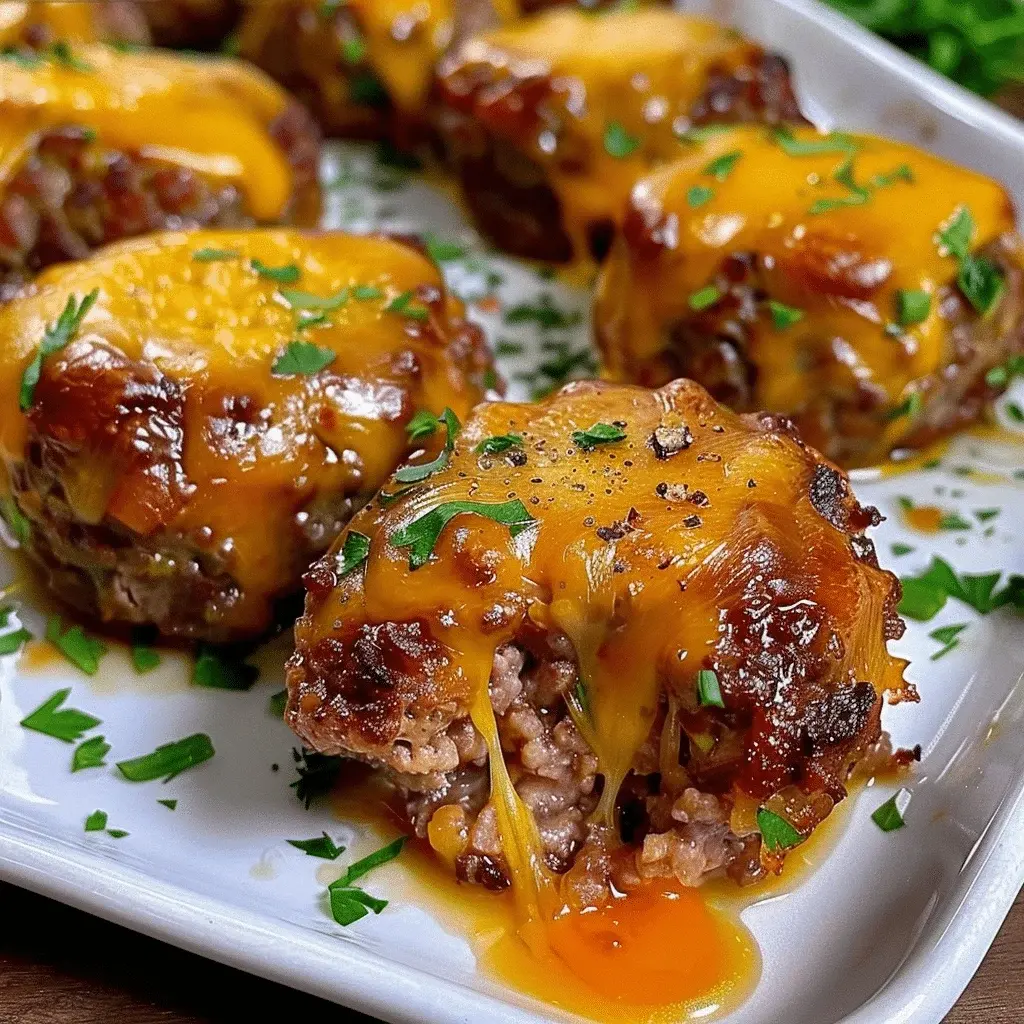
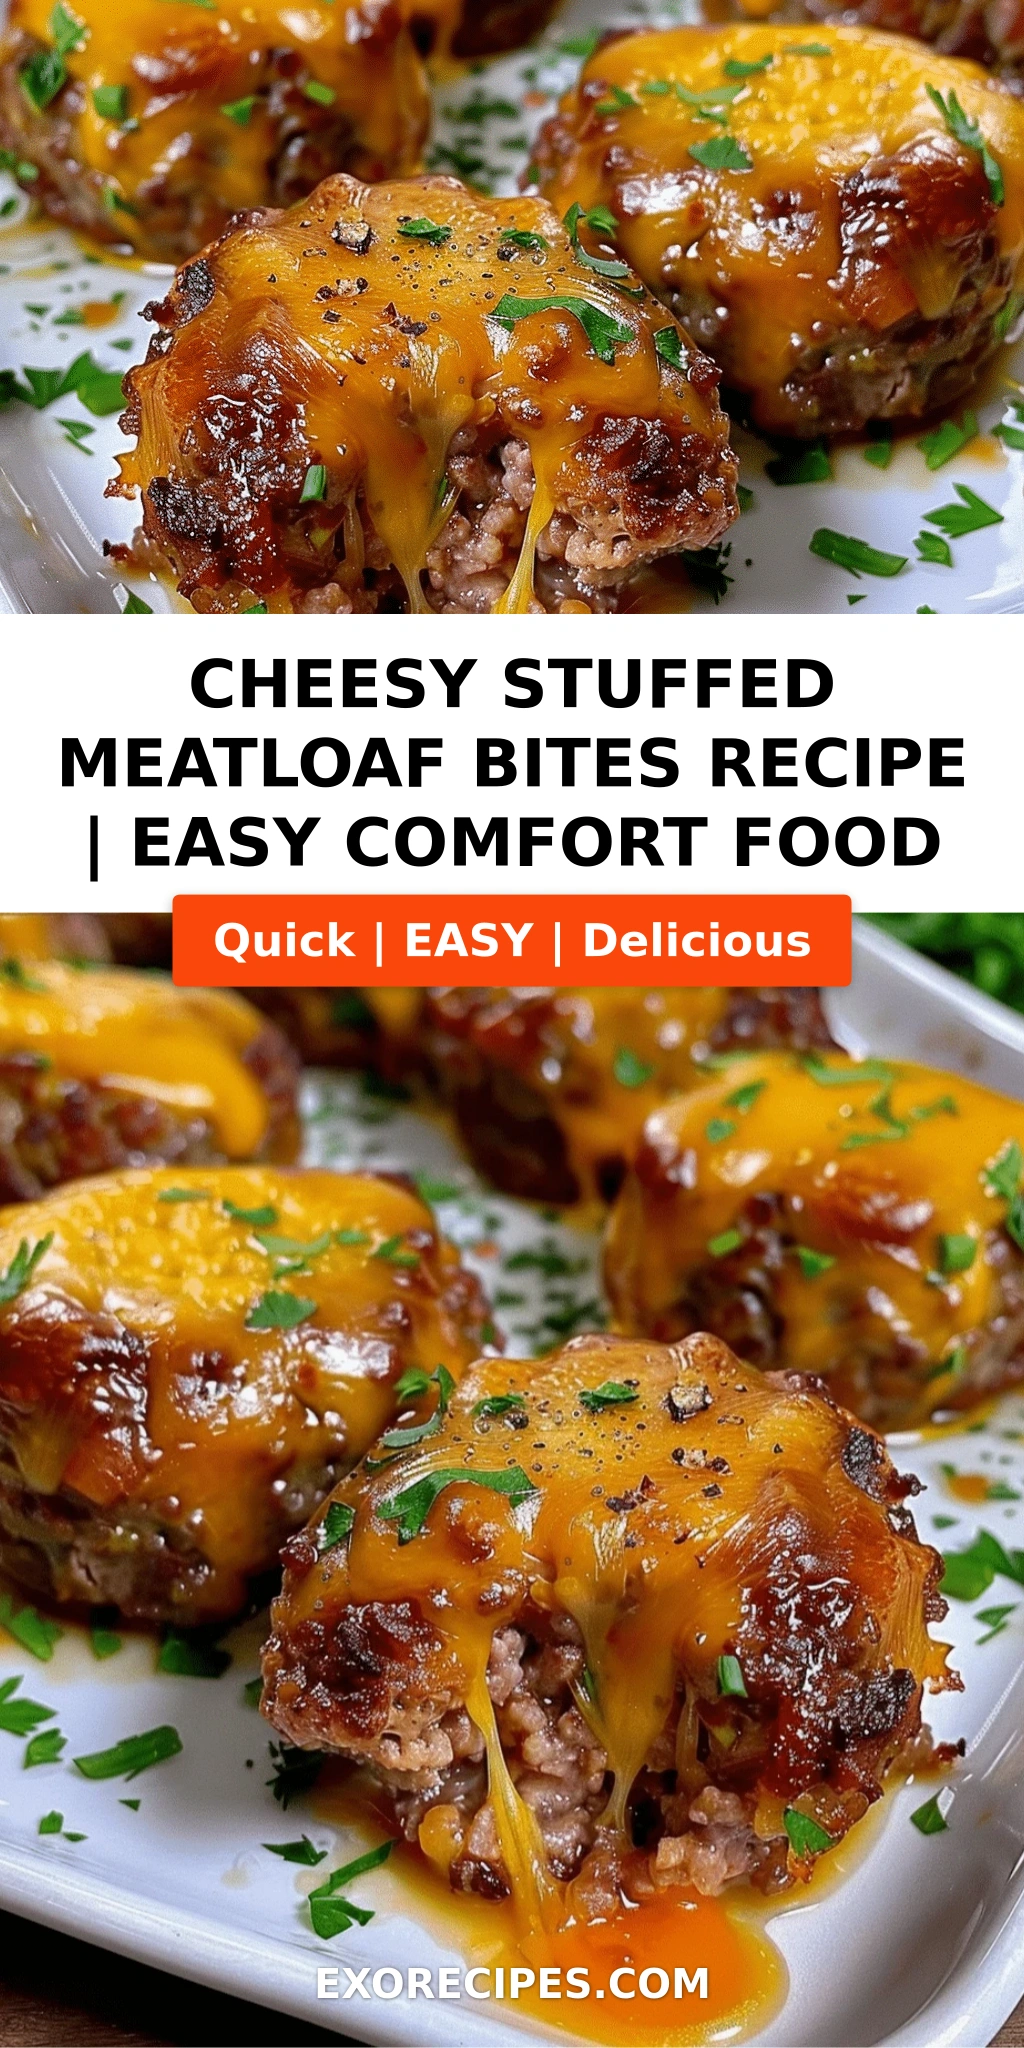
Cheesy Stuffed Meatloaf Bites: The Ultimate Comfort Food – Double-Cheese, Tangy Glaze

⚖️
Difficulty
Easy
⏲️
Prep Time
15 mins
🕒
Cook Time
25 mins
⏱️
Total Time
40 mins
🍽️
Servings
12 bites

I’ll never forget the first time I made these stuffed meatloaf bites. It was a cold Sunday in my tiny NYC apartment, and I was craving the cozy, hearty meals my mother used to make in Morocco. She’d shape spiced meat into little balls and simmer them in tomato sauce — simple, soulful. Years later, after training in Paris and learning the art of cheese-filled gratins and perfectly sealed dumplings, I knew I could reinvent that idea. These cheesy meatloaf bites are that reinvention: juicy ground beef wrapped around a cube of cheddar, topped with a glossy ketchup-mustard glaze, and finished with bubbly mozzarella. They’re the ultimate comfort food — easy to make, impossible to resist.

Imagine pulling a tray out of the oven: the glaze is caramelized and sticky, the meatballs are golden and firm, and when you cut one open, a river of molten cheddar spills out. The aroma — sweet from the brown sugar, tangy from the mustard, and deeply savory from the Worcestershire and garlic — fills your kitchen like a hug. Each bite is a perfect balance of tender meat, sharp cheese, and that sweet-tangy glaze. In my Parisian training, we called this kind of layering “harmony of textures.” Here, it’s just pure joy.

I’ve tested this recipe more times than I can count, from my own oven to friends’ game-day tables. The secret? Sealing the cheese completely so it stays inside, and brushing the glaze twice for that crackly finish. In the steps below, I’ll share the one common mistake that makes meatloaf bites fall apart — and my French-trained trick to avoid it. Let’s make these easy meatloaf bites together.

Why This Cheesy Stuffed Meatloaf Bites Recipe Is the Best

What sets these mini meatloaf appetizers apart is the double-cheese technique. I use a cube of cheddar hidden inside — it melts slower than shredded cheese, giving you that dramatic pull-apart moment — and then top each bite with shredded mozzarella for a golden, bubbly crust. This layering is something I borrowed from French raclette: one cheese for the ooze, another for the crust. The glaze, meanwhile, is my nod to classic American meatloaf, brightened with a splash of mustard and a touch of brown sugar. It caramelizes beautifully, locking in moisture.

Texture-wise, these bites are incredibly tender. The trick is a panade — a mixture of breadcrumbs and milk that keeps the ground beef from getting dense. I learned that in Paris from my pastry chef, who used a similar technique for quenelles. Combined with a lightly beaten egg, the panade ensures each bite stays juicy, not dry. The onions are finely chopped so they melt into the meat, adding sweetness without crunch. This is comfort food that feels light, not heavy.

And the best part for busy cooks? Everything comes together in one bowl, one baking sheet, and under 40 minutes. No browning, no flipping, no fuss. The oven does all the work, and the glaze does all the flavouring. Whether you’re making them for a weeknight dinner (serve with mashed potatoes!) or a party platter, they’re foolproof. I’ve had beginner cooks nail these on the first try, and that’s exactly what I want — confident, happy cooking.

Stuffed Meatloaf Bites Ingredients

Every time I walk through the Union Square Greenmarket, I think about which ingredients will shine in this recipe. For these bites, I usually grab grass-fed ground beef from a local farm, sharp cheddar from a Vermont creamery, and sweet onions from the Market District. But here in NYC, you can find everything you need at any grocery store — and the recipe is forgiving. Let me walk you through each component.

Ingredients List

  • 1 lb ground beef (80/20 or leaner)
  • 1/2 cup breadcrumbs (plain or panko)
  • 1/4 cup milk (whole or 2%)
  • 1 large egg
  • 1/2 cup finely chopped onion (yellow or sweet)
  • 2 cloves garlic, minced
  • 1 teaspoon salt
  • 1/2 teaspoon black pepper
  • 1 teaspoon Worcestershire sauce
  • 1/2 teaspoon dried oregano
  • 1/2 teaspoon dried basil
  • 1 cup shredded mozzarella cheese
  • 12 small cubes cheddar cheese (about 1/2 inch each)
  • 1/2 cup ketchup
  • 2 tablespoons brown sugar
  • 1 tablespoon yellow mustard

Ingredient Spotlight

Ground Beef: I recommend 80/20 for juiciest results — the fat keeps the bites tender. If you use leaner (like 93/7), add 2 teaspoons olive oil to the mixture. Cheddar Cheese Cubes: Use a firm cheddar (aged at least 6 months). It melts slower than mild cheddar, so it stays inside. Havarti or Gouda also work. Breadcrumbs: Panko gives a slightly lighter texture; plain breadcrumbs are fine. For gluten-free, use almond flour or crushed pork rinds (see substitutions table). Ketchup Glaze: The combination of brown sugar and mustard creates that signature sweet-tangy crust. If you omit the mustard, the glaze will be sweeter — still delicious.

Original IngredientBest SubstitutionFlavor / Texture Impact
BreadcrumbsAlmond flour (gluten-free)Slightly denser, nuttier; use 1/3 cup
Cheddar cubesProvolone or Monterey Jack cubesSofter melt, milder flavor
Worcestershire sauceSoy sauce + splash of vinegarMore umami, less sweet
MilkButtermilk or plain yogurt (thin with water)More tang, extra tender

How to Make Cheesy Stuffed Meatloaf Bites — Step-by-Step

Making these easy meatloaf bites is straightforward — but a few chef’s tricks make all the difference. Follow these steps and you’ll get perfect results every time.

Step 1: Prepare the Meat Mixture

Preheat your oven to 375°F (190°C) and line a baking sheet with parchment paper. In a large bowl, combine the ground beef, breadcrumbs, milk, egg, finely chopped onion, minced garlic, salt, pepper, Worcestershire sauce, oregano, and basil. Mix gently with your hands or a fork — just until everything is incorporated. Overmixing can make the bites tough.

💡 mia’s Pro Tip: Let the mixture rest for 5 minutes before shaping. This allows the breadcrumbs to fully absorb the milk, resulting in a more tender bite.

Step 2: Shape and Stuff

Divide the meat mixture into 12 equal portions. Flatten each portion into a round patty about 3 inches wide. Place a cube of cheddar cheese in the center of each patty, then fold the meat around it, sealing the edges completely. Roll between your palms to form a smooth ball.

⚠️ Common Mistake to Avoid: If the cheese peeks out through a crack, it will melt onto the pan. Make sure the meat completely encloses the cube — pinch any seams closed.

Step 3: Glaze and Bake

Place the meatballs on the prepared baking sheet. In a small bowl, whisk together the ketchup, brown sugar, and yellow mustard. Brush the glaze generously over each meatball (use all of it). Bake for 20–25 minutes, until the meatballs are cooked through (internal temp 160°F) and the glaze is caramelized and sticky.

💡 mia’s Pro Tip: For an extra-thick glaze, brush a second coat halfway through baking — the sugars will concentrate and form a beautiful lacquered crust.

Step 4: Add Mozzarella and Finish

Remove the tray from the oven and sprinkle the shredded mozzarella over each meatball. Return to the oven and bake for another 2–3 minutes, just until the cheese is melted and bubbly. Let cool for 5 minutes — this allows the cheese inside to set slightly so it doesn’t gush out when you bite in.

⚠️ Common Mistake to Avoid: Don’t skip the cooling time! If you serve them immediately, the molten cheese can burn mouths. Five minutes is perfect.

StepActionDurationKey Visual Cue
1Mix ingredients5 minHomogeneous, slightly sticky
2Shape & stuff8 minSeamless balls, no cheese visible
3Bake with glaze20–25 minGlaze bubbling, edges dark brown
4Add mozzarella & finish2–3 minCheese melted, golden in spots

Serving & Presentation

These cheesy stuffed meatloaf bites are incredibly versatile. For a main dish, I love serving 4–5 bites per person alongside creamy mashed potatoes or roasted broccoli — the tangy glaze cuts through the richness. As an appetizer, arrange them on a platter with a tiny bowl of extra ketchup or a drizzle of sriracha mayo. Garnish with chopped parsley and a sprinkle of flaky sea salt for a touch of elegance.

I often take inspiration from my Moroccan roots and pair them with a side of warm pita and a quick cucumber-tomato salad with lemon. The freshness balances the meaty, cheesy goodness. For a Parisian-style presentation, serve on a wooden board with cornichons and whole grain mustard — your guests will feel like they’re at a chic bistro in the 7th arrondissement.

Pairing TypeSuggestionsWhy It Works
Side DishMashed potatoes, roasted carrots, or buttered egg noodlesCreamy sides soak up the glaze
Sauce / DipExtra ketchup, ranch dressing, or honey mustardEnhances the sweet-tangy profile
BeverageIce-cold pilsner, zinfandel, or iced teaRefreshing contrast to rich meat
GarnishChopped parsley, flaky sea salt, or sesame seedsAdds color and a slight crunch

Make-Ahead, Storage & Reheating

Living in NYC means my schedule is often packed — between food shoots, market trips, and writing. That’s why I love that these stuffed meatloaf bites are so make-ahead friendly. You can prep them the night before or freeze a batch for busy weeks. Here’s my tested system.

MethodContainerDurationReheating Tip
RefrigeratorAirtight containerUp to 4 daysReheat in 350°F oven for 8–10 min
FreezerFreezer bag or containerUp to 3 monthsThaw overnight; reheat as above
Make-Ahead (uncooked)Covered dish in fridgeUp to 24 hoursAdd glaze just before baking

For the best results when reheating, place the bites on a wire rack over a baking sheet so the bottoms stay crisp. Microwaving will soften them — fine in a pinch but the oven is superior. If frozen, let them thaw in the fridge overnight; they’ll taste just as fresh as the day you made them.

One more thing: if you’re making a double batch for a party, you can keep them warm in a 200°F oven for up to 30 minutes. Cover loosely with foil to prevent the glaze from hardening.

Variations & Easy Swaps

One of the things I love about this easy meatloaf recipe is how adaptable it is. You can change the protein, the cheese, the glaze — it’s like a canvas. Below are my favorite variations, each tested in my own kitchen.

VariationKey ChangeBest ForDifficulty Impact
Moroccan-SpicedAdd 1 tsp cumin + 1/2 tsp cinnamon + 1/4 tsp cayenne to meatExotic twist, my rootsEasy
Turkey & SpinachUse 1 lb ground turkey + 1/2 cup thawed frozen spinach (squeezed dry)Lighter, weeknightEasy
BBQ Ranch StyleSwap ketchup glaze with BBQ sauce + ranch seasoning in meatGame-day platterEasy

Moroccan-Spiced Bites

This is my personal favorite — I add a teaspoon of cumin, half a teaspoon of cinnamon, and a pinch of cayenne to the meat mixture. The warmth of the spices pairs beautifully with the sweet glaze and melty cheese. It reminds me of the lamb kefta my mother would grill in the souks of Marrakech. Serve with a side of harissa-spiked yogurt for dipping.

Gluten-Free & Dairy-Free Variation

To make these gluten-free, substitute the breadcrumbs with 1/2 cup of almond flour or crushed pork rinds (about 1 ounce). For dairy-free, use vegan cheddar cubes and a dairy-free mozzarella shred (I like Miyoko’s). The texture will be slightly less gooey but still deliciously satisfying. Omit the milk and use unsweetened almond milk or water instead. I’ve tested this version for friends with allergies — they loved it.

Sweet & Smoky Bites

Inspired by my love for NYC BBQ joints, I swap the ketchup glaze for a mixture of 1/3 cup BBQ sauce, 2 tablespoons maple syrup, and 1 teaspoon smoked paprika. Brush it on the same way. The result is a deeper, smokier sweetness that clings to the meat. Add a few drops of liquid smoke to the meat mixture if you want even more backyard flavor.

What is the best cheese to use for stuffed meatloaf bites to keep them from melting out?

I recommend using a firm, aged cheese like sharp cheddar (aged 6+ months) or Gouda for the center cube. These cheeses have a higher melting point, so they soften and become gooey without fully liquefying and leaking out. Avoid soft cheeses like Brie or fresh mozzarella — they melt too quickly and will escape through any tiny gap. For the top, shredded mozzarella is ideal because it melts into a cohesive, stretchy layer. Pro tip: freeze the cheddar cubes for 15 minutes before stuffing; they’ll hold their shape even better.

Can I make cheesy stuffed meatloaf bites ahead of time and reheat them?

Absolutely! These bites are perfect for meal prep. You have two options: assemble the uncooked meatballs (without the glaze) up to 24 hours ahead, cover, and refrigerate. When ready to bake, add the glaze and proceed. Or bake them fully, cool, and store in an airtight container in the fridge for up to 4 days. To reheat, place them on a wire rack over a baking sheet at 350°F for 8–10 minutes — this restores the crisp glaze and keeps the cheese molten. For longer storage, freeze the baked bites for up to 3 months. Thaw overnight in the fridge before reheating.

How do you prevent stuffed meatloaf bites from falling apart while cooking?

The key is a proper binder and careful shaping. My recipe uses breadcrumbs and an egg, which act as glue. Make sure the meat mixture is not too wet — if you chopped onions very finely, squeeze out any excess moisture. When shaping, press the meat firmly around the cheese cube and seal the edges by pinching. A common mistake is overmixing the meat, which can make it crumbly. Mix just until combined. Finally, let the bites rest for 10 minutes after shaping before baking; this helps the proteins relax and hold together.

What can I substitute for breadcrumbs in cheesy stuffed meatloaf bites?

For a gluten-free option, use almond flour (1/3 cup), crushed pork rinds (about 1 ounce), or gluten-free panko. Oat flour also works well (1/3 cup). If you’re not avoiding gluten but just out of breadcrumbs, crush regular crackers or cornflakes. The ratio is roughly the same — 1/2 cup. Each substitution changes the texture slightly: almond flour makes them denser and richer; pork rinds keep them light and airy. Add an extra tablespoon of milk if the mixture feels too dry. I’ve tested all these options and they all produce delicious, stable bites.

Can I use a different type of ground meat?

Yes! Ground pork, turkey, or chicken all work beautifully. If using lean poultry, add 2 teaspoons of olive oil to the mixture for moisture. Ground lamb is fantastic too — try it with the Moroccan spice variation (cumin, cinnamon, cayenne). The cooking time stays the same, but always check that the internal temperature reaches 160°F for beef/pork/lamb, or 165°F for poultry. One note: turkey and chicken are stickier, so wet your hands slightly when shaping to prevent sticking.

Share Your Version!

I truly believe that the best recipes are the ones we make our own. Have you tried these cheesy stuffed meatloaf bites? Did you add a pinch of smoked paprika or swap in pepper jack cheese? I’d love to hear how they turned out — leave a star rating and a comment below. Your feedback not only helps other home cooks but also inspires me to keep creating. If you snap a photo, tag me on Instagram or Pinterest at @exorecipe — I can’t wait to see your gooey, glazed creations.

One last challenge: try the Moroccan-spiced version and tell me if it reminds you of something familiar. For me, it’s a taste of home. From my NYC kitchen to yours — I hope this recipe brings as much warmth to your table as it does to mine. — mia 🧡

📌

Love This Recipe? Save It to Pinterest!

If you enjoyed this Cheesy Stuffed Meatloaf Bites recipe, don’t let it get lost in your browser tabs! 😄 Pin it now so you can find it again anytime — and explore hundreds more tried-and-tested recipes waiting for you on my Pinterest boards.

👉 Follow mia on Pinterest @chefrecipes2

📌 Pin this recipe · 🔁 Re-pin your favorites · 💬 Tag me when you make it — I love seeing your creations!

Print

clock clock iconcutlery cutlery iconflag flag iconfolder folder iconinstagram instagram iconpinterest pinterest iconfacebook facebook iconprint print iconsquares squares iconheart heart iconheart solid heart solid icon

Cheesy Stuffed Meatloaf Bites The Ultimate Comfort Food

  • Author: Chef Mia
  • Prep Time: 15 minutes
  • Cook Time: 25 minutes
  • Total Time: 40 minutes
  • Yield: 12 bites 1x
  • Method: Appetizer
  • Cuisine: American

Description

These cheesy stuffed meatloaf bites are the ultimate comfort food—juicy, flavorful, and filled with gooey cheese. Perfect as an appetizer or main dish, they are easy to make and sure to be a hit.


Ingredients

Scale
  • 1 lb ground beef
  • 1/2 cup breadcrumbs
  • 1/4 cup milk
  • 1 large egg
  • 1/2 cup finely chopped onion
  • 2 cloves garlic, minced
  • 1 teaspoon salt
  • 1/2 teaspoon black pepper
  • 1 teaspoon Worcestershire sauce
  • 1/2 teaspoon dried oregano
  • 1/2 teaspoon dried basil
  • 1 cup shredded mozzarella cheese
  • 12 small cubes cheddar cheese (about 1/2 inch each)
  • 1/2 cup ketchup
  • 2 tablespoons brown sugar
  • 1 tablespoon yellow mustard

Instructions

  1. Preheat oven to 375°F (190°C). Line a baking sheet with parchment paper.
  2. In a large bowl, combine ground beef, breadcrumbs, milk, egg, onion, garlic, salt, pepper, Worcestershire sauce, oregano, and basil. Mix until just combined.
  3. Divide the meat mixture into 12 equal portions. Flatten each portion into a round patty.
  4. Place a cube of cheddar cheese in the center of each patty. Fold the meat around the cheese and roll into a ball, sealing the edges.
  5. Place the meatballs on the prepared baking sheet.
  6. In a small bowl, whisk together ketchup, brown sugar, and mustard. Brush the glaze over each meatball.
  7. Bake for 20-25 minutes, or until the meatballs are cooked through and the glaze is caramelized.
  8. Sprinkle shredded mozzarella over the meatballs and bake for an additional 2-3 minutes, until melted.
  9. Let cool for 5 minutes before serving.

Notes

Feel free to substitute the cheese with your favorite variety. For a spicier kick, add a pinch of cayenne pepper to the meat mixture.


Nutrition

  • Calories: 280
  • Sugar: 6 g
  • Fat: 18 g
  • Carbohydrates: 12 g
  • Protein: 18 g


Cheesy Stuffed Meatloaf Bites The Ultimate Comfort Food

k">

Tried This Recipe? Leave a Comment!

Did you make this recipe? I’d love to hear how it turned out! Please leave a comment and a rating below. Your feedback helps other home cooks and supports cheerychop.com!

For more delicious inspiration, follow me on Pinterest!
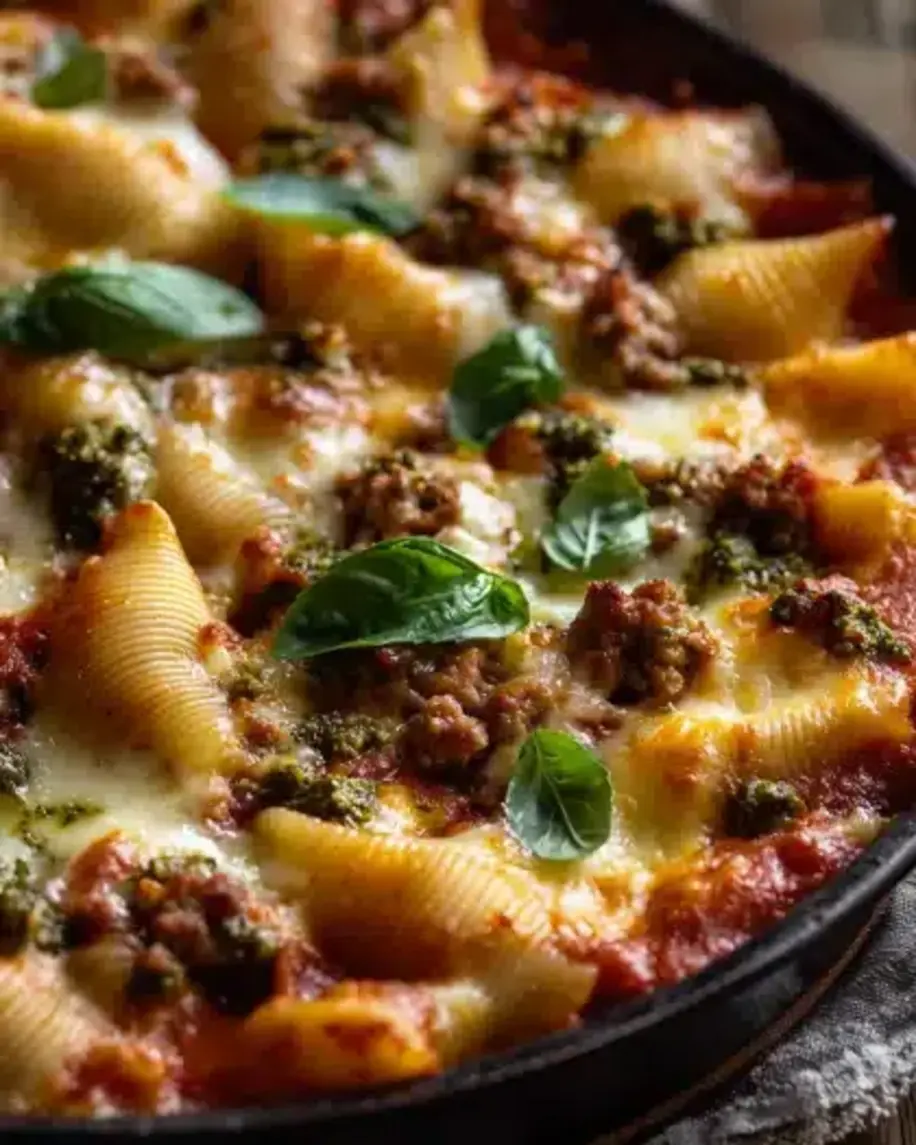
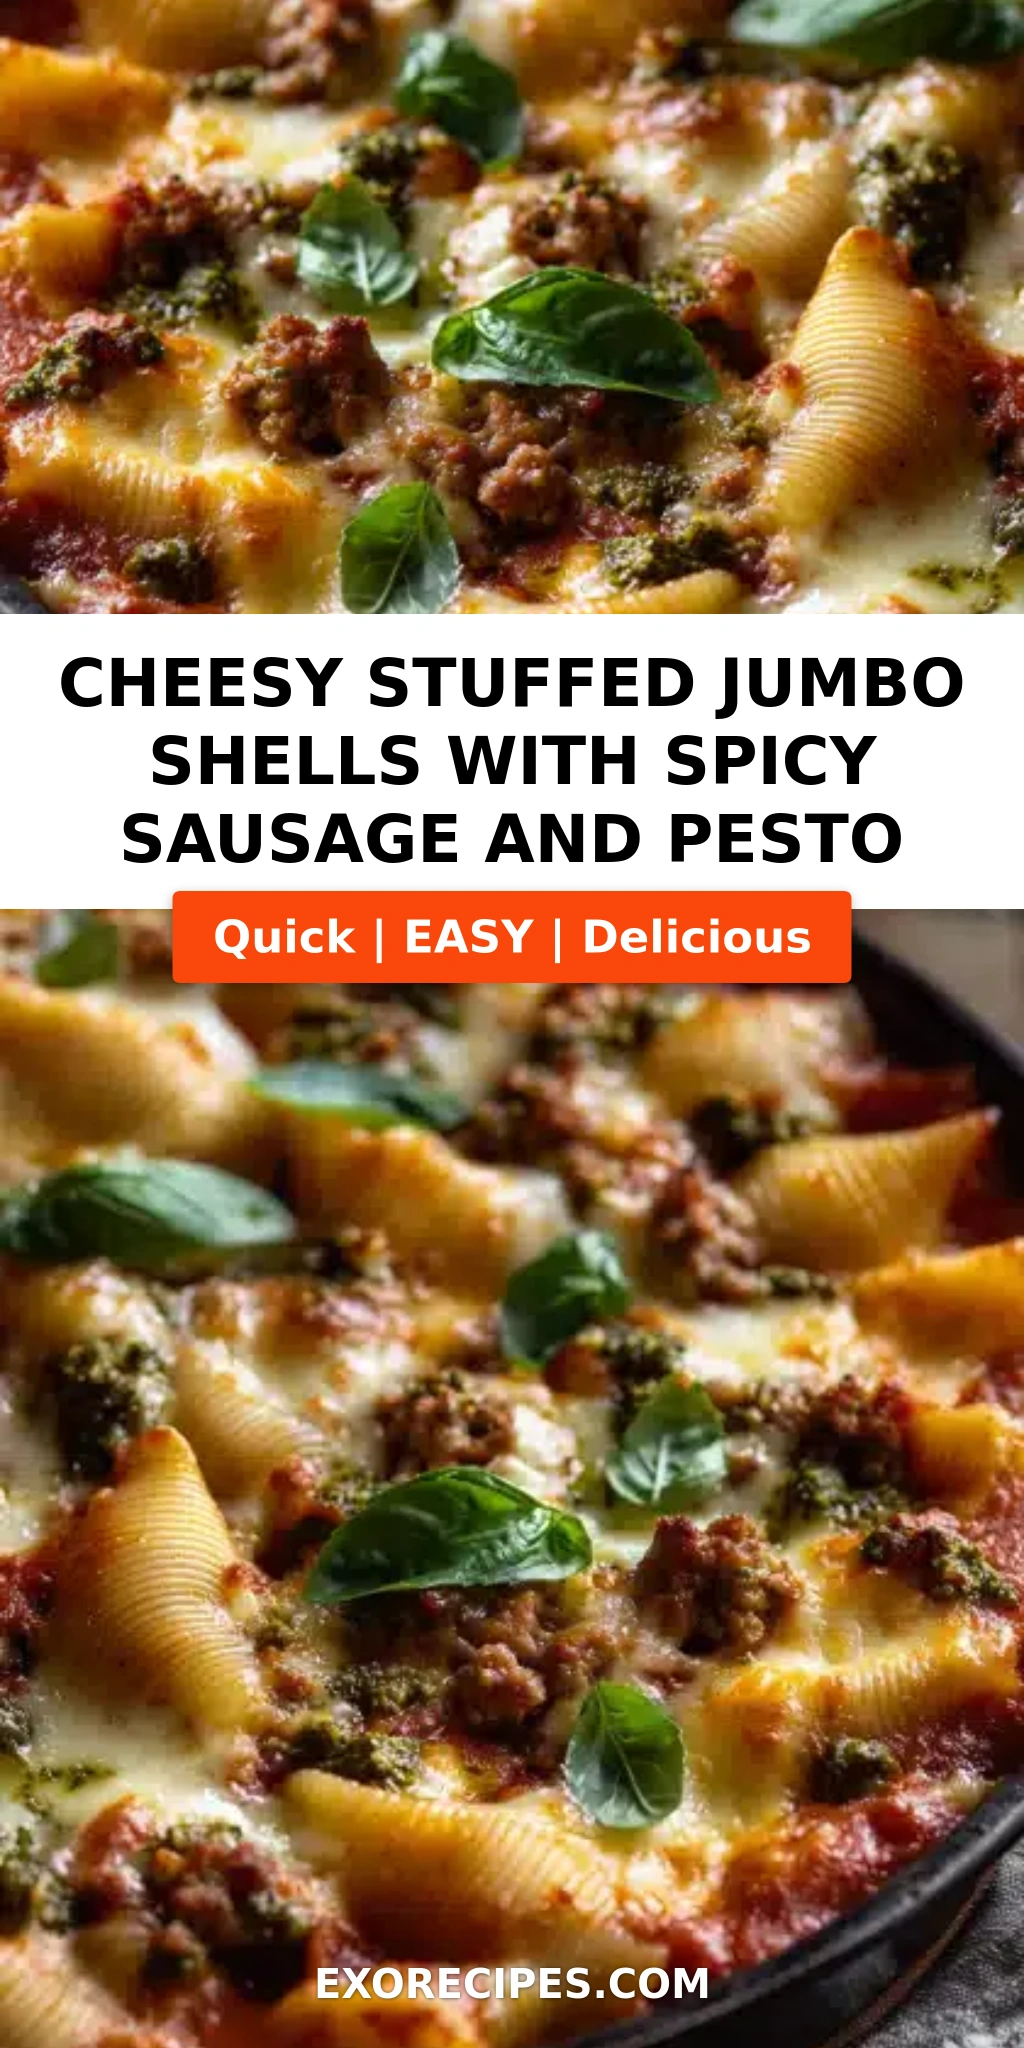
Cheesy Stuffed Jumbo Shells with Spicy Sausage and Pesto: Your Next Go-To Comfort Food Recipe

⚖️
Difficulty
Medium
⏲️
Prep Time
25 mins
🕒
Cook Time
35 mins
⏱️
Total Time
60 mins
🍽️
Servings
6 to 8

When I first moved to New York City from Paris, I craved the kind of dinner that hugs you from the inside — something warm, cheesy, and deeply satisfying. I spent weekends testing recipes in my tiny kitchen, trying to recreate the feeling of my mother’s tagine in Morocco but with the bold flavors of my new home. This Cheesy Stuffed Jumbo Shells with Spicy Sausage and Pesto was born on a rainy Saturday when I had a box of jumbo shells, some leftover spicy sausage from the Italian market on Arthur Avenue, and a jar of basil pesto I had made that morning. It’s become my go-to for busy weeknights and dinner parties alike — a true comfort food star.

Imagine a platter of tender pasta shells, each one filled with a creamy ricotta mixture studded with spicy Italian sausage, all nestled in a rich marinara sauce and topped with vibrant green pesto and bubbling mozzarella. The first bite gives you that perfect contrast: the slight resistance of the al dente shell giving way to the luscious, cheesy filling, followed by the kick of fennel and red pepper flakes from the sausage, and then the herbal brightness of pesto cutting through the richness. It’s the kind of dish that makes the whole kitchen smell like Sunday dinner — even on a Tuesday night. I like to use a good quality marinara (preferably from a Brooklyn-based brand) and fresh basil from the Union Square Greenmarket.

I’ve made this recipe dozens of times, and I’ve refined every detail: the exact cooking time for the shells so they stay firm enough to stuff, the ratio of ricotta to mozzarella for maximum creaminess without turning soggy, and the trick of dolloping pesto on top instead of mixing it in — this way the flavor stays bright. One common mistake I see is overcooking the shells until they tear; I’ll share my foolproof method below. This stuffed shells with sausage recipe is designed for home cooks of any level. Trust me, once you try this version with pesto, you’ll never go back to plain baked pasta.

Why This Cheesy Stuffed Jumbo Shells Recipe Is the Best

The Flavor Secret: The combination of spicy Italian sausage and pesto is my signature twist. Growing up in Morocco, I learned how a single herbal note can transform a dish — like fresh cilantro in a lamb tagine. Here, pesto adds that same lift. It’s not just a garnish; it’s a layer that balances the richness of the cheese and the heat of the sausage. This isn’t your average stuffed shells recipe — it’s a flavor-packed experience.

Perfected Texture: My Parisian training taught me the importance of texture. For this jumbo shells recipe, I cook the shells just shy of al dente — they’ll finish cooking in the oven. The filling is creamy but not runny, thanks to the egg and the right cheese ratios. I also drain the cooked sausage well to prevent any greasiness. The result: each shell holds its shape, and every bite is a perfect mouthful.

Foolproof & Fast: Despite the name, this easy comfort food dinner comes together in about an hour. There are no complicated techniques — just browning sausage, mixing a filling, and assembling. Even if you’ve never stuffed a shell before, you’ll get the hang of it after the first few. And if you make it ahead, it’s even more convenient. This is the kind of recipe I rely on when I need a showstopper without the stress.

Cheesy Stuffed Jumbo Shells Ingredients

I like to source my ingredients from a mix of places: the spicy Italian sausage from a local butcher (I’m partial to Faicco’s in the West Village), fresh ricotta from a dairy in upstate New York that sells at the farmers market, and my pesto — either homemade or from a small-batch producer in Brooklyn. The quality really shines here. Growing up in Morocco, we always used the best olive oil for cooking, and I carry that philosophy into every dish.

Ingredients List

  • 1 box (12 oz) jumbo pasta shells
  • 1 lb spicy Italian sausage, casings removed
  • 15 oz ricotta cheese (whole milk preferred)
  • 2 cups shredded mozzarella cheese, divided
  • 1/2 cup grated Parmesan cheese
  • 1 large egg, lightly beaten
  • 1/4 cup chopped fresh parsley
  • 2 cloves garlic, minced
  • 1/2 teaspoon salt
  • 1/4 teaspoon black pepper
  • 24 oz marinara sauce
  • 1/3 cup prepared pesto
  • Fresh basil for garnish (optional)

Ingredient Spotlight

Spicy Italian Sausage: This is the backbone of the dish. The fennel and red pepper flakes give it that signature heat. I prefer a loose (bulk) sausage without casings for easy crumbling. Look for sausage that has a good fat content (about 20%) for flavor. If you can’t find spicy, use sweet Italian sausage and add 1/2 teaspoon red pepper flakes.

Ricotta Cheese: For the creamiest filling, use whole milk ricotta. It’s thicker and less watery than part-skim. I like Calabro brand — it’s sold in many NYC supermarkets. If your ricotta seems wet, drain it in a fine-mesh sieve for 30 minutes before mixing.

Pesto: This adds a fresh, herby counterpoint to the rich cheese and sausage. Homemade is always best (it takes 5 minutes in a food processor with basil, pine nuts, garlic, Parmesan, and olive oil), but a good store-bought like Seggiano works well. Avoid cheap pesto that’s mostly oil and fillers; check the ingredient list for real basil.

Jumbo Shells: The large, concave shape is perfect for holding the filling. Brands like Barilla are reliable. Undercook them slightly (1 minute less than package directions) so they don’t tear and hold their shape during baking.

Original IngredientBest SubstitutionFlavor / Texture Impact
Spicy Italian sausageSweet Italian sausage + 1/2 tsp red pepper flakesLess heat, still flavorful; add more red pepper for spice
Whole milk ricottaPart-skim ricotta (drain well) or cottage cheese (blended)Slightly less creamy; cottage cheese adds a tangy note
PestoSun-dried tomato pesto or spinach-basil pestoSun-dried tomato: sweeter, less herbaceous; spinach: milder green flavor
Jumbo shellsManicotti tubes (boil per package; stuff with piping bag)Larger, can hold more filling; texture similar if not overcooked
Marinara sauceCrushed tomatoes with Italian seasoningThinner consistency, adjust simmering time; flavor more rustic

How to Make Cheesy Stuffed Jumbo Shells — Step-by-Step

Making these stuffed shells is a rewarding process. Take it step by step, and you’ll have a bubbling, golden dish that will steal the show. I’ve broken it down into simple stages with my professional tips to guarantee success.

Step 1: Preheat and Prep

Preheat your oven to 375°F (190°C). Position a rack in the middle. While the oven heats, bring a large pot of salted water to a boil for the shells.

💡 mia’s Pro Tip: For the best flavor, add a tablespoon of salt to the pasta water — it seasons the shells from the inside out.

Step 2: Cook the Jumbo Shells

Add the jumbo shells to the boiling water and cook according to package directions until al dente — usually 9-11 minutes. Stir occasionally to prevent sticking. Drain and rinse under cold water to stop the cooking process. Lay them out on a clean kitchen towel or baking sheet to dry slightly.

⚠️ Common Mistake to Avoid: Overcooking the shells until they are too soft. They should be flexible but still hold their shape when picked up. Rinsing with cold water also makes them easier to handle.

Step 3: Cook the Spicy Sausage

In a large skillet over medium-high heat, add the spicy Italian sausage (casings removed). Break it up with a wooden spoon and cook until browned and cooked through, about 5-7 minutes. Drain off excess fat and let the sausage cool for a few minutes.

💡 mia’s Pro Tip: Don’t skip draining the fat — too much grease will make the filling heavy and soggy. Use a slotted spoon to transfer the sausage to a plate.

Step 4: Make the Filling

In a large bowl, combine the ricotta, 1 cup of the shredded mozzarella, Parmesan, beaten egg, chopped parsley, minced garlic, salt, pepper, and the cooked sausage. Mix until well combined. Taste and adjust seasoning if needed.

⚠️ Common Mistake to Avoid: Adding cold ricotta straight from the fridge — bring it to room temperature for 15 minutes for a smoother mix.

Step 5: Assemble the Dish

Spread 1 cup of marinara sauce evenly over the bottom of a 9×13-inch baking dish. Take each cooked shell and fill it with about 1-2 tablespoons of the sausage-cheese mixture. Use a small spoon or your fingers — it’s okay to overfill slightly. Arrange the shells open side up in the dish, nestled together.

💡 mia’s Pro Tip: For neat filling, use a piping bag with a large tip. If you don’t have one, a zip-top bag with the corner snipped off works perfectly.

Step 6: Top and Bake

Pour the remaining marinara sauce over the stuffed shells, then spoon or dollop the pesto evenly on top (not mixed in — this keeps it bright). Sprinkle the remaining 1 cup of mozzarella over everything. Cover the dish with foil and bake for 25 minutes. Then uncover and bake for an additional 10 minutes until the sauce is bubbly and the cheese is melted and lightly golden.

⚠️ Common Mistake to Avoid: Skipping the covered baking time. The steam helps cook the shells through and prevents the cheese from burning before the filling is hot.

Step 7: Rest and Serve

Let the dish rest for 5 minutes before serving. This allows the filling to set slightly so the shells hold together better. Garnish with fresh basil if desired.

💡 mia’s Pro Tip: Use a wide spatula to lift the shells out carefully — they’re tender and can break if you’re too rough.

StepActionDurationKey Visual Cue
1Preheat oven & boil pasta water10 minutesOven light comes on, water at rolling boil
2Cook shells al dente9-11 minutesShells tender but firm; no white center
3Brown sausage5-7 minutesNo pink; deep brown color
4Mix filling3 minutesUniform, creamy mixture
5Stuff shells & assemble15-20 minutesAll shells filled and snug in dish
6Bake covered then uncovered25 + 10 minutesBubbling edges, golden cheese top
7Rest & serve5 minutesFilling sets slightly; cheese slightly sets

Serving & Presentation

When I serve these cheesy stuffed jumbo shells, I like to bring the whole baking dish to the table — it’s rustic and family-style, which reminds me of both my mother’s tagine dinners in Morocco and the casual Sunday suppers I attended in Paris. The shells are stunning on their own, but a little garnish goes a long way: fresh basil leaves, a drizzle of extra pesto, and a sprinkle of red pepper flakes for those who want extra heat.

I usually pair this hearty main with a simple side salad of arugula, lemon juice, and shaved Parmesan — the peppery greens cut through the richness beautifully. A glass of medium-bodied red wine, like a Chianti or a Montepulciano, echoes the tomato sauce and the spicy sausage. For a non-alcoholic option, a sparkling water with a twist of lemon works wonderfully.

If I’m feeling extra, I’ll serve it with warm garlic bread (rubbed with a cut clove of garlic and drizzled with olive oil) to sop up the sauce. The combination of the creamy filling, the pesto, and the crusty bread is pure comfort.

Pairing TypeSuggestionsWhy It Works
Side DishArugula with lemon vinaigrette, roasted broccoli, garlic breadAcidic greens and crunchy bread balance richness
Sauce / DipExtra pesto, red pepper flakes & olive oilEnhances basil flavor and adds fresh kick
BeverageChianti, Montepulciano, sparkling lemon waterWine tannins cut fat; sparkling water cleanses palate
GarnishFresh basil, shaved Parmesan, red pepper flakesAdds color, freshness, and customizable heat

Make-Ahead, Storage & Reheating

In my busy NYC life, I almost always make a double batch of these stuffed shells — one to bake that night, and one to assemble and store for later. The beauty of this spicy sausage pasta bake is that it tastes even better the next day as the flavors meld. Here are my tested methods for make-ahead and storage.

MethodContainerDurationReheating Tip
RefrigeratorWrapped tightly with foil or in an airtight dishUp to 4 daysReheat covered at 350°F for 20 minutes, then uncover for 5 min to crisp cheese
FreezerAssembled but unbaked, in a freezer-safe dish, wrapped in foil + plasticUp to 3 monthsThaw in fridge overnight, then bake covered at 375°F for 35-40 min, then uncovered for 10 min
Make-AheadAssemble in dish, cover, refrigerateUp to 24 hours before bakingAdd 10-15 minutes to covered baking time if starting from cold

If you’re reheating a single serving, microwave works in a pinch — cover with a damp paper towel and heat in 30-second intervals. But for the best texture, an oven or toaster oven is worth the extra minutes. I often reheat leftovers for lunch with a fresh handful of arugula on the side — it feels like a whole new meal.

Variations & Easy Swaps

One of the reasons I love this easy comfort food dinner is how adaptable it is. Over the years, I’ve experimented with countless variations — some inspired by my Paris training, others by my NYC farmers market finds. Here’s a quick overview, followed by three of my favorite twists.

VariationKey ChangeBest ForDifficulty Impact
Chicken & SpinachSwap sausage for shredded cooked chicken + 1 cup frozen spinach (thawed & drained)Lighter, mild flavor, family-friendlySame difficulty
Vegetarian Mushroom & RicottaReplace sausage with 8 oz cremini mushrooms finely chopped and sautéed with garlicMeatless Monday, earthy flavorsSlightly more prep (chopping mushrooms)
Spicy Vodka SauceUse vodka sauce instead of marinara; add 1 tbsp tomato paste for depthExtra richness, luxurious twistSame difficulty

Chicken & Spinach Stuffing

This is my go-to when I want a milder, lighter version. I use leftover rotisserie chicken (thank you, NYC neighborhood shops) and a cup of frozen spinach that I thaw and squeeze dry. The filling stays moist but not greasy. A sprinkle of nutmeg — a classic French touch — elevates the spinach. This version is perfect for kids or anyone sensitive to spice.

Gluten-Free / Dairy-Free Version

For gluten-free, use gluten-free jumbo shells (like Jovial brand) — cook them a minute or two longer. For dairy-free, replace ricotta with a cashew-based “ricotta” (soaked cashews blended with lemon, garlic, and salt) and use a vegan mozzarella shred that melts well. The pesto should be dairy-free as well (many brands are). The texture will be a bit less creamy, but the flavor still shines. I tested this for a friend with allergies and it passed the “please may I have more?” test.

Spring Asparagus & Lemon Twist

In spring, when asparagus appears at the Union Square Greenmarket, I add 1 cup of blanched, chopped asparagus to the ricotta filling, and finish the dish with a squeeze of fresh lemon juice and lemon zest before serving. The bright, grassy notes pair beautifully with the pesto and cut through the richness. It’s a seasonal gem that makes the whole dish feel lighter, even with all that cheese.

Can I use a different type of sausage in cheesy stuffed jumbo shells if I don’t have spicy Italian sausage?

Absolutely! The beauty of this recipe is its flexibility. If you don’t have spicy Italian sausage, you can use sweet Italian sausage for a milder flavor — just add 1/2 teaspoon of red pepper flakes to the filling to bring back some heat. You can also try chicken or turkey Italian sausage for a leaner option; just be sure to brown it well and drain any excess fat, as poultry sausage can be less fatty. For a completely different twist, crumbled chorizo works beautifully — it adds a smoky, paprika-rich flavor that pairs wonderfully with the pesto. If you use a plain ground meat (like ground pork or beef), season it generously with fennel seeds, garlic powder, and a pinch of cayenne to mimic the Italian sausage profile.

How can I prevent the jumbo shells from breaking while stuffing them with the sausage and cheese mixture?

This is one of the most common questions I get, and I have a few key tricks. First, cook the shells until just al dente — about 1 minute less than the package instructions. Overcooked shells become fragile and tear easily. After draining, rinse them with cold water to stop the cooking and to make them easier to handle. Then lay them out on a clean kitchen towel or paper towel to dry; a little moisture helps prevent sticking. When stuffing, use a small spoon or your fingers, and be gentle — don’t overfill; about 1 to 2 tablespoons per shell is perfect. If you find the shells are still breaking, try using a piping bag (or a zip-top bag with a corner snipped off) to pipe the filling in without touching the edges. Finally, arrange the shells snugly in the dish so they support each other during baking.

Should I cook the jumbo shells before stuffing them, or can I use no-boil shells for this recipe?

For this particular recipe, I strongly recommend cooking the jumbo shells before stuffing. No-boil shells are designed for lasagna-style layered dishes where they absorb liquid from the sauce as they bake. In a stuffed shell recipe, the shells are not surrounded by enough sauce to hydrate properly — they would end up hard and chewy. Pre-cooking the shells ensures a tender, al dente texture that’s essential for the perfect bite. That said, you can prepare the shells a day ahead: cook them, drain, toss with a little olive oil to prevent sticking, and refrigerate in an airtight container. Then just stuff and bake the next day. If you’re in a real pinch, some brands sell “oven-ready” jumbo shells that don’t require boiling, but I haven’t found any that work as well as traditional boiled shells.

Can I make cheesy stuffed jumbo shells with spicy sausage and pesto ahead of time and refrigerate before baking?

Yes, this is actually one of my favorite meal prep strategies! You can fully assemble the dish — shells stuffed and topped with sauce, pesto, and cheese — then cover tightly with foil and refrigerate for up to 24 hours. When you’re ready to bake, remove the dish from the fridge while the oven preheats (about 20 minutes) to take the chill off. Then bake covered at 375°F for 35-40 minutes (instead of 25) and uncovered for the last 10 minutes. The internal temperature should reach 165°F. I’ve also frozen the unbaked dish for up to 3 months. Thaw overnight in the fridge before baking, and add 10-15 minutes to the covered baking time. The flavor actually deepens as it sits, so make-ahead works beautifully.

What can I use instead of ricotta cheese in stuffed shells?

If you don’t have ricotta, you have several great options. Cottage cheese is the most common substitute — just blend it in a food processor for a smoother texture, or leave it chunky if you like some texture. Drain it well first to avoid excess liquid. Another excellent choice is goat cheese, which adds a tangy, creamy flavor that pairs wonderfully with pesto and spicy sausage. Use an equal amount (15 oz) of soft goat cheese. For a dairy-free alternative, cashew-based ricotta works perfectly: soak 1 cup cashews overnight, then blend with 1/4 cup water, 1 tablespoon lemon juice, 1 clove garlic, and salt until creamy. Each substitute changes the flavor profile slightly but remains delicious. If you use cottage cheese, you may need to add a little more salt.

How do I store leftover stuffed shells and reheat them without drying out?

Storing leftovers is simple: transfer any remaining shells to an airtight container or keep them in the baking dish covered tightly with foil. Refrigerate for up to 4 days. For the best reheating results, I recommend the oven over the microwave. Place the shells in an oven-safe dish, add a tablespoon or two of water or extra marinara sauce to create steam, cover with foil, and reheat at 350°F for about 15-20 minutes. If you’re in a rush, the microwave works fine — just cover with a damp paper towel and heat in 30-second bursts to prevent the pasta from becoming tough. The key is to reintroduce a little moisture. Leftover stuffed shells also freeze well in a freezer-safe container for up to 3 months; thaw in the fridge overnight before reheating.

Can I use a different type of pasta shape instead of jumbo shells?

Absolutely, though the cooking times and assembly will vary. The best substitutes are manicotti tubes, which are large and easy to fill with a piping bag. You’ll need to cook them the same way (al dente) and stuff them individually. Another option is large conchiglie (pasta shells) — they’re smaller, so you’ll need more of them, and you can simply mix the filling with the sauce and bake it as a casserole. If you want to skip stuffing entirely, you can turn this into a baked ziti-style dish: cook 1 pound of rigatoni or penne, toss with the sauce and half the cheese, then layer with the sausage and cheese mixture. Bake as directed. The flavor will be the same, and it’s even faster to prepare — perfect for a busy weeknight.

Is it necessary to use pesto in this stuffed shells recipe? What can I use instead?

Pesto is not strictly necessary, but it adds a beautiful fresh, herbal note that really elevates the dish. If you don’t have pesto or prefer a different flavor, there are several great alternatives. A simple bechamel or cream sauce would add richness without the green flavor — just melt 2 tablespoons butter, whisk in 2 tablespoons flour, then gradually add 1 cup milk and simmer until thickened; season with nutmeg and Parmesan. You can also skip the pesto and add a layer of fresh spinach between the shells and the sauce, or stir a handful of chopped fresh basil into the ricotta filling. For an even brighter twist, try a gremolata made from chopped parsley, lemon zest, and garlic sprinkled on top after baking. Each option brings its own charm.

How do I know when the stuffed shells are fully baked?

You’ll know the stuffed shells are ready when the sauce is bubbling around the edges, the cheese on top is melted and lightly golden, and the internal temperature reaches at least 165°F if you want to be precise. I usually rely on visual and textural cues: the shells should be tender when pierced with a fork (but not mushy), and the filling should be hot and oozy. If you’re baking after refrigerating, it may take an extra 10-15 minutes; check that the center is piping hot. To avoid overcooking, I recommend checking at the minimum time and then adding 5 minutes if needed. Let the dish rest for 5 minutes after baking — this allows the filling to set slightly so the shells hold their shape better when served.

Can I add vegetables to the filling for extra nutrition?

Absolutely! This is a great way to boost the nutritional value without sacrificing flavor. Finely chopped spinach (thawed frozen and squeezed dry) is my top recommendation — just stir it into the ricotta mixture. Sautéed mushrooms, zucchini, or bell peppers also work beautifully; make sure to cook them first to remove excess moisture, then let them cool before mixing with the cheese. For a seasonal twist, try roasted butternut squash cubes in the fall — they add a sweet creaminess that pairs well with the spicy sausage. If you’re adding vegetables, reduce the amount of sausage slightly (to about 3/4 lb) to keep the filling from overflowing. The same baking instructions apply, but check that the filling is heated through, especially if you’ve added raw vegetables like zucchini.

Share Your Version!

I love hearing how you make this recipe your own. Did you try the chicken & spinach variation? Or did you go all-in with spicy vodka sauce and extra cheese? Drop a comment below and let me know — your tips might inspire another home cook. If you share a photo on Instagram or Pinterest, be sure to tag @exorecipes so I can see your beautiful creation. It always makes my day to see my recipes being enjoyed in kitchens around the world.

And if you have any questions — maybe about swapping ingredients, baking times, or even how to get the perfect pesto dollop — just ask in the comments. I read every single one, and I’m here to help you nail this dish. From my NYC kitchen to yours — I hope this recipe brings as much warmth to your table as it does to mine. — mia 🧡

📌

Love This Recipe? Save It to Pinterest!

If you enjoyed this Cheesy Stuffed Jumbo Shells with Spicy Sausage and Pesto recipe, don’t let it get lost in your browser tabs! 😄 Pin it now so you can find it again anytime — and explore hundreds more tried-and-tested recipes waiting for you on my Pinterest boards.

👉 Follow mia on Pinterest @exorecipe

📌 Pin this recipe · 🔁 Re-pin your favorites · 💬 Tag me when you make it — I love seeing your creations!

Print

clock clock iconcutlery cutlery iconflag flag iconfolder folder iconinstagram instagram iconpinterest pinterest iconfacebook facebook iconprint print iconsquares squares iconheart heart iconheart solid heart solid icon

Cheesy Stuffed Jumbo Shells with Spicy Sausage and Pesto: Your Next Go-To Comfort Food Recipe

  • Author: Chef Mia
  • Prep Time: 25 minutes
  • Cook Time: 35 minutes
  • Total Time: 1 hour
  • Yield: 6 to 8 1x
  • Method: Main Course
  • Cuisine: Italian-American

Description

Jumbo pasta shells stuffed with a creamy, cheesy ricotta and spicy sausage mixture, baked in a rich tomato sauce and topped with pesto and mozzarella. An irresistible comfort food dinner.


Ingredients

Scale
  • 1 box (12 oz) jumbo pasta shells
  • 1 lb spicy Italian sausage, casings removed
  • 15 oz ricotta cheese
  • 2 cups shredded mozzarella cheese, divided
  • 1/2 cup grated Parmesan cheese
  • 1 large egg, lightly beaten
  • 1/4 cup chopped fresh parsley
  • 2 cloves garlic, minced
  • 1/2 teaspoon salt
  • 1/4 teaspoon black pepper
  • 24 oz marinara sauce
  • 1/3 cup prepared pesto
  • Fresh basil for garnish (optional)

Instructions

  1. Preheat oven to 375°F (190°C).
  2. Cook jumbo shells according to package directions until al dente. Drain and rinse with cold water to stop cooking. Set aside.
  3. In a large skillet over medium-high heat, cook the spicy Italian sausage, breaking it up with a spoon, until browned and cooked through (about 5-7 minutes). Drain excess fat and let cool slightly.
  4. In a large bowl, combine ricotta, 1 cup mozzarella, Parmesan, egg, parsley, garlic, salt, pepper, and cooked sausage. Mix well.
  5. Spread 1 cup of marinara sauce on the bottom of a 9×13-inch baking dish.
  6. Fill each cooked shell with about 1-2 tablespoons of the sausage-cheese mixture and arrange in the baking dish, open side up.
  7. Pour remaining marinara sauce over the shells, then spoon or dollop pesto evenly over the top. Sprinkle with remaining 1 cup mozzarella.
  8. Cover with foil and bake for 25 minutes. Uncover and bake for an additional 10 minutes until bubbly and cheese is melted.
  9. Let rest for 5 minutes before serving. Garnish with fresh basil if desired.

Notes

To make ahead, assemble the dish but do not bake. Cover and refrigerate up to 24 hours. Add 10-15 minutes to the covered baking time. For a milder version, use sweet Italian sausage.


Nutrition

  • Calories: 580
  • Sugar: 8g
  • Fat: 34g
  • Carbohydrates: 38g
  • Protein: 28g


Cheesy Stuffed Jumbo Shells with Spicy Sausage and Pesto: Your Next Go-To Comfort Food Recipe

k">

Tried This Recipe? Leave a Comment!

Did you make this recipe? I’d love to hear how it turned out! Please leave a comment and a rating below. Your feedback helps other home cooks and supports cheerychop.com!

For more delicious inspiration, follow me on Pinterest!

“`html

Cheesy Stuffed Chicken Breasts with Spinach and Sun-Dried Tomatoes – A Creamy, Golden-Baked Dinner

⚖️
Difficulty
Easy
⏲️
Prep Time
15 mins
🕒
Cook Time
30 mins
⏱️
Total Time
45 mins
🍽️
Servings
4

I still remember the first time I made this stuffed chicken breast recipe for a dinner party in my tiny Paris apartment. I had just finished my pastry training at Le Cordon Bleu, and I wanted to create something that felt both luxurious and deeply comforting. I called my mother in Morocco that morning, and she reminded me of how she used to stuff chicken with spinach and preserved lemons — but I swapped the lemons for sun-dried tomatoes and added a creamy three-cheese blend. That night, my friends scraped the skillet clean and asked for the recipe. This cheesy chicken spinach sun-dried tomatoes dish has been a staple in my kitchen ever since, and now I’m thrilled to share my version with you.

Imagine slicing into a golden, seared chicken breast and watching a river of melted mozzarella, creamy spinach, and tangy sun-dried tomatoes spill onto your plate. The aroma alone — garlic, Parmesan, and a hint of olive oil — will fill your kitchen with the kind of warmth that makes everyone wander in and ask, “What’s for dinner?” Each bite delivers a perfect contrast: the juicy, tender chicken on the outside, and the rich, savory stuffing on the inside. I love serving this with a simple arugula salad or crusty bread to soak up every last drop of the pan juices.

What sets my stuffed chicken breast with spinach and tomato apart is the technique I learned in Paris — searing the chicken first in an oven-safe skillet to lock in flavor, then finishing it in the oven with a splash of chicken broth to keep it impossibly moist. I also use a combination of three cheeses (mozzarella, cream cheese, and Parmesan) for a filling that’s creamy, stretchy, and deeply flavorful without being heavy. Whether you’re a seasoned home cook or trying stuffed chicken for the first time, I’ll guide you through every step — including my best tip for keeping the stuffing securely inside. Trust me, once you try this easy stuffed chicken dinner, it will earn a permanent spot in your weekly rotation.

Why This Cheesy Stuffed Chicken Recipe Is the Best

The Flavor Secret: The magic of this creamy stuffed chicken recipe lies in the trifecta of cheeses. Mozzarella gives you that irresistible pull-apart stretch, cream cheese adds velvety richness, and Parmesan brings a sharp, nutty depth that ties everything together. I learned this layering technique during my time in Paris, where cheese sauces are practically an art form. The sun-dried tomatoes add a sweet-tart pop that cuts through the richness, just like the preserved lemons my mother used in Morocco. Together, they create a filling that’s bold, balanced, and absolutely unforgettable.

Perfected Texture: One of the biggest challenges with stuffed chicken is ending up with dry meat. My solution? A quick sear in a hot skillet to develop a golden crust, followed by gentle oven baking in a shallow pool of chicken broth. This method, which I refined during my years cooking in NYC, ensures the chicken stays juicy and tender while the filling stays creamy and intact. The broth also creates a light pan sauce that you’ll want to spoon over everything on your plate.

Foolproof & Fast: This easy stuffed chicken dinner comes together in 45 minutes with just 15 minutes of active prep. The ingredient list is short and grocery-store friendly — no obscure spices or specialty items. I’ve tested this recipe more times than I can count, and I’ve designed the steps to be forgiving for beginners. Whether you’re cooking for a weeknight family meal or a special date night, this recipe delivers restaurant-quality results with minimal fuss.

Stuffed Chicken Breast Recipe Ingredients

Every ingredient in this recipe has a purpose. I source my spinach from the Union Square Greenmarket in NYC when it’s in season, and I always reach for oil-packed sun-dried tomatoes — they have so much more flavor than the dry kind. The cheese blend is inspired by the fromageries I visited in Paris, and the technique for cutting the pocket comes straight from my culinary training. Let’s look at what you’ll need.

Ingredients List

  • 4 boneless, skinless chicken breasts (about 6 oz each)
  • 1 cup chopped fresh spinach (packed)
  • 1/2 cup sun-dried tomatoes, chopped (oil-packed, drained)
  • 1 cup shredded mozzarella cheese
  • 1/2 cup cream cheese, softened to room temperature
  • 1/4 cup grated Parmesan cheese
  • 2 cloves garlic, minced
  • 1/2 teaspoon salt
  • 1/4 teaspoon black pepper
  • 1 tablespoon olive oil
  • 1/2 cup chicken broth (low-sodium)

Ingredient Spotlight

Sun-dried tomatoes: These little flavor bombs are the heart of this dish. Oil-packed sun-dried tomatoes are softer, more flavorful, and easier to chop than the dry-packed kind. I recommend draining them well and patting them dry so they don’t add excess moisture to the filling. If you can find ones packed in olive oil with herbs, even better — that extra flavor will infuse the whole dish.

Cream cheese: This is my secret weapon for a creamy, cohesive filling that doesn’t separate during baking. Make sure it’s fully softened to room temperature so it blends smoothly with the other ingredients. If you’re in a hurry, you can microwave it in 10-second bursts until soft — just don’t let it melt. Neufchâtel cheese, which has less fat, works well as a lighter substitute.

Fresh spinach: I always use fresh spinach for this recipe. It has a brighter flavor and better texture than frozen, and it wilts down beautifully when mixed with the warm cream cheese. One cup of packed fresh spinach is about two generous handfuls. If you only have frozen spinach on hand, thaw it completely and squeeze out every drop of water before using — otherwise, your filling will be watery.

Original IngredientBest SubstitutionFlavor / Texture Impact
MozzarellaProvolone or FontinaSimilar melt and stretch; slightly nuttier flavor
Cream CheeseNeufchâtel or mascarponeLess tang with Neufchâtel; richer and sweeter with mascarpone
ParmesanPecorino Romano or Grana PadanoMore salt and bite with Pecorino; milder with Grana Padano
Sun-dried tomatoes (oil-packed)Roasted red bell peppers + 1 tsp tomato pasteSweeter, less tangy; still provides color and moisture
Fresh spinachChopped kale (massaged) or Swiss chardKale is heartier and takes longer to wilt; chard is more delicate

How to Make Cheesy Stuffed Chicken Breasts — Step-by-Step

I’ve broken this down into seven simple steps with a pro tip and a common mistake at key points so you can cook with confidence. Let’s get started!

Step 1: Preheat and Prep

Preheat your oven to 375°F (190°C). While the oven heats, take your cream cheese out of the refrigerator so it can soften. Pat the chicken breasts dry with paper towels — this helps the seasoning stick and ensures a good sear. Season both sides of each breast with salt and pepper. Set the chicken aside while you prepare the filling.

💡 mia’s Pro Tip: If your chicken breasts are very thick (over 1 inch), place them between two sheets of plastic wrap and gently pound them to an even 3/4-inch thickness using a rolling pin or the bottom of a heavy skillet. This ensures they cook evenly and roll up easily if you prefer a stuffed roll rather than a pocket.

Step 2: Make the Filling

In a medium bowl, combine the chopped fresh spinach, chopped sun-dried tomatoes, shredded mozzarella, softened cream cheese, grated Parmesan, and minced garlic. Mix everything together with a rubber spatula or wooden spoon until fully combined. The cream cheese should evenly coat all the other ingredients, creating a thick, cohesive paste. Season the mixture with a pinch of salt and pepper, then taste and adjust if needed.

⚠️ Common Mistake to Avoid: Don’t overmix the filling or use a food processor — you want the spinach and sun-dried tomatoes to remain distinct, not turn into a puree. A chunky filling gives the finished dish better texture and visual appeal.

Step 3: Cut the Pockets

Place one chicken breast on a cutting board. Using a sharp paring knife, hold the breast flat with your non-dominant hand and carefully cut a horizontal slit along the side, about 3/4 of the way through the breast. Start at the thickest part and work your way across, creating a deep pocket. Be careful not to cut all the way through to the other side. Repeat with the remaining chicken breasts.

💡 mia’s Pro Tip: Use your fingers to gently open the pocket and check for any thin spots. If you accidentally cut through in one spot, don’t worry — you can patch it with a small piece of the filling mixture or secure it with a toothpick later.

Step 4: Stuff the Chicken

Divide the filling evenly among the four pockets (about 1/3 cup per breast). Use your fingers or a small spoon to push the filling gently into the pocket, spreading it evenly to the edges. Don’t overstuff — you want the chicken to close comfortably around the filling. If the opening is wide or the filling threatens to escape, secure the edge with one or two toothpicks inserted at an angle.

⚠️ Common Mistake to Avoid: Overstuffing is the #1 reason filling leaks out during cooking. The filling expands as it heats, so leave a little room. And always insert toothpicks at a 45-degree angle so they’re easy to remove after baking.

Step 5: Sear the Chicken

Heat 1 tablespoon of olive oil in a large oven-safe skillet (cast iron or stainless steel works best) over medium-high heat. When the oil shimmers and flows like water, carefully place the stuffed chicken breasts in the skillet, seam side down if you used toothpicks. Sear for 2-3 minutes without moving them — this creates a beautiful golden crust. Flip each breast and sear the other side for another 2-3 minutes.

💡 mia’s Pro Tip: Don’t crowd the skillet. If your chicken breasts are large, work in batches. Crowding lowers the pan temperature and causes steaming instead of searing. A golden-brown crust adds deep flavor and helps seal the filling inside.

Step 6: Add Broth and Bake

Pour 1/2 cup of chicken broth around the chicken in the skillet, being careful not to pour it directly over the tops (you want to keep that seared crust intact). Transfer the skillet to the preheated oven and bake for 20-25 minutes, or until the chicken reaches an internal temperature of 165°F (74°C) when tested with an instant-read thermometer inserted into the thickest part of the breast.

⚠️ Common Mistake to Avoid: Don’t rely on cooking time alone — always use a thermometer! Oven temperatures vary, and stuffed chicken can cook unevenly. Insert the thermometer into the thickest part of the chicken, not the filling, which heats faster. 165°F is your safe target.

Step 7: Rest and Serve

Remove the skillet from the oven and let the chicken rest for 5 minutes. This allows the juices to redistribute throughout the meat, ensuring every bite is moist and tender. If you used toothpicks, remove them carefully before serving. Spoon some of the pan juices over each breast for extra flavor, then serve immediately.

💡 mia’s Pro Tip: Resting is non-negotiable! If you cut into the chicken too soon, the juices and some of the filling will run out onto the plate instead of staying inside the meat. Five minutes makes all the difference between a good stuffed chicken and a great one.

StepActionDurationKey Visual Cue
1Preheat & season chicken5 minutesOven at 375°F; chicken patted dry
2Mix filling3 minutesUniform, thick paste with visible spinach
3Cut pockets4 minutesDeep slit without breaking through
4Stuff chicken3 minutesPocket filled but not bulging
5Sear chicken4-6 minutesDeep golden-brown crust on both sides
6Add broth & bake20-25 minutesInternal temp 165°F
7Rest & serve5 minutesJuices settle; toothpicks removed

Serving & Presentation

When I serve this dish in my NYC home, I like to plate each chicken breast on a warm dinner plate with a generous spoonful of the pan juices drizzled over the top. A sprinkle of fresh parsley or basil adds a pop of color and freshness. I often pair it with a side of garlicky sautéed green beans or a simple arugula salad with lemon vinaigrette — the peppery greens cut through the richness beautifully. For a more substantial meal, serve it alongside creamy polenta or buttered egg noodles to soak up every drop of that savory broth.

This dish also shines in a more formal setting. Slice each breast diagonally into thick medallions to reveal the beautiful spiral of green spinach and red sun-dried tomatoes against the white cheese. Fan the slices across a platter, garnish with fresh herbs, and serve family-style. It’s the kind of presentation that makes guests think you spent hours in the kitchen — but you and I know it came together in under an hour.

Pairing TypeSuggestionsWhy It Works
Side DishSautéed green beans, roasted asparagus, or arugula saladBright, green sides balance the creamy richness
Sauce / DipPan juices, balsamic glaze, or lemon-butter sauceAdds acidity and moisture; pan juices are already infused with flavor
BeveragePinot Grigio, Sauvignon Blanc, or sparkling water with lemonCrisp, acidic wines cut through the cheese and complement the tomatoes
GarnishFresh basil, parsley, or chives; shaved ParmesanHerbs add color and freshness; extra Parmesan reinforces the cheese flavor

Make-Ahead, Storage & Reheating

I love keeping a couple of these stuffed chicken breasts in the fridge for busy weeknights. Here in NYC, where schedules are packed, having a ready-to-heat dinner option is a lifesaver. The filling can be prepared up to two days in advance, and you can even assemble the stuffed chicken breasts a day ahead — just keep them covered in the refrigerator until you’re ready to sear and bake.

MethodContainerDurationReheating Tip
RefrigeratorAirtight containerUp to 3 daysReheat in a 350°F oven for 10-12 minutes, covered with foil
FreezerFreezer-safe wrap or bagUp to 3 monthsThaw overnight in fridge; reheat at 350°F for 15-18 minutes
Make-AheadCovered dish in fridgeAssemble up to 1 day beforeAdd 5 minutes to baking time if starting from fridge

To reheat, I recommend using the oven rather than the microwave, which can make the chicken tough and the filling rubbery. Place the leftover chicken in a baking dish with a splash of chicken broth, cover with foil, and warm in a 350°F oven until heated through. The broth creates steam that keeps the chicken moist and prevents the cheese from drying out. For a quick lunch, you can slice the chilled chicken and serve it cold over a salad — the flavors are just as delicious the next day.

Variations & Easy Swaps

VariationKey ChangeBest ForDifficulty Impact
Mediterranean TwistReplace mozzarella with feta; add oregano and kalamata olivesBold, briny flavor; great with Greek saladEasy (same technique)
Gluten-Free / Dairy-FreeUse dairy-free cream cheese and shredded vegan mozzarellaDietary restrictions without sacrificing flavorEasy (same technique)
Spicy SouthwestAdd jalapeño, cumin, and pepper Jack cheese; replace spinach with cilantroKick of heat; pairs with black beans and riceEasy (same technique)

Mediterranean Twist with Feta and Oregano

This variation takes me straight back to the souks of Marrakech, where the aroma of oregano and briny olives fills the air. Swap the mozzarella for 3/4 cup of crumbled feta cheese, and add 1 teaspoon of dried oregano and 1/4 cup of chopped kalamata olives to the filling. The feta adds a tangy, salty punch that pairs beautifully with the sun-dried tomatoes. Serve with a Greek salad and warm pita bread for a meal that feels like a Mediterranean escape.

Gluten-Free / Dairy-Free Version

I developed this version for a friend who has both gluten and dairy sensitivities, and it turned out so well that I now make it on repeat. Use a high-quality dairy-free cream cheese (I like the one from Kite Hill) and a shredded vegan mozzarella that melts well, such as Miyoko’s or Violife. The rest of the ingredients are naturally gluten-free. The texture is slightly less stretchy than the original, but the flavor is still rich and satisfying. Be sure to check that your chicken broth is gluten-free as well.

Spicy Southwest Variation

After a long NYC winter, I crave bold, warming flavors — and this variation delivers. Replace the spinach with 1 cup of chopped fresh cilantro, swap the mozzarella for 1 cup of shredded pepper Jack cheese, and add 1 finely chopped jalapeño (seeds removed for less heat) and 1/2 teaspoon of ground cumin to the filling. The pepper Jack brings a creamy melt with a gentle kick, and the cilantro keeps it fresh. Serve with cilantro-lime rice and a dollop of sour cream.

What cheese works best for stuffing chicken breasts with spinach and sun-dried tomatoes?

A combination of mozzarella, cream cheese, and Parmesan creates the ideal filling. Mozzarella provides that beautiful stretch and mild creaminess, cream cheese makes the filling rich and cohesive, and Parmesan adds a sharp, salty depth. You can substitute provolone or fontina for the mozzarella, but stick with a blend that includes at least one soft, spreadable cheese (like cream cheese) to keep the filling from drying out during baking. Avoid using only hard cheeses like cheddar or gouda, as they can become greasy and separate.

How do you keep the stuffing from falling out of the chicken breasts while cooking?

The most reliable method is to secure the opening of the pocket with one or two toothpicks inserted at a 45-degree angle. This keeps the filling contained during the searing and baking process. You can also use the “envelope” method: after stuffing, press the edges of the chicken together gently — the cream cheese in the filling acts as a natural binder. If you’ve cut your pocket on the thicker side of the breast, the natural shape of the chicken will often hold the filling in place without toothpicks. Just be sure not to overstuff, as too much filling will push the opening apart as it expands in the oven.

Should I use fresh or frozen spinach for cheesy stuffed chicken breasts?

I recommend fresh spinach for this recipe. Fresh spinach has a brighter flavor and a better texture — it wilts slightly when mixed with the cream cheese but retains some structure, giving the filling a pleasant bite. Frozen spinach, on the other hand, contains a lot of water that can make the filling soggy. If frozen spinach is all you have, thaw it completely and squeeze it dry in a clean kitchen towel or paper towels until no more liquid comes out. You’ll need about 1/2 cup of squeezed dry frozen spinach as a substitute for 1 cup of fresh.

How long do you bake stuffed chicken breasts with spinach and sun-dried tomatoes at 375°F?

Bake the stuffed chicken breasts at 375°F for 20 to 25 minutes, or until an instant-read thermometer inserted into the thickest part of the chicken registers 165°F. The exact time depends on the size of your chicken breasts and whether you seared them first. If your breasts are on the smaller side (5-6 ounces), check at 18 minutes. For larger breasts (8-10 ounces), expect closer to 25 minutes. Always rely on a thermometer rather than visual cues — stuffed chicken can look golden and cooked on the outside while still being underdone near the bone.

Can I prepare stuffed chicken breasts ahead of time for a dinner party?

Yes, absolutely! You can assemble the stuffed chicken breasts up to 24 hours in advance. Follow the recipe through Step 4 (stuffing the chicken), then place the stuffed breasts on a plate or baking dish, cover tightly with plastic wrap, and refrigerate. When you’re ready to cook, let them sit at room temperature for 15 minutes while you preheat the oven, then proceed with searing and baking. You may need to add 3-5 minutes to the baking time since the chicken is starting from a colder temperature. The filling can also be made up to 2 days ahead and stored in the refrigerator.

What can I serve with cheesy stuffed chicken breasts for a complete meal?

This dish pairs beautifully with a wide range of sides. For a light, fresh option, try a crisp arugula salad with lemon vinaigrette or sautéed green beans with garlic. For something more substantial, creamy polenta, buttered egg noodles, or roasted baby potatoes are excellent choices. I also love serving it with crusty bread to soak up the pan juices. In the summer, I’ll add a side of grilled zucchini or roasted cherry tomatoes for extra color and flavor. The key is to choose sides that complement the rich, creamy filling without overwhelming it.

How do I reheat stuffed chicken breasts without drying them out?

The best way to reheat stuffed chicken breasts is in the oven. Place the leftover chicken in a baking dish with a splash of chicken broth (about 2 tablespoons per breast), cover the dish tightly with aluminum foil, and warm in a 350°F oven for 10-15 minutes. The broth creates steam that keeps the chicken moist and prevents the cheese from becoming rubbery. Avoid using the microwave, which heats unevenly and can make the chicken tough. If you’re in a hurry, you can slice the cold chicken and serve it over a salad — the flavors are delicious even at room temperature.

Can I use chicken thighs instead of chicken breasts for this stuffed chicken recipe?

Yes, boneless, skinless chicken thighs work wonderfully as a substitute. Thighs are more forgiving than breasts because they have a higher fat content, which means they stay moist and tender even if you cook them a few minutes too long. Use 6-8 thighs (depending on size) and arrange them in the skillet with the filling rolled inside or spooned on top. The baking time will be similar — about 20-25 minutes at 375°F — but always check for an internal temperature of 165°F. Thighs are also great for meal prep because they reheat beautifully without drying out.

How can I add more flavor to the stuffing mixture?

There are several ways to boost the flavor of the stuffing. Add a pinch of red pepper flakes or a dash of cayenne for gentle heat. Stir in 1 tablespoon of fresh chopped basil or parsley for herbal freshness. A squeeze of lemon juice (about 1 teaspoon) brightens the whole mixture and balances the richness of the cheeses. For an umami punch, add 1 teaspoon of anchovy paste or a few chopped capers — trust me, it won’t taste fishy; it just deepens the savory notes. Always taste the filling before stuffing and adjust the salt and pepper as needed.

Why did my stuffed chicken breast turn out dry?

Dry stuffed chicken is usually the result of overcooking or using chicken breasts that are too thin. Always use an instant-read thermometer to check for 165°F at the thickest part, and remove the chicken from the oven as soon as it reaches that temperature. Another common cause is skipping the searing step — a quick seal in a hot pan locks in juices before the chicken goes into the oven. Finally, make sure you’re using enough chicken broth in the skillet (1/2 cup) to create steam during baking. The broth keeps the environment moist and helps the chicken stay tender from the outside in.

Share Your Version!

I absolutely love hearing how this stuffed chicken breast recipe turns out in your kitchen. Did you try one of the variations — or create your own twist? Maybe you added a pinch of smoked paprika, swapped the spinach for kale, or served it with a side of roasted vegetables that made the meal sing. Drop a comment below and let me know how it went. Your feedback helps other readers discover new ideas and gives me so much inspiration for future recipes.

If you snap a photo of your finished dish, tag me on Instagram or Pinterest @exorecipes — I want to see your beautiful creation! And if you loved this recipe, please give it a 5-star rating below. It means the world to me and helps other home cooks find their next favorite dinner. From my NYC kitchen to yours — I hope this recipe brings as much warmth to your table as it does to mine. — mia 🧡

📌

Love This Recipe? Save It to Pinterest!

If you enjoyed this Cheesy Stuffed Chicken Breasts with Spinach and Sun-Dried Tomatoes recipe, don’t let it get lost in your browser tabs! 😄 Pin it now so you can find it again anytime — and explore hundreds more tried-and-tested recipes waiting for you on my Pinterest boards.

👉 Follow mia on Pinterest @exorecipe

📌 Pin this recipe · 🔁 Re-pin your favorites · 💬 Tag me when you make it — I love seeing your creations!

“`

Print

clock clock iconcutlery cutlery iconflag flag iconfolder folder iconinstagram instagram iconpinterest pinterest iconfacebook facebook iconprint print iconsquares squares iconheart heart iconheart solid heart solid icon

Cheesy Stuffed Chicken Breasts with Spinach and Sun-Dried Tomatoes

  • Author: Chef Mia
  • Prep Time: 15 minutes
  • Cook Time: 30 minutes
  • Total Time: 45 minutes
  • Yield: 4 1x
  • Method: Main Course
  • Cuisine: Italian-American

Description

Juicy chicken breasts stuffed with a creamy mixture of spinach, sun-dried tomatoes, and cheese, then baked to golden perfection.


Ingredients

Scale
  • 4 boneless, skinless chicken breasts
  • 1 cup chopped fresh spinach
  • 1/2 cup sun-dried tomatoes, chopped (oil-packed, drained)
  • 1 cup shredded mozzarella cheese
  • 1/2 cup cream cheese, softened
  • 1/4 cup grated Parmesan cheese
  • 2 cloves garlic, minced
  • 1/2 teaspoon salt
  • 1/4 teaspoon black pepper
  • 1 tablespoon olive oil
  • 1/2 cup chicken broth

Instructions

  1. Preheat oven to 375°F (190°C).
  2. In a bowl, combine spinach, sun-dried tomatoes, mozzarella, cream cheese, Parmesan, garlic, salt, and pepper.
  3. Cut a pocket into each chicken breast horizontally, being careful not to cut all the way through.
  4. Stuff each chicken breast with the cheese-spinach mixture and secure with toothpicks if needed.
  5. Heat olive oil in an oven-safe skillet over medium-high heat. Sear chicken breasts for 2-3 minutes per side until golden.
  6. Pour chicken broth around the chicken in the skillet.
  7. Transfer skillet to oven and bake for 20-25 minutes until chicken is cooked through (internal temperature 165°F).
  8. Let rest for 5 minutes before serving. Remove toothpicks if used.

Notes

For extra flavor, add a pinch of red pepper flakes to the stuffing mixture. Leftovers can be refrigerated for up to 3 days.


Nutrition

  • Calories: 420
  • Sugar: 3g
  • Fat: 24g
  • Carbohydrates: 6g
  • Protein: 45g


Cheesy Stuffed Chicken Breasts with Spinach and Sun-Dried Tomatoes

ph">For more delicious inspiration, follow me on Pinterest!