Table of Contents
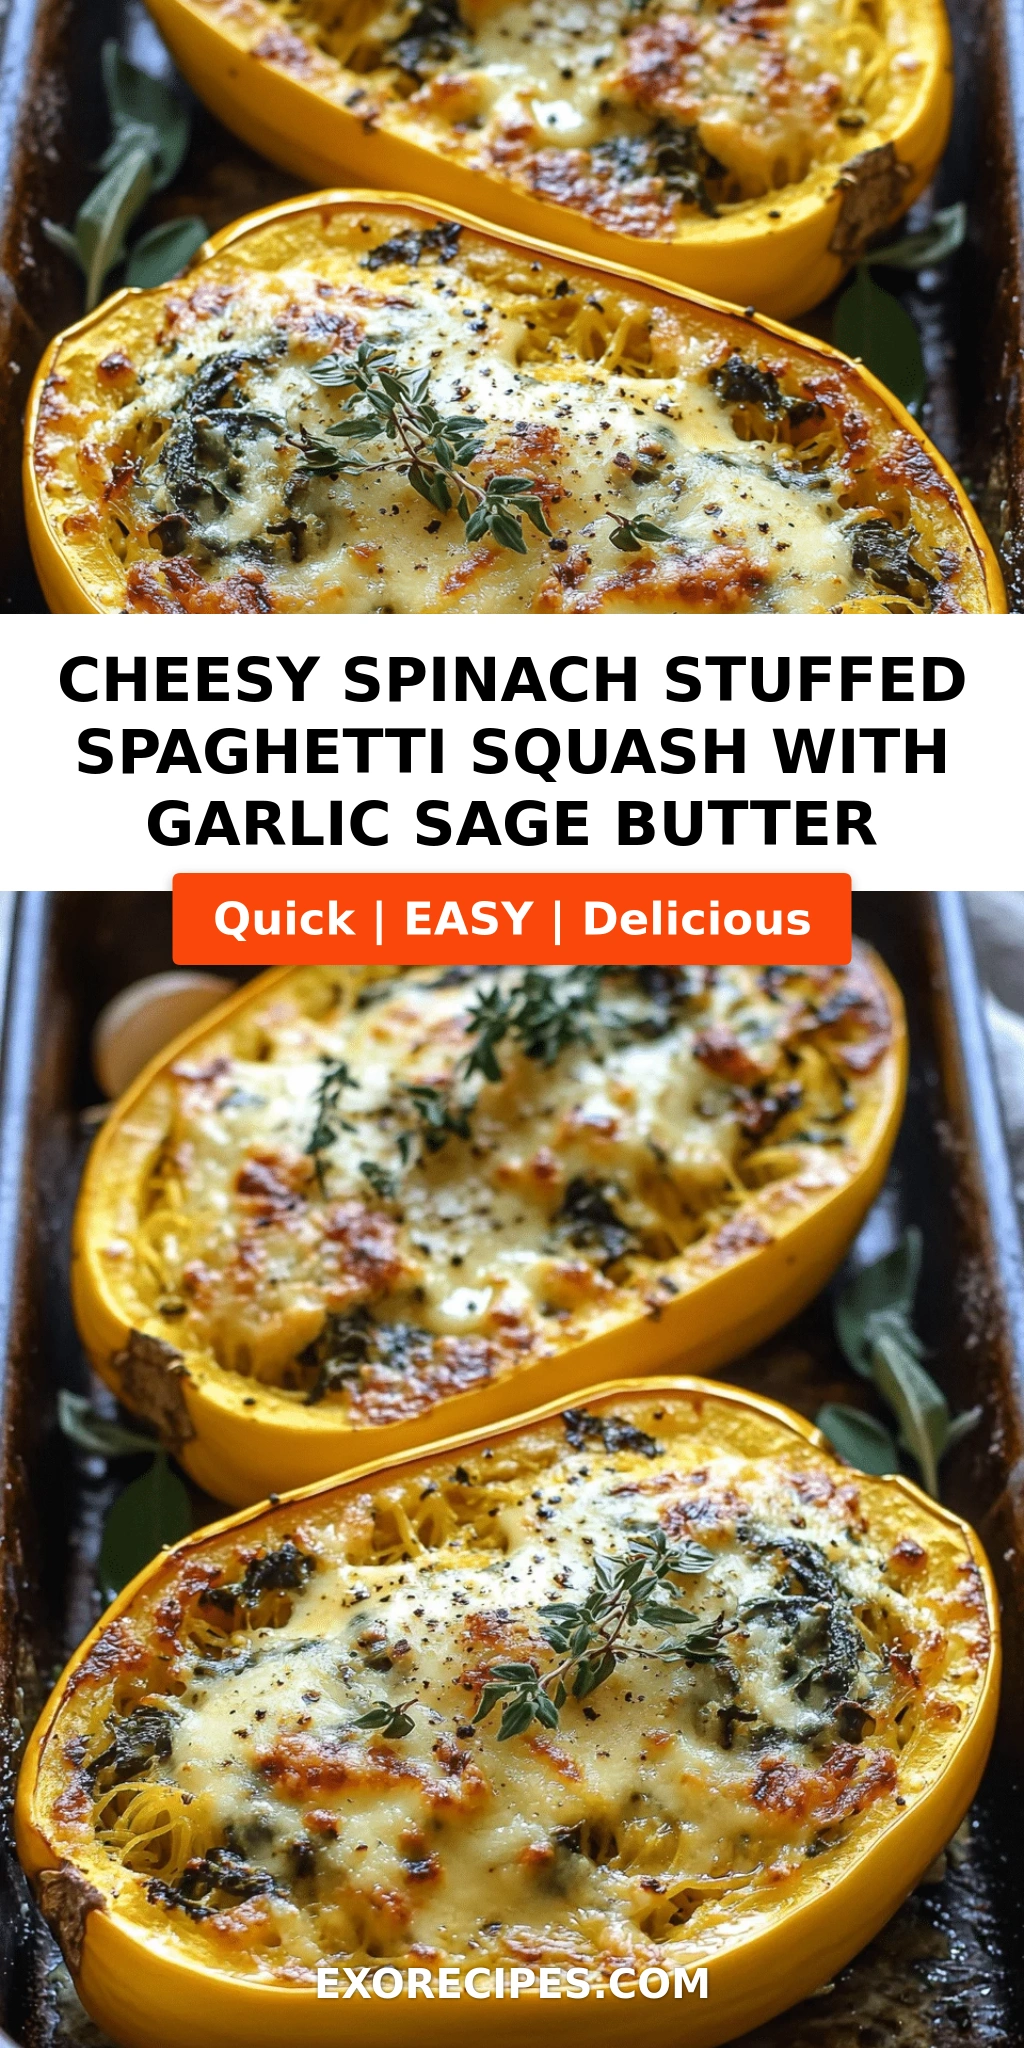
Cheesy Spinach Stuffed Spaghetti Squash with Garlic Sage Butter – A Cozy, Low-Carb Dinner

There’s something magical about the way spaghetti squash transforms in the oven. Growing up in Morocco, my mother would roast all kinds of winter squashes with cinnamon and honey, but it wasn’t until my culinary training in Paris that I learned to treat them like a blank canvas for bold flavors. Now, living in New York City, I find myself reaching for spaghetti squash whenever I crave something hearty yet light. This cheesy spinach stuffed spaghetti squash with garlic sage butter is exactly that kind of recipe — it’s the main keyword we’re talking about here, and it’s a showstopper. The unique angle? We’re not just stuffing the squash; we’re building a creamy, cheesy filling that contrasts beautifully with the tender strands, all finished with a fragrant butter sauce that reminds me of the sage brown butter I used to make at Le Cordon Bleu.
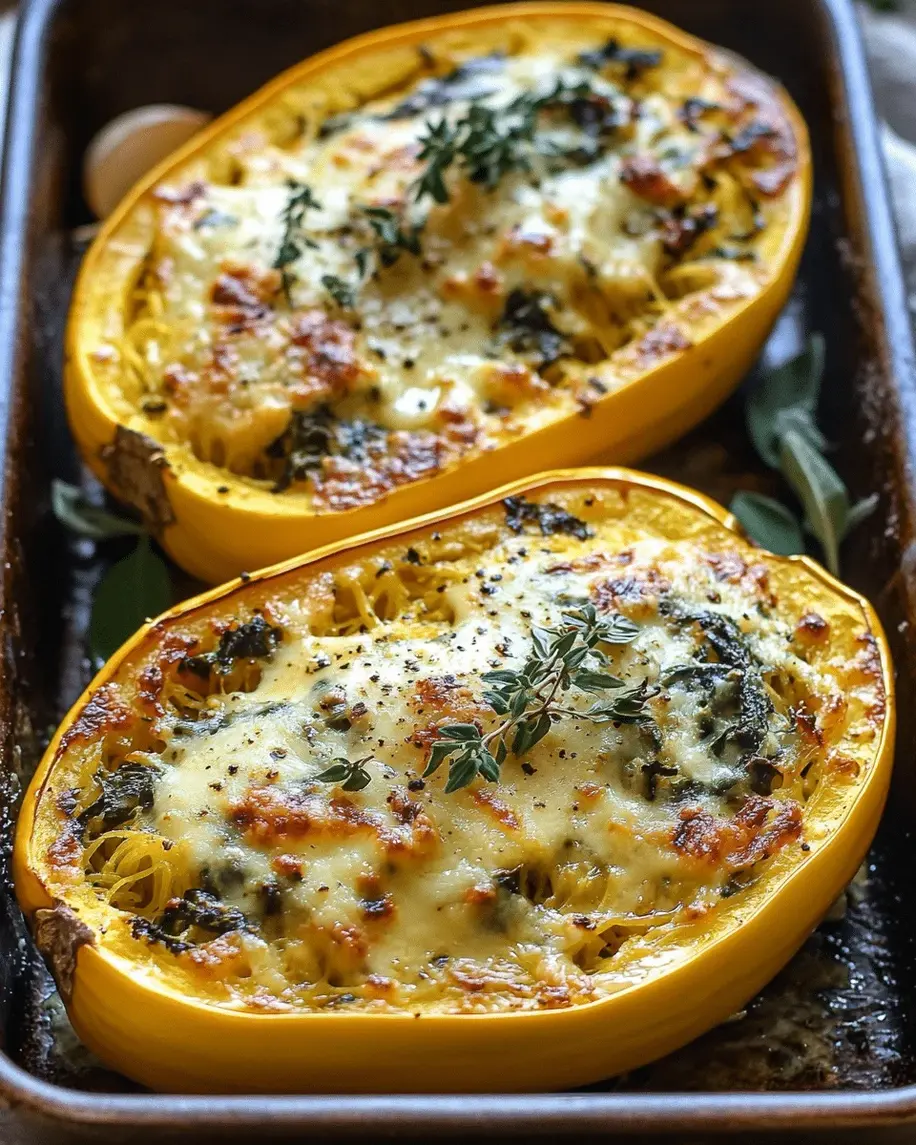
Picture this: you cut into a golden-brown squash shell, and out comes a tangle of spaghetti-like strands coated in a rich mixture of ricotta, mozzarella, Parmesan, and wilted spinach. The garlic sage butter is drizzled on top — it sizzles as it hits the hot cheese, releasing an earthy, herbal aroma that fills your kitchen. Each bite is a balance of creamy, cheesy richness and the subtle nuttiness of the squash. The red pepper flakes (optional) add a gentle warmth that cuts through the richness, making you want to go back for seconds. It’s the kind of dish that feels indulgent but is surprisingly low in carbs — perfect for a weeknight dinner when you want something satisfying without the heaviness.
I’ve tested this recipe countless times, tweaking the ratio of cheeses and perfecting the roasting time. My version stands out because I pre-bake the squash shells a little longer to ensure they hold their shape, and I use a mix of fresh sage and garlic that I bloom in butter at the very end — a classic French technique that takes the flavor to the next level. 💡 mia’s Pro Tip: Don’t skip the step of reserving the shells; they act as edible bowls that keep the filling moist and add a gorgeous presentation. And one common mistake I see is not drying the spinach properly — if you don’t squeeze out the excess moisture, the filling can become watery. I’ll show you exactly how to avoid that.
Why This Cheesy Spinach Stuffed Spaghetti Squash Recipe Is the Best
The Flavor Secret: The real magic lies in the garlic sage butter — a simple sauce made by melting butter with fresh garlic and sage until the sage leaves crisp up slightly. This isn’t just a drizzle; it’s the flavor backbone of the dish. Growing up, my mother always said that butter and sage were a match made in heaven, and she was right. In Paris, I learned to infuse butter with herbs at low heat to extract maximum flavor without burning. That technique is the heart of this recipe. Combined with the creamy trio of ricotta, mozzarella, and Parmesan, the result is a filling that’s both luxurious and surprisingly light.
Perfected Texture: The key to the perfect stuffed spaghetti squash is getting the squash itself just right. If you overcook it, the strands become mushy; undercook it, and they’re crunchy. I roast the squash cut-side down at 400°F for 35-40 minutes until the skin is tender and the strands yield easily to a fork. Then I let it cool slightly before scraping — this prevents the strands from tearing. The filling is mixed directly into the warm squash strands, which helps the cheese melt evenly. The second bake (10-15 minutes) crisps the top slightly while keeping the inside creamy. It’s a texture lover’s dream.
Foolproof & Fast: Despite the multiple steps, this recipe is incredibly forgiving. You can roast the squash up to two days ahead, and the filling can be assembled in the time it takes the squash to cool. I’ve taught this dish to my cooking students in NYC, and even beginners nail it on the first try. The key is to trust the process — don’t rush the roasting, and don’t be afraid to taste and adjust seasoning. Whether you’re feeding your family or impressing guests, this stuffed spaghetti squash is a guaranteed crowd-pleaser. And it’s naturally gluten-free, making it a great option for those with dietary restrictions.
Cheesy Spinach Stuffed Spaghetti Squash Ingredients
When I shop for this recipe at the Union Square Greenmarket, I look for firm, heavy spaghetti squashes with a deep yellow color — they’re sweeter and have a better texture. For the cheese, I always grab whole-milk ricotta and fresh mozzarella from the deli counter; the premium is worth it for the creaminess. The sage comes from my tiny herb window box, but any grocery store will have it. Let me walk you through the ingredients.
Ingredients List
- 1 medium spaghetti squash (about 3-4 lbs)
- 2 tablespoons olive oil
- Salt and black pepper to taste
- 2 tablespoons unsalted butter
- 3 cloves garlic, minced
- 10 fresh sage leaves, chopped
- 5 oz fresh baby spinach
- 1 cup ricotta cheese
- 1/2 cup shredded mozzarella cheese
- 1/4 cup grated Parmesan cheese
- 1/4 teaspoon red pepper flakes (optional)
- Additional sage leaves for garnish (optional)
Ingredient Spotlight
Spaghetti Squash: The star of the show. Choose a squash that’s heavy for its size and has a uniform, hard skin. When cut in half, the flesh should be pale yellow. If you can’t find spaghetti squash, you can substitute with roasted pumpkin or delicata squash — but the texture will be less stringy. The flavor is mild and slightly sweet, making it a perfect canvas.
Fresh Sage: I adore sage, and this recipe uses it two ways — in the butter and as a garnish. Fresh sage is earthy and slightly peppery, much more fragrant than dried. If you can’t find fresh, use 1 teaspoon dried sage, but add it with the garlic and expect a more subtle flavor. 💡 mia’s Pro Tip: To crisp the sage leaves for garnish, fry them in a little butter for 30 seconds — they become a delightful, crunchy topping.
Ricotta Cheese: For the creamiest filling, use whole-milk ricotta. Low-fat or non-fat ricotta can be grainy and won’t melt as smoothly. If you’re dairy-free, a good-quality tofu ricotta (blended silken tofu with lemon, salt, and nutritional yeast) works beautifully. Just be sure to press and drain the tofu first.
Baby Spinach: Fresh baby spinach wilts quickly and adds a lovely green color. I prefer fresh for its texture, but frozen spinach can be used — just thaw it completely and squeeze out every drop of water before adding to the filling. Otherwise, you’ll end up with a watery dish.
| Original Ingredient | Best Substitution | Flavor / Texture Impact |
|---|---|---|
| Butter | Vegan butter or olive oil | Slightly less rich, but still delicious |
| Ricotta | Tofu ricotta or cottage cheese (blended) | Cottage cheese makes filling lighter; tofu ricotta is less creamy |
| Mozzarella | Dairy-free mozzarella shreds | Meltability varies; choose a brand that browns well |
| Fresh sage | Dried sage (1 tsp) or fresh thyme | Thyme is more floral; dried sage is less pungent |
How to Make Cheesy Spinach Stuffed Spaghetti Squash — Step-by-Step
Don’t be intimidated by the number of steps — this recipe flows beautifully, and I’ve broken it down so you can follow along easily. Each step builds on the last, and I’ve included my best tips to guarantee success.
Step 1: Prepare and Roast the Squash
Preheat your oven to 400°F (200°C) and line a baking sheet with parchment paper. Carefully cut the spaghetti squash in half lengthwise — this can be tough, so use a sharp chef’s knife and go slowly. Scoop out the seeds and stringy pulp with a spoon. Brush the cut sides with olive oil and season generously with salt and pepper. Place the halves cut-side down on the baking sheet. Roast for 35-40 minutes, until the skin is tender and a fork easily pierces through. 💡 mia’s Pro Tip: For perfectly tender strands, don’t over-roast. Test at 35 minutes by pressing the skin — it should give slightly. Let the squash cool for 10 minutes before handling.
⚠️ Common Mistake to Avoid: Cutting the squash when it’s too hot — the steam can burn your hands. Always let it cool first.
Step 2: Make the Garlic Sage Butter and Wilt Spinach
While the squash roasts, melt 2 tablespoons of unsalted butter in a large skillet over medium heat. Add the minced garlic and chopped sage leaves, and cook for about 1 minute until the garlic is fragrant and the sage begins to crisp slightly. Add the fresh baby spinach in handfuls — it will wilt quickly. Stir and cook for 2-3 minutes until completely wilted. Remove from heat. 💡 mia’s Pro Tip: Don’t skip the wilting step; raw spinach would make the filling watery. If you want extra flavor, add a pinch of red pepper flakes with the garlic.
Step 3: Scrape and Mix the Filling
Once the squash halves are cool enough to handle, use a fork to scrape the strands into a large bowl. Be gentle — you want long, beautiful strands. Reserve the hollowed-out shells. In the bowl with the squash strands, add the wilted spinach mixture (including any butter left in the pan), ricotta, mozzarella, Parmesan, and red pepper flakes if using. Mix well until everything is evenly combined. Taste and adjust salt and pepper. ⚠️ Common Mistake to Avoid: Overmixing can break the squash strands into mush. Fold gently with a spatula.
Step 4: Stuff and Bake Again
Spoon the filling back into the reserved squash shells, dividing it evenly. Don’t pack it too tightly — you want some air pockets for even heating. Return the stuffed squash halves to the baking sheet (cut-side up) and bake for 10-15 minutes, until the filling is heated through and the cheese on top is melted and lightly golden. For extra browning, switch to broil for the last 1-2 minutes, but watch carefully.
Step 5: Garnish and Serve
Remove from the oven, let rest for 5 minutes, then garnish with extra fresh sage leaves if desired. Serve warm as a main course with a simple green salad or roasted vegetables. 💡 mia’s Pro Tip: A final drizzle of good balsamic glaze or a squeeze of lemon brightens up the richness beautifully.
| Step | Action | Duration | Key Visual Cue |
|---|---|---|---|
| 1 | Roast spaghetti squash | 35-40 min | Skin is tender, strands separate easily |
| 2 | Make butter, wilt spinach | 3-4 min | Sage is fragrant, spinach reduced in volume |
| 3 | Scrape and mix filling | 5 min | Strands separate, cheeses evenly distributed |
| 4 | Stuff and bake again | 10-15 min | Cheese melted, top lightly browned |
| 5 | Garnish and serve | 5 min rest | Steam rises, garnishes brighten dish |
Serving & Presentation
To serve, place each stuffed squash half on a plate, cut side up, so the beautiful filling is visible. I like to garnish with a few whole fried sage leaves — they add a beautiful crispy texture and a vibrant green color. A light sprinkle of flaky sea salt right before serving enhances all the flavors. This dish is substantial enough to be a main course, but it pairs wonderfully with a crisp arugula salad dressed in lemon vinaigrette. The peppery greens cut through the richness of the cheese. For a heartier meal, serve alongside roasted chicken or grilled salmon.
In my NYC kitchen, I often make this for Sunday night dinners. It’s the kind of dish that feels like a hug from the inside out. The aroma of sage and garlic fills the apartment, and my neighbors have started to recognize the smell — they know they’re invited! When I bring it to potlucks, it’s always the first thing to disappear.
| Pairing Type | Suggestions | Why It Works |
|---|---|---|
| Side Dish | Arugula salad, roasted broccoli, garlic bread | Arugula’s bitterness balances richness; broccoli adds crunch |
| Sauce / Dip | Balsamic glaze, lemon wedge, extra garlic butter | Acidity cuts through cheese; extra butter amplifies sage |
| Beverage | Chardonnay, Sauvignon Blanc, sparkling water with lemon | White wine’s acidity complements cheese; sparkling water cleanses palate |
| Garnish | Fried sage leaves, red pepper flakes, pine nuts | Adds texture, color, and a burst of flavor |
Make-Ahead, Storage & Reheating
As a busy NYC food blogger, I live by make-ahead meals. This stuffed spaghetti squash is one of my favorites to prep on Sunday for quick weeknight dinners. The roasted squash halves and the spinach mixture can be stored separately, then assembled and baked when you’re ready. Here’s how to store and reheat like a pro.
| Method | Container | Duration | Reheating Tip |
|---|---|---|---|
| Refrigerator | Airtight container (shells + filling separate) | Up to 4 days | Assemble and bake at 350°F for 15-20 min until hot |
| Freezer | Freezer-safe container or zip-top bag (filling only) | Up to 3 months | Thaw overnight in fridge; bake as above, adding 5-10 min |
| Make-Ahead | Roast squash and wilt spinach up to 2 days ahead | 2 days | Mix filling just before second bake for best texture |
When reheating, the oven is your best friend — it restores the crispiness of the squash skin and melds the cheeses beautifully. Microwaving works in a pinch, but the filling may become a little watery. If you’re reheating from frozen, I recommend baking covered with foil for the first 15 minutes, then uncovering for the last 5 to let the top brown.
Variations & Easy Swaps
Over the years, I’ve played with countless variations of this dish — some inspired by my Moroccan roots, others by the seasonal produce I find at the Chelsea Market. Whether you’re looking for a vegan twist or a flavor boost, there’s a version here for you.
| Variation | Key Change | Best For | Difficulty Impact |
|---|---|---|---|
| Moroccan Spiced Version | Add 1 tsp cinnamon and 1/2 tsp cumin to filling; substitute sage with cilantro | Aromatic, sweet-savory twist | Same – easy |
| Vegan / Dairy-Free | Use vegan butter, tofu ricotta, dairy-free mozzarella & Parmesan | Dairy-free diet | Slightly more prep – medium |
| Protein-Packed Version | Add 1 cup cooked shredded chicken or crumbled sausage to filling | Extra protein for athletes | Same – easy |
Moroccan Spiced Version
This variation is a nod to my childhood. Instead of garlic sage butter, I make a quick spice blend with cinnamon, cumin, and a pinch of cayenne. Sauté the spinach in olive oil with the spices, then mix with the cheese and squash. Garnish with fresh cilantro and a squeeze of orange juice. The cinnamon adds an unexpected warmth that pairs beautifully with the sweet squash — it’s a winner for fall gatherings.
Vegan / Dairy-Free Version
I’ve tested this dairy-free version for friends with allergies, and it holds up remarkably well. Use a high-quality vegan butter for the sage sauce — I like the Miyoko’s brand for its rich flavor. For the ricotta, blend one block of firm silken tofu with a tablespoon of lemon juice, a clove of garlic, and a pinch of salt. The mozzarella alternative should be one that melts well; Violife or Follow Your Heart are my go-tos. The result is still creamy and satisfying, though slightly less rich than the original.
Seasonal Twist with Mushrooms
When I find beautiful cremini or shiitake mushrooms at the Grand Central Market, I love adding them to the filling. Sauté 8 oz sliced mushrooms in the butter before adding the spinach and garlic. The earthy umami of mushrooms complements the sage and makes the dish even more substantial. It’s perfect for a rainy NYC evening.
How do you prevent stuffed spaghetti squash from becoming watery or soggy?
To prevent a watery filling, the most important step is to properly dry the spinach after wilting. Fresh spinach contains a lot of water, so after you cook it down, let it cool slightly, then squeeze it in a clean kitchen towel or paper towels to remove excess moisture. Also, avoid overcooking the spaghetti squash; if the strands are too soft, they release liquid. Roast the squash just until tender (35-40 minutes) and let it cool before scraping. Finally, don’t skip the second bake — it helps evaporate any remaining moisture and melts the cheeses into a cohesive, creamy filling.
Can I use frozen spinach instead of fresh for this recipe?
Absolutely, but frozen spinach requires a bit more prep. Thaw the spinach completely in the refrigerator or microwave, then place it in a clean dish towel and wring out every drop of liquid. You’ll be surprised how much water comes out! After squeezing, measure out about 5 ounces by weight (or about 1/2 cup packed, since frozen spinach is more concentrated). Because frozen spinach is already blanched, it will be more tender and less vibrant green than fresh, but the flavor will still work beautifully. I recommend using frozen only if fresh is unavailable, and always follow the squeezing step to avoid sogginess.
What cheese works best for a cheesy spinach stuffed spaghetti squash?
For the ultimate cheesy filling, use a combination of three cheeses: whole-milk ricotta for creaminess, fresh mozzarella for that stretchy melt, and Parmesan for a sharp, salty kick. The ricotta should be full-fat for the best texture; low-fat ricotta can be grainy. Fresh mozzarella (the kind sold in water) melts into glorious strings — pre-shredded bagged mozzarella often contains anti-caking agents that prevent smooth melting. Parmesan should be freshly grated from a wedge if possible. If you want to experiment, try provolone instead of mozzarella for a smokier flavor, or add a dollop of goat cheese for tanginess.
How long do you bake spaghetti squash for the perfect al dente texture?
For al dente spaghetti squash — strands that are tender but still have a slight bite — bake the halved squash at 400°F for 35-40 minutes. Start checking at 30 minutes if your squash is smaller. When it’s done, the skin will yield to gentle pressure, and a fork inserted into the flesh will pull up strands that are separate but not mushy. Overbaking (beyond 45 minutes) makes the strands waterlogged and mushy. Underbaking (less than 30 minutes) leaves them crunchy. The perfect al dente squash will have a slight resistance when you bite into it — similar to perfectly cooked pasta. Let it cool for 5-10 minutes before scraping to prevent tearing.
What can I use instead of sage for the garlic butter?
If sage isn’t available, the best substitutes are fresh thyme, rosemary (used sparingly), or even basil for a different profile. Thyme is earthy and works beautifully with garlic and butter. Use 1 tablespoon of fresh thyme leaves (or 1 teaspoon dried) and add them with the garlic. Rosemary is stronger — use about 1 teaspoon finely chopped. For an Italian twist, use fresh basil, but add it after the spinach is wilted to preserve its bright flavor. Dried sage can be used but use only 1 teaspoon; the flavor is more concentrated and less delicate.
Can I make this stuffed spaghetti squash ahead of time for a dinner party?
Yes, this is an excellent make-ahead dish. Up to two days before serving, roast the spaghetti squash halves and prepare the spinach and cheese filling. Store the shells and filling separately in the refrigerator. On party day, let them come to room temperature for about 20 minutes, then stuff the shells and bake as directed. You may need to add 5 extra minutes since the filling will be cold. The second bake can be done while guests arrive, and the aroma fills your home with anticipation. Leftover assembled squash can be reheated in the oven the next day — it’s almost as good as fresh.
How do I store leftover cheesy spinach stuffed spaghetti squash?
Store leftovers in an airtight container in the refrigerator for up to 4 days. For best results, keep the filled squash shells intact if possible, covered tightly with foil. If you have leftover filling separate, use it within 2 days. To reheat, place the stuffed squash in a 350°F oven for 15-20 minutes until warmed through; the microwave will work but may make the strands slightly mushy. The squash can also be frozen: wrap each stuffed half tightly in plastic wrap and then foil, or place in a freezer bag. Thaw overnight in the fridge before reheating. Freeze for up to 3 months.
Is this recipe gluten-free and low-carb?
Yes, this cheesy spinach stuffed spaghetti squash is naturally gluten-free as there is no flour, breadcrumbs, or pasta involved. It’s also excellent for low-carb and keto diets — one serving contains about 22 grams of carbohydrates and 8 grams of sugar, but the net carbs are lower due to fiber (estimates vary by squash size). The majority of carbs come from the spaghetti squash itself, which is much lower in carbs than traditional pasta. For an even lower-carb version, reduce the amount of squash strands and increase the spinach and cheese filling. As always, check labels if you are using store-bought cheese blends for any hidden gluten or carbs.
Share Your Version!
I’d love to see how this cheesy spinach stuffed spaghetti squash turns out in your kitchen! Did you try the Moroccan spice twist? Or maybe you added a handful of toasted pine nuts? Drop a comment below with your star rating — your feedback helps other readers decide what to cook tonight.
Snap a photo of your creation and share it on Instagram or Pinterest. Tag me @exorecipes so I can feature your version in my stories. I’m especially curious if anyone tried the garlic sage butter with a different herb — let me know what worked for you!
From my NYC kitchen to yours — I hope this recipe brings as much warmth to your table as it does to mine. — mia 🧡
Love This Recipe? Save It to Pinterest!
If you enjoyed this Cheesy Spinach Stuffed Spaghetti Squash with Garlic Sage Butter recipe, don’t let it get lost in your browser tabs! 😄 Pin it now so you can find it again anytime — and explore hundreds more tried-and-tested recipes waiting for you on my Pinterest boards.
👉 Follow mia on Pinterest @exorecipe
📌 Pin this recipe · 🔁 Re-pin your favorites · 💬 Tag me when you make it — I love seeing your creations!

Cheesy Spinach Stuffed Spaghetti Squash with Garlic Sage Butter
- Prep Time: 20 minutes
- Cook Time: 55 minutes
- Total Time: 1 hour 15 minutes
- Yield: 4 servings 1x
- Method: Main Course
- Cuisine: American
Description
A delicious and healthy low-carb meal featuring tender spaghetti squash stuffed with creamy spinach and cheese, drizzled with a fragrant garlic sage butter.
Ingredients
- 1 medium spaghetti squash (about 3–4 lbs)
- 2 tablespoons olive oil
- Salt and black pepper to taste
- 2 tablespoons unsalted butter
- 3 cloves garlic, minced
- 10 fresh sage leaves, chopped
- 5 oz fresh baby spinach
- 1 cup ricotta cheese
- 1/2 cup shredded mozzarella cheese
- 1/4 cup grated Parmesan cheese
- 1/4 teaspoon red pepper flakes (optional)
- Additional sage leaves for garnish (optional)
Instructions
- Preheat oven to 400°F (200°C). Line a baking sheet with parchment paper.
- Cut the spaghetti squash in half lengthwise and scoop out the seeds. Brush cut sides with olive oil and season with salt and pepper.
- Place squash halves cut-side down on the baking sheet. Roast for 35-40 minutes until tender. Remove from oven and let cool slightly. Using a fork, scrape the squash strands into a bowl, reserving the shells.
- In a large skillet over medium heat, melt butter. Add garlic and sage leaves; cook for 1 minute until fragrant. Add spinach and cook until wilted, about 2-3 minutes. Remove from heat.
- In a bowl, combine the spaghetti squash strands, spinach mixture, ricotta, mozzarella, Parmesan, and red pepper flakes (if using). Mix well.
- Spoon the mixture back into the reserved squash shells. Return to the oven and bake for 10-15 minutes until heated through and cheese is melted.
- Serve warm, garnished with extra sage leaves if desired.
Notes
For a dairy-free version, substitute butter with vegan butter, ricotta with tofu ricotta, and use dairy-free mozzarella and Parmesan alternatives. The squash can be roasted up to 2 days ahead and stored in the refrigerator.
Nutrition
- Calories: 380 kcal
- Sugar: 8 g
- Fat: 26 g
- Carbohydrates: 22 g
- Protein: 18 g
Tried This Recipe? Leave a Comment!
Did you make this recipe? I’d love to hear how it turned out! Please leave a comment and a rating below. Your feedback helps other home cooks and supports cheerychop.com!
For more delicious inspiration, follow me on Pinterest!