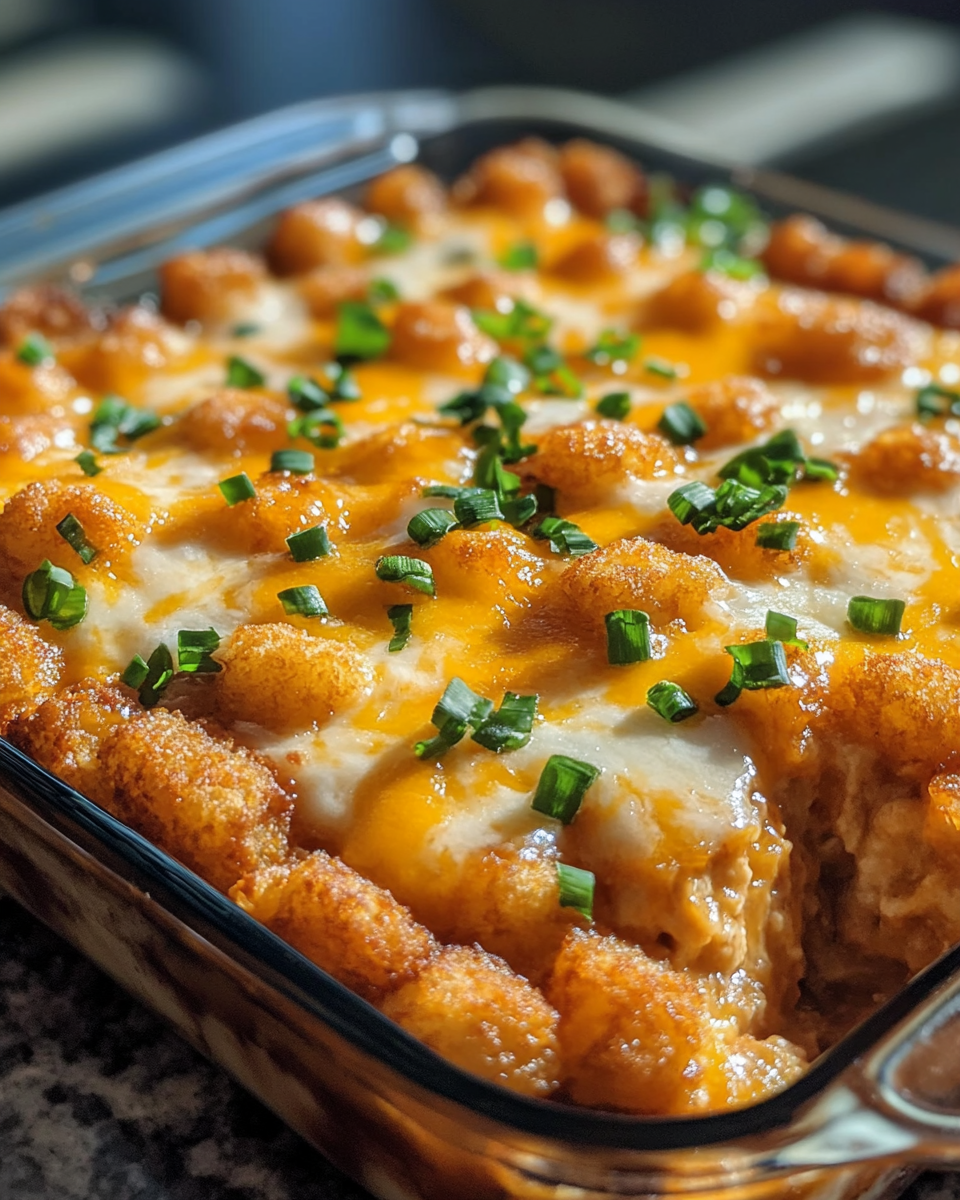
Tater Tot Breakfast Casserole: A Crowd-Pleasing Morning Delight

breakfast casserole with tater tots, easy breakfast casserole, cheesy tater tot breakfast bake, tater tot casserole recipe

Tater Tot Breakfast Casserole: A Hearty Start to Your Day

Tater Tot Breakfast Casserole is a versatile and delicious recipe perfect for busy mornings, lazy weekends, or holiday brunches. Combining the comforting flavors of crispy tater tots, savory meats, and creamy cheese, this casserole is a crowd-pleaser. Pair it with a refreshing salad or a sweet treat like Kentucky Butter Cake for a complete meal.


Why You’ll Love Tater Tot Breakfast Casserole

  • Quick Preparation: Easy to assemble and pop in the oven.
  • Feeds a Crowd: Great for family breakfasts or group brunches.
  • Customizable: Adapt it to suit vegetarian or low-carb diets.

For a lighter companion dish, try Sheetpan Pancakes for a well-rounded brunch spread.


Ingredients for a Perfect Tater Tot Casserole

Core Ingredients:

  • Tater Tots: The crispy base of the casserole.
  • Eggs: Provide structure and protein.
  • Cheese: A mix of cheddar and Monterey Jack for richness.
  • Milk or Heavy Cream: Ensures a creamy consistency.
  • Bacon or Sausage: Adds a savory, smoky flavor.
  • Vegetables: Diced onions, bell peppers, or spinach for freshness.

Optional Add-Ins:

  • Jalapeños for spice.
  • Mushrooms for an earthy flavor.
  • Fresh herbs like parsley or thyme for added aroma.

Step-by-Step Recipe Instructions

1. Prepare Your Ingredients

  • Cook and crumble bacon or sausage.
  • Dice vegetables and sauté until soft.
  • Whisk eggs with milk, salt, and pepper in a large mixing bowl.

2. Layer the Casserole

  • Preheat oven to 375°F (190°C).
  • Grease a 9×13-inch baking dish.
  • Layer frozen tater tots evenly across the bottom.
  • Pour the egg mixture over the tots.
  • Add cooked bacon or sausage and top with shredded cheese.

3. Bake and Serve

  • Bake for 40–50 minutes, or until the eggs are set and the cheese is bubbly.
  • Let the casserole rest for 5–10 minutes before slicing.
  • Serve warm, garnished with fresh herbs or additional cheese.

Pair this dish with No Peek Beef Tips for a satisfying dinner twist.


Creative Variations

Vegetarian Option:

  • Swap the meat for additional vegetables like zucchini or broccoli.

Spicy Kick:

  • Add diced jalapeños or a dash of cayenne pepper.

Cheesy Explosion:

  • Mix in cream cheese or substitute with Gouda for a gooey texture.

Southwestern Style:

  • Include black beans, corn, and salsa.

Pro Tips for the Best Tater Tot Casserole

  • Pre-Bake Tater Tots: For extra crispiness, bake the tots separately for 10 minutes before assembling the casserole.
  • Use Fresh Cheese: Shred your own cheese for better melting and flavor.
  • Make Ahead: Assemble the casserole the night before and refrigerate. Bake fresh the next morning.

FAQs About Tater Tot Breakfast Casserole

Q1: Can I use frozen tater tots directly?
A: Yes, but pre-baking them adds crispiness.

Q2: How do I store leftovers?
A: Refrigerate in an airtight container for up to 4 days or freeze for up to 3 months.

Q3: What’s the best way to reheat this casserole?
A: Warm in the oven at 350°F until heated through or microwave individual portions.

Q4: Can I make this casserole dairy-free?
A: Substitute almond milk and dairy-free cheese.

Q5: Can I use plant-based meat?
A: Absolutely! Plant-based sausages work well in this recipe.


Internal Linking Opportunities


Conclusion

Tater Tot Breakfast Casserole is a simple, crowd-pleasing recipe that combines comfort and convenience. Its versatility allows you to customize it for any occasion, from casual breakfasts to holiday brunches. Serve this with other favorites like Mini Pineapple Coconut Cheesecakes for a meal that leaves everyone satisfied!
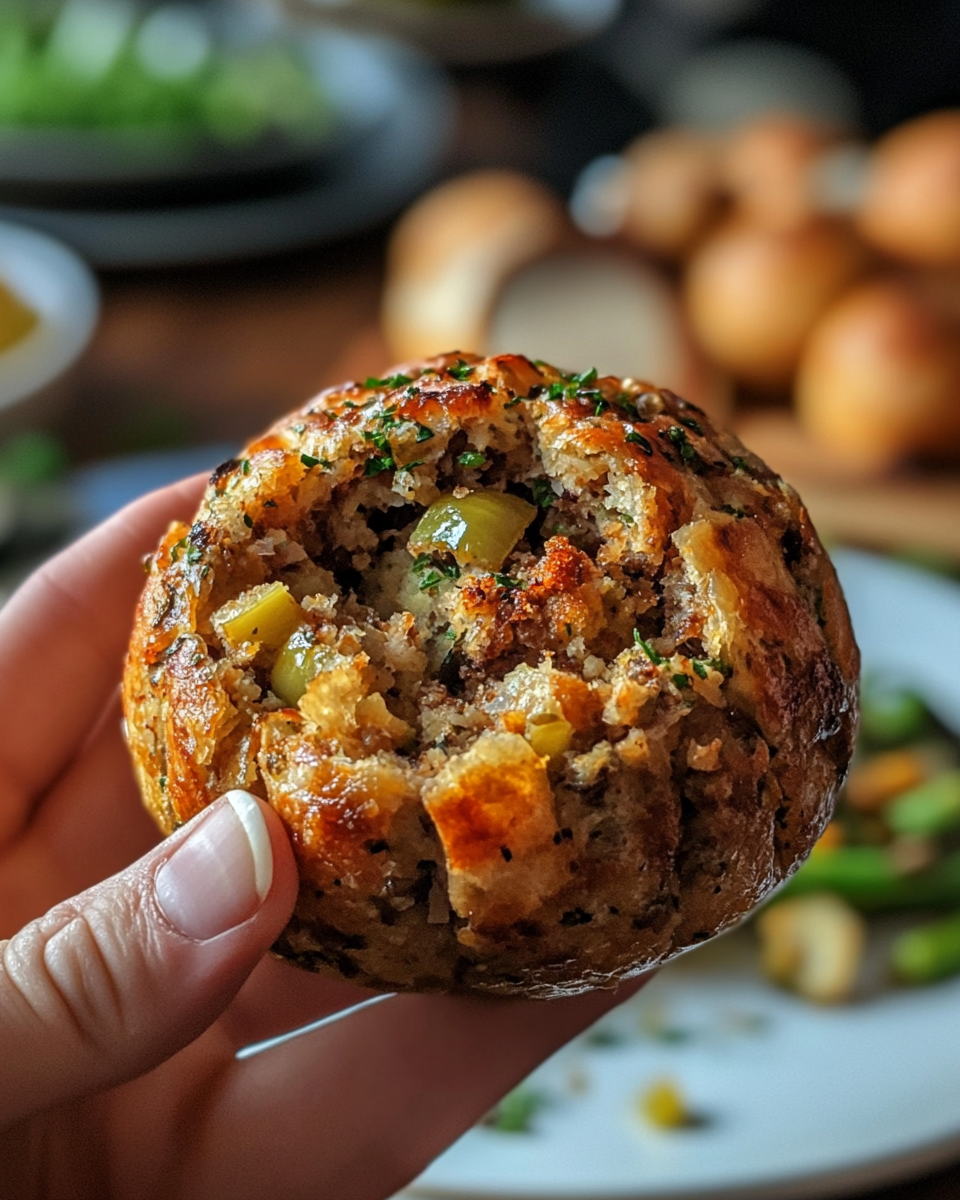
Easy Stuffing Balls: A Simple and Delicious Holiday Side Dish

stuffing balls recipe, holiday stuffing ideas, quick stuffing side dish, bite-sized stuffing balls, best stuffing balls for Thanksgiving

Easy Stuffing Balls: The Perfect Holiday Side Dish

If you’re searching for a quick, delicious, and versatile side dish, Easy Stuffing Balls are the answer. These bite-sized portions capture the comforting flavors of traditional stuffing while offering a convenient and elegant serving option. Pair them with rich gravies, festive main courses, or even as an appetizer to start the meal. Try pairing this with Crockpot Potato Soup for a warm and hearty dinner idea.


Why You’ll Love Stuffing Balls

  • Portion Control: Each ball is perfectly portioned, making it ideal for large gatherings.
  • Quick Cooking: These bake faster than traditional stuffing.
  • Customizable: Easily tailored to your flavor preferences or dietary needs.

For an elevated presentation, serve these alongside Slow Cooker Baked Ziti to impress your guests with variety.


Ingredients for Easy Stuffing Balls

Core Ingredients:

  • Bread Cubes: Day-old bread works best for texture.
  • Vegetables: Chopped onions, celery, and parsley provide classic stuffing flavors.
  • Seasoning: Poultry seasoning, salt, and pepper are essentials.
  • Binders: Eggs and chicken or vegetable broth to hold everything together.

Optional Add-Ins:

  • Meat: Add cooked sausage or bacon for a heartier option.
  • Sweetness: Dried cranberries or diced apples for a festive twist.
  • Crunch: Chopped nuts like pecans or walnuts for added texture.

Tools You’ll Need

  • Mixing Bowls: Large enough to combine all ingredients.
  • Baking Sheet: Lined with parchment paper for easy cleanup.
  • Cookie Scoop or Hands: For shaping uniform stuffing balls.

Step-by-Step Instructions

1. Prepare the Ingredients

  • Cut bread into 1/2-inch cubes and leave out overnight to dry.
  • Sauté onions and celery in butter until softened.
  • In a large bowl, mix bread cubes, sautéed vegetables, and seasonings.

2. Bind and Shape

  • Whisk eggs with broth and pour over the bread mixture.
  • Stir gently, ensuring the mixture is moist and holds its shape when pressed.

3. Shape the Balls

  • Preheat oven to 375°F (190°C).
  • Use a cookie scoop or your hands to form the mixture into golf ball-sized portions.
  • Place on the baking sheet, spacing them evenly.

4. Bake to Perfection

  • Bake for 20–25 minutes, turning halfway for even browning.
  • Remove from oven and serve warm with gravy or cranberry sauce.

For a comforting pairing, serve with No Peek Beef Tips as a hearty main course.


Tips for Success

  • Use Day-Old Bread: It absorbs liquid better without becoming mushy.
  • Don’t Overmix: Gently fold the ingredients to maintain texture.
  • Test the Mixture: Form a test ball to ensure the mixture holds together.

Creative Variations

Cheesy Stuffing Balls:

  • Add shredded cheddar or Parmesan to the mixture.

Herb-Infused:

  • Incorporate fresh rosemary, thyme, or sage for a more aromatic profile.

Sweet and Savory:

  • Mix in dried cranberries, raisins, or diced apples.

Vegetarian Option:

  • Swap chicken broth for vegetable broth and add sautéed mushrooms.

Spicy Stuffing Balls:

  • Include diced jalapeños or red chili flakes for a kick.

For more variety, consider pairing these with German Chocolate Poke Cake for a sweet finish.


Serving Suggestions

  • Serve as a side with turkey, ham, or chicken.
  • Pair with creamy mashed potatoes and roasted vegetables.
  • Include in a buffet spread with appetizers like Cheesy Bacon Jalapeño Corn Dip.

FAQs About Stuffing Balls

Q1: Can I prepare stuffing balls in advance?
A: Yes, you can shape the balls and refrigerate them for up to 24 hours or freeze them for longer storage.

Q2: How do I reheat stuffing balls?
A: Warm them in the oven at 350°F for 10–15 minutes or until heated through.

Q3: Can I make these gluten-free?
A: Substitute gluten-free bread for traditional bread. Adjust broth quantity as needed.

Q4: What’s the best way to store leftovers?
A: Store in an airtight container in the refrigerator for up to 4 days or freeze for up to 2 months.

Q5: Can I use stuffing balls in other recipes?
A: Yes, crumble them into soups or casseroles for added flavor.


Internal Linking Opportunities


Conclusion

Easy Stuffing Balls are a versatile and crowd-pleasing side dish that’s perfect for any occasion, from holiday dinners to casual gatherings. Their bite-sized format, quick preparation, and endless customization options make them a must-have recipe in your repertoire. Serve these with your favorite sides and desserts to create a memorable meal!

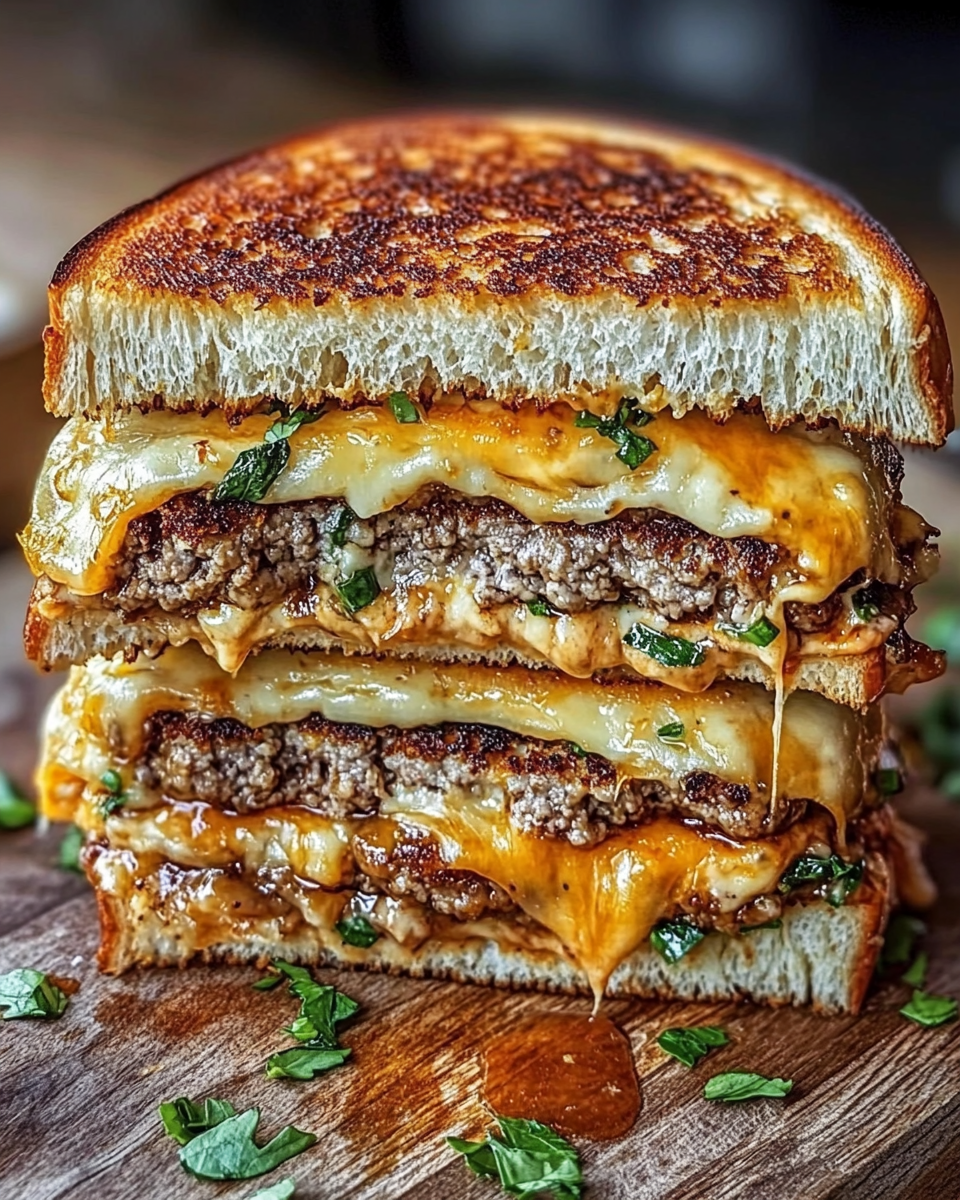
Ultimate Patty Melt with Secret Sauce: The Perfect Diner-Inspired Sandwich

best patty melt recipe, secret sauce for patty melts, gourmet patty melt sandwich, caramelized onion patty melt, diner-style patty melt

Ultimate Patty Melt with Secret Sauce: A Gourmet Diner Delight

The Ultimate Patty Melt with Secret Sauce combines the savory goodness of a classic patty melt with the indulgent tang of a homemade secret sauce. It’s the perfect fusion of burger and sandwich, ideal for anyone who craves comfort food with a gourmet twist. Pair this recipe with No Peek Beef Tips or serve alongside Cheesy Bacon Jalapeño Corn Dip for a complete meal experience.


Why This Patty Melt is a Crowd Favorite

  • Rich Flavors: A balance of caramelized onions, tangy sauce, and melted cheese.
  • Perfect Texture: Toasted rye bread with butter ensures a golden, crispy bite.
  • Versatility: Easy to customize with different cheeses, sauces, or bread options.

Learn more about caramelizing onions perfectly through this guide to elevate your sandwich game.


Ingredients You’ll Need

For the Patty Melt:

  • Ground Beef Patties: Use 85/15 for the best flavor.
  • Caramelized Onions: A slow-cooked blend of sweetness and depth.
  • Cheese: A mix of cheddar and Swiss works best.
  • Rye Bread: Traditional choice, but sourdough or Texas toast can work too.

For the Secret Sauce:

  • Mayonnaise, ketchup, Dijon mustard, pickle juice, garlic powder, and paprika.

Step-by-Step Instructions

1. Make the Secret Sauce:

  • Combine all ingredients in a bowl and whisk until smooth.
  • Store in the refrigerator for at least 30 minutes to let the flavors meld.

2. Caramelize the Onions:

  • Slice two large onions thinly.
  • Sauté in olive oil over low heat for 30–40 minutes, stirring occasionally.
  • Add a pinch of salt and a teaspoon of sugar to enhance the caramelization process.

3. Assemble the Sandwich:

  • Form the beef patties into thin, oval shapes slightly larger than the bread slices.
  • Season with salt, pepper, and Worcestershire sauce.
  • Grill patties until browned on both sides.

Expert Tips

  • Use softened butter for evenly toasted bread.
  • Don’t rush the onions; caramelizing takes time but is worth the effort.
  • Assemble the sandwich while ingredients are warm for the best melt.

For another hearty option, consider Slow Cooker Chicken and Gravy to pair with this patty melt.


Creative Variations

  • Spicy Patty Melt: Add jalapeños or hot sauce to the secret sauce.
  • Vegetarian Option: Use plant-based patties and vegan cheese.
  • Turkey Patty Melt: Swap out beef for turkey patties for a lighter option.
  • Breakfast Patty Melt: Top with a fried egg for a morning twist.

Serving Suggestions

  • Serve with crispy French fries or ranch-roasted potatoes.
  • Add a side of creamy coleslaw for a refreshing crunch.
  • Pair with Kentucky Butter Cake for a sweet ending to the meal.

FAQs

Q1: Can I make the patties ahead of time?
A: Yes, shape and season them in advance, then refrigerate until ready to cook.

Q2: How do I prevent the bread from getting soggy?
A: Toast the bread lightly before assembling the sandwich.

Q3: Can I use store-bought sauce?
A: Yes, but making your own secret sauce ensures a fresher and tangier flavor.

Q4: What’s the best way to reheat leftovers?
A: Reheat in a skillet over low heat to maintain crispness without overcooking.

Q5: Can I freeze assembled sandwiches?
A: It’s better to freeze cooked patties and assemble fresh sandwiches when ready to serve.


Internal Linking Opportunities


Conclusion

The Ultimate Patty Melt with Secret Sauce is a delicious twist on a diner classic, combining rich flavors and textures for a meal that’s satisfying and memorable. Whether you’re hosting a casual dinner or craving comfort food, this patty melt is a must-try! Pair it with hearty sides and sweet desserts to create the ultimate dining experience.

Christmas Cranberry Cheesecake Cupcakes: A Festive Holiday Treat

cranberry cheesecake holiday cupcakes, festive cheesecake cupcakes, holiday cranberry desserts, Christmas cupcake recipes, cranberry cream cheese treats

Christmas Cranberry Cheesecake Cupcakes: A Festive Delight for Your Holiday Table

Christmas Cranberry Cheesecake Cupcakes are the perfect blend of tangy cranberries, creamy cheesecake, and soft cupcake bases, making them the ultimate dessert for your festive celebrations. Pair these with Salted Caramel Apple Cheesecake for a dessert table that delights every palate.


Why These Cupcakes Shine During the Holidays

  • Festive and Flavorful: The tart cranberries contrast beautifully with the sweet, creamy cheesecake.
  • Perfectly Portionable: Easy to serve for parties, making them a crowd favorite.
  • Elegant Presentation: Garnished with rosemary and cranberries, they double as table décor.

Explore another elegant dessert with German Chocolate Poke Cake, which pairs wonderfully with these cupcakes.


Key Ingredients and Tools

Ingredients:

  • Cupcake Base: Butter, sugar, eggs, vanilla, and all-purpose flour for structure and flavor.
  • Cheesecake Filling: Cream cheese, sugar, vanilla extract, and eggs for a creamy layer.
  • Cranberry Sauce: Fresh or frozen cranberries, sugar, and water for a tangy swirl.

Optional Additions:

  • Zest from oranges or lemons for a citrusy kick.
  • Ground cinnamon or nutmeg for extra warmth.

Tools:

  • Muffin tin and cupcake liners for easy portioning.
  • Mixer for smooth cheesecake filling.
  • Saucepan to prepare the cranberry sauce.

Step-by-Step Recipe

1. Prepare the Cranberry Sauce:

  • Combine cranberries, sugar, and water in a saucepan.
  • Simmer until the cranberries burst, and the sauce thickens (around 10 minutes).
  • Let it cool to room temperature before using.

2. Make the Cupcake Batter:

  • Cream butter and sugar together until light and fluffy.
  • Beat in eggs, vanilla, and dry ingredients alternately with milk or buttermilk.

3. Assemble the Cupcakes:

  • Preheat oven to 350°F (175°C).
  • Fill cupcake liners halfway with batter.
  • Add a small dollop of cranberry sauce and swirl gently.
  • Top with a spoonful of cheesecake filling.

4. Bake and Garnish:

  • Bake for 20–25 minutes or until set.
  • Cool completely before garnishing with sugared cranberries and rosemary sprigs.

Creative Variations

  • Gluten-Free Version: Replace all-purpose flour with gluten-free flour blend.
  • Chocolate Cranberry Cupcakes: Add cocoa powder to the cupcake batter for a rich twist.
  • Mini Cupcakes: Use a mini muffin tin for bite-sized treats, adjusting bake time to 12–15 minutes.
  • Vegan Option: Substitute dairy with plant-based alternatives, such as almond cream cheese and aquafaba.

Serving Suggestions

  • Pair with mulled wine or hot chocolate for a cozy holiday vibe.
  • Dust with powdered sugar for a snowy, festive appearance.
  • Arrange alongside Mini Pineapple Coconut Milk Cheesecakes for a diverse dessert spread.

Storage and Reheating

  • Refrigerate: Store cupcakes in an airtight container for up to 5 days.
  • Freeze: Freeze without garnishes for up to 1 month. Thaw overnight in the refrigerator.
  • Reheat: Serve at room temperature; avoid microwaving to maintain texture.

Tips for Perfect Results

  • Use softened cream cheese for a silky cheesecake layer.
  • Do not overfill cupcake liners to avoid overflowing.
  • Allow cupcakes to cool completely before garnishing for best presentation.

Frequently Asked Questions (FAQs)

Q1: Can I use store-bought cranberry sauce?
A: Yes, but ensure it’s not overly sweetened to balance the flavors.

Q2: How do I make sugared cranberries?
A: Coat fresh cranberries in simple syrup, then roll them in granulated sugar. Let them dry for an hour before using.

Q3: Can these cupcakes be made ahead?
A: Yes, bake the cupcakes a day in advance and store in the refrigerator. Garnish just before serving.

Q4: What’s the best substitute for cream cheese?
A: Use mascarpone or a plant-based cream cheese for similar creaminess.

Q5: How can I make this recipe nut-free?
A: Simply avoid using nuts as garnishes or in the batter.


Internal Linking Opportunities


Conclusion

Christmas Cranberry Cheesecake Cupcakes are the ultimate holiday dessert, combining tangy cranberries, creamy cheesecake, and a soft cupcake base. Their festive appearance and delightful flavors make them a must-have for holiday gatherings. Try this recipe to spread joy and sweetness this Christmas!

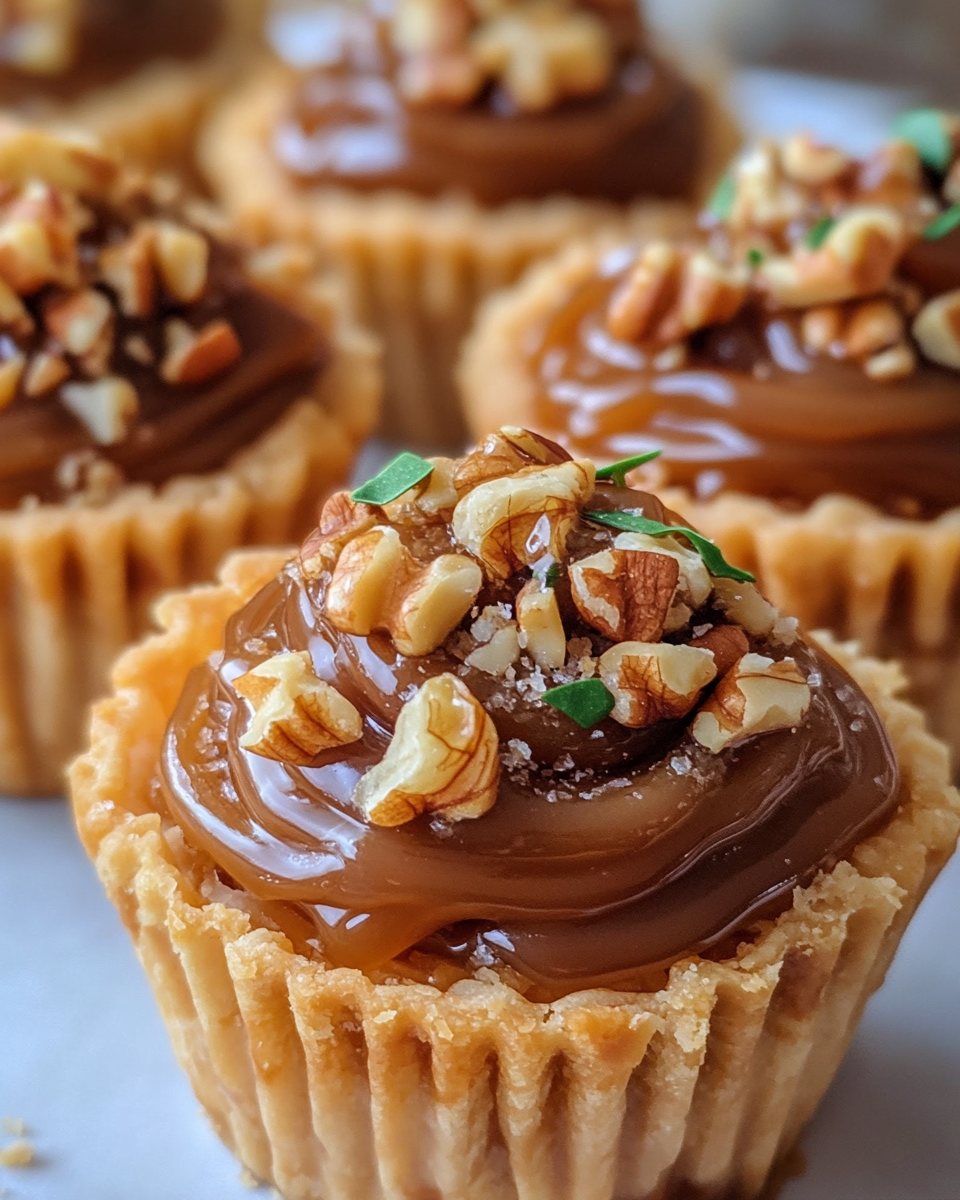
Pecan Caramel Baklava Cups: A Bite-Sized Dessert Delight

mini baklava cups, pecan caramel desserts, phyllo cup recipes, easy caramel pecan baklava, bite-sized baklava treats

Pecan Caramel Baklava Cups: A Perfect Bite-Sized Treat

Pecan Caramel Baklava Cups are an irresistible fusion of nutty pecans, sweet caramel, and flaky phyllo pastry. These elegant yet simple desserts are perfect for gatherings, holiday treats, or a delightful indulgence for yourself.

Pair this with Mini Pineapple Coconut Milk Cheesecakes to create a tropical dessert spread or try Salted Caramel Apple Cheesecake for a caramel lover’s paradise.


Why Pecan Caramel Baklava Cups Stand Out

  • Easy and Elegant: A simplified version of baklava in bite-sized portions.
  • Customizable: Adaptable with different nuts or flavors to suit any palate.
  • Perfect for Sharing: Great for parties or holiday platters.

For another decadent dessert idea, check out German Chocolate Poke Cake to round out your sweet offerings.


Ingredients You’ll Need

Core Ingredients:

  • Phyllo Pastry Cups: Pre-made or homemade for a flaky, buttery base.
  • Pecans: Rich and nutty, chopped finely.
  • Caramel Sauce: For gooey sweetness.
  • Butter and Brown Sugar: To create the baklava-style filling.
  • Cinnamon and Vanilla Extract: For warmth and depth of flavor.

Optional Add-ons:

  • Honey for traditional baklava sweetness.
  • Sea salt for a salted caramel twist.

Tools You’ll Need

  • Mini muffin tin to shape the phyllo cups.
  • Mixing bowls for preparing the filling.
  • Saucepan for warming caramel.

Step-by-Step Recipe

1. Preparing the Pecan Filling

  • Combine chopped pecans, brown sugar, melted butter, and cinnamon in a bowl.
  • Mix until well-coated for a crunchy and flavorful filling.

2. Assembling the Baklava Cups

  • Preheat the oven to 350°F (175°C).
  • Arrange phyllo cups on a lined baking sheet.
  • Fill each cup with the pecan mixture, ensuring they’re evenly packed.

3. Baking and Drizzling

  • Bake for 10–12 minutes until golden and bubbling.
  • Warm caramel sauce with vanilla and drizzle over the cups after cooling for 5 minutes.

Creative Variations

  1. Nut Medley Baklava Cups
    • Use a mix of pistachios, almonds, and walnuts for added texture and flavor.
  2. Chocolate-Caramel Cups
    • Drizzle melted dark chocolate over the caramel for a rich, layered effect.
  3. Fruit-Inspired Cups
    • Replace pecans with dried cranberries or chopped dates for a fruity twist.
  4. Savory Phyllo Bites
    • Swap the filling for feta and spinach for a savory option.

Serving Suggestions

  • Serve warm with a dollop of whipped cream or vanilla ice cream.
  • Sprinkle with powdered sugar or cinnamon for a festive touch.
  • Pair with hot coffee or a chilled dessert wine for a complete experience.

Storing and Reheating

  • Storage: Keep in an airtight container at room temperature for up to 2 days.
  • Reheating: Warm in the oven at 300°F for 5 minutes to refresh the texture.
  • Freezing: Freeze unbaked phyllo cups with filling; bake directly from frozen for added convenience.

Tips for Perfect Baklava Cups

  • Use high-quality caramel sauce for the best flavor.
  • Don’t overfill the cups to avoid spilling during baking.
  • Let the phyllo cups cool slightly before drizzling with caramel.

Frequently Asked Questions (FAQs)

Q1: Can I make my own phyllo cups?
A: Yes, layer phyllo dough sheets, buttering between layers, and shape them in mini muffin tins.

Q2: Are there gluten-free phyllo options?
A: Some specialty stores offer gluten-free phyllo dough alternatives.

Q3: What nuts can I use instead of pecans?
A: Walnuts, almonds, or hazelnuts are excellent substitutes.

Q4: How far in advance can I make these cups?
A: Prepare them up to 1 day in advance and store at room temperature.

Q5: How do I add a salted caramel flavor?
A: Sprinkle sea salt on top of the caramel drizzle for a salty-sweet combo.


Internal Linking Opportunities


Conclusion

Pecan Caramel Baklava Cups are a perfect fusion of nutty, sweet, and buttery flavors. They are an elegant and easy dessert, ideal for any occasion. Try this recipe for your next gathering or holiday celebration and impress your guests with these bite-sized treats!