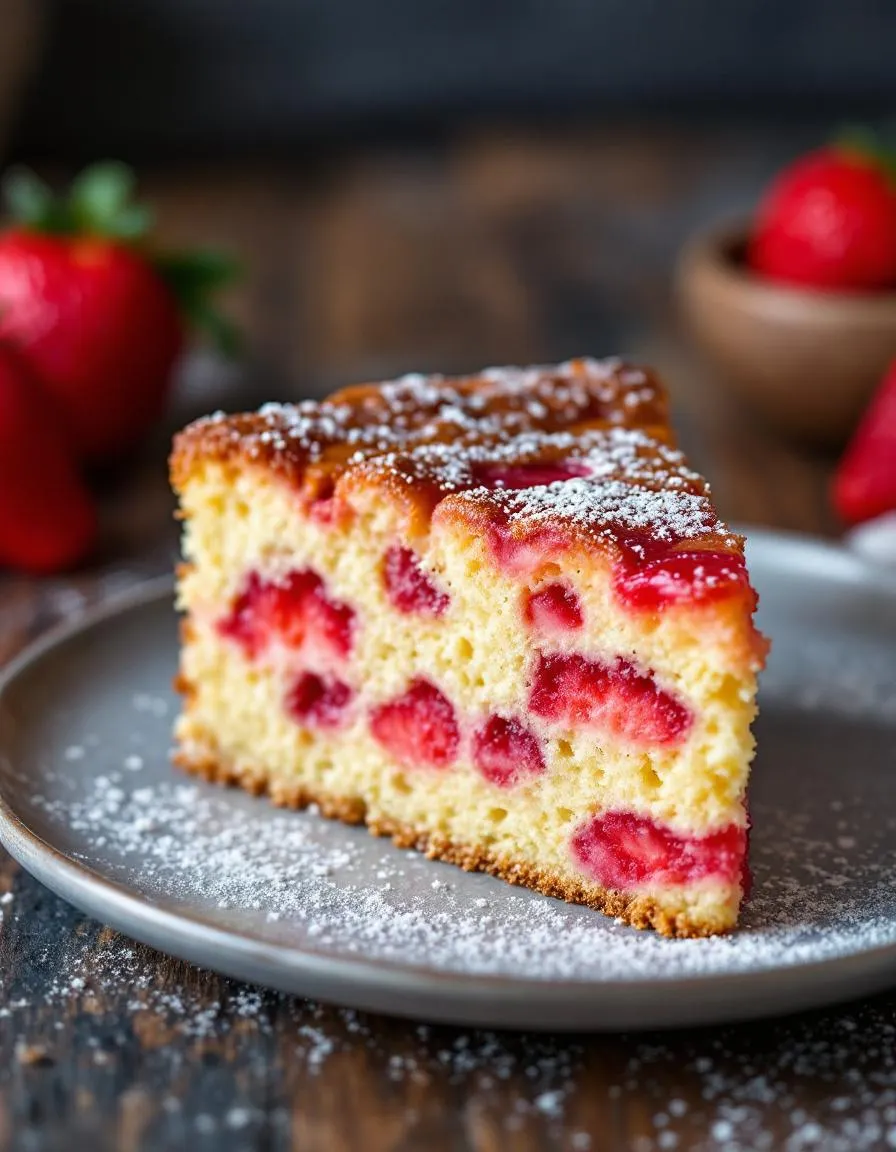
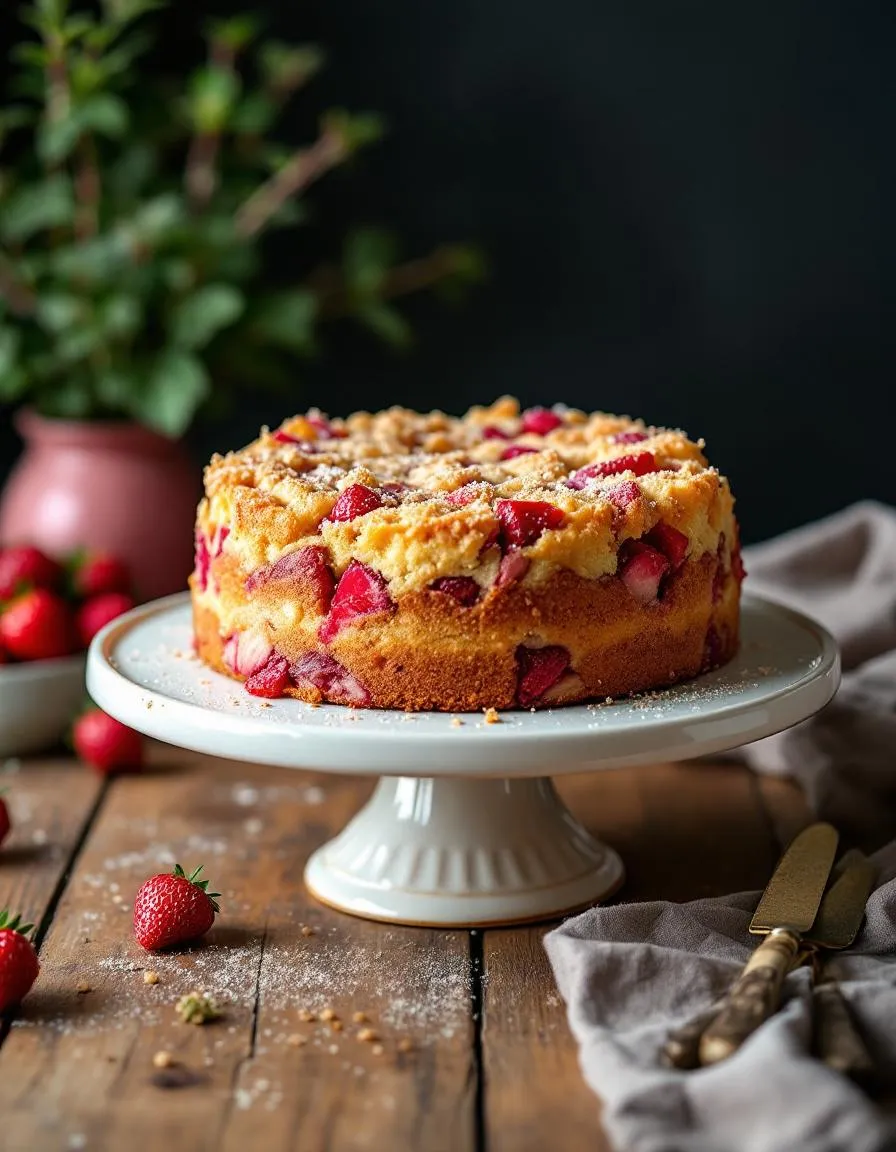
Best Strawberry Rhubarb Cake – Easy Homemade Recipe
Introduction
There’s something undeniably special about baking a cake that balances tart and sweet flavors perfectly. If you’ve ever craved a dessert that feels like a warm hug, then this Strawberry Rhubarb Cake will steal your heart. Whether you’re celebrating a milestone or simply treating yourself, this recipe brings joy to every bite. Plus, it’s a fantastic way to use seasonal produce, making it a favorite for spring and summer gatherings.
Strawberry Rhubarb Cake is a classic dessert that combines the bright tang of rhubarb with the natural sweetness of strawberries. The result is a moist, flavorful cake with a tender crumb and a vibrant filling that bursts with every forkful. What makes this cake so beloved is its versatility. You can serve it as a rustic dessert for family dinners or dress it up for special occasions. At brekcakes.com, we celebrate recipes that blend simplicity with elegance, and this cake fits right in. If you love fruity desserts, you’ll also adore our Blueberry Lemon Pound Cake or our Raspberry Almond Tart—both perfect for showcasing fresh berries.
Why I Love This Recipe
This Strawberry Rhubarb Cake holds a special place in my heart because it reminds me of my grandmother’s garden. She grew rhubarb every summer, and I loved watching her transform it into pies and cakes. Now, whenever I bake this recipe, it feels like carrying on a sweet tradition. The contrast of flavors and the comforting aroma never fail to bring back those cherished memories. More than just a dessert, this cake is a little piece of my story—one I’m thrilled to share with you.
Health and Nutrition
Why it’s good for your body
Strawberry Rhubarb Cake packs a delicious punch while offering surprising health benefits. First, strawberries bring a burst of vitamin C, which boosts immunity and supports glowing skin. Meanwhile, rhubarb delivers fiber to aid digestion and keep you feeling full longer. Together, these ingredients make Strawberry Rhubarb Cake a smarter dessert choice.
Additionally, this cake contains antioxidants from both strawberries and rhubarb. These compounds fight inflammation and may even protect your heart. For a sweet treat, Strawberry Rhubarb Cake also keeps added sugar in check when you use natural sweeteners or moderate portions. Plus, the vibrant colors signal a wealth of phytonutrients that promote overall wellness.
Finally, the joy of eating Strawberry Rhubarb Cake can uplift your mood. Comfort foods like this one, when enjoyed mindfully, contribute to emotional balance. Whether you savor it fresh or share it with loved ones, this dessert proves that flavor and nutrition can go hand in hand.
How it fits in a healthy lifestyle
Strawberry Rhubarb Cake fits perfectly into a balanced diet when you enjoy it in moderation. Pair a slice with protein-rich Greek yogurt or a handful of nuts to stabilize blood sugar. If you follow a gluten-free diet, simply swap regular flour for almond or oat flour—our gluten-free baking guide makes it easy.
For heart-healthy eating, focus on portion control and pair the cake with antioxidant-rich beverages like green tea. The fiber in rhubarb also supports gut health, making it a smart occasional treat. Craving more wholesome dessert ideas? Explore our healthy dessert swaps for inspiration. With a little creativity, Strawberry Rhubarb Cake can be part of your wellness journey without guilt.
A delightful and tangy cake combining fresh strawberries and rhubarb for a perfect summer dessert.
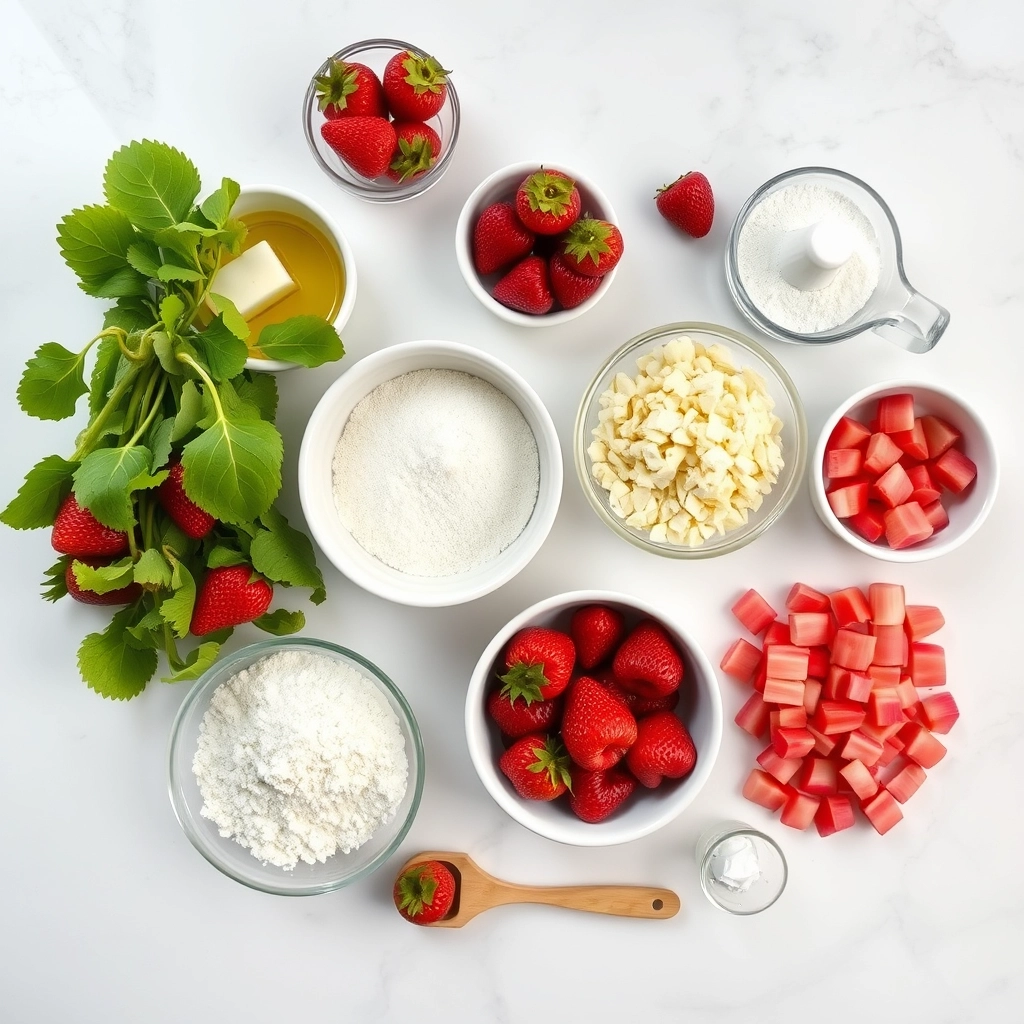
Ingredients
Scale
For the Crust:
1 1/2 cups all-purpose flour
1 1/2 teaspoons baking powder
1/2 teaspoon salt
1/2 cup unsalted butter, softened
1 cup granulated sugar
2 large eggs
1 teaspoon vanilla extract
1/2 cup milk
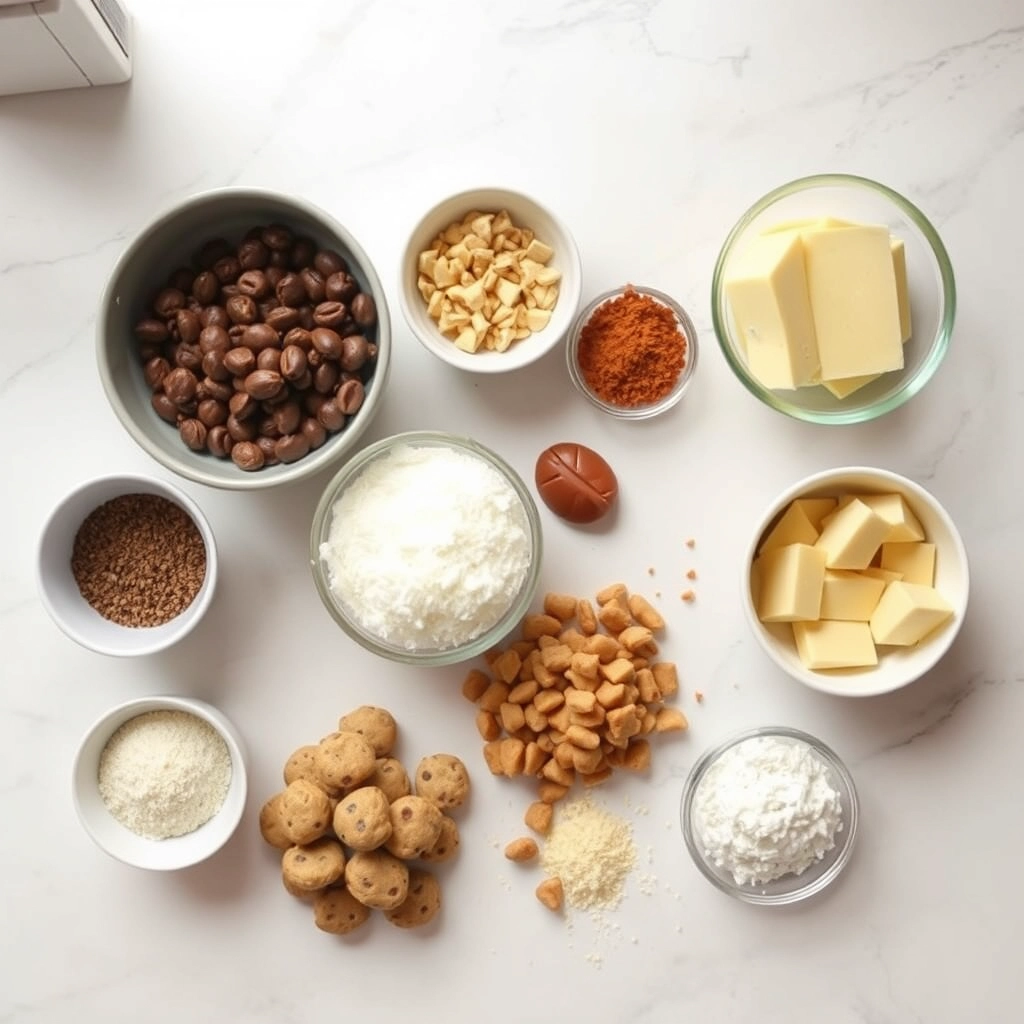
1 1/2 cups chopped rhubarb
1 1/2 cups chopped strawberries
2 tablespoons turbinado sugar (for topping)
Instructions
1. Prepare the Crust:
Preheat oven to 350°F (175°C). Grease a 9-inch round cake pan and line the bottom with parchment paper.
In a medium bowl, whisk together flour, baking powder, and salt.
In a large bowl, beat butter and sugar until light and fluffy. Add eggs one at a time, then mix in vanilla.
Alternately add the flour mixture and milk to the butter mixture, beginning and ending with the flour.
Gently fold in the chopped rhubarb and strawberries.
Pour batter into the prepared pan and sprinkle turbinado sugar on top.
Bake for 45-50 minutes or until a toothpick inserted in the center comes out clean.
Let cool in the pan for 10 minutes, then transfer to a wire rack to cool completely.
Notes
You can customize the seasonings to taste.
s-dish">How to Prepare This Dish
Steps and time-saving tips
Start by preheating your oven to 350°F and greasing a 9-inch cake pan. Meanwhile, whisk together flour, sugar, baking powder, and salt in a large bowl. In another bowl, mix melted butter, eggs, and vanilla until smooth. Gradually fold the wet ingredients into the dry mix, but avoid overworking the batter. For a lighter texture, gently fold in diced strawberries and rhubarb at the end. Spread the batter evenly in the pan and bake for 35-40 minutes until golden. To save time, chop the fruit while the oven preheats or use frozen strawberries if fresh ones aren’t available. Let the cake cool for 15 minutes before slicing. For extra flair, drizzle with a simple glaze made from powdered sugar and lemon juice. If you’re short on time, skip the glaze and serve warm with a scoop of vanilla ice cream instead.
Mistakes I’ve made and learned from
I once rushed the mixing process and ended up with a dense Strawberry Rhubarb Cake—turns out, overworking the batter activates too much gluten. Now, I stop stirring as soon as the ingredients combine. Another time, I skipped greasing the pan properly, and the cake stuck stubbornly to the bottom. A light dusting of flour over the buttered surface solves this every time. If your fruit sinks to the bottom, try tossing it in a bit of flour before folding it in, a trick I picked up from my baking tips for beginners guide. For more troubleshooting, check out my common cake mistakes post. Trust me, these small adjustments make all the difference.
n-and-variations">Cultural Connection and Variations
Where this recipe comes from
Strawberry Rhubarb Cake carries a nostalgic charm, rooted in the cozy kitchens of early American homesteads. Farmers often paired tart rhubarb with sweet strawberries, creating a balanced dessert that celebrated spring harvests. In the Midwest, families still bake this cake as a rite of passage when the first rhubarb stalks appear. Meanwhile, British bakers might fold custard into the batter, while Scandinavians top it with crunchy almond streusel.
My grandmother’s version added a splash of orange zest, turning the Strawberry Rhubarb Cake into a citrusy delight. Over time, I’ve seen friends swap rhubarb for apples in colder months or layer the cake with whipped cream for summer picnics. No matter the twist, this dessert always feels like a hug from the past.
How it fits in today’s cooking
Today, Strawberry Rhubarb Cake bridges tradition and modern flair. Busy bakers streamline the recipe with no-fuss techniques, like using pre-cut fruit or gluten-free flour. Meanwhile, food bloggers reinvent it as cupcakes or even a vegan showstopper. Its versatility keeps it relevant—whether served at Easter brunch or as a weeknight treat with coffee.
Seasonal eating trends
also spotlight this cake, as home cooks crave desserts that highlight fresh, local produce. From farmers’ markets to Instagram feeds, Strawberry Rhubarb Cake proves that some classics only get better with time.
Taste and Texture
What makes it delicious
Strawberry Rhubarb Cake delivers a vibrant balance of sweet and tangy flavors, with juicy strawberries softening rhubarb’s sharp bite. Each forkful bursts with fruity freshness, while a buttery crumb melts in your mouth. The aroma alone—warm vanilla, caramelized sugar, and bright berries—will draw everyone to the kitchen. Meanwhile, the tender cake contrasts beautifully with a slightly crisp top, creating a texture you’ll crave. Whether served warm or at room temperature, Strawberry Rhubarb Cake feels like a cozy hug with every bite.
Boosting the flavor
For an extra flavor boost, try folding lemon zest into the batter to brighten the strawberries or swapping vanilla extract for almond for a nutty depth. A dollop of whipped cream adds creamy richness, while a drizzle of vanilla custard sauce turns each slice into dessert heaven. If you love texture, sprinkle toasted sliced almonds on top for crunch. With these tweaks, your Strawberry Rhubarb Cake will shine even brighter.
Always use fresh strawberries and rhubarb for your Strawberry Rhubarb Cake to ensure vibrant flavor. Meanwhile, gently fold the fruit into the batter to prevent overmixing, which can lead to a dense texture. Additionally, line your baking pan with parchment paper for easy removal and even baking. For best results, let the cake cool completely before slicing so the layers set properly.
Mistakes to avoid
Avoid overpacking the measuring cup with flour, as this can make your Strawberry Rhubarb Cake dry. Instead, spoon the flour into the cup and level it off. Also, don’t skip preheating the oven, since uneven heat can cause the cake to bake poorly. If you’re unsure about oven temperature accuracy, check out our oven temperature guide. Finally, resist adding extra liquid to the batter, even if it seems thick—this can lead to a soggy texture. For more troubleshooting tips, explore our common baking mistakes article.
g-suggestions">Serving and Pairing Suggestions
How to serve this dish
For a stunning presentation, slice your Strawberry Rhubarb Cake into generous wedges and plate them on vintage dessert stands. Meanwhile, a dusting of powdered sugar or a dollop of whipped cream adds elegance. Alternatively, serve it warm with a scoop of vanilla ice cream for a cozy twist. This cake shines at brunches, picnics, or even as a sweet finale to holiday dinners. To make it extra inviting, garnish with fresh strawberry slices or edible flowers.
What goes well with it
Pair your Strawberry Rhubarb Cake with a hot cup of Earl Grey tea, as the bergamot notes balance the tangy rhubarb. For a refreshing contrast, try a glass of sparkling lemonade or a light Prosecco. If you love fruity desserts, consider serving it alongside our Blueberry Lemon Loaf for a vibrant spread. Finally, a drizzle of our Honey Vanilla Sauce enhances the cake’s natural sweetness without overpowering it.
math-faq-block">
What is the best way to prepare rhubarb for Strawberry Rhubarb Cake?
Trim and chop fresh rhubarb into small, even pieces for even baking in your Strawberry Rhubarb Cake. If the rhubarb is particularly tart, toss it with a tablespoon of sugar to balance the flavor before adding it to the batter.
Can I use frozen strawberries in Strawberry Rhubarb Cake?
Yes, frozen strawberries work well in Strawberry Rhubarb Cake—just thaw and drain them to remove excess liquid. This prevents the cake from becoming soggy while still delivering that sweet strawberry flavor.
How do I store Strawberry Rhubarb Cake to keep it fresh?
Store your Strawberry Rhubarb Cake in an airtight container at room temperature for up to 2 days or refrigerate for up to 5 days. For longer storage, wrap slices tightly and freeze for up to 3 months.
rank-math-faq-item">
Why is my Strawberry Rhubarb Cake too soggy?
A soggy Strawberry Rhubarb Cake often results from excess moisture from the fruit. To fix this, lightly coat strawberries and rhubarb in flour before folding them into the batter, which helps absorb some of the juices during baking.
Best Cookie Dough Bites – Easy No-Bake Recipe
Introduction
If you’ve ever craved the nostalgic taste of raw cookie dough but hesitated because of safety concerns, you’re in the right place. Today, I’m sharing my irresistible Cookie Dough Bites—a guilt-free treat that delivers all the creamy, dreamy flavor you love without the worry. Whether you need a quick snack, a party dessert, or just a little pick-me-up, these bites will become your new go-to. Plus, they’re incredibly easy to make, so you can enjoy them anytime the craving strikes.
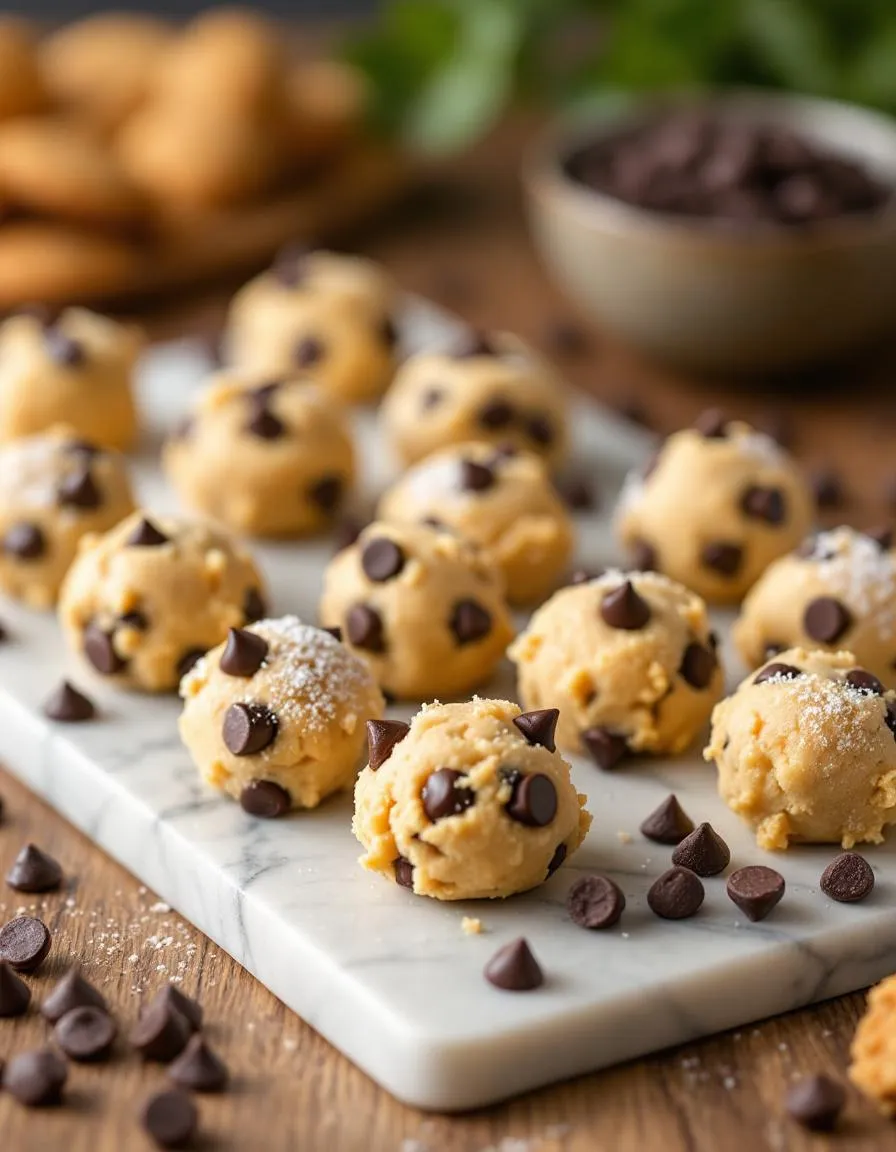
Cookie Dough Bites are bite-sized delights that capture the essence of classic cookie dough while skipping the raw eggs and flour. Instead, we use heat-treated flour and wholesome ingredients like almond butter and dark chocolate chips for a safe, satisfying treat. These little gems perfectly fit the brekcakes.com philosophy of simple, joyful baking. They’re versatile too—toss them in lunchboxes, serve them at gatherings, or stash them in the freezer for emergencies. If you love no-bake desserts, you’ll adore how these come together in minutes. For more easy sweet ideas, check out my 5-Minute Chocolate Mug Cake or explore Healthy No-Bake Snacks for guilt-free indulgence.
Why I Love This Recipe
Cookie Dough Bites hold a special place in my heart because they remind me of sneaking spoonfuls of dough as a kid while my mom baked cookies. Now, I get to recreate that joy safely—and share it with you. Every time I make these, I’m transported back to those cozy afternoons in my childhood kitchen. They’re not just a recipe; they’re a little edible hug, and I hope they bring you as much happiness as they’ve brought me.
Health and Nutrition
Why it’s good for your body
Cookie Dough Bites pack a surprising nutritional punch while satisfying your sweet tooth. First, they often contain wholesome ingredients like almond flour or oats, which provide fiber to support digestion. Additionally, many recipes use natural sweeteners like honey or maple syrup, so you avoid refined sugars. Because of this, Cookie Dough Bites deliver energy without the crash.
Moreover, these bites frequently include healthy fats from nuts or seeds, which help keep you full longer. For example, almond butter or chia seeds add protein and omega-3s, promoting heart health. Even better, Cookie Dough Bites can be customized with superfoods like flaxseed or dark chocolate for an antioxidant boost. As a result, you get a treat that fuels your body and mind.
Finally, portion control becomes effortless with Cookie Dough Bites. Since they come in small, bite-sized pieces, you naturally avoid overindulging. Whether you need a quick snack or a post-workout pick-me-up, these bites balance flavor and nutrition perfectly. After all, enjoying treats shouldn’t mean sacrificing your health goals.
How it fits in a healthy lifestyle
Cookie Dough Bites fit seamlessly into a balanced diet, whether you’re gluten-free, vegan, or just watching your sugar intake. For gluten-free eaters, swapping traditional flour for almond or coconut flour keeps these bites light and digestible. If you’re focused on heart health, ingredients like walnuts or dark chocolate support circulation and reduce inflammation.
For busy lifestyles, these bites make a convenient grab-and-go snack. Pair them with a protein-packed smoothie for a satisfying breakfast or enjoy them as an afternoon energy boost. Plus, their versatility means you can tweak recipes to match your dietary needs, like using plant-based substitutes for a dairy-free version. By incorporating Cookie Dough Bites mindfully, you can indulge without derailing your wellness routine.
Delicious, no-bake cookie dough bites that are safe to eat and perfect for a quick sweet treat.
Ingredients
Scale
For the Crust:
1 cup all-purpose flour
1/2 cup unsalted butter, softened
1/2 cup brown sugar
1/4 cup granulated sugar
1 teaspoon vanilla extract
1/4 cup milk
1/2 cup mini chocolate chips
1/4 teaspoon salt
Instructions
1. Prepare the Crust:
Heat-treat the flour by microwaving it in a bowl for 1 minute, stirring every 15 seconds, until it reaches 160°F.
In a large bowl, cream together the softened butter, brown sugar, and granulated sugar until smooth.
Add the vanilla extract and milk, mixing until well combined.
Gradually stir in the heat-treated flour and salt until fully incorporated.
Fold in the mini chocolate chips until evenly distributed.
Roll the dough into small, bite-sized balls and place them on a parchment-lined tray.
Refrigerate for at least 30 minutes before serving to firm up.
Notes
You can customize the seasonings to taste.
How to Prepare This Dish
Steps and time-saving tips
Start by gathering all your ingredients for the Cookie Dough Bites so everything is within reach. Cream the softened butter and brown sugar together in a large bowl until the mixture turns light and fluffy. Next, whisk in the vanilla extract and a splash of milk for extra richness. Gradually fold in the flour, taking care not to overmix—just combine until no dry streaks remain. Toss in the chocolate chips and gently stir them through the dough. For quicker chilling, roll tablespoon-sized portions of dough into balls and place them on a parchment-lined tray. Pop the tray in the freezer for 15 minutes instead of waiting hours in the fridge. If you prefer a softer texture, let the bites sit at room temperature for five minutes before serving. Meanwhile, melt some extra chocolate to drizzle on top for a bakery-worthy finish. Store any leftovers in an airtight container to keep them fresh for days.
and-learned-from">Mistakes I’ve made and learned from
Early on, I rushed the creaming step and ended up with dense Cookie Dough Bites instead of the tender texture I wanted. Now, I patiently beat the butter and sugar for a full three minutes—it makes all the difference. Another blunder? Skipping the chill time, which caused the bites to lose their shape. A quick freeze solves this, and I’ve found it’s the secret to perfect consistency, just like with my No-Bake Energy Balls. Oh, and once I used cold butter straight from the fridge, resulting in a crumbly mess. Softened butter blends smoothly, as I learned from my Perfect Chocolate Chip Cookies recipe. Trust me, these small tweaks save time and frustration!
Cultural Connection and Variations
Where this recipe comes from
Cookie Dough Bites trace their roots back to the irresistible allure of sneaking raw cookie dough straight from the mixing bowl. While no single culture claims them, they’ve become a universal treat, blending nostalgia with modern snack cravings. In the U.S., they’re a staple at bake sales and birthday parties, often rolled into bite-sized perfection. Meanwhile, in Japan, you might find them infused with matcha or black sesame for a subtle twist. Some European bakers even dip them in dark chocolate, turning them into elegant petits fours.
My grandma used to make
a version with crushed pecans and a hint of cinnamon, calling them “dough drops.” Nowadays, vegan and gluten-free adaptations let everyone enjoy Cookie Dough Bites without worry. Whether you prefer them classic or with a global spin, these little bites carry a playful charm that transcends borders. After all, who can resist that buttery, sweet flavor?
How it fits in today’s cooking
Cookie Dough Bites have evolved into a go-to treat for busy lifestyles. They’re perfect for meal prep, party platters, or even a quick energy boost during workouts. Many home cooks now swap traditional flour for almond or oat flour, making them a healthier indulgence. Others add protein powder, turning them into post-workout snacks—proof that this recipe adapts to modern needs without losing its fun appeal.
During holidays, they double as edible gifts, especially when paired with homemade hot cocoa mix. For a festive twist, try rolling them in crushed peppermint or drizzling them with caramel. Even better, they’re a hit at kids’ parties alongside rainbow cupcakes. No matter the occasion, Cookie Dough Bites keep winning hearts because they’re simple, versatile, and downright delicious.
>Taste and Texture
What makes it delicious
Cookie Dough Bites deliver a dreamy, indulgent experience with every bite. The rich, buttery flavor melts on your tongue, while the soft, chewy texture feels irresistibly satisfying. Vanilla and brown sugar add warmth, and tiny chocolate chunks provide bursts of sweetness with a slight crunch. Meanwhile, a hint of salt balances the sweetness, making these bites dangerously addictive. The aroma alone—toasty, caramel-like, and faintly nutty—will have you reaching for another before you finish the first. Whether you enjoy them chilled or at room temperature, Cookie Dough Bites offer a nostalgic treat that feels both comforting and decadent.
Boosting the flavor
Elevate your Cookie Dough Bites with easy tweaks that amplify their flavor. For a deeper caramel note, swap regular brown sugar for dark brown sugar, or fold in toasted pecans for a nutty crunch. Drizzling melted salted caramel sauce over the top adds a luxurious touch. If you love contrast, sprinkle flaky sea salt just before serving. For a fun twist, roll the bites in crushed cinnamon sugar to add a spicy-sweet crunch. Experimenting with mix-ins like espresso powder or orange zest can also create exciting new layers of taste.
Tips for Success
Best practices for results
Always chill the dough for at least 30 minutes before shaping your Cookie Dough Bites. This step prevents sticking and makes rolling easier. Use parchment paper when placing them on a baking sheet to maintain the perfect texture. For extra flavor, lightly toast the flour beforehand to enhance the nutty taste. Additionally, measure ingredients precisely, especially the brown sugar, to keep the dough balanced. If you prefer a softer bite, slightly underbake them, as they firm up while cooling.
Mistakes to avoid
Overmixing the dough can make your Cookie Dough Bites dense instead of tender. Instead, stir just until combined for the best texture. Another common error is skipping the flour toasting step, which adds depth to the flavor. For more tips on avoiding dry dough, check out our guide on perfect cookie texture. Also, resist the urge to overbake—they continue setting as they cool. If you struggle with uneven baking, our even baking tips will help you achieve consistent results every time.
Serving and Pairing Suggestions
How to serve this dish
Serve Cookie Dough Bites as a fun and irresistible treat at any gathering. For a playful twist, arrange them on a tiered dessert stand with mini forks or colorful toothpicks. Alternatively, scatter them over a scoop of vanilla ice cream for an instant crowd-pleaser. During holidays, pack them into clear cellophane bags tied with ribbon for adorable edible favors. No matter the occasion, these bite-sized delights always steal the spotlight.
h-it">What goes well with it
Pair Cookie Dough Bites with a cold glass of milk for a classic combo that never disappoints. If you prefer something richer, drizzle them with warm homemade caramel sauce to elevate the flavors. For a festive touch, serve them alongside a batch of peppermint hot chocolate during winter gatherings. Each pairing enhances the creamy, indulgent taste of Cookie Dough Bites while adding variety to your dessert spread.
Are Cookie Dough Bites safe to eat raw?
Yes, Cookie Dough Bites are specifically designed to be eaten raw because they use heat-treated flour and pasteurized eggs (or egg substitutes) to eliminate bacteria risks. These tasty treats give you all the flavor of classic cookie dough without the safety concerns.
rank-math-faq-item">
How do you store homemade Cookie Dough Bites?
Store Cookie Dough Bites in an airtight container in the refrigerator for up to 1 week or freeze them for up to 3 months. For best texture, let refrigerated bites sit at room temperature for 5 minutes before enjoying.
Can you bake Cookie Dough Bites into cookies?
While Cookie Dough Bites are meant to be eaten as-is, you can bake them at 350°F for 8-10 minutes for soft-baked cookies. Note that the texture may differ slightly from traditional cookie dough since these bites often contain binding ingredients like cream cheese.
What’s the best way to dip Cookie Dough Bites in chocolate?
For perfect chocolate-covered Cookie Dough Bites, freeze the dough balls for 30 minutes first, then dip them in tempered chocolate using a fork. Let excess chocolate drip off before placing on parchment paper to harden. This method gives you professional-looking treats every time.
>
Best BBQ Sausage Bites – Easy Party Appetizer
Introduction
If you’re looking for a crowd-pleasing appetizer that’s bursting with flavor, you’ve come to the right place. BBQ Sausage Bites are my go-to recipe when I want something quick, delicious, and guaranteed to disappear fast. Whether you’re hosting a game-day party or just craving a savory snack, these little bites pack a punch. Plus, they remind me of summer cookouts and family gatherings—moments where good food brings everyone together.
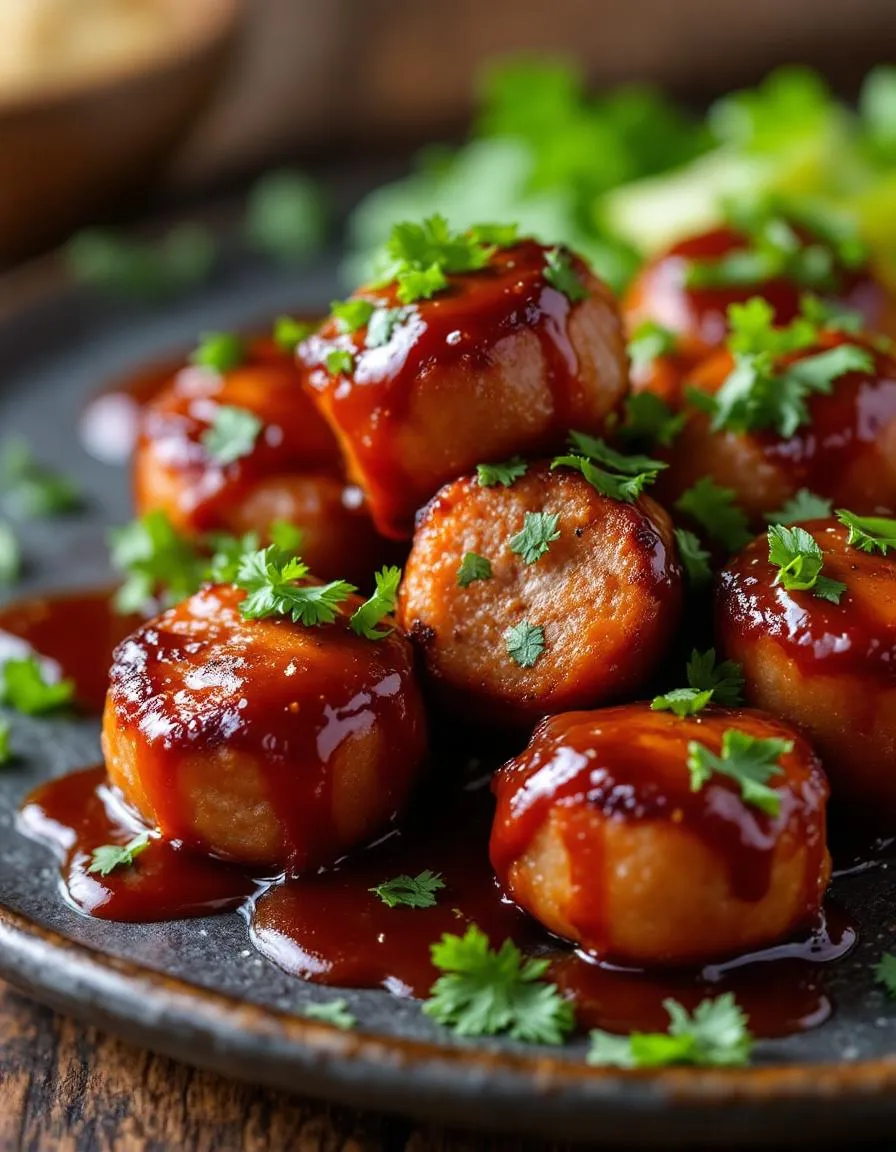
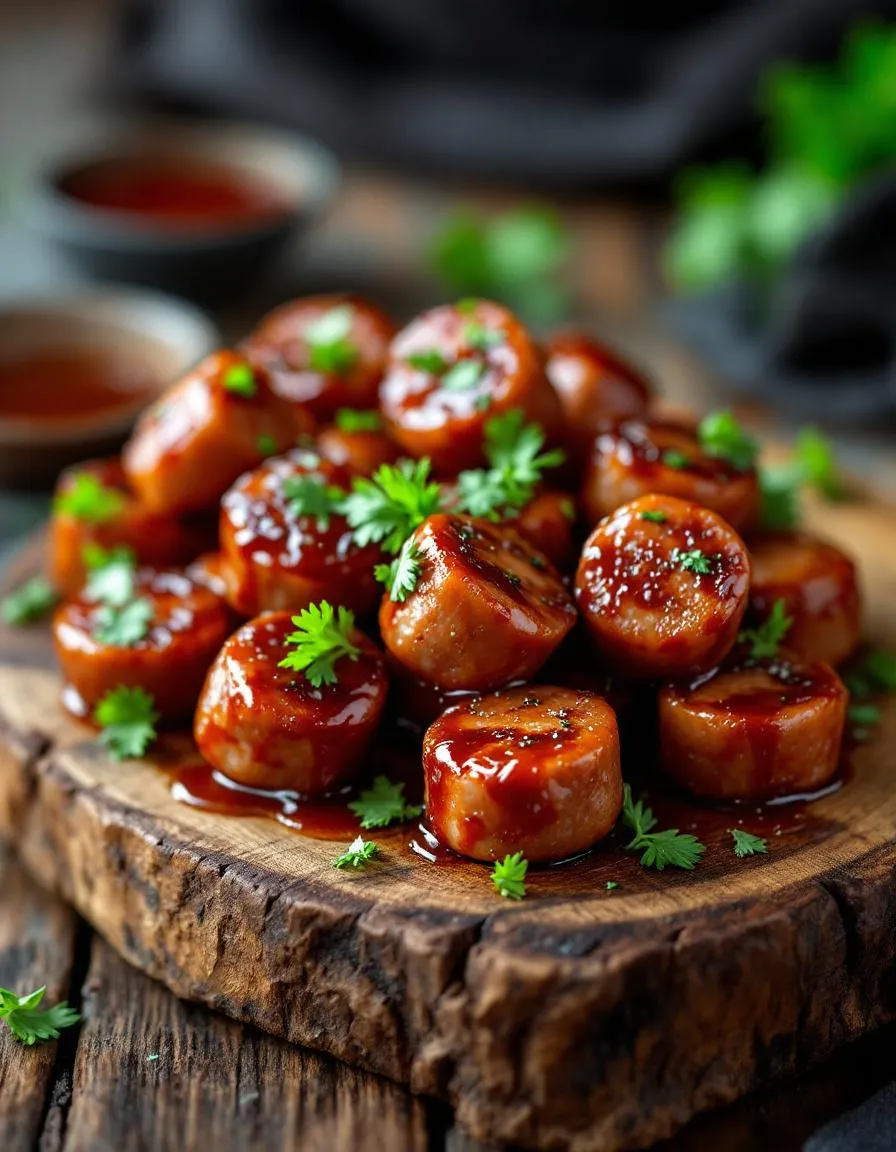
BBQ Sausage Bites are exactly what they sound like: juicy, smoky sausage pieces glazed in a tangy-sweet barbecue sauce. They’re incredibly easy to make, requiring just a handful of ingredients and minimal prep time. What makes them special is their versatility. You can serve them as an appetizer, toss them into pasta, or even pile them onto a sandwich. For busy home cooks, they’re a lifesaver because they deliver big flavor without the fuss. If you love dishes that balance simplicity and taste, you’ll adore this recipe. And if you’re a fan of easy, flavorful meals, you might also enjoy my Honey Garlic Chicken Thighs or Loaded Potato Skins—both are perfect for sharing.
Why I Love This Recipe
BBQ Sausage Bites hold a special place in my heart because they were the first appetizer I ever made for a big family reunion. I remember the nervous excitement as I pulled them out of the oven, only to watch them vanish within minutes. The compliments and laughter around the table that day made me realize how powerful food can be in creating connections. Now, every time I make them, I’m reminded of that joy—and I hope they bring the same happiness to your table too.
Health and Nutrition
Why it’s good for your body
BBQ Sausage Bites pack a flavorful punch while delivering solid nutritional benefits. First, they offer a great source of protein, which helps build muscle and keeps you full longer. Additionally, the sausages often contain iron and B vitamins, supporting energy levels and metabolism. Since BBQ Sausage Bites are typically grilled, they retain moisture without needing excessive oils, making them a smarter choice than fried alternatives.
Moreover, the smoky BBQ flavor comes from natural spices and seasonings, which can provide antioxidants. For instance, paprika and garlic, common in BBQ rubs, have anti-inflammatory properties. When you enjoy BBQ Sausage Bites in moderation, you also get a balanced mix of fats and proteins, keeping cravings in check. Finally, because they’re bite-sized, portion control becomes effortless, so you can savor the taste without overindulging.
How it fits in a healthy lifestyle
BBQ Sausage Bites fit perfectly into a balanced diet, especially if you prioritize protein-rich snacks. They work well for meal prep, pairing easily with veggies or whole grains for a complete meal. If you follow a gluten-free lifestyle, opt for sausages with certified gluten-free ingredients, as many brands now cater to dietary needs. For heart-healthy eating, choose leaner sausage options or turkey-based varieties to reduce saturated fat.
These bites also shine as a post-workout snack, replenishing protein after exercise. If you’re looking for more high-protein meal ideas, check out our guide to protein-packed dinners. And if you love grilling, explore our tips for healthy grilling techniques to keep your BBQ Sausage Bites nutritious and delicious. With smart choices, they can be a tasty part of your everyday routine.
Juicy sausage bites glazed in a sweet and tangy BBQ sauce, perfect for appetizers or game day snacks.
Ingredients
Scale
For the Crust:
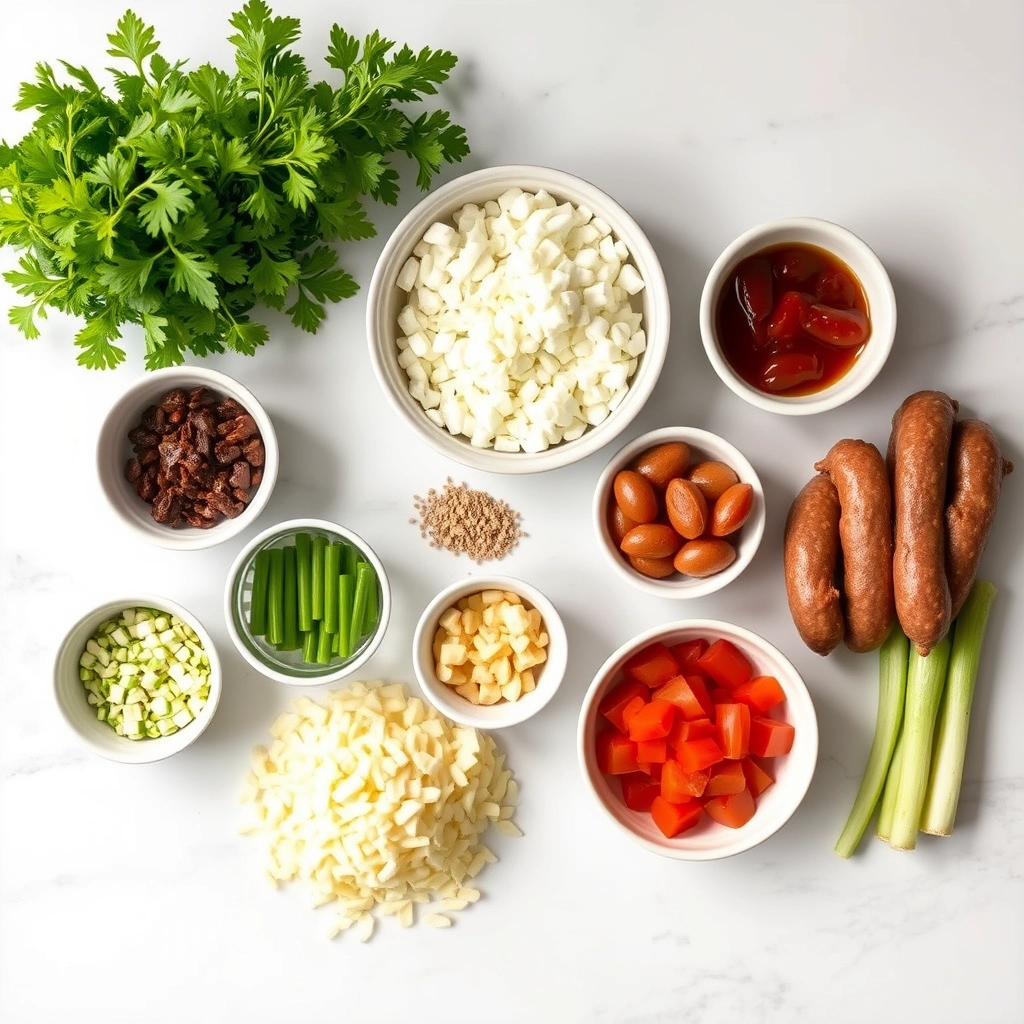
1 lb smoked sausage, sliced into 1-inch pieces
1 cup BBQ sauce
2 tbsp honey
1 tbsp Worcestershire sauce
1 tsp garlic powder
1/2 tsp smoked paprika
1 tbsp olive oil
Instructions
1. Prepare the Crust:
Heat olive oil in a skillet over medium heat. Add sausage pieces and cook until browned, about 5-7 minutes.
In a bowl, mix BBQ sauce, honey, Worcestershire sauce, garlic powder, and smoked paprika.
Pour the sauce mixture over the sausages in the skillet. Stir to coat evenly and simmer for 5 minutes until the sauce thickens.
Serve warm with toothpicks for easy eating.
Notes
You can customize the seasonings to taste.
s-dish">How to Prepare This Dish
Steps and time-saving tips
Start by preheating your oven to 375°F so it’s ready when you are. While it heats up, slice your favorite smoked sausage into bite-sized rounds—about ½-inch thick works best. Next, grab a mixing bowl and whisk together your BBQ sauce, honey, and a splash of apple cider vinegar for tangy sweetness. Toss the sausage bites in the sauce until they’re fully coated, then spread them evenly on a parchment-lined baking sheet. Pop them in the oven for 15 minutes, then flip each piece and bake another 10 minutes until caramelized. For extra crispiness, broil for 1-2 minutes at the end, but watch closely to avoid burning. Serve warm with toothpicks for easy snacking, and drizzle any leftover sauce from the pan over the top. To save time, prep the sauce ahead and store it in the fridge, or use pre-cooked sausage to skip extra browning steps. If you’re doubling the batch, rotate the pans halfway for even cooking.
Mistakes I’ve made and learned from
Early on, I learned the hard way that overcrowding the baking sheet leads to steamed, soggy BBQ Sausage Bites instead of crispy ones. Now I always leave space between each piece for better airflow. Another blunder? Using BBQ sauce straight from the bottle without thinning it—the bites came out overly sticky. A fix I swear by is adding a bit of broth or vinegar to the sauce, like in my Perfect BBQ Glaze recipe, for a smoother finish. Oh, and don’t skip the parchment paper unless you enjoy scrubbing pans! For more foolproof tips, check out my guide on Avoiding Common Baking Mistakes. Trust me, these small tweaks make all the difference.
n-and-variations">Cultural Connection and Variations
Where this recipe comes from
BBQ Sausage Bites have roots in backyard gatherings and tailgate parties, where smoky, savory flavors steal the show. Originally inspired by German bratwurst traditions, this dish evolved in the American South, where pitmasters added sweet, tangy barbecue sauce to juicy sausage pieces. Today, you’ll find regional twists—like spicy Cajun versions in Louisiana or maple-glazed bites in Vermont. Meanwhile, in Texas, they might swap pork for beef sausage and serve them with a side of pickled jalapeños.
In my family, BBQ Sausage Bites became a game-day staple after my uncle grilled them for a football party. He charred the edges just right, and now we argue over who makes them best. Across the globe, similar dishes pop up too. In Spain, chorizo gets skewered with peppers, while in Thailand, street vendors grill sweet-and-sour sai krok Isan. No matter where you go, the idea remains the same: bite-sized, flavorful, and impossible to resist.
How it fits in today’s cooking
BBQ Sausage Bites still shine because they’re versatile. They fit into summer cookouts, cozy winter appetizer spreads, or even easy weeknight dinners when you need something quick. Modern cooks love them for meal prep too—just reheat and serve. Plus, with dietary trends on the rise, many swap traditional pork for chicken or plant-based sausages without losing that smoky kick.
You’ll also spot
these bites at holidays, like Fourth of July parties or Super Bowl Sundays, where they pair perfectly with crowd-pleasing dips. Whether you stick to the classic recipe or experiment with global flavors, BBQ Sausage Bites keep bringing people together, one delicious bite at a time.
Taste and Texture
What makes it delicious
BBQ Sausage Bites deliver a mouthwatering blend of smoky, savory, and slightly sweet flavors that make them irresistible. The juicy sausage bursts with rich, meaty goodness, while the sticky BBQ glaze adds a caramelized depth that lingers on your tongue. Each bite offers a satisfying contrast—crispy edges give way to a tender, succulent center, and the aroma of garlic and smoked paprika fills the air as you eat. Whether you serve them as an appetizer or a main dish, BBQ Sausage Bites bring bold, crowd-pleasing flavor to every forkful.
Boosting the flavor
For an extra flavor kick, try brushing your BBQ Sausage Bites with a spicy honey glaze or sprinkling them with crumbled bacon before baking. If you love heat, a dash of cayenne or chipotle powder will amplify the smokiness. Pair them with a tangy dipping sauce like creamy avocado dressing or a zesty homemade BBQ sauce to balance the richness. Experiment with different sausage varieties, like spicy chorizo or maple-infused links, to keep the taste exciting. With these simple tweaks, your BBQ Sausage Bites will steal the spotlight at any gathering.
First, always preheat your oven before baking BBQ Sausage Bites to ensure even cooking. Meanwhile, use high-quality smoked sausage for the best flavor and texture. Additionally, lightly grease your baking sheet or line it with parchment paper to prevent sticking. For extra crispiness, space the bites evenly so they don’t steam. Finally, brush them with BBQ sauce during the last few minutes of baking for a glossy finish.
Mistakes to avoid
Avoid overcrowding the pan, as this leads to unevenly cooked BBQ Sausage Bites. Instead, give them room to crisp up properly. Also, don’t skip the step of patting the sausage dry before slicing—excess moisture can make them soggy. If you’re unsure about sauce consistency, check out our guide on perfecting BBQ sauce for the ideal thickness. Lastly, remember that overcooking dries them out, so follow our recommended baking times for juicy results every time.
g-suggestions">Serving and Pairing Suggestions
How to serve this dish
For a crowd-pleasing presentation, arrange your BBQ Sausage Bites on a rustic wooden board or skewer them with colorful toothpicks for easy grabbing. Meanwhile, a drizzle of extra BBQ sauce and a sprinkle of fresh parsley or chives add vibrant contrast. These bites shine at game-day parties, holiday gatherings, or even as a fun brunch appetizer. If you’re hosting outdoors, serve them straight from the grill in a cast-iron skillet to keep them warm and smoky.
What goes well with it
Pair BBQ Sausage Bites with tangy homemade coleslaw for a refreshing crunch that balances the smoky richness. Alternatively, try them alongside crispy air fryer potato wedges for a hearty combo. For drinks, a cold craft beer or zesty lemonade enhances the bold flavors. If you’re planning a full spread, add our grilled corn salad for a sweet, charred contrast that ties the meal together.
math-faq-block">
What are the best sausages to use for BBQ Sausage Bites?
For the best BBQ Sausage Bites, opt for smoked sausages like kielbasa, andouille, or bratwurst—they hold up well on the grill and pack bold flavor. Avoid lean or pre-cooked sausages, as they can dry out. BBQ Sausage Bites shine when made with juicy, high-quality sausages that caramelize nicely.
How long do you grill BBQ Sausage Bites?
Grill BBQ Sausage Bites for 8–10 minutes over medium heat, turning occasionally until they’re browned and heated through. If using precooked sausages, reduce the time to 5–7 minutes. Always check for an internal temperature of 160°F to ensure your BBQ Sausage Bites are safe to eat.
Can you make BBQ Sausage Bites in the oven?
Yes! Bake BBQ Sausage Bites at 400°F for 15–20 minutes on a parchment-lined sheet, flipping halfway. For extra crispiness, broil for 1–2 minutes at the end. Oven-baked BBQ Sausage Bites are a great alternative when grilling isn’t an option.
rank-math-faq-item">
What dipping sauces go well with BBQ Sausage Bites?
Classic BBQ sauce, honey mustard, or a spicy sriracha mayo pair perfectly with BBQ Sausage Bites. For a tangy twist, try ranch dressing or a homemade beer cheese dip. The smoky flavor of BBQ Sausage Bites complements both creamy and zesty sauces.
Easy Bundt Pan Nachos – Cheesy Crowd-Pleasing Snack
Introduction
If you’re craving a fun, shareable snack that brings people together, you’re in the right place. Bundt Pan Nachos are the ultimate crowd-pleaser, combining crispy tortilla chips, melty cheese, and all your favorite toppings in a unique, eye-catching presentation. Whether you’re hosting game night or just treating yourself, this recipe delivers big flavor with minimal effort. Plus, it’s a fantastic way to repurpose that Bundt pan gathering dust in your cabinet!
Bundt Pan Nachos reinvent the classic nacho experience by layering ingredients in a Bundt pan for even baking and easy serving. The hollow center ensures every chip gets perfectly coated in cheese, while the raised edges keep toppings from sliding off. Unlike traditional sheet-pan nachos, this method creates a stunning centerpiece that’s as Instagram-worthy as it is delicious. Perfect for potlucks or family movie nights, it aligns with brekcakes.com’s mission to make cooking approachable and joyful. For more creative twists on comfort food, check out our Cheesy Pull-Apart Bread or explore One-Pot Meals for stress-free dinners.
Why I Love This Recipe
Bundt Pan Nachos hold a special place in my heart because they remind me of lazy Sundays with friends. I first experimented with this idea during a last-minute gathering when my usual serving platters were all dirty. The Bundt pan saved the day, and now it’s my go-to for turning simple snacks into memorable moments. There’s something magical about watching everyone dig into the golden, cheesy layers—it’s comfort food at its most communal and celebratory.
Health and Nutrition
Why it’s good for your body
Bundt Pan Nachos pack a surprising nutritional punch while delivering bold flavors. First, they combine protein-rich ingredients like beans and lean meats, which help keep you full and energized. Additionally, the fresh toppings—think diced tomatoes, avocado, and cilantro—add vitamins and antioxidants to every bite. Because you layer everything in a Bundt pan, you naturally control portion sizes while still enjoying a satisfying meal.
Moreover, Bundt Pan Nachos offer a balanced mix of macronutrients. The whole-grain tortilla chips provide fiber, while the melted cheese adds calcium and healthy fats. If you opt for Greek yogurt instead of sour cream, you’ll even sneak in extra protein. Unlike traditional nachos, this version encourages mindful eating since the Bundt pan shape makes sharing easy and prevents overindulgence.
Finally, Bundt Pan Nachos adapt effortlessly to dietary preferences. You can load them with veggies for extra nutrients or swap in plant-based cheese for a dairy-free twist. Whether you’re fueling up after a workout or hosting a game-day gathering, this dish proves that tasty and nutritious can go hand in hand.
How it fits in a healthy lifestyle
Bundt Pan Nachos fit perfectly into a balanced diet because they’re customizable and nutrient-dense. For a heart-healthy version, use baked chips, lean turkey, and a sprinkle of reduced-fat cheese. If you’re following a gluten-free diet, simply choose certified gluten-free tortilla chips and check your seasoning labels. The dish also works well for meal prep—just assemble the dry ingredients ahead and bake when ready.
For those focusing on high-protein meals, top your Bundt Pan Nachos with extra black beans or grilled chicken. Pair them with a side of avocado salsa for added healthy fats. If you love creative, wholesome recipes, explore our balanced snack ideas for more inspiration. With smart tweaks, Bundt Pan Nachos can easily align with your health goals without sacrificing flavor.
Start by preheating your oven to 375°F to ensure it’s ready when you are. Meanwhile, grab a large mixing bowl and combine your favorite tortilla chips with a generous sprinkle of shredded cheese, black beans, and diced jalapeños. Toss everything gently to distribute the ingredients evenly. Next, lightly grease your Bundt pan with cooking spray to prevent sticking, then layer half the chip mixture into the bottom. Add a second layer of cheese, followed by the remaining chips, and finish with a final blanket of cheese for maximum meltiness. Slide the pan into the oven and bake for 12-15 minutes, or until the cheese bubbles and turns golden. While the Bundt Pan Nachos bake, whisk together a quick lime crema by mixing sour cream, lime juice, and a pinch of salt. Once the nachos are out of the oven, let them cool for just a minute before flipping the pan onto a serving platter. Drizzle the crema over the top, then scatter fresh cilantro, diced tomatoes, and sliced avocado for a vibrant finish. For a time-saving hack, prep your toppings while the nachos bake—this way, everything comes together effortlessly.
Mistakes I’ve made and learned from
My first attempt at Bundt Pan Nachos was a mess—literally. I overfilled the pan, and when I flipped it, chips and cheese went everywhere. Lesson learned: leave a little room at the top for easy flipping. Another blunder? Skipping the grease. Even non-stick pans need a light spray, or you’ll lose half your nachos to stubborn sticking. Now, I always use a quality cooking spray, like the one I swear by in my kitchen essentials guide. Oh, and timing matters. Bake too long, and the chips burn; too little, and the cheese won’t melt properly. After a few trials, I found the sweet spot at 13 minutes. If you’re new to Bundt baking, check out my Bundt pan basics for more foolproof tips. Trust me, these small adjustments make all the difference.
Bundt Pan Nachos might sound like a modern twist, but they actually tap into a fun tradition of reinventing classic dishes. The idea of stacking nachos in a Bundt pan likely started as a clever party hack, turning a messy snack into a shareable centerpiece. Families and friends quickly adopted it because, let’s face it, who doesn’t love pulling apart gooey cheese and crispy chips? In some regions, cooks add local flair—think smoked brisket in Texas or fresh mango salsa in coastal areas. Meanwhile, others keep it simple with just melted cheese and jalapeños, proving Bundt Pan Nachos can adapt to any taste.
Seasonally, this dish shines at game-day gatherings or summer barbecues, but it’s versatile enough for cozy winter nights too. My aunt, for example, swaps in spiced pumpkin seeds during fall for a festive touch. Globally, you’ll find similar concepts—like Mexico’s chilaquiles or Spain’s patatas bravas—but the Bundt pan’s shape gives this version its own quirky charm. Whether you’re feeding a crowd or just craving something fun, Bundt Pan Nachos bridge comfort food and creativity.
ays-cooking">How it fits in today’s cooking
Today, Bundt Pan Nachos fit perfectly into our love for easy, crowd-pleasing meals. Busy home cooks appreciate how quickly they come together, while foodies experiment with gourmet toppings like pulled pork or avocado crema. They’re also a hit for holidays—imagine serving them alongside holiday desserts for a sweet-and-savory spread. Plus, the Bundt pan’s design ensures every bite has the ideal cheese-to-chip ratio, making it a smarter take on standard nachos.
Modern twists keep the dish fresh, too. Some use gluten-free chips or dairy-free cheese, while others layer in unexpected ingredients like pickled onions or healthy snack swaps. Whether you’re hosting a casual get-together or need a quick weeknight treat, Bundt Pan Nachos prove that great food doesn’t have to be complicated—just delicious.
Taste and Texture
What makes it delicious
Bundt Pan Nachos deliver a mouthwatering mix of textures and flavors in every bite. The crispy tortilla chips soak up just enough melted cheese to stay crunchy while turning irresistibly gooey. Meanwhile, the savory ground beef or black beans add a hearty chew, and the fresh toppings—like tangy pico de gallo or cool sour cream—balance the richness. Warm spices like cumin and smoked paprika infuse the dish with a smoky, aromatic depth. Best of all, the Bundt Pan Nachos bake into a golden, pull-apart masterpiece that’s as fun to eat as it is delicious.
r">Boosting the flavor
For an extra flavor kick, try swapping regular cheese for a blend of pepper jack and sharp cheddar. A drizzle of homemade chipotle sauce adds a smoky heat, while pickled jalapeños bring a bright, vinegary punch. If you love bold spices, sprinkle on some chili powder or toss the chips with smoky taco seasoning before layering. Finally, don’t forget fresh cilantro and a squeeze of lime—they’ll make your Bundt Pan Nachos pop with freshness.
Tips for Success
Best practices for results
Always preheat your oven before assembling Bundt Pan Nachos to ensure even cooking. For the best texture, layer tortilla chips in a single, even layer so every bite gets crispy. Additionally, distribute cheese and toppings evenly to prevent clumping. If you love extra crunch, lightly spray the chips with oil before baking. Finally, let the Bundt Pan Nachos cool for a minute or two before serving so the cheese sets perfectly.
>Mistakes to avoid
Avoid overloading the pan with toppings, as this can make Bundt Pan Nachos soggy. Instead, stick to moderate portions for the ideal balance. Also, never skip greasing the Bundt pan, or the chips may stick. For more on perfecting cheese distribution, check out our guide on melting cheese techniques. If your nachos turn out unevenly cooked, rotate the pan halfway through baking. For additional troubleshooting, explore our tips for crispy nachos every time.
Serving and Pairing Suggestions
How to serve this dish
Turn Bundt Pan Nachos into a showstopper by presenting them on a large platter with colorful garnishes. For example, sprinkle fresh cilantro, diced tomatoes, and sliced jalapeños over the top for a vibrant finish. Meanwhile, serve them straight from the pan for a fun, shareable centerpiece at game day parties or casual gatherings. Alternatively, elevate the dish for brunch by adding a drizzle of crema and a side of sunny-side-up eggs. No matter the occasion, Bundt Pan Nachos always steal the spotlight with their unique shape and bold flavors.
What goes well with it
Pair Bundt Pan Nachos with a refreshing mango margarita to balance the savory spices with a touch of sweetness. For a lighter option, try a crisp cucumber limeade, which cleanses the palate between bites. If you want to round out the meal, serve them alongside a zesty avocado salad or a bowl of smoky black bean soup. For more inspiration, check out our favorite party appetizers or this crowd-pleasing homemade salsa to take your spread to the next level.
Yes! Bundt Pan Nachos are a fun and creative way to serve this classic snack. The pan’s center hole helps distribute heat evenly, ensuring crispy chips and melted cheese throughout. It’s perfect for parties or family gatherings.
What ingredients work best for Bundt Pan Nachos?
Sturdy tortilla chips hold up best, along with shredded cheese, black beans, jalapeños, and seasoned ground beef or chicken. Layering ingredients in the Bundt pan ensures every bite of your Bundt Pan Nachos is packed with flavor and texture.
rank-math-faq-item">
How do you prevent Bundt Pan Nachos from getting soggy?
Pre-bake the chips for 5 minutes before adding toppings, and avoid overloading with wet ingredients like salsa. Serving Bundt Pan Nachos immediately after baking keeps them crisp and delicious.
Can you make vegetarian Bundt Pan Nachos?
Absolutely! Swap meat for grilled veggies, refried beans, or plant-based crumbles. Vegetarian Bundt Pan Nachos are just as flavorful and satisfying, especially when topped with avocado or guacamole.
There’s something undeniably comforting about the aroma of freshly baked treats filling your home. Whether you’re craving a nostalgic dessert or a quick breakfast with a twist, Cherry Cobbler Muffins deliver that perfect balance of sweet, tart, and cozy. These muffins capture the essence of a classic cobbler but in a portable, irresistible form. Plus, they’re a fantastic way to use up seasonal cherries or even frozen ones when fresh aren’t available. Trust me, one bite will transport you straight to your happiest kitchen memories.
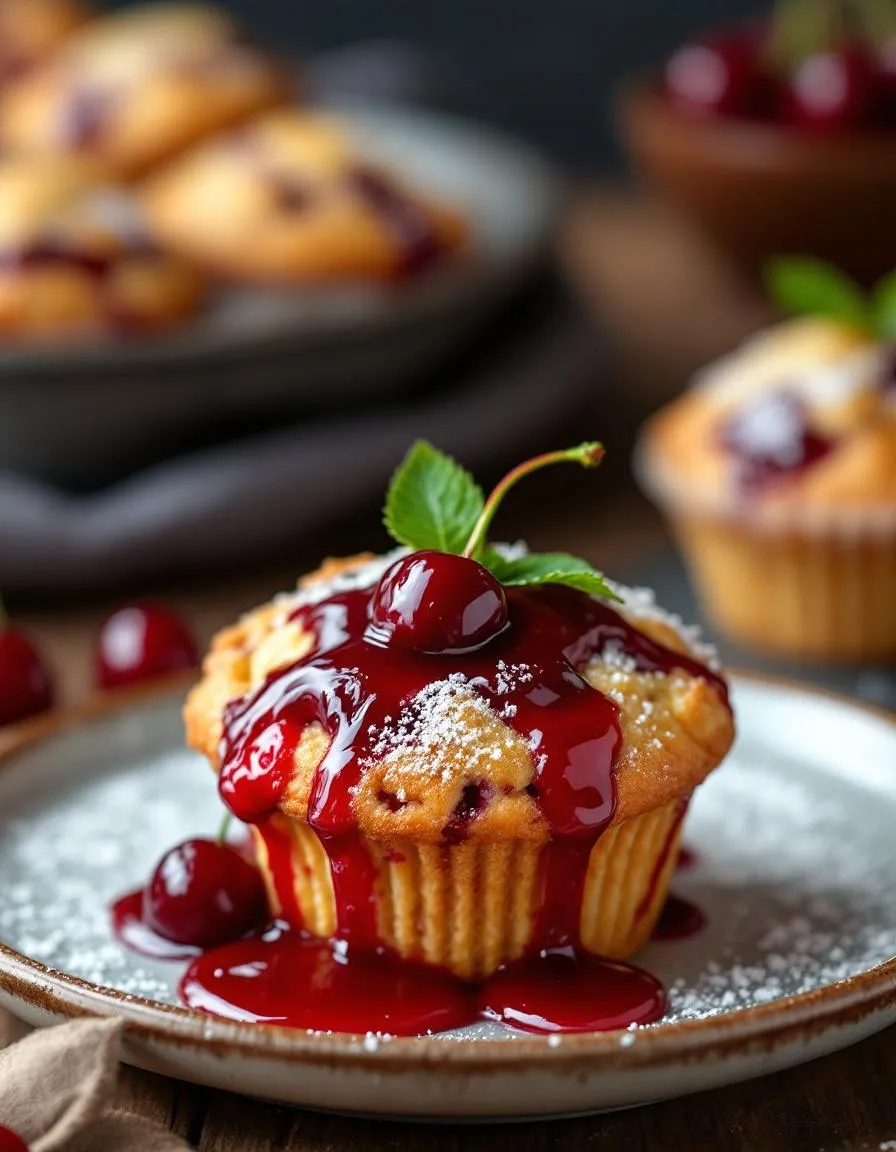
Cherry Cobbler Muffins combine the best of two worlds: the tender crumb of a muffin and the juicy, buttery topping of a cobbler. Unlike traditional muffins, these feature a streusel-like crown that bakes into a golden, crisp layer, while the cherries inside stay wonderfully soft and jammy. What makes them special is their versatility. You can serve them warm with a scoop of vanilla ice cream for dessert or enjoy them as a grab-and-go snack. They also fit perfectly with the brekcakes.com philosophy of approachable yet impressive baking. If you love easy breakfast recipes or crave simple desserts like our classic cobbler, this recipe will quickly become a favorite.
Why I Love This Recipe
Cherry Cobbler Muffins hold a special place in my heart because they remind me of summer visits to my grandma’s house. She always had a cherry tree in her backyard, and we’d spend hours pitting cherries for pies, crisps, and cobblers. This recipe is my way of keeping those sweet moments alive. Every time I bake them, I’m reminded of her laughter and the way she’d sneak an extra muffin onto my plate. Now, I love sharing that same joy with my own family—and with you.
Health and Nutrition
Why it’s good for your body
Cherry Cobbler Muffins pack a nutritious punch while satisfying your sweet tooth. First, cherries deliver powerful antioxidants like anthocyanins, which fight inflammation and support heart health. Additionally, these muffins often include whole grains or oats, providing fiber to keep you full and aid digestion. Moreover, the natural sweetness of cherries means you can cut back on added sugars without sacrificing flavor.
Another benefit of Cherry Cobbler Muffins is their versatility. You can easily tweak the recipe to boost protein with Greek yogurt or almond flour. Furthermore, cherries offer vitamins C and K, promoting immune function and bone health. Whether you enjoy them for breakfast or a snack, these muffins give you energy without the crash. Finally, baking them at home lets you control ingredients, avoiding processed additives. With each bite, you get a balance of taste and nourishment.
How it fits in a healthy lifestyle
Cherry Cobbler Muffins fit perfectly into a balanced diet when enjoyed mindfully. Pair one with a protein-rich food like Greek yogurt or eggs to create a satisfying meal. For gluten-free diets, simply swap regular flour for alternatives like almond or oat flour. If you’re watching sugar intake, reduce the sweetener and let the cherries shine.
These muffins also make meal prep easier. Bake a batch ahead of time for grab-and-go breakfasts or snacks. For more heart-healthy recipes, explore our gluten-free baking guide. If you love fruity treats, try our berry protein muffins for another nutrient-packed option. With smart choices, Cherry Cobbler Muffins can be part of your everyday wellness routine.
Start by preheating your oven to 375°F and lining a muffin tin with paper liners for easy cleanup. In a large bowl, whisk together the dry ingredients—flour, sugar, baking powder, and a pinch of salt—until well combined. Next, melt the butter and let it cool slightly before mixing it with milk, vanilla extract, and an egg in a separate bowl. Pour the wet ingredients into the dry mixture and gently stir until just combined; overmixing will make your Cherry Cobbler Muffins dense. Fold in the fresh or frozen cherries, reserving a handful for topping. Spoon the batter evenly into the muffin cups, then sprinkle the reserved cherries and a crumbly streusel topping over each one. Bake for 18-22 minutes, or until golden and a toothpick comes out clean. For a time-saving hack, prepare the streusel in advance and store it in the fridge. Let the muffins cool slightly before serving, or drizzle them with a simple glaze for extra sweetness.
Mistakes I’ve made and learned from
I once rushed the mixing process and ended up with tough Cherry Cobbler Muffins—turns out, overworking the batter activates too much gluten. Now, I stir just until the ingredients come together, and the texture is perfect every time. Another lesson? Using overly juicy cherries can make the muffins soggy. To avoid this, I toss the cherries in a bit of flour first, which helps absorb excess moisture. If you’re new to baking, check out my guide on avoiding common baking mistakes for more tips. And if you love fruity desserts, don’t miss my perfect streusel topping recipe—it’s a game-changer for muffins and cobblers alike.
Cherry Cobbler Muffins weave together the cozy charm of classic cobbler and the convenience of handheld muffins. Originally inspired by Southern fruit cobblers, this recipe borrows the sweet, jammy cherry filling and buttery topping but bakes it into individual portions. In the South, cobblers often star in summer gatherings, especially during cherry season when orchards burst with ripe fruit. Meanwhile, in the Midwest, home bakers might swap cherries for apples or berries, adapting the recipe to local harvests.
Families often put their own spin on Cherry Cobbler Muffins too. Some add a sprinkle of cinnamon or nutmeg for warmth, while others fold in almond extract to highlight the cherries’ natural sweetness. Across the pond, British bakers might top them with a crumbly streusel instead of a cobbler-style dough. No matter the variation, these muffins carry the same comforting spirit—a taste of nostalgia with every bite.
ays-cooking">How it fits in today’s cooking
Today, Cherry Cobbler Muffins fit perfectly into our fast-paced lives. They’re a quick way to enjoy dessert-for-breakfast vibes or a sweet afternoon pick-me-up. Modern cooks love how easily they adapt to dietary needs, like using gluten-free flour or coconut sugar. For busy parents, they’re a hit in lunchboxes, and for brunch hosts, they pair beautifully with easy brunch recipes.
Seasonally, these muffins shine in summer but work year-round with frozen cherries. They’ve also found a place in holiday baking, often appearing alongside holiday treats like gingerbread and peppermint bark. Whether you’re craving comfort or celebrating a special occasion, Cherry Cobbler Muffins bridge tradition and modern convenience effortlessly.
Taste and Texture
What makes it delicious
Cherry Cobbler Muffins deliver a burst of sweet-tart flavor with every bite, thanks to juicy cherries folded into the batter. The tender, buttery crumb melts in your mouth, while the golden-brown streusel topping adds a satisfying crunch. Warm cinnamon and vanilla weave through each muffin, creating a cozy, fragrant aroma that fills the kitchen. Meanwhile, the cherries soften just enough to offer a jammy contrast to the fluffy texture. Whether enjoyed fresh from the oven or at room temperature, Cherry Cobbler Muffins taste like dessert for breakfast—irresistibly comforting and packed with fruity goodness.
r">Boosting the flavor
For an extra layer of indulgence, drizzle warm Cherry Cobbler Muffins with a vanilla glaze or a dollop of whipped cream. Alternatively, swap the cherries for a mix of berries, like raspberries and blackberries, to deepen the fruity complexity. A pinch of nutmeg or cardamom in the streusel can also elevate the spice profile. If you love pairing baked goods with drinks, try serving these muffins alongside a homemade chai latte for a cozy twist. For more streusel inspiration, check out our guide to perfect crumb topping—it works wonders on muffins too!
Tips for Success
Best practices for results
Always measure your flour correctly by spooning it into the cup and leveling it off—this prevents dense Cherry Cobbler Muffins. Meanwhile, use room-temperature butter for even mixing and a tender crumb. For extra flavor, toss the cherries in a bit of sugar before folding them into the batter. Additionally, fill muffin liners only two-thirds full to avoid overflow and ensure even baking. Finally, let the muffins cool in the pan for 5 minutes before transferring them to a wire rack.
>Mistakes to avoid
Avoid overmixing the batter, as this can make Cherry Cobbler Muffins tough instead of light and fluffy. Instead, gently fold ingredients until just combined. Another common mistake is using frozen cherries without thawing and draining them first—excess moisture leads to soggy muffins. For more baking tips, check out our guide on perfect muffin texture. Also, don’t skip the crumb topping—it adds the classic cobbler touch. If you need help mastering toppings, explore our crumb topping secrets.
Serving and Pairing Suggestions
How to serve this dish
For a stunning presentation, serve Cherry Cobbler Muffins warm on a rustic wooden board or a vintage cake stand. Meanwhile, dust them lightly with powdered sugar or drizzle with vanilla glaze for extra charm. These muffins shine at brunch gatherings, holiday breakfasts, or even as a sweet afternoon treat. Additionally, top each muffin with a scoop of vanilla ice cream or whipped cream to elevate them into a decadent dessert. Finally, garnish with fresh cherries or mint leaves for a pop of color.
What goes well with it
Pair Cherry Cobbler Muffins with a hot cup of spiced chai or cold vanilla latte for a cozy contrast. Alternatively, try them alongside our homemade whipped cream for a creamy, indulgent bite. For a balanced brunch spread, serve them with our savory breakfast casserole, which offsets the muffins’ sweetness perfectly. Moreover, a side of fresh berries or a dollop of Greek yogurt adds a refreshing touch.
How do you make Cherry Cobbler Muffins from scratch?
To make Cherry Cobbler Muffins from scratch, combine flour, sugar, and baking powder, then mix in wet ingredients like milk and eggs. Fold in fresh or canned cherries and top with a crumbly cobbler-style streusel before baking. These muffins capture the classic flavors of cherry cobbler in a portable, handheld treat.
Can I use frozen cherries for Cherry Cobbler Muffins?
Yes, frozen cherries work well for Cherry Cobbler Muffins—just thaw and drain them thoroughly to avoid excess moisture. Pat them dry with a paper towel and toss with a bit of flour to prevent sinking during baking. The result will be just as delicious as using fresh cherries.
rank-math-faq-item">
What’s the best way to store Cherry Cobbler Muffins?
Store Cherry Cobbler Muffins in an airtight container at room temperature for up to 3 days or refrigerate for up to a week. For longer storage, freeze them in a sealed bag for up to 3 months—just reheat in the microwave for a warm, gooey texture.
Can I add a glaze to Cherry Cobbler Muffins?
A simple powdered sugar glaze or vanilla drizzle pairs perfectly with Cherry Cobbler Muffins for extra sweetness. For a more authentic cobbler touch, brush melted butter and sprinkle coarse sugar on top before baking for a crispy, caramelized finish.