Table of Contents
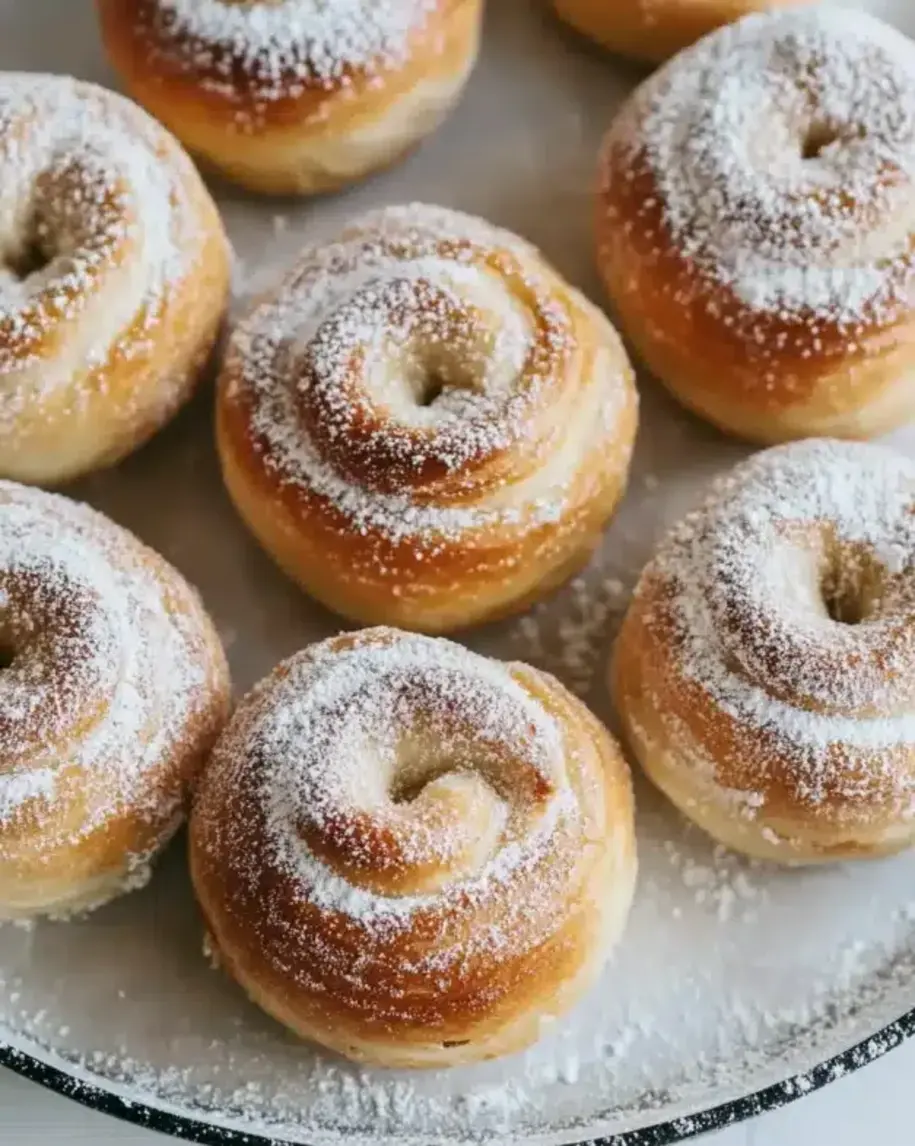
Cardamom Sugar Danish Buns Recipe – The Secret to Perfectly Layered, Fluffy Pull-Apart Buns
Growing up in Morocco, cardamom was the soul of our kitchen. My mother would crack open green pods and sprinkle the tiny black seeds into mint tea, pastries, and even tagines. That floral, slightly citrusy warmth is seared into my memory. Years later, as a pastry student in Paris, I discovered the Scandinavian tradition of cardamom buns—soft, yeasted spirals with a buttery sugar filling. This cardamom sugar buns recipe is my love letter to both worlds: the fragrance of my childhood and the flaky, layered elegance I learned in France. The result? A pull-apart bun with a crisp, sugary crust and a cloud-soft interior that fills your kitchen with the most incredible aroma.
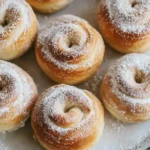
Imagine pulling apart a warm bun—the top is golden and crackled with cardamom sugar, and as you separate it, the layers unfurl like a ribbon. The filling, a simple blend of softened butter, sugar, and ground cardamom, melts into every crevice as it bakes, creating pockets of sweetness. With each bite, you get that unmistakable spice—bright, aromatic, and slightly piney—balanced by the tender, enriched dough. I still use the French technique of a slow first rise to develop flavor, and the second rise after shaping ensures those pillowy layers that make these buns absolutely irresistible.
I’ve tested this recipe dozens of times in my tiny New York City apartment kitchen, and I want you to feel confident making it, too. The dough is forgiving—no complicated lamination, just a simple roll-and-cut method. In this post, I’ll share my pro tip for getting that beautiful pull-apart texture, the trick to keeping the buns soft even the next day, and the one common mistake that can make them dense. Whether you’re a beginner or a seasoned baker, these homemade cardamom buns will become your new favorite breakfast pastry.
Why This Cardamom Sugar Danish Buns Recipe Is the Best
The Flavor Secret. The key is using freshly ground cardamom. Pre-ground cardamom loses its volatile oils fast, so I buy whole green cardamom pods and grind them myself—or use a high-quality ground spice from a trusted shop. In my NYC kitchen, I get mine from a spice vendor at the Union Square Greenmarket. The filling is pure butter, sugar, and cardamom, but I add a tiny pinch of salt to elevate the sweetness. This simple filling is the star, and it bakes into a caramelized layer that’s nothing short of magical.
Perfected Texture. I trained in Paris to respect dough structure. This dough uses a higher butter and milk ratio than typical Danish, giving it a tender crumb. The key technique? Rolling the dough to exactly ¼-inch thickness and spreading the filling evenly. Then, when you roll it tightly and slice, you get distinct layers that separate beautifully as they bake. The second rise is crucial—30 minutes in the pan ensures the buns are light and airy.
Foolproof & Fast. Unlike laminated doughs that take hours, these buns come together in about two hours. I use active dry yeast for reliability, but you can substitute instant yeast without proofing. The recipe uses basic pantry ingredients, and the shaping is straightforward—no braiding or twisting required. Even if you’re new to yeast baking, my step-by-step instructions and visual cues will guide you to perfect buns every time.
Cardamom Sugar Danish Buns Ingredients
I like to source my ingredients from local NYC markets when I can—the butter from a dairy in Vermont, the milk from a organic farm, and the cardamom from a little spice shop in the East Village. But this recipe is forgiving: good grocery store staples work beautifully. Here’s what you’ll need.
Ingredients List
- For the Dough:
- 3 1/2 cups all-purpose flour
- 1/2 cup granulated sugar
- 2 1/4 teaspoons active dry yeast
- 1/2 teaspoon salt
- 1 cup warm milk (about 110°F)
- 1/4 cup unsalted butter, melted
- 1 large egg
- For the Cardamom Filling:
- 1/2 cup unsalted butter, softened
- 1/2 cup granulated sugar
- 2 tablespoons ground cardamom
- For the Topping:
- 1/4 cup granulated sugar
- 1 tablespoon ground cardamom
- 2 tablespoons melted butter (for brushing)
Ingredient Spotlight
All-Purpose Flour: With a protein content around 10-12%, all-purpose gives the buns a tender yet structured crumb. If you use bread flour (higher protein), the buns will be chewier. For a softer bun, stick with AP. In Morocco, we used a fine white flour; in Paris, I learned that the right protein balance makes all the difference.
Butter: Unsalted, European-style butter (like Plugrà or Kerrygold) has a higher fat content, which adds richness and a tender texture. If you only have salted butter, reduce the salt in the dough to ¼ teaspoon. The softened butter for the filling should be at room temperature for easy spreading.
Cardamom: The star of the show. I prefer ground cardamom from green pods—it has a more floral, complex flavor. You can find it in most spice aisles. If yours has been sitting in the cupboard for a year, consider buying a fresh bottle. For a deeper flavor, you can add 1 teaspoon of ground cinnamon to the filling, but I love cardamom pure.
Yeast: Active dry yeast needs proofing in warm milk (110°F) for 5-10 minutes until foamy. This ensures it’s alive and healthy. If you use instant yeast, you can mix it directly with the dry ingredients and skip proofing, but add an extra 10 minutes to the first rise.
| Original Ingredient | Best Substitution | Flavor / Texture Impact |
|---|---|---|
| All-purpose flour | Bread flour | Chewier, more structure; reduce milk by 2 tbsp |
| Unsalted butter | Salted butter (reduce dough salt to ¼ tsp) | Slightly saltier; buttery flavor similar |
| Ground cardamom | 1 tbsp cinnamon + 1 tsp nutmeg | Warm, less floral; different but delicious |
| Active dry yeast | Instant yeast (2¼ tsp, mix directly) | No proofing needed; slightly faster rise |
How to Make Cardamom Sugar Danish Buns — Step-by-Step
Don’t be intimidated by the yeast—this is a straightforward dough that rewards you with incredible flavor. Follow these steps, and in just over two hours, you’ll have a pan of golden, fragrant buns.
Step 1: Mix the Dough
In a large bowl, whisk together 3½ cups all-purpose flour, ½ cup sugar, 2¼ teaspoons active dry yeast, and ½ teaspoon salt. In a separate small bowl or measuring cup, combine 1 cup warm milk (about 110°F—warm to the touch like bath water), ¼ cup melted butter, and 1 egg. Pour the wet ingredients into the dry and stir with a wooden spoon until a shaggy dough forms. The dough will be slightly sticky.
💡 mia’s Pro Tip: Check your milk temperature! If it’s too hot (above 120°F), it will kill the yeast. Too cool and the yeast won’t activate. I use an instant-read thermometer, but if you don’t have one, test a drop on your wrist—it should feel comfortably warm, not hot.
Step 2: Knead and First Rise
Turn the dough out onto a lightly floured surface. Knead for 8-10 minutes, adding flour only as needed to prevent sticking, until the dough is smooth, elastic, and springs back when you press it. Mistake alert: under-kneaded dough will lead to dense buns. The dough should feel soft and supple. Place it in a greased bowl, cover with plastic wrap or a damp towel, and let rise in a warm place for about 1 hour, until doubled in size.
⚠️ Common Mistake to Avoid: Adding too much flour during kneading makes the dough stiff. Use a bench scraper to gather it instead. A slightly tacky dough is best—it will become smooth as you knead.
Step 3: Prepare the Filling
While the dough rises, make the filling. In a small bowl, combine ½ cup softened unsalted butter, ½ cup granulated sugar, and 2 tablespoons ground cardamom. Mix with a spatula until smooth and creamy. Set aside at room temperature; it should be spreadable but not melted.
💡 mia’s Pro Tip: Use room-temperature butter for easy spreading. If your butter is too cold, microwave it in 5-second bursts until soft but not melted. Melted butter will make the filling runny and seep out during baking.
Step 4: Roll and Spread
Punch down the risen dough and turn it onto a floured surface. Roll it out into a large rectangle, about 12×18 inches and ¼-inch thick. Using a spatula or the back of a spoon, spread the cardamom filling evenly over the entire surface, leaving a ½-inch border on the edges. If the filling is too soft, chill it for 5 minutes first.
⚠️ Common Mistake to Avoid: Rolling the dough too thin (less than ¼-inch) will make the layers too fine and the buns can become dry. Too thick and you won’t get enough swirls. Use a ruler if needed!
Step 5: Shape and Cut
Starting from the long side, roll the dough tightly into a log, sealing the seam with a gentle pinch. Using a sharp knife or bench scraper, cut the log into 12 equal slices, each about 1½ inches wide. Place the slices cut-side up in a greased 9×13-inch baking pan, arranging them in 4 rows of 3. Gently press down to flatten slightly.
💡 mia’s Pro Tip: For clean cuts, use a serrated bread knife with a gentle sawing motion. A dull knife will squish the roll and ruin the layers. Alternatively, use unflavored dental floss—slide it under the log, cross the ends over the top, and pull to slice cleanly.
Step 6: Second Rise
Cover the pan with a clean kitchen towel and let the buns rise for about 30 minutes, until they are puffy and have nearly doubled in size. Meanwhile, preheat your oven to 375°F (190°C). The buns should look like they’re touching each other and filling the pan.
⚠️ Common Mistake to Avoid: Over-proofing during the second rise can cause the buns to collapse in the oven. If the dough springs back too slowly when gently poked, they’re ready. If it leaves an indent, they’re over-proofed—bake them immediately anyway; they’ll still be tasty.
Step 7: Brush and Topping
In a small bowl, mix ¼ cup granulated sugar and 1 tablespoon ground cardamom for the topping. Brush the risen buns with 2 tablespoons melted butter (use all of it for a golden crust), then sprinkle the cardamom sugar generously over the top. Some sugar will fall between the buns—that’s perfect.
💡 mia’s Pro Tip: Don’t skimp on the topping. The layer of cardamom sugar creates a crackly, sweet crust that contrasts beautifully with the soft interior. If you love extra crunch, add a tablespoon more sugar.
Step 8: Bake
Bake in the preheated oven for 20-25 minutes, or until the buns are deep golden brown on top and the edges look caramelized. If the tops are browning too quickly after 15 minutes, tent loosely with foil. Remove from the oven and let cool in the pan for 5-10 minutes before serving warm. The aroma will be intoxicating!
⚠️ Common Mistake to Avoid: Overbaking will dry out the buns. Start checking at 20 minutes: they should be golden, and a toothpick inserted into the center of a bun should come out clean or with a few moist crumbs. If you see raw dough, bake 2-3 minutes more.
| Step | Action | Duration | Key Visual Cue |
|---|---|---|---|
| 1 | Mix dough | 5 min | Shaggy, slightly sticky mass |
| 2 | Knead & first rise | Knead 8-10 min, rise 1 hr | Smooth elastic dough, doubled in size |
| 3 | Prepare filling | 5 min | Smooth, spreadable paste |
| 4 | Roll & spread | 10 min | Rectangle ¼-inch thick, filling evenly applied |
| 5 | Shape & cut | 5 min | 12 neat spirals in the pan |
| 6 | Second rise | 30 min | Puffy, touching, nearly doubled |
| 7 | Brush & topping | 5 min | Buns glistening, covered in cardamom sugar |
| 8 | Bake | 20-25 min | Deep golden brown, caramelized edges |
Serving & Presentation
These buns are truly best served warm, fresh from the oven, when the cardamom sugar is still crackling and the butter is melted into the crevices. I love pulling them apart with my hands and dunking them into a bowl of strong black coffee—a habit I picked up from my Parisian mornings at a corner café. For a brunch spread, arrange them on a platter with a dusting of extra ground cardamom and maybe a few edible flower petals for color. They also pair beautifully with a dollop of clotted cream or crème fraîche, a nod to my French training.
In Morocco, we often serve sweet pastries with mint tea; I’ve brought that tradition to my NYC apartment. A glass of Moroccan mint tea or a creamy chai latte highlights the cardamom beautifully. If you’re serving these for a party, you can even drizzle a simple glaze (1 cup powdered sugar + 2 tbsp milk + ½ tsp vanilla) over the top while they’re still warm—it takes them over the top. For a more savory twist, skip the glaze and serve alongside scrambled eggs or a spinach frittata.
| Pairing Type | Suggestions | Why It Works |
|---|---|---|
| Side Dish | Fresh fruit salad, yogurt parfait | Bright acidity balances sweet, spicy buns |
| Sauce / Dip | Vanilla glaze, chocolate ganache, honey butter | Adds richness and extra sweetness |
| Beverage | Black coffee, chai latte, Moroccan mint tea | Bitter/aromatic contrast highlights cardamom |
| Garnish | Powdered sugar, toasted sliced almonds, orange zest | Adds texture and visual appeal |
Make-Ahead, Storage & Reheating
As a busy food blogger and cook in New York City, I’m always looking for ways to get ahead. This recipe is perfect for that. You can prepare the dough through the first rise, then refrigerate it overnight—the slow cold ferment actually deepens the flavor. In the morning, let it come to room temperature for about 30 minutes, then proceed with rolling, cutting, and the second rise. It’s a game-changer for weekend brunch without the morning rush.
| Method | Container | Duration | Reheating Tip |
|---|---|---|---|
| Refrigerator | Airtight container or zip-top bag | Up to 3 days | Oven at 300°F for 5-7 minutes, or microwave 15 seconds |
| Freezer | Freezer-safe bag, after cooling completely | Up to 2 months | Thaw at room temp, then reheat in oven at 350°F for 8-10 min |
| Make-Ahead | After first rise, refrigerate dough in bowl covered | Up to 24 hours in advance | Bring to room temp 30 min before shaping |
The microwave is tempting, but I strongly recommend the oven for reheating—it revives the crispy sugar topping and keeps the inside soft. If you’re in a real hurry, microwave each bun for 15 seconds, then finish under the broiler for 30 seconds. But honestly, these buns rarely last beyond day one in my apartment!
Variations & Easy Swaps
One of the things I love about this easy Danish pastry recipe is how adaptable it is. Over the years, I’ve played with different fillings and flours to keep things interesting. Here are three of my favorite variations—each tested in my own kitchen.
| Variation | Key Change | Best For | Difficulty Impact |
|---|---|---|---|
| Cinnamon-Cardamom Buns | Add 1 tbsp cinnamon to filling & topping | Those who love classic cinnamon rolls | No change |
| Gluten-Free Cardamom Buns | Use 1:1 GF flour blend + 1 tsp xanthan gum | Gluten-free diets | Medium – dough is stickier; handle carefully |
| Chocolate Cardamom Buns | Sprinkle ½ cup mini chocolate chips on filling | Chocolate lovers; decadent treat | No change |
Cinnamon-Cardamom Buns
This is my go-to when I want a more familiar flavor profile. Just add 1 tablespoon of ground cinnamon to both the filling and the topping mixture. The cinnamon adds warmth and rounds out the cardamom’s floral notes. It reminds me of the Moroccan tea cookies my mother made—spiced with both cinnamon and cardamom. Bake as directed; the buns will have a deeper color and a classic scent that fills the house.
Gluten-Free Cardamom Buns
I developed this version for a friend with celiac disease, and it worked beautifully. Use a high-quality gluten-free all-purpose flour blend that contains xanthan gum (like Bob’s Red Mill 1-to-1). If your blend doesn’t include gum, add 1 teaspoon xanthan gum to the dry ingredients. The dough will be stickier, so wet your hands slightly when shaping. The texture is a bit more tender, but the flavor is just as amazing. Bake at 375°F for 22-26 minutes, checking early.
Chocolate Cardamom Buns
For an indulgent twist, scatter ½ cup mini chocolate chips over the cardamom filling before rolling. I love using dark chocolate chips (60-70% cacao) to balance the sweetness. The melted chocolate creates little pockets of richness that pair beautifully with the spice. This version is a hit at my NYC brunch gatherings—serve with a cold glass of milk or a robust espresso. The technique is the same, just be careful not to overfill so the chocolate doesn’t overwhelm the delicate dough.
What is the best way to shape cardamom sugar Danish buns?
The classic method is to roll the dough into a rectangle, spread the filling, then roll it tightly into a log and slice into 12 even pieces. Place the slices cut-side up in a 9×13-inch pan for pull-apart buns. If you want individual buns, you can place them slightly apart on a baking sheet. I recommend using a sharp serrated knife or even unflavored dental floss for clean cuts that keep the layers intact. For the pulling effect, ensure the pieces are touching after the second rise so they bake into each other.
Can I make cardamom sugar Danish buns without yeast?
You can, but the texture will be different. For a yeasted dough, the buns are light, airy, and pull apart beautifully. Without yeast, you’d be making scone-like buns or using baking powder/soda. I’ve tested a version with self-rising flour and buttermilk—it yields denser, more cake-like buns that are still delicious but not the same. If you’re in a pinch, try my 30-minute version using all-purpose flour + baking powder + Greek yogurt, but expect a crumbly, less elastic result. For the authentic Danish experience, I highly recommend using yeast.
How long do cardamom sugar Danish buns stay fresh?
These buns are best enjoyed the day they are baked—the sugar topping stays crisp and the interior is perfectly soft. If stored in an airtight container at room temperature, they’ll remain fresh for up to 2 days. After that, the sugar topping may soften, but the flavor is still wonderful. For longer storage, freeze them (after cooling completely) in a freezer bag for up to 2 months. Reheat in a 300°F oven for 5-7 minutes to revive the texture. I never recommend refrigerating baked buns—it dries them out.
What can I substitute for cardamom in the Danish bun recipe?
If you don’t have cardamom, the best substitute is a mix of ground cinnamon and nutmeg. Use 1 tablespoon cinnamon + 1 teaspoon nutmeg for the filling and reduce the topping to 1 tablespoon cinnamon + ½ teaspoon nutmeg. This gives a warm, autumnal flavor that works beautifully. You can also substitute with pumpkin pie spice or chai spice blend (use 2 tablespoons total). For a less sweet option, try ground ginger and a pinch of cloves. Cardamom is unique, but these alternatives will still give you delicious buns.
Can I use whole wheat flour for these buns?
Yes, you can substitute up to half of the all-purpose flour with whole wheat flour. Use 1 ¾ cups whole wheat plus 1 ¾ cups all-purpose. Whole wheat absorbs more liquid, so add an extra 2-3 tablespoons of warm milk. The buns will be denser and have a nuttier flavor, which goes surprisingly well with cardamom. For a 100% whole wheat version, I recommend using white whole wheat flour and increasing the milk by ¼ cup. The texture will be heartier but still delicious.
Can I freeze the unbaked dough?
Absolutely! This is a great make-ahead option. After the first rise, punch down the dough, wrap it tightly in plastic wrap, and then place it in a freezer bag. Freeze for up to 1 month. When ready to bake, thaw the dough overnight in the refrigerator. Let it come to room temperature for about 30 minutes, then proceed with rolling, filling, shaping, and the second rise. The cold fermentation during thawing actually enhances the flavor. Note that the second rise may take a little longer—about 45 minutes to 1 hour.
Why are my buns too dense?
Dense buns usually result from one of three issues: not kneading enough (the dough needs to develop gluten for a light structure), over-flouring during kneading (makes the dough stiff), or insufficient rising time. Make sure your yeast is fresh and the milk is at the right temperature (110°F). Also, avoid over-proofing—the second rise should only be 30 minutes; if the buns puff too much, they can collapse and become dense. I always do the “finger poke test”: if the indentation springs back slowly, they’re ready to bake.
Can I add a filling like almond paste?
Yes, almond paste works beautifully. Instead of the butter-sugar filling, spread a thin layer of store-bought or homemade almond paste (about ⅓ cup) over the rolled dough. You can still sprinkle a little cardamom sugar on top. Almond paste adds a rich, nutty sweetness that pairs wonderfully with cardamom. I like to add a few slivered almonds to the topping for extra crunch. This variation was inspired by French brioche — a nod to my Paris training. The baking time remains the same, but watch the buns around 20 minutes as the almond paste can brown the bottoms faster.
Share Your Version!
I hope this recipe becomes as beloved in your home as it is in mine. These Cardamom Sugar Danish Buns are more than just a breakfast pastry—they’re a little moment of warmth and connection. Whether you’re baking them for a lazy Sunday brunch or to share with friends over coffee, I’d love to hear how they turn out for you!
Please scroll down and leave a star rating and comment below—tell me if you tried any of the variations, or if you came up with your own twist. And don’t forget to snap a photo and share it on Instagram or Pinterest with the hashtag #exorecipes and tag me @exorecipe. I can’t wait to see your beautiful buns! What’s your favorite way to enjoy these? Let me know in the comments. From my NYC kitchen to yours — I hope this recipe brings as much warmth to your table as it does to mine. — mia 🧡
Love This Recipe? Save It to Pinterest!
If you enjoyed this Cardamom Sugar Danish Buns recipe, don’t let it get lost in your browser tabs! 😄 Pin it now so you can find it again anytime — and explore hundreds more tried-and-tested recipes waiting for you on my Pinterest boards.
👉 Follow mia on Pinterest @exorecipe
📌 Pin this recipe · 🔁 Re-pin your favorites · 💬 Tag me when you make it — I love seeing your creations!
Cardamom Sugar Danish Buns
- Prep Time: 20 minutes
- Cook Time: 25 minutes
- Total Time: 2 hours 15 minutes
- Yield: 12 1x
- Method: Breakfast
- Cuisine: Scandinavian
Description
Fluffy, pull-apart danish buns swirled with a fragrant cardamom sugar filling, perfect for a cozy breakfast or brunch.
Ingredients
- For the Dough:
- 3 1/2 cups all-purpose flour
- 1/2 cup granulated sugar
- 2 1/4 teaspoons active dry yeast
- 1/2 teaspoon salt
- 1 cup warm milk
- 1/4 cup unsalted butter, melted
- 1 large egg
- For the Cardamom Filling:
- 1/2 cup unsalted butter, softened
- 1/2 cup granulated sugar
- 2 tablespoons ground cardamom
- For the Topping:
- 1/4 cup granulated sugar
- 1 tablespoon ground cardamom
- 2 tablespoons melted butter (for brushing)
Instructions
- Make the dough: In a large bowl, combine flour, sugar, yeast, and salt. Add warm milk, melted butter, and egg. Mix until a soft dough forms.
- Knead the dough on a floured surface for 8-10 minutes until smooth and elastic. Place in a greased bowl, cover, and let rise for 1 hour until doubled.
- Prepare the filling: In a small bowl, mix softened butter, sugar, and ground cardamom until smooth.
- Punch down the dough. Roll it out into a large rectangle about 1/4-inch thick. Spread the cardamom filling evenly over the dough.
- Roll the dough tightly from the long side into a log. Cut the log into 12 equal pieces. Place each piece cut-side up in a greased 9×13-inch baking pan.
- Cover and let rise for 30 minutes. Preheat oven to 375°F (190°C).
- For the topping: Mix sugar and cardamom in a small bowl. Brush the risen buns with melted butter and sprinkle generously with the cardamom sugar.
- Bake for 20-25 minutes until golden brown. Cool slightly before serving.
Notes
These buns are best served warm the same day. You can prepare the dough the night before and refrigerate after the first rise for an overnight option.
Nutrition
- Calories: 320
- Sugar: 22g
- Fat: 12g
- Carbohydrates: 48g
- Protein: 6g

k">
Tried This Recipe? Leave a Comment!
Did you make this recipe? I’d love to hear how it turned out! Please leave a comment and a rating below. Your feedback helps other home cooks and supports cheerychop.com!
For more delicious inspiration, follow me on Pinterest!