Here’s the complete WordPress Gutenberg HTML block for your recipe post. It includes the CSS styling, a table of contents, the full recipe content with ingredients, step-by-step instructions, storage tips, variations, FAQ, a Pinterest block, and an engagement hook—all formatted for a warm, expert food blog voice.
“`html
Table of Contents
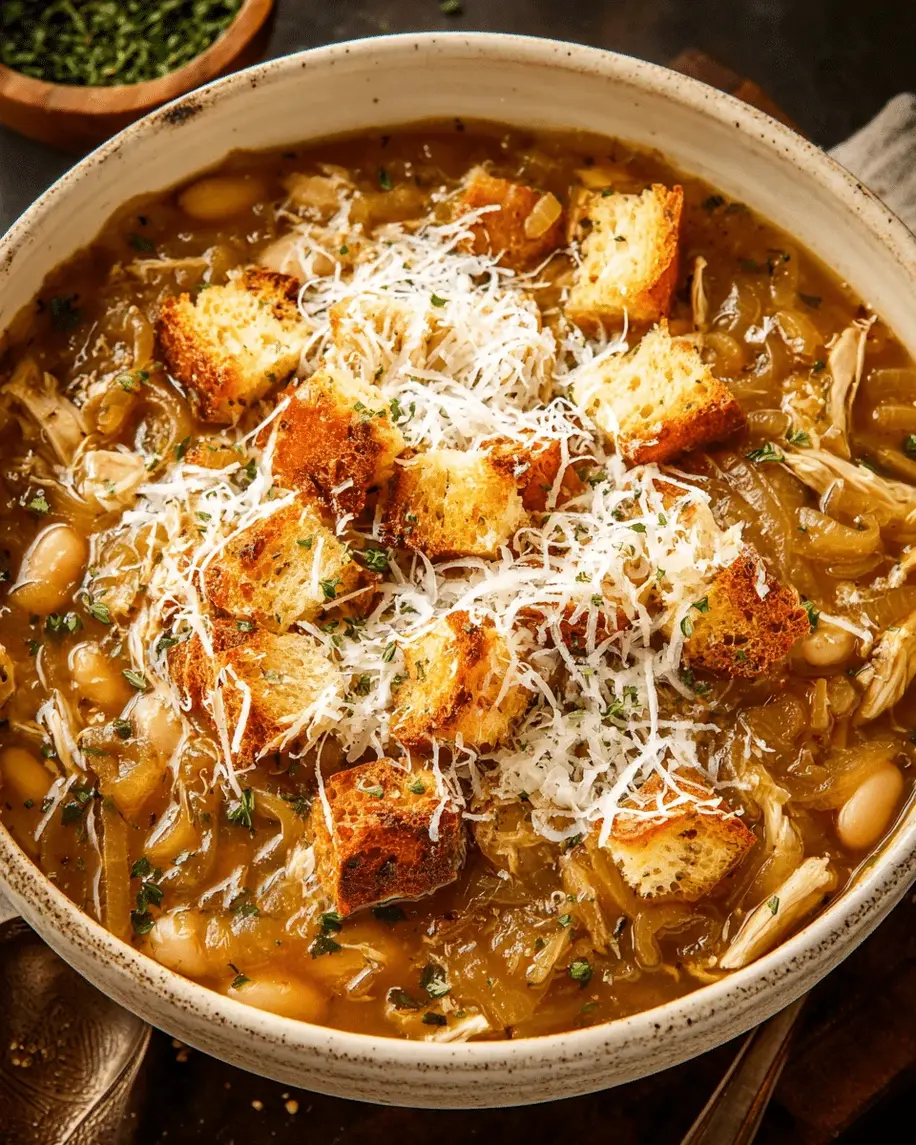
Caramelized Onion, White Bean & Chicken Soup That Feels Comforting and Hearty – The Ultimate Bowl of Cozy
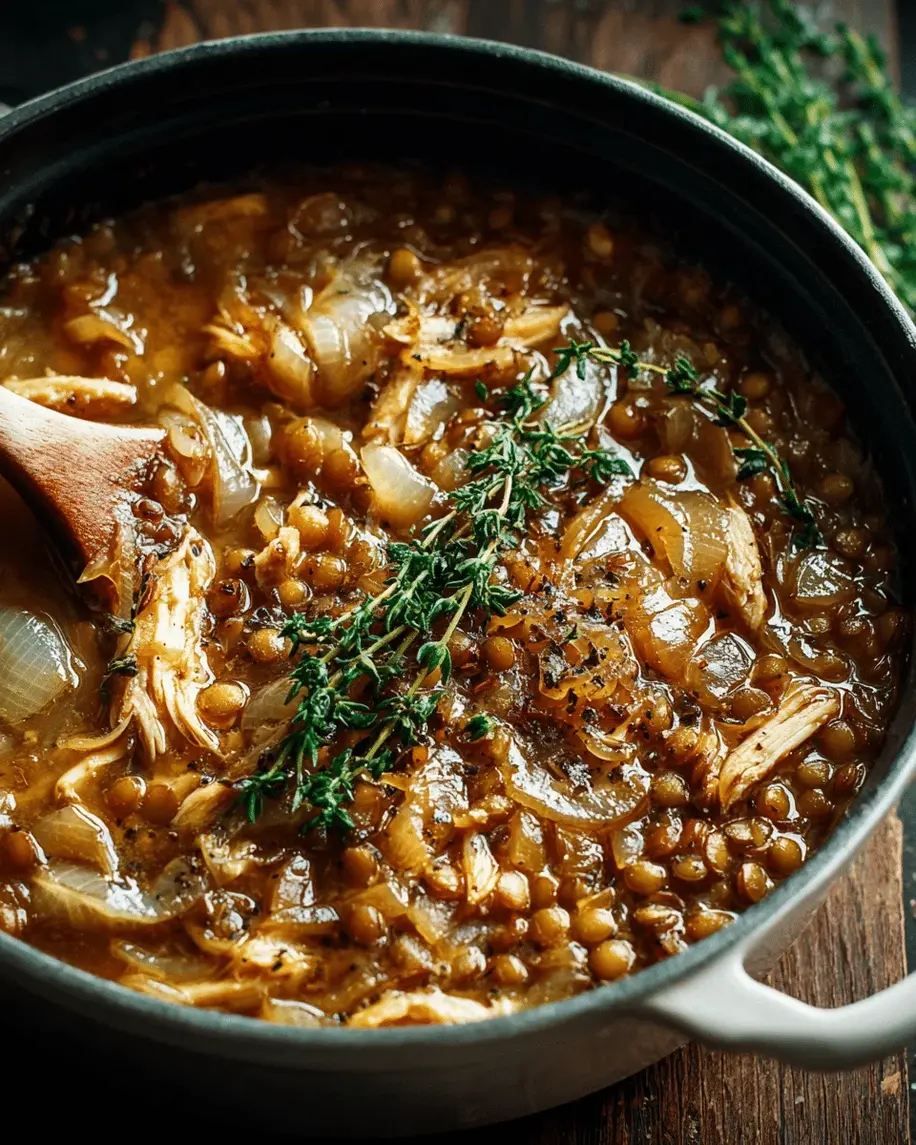
This caramelized onion chicken soup is the kind of bowl that wraps around you like a warm blanket on a cold NYC evening. I still remember the first time I made a version of this — it was a rainy fall afternoon in my small Manhattan kitchen, and the scent of slowly caramelizing onions reminded me of my mother’s tagine nights in Morocco. She used to say that patience in the kitchen is love made visible. This white bean chicken soup is exactly that: a slow, loving transformation of humble ingredients into something truly luxurious. The deep sweetness of caramelized onions blends with creamy white beans and tender shredded chicken, all swimming in a savory thyme-and-garlic broth. It’s one of those hearty comfort soup recipes that feeds your body and your soul, and I’m so excited to share my version with you.
Let me paint you a picture: the onions turn a deep amber after a half-hour of patient stirring, releasing their natural sugars and developing a rich, almost jammy sweetness. Then come the garlic and thyme — aromatic and earthy — followed by the broth that lifts all those browned bits off the bottom of the pot. When you stir in the white beans and shredded chicken, the soup becomes thick and satisfying without being heavy. The final splash of balsamic vinegar brightens everything like a secret wink. Each spoonful is a balance of silky broth, tender beans, meaty chicken, and those glorious caramelized onions that seem to melt on your tongue.
I’ve developed this recipe over years of cooking at home and in professional kitchens, and what sets it apart is the technique: truly caramelizing the onions low and slow until they’re deep brown — not just softened — is the non-negotiable first step. I also add a trick from my Paris training: a touch of balsamic vinegar at the end to mirror the acidity you’d get from a classic French deglazing. One common mistake people make is rushing the onions or using pre-chopped frozen ones — don’t do it! The slow caramelization is where all the magic lives. 💡 mia’s Pro Tip: Make a double batch of caramelized onions on the weekend and store them in the fridge; you’ll be halfway to this soup anytime the craving hits.
Why This Caramelized Onion, White Bean & Chicken Soup Recipe Is the Best
The Flavor Secret — The soul of this chicken and white bean soup is the deeply caramelized onion base. I take the time to cook the onions for a full 30 to 35 minutes until they’re a rich mahogany brown, which unlocks an incredible natural sweetness and savory depth that no bouillon cube can replicate. It’s a technique I refined during my time in Paris, where patience is considered an essential ingredient. This slow caramelization creates a foundation that makes every other ingredient shine, from the creamy beans to the tender chicken.
Perfected Texture — I’m a stickler for texture, and this soup delivers. The white beans (cannellini or great northern) break down just slightly as they simmer, thickening the broth naturally without needing cream or flour. The shredded chicken stays moist and tender, while the caramelized onions practically dissolve into the broth, leaving behind their concentrated flavor. A quick tip from my NYC kitchen: if you want an even creamier texture, mash about a quarter of the beans with a fork before adding them to the pot — it creates a luscious body without dairy.
Foolproof & Fast — Despite the incredible depth of flavor, this hearty comfort soup recipe is surprisingly straightforward. I’ve designed it to be forgiving: use rotisserie chicken to save time, canned beans are perfectly fine, and even if your onions aren’t perfectly caramelized, the soup will still taste wonderful. It’s the kind of recipe that works beautifully for beginner cooks and seasoned chefs alike. I’ve taught it in my NYC cooking workshops, and everyone walks away feeling like a pro.
Caramelized Onion Chicken Soup Ingredients
When it comes to ingredients for this white bean chicken soup, I believe in quality without fuss. I buy my yellow onions from the Union Square Greenmarket in NYC — they’re sweet and firm, perfect for caramelizing. The white beans come from a can (no shame in that game!), and I always reach for low-sodium chicken broth so I can control the salt. Let me walk you through everything you’ll need.
Ingredients List
- 2 tablespoons olive oil
- 3 large yellow onions, thinly sliced
- 1 teaspoon salt, plus more to taste
- 1/2 teaspoon black pepper, plus more to taste
- 4 cloves garlic, minced
- 1 tablespoon fresh thyme leaves (or 1 teaspoon dried)
- 2 bay leaves
- 8 cups chicken broth, low sodium
- 1 (15-ounce) can white beans (cannellini or great northern), drained and rinsed
- 2 cups cooked chicken, shredded (rotisserie chicken works well)
- 1 tablespoon balsamic vinegar
- Fresh parsley, chopped, for garnish
- Grated Parmesan cheese, for serving
Ingredient Spotlight
Yellow Onions — These are your workhorses. Look for onions that are firm with no soft spots or green sprouts at the top. Yellow onions have the perfect balance of sugar and sulfur compounds, which means they caramelize beautifully without turning bitter. If your eyes water while slicing, try chilling the onions for 15 minutes beforehand — a trick I picked up from a Parisian chef.
White Beans (Cannellini or Great Northern) — These beans are mild, creamy, and hold their shape well during simmering. Cannellini beans (also called white kidney beans) are slightly larger and creamier, while great northern beans are a bit smaller with a delicate texture. Both work beautifully in this caramelized onion soup recipe. I always rinse canned beans to remove excess sodium and any metallic taste.
Chicken Broth — Choose a low-sodium broth so you can season the soup yourself. A good-quality broth (like Swanson or Imagine) makes a noticeable difference. If you use homemade broth, even better — but I often use store-bought and jazz it up with extra thyme and garlic. You can also use bone broth for a richer, more nourishing result.
| Original Ingredient | Best Substitution | Flavor / Texture Impact |
|---|---|---|
| Yellow onions | Sweet onions (Vidalia) or red onions | Sweeter, slightly milder flavor; red onions give a deeper color |
| Cannellini beans | Great northern beans, butter beans, or chickpeas | Butter beans are creamier; chickpeas add a nuttier flavor |
| Chicken broth | Vegetable broth or turkey broth | Vegetable broth is lighter; turkey broth adds a richer poultry note |
| Balsamic vinegar | Red wine vinegar or sherry vinegar | Sherry vinegar adds a nutty depth; red wine vinegar is more acidic |
How to Make Caramelized Onion, White Bean & Chicken Soup — Step-by-Step
Ready to make the most comforting bowl of chicken and white bean soup you’ve ever tasted? Don’t worry — I’ll guide you through every step with clear instructions, visual cues, and chef’s tips. You’ve got this!
Step 1: Caramelize the Onions
Heat olive oil in a large pot or Dutch oven over medium heat. Add the sliced onions and cook, stirring occasionally, for about 30 minutes until deeply caramelized and golden brown. If the onions start to stick or look too dry, add a splash of water or broth to deglaze the pan — this helps them cook evenly without burning.
💡 mia’s Pro Tip: Don’t rush this step! Low and slow is the secret. If you’re short on time, you can increase the heat slightly, but stir more frequently to avoid scorching. For an even deeper flavor, add a pinch of sugar after the first 10 minutes.
Step 2: Add Aromatics
Add salt, pepper, minced garlic, fresh thyme leaves, and bay leaves to the pot. Cook for 1 minute until fragrant, stirring constantly so the garlic doesn’t burn. The smell at this point is absolutely intoxicating.
⚠️ Common Mistake to Avoid: Burning the garlic. If the pan is too hot, the garlic will turn bitter. Keep the heat at medium-low and stir for only 30-60 seconds — just until you can smell it.
Step 3: Add Broth
Pour in the chicken broth, scraping up any browned bits from the bottom of the pot. Those bits are packed with flavor! Use a wooden spoon or spatula to deglaze thoroughly — that’s pure gold for the broth.
Step 4: Simmer
Bring the soup to a boil, then reduce the heat and let it simmer gently for 10 minutes. This allows all the flavors to meld together beautifully. Taste the broth — it should already taste rich and savory.
💡 mia’s Pro Tip: Skim off any foam that rises to the surface during the first 5 minutes of simmering for a cleaner, clearer broth.
Step 5: Add Beans and Chicken
Stir in the drained white beans and shredded chicken. Cook for 5 more minutes until everything is heated through. The beans should be tender but not mushy, and the chicken should be moist.
⚠️ Common Mistake to Avoid: Adding the beans too early or cooking them too long can make them fall apart. Stir them in gently and just heat them through — about 5 minutes is perfect.
Step 6: Finish and Serve
Remove the bay leaves, stir in the balsamic vinegar, and adjust seasoning to taste. Ladle the soup into bowls, garnish with fresh parsley and grated Parmesan cheese. Serve hot and watch everyone smile.
💡 mia’s Pro Tip: The balsamic vinegar is the secret weapon here! It brightens the whole soup and balances the sweetness of the caramelized onions. Don’t skip it — even if you think it sounds unusual, trust me.
| Step | Action | Duration | Key Visual Cue |
|---|---|---|---|
| 1 | Caramelize onions | 30 min | Deep golden brown, soft and shrunken |
| 2 | Add aromatics | 1 min | Fragrant, garlic is just softened |
| 3 | Add broth & deglaze | 2 min | Browned bits lift off the bottom |
| 4 | Simmer soup | 10 min | Broth is aromatic and slightly reduced |
| 5 | Add beans & chicken | 5 min | Beans are tender, chicken is heated through |
| 6 | Finish & serve | 2 min | Balsamic stirred in, soup is glossy |
Serving & Presentation
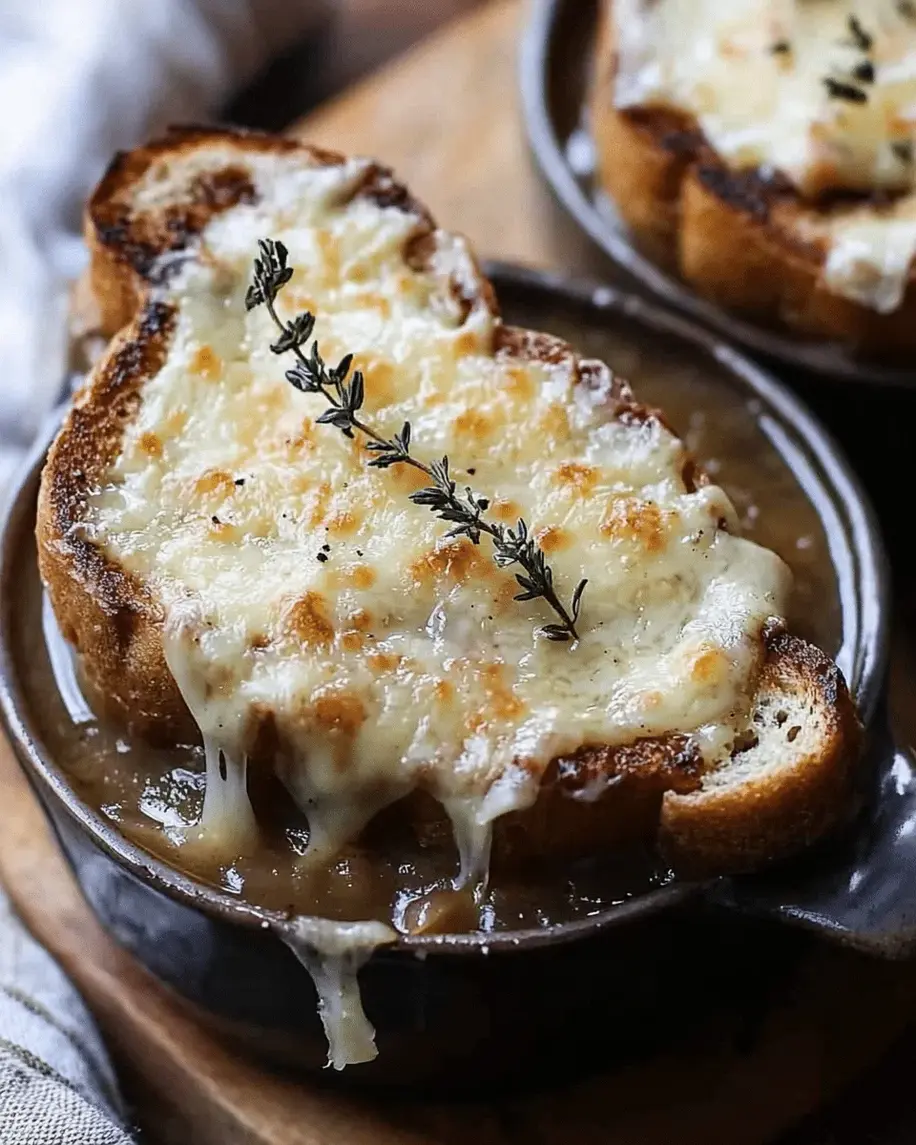
This caramelized onion chicken soup is a meal in itself, but how you serve it can elevate the whole experience. I love to ladle it into wide, shallow bowls so the beans and chicken are visible on top. A generous sprinkle of fresh parsley and a shower of grated Parmesan add color and saltiness. For a touch of crunch, serve with crusty bread or garlic croutons on the side — perfect for dipping into that rich broth.
In my NYC kitchen, I often pair this soup with a simple green salad dressed with lemon and olive oil, or with a grilled cheese sandwich for the ultimate comfort combo. The soup also pairs beautifully with a crisp white wine like Sauvignon Blanc or a light Pinot Noir. And if you want to go full Moroccan-inspired, serve it with a side of warm pita bread and a dollop of harissa for a spicy kick.
For a cozy presentation, I like to garnish each bowl with a few extra thyme sprigs and a drizzle of good olive oil. It makes the soup look as beautiful as it tastes — and that’s the kind of care I learned from my mother’s kitchen in Morocco.
| Pairing Type | Suggestions | Why It Works |
|---|---|---|
| Side Dish | Crusty sourdough, garlic bread, simple green salad | Adds crunch and freshness; balances the hearty soup |
| Sauce / Dip | Harissa, pesto, or a drizzle of balsamic glaze | Adds heat/herbaceousness or extra acidity |
| Beverage | Sauvignon Blanc, light Pinot Noir, sparkling water with lemon | Crisp wine cuts through richness; sparkling water refreshes |
| Garnish | Fresh parsley, grated Parmesan, thyme sprigs, olive oil drizzle | Adds color, freshness, and a salty/umami finish |
Make-Ahead, Storage & Reheating
This hearty comfort soup recipe is a dream for meal prep. As a busy NYC food blogger, I rely on recipes that taste even better the next day, and this one delivers. The flavors continue to meld and deepen overnight, making it a perfect make-ahead meal for busy weekdays. Here’s everything you need to know about storing and reheating.
| Method | Container | Duration | Reheating Tip |
|---|---|---|---|
| Refrigerator | Airtight container (glass or plastic) | Up to 4 days | Reheat gently on the stovetop over medium-low heat, adding a splash of broth or water if too thick. Microwave in 30-second bursts, stirring in between. |
| Freezer | Freezer-safe container or zip-top bag | Up to 3 months | Thaw overnight in the fridge. Reheat on the stovetop, adding a splash of broth if needed. The texture of the beans may soften slightly, but the flavor will be amazing. |
| Make-Ahead | Same as refrigerator | Up to 2 days in advance | Prepare the soup completely, cool to room temperature, then refrigerate. The flavors will be even more developed the next day. Add the parsley and Parmesan just before serving. |
One thing I’ve learned from my Paris training: soups like this often taste better after a day in the fridge. The onions continue to infuse the broth, and the beans absorb all those savory flavors. When reheating, go low and slow to prevent the chicken from drying out. If the soup thickens too much upon standing (the beans love to soak up broth), just add a splash of chicken broth or water until it reaches your desired consistency.
I also recommend portioning the soup into individual containers for easy grab-and-heat lunches. It’s a lifesaver on busy days when you need something warm and nourishing but don’t have time to cook from scratch.
Variations & Easy Swaps
One of the things I love most about this caramelized onion white bean soup is how versatile it is. Over the years, I’ve experimented with countless variations — some inspired by my Moroccan roots, others by my French training, and a few that came from random NYC farmers market finds. Here are three of my favorite ways to change things up.
| Variation | Key Change | Best For | Difficulty Impact |
|---|---|---|---|
| Moroccan Spiced | Add 1 tsp cumin, 1/2 tsp turmeric, and a pinch of cinnamon | Warming, aromatic twist | Easy |
| Creamy Coconut | Stir in 1/2 cup coconut milk at the end | Dairy-free, extra creaminess | Easy |
| Hearty Greens | Add 3 cups chopped kale or spinach in the last 5 minutes | Extra nutrition and color | Easy |
Moroccan Spiced Variation
This variation is a nod to my heritage. Add 1 teaspoon of ground cumin, 1/2 teaspoon of turmeric, and a pinch of cinnamon along with the garlic and thyme. The warm spices complement the sweet caramelized onions beautifully and give the soup a gorgeous golden hue. I love serving this version with a dollop of yogurt and a sprinkle of fresh cilantro. My mother would approve!
Dairy-Free Creamy Variation
For a luscious, dairy-free version, stir in 1/2 cup of full-fat coconut milk after you remove the bay leaves. The coconut milk adds a silky richness that pairs surprisingly well with the thyme and balsamic vinegar. I tested this version during a winter workshop in NYC, and it was a hit with everyone — even those who usually avoid coconut flavor. The key is to use full-fat coconut milk for the best texture.
Hearty Greens Variation
When I find beautiful kale or spinach at the Union Square Greenmarket, I love adding it to this soup. Simply fold in 3 cups of chopped kale or baby spinach during the last 5 minutes of cooking, allowing it to wilt into the broth. The greens add a boost of nutrients, a pleasant textural contrast, and a pop of vibrant green against the golden broth. This is my go-to version when I want to pack in extra veggies without compromising on flavor.
How do you caramelize onions for soup without burning them?
The key to perfect caramelized onions without burning is low heat and patience. Start by heating your oil over medium heat, then add the sliced onions and stir to coat. Reduce the heat to medium-low and cook slowly, stirring every 5 minutes or so. If the onions start to stick or look dry, add a splash of water or broth to deglaze the pan — this creates steam that helps them cook evenly. The total process takes about 30 minutes. Keep an eye on the color; you want a deep golden brown, not dark brown or black. A good visual cue is when the onions have reduced significantly in volume and look jammy and glossy.
Can I use a different type of bean instead of white beans in this chicken soup?
Absolutely! While cannellini or great northern beans are classic for this caramelized onion chicken soup, you can easily swap them. Butter beans (lima beans) are a fantastic substitute — they’re larger and even creamier, which adds a luscious texture. Chickpeas (garbanzo beans) also work well and bring a slightly nutty flavor that complements the caramelized onions. If you’re in a pinch, even pinto beans or black beans can work, though they’ll change the color and flavor profile a bit. Just remember to drain and rinse any canned beans before adding them to the soup to remove excess sodium and any metallic taste.
How long does it take for the flavors to meld in this caramelized onion and chicken soup?
The flavors in this white bean chicken soup start melding immediately as you cook, but they reach their peak after a few hours — or even better, overnight. Once the soup is fully cooked, let it simmer for an extra 10-15 minutes (covered, on low heat) to allow the onions, beans, and chicken to really get cozy together. However, the real magic happens when you let the soup cool and refrigerate it for a day. The next day, the caramelized onion flavor has infused every spoonful, and the beans have absorbed the savory broth. I actually prefer making this soup a day ahead for the deepest, most comforting flavor.
What can I serve with this hearty chicken and white bean soup for a complete meal?
This hearty comfort soup recipe is already quite filling, but you can easily round it into a complete meal. My favorite pairing is a crusty sourdough bread or garlic bread for dipping — it’s perfect for sopping up every last drop of broth. A simple side salad with mixed greens, lemon vinaigrette, and shaved Parmesan adds freshness and crunch. For a more substantial meal, serve the soup with a grilled cheese sandwich (try Gruyère or cheddar). If you’re hosting, a cheese board with crackers and a glass of Sauvignon Blanc or light Pinot Noir makes the meal feel special. And for a cozy weeknight, nothing beats a bowl of this soup with a side of roasted vegetables.
Is this caramelized onion chicken soup gluten-free?
Yes, this caramelized onion chicken soup is naturally gluten-free! All the ingredients — olive oil, onions, garlic, thyme, bay leaves, chicken broth, white beans, chicken, balsamic vinegar, parsley, and Parmesan — are gluten-free. Just be sure to check the labels on your chicken broth and balsamic vinegar to ensure they are certified gluten-free, as some brands may contain additives or be processed in facilities that handle gluten. If you’re serving the soup with bread on the side, simply choose your favorite gluten-free bread or crackers. This soup is naturally hearty and satisfying all on its own!
Can I freeze this chicken and white bean soup?
Definitely! This white bean chicken soup freezes beautifully. Let the soup cool completely to room temperature, then transfer it to freezer-safe containers or zip-top bags. I recommend portioning it into individual servings for easy thawing. It will keep for up to 3 months in the freezer. When you’re ready to enjoy it, thaw the soup overnight in the refrigerator, then reheat gently on the stovetop over medium-low heat. You may need to add a splash of chicken broth or water if the soup has thickened too much, as the beans tend to absorb liquid during freezing. The flavor will still be deliciously rich and comforting.
What type of chicken is best for this soup — rotisserie or fresh?
Both work wonderfully, and I use both depending on my schedule. Rotisserie chicken is my go-to shortcut on busy weekdays — it’s already cooked, tender, and flavorful. Just remove the skin and shred the meat. It saves time and adds a nice roasted flavor to the soup. Fresh chicken (boneless, skinless breasts or thighs) is also excellent. If using fresh, I recommend poaching it in the broth for the last 15-20 minutes of simmering, then removing it, shredding it, and stirring it back in. This infuses the chicken with flavor and keeps it incredibly moist. For the easiest version, rotisserie chicken is perfect. For the richest flavor, poach fresh chicken in the broth.
How do I make this caramelized onion soup recipe vegetarian?
Making this caramelized onion soup recipe vegetarian is simple! Replace the chicken broth with a high-quality vegetable broth or mushroom broth for rich, savory flavor. Omit the chicken and add an extra can of white beans or a can of chickpeas for protein. You can also add hearty vegetables like diced carrots, celery, or mushrooms when you add the garlic and thyme. For extra umami, stir in a teaspoon of miso paste or a splash of soy sauce along with the balsamic vinegar. The caramelized onions and beans provide so much depth and creaminess that you won’t miss the chicken at all. Garnish with fresh parsley and a sprinkle of nutritional yeast instead of Parmesan, or use a vegetarian Parmesan alternative.
Can I make this soup in a slow cooker or Instant Pot?
Yes, you can adapt this hearty comfort soup recipe for both appliances. For a slow cooker: Caramelize the onions in a skillet first (this step is essential for flavor), then transfer them to the slow cooker with the garlic, thyme, bay leaves, and broth. Cook on low for 6-8 hours or high for 3-4 hours. Stir in the beans and shredded chicken during the last 30 minutes of cooking. For an Instant Pot: Use the sauté function to caramelize the onions and cook the aromatics. Add the broth, scrape up any browned bits, then cook on high pressure for 10 minutes with a natural release. Stir in the beans and shredded chicken and let them heat through using the sauté function. The flavors will be slightly different from the stovetop version but still delicious.
What if I don’t have balsamic vinegar — can I skip it or use something else?
I strongly recommend using balsamic vinegar because it adds a unique sweetness and acidity that balances the rich, savory soup perfectly. However, if you don’t have it, you can substitute with red wine vinegar, sherry vinegar, or apple cider vinegar. Use the same amount (1 tablespoon) and expect a slightly different flavor profile: red wine vinegar is more tart, sherry vinegar adds a nutty depth, and apple cider vinegar is fruity and mild. If you have no vinegar at all, a squeeze of fresh lemon juice can also work in a pinch. The vinegar is important for cutting through the richness of the caramelized onions and beans, so I don’t recommend skipping it entirely.
Share Your Version!
I absolutely love hearing how this caramelized onion chicken soup turns out in your kitchen! Every time someone tells me they made this white bean chicken soup and it brought warmth to their table, it makes my day. Did you try the Moroccan spiced variation? Did you add extra greens? I want to know all about it!
Leave a star rating and a comment below to let me know how it went. Share a photo of your soup on Instagram or Pinterest and tag @exorecipes — I love seeing your beautiful creations. And if you have a question about any step or substitution, just ask! I read every comment and I’m here to help you make the most comforting bowl possible. From my NYC kitchen to yours — I hope this recipe brings as much warmth to your table as it does to mine. — mia 🧡
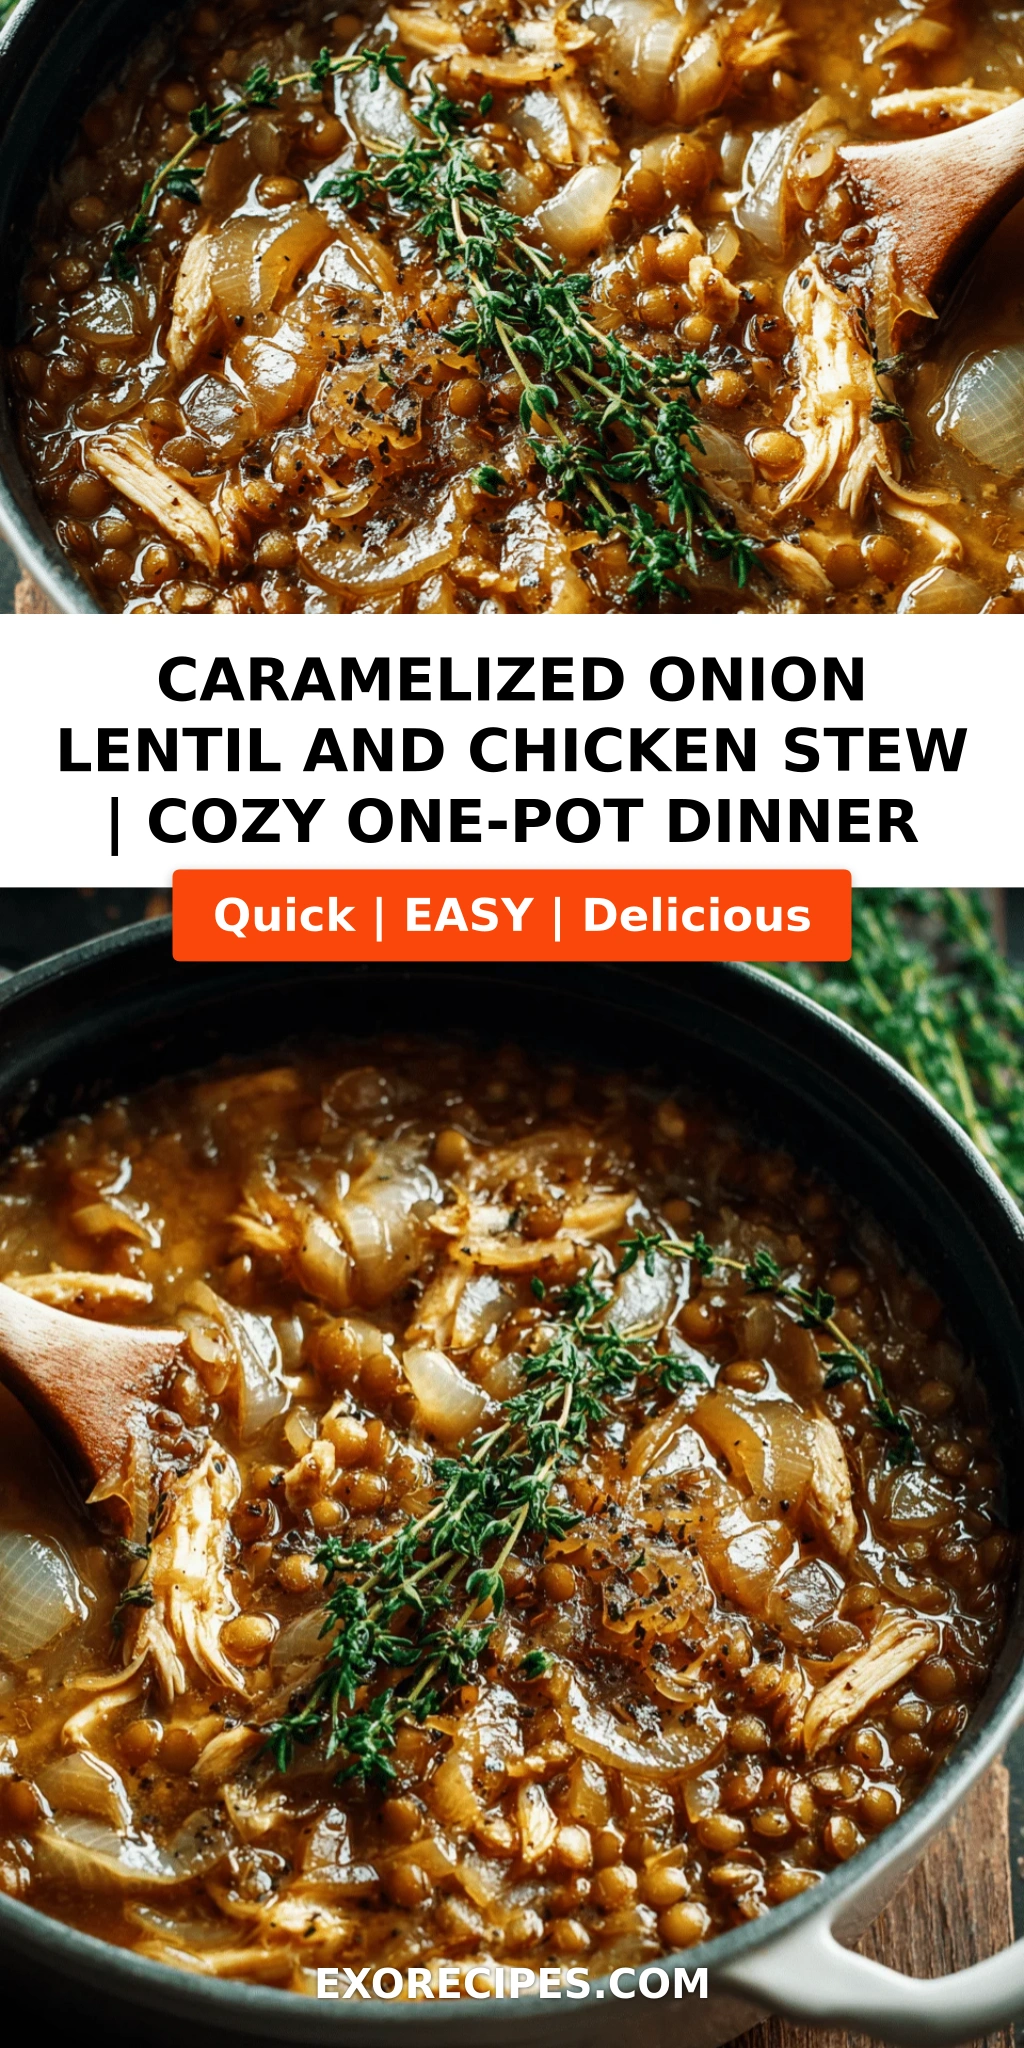
Love This Recipe? Save It to Pinterest!
If you enjoyed this Caramelized Onion, White Bean & Chicken Soup recipe, don’t let it get lost in your browser tabs! 😄 Pin it now so you can find it again anytime — and explore hundreds more tried-and-tested recipes waiting for you on my Pinterest boards.
👉 Follow mia on Pinterest @exorecipe
📌 Pin this recipe · 🔁 Re-pin your favorites · 💬 Tag me when you make it — I love seeing your creations!
💬 What’s your favorite way to enjoy this caramelized onion chicken soup? Drop a comment below — I read every single one!
“`
Print
Caramelized Onion, White Bean & Chicken Soup That Feels Comforting and Hearty
- Prep Time: 15 minutes
- Cook Time: 45 minutes
- Total Time: 1 hour
- Yield: 6 1x
- Method: Soup
- Cuisine: American
Description
This Caramelized Onion, White Bean & Chicken Soup That Feels Comforting and Hearty is a cozy, flavorful soup with tender chicken, creamy white beans, and sweet caramelized onions. It’s perfect for cold nights and meal prep.
Ingredients
- 2 tablespoons olive oil
- 3 large yellow onions, thinly sliced
- 1 teaspoon salt, plus more to taste
- 1/2 teaspoon black pepper, plus more to taste
- 4 cloves garlic, minced
- 1 tablespoon fresh thyme leaves (or 1 teaspoon dried)
- 2 bay leaves
- 8 cups chicken broth, low sodium
- 1 (15-ounce) can white beans (cannellini or great northern), drained and rinsed
- 2 cups cooked chicken, shredded (rotisserie chicken works well)
- 1 tablespoon balsamic vinegar
- Fresh parsley, chopped, for garnish
- Grated Parmesan cheese, for serving
Instructions
- Heat olive oil in a large pot or Dutch oven over medium heat.
- Add sliced onions and cook, stirring occasionally, for about 30 minutes until deeply caramelized and golden brown. If onions start to stick, add a splash of water or broth.
- Add salt, pepper, garlic, thyme, and bay leaves; cook for 1 minute until fragrant.
- Pour in chicken broth, scraping up any browned bits from the bottom of the pot.
- Bring to a boil, then reduce heat and simmer for 10 minutes.
- Stir in white beans and shredded chicken; cook for 5 more minutes until heated through.
- Remove bay leaves, stir in balsamic vinegar, and adjust seasoning to taste.
- Ladle into bowls, garnish with fresh parsley and grated Parmesan cheese.
Notes
To save time, use pre-cooked rotisserie chicken. Caramelizing the onions slowly is key for deep flavor; don’t rush this step. This soup keeps well in the fridge for up to 4 days.
Nutrition
- Calories: 320
- Sugar: 8g
- Fat: 12g
- Carbohydrates: 28g
- Protein: 26g

k">
Tried This Recipe? Leave a Comment!
Did you make this recipe? I’d love to hear how it turned out! Please leave a comment and a rating below. Your feedback helps other home cooks and supports cheerychop.com!
For more delicious inspiration, follow me on Pinterest!