Table of Contents
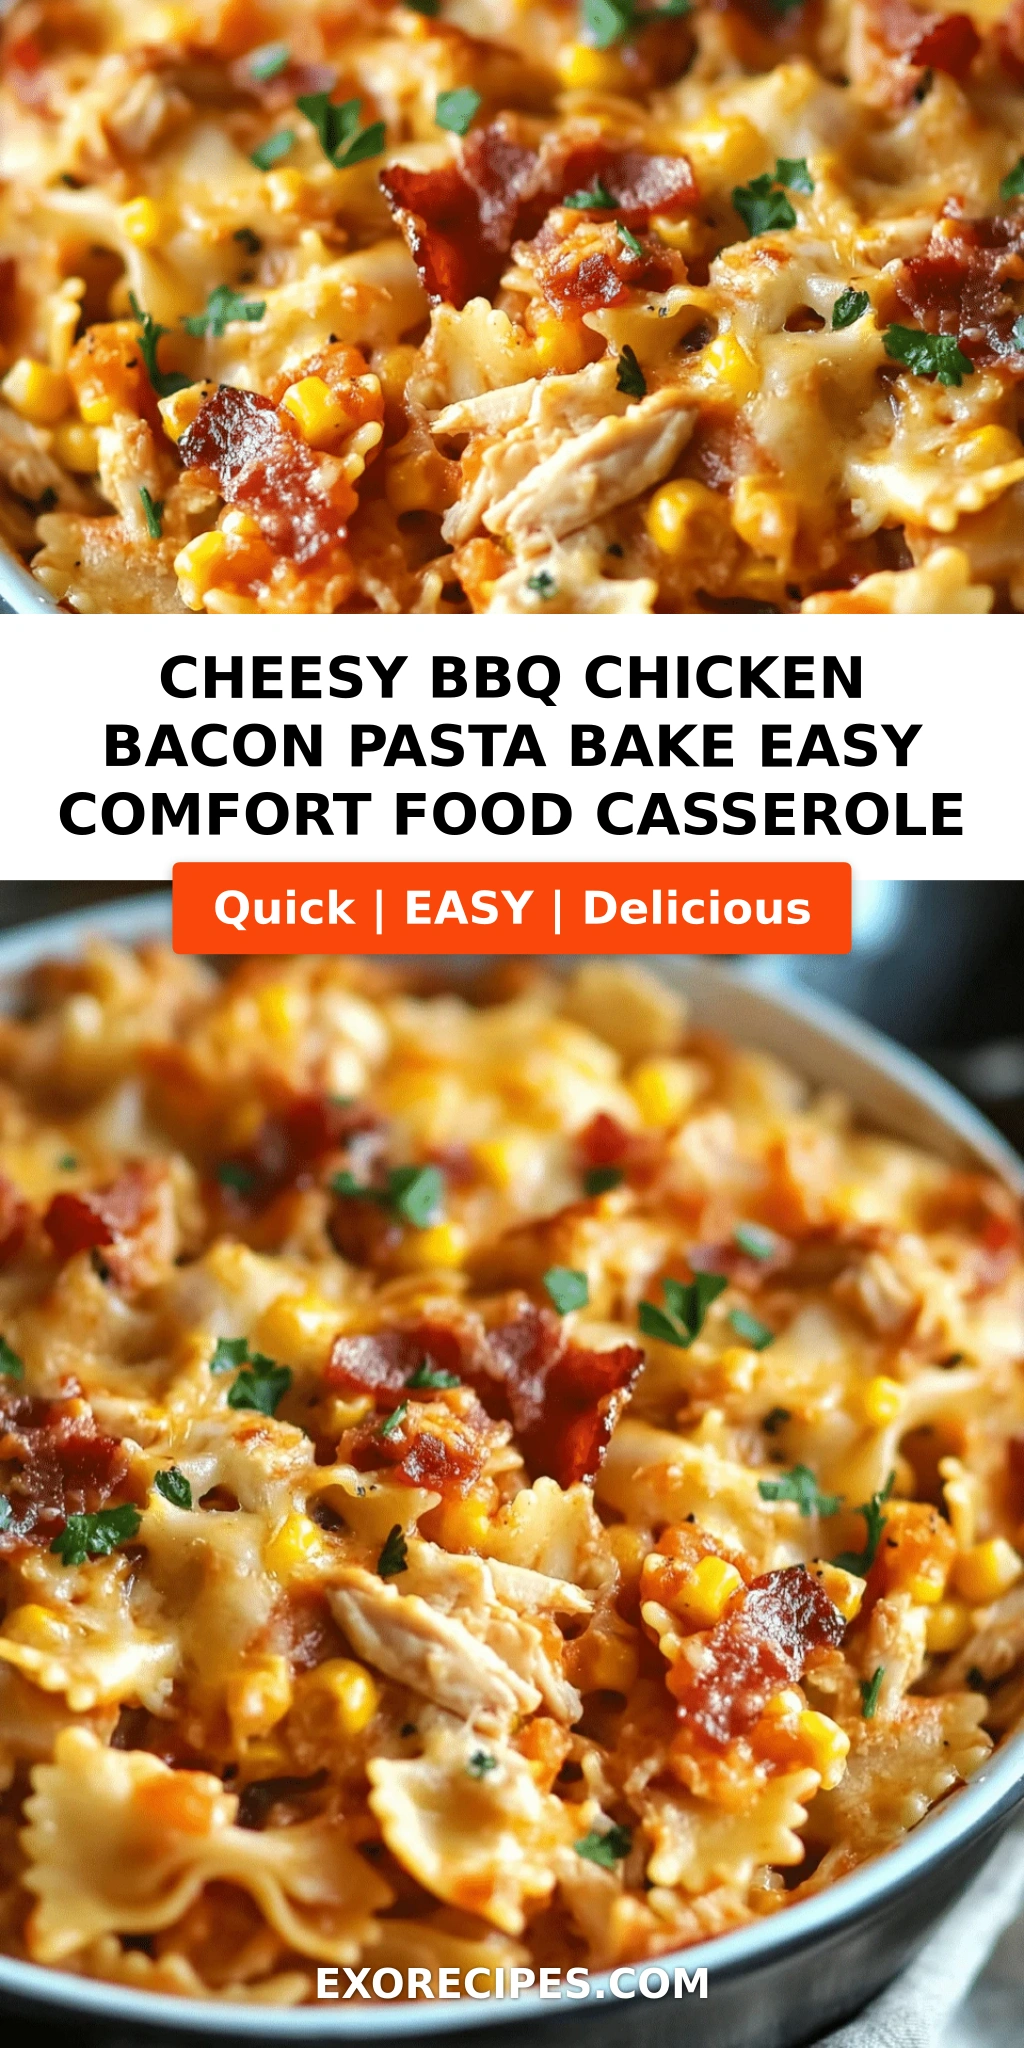
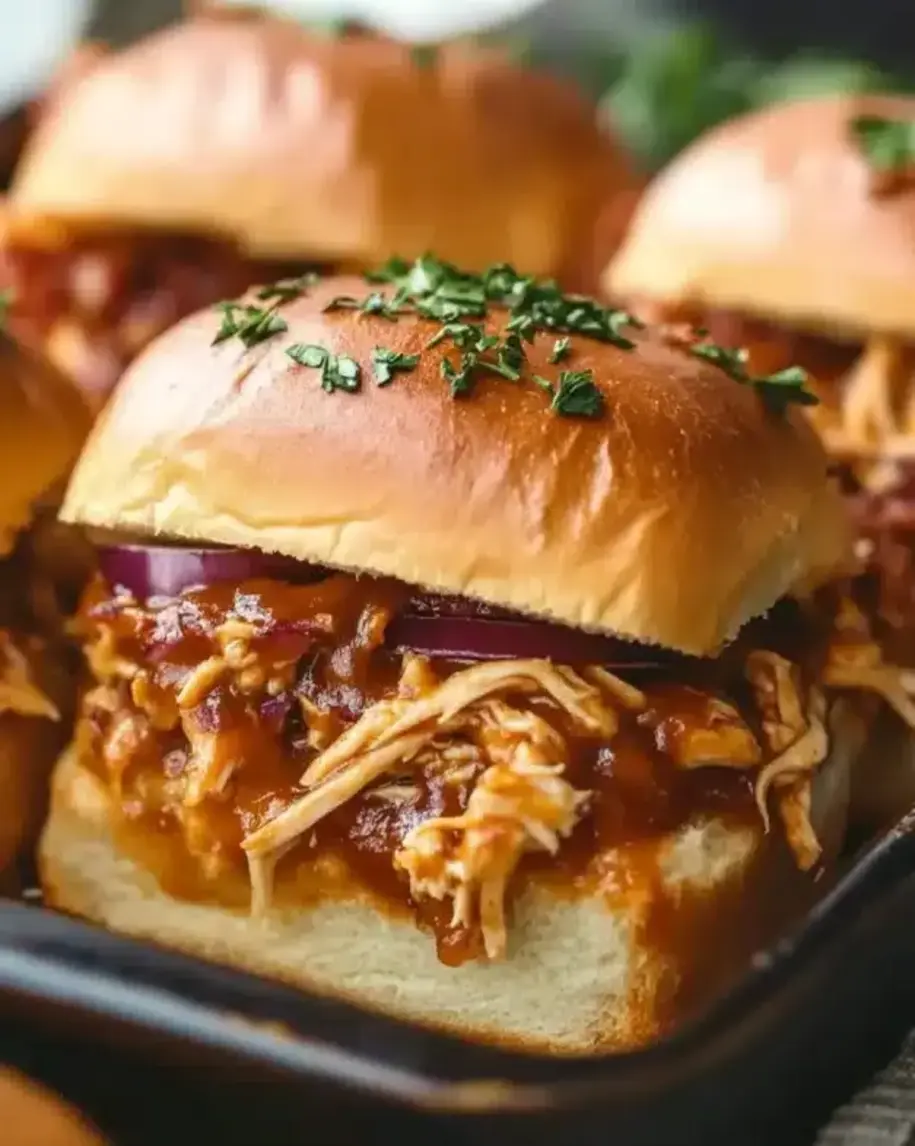
Cheesy BBQ Chicken Bacon Sliders – The Ultimate Game Day Sensation
Growing up in Morocco, my mother taught me that the best food is the food you share — piled high on a platter, passed around a table full of people you love. These Cheesy BBQ Chicken Bacon Sliders are my love letter to that idea, with a distinctly New York twist. The first time I made them for a game-day gathering in my tiny Manhattan kitchen, the platter was empty in under ten minutes. That’s when I knew I’d created something special: a BBQ chicken bacon sliders recipe that disappears as fast as you can bake it.
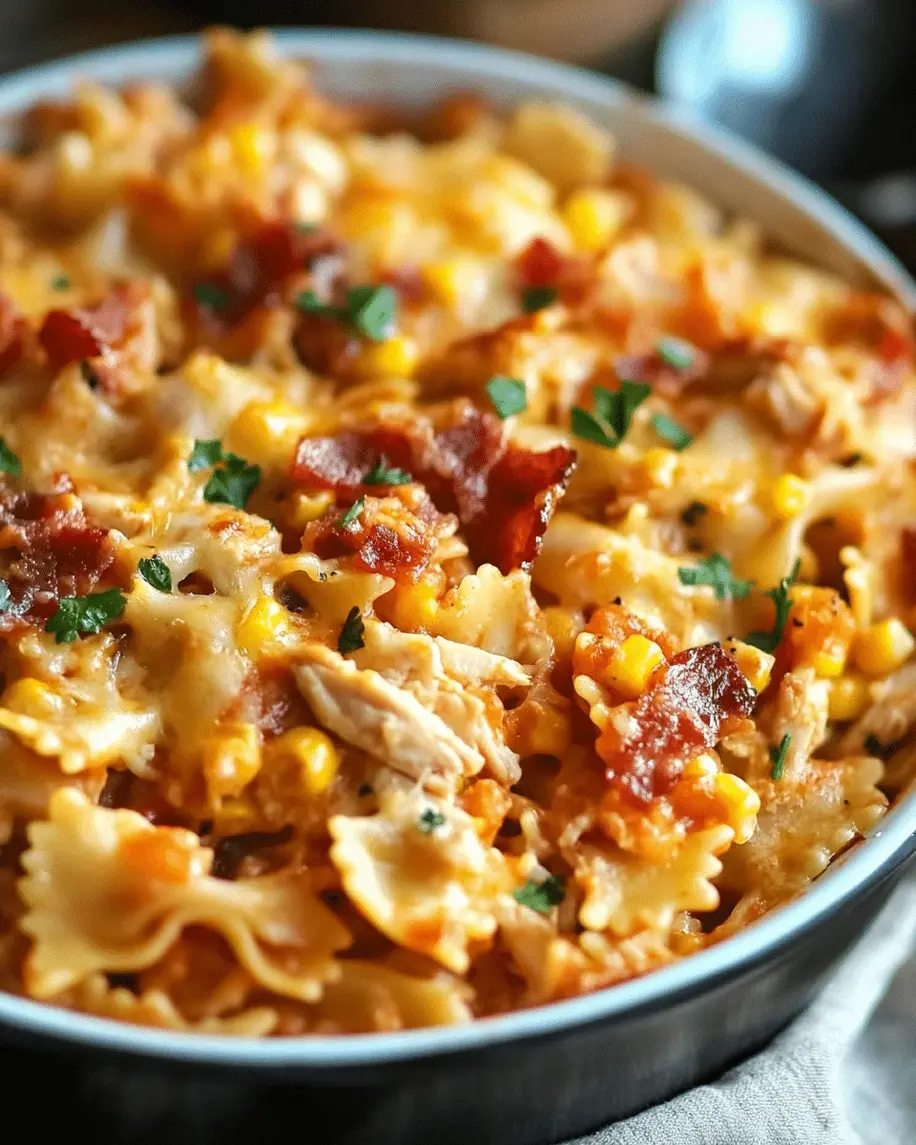
Imagine this: soft, pillowy slider buns toasted to golden perfection, layered with tender shredded chicken drenched in smoky-sweet barbecue sauce, topped with crispy bacon crumbles and a generous blanket of melted cheddar cheese. Every bite gives you that perfect pull-apart moment — the cheese stretches, the bun gives way, and the smoky, tangy, savory flavors collide in the most satisfying way. The aroma alone — bacon baking, butter browning, cheese bubbling — will draw everyone into your kitchen before you even pull the dish out of the oven.
What sets my version apart is a technique I picked up during my pastry training in Paris: brushing the tops of the buns with a seasoned butter glaze before baking. It gives the sliders that gorgeous golden crust and a whisper of garlic and sesame that elevates every bite. Plus, I’ve tested this recipe a dozen times to ensure it stays perfectly balanced — saucy but not soggy, cheesy but not greasy, crispy on top and tender inside. Whether you’re feeding a crowd or meal-prepping for a busy week, these sliders deliver every single time.
Why This Cheesy BBQ Chicken Bacon Sliders Recipe Is the Best
The flavor secret here is all about layering. I learned from my mother’s tagine-making that depth comes from building each component separately before bringing them together. The shredded chicken gets tossed in a high-quality barbecue sauce — I love a smoky variety with a touch of molasses — so every strand is coated. The bacon is cooked until ultra-crispy, then crumbled into tiny salty nuggets that punctuate each bite. And the cheddar? I use a sharp, aged cheddar that melts like a dream without turning greasy. That combination of sweet, smoky, salty, and tangy is pure magic.
Texture is where my French training really comes through. The butter glaze — melted butter whisked with sesame seeds, garlic powder, and onion powder — is brushed generously over the buns before baking. As the sliders heat through, that glaze caramelizes, creating a delicate, golden crust on top while the bottoms stay soft and tender from the steam released by the chicken and cheese. It’s the same principle I used for brioche in Paris: a beautiful contrast between a crisp exterior and a pillowy interior. Every bite has that satisfying crunch followed by that luscious, cheesy pull.
And here’s the best part: this recipe is absolutely foolproof. You don’t need any special equipment or advanced cooking skills. If you can shred a chicken and stir together a butter glaze, you can make these sliders. The total active time is just ten minutes — the oven does the rest. I’ve made these for everything from Super Bowl parties to quick weeknight dinners, and they’ve never failed me. They’re the kind of recipe that makes you look like a hero with almost zero effort.
Cheesy BBQ Chicken Bacon Sliders Ingredients
I source most of my ingredients from the Union Square Greenmarket and my favorite bodega in Brooklyn. For the barbecue sauce, I always reach for a brand that lists molasses or brown sugar as the first ingredient — it makes all the difference. And the cheddar? I buy a block and shred it myself; pre-shredded cheese has anti-caking agents that prevent it from melting as smoothly. Here’s everything you’ll need.
Ingredients List
- 1 lb cooked chicken breast, shredded
- 1 cup barbecue sauce (your favorite brand)
- 12 slider buns
- 12 slices bacon, cooked and crumbled
- 2 cups shredded cheddar cheese
- 1/2 cup butter, melted
- 1 tablespoon sesame seeds
- 1 teaspoon garlic powder
- 1 teaspoon onion powder
- Fresh parsley, chopped (optional for garnish)
Ingredient Spotlight
Chicken: I prefer poaching chicken breasts for this recipe — it keeps the meat incredibly moist and tender. Simply simmer the breasts in salted water with a bay leaf and a few peppercorns for about 15 minutes, then shred. A rotisserie chicken from the store works beautifully too; just remove the skin and shred the meat. Substitution: Boneless thighs add even more richness and stay just as tender.
Barbecue Sauce: This is the backbone of the dish. I look for a sauce with a balance of sweetness and smokiness — Kansas City-style is my go-to. Avoid sauces that are overly vinegar-based (like Carolina-style) as they can make the sliders taste acidic. Substitution: A homemade BBQ sauce with smoked paprika and honey works beautifully if you have the time.
Slider Buns: Soft, slightly sweet brioche-style or potato slider buns are ideal. They hold up to the saucy filling without falling apart. Hawaiian rolls are a fantastic shortcut option — their natural sweetness pairs perfectly with the smoky barbecue. Substitution: Gluten-free slider buns work well; just reduce the baking time by 5 minutes and check for doneness.
Cheddar Cheese: Sharp cheddar brings the most flavor and melts into that beautiful, golden, stretchy layer. I recommend shredding it yourself from a block — it melts more evenly and has a better texture. Substitution: Monterey Jack, smoked gouda, or a blend of cheddar and mozzarella are all excellent choices.
| Original Ingredient | Best Substitution | Flavor / Texture Impact |
|---|---|---|
| Cooked chicken breast | Rotisserie chicken or boneless thighs | Thighs are juicier and more flavorful; rotisserie adds a subtle roasted note |
| Barbecue sauce | Homemade BBQ sauce with smoked paprika and honey | More control over sweetness and smokiness; slightly thicker consistency |
| Slider buns | Hawaiian rolls or gluten-free slider buns | Hawaiian adds sweetness; gluten-free buns are slightly denser but work well |
| Cheddar cheese | Monterey Jack, smoked gouda, or cheddar-mozzarella blend | Monterey Jack is milder and creamier; gouda adds a deeper smoky flavor |
How to Make Cheesy BBQ Chicken Bacon Sliders — Step-by-Step
Trust me when I say this is one of the easiest recipes you’ll ever make. The oven does almost all the work, and the result is absolutely spectacular. Let me walk you through each step with the same attention I give every dish in my kitchen.
Step 1: Preheat and Prep
Preheat your oven to 350°F (175°C). Grease a 9×13-inch baking dish lightly with butter or nonstick spray. This ensures nothing sticks and makes cleanup a breeze. Take your slider buns and slice them in half horizontally — a serrated knife works best for this, as it cuts through the soft bread without crushing it.
💡 mia’s Pro Tip: Place the bottom halves of the buns in the dish in a single snug layer. If they’re slightly crowded, that’s fine — they’ll soften and meld together as they bake, creating that perfect pull-apart texture.
Step 2: Build the Filling
In a medium bowl, combine your shredded chicken and barbecue sauce. Stir well until every strand of chicken is evenly coated. Don’t oversaturate — you want the chicken to be glossy and saucy, not swimming in sauce. Spread this mixture evenly over the bottom layer of buns, making sure it reaches the edges so every slider gets some.
⚠️ Common Mistake to Avoid: Adding too much sauce at this stage. The chicken should be well-coated but not dripping — excess sauce will make the buns soggy before they even hit the oven. Start with ¾ cup of sauce and add more only if needed.
Step 3: Layer the Bacon and Cheese
Sprinkle your crumbled bacon evenly over the saucy chicken. Then shower the shredded cheddar cheese over the top — don’t be shy, cover every bit of chicken and bacon. The cheese acts as both a flavor layer and a barrier that helps keep the buns from getting soggy. Place the top halves of the buns over the cheese, pressing down gently to nestle them into the filling.
💡 mia’s Pro Tip: For the crispiest bacon, cook it in the oven on a parchment-lined sheet pan at 400°F for 15-18 minutes. It comes out perfectly flat and shatter-crisp, and you can crumble it easily with your hands once it cools slightly.
Step 4: Make the Glaze
In a small bowl, whisk together the melted butter, sesame seeds, garlic powder, and onion powder. The sesame seeds are my little nod to the North African spice markets I visited as a girl — they add a nutty, toasted flavor and a beautiful visual finish. Brush this mixture generously over the tops of the buns, making sure every surface gets coated. Don’t forget the edges — the butter will help those edges crisp up beautifully.
⚠️ Common Mistake to Avoid: Skipping the glaze or brushing it too thinly. The butter is what gives these sliders their iconic golden, crispy top. Be generous — you want every bun to have that beautiful sheen and crunch.
Step 5: Bake to Perfection
Bake for 20-25 minutes, until the cheese is fully melted and bubbly, the tops are deep golden brown and crispy, and the edges are caramelized. The kitchen will smell absolutely incredible at this point — smoky bacon, buttery buns, melted cheese. If your buns are browning too quickly, tent the dish loosely with foil for the last 5 minutes. Let the sliders rest for 2-3 minutes before garnishing with fresh parsley (if using) and serving warm.
💡 mia’s Pro Tip: For an extra-crispy top, switch the oven to broil for the last 1-2 minutes. Watch carefully — butter and sesame seeds can burn quickly under the broiler. This step is optional but gives you that bakery-level golden crust.
| Step | Action | Duration | Key Visual Cue |
|---|---|---|---|
| 1 | Preheat oven and grease dish | 5 minutes | Oven reaches 350°F, dish is lightly greased |
| 2 | Toss chicken with BBQ sauce | 2 minutes | Chicken is evenly coated, glossy but not dripping |
| 3 | Layer chicken, bacon, cheese, and top buns | 3 minutes | Even layers, cheese covers all filling, buns sit flat |
| 4 | Whisk and brush butter glaze | 2 minutes | Buns are fully coated, shiny with visible sesame seeds |
| 5 | Bake sliders | 20-25 minutes | Tops deep golden, cheese bubbly at edges, buns crispy |
Serving & Presentation
I love serving these sliders directly from the baking dish — it keeps them warm and gives that cozy, family-style feel that reminds me of gatherings in my mother’s home in Marrakech. Place the dish on a wooden board or trivet in the center of the table and let everyone pull apart their own slider. Garnish with a sprinkle of fresh chopped parsley for a pop of color and a hint of freshness that cuts through the richness.
For a complete meal, I pair these sliders with a crisp coleslaw — the tangy crunch is the perfect counterpoint to the smoky, cheesy sliders. In the summer, I’ll add grilled corn on the cob or a simple tomato salad with cucumbers and red onion. In the winter, a warm potato salad or roasted sweet potato wedges are my go-to. And if you’re serving these for game day, set out extra barbecue sauce and ranch dressing for dipping — trust me, people will use them.
| Pairing Type | Suggestions | Why It Works |
|---|---|---|
| Side Dish | Creamy coleslaw, grilled corn, sweet potato wedges | Crunchy, tangy, or sweet sides balance the rich, savory sliders |
| Sauce / Dip | Extra BBQ sauce, ranch dressing, creamy chipotle dip | Adds moisture and extra flavor; ranch cools the smokiness |
| Beverage | Iced tea, lemonade, amber ale, crisp lager | Refreshing and palate-cleansing; beer complements the smoky, cheesy flavors |
| Garnish | Fresh parsley, sliced jalapeños, pickled red onions | Adds color, freshness, and a pop of acidity or heat |
Make-Ahead, Storage & Reheating
Living in NYC means my schedule is always packed — between blogging, recipe testing, and exploring new restaurants, I rely on make-ahead meals to keep me fed. These sliders are a dream for meal prep. You can assemble them completely (without the butter glaze) up to 24 hours in advance, cover tightly with foil, and refrigerate. When you’re ready to bake, just brush on the glaze and add 5 extra minutes to the baking time to account for the cold start.
| Method | Container | Duration | Reheating Tip |
|---|---|---|---|
| Refrigerator | Airtight container or original baking dish wrapped in foil | Up to 4 days | Reheat in a 350°F oven for 8-10 minutes, uncovered, to restore crispiness |
| Freezer | Wrap sliders individually in foil, then place in a freezer bag | Up to 3 months | Thaw in fridge overnight, then reheat at 350°F for 12-15 minutes |
| Make-Ahead | Assemble in baking dish, cover tightly with foil, refrigerate | Up to 24 hours in advance | Add glaze just before baking; add 5 minutes to bake time |
For the crispiest reheated sliders, always use the oven — the microwave will soften the buns and make them chewy. I’ve tested this many times, and a quick 8-minute stint in a 350°F oven brings back that beautiful golden crust and melted, gooey cheese. If you’re reheating from frozen, let the sliders thaw in the refrigerator overnight first, then follow the same oven method. The texture will be nearly as good as fresh.
Variations & Easy Swaps
| Variation | Key Change | Best For | Difficulty Impact |
|---|---|---|---|
| Spicy Chipotle Sliders | Add 1-2 minced chipotles in adobo to the BBQ sauce | Heat lovers and smoky flavor enthusiasts | Easy — just stir in the chipotles |
| Smoked Gouda & Apple Sliders | Replace cheddar with smoked gouda; add thin apple slices | A sophisticated twist for dinner parties | Easy — just swap cheese and add apple slices before baking |
| Moroccan Spice Sliders | Add 1 tsp ras el hanout and ½ tsp cinnamon to the BBQ sauce | Adventurous eaters who love warm, aromatic spices | Easy — just whisk in the spices |
Spicy Chipotle Sliders
If you love heat, this is your version. Mince 1-2 chipotle peppers in adobo sauce and stir them into the barbecue sauce before tossing with the chicken. The smoky, earthy heat of chipotle pairs beautifully with the sweet BBQ and salty bacon. I like to add a few slices of fresh jalapeño on top of the cheese before baking for an extra layer of spicy crunch. This version is always a hit at my game-day parties — just be sure to label it if you’re serving a crowd with varying heat tolerance.
Gluten-Free and Dairy-Free Sliders
To make these sliders gluten-free, simply swap the slider buns for your favorite gluten-free variety. I’ve tested this with both store-bought gluten-free brioche-style rolls and homemade gluten-free buns, and they work beautifully. For a dairy-free version, replace the cheddar cheese with a high-quality dairy-free shredded cheese — look for one that melts well, like a cashew-based mozzarella or cheddar alternative. Use vegan butter or olive oil in place of the butter for the glaze. The texture will be slightly different (dairy-free cheese doesn’t stretch the same way), but the flavor is still fantastic.
Moroccan Spice Sliders
This variation is near and dear to my heart. Add 1 teaspoon of ras el hanout — a North African spice blend that typically includes cumin, coriander, turmeric, cinnamon, and cardamom — and ½ teaspoon of cinnamon to the barbecue sauce. The warm, aromatic spices transform the sliders into something entirely new: exotic, fragrant, and deeply comforting. I love serving these with a side of harissa-spiked yogurt for dipping. It’s a beautiful fusion of my Moroccan roots and my adopted American home.
What type of cheese melts best on Cheesy BBQ Chicken Bacon Sliders?
Sharp cheddar cheese is my top recommendation for these sliders because it melts beautifully and brings a bold, tangy flavor that stands up to the smoky barbecue sauce and salty bacon. If you want a creamier melt, Monterey Jack or a cheddar-mozzarella blend are excellent choices. Smoked gouda adds a deeper, more complex smoky note that complements the bacon. The key is to shred the cheese yourself from a block — pre-shredded cheese contains anti-caking agents like potato starch and cellulose, which prevent it from melting into that smooth, gooey layer you’re looking for.
How do you keep the sliders from getting soggy when adding BBQ sauce?
The number one rule is to coat the chicken generously but not drown it. You want the shredded chicken to be glossy and well-coated, not sitting in a pool of sauce. Use about ¾ cup of barbecue sauce for 1 pound of chicken — that’s the sweet spot where every strand is flavorful without making the buns soggy. Another trick is to let the sauced chicken sit for 5 minutes before assembling so the sauce has time to absorb slightly into the meat rather than seeping into the bread. Also, the layer of cheese on top of the chicken acts as a barrier that helps protect the top buns from moisture. And finally, never skip the butter glaze — it creates a crispy seal on the top buns that keeps them from absorbing steam during baking.
Can you make Cheesy BBQ Chicken Bacon Sliders ahead of time and reheat them?
Absolutely! These sliders are actually perfect for making ahead. You can assemble the entire dish (without the butter glaze) up to 24 hours in advance, cover it tightly with foil, and refrigerate. When you’re ready to serve, brush on the butter glaze and bake as directed, adding about 5 extra minutes to the cooking time since you’re starting from cold. For reheating leftovers, the oven is your best friend — a 350°F oven for 8-10 minutes will restore the crispy top and melted cheese far better than a microwave ever could. If you want to freeze them, wrap each slider individually in foil and store in a freezer bag for up to 3 months. Thaw overnight in the fridge and reheat at 350°F for 12-15 minutes.
What is a good substitute for chicken in these BBQ bacon sliders?
There are several fantastic substitutes for chicken in this recipe. Shredded pork shoulder (pulled pork) is the most natural swap — it has a similar texture and absorbs barbecue sauce beautifully. Cooked, shredded turkey breast is another excellent option, especially if you have leftover holiday turkey. For a vegetarian version, try using shredded jackfruit — when cooked and sauced, it has a remarkably similar texture to pulled chicken. You can also use sliced portobello mushrooms or firm tofu that’s been pressed, shredded, and pan-seared for a non-meat option. Just keep in mind that cooking times may vary slightly: pre-cooked meats need only to heat through, while jackfruit may need a few extra minutes in the oven to soften fully.
Can I use pre-shredded cheese for these sliders?
I strongly recommend shredding your own cheese from a block for the best results. Pre-shredded cheese is coated with anti-caking agents like potato starch, cornstarch, or cellulose powder, which prevent it from melting into that smooth, gooey, stretchy layer we all love. When you shred your own cheese, it melts evenly and creates a much creamier texture. For this recipe, you’ll need about 8 ounces of cheese, which takes less than 2 minutes to shred on a box grater or in a food processor. The difference in the final texture is absolutely worth the tiny extra effort — your sliders will be noticeably more luxurious and satisfying.
What kind of barbecue sauce works best for this recipe?
A Kansas City-style barbecue sauce is my top recommendation for these sliders because it strikes the perfect balance between sweet, smoky, and tangy. Look for a sauce that lists molasses, brown sugar, or honey as one of the first ingredients — this gives the sliders that rich, caramelized sweetness that pairs so beautifully with the salty bacon and sharp cheddar. Avoid sauces that are heavily vinegar-based, like Carolina-style, as they can make the sliders taste acidic and can also make the buns soggy. If you want to experiment, a bourbon-infused sauce adds a lovely depth, and a honey-chipotle sauce brings a gentle heat. As I always tell my readers: use a sauce you genuinely love eating straight from the bottle, because its flavor will be front and center in every bite.
How do I shred chicken for these sliders?
There are several easy ways to shred chicken for this recipe, and I’ve tested them all. My preferred method is to poach the chicken breasts first — place them in a pot of salted water with a bay leaf, a few peppercorns, and a halved garlic clove, bring to a gentle simmer, and cook for 15-18 minutes until the internal temperature reaches 165°F. Let the chicken rest for 5 minutes, then shred it using two forks — hold the chicken steady with one fork and pull the meat apart with the other. For a faster method, you can use a stand mixer with the paddle attachment on low speed; it shreds the chicken in about 30 seconds without any effort. A rotisserie chicken from the store is the ultimate shortcut — just remove the skin and bones, and shred the meat with your hands or forks.
Can I add vegetables to these Cheesy BBQ Chicken Bacon Sliders?
Absolutely! Adding vegetables is a great way to boost flavor, texture, and nutrition. Sautéed sliced onions and bell peppers are a classic addition — cook them until soft and caramelized before layering them on top of the chicken. Pickled jalapeños or banana peppers add a bright, tangy kick that cuts through the richness. For a fresh crunch, add a handful of arugula or baby spinach right before serving — the slight bitterness pairs beautifully with the sweet BBQ sauce. If you want to sneak in some extra veggies, finely diced mushrooms sautéed with the chicken add moisture and an umami depth that even picky eaters won’t notice. Just be mindful not to overload the sliders with too many wet vegetables, or they can become soggy during baking.
How do you keep the tops of the sliders from burning?
The butter glaze on top of the buns contains sesame seeds, garlic powder, and onion powder, which can burn if left under high heat for too long. To prevent this, bake the sliders at 350°F rather than a higher temperature — this gentle heat allows the buns to toast golden and the cheese to melt fully without scorching the top. If you notice the tops are browning too quickly during baking, tent the dish loosely with aluminum foil for the last 5-10 minutes. If you want that extra-crispy finish, you can switch the oven to broil for the final 1-2 minutes — but watch it like a hawk, because the butter and seeds can go from golden to burnt in seconds. Every oven is different, so I always recommend checking the sliders at the 18-minute mark and adjusting accordingly.
What can I serve with Cheesy BBQ Chicken Bacon Sliders for a crowd?
These sliders are the star of any spread, and they pair beautifully with a wide range of sides. For a classic game-day menu, serve them with creamy coleslaw (the tangy crunch is the perfect contrast), crispy sweet potato fries, and a big bowl of fresh fruit salad. For a more substantial meal, add baked beans, corn on the cob, or a simple green salad with a lemon vinaigrette to cut through the richness. I love setting up a topping bar with extra barbecue sauce, ranch dressing, pickled onions, sliced jalapeños, and fresh lettuce so everyone can customize their slider. For beverages, iced tea, lemonade, or a crisp lager are all excellent choices. The beauty of this recipe is that it’s incredibly versatile — it works just as well for a casual backyard barbecue as it does for a Super Bowl party or a family dinner.
Share Your Version!
I absolutely love hearing from you — it’s the best part of this journey. If you make these Cheesy BBQ Chicken Bacon Sliders, please leave a star rating and a comment below letting me know how they turned out. Did you try one of the variations? Did you invent your own twist? Share a photo on Instagram or Pinterest and tag @exorecipes — I love seeing your creations and featuring them in my stories. And I have one question I’d love for you to answer: what’s your go-to game-day dish that always disappears first at your gatherings? I’m always looking for new ideas to test in my NYC kitchen.
From my NYC kitchen to yours — I hope this recipe brings as much warmth to your table as it does to mine. — mia 🧡
Love This Recipe? Save It to Pinterest!
If you enjoyed this Cheesy BBQ Chicken Bacon Sliders recipe, don’t let it get lost in your browser tabs! 😄 Pin it now so you can find it again anytime — and explore hundreds more tried-and-tested recipes waiting for you on my Pinterest boards.
👉 Follow mia on Pinterest @exorecipe
📌 Pin this recipe · 🔁 Re-pin your favorites · 💬 Tag me when you make it — I love seeing your creations!

Cheesy BBQ Chicken Bacon Sliders
- Prep Time: 10 minutes
- Cook Time: 25 minutes
- Total Time: 35 minutes
- Yield: 12 sliders 1x
- Method: Appetizer, Main Course
- Cuisine: American
Description
These Cheesy BBQ Chicken Bacon Sliders are the perfect game-day appetizer or quick dinner. Shredded chicken is tossed in smoky barbecue sauce, layered with crispy bacon and melted cheese, then baked on soft slider buns until golden and bubbly.
Ingredients
- 1 lb cooked chicken breast, shredded
- 1 cup barbecue sauce (your favorite brand)
- 12 slider buns
- 12 slices bacon, cooked and crumbled
- 2 cups shredded cheddar cheese
- 1/2 cup butter, melted
- 1 tablespoon sesame seeds
- 1 teaspoon garlic powder
- 1 teaspoon onion powder
- Fresh parsley, chopped (optional for garnish)
Instructions
- Preheat oven to 350°F (175°C). Grease a 9×13-inch baking dish.
- In a medium bowl, combine shredded chicken and barbecue sauce. Mix well.
- Slice slider buns in half horizontally. Place the bottom halves in the prepared baking dish.
- Spread the chicken mixture evenly over the bottom buns.
- Sprinkle crumbled bacon over the chicken, then top with shredded cheddar cheese.
- Place the top halves of the buns over the cheese.
- In a small bowl, whisk together melted butter, sesame seeds, garlic powder, and onion powder. Brush this mixture over the tops of the buns.
- Bake for 20-25 minutes, until the cheese is melted and the tops are golden and crispy.
- If desired, garnish with chopped parsley before serving. Serve warm.
Notes
For extra flavor, try using smoked bacon or a spicy barbecue sauce. These sliders are best served fresh but can be reheated in a 350°F oven for 5-10 minutes.
Nutrition
- Calories: 420
- Sugar: 12g
- Fat: 22g
- Carbohydrates: 32g
- Protein: 28g

Tried This Recipe? Leave a Comment!
Did you make this recipe? I’d love to hear how it turned out! Please leave a comment and a rating below. Your feedback helps other home cooks and supports cheerychop.com!