Table of Contents
Whipped Vanilla Buttercream Light and Fluffy: The Secret to Perfect Frosting
Growing up in Morocco, the concept of elaborate frosted cakes wasn’t quite the same as the grand French patisserie creations I’d later learn. But the love for rich, sweet flavors? That was always there! When I first came to Paris for culinary school, I was introduced to buttercreams that were both ethereal and robust, and then moving to NYC, I saw how cakes became canvases. This journey led me to perfect my own whipped vanilla buttercream recipe – a frosting that’s truly light and fluffy, yet holds its shape beautifully. It’s the secret to transforming any simple dessert into a showstopper, a technique I’m thrilled to share with you, right from my Brooklyn kitchen.
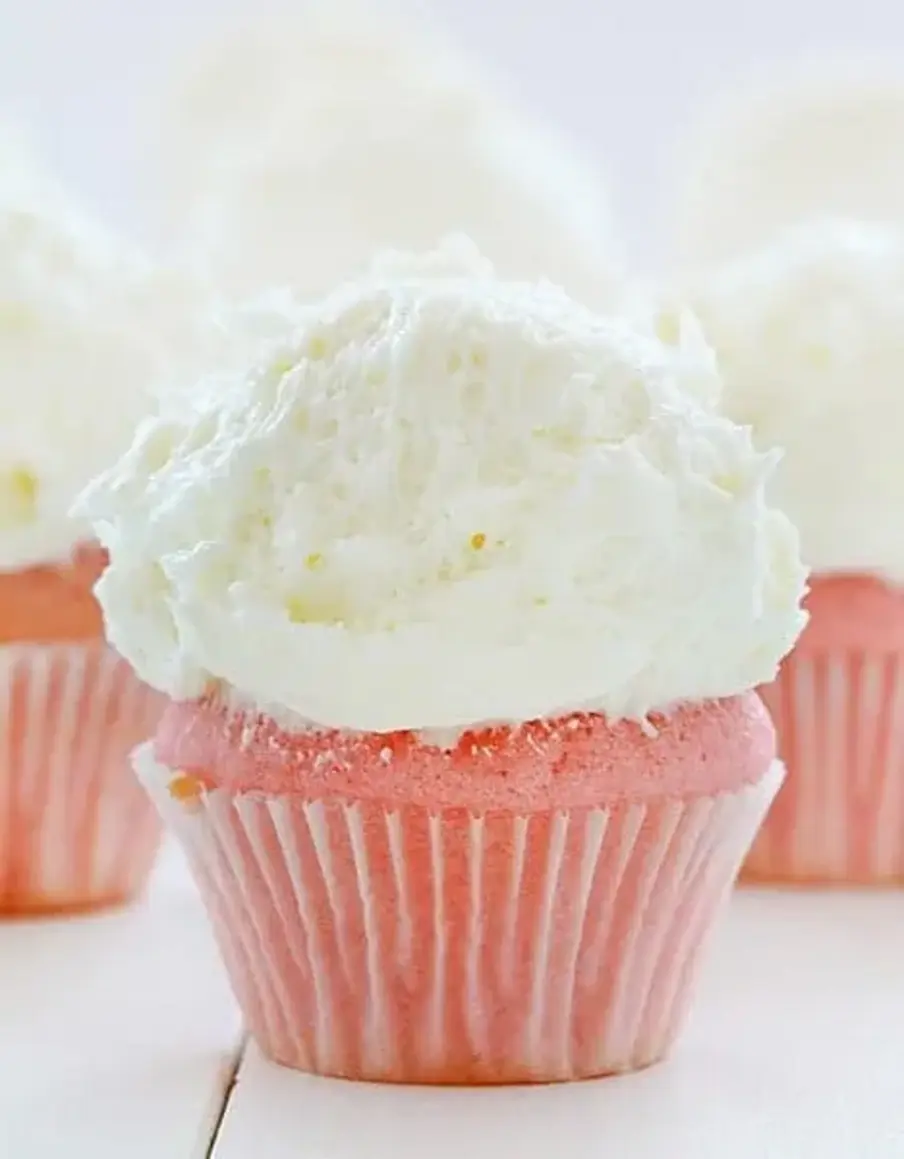
Imagine a cloud-like frosting, so smooth it glides effortlessly, with that unmistakable rich vanilla aroma dancing with a hint of almond. That’s what this homemade vanilla buttercream frosting delivers. It’s not overly sweet like some can be; instead, it offers a sophisticated balance, allowing the pure butter and vanilla notes to truly shine. The texture is key here – whipped to an incredible lightness, it has a beautiful ivory sheen that makes it irresistible. This isn’t just about topping a cake; it’s about adding a whisper of elegance, a touch of indulgence that feels both familiar and special.
What sets my method for this fluffy buttercream frosting apart is a careful balance of technique and timing. Through my years of baking and creating in New York’s bustling culinary scene, I’ve learned that patience and a few simple tricks can elevate everyday ingredients to extraordinary heights. I’ll show you how to avoid common pitfalls like gritty sugar or a greasy texture, ensuring your frosting is consistently perfect. Plus, I’ll share my pro tip for getting that incredible airy lightness, making this the ideal vanilla buttercream for cakes, cupcakes, or frankly, just a spoon!
Why This Vanilla Buttercream Recipe Is the Best
The secret to its incredible flavor often lies in the quality of your extracts and the butter. My mother always said, “Good ingredients are half the battle,” and she was right. I opt for pure vanilla extract, often a double-fold variety for an intense aroma, which echoes some of the floral notes in pastries from my childhood in Morocco. The touch of almond extract is a nod to the subtle nuttiness often found in classic French sweets, adding a depth that truly distinguishes this buttercream.
Achieving the perfect texture is a chef’s discipline. We’re aiming for a consistency that’s stable enough for piping intricate designs, yet melts in your mouth. The key is in the whipping – not just until combined, but significantly longer, incorporating air to create that light, fluffy mouthfeel. It’s a technique I honed in Parisian kitchens, understanding how aeration transforms viscosity and lightness, ensuring the frosting is never heavy or dense.
Despite its luxurious result, this easy buttercream frosting recipe is incredibly straightforward. It’s designed to be foolproof, even if you’re a beginner baker, delivering professional-quality results without requiring complex equipment or advanced skills. I’ll guide you through each step, making sure you hit all the marks for a velvety smooth, beautifully stable, and utterly delicious frosting that will impress everyone.
Homemade Vanilla Buttercream Frosting Ingredients
When I head to the farmer’s market here in NYC, I always look for the freshest, highest quality ingredients, because even for something as simple as frosting, they truly make a difference. Memories of the vibrant souks in Morocco, overflowing with spices and fresh produce, always come to mind. While I can’t get fresh vanilla beans as easily here, I choose the best extracts available.
Ingredients List
- 1 cup (2 sticks or 226g) butter, (softened)
- 2 teaspoons Vanilla Extract
- 1 teaspoon Almond Extract
- 4 cups (32 ounces) confectioners sugar, (sifted*)
- 2 tablespoons whole milk, (you can use up to 1/2 cup if you need a loose, creamy consistency)
- pinch salt
Ingredient Spotlight
Butter: Use unsalted butter here, as it gives you control over the final saltiness. It’s the backbone of your whipped vanilla buttercream recipe, providing structure and that rich, creamy flavor. Make sure it’s properly softened, not melted, which ensures it creams beautifully and incorporates air effectively. I prefer a good quality European-style butter for its higher fat content.
Vanilla Extract: This is where the “vanilla” in homemade vanilla buttercream frosting truly shines! Opt for pure vanilla extract, not imitation. The alcohol in the extract helps to deepen the flavor as it disperses through the butter. If you’re feeling fancy, a vanilla bean paste can add beautiful flecks and a more intense, complex profile. Never skip good vanilla!
Almond Extract: A little goes a long way with almond extract, but it adds a wonderful depth and complexity that complements the vanilla without overpowering it. It’s my little French touch! If you’re not a fan, you can omit it, but I highly recommend trying it. It gives this fluffy buttercream frosting a subtle ‘je ne sais quoi’.
Confectioners’ Sugar (Powdered Sugar): Sifting is crucial here! It breaks up any lumps and ensures the smoothest, most luxurious consistency for your vanilla buttercream for cakes. The cornstarch often present in confectioners’ sugar helps stabilize the frosting, contributing to its fluffy texture. If you skip sifting, you risk a gritty buttercream.
Whole Milk: The milk helps lighten the buttercream and achieve the perfect spreadable consistency. Whole milk offers the best richness, but you can use half-and-half or even heavy cream for an even more decadent result. Start with the recommended amount and add more gradually until you reach your desired texture. Plant-based milks like almond or oat milk can also work for a dairy-free version, affecting the flavor slightly.
| Original Ingredient | Best Substitution | Flavor / Texture Impact |
|---|---|---|
| Unsalted Butter | Salted Butter (reduce added salt by pinch) | Slightly saltier, can balance sweetness. Ensure butter is softened. |
| Vanilla Extract (Pure) | Vanilla Bean Paste | More intense vanilla flavor, visible flecks. |
| Almond Extract | Omitted or 1/2 tsp other extract (e.g., lemon) | Will lose the subtle nutty depth; other extracts change flavor profile significantly. |
| Confectioners’ Sugar | Granulated Sugar (Process in food processor until fine) | Texture might be slightly less smooth, more work. Sifting still critical. |
| Whole Milk | Heavy Cream or Half-and-Half | Richer, slightly thicker consistency. Or plant-based milk (almond, oat) for dairy-free. |

How to Make Whipped Vanilla Buttercream — Step-by-Step
Making this fluffy frosting is simple, I promise! Just follow these steps, and you’ll have perfect whipped vanilla buttercream every time.
Step 1: Cream the Butter
In the bowl of your stand mixer fitted with the whisk attachment, beat the softened butter on medium-high speed for about 3 minutes. You want it to become noticeably lighter in color and fluffy in texture. This is a crucial step for incorporating air, essential for that light and fluffy consistency.
💡 mia’s Pro Tip: Ensure your butter is truly softened, not melted. If it’s too warm, the buttercream can become greasy or separated. If it’s too cold, it won’t cream properly, leading to a dense frosting. Room temperature means it yields to gentle pressure, but still holds its shape.
Step 2: Add Extracts
Once your butter is light and fluffy, add the vanilla extract and almond extract. Beat for another 30 seconds on medium speed to ensure they are well incorporated and their aromatic oils are evenly distributed throughout the butter. The smell alone will tell you you’re on the right track!
⚠️ Common Mistake to Avoid: Don’t add extracts later in the process. Adding them to the butter first allows their flavors to bloom properly and blend seamlessly before the sugar is introduced.
Step 3: Combine Powdered Sugar and Milk
With the mixer on low speed, gradually add the sifted confectioners’ sugar, milk, and pinch of salt. Work slowly at first to avoid a sugar cloud! As it combines, stop frequently to scrape down the sides and bottom of the bowl with a spatula. This ensures all ingredients are fully incorporated and prevents any streaks of unmixed sugar or butter.
Step 4: Whip to Fluffy Perfection
Once everything is incorporated, turn the mixer up to medium-high to high speed and whip for at least 3 minutes, or even up to 7 minutes, depending on your mixer’s power. I often let mine go for 5-7 minutes. This extended whipping is the magic behind truly fluffy buttercream frosting. You’ll see it transform; it will lighten in color even further and increase significantly in volume.
💡 mia’s Pro Tip: Don’t be shy about whipping! The longer you whip (within reason), the more air is incorporated, resulting in a lighter and less-sweet tasting buttercream. It changes the texture from dense to divine, making it perfect for vanilla buttercream for cakes.
Step 5: Adjust Consistency if Needed
If your frosting feels too thick to spread easily, gradually beat in additional milk, one teaspoon at a time, until it reaches your desired consistency. For a thinner piping consistency, you might use up to 1/2 cup of milk total. Conversely, if it’s too thin, you can add a tablespoon or two more sifted confectioners’ sugar.
⚠️ Common Mistake to Avoid: Adding too much liquid at once. Always add liquids *gradually*. You can always add more, but it’s much harder to thicken a runny frosting without changing the sugar balance.
Step 6: Store and Re-whip
If not using immediately, store your buttercream in an airtight container in the refrigerator for up to 2 weeks. Before using, let it come to room temperature, then re-whip it on medium-high speed until it’s light and fluffy again – this re-aerates the frosting and restores its perfect texture.
| Step | Action | Duration | Key Visual Cue |
|---|---|---|---|
| 1 | Cream Butter | ~3 mins | Butter is pale yellow and fluffy. |
| 2 | Add Extracts | ~30 secs | Fully incorporated, fragrant. |
| 3 | Combine Dry & Wet | ~2-3 mins | No dry streaks of powder, smooth paste. |
| 4 | Whip to Perfection | 3-7 mins | Lightens in color, increases in volume, fluffy. |
| 5 | Adjust Consistency | As needed | Achieve desired spreadability. |
| 6 | Store & Rewhip | Up to 2 weeks (refrig.) | Smooth upon re-whipping. |
Serving & Presentation
This whipped vanilla buttercream recipe is incredibly versatile for serving. Whether you’re piping elegant swirls onto cupcakes, artfully spreading it between cake layers, or creating a smooth finish on a sheet cake, its light and stable texture performs beautifully. I often think of the precision I learned in pastry school, where every detail matters. A simple sprinkle of colorful nonpareils or a few fresh berries can elevate its appearance, making even the simplest dessert look festive, just like a window display in a Parisian patisserie.
For a bolder presentation that hints at my Moroccan roots, I sometimes dust the frosted cake with a very fine sifting of cinnamon or cardamom, adding a subtle warmth that contrasts beautifully with the sweet vanilla. Or, for a true New York City flair, a sprinkle of flaky sea salt on top of a chocolate cake with this buttercream is absolutely divine, creating that perfect sweet-and-salty balance that everyone loves.
This buttercream pairs perfectly with almost any cake or cupcake flavor. Think classic chocolate, vibrant red velvet, delicate lemon, or even a spiced apple cake. Its robust vanilla profile makes it adaptable, enhancing rather than overpowering. A simple garnish of fresh mint or a delicate chocolate curl can also add that final touch of professional polish.
| Pairing Type | Suggestions | Why It Works |
|---|---|---|
| Side Dish | Fresh berries, fruit coulis, candied citrus peel | Adds freshness, tartness, and visual appeal to cut through the richness. |
| Sauce / Dip | Warm chocolate ganache, salted caramel sauce | Introduces contrasting textures and flavors, making the dessert more decadent. |
| Beverage | Coffee, black tea, sparkling wine | The bitterness of coffee or tea balances the sweetness, while sparkling wine offers a refreshing palate cleanser. |
| Garnish | Toasted nuts, chocolate shavings, edible flowers | Adds texture, visual interest, and can introduce complementary flavors. |
Make-Ahead, Storage & Reheating
Living in NYC with its demanding pace, I’ve mastered the art of making components ahead of time. This easy buttercream frosting recipe is perfect for prepping in advance, allowing you more time to enjoy your guests or focus on other aspects of your meal. Knowing I have a batch of this heavenly frosting ready to go means I can whip up a last-minute dessert if friends drop by from across the city!
| Method | Container | Duration | Reheating Tip |
|---|---|---|---|
| Refrigerator | Airtight container | Up to 2 weeks | Bring to room temp & re-whip until fluffy. |
| Freezer | Airtight freezer-safe container | Up to 3 months | Thaw overnight in fridge, bring to room temp, then re-whip. |
| Make-Ahead | Airtight container (fridge) | 2-3 days in advance | Simply re-whip as directed before applying to your cake or cupcakes. |
When thawing from the freezer, make sure to give it ample time in the refrigerator, usually overnight, before bringing it out to reach room temperature. Patience is key! Rapid thawing can sometimes cause separation. Once it’s at a malleable room temperature, a good re-whip in your stand mixer will bring it right back to that beautiful, fluffy consistency you started with. It’s like magic, truly, an invaluable trick for any home baker.
frosted cakes or cupcakes, they’re best covered lightly at room temperature for a day or two, or refrigerated for longer storage, up to 5 days. Just remember that refrigeration can firm up the buttercream, so for best taste and texture, allow frosted items to come to room temperature for about 30 minutes before serving. This ensures the butter is soft and creamy. This is especially true for vanilla buttercream for cakes; you want that melt-in-your-mouth experience.
Variations & Easy Swaps
| Variation | Key Change | Best For | Difficulty Impact |
|---|---|---|---|
| Chocolate Dream | Add melted & cooled chocolate or cocoa powder. | Chocolate cakes, decadent desserts. | Slightly more complex, requires careful chocolate addition. |
| Dairy-Free Alternative | Swap butter for vegan butter sticks; use plant-based milk. | Those with dairy sensitivities. | Texture might be slightly softer, flavor subtly different. |
| Citrus Twist | Add citrus zest and adjust liquid. | Light cakes, spring/summer treats. | Easy, adds brightness without changing base technique. |
Chocolate Dream Variation
To make a rich chocolate buttercream, simply melt 4 ounces of good quality semi-sweet or dark chocolate, let it cool partially, then slowly beat it into your finished whipped vanilla buttercream recipe. Alternatively, you can sift in 1/2 cup of unsweetened cocoa powder with your confectioners’ sugar for a cocoa-based chocolate frosting. I sometimes add a pinch of Moroccan coffee to enhance the chocolate notes, a trick I picked up from a good friend who worked in a French chocolaterie.
Dairy-Free Alternative
For a dairy-free homemade vanilla buttercream frosting, substitute the regular butter with a good quality vegan butter stick (not margarine in a tub). Use a plant-based milk like almond or oat milk instead of cow’s milk. The texture will be very similar, though sometimes slightly softer, and the flavor will still be wonderfully vanilla-rich. I always keep vegan butter on hand for friends with dietary restrictions I meet at the NYC farmers markets.
Citrus Twist Vanilla Buttercream
If you want to add a bright, zesty note, incorporate the zest of one lemon, orange, or lime along with your extracts. The tiny bursts of citrus oil perfume the frosting beautifully, cutting through the sweetness and offering a wonderful counterpoint to the vanilla. This variation is particularly lovely on lemon or blueberry cakes, reminding me of the fresh citrus groves back home.
How do you make whipped vanilla buttercream fluffy and not too sweet?
The key to fluffy and less sweet whipped vanilla buttercream lies in extended whipping. After all ingredients are incorporated, beat the frosting on medium-high to high speed for at least 3-7 minutes. This process aerates the butter and sugar mixture significantly, increasing its volume and creating a lighter, almost cloud-like texture. The increased air lightens the perception of sweetness on your palate, making it feel less cloying. Additionally, ensure your butter is properly softened, as this allows it to cream beautifully and incorporate more air from the start.
Can you use salted butter instead of unsalted butter in whipped vanilla buttercream?
Yes, you can absolutely use salted butter instead of unsalted butter in your whipped vanilla buttercream. However, if you do, I recommend omitting the pinch of salt that the recipe suggests adding separately. Salted butter can sometimes have varying levels of sodium, so using it means you give up a bit of control over the precise saltiness, but it will still work wonderfully. A little salt actually helps to balance the sweetness of the frosting, so using salted butter can often enhance the flavor profile, making it a delicious choice!
How long should you whip vanilla buttercream to get the right consistency?
For the perfect light and fluffy consistency, you should plan to whip your vanilla buttercream for at least 3 minutes on medium-high to high speed after all the confectioners’ sugar and liquid have been incorporated. In my experience, for an extra ethereal texture, I often let my stand mixer go for 5 to 7 minutes. You’ll notice the buttercream transform significantly – it will become much lighter in color, increase in volume, and develop a noticeably airy, smooth consistency that is both spreadable and perfectly pipeable.
What is the best way to store whipped vanilla buttercream after frosting a cake?
After frosting a cake with whipped vanilla buttercream, it’s best to store it covered to prevent it from drying out or absorbing refrigerator odors. If you plan to serve the cake within a day or two, it can generally be left at cool room temperature away from direct sunlight. For longer storage, or if your kitchen is warm, refrigerate the frosted cake loosely covered for up to 5 days. For the best flavor and texture, always allow the cake to come to room temperature for about 30 minutes before serving, allowing the buttercream to soften and become creamy again.
Why is my homemade vanilla buttercream frosting gritty?
A gritty homemade vanilla buttercream frosting is almost always due to unsifted confectioners’ sugar. Confectioners’ sugar often forms small clumps in the package, and if these aren’t broken up before being added to the butter, they won’t dissolve properly, leading to that unpleasant grainy texture. To avoid this, always make sure to sift your confectioners’ sugar thoroughly before adding it, even if it looks fine straight from the bag. A fine-mesh sieve or a specific sifter works wonders for ensuring a perfectly smooth result.
Share Your Version!
I absolutely adore hearing from you and seeing your beautiful creations! This whipped vanilla buttercream recipe holds such a special place in my heart, marrying the elegance of French pastry with the versatility I’ve come to love in New York’s dynamic food scene. I’d love to know how it turns out for you!
Please leave a star rating and comment below to let me know how it went. Did you try a new variation? What did you pair it with? And if you share a photo on Instagram or Pinterest, don’t forget to tag @exorecipes — I can’t wait to see your stunning cakes and cupcakes adorned with this light and fluffy frosting. Have you ever tried using a hint of rosewater in your buttercream like we do in some Moroccan desserts?
From my NYC kitchen to yours — I hope this recipe brings as much warmth to your table as it does to mine. — mia 🧡
Love This Recipe? Save It to Pinterest!
If you enjoyed this Whipped Vanilla Buttercream Light and Fluffy recipe, don’t let it get lost in your browser tabs! 😄 Pin it now so you can find it again anytime — and explore hundreds more tried-and-tested recipes waiting for you on my Pinterest boards.
👉 Follow mia on Pinterest @chefrecipes2
📌 Pin this recipe · 🔁 Re-pin your favorites · 💬 Tag me when you make it — I love seeing your creations!
Vanilla Buttercream
Description
The BEST Whipped Vanilla Buttercream frosting!
Ingredients
- 1 cup (2 sticks or 226g) butter, (softened)
- 2 teaspoons Vanilla Extract
- 1 teaspoon Almond Extract
- 4 cups (32 ounces) confectioners sugar, (sifted*)
- 2 tablespoons whole milk, (you can use up to 1/2 cup if you need a loose, creamy consistency)
- pinch salt
Instructions
- Beat butter in bowl of stand mixer with whisk attachment on medium-high speed until light and fluffy. (about 3 minutes)
- Add vanilla and almond extract.
- With the mixer on low, slowly add in confectioners sugar , milk, and salt; frequently scrape sides and bottom of the bowl.
- Once incorporated, whip frosting for at least 3 minutes on medium high to high. (My mixer went for 7 minutes)
- If frosting is too thick to spread, gradually beat in additional milk.
- Store in refrigerator up to 2 weeks. Rewhip before using.

Tried This Recipe? Leave a Comment!
Did you make this recipe? I’d love to hear how it turned out! Please leave a comment and a rating below. Your feedback helps other home cooks and supports cheerychop.com!
For more delicious inspiration, follow me on Pinterest!
