Table of Contents
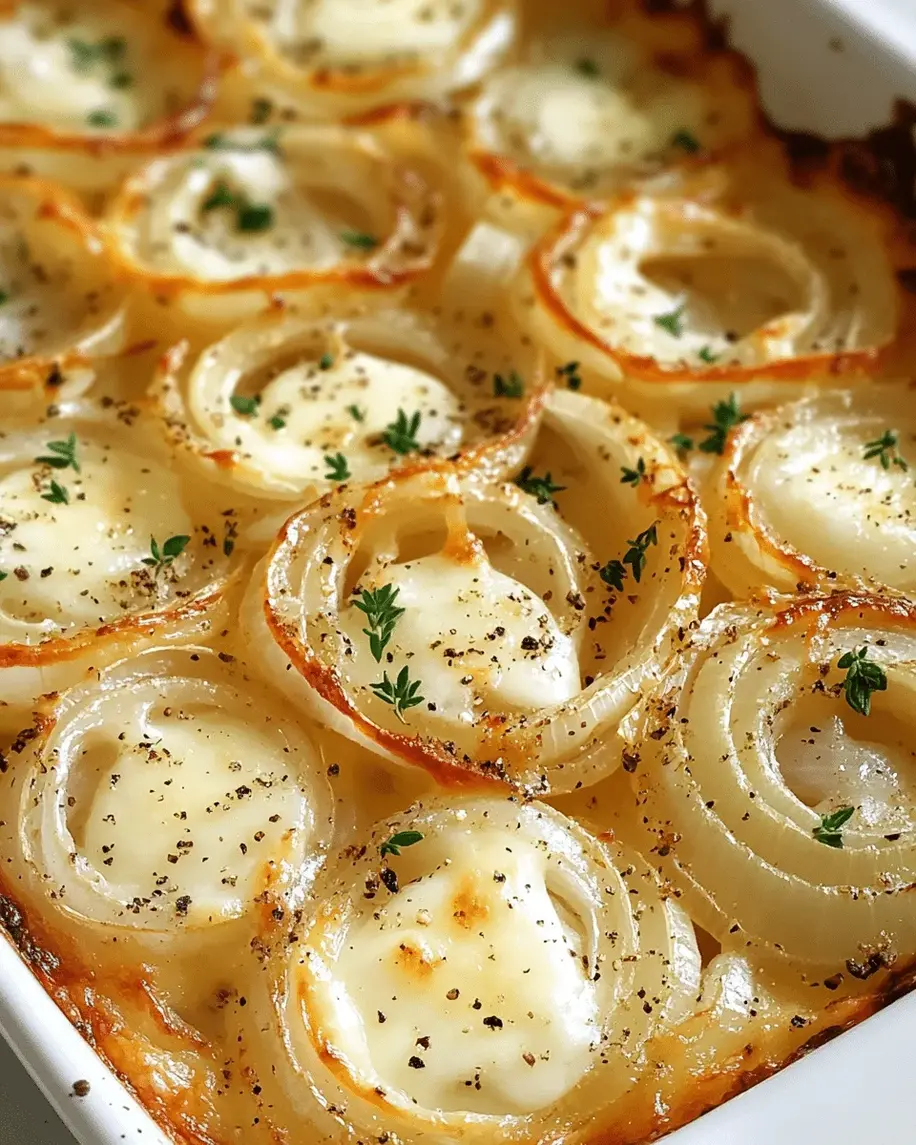
Cheesy Baked Onion Casserole: A Savory Delight You’ll Want to Make Again and Again – Easy, Creamy, and Perfect for Any Occasion
Growing up in Morocco, my mother’s kitchen was a symphony of slow-cooked onions, warm spices, and the kind of comfort that only a bubbling casserole can bring. When I moved to New York after my years at Le Cordon Bleu in Paris, I realized that the humble onion – the backbone of so many French sauces and Moroccan tagines – deserved a starring role on the American table. This baked onion casserole recipe is the result of that journey: a rich, creamy dish that takes the cheesy baked onion casserole to new heights with a buttery cracker crust. It’s the dish I turn to when I crave both nostalgia and elegance, and it never fails to draw raves at potlucks and holiday feasts.
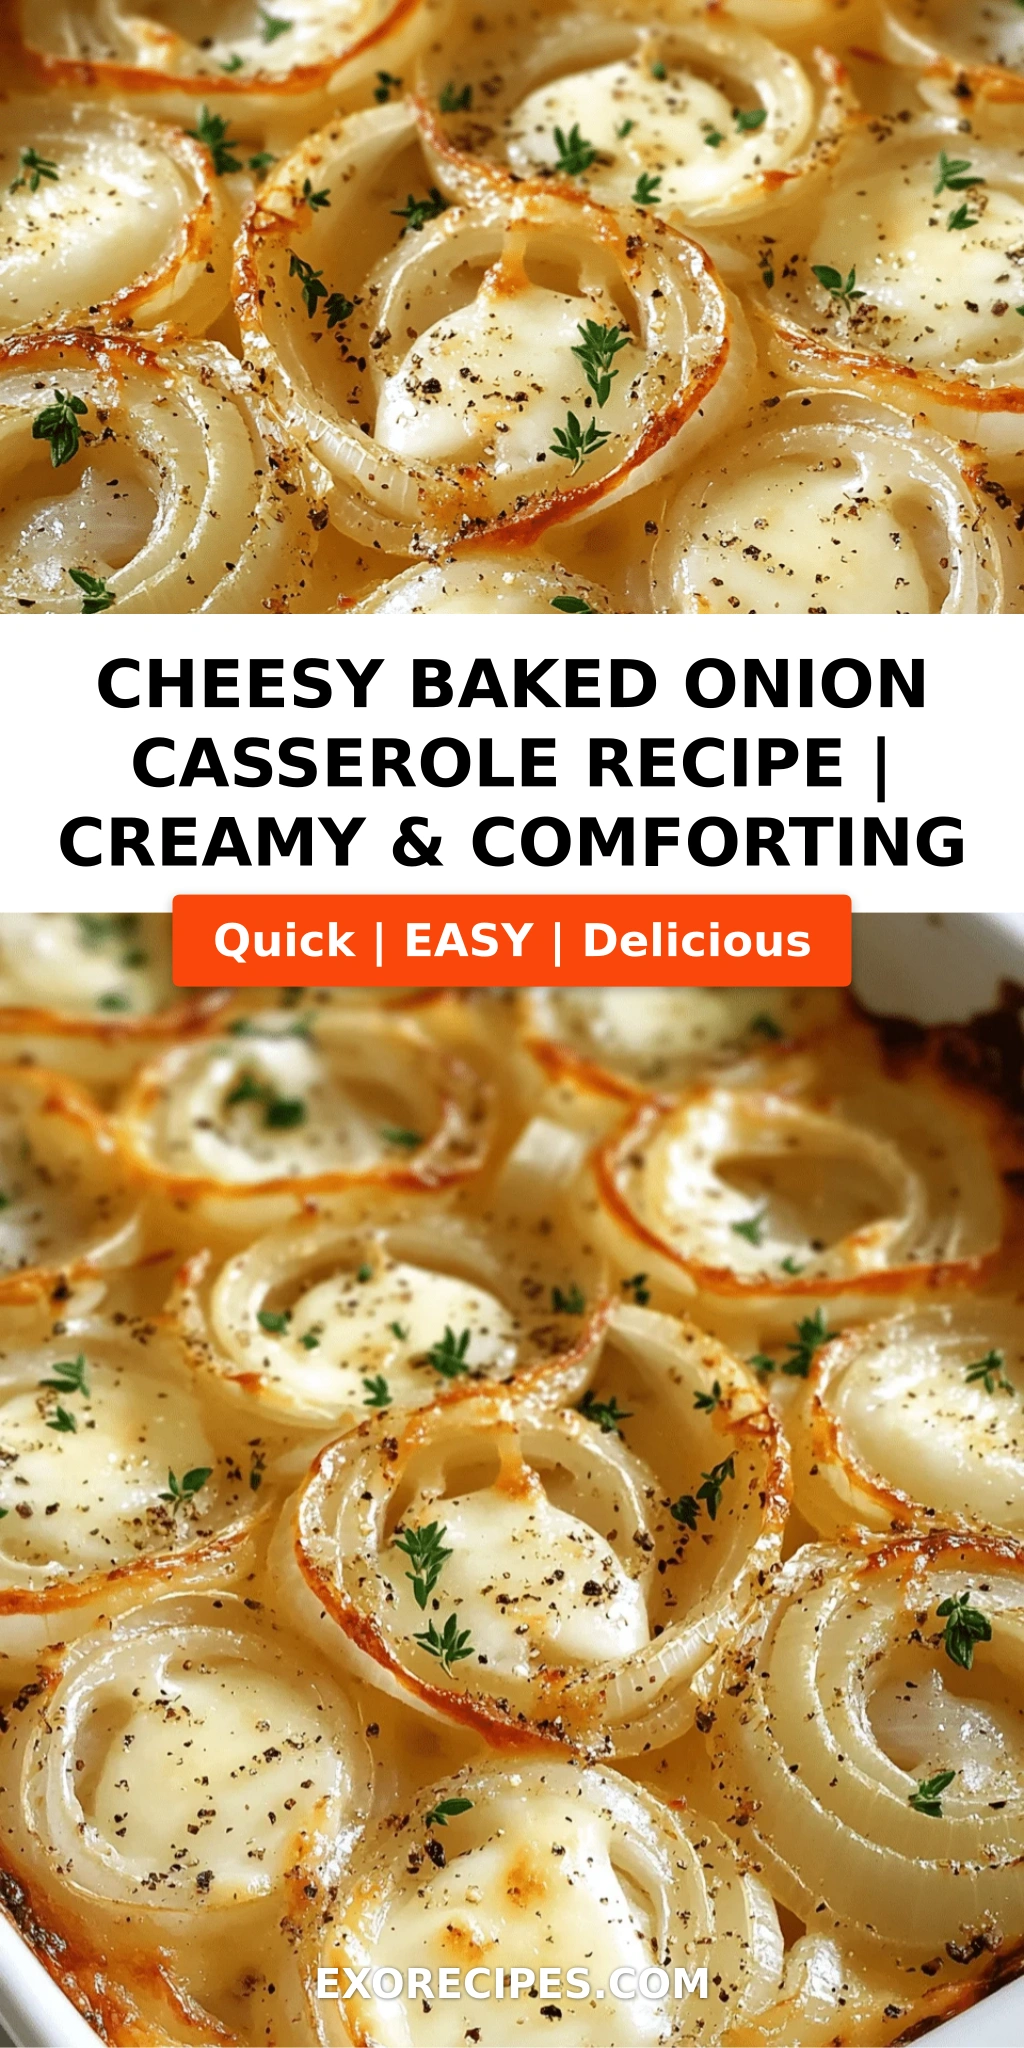
The first time I made this savory onion casserole for a friendsgiving in Brooklyn, the aroma of golden caramelized onions mingling with sharp cheddar and Parmesan filled my entire apartment. One bite – tender onions cloaked in a velvety sour cream and mayonnaise base, topped with crunchy, golden Ritz crumbs – and everyone asked for the recipe. What makes this easy onion casserole so special is the balance: the sweetness of slowly cooked onions against the tang of cheese, the creamy interior beneath a crackly crust. It’s pure, unpretentious comfort, the kind that tastes like home whether you’re in a Moroccan riad or a New York loft.
As a professionally trained chef, I’ve tested every component to ensure foolproof results. The secret? Don’t rush the onions. Twenty minutes of patient stirring transforms them from sharp and crunchy to jammy and sweet. And that buttery Ritz topping – it’s the same trick my Parisian chef taught me for gratin dishes: pre-toast the crumbs lightly in melted butter before sprinkling, so they stay crisp even after baking. One common mistake I see home cooks make is skipping the rest time after baking. Let the casserole sit for five minutes; it allows the custard to set and makes serving clean and easy. Trust me – your family will thank you.
Why This Cheesy Baked Onion Casserole Recipe Is the Best
The Flavor Secret: This isn’t just another cheesy onion casserole – it’s a lesson in layering. I rely on yellow onions, which are sweeter and more forgiving than white or red. Cooking them low and slow in butter unlocks natural sugars that complement the rich, tangy notes of cheddar and Parmesan. A touch of garlic powder and a splash of mayonnaise (yes, mayonnaise!) bind the creaminess without overpowering. It’s a trick I learned from my mother’s Moroccan mechouia salad – a little fat carries flavor.
Perfected Texture: The contrast between the silky onion custard and the crunchy, buttery cracker topping is what makes this baked onion casserole recipe impossible to resist. I tested every cracker from saltines to panko, and only crushed Ritz crackers gave that perfect golden crunch without turning soggy. Tossing them with melted butter before baking ensures each bite has a toasty, nutty finish.
Foolproof & Fast: Despite its luxurious taste, this easy onion casserole comes together in just over an hour – and most of that time is hands-off baking. The prep is straightforward: slice, sauté, stir, bake. No complicated techniques, no exotic ingredients. It’s forgiving enough for a weeknight side dish yet impressive enough for a holiday spread. I’ve made it for Thanksgiving, Easter brunch, and casual Tuesday dinners alike.
Cheesy Baked Onion Casserole Ingredients
I buy my onions from the Union Square Greenmarket in the fall – the sweet yellows from upstate New York are phenomenal. In winter, I grab a bag from my local bodega; any yellow onion works beautifully. For the cheese, I always grate my own cheddar from a block – pre-shredded contains anti-caking agents that can make the sauce grainy. The rest of the ingredients are pantry staples you probably already have. Let me walk you through each one and why it matters.
Ingredients List
- 4 large yellow onions, thinly sliced
- 3 tablespoons butter
- 1 cup sour cream
- 1 cup grated cheddar cheese
- 1/2 cup grated Parmesan cheese
- 1/2 cup mayonnaise
- 1/2 teaspoon garlic powder
- 1/2 teaspoon salt
- 1/4 teaspoon black pepper
- 1 cup crushed buttery crackers (e.g., Ritz)
- 2 tablespoons melted butter (for topping)
Ingredient Spotlight
Yellow Onions – Their high sugar content makes them ideal for slow caramelizing. Choose onions that are firm, heavy for their size, and free of soft spots. Red onions are too sharp, while white onions lack sweetness. If you only have sweet onions like Vidalia, they work beautifully – just reduce the salt slightly.
Cheddar Cheese – I use a sharp white cheddar for its bold flavor and meltability. Grate it yourself from a block; the pre-shredded bags won’t melt as smoothly. For a milder version, use Monterey Jack or Havarti.
Sour Cream & Mayonnaise – This duo creates the silky, tangy base. Full-fat sour cream gives the best texture. Greek yogurt can replace sour cream (use plain whole-milk), but the casserole will be slightly less rich. Mayo adds a subtle savory boost and helps the custard stay creamy without curdling.
Buttery Crackers (Ritz) – They provide that iconic golden crust. Crush them to fine crumbs for a delicate topping, or leave some larger pieces for extra crunch. Saltines or buttery club crackers work too, but avoid matzo meal or panko – they don’t absorb butter as well and can become dusty.
| Original Ingredient | Best Substitution | Flavor / Texture Impact |
|---|---|---|
| Sour Cream | Plain Greek yogurt (full-fat) | Slightly less rich and more tangy; casserole may be a bit lighter. |
| Mayonnaise | Extra sour cream or cream cheese (2 oz) | Loses some savory depth; texture becomes slightly denser with cream cheese. |
| Cheddar Cheese | Monterey Jack, Gouda, or Gruyère | Milder/butterier (Jack), smokier (Gouda), nuttier (Gruyère). All melt well. |
| Buttery Crackers | Crushed Saltine or Club crackers | Slightly less buttery, but still crisp; add a pinch of salt to topping. |
| Butter (for sautéing) | Olive oil or ghee | Olive oil adds fruity notes; ghee gives nuttiness. Avoid margarine. |
How to Make Cheesy Baked Onion Casserole — Step-by-Step
Making this cheesy baked onion casserole is easier than you think. Follow each step closely, and you’ll have a golden, bubbly masterpiece that will disappear from the table in minutes.
Step 1: Caramelize the Onions
Preheat your oven to 350°F (175°C). In a large skillet (12-inch works best), melt 3 tablespoons butter over medium heat. Add the thinly sliced onions and cook, stirring occasionally, for about 20 minutes. You want them soft, golden, and slightly sticky – but not browned. The key is to stir every few minutes so they cook evenly and don’t burn. If they start to brown too quickly, reduce the heat to medium-low and add a splash of water.
💡 mia’s Pro Tip: Slice the onions uniformly – about ¼-inch thick. Thicker slices take longer to soften, while thinner pieces may turn to mush. A mandoline makes quick work and ensures even slices.
Step 2: Make the Creamy Cheese Mixture
In a large bowl, combine the sour cream, cheddar cheese, Parmesan cheese, mayonnaise, garlic powder, salt, and pepper. Stir until well blended. Fold in the cooked onions, making sure every strand is coated in the creamy mixture. The mixture will look thick – that’s good.
⚠️ Common Mistake to Avoid: Don’t use hot onions directly from the skillet. Let them cool for 5 minutes before mixing. If the onions are too hot, they can cause the sour cream and mayonnaise to separate, making the casserole watery.
Step 3: Assemble the Casserole
Grease a 1.5-quart baking dish (an 8×8 square or 9×7 works perfectly). Transfer the onion mixture into the dish and spread it evenly. Now is the time to add any extras like a pinch of cayenne or fresh thyme, if you like.
💡 mia’s Pro Tip: For an even richer flavor, sprinkle an extra ¼ cup of cheddar cheese on top before adding the cracker topping. It creates an extra cheese layer that gets wonderfully golden.
Step 4: Add the Buttery Cracker Topping
In a small bowl, mix the crushed crackers with the 2 tablespoons melted butter. Stir until every crumb is coated. Sprinkle the mixture evenly over the casserole. Don’t press it down – you want a fluffy, crunchy layer.
⚠️ Common Mistake to Avoid: Skipping the butter toss makes the crackers dry and pale. The butter helps them brown and crisp, so don’t skimp.
Step 5: Bake and Rest
Place the dish in the preheated oven and bake for 25–30 minutes. You’ll know it’s ready when the edges are bubbly and the top is golden brown. Remove from the oven and let it rest on a wire rack for at least 5 minutes before serving. This rest is crucial – it allows the custard to set so the casserole holds its shape when you scoop it.
💡 mia’s Pro Tip: If the topping is browning too fast (after about 15 minutes), cover loosely with aluminum foil and continue baking. Remove the foil for the last 5 minutes to crisp up.
| Step | Action | Duration | Key Visual Cue |
|---|---|---|---|
| 1 | Caramelize onions | 20 min | Soft, golden, translucent, no raw crunch |
| 2 | Mix cheese & onions | 5 min | Uniformly coated, creamy mixture |
| 3 | Assemble in dish | 5 min | Even layer, top flat |
| 4 | Add topping | 5 min | Even crumb coating, no gaps |
| 5 | Bake & rest | 30 min bake + 5 min rest | Bubbly edges, golden top, set center |
Serving & Presentation
This cheesy baked onion casserole is a workhorse side dish. I love serving it alongside a roasted chicken or a juicy steak – the creamy onion richness is a perfect counterbalance to savory meat. For holiday dinners, it sits proudly next to turkey, mashed potatoes, and green beans. And on weeknights, a scoop of this casserole with a simple green salad makes a satisfying vegetarian meal.
When I plate it, I use a wide spatula to lift a square intact, revealing the golden crust and creamy interior. A sprinkle of fresh chopped parsley or chives adds a pop of color and freshness. If I’m feeling extra (which I often am, thanks to my Paris training), I’ll add a few drops of truffle oil just before serving – it’s a decadent touch that elevates the humble onion to something truly special.
One of my favorite pairings is a crisp, dry white wine like Sauvignon Blanc or a light Pinot Noir. The acidity cuts through the richness beautifully. For non-alcoholic options, a sparkling water with lemon or an iced herbal tea works well.
| Pairing Type | Suggestions | Why It Works |
|---|---|---|
| Side Dish | Roasted chicken, grilled steak, pork chops | Creamy texture complements protein; savory richness balances meat. |
| Garnish | Fresh parsley, chives, green onions, truffle oil | Adds brightness, color, and optional luxury. |
| Beverage | Sauvignon Blanc, Pinot Noir, sparkling water with lemon | Acidic/crisp drinks cut through the creaminess. |
| Bread | Crusty sourdough, dinner rolls, garlic bread | Perfect for soaking up extra creamy sauce. |
Make-Ahead, Storage & Reheating
Living in New York, I’m all about smart meal prep. This casserole is a dream for busy cooks because you can assemble it entirely ahead of time. I often put it together the night before a big dinner, then simply add the cracker topping and bake just before serving. It saves so much stress on the day of. Here’s how to store and reheat leftovers – though in my house, leftovers are rare!
| Method | Container | Duration | Reheating Tip |
|---|---|---|---|
| Refrigerator | Airtight container or covered baking dish | Up to 4 days | Reheat in a 350°F oven for 10–15 min, or microwave in 30-sec bursts. |
| Freezer | Freezer-safe dish, wrapped tightly in plastic + foil | Up to 3 months | Thaw overnight in fridge; bake at 350°F for 20–25 min, covered then uncovered last 5. |
| Make-Ahead | Assembled in baking dish (without topping) | 1 day in advance | Add topping just before baking; increase bake time by 5 min if chilled. |
When reheating, the cracker topping can soften a bit. To bring back its crunch, I reheat the casserole uncovered in a hot oven (400°F) for the last 5 minutes. If you’re using the microwave, remove the topping, microwave the casserole, then add a fresh sprinkle of buttered crumbs. But honestly, even slightly softened, this casserole is ridiculously delicious.
Variations & Easy Swaps
One of the things I love about this cheesy onion casserole is how adaptable it is. Over the years, I’ve tweaked it for different seasons, dietary needs, and flavor cravings. Here are three of my favorite variations – all tested in my NYC kitchen.
| Variation | Key Change | Best For | Difficulty Impact |
|---|---|---|---|
| Spicy Moroccan Onion Casserole | Add 1 tsp cumin, ½ tsp paprika, pinch cayenne | North African-inspired meals | Easy |
| Gluten-Free & Dairy-Free | Use GF crackers & dairy-free cheese/sour cream | Allergy-friendly entertaining | Moderate |
| Spring Onion & Herb | Replace 1 cup yellow onion with sliced leeks; add 2 tbsp fresh dill | Spring celebrations, lighter flavor | Easy |
Add Some Heat with Spices
This variation is inspired by my Moroccan roots. While the onions are cooking, stir in 1 teaspoon ground cumin, ½ teaspoon sweet paprika, and a pinch of cayenne pepper (or more if you like heat). The cumin adds an earthy warmth that pairs beautifully with the creamy cheese. Serve this version alongside lamb chops or roasted eggplant for a dish that feels like a trip to Marrakech.
Gluten-Free & Dairy-Free Options
To make this cheesy baked onion casserole gluten-free, substitute equal weight of gluten-free buttery crackers (like Schär or Simple Mills) for the Ritz. For dairy-free, use a high-quality plant-based sour cream (I like Tofutti or Kite Hill), vegan cheddar shreds, and a dairy-free Parmesan alternative. The texture will be slightly less rich but still wonderfully creamy. My friend with celiac disease tested this version and gave it two thumbs up.
Seasonal Twist: Spring Onion and Herb
In spring, when ramps and leeks appear at the Union Square market, I swap out one cup of the yellow onions for thinly sliced leeks (white and light green parts only). I also fold in 2 tablespoons of fresh dill or tarragon just before baking. The leeks add a delicate, almost sweet onion flavor, and the herbs bring a fresh, grassy note that brightens the whole dish. This version is lovely with baked salmon or roast chicken.
Frequently Asked Questions
What is the best type of onion to use for a cheesy baked onion casserole?
Yellow onions are my top choice for this dish. They have a higher sugar content than white or red onions, which means they caramelize beautifully – turning sweet and golden without becoming bitter. Sweet onions like Vidalia are also excellent, especially when in season, but they may make the casserole slightly sweeter, so you can reduce the salt a touch. Avoid red onions; they can turn an unappealing gray color when cooked and have a sharper flavor that doesn’t blend as well with the creamy cheese base.
Can I make cheesy baked onion casserole ahead of time and refrigerate it before baking?
Absolutely – this is one of my favorite meal-prep hacks. You can assemble the entire casserole (without the cracker topping) up to one day in advance. Simply prepare the onion mixture, transfer it to your baking dish, cover tightly with plastic wrap or foil, and refrigerate. When you’re ready to bake, add the buttered cracker topping and bake as directed, adding about 5 extra minutes since the casserole will be cold. This is a lifesaver for Thanksgiving or any dinner party – it frees up oven space and reduces last-minute stress.
How do I prevent the casserole from becoming too watery or soggy?
The key to avoiding a watery casserole is a three-step approach. First, cook the onions long enough – a full 20 minutes over medium heat – to drive off excess moisture. If your onions release a lot of liquid toward the end, raise the heat briefly to evaporate it. Second, let the cooked onions cool for a few minutes before mixing with the sour cream and mayonnaise; hot onions can cause the dairy to separate and release water. Third, don’t skip the five-minute rest after baking. This allows the custard to set and reduces any pooling of liquid on the bottom.
What is a good substitute for the cheese in this baked onion casserole?
If you’re out of cheddar or Parmesan, don’t worry – this casserole is very forgiving. For a similar melt and flavor, try Gruyère, Monterey Jack, or mild gouda. They all melt smoothly and have a creamy, not-too-strong taste. If you want a dairy-free option, use a vegan cheddar-style shred (I recommend Violife or Follow Your Heart) and a nutritional yeast-based Parmesan. For a lower-fat version, you can reduce the cheese by half and add an extra ¼ cup of sour cream, though the casserole will be less rich.
Can I add protein or vegetables to make it a main dish?
Yes! This casserole is a great base for a one-dish meal. I’ve added crumbled cooked sausage (chorizo or Italian), shredded rotisserie chicken, or even sliced mushrooms (sauté them with the onions for extra flavor). For vegetables, chopped spinach or broccoli florets (blanched first) work beautifully – just make sure to squeeze out any excess moisture after cooking. If you add more than a cup of extra ingredients, you may need to increase the baking time by 5–10 minutes and check for doneness.
How do I make the cracker topping extra crispy?
The secret to a shatteringly crisp topping is twofold: first, toss the crushed crackers with melted butter until every crumb is coated – don’t just drizzle the butter on top. Second, bake the casserole uncovered for the full time. If the topping starts to brown too quickly (after about 15 minutes), tent the dish loosely with foil, then remove the foil for the last 5–7 minutes. For extra insurance, you can also toast the buttered crumbs on a baking sheet for 5 minutes before adding them to the casserole, but I find that unnecessary if you follow the direct method.
Is this recipe suitable for a low-carb or keto diet?
This casserole is relatively low in carbs (about 18g per serving, mostly from onions), but it’s not strictly keto – the crackers add about 6g carbs per serving on their own. To make it keto-friendly, replace the cracker topping with crushed pork rinds or a mixture of almond flour and melted butter. Also, ensure you use full-fat sour cream and mayonnaise, and consider adding extra cheese. With those swaps, each serving drops to around 8–10g net carbs, making it a great low-carb side dish.
Can I use a different type of cracker for the topping?
Absolutely. While I love Ritz for their buttery flavor and delicate crunch, you can use any buttery cracker you have on hand. Saltines (about 1 sleeve) work well – they are less rich, so add an extra tablespoon of melted butter to the crumbs. Club crackers are also excellent; they give a slightly more substantial crunch. For a gluten-free option, use gluten-free butter crackers (like Schär brand) or even crushed Rice Chex. Avoid panko or breadcrumbs – they don’t produce the same golden, crisp crust and can become dusty.
What main dishes pair best with cheesy baked onion casserole?
This casserole is incredibly versatile. It’s a classic partner for roasted chicken, turkey, or ham on holidays. For weeknights, I serve it with pan-seared pork chops, meatloaf, or a simple steak. It also works as a vegetarian main when served with a big green salad or roasted vegetables. The creamy, cheesy richness complements almost any protein – even grilled fish (like salmon) if you keep the seasoning mild. For a complete comfort meal, add mashed potatoes and steamed broccoli.
How can I make this casserole spicier?
I love adding a kick to this dish. Start by stirring ½ teaspoon of cayenne pepper or red pepper flakes into the cheese mixture. You can also add a finely chopped jalapeño (seeds removed for milder heat) to the onions while they sauté. For a smoky heat, smoked paprika or chipotle powder work wonders. Another idea is to use pepper jack cheese in place of part of the cheddar. If you’re making the Moroccan-inspired variation, a teaspoon of harissa paste mixed into the sour cream base adds both heat and depth.
Share Your Version!
I’d love to see how you make this cheesy baked onion casserole your own! Did you add a special spice, a new topping, or a clever substitution? Drop a comment below and leave a star rating – it helps other home cooks find this recipe and know what works. Snap a picture of your golden, bubbly casserole and tag me on Instagram @exorecipes, or share it on Pinterest with the hashtag #CheesyOnionCasserole. Your creativity inspires me every day.
One question I always ask my readers: what’s the one side dish you can’t imagine your holiday table without? For me, it’s this one – a nostalgic nod to my Moroccan childhood, a classic French technique, and the bold, comforting flavors of my New York home. From my NYC kitchen to yours – I hope this recipe brings as much warmth to your table as it does to mine. — mia 🧡
Love This Recipe? Save It to Pinterest!
If you enjoyed this cheesy baked onion casserole recipe, don’t let it get lost in your browser tabs! 😄 Pin it now so you can find it again anytime — and explore hundreds more tried-and-tested recipes waiting for you on my Pinterest boards.
👉 Follow mia on Pinterest @chefrecipes2
📌 Pin this recipe · 🔁 Re-pin your favorites · 💬 Tag me when you make it — I love seeing your creations!
🎉 Loved this recipe? Don’t keep it to yourself! Tag @exorecipes on Instagram or Pin it to your boards. Your support helps me keep bringing you delicious, tested recipes. Thank you! 💛
Cheesy Baked Onion Casserole: A Savory Delight Youll Want to Make Again and Again
- Prep Time: 15 minutes
- Cook Time: 50 minutes
- Total Time: 1 hour 5 minutes
- Yield: 8 servings 1x
- Method: Side Dish
- Cuisine: American
Description
A rich and creamy onion casserole topped with melted cheese and buttery breadcrumbs, perfect for a comforting side dish.
Ingredients
- 4 large yellow onions, thinly sliced
- 3 tablespoons butter
- 1 cup sour cream
- 1 cup grated cheddar cheese
- 1/2 cup grated Parmesan cheese
- 1/2 cup mayonnaise
- 1/2 teaspoon garlic powder
- 1/2 teaspoon salt
- 1/4 teaspoon black pepper
- 1 cup crushed buttery crackers (e.g., Ritz)
- 2 tablespoons melted butter
Instructions
- Preheat oven to 350°F (175°C).
- In a large skillet, melt 3 tablespoons butter over medium heat. Add sliced onions and cook, stirring occasionally, until very soft and golden, about 20 minutes.
- In a bowl, combine sour cream, cheddar cheese, Parmesan cheese, mayonnaise, garlic powder, salt, and pepper. Stir in the cooked onions.
- Transfer the mixture to a greased 1.5-quart baking dish.
- In a small bowl, mix crushed crackers with 2 tablespoons melted butter; sprinkle over the casserole.
- Bake for 25-30 minutes until bubbly and golden on top. Let rest 5 minutes before serving.
Notes
For extra richness, you can substitute half the sour cream with cream cheese. This casserole can be assembled a day ahead and refrigerated before baking.
Nutrition
- Calories: 320 kcal
- Sugar: 6 g
- Fat: 25 g
- Carbohydrates: 18 g
- Protein: 8 g
Tried This Recipe? Leave a Comment!
Did you make this recipe? I’d love to hear how it turned out! Please leave a comment and a rating below. Your feedback helps other home cooks and supports cheerychop.com!
For more delicious inspiration, follow me on Pinterest!