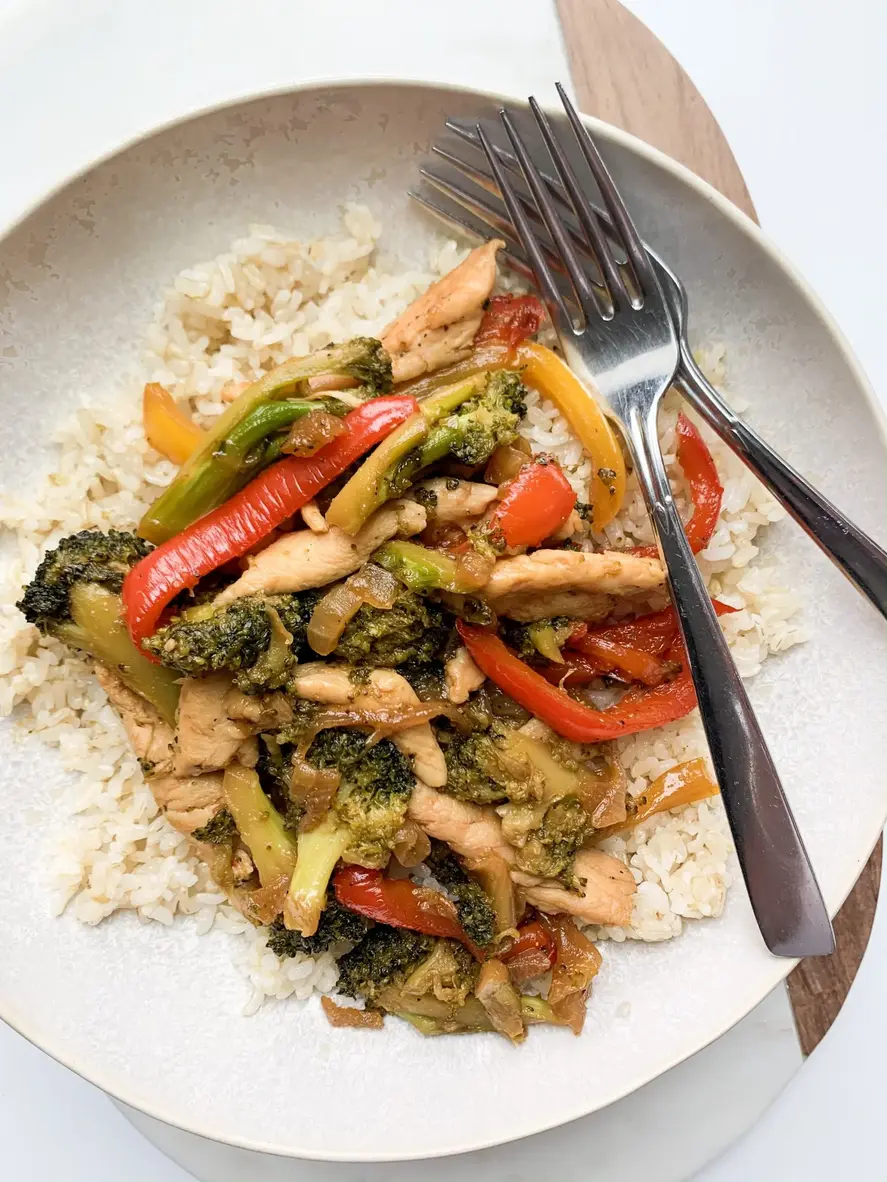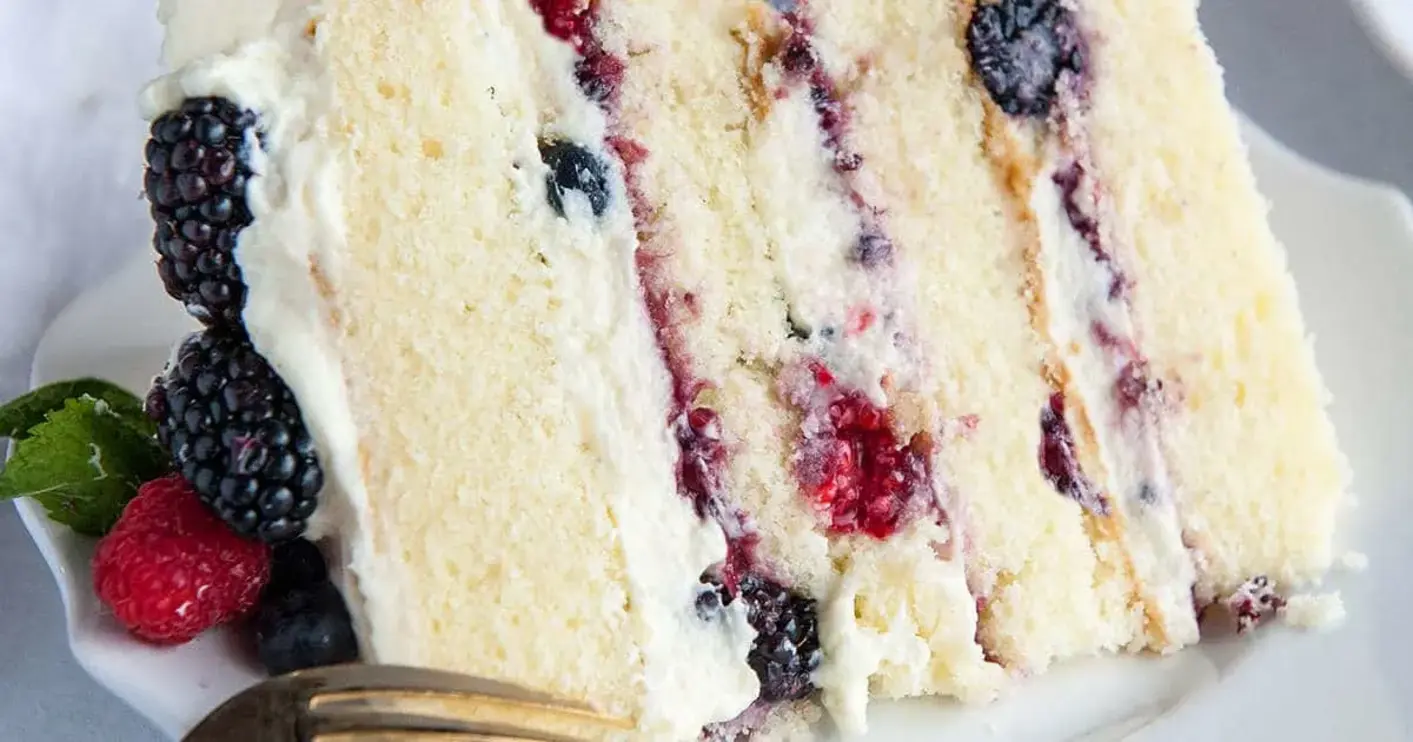
Best Bakery Buttercream Frosting – Smooth & Creamy Perfection

Best Bakery Buttercream Frosting: Smooth & Creamy Perfection – Your Go-To Recipe for Fluffy Desserts

⚖️
Difficulty
Easy
⏲️
Prep Time
10 mins
🕒
Cook Time
0 mins
⏱️
Total Time
10 mins
🍽️
Servings
12

Growing up in Morocco, the concept of elaborate buttercream wasn’t part of our daily dessert repertoire, which leaned more towards honey-soaked pastries and almond-laced cookies. But in my Parisian culinary school, I discovered the magic of French patisserie, and buttercream became an art form. Today, living in vibrant New York City, I’ve blended those influences to create what I truly believe is the best bakery buttercream frosting you can make at home. It’s smooth, creamy, and has that perfect fluffy texture you crave, making it ideal for everything from elegant layer cakes to whimsical cupcakes.

Imagine biting into a perfectly frosted cupcake, the frosting light as air yet rich with vanilla, melting delicately on your tongue without being overly sweet. That’s the experience this easy buttercream frosting delivers. It spreads like a dream, pipes beautifully, and holds its shape with an elegance that reminds me of the classic pastry shops near Les Halles. The secret lies in simple ingredients and a meticulous whipping technique that creates that signature fluffy buttercream frosting texture. It’s truly a game-changer for homemade desserts.

Many American buttercream recipes can sometimes feel too heavy or cloyingly sweet. My version of this vanilla buttercream frosting takes those traditional methods and refines them with a touch of European finesse, ensuring it’s balanced, incredibly smooth, and easy to work with. I’ll walk you through exactly how to achieve this, sharing my pro tips for perfect consistency and how to avoid common pitfalls like gritty or greasy frosting. Get ready to elevate your baking game with this homemade buttercream frosting recipe!

Why This Best Bakery Buttercream Frosting Recipe Is the Best

The Flavor Secret: My secret to the best bakery buttercream frosting is using high-quality unsalted butter and pure vanilla extract. While many recipes pile on the sugar, I balance it carefully to ensure the rich, creamy flavor of the butter and the aromatic vanilla shine through, reminiscent of the subtle elegance found in fine French pastries. A tiny pinch of salt isn’t just for seasoning; it magically enhances all the other flavors, giving the frosting depth.

Perfected Texture: Achieving that signature fluffy buttercream frosting texture is all about aeration. My Parisian training taught me the importance of beating the butter thoroughly, then gradually incorporating the powdered sugar, followed by a final, vigorous whip with heavy cream. This process introduces air, transforming what could be a dense frosting into a light, pipeable cloud that melts in your mouth.

Foolproof & Fast: You might think bakery-quality frosting is complicated, but this easy buttercream frosting recipe simplifies the process. It comes together in about 10 minutes with just a few basic ingredients and a stand mixer (or handheld electric mixer). No egg yolks, no heating, just straightforward steps that yield consistent, beautiful results every single time, even for novice bakers.

Best Bakery Buttercream Frosting Ingredients

Making the best bakery buttercream frosting starts with understanding the role each ingredient plays. Back in my mother’s kitchen in Morocco, ingredients were always fresh and of the highest quality—a principle I carry with me today, whether I’m shopping at a farmers market in NYC or for pantry staples. Here’s what you’ll need:

Ingredients List

  • 1 cup unsalted butter, softened
  • 4 cups powdered sugar
  • 1 teaspoon vanilla extract
  • 2 tablespoons heavy cream or milk
  • Pinch of salt

Ingredient Spotlight

Unsalted Butter: This is the backbone of your fluffy buttercream frosting. Using unsalted butter allows you to control the overall saltiness of your frosting. For the best flavor and texture, choose a good quality butter, preferably one with a higher fat content. Ensure it’s softened to true room temperature (around 68-70°F or 20-21°C), but not melted, for optimal creaming.

Powdered Sugar (Confectioners’ Sugar): Also known as confectioners’ sugar, this finely milled sugar contains a small amount of cornstarch which helps prevent caking and gives the frosting its smooth, non-gritty texture. There’s no good substitution for this ingredient to achieve that classic bakery buttercream smoothness.

Vanilla Extract: Pure vanilla extract is essential for that traditional, comforting flavor. I use a high-quality Madagascar Bourbon vanilla, as it offers a deep, nuanced aroma. Avoid imitation vanilla if possible, as it can leave an artificial aftertaste. For a truly special touch, infuse your own vanilla or use vanilla bean paste.

Heavy Cream or Milk: This liquid serves to thin the frosting to the perfect consistency and adds to its creamy mouthfeel. Heavy cream will result in a richer, slightly more stable frosting, while milk (whole milk often preferred) will yield a slightly lighter texture. You can adjust the amount slightly to reach your desired piping consistency.

Salt: A tiny pinch of fine salt is critical! It might seem counterintuitive in a sweet recipe, but salt brightens and balances all the flavors, preventing the frosting from tasting flat or overly sweet. It’s the culinary secret weapon for making everything taste “more like itself,” a trick I learned in my Parisian pastry classes.

Original IngredientBest SubstitutionFlavor / Texture Impact
Unsalted ButterVegan Butter Sticks (e.g., Miyoko’s Kitchen)Similar richness and texture, suitable for dairy-free.
Powdered SugarNone for texture; Granulated sugar will result in gritty frosting.Significantly gritty texture and won’t hold its shape.
Vanilla ExtractVanilla Bean PasteMore intense vanilla flavor and visible vanilla specks.
Heavy CreamAny plain milk (whole is best), or plant-based milks like oat or almond.Slightly less rich, potentially less stable, but still creamy.
SaltFlaky sea salt (very sparingly)Enhanced flavor, slight crunchy texture if not fully dissolved.

Best Bakery Buttercream Frosting

How to Make Best Bakery Buttercream Frosting — Step-by-Step

Creating this smooth, creamy best bakery buttercream frosting is simpler than you think. Just follow these steps, and you’ll be frosting like a pro in no time!

Step 1: Cream the Butter

In a large mixing bowl (or the bowl of a stand mixer fitted with the paddle attachment), beat the softened unsalted butter with an electric mixer on medium speed for 2-3 minutes. You want it to become noticeably lighter in color, pale yellow, and incredibly creamy, almost fluffy. This initial aeration is key to a light frosting.

💡 mia’s Pro Tip: Your butter should be soft enough to easily indent with a finger, but not greasy or melted. If it’s too cold, it won’t cream properly; if it’s too warm, your frosting might be soupy. I often take mine out 1-2 hours before I start.

Step 2: Add Powdered Sugar Gradually

With the mixer on low speed, gradually add the powdered sugar, one cup at a time. Beat until each addition is fully incorporated before adding the next. This prevents a sugar cloud explosion and ensures a smooth blend. Once all the sugar is in, scrape down the sides of the bowl.

⚠️ Common Mistake to Avoid: Don’t add all the powdered sugar at once! It will make a huge mess and won’t incorporate as smoothly, leading to potential lumps. Slow and steady wins the race here.

Step 3: Flavor and Lighten

Add the vanilla extract, heavy cream (or milk), and the pinch of salt to the butter-sugar mixture. Beat on medium-high speed for 3-4 minutes. This final vigorous beating is what makes the frosting light, fluffy, and truly bakery-worthy. It should almost double in volume and become incredibly pale and smooth.

💡 mia’s Pro Tip: For an extra fluffy buttercream frosting, whip it a bit longer than you think you need to. The more air you incorporate at this stage, the lighter and more ethereal your frosting will be. If it feels too stiff, add a tiny bit more cream; if too loose, a tablespoon more powdered sugar.

Step 4: Use or Store

Your homemade buttercream frosting is now ready to use! Pipe it onto cupcakes, spread it over cakes, or use it for decorative elements. If not using immediately, transfer it to an airtight container and refrigerate. When ready to use, bring it back to room temperature and re-whip briefly until light and fluffy again.

StepActionDurationKey Visual Cue
1Cream Butter2-3 minPale yellow, creamy, fluffy
2Add Powdered Sugar3-4 min (1 cup at a time)Smooth, no visible sugar lumps
3Flavor & Lighten3-4 minIncreased volume, very pale, ethereal and smooth
4Use or StoreN/AReady for piping or spreading

Serving & Presentation

This best bakery buttercream frosting is incredibly versatile, making any dessert feel special. For cupcakes, I love to use a large star tip to create beautiful swirls that beckon you to take a bite – it instantly elevates them to bakery-level status. For a layer cake, a smooth, even application with an offset spatula gives a clean, professional finish, or try a rustic textured look with the back of a spoon.

In NYC, I often find inspiration for presentation from the elaborate window displays of patisseries. A simple garnish can go a long way: colorful sprinkles for a festive cake, fresh berries for a lighter touch, or a dusting of cocoa powder for an elegant contrast. For a more sophisticated look reminiscent of my French training, consider a few edible gold flakes or a delicate chocolate curl.

I also love pairing this vanilla buttercream frosting with unexpected flavors. It’s fantastic on a classic vanilla sponge, but equally delightful with a rich chocolate cake, vibrant red velvet, or even a spicy carrot cake. Think beyond typical pairings – once, I used it on rosewater-infused cupcakes, a nod to my Moroccan heritage, and the result was simply enchanting.

Pairing TypeSuggestionsWhy It Works
Dessert BaseVanilla cake, Red Velvet cupcakes, Carrot cake, Chocolate browniesComplements classic flavors, adds creaminess and sweetness.
GarnishFresh berries, chocolate shavings, sprinkles, edible flowers, citrus zestAdds visual appeal, fresh counterpoint, or textural contrast.
BeverageCoffee, tea (earl grey or herbal), sparkling ciderCuts through the richness, provides a refreshing balance.
Flavor BoostA drizzle of caramel, a sprinkle of cinnamon, toasted nutsAdds layers of complexity and texture to the vanilla base.

Make-Ahead, Storage & Reheating

Living in NYC means I’m always on the go, and efficient meal prep, even for desserts, is a must. This homemade buttercream frosting recipe is fantastic for making ahead, saving you precious time when you’re assembling your final dessert. It stores beautifully, so you can whip up a batch whenever inspiration strikes!

MethodContainerDurationReheating Tip
RefrigeratorAirtight containerUp to 1 weekBring to room temp & re-whip until fluffy.
FreezerAirtight, freezer-safe containerUp to 3 monthsThaw overnight in fridge, bring to room temp & re-whip.
Make-AheadAirtight container (fridge)2-3 days in advanceEssential to re-whip for best texture before use or it may be too dense.

When you refrigerate your best bakery buttercream frosting, it will firm up considerably. This is completely normal! To bring it back to that smooth, pipeable, fluffy buttercream frosting consistency, simply let it sit on the counter until it reaches room temperature (this might take several hours, depending on your kitchen’s warmth). Then, transfer it to your mixer and whip it on medium-high speed for a few minutes. It will miraculously transform back into its light and airy self! If it seems a little too stiff even after re-whipping, add a teaspoon of heavy cream at a time until it reaches your desired consistency. Freezing works just as well; just give it ample time to thaw in the fridge before the room temperature and re-whip steps.

Variations & Easy Swaps

This classic vanilla buttercream frosting is a fantastic base for endless creativity. Just like in Parisian patisseries, where simple buttercreams are transformed with a touch of fruit or chocolate, you can easily adapt this recipe to suit any flavor profile or dietary need.

VariationKey ChangeBest ForDifficulty Impact
ChocolateAdd melted, cooled chocolate or cocoa powderChocolate cakes, brownies, eclairsMinimal – just an extra mixing step
Dairy-FreeSwap butter for vegan butter, cream for plant milkVegan desserts, dietary restrictionsSlightly different texture, easily manageable
Espresso / CoffeeAdd instant espresso powder dissolved in creamCoffee cakes, tiramisu-inspired dessertsMinimal – adds a rich layer of flavor

Chocolate Bakery Buttercream

To make a rich chocolate version, melt and cool 4 oz (113g) of good quality dark chocolate. Beat it into the finished vanilla buttercream frosting during Step 3. Alternatively, sift in 1/2 cup of unsweetened cocoa powder along with the powdered sugar for a less intense but equally delicious chocolate flavor. This works wonderfully on chocolate lava cakes, reminiscent of a French ‘gâteau au chocolat’.

Dairy-Free Bakery Buttercream

For a dairy-free option, swap the unsalted butter for a high-quality vegan butter substitute (I recommend stick varieties, not tub margarines). Use a plant-based milk (like unsweetened almond or oat milk) instead of heavy cream. The texture will be very similar, and it’s a fantastic way to ensure everyone at your table, even those with dietary restrictions, can enjoy a delicious homemade buttercream frosting.

Espresso Bakery Buttercream

Introduce a sophisticated coffee flavor by dissolving 1-2 teaspoons of instant espresso powder into your heavy cream before adding it to the frosting. The coffee acts as a flavor enhancer, much like salt, and pairs beautifully with many cake flavors. This is a favorite in my NYC kitchen, adding a delightful kick to classic vanilla or chocolate cakes.

What is the difference between American buttercream and bakery buttercream frosting?

American buttercream, which is what this recipe represents, is essentially butter whipped with powdered sugar, a liquid (like milk or cream), and flavorings. It’s known for being easy to make and quite sweet. When I refer to “bakery buttercream frosting,” I’m really detailing how to elevate that American style to achieve a professional, less-sweet, and exceptionally smooth texture, akin to what you’d find in a high-end bakery. The key is in proper creaming of the butter, gradual sugar incorporation, and significant whipping time at the end to make it light and fluffy, rather than dense and overly sweet.

How do you get bakery buttercream frosting to be stiff and hold its shape?

To ensure your homemade buttercream frosting is stiff and holds its shape perfectly, several factors are crucial. First, start with proper room temperature butter – not too soft, not too hard. Second, ensure you whip the butter thoroughly at the beginning until it’s light and fluffy. Third, gradually add the powdered sugar, allowing it to fully incorporate. Finally, the vigorous beating after adding the cream and vanilla is paramount. This incorporates enough air to create a stable, pipeable fluffy buttercream frosting. If it’s still too soft, try adding a tablespoon more powdered sugar and whipping again for another minute. For very hot climates, you might reduce the cream slightly or chill the finished frosting for 10-15 minutes before re-whipping and using.

Can you use salted butter instead of unsalted butter in bakery buttercream frosting?

You can use salted butter in a pinch, but I do not recommend it for my best bakery buttercream frosting recipe. The reason is that salted butter contains varying amounts of salt, making it difficult to control the overall flavor balance. As a chef, I always prefer unsalted butter so I can add salt precisely to enhance the other ingredients, rather than having the butter dictate the saltiness. If you must use salted butter, omit the pinch of salt from the recipe entirely, and taste as you go. You may find the resulting frosting has a slightly different flavor profile than intended, but it will still be delicious.

How long does bakery buttercream frosting last at room temperature or in the fridge?

This homemade buttercream frosting, if made with dairy, is generally good at cool room temperature (below 75°F or 24°C) for up to 1-2 days, especially if used on a freshly baked cake or cupcakes. However, for optimal freshness and safety, I always recommend refrigerating it. Stored in an airtight container in the refrigerator, it will last for up to a week. When you’re ready to use it, simply bring it back to room temperature and give it a good re-whip in your mixer until it’s light and fluffy again. Never use frosting that smells off or clearly shows signs of spoilage; when in doubt, throw it out!

My buttercream tastes too sweet. How can I fix it?

If your fluffy buttercream frosting tastes too sweet, there are a couple of tricks from my French pastry training you can try. First, ensure you added the pinch of salt; it dramatically balances sweetness. If you’ve already made it, you can sometimes beat in an additional tablespoon or two of softened unsalted butter to dilute the sweetness slightly, or a tiny splash of lemon juice or even a neutral spirit like vodka can cut through the richness without adding a noticeable flavor (just a few drops!). Next time, consider using less sugar initially and tasting before adding more, or incorporating a different flavor profile like cocoa powder or espresso to temper the sweetness.

Why is my buttercream gritty?

Gritty buttercream is usually a sign that your powdered sugar hasn’t fully dissolved or isn’t fine enough. Ensure you’re using true confectioners’ (powdered) sugar, not granulated sugar. Sometimes, sifting the powdered sugar before adding it can help tremendously, especially if it’s been sitting in your pantry for a while and has clumped. The most important step is to beat the frosting long enough after adding the sugar to allow the sugar particles to fully dissolve into the butter. Don’t rush this step; the extended whipping time in Step 3 is critical for a smooth, homogenous texture in this best bakery buttercream frosting.

Share Your Version!

I truly hope you adore this best bakery buttercream frosting as much as I do. It’s a recipe that’s been perfected with love and a touch of professional finesse over years, bringing that NYC bakery quality right into your home kitchen. There’s nothing more rewarding than seeing your creations come to life!

If you try this homemade buttercream frosting recipe, please do me a huge favor and leave a star rating and comment below. Your feedback means the world to me and helps other home bakers find and love this recipe too! And if you share a photo of your beautiful frosted creations on Instagram or Pinterest, make sure to tag @exorecipes so I can see what you’ve made – I absolutely love celebrating your culinary successes. What’s your favorite cake flavor to pair with this fluffy buttercream frosting? Let me know below!

From my NYC kitchen to yours — I hope this recipe brings as much warmth to your table as it does to mine. — mia 🧡

📌

Love This Recipe? Save It to Pinterest!

If you enjoyed this Best Bakery Buttercream Frosting recipe, don’t let it get lost in your browser tabs! 😄 Pin it now so you can find it again anytime — and explore hundreds more tried-and-tested recipes waiting for you on my Pinterest boards.

👉 Follow mia on Pinterest @chefrecipes2

📌 Pin this recipe · 🔁 Re-pin your favorites · 💬 Tag me when you make it — I love seeing your creations!
Print

clock clock iconcutlery cutlery iconflag flag iconfolder folder iconinstagram instagram iconpinterest pinterest iconfacebook facebook iconprint print iconsquares squares iconheart heart iconheart solid heart solid icon

Best Bakery Buttercream Frosting

  • Author: Chef Mia
  • Prep Time: 10 minutes
  • Cook Time: 0 minutes
  • Total Time: 10 minutes
  • Yield: 12 1x
  • Method: Dessert
  • Cuisine: American

Description

A classic bakery-style buttercream frosting that is smooth, creamy, and perfect for cakes and cupcakes.


Ingredients

Scale
  • 1 cup unsalted butter, softened
  • 4 cups powdered sugar
  • 1 teaspoon vanilla extract
  • 2 tablespoons heavy cream or milk
  • Pinch of salt

Instructions

  1. In a large bowl, beat the softened butter with an electric mixer until creamy.
  2. Gradually add the powdered sugar, one cup at a time, beating on low speed until combined.
  3. Add the vanilla extract, heavy cream, and salt. Beat on medium-high speed for 3-4 minutes until light and fluffy.
  4. Use immediately or refrigerate for later use. Bring to room temperature and re-whip before using.

Notes

For best results, ensure butter is at room temperature but not too soft. Adjust consistency with additional cream or powdered sugar as needed.


Nutrition

  • Calories: 150 kcal
  • Sugar: 19 g
  • Fat: 8 g
  • Carbohydrates: 20 g
  • Protein: 0 g


Best Bakery Buttercream Frosting

ph">For more delicious inspiration, follow me on Pinterest!

Homemade Teriyaki Chicken Stir Fry in 20 Minutes

Most Delicious Teriyaki Chicken with Homemade Sauce – A 20-Minute Stir-Fry Delight

⚖️
Difficulty
Easy
⏲️
Prep Time
10 mins
🕒
Cook Time
10 mins
⏱️
Total Time
20 mins
🍽️
Servings
4

Growing up in Morocco, my mother’s kitchen was always a symphony of spices and slow-cooked tagines. While that culinary foundation is deep in my soul, living in New York City has opened my palate to a world of quick, flavorful weeknight meals. That’s why I adore this easy teriyaki chicken recipe. It’s a complete stir-fry dinner that comes together faster than takeout, featuring succulent chicken thighs coated in my special homemade teriyaki sauce. This isn’t just another dinner; it’s a testament to how global flavors can make their way into your everyday cooking, adapting to busy lives without sacrificing taste or quality.

The beauty of this chicken teriyaki lies in its irresistible balance – savory tamari, sweet honey, and the subtle tang of mirin and sake create a sauce that’s both complex and utterly approachable. Imagine golden-brown chicken, kissed by the heat of the wok, then bathing in that glossy, aromatic teriyaki. The ginger and garlic infuse everything with a fresh, pungent warmth, making the kitchen smell absolutely divine. It’s a sensual experience, from the sizzle in the pan to the first bite of tender, saucy chicken. I remember learning about balancing sweetness and acidity in Paris, and this sauce truly embodies that delicate harmony for a truly delicious result.

What sets my most delicious teriyaki chicken apart is not just the speed but the depth of flavor from the homemade teriyaki sauce – it’s miles beyond anything store-bought. You get to control the sweetness and salinity, ensuring a perfectly balanced dish every time. I’ll show you a chef’s trick for getting perfectly even browning on your chicken and share a common pitfall to avoid that can make your sauce watery. Trust me, with just a few simple steps and this foolproof recipe, you’ll be making the best chicken teriyaki at home in just 20 minutes, ready to impress even the pickiest eaters!

Why This Easy Teriyaki Chicken Recipe Is the Best

The secret to this chicken teriyaki’s incredible flavor lies in the homemade sauce. Many store-bought teriyaki sauces are loaded with high-fructose corn syrup and artificial ingredients. By making it from scratch, I use quality tamari (or coconut aminos for a gluten-free twist), real honey, and authentic mirin and sake. This blend, inspired by the umami principles I studied in culinary school, creates a depth of flavor that is truly unparalleled, tasting fresh and vibrant.

Achieving perfectly tender chicken with a beautiful golden crust is a technique I honed over years. Many recipes overcrowd the pan, steaming the chicken instead of searing it. I’ll guide you through cooking the chicken in batches if necessary, ensuring each piece develops that desirable caramelized exterior while staying juicy and moist inside, a hallmark of expertly cooked poultry.

This recipe is designed for maximum flavor with minimal effort, making it ideal for anyone – from beginner cooks to seasoned home chefs. It’s a 20-minute wonder, meaning you can have a gourmet-tasting meal on the table even on your busiest weeknights. Plus, the simple steps and clear instructions ensure a foolproof cooking experience, so you can confidently tackle this dish and achieve delicious results every single time.

Easy Teriyaki Chicken Recipe Ingredients

For this easy teriyaki chicken recipe, I love picking up fresh ginger and green onions from my local NYC farmers market. There’s something about the vibrant produce that reminds me of the fresh ingredients my mother always sourced back in Morocco. The quality of your ingredients truly makes a difference in a simple dish like this.

Ingredients List

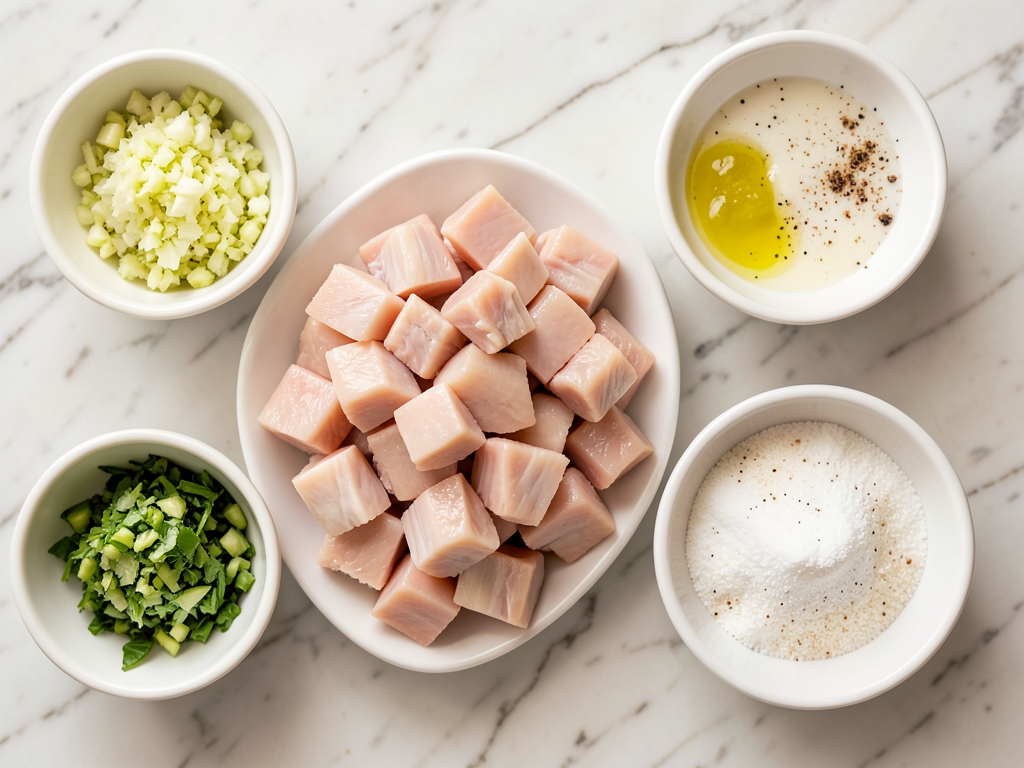
  • 1 ½ pounds boneless skinless chicken thighs (diced into 1-inch cubes)
  • 1 tablespoon avocado oil
  • 1 tablespoon finely chopped ginger
  • 2 cloves garlic (minced)
  • salt and pepper (to taste)
  • ¼ cup tamari soy sauce (or coconut aminos)
  • ¼ cup sake
  • ¼ cup mirin
  • 2 tablespoons honey
  • sesame seeds (for garnish)
  • sliced green onion (for garnish)

Ingredient Spotlight

Chicken Thighs: I prefer boneless, skinless chicken thighs for this recipe because they stay incredibly juicy and tender, even with high-heat stir-frying, thanks to their higher fat content compared to breasts. In any grocery store, look for thighs that are plump and rosy, with no strong odor. If you only have chicken breasts, dice them and reduce cooking time slightly to avoid dryness.

Tamari Soy Sauce: This is the foundation of our teriyaki sauce, providing that essential umami depth. Tamari is naturally gluten-free and has a slightly richer, less salty flavor than regular soy sauce. You can find it in the international aisle of most supermarkets. If you don’t have tamari, regular soy sauce works perfectly fine, or use coconut aminos for a soy-free and gluten-free alternative, though it will be slightly sweeter.

Sake & Mirin: These Japanese rice wines are critical for authentic teriyaki flavor. Sake adds a subtle, complex boozy note, while mirin contributes sweetness and a beautiful glaze-like quality. Look for “cooking sake” and “hon-mirin” (true mirin) in Asian markets or well-stocked grocery stores. If you can’t find sake, a dry sherry or white wine can be a substitute, but the flavor won’t be quite the same. For mirin, if unavailable, you can use rice vinegar with a pinch of sugar, but be aware of the difference in depth.

Honey: I use honey instead of refined sugar to add natural sweetness and help create that gorgeous, sticky glaze. Any good quality liquid honey will work. Maple syrup is a decent substitute, though it will impart a slightly different flavor profile. The key is to balance the sweetness with the savory notes of the tamari and the subtle sharpness of the ginger and garlic.

Original IngredientBest SubstitutionFlavor / Texture Impact
Boneless Skinless Chicken ThighsBoneless Skinless Chicken BreastsSlightly drier texture; reduce cooking time.
Tamari Soy SauceRegular Soy Sauce (not gluten-free) or Coconut AminosRegular soy sauce is saltier; coconut aminos are sweeter and soy-free.
SakeDry Sherry or Dry White WineFlavor will be slightly different, less traditional Japanese note.
MirinRice Vinegar with a pinch of sugarLess depth and sweetness, more acidic.
HoneyMaple SyrupSlightly different flavor profile, but still provides sweetness and glaze.

Easy Teriyaki Chicken Recipe

How to Make Easy Teriyaki Chicken Recipe — Step-by-Step

Making this easy teriyaki chicken recipe is a breeze, even if you’re a beginner. Just follow these simple steps, and you’ll have a fantastic meal in no time!

Step 1: Make the Homemade Teriyaki Sauce

In a medium-sized bowl, whisk together the tamari soy sauce (or coconut aminos), sake, mirin, and honey until everything is thoroughly combined and the honey has dissolved. This is your flavor base, so ensure it’s well mixed. Set this delicious concoction aside; it will be ready when the chicken is perfectly seared.

💡 mia’s Pro Tip: Whisk your sauce ingredients well in advance. This allows the flavors to meld beautifully and ensures a smooth, lump-free sauce that will coat your chicken evenly. This is a trick I learned in my Paris culinary training for perfecting sauces!

Step 2: Stir Fry the Chicken

Heat the avocado oil in a large sauté pan or wok over medium-high heat. Once the oil shimmers, add the diced chicken thighs in a single layer. Don’t overcrowd the pan; cook in two batches if necessary to ensure golden-brown searing instead of steaming. Let the chicken cook for 1 to 2 minutes on one side until it’s beautifully golden. Season generously with salt and pepper, then flip and cook the other side for another 1 to 2 minutes. The goal here is a lovely crust and partial cooking, as it will finish in the sauce.

⚠️ Common Mistake to Avoid: Overcrowding your pan. This causes the temperature to drop, and the chicken will steam rather than sear, resulting in a pale, rubbery texture instead of that desirable golden crust. Cook in batches if needed!

Step 3: Toss and Simmer

Once all the chicken is seared, give your whisked sauce another quick stir and pour it into the pan along with the minced ginger and garlic. Stir everything together, ensuring the chicken is well coated. Bring the sauce to a gentle simmer and let it cook for 4 to 5 minutes, stirring occasionally. The sauce will naturally reduce and thicken as it cooks, transforming into a glossy, sticky glaze that clings perfectly to every piece of chicken.

💡 mia’s Pro Tip: The sauce will thicken quite a bit as it simmers and cools slightly. Don’t let it reduce too much in the pan, or it will become overly sticky. You’re looking for a luscious, pourable glaze that still coats a spoon.

Step 4: Serve and Garnish

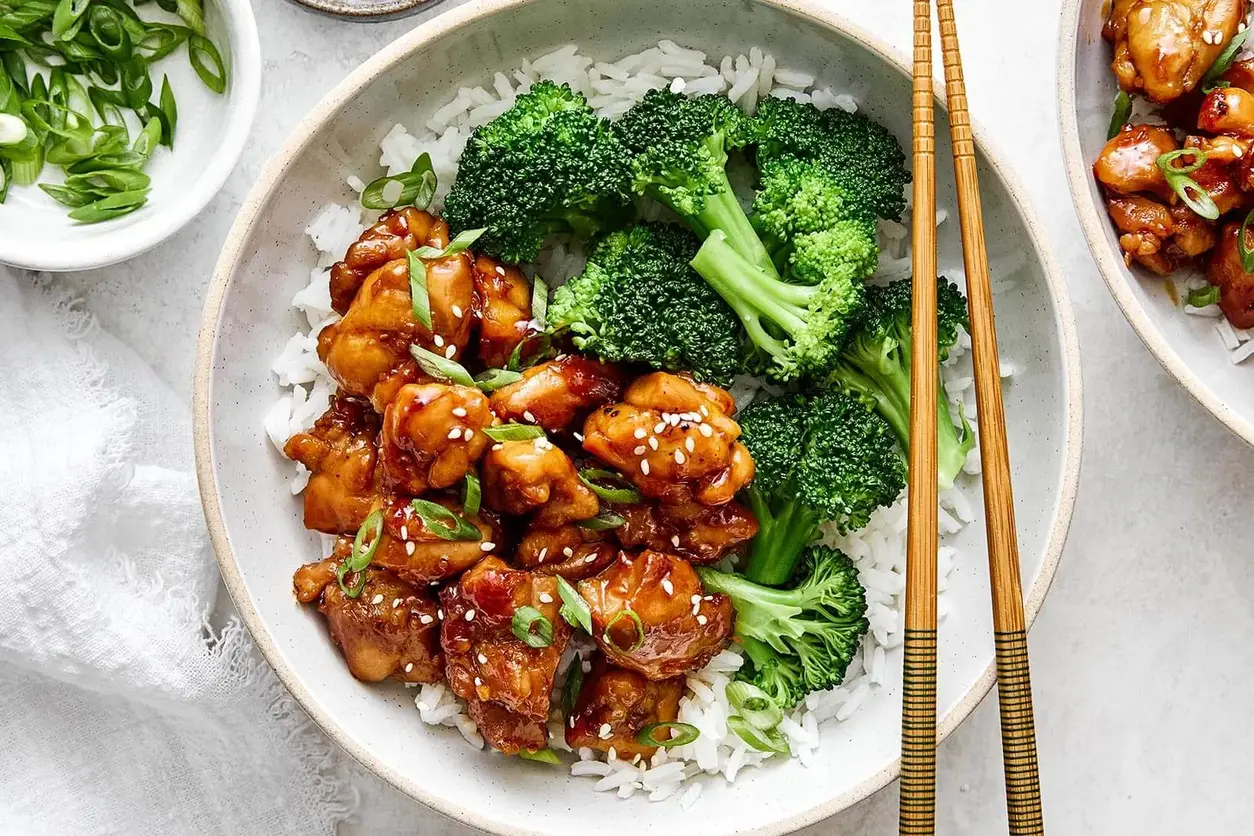
Once the sauce has reached your desired consistency, remove the pan from the heat. This easy teriyaki chicken is best served immediately on a fresh bed of warm rice. For a complete meal, I love serving it with a side of steamed broccoli or a simple green salad. Finish by garnishing generously with toasted sesame seeds and freshly sliced green onions for a pop of color and freshness. Enjoy your perfectly balanced, flavorful meal!

⚠️ Common Mistake to Avoid: Adding fresh ginger and garlic too early in the cook. If they burn, they’ll turn bitter. Adding them when the sauce goes in allows them to gently infuse without scorching, keeping their vibrant flavor profile intact.

StepActionDurationKey Visual Cue
1Make the Teriyaki Sauce2 minsAll ingredients combined, smooth liquid.
2Stir Fry Chicken2-4 minsGolden-brown crust on chicken pieces.
3Toss & Simmer4-5 minsSauce thickens to a glossy glaze, coats chicken.
4Serve & Garnish1 minChicken on rice, garnished with sesame/green onion.

Serving & Presentation

Serving this Most Delicious Teriyaki Chicken is all about creating a visually appealing and satisfying meal. I love to present it generously piled over a fluffy bed of perfectly steamed white rice, allowing the glossy teriyaki sauce to seep into the grains. In Morocco, we cherish shared plates, and this dish lends itself beautifully to a family-style presentation. Arrange the chicken artfully, ensuring plenty of that rich sauce is visible.

For garnishes, simplicity is key, but don’t underestimate their impact. A sprinkle of toasted sesame seeds adds a lovely nutty crunch and visual elegance. Finely sliced green onions provide a fresh, peppery counterpoint to the rich sauce and a vibrant pop of color. Sometimes, if I’m feeling particularly fancy, I’ll add a few delicate cilantro sprigs, though it’s not traditional, it complements the flavors beautifully.

Complete the meal with a side that cuts through the richness. Steamed or roasted broccoli, asparagus, or green beans are classic choices that offer a refreshing, crisp texture. A light cucumber salad with a rice vinegar dressing also works wonderfully, a nod to the fresh, vibrant salads often found in bustling NYC food stalls. And to drink? A crisp, cold sake or even a ginger ale makes a perfect partner to this flavorful stir-fry.

Pairing TypeSuggestionsWhy It Works
Side DishSteamed White Rice, Roasted Broccoli, Sautéed AsparagusAbsorbs sauce, provides a neutral base, adds freshness and fiber.
Sauce / DipExtra Teriyaki Sauce, Sriracha Mayo, Chili Garlic SauceAdds an extra layer of flavor, heat, or creaminess.
BeverageSake, Green Tea, Ginger Ale, Cold BeerComplements Asian flavors, refreshing, or cuts richness.
GarnishToasted Sesame Seeds, Sliced Green Onions, Red Pepper FlakesAdds crunch, freshness, visual appeal, and a hint of spice.

Make-Ahead, Storage & Reheating

As a busy cook in NYC, I know the value of a meal that can be prepared ahead or easily stored for later. This easy teriyaki chicken recipe is fantastic for meal prep. I often make a double batch for my family, ensuring I have wholesome, homemade dinners ready to go throughout the week, making school nights and demanding workdays much smoother.

MethodContainerDurationReheating Tip
RefrigeratorAirtight container3-4 daysMicrowave until hot, or gently reheat in a pan with a splash of water.
FreezerFreezer-safe bag or container2-3 monthsThaw overnight in the fridge, then reheat as above.
Make-AheadStore sauce separately, cooked chicken separatelySauce: 1 week; Chicken: 3-4 daysReheat chicken, then add sauce and simmer to combine.

When reheating this teriyaki chicken, patience is a virtue. While a microwave is quick, for the best results and to prevent the chicken from drying out, I recommend a stovetop method. Place the chicken and sauce in a skillet over medium-low heat, adding a tablespoon or two of water or chicken broth to loosen the sauce. Cover and heat gently, stirring occasionally until heated through. This helps reactivate the sauce and keeps the chicken moist.

You can also prepare the teriyaki sauce several days in advance and keep it in an airtight jar in the refrigerator. This cuts down on weeknight prep even further, allowing you to simply cook the chicken and add the pre-made sauce. It’s a lifesaver on those evenings when you’re craving something delicious but have minimal time.

Variations & Easy Swaps

VariationKey ChangeBest ForDifficulty Impact
Spicy Sriracha TeriyakiAdd Sriracha or chili flakes to sauceHeat lovers, a bold flavor twistNone
Gluten-Free & Nut-FreeUse Tamari and ensure all other ingredients are certified GF/NFDietary restrictionsNone
Seasonal Vegetable BoostAdd crisp-tender veggies to the stir-fryExtra nutrition, color, and textureSlight increase in prep time

Spicy Sriracha Teriyaki

For those who appreciate a kick, a spicy twist on this easy teriyaki chicken is absolutely delicious. Simply add 1-2 teaspoons of Sriracha or a pinch of red pepper flakes to your homemade teriyaki sauce. The heat beautifully balances the sweetness, adding another layer of complexity that reminds me of the robust flavors found in North African spice blends, but with a Japanese flair. It’s a bold variation that’s easy to implement.

Gluten-Free and Nut-Free Friendly

This recipe is already largely gluten-free if you use tamari instead of regular soy sauce. For a complete gluten-free and nut-free version, simply ensure your mirin and sake are certified GF, and you’re good to go! Coconut aminos are an excellent soy-free and gluten-free alternative to tamari, offering a slightly sweeter profile. I always test these swaps in my NYC kitchen to ensure the flavor remains authentic and delicious.

Seasonal Vegetable Boost

To make this an even heartier meal, stir in some seasonal vegetables. Broccoli florets, sliced bell peppers, snow peas, or shredded carrots are excellent additions. Blanch tougher vegetables like broccoli first, then add them during the last few minutes of simmering the chicken in the sauce to ensure they are crisp-tender and absorb all that fantastic teriyaki flavor. It’s a great way to use up fresh finds from the Union Square Greenmarket!

What is the best way to thicken teriyaki sauce for chicken?

The best way to naturally thicken this homemade teriyaki sauce is by simply simmering it with the chicken for 4-5 minutes, as the honey and reduced liquids will create a beautiful glaze. However, if you prefer a thicker sauce, you can create a cornstarch slurry. Whisk 1 teaspoon of cornstarch with 1 tablespoon of cold water until smooth. Once the sauce and chicken are simmering, slowly drizzle in the slurry while stirring constantly. The sauce will thicken almost immediately. A common ratio I use in my kitchen when teaching this technique is 1 tablespoon of cornstarch per cup of liquid for a medium-thick sauce, adjusting as needed for your desired consistency.

Can I use chicken thighs instead of chicken breasts in this recipe?

Absolutely! In fact, I highly recommend using chicken thighs for this easy teriyaki chicken recipe, which is precisely what I’ve included in my ingredient list. Chicken thighs are my preferred choice because they are more forgiving and remain incredibly juicy and flavorful even when cooked at high heat, thanks to their slightly higher fat content. If you opt for chicken breasts, dice them into similar 1-inch cubes and be mindful not to overcook them, as they can dry out more easily. Reduce the simmering time by a minute or two and watch for them to turn opaque and reach an internal temperature of 165°F (74°C).

How long should I marinate teriyaki chicken for maximum flavor?

For this specific easy teriyaki chicken recipe, I don’t call for a separate marinating step because the chicken cooks right in the homemade sauce, absorbing all those delicious flavors incredibly quickly. The high heat stir-fry technique, coupled with the simmering in the sauce, ensures maximum flavor penetration in just minutes. If you wish to marinate, you could cube the chicken and toss it with half of the sauce for
30 minutes at room temperature, or up to 4 hours in the refrigerator. However, for a weeknight meal, skipping the pre-marination is perfectly fine and won’t compromise the fantastic taste.

What are some good side dishes to serve with teriyaki chicken?

Beyond the classic steamed white rice, there are many delightful side dishes that pair well with easy teriyaki chicken. I often serve it with steamed or roasted broccoli, asparagus, or green beans for a vibrant green vegetable crunch. A simple cucumber salad dressed with rice vinegar and a pinch of sugar offers a refreshing contrast. For something heartier, consider stir-fried noodles or even quinoa. In my NYC kitchen, I sometimes quickly sauté a mix of bell peppers and snap peas for extra color and texture, giving it a true stir-fry feel. The key is to choose sides that balance the richness of the teriyaki sauce.

Can I use regular soy sauce instead of tamari in the teriyaki sauce?

Yes, you can absolutely use regular soy sauce in place of tamari in the teriyaki sauce. Tamari is typically gluten-free and has a slightly milder, richer flavor, but traditional soy sauce will work perfectly fine. If you do use regular soy sauce, you might want to consider slightly reducing the salt you add to the chicken, as conventional soy sauce tends to be a bit saltier. Taste the sauce as you whisk it together and adjust to your preference. While tamari offers a nuanced depth, the essence of the sauce will still shine through with regular soy sauce, creating a delicious result for your teriyaki chicken.

How can I make this teriyaki chicken recipe healthier?

To make this easy teriyaki chicken recipe even healthier, there are a few simple tweaks. You can reduce the amount of honey slightly, or swap it for a sugar-free alternative, though be aware of potential flavor changes. Incorporating more vegetables is always a great idea—stir in extra broccoli, carrots, bell peppers, or spinach during the last few minutes of cooking. Serving it with brown rice or quinoa instead of white rice will boost fiber. Limiting the amount of oil used for searing and ensuring you’re using lean chicken thighs also contributes to a lighter dish without sacrificing the delicious flavors of the homemade teriyaki sauce. It’s all about balance!

Share Your Version!

I poured my heart into perfecting this easy teriyaki chicken recipe, bringing a piece of my New York energy and culinary passion right into your kitchen. I truly hope you love making and eating it as much as I do!

If you try this recipe, please come back and leave a star rating and a comment below – your feedback means the world to me and helps other home cooks discover delicious meals. And if you snap a photo, share it on Instagram or Pinterest and tag @exorecipes! I absolutely adore seeing your culinary creations. What’s your favorite vegetable to pair with this chicken teriyaki stir-fry?

From my NYC kitchen to yours — I hope this recipe brings as much warmth to your table as it does to mine. — mia 🧡

📌

Love This Recipe? Save It to Pinterest!

If you enjoyed this Most Delicious Teriyaki Chicken recipe, don’t let it get lost in your browser tabs! 😄 Pin it now so you can find it again anytime — and explore hundreds more tried-and-tested recipes waiting for you on my Pinterest boards.

👉 Follow mia on Pinterest @chefrecipes2

📌 Pin this recipe · 🔁 Re-pin your favorites · 💬 Tag me when you make it — I love seeing your creations!

Print

clock clock iconcutlery cutlery iconflag flag iconfolder folder iconinstagram instagram iconpinterest pinterest iconfacebook facebook iconprint print iconsquares squares iconheart heart iconheart solid heart solid icon

Most Delicious Teriyaki Chicken

  • Author: Chef Mia

Description

This easy teriyaki chicken is everyones favorite stir-fry dinner. Its made special tossing chicken thighs with my homemade teriyaki sauce, and comes together in just 20 minutes! Watch the video below to see how I make this in my kitchen!


Ingredients

Scale
  • 1 ½ pounds boneless skinless chicken thighs (diced into 1-inch cubes)
  • 1 tablespoon avocado oil
  • 1 tablespoon finely chopped ginger
  • 2 cloves garlic (minced)
  • salt and pepper (to taste)
  • ¼ cup tamari soy sauce (or coconut aminos)
  • ¼ cup sake
  • ¼ cup mirin
  • 2 tablespoons honey
  • sesame seeds
  • sliced green onion

Instructions

  1. Make the teriyaki sauce. In a medium sized bowl, whisk together the soy sauce, sake, mirin, and honey until everything is well combined. Set this aside.
  2. Stir fry the chicken. Heat the oil in a large saute pan or wok over medium-high heat. Add in the chicken and let it cook for 1 to 2 minutes on one side, until nice and golden. Season the chicken with salt and pepper. Then, flip it over and cook the other side for another 1 to 2 minutes.
  3. Toss together. Give the sauce a quick whisk and add it to the pan along with the minced ginger and garlic. Stir the sauce with the chicken and let it simmer for 4 to 5 minutes until the sauce has reduced and thickened.
  4. Serve on top of a fresh bed of rice and a side of steamed broccoli. Garnish with diced green onions and sesame seeds.


Nutrition

  • Calories: 321 kcal
  • Sugar: 12 g
  • Fat: 11 g
  • Carbohydrates: 17 g
  • Protein: 35 g


Easy Teriyaki Chicken Recipe

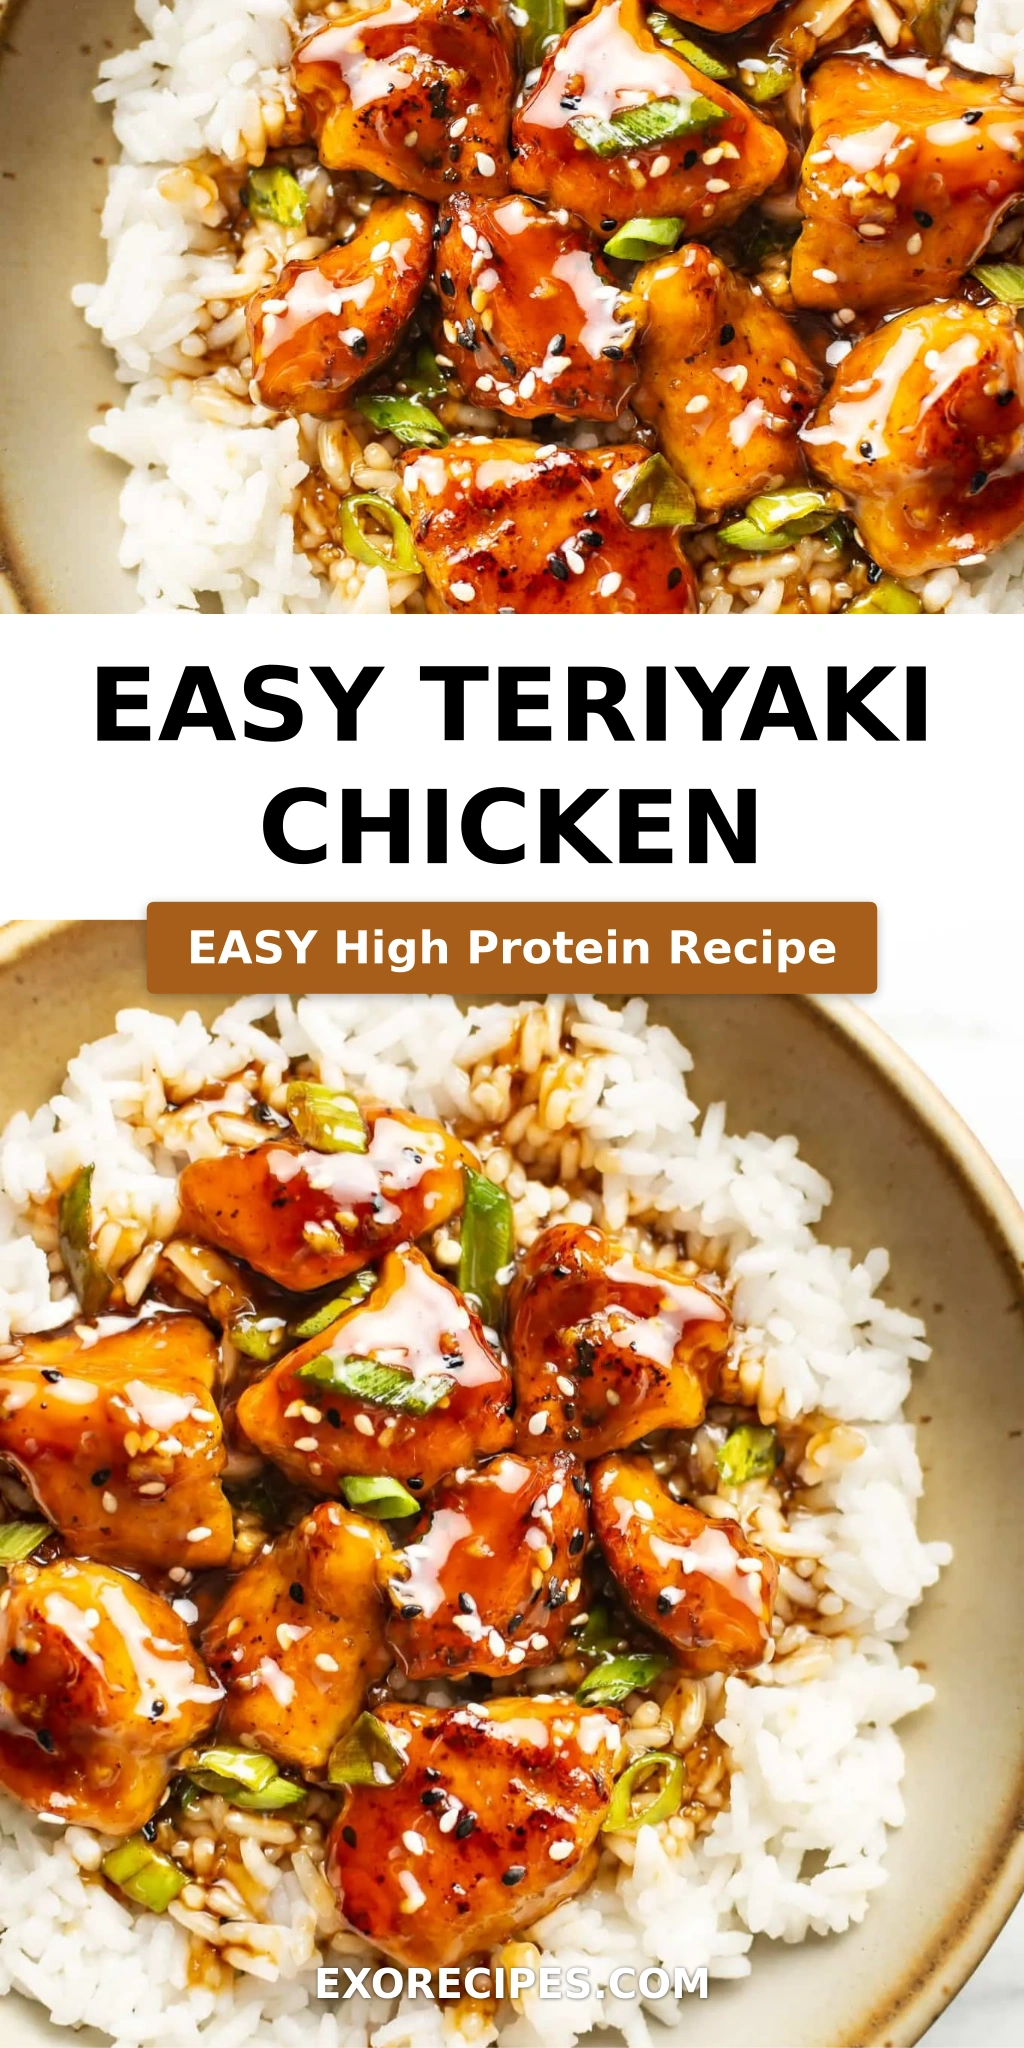
Perfect Homemade Teriyaki Chicken Better Than Takeout

Easy Teriyaki Chicken with Homemade Sauce – Better Than Takeout

⚖️
Difficulty
Easy
⏲️
Prep Time
10 mins
🕒
Cook Time
20 mins
⏱️
Total Time
30 mins
🍽️
Servings
4

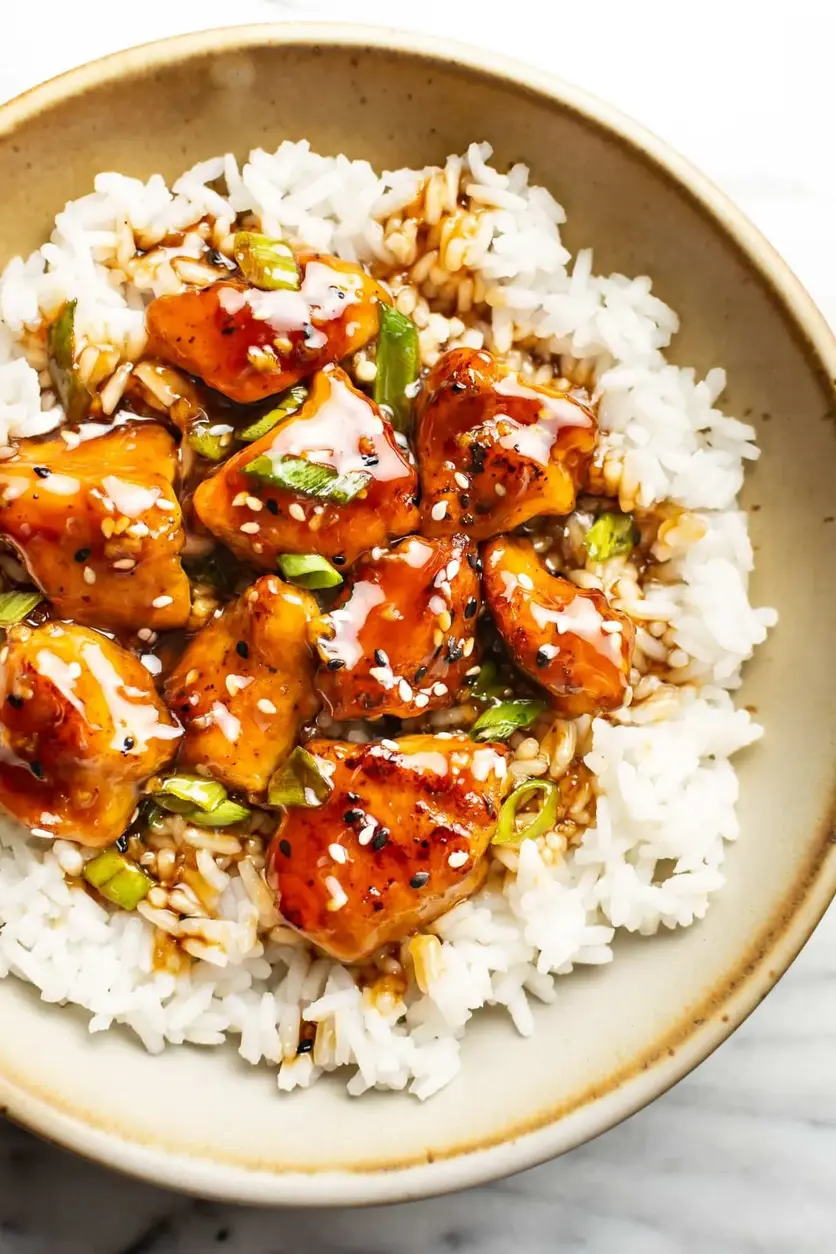
Growing up in Morocco, the aromas of cumin and coriander often filled my mother’s kitchen, but living in New York City has truly opened my culinary world to an incredible array of global flavors. One dish I’ve absolutely perfected, blending my classical French training with a touch of NYC speed, is this incredibly easy teriyaki chicken recipe. It’s a 30-minute wonder that delivers juicy chicken bites coated in a rich, homemade teriyaki sauce from scratch – forget about those bland store-bought versions! This recipe isn’t just easy, it creates a homemade teriyaki sauce that elevates simple chicken into a dish that’s truly better than any takeout I’ve had in the city.

Imagine tender chicken, perfectly seared with a beautiful golden-brown crust,
each piece glistening with a thick, savory-sweet teriyaki glaze. The sauce,
made from a blend of soy, mirin, and fresh ginger, clings to every bite,
offering a harmonious balance that is both umami-rich and subtly sweet. The
aroma alone, as the ginger and garlic hit the hot pan, transports me back to
the bustling markets of Asia that I’ve explored over the years. It’s a symphony
of flavors that dances on the palate, brightened further by a hint of rice
vinegar, a little trick I picked up during my time in Paris, where balancing
acidity is key to a truly refined dish.

What sets my version apart is the simplicity without sacrificing an ounce of flavor. Many teriyaki recipes call for marinating for hours, but my technique ensures tender, flavorful chicken in just minutes. I’ve streamlined the process to deliver maximum taste with minimal fuss, which is essential for busy weeknights in the city. I’ll show you how to create the most incredible, sticky, finger-licking good teriyaki sauce from scratch—a true game-changer—and reveal my secret to perfectly cooked chicken every single time. Plus, I’ll share a pro tip for ensuring your sauce thickens perfectly, and a common mistake to avoid for gooey, not watery, results!

Why This Easy Teriyaki Chicken Recipe Is the Best

My unique spin on this chicken teriyaki lies in the homemade sauce. While many recipes opt for pre-made bottles, crafting your own allows for a depth of flavor that’s incomparable. The fresh ginger and garlic, combined with the precise balance of soy, mirin, and brown sugar, create a sauce that is both intensely savory and perfectly caramelized, a direct application of the sauce-making principles I mastered in Paris.

Achieving perfectly tender chicken bites, even without a long marinade, comes down to a specific searing technique. By cooking the cornstarch-coated chicken in batches, you ensure each piece gets that beautiful golden-brown crust and cooks through evenly, locking in juices. It’s a trick that prevents overcrowding the pan, which would otherwise steam the chicken instead of crisping it, yielding a far less desirable texture.

This recipe is truly foolproof and fast, making it ideal for home cooks looking for a delicious, weeknight meal. From start to finish, you’re looking at about 30 minutes, which is faster than ordering takeout in many parts of NYC! The ingredients are readily available at any grocery store, and the steps are straightforward enough for even a novice cook to achieve restaurant-quality results.

Easy Teriyaki Chicken Recipe Ingredients

As a chef, I always stress the importance of quality ingredients. For this easy teriyaki chicken recipe, I source my fresh ginger and garlic from the local NYC farmers markets, but you can find high-quality versions at any good grocery store. These simple ingredients, when combined thoughtfully, unlock incredible flavors.

Ingredients List

  • 2 chicken breasts (cut into 1″ pieces)
  • 1/2 teaspoon garlic powder
  • Pepper (to taste)
  • 3 tablespoons cornstarch
  • 3 tablespoons olive oil (divided)
  • Garnish (optional): chopped scallions & sesame seeds (to taste)
  • 1/4 cup brown sugar (packed)
  • 1 teaspoon grated fresh ginger
  • 2 cloves garlic (minced)
  • 3 tablespoons mirin (see note)
  • 2 tablespoons soy sauce
  • 1 teaspoon rice vinegar (or apple cider vinegar)
  • 1/2 cup water
  • 1 tablespoon cornstarch

Ingredient Spotlight

Chicken Breasts: I prefer boneless, skinless chicken breasts for their tenderness and lean protein, which is perfect for quick cooking. When selecting, look for plump, firm pieces with no discoloration. If you prefer, chicken thighs work beautifully too; they offer a richer flavor and stay incredibly juicy even if slightly overcooked.

Fresh Ginger & Garlic: These aromatics are the heart of our homemade teriyaki sauce. Fresh is key here – avoid the pre-minced jars if you can. For ginger, choose firm, smooth roots, and for garlic, firm heads without sprouts. If you’re in a pinch, 1 teaspoon of ground ginger can replace fresh, but the flavor will be less vibrant, and 1/2 teaspoon of garlic powder can replace fresh minced garlic.

Mirin: This Japanese sweet rice wine is crucial for authentic teriyaki flavor, providing a subtle sweetness and glossiness to the sauce. You can typically find it in the international aisle of most well-stocked grocery stores. If you can’t find mirin, a dry sherry or even white wine mixed with a pinch of sugar can work as a substitute, though the flavor profile will be slightly different.

Cornstarch: This acts as a thickener for both the chicken coating and the sauce. For the chicken, it creates a light, crispy crust and helps tenderize the meat. In the sauce, it gives that alluring, glossy finish. If you need a substitute, arrowroot powder can be used in equal amounts for thickening, but it can sometimes result in a slightly thinner sauce.

Original IngredientBest SubstitutionFlavor / Texture Impact
Chicken BreastsChicken ThighsRicher flavor, more tender, less prone to drying out.
Fresh Ginger/GarlicGround Ginger/Garlic PowderFlavor will be less pronounced and not as fresh, use smaller amounts.
MirinDry Sherry + pinch of sugarSimilar sweetness and depth, but lacking subtle authentic fermented notes.
CornstarchArrowroot PowderSimilar thickening agent, may result in a slightly thinner sauce.

Easy Teriyaki Chicken

How to Make Easy Teriyaki Chicken — Step-by-Step

Creating this easy teriyaki chicken is a breeze, and I’ll walk you through each step to ensure your dish is absolutely perfect. You’ve got this!

Step 1: Whisk the Sauce Together

In a small bowl, combine your brown sugar, grated fresh ginger, minced garlic, mirin, soy sauce, rice vinegar, 1/2 cup water, and 1 tablespoon of cornstarch. Whisk it all together until the cornstarch is fully dissolved and there are no lumps. It’s crucial for achieving that silky smooth, thick teriyaki sauce we’re after!

💡 mia’s Pro Tip: Whisk in cold water for your cornstarch slurry first to prevent lumps before adding it to other ingredients or heat. This ensures a perfectly smooth sauce every time!

Step 2: Prep the Chicken

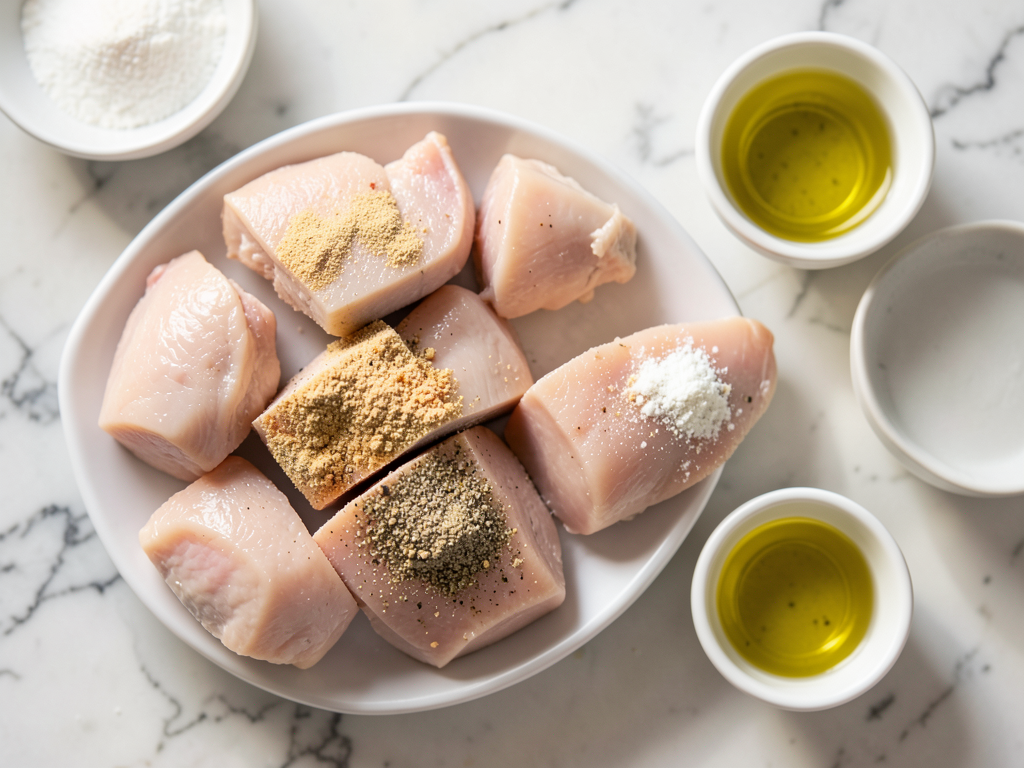
Cut your chicken breasts into uniform 1-inch pieces. This ensures even cooking. Transfer the chicken to a separate bowl. Season with garlic powder and pepper, stirring to coat evenly. Then, add the 3 tablespoons of cornstarch and stir again until every piece of chicken is lightly dusted. This coating is key for tender chicken and that irresistible golden crust.

⚠️ Common Mistake to Avoid: Don’t skimp on coating the chicken evenly with cornstarch. This step is vital for that beautiful sear and juicy interior – uneven coating leads to uneven cooking!

Step 3: Cook the Chicken

Heat 2 tablespoons of olive oil in a large skillet over medium-high heat for a few minutes. Once shimmering, add about half of your chicken pieces, ensuring not to overcrowd the pan. Cook for about 4 minutes until deeply browned on one side, then flip with tongs and cook for another 3-4 minutes until cooked through (internal temperature of 165°F). Transfer the cooked chicken to a plate and repeat with the remaining chicken, adding another tablespoon of oil if needed.

Step 4: Finish with Sauce

Once all the chicken is cooked and on the plate, return the first batch of chicken back to the pan. Pour your prepared teriyaki sauce mixture over the chicken. Let it bubble gently for about a minute or two, stirring constantly, until the sauce thickens and coats all the chicken beautifully. Serve immediately over steamed rice, garnished with a sprinkle of fresh scallions and sesame seeds. Enjoy your incredible homemade easy teriyaki chicken!

StepActionDurationKey Visual Cue
1Whisk Sauce2 minsNo lumps, cornstarch dissolved
2Prep Chicken5 minsUniform pieces, evenly coated
3Cook Chicken6-8 mins per batchGolden brown, 165°F internal temp
4Finish with Sauce1-2 minsSauce thickened, coats chicken

Serving & Presentation

For me, the beauty of this easy teriyaki chicken lies not just in its flavor, but in its versatility for presentation. I love to serve it simply over a bed of fluffy white rice, which soaks up every bit of that glorious homemade teriyaki sauce. A sprinkle of freshly chopped green onions provides a pop of color and a fresh, welcome bite, while a dash of sesame seeds adds an elegant finish and a tiny crunch. It’s a humble dish made extraordinary by these small details.

When I lived in Paris training, we always focused on creating plates that were aesthetically pleasing, even for the most rustic dishes. For this teriyaki, consider plating it in a wide, shallow bowl to show off the glossy chicken and vibrant garnishes. Sometimes, I add a quick side of blanched broccolini or some stir-fried bell peppers to create a well-rounded meal, reminiscent of the colorful tagines from my Moroccan heritage, but with an Asian twist.

Another wonderful serving suggestion, especially if you’re looking to elevate it beyond a weeknight meal, is to serve it in lettuce cups as an appetizer. The crisp lettuce offers a refreshing contrast to the rich chicken and sauce. I often bring this to potlucks here in NYC, and it’s always a huge hit!

Pairing TypeSuggestionsWhy It Works
Side DishSteamed Jasmine Rice, Stir-fried Vegetables (broccoli, snap peas), QuinoaRice absorbs sauce, veggies add crunch and nutrition, quinoa offers a nutty alternative.
Sauce / DipA drizzle of sriracha mayo, Extra teriyaki sauceAdds a creamy, spicy kick or reinforces the main flavor profile.
BeverageGreen Tea, Sake, Light LagerComplements Asian flavors, refreshes the palate, light beer pairs well with savory food.
GarnishToasted Sesame Seeds, Chopped Scallions, Chili FlakesAdds texture, fresh aroma, and a hint of heat.

Make-Ahead, Storage & Reheating

Living in the hustle and bustle of NYC, I’m all about smart meal prep. This easy teriyaki chicken recipe is fantastic for making ahead, which means less cooking stress during a busy week. I often double the recipe on a Sunday to have delicious, chef-level meals ready for quick lunches or dinners.

MethodContainerDurationReheating Tip
RefrigeratorAirtight container3-4 daysMicrowave on medium heat, stirring occasionally, or gentle stovetop reheat.
FreezerFreezer-safe bag or containerUp to 3 monthsThaw overnight in the fridge; reheat gently on stovetop or microwave.
Make-AheadCooked chicken and sauce stored separatelyPrep ingredients 1 day in advanceCook chicken fresh, then add pre-made sauce.

When reheating, my preferred method is on the stovetop over medium-low heat, with a tablespoon or two of water added to prevent drying out and help loosen the sauce. This brings the sauce back to its glossy consistency. If you’re using the microwave, always cover the dish to retain moisture and reheat in short bursts, stirring in between, until heated through. Overheating can make the chicken tough, so keep a close eye on it!

Variations & Easy Swaps

This easy teriyaki chicken is a fantastic base for creativity. Whether you’re adapting to dietary needs or just craving a new flavor profile, these variations keep things exciting!

VariationKey ChangeBest ForDifficulty Impact
Spicy TeriyakiAdd sriracha or chili flakesThose who love heatMinimal
Gluten-FreeUse tamari instead of soy sauceGluten-sensitive dietsMinimal
Vegetable BoostAdd stir-fried veggiesAdding more nutrients and colorSlightly more prep

Spicy Sriracha Teriyaki

For those who like a little kick, a tablespoon of sriracha added to the sauce mixture before thickening delivers a fantastic depth of heat without overpowering the delicate teriyaki flavor. Growing up in Morocco, spicy elements were often woven into our family meals, and I believe a touch of chili can elevate almost any dish, including this one. Alternatively, a pinch of red pepper flakes after cooking also provides a beautiful visual and a burst of warmth.

Gluten-Free Friendly Teriyaki

Making this easy teriyaki chicken gluten-free is incredibly simple! Just swap out regular soy sauce for tamari, a gluten-free alternative that offers the same rich umami flavor. Also, ensure your mirin is gluten-free (some brands contain wheat). This simple swap, which I’ve personally tested for consistency and flavor, ensures everyone can enjoy this delicious dish without compromise, retaining the same perfect texture and taste.

Sesame Ginger Boost

If you’re a fan of a stronger aromatic profile, consider adding another teaspoon of freshly grated ginger and a splash of toasted sesame oil to the sauce. The sesame oil, added at the very end of cooking, imparts a wonderfully nutty aroma that truly amplifies the existing flavors. I discovered a fantastic sesame oil at an Asian grocery in Flushing, Queens, and now it’s a staple in my pantry for dishes like this!

What is the best way to thicken teriyaki sauce for chicken?

The best way to thicken teriyaki sauce, and the method I use in this easy teriyaki chicken recipe, is by using a cornstarch slurry. Cornstarch, when mixed with cold water, creates a smooth paste that thickens liquids beautifully without lumps. When adding it to the sauce in your skillet, ensure the sauce is simmering, and stir continuously. It will thicken almost immediately, giving you that perfect glossy, clingy consistency. This is a classic French technique for creating a ‘liaison’ to thicken sauces, adapted here for Asian flavors.

Can I use chicken thighs instead of chicken breasts for this recipe?

Absolutely, you can! Chicken thighs are a fantastic alternative to chicken breasts for this easy teriyaki chicken. They are naturally more forgiving and tend to stay juicier, thanks to their higher fat content. If you’re using thighs, you might want to trim off any excess fat and cut them into similar 1-inch pieces to ensure even cooking. The cook time might be similar, but keep an eye on them for that perfect golden brown sear and tender interior. Thighs offer a slightly richer flavor that pairs wonderfully with the sweet and savory teriyaki sauce.

How long should I marinate teriyaki chicken for maximum flavor?

For this specific easy teriyaki chicken recipe, you don’t actually need to marinate the chicken at all! My method focuses on coating the chicken with cornstarch and seasonings, then quickly searing it to create a flavorful crust. The homemade teriyaki sauce is then cooked down with the chicken, allowing it to coat and flavor every piece beautifully. The rapid thickening of the sauce ensures maximum flavor adherence. While some teriyaki recipes call for marinating, my goal was a fast, flavorful, and easy dish that doesn’t compromise on taste due to lengthy prep times, perfect for my busy NYC schedule.

What are some good side dishes to serve with teriyaki chicken?

With its rich and savory profile, easy teriyaki chicken pairs wonderfully with a variety of side dishes. My go-to is always fluffy steamed jasmine rice, as it’s perfect for soaking up every drop of that delicious sauce. Other excellent choices include blanched or stir-fried vegetables like broccoli, snap peas, bell peppers, or even asparagus for a fresh, crisp contrast. A simple cucumber salad with a light vinaigrette also provides a refreshing balance. For a healthier option, try brown rice or quinoa. The key is to choose sides that complement without overpowering the star of the show.

Can I make the easy teriyaki sauce ahead of time?

Yes, absolutely! Preparing the homemade teriyaki sauce ahead of time is a fantastic way to streamline your cooking process. You can whisk all the sauce ingredients together and store it in an airtight jar or container in the refrigerator for up to 3-4 days. When you’re ready to cook, just give it a good shake or stir to recombine everything before adding it to your hot pan with the cooked chicken. This makes for an even faster weeknight meal – it’s a trick I often rely on in my own kitchen when I know I have a busy day ahead.

Share Your Version!

I truly hope you enjoy making this easy teriyaki chicken as much as I do. It’s become a weeknight staple in my NYC kitchen, a beautiful testament to how simple, quality ingredients can create something truly special. If you try this recipe, please leave a star rating and comment below – I love hearing your feedback and seeing your creations!

Don’t forget to share a photo of your delicious homemade teriyaki chicken on Instagram or Pinterest and tag @exorecipes. I’m always inspired by how you personalize my recipes. And tell me, what’s your favorite vegetable to serve with this teriyaki chicken to complete the meal?

From my NYC kitchen to yours — I hope this recipe brings as much warmth to your table as it does to mine. — mia 🧡

📌

Love This Recipe? Save It to Pinterest!

If you enjoyed this Easy Teriyaki Chicken recipe, don’t let it get lost in your browser tabs! 😄 Pin it now so you can find it again anytime — and explore hundreds more tried-and-tested recipes waiting for you on my Pinterest boards.

👉 Follow mia on Pinterest @chefrecipes2

📌 Pin this recipe · 🔁 Re-pin your favorites · 💬 Tag me when you make it — I love seeing your creations!

Print

clock clock iconcutlery cutlery iconflag flag iconfolder folder iconinstagram instagram iconpinterest pinterest iconfacebook facebook iconprint print iconsquares squares iconheart heart iconheart solid heart solid icon

Easy Teriyaki Chicken

  • Author: Chef Mia

Description

This easy teriyaki chicken recipe has the most tender, delicious chicken bites coated in a sweet teriyaki sauce from scratch. It’s a 30-minute dish that’s better than takeout!


Ingredients

Scale
  • 2 chicken breasts (cut into 1" pieces)
  • 1/2 teaspoon garlic powder
  • Pepper (to taste)
  • 3 tablespoons cornstarch
  • 3 tablespoons olive oil (divided)
  • Garnish (optional): chopped scallions & sesame seeds (to taste)
  • 1/4 cup brown sugar (packed)
  • 1 teaspoon grated fresh ginger
  • 2 cloves garlic (minced)
  • 3 tablespoons mirin (see note)
  • 2 tablespoons soy sauce
  • 1 teaspoon rice vinegar (or apple cider vinegar)
  • 1/2 cup water
  • 1 tablespoon cornstarch

Instructions

  1. Add the sauce ingredients to a small bowl and whisk together.
  2. Cut the chicken into about 1" pieces and add it to another bowl. Add the garlic powder and pepper and stir until coated, then add the cornstarch and stir again to coat.
  3. Add 2 tablespoons of oil to a skillet. Let it heat for a few minutes over medium-high heat. Cook the chicken in 2 batches (don't crowd the pan). Cook the chicken for 4 minutes and then flip (I use tongs to make it easy) and cook for another 3-4 minutes or so. Chicken should be browned and cooked through (165F). Transfer chicken to plate. For the second batch, I add another tablespoon of olive oil to the pan.
  4. Once the second batch of chicken is done, add the chicken that's on the plate back to the pan. Stir in the sauce and let it bubble for a minute or so, until thickened. Serve immediately over rice with scallions & sesame seeds sprinkled on top.


Nutrition

  • Calories: 333 kcal
  • Sugar: 17 g
  • Fat: 13 g
  • Carbohydrates: 27 g
  • Protein: 25 g


Easy Teriyaki Chicken

k">

Tried This Recipe? Leave a Comment!

Did you make this recipe? I’d love to hear how it turned out! Please leave a comment and a rating below. Your feedback helps other home cooks and supports cheerychop.com!
For more delicious inspiration, follow me on Pinterest!

Crispy Air Fryer Korean Soy Garlic Chicken Thighs Recipe

Air Fryer Korean Soy Garlic Chicken Thighs (Easy Recipe) – A Crispy, Sticky Flavor Explosion

⚖️
Difficulty
Easy
⏲️
Prep Time
15 mins
🕒
Cook Time
20 mins
⏱️
Total Time
35 mins
🍽️
Servings
4

Growing up in my mother’s kitchen in Morocco, there was always an emphasis on balancing sweet, savory, and a touch of heat. Moving to New York City, I’ve found endless inspiration in the global culinary scene, and Korean food quickly captured my heart with its vibrant flavors. This Air Fryer Korean Soy Garlic Chicken Thighs recipe is my love letter to that fusion – taking the incredible tastes of classic Korean fried chicken and making it accessible and weeknight-friendly using the air fryer. Forget deep-frying; we’re achieving that irresistible crispy texture and sticky, glossy coating with a fraction of the oil, making it an easy korean chicken recipe that’s as delicious as it is simple.

Imagine biting into perfectly golden-brown, juicy chicken thighs, each piece coated in a savory-sweet, garlicky sauce with a subtle kick of chili. The aroma alone, a blend of toasted sesame, pungent garlic, and a hint of caramelized honey, fills my NYC apartment, instantly transporting me. It’s like a symphony of textures and tastes: the delicate crunch of the potato starch crust, the tender meat within, and that finger-licking, glossy sauce that clings to every morsel. This recipe utilizes the power of the air fryer, a French-trained chef’s secret for achieving a crisp that rivals traditional frying methods without the fuss.

While traditional Korean fried chicken is a culinary masterpiece, I wanted to create a version that delivers on flavor and crunch without the extensive prep and cleanup. My approach focuses on maximizing flavor with minimal effort, ensuring every piece of chicken is caramelized and infused with that signature soy garlic goodness. I’ll share a pro tip for the crispiest skin, and we’ll steer clear of a common mistake that can leave your chicken soggy. If you’ve been looking for an incredible soy garlic chicken air fryer recipe, you’ve just found your new favorite.

Why This Air Fryer Korean Chicken Thighs Recipe Is the Best

The secret to the phenomenal flavor in this recipe lies in the perfect balance of sweet, savory, and umami. Drawing from my French culinary training in sauce work, I’ve crafted a sticky soy garlic sauce that coats each piece of chicken beautifully. It’s a harmonious blend of dark soy sauce, honey, rice vinegar, and a generous amount of fresh garlic, which, when caramelized, develops an incredible depth of flavor that’s both bold and comforting. This isn’t just any sauce; it’s designed to cling, shine, and deliver that authentic Korean taste.

Achieving that perfected texture was paramount for me. Boneless, skinless chicken thighs are naturally juicy, but making them crispy without deep frying is the real magic trick. My technique uses a precise combination of potato starch and all-purpose flour for a light yet incredibly crisp coating that stands up to the sticky sauce. The air fryer works its wonders, circulating hot air to create an even, golden-brown exterior that rivals its deep-fried cousins. It’s all about controlling the heat and ensuring proper breading, a principle I learned and refined during my time in Paris.

As a busy New Yorker, I know the importance of a foolproof and fast recipe. This air fryer chicken thighs recipe is designed for maximum impact with minimum fuss. From drying the chicken to mixing the simple coating and whisking together the sauce, each step is straightforward. The air fryer handles the cooking efficiently, freeing you up to prepare your sides. It’s perfect for a weeknight meal when you crave something special but need it on the table fast, proving that extraordinary flavor doesn’t have to mean endless hours in the kitchen.

Air Fryer Korean Chicken Thighs Ingredients

When I shop for ingredients for this dish, I love visiting the Asian markets in Flushing, Queens, or even some of the more specialized stores in Manhattan. The freshness of the garlic, the quality of the soy sauce – it really makes a difference. But don’t worry, you can find everything you need at your local grocery store too!

Ingredients List

  • Chicken
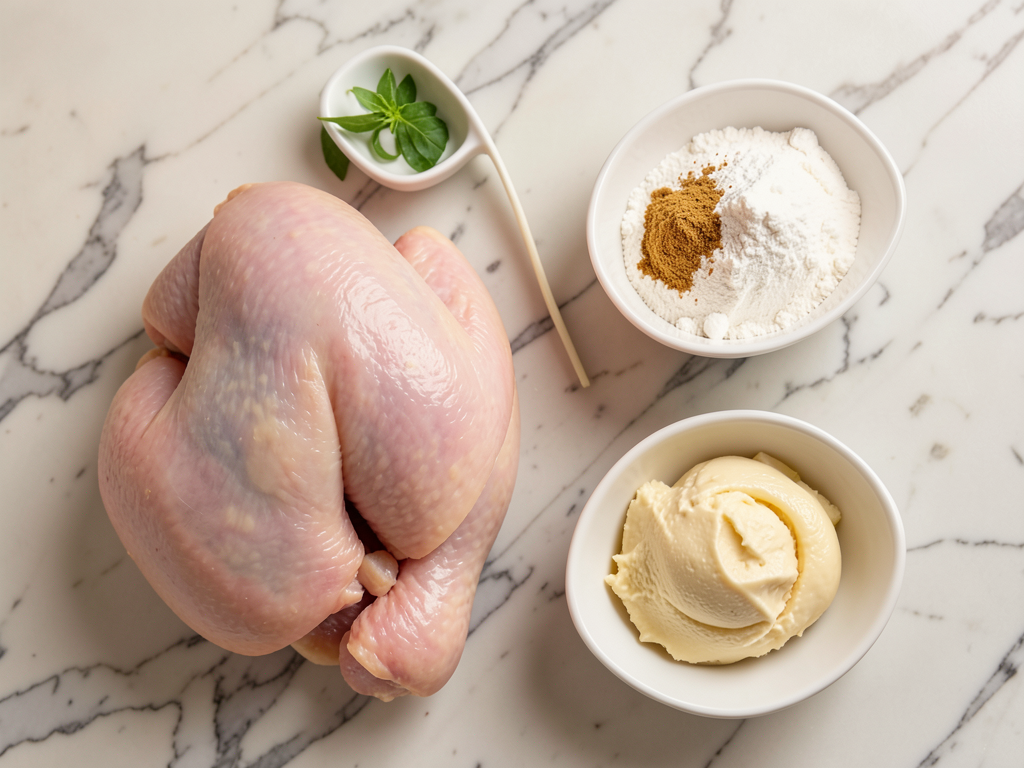
  • 1 lb chicken thighs boneless skinless
  • 3 tbsp potato starch
  • 3 tbsp all purpose flour
  • 1 tsp garlic powder
  • 1/2 tsp salt
  • 1/2 tsp black pepper
  • 3 tbsp neutral oil for pan frying
  • 8 cloves of garlic (minced)
  • 2 stalks green onion (green and white parts seperated)
  • 1 tsp red chili flakes
  • Sauce
  • 1/2 cup chicken stock (sub: water & chicken bouillon)
  • 3 tbsp honey
  • 1 tbsp rice vinegar
  • 1 tbsp dark soy sauce
  • 1 tsp cornstarch
  • Garnish
  • Green onion (green part)
  • Sesame seeds

Ingredient Spotlight

Boneless, Skinless Chicken Thighs: These are the star of our show! Thighs are incredibly forgiving and stay wonderfully juicy thanks to their higher fat content. When selecting, look for plump, pink pieces without any discolored spots. If you can only find bone-in, skin-on thighs, you can debone and skin them yourself, just be careful and use a sharp knife. Chicken breasts can be used, but they might dry out more easily and cook faster; adjust your air frying time accordingly for best results.

Potato Starch: This is a game-changer for that signature Korean fried chicken crisp, even if we’re air frying. Potato starch creates an incredibly light and crispy coating that also helps the sauce adhere beautifully. You can usually find it in the baking aisle or international foods section. If you can’t get potato starch, cornstarch is an acceptable substitute; it will still yield a good crisp, but perhaps not quite as light and airy as potato starch.

Dark Soy Sauce: This isn’t just for saltiness; dark soy sauce provides that beautiful, rich color and a touch of subtle sweetness and deeper umami flavor to our sauce. It’s distinct from regular soy sauce. If you don’t have dark soy sauce, you can use regular soy sauce but perhaps add a tiny pinch of sugar or a touch more honey to achieve a similar depth of color and sweetness. The flavor profile will be slightly different but still delicious.

Honey: Beyond just sweetness, honey helps create that gorgeous, sticky, glossy glaze that is so characteristic of this dish. Any good quality honey will work. If you prefer, maple syrup can be used as a vegan or alternative sweetener, though it will impart a slightly different flavor. Brown sugar can also be used, but you might need to adjust the liquid slightly to achieve the desired consistency.

Fresh Garlic: We’re using a generous amount of minced garlic here, and for good reason! It’s the backbone of the “garlic” in our soy garlic sauce. Freshly minced garlic yields a much more potent and aromatic flavor than garlic powder. When sauteed lightly, it sweetens and deepens. If fresh garlic is absolutely not an option, you can use garlic powder, but start with less (maybe 1-2 teaspoons) and taste as you go.

Original IngredientBest SubstitutionFlavor / Texture Impact
Chicken ThighsChicken BreastLess juicy, faster cook time; may dry out if overcooked.
Potato StarchCornstarchStill crispy, but slightly less light and airy texture.
Dark Soy SauceRegular Soy Sauce + pinch of sugarLighter color, slightly less depth of flavor; sweetness needs adjusting.
HoneyMaple Syrup or Brown SugarDifferent subtle flavor notes; adjust liquid if using brown sugar.
Fresh Garlic (minced)Garlic Powder (1-2 tsp)Less potent and aromatic; adjust to taste.

Air Fryer Korean Soy Garlic Chicken Thighs (Easy Recipe)

How to Make Air Fryer Korean Soy Garlic Chicken Thighs — Step-by-Step

You’re just a few steps away from an incredibly flavorful meal. Follow these instructions carefully, and you’ll have perfectly crispy, sticky Korean soy garlic chicken thighs ready to impress!

Step 1: Prepare the Soy Garlic Chicken Sauce

In a small bowl, combine all the sauce ingredients: 1/2 cup chicken stock (or use water with a chicken bouillon cube), 3 tbsp honey, 1 tbsp rice vinegar, 1 tbsp dark soy sauce, and 1 tsp cornstarch. Whisk until the cornstarch is fully dissolved and there are no lumps. Set this mixture aside; it’s going to become our glossy, irresistible glaze later.

💡 mia’s Pro Tip: Whisking the cornstarch thoroughly into a cold liquid before heating is a classic French technique to prevent lumps. It ensures a silky-smooth sauce every time!

Step 2: Pat Dry and Coat Chicken

Begin by patting the boneless, skinless chicken thighs thoroughly dry with paper towels. This is a crucial step for achieving maximum crispiness. On a large plate, mix together the potato starch, all-purpose flour, garlic powder, salt, and black pepper. Lightly dredge each chicken thigh in this mixture, ensuring it’s evenly coated on all sides. Shake off any excess flour mixture.

⚠️ Common Mistake to Avoid: Don’t skip patting the chicken dry! Moisture is the enemy of crispiness. Wet chicken steams rather than fries, leading to a soggy coating.

Step 3: Air Fry the Chicken

Preheat your air fryer to 400°F (200°C). Lightly grease the air fryer basket or spray with cooking oil. Place the coated chicken thighs in a single layer in the air fryer basket, ensuring not to overcrowd them. Work in batches if necessary. Air fry for 18-22 minutes, flipping halfway through, or until the chicken is golden brown, crispy, and cooked through (internal temperature reaches 165°F / 74°C).

💡 mia’s Pro Tip: For extra crispiness and even cooking, give the air fryer basket a gentle shake or flip the chicken a couple of times during the cooking process. Overcrowding will steam the chicken, so give each piece its breathing room!

Step 4: Sauté Aromatics

While the chicken is air frying, heat 1 tablespoon of neutral oil in a large frying pan or skillet over medium-high heat. Add the minced garlic, the white parts of the green onion, and the red chili flakes. Sauté for about 2-3 minutes, stirring constantly, until the garlic is fragrant and lightly golden brown. Be careful not to burn the garlic, as it can turn bitter quickly!

Step 5: Thicken the Sauce and Combine with Chicken

Pour the previously prepared soy garlic sauce mixture into the pan with the sautéed aromatics. Bring the sauce to a gentle simmer, stirring constantly, for about 1 minute or until the sauce has thickened to a glossy glaze. Once the sauce is thick and shiny, add the crispy air-fried chicken thighs back into the pan. Toss the chicken gently to ensure every piece is thoroughly coated with the delicious, sticky glaze. Cook for another 1-2 minutes, allowing the sauce to truly cling to the chicken.

⚠️ Common Mistake to Avoid: Don’t overcook the sauce once the chicken is added back. You want the sauce to coat, not to become overly reduced or clumpy. A quick toss is all it takes!

StepActionDurationKey Visual Cue
1Prepare Sauce2 minsCornstarch dissolved, no lumps.
2Pat & Coat Chicken5 minsChicken dry, evenly coated, no excess flour.
3Air Fry Chicken18-22 minsGolden brown, crispy, internal temp 165°F.
4Sauté Aromatics2-3 minsGarlic fragrant, lightly golden, not burnt.
5Thicken Sauce & Combine2-3 minsSauce glossy & thick, chicken fully coated.

Serving & Presentation

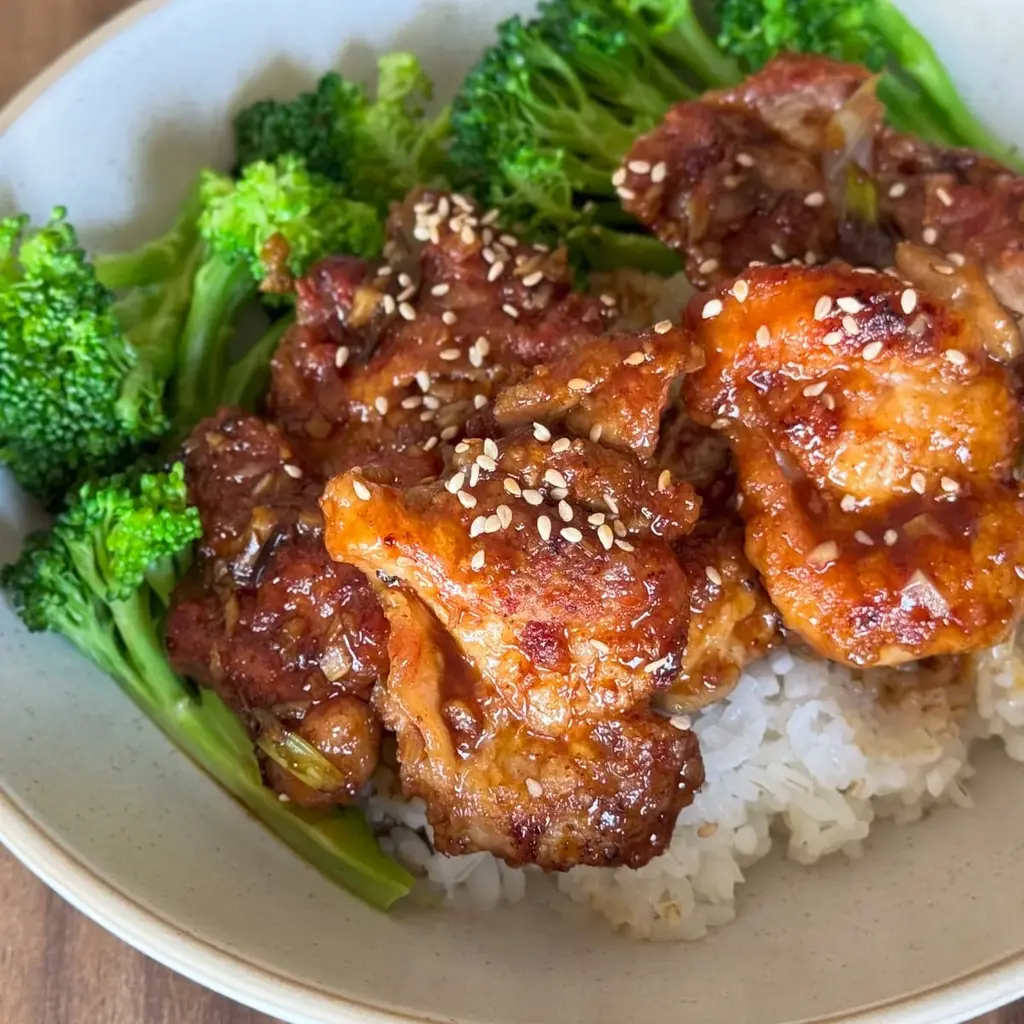
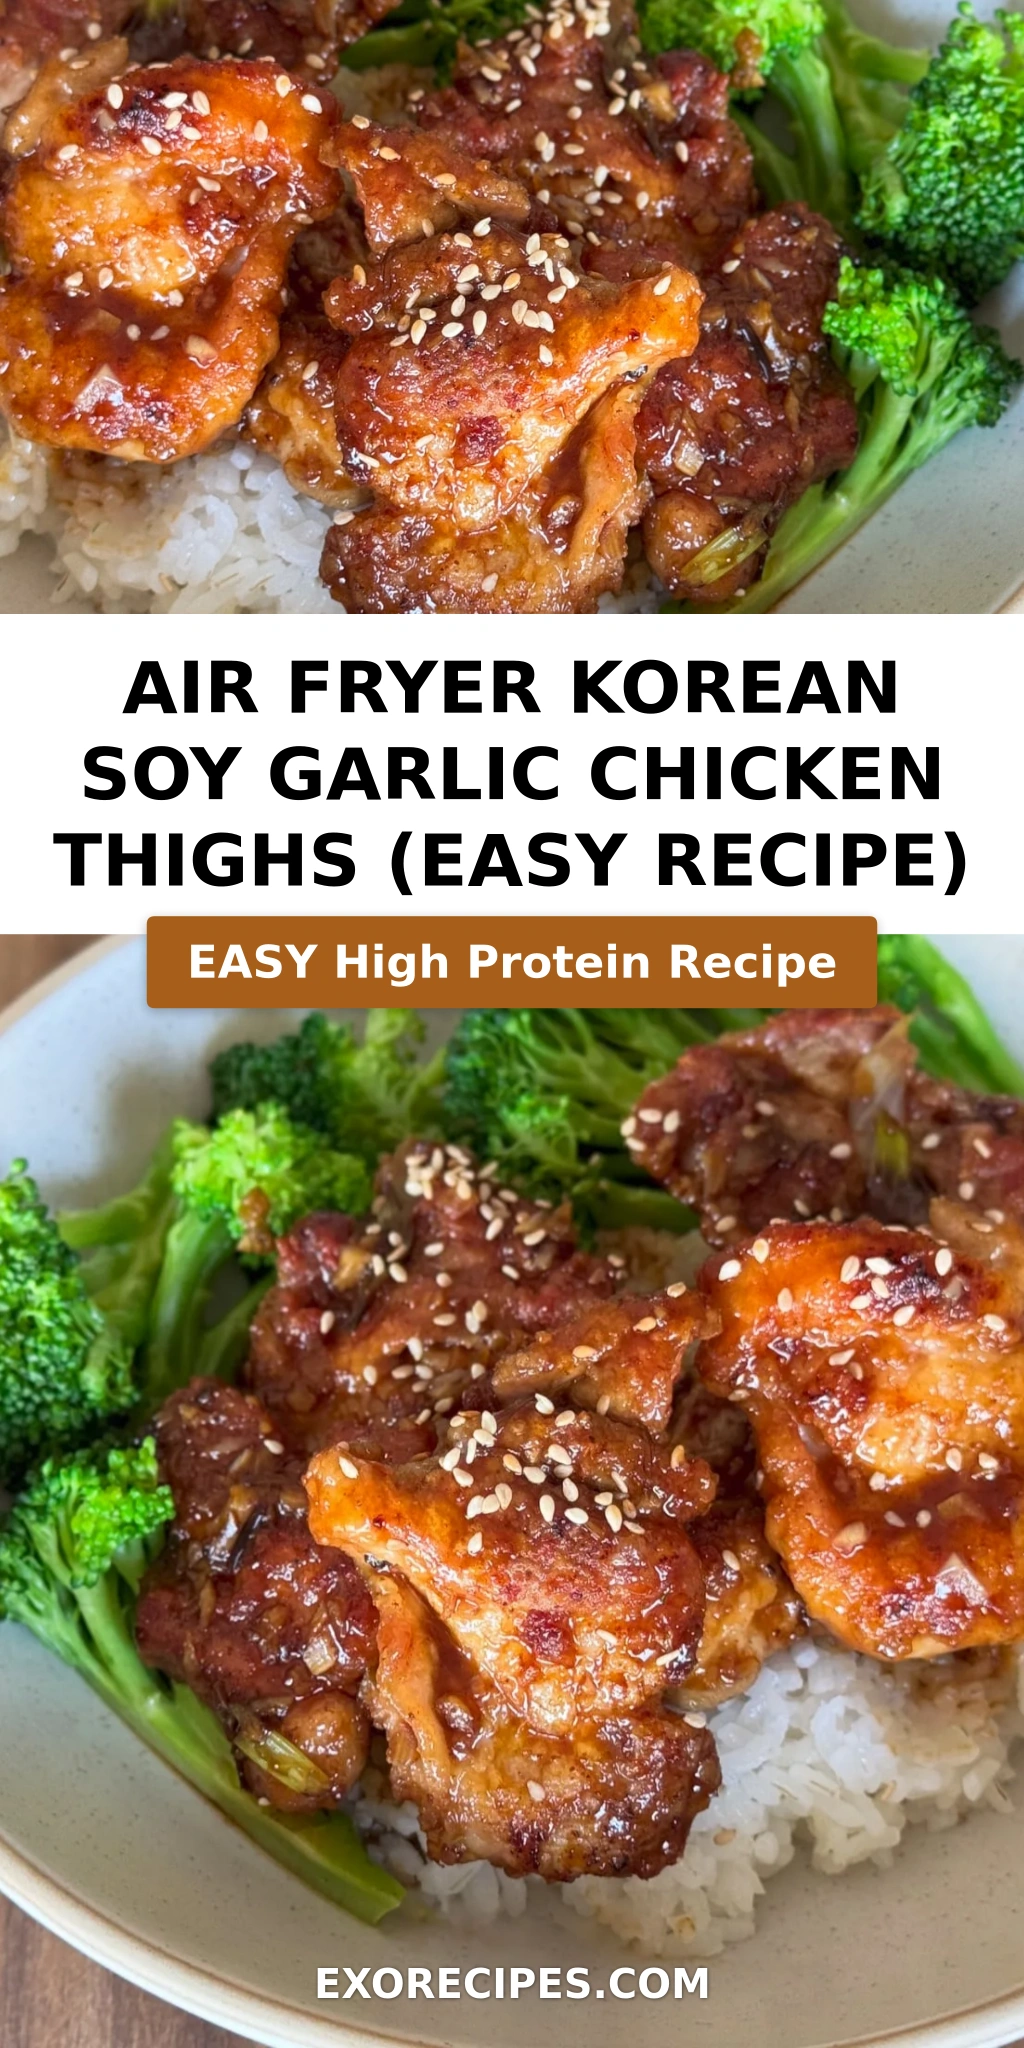
When it comes to presenting this beautiful air fryer korean chicken thighs, I always think about balance and color. Arrange the glistening chicken thighs artfully on a platter or individual plates. The deep caramel color of the sauce against the golden-brown chicken is already appealing, but a pop of green and a sprinkle of white really elevate it. This dish demands to be seen and savored!

For garnish, a generous sprinkle of thinly sliced green onion (the green parts we set aside earlier) adds freshness and a subtle oniony crunch. Toasted sesame seeds, white or black, provide an exquisite textural contrast and a nutty aroma – a trick I picked up from watching my chef mentors in Paris pay attention to every detail. Sometimes I’ll add a few extra red chili flakes for those who like an extra kick.

Pairing is key with a dish this flavorful. I love serving it with a simple bowl of fluffy steamed white or brown rice to soak up every last bit of that incredible soy garlic sauce. For a burst of freshness and to cut through the richness, a quick cucumber salad with a light vinegar dressing, or some simply blanched and seasoned broccoli or asparagus, makes for a complete and satisfying meal. Think about the vibrant, fresh flavors typical of fine dining in NYC, or even the simple yet perfect pairings my mother would make in Morocco – balance is everything.

Pairing TypeSuggestionsWhy It Works
Side DishSteamed white rice, brown rice, quick kimchi-style cucumber saladAbsorbs sauce beautifully, provides textural contrast and fresh counterpoint
Sauce / DipExtra drizzle of sauce, sriracha mayo, lime wedgeAdds more flavor, creaminess, or a refreshing citrus bite
BeverageCold lager beer, sparkling water with lemon, chilled sakeComplements the rich flavors, refreshing and light
GarnishToasted sesame seeds, sliced green onion, extra chili flakesAdds visual appeal, nutty flavor, freshness, or heat

Make-Ahead, Storage & Reheating

As a busy cook in NYC, I know the value of meal prep! This soy garlic chicken air fryer recipe is fantastic for making ahead, and it reheats surprisingly well, making it perfect for office lunches or quick dinners throughout the week. Planning is key to enjoying delicious food without the daily hustle.

MethodContainerDurationReheating Tip
RefrigeratorAirtight container3-4 daysReheat briefly in air fryer for crispness (350°F, 5-7 mins).
FreezerFreezer-safe bag/containerUp to 2 monthsThaw overnight, then reheat in air fryer.
Make-AheadCook chicken completely, store sauce separately.Chicken: 1 day, Sauce: 3-4 daysReheat chicken in air fryer till hot, then toss with warmed sauce.

If you’re making this ahead, I recommend storing the chicken and the sauce separately if possible. This helps maintain the chicken’s crispiness. You can air fry the chicken until perfectly golden, then let it cool completely before storing. Prepare the sauce and keep it in a separate airtight jar in the fridge. When ready to serve, gently rewarm the sauce on the stovetop and reheat the chicken in the air fryer until hot and crisp, then toss them together.

For best reheating, the air fryer truly is your friend. A quick 5-7 minutes at 350°F (175°C) will bring back a good amount of the original crispiness. Microwaving is an option in a pinch, but you will lose most of the crisp texture, so I recommend crisping it up again for a minute or two in a hot pan if you don’t have an air fryer handy. Don’t be afraid to make a double batch — it’s always a hit!

Variations & Easy Swaps

One of the joys of cooking is experimenting with flavors and tailoring dishes to your preference or what you have on hand. This easy korean chicken recipe is incredibly versatile, and you can easily adapt it to create new and exciting meals. Here are some of my favorite twists:

VariationKey ChangeBest ForDifficulty Impact
Spicy Gochujang VariationAdd Gochujang (Korean chili paste) to sauceHeat lovers, authentic Korean spiceSlightly increased ingredient sourcing, same difficulty
Gluten-Free Soy Garlic ChickenUse tamari or coconut aminos, gluten-free flourDietary restrictions (gluten-free)Minor ingredient swaps, same difficulty
Citrus-Ginger TwistAdd orange zest and fresh ginger to sauceBrighter, zesty flavor profileMinor ingredient addition, same difficulty

Spicy Gochujang Variation

If you crave a bit more heat, a spicy gochujang variation is a must-try. Simply add 1-2 tablespoons of gochujang (Korean chili paste) to your sauce mixture in Step 1. Gochujang brings a complex, fermented chili flavor that is deeply savory and wonderfully spicy, reminiscent of many authentic Korean dishes I’ve enjoyed in K-Town. Adjust the amount to your personal spice preference – I sometimes add a touch of Aleppo pepper for a Moroccan twist on the heat!

Gluten-Free Soy Garlic Chicken

Making this recipe gluten-free is incredibly easy! Simply swap out the all-purpose flour for a gluten-free all-purpose flour blend (ensure it contains xanthan gum for best results) and use tamari instead of dark soy sauce. Tamari is a gluten-free soy sauce alternative that still provides rich umami flavor. The potato starch is naturally gluten-free, so no need to change that. This ensures everyone can enjoy these delicious air fryer korean chicken thighs without compromise.

Citrus-Ginger Twist

For a brighter, zestier take that I sometimes prepare with spring finds from the Union Square Greenmarket, introduce fresh ginger and a hint of citrus. Add 1 tablespoon of finely grated fresh ginger to the pan with the garlic in Step 4, and about 1 teaspoon of orange or lime zest to the sauce mixture in Step 1. The fresh ginger adds a warm, spicy aroma, while the citrus zest brightens the entire dish, cutting through the richness and adding an unexpected layer of fresh flavor.

How long do you cook chicken thighs in an air fryer for this Korean soy garlic recipe?

For this Air Fryer Korean Soy Garlic Chicken Thighs recipe, I generally recommend air frying the boneless, skinless chicken thighs at 400°F (200°C) for 18-22 minutes. The exact time can vary slightly depending on the thickness of your chicken thighs and your specific air fryer model. Always ensure you flip the chicken halfway through to get that beautiful, even golden-brown crisp on both sides. The most important thing is to confirm the internal temperature reaches 165°F (74°C) to ensure they are safely cooked through and perfectly juicy. Using a meat thermometer is always my preferred method for precision!

Can I use chicken breasts instead of chicken thighs for this air fryer Korean chicken?

Yes, you can certainly use chicken breasts if that’s what you prefer or have on hand for this air fryer Korean chicken. However, be aware that chicken breasts are leaner and tend to dry out more easily than thighs. I would recommend cutting them into similar-sized pieces as the thighs (or even slightly smaller) to ensure even cooking. You’ll also need to adjust the cooking time; chicken breasts will likely cook faster, probably in the range of 15-20 minutes at 400°F (200°C). Keep a close eye on them and use a meat thermometer to ensure they reach 165°F (74°C) without overcooking.

What can I substitute for gochujang or soy sauce in this Korean garlic chicken recipe?

My recipe doesn’t explicitly call for gochujang in the main version, but if you’re exploring the spicy variation or a different Korean garlic chicken recipe, you can substitute gochujang with a mix of sriracha and a touch of brown sugar for sweetness, although the flavor profile will be different due to the lack of fermentation. For soy sauce, specifically the dark soy sauce, you can use tamari for a gluten-free option, or even coconut aminos for a soy-free alternative. If using regular soy sauce, you might want to add a tiny pinch more sugar or honey to replicate the subtle sweetness and color of dark soy sauce. These swaps will alter the taste slightly but still yield a delicious result.

What should I serve with air fryer Korean soy garlic chicken thighs?

These air fryer Korean soy garlic chicken thighs are so flavorful, they pair beautifully with a variety of sides. My go-to is always fluffy steamed white or brown rice to soak up that glorious sticky sauce. For vegetables, a simple quick cucumber salad with a light vinaigrette or some blanched and seasoned broccoli or asparagus adds a lovely fresh contrast. Other great options include sautéed spinach, a simple side of kimchi, or even spiralized zucchini noodles for a lighter, low-carb meal. Don’t forget a sprinkle of toasted sesame seeds and fresh green onions for garnish, as they add both texture and flavor to complete the dish.

How do I ensure my chicken is crispy when making soy garlic chicken in an air fryer?

Achieving crispiness in the air fryer is all about managing moisture and having the right coating! First, always pat your chicken thighs thoroughly dry with paper towels before breading – excess moisture creates steam, which leads to soggy chicken. Second, the combination of potato starch and all-purpose flour in my recipe is key; potato starch gives that super light, airy crisp. Third, don’t overcrowd the air fryer basket. Cook in batches if necessary, ensuring there’s enough space for hot air to circulate around each piece, giving every surface a chance to crisp up. Lastly, a light spray of oil on the chicken before air frying can enhance the golden-brown crust. Following these steps will result in wonderfully crispy air fryer Korean chicken thighs!

Share Your Version!

I poured my heart into crafting this Air Fryer Korean Soy Garlic Chicken Thighs recipe, blending my culinary training with my love for bold flavors, and now I’d love to see what you create! If you whip up this easy Korean chicken recipe, please leave a star rating and a comment below – your feedback means the world to me. Did you try a new side dish inspiration, or perhaps add a unique spice blend inspired by your own heritage?

Don’t forget to share a photo of your delicious creation on Instagram or Pinterest and tag @exorecipes. I absolutely adore seeing my recipes come to life in your kitchens! What’s your favorite sauce to add a unique flavor twist to air-fried chicken thighs? Can’t wait to hear from you!

From my NYC kitchen to yours — I hope this recipe brings as much warmth to your table as it does to mine. — mia 🧡

📌

Love This Recipe? Save It to Pinterest!

If you enjoyed this Air Fryer Korean Soy Garlic Chicken Thighs (Easy Recipe) recipe, don’t let it get lost in your browser tabs! 😄 Pin it now so you can find it again anytime — and explore hundreds more tried-and-tested recipes waiting for you on my Pinterest boards.

👉 Follow mia on Pinterest @chefrecipes2

📌 Pin this recipe · 🔁 Re-pin your favorites · 💬 Tag me when you make it — I love seeing your creations!

Print

clock clock iconcutlery cutlery iconflag flag iconfolder folder iconinstagram instagram iconpinterest pinterest iconfacebook facebook iconprint print iconsquares squares iconheart heart iconheart solid heart solid icon

Air Fryer Korean Soy Garlic Chicken Thighs (Easy Recipe)

  • Author: Chef Mia

Description

Soy Garlic Chicken Thighs are 10 /10 delicious and super easy to make. Everything can be done in one pan. Lightly bread with potato starch. Pan fry the chicken pieces, add the sauce and let it thicken and thats it.


Ingredients

Scale
  • Chicken
  • 1 lb chicken thighs boneless skinless
  • 3 tbsp potato starch
  • 3 tbsp all purpose flour
  • 1 tsp garlic powder
  • 1/2 tsp salt
  • 1/2 tsp black pepper
  • 3 tbsp neutral oil for pan frying
  • 8 cloves of garlic (minced)
  • 2 stalks green onion (green and white parts seperated)
  • 1 tsp red chili flakes
  • Sauce
  • 1/2 cup chicken stock (sub: water & chicken bouillon)
  • 3 tbsp honey
  • 1 tbsp rice vinegar
  • 1 tbsp dark soy sauce
  • 1 tsp cornstarch
  • Garnish
  • Green onion (green part)
  • Sesame seeds

Instructions

  1. SOY GARLIC CHICKEN SAUCE: combine all the sauce ingredients 1/2 cup chicken stock (or sub with water and chicken bouillon), 3 tbsp honey, 1 tbsp 1 tbsp rice vinegar, 1 tbsp dark soy sauce, 1 tsp cornstarch, mix then set aside.
  2. CHICKEN: Dry the boneless skinless chicken thighs with a paper towel.
  3. Mix the potato starch, flour, garlic powder, salt, and black pepper on a large plate.
  4. Lightly coat the chicken thighs on both sides.
  5. Heat enough neutral oil in a large frying pan over medium-high heat to cover the bottom of the pan.
  6. Once the oil is hot, add the chicken thighs and fry until golden brown on both sides, about 7 minutes per side.
  7. Remove the chicken from the pan and set aside on a plate.
  8. SAUCE: In the same pan, add the minced garlic, the white part of the green onion, and red chili flakes and saute for 3 minutes until the garlic is golden brown.
  9. Add the sauce to the pan and cook for 1 minute or until the sauce has thickened.
  10. Add the chicken back to the pan. Cook for 5 minutes or until the chicken is cooked and covered with the glossy sauce.
  11. Serve it with your favorite veggies and steamed rice.


Air Fryer Korean Soy Garlic Chicken Thighs (Easy Recipe)

k">

Tried This Recipe? Leave a Comment!

Did you make this recipe? I’d love to hear how it turned out! Please leave a comment and a rating below. Your feedback helps other home cooks and supports cheerychop.com!
For more delicious inspiration, follow me on Pinterest!

Quick Honey Garlic Chicken Stir Fry Dinner

Easy Chicken Stir Fry with a Honey Garlic Kick – Your Weeknight Hero!

⚖️
Difficulty
Easy
⏲️
Prep Time
15 mins
🕒
Cook Time
20 mins
⏱️
Total Time
35 mins
🍽️
Servings
4

Growing up in Morocco, cooking was always a communal affair, full of laughter and vibrant spices. But now, in the bustling heart of New York City, I’ve learned the art of efficiency without sacrificing flavor. That’s why I’m so excited to share my go-to recipe for an easy chicken stir fry. This isn’t just any quick meal; it’s a healthy chicken stir fry that brings together crisp vegetables and succulent chicken in a delightful honey garlic sauce. It’s perfect for those busy weeknights when you crave something wholesome and delicious, but don’t have hours to spend in the kitchen. Trust me, it’s a recipe I’ve perfected over many NYC evenings.

Imagine those tender pieces of chicken, lightly browned and infused with a savory-sweet glaze, nestled amongst vibrant emerald broccoli florets, snappy red and yellow bell peppers, and sweet, slightly caramelized onions. The aroma alone, a blend of warm garlic, spicy ginger, and rich soy, is enough to get your family flocking to the kitchen. My French culinary training taught me the importance of balance, and in this quick stir fry, every ingredient plays its part – from the robust crunch of the vegetables to the smooth, clingy sauce that coats every bite. It’s a sensory experience that wakes up the palate with its irresistible combination of textures and tastes.

What sets my chicken stir fry recipe apart? It’s all in the simplicity and the quality of the ingredients, plus a few chef’s tricks I’ve picked up along the way. I’ll show you how to achieve that perfect caramelization on your chicken without overcooking it, and how to get your vegetables perfectly tender-crisp. You’ll learn my secret for a genuinely flavorful honey garlic sauce that’s balanced and easy to modify. And forget watery stir-fries! I’ll share a pro tip to ensure your sauce clings beautifully. We’ll also tackle a common mistake: overcrowding the pan, which can turn a vibrant stir fry into a steamed mess.

Why This Easy Chicken Stir Fry Recipe Is the Best

The secret to this chicken stir fry recipe lies in its irresistible honey garlic sauce. It’s a beautiful dance between sweet and savory, with a subtle warmth from the ginger. Having spent years refining sauces in Parisian kitchens, I truly appreciate how a well-balanced sauce can elevate simple ingredients into something extraordinary. This sauce coats every piece of chicken and vegetable, ensuring a burst of flavor with each bite, making it an incredibly satisfying dish.

Achieving the perfect texture in a stir fry is paramount. Through careful sequencing and temperature control, we ensure the chicken remains tender and juicy, while the vegetables maintain a delightful al dente crunch. This technique, something I emphasize from my classical training, prevents sad, soggy vegetables and ensures a varied and engaging mouthfeel that is truly enjoyable.

This recipe truly is a foolproof and fast option for anyone, regardless of their cooking experience. Whether you’re a seasoned cook or just starting out, the clear, step-by-step instructions make it incredibly approachable. It’s a healthy chicken stir fry that comes together in under 35 minutes, proving that delicious, home-cooked meals don’t have to be complicated or time-consuming, fitting perfectly into even the busiest NYC schedule.

Easy Chicken Stir Fry Ingredients

When I head to the farmers market here in NYC, I love picking out the freshest, most vibrant ingredients for my recipes. This easy chicken stir fry is no exception. Using quality ingredients, even simple ones, makes all the difference in the final taste!

Ingredients List

  • 1 lb chicken tenders
  • 1 head broccoli
  • 2 bell peppers (any color)
  • 1 yellow onion
  • 1/4 cup + 2 tbsp soy sauce
  • 3 tbsp olive oil
  • 2 1/2 tbsp honey
  • 1 1/2 tsp garlic powder
  • 1/2 tsp ground ginger
  • Pepper, to taste (optional)
  • Salt, to taste (optional)

Ingredient Spotlight

Chicken Tenders: I opt for chicken tenders here because they cook quickly and evenly, ensuring our easy chicken stir fry lives up to its name. Look for plump, fresh tenders at your local butcher or supermarket. If you can’t find tenders, chicken breast cut into 1-inch strips works perfectly as a substitution, though it might need a minute or two more cooking time.

Broccoli: The star of our vegetable stir fry! Fresh broccoli florets offer a fantastic texture and absorb the sauce beautifully. When selecting, choose heads with tightly packed florets and firm, green stalks. If fresh isn’t available, frozen broccoli florets can be used; just make sure to thaw them completely and pat them dry to avoid excess water in your stir fry.

Bell Peppers: These add vibrant color and a wonderful sweetness to the dish. I love using a mix of red and yellow for visual appeal, but any color will do! Select firm, glossy peppers without any soft spots. If you’re out of bell peppers, snap peas or carrots can be a good substitute, offering a similar crunch and sweetness when sautéed.

Honey: Honey is crucial for that perfect sweet-savory balance in our honey garlic sauce. I always use a good quality local honey if I can get it from the NYC greenmarkets – it makes a difference! Maple syrup can be a suitable substitute if you prefer, offering a slightly different but equally delicious depth of sweetness.

Garlic Powder & Ground Ginger: These aromatics are the soul of the stir fry. While fresh garlic and ginger are wonderful, using powders keeps this recipe quick and accessible. If you prefer fresh, use 3-4 cloves minced garlic and 1 tablespoon grated fresh ginger for an even bolder flavor profile.

Original IngredientBest SubstitutionFlavor / Texture Impact
Chicken TendersChicken Breast or ThighsChicken breast: slightly drier, needs thinner slicing. Chicken thighs: richer flavor, juicier.
BroccoliCauliflower, Asparagus, or Green BeansCauliflower: similar texture, milder flavor. Asparagus and Green Beans: quicker cook time, distinct flavors.
Bell PeppersZucchini or CarrotsZucchini: softer texture, milder taste. Carrots: sweeter, firmer crunch, longer cooking time.
HoneyMaple Syrup or Brown SugarMaple Syrup: similar sweetness, subtle earthy notes. Brown Sugar: deeper molasses flavor, may need more liquid.
Garlic Powder & Ground GingerFresh Garlic & GingerFresh: more pungent, vibrant flavor. Use 3-4 cloves minced garlic, 1 tbsp grated fresh ginger.

Easy Chicken Stir Fry with vegetables

How to Make Easy Chicken Stir Fry — Step-by-Step

Making this easy chicken stir fry is simpler than you think, and I’ll guide you through each step to ensure your dish is a resounding success!

Step 1: Prep the Vegetables

Start by chopping your vegetables. Chop the broccoli into bite-sized chunks, aiming for pieces roughly 1-inch in size, so they cook evenly. Cut the bell peppers and yellow onion into thin slices, about ¼-inch thick. This uniform size helps them cook quickly and creates an appealing presentation for your vegetable stir fry.

💡 mia’s Pro Tip: The French culinary tradition teaches us the importance of mise en place. Chop all your vegetables before you even turn on the heat. Stir-frying moves fast, so having everything ready will make the process smooth and stress-free.

Step 2: Slice the Chicken

Next, cut the chicken tenders into 1-inch strips. If using chicken breasts, slice them against the grain for maximum tenderness. Evenly sized pieces ensure the chicken cooks through at the same time, preventing some pieces from becoming overcooked while others are still raw, which is key for a tender chicken stir fry.

Step 3: Cook the Chicken

Add 1 tablespoon of olive oil to a large skillet or wok and place over medium-high heat. Once the oil shimmers, add the chicken in a single layer, season generously with salt and pepper, and cook until browned on both sides and cooked through. This should take about 5-7 minutes. Once cooked, remove the chicken from the pan and set aside. Don’t overcrowd the pan; cook in batches if necessary.

⚠️ Common Mistake to Avoid: Overcrowding the pan when cooking the chicken. This lowers the pan’s temperature and steams the chicken instead of browning it, leading to a bland flavor and rubbery texture. Give your chicken space to develop that delicious golden crust!

Step 4: Sauté the Aromatics and Vegetables

To the same pan (or a bigger one if needed for space), add the remaining 2 tablespoons of olive oil. Add the broccoli, bell peppers, onion, garlic powder, and ground ginger. Season with a pinch of pepper. Sauté for about 10 minutes, stirring occasionally, until the vegetables are tender-crisp but still vibrant. They should have a slight bite to them, not be mushy.

Step 5: Build the Sauce

Lower the heat to medium-low. Add the soy sauce and honey to the pan with the vegetables. Stir well to combine, ensuring the honey dissolves into the sauce. Let it simmer for a few minutes, allowing the flavors to meld and the sauce to slightly thicken. This honey garlic sauce is truly what makes this delicious quick stir fry shine.

💡 mia’s Pro Tip: If your sauce isn’t thickening enough, try whisking a teaspoon of cornstarch with a tablespoon of cold water and stirring it into the simmering sauce. It’s a classic French technique for creating a beautifully glossy and viscous sauce.

Step 6: Combine and Simmer

Add the cooked chicken back into the pan with the vegetables and sauce. Mix everything together gently but thoroughly, making sure all the chicken and vegetables are coated. Simmer for another 5 minutes to allow the flavors to truly combine and for the chicken to warm through. Taste and adjust salt and pepper if needed.

StepActionDurationKey Visual Cue
1Prep Vegetables10 minsUniformly chopped broccoli, sliced peppers and onion.
2Slice Chicken5 minsChicken tenders cut into 1-inch strips.
3Cook Chicken5-7 minsChicken tenders browned and cooked through, no pink.
4Sauté Vegetables & Aromatics10 minsVegetables tender-crisp and vibrant.
5Build Sauce2-3 minsSauce simmered, honey dissolved, slightly thickened.
6Combine & Simmer5 minsAll ingredients coated, flavors fully integrated.

Serving & Presentation

Serving this easy chicken stir fry is all about highlighting its vibrant colors and rich flavors. I love to plate it artfully, just like I learned in Paris. Ladle a generous portion over a bed of fluffy jasmine or brown rice. The contrast between the glistening stir fry and the pristine white rice is always striking. For an authentic touch, you can add a sprinkle of toasted sesame seeds and a few finely sliced green onions for freshness and a subtle oniony bite.

For an even more satisfying meal, especially how we might enjoy it in a vibrant NYC eatery, try serving this quick stir fry alongside some homemade kimchi or a crisp cucumber salad with a sesame-ginger dressing. The tang and crunch will provide a wonderful counterpoint to the savory and slightly sweet stir fry. Don’t be afraid to get creative with your plating – a little height and a thoughtful garnish can turn a simple weeknight meal into a dinner party showstopper.

In Morocco, sharing food is a cornerstone of hospitality. This healthy chicken stir fry, with its generous portions and inviting aroma, is perfect for passing around the family table. Offer extra soy sauce or a dash of sriracha on the side for those who like to customize their spice level. The best food is that which is shared, creating memories around the table.

Pairing TypeSuggestionsWhy It Works
Side DishJasmine Rice, Brown Rice, QuinoaAbsorbs the delicious sauce, providing a satisfying base and balancing the flavors.
Sauce / DipSriracha, Chili Garlic Sauce, Extra Soy SauceAllows customization of heat and saltiness for individual preferences.
BeverageGreen Tea, Light Lager, Dry RieslingComplements Asian flavors without overpowering them; light and refreshing.
GarnishSesame Seeds, Sliced Green Onions, Fresh CilantroAdds visual appeal, nutty crunch, fresh herbaceous notes, and a pop of color.

Make-Ahead, Storage & Reheating

Life in NYC moves fast, so meal prepping is an essential part of my week. This easy chicken stir fry is fantastic for making ahead, making it perfect for healthy lunches or dinners throughout the week. I often make a double batch to ensure I have nutritious, delicious meals ready to go, saving me time and stress.

MethodContainerDurationReheating Tip
RefrigeratorAirtight container3-4 daysMicrowave on medium, stirring halfway. Or gently reheat in a pan with a splash of water.
FreezerFreezer-safe container2-3 monthsThaw overnight in the fridge. Reheat gently in a skillet or microwave until warmed through.
Make-AheadSeparate rice from stir fryUp to 3 days in advancePrepare all components, store separately, then combine and reheat just before serving for best texture.

When reheating this chicken stir fry, whether from the fridge or freezer, I recommend doing so gently to retain the vegetables’ texture. If reheating in a pan, a tiny splash of water or broth can help moisten the dish and prevent any drying out. You want to warm it through, not re-cook it, ensuring those tender-crisp vegetables remain delicious. Overheating can lead to mushy vegetables, which is something we want to avoid!

For lunch meal prep, I often portion the stir fry and rice into individual airtight containers. This makes grabbing a healthy, homemade meal so easy when you’re rushing out the door. It’s a wonderful way to enjoy the fruits of your labor long after the initial cooking, and tastes just as good on day three!

Variations & Easy Swaps

One of the joys of cooking is the ability to adapt and experiment! This healthy chicken stir fry recipe is a wonderful canvas for creativity. Here are some variations based on my kitchen experiments and global inspirations.

VariationKey ChangeBest ForDifficulty Impact
Spicy Szechuan Chicken Stir FryAdd chili flakes, Szechuan peppercorns.Heat seekers, bold flavor enthusiasts.Easy – just adds a few extra spices.
Gluten-Free Veggie Stir FryUse Tamari instead of Soy Sauce.Those with gluten sensitivities.None – simple swap.
Seasonal Harvest Stir FrySwap broccoli/peppers for seasonal produce.Eating seasonally, exploring new flavors.Easy – ingredient substitution.

Spicy Szechuan Chicken Stir Fry

For those who love a kick, introduce a touch of heat. In my Moroccan kitchen, spices are king, and this variation takes a leaf from that book! Add 1 teaspoon of red chili flakes and a pinch of ground Szechuan peppercorns along with the garlic powder and ginger. The peppercorns provide a unique tingly sensation that pairs wonderfully with the sweet-savory notes of the honey garlic sauce, creating a truly dynamic flavor profile.

Gluten-Free Veggie Stir Fry

Making this an entirely gluten-free chicken stir fry is incredibly simple. Just swap out regular soy sauce for Tamari, which is a gluten-free alternative that offers the same rich, umami flavor without any wheat. I’ve tested this substitution many times for friends with dietary restrictions, and the flavor impact is minimal, ensuring everyone can enjoy this delicious quick stir fry.

Seasonal Harvest Stir Fry

Leverage the abundance of your local market, just like I do here in NYC! Aside from bell peppers and broccoli, consider adding sliced carrots, snow peas, mushrooms, or even thinly sliced zucchini. Adjust cooking times slightly based on the hardness of the vegetables; harder vegetables like carrots will need a few extra minutes, while softer ones like mushrooms cook quickly. This keeps your easy chicken stir fry fresh and exciting with every season.

FAQ

What is the best sauce for an easy chicken stir fry?

For an easy chicken stir fry, I firmly believe a honey garlic sauce is truly the best! It strikes a perfect balance between sweet, savory, and aromatic. The honey provides a lovely glaze and mellow sweetness, while the garlic powder and ground ginger infuse the dish with warmth and depth. Combined with soy sauce, it creates a rich, umami-packed coating that adheres beautifully to the chicken and vegetables, making every bite incredibly flavorful. It’s simple to mix and consistently delivers fantastic results, which is why it’s my go-to for a quick weeknight meal.

Can I make chicken stir fry without soy sauce?

Absolutely! If you’re looking to make a chicken stir fry without soy sauce, there are several excellent substitutions. Tamari is my top recommendation for a gluten-free option, as it offers a very similar flavor profile. Coconut aminos are another fantastic choice, providing a slightly sweeter and less salty umami flavor that works wonderfully in stir-fries. For a completely different twist, try a savory broth (like chicken or vegetable) seasoned with a touch of fish sauce for umami, or even just a squeeze of lime juice and a dash of white pepper to brighten the flavors.

How long does it take to cook chicken stir fry from start to finish?

One of the best things about this easy chicken stir fry is how quickly it comes together! From chopping your vegetables to serving it on your plate, you can expect this dish to be ready in about 30-35 minutes. Most of that time is dedicated to initial preparation (mise en place, as we say in French culinary schools), ensuring all your ingredients are ready to go. The actual cook time in the pan is usually less than 20 minutes, making it a perfect solution for busy weeknights when you need a healthy and delicious meal in a flash.

What vegetables go well in a simple chicken stir fry?

When it comes to a simple chicken stir fry, a wide array of vegetables can truly shine! I personally love broccoli, bell peppers, and yellow onion for their vibrant colors, varied textures, and quick cooking times. Other fantastic additions include snap peas, carrots (sliced thinly), mushrooms, zucchini, baby corn, or even bok choy. The key is to choose vegetables that cook at a similar rate or to slice harder vegetables thinner so they can become tender-crisp in just a few minutes. Mixing colors and textures also adds to the appeal of your vegetable stir fry.

What is the best type of chicken for stir fry?

For an easy chicken stir fry, I find chicken tenders are ideal because they cook quickly and maintain excellent tenderness. They are naturally thin, so they require minimal prep to get them ready for the pan. Chicken breast is another fantastic choice; just be sure to slice it into uniform, thin strips against the grain to prevent it from becoming dry or tough. Chicken thighs can also be used for a richer flavor and juicier result, but they might need a minute or two longer to cook through thoroughly. Consistency in chopping is key for even cooking.

Can I add other proteins to this stir fry?

Absolutely! This recipe is incredibly versatile. If you want to switch things up, you can easily substitute the chicken with shrimp, beef (thinly sliced flank steak or sirloin work best), or even tofu for a vegetarian option. The cooking times will vary slightly depending on the protein. Shrimp cooks very quickly, usually 2-3 minutes per side. Beef might need a bit longer to achieve your desired doneness. Tofu should be pressed and then pan-fried separately until golden brown before adding back in, to ensure it doesn’t get mushy. The honey garlic sauce pairs wonderfully with almost any protein!

How do I prevent my stir fry from getting watery?

To prevent a watery stir fry, there are a few important tricks I learned in my culinary training. First, ensure your pan is hot enough (medium-high heat) before adding ingredients. Second, avoid overcrowding the pan; cook your chicken and vegetables in batches if necessary, allowing them space to sear and caramelize rather than steam. Third, if using frozen vegetables, be sure to thaw and thoroughly pat them dry to remove excess moisture. Finally, a cornstarch slurry (1 tsp cornstarch mixed with 1 tbsp cold water) added to the sauce during the simmering stage can help thicken it beautifully, ensuring it coats your ingredients instead of pooling at the bottom of the pan.

Share Your Version!

I poured my heart into crafting this easy chicken stir fry recipe, blending my Moroccan heritage with French techniques and the vibrant pulse of NYC. Now it’s your turn to make it your own! I absolutely adore seeing your culinary adventures come to life in your kitchens.

Did you try a fun variation? Perhaps you added some seasonal vegetables from your local market, or spiced it up with some extra chili? Leave a star rating and a comment below, and don’t forget to share a photo of your beautiful creation on Instagram or Pinterest. Tag @exorecipies — I can’t wait to see what you cook up! What’s your favorite unexpected vegetable to add to a stir fry?

From my NYC kitchen to yours — I hope this recipe brings as much warmth to your table as it does to mine. — mia 🧡

📌

Love This Recipe? Save It to Pinterest!

If you enjoyed this Easy Chicken Stir Fry recipe, don’t let it get lost in your browser tabs! 😄 Pin it now so you can find it again anytime — and explore hundreds more tried-and-tested recipes waiting for you on my Pinterest boards.

👉 Follow mia on Pinterest @chefrecipes2

📌 Pin this recipe · 🔁 Re-pin your favorites · 💬 Tag me when you make it — I love seeing your creations!

Print

clock clock iconcutlery cutlery iconflag flag iconfolder folder iconinstagram instagram iconpinterest pinterest iconfacebook facebook iconprint print iconsquares squares iconheart heart iconheart solid heart solid icon

Easy Chicken Stir Fry

  • Author: Chef Mia

Description

Need an easy and healthy dinner recipe? Easy Chicken Stir Fry with vegetables is your answer. This asian inspired dish is made with broccoli, bell peppers, ginger, and a delicious honey garlic sauce. It is perfect served over rice for an easy weeknight dinner or even as meal prep!


Ingredients

Scale
  • 1 lb chicken tenders
  • 1 head broccoli
  • 2 bell peppers
  • 1 yellow onion
  • 1/4 cup + 2 tbsp soy souce
  • 3 tbsp olive oil
  • 2 1/2 tbsp honey
  • 1 1/2 tsp garlic powder
  • 1/2 tsp ground ginger
  • pepper
  • salt

Instructions

  1. Start by chopping your vegetables. Chop the broccoli into bite sized chunks and cut the peppers and onion into thin slices.
  2. Next cut the chicken tenders into strips.
  3. Add 1 tbsp of the olive oil to a pan and place over medium heat. Add the chicken in, season with salt and pepper and cook until browned on both sides and cooked through. Remove from the heat.
  4. To the same pan (or a bigger one if needed) add 2 tbsp of olive oil, broccoli, peppers, onion, garlic powder, and ground ginger. Also add some pepper.
  5. Sauté for about 10 minutes or until soft.
  6. Lower the heat and add in the soy sauce and honey. Simmer for a few minutes.
  7. Add the cooked chicken back into the pan. Mix everything together and simmer for another 5 minutes for all the flavors to combine. You can also add salt and pepper to taste at this point.
  8. Serve over rice and enjoy!


Easy Chicken Stir Fry with vegetables

k">

Tried This Recipe? Leave a Comment!

Did you make this recipe? I’d love to hear how it turned out! Please leave a comment and a rating below. Your feedback helps other home cooks and supports cheerychop.com!
For more delicious inspiration, follow me on Pinterest!