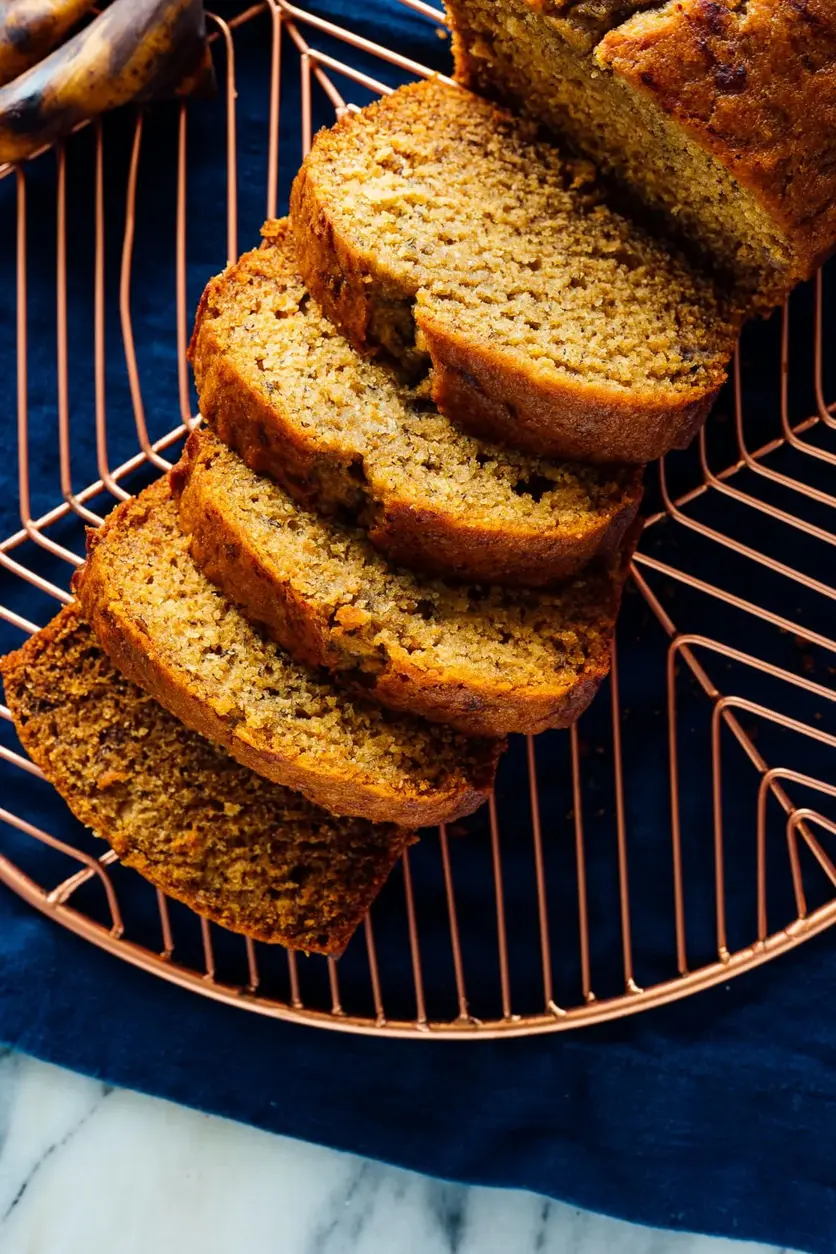
Healthy Banana Bread with Whole Wheat Flour – Moist & Naturally Sweet

Healthy Banana Bread with Whole Wheat Flour – A Naturally Sweet Delight

⚖️
Difficulty
Easy
⏲️
Prep Time
15 mins
🕒
Cook Time
60 mins
⏱️
Total Time
75 mins
🍽️
Servings
10 slices

Growing up in Morocco, the scent of fresh baking was a daily ritual in my mother’s kitchen. While traditional Moroccan sweets are often date or almond-based, the comfort of a warm, spiced loaf is universal. That’s why I’ve painstakingly perfected this healthy banana bread recipe, ensuring it delivers that same profound comfort while being naturally sweetened and featuring wholesome whole wheat flour. It’s a wonderful way to use up those overripe bananas, transforming them into a moist, flavorful treat that feels indulgent but is secretly good for you. I guarantee you’ll appreciate the simplicity and the delicious results.

Imagine biting into a slice of perfectly moist banana bread: the sweetness of ripe bananas mingling with a subtle hint of cinnamon, offering a comforting warmth that spreads with every mouthful. The texture is key here – a tender crumb that’s soft without being gummy, providing just the right amount of density. I’ve incorporated a special technique, inspired by French patisserie, to ensure the bananas not only lend sweetness but also contribute to an incredibly moist texture. This easy banana bread truly sings with natural flavors, making it a staple in my New York City kitchen for everything from a quick breakfast to an afternoon pick-me-up.

What sets my healthy banana bread apart is its thoughtful balance. It’s truly a sugar-free banana bread masterpiece, relying entirely on the natural sugars of ripe bananas and the gentle sweetness of honey or maple syrup. I’ve also swapped out refined flours for nutritious whole wheat, which adds a lovely depth and hearty texture without compromising on tenderness. In this recipe, I’ll share a pro tip for ensuring your loaf is moist every time, and we’ll tackle a common mistake that can leave your banana bread dry. Get ready for a delicious journey to the best banana bread you’ve ever baked!

Why This Healthy Banana Bread Recipe Is the Best

My approach to this healthy banana bread leans heavily on the principles I learned in culinary school in Paris: understanding ingredients and letting their natural flavors shine. The secret to its incredible taste is twofold: perfectly ripe bananas and carefully chosen natural sweeteners. This combination creates a deeply satisfying flavor profile that’s rich and sweet without being cloying, a hallmark of good baking.

Achieving that perfect moist banana bread texture with whole wheat flour can be a challenge, but I’ve cracked the code. The key is in how you handle the wet and dry ingredients and a specific ratio that my Parisian training emphasized for delicate batters. It prevents the whole wheat from making the bread dense and ensures a tender, melt-in-your-mouth crumb every time. Many recipes underestimate this balance, but with a chef’s eye, I’ve fine-tuned it.

This recipe is designed to be foolproof, even if you’re new to baking. It’s an easy banana bread that comes together with minimal fuss, making it perfect for busy weeknights or lazy Sunday mornings. The steps are straightforward, and the ingredients are readily available, proving that healthy and delicious cooking doesn’t have to be complicated. It’s a kitchen triumph waiting to happen!

Healthy Banana Bread Ingredients

Finding quality ingredients is half the battle, especially here in NYC. I love wandering through the Union Square farmers market for fresh finds, but for pantry staples like flour and oils, I rely on my local natural foods store. My mother always taught me to appreciate the foundation of a good dish, and this healthy banana bread recipe starts with just that.

Ingredients List

  • 1/2 cup (75 grams) melted coconut oil or extra-virgin olive oil or high quality vegetable oil*
  • 1/2 cup honey (168 grams) or maple syrup (155 grams)
  • 2 eggs
  • 1 cup (225 grams) mashed ripe bananas (about 2 1/2 medium or 2 large bananas)
  • 1/4 cup (56 grams) milk of choice or water
  • 1 teaspoon baking soda (NOT baking powder; they aren’t the same!)
  • 1 teaspoon vanilla extract
  • 1/2 teaspoon salt
  • 1/2 teaspoon ground cinnamon, plus more to swirl on top
  • 1 3/4 cups (220 grams) white whole wheat flour or regular whole wheat flour**
  • Totally optional: 1/2 cup mix-ins like chopped walnuts or pecans, chocolate chips, raisins, chopped dried fruit, fresh banana slices

Ingredient Spotlight

Ripe Bananas: These are the true heroes of this sugar-free banana bread. They provide natural sweetness and essential moisture. Look for bananas with plenty of brown spots – the browner, the sweeter, and the better for mashing. If you have firm yellow bananas, you can ripen them faster by baking them unpeeled at 300°F (150°C) for 15-20 minutes until their skins turn black. Don’t substitute with unripe bananas; your bread won’t be sweet or moist enough.

Whole Wheat Flour: This gives our healthy banana bread its wholesome character. White whole wheat flour is my preference as it has a lighter color and milder flavor than regular whole wheat flour, offering a texture closer to all-purpose while retaining all the nutritional benefits. If you only have regular whole wheat flour, it works well but might result in a slightly denser loaf. All-purpose flour can be used if you prefer a less “healthy” version, maintaining the same quantity.

Honey or Maple Syrup: These natural sweeteners are fantastic alternatives to refined sugar, contributing to the “healthy” aspect of this recipe. Both offer unique flavor notes – honey brings a floral richness, while maple syrup has an earthy, caramel-like sweetness. I often use whatever I have on hand. Agave nectar could also be a suitable substitute, though it’s slightly less viscous so adjust other liquids if needed.

Melted Coconut Oil (or Olive Oil): This provides the necessary fat for a moist and tender crumb. Coconut oil contributes a subtle tropical hint, especially if unrefined. Extra-virgin olive oil lends a slightly peppery note, which I love, especially with cinnamon. You can also use a high-quality neutral vegetable oil like avocado oil. Butter is also an option if you don’t mind the dairy and are not looking for a vegan alternative; melt it first.

Original IngredientBest SubstitutionFlavor / Texture Impact
Coconut OilMelted unsalted butter, extra-virgin olive oil, or avocado oilButter adds richness, olive oil a fruity note, avocado oil is neutral. Texture remains moist.
HoneyMaple syrup or agave nectarMaple syrup adds an earthy sweetness; agave is slightly less viscous and less rich.
Whole Wheat FlourAll-purpose flour or gluten-free all-purpose blend (with xanthan gum)All-purpose will yield a lighter, fluffier crumb. GF blend can be slightly denser, but still good.
EggsFlax eggs (1 tbsp ground flaxseed + 3 tbsp water per egg, let sit 5 mins)For a vegan version, flax eggs work well but can make the bread slightly denser.

Healthy Banana Bread!

How to Make Healthy Banana Bread — Step-by-Step

Making this easy banana bread is straightforward and enjoyable. Just follow these steps, and you’ll have a wonderfully moist, wholesome loaf.

Step 1: Prepare and Mix

Preheat your oven to 325 degrees Fahrenheit (165 degrees Celsius). Take a 9×5-inch loaf pan and grease it thoroughly. This small step ensures your beautiful loaf comes out effortlessly.

💡 mia’s Pro Tip: Don’t skimp on greasing! I often use butter or coconut oil, plus a dusting of flour, especially for whole wheat breads, to prevent sticking and ensure a perfect release.

Step 2: Combine Wet Ingredients

In a large bowl, whisk together the melted oil and honey or maple syrup until well combined. Add the eggs and beat them in thoroughly. Next, fold in your mashed ripe bananas and milk of choice (or water). If your coconut oil solidifies upon contact with colder ingredients, simply place the bowl in a warm spot, like on top of your preheating oven or a quick 10-second zap in the microwave, to re-melt it slightly.

⚠️ Common Mistake to Avoid: Do not overmix the wet ingredients after adding the bananas. Gentle whisking is enough to combine them, especially to maintain the light, airy texture that contributes to moist banana bread.

Step 3: Add Dry Ingredients

Sprinkle the baking soda, vanilla extract, salt, and ground cinnamon over the wet mixture and whisk briefly to blend. Then, switch to a large spoon or spatula. Gently stir in the white whole wheat flour (or regular whole wheat flour) just until it’s combined. A few lumps are perfectly fine and often preferred to prevent overmixing. If you’re adding any optional mix-ins like nuts or chocolate chips, fold them in now.

💡 mia’s Pro Tip: Overmixing the flour activates gluten too much, which can lead to a tough, dry banana bread. Mix just until no dry streaks of flour remain; a lumpy batter is a happy batter!

Step 4: Bake to Golden Perfection

Pour the batter into your greased loaf pan and smooth the top. For a lovely finish, sprinkle a little extra cinnamon on top. If you desire a swirled effect, gently drag the tip of a knife through the batter in a zig-zag pattern. Bake for 55 to 60 minutes, or until a toothpick inserted into the center comes out clean. My loaf is usually done at 55 minutes without mix-ins; with them, it might need closer to 60 minutes. Let the bread cool in the pan for at least 10 minutes before carefully transferring it to a wire rack to cool completely before slicing.

⚠️ Common Mistake to Avoid: Cutting into the bread too soon can cause it to collapse or become gummy. Patience is key! Letting it cool in the pan and then on a rack allows the structure to set properly and moisture to redistribute for that perfectly moist banana bread.

StepActionDurationKey Visual Cue
1Preheat oven, grease pan5-10 mins (preheating)Oven reaches 325°F (165°C)
2Combine wet ingredients5 minsSmooth, emulsified mixture (check for solidified coconut oil)
3Add dry ingredients & mix-ins3 minsJust combined, a few lumps of flour okay
4Bake and cool55-60 mins (bake), 10+ mins (cool)Golden brown crust, toothpick comes out clean

Serving & Presentation

In my NYC kitchen, whether I’m serving this healthy banana bread recipe for brunch or an afternoon coffee break, presentation always matters. A simple slice can be elevated with thoughtful garnishes. I love serving it warm, cut into thick slices, perhaps with a dusting of powdered sugar (if you’re feeling less “sugar-free”) or a light drizzle of honey to highlight its natural sweetness.

For a touch of Moroccan hospitality, I might offer small bowls of plain Greek yogurt mixed with a pinch of cinnamon and a swirl of orange blossom water alongside. The tanginess of the yogurt perfectly complements the sweet bread. You could also serve it with a dollop of homemade whipped cream, lightly sweetened, or a spread of your favorite nut butter for added protein and richness, making it a truly satisfying snack or light breakfast.

And for those of you who appreciate a good beverage pairing, think a strong cup of Moroccan mint tea or a classic French press coffee. The warmth and slight bitterness of the drinks create a beautiful contrast with the soft, sweet notes of the banana bread, completing a delightful culinary experience à la mia.

Pairing TypeSuggestionsWhy It Works
Side DishGreek yogurt with cinnamon, cottage cheese, fresh berriesAdds protein and a tangy contrast, or fresh fruit for brightness.
Sauce / DipNut butter (almond, peanut), light cream cheese spread, fruit jamEnhances richness, adds healthy fats, or a fruity zing.
BeverageCoffee, black tea, Moroccan mint tea, cold milk (nut milk for vegan)Balances sweetness, offers warmth or a refreshing cool contrast.
GarnishToasted chopped nuts, a sprinkle of cinnamon sugar, a tiny mint leafAdds texture, visual appeal, and a hint of extra flavor.

Make-Ahead, Storage & Reheating

Living in New York City, I’ve mastered the art of meal prepping, and this easy banana bread is a constant in my rotation. It’s perfect for making ahead and enjoying throughout the week, ensuring I always have a wholesome snack on hand during my busy days. Proper storage is key to maintaining its delicious moisture and flavor.

MethodContainerDurationReheating Tip
RefrigeratorAirtight container or tightly wrapped in plastic filmUp to 5 daysSlice and microwave for 15-20 seconds for warmth.
FreezerDouble-wrapped in plastic film then foil, or in a freezer bagUp to 3 monthsThaw at room temperature or warm slices gently in microwave/toaster oven.
Make-AheadPrepare batter up to 1 day in advance, store in fridge1 day in advanceBring batter to room temp, stir gently, then bake as directed.

When freezing this moist banana bread, I always slice it first. This way, I can pull out just one or two slices as needed, making for a super quick and convenient snack. They thaw surprisingly fast at room temperature, but if you’re impatient like me, a few seconds in the microwave works wonders to bring back that freshly baked warmth and aroma.

To avoid any dryness when reheating, especially from the freezer, I sometimes wrap a slice in a damp paper towel before microwaving. It helps to trap the moisture, keeping the banana bread wonderfully soft and tender as if it just came out of the oven.

Variations & Easy Swaps

One of the joys of cooking in my NYC kitchen is experimenting with flavors and dietary needs. This healthy banana bread recipe is an excellent canvas for creativity, allowing for easy swaps to suit different tastes or restrictions without sacrificing that delicious, moist banana bread texture.

VariationKey ChangeBest ForDifficulty Impact
VeganFlax eggs, plant-based milkDairy-free, egg-free dietsMinimal, slightly denser crumb
Gluten-FreeGluten-free all-purpose flour blendGluten sensitivitiesMinimal, may need slightly more liquid
Spiced AppleGrated apple, extra spicesFall flavors, added fruitinessMinimal

Vegan Banana Bread

To make this recipe entirely vegan, simply swap the eggs for two “flax eggs” (2 tablespoons of ground flaxseed meal mixed with 6 tablespoons of water, left to sit for 5 minutes until thickened). Ensure you use a plant-based milk (almond, soy, or oat milk work beautifully) and coconut oil or a neutral vegetable oil. The result is still incredibly moist, though with a slightly richer, denser texture, reminiscent of some of the delightful plant-based patisseries I’ve encountered in Paris.

Gluten-Free Banana Bread

If you need a gluten-free option, a good quality gluten-free all-purpose flour blend (one that contains xanthan gum) can be used as a direct 1:1 substitute for the whole wheat flour. I’ve tested this, and the results are excellent; the texture remains tender and holds together well. Just ensure your blend includes xanthan gum as it helps with the structure that gluten usually provides.

Spiced Apple Banana Bread

For an autumnal twist, incorporate 1/2 cup of finely grated apple (squeeze out excess moisture) and boost the spices باضافة a pinch of nutmeg and a touch of cardamom, a spice my mother often used in Moroccan baking. This adds another layer of fruitiness and warmth, perfect for a cozy morning or afternoon snack. The NYC fall markets always inspire me to add these seasonal touches.

What is the best substitute for butter in healthy banana bread?

The best substitutes for butter in this healthy banana bread recipe are either melted coconut oil or extra-virgin olive oil. Coconut oil will give you a slightly richer flavor and can even enhance the natural sweetness of the bananas, without adding a strong coconut taste if you use refined coconut oil. Olive oil, especially a mild one, can contribute a wonderful subtle fruitiness that works surprisingly well with banana and cinnamon. Both provide the necessary fat for a moist crumb while keeping the recipe dairy-free and leaning towards healthier unsaturated fats. I’ve found great success with both in my kitchen, depending on the flavor profile I’m aiming for.

How do I make banana bread with less sugar without ruining the texture?

The key to making sugar-free banana bread without sacrificing texture lies in selecting very ripe bananas. These naturally sweeten the loaf significantly, allowing you to reduce or even eliminate added sugar. This recipe uses honey or maple syrup strategically; they not only sweeten but also contribute to the moistness and tender crumb. Avoiding overmixing the batter is also crucial, as over-developed gluten can lead to a dry, tough texture, especially with whole wheat flour. Remember, the natural sugars in very ripe bananas are your best friend here, providing both sweetness and essential moisture.

Can I use whole wheat flour instead of all-purpose flour for healthy banana bread?

Absolutely, and this recipe specifically calls for it! Using whole wheat flour (either white whole wheat or regular whole wheat) is a fantastic way to make your banana bread healthier by adding fiber and nutrients. White whole wheat flour is often preferred because it offers a lighter texture and milder flavor compared to regular whole wheat, making it an easier transition from all-purpose. If you only have regular whole wheat flour, it works well, but your loaf might be slightly denser. The trick is to avoid overmixing, which can make whole wheat baked goods tough, as I emphasize in my recipe steps.

How long does healthy banana bread last, and how should I store it?

Your healthy banana bread, when stored properly, will stay fresh and delicious for several days. At room temperature, on your counter, it will last about 2-3 days tightly wrapped or in an airtight container. If you want to extend its life, I recommend storing it in the refrigerator in an airtight container where it will keep for up to 5 days. For longer storage, this banana bread freezes beautifully! Wrap individual slices or the whole loaf tightly in plastic wrap, then an additional layer of aluminum foil, and it will last for up to 3 months in the freezer. Just thaw at room temperature or warm gently before serving.

What makes this banana bread moist, even with whole wheat flour?

The incredible moistness of this banana bread, despite using whole wheat flour, comes from a combination of factors. Firstly, using extremely ripe, mashed bananas is crucial – they contribute significant natural moisture. Secondly, the choice of liquid fat like melted coconut oil or olive oil helps keep the crumb tender. Thirdly, correctly balancing the wet and dry ingredients, along with the baking soda, ensures the bread rises well without becoming dense or dry. And finally, the critical step of not overmixing the batter prevents gluten from developing too much, which can lead to a tough, dry loaf. It’s all about careful ratios and gentle handling.

Can I add nuts or chocolate chips to this healthy banana bread recipe?

Absolutely! I’ve included an optional section for mix-ins because I love customizing my banana bread. You can add 1/2 cup of chopped walnuts or pecans for a delightful crunch, or chocolate chips for a touch of indulgence. Raisins, chopped dried fruit, or even fresh banana slices placed on top before baking also work wonderfully. Just gently fold them into the batter in the last mixing step. Adding mix-ins might increase the baking time by a few minutes, typically needing closer to 60 minutes, so always rely on the toothpick test for doneness.

Why is baking soda used instead of baking powder in this recipe?

This recipe specifically calls for baking soda because it reacts with acidic ingredients present in the batter (like the ripe bananas and sometimes milk if it’s slightly acidic) to produce carbon dioxide gas, which helps the bread rise. Baking powder, on the other hand, contains both an acid and a base and reacts twice (once with liquid, once with heat). Since this healthy banana bread relies on natural acids from the bananas to activate the leaven, baking soda is the perfect choice for a light and airy yet moist texture.

What’s the best way to get uniformly ripe bananas for this recipe?

To get uniformly ripe bananas for this healthy banana bread recipe, look for bananas that are heavily speckled with brown spots and feel soft to the touch. The browner, the better – don’t be afraid if they look almost black! If your bananas aren’t quite there yet, you can speed up the ripening process. Place them in a paper bag with an apple or tomato; the ethylene gas they release will encourage ripening. For an even quicker method, you can bake unpeeled yellow bananas at 300°F (150°C) for 15-20 minutes until their skins turn black – this makes them perfectly sweet and soft for mashing.

Share Your Version!

I poured my heart into perfecting this healthy banana bread recipe, blending my Moroccan roots with my French culinary training and the vibrant spirit of NYC. I truly hope it brings warmth and joy to your kitchen as it does to mine. When you bake this, I would absolutely love to hear about it!

Please leave a star rating and a comment below to let me know how it turned out for you. Did you add any special mix-ins? Did it remind you of a favorite memory? If you snap a photo, share it on Instagram or Pinterest and tag @exorecipes – I adore seeing your culinary creations. And tell me, what’s your go-to trick for getting those bananas perfectly ripe for baking?

From my NYC kitchen to yours — I hope this recipe brings as much warmth to your table as it does to mine. — mia 🧡

📌

Love This Recipe? Save It to Pinterest!

If you enjoyed this Healthy Banana Bread recipe, don’t let it get lost in your browser tabs! 😄 Pin it now so you can find it again anytime — and explore hundreds more tried-and-tested recipes waiting for you on my Pinterest boards.

👉 Follow mia on Pinterest @chefrecipes2

📌 Pin this recipe · 🔁 Re-pin your favorites · 💬 Tag me when you make it — I love seeing your creations!
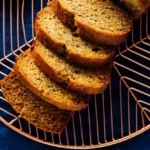
Print

clock clock iconcutlery cutlery iconflag flag iconfolder folder iconinstagram instagram iconpinterest pinterest iconfacebook facebook iconprint print iconsquares squares iconheart heart iconheart solid heart solid icon

Healthy Banana Bread

  • Author: Chef Mia

Description

With this healthy banana bread recipe, you’re only a few simple ingredients away from the best banana bread ever! It’s made with whole wheat flour and naturally sweetened with honey or maple syrup. You can easily make this banana bread vegan or gluten freecheck the recipe notes for details. Recipe yields 1 loaf (about 10 slices).


Ingredients

Scale
  • 1/2 cup (75 grams) melted coconut oil or extra-virgin olive oil or high quality vegetable oil*
  • 1/2 cup honey (168 grams) or maple syrup (155 grams)
  • 2 eggs
  • 1 cup (225 grams) mashed ripe bananas (about 2 1/2 medium or 2 large bananas)
  • 1/4 cup (56 grams) milk of choice or water
  • 1 teaspoon baking soda (NOT baking powder; they arent the same!)
  • 1 teaspoon vanilla extract
  • 1/2 teaspoon salt
  • 1/2 teaspoon ground cinnamon, plus more to swirl on top
  • 1 3/4 cups (220 grams) white whole wheat flour or regular whole wheat flour**
  • Totally optional: 1/2 cup mix-ins like chopped walnuts or pecans, chocolate chips, raisins, chopped dried fruit, fresh banana slices

Instructions

  1. Preheat oven to 325 degrees Fahrenheit (165 degrees Celsius) and grease a 9×5-inch loaf pan.
  2. In a large bowl, beat the oil and honey together with a whisk. Add the eggs and beat well, then whisk in the mashed bananas and milk. (If your coconut oil solidifies on contact with cold ingredients, simply let the bowl rest in a warm place for a few minutes, like on top of your stove, or warm it for about 10 seconds in the microwave.)
  3. Add the baking soda, vanilla, salt and cinnamon, and whisk to blend. Lastly, switch to a big spoon and stir in the flour, just until combined. Some lumps are ok! If youre adding any additional mix-ins, gently fold them in now.
  4. Pour the batter into your greased loaf pan and sprinkle lightly with cinnamon. If youd like a pretty swirled effect, run the tip of a knife across the batter in a zig-zag pattern.
  5. Bake for 55 to 60 minutes, or until a toothpick inserted into the center comes out clean (typically, if I havent added any mix-ins, my bread is done at 55 minutes; if I have added mix-ins, it needs closer to 60 minutes). Let the bread cool in the loaf pan for at least 10 minutes. You may need to run a butter knife around the edges to loosen the bread from the pan. Carefully transfer the loaf to a wire rack to cool before slicing.


Nutrition

  • Calories: 233 calories
  • Sugar: 18 g
  • Fat: 8.9 g
  • Carbohydrates: 36.3 g
  • Protein: 4.6 g


Healthy Banana Bread!

k">

Tried This Recipe? Leave a Comment!

Did you make this recipe? I’d love to hear how it turned out! Please leave a comment and a rating below. Your feedback helps other home cooks and supports cheerychop.com!

For more delicious inspiration, follow me on Pinterest!
Old-Fashioned Whipped Cream Cake – Fluffy One-Bowl Delight

Old-Fashioned Whipped Cream Cake: A Fluffy One-Bowl Delight – Simple Sweet Perfection

⚖️
Difficulty
Easy
⏲️
Prep Time
15 mins
🕒
Cook Time
35 mins
⏱️
Total Time
50 mins
🍽️
12 Servings

Growing up in Morocco, Sunday afternoons often meant the scent of something sweet baking, a ritual my mother cherished. While her usual repertoire leaned towards spiced cookies and semolina cakes, I always dreamed of the lighter, fluffier cakes I’d seen in French cookbooks. This Old-Fashioned Whipped Cream Cake, with its incredibly moist crumb and delightful vanilla flavor, embodies that yearning for simple European elegance. It’s a truly wonderful vintage whipped cream cake recipe that relies on the magic of whipped cream to achieve a surprisingly light texture, making it feel special yet incredibly approachable.

The beauty of this classic cream cake lies in its delicate balance – not overly sweet, allowing the pure vanilla to shine through. The texture is what truly sets it apart: gossamer-light yet rich, with a moistness that makes every bite disappear far too quickly. Imagine a soft cloud, infused with warm vanilla, melting on your tongue. It’s not heavy like some butter cakes, nor quite as airy as a sponge, but rather a perfect middle ground that feels luxurious and comforting. The natural fats in the heavy cream are the secret behind this beautiful mouthfeel, ensuring a tender, delectable crumb that is hard to resist.

As a professional cook trained at Le Cordon Bleu in Paris and now thriving in the vibrant culinary scene of NYC, I constantly seek out recipes that deliver maximum flavor and charm with minimal fuss. This old fashioned cake recipe is a testament to that philosophy. My version streamlines the process, bringing this delightful cake to your table with ease. I’ll share my pro tips for whipping cream perfectly and achieving that signature light texture, while also highlighting the common pitfalls to guarantee your success. Get ready to bake a new family favorite!

Why This Old-Fashioned Whipped Cream Cake Recipe Is the Best

This recipe captures the essence of a truly vintage whipped cream cake, not just in flavor but in its ingenious simplicity. The heavy cream itself is the fat and a significant leavening agent, creating an incredibly tender crumb that’s far more delicate than cakes made with butter or oil alone. My Parisian training taught me the nuance of dairy, and here, the quality of your heavy whipping cream makes all the difference in achieving that signature fluffy texture and rich, comforting flavor. It’s what transforms this from a good cake to an extraordinary one.

The texture of this old-fashioned whipped cream cake from scratch is truly perfected. By folding stiff-peaked whipped cream directly into the batter, we incorporate a tremendous amount of air. This technique, similar to a delicate French mousse, ensures an incredibly light, cloud-like cake that practically floats off the plate. It’s that airy structure combined with the cream’s natural richness that gives it a moistness without being dense, a culinary balance I strive for in all my baking.

For all its elegance, this recipe is surprisingly foolproof and fast. It’s a one-bowl wonder once the cream is whipped, requiring minimal special equipment and straightforward steps. This makes it a fantastic choice for both novice bakers and seasoned pros who appreciate efficiency. I’ve refined this method over the years, ensuring that even on a busy Tuesday in my NYC kitchen, I can whip up this delightful dessert without breaking a sweat, proving that classic taste doesn’t have to mean complicated steps.

Old-Fashioned Whipped Cream Cake Ingredients

I love how simple the ingredients are for an old-fashioned whipped cream cake. It’s a testament to using quality, everyday items to create something truly special. I usually pick up my heavy cream from a local farmers market in Brooklyn, knowing that fresh, high-fat cream makes a world of difference. The eggs, too, I try to source from happy, healthy chickens – it really impacts the richness and color of the cake.

Ingredients List

  • 4 large eggs
  • 2 cups granulated sugar
  • 2 teaspoons vanilla extract
  • 2 cups all-purpose flour
  • 1 teaspoon baking powder
  • 1/4 teaspoon salt
  • 1 cup heavy whipping cream
  • Additional fresh whipped cream (confectioners sugar or berries for garnish, optional)

Ingredient Spotlight

Heavy Whipping Cream: This is the star of our show for this vintage whipped cream cake recipe! It not only provides richness and moisture but also acts as a leavening agent when whipped to stiff peaks, incorporating air that makes the cake incredibly light. When selecting it at the store, look for “heavy cream” or “heavy whipping cream” with at least 36% milk fat. Don’t use “whipping cream” as it has a lower fat content and won’t hold its volume as well, leading to a denser cake. There’s no direct substitute for the unique effect of whipped heavy cream in this recipe; half-and-half or milk will not work.

Eggs: Large eggs provide structure, richness, and help with the emulsification of the batter. They contribute to the cake’s golden color and moist texture. Always use large eggs and make sure they are at room temperature – this helps them combine more easily and smoothly with other ingredients, creating a more uniform batter. For a substitute, in a pinch, you *could* try flax eggs (1 tbsp ground flax meal + 3 tbsp water per egg, let sit 5 mins), but expect a slightly denser cake with a different texture and color.

All-Purpose Flour: Standard all-purpose flour works perfectly here, providing the necessary structure without making the cake too dense. When measuring, always spoon and level rather than scooping directly from the bag, which can compact the flour and lead to an overly dense cake. If you’re looking for a substitute, a good quality gluten-free all-purpose flour blend (one specifically designed for baking, containing xanthan gum) can work, but the cake might be a tad more delicate and crumbly.

Vanilla Extract: Pure vanilla extract is essential for that classic, comforting flavor. I always reach for a high-quality vanilla as it truly makes a difference. In Morocco, vanilla pods are often used, and if you have them, a scraped vanilla bean can elevate this even further! Mexican vanilla is also a beautiful choice. For a different flavor profile, you could try almond extract, but I’d recommend using slightly less (around 1.5 teaspoons) as its flavor is more potent.

Original IngredientBest SubstitutionFlavor / Texture Impact
Heavy Whipping CreamNo direct substitute for primary role.Crucial for light texture and richness; other creams lack fat content for aeration.
Large EggsFlax eggs (for vegan, 1 tbsp ground flax + 3 tbsp water = 1 egg)Cake will be denser, color and flavor will differ. Preferable to use real eggs here.
All-Purpose FlourGluten-free all-purpose flour blend (with xanthan gum)Slightly more delicate crumb; ensure GF blend is meant for baking.
Vanilla ExtractAlmond extract (use 3/4 amount)Different, nuttier flavor profile; can be overpowering if too much is used.
Old-Fashioned Whipped Cream Cake

How to Make Old-Fashioned Whipped Cream Cake — Step-by-Step

Making this old-fashioned whipped cream cake is a joy, designed to be as simple as it is delicious. Follow these steps, and you’ll have a beautiful, light cake ready for any occasion.

Step 1: Preheat and Prepare Pan

Preheat your oven to 325 degrees F (160 degrees C). Liberally grease a 9×13 rectangular baking pan with cooking spray or butter and flour, ensuring all corners and edges are well covered to prevent sticking. This lower oven temperature helps the cake bake evenly and rise gently, resulting in a more tender crumb.

💡 mia’s Pro Tip: For a truly clean release, I sometimes line the bottom of my greased pan with parchment paper, leaving an overhang on the sides. This makes lifting the cooled cake out incredibly easy, especially if you plan to transfer it to a serving platter.

Step 2: Whip Cream and Mix Batter

In a medium, chilled bowl, beat the 1 cup of heavy whipping cream with a mixer (stand mixer with whisk attachment or a handheld electric mixer) until stiff peaks form, about 5-7 minutes. The cream should hold its shape when the whisk is lifted. Set this aside in the refrigerator to keep it firm. Meanwhile, in another large bowl, cream together the 4 large eggs, 2 cups granulated sugar, and 2 teaspoons vanilla extract with the mixer until the mixture is pale yellow and fluffy, about 2 minutes. This step incorporates air into the eggs and sugar, contributing to the cake’s lightness. Slowly add in the 2 cups all-purpose flour, 1 teaspoon baking powder, and 1/4 teaspoon salt to the egg mixture, mixing until just blended. Do not overmix! Gently, yet thoroughly, fold in the reserved whipped cream until it’s fully incorporated and no streaks of whipped cream remain. This is the crucial step for that incredibly light texture. Pour the batter into your prepared baking pan.

⚠️ Common Mistake to Avoid: Overmixing the batter after adding the flour or folding in the whipped cream can develop the gluten too much, resulting in a tough and dense cake. Mix until just combined, and fold the whipped cream in gently with a spatula to preserve the air you’ve incorporated.

Step 3: Bake and Cool

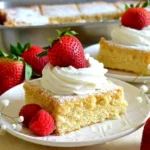
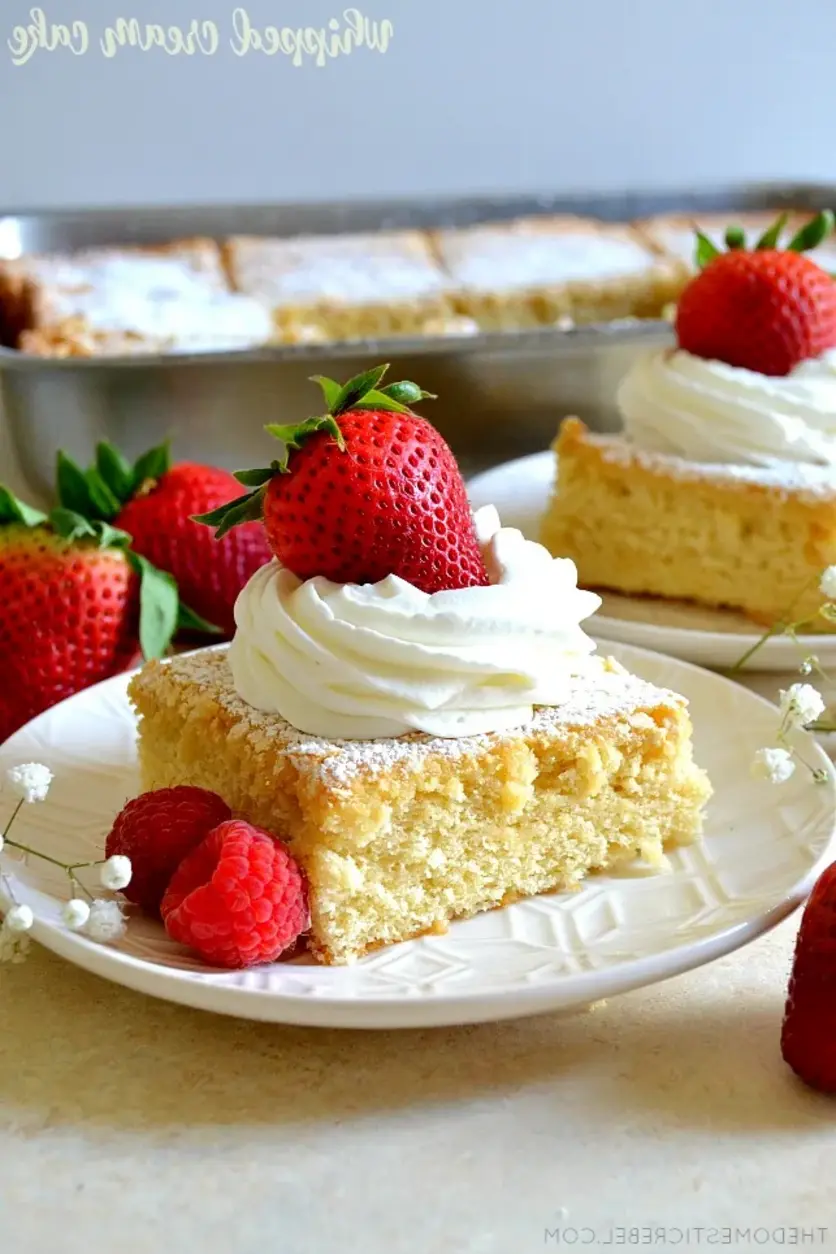
Bake for approximately 30-40 minutes. The exact time will vary slightly depending on your oven, so keep an eye on it. The cake is done when a toothpick inserted near the center comes out clean or with just a few moist crumbs attached. Avoid opening the oven door too frequently during baking, especially in the first 20 minutes, as this can cause the cake to sink. Once baked, remove from the oven and let it cool completely in the pan before cutting into squares. Dust with confectioners’ sugar if desired and serve with additional fresh whipped cream and fresh berries for a truly delightful treat. Cooling completely is key to avoiding a crumbly cake when sliced.

💡 mia’s Pro Tip: To ensure even cooling and prevent the cake from drying out, I often place a clean kitchen towel directly over the pan for the first 15-20 minutes after taking it out of the oven. This traps a little steam and helps the cake retain its moisture.

StepActionDurationKey Visual Cue
1Preheat oven, prepare pan5 minsOven reaches 325°F; pan coated
2Whip cream, mix batter10 minsStiff peaks; pale, fluffy egg mixture; no streaks in batter
3Bake and cool30-40 mins bake, 45-60 mins coolToothpick clean; cake completely cool

Serving & Presentation

This Old-Fashioned Whipped Cream Cake is a beauty in its simplicity, making presentation easy and elegant. Once completely cooled, I like to slice it into neat squares. For a touch of understated sophistication, a light dusting of confectioners’ sugar from a fine-mesh sieve is usually all it needs. It brings a delicate sweetness and a lovely finish, reminiscent of snow-dusted Moroccan terraces in winter.

To truly elevate this classic cream cake, serve each slice with a dollop of freshly whipped cream – not too sweet – and a scattering of fresh berries. Strawberries, raspberries, and blueberries add a burst of color, a hint of tartness, and a wonderful juiciness that contrasts beautifully with the cake’s light texture. This is how I’d serve it for a brunch in a chic NYC cafe or a relaxed family gathering.

For beverages, a simple pairing works best. A hot cup of strong coffee, perhaps a French press brew, or a delicate black tea would be perfect. For a more festive occasion, a dry sparkling wine or even a homemade berry shrub would complement the cake without overpowering its subtle vanilla notes.

Pairing TypeSuggestionsWhy It Works
Side DishFresh mixed berries, Raspberry Coulis, Lemon CurdAdds bright, tart contrast, cuts sweetness, and enhances moisture for a delightful mouthfeel.
Sauce / DipAdditional unsweetened whipped cream, Chocolate ganache (light drizzle)Complements the existing creaminess without adding heaviness; chocolate offers a classic pairing.
BeverageHot coffee, English breakfast tea, Dry sparkling wineCoffee/tea balance the sweetness; sparkling wine offers a crisp, celebratory complement.
GarnishConfectioners’ sugar, Mint sprigs, Chocolate shavingsAdds visual appeal, extra touch of sweetness, and fresh aroma to each slice of this vintage whipped cream cake.

Make-Ahead, Storage & Reheating

For a busy chef like mia in NYC, being able to prepare components ahead of time is a lifesaver. This Old-Fashioned Whipped Cream Cake is wonderfully flexible when it comes to make-ahead options and storage, ensuring you can enjoy a fresh-tasting treat whenever the craving strikes.

MethodContainerDurationReheating Tip
RefrigeratorAirtight container or covered with plastic wrapUp to 3-4 daysAllow to come to room temperature for 15-30 minutes before serving for best texture.
FreezerDouble-wrapped in plastic wrap, then foilUp to 1 monthThaw overnight in the refrigerator, then bring to room temperature before serving.
Make-AheadBake and cool fully, wrap cake in plastic wrapCake can be baked 1-2 days in advanceDust with confectioners’ sugar and add fresh cream/berries just before serving.

When storing in the refrigerator, ensure the cake is well-wrapped to prevent it from drying out or absorbing other odors from your fridge. I find that storing it in an airtight cake carrier works best. The cake is lovely cold, straight from the fridge, especially on a warm day, but its delicate crumb and full flavor truly shine when it’s allowed to come to room temperature for about 15-30 minutes before serving.

Freezing slices of this old-fashioned whipped cream cake is also a fantastic idea if you want to enjoy it over a longer period. Wrap individual slices tightly in plastic wrap, then an additional layer of foil to prevent freezer burn. To serve, simply unwrap and thaw in the refrigerator overnight, then let it sit at room temperature for a little while. Avoid reheating in the microwave, as it can alter the delicate texture of this classic cream cake.

Variations & Easy Swaps

VariationKey ChangeBest ForDifficulty Impact
Citrus Zest DreamAdd fresh citrus zest (lemon, orange, lime) to batter.A bright, refreshing twist for spring or summer.Minimal (adding zest).
Gluten-Free Whipped Cream CakeSwap all-purpose flour for GF baking blend.Catering to dietary restrictions without sacrificing flavor.Minimal, if using a good GF blend.
Berry Compote SwirlSwirl homemade berry compote into portion of batter.Adding fruitiness and visual appeal.Slightly increased (making compote).

Citrus Zest Dream

For a brighter, more aromatic twist on this old-fashioned whipped cream cake, add the finely grated zest of one lemon, orange, or even a mix of both to the sugar and egg mixture before beating. The essential oils in the zest release beautiful perfumes and a tangy counterpoint to the vanilla. This reminds me of the fresh citrus groves back in Morocco, and it’s a French pastry chef’s secret to adding dimension without extra liquid.

Gluten-Free Whipped Cream Cake

Yes, you absolutely can make this classic cream cake gluten-free! Simply substitute the all-purpose flour cup-for-cup with a high-quality gluten-free all-purpose baking blend that contains xanthan gum. I’ve tested several using my NYC ingredient finds, and brands like Bob’s Red Mill 1-to-1 or King Arthur’s Measure for Measure work wonderfully. The texture might be ever so slightly more delicate, but the characteristic lightness and moistness of the whipped cream cake from scratch will still shine through.

Berry Compote Swirl

For a beautiful marbled effect and an extra burst of fruit flavor, prepare a simple berry compote (just simmer 1 cup of mixed berries with 1-2 tablespoons of sugar and a squeeze of lemon juice until thickened, then cool). Swirl about half a cup of the cooled compote gently into the batter just before pouring it into the pan, creating ribbons of fruit. This is particularly lovely with the fresh berries found at the Union Square Greenmarket in warmer months.

What is the secret to making a light and fluffy old-fashioned whipped cream cake?

The true secret to a light and fluffy old-fashioned whipped cream cake lies in the technique of folding in stiff-peaked heavy whipping cream. Unlike traditional cakes that rely heavily on butter for richness and air from creaming, this recipe harnesses the voluminous air trapped in whipped cream. When you gently fold this into the batter, it creates an incredibly delicate structure and tender crumb. My French culinary training emphasized the importance of aeration, and this technique is a fantastic example of using dairy to achieve both richness and lightness, ensuring your classic cream cake isn’t dense.

Can I substitute heavy cream with something else in a whipped cream cake recipe?

For this specific old-fashioned whipped cream cake from scratch recipe, I strongly advise against substituting heavy cream. The high-fat content (at least 36%) of heavy whipping cream is what allows it to whip up to stiff peaks, incorporating the air necessary for the cake’s unique light texture. Lighter creams like “whipping cream” (lower fat), half-and-half, or milk will not provide the same structural integrity or richness once whipped, leading to a much denser and potentially drier cake. There is no direct substitute that will yield the same results for this particular type of cake.

How long should you bake an old-fashioned whipped cream cake, and at what temperature?

This vintage whipped cream cake recipe bakes best at a moderate temperature of 325 degrees F (160 degrees C). A lower temperature helps the cake bake evenly all the way through, preventing the edges from drying out before the center is cooked. You should plan to bake it for approximately 30-40 minutes. Always test for doneness by inserting a toothpick into the center; it should come out clean or with only a few moist crumbs. Overbaking can lead to a dry cake, so start checking around the 30-minute mark to achieve that perfect moist crumb.

What is the best way to serve or store an old-fashioned whipped cream cake?

The best way to serve this old-fashioned whipped cream cake is at room temperature, perhaps with a dusting of confectioners’ sugar and fresh berries. The subtle vanilla flavor and light texture really shine when it’s not too cold. For storage, keep any leftovers of this classic cream cake tightly covered in an airtight container in the refrigerator for up to 3-4 days. While delicious cold, letting it sit out for 15-30 minutes before serving will allow the texture to soften beautifully. It also freezes well, double-wrapped, for up to a month.

Why is my homemade whipped cream cake dense instead of fluffy?

If your homemade whipped cream cake turned out dense, there are a few common culprits. Firstly, make sure your heavy cream was whipped to stiff peaks before folding it into the batter; insufficient whipping means less air. Secondly, overmixing the batter, especially after adding the flour, can develop the gluten too much, leading to a tough texture. Finally, if you didn’t fold the whipped cream in gently enough, you might have deflated some of the air, which is crucial for achieving that characteristic lightness of an old-fashioned cake recipe.

Can I make this old-fashioned whipped cream cake in different pan sizes?

Yes, you can adapt this vintage whipped cream cake recipe to different pan sizes, though you may need to adjust baking times. For instance, if using two 8-inch round pans, the baking time might be slightly less (around 25-30 minutes), and you’ll get a lovely layer cake. A bundt pan would also work beautifully, but grease it very thoroughly, and expect baking time to be similar to the 9×13 pan, around 35-45 minutes. Always keep a close eye on the cake and use the toothpick test for doneness, regardless of the pan size.

Share Your Version!

I absolutely adore seeing your creations! If you’ve whipped up this delightful Old-Fashioned Whipped Cream Cake, please consider leaving a star rating and a comment below to let me know how it turned out. Your feedback truly brightens my day and helps other home cooks. Did you add a touch of orange zest, like my Moroccan-inspired twist? Or perhaps decorated it with berries from your local market, just like I do here in NYC?

Don’t forget to share a photo of your beautiful cake on Instagram or Pinterest and tag @exorecipe! I love to virtually gather around your tables and see how you adapt my recipes to your own kitchens. What’s your favorite occasion to bake a classic cream cake like this one?

From my NYC kitchen to yours — I hope this recipe brings as much warmth to your table as it does to mine. — mia 🧡

📌

Love This Recipe? Save It to Pinterest!

If you enjoyed this Old-Fashioned Whipped Cream Cake recipe, don’t let it get lost in your browser tabs! 😄 Pin it now so you can find it again anytime — and explore hundreds more tried-and-tested recipes waiting for you on my Pinterest boards.

👉 Follow mia on Pinterest @chefrecipes2

📌 Pin this recipe · 🔁 Re-pin your favorites · 💬 Tag me when you make it — I love seeing your creations!

Print

clock clock iconcutlery cutlery iconflag flag iconfolder folder iconinstagram instagram iconpinterest pinterest iconfacebook facebook iconprint print iconsquares squares iconheart heart iconheart solid heart solid icon

Old-Fashioned Whipped Cream Cake

  • Author: Chef Mia

Description

This Old-Fashioned Whipped Cream Cake will soon become a new family favorite! Easy and delicious, it comes together quickly and tastes amazing with a light and fluffy texture, a moist crumb, and a delectable vanilla flavor.


Ingredients

Scale
  • 4 large eggs
  • 2 cups granulated sugar
  • 2 teaspoons vanilla extract
  • 2 cups all-purpose flour
  • 1 teaspoon baking powder
  • 1/4 teaspoon salt
  • 1 cup heavy whipping cream
  • Additional fresh whipped cream (confectioners sugar or berries for garnish, optional)

Instructions

  1. Preheat oven to 325 degrees F. Liberally grease a 9×13 rectangular baking pan with cooking spray; set aside.
  2. In a medium bowl, beat the heavy whipping cream with a mixer until stiff peaks form, about 5-7 minutes. Set aside. Meanwhile, cream together the eggs, sugar, and vanilla with the mixer in another large bowl until pale and fluffy, about 2 minutes. Add in the flour, baking powder, and salt until well blended. Fold in the whipped cream gently until fully incorporated and no streaks of whipped cream remain. Pour into the prepared baking pan.
  3. Bake for approximately 30-40 minutes or until a toothpick inserted near the center comes out clean or with moist crumbs. Cool completely before cutting into squares. Dust with confectioners' sugar if you'd like and serve up with more fresh whipped cream and fresh berries.


Old-Fashioned Whipped Cream Cake

Whipped Vanilla Buttercream Light and Fluffy – Perfect Frosting

Whipped Vanilla Buttercream Light and Fluffy: The Secret to Perfect Frosting

⚖️
Difficulty
Easy
⏲️
Prep Time
5 mins
🕒
Cook Time
0 mins
⏱️
Total Time
10 mins
🍽️
Servings
12

Growing up in Morocco, the concept of elaborate frosted cakes wasn’t quite the same as the grand French patisserie creations I’d later learn. But the love for rich, sweet flavors? That was always there! When I first came to Paris for culinary school, I was introduced to buttercreams that were both ethereal and robust, and then moving to NYC, I saw how cakes became canvases. This journey led me to perfect my own whipped vanilla buttercream recipe – a frosting that’s truly light and fluffy, yet holds its shape beautifully. It’s the secret to transforming any simple dessert into a showstopper, a technique I’m thrilled to share with you, right from my Brooklyn kitchen.

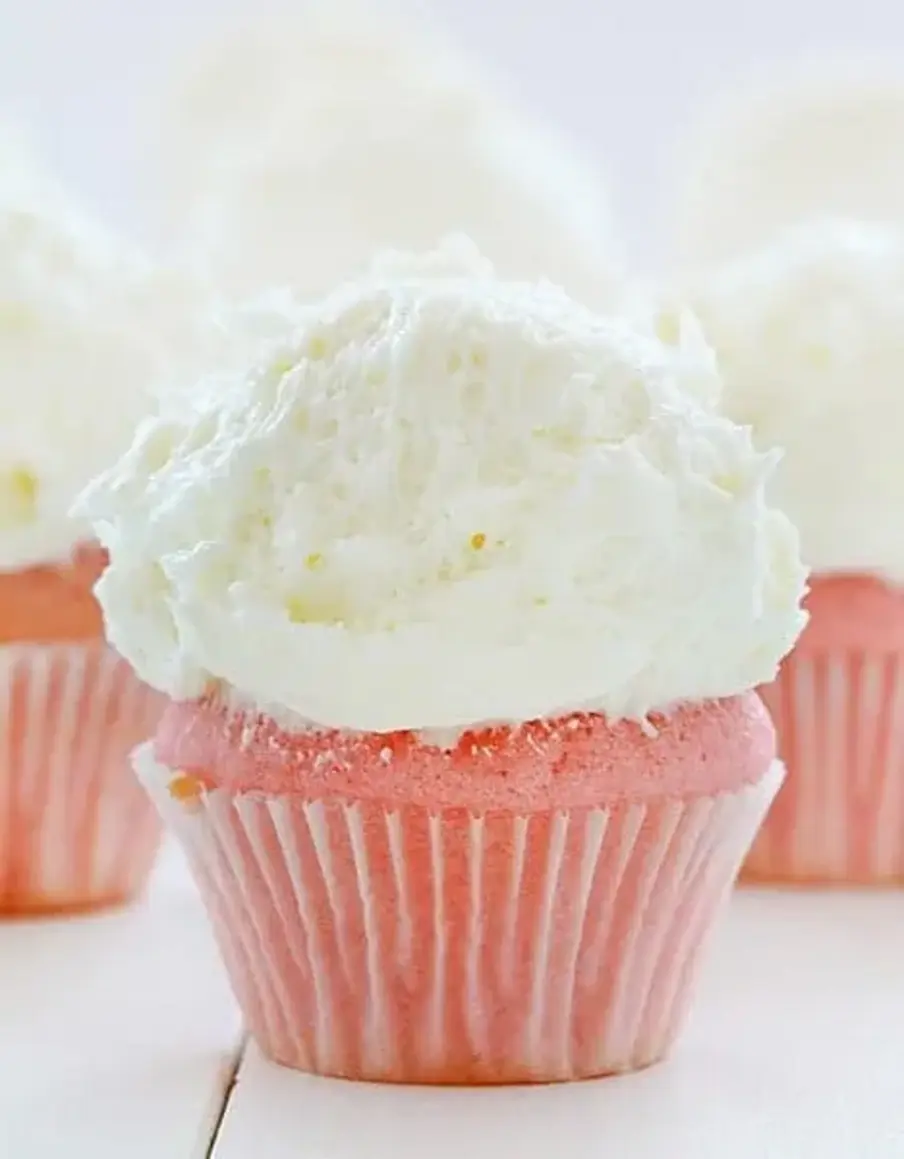
Imagine a cloud-like frosting, so smooth it glides effortlessly, with that unmistakable rich vanilla aroma dancing with a hint of almond. That’s what this homemade vanilla buttercream frosting delivers. It’s not overly sweet like some can be; instead, it offers a sophisticated balance, allowing the pure butter and vanilla notes to truly shine. The texture is key here – whipped to an incredible lightness, it has a beautiful ivory sheen that makes it irresistible. This isn’t just about topping a cake; it’s about adding a whisper of elegance, a touch of indulgence that feels both familiar and special.

What sets my method for this fluffy buttercream frosting apart is a careful balance of technique and timing. Through my years of baking and creating in New York’s bustling culinary scene, I’ve learned that patience and a few simple tricks can elevate everyday ingredients to extraordinary heights. I’ll show you how to avoid common pitfalls like gritty sugar or a greasy texture, ensuring your frosting is consistently perfect. Plus, I’ll share my pro tip for getting that incredible airy lightness, making this the ideal vanilla buttercream for cakes, cupcakes, or frankly, just a spoon!

Why This Vanilla Buttercream Recipe Is the Best

The secret to its incredible flavor often lies in the quality of your extracts and the butter. My mother always said, “Good ingredients are half the battle,” and she was right. I opt for pure vanilla extract, often a double-fold variety for an intense aroma, which echoes some of the floral notes in pastries from my childhood in Morocco. The touch of almond extract is a nod to the subtle nuttiness often found in classic French sweets, adding a depth that truly distinguishes this buttercream.

Achieving the perfect texture is a chef’s discipline. We’re aiming for a consistency that’s stable enough for piping intricate designs, yet melts in your mouth. The key is in the whipping – not just until combined, but significantly longer, incorporating air to create that light, fluffy mouthfeel. It’s a technique I honed in Parisian kitchens, understanding how aeration transforms viscosity and lightness, ensuring the frosting is never heavy or dense.

Despite its luxurious result, this easy buttercream frosting recipe is incredibly straightforward. It’s designed to be foolproof, even if you’re a beginner baker, delivering professional-quality results without requiring complex equipment or advanced skills. I’ll guide you through each step, making sure you hit all the marks for a velvety smooth, beautifully stable, and utterly delicious frosting that will impress everyone.

Homemade Vanilla Buttercream Frosting Ingredients

When I head to the farmer’s market here in NYC, I always look for the freshest, highest quality ingredients, because even for something as simple as frosting, they truly make a difference. Memories of the vibrant souks in Morocco, overflowing with spices and fresh produce, always come to mind. While I can’t get fresh vanilla beans as easily here, I choose the best extracts available.

Ingredients List

  • 1 cup (2 sticks or 226g) butter, (softened)
  • 2 teaspoons Vanilla Extract
  • 1 teaspoon Almond Extract
  • 4 cups (32 ounces) confectioners sugar, (sifted*)
  • 2 tablespoons whole milk, (you can use up to 1/2 cup if you need a loose, creamy consistency)
  • pinch salt

Ingredient Spotlight

Butter: Use unsalted butter here, as it gives you control over the final saltiness. It’s the backbone of your whipped vanilla buttercream recipe, providing structure and that rich, creamy flavor. Make sure it’s properly softened, not melted, which ensures it creams beautifully and incorporates air effectively. I prefer a good quality European-style butter for its higher fat content.

Vanilla Extract: This is where the “vanilla” in homemade vanilla buttercream frosting truly shines! Opt for pure vanilla extract, not imitation. The alcohol in the extract helps to deepen the flavor as it disperses through the butter. If you’re feeling fancy, a vanilla bean paste can add beautiful flecks and a more intense, complex profile. Never skip good vanilla!

Almond Extract: A little goes a long way with almond extract, but it adds a wonderful depth and complexity that complements the vanilla without overpowering it. It’s my little French touch! If you’re not a fan, you can omit it, but I highly recommend trying it. It gives this fluffy buttercream frosting a subtle ‘je ne sais quoi’.

Confectioners’ Sugar (Powdered Sugar): Sifting is crucial here! It breaks up any lumps and ensures the smoothest, most luxurious consistency for your vanilla buttercream for cakes. The cornstarch often present in confectioners’ sugar helps stabilize the frosting, contributing to its fluffy texture. If you skip sifting, you risk a gritty buttercream.

Whole Milk: The milk helps lighten the buttercream and achieve the perfect spreadable consistency. Whole milk offers the best richness, but you can use half-and-half or even heavy cream for an even more decadent result. Start with the recommended amount and add more gradually until you reach your desired texture. Plant-based milks like almond or oat milk can also work for a dairy-free version, affecting the flavor slightly.

Original IngredientBest SubstitutionFlavor / Texture Impact
Unsalted ButterSalted Butter (reduce added salt by pinch)Slightly saltier, can balance sweetness. Ensure butter is softened.
Vanilla Extract (Pure)Vanilla Bean PasteMore intense vanilla flavor, visible flecks.
Almond ExtractOmitted or 1/2 tsp other extract (e.g., lemon)Will lose the subtle nutty depth; other extracts change flavor profile significantly.
Confectioners’ SugarGranulated Sugar (Process in food processor until fine)Texture might be slightly less smooth, more work. Sifting still critical.
Whole MilkHeavy Cream or Half-and-HalfRicher, slightly thicker consistency. Or plant-based milk (almond, oat) for dairy-free.

whipped vanilla buttercream

How to Make Whipped Vanilla Buttercream — Step-by-Step

Making this fluffy frosting is simple, I promise! Just follow these steps, and you’ll have perfect whipped vanilla buttercream every time.

Step 1: Cream the Butter

In the bowl of your stand mixer fitted with the whisk attachment, beat the softened butter on medium-high speed for about 3 minutes. You want it to become noticeably lighter in color and fluffy in texture. This is a crucial step for incorporating air, essential for that light and fluffy consistency.

💡 mia’s Pro Tip: Ensure your butter is truly softened, not melted. If it’s too warm, the buttercream can become greasy or separated. If it’s too cold, it won’t cream properly, leading to a dense frosting. Room temperature means it yields to gentle pressure, but still holds its shape.

Step 2: Add Extracts

Once your butter is light and fluffy, add the vanilla extract and almond extract. Beat for another 30 seconds on medium speed to ensure they are well incorporated and their aromatic oils are evenly distributed throughout the butter. The smell alone will tell you you’re on the right track!

⚠️ Common Mistake to Avoid: Don’t add extracts later in the process. Adding them to the butter first allows their flavors to bloom properly and blend seamlessly before the sugar is introduced.

Step 3: Combine Powdered Sugar and Milk

With the mixer on low speed, gradually add the sifted confectioners’ sugar, milk, and pinch of salt. Work slowly at first to avoid a sugar cloud! As it combines, stop frequently to scrape down the sides and bottom of the bowl with a spatula. This ensures all ingredients are fully incorporated and prevents any streaks of unmixed sugar or butter.

Step 4: Whip to Fluffy Perfection

Once everything is incorporated, turn the mixer up to medium-high to high speed and whip for at least 3 minutes, or even up to 7 minutes, depending on your mixer’s power. I often let mine go for 5-7 minutes. This extended whipping is the magic behind truly fluffy buttercream frosting. You’ll see it transform; it will lighten in color even further and increase significantly in volume.

💡 mia’s Pro Tip: Don’t be shy about whipping! The longer you whip (within reason), the more air is incorporated, resulting in a lighter and less-sweet tasting buttercream. It changes the texture from dense to divine, making it perfect for vanilla buttercream for cakes.

Step 5: Adjust Consistency if Needed

If your frosting feels too thick to spread easily, gradually beat in additional milk, one teaspoon at a time, until it reaches your desired consistency. For a thinner piping consistency, you might use up to 1/2 cup of milk total. Conversely, if it’s too thin, you can add a tablespoon or two more sifted confectioners’ sugar.

⚠️ Common Mistake to Avoid: Adding too much liquid at once. Always add liquids *gradually*. You can always add more, but it’s much harder to thicken a runny frosting without changing the sugar balance.

Step 6: Store and Re-whip

If not using immediately, store your buttercream in an airtight container in the refrigerator for up to 2 weeks. Before using, let it come to room temperature, then re-whip it on medium-high speed until it’s light and fluffy again – this re-aerates the frosting and restores its perfect texture.

StepActionDurationKey Visual Cue
1Cream Butter~3 minsButter is pale yellow and fluffy.
2Add Extracts~30 secsFully incorporated, fragrant.
3Combine Dry & Wet~2-3 minsNo dry streaks of powder, smooth paste.
4Whip to Perfection3-7 minsLightens in color, increases in volume, fluffy.
5Adjust ConsistencyAs neededAchieve desired spreadability.
6Store & RewhipUp to 2 weeks (refrig.)Smooth upon re-whipping.

Serving & Presentation

This whipped vanilla buttercream recipe is incredibly versatile for serving. Whether you’re piping elegant swirls onto cupcakes, artfully spreading it between cake layers, or creating a smooth finish on a sheet cake, its light and stable texture performs beautifully. I often think of the precision I learned in pastry school, where every detail matters. A simple sprinkle of colorful nonpareils or a few fresh berries can elevate its appearance, making even the simplest dessert look festive, just like a window display in a Parisian patisserie.

For a bolder presentation that hints at my Moroccan roots, I sometimes dust the frosted cake with a very fine sifting of cinnamon or cardamom, adding a subtle warmth that contrasts beautifully with the sweet vanilla. Or, for a true New York City flair, a sprinkle of flaky sea salt on top of a chocolate cake with this buttercream is absolutely divine, creating that perfect sweet-and-salty balance that everyone loves.

This buttercream pairs perfectly with almost any cake or cupcake flavor. Think classic chocolate, vibrant red velvet, delicate lemon, or even a spiced apple cake. Its robust vanilla profile makes it adaptable, enhancing rather than overpowering. A simple garnish of fresh mint or a delicate chocolate curl can also add that final touch of professional polish.

Pairing TypeSuggestionsWhy It Works
Side DishFresh berries, fruit coulis, candied citrus peelAdds freshness, tartness, and visual appeal to cut through the richness.
Sauce / DipWarm chocolate ganache, salted caramel sauceIntroduces contrasting textures and flavors, making the dessert more decadent.
BeverageCoffee, black tea, sparkling wineThe bitterness of coffee or tea balances the sweetness, while sparkling wine offers a refreshing palate cleanser.
GarnishToasted nuts, chocolate shavings, edible flowersAdds texture, visual interest, and can introduce complementary flavors.

Make-Ahead, Storage & Reheating

Living in NYC with its demanding pace, I’ve mastered the art of making components ahead of time. This easy buttercream frosting recipe is perfect for prepping in advance, allowing you more time to enjoy your guests or focus on other aspects of your meal. Knowing I have a batch of this heavenly frosting ready to go means I can whip up a last-minute dessert if friends drop by from across the city!

MethodContainerDurationReheating Tip
RefrigeratorAirtight containerUp to 2 weeksBring to room temp & re-whip until fluffy.
FreezerAirtight freezer-safe containerUp to 3 monthsThaw overnight in fridge, bring to room temp, then re-whip.
Make-AheadAirtight container (fridge)2-3 days in advanceSimply re-whip as directed before applying to your cake or cupcakes.

When thawing from the freezer, make sure to give it ample time in the refrigerator, usually overnight, before bringing it out to reach room temperature. Patience is key! Rapid thawing can sometimes cause separation. Once it’s at a malleable room temperature, a good re-whip in your stand mixer will bring it right back to that beautiful, fluffy consistency you started with. It’s like magic, truly, an invaluable trick for any home baker.

frosted cakes or cupcakes, they’re best covered lightly at room temperature for a day or two, or refrigerated for longer storage, up to 5 days. Just remember that refrigeration can firm up the buttercream, so for best taste and texture, allow frosted items to come to room temperature for about 30 minutes before serving. This ensures the butter is soft and creamy. This is especially true for vanilla buttercream for cakes; you want that melt-in-your-mouth experience.

Variations & Easy Swaps

VariationKey ChangeBest ForDifficulty Impact
Chocolate DreamAdd melted & cooled chocolate or cocoa powder.Chocolate cakes, decadent desserts.Slightly more complex, requires careful chocolate addition.
Dairy-Free AlternativeSwap butter for vegan butter sticks; use plant-based milk.Those with dairy sensitivities.Texture might be slightly softer, flavor subtly different.
Citrus TwistAdd citrus zest and adjust liquid.Light cakes, spring/summer treats.Easy, adds brightness without changing base technique.

Chocolate Dream Variation

To make a rich chocolate buttercream, simply melt 4 ounces of good quality semi-sweet or dark chocolate, let it cool partially, then slowly beat it into your finished whipped vanilla buttercream recipe. Alternatively, you can sift in 1/2 cup of unsweetened cocoa powder with your confectioners’ sugar for a cocoa-based chocolate frosting. I sometimes add a pinch of Moroccan coffee to enhance the chocolate notes, a trick I picked up from a good friend who worked in a French chocolaterie.

Dairy-Free Alternative

For a dairy-free homemade vanilla buttercream frosting, substitute the regular butter with a good quality vegan butter stick (not margarine in a tub). Use a plant-based milk like almond or oat milk instead of cow’s milk. The texture will be very similar, though sometimes slightly softer, and the flavor will still be wonderfully vanilla-rich. I always keep vegan butter on hand for friends with dietary restrictions I meet at the NYC farmers markets.

Citrus Twist Vanilla Buttercream

If you want to add a bright, zesty note, incorporate the zest of one lemon, orange, or lime along with your extracts. The tiny bursts of citrus oil perfume the frosting beautifully, cutting through the sweetness and offering a wonderful counterpoint to the vanilla. This variation is particularly lovely on lemon or blueberry cakes, reminding me of the fresh citrus groves back home.

How do you make whipped vanilla buttercream fluffy and not too sweet?

The key to fluffy and less sweet whipped vanilla buttercream lies in extended whipping. After all ingredients are incorporated, beat the frosting on medium-high to high speed for at least 3-7 minutes. This process aerates the butter and sugar mixture significantly, increasing its volume and creating a lighter, almost cloud-like texture. The increased air lightens the perception of sweetness on your palate, making it feel less cloying. Additionally, ensure your butter is properly softened, as this allows it to cream beautifully and incorporate more air from the start.

Can you use salted butter instead of unsalted butter in whipped vanilla buttercream?

Yes, you can absolutely use salted butter instead of unsalted butter in your whipped vanilla buttercream. However, if you do, I recommend omitting the pinch of salt that the recipe suggests adding separately. Salted butter can sometimes have varying levels of sodium, so using it means you give up a bit of control over the precise saltiness, but it will still work wonderfully. A little salt actually helps to balance the sweetness of the frosting, so using salted butter can often enhance the flavor profile, making it a delicious choice!

How long should you whip vanilla buttercream to get the right consistency?

For the perfect light and fluffy consistency, you should plan to whip your vanilla buttercream for at least 3 minutes on medium-high to high speed after all the confectioners’ sugar and liquid have been incorporated. In my experience, for an extra ethereal texture, I often let my stand mixer go for 5 to 7 minutes. You’ll notice the buttercream transform significantly – it will become much lighter in color, increase in volume, and develop a noticeably airy, smooth consistency that is both spreadable and perfectly pipeable.

What is the best way to store whipped vanilla buttercream after frosting a cake?

After frosting a cake with whipped vanilla buttercream, it’s best to store it covered to prevent it from drying out or absorbing refrigerator odors. If you plan to serve the cake within a day or two, it can generally be left at cool room temperature away from direct sunlight. For longer storage, or if your kitchen is warm, refrigerate the frosted cake loosely covered for up to 5 days. For the best flavor and texture, always allow the cake to come to room temperature for about 30 minutes before serving, allowing the buttercream to soften and become creamy again.

Why is my homemade vanilla buttercream frosting gritty?

A gritty homemade vanilla buttercream frosting is almost always due to unsifted confectioners’ sugar. Confectioners’ sugar often forms small clumps in the package, and if these aren’t broken up before being added to the butter, they won’t dissolve properly, leading to that unpleasant grainy texture. To avoid this, always make sure to sift your confectioners’ sugar thoroughly before adding it, even if it looks fine straight from the bag. A fine-mesh sieve or a specific sifter works wonders for ensuring a perfectly smooth result.

Share Your Version!

I absolutely adore hearing from you and seeing your beautiful creations! This whipped vanilla buttercream recipe holds such a special place in my heart, marrying the elegance of French pastry with the versatility I’ve come to love in New York’s dynamic food scene. I’d love to know how it turns out for you!

Please leave a star rating and comment below to let me know how it went. Did you try a new variation? What did you pair it with? And if you share a photo on Instagram or Pinterest, don’t forget to tag @exorecipes — I can’t wait to see your stunning cakes and cupcakes adorned with this light and fluffy frosting. Have you ever tried using a hint of rosewater in your buttercream like we do in some Moroccan desserts?

From my NYC kitchen to yours — I hope this recipe brings as much warmth to your table as it does to mine. — mia 🧡

📌

Love This Recipe? Save It to Pinterest!

If you enjoyed this Whipped Vanilla Buttercream Light and Fluffy recipe, don’t let it get lost in your browser tabs! 😄 Pin it now so you can find it again anytime — and explore hundreds more tried-and-tested recipes waiting for you on my Pinterest boards.

👉 Follow mia on Pinterest @chefrecipes2

📌 Pin this recipe · 🔁 Re-pin your favorites · 💬 Tag me when you make it — I love seeing your creations!

Print

clock clock iconcutlery cutlery iconflag flag iconfolder folder iconinstagram instagram iconpinterest pinterest iconfacebook facebook iconprint print iconsquares squares iconheart heart iconheart solid heart solid icon

Vanilla Buttercream

  • Author: Chef Mia

Description

The BEST Whipped Vanilla Buttercream frosting!


Ingredients

Scale
  • 1 cup (2 sticks or 226g) butter, (softened)
  • 2 teaspoons Vanilla Extract
  • 1 teaspoon Almond Extract
  • 4 cups (32 ounces) confectioners sugar, (sifted*)
  • 2 tablespoons whole milk, (you can use up to 1/2 cup if you need a loose, creamy consistency)
  • pinch salt

Instructions

  1. Beat butter in bowl of stand mixer with whisk attachment on medium-high speed until light and fluffy. (about 3 minutes)
  2. Add vanilla and almond extract.
  3. With the mixer on low, slowly add in confectioners sugar , milk, and salt; frequently scrape sides and bottom of the bowl.
  4. Once incorporated, whip frosting for at least 3 minutes on medium high to high. (My mixer went for 7 minutes)
  5. If frosting is too thick to spread, gradually beat in additional milk.
  6. Store in refrigerator up to 2 weeks. Rewhip before using.


whipped vanilla buttercream

Creamy Butter Cake Recipe with Cheesecake Layer

Creamy Butter Cake Recipe with a Luscious Cheesecake Layer: A Taste of CPK at Home

⚖️
Difficulty
Easy
⏲️
Prep Time
20 mins
🕒
Cook Time
50 mins
⏱️
Total Time
70 mins
🍽️
Servings
6

Growing up in Morocco, our desserts were always rich with honey, almonds, and warm spices – absolutely divine. But when I moved to New York City and discovered the California Pizza Kitchen’s Creamy Butter Cake, it was a revelation! That warm, gooey, two-layer dessert instantly captured my heart. Today, I’m thrilled to share my easy copycat Creamy Butter Cake recipe, bringing that irresistible taste of CPK right into your kitchen. It’s perfect for a weeknight treat or a simple weekend indulgence, and trust me, it’s far simpler to make than you might imagine.

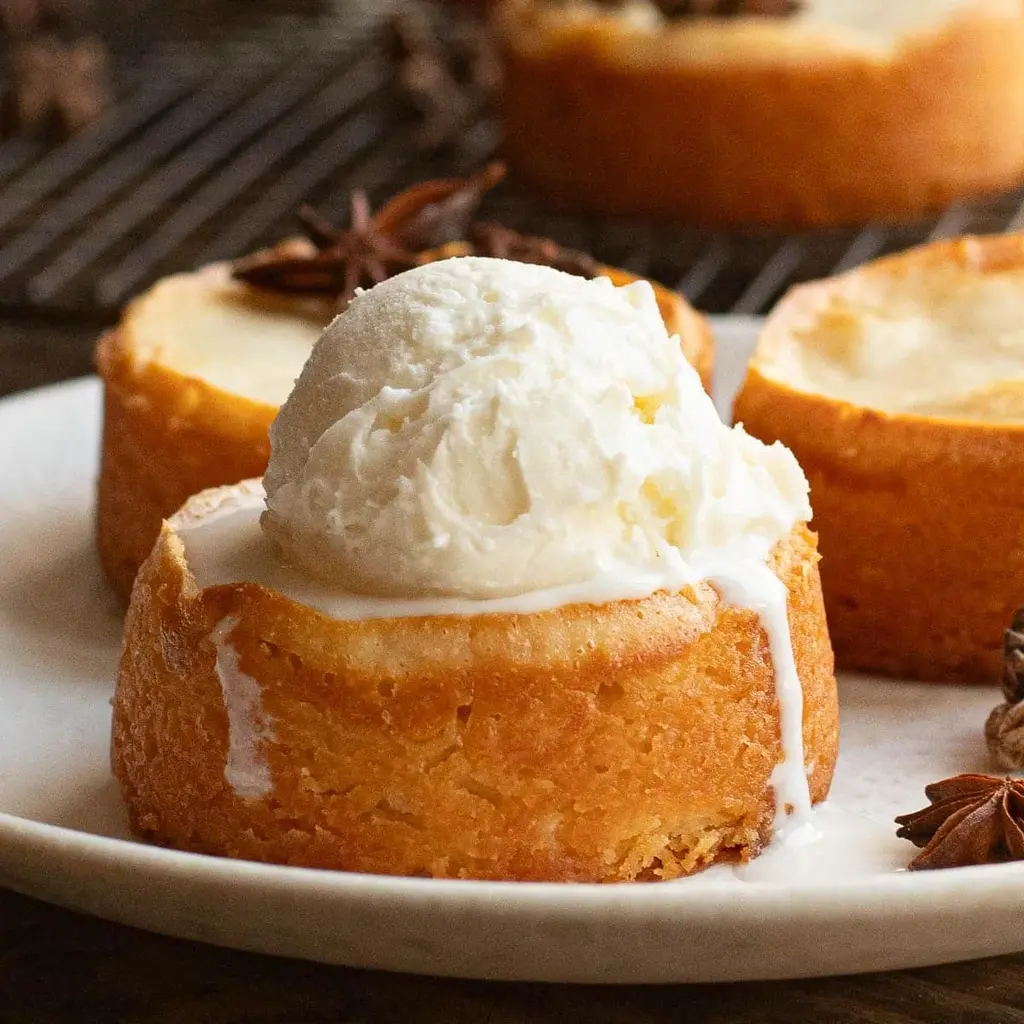
Imagine sinking your spoon into a luxuriously moist, buttery cake, topped with a silken, slightly tangy cream cheese layer, all baked to a beautiful golden brown. The aroma alone, a blend of sweet vanilla and rich butter, fills my kitchen and takes me back to my first bite. It’s that perfect balance of comforting cake and decadent cheesecake, truly a match made in dessert heaven. Drawing on my culinary training in Paris, where we mastered the subtle art of textures and flavors, I’ve refined this recipe to ensure every spoonful is pure bliss.

What sets my version apart is the careful balance of textures and flavors, ensuring that signature gooey center without being underbaked. I’ve streamlined the process to make recreating this copycat butter cake recipe achievable for any home baker, whether you’re a seasoned pro or just starting out. I’ll walk you through each step, share a few of mia’s Pro Tips gathered from years in the kitchen, and even point out a common mistake to avoid. Get ready to bake a dessert that will have everyone asking for the recipe!

Why This Copycat Butter Cake Recipe Is the Best

My love for rich, comforting desserts, influenced by both my Moroccan heritage and French patisserie training, truly shines in this copycat butter cake recipe. The secret to its incredible flavor lies in the dual cream cheese additions – one for the cake batter, creating an unparalleled moist crumb, and another for that distinctive tangy, creamy topping. It’s a method that ensures depth and complexity in every bite, far beyond what a simple sugar cake could offer.

Achieving that perfectly gooey and tender texture is all about gentle mixing and precise baking. Over-mixing can lead to a tough cake, so I emphasize folding in the flour just until combined. My French culinary education taught me the importance of respecting ingredients and their role in the final texture. This recipe ensures a delicate balance for a melt-in-your-mouth experience that is both rich and surprisingly light at the same time.

Despite its impressive appearance and decadent taste, this homemade butter cake is surprisingly foolproof and easy to make. I’ve designed the steps to be clear and straightforward, so you can achieve bakery-quality results without any stress. You won’t need any fancy equipment, just a stand mixer and a few ramekins, and you’ll be well on your way to enjoying this delightful two-layer dessert. It’s the kind of recipe I love to share because it consistently delivers joy with minimal fuss.

Creamy Butter Cake Ingredients

When it comes to baking, especially a dessert as comforting as this creamy butter cake, using quality ingredients makes all the difference. I often visit the Union Square Greenmarket here in NYC for my dairy, but good quality butter and cream cheese are readily available at any grocery store.

Ingredients List

  • 3/4 cup all-purpose flour
  • 1 cup unsalted butter (2 sticks)
  • 1 cup sugar
  • 1 large egg
  • 2 oz. cream cheese (room temperature, for cake layer)
  • 1 tsp. vanilla extract
  • 1/4 tsp. salt
  • 3 oz. cream cheese (room temperature, for cheesecake layer)
  • 3 Tbsp. sugar (for cheesecake layer)
  • 1 egg white
  • 1/4 tsp. vanilla extract (for cheesecake layer)

Ingredient Spotlight

Unsalted Butter: The star of this Creamy Butter Cake recipe! Unsalted butter allows you to control the salt content in your bake. It provides the signature richness and tender crumb. When choosing butter, aim for European-style butter if possible, for its higher fat content and creamier taste, though any good quality unsalted butter will work beautifully. If you only have salted butter, you can use it but omit the added 1/4 tsp of salt in the cake batter to avoid an overly salty flavor.

Cream Cheese (Room Temperature): This ingredient is key to both the cake’s tenderness and the cheesecake layer’s creaminess. Using full-fat cream cheese at room temperature is crucial for a smooth batter without lumps. Its tanginess beautifully balances the sweetness of the cake. If you’re out of cream cheese, mascarpone cheese can be a decadent substitute for the cake layer, though it will give a slightly richer, less tangy flavor. Unfortunately, there isn’t a direct substitute for the cheesecake layer that provides the same texture and tang.

Vanilla Extract: Vanilla is often the unsung hero, enhancing all the other flavors. Always opt for pure vanilla extract over imitation for the best taste. I love using a good quality Madagascar vanilla that I pick up from a specialty shop in the West Village. If you don’t have extract, a vanilla bean paste can be used (half the amount), or a scraped vanilla bean for an even more intense flavor, which is a technique I learned during my pastry training in Paris.

All-Purpose Flour: This provides the structure for our butter cake. While it might seem basic, using good quality, unbleached all-purpose flour makes a difference in the overall texture. There’s no need for cake flour here; the cream cheese and butter ensure ample tenderness. For a gluten-free option, a 1:1 gluten-free baking flour blend (ensure it contains xanthan gum) can be substituted directly, and I’ll share more about that in the variations section.

Original IngredientBest SubstitutionFlavor / Texture Impact
Unsalted ButterSalted Butter (omit added salt)Slightly saltier, may require less added salt.
Cream CheeseMascarpone (for cake layer only)Richer, less tangy flavor; not ideal for cheesecake layer.
Vanilla ExtractVanilla Bean Paste (half amount); Scraped Vanilla BeanMore intense, visible vanilla specks.
All-Purpose Flour1:1 Gluten-Free Flour Blend (with xanthan gum)Slightly denser texture, but still delicious and tender.

Creamy Butter Cake Recipe (California Pizza Kitchen)

How to Make Creamy Butter Cake Recipe — Step-by-Step

Don’t let the “two layers” intimidate you! This is a surprisingly straightforward process, and with these clear instructions, you’ll feel like a pastry chef in your own kitchen.

Step 1: Prepare Your Ramekins and Oven

Preheat your oven to 325°F (160°C). This ensures a consistent baking temperature from the moment your cakes go in. Then, generously coat six 6-ounce ramekins with nonstick cooking spray. I find this much more reliable than butter and flour for easy release. Arrange them on a baking sheet to make transfer to and from the oven much easier.

💡 mia’s Pro Tip: Preheating your oven adequately is crucial for uniform baking. Give it at least 20 minutes after it signals it’s preheated to ensure it’s truly at temperature. This is a trick I picked up from my Parisian pastry chef mentors.

Step 2: Create the Rich Cake Layer

In the bowl of your stand mixer fitted with the paddle attachment, beat together the 1 cup unsalted butter, 1 cup sugar, and 2 oz. room temperature cream cheese until light and fluffy. This could take 3-5 minutes. Then, beat in the large egg, 1 tsp. vanilla extract, and 1/4 tsp. salt until well combined. With the mixer running on low speed, slowly add the 3/4 cup all-purpose flour, mixing just until incorporated. Be careful not to overmix! Divide this cake mixture evenly among your prepared ramekins, pouring about 6 tablespoons into each one. Don’t worry about smoothing the top perfectly; the cheesecake layer will take care of that.

⚠️ Common Mistake to Avoid: Overmixing the flour will develop the gluten too much, leading to a tough, dense cake. Mix only until no dry streaks of flour remain. A fluffy cake is a happy cake!

Step 3: Clean Up and Prepare for Cheesecake

Before moving on to the cheesecake layer, clean the bowl of your stand mixer and place it back on the stand. If you prefer to be efficient or don’t have time to wash, you can certainly do this step in a separate large bowl with a hand mixer. Ensuring your bowl is clean prevents any residual cake batter from interfering with the smooth consistency of the cheesecake layer.

Step 4: Mix the Silky Cheesecake Layer

In your clean stand mixer bowl (or separate bowl), beat the remaining 3 oz. room temperature cream cheese with 3 tablespoons of sugar until creamy and smooth, about 2 minutes. Then, slowly beat in the single egg white and 1/4 tsp. vanilla extract until everything is just combined. You’re looking for a smooth, pourable consistency. Carefully spoon about 1 tablespoon of this cheesecake batter on top of the cake layer in each ramekin, gently spreading it to cover the surface.

Step 5: Bake to Golden Perfection

Carefully transfer the baking sheet with the ramekins into your preheated oven. Bake for 45-50 minutes, or until the tops are golden brown and a toothpick inserted into the cake portion comes out with moist crumbs, not wet batter. The cheesecake layer might still have a slight jiggle, which is perfectly fine – it will firm up as it cools. The Moroccan desserts my mother taught me often relied on visual cues, and a golden top is always a good indicator!

💡 mia’s Pro Tip: The cheesecake layer will set more as it cools. Don’t overbake trying to get it completely firm in the oven, or you’ll lose that delightful creamy texture that makes this CPK butter cake so special. A slight wobble is exactly what you want!

Step 6: Cool and Release

Once baked, remove the ramekins from the oven and transfer them to a wire rack to cool completely. This cooling process is essential for the structure of the cake and helps the flavors meld beautifully. Once fully cooled, run a thin knife around the edges of each cake. This gentle action will help release them cleanly from the ramekins, ensuring a perfect presentation.

Step 7: Serve and Enjoy!

These creamy butter cakes are best served warm or at room temperature. For an extra special treat, I love serving them with a scoop of good quality vanilla bean ice cream or a dollop of fresh whipped cream. The contrast of the warm cake with cold ice cream is simply divine, a pairing I often saw in French patisseries. Enjoy your homemade California Pizza Kitchen butter cake!

StepActionDurationKey Visual Cue
1Prep oven & ramekins5 minOven to 325°F, ramekins sprayed.
2Make cake layer10 minLight & fluffy batter, no dry flour streaks.
3Clean bowl2 minMixer bowl ready for next step.
4Make cheesecake layer5 minSmooth, pourable cheesecake batter.
5Bake45-50 minGolden brown tops, toothpick with moist crumbs.
6Cool & release30 min+Cakes completely cooled, easily separated.
7ServeImmediateWarm or room temp, with ice cream.

Serving & Presentation

The beauty of this Creamy Butter Cake recipe lies not just in its incredible taste, but also in its versatility for presentation. While delicious on its own, a little flourish can elevate it into a truly memorable dessert. For special occasions in my NYC apartment, I like to serve these individually in their ramekins, perhaps dusted with a fine layer of confectioners’ sugar. The warm, comforting aroma instantly draws everyone to the table.

A classic pairing, and one I always recommend, is a scoop of premium vanilla bean ice cream. The cold, creamy ice cream melting into the warm, gooey cake is pure culinary magic. For a touch of freshness, especially during the summer, a sprinkle of fresh berries like raspberries or blueberries can add a lovely contrast in color and a hint of tartness that cuts through the richness.

When I have a little more time, I might whip up a quick berry compote – simply simmering fresh or frozen berries with a touch of sugar and a squeeze of lemon juice until slightly thickened. This adds a beautiful sheen and another layer of flavor, reminiscent of the fruit tarts I adored in Parisian bakeries. For a Moroccan touch, a light sprinkle of cinnamon or even a tiny amount of orange blossom water in the vanilla extract can add an unexpected, delightful twist.

Pairing TypeSuggestionsWhy It Works
Side DishVanilla Bean Ice Cream, Fresh Whipped CreamCool, creamy contrast with warm, rich cake.
Sauce / DipRaspberry Coulis, Salted Caramel SauceAdds tartness or extra sweet-savory depth.
BeverageEspresso, Black Tea, Dessert WineCoffee cuts richness, tea complements sweetness, wine enhances flavors.
GarnishFresh Berries, Mint Sprig, Confectioners’ SugarAdds color, lightness, and elegant finish.

Make-Ahead, Storage & Reheating

As a busy chef in NYC, I’m always looking for ways to streamline my cooking, and that includes desserts! This Creamy Butter Cake recipe is wonderfully accommodating when it comes to making ahead and storing, which means you can enjoy that famous CPK butter cake taste throughout the week.

MethodContainerDurationReheating Tip
RefrigeratorAirtight container3-4 daysMicrowave (30-60 sec) or oven (10 min at 300°F).
FreezerIndividually wrapped, then in airtight containerUp to 1 monthThaw overnight in fridge, then reheat as above.
Make-AheadUnbaked batter in ramekins, covered tightlyUp to 24 hours in fridgeBring to room temp for 30 min, then bake as directed.

For best results, always store any leftover creamy butter cake in an airtight container to prevent it from drying out. The cream cheese layer especially benefits from being kept sealed. While delicious cold, the true magic of this cake, much like certain Moroccan pastries, really shines when it’s warm and slightly gooey. A quick reheat truly brings it back to life.

When reheating from the refrigerator, I find a quick zap in the microwave (30-60 seconds, depending on your microwave’s power) is usually sufficient to warm it through and make the center wonderfully soft again. If you’re reheating multiple cakes or prefer an oven method, cover them loosely with foil and bake at 300°F (150°C) for about 10-15 minutes, or until warmed to your liking. The subtle warming enhances the buttery notes and cream cheese texture beautifully.

Variations & Easy Swaps

Part of the joy of cooking is experimenting, and this easy butter cake recipe is a fantastic canvas for creativity! Here are a few ways to switch things up, inspired by my diverse culinary background.

VariationKey ChangeBest ForDifficulty Impact
Lemon Zest Butter CakeAdd lemon zest to cake batterA brighter, tangy flavor profileMinimal (easy)
Gluten-Free Butter CakeSwap all-purpose flour for GF blendDietary accommodationMinimal (easy)
Berry Compote Butter CakeSwirl in fruit compote before bakingSeasonal fruit enhancementMinimal (easy)

Lemon Zest Butter Cake

For a bright, refreshing twist on this homemade butter cake, add 1 tablespoon of finely grated lemon zest to the cake batter along with the vanilla. The citrus will enhance the tanginess of the cream cheese and add a beautiful aroma. This is a technique I learned in Paris, where citrus was used to lift rich desserts, much like my mother used oranges in traditional Moroccan sweets.

Gluten-Free Butter Cake

To make this copycat butter cake recipe gluten-free, simply swap the 3/4 cup all-purpose flour with a 1:1 gluten-free baking flour blend that contains xanthan gum. I’ve tested several brands, and most work beautifully without any noticeable change in texture. It’s a fantastic way to ensure everyone at your table can enjoy this rich dessert.

Berry Compote Butter Cake

Before adding the cheesecake layer, you can spoon a small amount (about 1-2 teaspoons) of your favorite berry compote or jam over the cake batter in the ramekins. Then add the cheesecake layer as usual. As it bakes, the compote will create sweet pockets of fruit, adding another layer of flavor and texture. I love doing this with local berries I find at the NYC farmer’s market during peak season.

What makes the California Pizza Kitchen creamy butter cake so moist and rich?

The secret to the California Pizza Kitchen creamy butter cake’s incredible moisture and richness, which I’ve replicated in this copycat recipe, lies in the generous amount of butter and the addition of cream cheese directly into the cake batter. This helps to create a tender, dense, and super moist crumb. Unlike many traditional butter cakes that rely solely on butter, the cream cheese adds a slight tanginess and an extra layer of velvety texture, preventing the cake from drying out and contributing to that melt-in-your-mouth sensation. It’s truly a luxurious base for the cheesecake topping!

Can I use a boxed cake mix instead of making the batter from scratch for this copycat recipe?

While you certainly *can* use a boxed cake mix for the base of this copycat butter cake recipe, mia strongly recommends making the batter from scratch as outlined. The unique richness and specific texture of the “creamy butter cake” comes from the careful balance of butter, sugar, and cream cheese in the homemade cake layer. A boxed mix, even a high-quality one, might not yield the same depth of flavor or the signature density that makes this dessert so special. If you do opt for a mix, you might need to adjust liquid amounts and still incorporate the 2 oz. cream cheese mentioned in my recipe for best results.

How long should I bake a creamy butter cake to get that signature gooey center?

Achieving that perfect signature gooey center for your creamy butter cake typically takes about 45-50 minutes when baked at 325°F (160°C) in ramekins. The key is to look for a golden-brown top, and when you gently jiggle the ramekin, the cheesecake layer should still have a slight wobble. A toothpick inserted into the cake portion (not the cheesecake top) should come out with moist crumbs, but not wet batter. Overbaking will firm up that creamy center too much, so keep a close eye on it towards the end of the baking time!

What is the best way to serve and reheat leftover CPK creamy butter cake?

The best way to serve your homemade CPK creamy butter cake is warm or at room temperature, ideally with a scoop of vanilla bean ice cream or a dollop of fresh whipped cream. For reheating leftovers, wrap individual cakes loosely in foil or place them in an airtight container. You can gently warm them in a preheated oven at 300°F (150°C) for about 10-15 minutes, or for a quicker option, microwave them for 30-60 seconds until heated through and softened. Reheating truly brings back that desirable warm, gooey texture.

Can I bake this Creamy Butter Cake in a single larger baking dish instead of individual ramekins?

Yes, you absolutely can bake this creamy butter cake recipe in a larger baking dish! If you’d prefer to make one large cake, I recommend using an 8×8 inch (20×20 cm) square baking dish. You’ll need to adjust the baking time accordingly. The exact time will vary, but expect it to take about 60-75 minutes at 325°F (160°C). Keep an eye on it after 45 minutes; the top should be golden brown, and a toothpick inserted into the center (avoiding the very center where the cheesecake might still be soft) should come out with moist crumbs. This is great for serving a crowd!

Share Your Version!

I poured my heart and culinary expertise into perfecting this Creamy Butter Cake recipe, and I hope it brings as much joy to your home as it does to mine. If you give it a try, please let me know what you think! Leave a star rating and a comment below – your feedback means the world to me. Did you love that gooey center as much as I do?

Don’t forget to share your delicious creations on Instagram or Pinterest! Tag @exorecipes so I can see your masterpieces and celebrate your baking success. And tell me, what’s your favorite topping for this decadent butter cake – classic vanilla ice cream or something a little more adventurous?

From my NYC kitchen to yours — I hope this recipe brings as much warmth to your table as it does to mine. — mia 🧡

📌

Love This Recipe? Save It to Pinterest!

If you enjoyed this Creamy Butter Cake Recipe (California Pizza Kitchen) recipe, don’t let it get lost in your browser tabs! 😄 Pin it now so you can find it again anytime — and explore hundreds more tried-and-tested recipes waiting for you on my Pinterest boards.

👉 Follow mia on Pinterest @chefrecipes2

📌 Pin this recipe · 🔁 Re-pin your favorites · 💬 Tag me when you make it — I love seeing your creations!

Print

clock clock iconcutlery cutlery iconflag flag iconfolder folder iconinstagram instagram iconpinterest pinterest iconfacebook facebook iconprint print iconsquares squares iconheart heart iconheart solid heart solid icon

Creamy Butter Cake Recipe (California Pizza Kitchen)

  • Author: Chef Mia

Description

An easy copycat recipe for the famous two-layer dessert


Ingredients

Scale
  • 3/4 cup all-purpose flour
  • 1 cup unsalted butter (2 sticks)
  • 1 cup sugar
  • 1 large egg
  • 2 oz. cream cheese (room temperature)
  • 1 tsp. vanilla extract
  • 1/4 tsp. salt
  • 3 oz. cream cheese (room temperature)
  • 3 Tbsp. sugar
  • 1 egg white
  • 1/4 tsp. vanilla extract

Instructions

  1. Preheat oven to 325 degrees. Coat 6 ramekins with nonstick cooking spray.
  2. Make the cake layer: Beat butter, sugar and cream cheese together in the bowl of a stand mixer fitted with the paddle attachment. Beat in the egg, vanilla and salt.
  3. With the mixer running on low speed, slowly add the flour until incorporated. Pour 6 Tbsp. cake mixture into each ramekin.
  4. Clean the bowl of the stand mixer and place it back on the stand. (Alternatively, do the next step in a separate large bowl.)
  5. Make the cheesecake layer: Beat the sugar and cream cheese together. Slowly beat in the egg white and vanilla until combined. Pour 1 Tbsp. of the cheesecake batter on top of the cake layer in each ramekin.
  6. Place the ramekins on a baking sheet. Bake 45- 50 minutes, until tops are golden brown. Transfer ramekins to a wire rack to cool. Once completely cool, run a knife around the edges of each cake to release them from the ramekins.
  7. Serve warm or at room temperature with a scoop of ice cream.


Creamy Butter Cake Recipe (California Pizza Kitchen)

Best Bakery Buttercream Frosting – Smooth & Creamy Perfection

Best Bakery Buttercream Frosting: Smooth & Creamy Perfection – Your Go-To Recipe for Fluffy Desserts

⚖️
Difficulty
Easy
⏲️
Prep Time
10 mins
🕒
Cook Time
0 mins
⏱️
Total Time
10 mins
🍽️
Servings
12

Growing up in Morocco, the concept of elaborate buttercream wasn’t part of our daily dessert repertoire, which leaned more towards honey-soaked pastries and almond-laced cookies. But in my Parisian culinary school, I discovered the magic of French patisserie, and buttercream became an art form. Today, living in vibrant New York City, I’ve blended those influences to create what I truly believe is the best bakery buttercream frosting you can make at home. It’s smooth, creamy, and has that perfect fluffy texture you crave, making it ideal for everything from elegant layer cakes to whimsical cupcakes.

Imagine biting into a perfectly frosted cupcake, the frosting light as air yet rich with vanilla, melting delicately on your tongue without being overly sweet. That’s the experience this easy buttercream frosting delivers. It spreads like a dream, pipes beautifully, and holds its shape with an elegance that reminds me of the classic pastry shops near Les Halles. The secret lies in simple ingredients and a meticulous whipping technique that creates that signature fluffy buttercream frosting texture. It’s truly a game-changer for homemade desserts.

Many American buttercream recipes can sometimes feel too heavy or cloyingly sweet. My version of this vanilla buttercream frosting takes those traditional methods and refines them with a touch of European finesse, ensuring it’s balanced, incredibly smooth, and easy to work with. I’ll walk you through exactly how to achieve this, sharing my pro tips for perfect consistency and how to avoid common pitfalls like gritty or greasy frosting. Get ready to elevate your baking game with this homemade buttercream frosting recipe!

Why This Best Bakery Buttercream Frosting Recipe Is the Best

The Flavor Secret: My secret to the best bakery buttercream frosting is using high-quality unsalted butter and pure vanilla extract. While many recipes pile on the sugar, I balance it carefully to ensure the rich, creamy flavor of the butter and the aromatic vanilla shine through, reminiscent of the subtle elegance found in fine French pastries. A tiny pinch of salt isn’t just for seasoning; it magically enhances all the other flavors, giving the frosting depth.

Perfected Texture: Achieving that signature fluffy buttercream frosting texture is all about aeration. My Parisian training taught me the importance of beating the butter thoroughly, then gradually incorporating the powdered sugar, followed by a final, vigorous whip with heavy cream. This process introduces air, transforming what could be a dense frosting into a light, pipeable cloud that melts in your mouth.

Foolproof & Fast: You might think bakery-quality frosting is complicated, but this easy buttercream frosting recipe simplifies the process. It comes together in about 10 minutes with just a few basic ingredients and a stand mixer (or handheld electric mixer). No egg yolks, no heating, just straightforward steps that yield consistent, beautiful results every single time, even for novice bakers.

Best Bakery Buttercream Frosting Ingredients

Making the best bakery buttercream frosting starts with understanding the role each ingredient plays. Back in my mother’s kitchen in Morocco, ingredients were always fresh and of the highest quality—a principle I carry with me today, whether I’m shopping at a farmers market in NYC or for pantry staples. Here’s what you’ll need:

Ingredients List

  • 1 cup unsalted butter, softened
  • 4 cups powdered sugar
  • 1 teaspoon vanilla extract
  • 2 tablespoons heavy cream or milk
  • Pinch of salt

Ingredient Spotlight

Unsalted Butter: This is the backbone of your fluffy buttercream frosting. Using unsalted butter allows you to control the overall saltiness of your frosting. For the best flavor and texture, choose a good quality butter, preferably one with a higher fat content. Ensure it’s softened to true room temperature (around 68-70°F or 20-21°C), but not melted, for optimal creaming.

Powdered Sugar (Confectioners’ Sugar): Also known as confectioners’ sugar, this finely milled sugar contains a small amount of cornstarch which helps prevent caking and gives the frosting its smooth, non-gritty texture. There’s no good substitution for this ingredient to achieve that classic bakery buttercream smoothness.

Vanilla Extract: Pure vanilla extract is essential for that traditional, comforting flavor. I use a high-quality Madagascar Bourbon vanilla, as it offers a deep, nuanced aroma. Avoid imitation vanilla if possible, as it can leave an artificial aftertaste. For a truly special touch, infuse your own vanilla or use vanilla bean paste.

Heavy Cream or Milk: This liquid serves to thin the frosting to the perfect consistency and adds to its creamy mouthfeel. Heavy cream will result in a richer, slightly more stable frosting, while milk (whole milk often preferred) will yield a slightly lighter texture. You can adjust the amount slightly to reach your desired piping consistency.

Salt: A tiny pinch of fine salt is critical! It might seem counterintuitive in a sweet recipe, but salt brightens and balances all the flavors, preventing the frosting from tasting flat or overly sweet. It’s the culinary secret weapon for making everything taste “more like itself,” a trick I learned in my Parisian pastry classes.

Original IngredientBest SubstitutionFlavor / Texture Impact
Unsalted ButterVegan Butter Sticks (e.g., Miyoko’s Kitchen)Similar richness and texture, suitable for dairy-free.
Powdered SugarNone for texture; Granulated sugar will result in gritty frosting.Significantly gritty texture and won’t hold its shape.
Vanilla ExtractVanilla Bean PasteMore intense vanilla flavor and visible vanilla specks.
Heavy CreamAny plain milk (whole is best), or plant-based milks like oat or almond.Slightly less rich, potentially less stable, but still creamy.
SaltFlaky sea salt (very sparingly)Enhanced flavor, slight crunchy texture if not fully dissolved.

Best Bakery Buttercream Frosting

How to Make Best Bakery Buttercream Frosting — Step-by-Step

Creating this smooth, creamy best bakery buttercream frosting is simpler than you think. Just follow these steps, and you’ll be frosting like a pro in no time!

Step 1: Cream the Butter

In a large mixing bowl (or the bowl of a stand mixer fitted with the paddle attachment), beat the softened unsalted butter with an electric mixer on medium speed for 2-3 minutes. You want it to become noticeably lighter in color, pale yellow, and incredibly creamy, almost fluffy. This initial aeration is key to a light frosting.

💡 mia’s Pro Tip: Your butter should be soft enough to easily indent with a finger, but not greasy or melted. If it’s too cold, it won’t cream properly; if it’s too warm, your frosting might be soupy. I often take mine out 1-2 hours before I start.

Step 2: Add Powdered Sugar Gradually

With the mixer on low speed, gradually add the powdered sugar, one cup at a time. Beat until each addition is fully incorporated before adding the next. This prevents a sugar cloud explosion and ensures a smooth blend. Once all the sugar is in, scrape down the sides of the bowl.

⚠️ Common Mistake to Avoid: Don’t add all the powdered sugar at once! It will make a huge mess and won’t incorporate as smoothly, leading to potential lumps. Slow and steady wins the race here.

Step 3: Flavor and Lighten

Add the vanilla extract, heavy cream (or milk), and the pinch of salt to the butter-sugar mixture. Beat on medium-high speed for 3-4 minutes. This final vigorous beating is what makes the frosting light, fluffy, and truly bakery-worthy. It should almost double in volume and become incredibly pale and smooth.

💡 mia’s Pro Tip: For an extra fluffy buttercream frosting, whip it a bit longer than you think you need to. The more air you incorporate at this stage, the lighter and more ethereal your frosting will be. If it feels too stiff, add a tiny bit more cream; if too loose, a tablespoon more powdered sugar.

Step 4: Use or Store

Your homemade buttercream frosting is now ready to use! Pipe it onto cupcakes, spread it over cakes, or use it for decorative elements. If not using immediately, transfer it to an airtight container and refrigerate. When ready to use, bring it back to room temperature and re-whip briefly until light and fluffy again.

StepActionDurationKey Visual Cue
1Cream Butter2-3 minPale yellow, creamy, fluffy
2Add Powdered Sugar3-4 min (1 cup at a time)Smooth, no visible sugar lumps
3Flavor & Lighten3-4 minIncreased volume, very pale, ethereal and smooth
4Use or StoreN/AReady for piping or spreading

Serving & Presentation

This best bakery buttercream frosting is incredibly versatile, making any dessert feel special. For cupcakes, I love to use a large star tip to create beautiful swirls that beckon you to take a bite – it instantly elevates them to bakery-level status. For a layer cake, a smooth, even application with an offset spatula gives a clean, professional finish, or try a rustic textured look with the back of a spoon.

In NYC, I often find inspiration for presentation from the elaborate window displays of patisseries. A simple garnish can go a long way: colorful sprinkles for a festive cake, fresh berries for a lighter touch, or a dusting of cocoa powder for an elegant contrast. For a more sophisticated look reminiscent of my French training, consider a few edible gold flakes or a delicate chocolate curl.

I also love pairing this vanilla buttercream frosting with unexpected flavors. It’s fantastic on a classic vanilla sponge, but equally delightful with a rich chocolate cake, vibrant red velvet, or even a spicy carrot cake. Think beyond typical pairings – once, I used it on rosewater-infused cupcakes, a nod to my Moroccan heritage, and the result was simply enchanting.

Pairing TypeSuggestionsWhy It Works
Dessert BaseVanilla cake, Red Velvet cupcakes, Carrot cake, Chocolate browniesComplements classic flavors, adds creaminess and sweetness.
GarnishFresh berries, chocolate shavings, sprinkles, edible flowers, citrus zestAdds visual appeal, fresh counterpoint, or textural contrast.
BeverageCoffee, tea (earl grey or herbal), sparkling ciderCuts through the richness, provides a refreshing balance.
Flavor BoostA drizzle of caramel, a sprinkle of cinnamon, toasted nutsAdds layers of complexity and texture to the vanilla base.

Make-Ahead, Storage & Reheating

Living in NYC means I’m always on the go, and efficient meal prep, even for desserts, is a must. This homemade buttercream frosting recipe is fantastic for making ahead, saving you precious time when you’re assembling your final dessert. It stores beautifully, so you can whip up a batch whenever inspiration strikes!

MethodContainerDurationReheating Tip
RefrigeratorAirtight containerUp to 1 weekBring to room temp & re-whip until fluffy.
FreezerAirtight, freezer-safe containerUp to 3 monthsThaw overnight in fridge, bring to room temp & re-whip.
Make-AheadAirtight container (fridge)2-3 days in advanceEssential to re-whip for best texture before use or it may be too dense.

When you refrigerate your best bakery buttercream frosting, it will firm up considerably. This is completely normal! To bring it back to that smooth, pipeable, fluffy buttercream frosting consistency, simply let it sit on the counter until it reaches room temperature (this might take several hours, depending on your kitchen’s warmth). Then, transfer it to your mixer and whip it on medium-high speed for a few minutes. It will miraculously transform back into its light and airy self! If it seems a little too stiff even after re-whipping, add a teaspoon of heavy cream at a time until it reaches your desired consistency. Freezing works just as well; just give it ample time to thaw in the fridge before the room temperature and re-whip steps.

Variations & Easy Swaps

This classic vanilla buttercream frosting is a fantastic base for endless creativity. Just like in Parisian patisseries, where simple buttercreams are transformed with a touch of fruit or chocolate, you can easily adapt this recipe to suit any flavor profile or dietary need.

VariationKey ChangeBest ForDifficulty Impact
ChocolateAdd melted, cooled chocolate or cocoa powderChocolate cakes, brownies, eclairsMinimal – just an extra mixing step
Dairy-FreeSwap butter for vegan butter, cream for plant milkVegan desserts, dietary restrictionsSlightly different texture, easily manageable
Espresso / CoffeeAdd instant espresso powder dissolved in creamCoffee cakes, tiramisu-inspired dessertsMinimal – adds a rich layer of flavor

Chocolate Bakery Buttercream

To make a rich chocolate version, melt and cool 4 oz (113g) of good quality dark chocolate. Beat it into the finished vanilla buttercream frosting during Step 3. Alternatively, sift in 1/2 cup of unsweetened cocoa powder along with the powdered sugar for a less intense but equally delicious chocolate flavor. This works wonderfully on chocolate lava cakes, reminiscent of a French ‘gâteau au chocolat’.

Dairy-Free Bakery Buttercream

For a dairy-free option, swap the unsalted butter for a high-quality vegan butter substitute (I recommend stick varieties, not tub margarines). Use a plant-based milk (like unsweetened almond or oat milk) instead of heavy cream. The texture will be very similar, and it’s a fantastic way to ensure everyone at your table, even those with dietary restrictions, can enjoy a delicious homemade buttercream frosting.

Espresso Bakery Buttercream

Introduce a sophisticated coffee flavor by dissolving 1-2 teaspoons of instant espresso powder into your heavy cream before adding it to the frosting. The coffee acts as a flavor enhancer, much like salt, and pairs beautifully with many cake flavors. This is a favorite in my NYC kitchen, adding a delightful kick to classic vanilla or chocolate cakes.

What is the difference between American buttercream and bakery buttercream frosting?

American buttercream, which is what this recipe represents, is essentially butter whipped with powdered sugar, a liquid (like milk or cream), and flavorings. It’s known for being easy to make and quite sweet. When I refer to “bakery buttercream frosting,” I’m really detailing how to elevate that American style to achieve a professional, less-sweet, and exceptionally smooth texture, akin to what you’d find in a high-end bakery. The key is in proper creaming of the butter, gradual sugar incorporation, and significant whipping time at the end to make it light and fluffy, rather than dense and overly sweet.

How do you get bakery buttercream frosting to be stiff and hold its shape?

To ensure your homemade buttercream frosting is stiff and holds its shape perfectly, several factors are crucial. First, start with proper room temperature butter – not too soft, not too hard. Second, ensure you whip the butter thoroughly at the beginning until it’s light and fluffy. Third, gradually add the powdered sugar, allowing it to fully incorporate. Finally, the vigorous beating after adding the cream and vanilla is paramount. This incorporates enough air to create a stable, pipeable fluffy buttercream frosting. If it’s still too soft, try adding a tablespoon more powdered sugar and whipping again for another minute. For very hot climates, you might reduce the cream slightly or chill the finished frosting for 10-15 minutes before re-whipping and using.

Can you use salted butter instead of unsalted butter in bakery buttercream frosting?

You can use salted butter in a pinch, but I do not recommend it for my best bakery buttercream frosting recipe. The reason is that salted butter contains varying amounts of salt, making it difficult to control the overall flavor balance. As a chef, I always prefer unsalted butter so I can add salt precisely to enhance the other ingredients, rather than having the butter dictate the saltiness. If you must use salted butter, omit the pinch of salt from the recipe entirely, and taste as you go. You may find the resulting frosting has a slightly different flavor profile than intended, but it will still be delicious.

How long does bakery buttercream frosting last at room temperature or in the fridge?

This homemade buttercream frosting, if made with dairy, is generally good at cool room temperature (below 75°F or 24°C) for up to 1-2 days, especially if used on a freshly baked cake or cupcakes. However, for optimal freshness and safety, I always recommend refrigerating it. Stored in an airtight container in the refrigerator, it will last for up to a week. When you’re ready to use it, simply bring it back to room temperature and give it a good re-whip in your mixer until it’s light and fluffy again. Never use frosting that smells off or clearly shows signs of spoilage; when in doubt, throw it out!

My buttercream tastes too sweet. How can I fix it?

If your fluffy buttercream frosting tastes too sweet, there are a couple of tricks from my French pastry training you can try. First, ensure you added the pinch of salt; it dramatically balances sweetness. If you’ve already made it, you can sometimes beat in an additional tablespoon or two of softened unsalted butter to dilute the sweetness slightly, or a tiny splash of lemon juice or even a neutral spirit like vodka can cut through the richness without adding a noticeable flavor (just a few drops!). Next time, consider using less sugar initially and tasting before adding more, or incorporating a different flavor profile like cocoa powder or espresso to temper the sweetness.

Why is my buttercream gritty?

Gritty buttercream is usually a sign that your powdered sugar hasn’t fully dissolved or isn’t fine enough. Ensure you’re using true confectioners’ (powdered) sugar, not granulated sugar. Sometimes, sifting the powdered sugar before adding it can help tremendously, especially if it’s been sitting in your pantry for a while and has clumped. The most important step is to beat the frosting long enough after adding the sugar to allow the sugar particles to fully dissolve into the butter. Don’t rush this step; the extended whipping time in Step 3 is critical for a smooth, homogenous texture in this best bakery buttercream frosting.

Share Your Version!

I truly hope you adore this best bakery buttercream frosting as much as I do. It’s a recipe that’s been perfected with love and a touch of professional finesse over years, bringing that NYC bakery quality right into your home kitchen. There’s nothing more rewarding than seeing your creations come to life!

If you try this homemade buttercream frosting recipe, please do me a huge favor and leave a star rating and comment below. Your feedback means the world to me and helps other home bakers find and love this recipe too! And if you share a photo of your beautiful frosted creations on Instagram or Pinterest, make sure to tag @exorecipes so I can see what you’ve made – I absolutely love celebrating your culinary successes. What’s your favorite cake flavor to pair with this fluffy buttercream frosting? Let me know below!

From my NYC kitchen to yours — I hope this recipe brings as much warmth to your table as it does to mine. — mia 🧡

📌

Love This Recipe? Save It to Pinterest!

If you enjoyed this Best Bakery Buttercream Frosting recipe, don’t let it get lost in your browser tabs! 😄 Pin it now so you can find it again anytime — and explore hundreds more tried-and-tested recipes waiting for you on my Pinterest boards.

👉 Follow mia on Pinterest @chefrecipes2

📌 Pin this recipe · 🔁 Re-pin your favorites · 💬 Tag me when you make it — I love seeing your creations!

Print

clock clock iconcutlery cutlery iconflag flag iconfolder folder iconinstagram instagram iconpinterest pinterest iconfacebook facebook iconprint print iconsquares squares iconheart heart iconheart solid heart solid icon

Best Bakery Buttercream Frosting

  • Author: Chef Mia
  • Prep Time: 10 minutes
  • Cook Time: 0 minutes
  • Total Time: 10 minutes
  • Yield: 12 1x
  • Method: Dessert
  • Cuisine: American

Description

A classic bakery-style buttercream frosting that is smooth, creamy, and perfect for cakes and cupcakes.


Ingredients

Scale
  • 1 cup unsalted butter, softened
  • 4 cups powdered sugar
  • 1 teaspoon vanilla extract
  • 2 tablespoons heavy cream or milk
  • Pinch of salt

Instructions

  1. In a large bowl, beat the softened butter with an electric mixer until creamy.
  2. Gradually add the powdered sugar, one cup at a time, beating on low speed until combined.
  3. Add the vanilla extract, heavy cream, and salt. Beat on medium-high speed for 3-4 minutes until light and fluffy.
  4. Use immediately or refrigerate for later use. Bring to room temperature and re-whip before using.

Notes

For best results, ensure butter is at room temperature but not too soft. Adjust consistency with additional cream or powdered sugar as needed.


Nutrition

  • Calories: 150 kcal
  • Sugar: 19 g
  • Fat: 8 g
  • Carbohydrates: 20 g
  • Protein: 0 g


Best Bakery Buttercream Frosting

ph">For more delicious inspiration, follow me on Pinterest!