Perfect Homemade Chicken Teriyaki with Marinade

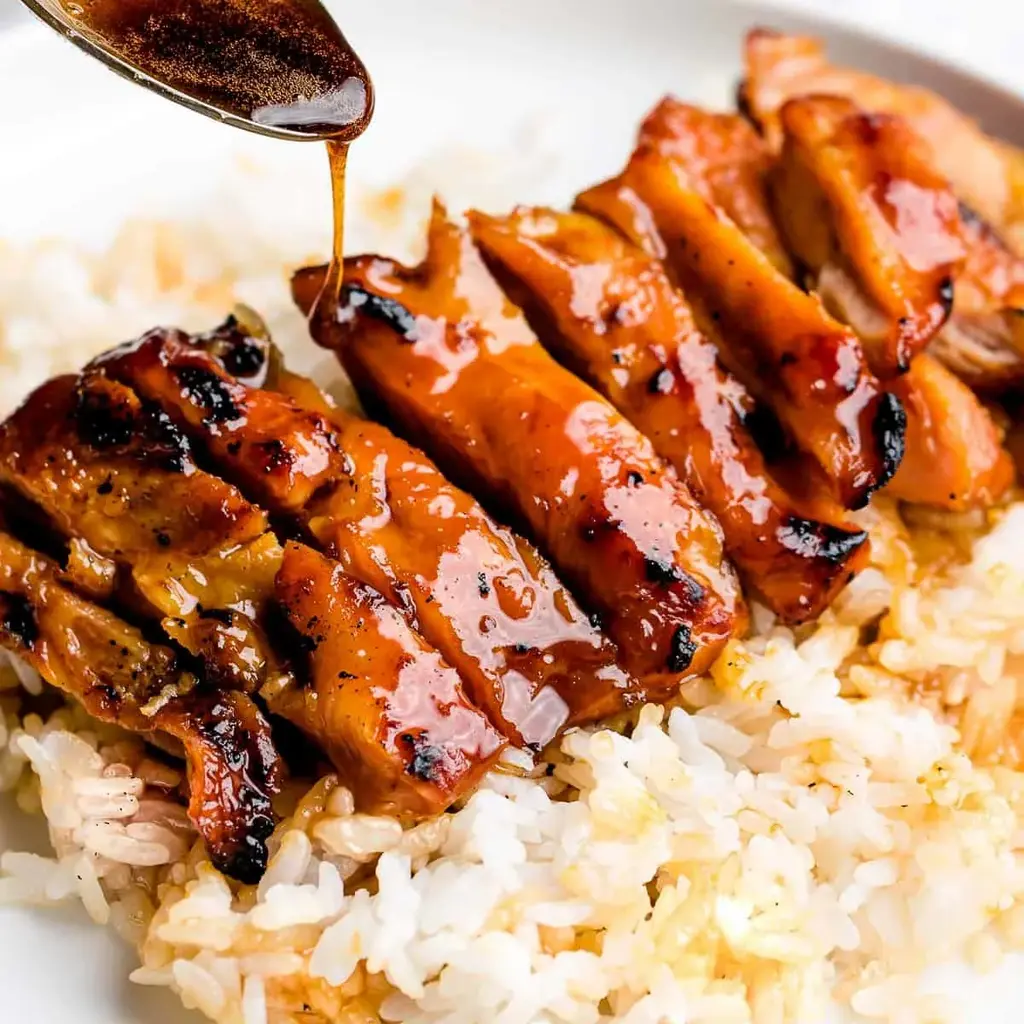
Easy Chicken Teriyaki with Marinade: Homemade Teriyaki Sauce, Better Than Takeout

⚖️
Difficulty
Easy
⏲️
Prep Time
15 mins
🕒
Cook Time
20 mins
⏱️
Total Time
35 mins + marinating
🍽️
Servings
4

Growing up in Morocco, my mother’s kitchen was a whirlwind of spices and traditional tagines. But when I moved to Paris for culinary school, my world opened up to global flavors and techniques. This easy chicken teriyaki with marinade combines that Parisian precision with a touch of NYC’s multicultural flair. I’ve stripped away the complexity to bring you a chicken teriyaki recipe that’s bursting with flavor, incredibly juicy, and so much better than any takeout you’ll find. It’s all thanks to a simple, yet potent, homemade teriyaki sauce that doubles as a glaze, making dinner a breeze.

Imagine succulent chicken, charred just right from the grill or perfectly pan-fried, coated in a glistening, sticky, savory-sweet glaze. The aroma of soy, mirin, and a hint of ginger fills your kitchen, reminiscent of bustling markets and vibrant street food. This dish isn’t just about cooking; it’s about creating an experience. The umami from the soy sauce, the delicate sweetness from the mirin, and the rich depth the marinade imparts to the chicken… it’s a symphony of flavors that hits all the right notes. It reminds me of how a well-balanced sauce in French cuisine brings together every element of a dish.

What sets my quick teriyaki chicken apart is the dual-purpose marinade, which I perfected during my NYC chef days. We marinate the chicken to infuse it with deep flavor and then reserve half of that magical mixture to reduce into a rich, thick glaze right at the end. This technique ensures maximum flavor absorption and a truly beautiful finish. I’ll even share my secret to getting that perfect golden-brown crust without drying out the chicken. Stay tuned for a brilliant pro tip on thickening your glaze and a common mistake to avoid when cooking your chicken!

Why This Easy Chicken Teriyaki Recipe Is the Best

My approach to easy chicken teriyaki focuses on depth of flavor through simplicity. The homemade teriyaki sauce isn’t just impactful, it’s intelligently designed. By using the same base for both marination and glazing, we build an incredible umami foundation that permeates the chicken. This dual-purpose technique, inspired by classic French mother sauces which build flavor layer by layer, ensures every bite is truly saturated with that iconic teriyaki taste.

Achieving perfectly cooked chicken is an art, and my method guarantees a tender, juicy result every time. The key is in preparing the chicken – whether breast or thigh – to an even thickness. This ensures uniform cooking, so you avoid dry patches while other parts are still undercooked. I’ll guide you through cooking it to a perfect 165°F (74°C) internal temperature, whether you choose to grill, pan-fry, or even bake, ensuring that signature succulent texture.

This quick teriyaki chicken recipe is designed for real life – busy weekdays, impromptu gatherings, or simply when you’re craving something truly delicious without the fuss. It’s incredibly versatile and forgiving, perfect for home cooks of any skill level. With clear, step-by-step instructions and my pro tips from years in NYC kitchens, you’ll be serving up restaurant-quality chicken teriyaki in no time, easily making it a weeknight staple.

Easy Chicken Teriyaki Ingredients

In New York, I’m lucky to have access to incredible produce and ingredients from all over the world. But for this easy chicken teriyaki, what I adore is how simple, readily available ingredients come together to create something truly spectacular. It’s just like how a few foundational spices in Moroccan cooking can transform simple vegetables into a feast.

Ingredients List

  • ¾ lb chicken thigh (or chicken breast; See Note 1)
  • 1 Tablespoon vegetable oil
  • 1 Tablespoon toasted white sesame seeds
  • ½ cup low sodium soy sauce
  • ¼ cup mirin (see Note 2 for substitutions)
  • ¼ cup sugar (see Note 3 for substitutions)
  • 1 teaspoon minced garlic or ginger ((optional))

Ingredient Spotlight

Chicken Thighs or Breast: I almost always opt for chicken thighs for their incredible flavor and moisture retention, making them very forgiving to cook. They stay juicy even if slightly overcooked. If using chicken breast, make sure to flatten it evenly to about ¾ inch thick to ensure even cooking and prevent dryness. Boneless, skinless is usually best for teriyaki as it cooks quickly and absorbs the marinade well.

Low Sodium Soy Sauce: This is the backbone of our homemade teriyaki sauce. Using low sodium allows us to control the saltiness, preventing the dish from becoming overly salty, especially as the glaze reduces. Look for naturally brewed varieties for the best flavor complexity. If you only have regular soy sauce, you can still use it, but consider reducing other added salt in the dish.

Mirin: Mirin is a sweet Japanese rice wine, and it’s essential for achieving that authentic teriyaki flavor and glossy finish. It adds a subtle sweetness and a beautiful sheen to the sauce. You can typically find it in the international aisle of most well-stocked grocery stores (often near the soy sauce). If you can’t find it, a decent substitute is dry sherry or a mixture of sake and a pinch of sugar.

Sugar: The sugar in this recipe adds sweetness and contributes to the beautiful caramelization and sticky texture of the glaze, balancing the savory soy sauce. Granulated sugar works perfectly here. For a slightly different flavor profile or if you want to use a natural sweetener, honey or maple syrup can be used, though they will slightly alter the final taste and consistency of the glaze. Start with a bit less and adjust to your preference.

Original IngredientBest SubstitutionFlavor / Texture Impact
Chicken ThighChicken BreastSlightly less juicy, cooks faster. Ensure even thickness.
MirinDry Sherry OR Sake + pinch of sugarDry sherry offers a similar sweetness and complexity. Sake needs sugar to mimic mirin’s profile.
SugarHoney or Maple SyrupWill add a different underlying flavor (floral for honey, caramel for maple). May require slight adjustment in quantity.
Easy Chicken Teriyaki with Marinade

How to Make Easy Chicken Teriyaki — Step-by-Step

Don’t be intimidated, these steps will guide you through creating a perfect, quick teriyaki chicken dish that tastes like it came straight from a gourmet kitchen. Each instruction is designed to build flavor and achieve that fantastic texture.

Step 1: Prep the Chicken

Flatten the chicken so it’s about ¾ inch thick for even cooking. This vital step, taught to me during my culinary training in Paris, ensures that every piece cooks uniformly. Place the prepared chicken in a zipper bag or a large bowl, ready for marinating.

💡 mia’s Pro Tip: For chicken breast, place it between two pieces of plastic wrap and use a meat tenderizer or a heavy rolling pin to gently pound it to an even thickness. This guarantees tender, evenly cooked chicken.

Step 2: Marinate and Reserve

Combine all the ingredients for your marinade – low sodium soy sauce, mirin, sugar, and optional minced garlic or ginger – in a bowl and mix thoroughly until the sugar completely dissolves. This forms your incredible tasting homemade teriyaki sauce! Reserve half of this mixture for later glazing. With the remaining half, generously coat the chicken and marinate for at least 15 minutes, or for deeper flavor, overnight in the fridge. This technique enhances the flavor of our chicken teriyaki recipe like magic.

⚠️ Common Mistake to Avoid: Don’t marinate for too long if using chicken breast, as the acid in some marinades (though not overly acidic here) can start to “cook” the delicate protein, making it mushy. 15 minutes to 4 hours is usually sufficient for breast, while thighs can handle overnight.

Step 3: Grill or Pan Fry to Perfection

Heat your grill or pan over medium-high heat and add the vegetable oil. Remove the chicken from the marinade, wiping off any excess (this prevents burning and encourages browning). If using skin-on chicken, cook skin-side down first until golden brown and crispy. Flip the chicken. During the last 3 minutes of cooking, add your desired amount of the reserved teriyaki marinade to the pan. It will quickly reduce and thicken into a glorious glaze as the chicken finishes cooking. Cook until the internal temperature registers 165°F (74°C) and juices run clear.

Step 4: (Optional) Bake Tender Teriyaki Chicken

Preheat your oven to 400°F (200°C) and line a baking pan for easy cleanup. Arrange the chicken on the pan. Bake for about 20 minutes, or until fully cooked. During the last 5 to 7 minutes of baking, brush the reserved sauce over the chicken a few times. The sauce will thicken into a beautiful glaze. Keep an eye on it and reduce the heat slightly if you notice it starting to burn, ensuring a perfect, luscious chicken teriyaki glaze.

💡 mia’s Pro Tip: To achieve that rich, restaurant-style glaze, let the reserved sauce simmer gently in a small saucepan until it thickens to your desired consistency before adding it to the chicken. This ensures a consistent, glossy finish.

Step 5: Serve and Enjoy!

Once cooked, cut the chicken into bite-sized pieces. Serve it immediately over a bed of fluffy steamed rice, allowing the rice to soak up all that incredible flavor. Sprinkle with toasted sesame seeds for a beautiful garnish and a nutty crunch. Spoon any remaining glaze directly over the chicken and rice. Enjoy this wonderfully flavorful and quick teriyaki chicken meal!

⚠️ Common Mistake to Avoid: Do not add cornstarch directly into a hot marinade or sauce. Always mix it with an equal amount of cold water to form a slurry first, then whisk it into the simmering sauce to avoid lumps.

StepActionDurationKey Visual Cue
1Prep Chicken5-10 minsEvenly flattened ¾ inch thick
2Marinate & Reserve15 mins – overnightSugar dissolved, chicken coated
3Grill / Pan Fry5-7 mins per sideGolden brown, internal 165°F, clear juices, thick glaze
4(Optional) Bake20 minsBrush glaze during last 5-7 mins, internal 165°F
5ServeInstantCut into pieces, serve over rice, garnish with sesame seeds

Serving & Presentation

When I plate a dish, whether in a high-end NYC restaurant or for my family, presentation is key. For this easy chicken teriyaki, I love creating a vibrant, appealing bowl. Start with a generous bed of perfectly steamed white rice—Japanese short-grain is ideal for its stickiness, but even a good jasmine rice works beautifully. The rice absorbs that luscious teriyaki glaze, making every spoonful a delight.

Arrange your sliced, glistening teriyaki chicken artfully over the rice. Beyond the essential toasted sesame seeds for garnish and crunch, think fresh. A sprinkle of finely chopped green onions or chives adds a delicate oniony freshness and a pop of color. For a touch of Moroccan brightness, a very finely grated lemon zest can awaken the flavors even further, balancing the richness of the glaze. In Paris, we learned that a dish should be a feast for the eyes before it’s a feast for the mouth!

Consider serving alongside a simple side salad with a light vinaigrette to cut through the richness, or some quickly stir-fried, vibrant green vegetables like blanched broccoli, asparagus, or sugar snap peas. These add texture, color, and a healthy balance to your meal. My favorite pairing is a crisp cucumber salad with a light rice vinegar dressing – it’s refreshing and complements the savory chicken beautifully.

Pairing TypeSuggestionsWhy It Works
Side DishSteamed White Rice, Sautéed Asparagus, Quick Cucumber SaladThe rice provides a perfect base for the glaze, while crisp vegetables offer a refreshing contrast and balance.
Sauce / DipExtra teriyaki glaze, Sriracha mayo, Chili garlic sauceEnhances flavor and adds a touch of heat or creaminess for variety.
BeverageGreen Tea, Sake, Light Lager BeerCleanses the palate, complements Asian flavors, and balances the sweetness.
GarnishToasted sesame seeds, Sliced green onions, Chili threadsAdds visual appeal, aromatic freshness, and an extra layer of texture.

Make-Ahead, Storage & Reheating

Living in NYC and running a food blog means I’m always looking for ways to streamline meal prep. This easy chicken teriyaki is a lifesaver when it comes to make-ahead meals because the flavors only deepen over time, making it even more delicious on day two or three. It’s fantastic for meal prepping for a busy week.

MethodContainerDurationReheating Tip
RefrigeratorAirtight container3-4 daysMicrowave on medium heat, or gently warm in a pan with a splash of water/broth.
FreezerFreezer-safe container/bag2-3 monthsThaw overnight in fridge. Reheat as above.
Make-AheadChicken in marinadeUp to 24 hours (chicken thighs), 4 hours (chicken breast)Cook as per instructions, reserving half the marinade for glazing.

When reheating, especially from the refrigerator, I find that a quick warm-up in a non-stick pan over medium heat works wonders. Add a tablespoon of water or chicken broth to create a little steam and prevent the chicken from drying out, and it will be almost as good as fresh. For microwaving, cover loosely and heat in short bursts, stirring occasionally, until heated through to maintain moisture.

If you’ve frozen your chicken teriyaki, always thaw it completely in the refrigerator before reheating. This ensures even warming and maintains the texture of the chicken. Freezing is an excellent way to prepare large batches, making weeknight dinners effortless.

Variations & Easy Swaps

VariationKey ChangeBest ForDifficulty Impact
Spicy Ginger TeriyakiAdd red pepper flakes and extra ginger to the marinade.Those who love a kick and vibrant ginger flavor.Minimal
Gluten-Free & Soy-FreeUse tamari instead of soy sauce, and coconut aminos for soy-free.Dietary restrictions (gluten intolerance, soy allergy).Minimal
Honey-Garlic TeriyakiSwap sugar for honey, increase garlic/ginger.A richer, slightly sweeter, and more aromatic profile.Minimal

Spicy Ginger Teriyaki

For a fiery kick, introduce a teaspoon of red pepper flakes or a thin slice of a fresh bird’s eye chili into your marinade. Boost the ginger too – perhaps a full tablespoon of finely grated fresh ginger. This variation brings a warming heat that balances the sweet and savory notes beautifully, reminiscent of some of the spicier tagines I enjoyed in my mother’s kitchen in Morocco, but with an Asian twist. It definitely elevates the easy chicken teriyaki experience.

Gluten-Free & Soy-Free Teriyaki

It’s easy to make this chicken teriyaki recipe adaptable for dietary needs! Simply swap the low-sodium soy sauce for tamari, a naturally gluten-free alternative that delivers the same umami depth. For a soy-free option, coconut aminos are an excellent choice – they offer a similar salty-sweet profile, though slightly less potent, so you might need a touch more. I’ve tested this extensively for clients in NYC, and the results are fantastic, yielding a glaze with a lovely sheen and delicious flavor.

Honey-Garlic Teriyaki Twist

To achieve a richer, deeply caramelized flavor, try swapping the granulated sugar for an equal amount of honey. Honey brings a floral sweetness and helps the glaze achieve an even more beautiful, sticky texture. At the same time, double the minced garlic and ginger for a more pungent, aromatic punch. This variation is a nod to the rich sauces I learned to master in culinary school in Paris, where balancing sweetness and aromatics was always a key lesson. It makes for an exceptionally homemade teriyaki sauce with a twist.

How long should I marinate chicken for teriyaki?

For chicken thighs, you can marinate from as little as 15 minutes up to overnight (8-12 hours) in the refrigerator. Thighs are more forgiving and absorb flavor beautifully over a longer period without breaking down. If you’re using more delicate chicken breast, I recommend marinating for a shorter duration, ideally 15 minutes to 4 hours. Longer than that, and the soy sauce can start to cure the chicken, sometimes resulting in a slightly firmer or stringier texture. Always ensure your chicken is flattened evenly for optimal absorption and consistent cooking.

What can I substitute for mirin in chicken teriyaki?

If you can’t find mirin, the best substitute is dry sherry. It offers a similar sweet, slightly acidic, and complex flavor profile that contributes to the authentic taste of teriyaki. Use an equal amount. Another good alternative is to combine sake (Japanese rice wine) with a pinch of sugar, as sake is less sweet than mirin. In a pinch, you can even use white wine or rice vinegar with a bit more sugar, but be aware these will slightly alter the final flavor. Mirin truly gives that characteristic shiny glaze, so use a substitute wisely.

Can I make chicken teriyaki without a grill?

Absolutely! My recipe includes options for both pan-frying and baking, making it incredibly versatile. For pan-frying, a cast-iron skillet or a heavy-bottomed pan works wonderfully to achieve a beautiful sear and crispy edges. For baking, simply preheat your oven to 400°F (200°C) and bake on a lined sheet pan for about 20 minutes, brushing with the reserved glaze during the last few minutes. Both methods yield delicious, juicy chicken teriyaki with that signature sticky glaze.

What sides go well with chicken teriyaki?

Classic pairings for chicken teriyaki include steamed white rice, which perfectly soaks up the savory-sweet glaze. For vegetables, I love serving it with blanched or lightly sautéed broccoli, asparagus, or green beans. A simple cucumber salad dressed with rice vinegar and a pinch of sugar offers a refreshing contrast. Sometimes, I’ll even add a vibrant coleslaw or a side of edamame for a complete and satisfying meal. The key is to balance the rich chicken with lighter, often crisp, side dishes.

How do I get a thick, glossy teriyaki glaze?

The secret to a thick, glossy teriyaki sauce lies in two main elements: sugar and reduction. The sugar in the marinade caramelizes as it cooks, contributing to the stickiness and shine. More importantly, when you add the reserved marinade to the pan during the last few minutes of cooking, allow it to simmer vigorously. As the water evaporates, the sauce will naturally thicken. For an extra thick, restaurant-quality glaze, you can whisk in a cornstarch slurry (1 tsp cornstarch mixed with 1 tsp cold water) into the simmering sauce until it reaches your desired consistency. Don’t add cornstarch directly as it will clump.

Can I use skin-on chicken for this recipe?

Absolutely! If you prefer a richer flavor and crispy skin, skin-on chicken thighs are an excellent choice for this chicken teriyaki recipe. Just make sure to start cooking them skin-side down in your hot pan or grill. This allows the skin to render its fat and crisp up beautifully before you flip the chicken. The rendered fat also adds incredible flavor to the pan, contributing to a more complex glaze. Just be mindful of flare-ups if grilling due to the fat content.

Is it safe to use the reserved marinade as a glaze?

It’s crucial to understand that the marinade that has come into contact with raw chicken should never be used directly as a sauce without proper cooking. In this recipe, I instruct you to *reserve half of the marinade BEFORE* it touches the chicken. This reserved portion is safe to use as a glaze. If you accidentally used it all for marinating, you can quickly simmer the used marinade in a saucepan for at least 5 minutes, or until it reaches a rolling boil, to kill any bacteria before serving, though flavor might be slightly compromised. My method of reserving half ensures safety and maximum fresh flavor.

Can I prepare the teriyaki marinade in advance?

Absolutely! The homemade teriyaki sauce (marinade) can be prepared several days in advance. Simply whisk all the marinade ingredients together and store it in an airtight container in the refrigerator for up to a week. This makes meal prep even quicker on a busy weeknight. When you’re ready to cook, just take out your prepared marinade, reserve half for glazing, and add the chicken to the remaining half. This strategy is a favorite of mine for efficient cooking in my fast-paced NYC kitchen.

Share Your Version!

I truly hope you adore this easy chicken teriyaki recipe as much as I do. It’s a dish that brings so much joy and flavor to the table without any fuss. I’d absolutely love to hear how it turns out for you!

Please leave a star rating and a comment below to share your experience – your feedback helps me grow and inspires other home cooks. Don’t forget to share your photos on Instagram or Pinterest and tag @exorecipes! I always get so excited to see your beautiful creations. Tell me, what’s your favorite vegetable to serve alongside this sticky, sweet, and savory chicken?

From my NYC kitchen to yours — I hope this recipe brings as much warmth to your table as it does to mine. — mia 🧡

📌

Love This Recipe? Save It to Pinterest!

If you enjoyed this Easy Chicken Teriyaki with Marinade recipe, don’t let it get lost in your browser tabs! 😄 Pin it now so you can find it again anytime — and explore hundreds more tried-and-tested recipes waiting for you on my Pinterest boards.

👉 Follow mia on Pinterest @chefrecipes2

📌 Pin this recipe · 🔁 Re-pin your favorites · 💬 Tag me when you make it — I love seeing your creations!
Print

clock clock iconcutlery cutlery iconflag flag iconfolder folder iconinstagram instagram iconpinterest pinterest iconfacebook facebook iconprint print iconsquares squares iconheart heart iconheart solid heart solid icon

Easy Chicken Teriyaki with Marinade

  • Author: Chef Mia

Description

This easy chicken teriyaki is marinated then grilled, baked, or stir fried until perfectly cooked and juicy! Glaze with teriyaki sauce for the best chicken teriyaki that’s even better than takeout! Works great with chicken breast or chicken thighs!


Ingredients

Scale
  • ¾ lb chicken thigh (or chicken breast; See Note 1)
  • 1 Tablespoon vegetable oil
  • 1 Tablespoon toasted white sesame seeds
  • cup low sodium soy sauce
  • cup mirin (see Note 2 for substitutions)
  • cup sugar (see Note 3 for substitutions)
  • 1 teaspoon minced garlic or ginger ((optional))

Instructions

  1. Prep chicken: Flatten the chicken so it's about ¾ inch thick for even cooking. Place in a zipper bag or large bowl to marinate.
  2. Marinade: Combine the ingredients for the marinade and mix together until the sugar dissolves. Reserve half for later use and marinate the chicken with the remaining half for at least 15 minutes to overnight in the fridge.
  3. Grill or Pan fry: Heat your grill or pan over medium high heat and add the oil. Remove chicken from the marinade, wiping off the excess. Cook skin-side down if using skin-on chicken and flip when golden brown. During the last 3 minutes, add your desired amount of the reserved teriyaki marinade. It will reduce and thicken into a glaze as the chicken cooks. Internal temperature should register 165°F and juices should run clear.
  4. (Optional) Bake: Preheat oven to 400°F and line a baking pan. Bake chicken for about 20 until fully cooked, brushing on the reserved sauce a few times during the last 5 to 7 minutes. The reserved sauce will thicken into a glaze. Reduce the heat if it starts to burn.
  5. Cut the chicken into bite sized pieces and serve over steamed rice. Sprinkle with sesame seeds and spoon any remaining glaze over the chicken. Enjoy!


Nutrition

  • Calories: 412 kcal
  • Sugar: 43 g
  • Fat: 7 g
  • Carbohydrates: 53 g
  • Protein: 35 g


Easy Chicken Teriyaki with Marinade

ph">For more delicious inspiration, follow me on Pinterest!

Irresistible Sticky Chicken Rice Bowls with Sriracha Mayo

Sticky Chicken Rice Bowl Recipe with Sriracha Mayo Drizzle – Your New Weeknight Favorite

⚖️
Difficulty
Easy
⏲️
Prep Time
15 mins
🕒
Cook Time
25 mins
⏱️
Total Time
40 mins
🍽️
Servings
4

Growing up in my mother’s bustling kitchen in Morocco, every meal was an event, a symphony of flavors and aromas. Even now, living in the vibrant culinary melting pot of NYC, I still long for that comforting satisfaction of a home-cooked meal that truly nourishes the soul. That’s why I’m so excited to share my go-to sticky chicken rice bowl recipe. It’s a dish that artfully blends the bold, bright flavors I’ve come to love from Asian cuisine with the hearty, comforting feel of a traditional Moroccan tagine, all elevated with a unique sriracha mayo drizzle. This recipe isn’t just a meal; it’s an experience, promising to be your new weeknight favorite that truly fills you up with satisfying protein and flavor.

The beauty of these sticky chicken bowls lies in their exquisite balance. Picture perfectly fluffy rice, tender-crisp broccoli, and succulent chicken pieces coated in a glossy, deeply caramelized sticky sauce. The aroma alone, a tantalizing mix of sweet honey, savory soy, and aromatic ginger, will pull everyone to the kitchen. Then, a vibrant drizzle of spicy sriracha mayo cuts through the richness, adding a creamy, fiery kick that awakens your palate, reminiscent of the vibrant street food scene I adore in New York. I often find myself thinking back to the markets here in Flushing, Queens, where the scent of cooking meats and spices always reminds me of the layers of flavor possible in a simple bowl.

As a professional cook trained in the rigorous French techniques of classic sauces and pastry, I appreciate a dish that delivers maximum flavor with minimal fuss. My approach to this easy chicken rice bowl combines that professional precision with the heart of home cooking. I’ll show you how to achieve that perfect sticky chicken glaze every time, reveal my secret for ultra-tender chicken, and even share a pro tip for making your spicy mayo effortlessly creamy. We’ll also tackle a common mistake home cooks make with their sticky sauces, ensuring your Asian chicken rice bowl always comes out restaurant-quality.

Why This Sticky Chicken Rice Bowl Recipe Is the Best

What sets my sticky chicken rice bowl recipe apart is the deeply layered flavor profile, especially that irresistible sticky sauce. Drawing on my culinary training, I’ve balanced the umami of soy sauce with the sweetness of honey and a bright tang of rice vinegar, all punctuated by fresh ginger and garlic. The addition of a touch of sriracha in the sauce itself builds a subtle warmth, a technique I often use to add depth without overwhelming. This isn’t just a sweet sauce; it’s a symphony of savory, sweet, and tangy notes that cling perfectly to every piece of chicken.

The texture in this bowl is pure perfection. I’ve opted for air-fried chicken, which achieves an incredible tenderness on the inside with a slight crispy edge that holds up beautifully to the rich sticky sauce. This method is a shortcut I use often in my NYC kitchen when I need something delicious and quick, and it ensures the chicken isn’t just tender but also absorbs the flavors wonderfully. The broccoli is steamed to a perfect al dente, providing a refreshing crunch that contrasts beautifully with the soft rice and succulent chicken.

This recipe is designed to be foolproof and fast, making it ideal for busy weeknights, even for beginners. My clear step-by-step instructions ensure success, from cooking your rice perfectly to mastering the sticky sauce. The use of an air fryer for the chicken is a brilliant shortcut that simplifies the process, cutting down on cook time and cleanup. You’ll be amazed at how quickly you can put together such a gourmet-tasting Asian chicken rice bowl, leaving you more time to enjoy your meal and less time in the kitchen.

Sticky Chicken Rice Bowl Ingredients

Gathering ingredients for these bowls always reminds me of a stroll through the bustling Union Square Greenmarket back home in NYC. I love seeing the fresh produce and unique spices. For this dish, most of what you need can be found in any good grocery store, but if you can, seek out fresh ginger and garlic – they truly make all the difference in the sauce!

Ingredients List

  • 2 cups uncooked rice (I prefer Jasmine or Basmati)
  • 2 small heads broccoli, chopped
  • 3 large boneless, skinless chicken breasts
  • 2 tbsp olive oil
  • 1 tsp salt
  • 1/2 tsp pepper
  • 1 tsp chili powder
  • 1 tsp smoked paprika
  • 1 tsp onion powder
  • 1 tsp oregano (dried)
  • 1/2 cup low-sodium soy sauce
  • 1/2 cup honey
  • 1/4 cup rice vinegar
  • 3 cloves garlic, minced (about 1 tbsp)
  • 2 tbsp sriracha (for the sauce)
  • 2 tsp sesame oil
  • 1 tsp ground ginger (or 1 tbsp fresh grated ginger for brighter flavor)
  • 2 tsp arrowroot powder mixed with 2 tbsp water to make a slurry (sub cornstarch for equal measure)
  • 1/2 cup mayo (for spicy drizzle)
  • 1 tbsp sriracha (for spicy drizzle)
  • 2-3 tbsp water (for spicy drizzle, adjust to desired consistency)
  • Sesame seeds for topping (optional, but highly recommended!)

Ingredient Spotlight

Chicken Breasts: I always opt for large, boneless, skinless chicken breasts for this sticky chicken rice bowl. They’re lean, cook quickly, and absorb the marinade and sauce beautifully. When shopping, look for plump, even-colored breasts without discoloration. You can also use chicken thighs if you prefer darker meat; just be aware they might need a few extra minutes in the air fryer to cook through. This dish is forgiving, so don’t worry if your chicken isn’t perfectly uniform.

Honey: Honey is key to the “sticky” factor in this Asian chicken rice bowl. It provides a natural sweetness and caramelizes wonderfully. When selecting honey, any pure honey will work, but I love using local wildflower honey from my farmers market for an extra layer of floral notes. If you don’t have honey, maple syrup is a good substitute, though it will alter the flavor slightly and might be a touch less sweet, giving you a slightly different but still delicious sticky chicken bowl.

Sriracha: This chili garlic sauce brings a delightful heat and a hint of tang to both the main sauce and the creamy drizzle. I rely on the classic Huy Fong Sriracha brand, which is widely available. Its vibrant red color and distinctive flavor are unmistakable. If you’re sensitive to spice, you can reduce the amount in the sauce or omit it entirely, but I find it crucial for that authentic kick in the sriracha mayo drizzle. A good alternative with less heat would be a sweet chili sauce, but you’d lose some of that garlic punch.

Arrowroot Powder: This is my preferred thickener for sauces because it creates a glossy finish and a smooth texture without any cloudy appearance, unlike cornstarch. I learned this technique in Paris for clear, beautiful sauces. Arrowroot powder is also gluten-free, which is a bonus. You’ll find it in the baking or organic sections of most well-stocked grocery stores. If you can’t find it, cornstarch is a perfectly adequate substitute, just use the same measurement for the slurry.

Original IngredientBest SubstitutionFlavor / Texture Impact
Chicken BreastsChicken ThighsRicher flavor, slightly longer cook time, but just as tender.
HoneyMaple SyrupSlightly different sweetness profile, less sticky glaze, but still delicious.
SrirachaSweet Chili Sauce (reduce quantity)Less heat, sweeter profile, less garlic punch.
Arrowroot PowderCornstarchSame thickening power, but might result in a slightly less clear sauce.
BroccoliAsparagus, Green Beans, Bell PeppersSimilar crunch and nutritional value, adjust cook time as needed.

Sticky Chicken Rice Bowls

How to Make Sticky Chicken Rice Bowls — Step-by-Step

Don’t be intimidated by the number of components in this sticky chicken rice bowl; each step is straightforward and builds on the last, guaranteeing a delicious result!

Step 1: Cook the Rice

Begin by cooking your 2 cups of uncooked rice according to the package directions. Whether you’re using a rice cooker, stovetop, or instant pot, aim for perfectly fluffy, separate grains. Set aside once done to keep warm.

💡 mia’s Pro Tip: Always rinse your rice thoroughly before cooking. This removes excess starch, preventing sticky, clumpy rice and ensuring a beautiful, fluffy texture perfect for a chicken rice bowl. I picked up this simple yet effective habit from observing my mother’s meticulous preparation of couscous in Morocco.

Step 2: Steam the Broccoli

While your rice is cooking, chop your 2 small heads of broccoli into bite-sized florets. Steam them in the microwave or on the stovetop until they are fork-tender but still retain a slight bite – we want them vibrant green, not mushy! Set the prepared broccoli aside.

Step 3: Prepare and Cook the Chicken

Cut your 3 large chicken breasts into small, uniform bite-sized pieces. In a bowl, toss the chicken with 2 tbsp olive oil, 1 tsp salt, 1/2 tsp pepper, 1 tsp chili powder, 1 tsp smoked paprika, 1 tsp onion powder, and 1 tsp oregano. Lay the seasoned chicken in a single layer in your air fryer basket. Cook in a preheated air fryer at 400°F for 12 minutes, or until the chicken reaches an internal temperature of 160°F. If you don’t have an air fryer, you can pan-fry the chicken until cooked through and slightly browned.

⚠️ Common Mistake to Avoid: Don’t overcrowd your air fryer or pan when cooking the chicken. This lowers the temperature and steams the chicken instead of crisping it, preventing those delicious slightly charred edges that are perfect for sticky chicken bowls. Cook in batches if necessary for best results!

Step 4: Simmer the Sticky Sauce

While the chicken is cooking, prepare your signature sticky sauce. In a small saucepan, combine 1/2 cup soy sauce, 1/2 cup honey, 1/4 cup rice vinegar, 3 minced cloves of garlic, 2 tbsp sriracha, 2 tsp sesame oil, and 1 tsp ground ginger. Bring the mixture to a boil over medium heat. Once boiling, reduce the heat to a simmer and add the arrowroot slurry (2 tsp arrowroot powder mixed with 2 tbsp water). Let it boil gently for 4-5 minutes, stirring occasionally, until the sauce has thickened significantly and coats the back of a spoon.

💡 mia’s Pro Tip: For an extra layer of flavor and aroma in your sticky sauce, toast the sesame oil slightly in the empty saucepan for 30 seconds before adding the other sauce ingredients. This brings out its nutty depth, a small detail that makes a big impact, much like how a perfectly bloomed spice mixture enriches Moroccan dishes.

Step 5: Assemble Your Bowls

Now for the best part—assembly! Prepare your bowls by layering the fluffy rice, steamed broccoli, and cooked chicken. Generously spoon the thickened sticky sauce over the chicken and broccoli. In a separate small bowl, whisk together 1/2 cup mayo, 1 tbsp sriracha, and 2-3 tbsp water to create your spicy mayo drizzle. Adjust the water to achieve your desired consistency. Drizzle this creamy, spicy goodness over each bowl. Finish with a sprinkle of sesame seeds for an extra flourish and delightful crunch. Serve immediately and enjoy your homemade sticky chicken rice bowl!

StepActionDurationKey Visual Cue
1Cook Rice15-20 minsFluffy, separate grains
2Steam Broccoli3-5 minsVibrant green, fork-tender
3Cook Chicken12 minsInternal temp 160°F, lightly browned
4Simmer Sauce4-5 minsSauce visibly thickens and coats a spoon
5Assemble Bowls2 minsAll components layered, drizzled, and topped

Serving & Presentation

Plating a delicious meal is an art form, something I valued deeply during my culinary training in Paris. For these sticky chicken rice bowls, I love to arrange each component thoughtfully. Start with a bed of fluffy rice as your canvas, then artfully arrange the vibrant steamed broccoli and glistening sticky chicken. A generous zig-zag of the spicy sriracha mayo drizzle over the top not only adds flavor but creates visual intrigue. Finish with a sprinkle of toasted sesame seeds for crunch and an optional scattering of thinly sliced green onions for a fresh, oniony bite.

Beyond the visual appeal, consider the accompaniments. While these bowls are a complete meal on their own, a simple side salad with a ginger-sesame dressing or a bowl of crispy wonton strips can elevate the experience. For drinks, I find a refreshing iced green tea or a crisp, light-bodied Sauvignon Blanc pairs beautifully with the rich, sweet, and spicy flavors. Think about balancing the intensity of the sticky sauce.

This dish, in its simplicity and bold flavors, reminds me of the hearty, communal meals we would share in Morocco, where every component, though distinct, contributes to a harmonious whole. These sticky chicken rice bowls are perfect for a cozy weeknight dinner but elegant enough to serve guests. The key is to embrace the vibrant combination of tastes and textures. It’s a truly satisfying dish.

Pairing TypeSuggestionsWhy It Works
Side DishEdamame, Asian cucumber salad, Crispy spring rollsAdds fresh crunch, protein, and complements Asian flavors.
Sauce / DipExtra Sriracha Mayo, Toasted Sesame DressingEnhances spice and creaminess or adds an extra nutty, savory element.
BeverageIced Green Tea, Light Lager, Dry RieslingCuts through richness, refreshes the palate, and complements Asian spices.
GarnishGreen onions, Toasted peanuts, CilantroAdds freshness, contrasting texture, and aromatic pop.

Make-Ahead, Storage & Reheating

In my busy NYC life, meal prepping is essential, and this sticky chicken rice bowl recipe is a superstar for make-ahead convenience. I often prepare a big batch on Sunday to enjoy for lunches throughout the week. The components hold up beautifully, meaning you can have a delicious and satisfying meal ready in minutes, even on your busiest days.

MethodContainerDurationReheating Tip
RefrigeratorAirtight containersUp to 4 daysMicrowave until hot, add fresh mayo.
FreezerFreezer-safe containers (chicken & sauce only)Up to 2 monthsThaw overnight, reheat chicken & sauce. Make fresh rice & broccoli.
Make-AheadSeparate containers for componentsUp to 3 days in advanceAssemble and drizzle just before serving.

When storing, I highly recommend keeping the spicy mayo drizzle separate until serving, as it can sometimes split when reheated. The rice, chicken, and broccoli can all be stored together or separately, depending on your preference. I usually portion them out into individual meal prep containers for grab-and-go convenience. Make sure everything cools completely before sealing to prevent condensation and sogginess.

For reheating, the microwave works perfectly. A quick zap until hot, then a fresh dollop of spicy mayo, and maybe a sprinkle of sesame seeds, and you’re good to go. If you’re reheating larger portions, you can transfer the chicken and sauce to a small pan on the stovetop over low heat, adding a splash of water if needed to prevent sticking. The broccoli can be quickly re-steamed or refreshed with a quick toss in a hot pan. Enjoying leftovers of this sticky chicken rice bowl often feels just as good as the first time!

Variations & Easy Swaps

VariationKey ChangeBest ForDifficulty Impact
Spicy Peanut Chicken Rice BowlAdd peanut butter to sauce, garnish with crushed peanuts.Nut lovers, those wanting richer flavor.Slightly more complex sauce balancing.
Gluten-Free / Dairy-FreeUse tamari, DF mayo, ensure GF spices.Dietary restrictions.Minimal, ingredient swaps only.
Sesame Ginger Tofu BowlSubstitute chicken with pan-fried tofu.Vegetarian option.Same, just different protein prep.

Spicy Peanut Chicken Rice Bowl

For a richer, nuttier twist, transform your sticky chicken rice bowl into a spicy peanut version. Simply whisk 2-3 tablespoons of creamy peanut butter into the sticky sauce towards the end of its simmering time. This creates a beautifully velvety sauce with a deeply satisfying flavor profile, reminiscent of West African groundnut stews I sometimes prepare, but with an Asian twist. Garnish with crushed roasted peanuts for extra crunch, enhancing both texture and taste.

Gluten-Free or Dairy-Free Sticky Chicken Rice Bowl

Making this dish suitable for those with dietary restrictions is incredibly easy. To go gluten-free, simply swap regular soy sauce for tamari, a naturally gluten-free alternative that delivers the same umami punch as a truly authentic Asian chicken rice bowl. For a dairy-free sticky chicken bowl, ensure your chosen mayonnaise is dairy-free (many brands are) or opt for a simple vinaigrette instead of the creamy sriracha mayo. I’ve tested these swaps extensively in my kitchen, and the results are equally delicious.

Sesame Ginger Tofu Bowl

This sticky sauce is so versatile, it shines with other proteins too! To make a fantastic vegetarian option, replace the chicken with extra-firm tofu. Press the tofu to remove excess water, then cut it into cubes and pan-fry until golden and crispy before tossing it with the spices and sauce. This creates a delightful sesame ginger tofu bowl that’s just as satisfying and bursting with flavor, perfect for expanding this easy chicken rice bowl concept.

What sauce is used for sticky chicken rice bowls?

The primary sauce in this delicious sticky chicken rice bowl recipe is a homemade concoction of soy sauce, honey, rice vinegar, minced garlic, sriracha, sesame oil, and ground ginger, thickened with an arrowroot or cornstarch slurry. This combination creates a perfect balance of savory, sweet, tangy, and a hint of spicy, which clings beautifully to the chicken. Additionally, I use a separate creamy and spicy sriracha mayo for drizzling, adding another layer of flavor and luxuriousness to the final dish.

Can I make sticky chicken rice bowls in a slow cooker?

While you can adapt the chicken and sauce for a slow cooker, the resulting texture will be different from the air-fried or pan-fried version. For slow cooking, you would typically combine the chicken and sauce ingredients (minus the slurry) and cook on low for 3-4 hours or high for 1.5-2 hours, until the chicken is tender. Towards the end, you would shred the chicken and then stir in the arrowroot slurry to thicken the sauce. However, you’d miss the slightly crispy edges that the air fryer gives, which I adore in this sticky chicken bowl.

What can I substitute for brown sugar in the sticky chicken glaze?

My recipe actually calls for honey instead of brown sugar, which provides a more natural, nuanced sweetness and helps create that incredible glossy, sticky glaze. If you don’t have honey, pure maple syrup is an excellent substitute, offering a similar liquid sweetness, though with a slightly different flavor profile. Agave nectar could also work. If you specifically prefer brown sugar, you could use 1/2 cup packed light brown sugar in place of the honey, adjusting for sweetness as needed. The goal is that perfect balance for your Asian chicken rice bowl.

What vegetables go well with sticky chicken rice bowls?

For these sticky chicken bowls, I love steamed broccoli for its vibrant color and tender-crisp texture, which provides a great counterpoint to the rich sauce. However, many other vegetables would be fantastic! Consider sautéed bell peppers (red, yellow, or orange), snap peas, shredded carrots, or even baby bok choy. You could also quickly stir-fry a mix of your favorite Asian-inspired veggies or add some steamed edamame for extra protein and color. Have fun experimenting with what’s in season!

Can I prepare the sticky sauce ahead of time?

Absolutely, preparing the sticky sauce in advance is a fantastic time-saver! You can make the sauce up to 3-4 days ahead and store it in an airtight container in the refrigerator. When you’re ready to use it, simply gently reheat it on the stovetop over low heat, stirring occasionally. If it has thickened too much, you can add a tablespoon or two of water or chicken broth to reach your desired consistency. This makes assembling your easy chicken rice bowl even faster on a busy weeknight.

How can I make the chicken spicier?

If you love heat, there are several ways to amp up the spice in your sticky chicken rice bowl! You can increase the amount of sriracha in the main sticky sauce or the spicy mayo drizzle. Beyond that, consider adding a pinch of red pepper flakes to the chicken seasoning before air frying, or even mixing a dash of your favorite hot sauce into the sticky sauce. For an extra kick, a finely minced Thai bird chili or a drizzle of chili oil over the finished bowl would certainly do the trick, honoring that bold NYC food culture.

What kind of rice is best for rice bowls?

For a perfect chicken rice bowl, I highly recommend using Jasmine or Basmati rice. Both are long-grain varieties that cook up fluffy and separate, providing an ideal base that absorbs the delicious sticky sauce without becoming mushy. Sushi rice or medium-grain rice can also work if you prefer a slightly stickier texture, but for the best individual grain experience that allows all the flavors to shine, stick with Jasmine or Basmati. Always rinse your rice well!

Any tips for perfectly air-fried chicken?

Achieving perfectly air-fried chicken in your sticky chicken rice bowl is all about technique. First, ensure your chicken pieces are cut into uniform sizes for even cooking. Second, avoid overcrowding the air fryer basket; cook in batches if necessary so air can circulate, giving you crispy, tender results, not steamed chicken. Preheat your air fryer for optimal performance, and don’t forget to shake the basket halfway through cooking for even browning. A meat thermometer is your best friend to ensure it’s cooked to a safe 165°F (160°F from the recipe, which will rise to 165°F while resting).

Can I meal prep these sticky chicken rice bowls?

These sticky chicken rice bowls are absolutely perfect for meal prepping! You can cook all components—rice, broccoli, and chicken with the sticky sauce—and store them in separate airtight containers or assembled bowls in the refrigerator for up to 3-4 days. I always recommend keeping the spicy mayo drizzle separate and adding it just before serving or reheating, as it holds up better this way. It’s a fantastic way to ensure you have delicious and healthy lunches or dinners ready to go throughout your busy week.

What’s the best way to get a super glossy sticky sauce?

The secret to a super glossy sticky sauce, often found in the finest French patisseries and Asian dishes, lies in the thickening agent and proper cooking. Using arrowroot powder, as I recommend, is key because it provides a clear, shiny finish. Ensure your slurry is well-mixed with water before adding it to the boiling sauce to prevent lumps. Then, let the sauce simmer for the full 4-5 minutes, allowing it to thicken sufficiently. The honey also contributes significantly to that beautiful sheen and perfectly sticky texture in your sticky chicken bowl.

Share Your Version!

I poured my heart and culinary experience into perfecting this sticky chicken rice bowl recipe, and now I’d love to see how it comes alive in your kitchen! Please leave a star rating and a comment below to let me know your thoughts – did you add extra spice? Found a perfect pairing? I’m always eager to hear about your cooking adventures.

Don’t forget to snap a photo and share your beautiful Asian chicken rice bowls on Instagram or Pinterest! Tag me @exorecipes so I can admire your creations and maybe even share them with my community. And tell me, what’s your favorite secret ingredient that elevates an easy chicken rice bowl from good to absolutely unforgettable?

From my NYC kitchen to yours — I hope this recipe brings as much warmth to your table as it does to mine. — mia 🧡

📌

Love This Recipe? Save It to Pinterest!

If you enjoyed this Sticky Chicken Rice Bowls recipe, don’t let it get lost in your browser tabs! 😄 Pin it now so you can find it again anytime — and explore hundreds more tried-and-tested recipes waiting for you on my Pinterest boards.

👉 Follow mia on Pinterest @chefrecipes2

📌 Pin this recipe · 🔁 Re-pin your favorites · 💬 Tag me when you make it — I love seeing your creations!

Print

clock clock iconcutlery cutlery iconflag flag iconfolder folder iconinstagram instagram iconpinterest pinterest iconfacebook facebook iconprint print iconsquares squares iconheart heart iconheart solid heart solid icon

Sticky Chicken Rice Bowls

  • Author: Chef Mia

Description

Fill up on satisfying protein and flavor with these Sticky Chicken Rice Bowls. Between the bowl base, the delicious sticky sauce, and the spicy mayo drizzle, you can expect this to become your new favorite meal.


Ingredients

Scale
  • 2 cups uncooked rice
  • 2 small heads broccoli, chopped
  • 3 large chicken breasts
  • 2 tbsp olive oil
  • 1 tsp salt
  • 1/2 tsp pepper
  • 1 tsp chili powder
  • 1 tsp smoked paprika
  • 1 tsp onion powder
  • 1 tsp oregano
  • 1/2 cup soy sauce
  • 1/2 cup honey
  • 1/4 cup rice vinegar
  • 3 cloves garlic, minced
  • 2 tbsp sriracha
  • 2 tsp sesame oil
  • 1 tsp ground ginger
  • 2 tsp arrowroot powder mixed with 2 tbsp water to make a slurry (sub cornstarch)
  • 1/2 cup mayo
  • 1 tbsp sriracha
  • 23 tbsp water
  • sesame seeds for topping

Instructions

  1. Cook rice according to package.
  2. Steam broccoli in microwave or on stove top until fork tender. Set aside.
  3. Cut chicken up into small bitesized pieces.
  4. Toss chicken with oil and all spices. Lay flat in air fryer and cook in preheated air fryer at 400F to 12 minutes or until chicken is 160F internally.
  5. While chicken is cooking, add soy sauce, honey, rice vinegar, garlic, sriracha, sesame oil, and ground ginger to a sauce pot. Bring to a boil. Once boiling, add arrowroot slurry. Let boil 4-5 minutes or until sauce has thickened greatly.
  6. Prepare bowls by layering rice, broccoli, chicken, and covering in sauce. Mix together spicy mayo ingredients and drizzle on top. Top with sesame seeds.


Nutrition

  • Calories: 560 calories
  • Sugar: 34.7 g
  • Fat: 25.7 g
  • Carbohydrates: 73.6 g
  • Protein: 15.3 g


Sticky Chicken Rice Bowls

Perfectly Juicy Air Fryer Chicken Breasts Recipe

The BEST Air Fryer Chicken Breasts Recipe EVER!! – Achieve Perfectly Juicy, Tender Chicken

⚖️
Difficulty
Easy
⏲️
Prep Time
5 mins
🕒
Cook Time
18 mins
⏱️
Total Time
23 mins
🍽️
Servings
2

Growing up in my mother’s kitchen in Morocco, the art of cooking was about transforming simple ingredients into something extraordinary. While the tagine was our air fryer of choice back then, I’ve embraced modern conveniences here in my New York City kitchen. And let me tell you, this air fryer chicken breasts recipe has truly become a weeknight miracle. It’s not just fast; it’s foolproof, consistently delivering perfectly juicy air fryer chicken breast that’s far from the dry, bland versions you might have encountered. Today, I’m thrilled to share my secret to the most succulent chicken, imbued with a classic herb and spice blend that will make your taste buds sing.

Imagine tender chicken that’s crispy on the outside, bursting with a savory aroma of paprika, oregano, and garlic, yet incredibly moist with every bite. The beauty of this recipe lies in its simplicity, making it accessible even for beginner cooks looking to master how to cook chicken breast in air fryer. The high heat circulation of the air fryer works wonders, creating that delightful crust without sacrificing the tender interior. It’s a quick trip to flavor town, reminiscent of the perfectly roasted poultry my French culinary training taught me to appreciate, but with the speed and ease that fits my busy NYC life.

What sets this air fryer chicken breast recipe apart? It’s a combination of a precise seasoning paste—inspired by the deep flavor layering of Moroccan cuisine—and a careful cooking technique that ensures maximum juiciness. Forget dry chicken forever! I’ll walk you through my method, show you a clever pro tip for retaining moisture, and highlight a common mistake many people make that can ruin an otherwise perfect dish. Get ready to elevate your chicken game and add this incredible recipe to your weekly rotation.

Why This Air Fryer Chicken Breast Recipe Is the Best

The secret to its unparalleled flavor lies in a technique I picked up early on: creating a potent spice paste. Instead of just sprinkling dry seasoning, mixing the herbs and spices with good quality olive oil helps them adhere better to the chicken and infuse more deeply. This paste acts as a flavor barrier, locking in moisture and delivering a truly aromatic experience with every bite. It’s a small step from my Moroccan heritage that makes a huge difference in the final taste.

Achieving a consistently juicy texture in chicken breast can be a challenge, but with the air fryer and a chef’s understanding of heat, it becomes effortless. My method focuses on a high initial temperature to crisp the exterior, followed by a slight adjustment to ensure the internal temperature reaches perfection without overcooking. The resting period, a fundamental technique from my Parisian culinary studies, is also critical. It allows the juices to redistribute throughout the meat, preventing dryness and ensuring tender results.

This recipe is explicitly designed for busy individuals who want delicious, healthy meals without fuss. It’s incredibly fast, going from prep to plate in under 25 minutes, making it ideal for weeknights. Plus, the air fryer guarantees consistent results, taking the guesswork out of cooking chicken breast. Whether you’re a seasoned home cook or just starting your culinary journey, this foolproof approach will give you confidence and a fantastic meal every time.

Air Fryer Chicken Breasts Ingredients

Here in NYC, I love browsing the farmers markets for the freshest ingredients, but for pantry staples like these, a good local grocery store always serves me well. The quality of your spices truly matters here; fresh, aromatic spices make all the difference, reminding me of the vibrant spice markets of Marrakech.

Ingredients List

  • 1 Tablespoon olive oil
  • 2 chicken breasts (boneless and skinless, about 6-8 oz each)
  • 1/2 teaspoon kosher salt
  • ½ teaspoon oregano
  • ½ teaspoon paprika
  • ½ teaspoon black pepper
  • ½ teaspoon garlic powder

Ingredient Spotlight

Boneless, Skinless Chicken Breasts: Look for fresh, plump chicken breasts that are a uniform thickness. If they vary in size, you might want to pound the thicker parts slightly to ensure even cooking. Their mild flavor makes them a perfect canvas for our spice blend. If you only have bone-in, skin-on chicken, the cooking time will increase significantly, and the texture will be richer, but the core seasoning still works.

Olive Oil: A good quality extra virgin olive oil not only adds flavor but also helps the spices adhere and promotes a beautiful browning. It’s essential for creating that flavorful paste. In a pinch, any neutral oil like avocado or grapeseed will work, but you’ll miss some of the subtle flavor notes that olive oil provides.

Spices (Kosher Salt, Oregano, Paprika, Black Pepper, Garlic Powder): These form the backbone of our seasoning. Freshly ground black pepper and potent garlic powder make a huge difference. Paprika, especially a good quality sweet paprika, adds color and a lovely mild sweetness. You can swap in an Italian seasoning blend for the oregano and paprika, though the flavor profile will shift slightly. Adjust salt to your preference, but don’t skip it – it’s crucial for flavor and moisture retention.

Original IngredientBest SubstitutionFlavor / Texture Impact
Olive OilAvocado Oil or Grapeseed OilSimilar texture, slightly milder flavor. May need a touch more salt.
OreganoDried Italian Seasoning BlendWill add a broader herb flavor (basil, thyme, marjoram often included).
PaprikaSmoked PaprikaAdds a deeper, smoky flavor profile. Use ¾ of the amount if it’s very potent.
Garlic PowderFresh Minced Garlic (1 clove per breast)More pungent, fresh garlic flavor. Mix directly into the oil paste.

The BEST Air Fryer Chicken Breasts Recipe EVER!!

How to Make Air Fryer Chicken Breast — Step-by-Step

Making these air fryer chicken breasts is surprisingly simple, even if you’re new to air frying. Just follow these steps, and you’ll have a delicious meal ready in no time.

Step 1: Prepare the Spice Paste

In a small bowl, combine the olive oil, kosher salt, oregano, paprika, black pepper, and garlic powder. Mix thoroughly until it forms a thick, even paste. This ensures that every bit of chicken gets richly coated with our flavorful seasoning. Ensure there are no lumps of spices.

💡 mia’s Pro Tip: Whisk the olive oil and spices together for at least 30 seconds to fully hydrate the dried herbs and spices. This brings out their essential oils and deepens the flavor when applied to the chicken. It’s a trick I learned in Paris for maximizing aromatics!

Step 2: Coat the Chicken

Pat your boneless, skinless chicken breasts completely dry with paper towels. This is crucial for achieving that desirable crispy exterior. Then, evenly spread the prepared spice paste over both sides of each chicken breast. Rub it in gently to ensure the spices truly adhere. Don’t be shy – get every nook and cranny!

⚠️ Common Mistake to Avoid: Don’t skip patting the chicken dry! Moisture on the surface will steam the chicken instead of crisping it, leading to a less flavorful and less appealing texture. Ensure it’s thoroughly dry before adding the paste.

Step 3: Air Fry to Perfection

Preheat your air fryer to 370°F (185°C) for about 3-5 minutes. Place the coated chicken breasts in a single layer in the air fryer basket, ensuring they don’t overlap to allow for even air circulation. Cook for 10 minutes, then flip the chicken breasts. Continue cooking for an additional 4-8 minutes, or until the internal temperature reaches 160°F (71°C) when measured with an instant-read thermometer at the thickest part. The exact time will depend on the thickness of your chicken breasts and your air fryer model.

💡 mia’s Pro Tip: For even cooking and maximum crispness, always arrange your chicken in a single layer. If you have more than two breasts, cook them in batches. Overcrowding the basket traps steam and prevents the exterior from getting beautifully golden.

Step 4: Rest and Serve

Once the chicken reaches 160°F (71°C), remove it from the air fryer and immediately tent it loosely with aluminum foil. Let it rest for 5 minutes before slicing or serving. This resting period is vital, as the internal temperature will rise a few more degrees to the safe final temperature of 165°F (74°C), and most importantly, it allows the juices to redistribute throughout the meat, ensuring every bite is incredibly tender and moist.

⚠️ Common Mistake to Avoid: Cutting into the chicken immediately after cooking releases all those precious juices, leaving you with dry meat. Always allow at least 5 minutes of resting time for the juiciest results! It’s a fundamental principle of cooking poultry.

StepActionDurationKey Visual Cue
1Prepare Spice Paste2 minsSmooth, thick paste forms
2Coat Chicken3 minsChicken fully coated, no dry spots
3Air Fry14-18 mins (total)Golden brown exterior, internal temp 160°F
4Rest Chicken5 minsJuices redistribute, temperature rises to 165°F

Serving & Presentation

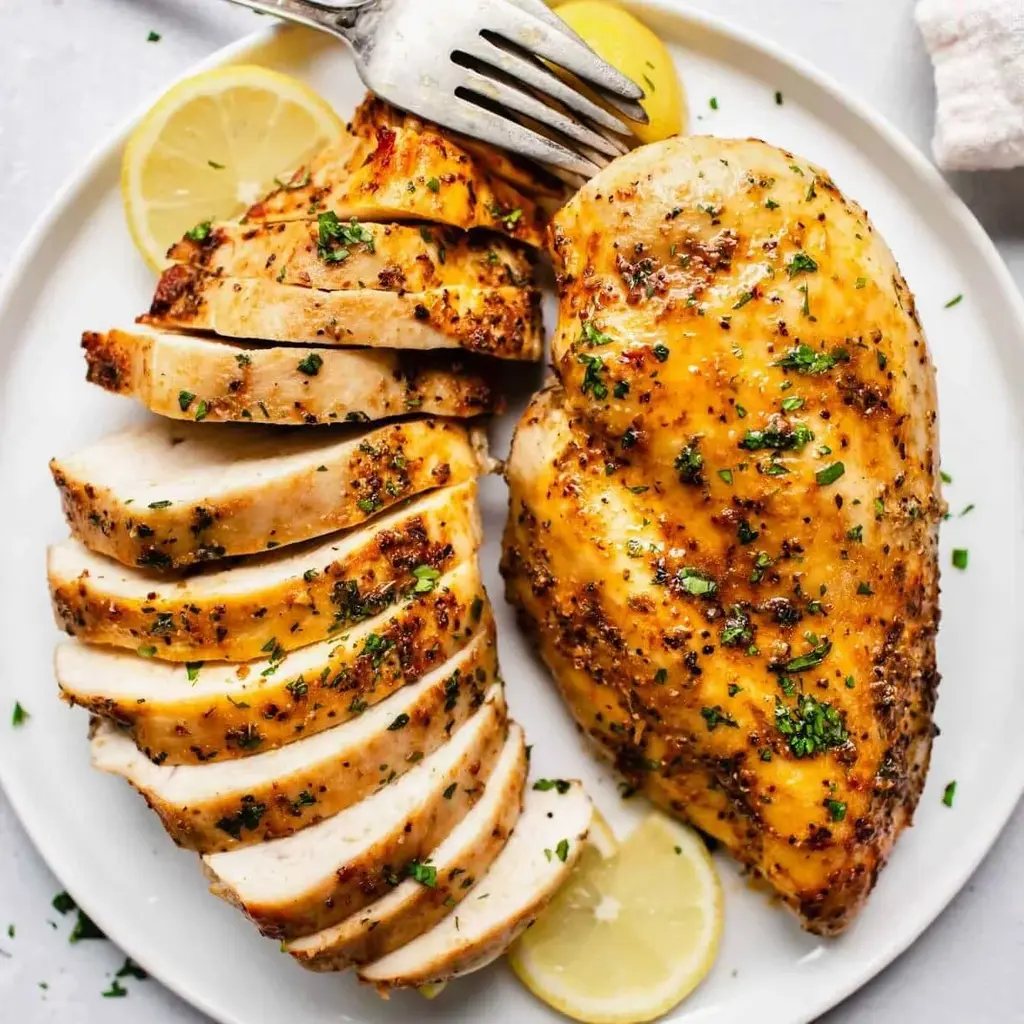
The beauty of these juicy air fryer chicken breasts is their incredible versatility. In my NYC kitchen, I love to slice them on the bias, revealing their tender, juicy interior, and arrange them fanned out on a simple plate. A sprinkle of fresh parsley or cilantro – a nod to my Moroccan roots – adds a pop of color and freshness. Don’t be afraid to keep it simple; the chicken is the star here!

For pairings, I often think of contrasts and complementary flavors. A vibrant green salad with a bright vinaigrette offers a refreshing counterpoint to the savory chicken. When I’m feeling a little more traditional, I love serving it with a creamy mashed potato or a light couscous, much like we would have in Morocco. The chicken’s mild yet flavorful profile allows it to harmonize with almost anything you put next to it. For a French touch, consider a simple pan sauce made from the resting juices with a splash of white wine or chicken stock.

Pairing TypeSuggestionsWhy It Works
Side DishQuinoa pilaf, Roasted vegetables (broccoli, asparagus), Simple green saladOffers a healthy balance, texture contrast, and complements the savory chicken.
Sauce / DipCreamy yogurt sauce (with a hint of garlic), Chimichurri, Quick pan sauceAdds extra moisture and a burst of complementary flavor.
BeverageCrisp Sauvignon Blanc, Light-bodied Pinot Noir, Lemonade (sparkling)Enhances the meal without overpowering the chicken’s delicate flavors.
GarnishFresh parsley, Cilantro, Lemon wedges, Toasted sesame seedsAdds visual appeal, freshness, and can brighten the flavor profile.

Make-Ahead, Storage & Reheating

Living in New York City with a busy schedule means meal prepping is essential for me. These air fryer chicken breasts are perfect for that! I often make a larger batch on Sunday to enjoy quick, healthy meals throughout the week without sacrificing flavor.

MethodContainerDurationReheating Tip
RefrigeratorAirtight container3-4 daysSlice and reheat gently in the microwave or air fryer (300°F for 3-5 min).
FreezerFreezer-safe bag/container2-3 monthsThaw overnight in fridge, then reheat as above.
Make-AheadPre-seasoned chickenUp to 24 hours in fridgeSeason chicken up to a day in advance, store covered, then air fry as directed.

To reheat, I always recommend using the air fryer if you can. It helps bring back some of that beautiful crispness without drying out the chicken. Reheat at a slightly lower temperature, around 300°F (150°C), for about 3-5 minutes, or until just warmed through. Be careful not to overcook, as reheated chicken can dry out quickly. If using a microwave, cover loosely to retain moisture and heat in 30-second intervals.

You can also slice the cooked chicken cold and add it to salads, wraps, or even pasta dishes. It’s truly a versatile protein that makes meal planning a breeze, giving you more time to enjoy your culinary creations rather than stressing in the kitchen.

Variations & Easy Swaps

Part of the joy of cooking, for me, is adapting a recipe to suit my mood, the season, or what I find at the Union Square Greenmarket. This air fryer chicken breast recipe is a fantastic base for all sorts of flavor explorations.

VariationKey ChangeBest ForDifficulty Impact
Spicy Harissa ChickenAdd 1 tsp Harissa paste to spice blendThose who love a fiery kick and North African flavorsMinimal
Garlic & Herb MedleySubstitute oregano/paprika with dried rosemary & thymeA classic, aromatic herb flavor reminiscent of French cuisineMinimal
Lemon-Pepper ZestAdd 1 tsp lemon zest and an extra ½ tsp black pepperA bright, fresh, and peppery twistMinimal

Spicy Harissa Chicken Breast

For a vibrant taste of my Moroccan heritage, add about 1 teaspoon of harissa paste to your spice mixture. This fiery red chili paste will imbue your air fryer chicken breasts with a complex heat and a beautiful color. Adjust the amount based on your spice tolerance; even a small addition delivers a significant flavor punch and a wonderful aroma.

Gluten-Free / Dairy-Free Air Fryer Chicken

This recipe is naturally gluten-free and dairy-free as written, which is wonderful! The olive oil provides all the necessary fat and moisture. Always double-check your spice blends if buying pre-mixed, though, to ensure no hidden gluten or dairy additives. It truly remains universally delicious without any complex substitutions.

Lemony Herb Twist

For a brighter, fresher profile, incorporate the zest of half a lemon into your spice paste. The citrus notes pair beautifully with the herbs and chicken, lifting the flavors and adding a wonderful aroma. It’s a simple addition that makes a big impact, perfect for warmer months or when you crave a bit more zing.

How long do you cook chicken breasts in an air fryer?

For boneless, skinless chicken breasts (typically 6-8 ounces each), I recommend air frying at 370°F (185°C) for a total of 14-18 minutes. Cook for 10 minutes, then flip them over and continue for another 4-8 minutes. The most important thing is to use an instant-read thermometer to ensure the internal temperature reaches 160°F (71°C) before resting, as it will rise to 165°F (74°C) during the rest. Thicker breasts will naturally take a little longer, so trust your thermometer over strict timing.

What temperature should I use for air fryer chicken breasts?

I find that 370°F (185°C) is the ideal temperature for cooking air fryer chicken breasts. This temperature is hot enough to create a beautifully golden and slightly crispy exterior without drying out the interior. Going too high, above 400°F, can sometimes burn the outside before the inside is fully cooked, especially if your chicken breasts are thick. A slightly moderate high heat ensures even cooking and a juicy result.

How do you keep air fryer chicken breasts from drying out?

There are a few key tricks I use to prevent dry air fryer chicken breasts. First, pat the chicken completely dry before seasoning, as this helps create a crust that locks in moisture. Second, don’t overcrowd the air fryer basket; cook in batches if necessary so air can circulate. Third, and most crucially, use an instant-read thermometer and cook only until the chicken reaches 160°F (71°C), then immediately remove and tent with foil to rest for 5 minutes. This resting period lets the juices redistribute, guaranteeing a tender, juicy result.

Can you cook frozen chicken breasts in an air fryer?

Yes, you absolutely can cook frozen chicken breasts in an air fryer, but the cooking time will be significantly longer. It’s best to cook them plain for about 10-15 minutes at 370°F (185°C) until they are thawed enough to separate, then you can apply your spice paste and continue cooking for an additional 20-30 minutes, or until the internal temperature reaches 165°F (74°C). The texture might be slightly less tender than fresh chicken, but it’s a great option for a last-minute meal.

Should I flip chicken breast in air fryer?

Yes, I definitely recommend flipping your chicken breasts halfway through the cooking process when using an air fryer. This ensures that both sides get even exposure to the circulating hot air, promoting uniform browning and crispness. For this recipe, after 10 minutes of initial cooking, a quick flip ensures both sides develop that delicious golden crust and cook to perfection without any dry spots.

Do you put oil on chicken breast for air fryer?

Absolutely, yes! A little bit of oil is crucial for the best air fryer chicken breasts. In my recipe, I incorporate olive oil directly into the spice paste. This not only helps the spices adhere beautifully to the chicken but also contributes to that desirable golden-brown exterior and helps keep the chicken juicy. Without oil, the chicken can sometimes look pale and be prone to drying out more quickly. Just a tablespoon is enough for two breasts.

What are the best seasonings for air fryer chicken breasts?

For truly flavorful air fryer chicken breasts, my go-to blend includes kosher salt, black pepper, garlic powder, paprika, and oregano. This combination creates a savory, aromatic profile that is broadly appealing and versatile. However, feel free to experiment! You could add a pinch of cumin for a Moroccan twist, a dash of smoked paprika for depth, or a touch of onion powder for extra savoriness. The key is to blend them with a little oil to create a paste for maximum flavor adherence.

Share Your Version!

I poured my heart into perfecting this air fryer chicken breast recipe, blending my culinary training with my heritage, and I truly believe it’s the best way to achieve perfectly juicy chicken every time. I’d love to hear how it turns out for you! Please leave a star rating and a comment below to share your experience.

Did you try a new spice blend or pair it with an excellent side dish? Share your photos on Instagram or Pinterest and tag me @exorecipe. I adore seeing your culinary creativity! What’s your favorite way to make air fryer chicken breasts extra special?

From my NYC kitchen to yours — I hope this recipe brings as much warmth to your table as it does to mine. — mia 🧡

📌

Love This Recipe? Save It to Pinterest!

If you enjoyed this The BEST Air Fryer Chicken Breasts Recipe EVER!! recipe, don’t let it get lost in your browser tabs! 😄 Pin it now so you can find it again anytime — and explore hundreds more tried-and-tested recipes waiting for you on my Pinterest boards.

👉 Follow mia on Pinterest @chefrecipes2

📌 Pin this recipe · 🔁 Re-pin your favorites · 💬 Tag me when you make it — I love seeing your creations!

Print

clock clock iconcutlery cutlery iconflag flag iconfolder folder iconinstagram instagram iconpinterest pinterest iconfacebook facebook iconprint print iconsquares squares iconheart heart iconheart solid heart solid icon

Air Fryer Chicken Breast

  • Author: Chef Mia

Description

This foolproof recipe makes flavorful and tender air fryer chicken breasts every time, seasoned with herbs and spices.


Ingredients

Scale
  • 1 Tablespoon olive oil
  • 2 chicken breasts (boneless and skinless)
  • 1/2 teaspoon kosher salt (***)
  • ½ teaspoon oregano
  • ½ teaspoon paprika
  • ½ teaspoon black pepper
  • ½ teaspoon garlic powder

Instructions

  1. In a small bowl combine the salt and spices with oil to create a paste. Coat chicken breasts with the paste.
  2. Place in the air fryer basket and cook at 370-degrees for 10 minutes. Flip the chicken and cook for an additional 4-8 minutes, or until the internal temperature reaches 160-degrees.
  3. Tent the chicken with tin foil and allow to rest for 5 minutes before serving.


Nutrition

  • Calories: 326 kcal
  • Sugar: 0.1 g
  • Fat: 13 g
  • Carbohydrates: 1 g
  • Protein: 48 g


The BEST Air Fryer Chicken Breasts Recipe EVER!!

Authentic Greek Chicken Gyro Souvlaki with Creamy Tzatziki

Authentic Greek Chicken Gyro Souvlaki – Easy Dinner With Creamy Tzatziki

⚖️
Difficulty
Easy
⏲️
Prep Time
20 mins
🕒
Cook Time
20 mins
⏱️
Total Time
40 mins
🍽️
Servings
6

Growing up in my mother’s bustling kitchen in Morocco, I learned early on that the best food tells a story. And this authentic Greek chicken gyro recipe, complete with a rich, creamy homemade tzatziki sauce, certainly does! This dish takes me back to my first street food encounter in Paris after culinary school – a savory, perfectly seasoned chicken, wrapped in warm pita, slathered with vibrant tzatziki. That blend of rustic simplicity and bold flavors immediately resonated with my North African roots, and I knew I had to master it. Now, from my NYC kitchen, I’m sharing my family’s perfected version of this easy Greek dinner, designed to bring those sunny Mediterranean flavors right to your table, no matter how busy your week gets.

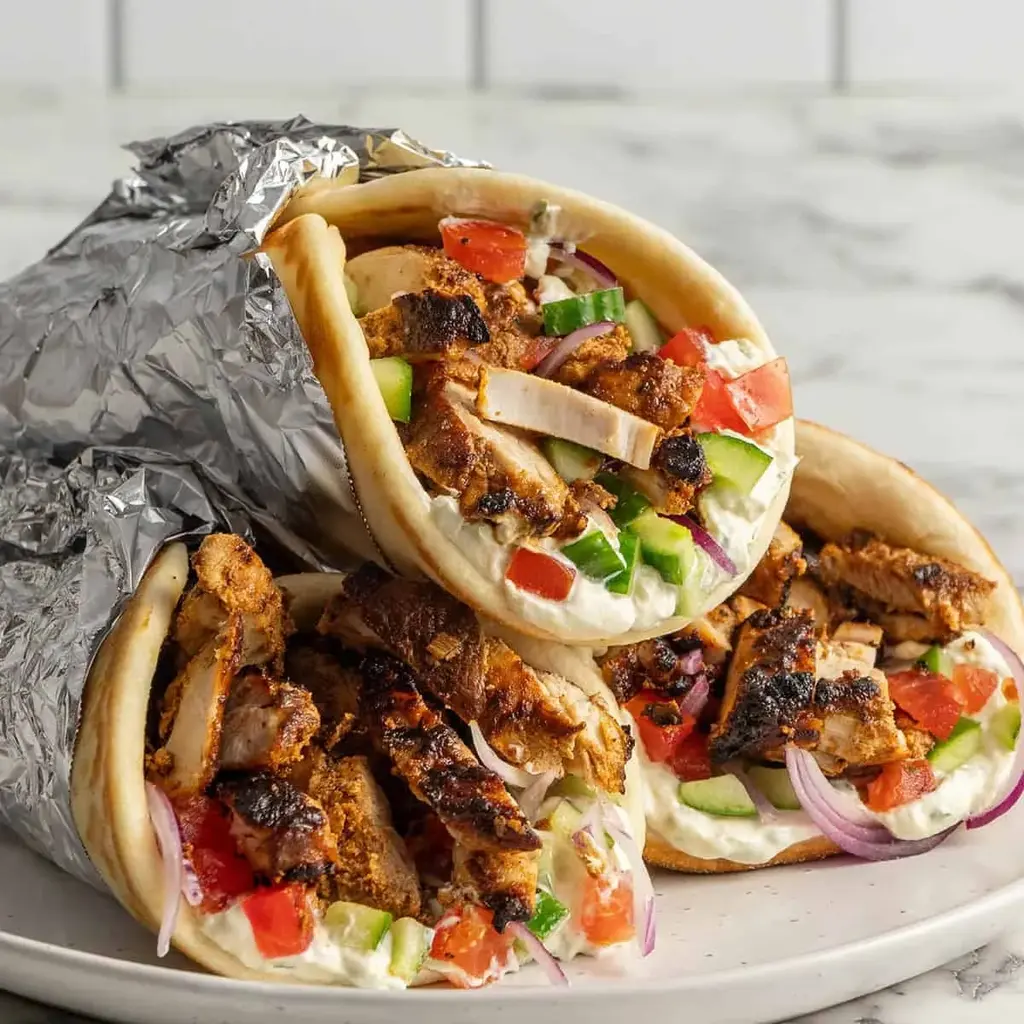
Close your eyes and imagine: tender, juicy chicken thighs, marinated with a symphony of spices like paprika, cumin, and just a hint of cinnamon – a nod to the aromatic spices I often use in Moroccan stews. This chicken is then broiled to perfection, achieving that beautiful charred exterior and succulent interior. Each bite is a textural delight, from the soft, fluffy pita bread, straight off the griddle, to the cool, crisp cucumber and tomato, and the sharp bite of red onion. The crowning glory, of course, is the thick, garlicky homemade tzatziki, its tangy coolness a refreshing contrast that ties all the vibrant flavors together. It’s a sensory experience that transports you straight to the Greek islands, all from the comfort of your home.

What sets my Greek chicken gyros apart isn’t just the carefully balanced spices, but a few chef-approved techniques that ensure incredible results every time. I’ve perfected the marinade to tenderize the chicken perfectly, and my secret for that ideal char without drying out the meat is something I learned while interning in a French bistro. I’ll also show you how to truly elevate your tzatziki from good to absolutely unforgettable. Stick with me, and you’ll avoid common pitfalls like dry chicken or watery sauce, and instead, serve up an easy Greek dinner that will have everyone asking for your secret! Get ready to impress with this authentic chicken souvlaki experience.

Why This Greek Chicken Gyros Recipe Is the Best

My approach to this Greek chicken gyro recipe focuses on maximizing flavor with minimal fuss, a principle I carried from my French culinary training straight into my NYC professional kitchen. The secret lies in the long marinade for the chicken, infusing every fiber with the bright zest of lemon and the earthy warmth of cumin and paprika, mimicking the depth you’d find in slow-cooked Moroccan tagines. This isn’t just a quick coat; it’s a flavor bath that makes bland chicken a thing of the past, ensuring your homemade gyros are bursting with a truly authentic taste.

Achieving the perfect texture for your chicken souvlaki is critical. My method, utilizing the oven broiler, creates chicken that’s beautifully caramelized and slightly crispy on the outside, while remaining incredibly tender and juicy inside. This technique, a simplified version of professional grilling, ensures a satisfying bite without the need for fancy equipment. Coupled with soft, warmed pita bread and crisp fresh vegetables, every component contributes to a balanced and delightful mouthfeel that will remind you of the best street food from Athens.

This recipe is explicitly designed to be foolproof, even for beginner cooks, while still delivering an easy Greek dinner that tastes like it came from a specialty restaurant. From preparing the chicken to assembling the final gyro, I break down each step with clear, concise instructions. I’ve incorporated shortcuts learned from years in busy NYC kitchens, like using boneless, skinless chicken thighs for speed and flavor, and a simple but effective tzatziki method. You’ll avoid common kitchen woes and create a dish that’s both impressive and incredibly simple to execute, proving that authentic flavor doesn’t have to be complicated.

Authentic Greek Chicken Gyro Souvlaki – Easy Dinner Ingredients

When I head to my favorite NYC farmers’ market or local Middle Eastern grocery, I always seek out the freshest ingredients for my Greek chicken gyro recipe. The quality of your produce and dairy truly makes all the difference in recreating that vibrant Greek flavor, harkening back to the fresh, seasonal ingredients my mother always insisted on in Morocco.

Ingredients List

  • 1/2 cup Greek yogurt (full-fat for best results)
  • 1/2 lemon (juiced, about 2 tbsp)
  • 1 tbsp red wine vinegar (high-quality makes a difference)
  • 3 garlic cloves (minced, don’t skimp!)
  • 1 tbsp paprika (sweet or smoked, your preference)
  • 1 tbsp cumin powder
  • 1/2 tsp cinnamon powder (optional, but adds depth)
  • 1 tbsp dried oregano (Greek preferred)
  • Pepper to taste
  • 1 tsp salt
  • 2 tbsp olive oil (extra virgin for flavor)
  • 10 chicken thighs (boneless and skinless, about 2 lbs)
  • 3 Lebanese cucumbers (or 1 English cucumber, see notes)
  • 2 ripe tomatoes (beefsteak or Roma work well)
  • 6 pitas (soft, thick Greek-style pitas are ideal)
  • 1 batch tzatziki (my homemade recipe is linked!)
  • 1/2 red onion (thinly sliced)

Ingredient Spotlight

Greek Yogurt: For that truly creamy, authentic tzatziki and a tender chicken marinade, rich, full-fat Greek yogurt is non-negotiable. Look for brands with minimal additives. The higher fat content provides a luscious mouthfeel and helps the marinade cling beautifully to the chicken. If you can only find low-fat, drain it overnight in a cheesecloth for a thicker consistency, though the richness won’t be quite the same.

Chicken Thighs: Boneless, skinless chicken thighs are my go-to for chicken souvlaki. They cook up incredibly juicy and flavorful, much more forgiving than breast meat. Their higher fat content prevents them from drying out, even under intense heat, which is key for those perfectly charred edges without losing tenderness. If you prefer chicken breast, reduce the cooking time slightly and be careful not to overcook, as it can become dry very quickly.

Lebanese Cucumbers: These small, sweet cucumbers have thin skins and fewer seeds, making them ideal for dicing into your fresh gyro fillings without needing to be peeled or seeded extensively. In American grocery stores, you might find them labeled as Persian or mini cucumbers. If unavailable, one large English cucumber works wonderfully; just be sure to scoop out the watery seeds if they’re particularly large to prevent your gyro from getting soggy.

Pita Bread: The foundation of any great gyro! Look for soft, thick pitas, sometimes labeled “Greek style” or “pocketless pita.” These are more robust and less prone to tearing than the thinner sandwich pitas. I often find excellent ones at Middle Eastern or Mediterranean markets here in NYC. If you can only find thinner pitas, gently warm them and use two per gyro for extra stability.

Original IngredientBest SubstitutionFlavor / Texture Impact
Greek YogurtSour Cream (for marinade only) or drained regular yogurtSour cream works for marinade but tzatziki won’t be as tangy. Draining regular yogurt gives thickness, but less rich.
Chicken ThighsChicken BreastLess juicy, can dry out easily. Reduce cooking time to prevent dryness. Marinade is even more crucial.
Lebanese CucumbersEnglish CucumberSimilar mild flavor, but generally larger. Make sure to scoop out large seeds before dicing to avoid excess water.
Red Wine VinegarApple Cider VinegarProvides similar acidity, but will have a slightly fruitier, less robust flavor profile. White wine vinegar also works.

Authentic Greek Chicken Gyro Souvlaki - Easy Dinner

How to Make Greek Chicken Gyros — Step-by-Step

Making these delicious Greek chicken gyros is easier than you think, and with my step-by-step guidance, you’ll be assembling perfect, flavorful wraps in no time. Let’s get cooking!

Step 1: Prepare the Marinade and Chicken

In a large mixing bowl, combine the Greek yogurt, fresh lemon juice, red wine vinegar, minced garlic cloves, paprika, cumin, optional cinnamon, dried oregano, a generous pinch of pepper, salt, and olive oil. Stir everything together with a spoon until you have a well-combined, aromatic paste. Add the boneless, skinless chicken thighs to the bowl, ensuring each piece is thoroughly coated in the marinade. Cover the bowl tightly with plastic wrap and refrigerate for at least 2 hours to allow the flavors to penetrate deeply. Ideally, let it marinate overnight for the absolute best taste and tenderness – trust me, it’s worth the wait!

⚠️ Common Mistake to Avoid: Not marinating long enough. The acidity in the yogurt and lemon tenderizes the chicken and infuses flavor. Shorter marinating times will result in less flavorful, potentially tougher chicken. Always aim for at least 2 hours, but overnight is gold!

Step 2: Cook the Marinated Chicken

Preheat your oven broiler to its highest setting and position an oven rack as high as it will go, typically 4-6 inches from the broiler element. Line a baking tray with aluminum foil for easier cleanup. Arrange the marinated chicken thighs in a single layer on the prepared tray. Grill for 10 minutes, or until the chicken tops are slightly charred and browned. Carefully remove the tray, flip each chicken thigh using tongs, and return to the broiler for another 10 minutes, or until the second side is also nicely charred and the internal temperature reaches 165°F (75°C). Let the cooked chicken rest on a cutting board for 10 minutes before roughly chopping into bite-sized pieces. This resting period is crucial for juicy chicken!

💡 mia’s Pro Tip: The resting period for the chicken is non-negotiable. Just like a perfectly roasted leg of lamb from my Parisian days, allowing the chicken to rest redistributes the juices, ensuring every piece of your chicken souvlaki is incredibly tender and moist. Patience here truly pays off!

Step 3: Prepare the Fresh Fillings

While the chicken is cooking or resting, clean and pat dry your Lebanese cucumbers and ripe tomatoes. Trim the ends off both vegetables and then slice them in half. With a spoon, gently scoop out the watery seeds from both the cucumbers and tomatoes – this prevents soggy gyros. Dice the deseeded cucumbers and tomatoes into small, uniform cubes and place them in a bowl. Thinly slice the red onion. This uniform dicing is a little attention to detail from my culinary training that ensures every bite of your chicken gyro has a balanced mix of textures and flavors.

⚠️ Common Mistake to Avoid: Skipping the deseeding of cucumbers and tomatoes. The excess moisture can make your pita bread wet and break down the structure of your gyro. Taking a few extra seconds to remove the seeds will significantly improve your overall experience.

Step 4: Assemble Your Gyros Like a Pro

Lay out a large piece of aluminum foil on a clean surface. Place one pita bread in the center of the foil. Spoon a generous scoop of your creamy homemade tzatziki sauce (or plain Greek yogurt if that’s what you’re using for now) onto the pita. Spread the tzatziki around, leaving a small border at the bottom and sides to facilitate wrapping. Then, layer an even amount of the diced tomato, cucumber, thinly sliced red onion, and finally, the chopped Greek chicken onto the center of the pita.

💡 mia’s Pro Tip: Gently warm your pita bread before assembling! A quick pass on a dry skillet, in the microwave for 15 seconds, or even under the broiler for 30 seconds makes it more pliable and prevents tearing, giving you that authentic soft pita experience. This is a trick I picked up from a vendor in a Moroccan souk!

Step 5: Master the Gyro Wrap

To create a neatly wrapped gyro that holds all its delicious fillings, start by folding the bottom edge of the pita bread up and over the filling. Use one hand to firmly hold this bottom fold in place. With your other hand, fold one side of the pita over the filling, continuing to hold both the bottom and side folds securely. Now, fold the final side of the pita over. As you make each fold, gently compress the filling. Once the pita is wrapped, immediately use the surrounding aluminum foil to snugly wrap around the gyro, which helps maintain its shape and keeps everything warm. Serve your fresh, perfectly wrapped gyros immediately and enjoy!

StepActionDurationKey Visual Cue
1Marinate Chicken2 hours (or overnight)Chicken coated in creamy, spiced yogurt; deep color.
2Cook Chicken20 mins (10 per side)Chicken with charred edges, cooked through (165°F / 75°C internal temp).
3Prepare Fillings10-15 minsDiced cucumber and tomato with no visible seeds, thinly sliced red onion.
4Assemble Gyro1-2 mins per gyroEven spread of tzatziki, well-distributed fillings.
5Wrap Gyro<1 min per gyroTightly folded pita, secured with foil; no filling spilling out.

Serving & Presentation

Presenting these authentic Greek chicken gyros is all about celebrating their rustic charm and vibrant freshness. I like to serve them wrapped snugly in their foil, which not only keeps them warm but also makes them easy to hold—a nod to the street food experience that inspired me. For a beautiful contrast, I often arrange them on a platter with extra fresh lemon wedges, a sprinkle of fresh chopped parsley (a habit from my Moroccan mother’s kitchen), and perhaps a small bowl of extra tzatziki for those who love an extra dollop.

To truly complete the experience, consider what you’d find in a traditional Greek taverna or even a modern NYC eatery. A simple Greek salad with crisp lettuce, Kalamata olives, and a light vinaigrette is a perfect fresh complement. For something heartier, a side of crispy seasoned fries or oven-roasted potatoes sprinkled with oregano would be absolutely divine. The key is to keep the sides fresh and light, allowing the bold flavors of the chicken souvlaki and creamy tzatziki to shine.

Don’t be afraid to get creative with your garnishes! A light dusting of sumac (a spice I love for its tartness, often used in North African cuisine) can add an unexpected tangy note, or a few fresh mint leaves layered into the gyro can provide an invigorating pop of flavor. The visual appeal is just as important as the taste; after all, we eat with our eyes first. Make it colorful, make it inviting, and your easy Greek dinner will feel like a truly special occasion.

Pairing TypeSuggestionsWhy It Works
Side DishGreek Salad, Lemon Roasted Potatoes, French FriesFreshness cuts richness, starches are classic accompaniments, completing the meal.
Sauce / DipExtra Tzatziki, Spicy Feta Dip (Tirokafteri)Tzatziki enhances flavor; spicy feta adds a contrastingkick.
BeverageCrisp White Wine (Assyrtiko), Iced Tea, Sparkling Water with MintRefreshing drinks balance the savory flavors; wine complements Mediterranean cuisine.
GarnishFresh Parsley, Lemon Wedges, Kalamata OlivesAdds freshness, visual appeal, and brightens flavors.

Make-Ahead, Storage & Reheating

Living in NYC with a demanding schedule, I’ve mastered the art of meal prepping. This Greek chicken gyro recipe is fantastic for making ahead, allowing you to enjoy delicious, easy Greek dinners throughout the week without the last-minute rush. Proper storage is key to maintaining freshness and flavor, so let me share my tested methods.

MethodContainerDurationReheating Tip
RefrigeratorAirtight containers, separate ingredients3-4 daysReheat chicken gently; warm pita; add fresh tzatziki and veggies just before serving.
FreezerFreezer bags (chicken only), flatUp to 2 monthsThaw chicken overnight in fridge. Reheat in oven or skillet until warmed through.
Make-AheadPre-chopped veggies, cooked chicken, prepared tzatziki2-3 days in advanceStore components separately. Assemble just before eating for best texture.

When storing, it’s crucial to keep your cooked chicken, fresh vegetables, and tzatziki sauce in separate airtight containers. This prevents the pita from getting soggy and the veggies from wilting. For reheating the chicken, I prefer a quick warm-up in a skillet over medium heat or a few minutes in a preheated oven at 350°F (175°C) until just warmed through. Avoid microwaving the chicken if possible, as it can make it rubbery – a lesson I learned quickly in catering large events in Paris where texture preservation is paramount!

Pita bread can be warmed gently in a dry skillet for 30 seconds per side, or wrapped in foil and heated in the oven. The beauty of this easy Greek dinner is its modularity; assembling it fresh is quick once all the components are ready. This makes it perfect for weeknight meals or even a quick grab-and-go lunch, which is essential for my busy food blogging life here in NYC.

Variations & Easy Swaps

One of the joys of cooking is adapting dishes to suit your taste or what you have on hand. My authentic Greek chicken gyro recipe is wonderfully versatile, and these variations are perfect for keeping things interesting, inspired by both my Moroccan heritage and French culinary adaptability.

VariationKey ChangeBest ForDifficulty Impact
Spicy Moroccan TwistAdd Harissa to marinade/tzatzikiThose who love a fiery kick and North African flavors.Minimal (just add a spice).
Vegetarian DelightSwap chicken for grilled halloumi or marinated chickpeasMeat-free diners, or a lighter meal.Slight (different cooking method for halloumi/chickpeas).
Low-Carb Open FaceServe over lettuce wraps or cauliflower riceKeto-friendly, gluten-free, or if you’re out of pitas.None (only assembly change).

Spicy Moroccan Gyro Twist

For those who like a bit of heat, introduce a Moroccan twist! Add 1-2 teaspoons of harissa paste to your chicken marinade, intensifying the spice profile with its smoky, garlicky warmth. You can also swirl a little into your tzatziki for a vibrant kick that perfectly complements the rich chicken. This infusion brings a familiar comfort to me, reminiscent of the bold flavors from my mother’s kitchen, transforming this easy Greek dinner into something truly unique.

Gluten Free or Dairy Free Chicken Gyros

Making this recipe suitable for dietary needs is simple. For a gluten-free option, swap traditional pita bread for gluten-free flatbreads or serve the chicken and fillings in large lettuce cups. If you’re avoiding dairy, use a high-quality dairy-free plain yogurt (like coconut or almond-based) in both the marinade and the tzatziki. I’ve tested these substitutions in my NYC kitchen, and while the texture of the tzatziki might be slightly different, the flavor remains delightful, especially with my robust spice blend on the chicken souvlaki.

Seasonal Vegetable Medley

Embrace the seasons! While cucumber and tomato are classic, feel free to add other seasonal vegetables. In summer, I love adding grilled bell peppers or zucchini thinly sliced. For autumn, a hint of roasted butternut squash might add a surprising sweetness. These additions, inspired by my trips to the Union Square Greenmarket, can add new layers of flavor and texture, ensuring your homemade gyros are always fresh and exciting.

What is the difference between gyro and souvlaki?

This is a great question often asked, and the answer lies mainly in how the meat is cooked and served. A gyro (pronounced YEE-roh) traditionally features meat (pork, chicken, or often a mix of beef and lamb) that is cooked on a vertical rotisserie, then thinly sliced off and wrapped in pita. Souvlaki (soo-VLAH-kee), on the other hand, refers to small pieces of meat (usually pork or chicken) grilled on a skewer. While both are served in pita with similar toppings like tzatziki, the cooking method for the meat is the key differentiator. My recipe for Greek chicken gyro uses a broiler which mimics the charred, flavorful qualities of traditionally cooked gyro meat, giving you that authentic experience at home.

What is the best way to make tzatziki sauce for chicken gyros?

The best tzatziki sauce starts with full-fat Greek yogurt – the thicker, the better! My recipe calls for grating cucumber (and squeezing out all excess water!), finely minced fresh garlic, a good splash of fresh lemon juice, and a drizzle of quality olive oil, along with fresh dill or mint if you have it. The secret is definitely in getting rid of that excess cucumber water, which keeps your sauce thick and creamy, preventing it from making your pita soggy. A touch of red wine vinegar adds a great tang too, something I learned from an old Greek chef I worked with in a Parisian kitchen. You’ll find my full homemade tzatziki recipe linked within this post for a truly authentic taste.

Can I make Greek chicken souvlaki in the oven instead of on a grill?

Absolutely! In fact, my Greek chicken gyro recipe specifically uses the oven broiler (often called the grill function in Europe) to achieve that delicious char and succulent texture without needing an outdoor grill. The intense overhead heat of the broiler mimics the direct heat of a grill, giving the chicken those desirable browned, slightly crispy edges while keeping the inside tender and juicy. This method is perfect for apartment dwellers in places like NYC or anyone who wants authentic chicken souvlaki flavor without the fuss of charcoal or propane. Just make sure your oven rack is close to the broiler element for maximum effect and a quick cooking time!

What are traditional side dishes to serve with chicken gyros?

When I think of an easy Greek dinner, the sides are just as important as the main event! Traditionally, chicken gyros and chicken souvlaki are often served with crispy French fries, but for a lighter touch, lemon roasted potatoes are a fantastic option. A fresh, vibrant Greek salad with Kalamata olives, feta, and a simple vinaigrette is also a staple; it cuts through the richness of the meat and tzatziki beautifully. And, of course, no Greek meal is complete without extra warmed pita bread and perhaps some additional dips like a spicy feta dip (tyrokafteri) or even some hummus, offering a spectrum of flavors and textures.

How can I ensure my chicken is tender and juicy for an authentic Greek chicken gyro?

To ensure tender and juicy chicken, two things are absolutely essential in this authentic Greek chicken gyro recipe. First, using boneless, skinless chicken thighs is key; their higher fat content keeps them moist better than chicken breast. Second, a long marinade time is crucial. The Greek yogurt and lemon juice in my marinade contain enzymes and acids that actively tenderize the chicken fibers, while the spices infuse deep flavor. Aim for at least 2 hours of marinating, but if you can, let it sit overnight in the fridge. This ensures the chicken is not only flavorful but incredibly succulent once cooked under the broiler, giving you that genuine chicken souvlaki experience.

Share Your Version!

I poured my heart into perfecting this Authentic Greek Chicken Gyro Souvlaki recipe, and I truly hope it brings a slice of Mediterranean sunshine to your dinner table. Your feedback means the world to me!

If you tried this easy Greek dinner, please take a moment to leave a star rating and a comment below. I’d love to hear how it turned out for you! Don’t forget to share your culinary creations on Instagram or Pinterest and tag @exorecipe – I adore seeing your photos. What’s your favorite part about making homemade tzatziki sauce?

From my NYC kitchen to yours — I hope this recipe brings as much warmth to your table as it does to mine. — mia 🧡

📌

Love This Recipe? Save It to Pinterest!

If you enjoyed this Authentic Greek Chicken Gyro Souvlaki – Easy Dinner recipe, don’t let it get lost in your browser tabs! 😄 Pin it now so you can find it again anytime — and explore hundreds more tried-and-tested recipes waiting for you on my Pinterest boards.

👉 Follow mia on Pinterest @chefrecipes2

📌 Pin this recipe · 🔁 Re-pin your favorites · 💬 Tag me when you make it — I love seeing your creations!

Print

clock clock iconcutlery cutlery iconflag flag iconfolder folder iconinstagram instagram iconpinterest pinterest iconfacebook facebook iconprint print iconsquares squares iconheart heart iconheart solid heart solid icon

Greek Chicken Gyros With Creamy Tzatziki (Family Recipe)

  • Author: Chef Mia

Description

Chicken Gyros are made of Perfectly juicy and tasty chicken, wrapped in my soft pita bread with thick and creamy tzatziki made at home.


Ingredients

Scale
  • 1/2 cup Greek yogurt (see notes)
  • 1/2 lemon (juiced)
  • 1 tbsp red wine vinegar (see notes)
  • 3 garlic cloves (minced)
  • 1 tbsp paprika
  • 1 tbsp cumin powder
  • 1/2 tsp cinnamon powder (optional)
  • 1 tbsp dried oregano
  • Pepper to taste
  • 1 tsp salt
  • 2 tbsp olive oil
  • 10 chicken thighs (boneless and skinless (see notes))
  • 3 Lebanese cucumbers (see notes)
  • 2 ripe tomatoes (see notes)
  • 6 pitas
  • 1 batch tzatziki
  • 1/2 red onion (thinly sliced)

Instructions

  1. To make the marinade – To a large mixing bowl add the Greek yogurt, lemon juice, red wine vinegar, garlic, paprika, cumin, cinnamon, oregano, pepper, salt and olive oil and mix using a spoon to combine. Add the chicken thighs and mix to coat in the marinade. Cover with plastic wrap and allow to marinade for 2 hours. Overnight if you can!
  2. To cook – turn your oven broiler (grill function) on the highest setting and allow to heat for 10 minutes. Place the oven tray as far up as it will go. Line a baking tray with foil and place your marinaded chicken on top. Grill for 10 minutes or until slightly charged. Then take out of the oven and turn overusing tongs. Cook on the other side for another 10 minutes or until charged. The safe internal temperature of the chicken should be 75C / 165F. Allow to rest on a chopping board for 10 minutes before using a large knife to chop up into rough pieces.
  3. To prepare the fillings – you want to clean and pat dry your cucumber and tomato. Cut the ends off the cucumber and tomato and then slice in half. Do the same with the tomato. Use a spoon to scoop out the seeds from both vegetables as shown in the video. Cut into small cubes and place in a bowl. You want to thinly slice the red onion as well.
  4. To assemble – Place your pita onto a large piece of aluminum foil. Add a good scoop of Greek tzatziki or Greek yogurt onto each pita. Spread around leaving a gap at the bottom and sides. Add the tomato, cucumber, red onion and chopped chicken. Then add the chicken and wrap.
  5. To wrap your gyro – fold the bottom of the wrap over the filling. Then use one hand to hold that fold while folding over one side of the wrap. Hold those two folds down and fold over the final side. Hold it all down while you repeat this process with the foil to help keep everything in place. Serve fresh!


Nutrition

  • Calories: 654 kcal
  • Sugar: 4 g
  • Fat: 37 g
  • Carbohydrates: 42 g
  • Protein: 38 g


Authentic Greek Chicken Gyro Souvlaki - Easy Dinner

k">

Tried This Recipe? Leave a Comment!

Did you make this recipe? I’d love to hear how it turned out! Please leave a comment and a rating below. Your feedback helps other home cooks and supports cheerychop.com!
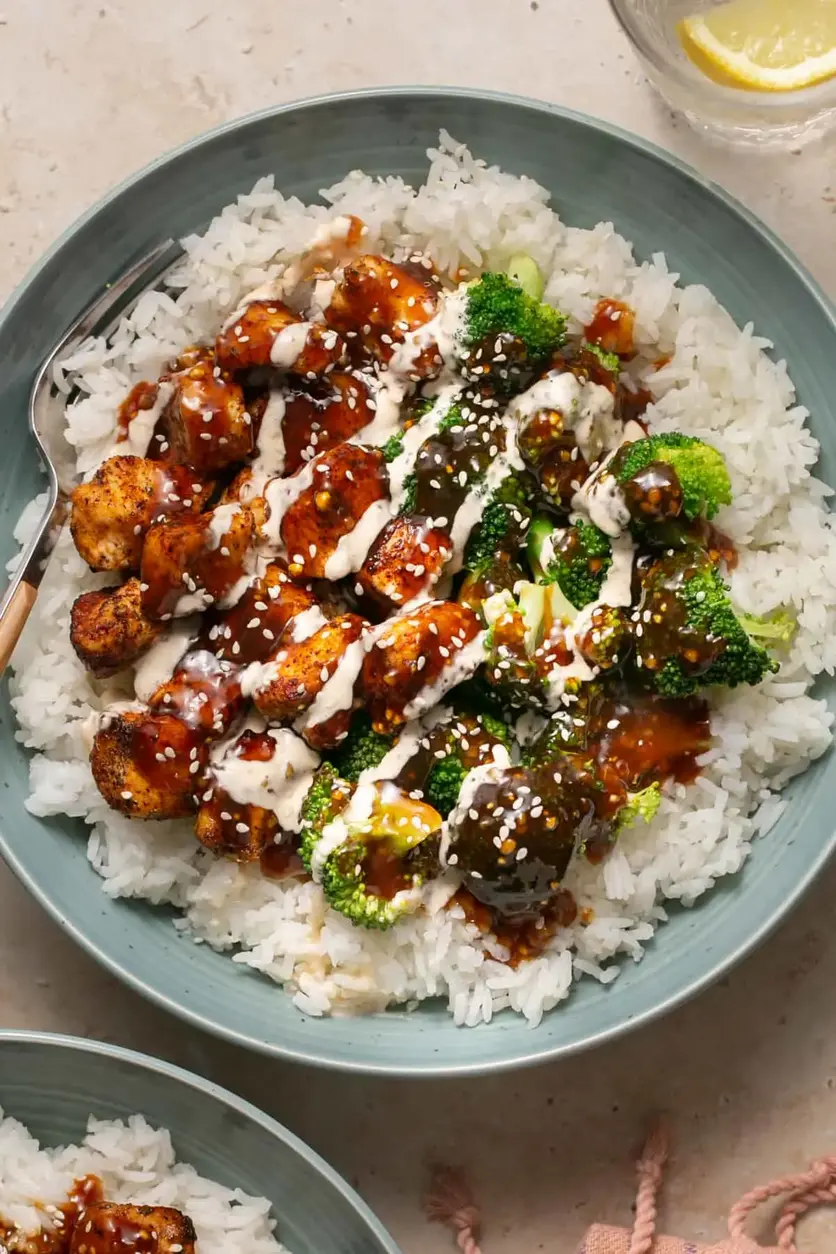
For more delicious inspiration, follow me on Pinterest!

Authentic Galinhada Brazilian Chicken and Rice Recipe

Galinhada (Brazilian Chicken and Rice) for a Flavorful One-Pot Meal

⚖️
Difficulty
Medium
⏲️
Prep Time
20 mins
🕒
Cook Time
40 mins
⏱️
Total Time
200 mins
🍽️
Servings
6

Growing up in my mother’s bustling kitchen in Morocco, I learned early on the magic of one-pot meals – dishes that simmer, meld, and build incredible flavor with minimal fuss. Now, living in the vibrant culinary landscape of New York City, I’m always on the hunt for new comforting dishes that echo that same warmth. This brings me to Galinhada, a traditional Brazilian chicken and rice dish that perfectly embodies everything I love about hearty, comforting cooking. My easy Galinhada recipe, a Brazilian chicken and rice marvel, is a staple in my kitchen for its incredible depth and the sheer joy it brings to the table. It’s a complete meal in itself, perfect for a weeknight dinner or feeding a crowd without breaking a sweat.

Imagine succulent chicken thighs, generously coated in a bright, aromatic marinade featuring turmeric and apple cider vinegar, then seared to perfection alongside savory calabresa sausage. This forms the soulful base of our galinhada brasileira. As it simmers, the rice absorbs all those glorious juices, creating a symphony of flavors and textures – tender chicken, perfectly cooked rice, and a subtle spice from the turmeric that reminds me of Sunday lunches in Casablanca. The fragrance alone, a blend of rich chicken, sweet onion, and earthy spices, fills my NYC apartment, creating an inviting aroma that transports me. It’s a dish that looks as good as it tastes, with its sunny yellow hue from the turmeric and vibrant flecks of parsley and tomato. This isn’t just galinhada recipe; it’s an experience.

What sets my version apart is a subtle refinement of the traditional marinade combined with the robust flavors I’ve learned to appreciate from my French culinary training, creating a truly memorable one-pot Brazilian chicken. I’ve found that balancing the acidity from the apple cider vinegar with the earthiness of turmeric elevates the chicken’s flavor before it even hits the pot. Today, I’m going to walk you through how to achieve this rich, flavorful dish, ensuring you avoid the common mistake of overcooking the rice and mastering the art of building flavor from the bottom up. Get ready for an easy galinhada that tastes like you spent hours Fussing over it!

Why This Galinhada Recipe Is the Best

The secret to my exceptional Galinhada (Brazilian Chicken and Rice) lies in the marinade. Drawing inspiration from the vibrant spices of my Moroccan heritage and the precision of French technique, I’ve crafted a turmeric and apple cider vinegar base that deeply infuses the chicken. This not only tenderizes it but also builds layers of flavor right from the start, a foundational principle I learned in culinary school in Paris. It’s this careful attention to the initial seasoning that sets the stage for a truly unforgettable galinhada brasileira. This marinade is what gives this easy galinhada its unique depth.

Achieving the perfect texture in this one-pot Brazilian chicken dish is all about timing and technique. We brown the sausage and chicken separately to develop those crucial caramelized bits at the bottom of the pot, known in French cooking as fond. This fond is then deglazed with white wine, capturing all that beautiful flavor. The rice is added at just the right moment, allowing it to absorb the broth and chicken juices without becoming mushy – a common pitfall. The final resting period off the heat is a crucial chef’s trick, allowing the rice to steam perfectly and preventing it from drying out.

Despite its complex flavor profile, this easy galinhada recipe is astonishingly foolproof and fast, especially for busy home cooks. It’s designed as a one-pot meal, minimizing cleanup, which is always a win in a tiny NYC kitchen. The detailed steps and clear instructions, honed from years of professional cooking, ensure that even beginners can achieve a restaurant-quality result. Plus, I’ve incorporated tips to avoid common mistakes, making this Brazilian chicken and rice accessible to everyone wanting a taste of traditional galinhada with modern convenience.

Galinhada Recipe Ingredients

When I shop for ingredients for my Galinhada recipe, I often find myself at one of the incredible farmers markets in NYC, searching for the freshest produce. The vibrant colors and aromas always remind me of the bustling souks in Morocco and the precision found in French markets. Getting fresh parsley and quality onions makes all the difference in this Brazilian chicken and rice dish.

Ingredients List

  • 1 onion (peeled)
  • 3 garlic cloves (peeled)
  • ½ cup fresh parsley
  • 1 tablespoon ground turmeric
  • 1 tablespoon apple cider vinegar
  • ½ cup olive oil
  • Salt and freshly ground pepper (to taste)
  • 1 ½ pounds skinless, boneless chicken thighs (cut into 1-inch pieces)
  • 1 teaspoon olive oil (for browning)
  • 2 (aprox. 4 ounces) calabresa sausages (sliced (substitute for kielbasa or chorizo))
  • 1 onion (chopped)
  • 1 large carrot (finely diced)
  • ½ cup white wine
  • 2 ½ cups chicken broth
  • 1 cup white long-grain rice (rinsed)
  • 2 bay leaves
  • 2 Roma tomatoes (chopped)
  • Salt and freshly ground pepper (to taste, for cooking)
  • 1/4 cup chopped parsley (for garnish)

Ingredient Spotlight

Chicken Thighs: For this galinhada recipe, I always opt for boneless, skinless chicken thighs. They stay incredibly moist and tender during the simmering process, much more so than chicken breast that can dry out. Look for thighs that look plump and have a good, healthy pink color at your local butcher or supermarket. If you only have bone-in, skin-on thighs, you can use them, just be sure to remove the skin after browning and debone before adding back to the pot, as the bones add flavor, but you don’t want them in the final dish.

Calabresa Sausage: This is a key component to the savory depth of our Brazilian chicken and rice. Calabresa is a smoky, slightly spicy Brazilian sausage, typically found in specialty Latin American stores or larger supermarkets in areas with a diverse food scene like NYC. If you can’t find it, a good quality smoked kielbasa or even a Spanish chorizo (not the dried kind, but the fresh, cooking chorizo) makes a fantastic substitute, maintaining that necessary savory, slightly spicy note. The flavor impact will be slightly different, but still delicious.

Ground Turmeric: This golden spice is not just for color; it adds a warm, earthy flavor that is essential to galinhada, and it’s a spice I use extensively in my Moroccan cooking. It’s important to use fresh, good-quality ground turmeric for the best flavor and vibrant hue. You can find it in the spice aisle of any grocery store. While saffron is sometimes suggested for color, turmeric provides the characteristic flavor profile for this easy galinhada and is much more accessible. There’s no direct flavor substitute, but a tiny pinch of saffron would provide color if that’s your primary goal, though it changes the flavor profile.

Long-Grain White Rice: The star of this one-pot Brazilian chicken meal next to the chicken! I recommend a good quality long-grain white rice like Basmati or Jasmine. These varieties absorb liquid beautifully without becoming overly sticky or mushy, which is crucial for a loose and fluffy galinhada. Always rinse your rice thoroughly under cold water until the water runs clear; this removes excess starch and helps prevent stickiness. Brown rice isn’t a good substitute here as it requires different cooking times and liquid ratios, altering the traditional texture significantly.

Original IngredientBest SubstitutionFlavor / Texture Impact
Calabresa SausageKielbasa or Fresh ChorizoSimilar smokiness and savory depth, might be less spicy depending on brand.
Ground TurmericNo direct flavor substitute, but a tiny pinch of saffron for color.Saffron will provide color but introduce a floral note not traditional to galinhada.
Apple Cider VinegarWhite Wine Vinegar or Lemon JuiceSimilar acidity to tenderize and brighten, but lemon juice will add a citrus note.
White Long-Grain RiceBasmati or Jasmine RiceThese also cook up fluffy and separate, retaining the desired texture. Avoid short-grain.

Galinhada (Brazilian Chicken and Rice) - Olivia's Cuisine

How to Make Brazilian Chicken and Rice — Step-by-Step

Making this easy Galinhada is a joyful process, and with my step-by-step guidance, you’ll feel like a seasoned chef creating this ultimate one-pot Brazilian chicken and rice dish. Don’t be intimidated by the number of steps; each one builds flavor beautifully.

Step 1: Prepare the Marinade

In a food processor, combine the peeled onion, garlic cloves, fresh parsley, ground turmeric, apple cider vinegar, ½ cup olive oil, and a generous pinch of salt and freshly ground pepper. Process until you have a smooth, vibrant paste. This is the foundation of flavor for your Brazilian chicken and rice!

💡 mia’s Pro Tip: The finer you process the marinade ingredients, the more evenly the flavors will distribute and penetrate the chicken. A smooth paste ensures every piece truly absorbs the essence of the turmeric and aromatics.

Step 2: Marinate the Chicken

In a large bowl, combine the 1 ½ pounds of 1-inch chicken thigh pieces with the prepared marinade. Toss everything together thoroughly, ensuring each piece of chicken is completely coated. Cover the bowl with plastic wrap or foil and refrigerate for at least 2 hours, or ideally, overnight. This prolonged marination is key to a truly flavorful galinhada brasileira.

⚠️ Common Mistake to Avoid: Don’t skimp on the marination time! Rushing this step means your chicken won’t be as tender or flavorful. The acid in the apple cider vinegar gently breaks down the chicken tissue, allowing the spices to infuse deeply.

Step 3: Brown the Sausage

Heat 1 teaspoon of olive oil in a large pot or Dutch Oven over medium heat. Add the sliced calabresa sausages and brown them on both sides for about 5 minutes until nicely golden and some of their fat has rendered. Using a slotted spoon, remove the browned sausage to a plate and set it aside, leaving any rendered fat in the pot. This fat will add incredible flavor to the rest of the dish.

Step 4: Sear the Chicken

Remove the marinated chicken from the refrigerator, making sure to reserve any excess marinade in the bowl. Add the chicken pieces to the same pot where the sausage cooked, sautéing them until lightly browned on all sides, about 10 minutes. Work in batches if necessary to avoid overcrowding the pot, which can steam the chicken instead of searing it. Once browned, remove the chicken and reserve it with the sausage.

💡 mia’s Pro Tip: Overcrowding the pot lowers the temperature, preventing a good sear. Searing in batches creates a beautiful crust and locks in the chicken’s juices, building that rich “fond” at the bottom of the pot, crucial for depth of flavor.

Step 5: Sauté Aromatics

If needed, add a little more olive oil to the pot. Add the chopped onion and finely diced carrot. Sauté them for about 5 minutes, stirring occasionally, until they start to soften and caramelize slightly. These vegetables provide a sweet aromatic base for your easy galinhada.

Step 6: Deglaze the Pan

Pour in the ½ cup of white wine to deglaze the pan. Use a wooden spoon to scrape up all the flavorful browned bits (the “fond”) from the bottom of the pot. Let the wine simmer for 1-2 minutes until it has largely reduced. This step is a cornerstone of French cooking and adds unparalleled depth to your Brazilian chicken and rice.

Step 7: Simmer Chicken and Sausage

Return both the browned chicken and sausage to the pot. Pour in the 2 ½ cups of chicken broth. Bring the mixture to a gentle simmer, then cover the pot, reduce the heat to medium-low, and let it simmer for 15 minutes. This allows the flavors to truly meld before the rice is added.

Step 8: Add Rice and Cook

Add the rinsed 1 cup white long-grain rice, chopped Roma tomatoes, bay leaves, and the reserved marinade from Step 2 to the pot. Stir gently to combine all the ingredients. Cover the pot again and continue cooking for another 15 minutes, or until the rice is tender and cooked through. There will still be some liquid in the pot, which is normal and desirable for a moist galinhada. Trust the process!

⚠️ Common Mistake to Avoid: Don’t lift the lid too often! Each time you peek, you release valuable steam, which is essential for the rice to cook evenly and thoroughly. Resist the urge and let the magic happen under the lid.

Step 9: Rest and Finish

Once the rice is cooked, turn off the heat entirely. Leave the pot covered and let the Galinhada rest for 10 minutes. This resting period allows the rice to fully absorb any remaining liquid and steam, resulting in perfectly fluffy grains and a more cohesive one-pot Brazilian chicken dish.

Step 10: Stir and Serve

Finally, uncover the pot, stir in the ¼ cup of fresh chopped parsley for a burst of freshness and color. Give it a final taste and adjust for salt and pepper if necessary. Ladle generous portions into bowls and serve immediately, enjoying this comforting and flavorful easy galinhada.

StepActionDurationKey Visual Cue
1Prepare Marinade5 minsSmooth, vibrant paste
2Marinate Chicken2+ hours (or overnight)Chicken thoroughly coated
3Brown Sausage5 minsGolden brown sausage, rendered fat
4Sear Chicken10 minsLightly browned chicken, pan fond
5Sauté Aromatics5 minsOnion and carrot softened, slightly caramelized
6Deglaze Pan1-2 minsWine reduced, fond scraped up
7Simmer Chicken & Sausage15 minsGentle simmer, flavors melding
8Add Rice & Cook15 minsRice tender, still some liquid
9Rest & Finish10 minsRice fully steamed, fluffy
10Stir & Serve1 minFresh parsley stirred in

Serving & Presentation

Presenting a rustic dish like this easy galinhada might seem straightforward, but a chef’s touch can elevate it. When serving my Brazilian Chicken and Rice, I aim for a visual appeal that matches its vibrant flavors. Ladle generous portions into shallow bowls, making sure each serving gets a good mix of chicken, sausage, and rice. A final sprinkle of fresh chopped parsley is non-negotiable – it adds a burst of green color and a fresh herbaceous counterpoint to the rich, savory dish. Think of it like a final flourish of French cuisine, where freshness always brightens a plate.

For a complete meal, I often serve this galinhada brasileira with a simple side salad dressed with a light vinaigrette. The crisp, cool greens provide a refreshing contrast to the warm, hearty rice. Another favorite pairing from my New York kitchen is a sprinkle of toasted cashews or peanuts for an added crunch and nutty layer of flavor. Some thinly sliced pickled red onions on the side offer a tangy kick that cuts through the richness beautifully, reminiscent of preserved lemons in Moroccan cuisine.

While perfectly satisfying on its own, this one-pot Brazilian chicken truly shines when complemented by humble accompaniments. Consider a side of collard greens, quickly sautéed with a touch of garlic, or a simple bowl of black beans for an authentic Brazilian touch. For beverages, something crisp like a chilled vinho verde or even a light, refreshing ginger beer would be perfect to complement the depth of flavor in this easy galinhada.

Pairing TypeSuggestionsWhy It Works
Side DishSimple Green Salad, Sautéed Collard Greens, Black BeansProvides freshness, vegetable balance, or added authentic texture.
Sauce / DipPimenta (Brazilian hot sauce), Lime wedgesAdds a spicy kick or a bright, acidic counterpoint.
BeverageChilled Vinho Verde, Light Lager, Ginger BeerRefreshes the palate and complements the savory notes without overpowering.
GarnishFresh Chopped Parsley, Toasted Cashews, Thinly Sliced Pickled Red OnionsAdds color, crunch, or a tangy brightness to finish the dish.

Make-Ahead, Storage & Reheating

In my busy NYC life, I’m all about meals that can be cooked once and enjoyed for days. This easy galinhada is a dream for meal prepping. I often make a big batch on Sunday, knowing I’ll have delicious, comforting Brazilian chicken and rice ready for quick lunches or dinners throughout the week. The flavors often deepen overnight, making it even more satisfying on day two.

MethodContainerDurationReheating Tip
RefrigeratorAirtight container3-4 daysMicrowave with a splash of broth, or stove-top (low heat).
FreezerFreezer-safe containerUp to 3 monthsThaw overnight, then reheat as above.
Make-AheadChicken marinated up to 24 hrs1 day in advanceHave all ingredients prepped and measured for quick assembly.

When reheating this one-pot Brazilian chicken and rice, often the rice can dry out a little. My trick, a small detail I picked up from years in a busy kitchen, is to add a splash of chicken broth or water before warming it through. This helps restore moisture and steam the rice back to its original fluffy texture. For stovetop reheating, use a non-stick pan over low to medium heat, stirring occasionally. If you’re using a microwave, cover the dish with a damp paper towel to help retain moisture.

Even if you’re not planning to freeze it, portioning out your leftovers right after cooling is a great way to ensure even reheating. I love having individual containers of this galinhada recipe ready for those hectic days when I need a delicious and nourishing meal in minutes. It’s a testament to the versatility and comforting nature of this traditional dish.

Variations & Easy Swaps

VariationKey ChangeBest ForDifficulty Impact
Vegetarian GalinhadaSwap chicken for hearty mushrooms, sausage for smoked tofu.Plant-based diets, lighter meal.Slightly increased (managing texture).
South African TouchAdd smoked paprika and a pinch of cayenne.Those who enjoy smoky heat.Minimal (spice addition).
Spicy GalinhadaInclude a diced habanero or a spoonful of harissa.Heat lovers, Moroccan flavor twist.Minimal (spice addition).

Vegetarian Galinhada

For a delicious plant-based version of this easy galinhada recipe, you can easily swap the chicken for hearty cremini or portobello mushrooms and the calabresa sausage for smoked tofu or a plant-based sausage. The key is to sear these substitutes to get plenty of browning and good texture before adding the other ingredients. You’ll still get a rich, umami-packed one-pot Brazilian chicken and rice experience, especially if you use a high-quality vegetable broth!

South African Touch

If you’re looking to introduce a touch of heat and smoky depth, reminiscent of the vibrant spice blends found in North Africa and beyond, try adding a tablespoon of smoked paprika and a tiny pinch of cayenne pepper with the turmeric. This subtle modification will give your Brazilian chicken and rice a warming glow and an extra layer of savory complexity without overpowering the dish. I sometimes do this when a chill wind blows through my NYC neighborhood, a little culinary hug.

Spicy Galinhada

For those who appreciate a fiery kick, my simple trick is to add a finely diced small habanero or serrano pepper along with the chopped onion and carrot. Alternatively, for a Moroccan-inspired twist, stir in a spoonful of harissa paste (a North African chili paste my mother used often) with the reserved marinade. This will infuse your galinhada brasileira with a bold, exciting heat that complements the earthy turmeric beautifully, creating a truly memorable dish.

What is the traditional way to season the chicken for Galinhada?

Traditionally, chicken for Galinhada, or Brazilian chicken and rice, is seasoned robustly with a blend of garlic, onion, and herbs like parsley or cilantro. My recipe enhances this with ground turmeric for its vibrant color and earthy flavor, and apple cider vinegar to tenderize the chicken and brighten the overall taste. This marinade is crucial for infusing every piece of chicken with a deep, savory foundation before it’s cooked into the one-pot dish. It’s a technique that echoes the importance of proper seasoning I learned during my culinary training, ensuring maximum flavor from the start.

Can I make Galinhada in a rice cooker or Instant Pot?

While my recipe is designed for a traditional pot or Dutch oven, you can certainly adapt this easy galinhada for a rice cooker or Instant Pot, though some steps will need adjustment. For an Instant Pot, you would use the sauté function to brown the sausage, sear the chicken, and sauté the aromatics. Then, combine all ingredients (reducing the broth slightly for pressure cooking) and cook on high pressure for about 7-8 minutes with a natural release, followed by a quick release. For a rice cooker, you’d perform the browning and sautéing steps on the stovetop first, then transfer all ingredients to the rice cooker to cook until the rice is tender. Adjust liquid levels carefully, as rice cookers require less evaporation than stovetop.

What are common side dishes to serve with Brazilian chicken and rice?

Brazilian chicken and rice, or Galinhada brasileira, is a hearty meal on its own, but it pairs wonderfully with a few simple sides. A classic choice is a crisp green salad, dressed lightly with vinaigrette, to provide a refreshing contrast to the richness of the dish. Sautéed collard greens (couve refogada) are also very common in Brazil and add a lovely earthy, slightly bitter counterpoint. For an extra touch of authenticity, you might serve it with a side of black beans (feijão) or a simple corn salad. I occasionally add a sprinkle of toasted nuts for texture, a little New York City flair.

What can I use as a substitute for saffron in Galinhada if I don’t have any?

My galinhada recipe, an easy galinhada version, actually relies on ground turmeric for its characteristic golden color and earthy flavor, which is more true to traditional Brazilian chicken and rice. So, you don’t need saffron at all! If you were to encounter a recipe that called for saffron and you didn’t have it, a small pinch of turmeric would provide the golden hue, though it doesn’t replicate saffron’s unique flavor. Turmeric is widely available and more economical, making it a perfect choice for this flavorful one-pot Brazilian chicken dish.

How can I prevent the rice in Galinhada from becoming mushy?

To prevent your rice for this easy galinhada from becoming mushy, there are a few key steps from my culinary playbook. First, always rinse your long-grain white rice thoroughly under cold water until the water runs clear. This removes excess starch, which can lead to stickiness. Second, ensure you use the correct liquid-to-rice ratio; my recipe specifies 2.5 cups of broth for 1 cup of rice, which is ideal for a slightly saucy but not mushy texture. Finally, and most importantly, resist the urge to lift the lid while the rice is simmering and during the final resting period. The trapped steam is essential for cooking the rice evenly and absorbing the liquid without overcooking.

Share Your Version!

I poured my heart into perfecting this Galinhada recipe, bringing together my Moroccan roots, French training, and NYC love for bold flavors. I genuinely hope it brings as much joy to your table as it does to mine! If you give this delicious Brazilian chicken and rice a try, please don’t be shy. Leave a star rating and a comment below to let me know how it turned out for you.

Did you add a special garnish, or perhaps you found an amazing calabresa sausage at your local market that you want to share? Snap a photo of your magnificent one-pot Brazilian chicken and share it on Instagram or Pinterest. Tag @exoreipes so I can see your beautiful creations and share them with our community! What’s your favorite part about cooking a hearty, comforting, easy galinhada?

From my NYC kitchen to yours — I hope this recipe brings as much warmth to your table as it does to mine. — mia 🧡

📌

Love This Recipe? Save It to Pinterest!

If you enjoyed this Galinhada (Brazilian Chicken and Rice) recipe, don’t let it get lost in your browser tabs! 😄 Pin it now so you can find it again anytime — and explore hundreds more tried-and-tested recipes waiting for you on my Pinterest boards.

👉 Follow mia on Pinterest @chefrecipes2

📌 Pin this recipe · 🔁 Re-pin your favorites · 💬 Tag me when you make it — I love seeing your creations!

Print

clock clock iconcutlery cutlery iconflag flag iconfolder folder iconinstagram instagram iconpinterest pinterest iconfacebook facebook iconprint print iconsquares squares iconheart heart iconheart solid heart solid icon

Galinhada (Brazilian Chicken and Rice)

  • Author: Chef Mia

Description

Galinhada is a delicious traditional Brazilian dish of chicken and rice. Hearty and comforting, this dish is easy to make, cooked in one pot and great to feed a crowd!


Ingredients

Scale
  • 1 onion (peeled)
  • 3 garlic cloves (peeled)
  • ½ cup fresh parsley
  • 1 tablespoon ground turmeric
  • 1 tablespoon apple cider vinegar
  • ½ cup olive oil
  • Salt and freshly ground pepper (to taste)
  • 1 ½ pounds skinless, boneless chicken thighs (cut into 1-inch pieces)
  • 1 teaspoon olive oil
  • 2 (aprox. 4 ounces) calabresa sausages (sliced (substitute for kielbasa or chorizo))
  • 1 onion (chopped)
  • 1 large carrot (finely diced)
  • ½ cup white wine
  • 2 ½ cups chicken broth
  • 1 cup white long-grain rice (rinsed)
  • 2 bay leaves
  • 2 Roma tomatoes (chopped)
  • Salt and freshly ground pepper (to taste)
  • 1/4 cup chopped parsley

Instructions

  1. In a food processor, combine all the marinade ingredients and process until smooth.
  2. In a bowl, combine the chicken and marinade, tossing so every piece is thoroughly coated. Cover with plastic or foil and refrigerate for at least 2 hours (or overnight).
  3. Heat the olive oil in a large pot or Dutch Oven, over medium heat. Brown the sausage on both sides, about 5 minutes. Then, remove with a slotted spoon into a plate and reserve.
  4. Remove the chicken from the marinade, reserving the excess marinade for later. Add the chicken to the pot, sautéing until lightly browned on all sides, about 10 minutes. Remove from the pot and reserve.
  5. Add more oil if needed, then sauté the onion and carrot until they begin to caramelize slightly, about 5 minutes.
  6. Pour in the wine to deglaze the pan, scraping all the browned bits from the bottom of the pot.
  7. Return the chicken and sausage to the pot, and pour in the chicken broth. Cover and reduce the heat to medium low. Simmer for 15 minutes.
  8. Add the rice, tomatoes, bay leaves, reserved marinade and a pinch of salt and pepper. Stir to combine. Cover and continue cooking for another 15 minutes, or until the rice is cooked. There will still be some liquid in the pot, that is normal.
  9. Turn the heat off and let the Galinhada rest, covered, for 10 minutes.
  10. Stir in the fresh parsley and serve!


Nutrition

  • Calories: 497 kcal
  • Sugar: 3 g
  • Fat: 27 g
  • Carbohydrates: 33 g
  • Protein: 27 g


Galinhada (Brazilian Chicken and Rice) - Olivia's Cuisine