“`html
Table of Contents
- Craving Crispy, Flavorful Wings?
- The Symphony of Flavors: Ingredients
- Mastering the Clock: Timing is Everything
- Your Culinary Journey: Step-by-Step
- Nutritional Spotlight
- Guilt-Free Indulgence: Healthier Alternatives
- Elevate Your Experience: Serving Suggestions
- Avoid the Pitfalls: Common Mistakes to Sidestep
- Savor the Flavor: Storing and Reheating
- Your New Favorite Wing Obsession
- Frequently Asked Questions
Delicious Asian Chicken Wings Recipe You’ll Love
Craving Crispy, Flavorful Wings?
Are you tired of the same old appetizers? Do you find yourself scrolling endlessly for that perfect party starter or a snack that truly satisfies that savory craving? If you’re like millions of home cooks searching for “best chicken wing recipe” or “easy asian wings,” you’re in luck! We’re about to embark on a culinary adventure that results in the most incredibly delicious Asian chicken wings you’ll ever taste. Imagine this: crispy, golden-brown chicken wings coated in a sticky, sweet, and tangy glaze that caramelizes to absolute perfection. These aren’t just wings; they’re a flavor explosion waiting to happen, promising a finger-licking experience that will have your guests (and your taste buds) begging for more. Whether you’re hosting a game day bash, a casual get-together, or just want to treat yourself to something truly special, this recipe delivers unparalleled satisfaction.
The Symphony of Flavors: Ingredients
The magic of these Asian chicken wings lies in the harmonious blend of simple ingredients that come together to create a spectacular flavor profile. We’ll break them down into two main components:
For the Wings
- 2 lbs chicken wings, flats and drumettes separated: The star of the show! Ensure they are patted completely dry for maximum crispiness. (If you can only find whole wings, simply cut them at the joint).
- 1 tablespoon cornstarch: This is the secret weapon for achieving that ultra-crispy exterior. It creates a light coating that crisps up beautifully when cooked. (Arrowroot starch is a great gluten-free alternative).
- 1 teaspoon garlic powder: Adds a foundational savory warmth.
- 1 teaspoon onion powder: For that subtle, sweet allium depth.
- ½ teaspoon salt: Enhances all the other flavors.
- ½ teaspoon black pepper: A classic pairing, adding a gentle kick.
- 1-2 tablespoons neutral oil (like vegetable or canola): For searing, helping to kickstart the crisping process.
For the Irresistible Glaze
- ½ cup soy sauce (or tamari for gluten-free): The salty, umami base. Low-sodium is recommended to control the saltiness.
- ¼ cup honey (or maple syrup for vegan option): For that beautiful sweet stickiness and caramelization. The flavor is rich and naturally sweet.
- 2 tablespoons rice vinegar: Adds a bright, tangy counterpoint to the sweetness and saltiness.
- 1 tablespoon grated fresh ginger: Provides a spicy, aromatic punch that is quintessentially Asian. (If fresh isn’t available, use 1 teaspoon ground ginger, but fresh is highly recommended for its vibrant flavor).
- 2 cloves garlic, minced: More garlic magic! Its pungent aroma and flavor are essential.
- 1 teaspoon sesame oil: For a toasty, nutty depth that adds complexity.
- Optional: Pinch of red pepper flakes: For a subtle hint of heat to balance the sweetness.
- Optional: Toasted sesame seeds and chopped green onions for garnish: For visual appeal and an extra layer of texture and freshness.
Mastering the Clock: Timing is Everything
Let’s talk time. A good recipe should respect your schedule, and these wings are surprisingly efficient for the flavor they deliver! Typically, chicken wing recipes can range from 45 minutes to over an hour, factoring in marinating and cooking. Our Asian Chicken Wings aim for efficiency without compromising taste:

Your Culinary Journey: Step-by-Step
Ready to create some magic? Follow these easy steps to achieve wing perfection!
Step 1: Prep the Wings for Perfection
Begin by ensuring your chicken wings are thoroughly dried. Pat them dry with paper towels – this is crucial for crispiness! In a large bowl, toss the wings with cornstarch, garlic powder, onion powder, salt, and pepper. Make sure each wing is lightly and evenly coated. This cornstarch coating acts like a little crisping agent, ensuring a delightful crunch with every bite.
Step 2: Sear for Ultimate Crispness
Heat the neutral oil in a large oven-safe skillet (like cast iron) over medium-high heat. Once the oil is shimmering, carefully add the coated chicken wings in a single layer. Don’t overcrowd the pan; sear in batches if necessary. Sear for about 3-4 minutes per side until they start to get a nice golden-brown color. This initial sear helps render some of the fat and kickstart the crisping process before they even hit the oven.
Step 3: Bake to Golden Glory
Preheat your oven to 400°F (200°C). Once the wings are seared, carefully transfer the skillet to the preheated oven. Bake for 25-30 minutes, flipping the wings halfway through. They should be cooked through and developing a golden, crispy texture.
Step 4: Craft the Glaze of Dreams
While the wings are baking, it’s time to whip up that incredible glaze. In a small saucepan, combine soy sauce, honey, rice vinegar, grated ginger, minced garlic, and sesame oil. If you’re using red pepper flakes, add them now. Bring the mixture to a gentle simmer over medium heat, stirring occasionally. Let it simmer for about 5-7 minutes, until it thickens slightly to a syrupy consistency. Be careful not to let it boil too vigorously or it might burn. The aroma will be intoxicating!
Step 5: Glaze and Caramelize to Perfection
Once the wings are baked and golden, carefully remove the skillet from the oven. Pour the thickened glaze over the hot wings. Toss them gently to ensure every single wing is thoroughly coated in the sticky, luscious glaze. Return the skillet to the oven for another 5-10 minutes, or until the glaze has caramelized beautifully and is wonderfully sticky. Watch them closely to prevent burning – the sugars in the glaze can burn quickly!
Step 6: Serve and Savor the Moment
Remove the wings from the oven and let them cool for just a minute or two. Garnish with toasted sesame seeds and chopped green onions, if desired, for that extra pop of texture and color. Serve immediately while they are hot, crispy, and delightfully sticky. Prepare for rave reviews!
Nutritional Spotlight
While exact nutritional values can vary based on ingredient brands and portion sizes, a typical serving of these Asian Chicken Wings is estimated to be:
- Calories: Approximately 250-320 per serving (about 3-4 wings)
- Protein: 18-25g
- Fat: 15-22g
- Carbohydrates: 8-12g (primarily from honey & cornstarch)
- Sugar: 5-8g
Note: These are estimates. For precise tracking, calculate using your specific ingredients.
Guilt-Free Indulgence: Healthier Alternatives
Looking to lighten things up without sacrificing flavor? Try these swaps:
- Oven-Baked or Air-Fried: Skip the searing step and bake or air fry the wings until crispy. This significantly reduces added oil.
- Reduced Sodium Soy Sauce: Use low-sodium soy sauce or coconut aminos to lower sodium intake.
- Sugar-Free Sweetener: For a keto or low-sugar option, consider using a sugar substitute like erythritol or monk fruit in place of honey. Adjust quantity as needed.
- Leaner Protein: While not wings, consider chicken breast pieces coated and glazed for a leaner protein option.
- Extra Veggies: Add steamed broccoli or snap peas to your plate to boost fiber and nutrients.
Elevate Your Experience: Serving Suggestions
These versatile wings are perfect for any occasion. Serve them:
- As a star appetizer for parties, game nights, or potlucks.
- As a delicious, satisfying main course with a side of rice and steamed vegetables.
- Alongside a fresh, crisp salad for a balanced meal.
- With celery sticks and a cooling dip (like ranch or blue cheese) for a classic wing experience.
Avoid the Pitfalls: Common Mistakes to Sidestep
To ensure your wings are a triumph, steer clear of these common errors:
- Wet Wings: Not drying the wings thoroughly is the #1 enemy of crispiness. Get them bone-dry!
- Overcrowding the Pan: This steams the wings instead of searing them, preventing crispiness. Cook in batches if needed.
- Glaze Burning: Watch the glaze carefully in the final stage. The sugars caramelize quickly and can burn, leading to a bitter taste.
- Under-baking: Ensure the wings are fully cooked through for food safety and optimal texture.
Savor the Flavor: Storing and Reheating
Leftover wings can be stored, but they are best enjoyed fresh. If you do have leftovers:
- Storage: Let the wings cool completely, then store them in an airtight container in the refrigerator for up to 3 days.
- Reheating: The key to reviving crispiness is to avoid the microwave. Reheat them in a single layer in the oven at around 375°F (190°C) for 10-15 minutes, or in an air fryer until heated through and crispy again.
Your New Favorite Wing Obsession
There you have it – a recipe for Asian Chicken Wings that is sure to become a staple in your recipe repertoire. With their perfect balance of sweet, tangy, and savory flavors, coupled with that irresistible crispy texture, these wings are guaranteed to impress. They’re easy enough for a weeknight treat yet impressive enough for any gathering. Dive in, get your hands sticky, and savor every single bite. We’d love to hear how yours turned out – share your experience in the comments below!
Frequently Asked Questions
What makes these wings so crispy?
The combination of a light cornstarch coating, searing the wings before baking, and ensuring they are extremely dry before cooking are key to achieving that perfect crispy texture.
Can I make these gluten-free?
Yes! Simply substitute tamari for soy sauce and use arrowroot starch instead of cornstarch. Ensure all other ingredients are also gluten-free.
How can I make them spicier?
Add more red pepper flakes to the glaze, or include a dash of sriracha or chili garlic sauce for an extra kick.
Can I use different cuts of chicken?
While this recipe is optimized for wings, you could adapt it for boneless chicken thighs or even chicken breast pieces, adjusting cooking times as needed.
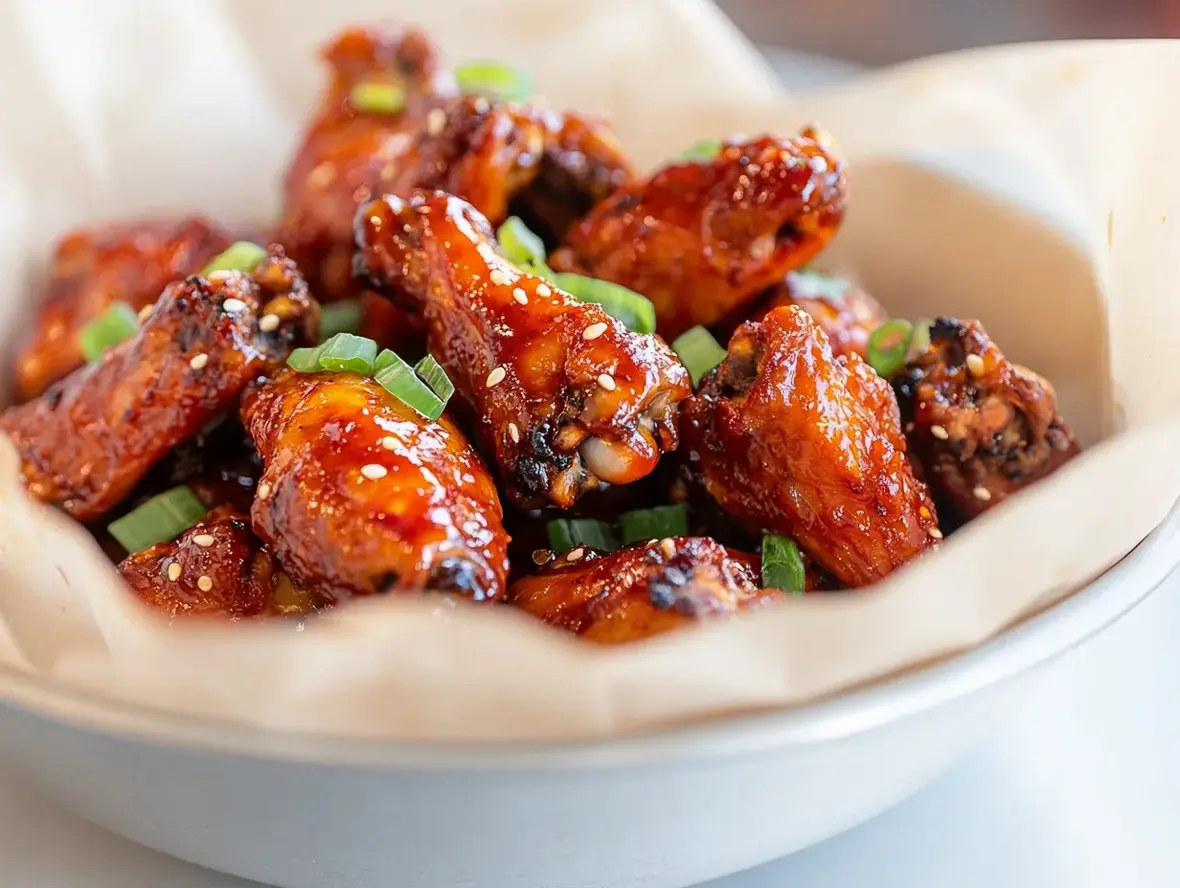
Sticky Asian Wings
Description
Crispy chicken wingscoated in a sweet and tangy glaze that caramelizes beautifully for the ultimate sticky, finger-licking experience. Perfect for appetizers, parties, or a delicious snack!
Ingredients
- For the Wings:16split chicken wings (drummettes and wingettes)1 tbspgarlic powder1 tspsalt1 tsppepperAvocado oil sprayFor the Sticky Glaze:¼ cupsweet Thai chili sauce¼ cupketchup
- For the Sticky Glaze:¼ cupsweet Thai chili sauce¼ cupketchup
Instructions
- 1️⃣Prepare the Wings:Pat the chicken wings dry with a paper towel to ensure they crisp up during cooking.Season evenly with garlic powder, salt, and pepper.Lightly spray the wings with avocado oil for added crispiness.2️⃣Cooking Options:Baking Method:Preheat the oven to425°F (218°C).Line a baking sheet with parchment paper and place a cooling rack on top. Arrange the wings in a single layer on the rack.Bake for25 minutes, flipping halfway through. Continue baking until desired crispiness is achieved, ensuring the internal temperature reaches165°F (74°C).Air Fryer Method:Preheat the air fryer to400°F (204°C).Place the wings in the air fryer basket in a single layer.Air fry for20 minutes, flipping halfway, until crispy and golden brown.3️⃣Make the Sticky Glaze:In a large skillet over medium heat, combine the sweet Thai chili sauce and ketchup.Sauté for about2 minutes, stirring until the glaze becomes bubbly and starts to caramelize.4️⃣Coat the Wings:Add the cooked wings to the skillet and toss until they are evenly coated in the sticky glaze.Let the wings cook in the sauce for an additional1–2 minutesto allow the glaze to caramelize fully.5️⃣Serve:Transfer the wings to a serving plate and enjoy them while they’re hot, sticky, and irresistibly delicious!
- Pat the chicken wings dry with a paper towel to ensure they crisp up during cooking.
- Season evenly with garlic powder, salt, and pepper.Lightly spray the wings with avocado oil for added crispiness.2️⃣Cooking Options:Baking Method:Preheat the oven to425°F (218°C).Line a baking sheet with parchment paper and place a cooling rack on top. Arrange the wings in a single layer on the rack.Bake for25 minutes, flipping halfway through. Continue baking until desired crispiness is achieved, ensuring the internal temperature reaches165°F (74°C).Air Fryer Method:Preheat the air fryer to400°F (204°C).Place the wings in the air fryer basket in a single layer.Air fry for20 minutes, flipping halfway, until crispy and golden brown.3️⃣Make the Sticky Glaze:In a large skillet over medium heat, combine the sweet Thai chili sauce and ketchup.Sauté for about2 minutes, stirring until the glaze becomes bubbly and starts to caramelize.4️⃣Coat the Wings:Add the cooked wings to the skillet and toss until they are evenly coated in the sticky glaze.Let the wings cook in the sauce for an additional1–2 minutesto allow the glaze to caramelize fully.5️⃣Serve:Transfer the wings to a serving plate and enjoy them while they’re hot, sticky, and irresistibly delicious!
- Lightly spray the wings with avocado oil for added crispiness.2️⃣Cooking Options:Baking Method:Preheat the oven to425°F (218°C).Line a baking sheet with parchment paper and place a cooling rack on top. Arrange the wings in a single layer on the rack.Bake for25 minutes, flipping halfway through. Continue baking until desired crispiness is achieved, ensuring the internal temperature reaches165°F (74°C).Air Fryer Method:Preheat the air fryer to400°F (204°C).Place the wings in the air fryer basket in a single layer.Air fry for20 minutes, flipping halfway, until crispy and golden brown.3️⃣Make the Sticky Glaze:In a large skillet over medium heat, combine the sweet Thai chili sauce and ketchup.Sauté for about2 minutes, stirring until the glaze becomes bubbly and starts to caramelize.4️⃣Coat the Wings:Add the cooked wings to the skillet and toss until they are evenly coated in the sticky glaze.Let the wings cook in the sauce for an additional1–2 minutesto allow the glaze to caramelize fully.5️⃣Serve:Transfer the wings to a serving plate and enjoy them while they’re hot, sticky, and irresistibly delicious!
- 2️⃣Cooking Options:
- Preheat the oven to425°F (218°C).Line a baking sheet with parchment paper and place a cooling rack on top. Arrange the wings in a single layer on the rack.Bake for25 minutes, flipping halfway through. Continue baking until desired crispiness is achieved, ensuring the internal temperature reaches165°F (74°C).Air Fryer Method:Preheat the air fryer to400°F (204°C).Place the wings in the air fryer basket in a single layer.Air fry for20 minutes, flipping halfway, until crispy and golden brown.3️⃣Make the Sticky Glaze:In a large skillet over medium heat, combine the sweet Thai chili sauce and ketchup.Sauté for about2 minutes, stirring until the glaze becomes bubbly and starts to caramelize.4️⃣Coat the Wings:Add the cooked wings to the skillet and toss until they are evenly coated in the sticky glaze.Let the wings cook in the sauce for an additional1–2 minutesto allow the glaze to caramelize fully.5️⃣Serve:Transfer the wings to a serving plate and enjoy them while they’re hot, sticky, and irresistibly delicious!
- Line a baking sheet with parchment paper and place a cooling rack on top. Arrange the wings in a single layer on the rack.
- Bake for25 minutes, flipping halfway through. Continue baking until desired crispiness is achieved, ensuring the internal temperature reaches165°F (74°C).Air Fryer Method:Preheat the air fryer to400°F (204°C).Place the wings in the air fryer basket in a single layer.Air fry for20 minutes, flipping halfway, until crispy and golden brown.3️⃣Make the Sticky Glaze:In a large skillet over medium heat, combine the sweet Thai chili sauce and ketchup.Sauté for about2 minutes, stirring until the glaze becomes bubbly and starts to caramelize.4️⃣Coat the Wings:Add the cooked wings to the skillet and toss until they are evenly coated in the sticky glaze.Let the wings cook in the sauce for an additional1–2 minutesto allow the glaze to caramelize fully.5️⃣Serve:Transfer the wings to a serving plate and enjoy them while they’re hot, sticky, and irresistibly delicious!
- Preheat the air fryer to400°F (204°C).
- Place the wings in the air fryer basket in a single layer.Air fry for20 minutes, flipping halfway, until crispy and golden brown.3️⃣Make the Sticky Glaze:In a large skillet over medium heat, combine the sweet Thai chili sauce and ketchup.Sauté for about2 minutes, stirring until the glaze becomes bubbly and starts to caramelize.4️⃣Coat the Wings:Add the cooked wings to the skillet and toss until they are evenly coated in the sticky glaze.Let the wings cook in the sauce for an additional1–2 minutesto allow the glaze to caramelize fully.5️⃣Serve:Transfer the wings to a serving plate and enjoy them while they’re hot, sticky, and irresistibly delicious!
- Air fry for20 minutes, flipping halfway, until crispy and golden brown.3️⃣Make the Sticky Glaze:In a large skillet over medium heat, combine the sweet Thai chili sauce and ketchup.Sauté for about2 minutes, stirring until the glaze becomes bubbly and starts to caramelize.4️⃣Coat the Wings:Add the cooked wings to the skillet and toss until they are evenly coated in the sticky glaze.Let the wings cook in the sauce for an additional1–2 minutesto allow the glaze to caramelize fully.5️⃣Serve:Transfer the wings to a serving plate and enjoy them while they’re hot, sticky, and irresistibly delicious!
- 3️⃣Make the Sticky Glaze:
- In a large skillet over medium heat, combine the sweet Thai chili sauce and ketchup.Sauté for about2 minutes, stirring until the glaze becomes bubbly and starts to caramelize.4️⃣Coat the Wings:Add the cooked wings to the skillet and toss until they are evenly coated in the sticky glaze.Let the wings cook in the sauce for an additional1–2 minutesto allow the glaze to caramelize fully.5️⃣Serve:Transfer the wings to a serving plate and enjoy them while they’re hot, sticky, and irresistibly delicious!
- Sauté for about2 minutes, stirring until the glaze becomes bubbly and starts to caramelize.4️⃣Coat the Wings:Add the cooked wings to the skillet and toss until they are evenly coated in the sticky glaze.Let the wings cook in the sauce for an additional1–2 minutesto allow the glaze to caramelize fully.5️⃣Serve:Transfer the wings to a serving plate and enjoy them while they’re hot, sticky, and irresistibly delicious!
- 4️⃣Coat the Wings:
- Add the cooked wings to the skillet and toss until they are evenly coated in the sticky glaze.Let the wings cook in the sauce for an additional1–2 minutesto allow the glaze to caramelize fully.5️⃣Serve:Transfer the wings to a serving plate and enjoy them while they’re hot, sticky, and irresistibly delicious!
- Let the wings cook in the sauce for an additional1–2 minutesto allow the glaze to caramelize fully.5️⃣Serve:Transfer the wings to a serving plate and enjoy them while they’re hot, sticky, and irresistibly delicious!
- 5️⃣Serve:
- Transfer the wings to a serving plate and enjoy them while they’re hot, sticky, and irresistibly delicious!
Notes
For extra flavor, garnish with sesame seeds and chopped green onions.If you like a bit more spice, add a teaspoon of Sriracha or red chili flakes to the glaze.Use parchment paper to make cleanup easy when baking.Serve with a side of ranch or blue cheese dressing for dipping.
If you like a bit more spice, add a teaspoon of Sriracha or red chili flakes to the glaze.Use parchment paper to make cleanup easy when baking.Serve with a side of ranch or blue cheese dressing for dipping.
Use parchment paper to make cleanup easy when baking.Serve with a side of ranch or blue cheese dressing for dipping.
Serve with a side of ranch or blue cheese dressing for dipping.
“`