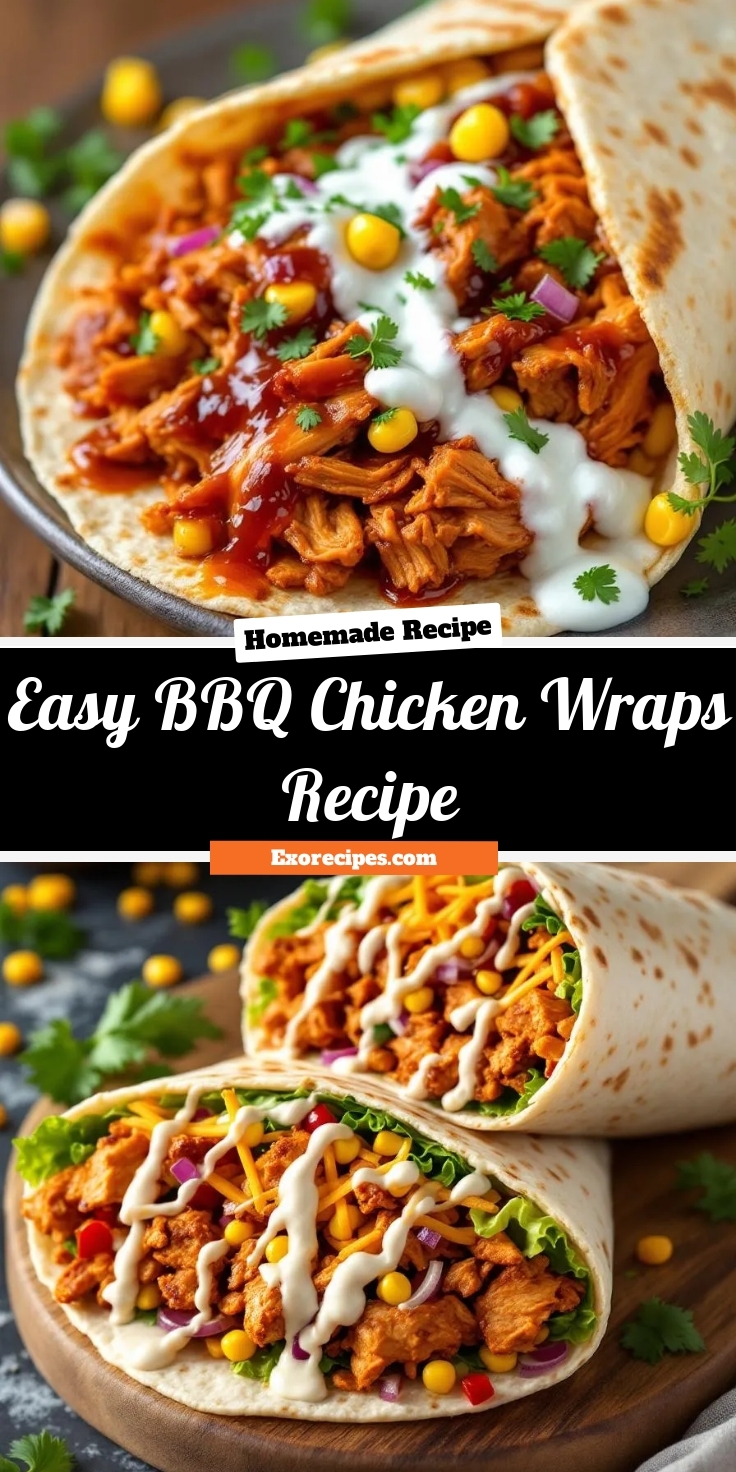
Do you ever crave that perfect combination of smoky, sweet, and savory but feel like you simply do not have the time? We completely understand that struggle. Fortunately, these incredibly easy and delicious BBQ Chicken Wraps are here to save your day. They deliver that classic barbecue satisfaction without any fuss. Moreover, they are the ultimate solution for a hectic weeknight or a last-minute lunch that will make everyone smile.
So what exactly are BBQ Chicken Wraps? Essentially, they are a fantastic handheld meal that combines tender, shredded chicken coated in tangy barbecue sauce with crisp, fresh vegetables and creamy cheese, all wrapped snugly in a soft tortilla. This dish matters because it perfectly solves the universal problem of wanting a meal that is both deeply satisfying and incredibly convenient. Furthermore, it fits our blog’s tone of creating approachable, family-friendly food that delivers on flavor without complexity. You can easily customize your wraps with different slaws or cheeses, making them a versatile staple for any cook. For instance, if you have leftover pulled chicken, this recipe becomes an even faster way to get dinner on the table. Ultimately, this recipe embodies what we stand for: making real food achievable for real life, much like our popular easy guacamole that turns a simple snack into something special.
Why I Love This Recipe
I genuinely love this recipe because it reminds me of summer evenings on our back patio. My family often requests these wraps for a casual dinner after a long day. The smell of the barbecue sauce warming in the skillet instantly creates a relaxed and happy atmosphere. I also appreciate how my kids eagerly eat their vegetables when they are tucked inside this flavorful package. Ultimately, this dish represents more than just a quick meal. It creates a little moment of joy and connection in the middle of a busy week.
Health and Nutrition
Why it’s good for your body
BBQ Chicken Wraps deliver a powerful nutritional punch that your body will truly appreciate. First and foremost, the lean chicken breast provides a fantastic source of high-quality protein. Consequently, this protein helps build and repair muscle tissue, keeps you feeling full and satisfied for hours, and even boosts your metabolism. Additionally, the smoky, tangy barbecue sauce adds a burst of flavor without requiring excessive amounts.
Moreover, when you load your wrap with fresh vegetables like crisp lettuce and juicy tomatoes, you add essential vitamins, minerals, and fiber. This combination supports healthy digestion and provides key antioxidants. Furthermore, opting for a whole-wheat tortilla increases your fiber intake even more, which is excellent for heart health and blood sugar stability. Ultimately, these BBQ Chicken Wraps offer a well-rounded meal that fuels your body efficiently. Finally, you can feel great about serving this dish, knowing it combines taste and nutrition in every single bite.
How it fits in a healthy lifestyle
BBQ Chicken Wraps fit perfectly into a balanced and healthy lifestyle. They are incredibly versatile, allowing you to tailor them to your specific dietary needs. For a gluten-free option, simply swap the tortilla for a large lettuce wrap or your favorite gluten-free brand. If you are focusing on a high-protein diet for muscle building or satiety, the chicken breast serves as an excellent foundation. You can easily control the sodium and sugar content by making your own homemade sugar-free BBQ sauce, putting you in complete charge of your ingredients.
This meal also supports practical, everyday healthy eating habits. It comes together quickly for a nutritious lunch that prevents you from reaching for less healthy convenience foods. Pair your wrap with a side of fresh fruit or a light salad for a completely balanced plate. For more inspiration on building meals that support your wellness goals, explore our guide on creating a balanced plate. It is a simple, delicious, and smart choice for anyone looking to eat well without sacrificing flavor.
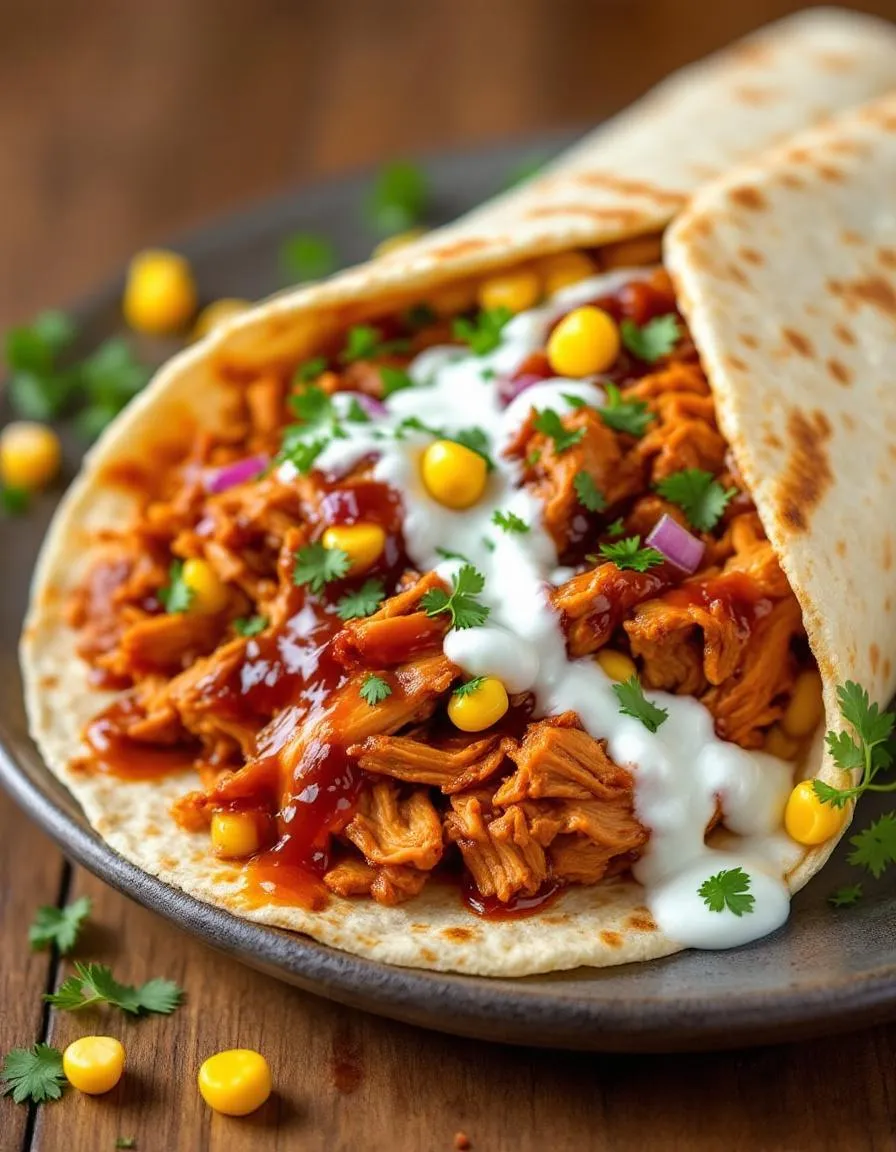
Quick and flavorful BBQ chicken wraps with crisp vegetables and tangy sauce, perfect for a satisfying lunch or light dinner.
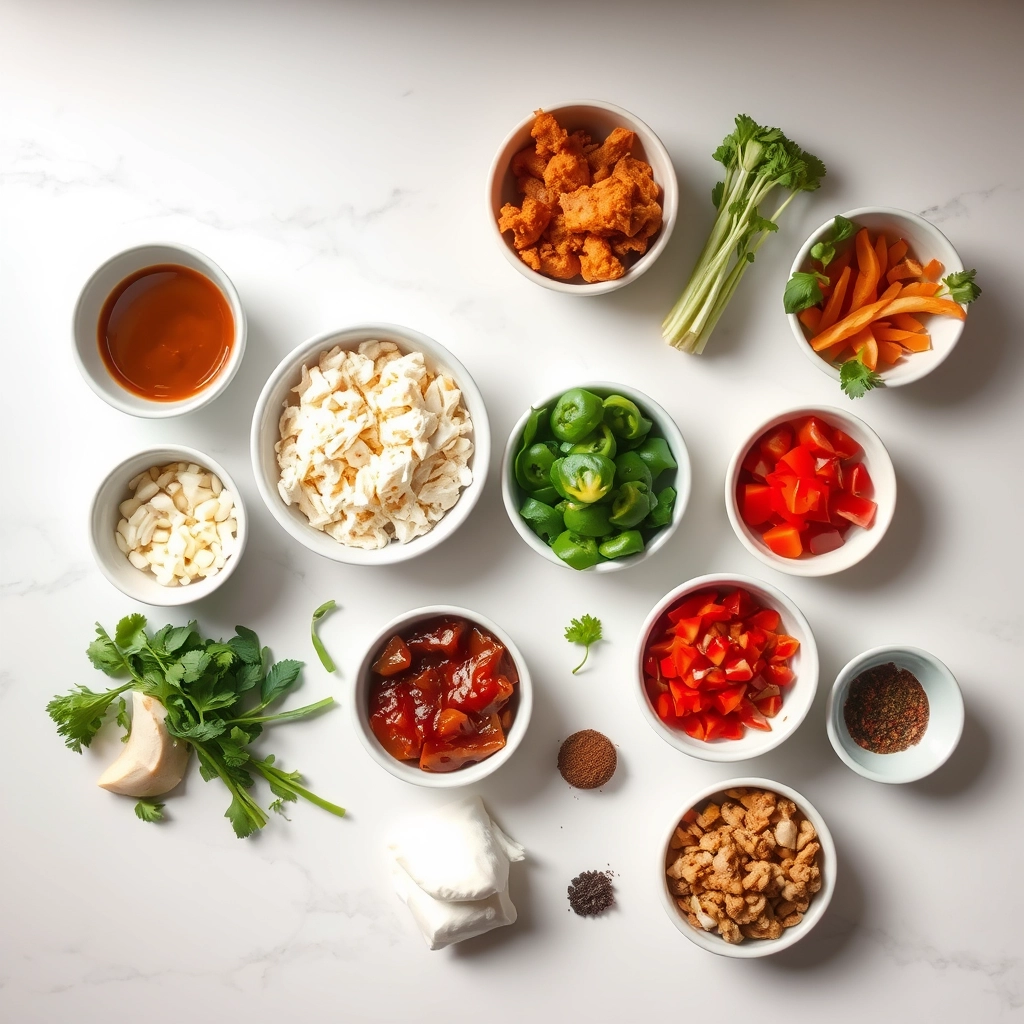
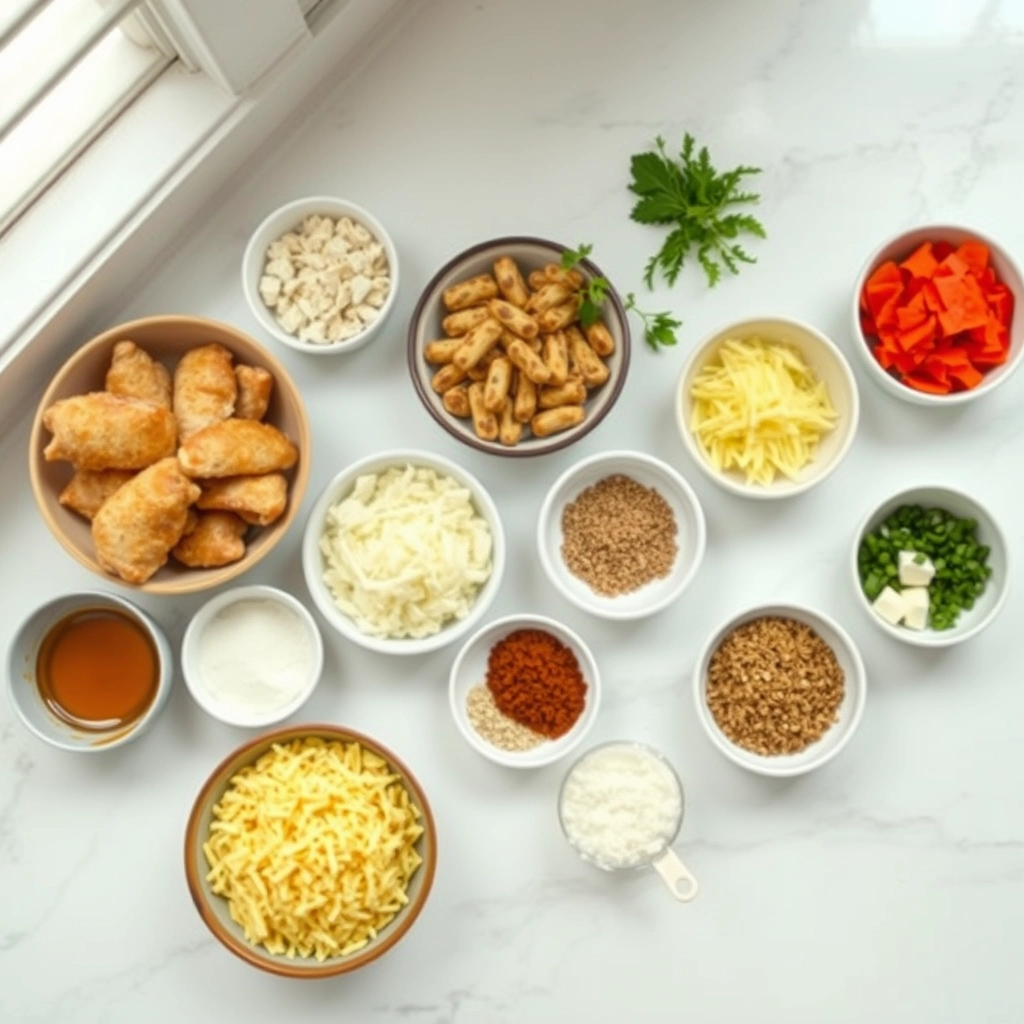
Ingredients
Scale
For the Crust:
2 cups cooked shredded chicken
1/2 cup BBQ sauce
4 large flour tortillas
1 cup shredded lettuce
1/2 cup diced red onion
1/2 cup corn kernels (canned or cooked)
1/2 cup shredded cheddar cheese
1/4 cup ranch dressing
Instructions
1. Prepare the Crust:
In a bowl, mix shredded chicken with BBQ sauce until well coated.
Lay out tortillas and divide chicken mixture evenly among them, spreading down the center.
Top each with lettuce, red onion, corn, and cheese.
Drizzle with ranch dressing.
Fold in sides of tortillas and roll tightly to form wraps. Serve immediately or wrap in foil for later.
Notes
You can customize the seasonings to taste.
s-dish">How to Prepare This Dish
Steps and time-saving tips
First, gather your ingredients to streamline the entire process. Next, shred your pre-cooked chicken into a spacious mixing bowl. Drizzle your favorite BBQ sauce generously over the chicken and then toss everything until each piece gets a perfect, sticky coating. For a creamier texture, fold in some shredded colby jack cheese and a scoop of sour cream. Meanwhile, warm your large flour tortillas briefly in a microwave or a dry skillet; this crucial step makes them incredibly pliable and prevents any unfortunate tearing. Now, layer a hearty line of the saucy chicken mixture down the center of each tortilla. Top it with a handful of crisp coleslaw for that essential crunch and a tangy contrast. Carefully fold the sides of the tortilla inward over the filling, and then firmly roll from the bottom up, creating a tight, secure bundle. Finally, you can serve your BBQ Chicken Wraps immediately for a warm, melty experience. Alternatively, wrap them tightly in parchment paper for a fantastic, mess-free lunch on the go. This entire process moves quickly, especially if you use a store-bought rotisserie chicken. Seriously, that single tip saves a tremendous amount of time and effort without sacrificing any flavor at all.
Mistakes I’ve made and learned from
I have absolutely learned the hard way that overfilling these wraps is a direct ticket to a messy disaster. My first attempt ended with BBQ sauce all over my hands and the filling spilling out the second I took a bite. The key is to show some restraint; use just enough chicken mixture to cover the center third of the tortilla. Another common pitfall involves using cold tortillas straight from the fridge. They crack and split every single time, no matter how careful you are. Now, I always gently warm them first, which makes them so much more cooperative. Getting the right sauce consistency is also crucial, something I perfected after a few too-sloppy batches. For more guidance on balancing wet and dry ingredients, my post on creating the perfect burger sauce has some great transferable tips. And if you’re worried about your tortillas, my method for making fluffy homemade flour tortillas ensures you have a sturdy yet soft base every time. Trust me, a little patience here makes all the difference between a good wrap and a great one.
n-and-variations">Cultural Connection and Variations
Where this recipe comes from
My story with BBQ Chicken Wraps starts at a noisy, sun-drenched county fair. Honestly, the scent of hickory smoke and grilled meat pulled us in long before we saw the stand. This wasn’t fancy food. It was pure, handheld joy, a perfect blend of sweet, smoky, and crunchy that captured the spirit of American summer gatherings. Since then, I have seen this simple concept travel and transform in fascinating ways. For example, in parts of Texas, they might swap the coleslaw for a spicy, vinegar-based version to cut through the rich sauce. Conversely, a Southern cook may add a scoop of creamy mac and cheese right into the tortilla, turning it into the ultimate comfort meal. These regional twists tell a story about local tastes and ingredients. Ultimately, every family makes these wraps their own, creating a delicious, portable tradition.
Furthermore, the beauty of BBQ Chicken Wraps lies in their incredible adaptability. My own family, for instance, fiercely debates the ideal sauce. My uncle swears by a classic Kansas City-style glaze, while I prefer a tangy Carolina mustard base. We even have a “create your own wrap” bar for big family picnics, which keeps everyone happy. This dish effortlessly bridges generations and preferences. It is a culinary chameleon, always delivering that satisfying combination of flavors and textures we all crave.
How it fits in today’s cooking
Today, BBQ Chicken Wraps fit perfectly into our fast-paced, health-conscious lifestyles. They are the ultimate quick lunch or easy weeknight dinner solution. Modern cooks brilliantly adapt the core recipe to suit different diets, perhaps using low-carb tortillas or loading them with extra veggies. Moreover, this dish is a fantastic way to repurpose leftovers, especially if you have some pulled pork or grilled chicken from a previous meal. This approach reduces food waste and saves precious time. Consequently, you get a delicious and satisfying meal on the table in minutes.
Additionally, the wrap
continues to be a star at casual gatherings and game day parties. It is a guaranteed crowd-pleaser that everyone enjoys. You can easily make a big batch ahead of time, which makes hosting so much simpler. For a complete spread, consider pairing your wraps with a fresh, crisp side. A simple macaroni salad often provides the ideal cool and creamy contrast to the smoky, savory filling. Ultimately, this humble wrap has secured its place as a modern classic because it delivers maximum flavor with minimal fuss.
Taste and Texture
What makes it delicious
These BBQ Chicken Wraps deliver a fantastic mix of textures and smoky sweetness in every single bite. First, you get the soft, pliable flour tortilla giving way to a cool and creamy coleslaw crunch. Meanwhile, the juicy, shredded chicken coated in tangy barbecue sauce provides a deeply savory and slightly sweet core. Furthermore, the melted cheddar cheese adds a rich, gooey element that beautifully ties everything together. Ultimately, the experience is a perfect balance of hearty, smoky, and fresh flavors that makes these BBQ Chicken Wraps a guaranteed crowd-pleaser.
Boosting the flavor
For an extra kick, consider mixing a teaspoon of chipotle powder into your barbecue sauce; it introduces a wonderful smoky heat that deepens the overall flavor profile. Additionally, topping your wrap with a handful of crispy fried onions or chopped bacon introduces a fantastic salty crunch. You can also swap the standard coleslaw for a spicy jalapeño slaw to add a vibrant, peppery zing that cuts through the richness. Finally, serving a side of cooling avocado dip on the side offers a creamy contrast that makes the meal even more satisfying.
Always warm your tortillas briefly in a dry skillet first, because this makes them pliable and prevents cracking. Furthermore, spread your sauce evenly across the entire surface, which ensures every single bite of your BBQ Chicken Wraps is packed with flavor. Subsequently, use a moderate hand with the fillings to avoid overstuffing, as this allows for a tight, secure roll. Finally, chill your assembled wraps for ten minutes before slicing; this crucial step helps them hold their perfect shape.
Mistakes to avoid
A common error involves using cold chicken straight from the fridge, which can make your wrap unpleasantly cool; therefore, always let your shredded BBQ chicken come to room temperature first. Additionally, many people overlook the importance of draining their ingredients, so always pat canned corn or black beans dry to prevent a soggy tortilla. For more guidance on handling moist ingredients, our article on keeping your wrap from getting soggy offers excellent solutions. Moreover, do not skip the step of toasting your wrap seam-side down, since this simple action seals it shut securely. If your chicken is dry, however, you can easily fix it by learning how to moisten dry shredded chicken for a much better texture.
g-suggestions">Serving and Pairing Suggestions
How to serve this dish
For a fun and interactive meal, serve these BBQ Chicken Wraps family-style. Consequently, arrange the whole wraps on a large wooden cutting board and let everyone dig in. Alternatively, slice each wrap in half on a sharp diagonal to reveal the beautiful, colorful filling inside. This simple presentation instantly makes them look more gourmet. Furthermore, a casual backyard barbecue provides the perfect occasion for these handheld delights. Finally, garnish your platter with fresh cilantro sprigs and a small bowl of extra BBQ sauce for dipping.
What goes well with it
A cool, creamy side perfectly balances the smoky flavor of your BBQ Chicken Wraps. For instance, a classic Classic Coleslaw adds a wonderful crunch and tangy contrast. Moreover, a handful of crispy potato chips or sweet potato fries on the side offers a satisfying salty crunch. For a drink pairing, a slightly sweet iced tea or a light lager beer complements the barbecue sauce without overpowering it. Ultimately, you can also offer a cool, creamy dip like our Avocado Crema for an extra layer of flavor.
math-faq-block">
What goes well with BBQ chicken wraps?
BBQ chicken wraps pair perfectly with a variety of sides. Classic choices include a simple side salad, coleslaw, sweet potato fries, or fresh fruit like watermelon. For a heartier meal, serve them with corn on the cob or a creamy pasta salad.
How do you keep BBQ chicken wraps from getting soggy?
The key to preventing soggy BBQ chicken wraps is to let the cooked chicken cool completely before assembling and to control moisture. Pat any wet ingredients like tomatoes or onions dry with a paper towel, and consider placing a layer of lettuce or cheese between the wrap and the saucy chicken to act as a barrier.
Can you make BBQ chicken wraps ahead of time?
Yes, you can prepare the components for BBQ chicken wraps ahead of time for easy assembly. Store the shredded BBQ chicken, chopped veggies, and wraps separately in airtight containers in the refrigerator. For the best texture, assemble them just before serving to avoid a soggy tortilla.
ank-math-faq-item">
What is the best way to cook chicken for BBQ wraps?
The best methods for cooking chicken for BBQ wraps are grilling, baking, or using a slow cooker. Grilling imparts a smoky flavor, while baking or slow cooking makes the chicken incredibly tender and easy to shred. Once cooked, shred the chicken and toss it in your favorite BBQ sauce before building your wraps.
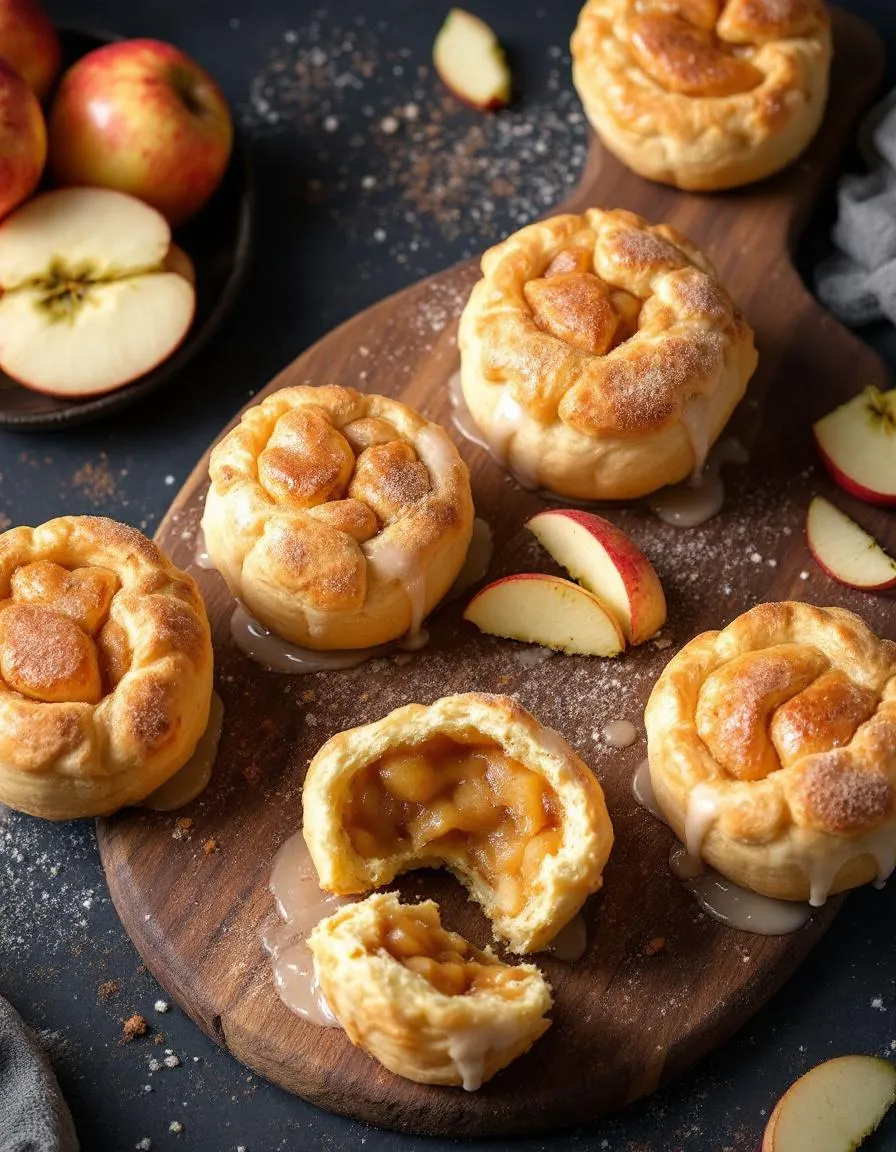
Best Apple Cinnamon Rolls Recipe
Introduction
Is there anything more comforting than the smell of warm apples and cinnamon wafting through your kitchen? Honestly, this aroma instantly transports me to cozy autumn mornings and cherished family gatherings. Furthermore, the promise of a gooey, sweet roll fresh from the oven feels like a warm hug. Today, we chase that exact feeling with the ultimate homemade treat: Apple Cinnamon Rolls. This recipe promises to fill your home with incredible fragrance and deliver pure, unadulterated joy in every single bite.
Apple Cinnamon Rolls are a magnificent twist on a classic favorite. Essentially, they transform the traditional cinnamon roll by weaving tender, spiced apple pieces directly into the iconic swirl. This addition creates pockets of juicy, fruity flavor that perfectly complement the warm cinnamon sugar and creamy glaze. For many people, this dish represents the very essence of fall baking. It matters because it turns a simple baking project into a memorable experience. The process invites you to slow down, knead the dough, and create something truly special from scratch. Moreover, the final result is a show-stopping baked good that impresses at brunch, comforts on a rainy day, and makes any ordinary morning feel like a celebration. This recipe fits our blog’s mission perfectly because we champion from-scratch cooking that delivers both incredible flavor and a deep sense of accomplishment. If you enjoy mastering foundational recipes, you will absolutely love our guide on creating the perfect homemade pizza dough; the skills are surprisingly similar. Ultimately, a successful batch of Apple Cinnamon Rolls proves that the best baked goods come from your own oven, filling your kitchen with love and irresistible aromas. They are the perfect project for a leisurely weekend and a guaranteed way to make everyone in your house incredibly happy.
Why I Love This Recipe
This recipe holds a special place in my heart because it connects me directly to my grandmother. She always made a similar version whenever we visited during the holidays, and the entire house would smell like heaven. I vividly remember standing on a stool next to her counter, desperately trying to sneak pieces of the apple filling. Now, whenever I bake these Apple Cinnamon Rolls, that same sense of warmth and anticipation washes over me. It is more than just a recipe; it is a edible memory that I love sharing with my own family and friends, creating new traditions around the breakfast table. For another baking project that fills your home with an amazing smell, try our classic easy homemade banana bread.
Health and Nutrition
Why it’s good for your body
These Apple Cinnamon Rolls offer more than just incredible flavor; they also provide some surprising nutritional benefits. First, the star ingredient, apples, delivers a powerful dose of soluble fiber. This fiber actively helps to regulate your digestion and promotes a lasting feeling of fullness. Furthermore, cinnamon brings its own set of advantages, as it possesses natural anti-inflammatory properties and may help manage blood sugar levels.
Consequently, this combination creates a treat that supports your body in multiple ways. Additionally, the warmth of the cinnamon perfectly complements the natural sweetness of the apples, which often means you can use less added sugar. Therefore, enjoying these Apple Cinnamon Rolls gives you a wholesome source of energy. Ultimately, this recipe transforms a classic indulgence into a more mindful choice that truly nourishes you from the inside out.
How it fits in a healthy lifestyle
You can absolutely enjoy these Apple Cinnamon Rolls as part of a balanced diet. Think of them as a satisfying component of a varied eating plan rather than an off-limits indulgence. For a complete and nutritious breakfast, simply pair one with a source of protein like Greek yogurt or a handful of nuts. This combination helps balance your energy levels throughout the entire morning.
If you follow specific dietary needs, you can easily adapt this recipe. For more ideas on creating delicious alternatives, explore our guide to gluten-free baking. You can also make these rolls a part of your meal prep routine for a quick, portion-controlled treat. Remember, a healthy lifestyle embraces all foods. For more inspiration on building a sustainable and enjoyable approach to eating, check out our tips for balanced eating habits.
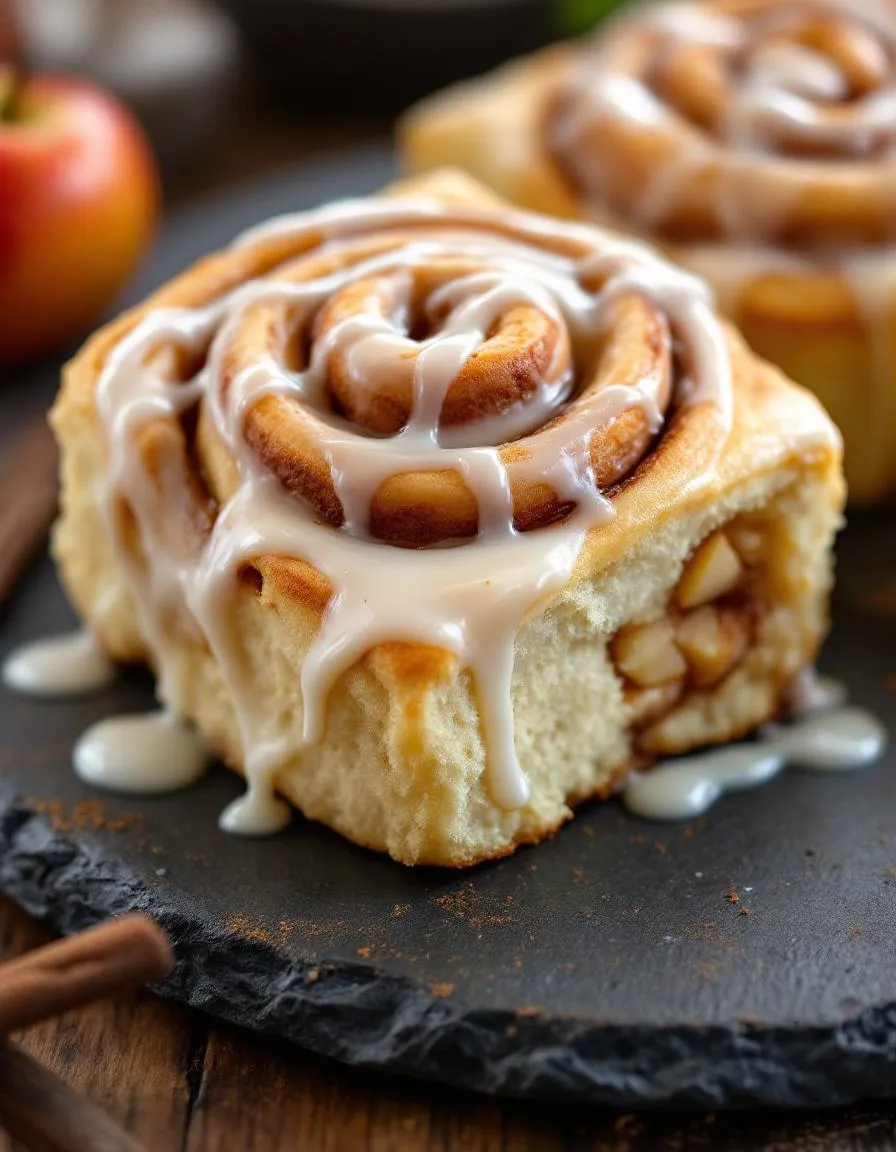
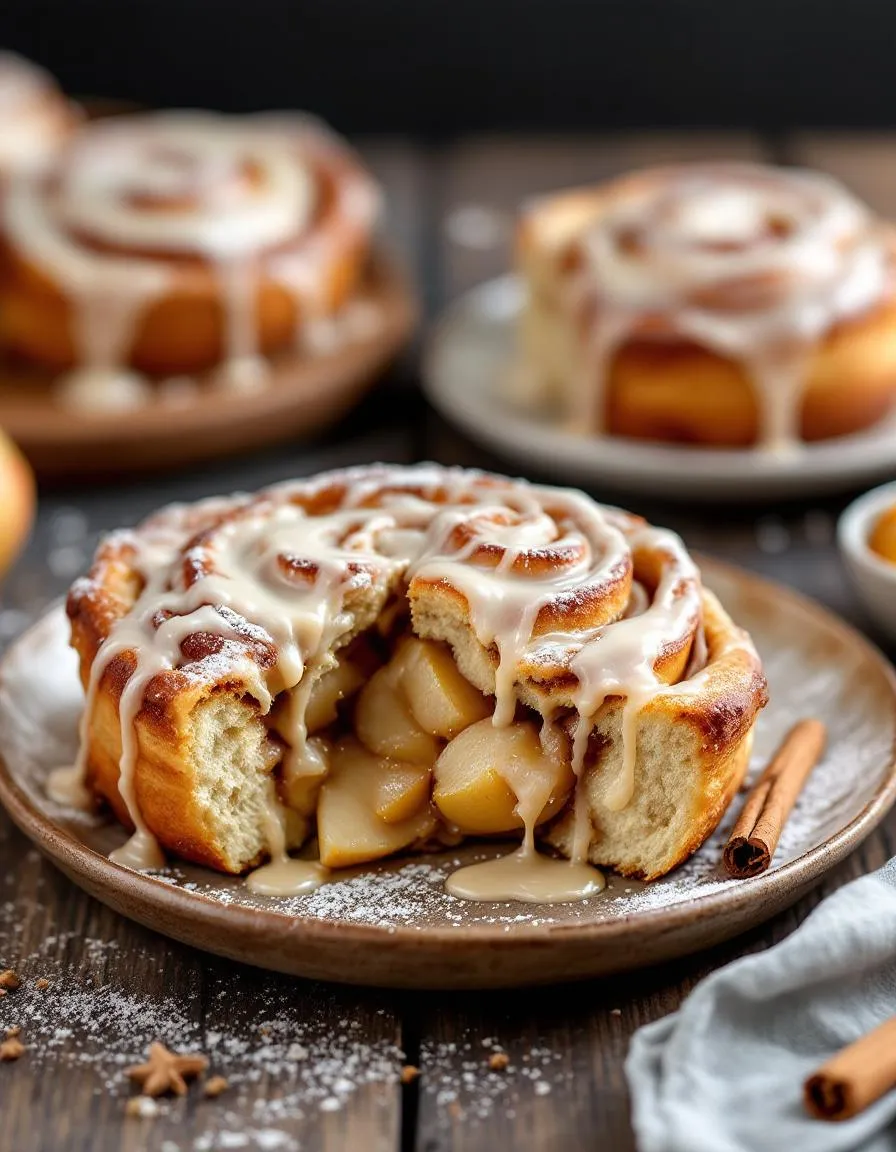
Soft, fluffy cinnamon rolls filled with sweet apple pieces and warm spices, topped with a creamy glaze.
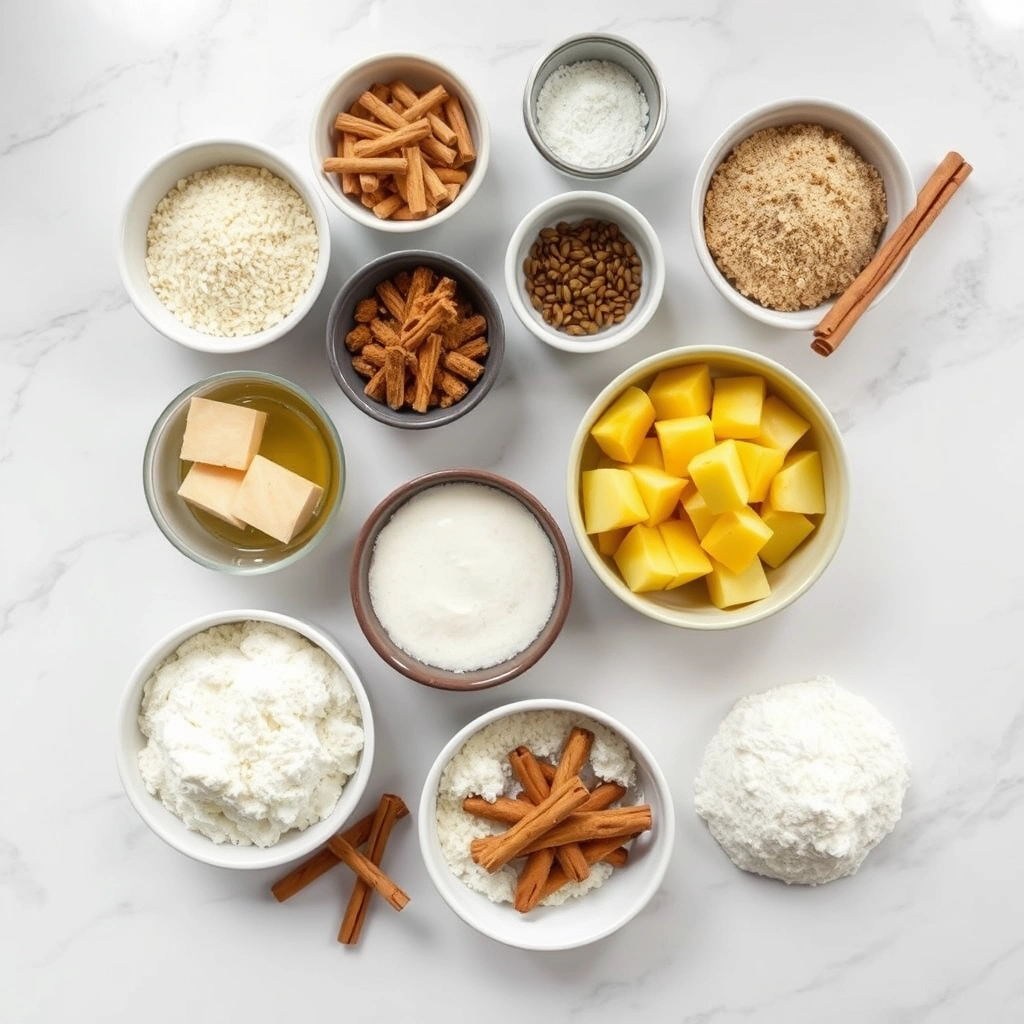
Ingredients
Scale
For the Crust:
2 1/4 cups all-purpose flour
1/4 cup granulated sugar
1 packet instant yeast
1/2 cup warm milk
1/4 cup unsalted butter, melted
1 large egg
1/2 tsp salt
2 medium apples, peeled and diced
1/3 cup brown sugar
2 tsp ground cinnamon
1/4 tsp nutmeg
2 tbsp butter, softened
1 cup powdered sugar
2 tbsp milk
1/2 tsp vanilla extract
Instructions
1. Prepare the Crust:
In a bowl, combine flour, sugar, yeast, and salt. Add warm milk, melted butter, and egg. Mix until a dough forms. Knead for 5 minutes, then let rise for 1 hour.
In a separate bowl, mix diced apples, brown sugar, cinnamon, and nutmeg. Roll dough into a rectangle, spread softened butter, then sprinkle apple mixture evenly.
Roll dough tightly from the long end, slice into 8 pieces, and place in a greased pan. Let rise 30 minutes. Bake at 350°F for 25-30 minutes.
Whisk powdered sugar, milk, and vanilla to make glaze. Drizzle over warm rolls before serving.
Notes
You can customize the seasonings to taste.
s-dish">How to Prepare This Dish
Steps and time-saving tips
First, gather all your ingredients to make the process smooth and efficient. Next, whisk together your warm milk, a bit of sugar, and the yeast in the bowl of a stand mixer; let this mixture sit for about five minutes until it becomes foamy. Meanwhile, peel and finely chop your apples into small, uniform pieces for even cooking. Add the remaining sugar, melted butter, egg, and flour to your yeast mixture, then use the dough hook attachment to knead everything for a solid seven minutes until the dough is soft and elastic. While the dough rises in a greased bowl, toss your apples with cinnamon, brown sugar, and a pinch of nutmeg to create the fragrant filling. Roll the risen dough into a large rectangle on a lightly floured surface, and spread a generous layer of softened butter over it. Sprinkle your spiced apple mixture evenly across the entire surface, then tightly roll the dough into a log. Use unflavored dental floss to slice the log into nine even rolls for a clean cut without squashing them. Place these rolls snugly into a prepared baking dish for their second rise. Finally, bake your Apple Cinnamon Rolls until they are golden brown and your kitchen smells incredible. For the ultimate finish, whisk together a simple glaze and drizzle it over the warm rolls right before serving.
Mistakes I’ve made and learned from
I cannot tell you how many times I killed my yeast by using milk that was far too hot, resulting in dense, brick-like rolls that were a total disappointment. Now I always use a thermometer to ensure the liquid is just warm to the touch, around 110°F, which makes all the difference for a perfect rise. Another classic error was rolling my dough log too loosely, which then caused all the beautiful filling to spill out during baking and create a sticky, burnt mess in the bottom of my pan. I learned to roll it tightly from the get-go, and pinching the seam securely is a non-negotiable step. Getting the bake time right was also a challenge; I often under-baked them, leaving a gummy, doughy center that no amount of glaze could fix. I finally invested in an oven thermometer to verify my oven’s accuracy, and it completely changed my baking game. For more tips on avoiding common pitfalls, my guide on fixing baking mistakes covers all these lessons in detail.
n-and-variations">Cultural Connection and Variations
Where this recipe comes from
My grandmother always said that the best recipes tell a story. Her Apple Cinnamon Rolls certainly did. She would make them every autumn when the crisp air first blew in, filling her tiny kitchen with the most incredible aroma. This tradition wasn’t unique to her, of course. Many cultures have their own version of sweet, spiced bread. Scandinavians might use cardamom in their buns, while Germans often incorporate nuts and raisins into their streusel-topped pastries. Our family’s version, however, always centered on the humble apple. We’d use whatever variety we had just picked, peeling and dicing them right into the buttery cinnamon sugar filling. Consequently, every batch of Apple Cinnamon Rolls tasted just a little bit different, a true reflection of the season’s harvest. Ultimately, this dish connects us to that timeless tradition of using what you have to create something warm, comforting, and deeply satisfying for the people you love.
How it fits in today’s cooking
Today, this classic treat fits perfectly into our modern lives. Many bakers now create overnight Apple Cinnamon Rolls, letting the dough rise slowly in the fridge for a spectacular, hassle-free breakfast. Others are experimenting with whole wheat flour or plant-based butter for a healthier twist. Furthermore, these rolls have become a staple for holiday mornings and cozy weekend brunches alike. They offer the same soul-warming comfort that a perfect slice of classic coffee cake provides, but with a fruity, autumnal twist. This adaptability ensures the recipe remains a beloved favorite. Similarly, the joy of baking them from scratch brings families together, much like the process of crafting a beautiful homemade focaccia does. It is a simple, rewarding ritual that never goes out of style.
Taste and Texture
What makes it delicious
Warm, gooey, and impossibly fragrant, these Apple Cinnamon Rolls deliver a symphony of cozy flavors. Firstly, the soft, fluffy dough yields with a tender, pillowy chew. Next, a sweet and slightly tart apple filling bursts with every bite, perfectly spiced with warm cinnamon. Consequently, the rich cream cheese glaze melts into the warm swirls, creating a luxurious, creamy finish. Ultimately, the aroma of baked apples and spice will fill your kitchen, making these rolls an irresistible treat.
r">Boosting the flavor
For an even more decadent experience, consider a few simple upgrades. Alternatively, a drizzle of homemade salted caramel sauce introduces a wonderful buttery depth that complements the apples. Furthermore, a handful of toasted pecans folded into the filling provides a delightful crunch. If you adore that warm spice profile, a pinch of nutmeg or cardamom alongside the cinnamon will truly make it sing. For more inspiration on crafting the perfect icing, explore our guide on cream cheese frosting. Moreover, serving your Apple Cinnamon Rolls warm with a scoop of vanilla ice cream transforms them into an unforgettable dessert.
Tips for Success
Best practices for results
Always use room temperature ingredients for your dough, as this helps it rise properly and creates a light texture. Furthermore, roll the dough out evenly to ensure your Apple Cinnamon Rolls bake uniformly. Additionally, do not overfill them with the apple mixture to prevent messy leakage during baking. For the best flavor, always use fresh, crisp apples that hold their shape. Finally, let the rolls cool slightly before applying the glaze so it doesn’t just melt off.
>Mistakes to avoid
A common error is killing the yeast with liquid that is too hot; instead, use a thermometer to guarantee it’s just warm to the touch. Consequently, your dough will rise beautifully. Another mistake is slicing the rolls with a dull knife, which squishes them instead of cutting cleanly. Instead, use unflavored dental floss for a perfect, clean cut every time. Moreover, avoid overbaking, as this will dry out your Apple Cinnamon Rolls. For more guidance on achieving the perfect bake, check out our tips on using your oven. If your dough isn’t rising, the environment might be too cold; learn how to fix this in our post on dough not rising.
Serving and Pairing Suggestions
How to serve this dish
Present your warm Apple Cinnamon Rolls on a beautiful rustic platter for a truly inviting look. Moreover, drizzle that glossy cream cheese glaze over the top just before serving for a stunning, mouth-watering effect. These rolls absolutely shine at a weekend brunch or as a special holiday morning treat. For an extra touch, garnish each plate with a few thin apple slices and a light dusting of cinnamon. Finally, serve them fresh from the oven when they are at their most soft and fragrant.
What goes well with it
A hot mug of coffee provides the perfect bitter contrast to the sweet, spiced notes of these Apple Cinnamon Rolls. Alternatively, a cold glass of milk wonderfully balances the richness of this cozy pastry. For a truly decadent brunch spread, consider pairing them with a savory option like our classic Breakfast Casserole. Furthermore, a side of our refreshing Winter Fruit Salad introduces a bright, juicy element that cuts through the sweetness beautifully.
What is the best apple to use for apple cinnamon rolls?
For the best texture and flavor, use firm, tart apples like Granny Smith or Honeycrisp. These varieties hold their shape well during baking and provide a nice contrast to the sweet dough and cinnamon sugar. Avoid very soft apples like Red Delicious, as they can turn mushy in your Apple Cinnamon Rolls.
Can you make apple cinnamon rolls ahead of time?
Absolutely! You can assemble the rolls the night before, cover the pan tightly, and refrigerate them. The next morning, let them sit at room temperature for 30-45 minutes before baking. This makes fresh Apple Cinnamon Rolls a convenient option for breakfast or brunch.
ank-math-faq-item">
What kind of glaze goes on apple cinnamon rolls?
A simple cream cheese glaze or a vanilla icing pairs perfectly with the warm spices and apple flavor. For a cream cheese glaze, mix softened cream cheese with powdered sugar, a little milk, and vanilla extract. A caramel glaze also complements the apples beautifully.
How do you keep apple cinnamon rolls from getting soggy?
The key is to properly prepare your apples. Tossing the diced apples in a little lemon juice and draining any excess liquid helps. You can also sauté them briefly to cook off some moisture before adding them to the filling, ensuring your rolls have the perfect texture.
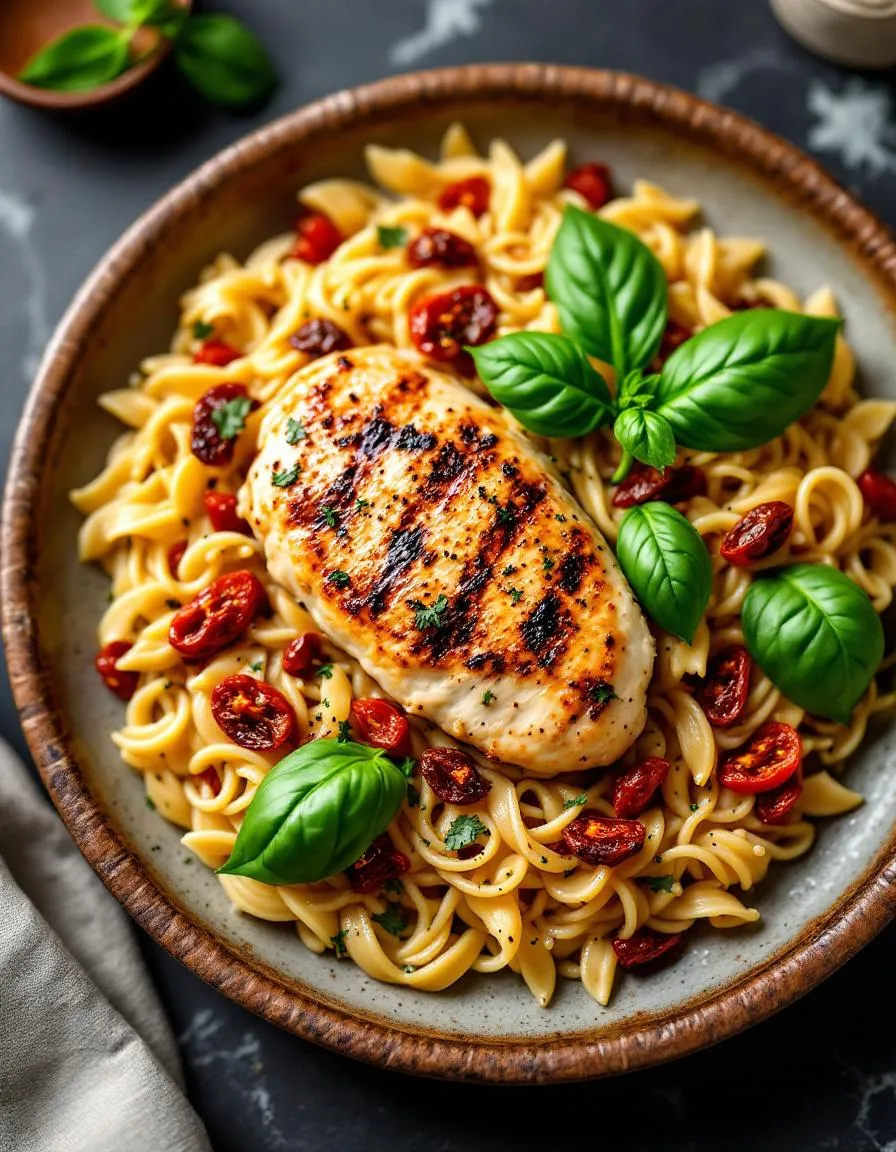
Easy One Pan Marry Me Chicken Orzo Recipe
Introduction
Ever have one of those days where you desperately need a dinner that feels like a warm hug? You crave something deeply satisfying yet utterly simple, a meal that whispers “everything will be okay” from the very first bite. Honestly, we all need that kind of comfort, especially on a hectic weeknight. This is precisely why the legendary One Pan Marry Me Chicken Orzo continues to capture so many hearts. Furthermore, it delivers restaurant-quality flavor with shockingly minimal cleanup, making it the ultimate solution for a stressful evening. Ultimately, this dish promises to become your new favorite comfort food, guaranteed to soothe your soul and simplify your life.
The name itself tells a story of a dish so irresistibly delicious that it could inspire a lifelong commitment. Traditionally, “Marry Me Chicken” refers to tender chicken breasts in a luxurious, creamy sun-dried tomato and parmesan sauce. We take that iconic flavor profile and transform it into a complete, hearty meal by adding orzo pasta directly to the pan. As the orzo simmers, it soaks up every bit of the incredible sauce, becoming incredibly flavorful and creamy. This brilliant one-pan approach not only maximizes taste but also minimizes your time at the sink, a true win-win for any home cook. For anyone seeking a dependable, crowd-pleasing recipe that feels both special and easy, this is your answer. It perfectly fits our blog’s mission to deliver recipes that are ambitious in flavor but simple in execution. If you enjoy this style of cooking, you will absolutely adore our Creamy Tuscan Chicken, which follows a similarly rewarding path. The beauty of this method lies in its simplicity; you achieve a complex, layered taste through a straightforward process that builds flavor at every step. Consequently, you get a magnificent dinner on the table without a mountain of dishes, proving that you do not need to compromise on quality for the sake of convenience. This recipe matters because it solves a real problem for busy people who still want to eat well and connect over a homemade meal.
Why I Love This Recipe
This One Pan Marry Me Chicken Orzo holds a special place in my kitchen rotation because it never fails to impress both my family and unexpected guests. I vividly remember the first time I made it for a friend who was having a particularly rough week; the look of pure comfort on her face after the first forkful told me everything I needed to know. Moreover, the entire process, from searing the chicken to watching the orzo puff up in that gorgeous sauce, is incredibly therapeutic and fills my home with the most amazing aroma. It genuinely reminds me of the cozy, feel-good vibes from our popular Chicken Pot Pie Soup, providing that same level of deep satisfaction. Ultimately, I love how this single dish manages to feel like a celebratory feast while being a practical weeknight solution, making ordinary dinners feel extraordinary.
Health and Nutrition
Why it’s good for your body
One Pan Marry Me Chicken Orzo delivers a powerful nutritional punch in every single bite. For instance, the lean chicken breast provides a fantastic source of high-quality protein, which actively supports muscle repair and keeps you feeling full and satisfied. Furthermore, the sundried tomatoes and spinach pack a serious antioxidant punch, fighting oxidative stress in your body.
This dish also offers a wonderful balance of macronutrients. The orzo provides energizing complex carbohydrates, while the olive oil contributes heart-healthy monounsaturated fats. Consequently, you get a steady release of energy without the dreaded crash that comes from simpler carbs. Additionally, the garlic and herbs don’t just add flavor; they also bring their own anti-inflammatory and immune-boosting properties to the party.
Ultimately, choosing One Pan Marry Me Chicken Orzo means you are nourishing your body with whole, recognizable ingredients. You can feel great about serving a meal that tastes indulgent but is genuinely good for you from the inside out.
How it fits in a healthy lifestyle
This recipe seamlessly fits into a balanced eating plan. It combines your protein, carb, and veggie servings all in one convenient dish, making portion control and clean-up a breeze on busy weeknights. If you’re focused on hitting your protein goals, you can easily add an extra piece of chicken or stir in some white beans at the end.
The ingredients also support a heart-healthy diet, especially when you use a quality olive oil and low-sodium broth. For those managing specific dietary needs, you can easily swap the regular orzo for a whole wheat or even a gluten-free pasta alternative to keep everything on track. Finding meals that are both delicious and supportive of your goals is key, and exploring our healthy dinner ideas can provide even more inspiration for your weekly rotation.
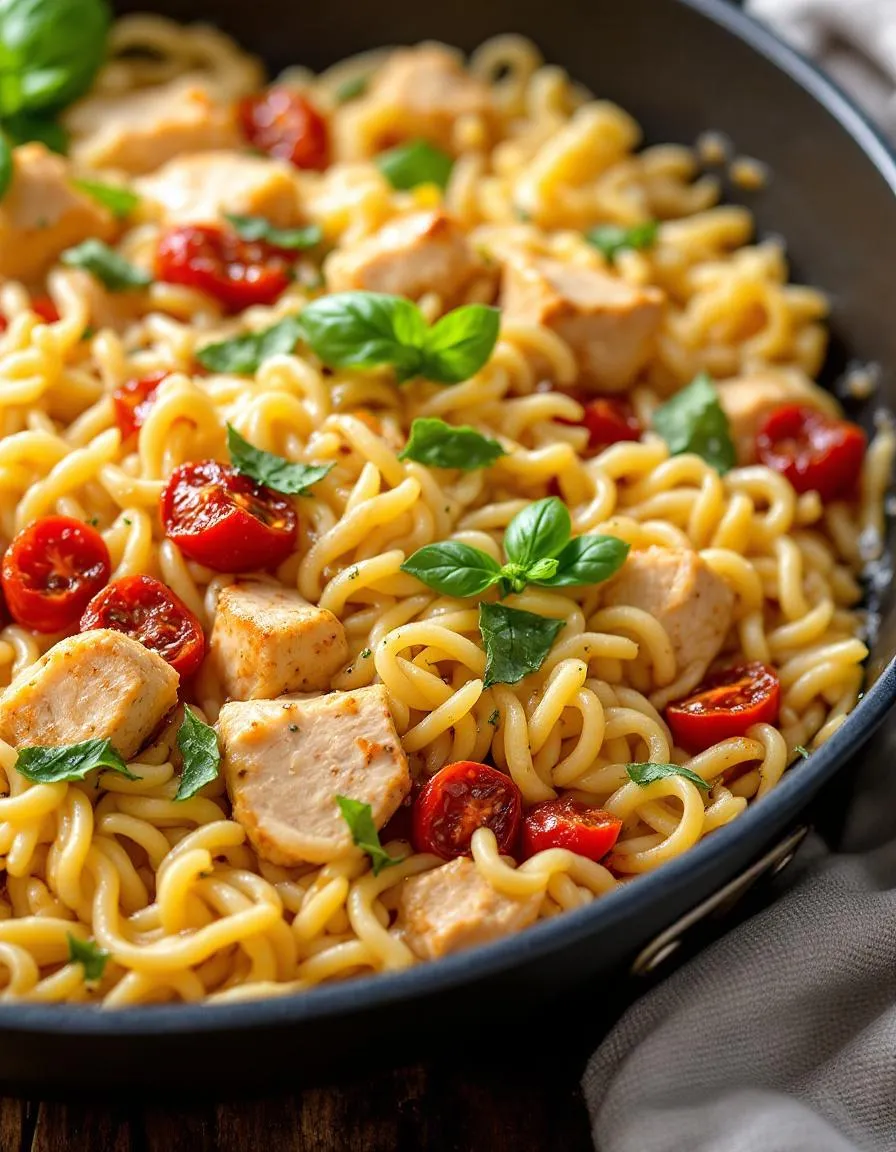
A creamy, flavorful one-pan dish featuring tender chicken and orzo pasta in a rich sun-dried tomato and Parmesan sauce.
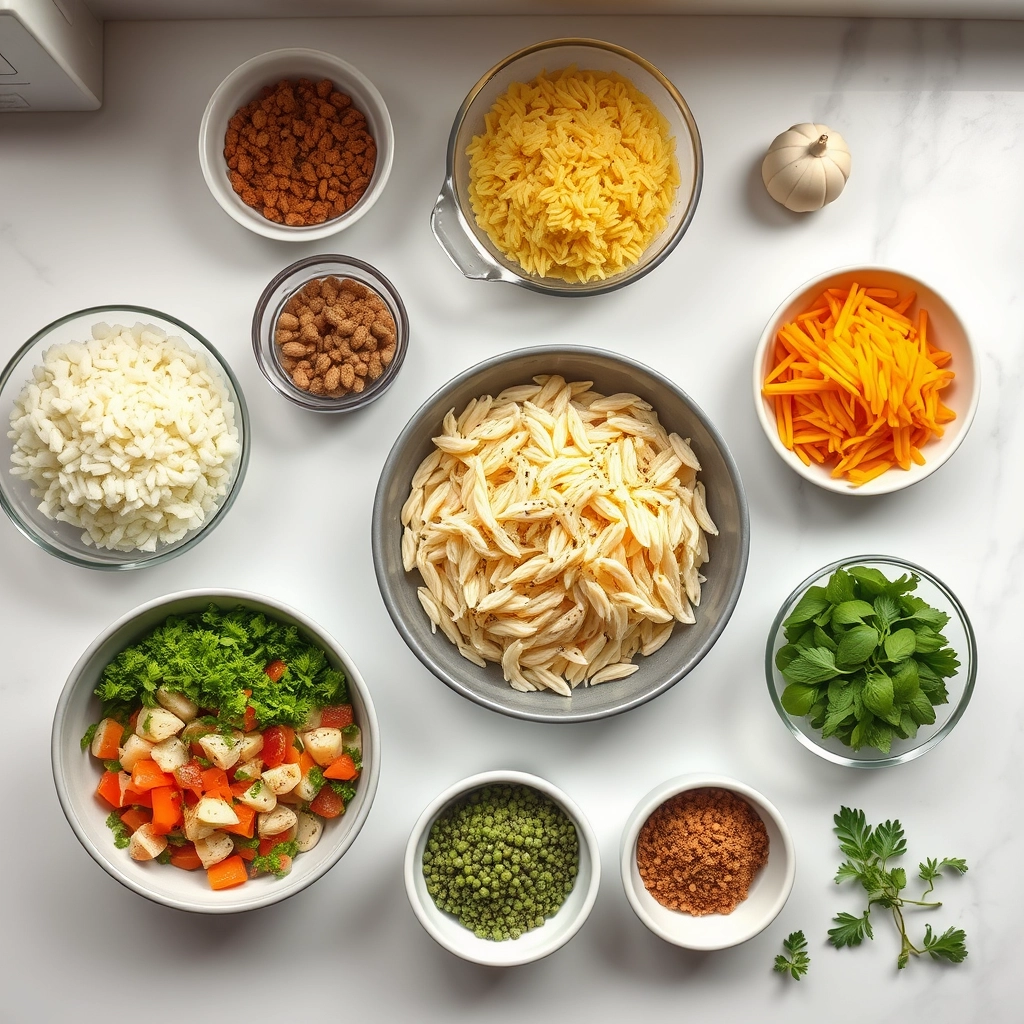
Ingredients
Scale
For the Crust:
4 boneless, skinless chicken breasts
1 tbsp olive oil
1 cup orzo pasta
1/2 cup sun-dried tomatoes, chopped
3 cloves garlic, minced
2 cups chicken broth
1 cup heavy cream
1/2 cup grated Parmesan cheese
1 tsp Italian seasoning
1/2 tsp red pepper flakes
Salt and black pepper to taste
Fresh basil for garnish
Instructions
1. Prepare the Crust:
Season chicken breasts with salt, pepper, and Italian seasoning. Heat olive oil in a large skillet over medium-high heat and cook chicken until golden, about 5-6 minutes per side. Remove and set aside.
In the same skillet, add orzo, sun-dried tomatoes, and garlic. Cook for 1-2 minutes until fragrant.
Pour in chicken broth and heavy cream, stirring to combine. Bring to a simmer, then reduce heat to medium-low.
Return chicken to the skillet, nestling it into the orzo mixture. Cover and cook for 15-20 minutes, until orzo is tender and chicken is cooked through.
Stir in Parmesan cheese and red pepper flakes. Adjust seasoning if needed. Garnish with fresh basil before serving.
Notes
You can customize the seasonings to taste.
How to Prepare This Dish
Steps and time-saving tips
First, gather all your ingredients for the One Pan Marry Me Chicken Orzo. This simple prep step saves you from frantic searches later. Pat your chicken breasts completely dry with a paper towel; this step is crucial for achieving a beautiful golden sear. Next, generously season both sides with salt and pepper. Meanwhile, heat a generous drizzle of olive oil in a large, oven-safe skillet over medium-high heat. Carefully place the chicken in the hot pan and sear for about 5-6 minutes per side until you get a deep golden-brown crust. Remove the chicken and set it aside on a clean plate. Do not wipe the skillet; those browned bits are flavor gold!
Now, reduce the heat to
medium and add the minced garlic and sun-dried tomatoes. Sauté them for just one minute until incredibly fragrant. Immediately pour in your chicken broth and heavy cream, then use a wooden spoon to scrape up all the delicious fond from the pan bottom. Bring the liquid to a gentle simmer before stirring in the uncooked orzo. Finally, nestle the seared chicken breasts back into the skillet, along with any accumulated juices. Transfer the entire pan to a preheated 400°F oven and bake for 20 minutes. For a perfect finish, remove the pan and top the One Pan Marry Me Chicken Orzo with grated parmesan and fresh basil. Let it rest for five minutes before serving, as this allows the sauce to thicken beautifully.
Mistakes I’ve made and learned from
I have absolutely rushed the searing process before, and it always leads to pale, steamed chicken instead of that gorgeous, flavorful crust. Patience here is non-negotiable; wait for the oil to be properly hot and don’t move the chicken until it releases easily from the pan. Another common blunder I’ve made is using the wrong skillet. If your pan isn’t truly oven-safe, that handle will get dangerously hot and can even warp, which is a lesson you only need to learn once. I now swear by a well-seasoned cast iron skillet for dishes like this. Finally, I once made the mistake of using old, clumpy spices which resulted in a bland dish. It taught me the importance of properly storing my spices to maintain their potency. And if you’re looking for another fantastic one-pan wonder that avoids these pitfalls, my One Pan Lemon Herb Salmon recipe is a guaranteed winner.
n-and-variations">Cultural Connection and Variations
Where this recipe comes from
This dish weaves a beautiful story of modern convenience and timeless Italian inspiration. While its exact birthplace is likely a creative American kitchen, its soul belongs to the sun-drenched hills of Italy. We see this in the orzo, a pasta that masquerades as rice, and in the creamy, tomato-infused sauce that hugs the chicken. The name itself, of course, tells a romantic tale. Many home cooks joke that this incredibly flavorful meal is so good, it could prompt a marriage proposal. Consequently, the One Pan Marry Me Chicken Orzo carries that joyful, celebratory energy.
Families often make it their own. For instance, some nonnas in Sicily might add a pinch of saffron for a golden hue and earthy depth. Meanwhile, a busy parent in the Midwest could swap sun-dried tomatoes for roasted red peppers from a jar. My own family adds a generous handful of spinach at the end for a pop of color and nutrition. The beauty of this recipe is its incredible flexibility. Ultimately, every variation still delivers that same promise of a spectacular, soul-warming meal. You can truly taste the love in every bite of One Pan Marry Me Chicken Orzo.
How it fits in today’s cooking
This recipe fits perfectly into our modern desire for meals that are both impressive and incredibly simple. We all crave that magical combination of minimal cleanup and maximum flavor. Furthermore, it suits our busy lifestyles without sacrificing the joy of a home-cooked dinner. You can easily find a place for it in your weekly rotation, perhaps alongside some easy air fryer appetizers for a complete feast.
Its relevance also exte
nds to seasonal cooking. In the summer, cooks might use fresh, ripe cherry tomatoes and basil from the garden. Conversely, during the colder months, they lean on pantry staples like sun-dried tomatoes and dried herbs for comfort. It’s the ultimate adaptable dish for any night. Finally, it serves as a fantastic centerpiece for a casual date night in or a small gathering with friends. After all, who needs takeout when you can create a restaurant-quality meal so effortlessly? For a sweet ending to this savory masterpiece, try a slice of classic New York cheesecake.
Taste and Texture
What makes it delicious
This dish immediately greets you with a rich, savory aroma from the garlic and sun-dried tomatoes. Each bite of One Pan Marry Me Chicken Orzo delivers incredibly tender, juicy chicken that contrasts beautifully with the creamy, perfectly cooked orzo. Consequently, the sundried tomatoes offer a sweet and tangy punch, while the spinach wilts into the sauce, adding a fresh, earthy note. Ultimately, the parmesan cheese melts into a luxurious, velvety sauce that coats every single element. The overall experience is deeply comforting and complex, making One Pan Marry Me Chicken Orzo a truly unforgettable meal.
Boosting the flavor
For an instant flavor upgrade, consider finishing your plate with a sprinkle of fresh basil or a pinch of red pepper flakes. Alternatively, you can swap the spinach for kale to introduce a more robust, peppery texture. A squeeze of fresh lemon juice just before serving brilliantly cuts through the richness and brightens the entire dish. If you adore creamy sauces, stirring in a spoonful of our creamy Cajun chicken pasta inspiration can add a wonderful spicy kick. Furthermore, serving it alongside a simple, crisp side salad perfectly balances the meal; our easy cucumber salad offers a refreshing, cool contrast that complements the creamy orzo wonderfully.
First, always pat your chicken breasts completely dry with a paper towel before seasoning. Consequently, you will achieve a much better sear and more flavorful fond in the pan. Furthermore, use a high-quality, low-sodium chicken broth for your cooking liquid because it directly controls the final saltiness of your dish. Meanwhile, toasting the orzo for a minute or two in the pan drippings before adding liquid deeply enhances its nutty flavor. Finally, always let your One Pan Marry Me Chicken Orzo rest for five minutes off the heat before serving so the sauce can properly thicken.
Mistakes to avoid
Avoid overcrowding the pan when you sear the chicken; otherwise, the pieces will steam instead of developing a golden-brown crust. If you notice your sauce is too thin after cooking, simply simmer the dish uncovered for a few extra minutes to reduce it further. Additionally, do not skip the fresh basil garnish at the end, as its bright flavor is essential for cutting through the rich sauce. Remember that orzo continues to absorb liquid as it sits; fortunately, you can easily refresh leftovers with a splash of broth when reheating, a technique we also recommend for our Creamy Tuscan Chicken Pasta. Moreover, always taste your sauce before serving and adjust the seasoning, a fundamental step for any perfect dish like our Perfect Herb Roasted Chicken.
g-suggestions">Serving and Pairing Suggestions
How to serve this dish
Immediately serve your One Pan Marry Me Chicken Orzo straight from the skillet for a rustic, family-style presentation that feels incredibly inviting. For a more elegant touch, plate individual portions and garnish with a final sprinkle of fresh basil or parsley and a light dusting of parmesan cheese. This simple step adds a vibrant color contrast and a fresh flavor burst. Furthermore, this dish truly shines as the centerpiece for a cozy date night in or even a casual holiday gathering. Ultimately, the rich, creamy sauce and tender chicken in this One Pan Marry Me Chicken Orzo promise to impress everyone at your table.
What goes well with it
First, a crisp, simple side salad provides the perfect textural and temperature contrast to the creamy, warm orzo. Specifically, our ultimate Easy Avocado Salad offers a cool, creamy counterpoint that beautifully cuts through the richness. Next, a crusty piece of garlic bread is absolutely essential for sopping up every last bit of the incredible sauce. For a delightful drink pairing, a glass of chilled Pinot Grigio or a crisp Sauvignon Blanc complements the dish’s creamy garlic and sun-dried tomato notes without overwhelming them. Finally, if you want to start your meal with another showstopper, consider our crowd-pleasing Cheesy Garlic Bread to set the tone for an unforgettable dinner.
math-faq-block">
Can I use a different pasta instead of orzo in Marry Me Chicken?
Yes, you can substitute orzo with other small pasta shapes like ditalini, acini di pepe, or even couscous. Keep in mind that cooking times may vary slightly depending on the pasta you choose, so adjust the liquid and simmering time accordingly for your One Pan Marry Me Chicken Orzo dish.
What makes “Marry Me Chicken” so special?
The name comes from the legend that this dish is so incredibly delicious, it could inspire a marriage proposal! The combination of tender chicken, creamy sun-dried tomato sauce, and flavorful herbs creates a rich and impressive meal. This One Pan Marry Me Chicken Orzo version simplifies the classic by cooking everything together for maximum flavor.
How do I prevent the orzo from getting mushy?
To avoid mushy orzo, ensure you use the correct liquid-to-orzo ratio as specified in your recipe and avoid overcooking. For the best One Pan Marry Me Chicken Orzo, let the dish rest for a few minutes after cooking; the orzo will continue to absorb liquid and achieve a perfect al dente texture.
ank-math-faq-item">
Can I make Marry Me Chicken Orzo ahead of time?
Absolutely, this dish reheats very well. Store it in an airtight container in the refrigerator for up to 3 days. When reheating, add a splash of chicken broth or cream to loosen the sauce, as the orzo will continue to absorb moisture.
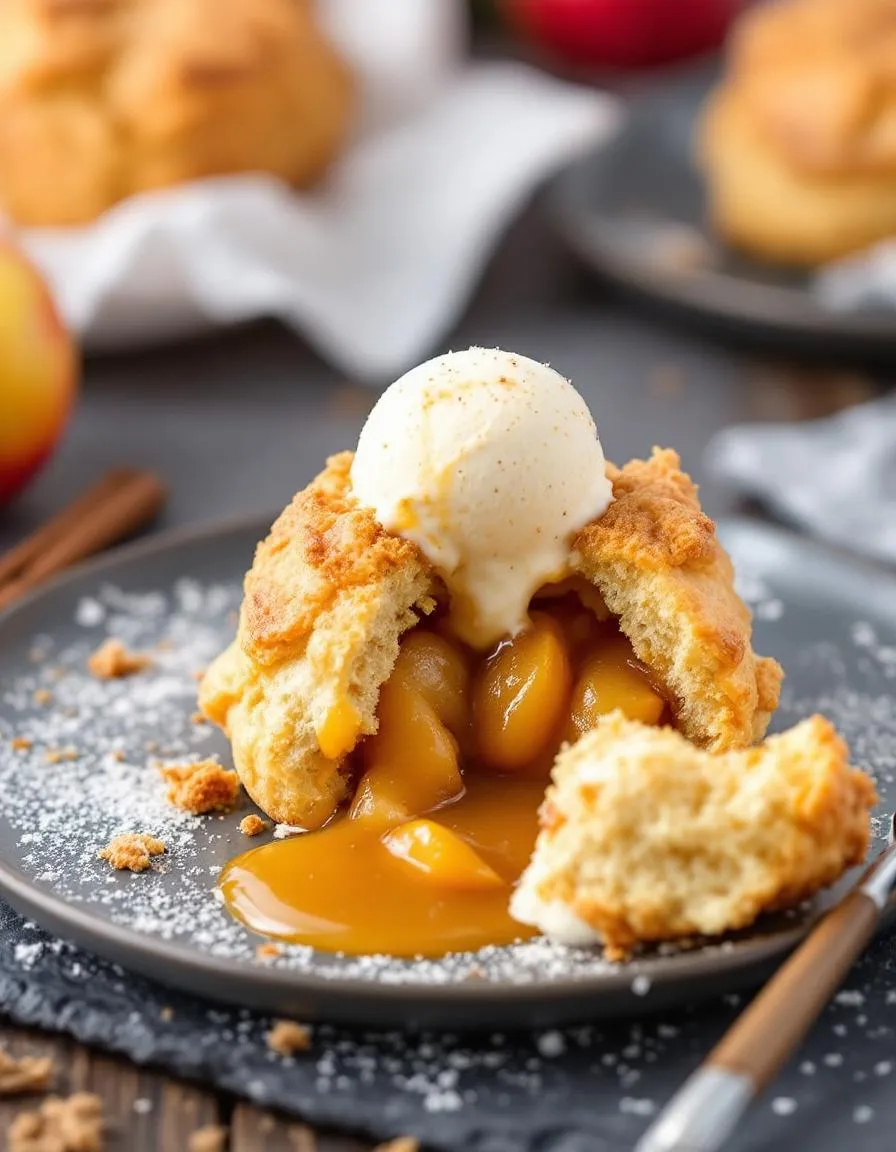
Easy Air Fryer Apple Pie Bombs Recipe
Introduction
Do you ever crave the warm, comforting taste of homemade apple pie but feel completely overwhelmed by the thought of making one? Honestly, we have all been there on a busy weeknight. Fortunately, you can now capture that cozy, spiced flavor in minutes without any fuss. These incredible Air Fryer Apple Pie Bombs deliver every bit of that nostalgic goodness. They offer a deliciously quick solution for your dessert emergency, and they will absolutely become your new favorite treat.
So, what exactly are Air Fryer Apple Pie Bombs? Essentially, they are delightful, handheld pastries that pack all the classic flavors of apple pie into a single, irresistible bite. You make them with simple ingredients like canned biscuit dough, tender spiced apples, and a generous dusting of cinnamon sugar. The air fryer works its magic by creating a wonderfully golden, flaky exterior while keeping the inside perfectly soft and gooey. This recipe matters because it demolishes the barrier between a complex baking project and a spontaneous dessert craving. It perfectly fits our blog’s mission to deliver incredibly tasty, approachable recipes that genuinely work for real life. If you enjoy using your appliance for savory dishes, you will love how it transforms dessert too. For another fantastic air fryer creation, check out our popular Air Fryer Chicken Tenders. Ultimately, these Air Fryer Apple Pie Bombs prove that you do not need to sacrifice flavor for convenience. They are the ultimate smart shortcut for anyone who loves impressive yet easy desserts. Moreover, this recipe is a fantastic way to get kids involved in the kitchen, as they love assembling the little bombs. The process is straightforward and the reward is immediate. Furthermore, the aroma that fills your kitchen while they cook is simply divine. It truly feels like a fall celebration, regardless of the season. This recipe exemplifies our core belief that great food should be both joyful to make and delicious to eat.
Why I Love This Recipe
I have a serious soft spot for these Air Fryer Apple Pie Bombs because they saved a last-minute potluck I was hosting. I needed a dessert quickly and had some apples about to turn. I threw these together in a panic, and they were the first thing to disappear from the table. Everyone raved about them and could not believe I made them so fast. Now, they are my go-to recipe when I need a little taste of comfort without spending hours in the kitchen. They remind me that the best recipes are often the simplest ones shared with good people.
Health and Nutrition
Why it’s good for your body
Air Fryer Apple Pie Bombs deliver a surprisingly wholesome treat. First, they feature apples as the star ingredient. Consequently, you get a natural dose of dietary fiber, which actively supports healthy digestion and keeps you feeling full longer. Moreover, apples provide essential vitamins like vitamin C, a powerful antioxidant that bolsters your immune system.
Furthermore, the air frying method makes these treats a smarter choice. Unlike traditional deep frying, air frying circulates hot air to achieve a crispy texture. As a result, you significantly reduce the amount of added fat and calories without sacrificing that satisfying crunch. Therefore, you can indulge in the warm, spiced flavor of Air Fryer Apple Pie Bombs with far less guilt.
Additionally, you can easily control the sugar content when you prepare them at home. Ultimately, choosing a lighter sugar option or a natural alternative allows you to manage your intake. Finally, the cinnamon spice not only adds warmth but also offers its own anti-inflammatory properties. So, every bite of Air Fryer Apple Pie Bombs supports your well-being in a delicious way.
How it fits in a healthy lifestyle
These Air Fryer Apple Pie Bombs perfectly align with a balanced approach to eating. They prove that you can absolutely enjoy comforting desserts while still honoring your health goals. Think of them as a fantastic component of an 80/20 lifestyle, where you eat nutritiously most of the time but leave room for mindful treats. Their portion-controlled nature helps immensely with practicing intuitive eating and avoiding overindulgence.
For anyone following specific dietary plans, this recipe is wonderfully adaptable. You can easily use a gluten-free flour blend to make it celiac-friendly. If you are exploring more plant-based options, consider our guide to vegan baking substitutions to find the perfect egg and butter alternatives. Pairing a bomb with a source of protein, like a scoop of Greek yogurt, can also turn it into a more balanced snack that stabilizes your energy levels. Remember, the key is building sustainable habits, and finding joy in your food is a huge part of that. For more inspiration on creating nourishing meals that you love, explore our thoughts on healthy weekly meal prep.
Delicious bite-sized apple pie treats with a flaky crust and warm cinnamon-spiced apple filling, perfectly cooked in the air fryer.
Ingredients
Scale
For the Crust:
1 can refrigerated biscuit dough (8 count)
1 cup finely diced apples
2 tbsp brown sugar
1 tsp ground cinnamon
1/4 tsp nutmeg
1 tbsp melted butter
1 tbsp granulated sugar for topping
Instructions
1. Prepare the Crust:
Preheat air fryer to 350°F (175°C). In a bowl, mix diced apples, brown sugar, cinnamon, and nutmeg.
Separate biscuit dough into 8 pieces. Flatten each piece into a 4-inch circle.
Place 1 tbsp apple mixture in center of each dough circle. Gather edges and pinch to seal, forming a ball.
Brush each bomb with melted butter and sprinkle with granulated sugar. Place in air fryer basket in single layer.
Air fry for 8-10 minutes until golden brown and cooked through. Let cool slightly before serving.
Notes
You can customize the seasonings to taste.
s-dish">How to Prepare This Dish
Steps and time-saving tips
First, gather your ingredients and preheat your air fryer to 350°F. This step jumpstarts the cooking process and ensures your Air Fryer Apple Pie Bombs start baking immediately. Next, combine the diced apples, sugar, cinnamon, and a pinch of nutmeg in a medium bowl. Toss everything together until the apple pieces are evenly coated in those warm, spiced flavors. Meanwhile, separate your canned biscuit dough into individual rounds. Gently flatten each round with your hands to create a small disc, which will make wrapping much easier. Place a generous spoonful of your apple filling into the center of each dough circle. Carefully pull the edges of the dough up and over the filling, pinching them firmly at the top to seal each bomb completely. This prevents any delicious filling from escaping during cooking. Lightly brush the tops with melted butter and sprinkle with a cinnamon-sugar mixture for that iconic, crispy finish. Arrange your Apple Pie Bombs in the air fryer basket, ensuring they have a little space between them for optimal air circulation. Cook for about 8-10 minutes, or until they turn a beautiful golden brown. Finally, let them cool for a few minutes before serving, as the filling will be extremely hot. For a real treat, drizzle them with a simple vanilla glaze or a scoop of vanilla ice cream.
Mistakes I’ve made and learned from
I have absolutely overfilled these Air Fryer Apple Pie Bombs more times than I care to admit. My eagerness to pack in more apple goodness always resulted in messy explosions, with sugary syrup leaking out and burning onto the air fryer basket. I learned that a modest, heaping teaspoon is the perfect amount to contain the chaos. Another classic error of mine was not sealing the dough tightly enough. A simple pinch wasn’t sufficient; I now make a true effort to really crimp and twist the dough at the top to create a solid seal. This is a technique I perfected after making my Air Fryer Breakfast Potatoes, where ensuring everything is evenly sized and sealed is also key to perfect results. Also, never skip the preheating step! I once got impatient and put them in a cold air fryer, which led to a soggy bottom instead of a crisp, flaky crust. It’s the same principle I use for getting the perfect texture on my Air Fryer French Toast—a hot start is non-negotiable for that ideal golden-brown finish.
n-and-variations">Cultural Connection and Variations
Where this recipe comes from
We can trace the heart of this recipe straight back to classic American ingenuity and a deep love for apple pie. After all, this dessert embodies the spirit of turning humble, seasonal ingredients into something magical. Every culture, however, puts its own spin on sweet, spiced fruit wrapped in dough. For instance, many Latin American countries make decadent fried empanadas dulces, while in Eastern Europe, you might find similar pastries like piroshki. My own family always made a huge production out of rolling pie crusts for holidays. Consequently, our kitchen would end up covered in flour. We eventually started gathering the scraps, stuffing them with cinnamon apples, and baking little hand pies. This created a delicious tradition that used every bit of dough. Our modern Air Fryer Apple Pie Bombs are a direct and speedy descendant of that thrifty, no-waste philosophy. Ultimately, this method captures that same cozy feeling in a fraction of the time.
How it fits in today’s cooking
This treat fits perfectly into our modern need for quick, satisfying comfort food. Air Fryer Apple Pie Bombs deliver that nostalgic flavor without heating up your whole kitchen. As a result, they have become a brilliant solution for spontaneous dessert cravings. Furthermore, they shine as a fun, interactive project for a family baking night. Many contemporary cooks love to experiment with the fillings too. For example, you can easily swap the apples for a summer berry mix or even a pumpkin filling in the fall. This versatility makes them a year-round favorite. If you adore these handheld delights, you must explore our collection of other creative air fryer desserts. They are the ideal finale to any meal, especially after a cozy dinner like our beloved creamy Tuscan chicken. Ultimately, this recipe proves that some classic comforts never go out of style. They simply get a brilliant, modern upgrade.
Taste and Texture
What makes it delicious
These Air Fryer Apple Pie Bombs deliver a warm, fragrant aroma that instantly fills your kitchen with the cozy scent of cinnamon and baked apples. Each bite offers a fantastic contrast, starting with a wonderfully crisp, golden-brown crescent roll crust that shatters delicately. Subsequently, your teeth sink into a soft, warmly spiced apple filling that is both sweet and slightly tart. Ultimately, the melted butter and cinnamon-sugar coating on top creates a sweet, slightly crunchy glaze that makes every single bite absolutely irresistible. The experience of eating Air Fryer Apple Pie Bombs is like enjoying a personal, handheld slice of classic apple pie with an exceptionally satisfying texture.
r">Boosting the flavor
For an even more decadent experience, consider adding a simple vanilla glaze or a generous scoop of vanilla ice cream on top; the creamy coldness perfectly complements the warm, spiced filling. Alternatively, you can mix chopped pecans or walnuts into the apple filling for a delightful crunch and nutty flavor. Furthermore, a dash of nutmeg or a splash of bourbon in the filling mixture will deepen the warm spice notes beautifully. If you love experimenting with different fillings, our recipe for Air Fryer Peach Hand Pies offers fantastic inspiration for a summer twist. For another incredible way to use your air fryer for dessert, our Air Fryer Chocolate Chip Cookies are a guaranteed crowd-pleaser that bakes in minutes.
Tips for Success
Best practices for results
Always chill your dough before shaping because, consequently, it becomes much easier to handle. Use parchment paper in your air fryer basket for the best texture and to prevent any sticking. Furthermore, do not overfill your Air Fryer Apple Pie Bombs with apple filling to ensure they seal completely. Lightly brush each bomb with an egg wash or melted butter before cooking for a beautifully golden finish.
>Mistakes to avoid
Avoid overpacking the air fryer basket since, otherwise, you will block the crucial air circulation and get soggy results. Always arrange your Air Fryer Apple Pie Bombs in a single layer with space between them. Additionally, do not skip preheating your appliance; a hot air fryer guarantees a perfectly crispy exterior right from the start. For more insights on getting that ideal texture, explore our guide on common air fryer mistakes. Moreover, ensure your apple pieces are uniformly small; otherwise, large chunks can create steam that breaks the dough seams. If you are new to working with dough, our tips for handling pastry dough will help you avoid tears and leaks.
Serving and Pairing Suggestions
How to serve this dish
First, always serve your Air Fryer Apple Pie Bombs warm for that irresistible, gooey center. For a beautiful presentation, arrange them on a rustic wooden board or a pretty platter. Then, dust them generously with powdered sugar for a snowy, elegant finish. Alternatively, you can create a stunning dessert platter for a holiday gathering. Finally, add a small bowl of caramel sauce for dipping right in the center.
These handheld treats shine at any event. For instance, they make a fantastic sweet bite at a brunch buffet. Moreover, they are the perfect, fuss-free finale to a weeknight family dinner. Their portable nature also makes them a huge hit at potlucks and parties.
h-it">What goes well with it
A scoop of vanilla ice cream is the ultimate partner for warm Air Fryer Apple Pie Bombs. The cold, creamy texture melts beautifully over the flaky, hot pastry, creating a perfect bite. Furthermore, a drizzle of our homemade salted caramel sauce adds a rich, buttery depth that enhances the spiced apples.
For a beverage pairing, a hot mug of coffee or black tea cuts through the sweetness wonderfully. Their robust bitterness provides a lovely balance to the rich dessert. If you prefer a cold drink, a glass of crisp apple cider complements the filling’s flavor notes.
Consider serving these bombs alongside other light desserts for a varied spread. For example, a slice of our popular lemon pound cake offers a bright, citrusy contrast that cleanses the palate between each delicious apple bomb.
Yes, canned biscuit dough is the most common and convenient base for Air Fryer Apple Pie Bombs. The flaky layers of the biscuits puff up beautifully in the air fryer, creating a perfect golden-brown crust that encases the warm apple pie filling. This shortcut makes the recipe incredibly easy and quick to prepare.
How do you keep apple pie bombs from getting soggy?
To prevent soggy Air Fryer Apple Pie Bombs, ensure your apple pie filling is not overly watery. Tossing the diced apples with a little cornstarch or flour helps to thicken the juices as they cook. Also, avoid overfilling each bomb and make sure to seal the dough tightly to lock the filling inside.
ank-math-faq-item">
What is the best way to reheat apple pie bombs?
The air fryer is the best tool for reheating your Apple Pie Bombs as it will restore their crispy exterior. Reheat them at 350°F (175°C) for 3-4 minutes until they are warm all the way through. This method works much better than a microwave, which can make the pastry soft and chewy.
Can you make air fryer apple pie bombs ahead of time?
You can assemble your Air Fryer Apple Pie Bombs ahead of time and keep them refrigerated for up to 24 hours before cooking. For longer storage, freeze the unbaked bombs on a baking sheet, then transfer to a freezer bag; you can cook them directly from frozen, just add a few extra minutes to the air frying time.
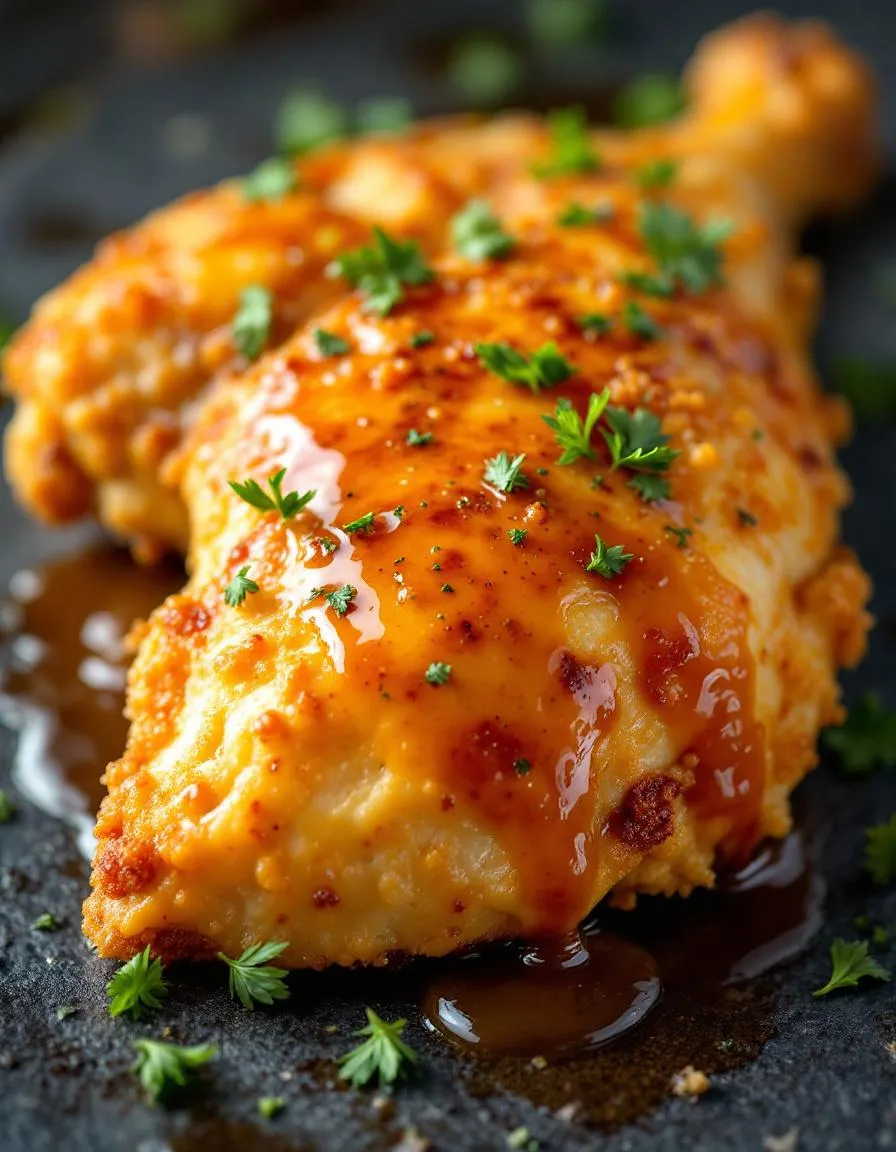
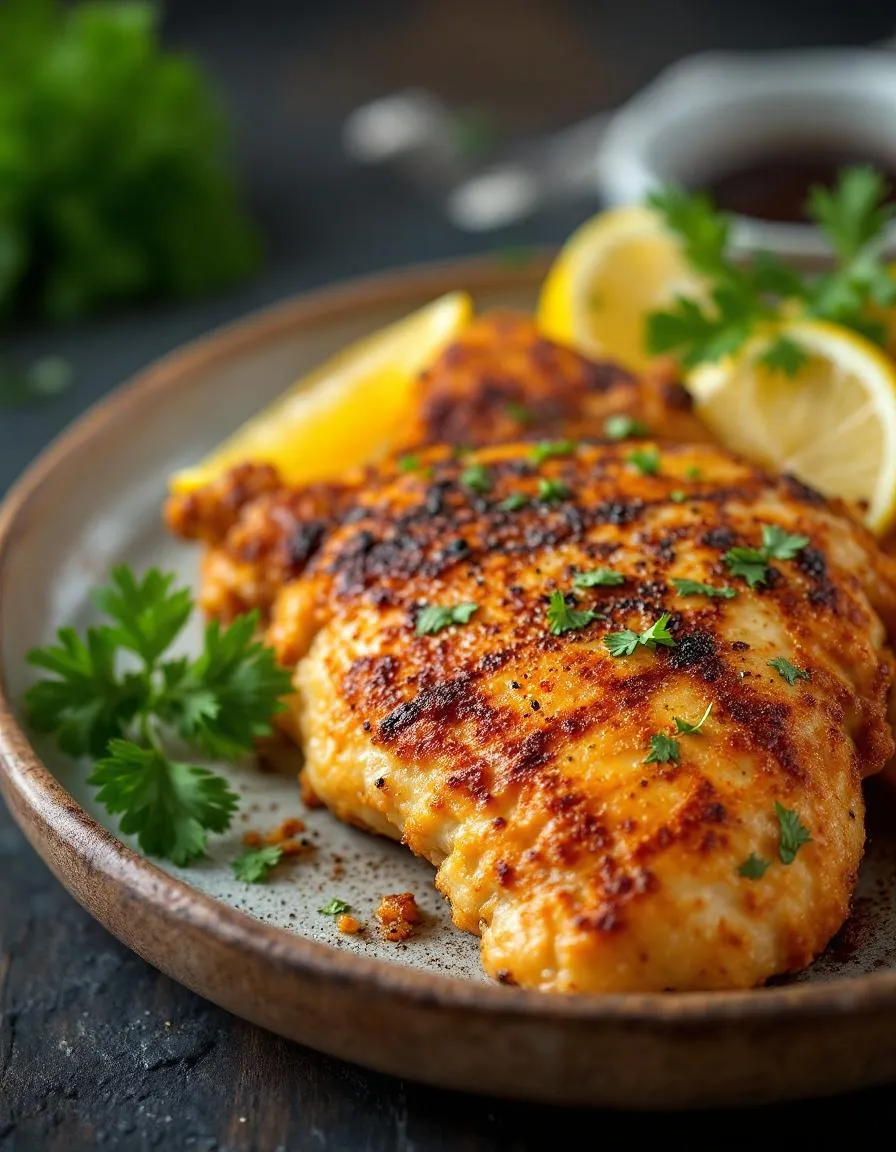
Best Crispy Baked Chicken – Easy Oven Recipe
Introduction
Do you ever crave that perfect, satisfying crunch of fried chicken but desperately want to skip the greasy mess and heavy guilt? You are absolutely not alone. We all dream of a healthier version that still delivers on that incredible texture and flavor. Fortunately, I have fantastic news for you. This recipe for the ultimate Crispy Baked Chicken will completely change your dinner game. It gives you everything you love about the classic comfort food, but in a way that makes you feel amazing about serving it to your family any night of the week.
Crispy Baked Chicken is a culinary game-changer that masterfully recreates the irresistible texture of deep-frying using only your oven. This method involves a few clever techniques, such as using a wire rack for air circulation and a well-seasoned coating, to achieve a shatteringly crisp exterior without submerging the chicken in oil. The result is a significantly lighter yet equally delicious main course that becomes a reliable staple in your weekly rotation. This approach matters because it aligns with a modern desire for wholesome, mindful eating without sacrificing an ounce of comfort or flavor. It proves that you can indeed have the best of both worlds. Furthermore, this dish perfectly fits our blog’s tone of creating approachable, family-friendly meals that are both nutritious and indulgent. For instance, if you love this method, you might also enjoy our oven-baked chicken tenders, which use a similar principle for a kid-approved snack. Ultimately, this recipe empowers you to create a crowd-pleasing masterpiece that supports your well-being goals. It is the perfect answer for a busy weeknight or a relaxed Sunday supper, proving that healthy eating never has to be boring or bland.
Why I Love This Recipe
This particular Crispy Baked Chicken recipe holds a special place in my heart because it truly saved our weeknight dinners. After my family decided to eat healthier, I worried they would miss our favorite fried foods. The first time I pulled this golden, crunchy chicken from the oven and heard that unmistakable sound, I knew I had found a keeper. My kids now request it constantly, and I love serving it alongside our favorite creamy garlic mashed potatoes. It gives me genuine joy to know I am feeding them something so delicious that is also good for them.
Health and Nutrition
Why it’s good for your body
This Crispy Baked Chicken delivers a powerful protein punch that actively supports muscle repair and keeps you feeling full and satisfied for hours. Furthermore, by choosing to bake instead of deep-fry, you dramatically slash unnecessary calories and unhealthy fats. Consequently, you enjoy that irresistible crunch without the heaviness or guilt that often follows a traditional fried meal.
Moreover, the lean protein in Crispy Baked Chicken serves as a fundamental building block for your body, promoting strong bones and a robust metabolism. Additionally, when you pair it with a colorful side of vegetables, you create a meal rich in essential vitamins and minerals. Ultimately, this cooking method preserves the natural juiciness of the chicken while ensuring a delightfully crispy exterior. Therefore, you receive a meal that is as nutritious as it is delicious. Finally, making Crispy Baked Chicken a regular part of your rotation means you are consistently choosing a smarter, healthier way to enjoy classic comfort food.
How it fits in a healthy lifestyle
Crispy Baked Chicken fits seamlessly into almost any healthy eating plan. If you’re focusing on high-protein goals for fitness or weight management, it provides a fantastic foundation for your plate. For those following a gluten-free lifestyle, you can easily achieve that perfect crunch by using certified gluten-free breadcrumbs or almond flour. This recipe is also a heart-healthier alternative to frying, as it allows you to control the type and amount of oil used.
Pairing your chicken with a fresh, vibrant salad turns it into a perfectly balanced meal. For more inspiration on creating wholesome plates, explore our guide to building a balanced diet. The best part is how simple and practical it is for busy weeknights. You can meal prep a batch to have ready-to-go protein for quick lunches or easy dinners all week long. It proves that eating well doesn’t require complicated recipes or sacrificing flavor. For more easy and healthy dinner ideas that the whole family will love, check out our collection of quick weeknight dinners.
Juicy chicken with a perfectly crispy, golden crust without deep frying. A healthier alternative that doesn’t sacrifice flavor or texture.
Ingredients
Scale
For the Crust:
4 boneless, skinless chicken breasts
1 cup panko breadcrumbs
1/2 cup grated Parmesan cheese
1 tsp paprika
1 tsp garlic powder
1 tsp onion powder
1/2 tsp black pepper
1/2 tsp salt
2 large eggs
1/4 cup all-purpose flour
Cooking spray or olive oil
Instructions
1. Prepare the Crust:
Preheat oven to 400°F (200°C) and line a baking sheet with parchment paper.
Set up three bowls: one with flour, one with beaten eggs, and one with breadcrumbs mixed with Parmesan and spices.
Dredge each chicken breast in flour, dip in egg, then coat thoroughly with breadcrumb mixture.
Place chicken on prepared baking sheet and spray lightly with cooking spray or drizzle with olive oil.
Bake for 20-25 minutes until internal temperature reaches 165°F and coating is golden and crispy.
Notes
You can customize the seasonings to taste.
s-dish">How to Prepare This Dish
Steps and time-saving tips
First, preheat your oven to 400°F and grab a large rimmed baking sheet. Line that sheet with parchment paper for the easiest cleanup later. Next, pat your chicken pieces completely dry with paper towels; this crucial step guarantees maximum crispiness. Meanwhile, whisk together your flour and all the seasonings in one shallow bowl. In a second bowl, beat a couple of eggs until they are perfectly smooth. Finally, pour your panko breadcrumbs into a third dish. Now, you will dredge each piece of chicken. First, coat it thoroughly in the seasoned flour, then dip it entirely into the egg wash, and finally press it firmly into the panko to create a solid, even crust. Arrange the coated chicken on your prepared baking sheet, making sure to leave a little space between each piece for hot air to circulate. For an extra golden finish, lightly drizzle or spray the tops with a neutral oil. Then, bake your Crispy Baked Chicken for about 20-25 minutes, but always flip the pieces halfway through the cooking time. You will know it is done when the exterior is a deep golden brown and the internal temperature hits 165°F. Let the chicken rest for five minutes on the pan; this allows the crust to set and become incredibly crunchy. Consequently, you get a perfect, guilt-free main course every single time.
Mistakes I’ve made and learned from
I have absolutely ruined a batch by crowding the pan, which steamed the chicken instead of baking it crispy. Now, I always use two sheets or work in batches if necessary. Another huge error was skipping the step of patting the chicken dry; moisture is the ultimate enemy of a crunchy crust. I also learned the hard way that not all oven temperatures are accurate. Investing in a simple oven thermometer completely changed my baking game and ensured my Crispy Baked Chicken cooked evenly. Finally, I used to skip the resting time because I was too impatient, but that always led to a disappointing, slightly soggy coating. Letting it sit for just a few minutes makes all the difference, much like the crucial cooling time I learned from my vanilla cupcake recipe.
n-and-variations">Cultural Connection and Variations
Where this recipe comes from
Every family seems to have its own version of this classic, and ours is no different. My grandmother swore that the secret to her legendary Crispy Baked Chicken wasn’t just the breading, but the specific rhythm of the seasons. She always prepared it for big Sunday suppers in the fall, filling the house with an aroma that promised comfort. Across the American South, cooks often use a buttermilk soak to achieve incredible tenderness before baking. Conversely, travel to Italy and you might find a similar dish called pollo al forno, which leans on rosemary, garlic, and lemon for its crisp, herby crust. In Japan, a similar technique creates tori no kara-age, though it typically involves a lighter potato starch coating and a quick fry. Ultimately, this global journey proves one thing: the universal craving for a perfectly crunchy, juicy piece of chicken knows no borders. Our particular recipe for Crispy Baked Chicken honors that tradition of sharing and satisfaction.
How it fits in today’s cooking
Thankfully, this dish effortlessly fits into our modern lives. It remains a superstar for weeknight dinners because it delivers that crave-worthy fried texture without the mess of a pot of oil. Furthermore, health-conscious cooks love that baking achieves maximum crispiness with significantly less fat. Many families still feature it as the centerpiece of holiday gatherings, especially when paired with classic sides. For instance, it pairs beautifully with some easy roasted potatoes for a complete and satisfying meal. You can also easily adapt the flavors to keep things exciting; try a smoky paprika rub or a gluten-free panko crust. Moreover, the leftovers are incredibly versatile. Shred the cold chicken the next day and toss it into a salad, or chop it up for a fantastic quick lunch wrap. Ultimately, its flexibility and foolproof method ensure that this comforting classic never goes out of style.
Taste and Texture
What makes it delicious
This Crispy Baked Chicken delivers a truly satisfying crunch with every single bite. Furthermore, the golden-brown crust shatters audibly before giving way to incredibly juicy and tender meat inside. Aromatic garlic and smoky paprika mingle beautifully, while a subtle hint of black pepper adds a warm, gentle kick. Ultimately, the experience is a perfect harmony of textures and savory flavors that makes this dish a guaranteed crowd-pleaser.
r">Boosting the flavor
Immediately transform your Crispy Baked Chicken by brushing it with a spicy honey glaze during the last few minutes of baking. Alternatively, for a creamy and herbaceous twist, serve it alongside a dollop of cool lemon-dill yogurt sauce. If you love bold flavors, consider using a homemade dry rub for chicken to create an even more robust crust. Finally, complete your meal with a simple, fresh side; a bright cucumber salad provides a wonderfully crisp and refreshing contrast.
Tips for Success
Best practices for results
Always pat your chicken pieces completely dry with paper towels before you season them. Furthermore, generously coat each piece in oil to help your seasoning stick and promote even browning. For the ultimate Crispy Baked Chicken, use a wire rack on your baking sheet to allow hot air to circulate underneath. Finally, always let the chicken rest for a few minutes after baking so the juices can redistribute.
>Mistakes to avoid
Avoid overcrowding your baking pan because the chicken will steam instead of getting crispy. Instead, give each piece plenty of space; if necessary, use two pans. Moreover, do not skip the preheating step for your oven, as a properly hot oven is crucial for that perfect sear. For more guidance on oven temperatures, check out our guide on oven temperature conversions. Additionally, resist the urge to constantly open the oven door, as this causes major temperature fluctuations. For a perfectly juicy result every time, learn how to tell when chicken is done without cutting into it prematurely.
Serving and Pairing Suggestions
How to serve this dish
Immediately serve your Crispy Baked Chicken straight from the oven for the ultimate crunch. For a stunning presentation, arrange the pieces on a large rustic platter. Generously garnish with freshly chopped parsley and lemon wedges for a vibrant pop of color. This dish truly shines at a casual family dinner or a festive holiday gathering. Consequently, you can easily double the recipe to feed a hungry crowd without any fuss.
What goes well with it
For a classic comfort meal, pair your Crispy Baked Chicken with our incredibly creamy Creamy Garlic Mashed Potatoes. The rich, smooth potatoes perfectly complement the savory, crispy coating. Alternatively, a bright, tangy dipping sauce like our homemade Honey Mustard Sauce adds a wonderful flavor contrast. Finally, a crisp, chilled glass of Chardonnay or a light lager beer balances the meal beautifully.
The key to avoiding soggy baked chicken is ensuring the surface is very dry before adding oil and seasoning. Pat the chicken pieces thoroughly with paper towels. Also, using a wire rack on your baking sheet allows hot air to circulate completely around the chicken, which is essential for achieving that perfectly Crispy Baked Chicken texture.
What is the secret to crispy chicken in the oven?
The secret lies in a few techniques: a light coating of oil or melted butter to help the seasoning adhere and promote browning, and high oven heat (around 400-425°F / 200-220°C). For extra crunch, you can use a coating like panko breadcrumbs, crushed cornflakes, or a dusting of baking powder with your spices.
ank-math-faq-item">
Is it better to bake chicken at 350 or 400?
For crispy skin and a juicy interior, 400°F is significantly better. Baking chicken at 350°F will cook it through more gently but will steam the skin instead of crisping it. The higher temperature of 400°F (or even 425°F) renders fat and creates a beautiful, golden-brown crust on your Crispy Baked Chicken.
How long does it take to bake chicken at 400?
Baking time depends on the cut and size of the chicken. Boneless, skin-on chicken breasts typically take 22-30 minutes, while bone-in thighs or drumsticks can take 35-45 minutes. The most reliable method is to use a meat thermometer; the internal temperature should reach 165°F (74°C) in the thickest part for safe and perfectly cooked chicken.