Ultimate Dutch Oven Pot Roast with French Onion Gravy
Introduction
Is there anything more comforting than walking into a home filled with the incredible aroma of a slowly simmering roast? Honestly, that smell instantly transports me back to my grandmother’s kitchen on a chilly Sunday afternoon. It promises warmth, comfort, and a meal that feels like a heartfelt hug. If you crave that deep, soul-satisfying experience, then you absolutely must try this incredible Dutch Oven Pot Roast Beef With French Onion Gravy. This dish masterfully transforms a simple cut of beef into the most tender, flavor-packed masterpiece you will ever taste.
So what exactly is this culinary wonder? Fundamentally, a Dutch Oven Pot Roast Beef With French Onion Gravy is a classic braised beef dish. We slowly cook a well-marbled chuck roast in a heavy-bottomed Dutch oven alongside a mountain of sweet, caramelized onions and rich herbs. This low and slow cooking method works magic, as it breaks down the tough connective tissues in the meat. Consequently, you get a result that is impossibly tender and juicy. The gravy, however, is the true star. It builds upon the foundation of those deeply browned onions, incorporating the savory beef drippings and a splash of robust red wine to create a sauce that is pure luxury. This recipe matters because it delivers restaurant-quality depth of flavor with straightforward, home-style techniques. It fits our blog’s tone perfectly because we champion approachable recipes that yield impressive, crowd-pleasing results. For another fantastic way to enjoy beef, explore our guide on how to cook perfect filet mignon. Ultimately, this Dutch Oven Pot Roast Beef With French Onion Gravy is the ultimate centerpiece for a family dinner or a special occasion, guaranteeing everyone leaves the table happy and full.
Why I Love This Recipe
This Dutch Oven Pot Roast Beef With French Onion Gravy holds a very special place in my heart and my kitchen. It was the first “project” meal I ever successfully made for my now-husband, and it became our tradition for every anniversary dinner at home. I love how the process forces you to slow down and be present, patiently caramelizing the onions and browning the meat to build those foundational flavors. The transformation from a few simple ingredients into this rich, complex, and elegant dish feels like alchemy. Moreover, it reminds me of my Nana, who taught me that the best meals are not just fed to the stomach but also to the soul. For a different but equally comforting braised dish, our easy osso buco recipe follows a similar, rewarding cooking principle. This pot roast is my ultimate comfort food, and sharing it always feels like sharing a piece of my family’s story.
Health and Nutrition
Why it’s good for your body
This Dutch Oven Pot Roast Beef With French Onion Gravy delivers a powerful protein punch. Consequently, this high-quality protein supports muscle repair and keeps you feeling full and satisfied for hours. Moreover, the slow-cooking process breaks down tough connective tissues, making the beef incredibly tender and easy to digest.
Additionally, the onions in the rich gravy do more than just add flavor. They provide a valuable source of prebiotics, which essentially feed the beneficial bacteria in your gut. Therefore, enjoying this meal supports a healthy digestive system. Furthermore, onions also offer antioxidants like quercetin, which help combat inflammation throughout your body.
Ultimately, this hearty dish is a fantastic source of essential vitamins and minerals. For instance, the beef provides a significant amount of iron, which is crucial for healthy blood cells and energy levels. Similarly, it delivers zinc for immune function and B vitamins for metabolism. Finally, a well-made Dutch Oven Pot Roast Beef With French Onion Gravy is a nutrient-dense choice that fuels your body effectively.
How it fits in a healthy lifestyle
This classic comfort food can absolutely fit into a balanced eating plan. For a heart-healthy approach, simply trim any visible fat from the beef chuck roast before searing it. You can also control the sodium levels by using a low-sodium beef broth and being mindful of how much salt you add during cooking. The result is a satisfying, high-protein meal that aligns perfectly with your fitness goals.
If you are managing specific dietary needs, this recipe is naturally gluten-free when you use a certified gluten-free flour or cornstarch to thicken the glorious French onion gravy. Pair your Dutch Oven Pot Roast Beef With French Onion Gravy with a side of roasted vegetables or a light salad for a complete and well-rounded plate. This approach to building a meal is a cornerstone of maintaining a healthy lifestyle with meal prep.
Remember, healthy eating is about the big picture, not any single dish. This pot roast offers wholesome, recognizable ingredients that you can feel good about serving your family. For more inspiration on creating balanced plates, explore our guide to simple and healthy side dishes that complement any main course.
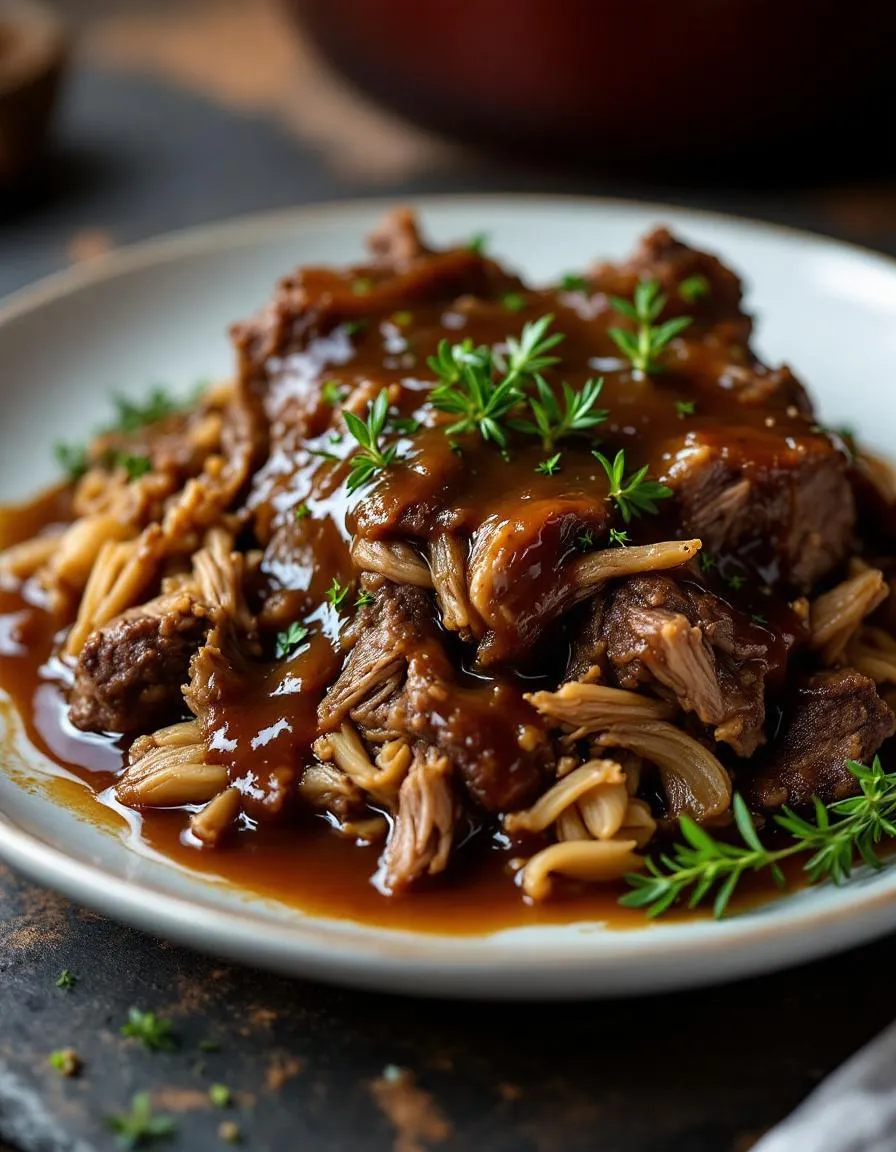
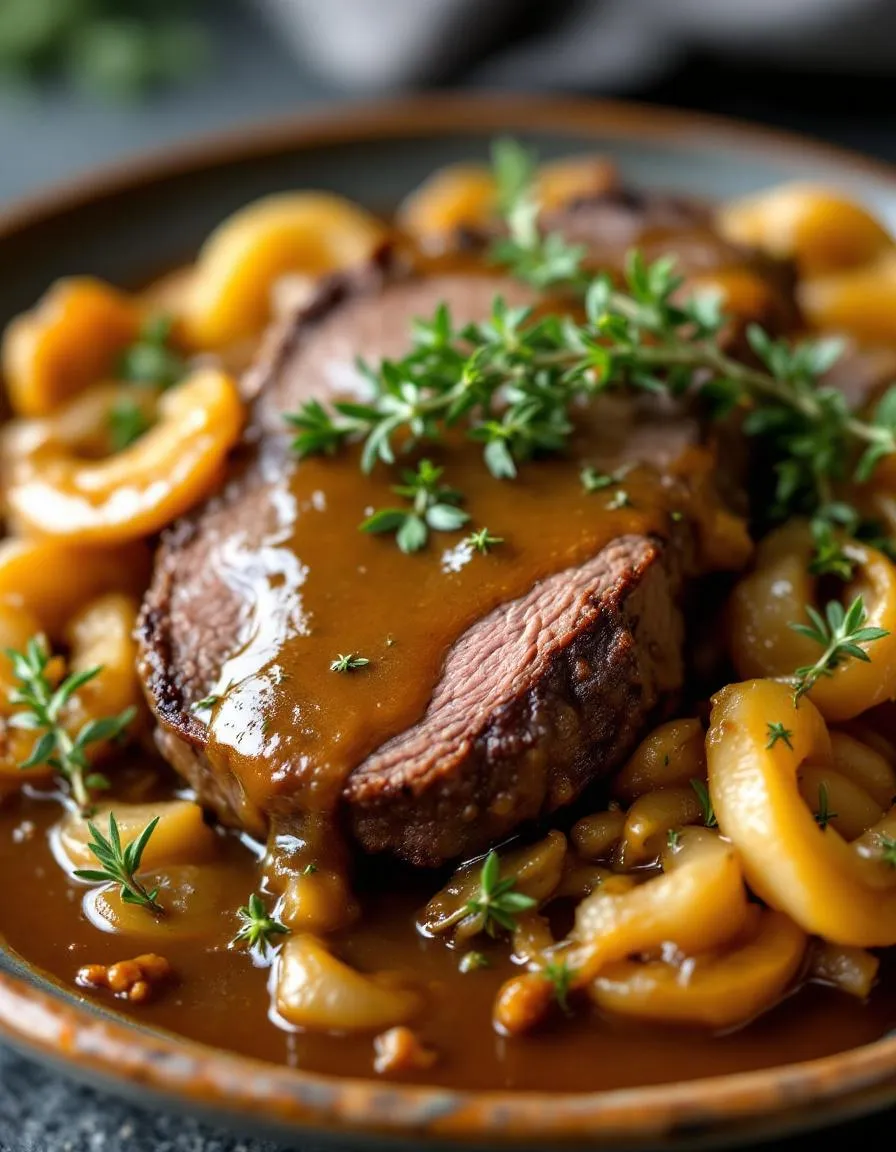
A classic comfort food featuring tender beef slow-cooked with caramelized onions in a rich, savory gravy.
Ingredients
Scale
For the Crust:
3–4 lb beef chuck roast
2 tbsp olive oil
3 large yellow onions, thinly sliced
4 cloves garlic, minced
2 cups beef broth
1 tbsp Worcestershire sauce
1 tsp dried thyme
2 bay leaves
Salt and black pepper to taste
2 tbsp all-purpose flour
2 tbsp butter
Instructions
1. Prepare the Crust:
Preheat oven to 325°F (165°C). Season beef generously with salt and pepper.
Heat olive oil in a Dutch oven over medium-high heat. Sear beef on all sides until browned, about 4-5 minutes per side. Remove and set aside.
Add onions to the pot and cook until softened and caramelized, about 15 minutes. Add garlic and cook for 1 minute more.
Sprinkle flour over onions and stir to coat. Gradually add beef broth and Worcestershire sauce, scraping up browned bits.
Return beef to pot. Add thyme and bay leaves. Bring to a simmer, then cover and transfer to oven.
Cook for 3-3.5 hours until beef is fork-tender. Remove beef and bay leaves. Stir butter into gravy until melted and slightly thickened.
Notes
You can customize the seasonings to taste.
s-dish">How to Prepare This Dish
Steps and time-saving tips
First, pat your beef roast completely dry with paper towels. This step is crucial for achieving a beautiful, dark sear. Next, generously season the roast on all sides with salt and pepper. Meanwhile, preheat your Dutch oven over medium-high heat with a bit of oil. Carefully place the roast in the hot pot and sear it for about 5-7 minutes per side. You want a deep brown crust to form. Then, remove the meat and set it aside on a plate. Now, toss your sliced onions into the same pot. Cook them, stirring occasionally, until they become deeply caramelized and soft. This process builds an incredible flavor base for your French Onion Gravy. After that, pour in a splash of beef broth to deglaze the pot, scraping up all those delicious browned bits. Finally, return the roast to the pot and add the remaining broth and herbs. Cover it and let it braise low and slow in the oven until it becomes fall-apart tender. For a time-saving tip, you can caramelize your onions a day ahead. Simply store them in the fridge until you’re ready to build the rest of your Dutch Oven Pot Roast Beef With French Onion Gravy.
Mistakes I’ve made and learned from
I used to rush the sear on my roast, pulling it from the pot before it developed a proper crust. Consequently, my Dutch Oven Pot Roast Beef With French Onion Gravy lacked that deep, rich flavor foundation. I learned the hard way that patience here is non-negotiable. Another classic blunder was slicing the meat immediately after it finished cooking. This caused all the precious juices to run out, leaving me with a drier result. Now, I always let it rest for a full 15-20 minutes tented with foil, which makes a world of difference. Getting the gravy consistency right was another hurdle. I eventually mastered the simple slurry technique I use for stews to perfect it every time. Honestly, the biggest lesson has been to trust the process, especially the low and slow cooking time. For more on that, my guide on why braising is such a fantastic method covers all the details.
n-and-variations">Cultural Connection and Variations
Where this recipe comes from
This dish feels like a heartfelt handshake between two classic comfort food traditions. Essentially, we marry the American Sunday supper pot roast with the deep, caramelized soul of French onion soup. My grandmother always made a version of this for family gatherings. However, she never wrote anything down. Consequently, we all learned by standing next to her at the stove, watching her deglaze the pot with a splash of red wine after searing the beef.
Globally, cultures put their own spin on slow-cooked beef. For instance, the French might lean into a boeuf bourguignon, braising with red wine and pearl onions. Meanwhile, a Midwestern U.S. cook may add root vegetables like carrots and potatoes directly into the pot. Alternatively, some families swear by a packet of dry onion soup mix for that signature flavor. Ultimately, our Dutch Oven Pot Roast Beef With French Onion Gravy celebrates this fusion. It takes a timeless technique and layers it with the rich, umami notes we adore from that bistro soup classic.
In the end, the beauty of this recipe lies in its adaptability. Whether you use a chuck roast or a bottom round, the method remains a testament to patient, loving cooking. This particular version of Dutch Oven Pot Roast Beef With French Onion Gravy has become our family’s definitive cold-weather centerpiece.
ays-cooking">How it fits in today’s cooking
Remarkably, this dish fits perfectly into our modern need for both convenience and connection. Busy home cooks adore it because it delivers a spectacular, crowd-pleasing meal with mostly hands-off time. Furthermore, it embodies the “one-pot wonder” trend we all love for easier cleanup. You can easily adapt it for a slow cooker or an Instant Pot on a hectic weekday. Conversely, it also shines as the star of a holiday table or a festive Sunday dinner.
Its relevance also stems from how well it utilizes affordable, tougher cuts of meat. The long, slow braise transforms an economical chuck roast into something incredibly tender and luxurious. This makes a recipe for hearty beef stew a fantastic option for budget-conscious meal planning. Families often pair it with simple sides, letting the glorious gravy be the star. In fact, you will want to drizzle that gravy over everything, especially a slice of crusty bread or a fluffy baking powder biscuit. Ultimately, it proves that the most satisfying meals come not from complexity, but from patience and good ingredients.
Taste and Texture
What makes it delicious
This Dutch Oven Pot Roast Beef With French Onion Gravy delivers a deeply savory and comforting experience. The beef itself becomes incredibly tender, practically melting in your mouth after its slow braise. Meanwhile, the rich gravy boasts a sweet, caramelized depth from the slowly cooked onions, which perfectly complements the hearty, umami-rich beef. Each forkful is a harmonious blend of soft, shreddable meat and silky, luxurious sauce. Ultimately, the aromatic herbs and robust wine create a fragrant, complex flavor profile that makes this dish a true centerpiece. You will find the entire experience of this Dutch Oven Pot Roast Beef With French Onion Gravy utterly irresistible.
r">Boosting the flavor
For an even deeper flavor, consider a few simple enhancements. First, stir a tablespoon of tomato paste into the vegetables as they sauté; this simple trick builds a wonderful umami foundation. Alternatively, a splash of balsamic vinegar added to the deglazing liquid introduces a bright, sweet acidity that cuts through the richness. Furthermore, finishing the gravy with a pat of cold butter right before serving adds a professional, glossy sheen and incredible silkiness. If you love experimenting with rich, savory dishes, our guide on how to make the perfect beef stew offers more great tips. For a side that soaks up every drop of that glorious gravy, our creamy garlic mashed potatoes are the ideal companion.
Tips for Success
Best practices for results
Always sear your meat on all sides first because this crucial step builds a rich, deep flavor foundation for your entire Dutch Oven Pot Roast Beef With French Onion Gravy. Furthermore, use a good quality, full-bodied red wine for deglazing the pan to maximize the savory notes in your gravy. Let the roast rest for a full fifteen minutes before slicing it; as a result, the juices will redistribute perfectly throughout the meat.
>Mistakes to avoid
Avoid rushing the initial sear since placing a cold roast into a lukewarm pot will steam the meat instead of creating a proper crust. For a perfect sear every time, make sure you read our guide on how to sear meat properly. Additionally, do not skip the step of caramelizing the onions slowly; otherwise, you will miss out on the sweet, complex flavor that defines the French onion gravy. Remember that low and slow is the key to tender meat, so resist the urge to boil the cooking liquid. If you are unsure about your oven’s temperature accuracy, which can greatly impact cooking time, consider checking our article on understanding oven temperature accuracy for helpful advice.
Serving and Pairing Suggestions
How to serve this dish
Present your Dutch Oven Pot Roast Beef With French Onion Gravy family-style for a truly welcoming and rustic feel. Consequently, place the entire pot right on the table so everyone can admire your masterpiece. For a more elegant plating, carefully arrange slices of the succulent beef over a pool of that rich gravy. Furthermore, always garnish with a final flourish of fresh thyme sprigs for a pop of color and aroma. This stunning dish absolutely shines as the centerpiece of any holiday feast or a special Sunday supper.
What goes well with it
For a classic pairing, serve this hearty Dutch Oven Pot Roast Beef With French Onion Gravy alongside our incredibly creamy Garlic Mashed Potatoes. The potatoes act as the perfect canvas for that savory French onion gravy. Additionally, a full-bodied red wine like a Cabernet Sauvignon beautifully cuts through the richness of the meat. Finally, a bright and tangy side salad provides a refreshing counterpoint. For instance, our simple Arugula Salad with a lemon vinaigrette cleanses the palate between each delicious bite.
What is the best cut of beef for a Dutch oven pot roast?
Chuck roast is the best cut for Dutch Oven Pot Roast Beef With French Onion Gravy because it’s well-marbled with fat and connective tissue. This marbling breaks down during the long, slow cooking process, resulting in incredibly tender and flavorful meat that shreds apart easily. The rich fat also renders into the cooking liquid, forming the base of a deeply savory French Onion Gravy.
How long does it take to cook a pot roast in a Dutch oven?
A typical Dutch Oven Pot Roast Beef With French Onion Gravy requires about 3 to 4 hours of braising time in a 300°F to 325°F oven. The exact time depends on the size of your roast, but it’s done when the meat is fork-tender and easily pulls apart. Low and slow cooking is the key to achieving the perfect texture for this classic comfort food dish.
ank-math-faq-item">
Can I make Dutch oven pot roast ahead of time?
Absolutely! In fact, making your Dutch Oven Pot Roast Beef With French Onion Gravy a day ahead often improves the flavor. The flavors of the gravy, onions, and beef have more time to meld together as it rests in the refrigerator. Simply reheat it gently on the stovetop or in the oven before serving.
What can I substitute for red wine in French onion gravy?
If you prefer not to use red wine, you can substitute with an equal amount of beef broth combined with a teaspoon of red wine vinegar or balsamic vinegar for acidity. This substitution will still create a rich and complex flavor profile for your French Onion Gravy without compromising the integrity of your Dutch Oven Pot Roast Beef.
Perfect Roasted Carrots – Easy and Delicious
Introduction
Have you ever stared into your fridge, desperately seeking a side dish that feels both wholesome and exciting? Moreover, you likely spot a bag of humble carrots hiding in the crisper drawer. These vibrant roots hold so much more potential than just a supporting role in a stew. In fact, transforming them into something spectacular is easier than you think. This recipe unlocks that potential, turning everyday carrots into a stunning, caramelized masterpiece that will completely steal the show at your dinner table.
Carrots are one of the most versatile and reliable vegetables you can keep in your kitchen. Naturally sweet and packed with beta-carotene, they form a fantastic foundation for countless dishes, from savory mains to sweet desserts. Their importance goes beyond nutrition, however, as they add a crucial pop of color and a satisfying crunch that elevates any meal. For a home cook, mastering a few great carrot recipes is essential, and this particular preparation fits the cozy, approachable tone we champion. It takes a simple ingredient and, with a few clever techniques, creates a side dish that feels both rustic and refined. This method of roasting carrots highlights their natural sugars, resulting in a tender interior and beautifully crisp edges. Furthermore, this recipe aligns perfectly with our philosophy of creating easy weeknight dinners that don’t sacrifice flavor for convenience. You can easily pair these glazed carrots with a simple roast chicken or a hearty pot roast for a complete and satisfying meal. Ultimately, understanding how to properly cook carrots empowers you to create healthier, more delicious food without extra effort, making it a fundamental skill for any home chef looking to expand their repertoire of vegetable side dishes.
Why I Love This Recipe
This recipe holds a special place in my heart because it reminds me of my grandmother’s kitchen. She always had a way of making the simplest ingredients feel like a celebration. I vividly remember the first time I helped her prepare a roasted carrot dish for a holiday gathering; the aroma of herbs and caramelizing sugar filled her entire house with warmth and anticipation. Now, every time I make these carrots, that comforting scent transports me right back to her table, surrounded by family and laughter. It is more than just a side dish for me; it is a tangible connection to cherished memories and the powerful, simple joy of good food shared with loved ones.
Health and Nutrition
Why it’s good for your body
Carrots deliver a powerful nutritional punch that benefits your entire body. First and foremost, they are famously rich in beta-carotene, which your body converts into vitamin A. Consequently, this process supports excellent vision, especially in low light. Furthermore, the antioxidants in carrots fight free radicals, thereby reducing oxidative stress and supporting your overall cellular health.
Moreover, carrots contribute significantly to a healthy heart. They contain potassium, which helps to manage blood pressure levels effectively. Additionally, the fiber content aids in digestion by promoting regularity and feeding the beneficial gut bacteria. Regularly eating carrots also provides a good source of vitamin K1 and biotin, which are essential for blood clotting and metabolism, respectively.
Ultimately, this vibrant root vegetable supports your immune system with its vitamin C content. So, by incorporating carrots into your meals, you actively nourish your body with essential vitamins and minerals. Finally, their natural sweetness makes them a satisfying and healthy choice for curbing sugar cravings.
How it fits in a healthy lifestyle
Carrots seamlessly fit into almost any healthy eating plan. For anyone following a gluten-free diet, they are a naturally safe and versatile ingredient that adds crunch, color, and nutrients to any plate. If you are focusing on heart-healthy choices, their lack of cholesterol and healthy fiber content makes them a smart addition to your daily routine.
You can easily enjoy them raw with a dip for a quick snack, roast them to bring out their natural sweetness, or shred them into a morning muffin batter. Their versatility means you never have to get bored. For more inspiration on incorporating wholesome ingredients into your breakfast, check out our guide to creating delicious gluten-free pancakes. Pairing a side of roasted carrots with a high-protein breakfast bowl also makes for a perfectly balanced and satisfying meal that keeps you energized all morning.
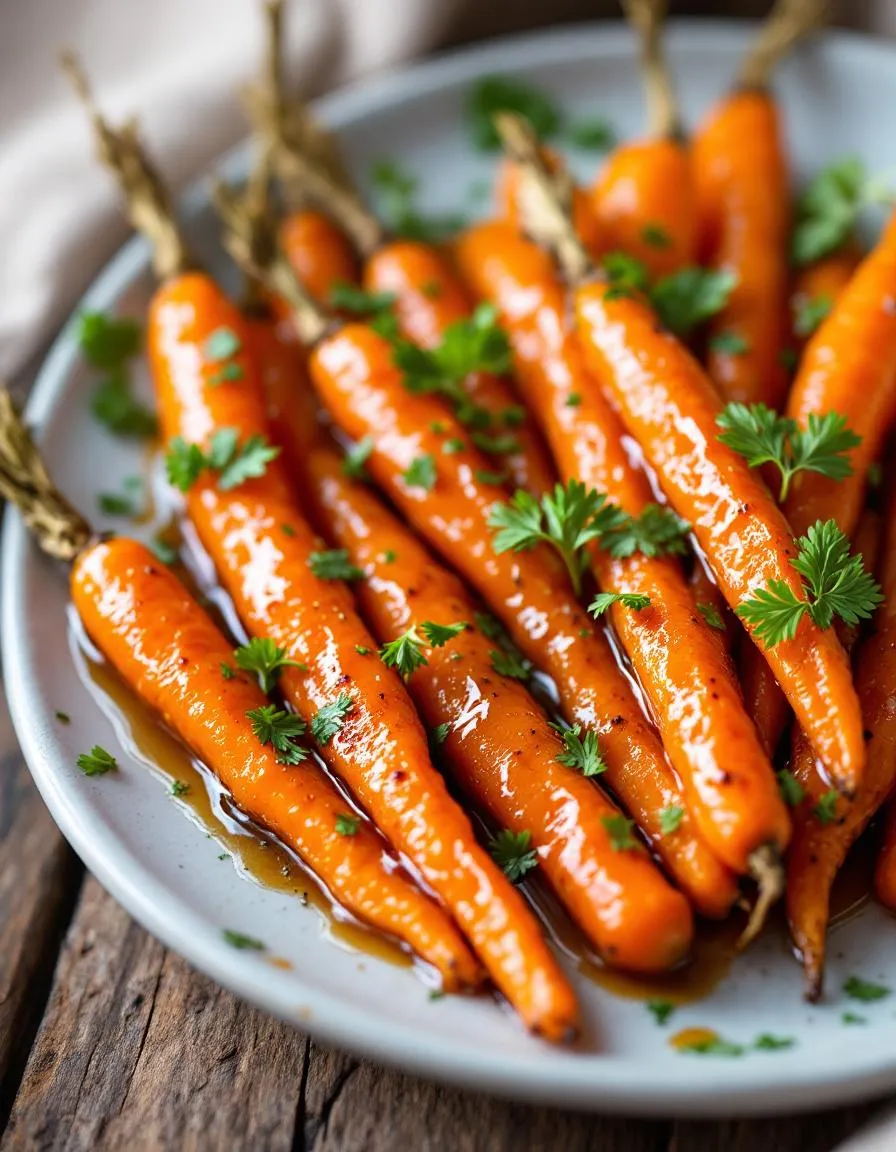
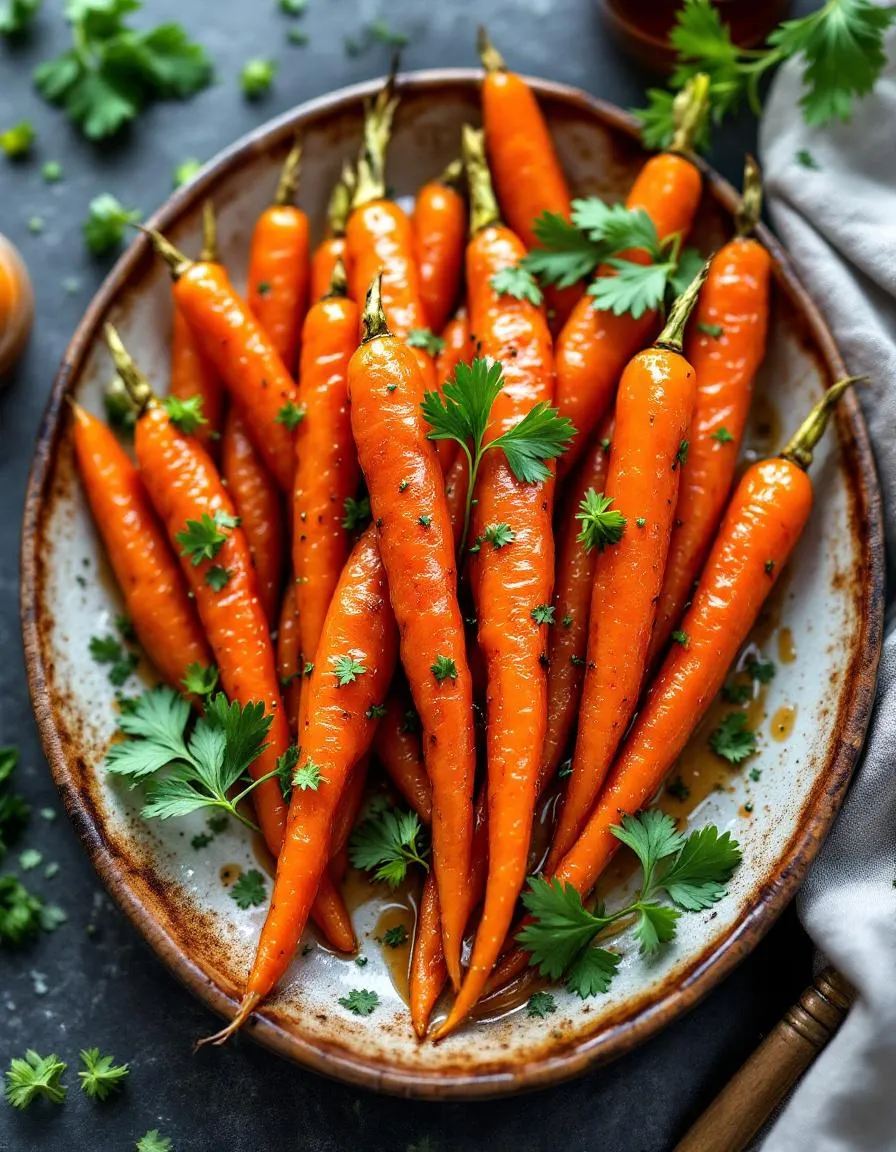
Sweet and savory roasted carrots with a glossy honey glaze, caramelized edges, and fresh herbs.
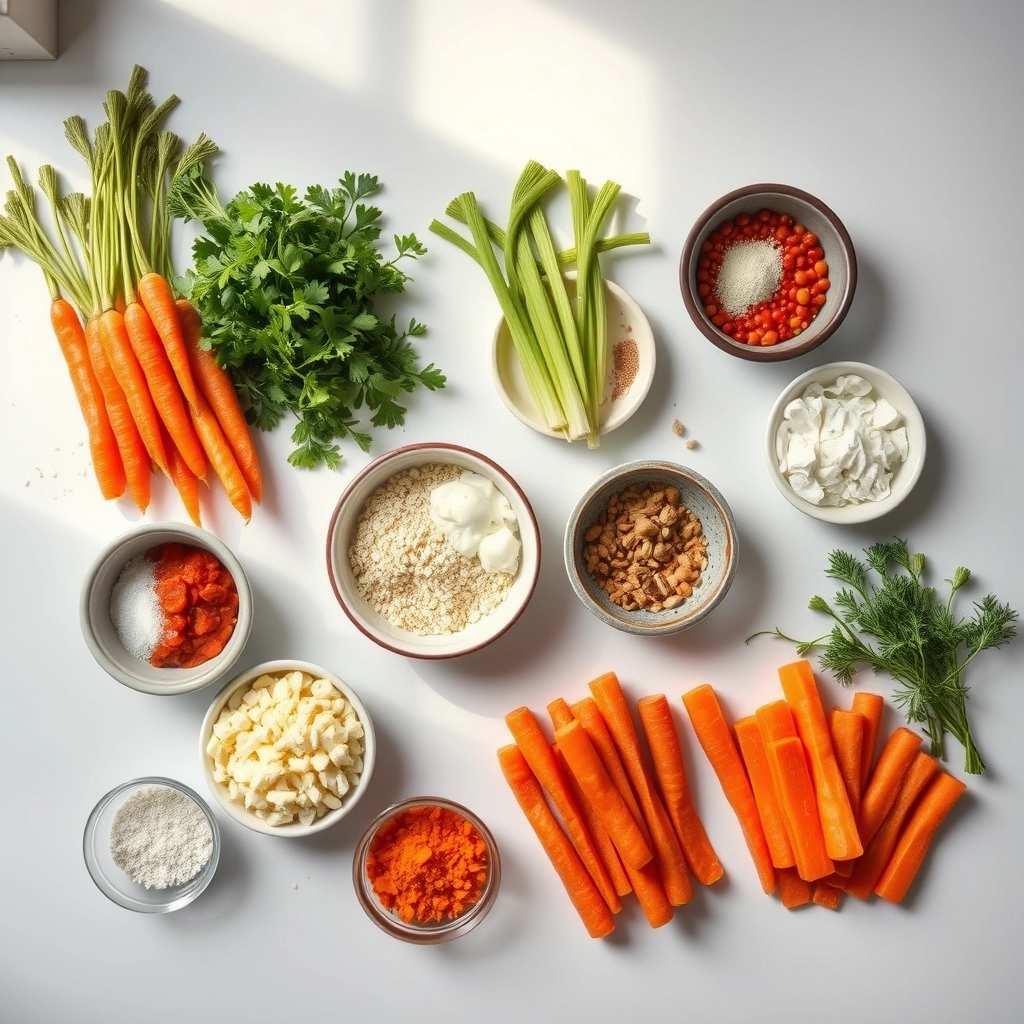
Ingredients
Scale
For the Crust:
1 lb carrots, peeled and cut into sticks
2 tbsp olive oil
2 tbsp honey
1 tsp fresh thyme leaves
1/2 tsp garlic powder
Salt and black pepper to taste
1 tbsp chopped fresh parsley for garnish
Instructions
1. Prepare the Crust:
Preheat oven to 400°F (200°C). Line a baking sheet with parchment paper.
In a large bowl, toss carrot sticks with olive oil, honey, thyme, garlic powder, salt, and pepper until evenly coated.
Spread carrots in a single layer on the prepared baking sheet. Roast for 20-25 minutes, turning once halfway, until tender and caramelized.
Transfer to a serving dish, garnish with fresh parsley, and serve warm.
Notes
You can customize the seasonings to taste.
How to Prepare This Dish
Steps and time-saving tips
First, grab your fresh carrots and give them a good scrub under cold water. You can peel them if you prefer, but leaving the skin on saves time and adds extra nutrients. Next, slice them uniformly; this ensures they all cook at the same rate. For a real time-saver, use a food processor with a slicing attachment. Now, heat a generous glug of olive oil in a large skillet over medium-high heat. Toss in your carrot coins and listen for that satisfying sizzle. Season them immediately with a pinch of salt and pepper. Sauté the carrots for a few minutes until they just start to soften and get some color. Then, add a splash of water or broth to the pan and cover it tightly. This creates steam, which helps the carrots cook through quickly and evenly. After about five minutes, remove the lid and let any remaining liquid evaporate. Finally, finish with a pat of butter and a drizzle of honey for a simple, glossy glaze. Give everything a final toss in the hot pan and serve immediately. This method delivers perfectly tender yet still slightly crisp carrots every single time.
and-learned-from">Mistakes I’ve made and learned from
I used to overcrowd the pan desperately hoping to cook all my carrots at once. Unfortunately, this just steamed them into a soggy, bland mess instead of giving them that beautiful caramelized edge. I learned that cooking in batches, while it feels slower, actually gets dinner on the table faster with far superior results. Another big lesson was in seasoning timing. I would add salt at the very end, but now I know seasoning early helps draw out the natural sugars in the carrots, making them taste sweeter. This is a trick I picked up from my journey of understanding umami and how layers of flavor work. Getting the texture right was also a challenge, often winding up with carrots that were either too hard or too mushy. Mastering the steam-and-sauté method changed everything for me, a technique that aligns with the principles of achieving perfect texture every time. Now, my carrots always have that ideal bite.
Cultural Connection and Variations
Where this recipe comes from
My grandmother always told me that a good kitchen never runs out of two things: stories and Carrots. She learned to make this glazed side dish from her mother, a first-generation immigrant who brought her own culinary traditions across the ocean. Fundamentally, this recipe represents humble comfort. After all, people have been sweetening this root vegetable for centuries to make the most of their harvest. Consequently, you will find a version of this dish on tables across Europe, each with its own local twist.
For instance, the Frenc
h might add a splash of white wine and fresh tarragon, while a German cook may use a hearty dash of caraway seeds. Meanwhile, in many American households, we often reach for the brown sugar and a pat of butter, creating a glaze that is both simple and deeply satisfying. My family’s version, however, always includes a pinch of nutmeg. This subtle spice reminds me of every holiday gathering around a crowded, joyful table. Ultimately, this dish transforms the humble carrot into a sweet, buttery, and nostalgic celebration.
How it fits in today’s cooking
Thankfully, this classic side dish has effortlessly found its place in modern cooking. It beautifully bridges the gap between weekday simplicity and festive occasion cooking. Busy home cooks now adapt it by roasting instead of boiling, which caramelizes the natural sugars in Carrots for an even deeper flavor without much extra effort. Furthermore, it remains a non-negotiable staple on holiday tables, especially during Easter and Thanksgiving feasts.
Its versatility also makes it a perfect pairing for so many main courses. For example, it provides a sweet counterpoint to the savory richness of a garlic herb pork loin. Similarly, its bright, sweet notes cut beautifully through the creamy textures of a creamy potato leek soup. Ultimately, this recipe continues to thrive because it delivers timeless flavor with reliable, crowd-pleasing results, meal after meal.
>Taste and Texture
What makes it delicious
Roasting fundamentally transforms the humble carrot into a sweet and deeply savory side dish. This process caramelizes the natural sugars, creating a tender interior with delightfully crisp, browned edges. Furthermore, a generous glug of olive oil and a sprinkle of sea salt amplify its earthy sweetness, making each bite incredibly satisfying. Ultimately, the texture of these roasted carrots provides a perfect balance, offering a slight resistance before giving way to a buttery-soft center.
Boosting the flavor
For an instant flavor upgrade, toss your carrots with a tablespoon of maple syrup and a pinch of cayenne pepper before roasting; this creates a magical sweet and spicy glaze. Alternatively, after they come out of the oven, finish them with a bright, herby kick from our favorite chimichurri sauce. If you crave a richer, nuttier dimension, a drizzle of tahini mixed with lemon juice works wonders. Finally, serving them over a bed of creamy whipped feta dip turns the entire experience into a luxurious and shareable appetizer.
Tips for Success
Best practices for results
Always use fresh, firm carrots for the best flavor and texture in your final dish. For even cooking, make sure you cut your carrots into uniform pieces. Furthermore, do not overcrowd your pan when roasting; this ensures the carrots caramelize beautifully instead of steaming. Finally, always taste your carrots before serving to perfectly adjust the seasoning.
Mistakes to avoid
A common mistake is under-seasoning your carrots, which can result in a bland side dish. Consequently, be generous with salt and pepper to enhance their natural sweetness. Additionally, avoid boiling carrots for too long, as this will make them mushy. For perfect texture, try steaming or roasting them instead, as detailed in our guide on perfect roasted vegetables. Moreover, do not store prepared carrots in a sealed container while they are still warm, as the trapped steam will cause sogginess. Instead, let them cool completely first, a technique we also recommend in our meal prep like a pro article.
Serving and Pairing Suggestions
How to serve this dish
For a beautiful presentation, arrange these carrots on a rustic white platter. Immediately after roasting, drizzle them with a touch of honey or a sprinkle of fresh dill. Consequently, this simple garnish enhances their natural sweetness and adds a pop of vibrant color. These carrots truly shine as a centerpiece for a holiday feast. Alternatively, serve them family-style in a warm ceramic dish for a comforting weeknight meal.
h-it">What goes well with it
These roasted carrots pair wonderfully with a main course like our classic herb crusted pork tenderloin. The savory, herbal notes from the pork create a perfect flavor harmony with the sweet carrots. For a lighter option, however, a simple arugula salad with a lemon vinaigrette offers a refreshing, peppery contrast. Finally, a chilled glass of Riesling or a crisp hard cider beautifully cuts through the caramelized richness of the carrots. You can also offer a cool, creamy dip like our lemon dill yogurt sauce for a delightful textural contrast.
How long do carrots last in the fridge?
Whole, unpeeled carrots can last for 3 to 4 weeks in the refrigerator when stored properly in a plastic bag in the crisper drawer. Peeled or baby carrots should be kept in a sealed container filled with water and will stay crisp for about 2 to 3 weeks. Always check your carrots for any signs of softness or sliminess before use.
ank-math-faq-item">
Can you eat carrots raw?
Yes, you can absolutely eat carrots raw! They are a crunchy, sweet, and nutritious snack that is rich in beta-carotene and fiber. Enjoy them whole, cut into sticks for dipping, or shredded into salads and slaws for a fresh crunch.
Why are my carrots soft?
Carrots become soft when they lose moisture. This often happens if they are stored improperly or have been in the fridge for too long. You can often revive slightly soft carrots by soaking them in a bowl of ice water for a few hours to re-crisp them.
Are carrots a vegetable or a fruit?
Botanically, carrots are classified as a root vegetable because they are the edible taproot of the plant. In culinary terms, we use them as a vegetable in savory dishes, not sweet ones, despite their natural sugar content. This versatile vegetable is a staple in kitchens worldwide.
div>
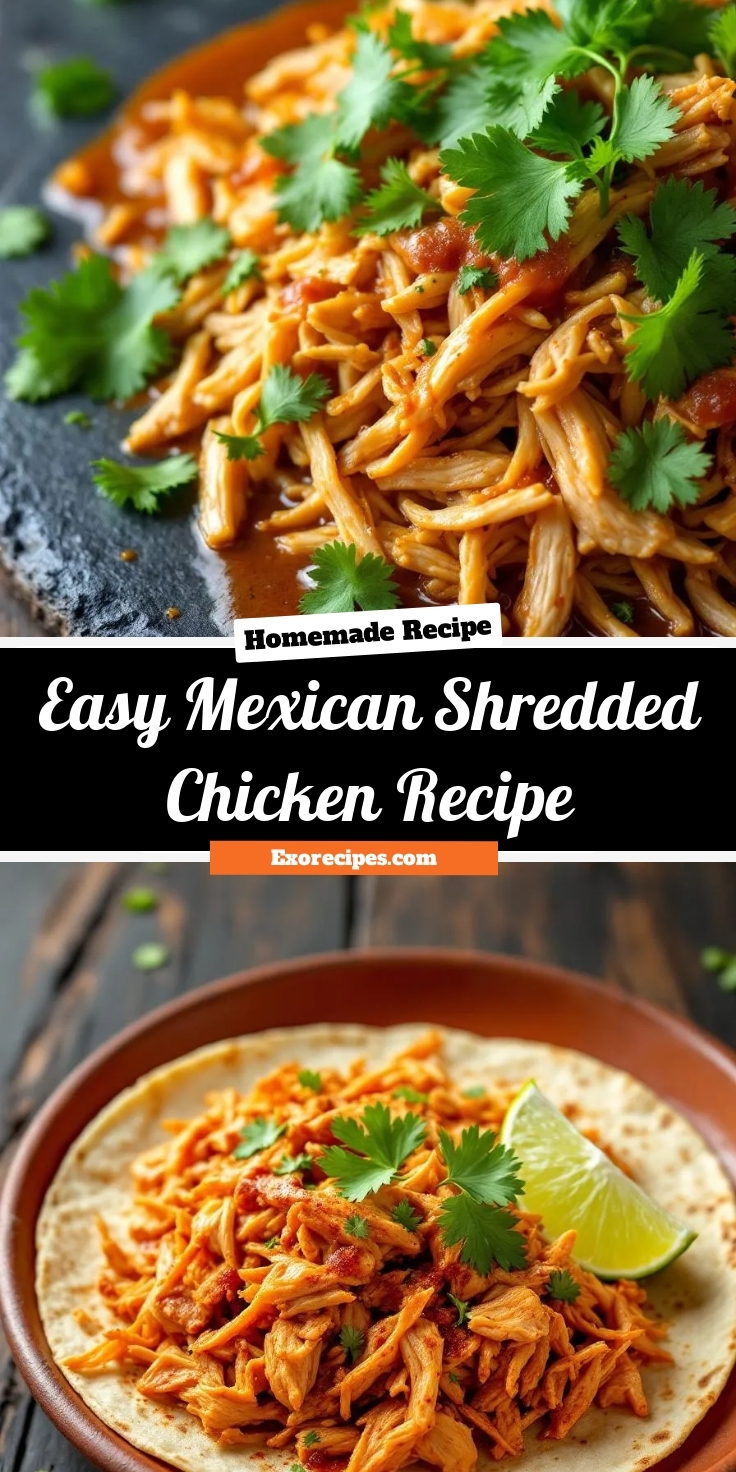
Easy Mexican Shredded Chicken Recipe
Introduction
Ever find yourself staring into the fridge, desperately craving something flavorful and satisfying, yet feeling completely uninspired? We have all been there, and frankly, that exact feeling is what led me to create this ultimate solution. This incredibly versatile Mexican Shredded Chicken Recipe will not only rescue your weeknight dinners but also become your new secret weapon for effortless, crowd-pleasing meals. Moreover, it fills your kitchen with the most intoxicating, authentic aromas that promise a truly delicious experience.
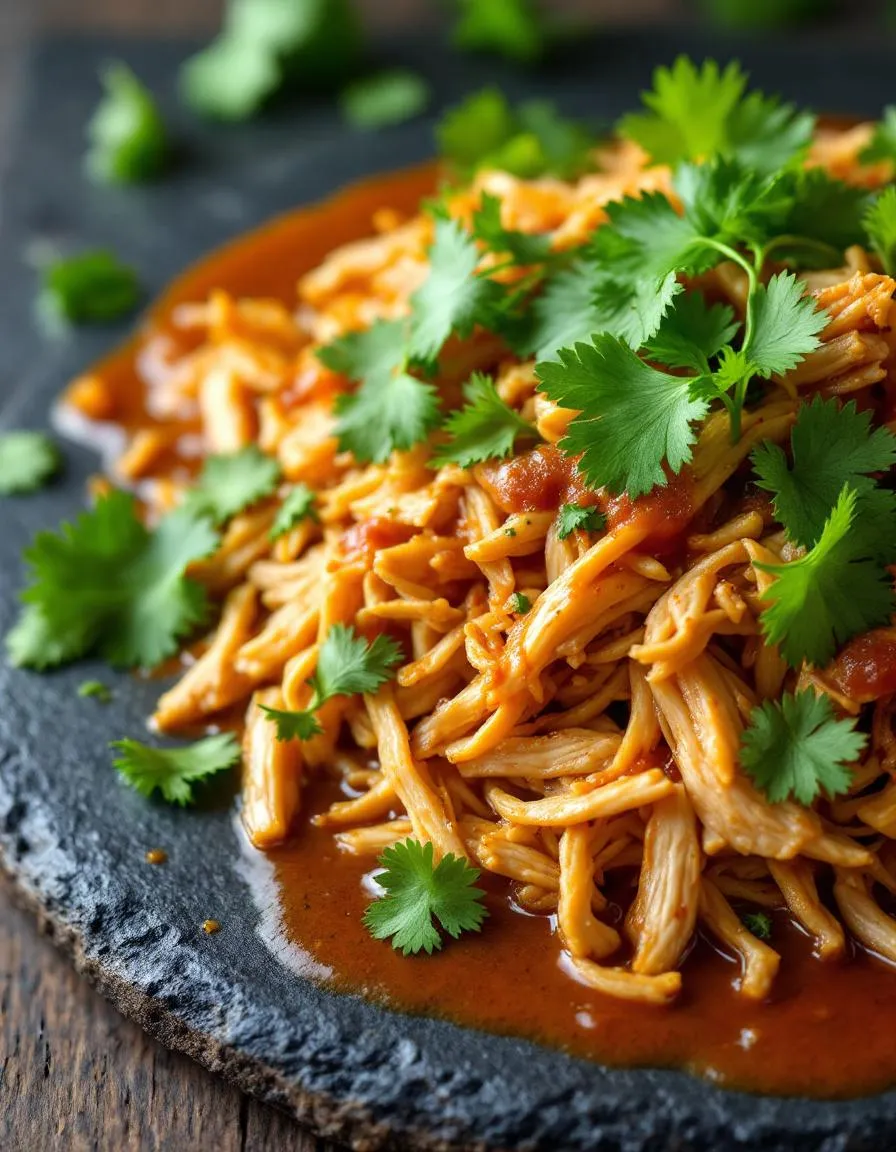
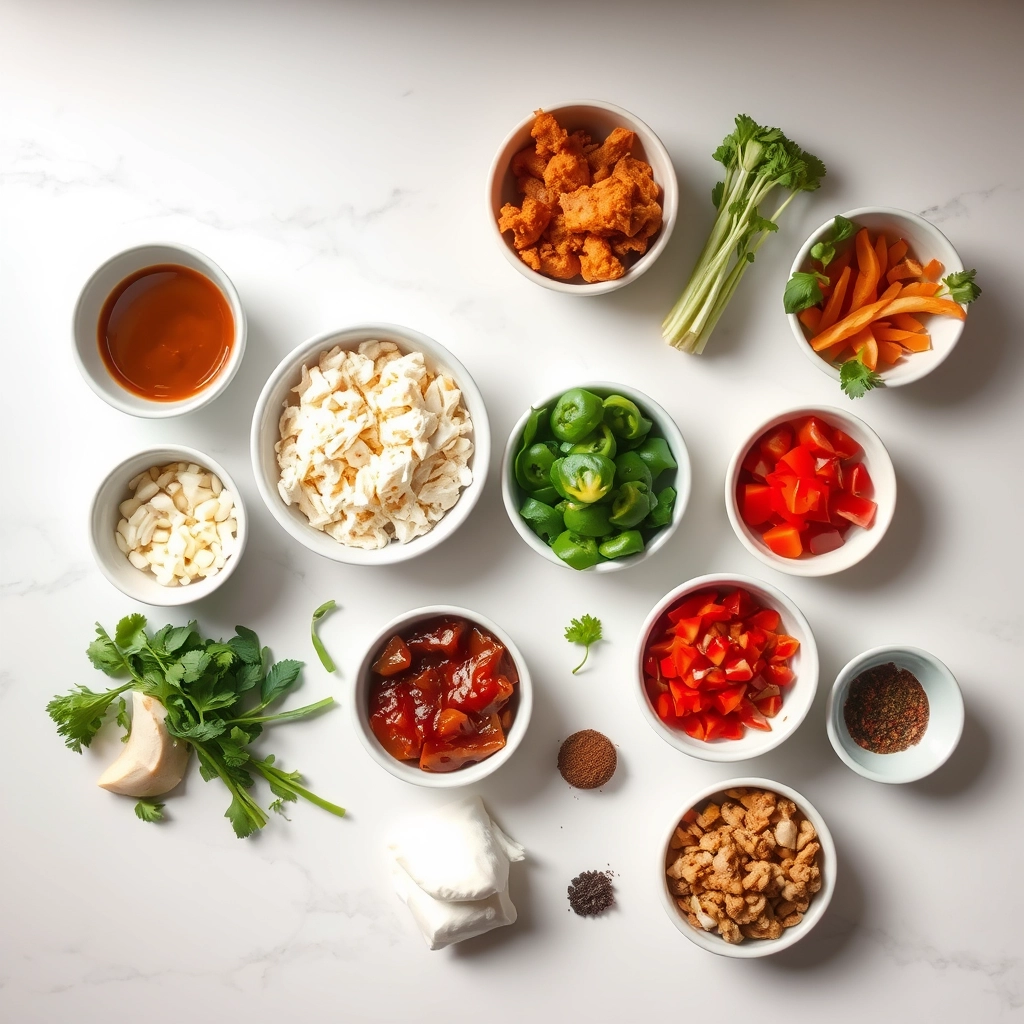
So what exactly is this culinary hero? Essentially, this Mexican Shredded Chicken Recipe involves slowly cooking chicken until it becomes impossibly tender, then shredding it and letting it soak up a vibrant blend of spices, tomatoes, and aromatics. This method creates a protein that is deeply flavorful, moist, and perfect for absorbing any sauce or seasoning you pair it with. Its importance cannot be overstated for busy home cooks. Firstly, it acts as a foundational recipe that you can prepare in a large batch, thus freeing up your precious time on hectic evenings. Secondly, it guarantees a delicious and healthy component for numerous meals throughout your week.
This approach perfectly fits our blog’s philosophy of creating recipes that are both incredibly delicious and genuinely practical. We firmly believe that amazing food should simplify your life, not complicate it. For instance, a single batch of this chicken can transform into quick tacos, a hearty topping for our Sheet Pan Chicken Fajitas, a filling for enchiladas, or a protein boost for salads and grain bowls. Additionally, this recipe is a fantastic gateway to exploring more complex Mexican-inspired dishes once you master the basic technique. Ultimately, mastering this Mexican Shredded Chicken Recipe empowers you to create restaurant-quality meals at home with minimal effort and maximum flavor, much like the simple techniques used in our popular Instant Pot Pulled Pork.
Why I Love This Recipe
I genuinely love this Mexican Shredded Chicken Recipe because it represents more than just food. It embodies the spirit of my family’s busy kitchen. I vividly remember the first time I perfected the spice blend. My kids, who were notoriously picky eaters at the time, actually asked for seconds on taco night. That moment was a total game-changer for me. Now, the scent of cumin and chili powder simmering on the stove instantly signals comfort and connection in our home. It is my absolute go-to for effortless meal prep. Consequently, it gives me the confidence to host impromptu gatherings. This recipe consistently delivers joy, and that is a feeling I always want to share.
Health and Nutrition
Why it’s good for your body
This Mexican Shredded Chicken Recipe delivers a powerful nutritional punch. First, it centers on lean protein, which actively supports muscle repair and keeps you feeling full for hours. Furthermore, the blend of spices like cumin and chili powder does more than just add flavor; these spices also boast anti-inflammatory properties. Consequently, you nourish your body while treating your taste buds.
Additionally, this cooking method preserves the integrity of the ingredients. For instance, simmering the chicken gently in a tomato-based sauce with aromatics like onion and garlic infuses it with flavor without needing excessive fats. Therefore, you enjoy a meal that feels indulgent yet remains incredibly wholesome. Ultimately, this Mexican Shredded Chicken Recipe provides a fantastic foundation for building a nutrient-dense plate.
Moreover, the dish naturally contains key micronutrients. Garlic and onions, for example, provide allicin and quercetin, compounds known for supporting immune health. Finally, you can feel great about serving this versatile protein to your family, knowing it fuels their bodies effectively.
How it fits in a healthy lifestyle
This Mexican Shredded Chicken Recipe seamlessly fits into almost any healthy eating plan. It naturally aligns with high-protein and gluten-free diets, making it a fantastic staple for fitness enthusiasts or anyone managing gluten sensitivities. The lean protein content helps build and maintain muscle, especially when paired with a consistent workout routine.
You can easily incorporate this shredded chicken into your weekly meal prep for quick, balanced lunches. Try it over a crisp salad for a light meal, or use it as a filling for lettuce wraps instead of tortillas. For more inspiration on building a wholesome plate, explore our guide to creating perfectly balanced meals. Its versatility means you never get bored, which is key to maintaining healthy habits long-term.
Since you control the sodium and additives, this homemade version is a heart-smart alternative to pre-packaged options. Pair it with fiber-rich sides like black beans or brown rice to create a complete, satisfying dish that supports sustained energy. Discover delicious and nutritious sides in our collection of healthy side dishes that complement any main course.
Tender, flavorful shredded chicken perfect for tacos, burritos, bowls, and more. Easy to make in one pot with authentic Mexican spices.
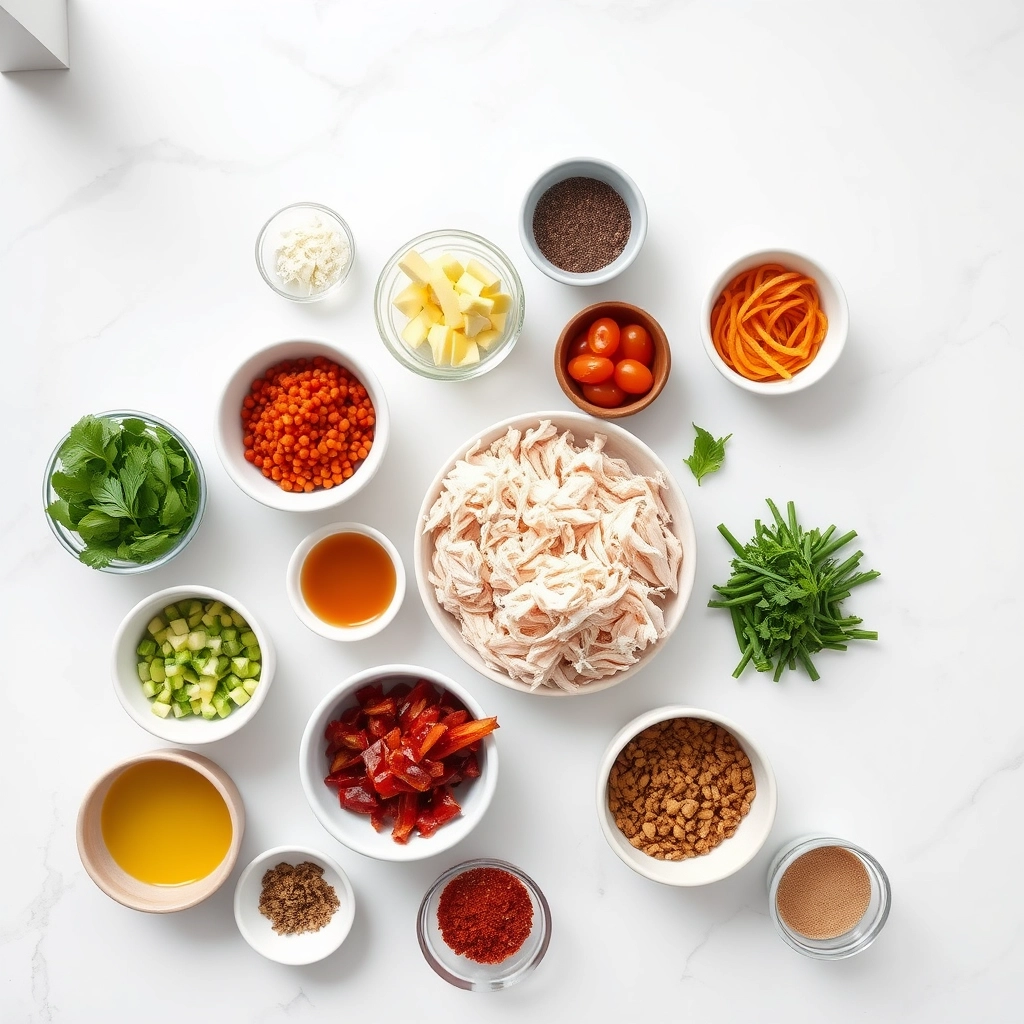
Ingredients
Scale
For the Crust:
2 lbs boneless, skinless chicken breasts
1 cup chicken broth
1 onion, diced
4 cloves garlic, minced
1 jalapeño, seeded and minced
1 tbsp chili powder
1 tsp cumin
1 tsp oregano
1/2 tsp paprika
1/4 tsp cayenne pepper (optional)
Salt and pepper to taste
2 tbsp lime juice
1/4 cup fresh cilantro, chopped
Instructions
1. Prepare the Crust:
Combine chicken, broth, onion, garlic, jalapeño, and all spices in a large pot. Bring to a boil.
Reduce heat to low, cover, and simmer for 20-25 minutes until chicken is cooked through and tender.
Remove chicken from pot and shred using two forks. Return shredded chicken to the pot.
Stir in lime juice and cilantro. Cook uncovered for 5-10 minutes until liquid reduces slightly. Serve warm.
Notes
You can customize the seasonings to taste.
How to Prepare This Dish
Steps and time-saving tips
First, gather all your ingredients for this Mexican Shredded Chicken Recipe. Next, generously season your chicken breasts with a simple, powerful spice blend. Meanwhile, heat a bit of oil in a large skillet over medium-high heat. Then, sear the chicken for just a few minutes per side until it develops a beautiful golden-brown crust. This crucial step locks in incredible flavor. After that, pour in your liquid, like chicken broth or a zesty salsa verde, and bring everything to a gentle simmer. Immediately reduce the heat to low, cover the skillet tightly, and let the chicken cook through. This gentle poaching method guarantees incredibly tender, juicy meat every single time. Furthermore, you can easily do this in a slow cooker for a truly hands-off approach. Once the chicken is fully cooked, transfer it to a clean bowl. Most importantly, use two forks to shred the meat apart. Finally, return the shredded chicken to that deliciously seasoned cooking liquid. Let it soak for a few minutes so it absorbs every last drop of flavor. Consequently, your final dish will be moist and incredibly tasty. This entire process for the Mexican Shredded Chicken Recipe is straightforward and delivers amazing results.
Mistakes I’ve made and learned from
I used to wildly underestimate the power of the sear, and I’d just toss pale chicken straight into the liquid. Unfortunately, this resulted in a finished Mexican Shredded Chicken Recipe that was tasty but lacked that deep, complex base flavor. I learned that taking those extra five minutes to get a good color on the chicken makes all the difference in the world. Another classic blunder was overcooking the chicken in a frantic attempt to make sure it was done. This left me with a dry, stringy texture that no amount of sauce could truly fix. Now, I use a simple instant-read thermometer to check for doneness perfectly every time. Trust me, it’s a total game-changer. Also, I’ve found that the cut of chicken matters more than you might think for the best texture. For a deeper dive on selecting proteins, my experience totally aligns with the tips in this ultimate guide to cooking with chicken. Learning these small lessons transformed my results from just okay to absolutely restaurant-quality.
My abuela’s kitchen in Guadalajara taught me that the soul of Mexican cooking lives in its simplest dishes. She never wrote anything down, of course. Instead, she would simply add a handful of this and a pinch of that, her hands telling a story generations old. This particular method for Mexican Shredded Chicken Recipe, or pollo deshebrado, is her legacy. It’s the workhorse of countless family meals, simmering quietly on the stove until it falls apart with a gentle nudge.
Naturally, every region in Mexico adds its own signature. In Yucatán, they might use vibrant achiote paste and bitter orange for a cochinita-inspired flavor. Conversely, northern states often keep it simple with just garlic, onion, and salt, letting the smoky char from the grill do the talking. My family’s version always includes a toasted guajillo chili for a touch of earthy sweetness without overwhelming heat. This humble Mexican Shredded Chicken Recipe truly showcases how a few core ingredients can create a canvas for endless personal and regional expression.
ays-cooking">How it fits in today’s cooking
This dish absolutely thrives in modern kitchens because of its incredible versatility. Busy weeknights demand efficient, multi-purpose heroes, and this chicken delivers. You can effortlessly transform it into tacos one night and a hearty topping for cheesy baked potato slices the next. Furthermore, its meal-prep friendly nature makes it a superstar for anyone looking to eat well without spending hours cooking daily.
Its comfort food status also remains unchallenged. After a long day, a warm tortilla filled with this savory chicken feels like a hug. Contemporary cooks also love streamlining the process. Many now use a slow cooker or an Instant Pot to achieve that same fork-tender perfection with even less hands-on time. Ultimately, whether you’re building a festive spread for a crowd or simply need a quick lunch, this chicken is your answer. It pairs beautifully with so many sides, especially a crisp, refreshing cucumber tomato salad, making every meal feel both nourishing and special.
Taste and Texture
What makes it delicious
This Mexican Shredded Chicken Recipe delivers a symphony of savory, smoky, and subtly spicy notes. Tender, juicy strands of chicken effortlessly soak up a deeply fragrant broth from toasted cumin, earthy oregano, and sharp garlic. Consequently, every forkful feels incredibly moist and satisfying. A bright hint of lime juice cuts through the richness, creating a perfectly balanced flavor profile that is both comforting and exciting. Ultimately, the texture is the star; the chicken becomes fall-apart tender, making it ideal for piling into tacos or burritos.
r">Boosting the flavor
You can easily amplify this dish with a few creative twists. For instance, stir in a chipotle pepper in adobo sauce to introduce a smoky heat that deeply penetrates the chicken. Alternatively, top your finished creation with a spoonful of creamy avocado crema for a cool, rich contrast. Furthermore, serving it alongside a vibrant mango avocado salsa adds a sweet and crunchy element that truly elevates the entire meal. Finally, a simple squeeze of fresh lime right before serving always wakes up all the other flavors beautifully.
Tips for Success
Best practices for results
Always use a heavy-bottomed pot or Dutch oven for this Mexican Shredded Chicken Recipe, as it will distribute heat evenly and prevent the bottom from scorching. Furthermore, do not rush the simmering process; let the chicken cook low and slow until it falls apart effortlessly with a fork. For the most authentic flavor, toast your whole spices in a dry skillet before grinding them, which will unlock their essential oils. Consequently, you will create a much more aromatic and complex dish. Always reserve some of the cooking liquid after you shred the chicken, then stir it back in to keep the meat incredibly moist and flavorful.
>Mistakes to avoid
Avoid using boneless, skinless chicken breasts exclusively, as they can easily become dry and stringy during the long cooking time. Instead, use a mix of thighs and breasts or whole legs for a more succulent final product. Moreover, do not skip the step of searing the chicken before adding the liquid, as this crucial Maillard reaction builds a deep, foundational flavor. Many home cooks also make the mistake of adding all their spices at the very end; however, you should sauté them with the onions to create a rich flavor base. For more guidance on building layers of flavor, check out our guide on how to sauté onions perfectly. Finally, never shred the chicken while it is still hot, because it will be too tender to handle and you might burn yourself. Let it cool slightly in the broth for easier handling, a technique we also recommend in our post on how to shred chicken safely and efficiently.
Serving and Pairing Suggestions
How to serve this dish
Present your vibrant Mexican Shredded Chicken Recipe in a warm, colorful bowl for a truly inviting table. For instance, top it with a bright sprinkle of fresh cilantro, a dollop of cool crema, and a zesty lime wedge on the side. Alternatively, serve it straight from the slow cooker at your next game day gathering for an effortless and crowd-pleasing buffet option. This versatile dish absolutely shines during festive occasions like Taco Tuesday or a casual weekend family brunch.
Consider setting up a build-your-own bowl or taco bar for maximum fun and interaction. Consequently, your guests will love customizing their meals with this delicious foundation.
h-it">What goes well with it
First, you must pair this flavorful chicken with our incredibly easy Spanish Rice. Its savory tomato-infused grains perfectly soak up the delicious juices from the Mexican Shredded Chicken Recipe. Similarly, a side of creamy, refreshing Avocado Salad provides a cool, crisp contrast that beautifully balances the warm, spiced meat.
For drinks, a classic margarita or an ice-cold Mexican beer makes an excellent companion. Ultimately, their citrusy and crisp profiles cut through the richness and elevate the entire dining experience.
math-faq-block">
What is the best way to shred chicken for Mexican shredded chicken?
The easiest and most effective method is to use two forks. Simply hold the cooked chicken steady with one fork and use the other to pull the meat apart into shreds. For larger batches, you can use a stand mixer with the paddle attachment on low speed for just 30 seconds to achieve perfectly shredded chicken for your Mexican Shredded Chicken Recipe.
Can I make Mexican shredded chicken in a slow cooker?
Absolutely! A slow cooker is an excellent tool for this recipe. Just place your chicken breasts or thighs in the crockpot, cover with your chosen seasonings and a bit of broth or salsa, and cook on low for 6-7 hours or on high for 3-4 hours. The chicken will become incredibly tender and easy to shred.
How long does Mexican shredded chicken last in the fridge?
Properly stored in an airtight container, your homemade Mexican Shredded Chicken Recipe will stay fresh in the refrigerator for 3 to 4 days. For the best quality and flavor, make sure to let it cool completely before sealing it and placing it in the fridge.
ank-math-faq-item">
What can I use Mexican shredded chicken for?
This versatile protein is perfect for countless dishes! Use it as a filling for tacos, burritos, enchiladas, quesadillas, and taquitos. You can also top salads, load it into nachos, or mix it with rice for a quick and satisfying bowl.
Easy Pumpkin Oreo Balls Recipe
Introduction
Do you ever crave a dessert that feels both decadently indulgent and surprisingly simple to create? Furthermore, you want something that delivers that wow factor without demanding hours in the kitchen. If so, you have absolutely found your next kitchen adventure. These irresistible Pumpkin Oreo Balls promise to satisfy that deep autumnal craving for spice and everything nice, all wrapped up in a no-bake, bite-sized treat. They are the perfect project for a cozy afternoon and will quickly become your most requested fall delicacy.
Pumpkin Oreo Balls are a brilliant no-bake confection that combines the iconic flavor of Oreo cookies with the warm, spiced essence of pumpkin pie. Essentially, we create a creamy, spiced filling, mix it with crushed cookies, and then coat each ball in rich chocolate. This process yields a stunning treat that looks professionally made but requires minimal effort and zero oven time. Consequently, they are a fantastic recipe for beginners and seasoned bakers alike who need a stunning dessert without the stress. This recipe matters because it perfectly captures the cozy, comforting spirit of fall in a single, pop-able bite. Moreover, it offers a fantastic way to involve kids in the kitchen or to make ahead for a party, ensuring you have a show-stopping dessert ready to go. These Pumpkin Oreo Balls fit our blog’s tone because we champion approachable recipes that deliver maximum flavor and joy. They are the epitome of what we love: a simple treat that feels incredibly special. For another fantastic no-bake option that the whole family will adore, explore our popular No Bake Cookie Dough Bites. If you find yourself with extra pumpkin puree, you must definitely try our ultimate Pumpkin Bread recipe for another taste of the season.
Why I Love This Recipe
I have a profound personal connection to these Pumpkin Oreo Balls because they are my go-to recipe for fostering connection. Every autumn, my daughter and I make a huge batch together, and the ritual of crushing the cookies, rolling the mixture, and clumsily dipping them in chocolate creates some of my most cherished memories. I love how the entire house fills with the scent of pumpkin and cinnamon, a aroma that truly defines the season for our family. Ultimately, these little bites represent more than just a dessert; they symbolize warmth, togetherness, and the simple joy of creating something delicious with someone you love.
Health and Nutrition
Why it’s good for your body
Pumpkin Oreo Balls offer a surprisingly wholesome twist on a classic treat. First and foremost, pumpkin puree provides a powerful dose of Vitamin A, which actively supports healthy vision and a strong immune system. Additionally, this festive ingredient delivers a good amount of fiber, thereby promoting healthy digestion and helping you feel satisfied. Consequently, these little bites do more than just satisfy your sweet tooth.
Moreover, the spices commonly paired with pumpkin, like cinnamon and nutmeg, bring their own set of benefits. For instance, cinnamon possesses natural anti-inflammatory properties. Furthermore, enjoying a dessert you truly love provides a significant mental health boost, which is a crucial part of overall wellness. Ultimately, these Pumpkin Oreo Balls create a more mindful indulgence compared to many other store-bought options.
Finally, making treats at home allows you to control the ingredients, ensuring you know exactly what you are eating. Therefore, you can feel good about sharing these delicious Pumpkin Oreo Balls with your friends and family.
How it fits in a healthy lifestyle
These Pumpkin Oreo Balls perfectly illustrate that a healthy lifestyle includes room for joy and indulgence. Think of them as a perfect portion-controlled treat that satisfies a craving without derailing your goals. You can easily enjoy one or two as a mindful dessert after a balanced meal. This approach helps you maintain a healthy relationship with food, where no options are completely off-limits.
For those with specific dietary patterns, you can easily adapt this recipe. If you explore gluten-free baking alternatives, you can create a version that everyone can enjoy. Pairing a treat with a source of protein, like a handful of nuts, can also help balance your blood sugar. Remember, the foundation of healthy eating is built on consistency and balance, not perfection. For more inspiration on building nourishing habits, check out our tips for healthy meal prep that saves time during a busy week.
Delicious no-bake pumpkin-spiced Oreo truffles coated in white chocolate, perfect for fall treats.
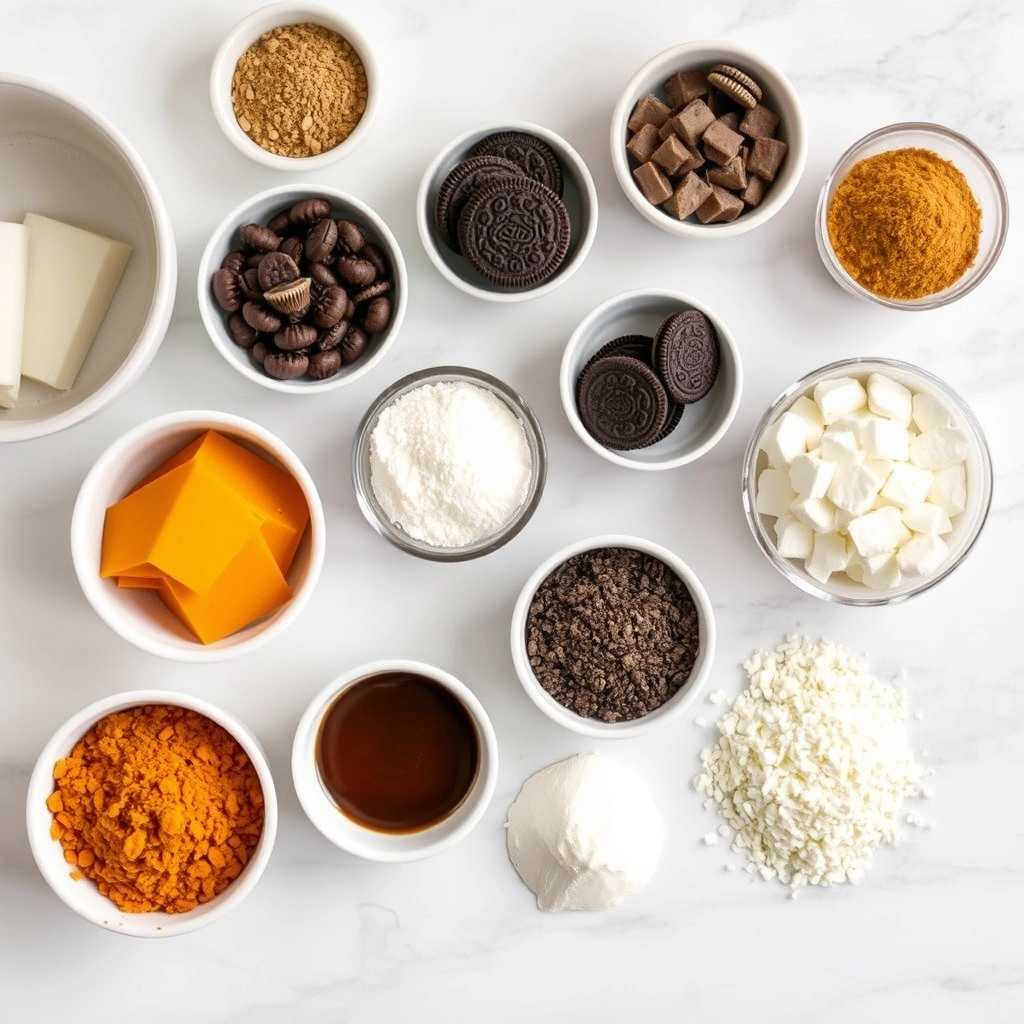
Ingredients
Scale
For the Crust:
1 package (14.3 oz) Oreo cookies
1 package (8 oz) cream cheese, softened
1/2 cup canned pumpkin puree
1 tsp pumpkin pie spice
2 cups white chocolate chips
1 tbsp coconut oil
Orange food coloring (optional)
Green candy melts or green icing (for stems)
Instructions
1. Prepare the Crust:
Crush Oreos into fine crumbs using a food processor or rolling pin.
In a bowl, mix cream cheese, pumpkin puree, and pumpkin pie spice until smooth. Fold in Oreo crumbs until fully combined.
Chill mixture for 30 minutes. Roll into 1-inch balls and place on a parchment-lined baking sheet. Freeze for 15 minutes.
Melt white chocolate chips with coconut oil, stirring until smooth. Add orange food coloring if desired. Dip each ball into chocolate, coating completely.
Place coated balls back on parchment. While chocolate is still wet, add a small piece of green candy melt or icing for the stem. Chill until set.
Notes
You can customize the seasonings to taste.
How to Prepare This Dish
Steps and time-saving tips
First, crush your Oreo cookies into a fine powder using a food processor. Alternatively, you can place them in a sealed plastic bag and roll them with a rolling pin. Next, transfer the crumbs to a large mixing bowl. Add the softened cream cheese and pure pumpkin puree. Use a hand mixer to combine everything on medium speed until you achieve a uniform, thick dough. This step is crucial for the right consistency. Meanwhile, line a large baking sheet with parchment paper. Then, use a small cookie scoop to portion the mixture. Roll each portion firmly between your palms to create a smooth, round ball. Place each finished ball onto the prepared sheet. Subsequently, melt your chocolate or candy melts according to the package instructions. Using a fork or a dipping tool, submerge each ball completely. Let the excess chocolate drip off before returning it to the tray. Finally, chill the entire tray for at least one hour. This step ensures the coating sets perfectly. For a quicker setting time, use the freezer for about twenty minutes. Moreover, work in small batches to keep the dough from becoming too soft.
Mistakes I’ve made and learned from
I learned the hard way that using cold cream cheese creates lumpy, impossible-to-roll dough. Now, I always set my cream cheese on the counter for a full hour beforehand. Another common error is skipping the chilling step before dipping. Warm balls will absolutely fall apart in melted chocolate, creating a huge mess. Trust me, patience here is non-negotiable. I also used to melt chocolate chips directly, which resulted in a thick, clumpy coating that never fully set. I’ve since discovered that using high-quality melting wafers is the ultimate game-changer for a smooth, snappy shell. For more tips on getting your desserts to set perfectly, check out my guide on how to make desserts set faster. And if you love this easy no-bake method, you must try my other favorite, no-bake cheesecake bites.
Honestly, we can trace the entire lineage of the Pumpkin Oreo Balls recipe back to one beautiful, delicious collision of cultures. It all starts with the classic no-bake Oreo ball, a staple of American potlucks and holiday parties for decades. Then, someone had a stroke of genius. They looked at the creamy, chocolatey mixture and thought, “What if we gave this a taste of fall?”
This is where the pumpkin spice phenomenon enters our story. By folding real pumpkin puree and those warm, cozy spices into the filling, they transformed a simple treat into a seasonal celebration. Consequently, these little bites carry the spirit of autumn in every single one. My family, for instance, always adds a tiny pinch of extra nutmeg. It reminds us of my grandmother’s famous pies. Around the world, bakers put their own spin on the concept. In some places, they might use a local spiced biscuit instead of Oreos. Others might roll their Pumpkin Oreo Balls in crushed gingersnaps for an extra kick.
Ultimately, this recipe
represents a modern tradition. It connects us to the universal joy of sweets while firmly rooting us in the crisp, colorful feelings of the harvest season.
How it fits in today’s cooking
Pumpkin Oreo Balls fit perfectly into our current cooking rhythms because they deliver huge flavor with minimal effort. Today’s home cooks adore recipes that are both impressive and incredibly simple to execute. These no-bake treats are a prime example of that demand. They seamlessly transition from a fun weekday project with the kids to the star of your holiday dessert table.
Furthermore, modern adaptations make this recipe even more versatile. Health-conscious bakers might use low-fat cream cheese or a sugar-free cookie alternative. Meanwhile, others push the creativity further by dipping them in white chocolate for a sweeter finish. This flexibility ensures everyone can enjoy them. For another fantastic no-bake option that’s perfect any time of year, you must try our classic Oreo Balls recipe.
They have also become a
staple for seasonal gatherings. Whether you’re contributing to a Halloween party spread or need a quick Thanksgiving dessert, these bites never disappoint. In fact, their make-ahead nature is a huge bonus for busy hosts. If you love these, you will definitely want to explore our entire collection of easy no-bake desserts for more inspiration. Ultimately, Pumpkin Oreo Balls continue to capture our love for tradition, convenience, and the unmistakable taste of fall.
Taste and Texture
What makes it delicious
These Pumpkin Oreo Balls deliver a wonderfully creamy and spiced experience. Initially, your teeth sink through a crisp chocolate shell, revealing an impossibly soft and cool interior. The rich, earthy pumpkin and warm cinnamon mingle perfectly with the deep chocolate of the cookie crumbs. Ultimately, every bite of these Pumpkin Oreo Balls offers a fragrant, autumnal aroma and a satisfyingly smooth texture that melts in your mouth.
Boosting the flavor
For an even more decadent treat, consider rolling your chilled truffles in crushed gingersnap cookies instead of Oreo crumbs. This simple swap introduces a delightful spicy snap that complements the pumpkin filling beautifully. Alternatively, a light drizzle of salted caramel sauce over the top adds a wonderful buttery sweetness that cuts through the richness. If you love the warm spices in this recipe, explore our guide to the best pumpkin spice recipes for more inspiration. Furthermore, serving these bites alongside a scoop of homemade vanilla ice cream creates a fantastic temperature and flavor contrast that truly elevates the entire dessert.
Always chill your mixture thoroughly before rolling, as this step prevents sticky hands and ensures your Pumpkin Oreo Balls hold their perfect shape. Furthermore, use a small cookie scoop for uniform sizing, which promotes even chilling and a professional appearance. For the best texture, gently tap the finished balls on the counter to smooth any cracks before the final chocolate coating sets.
Mistakes to avoid
A common error involves adding too much cream cheese, which consequently creates a mixture that is far too soft to shape properly. Instead, accurately measure your ingredients to guarantee your Pumpkin Oreo Balls have the ideal firm yet creamy consistency. Additionally, avoid dipping them while the chocolate is too warm; otherwise, you risk a thick, messy coating. For a flawless finish, always temper your chocolate correctly, a technique we detail in our guide on how to temper chocolate. Moreover, do not skip the step of freezing them solid before dipping, as this crucial tip prevents any falling apart. If your candy coating is consistently too thick, simply thin it with a teaspoon of coconut oil, a method we also recommend in our easy candy coating tips.
g-suggestions">Serving and Pairing Suggestions
How to serve this dish
Present your Pumpkin Oreo Balls in a way that delights your guests before they even take a bite. For instance, arrange them on a festive platter lined with orange and black parchment paper. Alternatively, place each one in a mini cupcake liner for a charming and mess-free presentation. Moreover, a light dusting of cinnamon or cocoa powder just before serving adds a beautiful finishing touch. These treats truly shine during autumn gatherings and holiday parties. Ultimately, a tiered stand creates an eye-catching centerpiece that showcases your delicious Pumpkin Oreo Balls perfectly.
What goes well with it
A warm mug of spiced chai tea makes a fantastic companion. Its aromatic spices beautifully echo the cozy pumpkin and cinnamon notes in every bite of these Pumpkin Oreo Balls. Furthermore, a glass of cold milk remains a classic and always satisfying pairing that cuts through the richness. For a truly decadent dessert spread, consider serving them alongside a slice of our creamy No Bake Cheesecake. Finally, if you want to offer another handheld treat, our popular Homemade Oreo Cookies make a wonderful thematic addition to any dessert table.
math-faq-block">
How do you keep pumpkin Oreo balls from falling apart?
Chilling the mixture thoroughly before rolling is the key to preventing your Pumpkin Oreo Balls from falling apart. Ensure the cream cheese is fully incorporated and the mixture is firm enough to hold its shape when handled. For extra stability, you can also briefly freeze the rolled balls before dipping them in chocolate.
Can you freeze pumpkin Oreo balls?
Yes, you can absolutely freeze pumpkin Oreo balls for longer storage. Place them in a single layer on a parchment-lined baking sheet to freeze solid, then transfer them to an airtight container or freezer bag. They will keep well for up to 2-3 months; just thaw them in the refrigerator before serving.
What is the best chocolate for coating Oreo balls?
Candy melts or almond bark are often considered the best for coating Pumpkin Oreo Balls because they set firmly and are easy to work with. High-quality melting wafers or tempered chocolate chips also provide a great snap and rich flavor that complements the pumpkin and cream cheese filling perfectly.
ank-math-faq-item">
How long do Oreo pumpkin balls last in the fridge?
Properly stored in an airtight container, these Pumpkin Oreo Balls will stay fresh in the refrigerator for up to one week. The cool environment helps maintain their texture and prevents the cream cheese filling from spoiling. For the best taste and texture, let them sit at room temperature for about 10 minutes before serving.
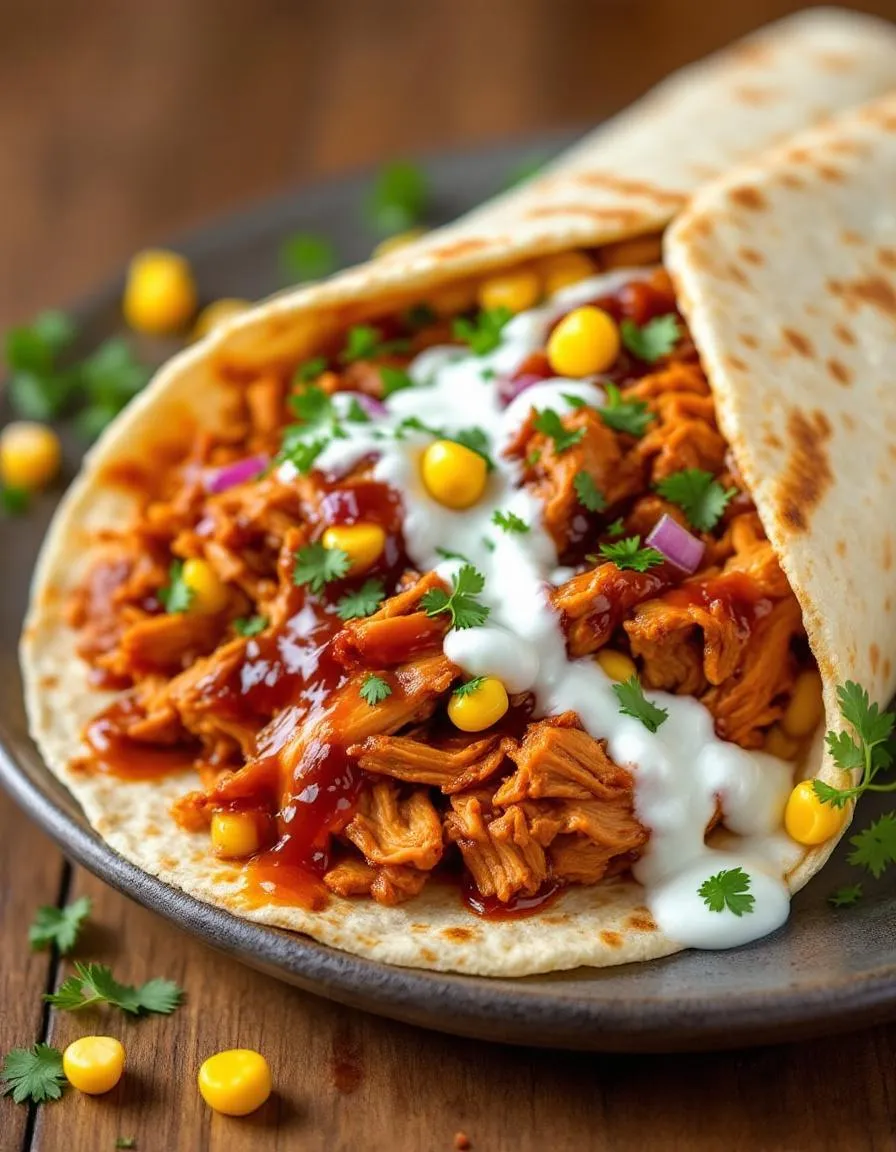
Easy BBQ Chicken Wraps Recipe
Introduction
Do you ever crave that perfect combination of smoky, sweet, and savory but feel like you simply do not have the time? We completely understand that struggle. Fortunately, these incredibly easy and delicious BBQ Chicken Wraps are here to save your day. They deliver that classic barbecue satisfaction without any fuss. Moreover, they are the ultimate solution for a hectic weeknight or a last-minute lunch that will make everyone smile.
So what exactly are BBQ Chicken Wraps? Essentially, they are a fantastic handheld meal that combines tender, shredded chicken coated in tangy barbecue sauce with crisp, fresh vegetables and creamy cheese, all wrapped snugly in a soft tortilla. This dish matters because it perfectly solves the universal problem of wanting a meal that is both deeply satisfying and incredibly convenient. Furthermore, it fits our blog’s tone of creating approachable, family-friendly food that delivers on flavor without complexity. You can easily customize your wraps with different slaws or cheeses, making them a versatile staple for any cook. For instance, if you have leftover pulled chicken, this recipe becomes an even faster way to get dinner on the table. Ultimately, this recipe embodies what we stand for: making real food achievable for real life, much like our popular easy guacamole that turns a simple snack into something special.
Why I Love This Recipe
I genuinely love this recipe because it reminds me of summer evenings on our back patio. My family often requests these wraps for a casual dinner after a long day. The smell of the barbecue sauce warming in the skillet instantly creates a relaxed and happy atmosphere. I also appreciate how my kids eagerly eat their vegetables when they are tucked inside this flavorful package. Ultimately, this dish represents more than just a quick meal. It creates a little moment of joy and connection in the middle of a busy week.
Health and Nutrition
Why it’s good for your body
BBQ Chicken Wraps deliver a powerful nutritional punch that your body will truly appreciate. First and foremost, the lean chicken breast provides a fantastic source of high-quality protein. Consequently, this protein helps build and repair muscle tissue, keeps you feeling full and satisfied for hours, and even boosts your metabolism. Additionally, the smoky, tangy barbecue sauce adds a burst of flavor without requiring excessive amounts.
Moreover, when you load your wrap with fresh vegetables like crisp lettuce and juicy tomatoes, you add essential vitamins, minerals, and fiber. This combination supports healthy digestion and provides key antioxidants. Furthermore, opting for a whole-wheat tortilla increases your fiber intake even more, which is excellent for heart health and blood sugar stability. Ultimately, these BBQ Chicken Wraps offer a well-rounded meal that fuels your body efficiently. Finally, you can feel great about serving this dish, knowing it combines taste and nutrition in every single bite.
How it fits in a healthy lifestyle
BBQ Chicken Wraps fit perfectly into a balanced and healthy lifestyle. They are incredibly versatile, allowing you to tailor them to your specific dietary needs. For a gluten-free option, simply swap the tortilla for a large lettuce wrap or your favorite gluten-free brand. If you are focusing on a high-protein diet for muscle building or satiety, the chicken breast serves as an excellent foundation. You can easily control the sodium and sugar content by making your own homemade sugar-free BBQ sauce, putting you in complete charge of your ingredients.
This meal also supports practical, everyday healthy eating habits. It comes together quickly for a nutritious lunch that prevents you from reaching for less healthy convenience foods. Pair your wrap with a side of fresh fruit or a light salad for a completely balanced plate. For more inspiration on building meals that support your wellness goals, explore our guide on creating a balanced plate. It is a simple, delicious, and smart choice for anyone looking to eat well without sacrificing flavor.
Quick and flavorful BBQ chicken wraps with crisp vegetables and tangy sauce, perfect for a satisfying lunch or light dinner.
Ingredients
Scale
For the Crust:
2 cups cooked shredded chicken
1/2 cup BBQ sauce
4 large flour tortillas
1 cup shredded lettuce
1/2 cup diced red onion
1/2 cup corn kernels (canned or cooked)
1/2 cup shredded cheddar cheese
1/4 cup ranch dressing
Instructions
1. Prepare the Crust:
In a bowl, mix shredded chicken with BBQ sauce until well coated.
Lay out tortillas and divide chicken mixture evenly among them, spreading down the center.
Top each with lettuce, red onion, corn, and cheese.
Drizzle with ranch dressing.
Fold in sides of tortillas and roll tightly to form wraps. Serve immediately or wrap in foil for later.
Notes
You can customize the seasonings to taste.
s-dish">How to Prepare This Dish
Steps and time-saving tips
First, gather your ingredients to streamline the entire process. Next, shred your pre-cooked chicken into a spacious mixing bowl. Drizzle your favorite BBQ sauce generously over the chicken and then toss everything until each piece gets a perfect, sticky coating. For a creamier texture, fold in some shredded colby jack cheese and a scoop of sour cream. Meanwhile, warm your large flour tortillas briefly in a microwave or a dry skillet; this crucial step makes them incredibly pliable and prevents any unfortunate tearing. Now, layer a hearty line of the saucy chicken mixture down the center of each tortilla. Top it with a handful of crisp coleslaw for that essential crunch and a tangy contrast. Carefully fold the sides of the tortilla inward over the filling, and then firmly roll from the bottom up, creating a tight, secure bundle. Finally, you can serve your BBQ Chicken Wraps immediately for a warm, melty experience. Alternatively, wrap them tightly in parchment paper for a fantastic, mess-free lunch on the go. This entire process moves quickly, especially if you use a store-bought rotisserie chicken. Seriously, that single tip saves a tremendous amount of time and effort without sacrificing any flavor at all.
Mistakes I’ve made and learned from
I have absolutely learned the hard way that overfilling these wraps is a direct ticket to a messy disaster. My first attempt ended with BBQ sauce all over my hands and the filling spilling out the second I took a bite. The key is to show some restraint; use just enough chicken mixture to cover the center third of the tortilla. Another common pitfall involves using cold tortillas straight from the fridge. They crack and split every single time, no matter how careful you are. Now, I always gently warm them first, which makes them so much more cooperative. Getting the right sauce consistency is also crucial, something I perfected after a few too-sloppy batches. For more guidance on balancing wet and dry ingredients, my post on creating the perfect burger sauce has some great transferable tips. And if you’re worried about your tortillas, my method for making fluffy homemade flour tortillas ensures you have a sturdy yet soft base every time. Trust me, a little patience here makes all the difference between a good wrap and a great one.
n-and-variations">Cultural Connection and Variations
Where this recipe comes from
My story with BBQ Chicken Wraps starts at a noisy, sun-drenched county fair. Honestly, the scent of hickory smoke and grilled meat pulled us in long before we saw the stand. This wasn’t fancy food. It was pure, handheld joy, a perfect blend of sweet, smoky, and crunchy that captured the spirit of American summer gatherings. Since then, I have seen this simple concept travel and transform in fascinating ways. For example, in parts of Texas, they might swap the coleslaw for a spicy, vinegar-based version to cut through the rich sauce. Conversely, a Southern cook may add a scoop of creamy mac and cheese right into the tortilla, turning it into the ultimate comfort meal. These regional twists tell a story about local tastes and ingredients. Ultimately, every family makes these wraps their own, creating a delicious, portable tradition.
Furthermore, the beauty of BBQ Chicken Wraps lies in their incredible adaptability. My own family, for instance, fiercely debates the ideal sauce. My uncle swears by a classic Kansas City-style glaze, while I prefer a tangy Carolina mustard base. We even have a “create your own wrap” bar for big family picnics, which keeps everyone happy. This dish effortlessly bridges generations and preferences. It is a culinary chameleon, always delivering that satisfying combination of flavors and textures we all crave.
How it fits in today’s cooking
Today, BBQ Chicken Wraps fit perfectly into our fast-paced, health-conscious lifestyles. They are the ultimate quick lunch or easy weeknight dinner solution. Modern cooks brilliantly adapt the core recipe to suit different diets, perhaps using low-carb tortillas or loading them with extra veggies. Moreover, this dish is a fantastic way to repurpose leftovers, especially if you have some pulled pork or grilled chicken from a previous meal. This approach reduces food waste and saves precious time. Consequently, you get a delicious and satisfying meal on the table in minutes.
Additionally, the wrap
continues to be a star at casual gatherings and game day parties. It is a guaranteed crowd-pleaser that everyone enjoys. You can easily make a big batch ahead of time, which makes hosting so much simpler. For a complete spread, consider pairing your wraps with a fresh, crisp side. A simple macaroni salad often provides the ideal cool and creamy contrast to the smoky, savory filling. Ultimately, this humble wrap has secured its place as a modern classic because it delivers maximum flavor with minimal fuss.
Taste and Texture
What makes it delicious
These BBQ Chicken Wraps deliver a fantastic mix of textures and smoky sweetness in every single bite. First, you get the soft, pliable flour tortilla giving way to a cool and creamy coleslaw crunch. Meanwhile, the juicy, shredded chicken coated in tangy barbecue sauce provides a deeply savory and slightly sweet core. Furthermore, the melted cheddar cheese adds a rich, gooey element that beautifully ties everything together. Ultimately, the experience is a perfect balance of hearty, smoky, and fresh flavors that makes these BBQ Chicken Wraps a guaranteed crowd-pleaser.
Boosting the flavor
For an extra kick, consider mixing a teaspoon of chipotle powder into your barbecue sauce; it introduces a wonderful smoky heat that deepens the overall flavor profile. Additionally, topping your wrap with a handful of crispy fried onions or chopped bacon introduces a fantastic salty crunch. You can also swap the standard coleslaw for a spicy jalapeño slaw to add a vibrant, peppery zing that cuts through the richness. Finally, serving a side of cooling avocado dip on the side offers a creamy contrast that makes the meal even more satisfying.
Always warm your tortillas briefly in a dry skillet first, because this makes them pliable and prevents cracking. Furthermore, spread your sauce evenly across the entire surface, which ensures every single bite of your BBQ Chicken Wraps is packed with flavor. Subsequently, use a moderate hand with the fillings to avoid overstuffing, as this allows for a tight, secure roll. Finally, chill your assembled wraps for ten minutes before slicing; this crucial step helps them hold their perfect shape.
Mistakes to avoid
A common error involves using cold chicken straight from the fridge, which can make your wrap unpleasantly cool; therefore, always let your shredded BBQ chicken come to room temperature first. Additionally, many people overlook the importance of draining their ingredients, so always pat canned corn or black beans dry to prevent a soggy tortilla. For more guidance on handling moist ingredients, our article on keeping your wrap from getting soggy offers excellent solutions. Moreover, do not skip the step of toasting your wrap seam-side down, since this simple action seals it shut securely. If your chicken is dry, however, you can easily fix it by learning how to moisten dry shredded chicken for a much better texture.
g-suggestions">Serving and Pairing Suggestions
How to serve this dish
For a fun and interactive meal, serve these BBQ Chicken Wraps family-style. Consequently, arrange the whole wraps on a large wooden cutting board and let everyone dig in. Alternatively, slice each wrap in half on a sharp diagonal to reveal the beautiful, colorful filling inside. This simple presentation instantly makes them look more gourmet. Furthermore, a casual backyard barbecue provides the perfect occasion for these handheld delights. Finally, garnish your platter with fresh cilantro sprigs and a small bowl of extra BBQ sauce for dipping.
What goes well with it
A cool, creamy side perfectly balances the smoky flavor of your BBQ Chicken Wraps. For instance, a classic Classic Coleslaw adds a wonderful crunch and tangy contrast. Moreover, a handful of crispy potato chips or sweet potato fries on the side offers a satisfying salty crunch. For a drink pairing, a slightly sweet iced tea or a light lager beer complements the barbecue sauce without overpowering it. Ultimately, you can also offer a cool, creamy dip like our Avocado Crema for an extra layer of flavor.
math-faq-block">
What goes well with BBQ chicken wraps?
BBQ chicken wraps pair perfectly with a variety of sides. Classic choices include a simple side salad, coleslaw, sweet potato fries, or fresh fruit like watermelon. For a heartier meal, serve them with corn on the cob or a creamy pasta salad.
How do you keep BBQ chicken wraps from getting soggy?
The key to preventing soggy BBQ chicken wraps is to let the cooked chicken cool completely before assembling and to control moisture. Pat any wet ingredients like tomatoes or onions dry with a paper towel, and consider placing a layer of lettuce or cheese between the wrap and the saucy chicken to act as a barrier.
Can you make BBQ chicken wraps ahead of time?
Yes, you can prepare the components for BBQ chicken wraps ahead of time for easy assembly. Store the shredded BBQ chicken, chopped veggies, and wraps separately in airtight containers in the refrigerator. For the best texture, assemble them just before serving to avoid a soggy tortilla.
ank-math-faq-item">
What is the best way to cook chicken for BBQ wraps?
The best methods for cooking chicken for BBQ wraps are grilling, baking, or using a slow cooker. Grilling imparts a smoky flavor, while baking or slow cooking makes the chicken incredibly tender and easy to shred. Once cooked, shred the chicken and toss it in your favorite BBQ sauce before building your wraps.