“`html
Table of Contents
Cheesy Potatoes Recipe for Easy Family Dinners
Elevate Your Weeknight Meals with the Ultimate Cheesy Potatoes
Are you on the hunt for a side dish that’s both incredibly easy and exceptionally delicious, capable of satisfying even the pickiest eaters? In today’s fast-paced world, finding recipes that offer comfort, flavor, and minimal fuss is key to successful family dinners. This Cheesy Potatoes recipe delivers on all fronts, transforming simple ingredients into a rich, creamy, and utterly irresistible casserole that will become a staple in your recipe rotation. Imagine a creamy potato bake, infused with the savory depth of French onion soup, crowned with a crunchy layer of homemade fried onions. It’s the kind of dish that brings smiles to the table and makes any meal feel like a special occasion. Perfect for holiday feasts, potlucks, or simply as a hearty accompaniment to a roasted chicken or grilled steak, this cheesy potato casserole is a crowd-pleaser that demands very little effort for maximum reward.
Gather Your Delicious Ingredients
The magic of this Cheesy Potatoes recipe lies in its humble yet impactful ingredients. We aim for a balance of creaminess, savory flavor, and delightful texture that sings with every bite.
- 2.5 lbs Russet Potatoes: These are the stars of our show. Their starchy nature breaks down beautifully when baked, creating a wonderfully creamy texture. A good substitute would be Yukon Gold potatoes, which offer a slightly buttery flavor and a creamier consistency. Peel them for a smoother dish or leave the skins on for a more rustic feel and added fiber!
- 1 (10.5 oz) can Condensed French Onion Soup: This ingredient is pure flavor gold. It provides a deep, savory, umami-rich base that is simply unparalleled. If you can’t find condensed French onion soup, you can substitute with 1.5 cups of a good quality beef broth mixed with 1 tablespoon of Worcestershire sauce and 1/4 teaspoon of onion powder. For an even richer flavor, consider sautéing one finely chopped yellow onion and adding it to your cream mixture.
- 1 cup Sour Cream: This adds a tangy creaminess that balances the richness of the soup and cheese. Full-fat sour cream will yield the best texture. Greek yogurt (plain, full-fat) is an excellent substitute, offering similar tang and creaminess with a potential health boost. For a lighter option, consider light sour cream or a mix of half sour cream and half milk.
- 1/2 cup Milk: Whole milk is preferred for its richness, but 2% or even non-dairy alternatives like unsweetened almond or soy milk can work in a pinch. This helps achieve the perfect pouring consistency for the sauce.
- 1.5 cups Shredded Cheddar Cheese: Sharp cheddar provides a fantastic tangy punch. Feel free to mix it up! A blend of Gruyere, Monterey Jack, or Colby Jack cheese would also be divine. For a smoother melt, shred your cheese from a block rather than using pre-shredded, which can sometimes contain anti-caking agents.
- 1/4 cup Butter: Unsalted butter is recommended to control the saltiness. This adds richness and helps bind the creamy sauce.
- Salt and Black Pepper: To taste. Remember that the French onion soup is already salty, so season cautiously. Freshly ground black pepper adds a lovely subtle heat.
- For the Crispy Fried Onions (Optional but highly recommended):
- 1 medium Yellow Onion, thinly sliced
- 1/2 cup All-Purpose Flour
- 1/4 teaspoon Salt
- 1/4 teaspoon Black Pepper
- Vegetable Oil or other neutral oil for frying (about 1-2 cups)
Perfect Timing for Your Cheesy Potatoes
Compared to the average potato casserole which often takes around 90-120 minutes from start to finish, this recipe is relatively quick, especially if you use pre-shredded cheese or skip the homemade fried onions.
Simple Steps to Potato Perfection
Step 1: Prep the Potatoes
Preheat your oven to 375°F (190°C). Lightly grease a 9×13 inch baking dish with butter or cooking spray. Wash and peel (if desired) your Russet potatoes. Slice them into thin rounds, about 1/8 to 1/4 inch thick. Uniformity is key here for even cooking. You can use a mandoline for perfect slices, but a sharp knife works just as well. Place the sliced potatoes into a large mixing bowl.
Step 2: Create the Creamy Base
In a separate medium bowl, whisk together the condensed French onion soup, sour cream, milk, and melted butter. Stir in the shredded cheddar cheese, reserving about 1/2 cup for topping. Season with salt and freshly ground black pepper to taste. Be mindful of the salt content in the soup. Mix until well combined and smooth. This is where that rich, savory flavor starts to build!
Step 3: Assemble the Casserole
Pour the creamy sauce mixture over the sliced potatoes in the large bowl. Gently toss to coat all the potato slices evenly. Make sure every slice is nestled in that delicious sauce. Transfer the potato and sauce mixture into the prepared baking dish, spreading it out evenly. If you reserved some cheese, sprinkle it over the top now.
Step 4: Bake to Perfection
Cover the baking dish tightly with aluminum foil. This traps the steam, helping the potatoes cook through and become tender. Place the dish in the preheated oven and bake for 45 minutes. After 45 minutes, remove the foil and continue baking for another 15-30 minutes, or until the potatoes are tender when pierced with a fork and the top is bubbly and lightly golden. The exact time will depend on the thickness of your potato slices.
Step 5: Top with Crispy Onions (Optional)
While the casserole is baking, prepare your crispy fried onions if you’re using them. In a shallow bowl, whisk together the flour, salt, and pepper for the onions. Heat about 1-2 inches of vegetable oil in a skillet over medium-high heat until it shimmers. Dredge the thinly sliced onions in the seasoned flour, shaking off any excess. Carefully add the floured onion slices to the hot oil, working in batches to avoid overcrowding. Fry for 2-4 minutes per batch, or until golden brown and crispy. Use a slotted spoon to transfer the fried onions to a plate lined with paper towels to drain. Once the casserole has finished baking and the top is golden, sprinkle these glorious crispy onions over the top. The contrast of creamy potatoes and crunchy onions is pure bliss!
Nutritional Insight
While exact nutritional values can vary based on specific ingredients and portion sizes, a typical serving of this Cheesy Potatoes recipe contains:
- Calories: Approximately 350-450 kcal (this can increase significantly with homemade fried onions and richer cheese).
- Protein: Around 10-15g
- Fat: Approximately 20-30g (with saturated fats making up a significant portion)
- Carbohydrates: Around 30-40g
- Fiber: Roughly 3-5g (higher if potato skins are left on)
Please note: This is an estimation. For precise nutritional information, it’s best to calculate using your specific ingredient quantities.
Making it Lighter Without Sacrificing Flavor
Want to make this comfort classic a bit more health-conscious? Here are a few swaps:
- Potatoes: While Russets are classic, consider adding a layer of sweet potatoes for added nutrients and a touch of sweetness. Leaving the skins on increases fiber content.
- Dairy: Opt for low-fat sour cream or Greek yogurt. Use a reduced-fat milk or a unsweetened, unflavored plant-based milk.
- Cheese: Use a reduced-fat cheddar or Monterey Jack. Or, use less cheese overall and incorporate other flavor enhancers like garlic powder or a pinch of nutmeg.
- Onions: Skip the fried onions altogether. Instead, thinly slice some raw red onion and sprinkle it on top during the last 10-15 minutes of baking for a fresh, sharp crunch. Alternatively, sauté onions with a little olive oil until caramelized for a sweeter, healthier flavor layer.
- Soup Substitute: Use low-sodium chicken or vegetable broth combined with lighter cream or a cornstarch slurry, and amp up the flavor with herbs like thyme and rosemary, and a generous pinch of garlic powder.
Perfect Pairings for Your Cheesy Potatoes
This rich and creamy casserole is a fantastic side dish for a variety of mains:
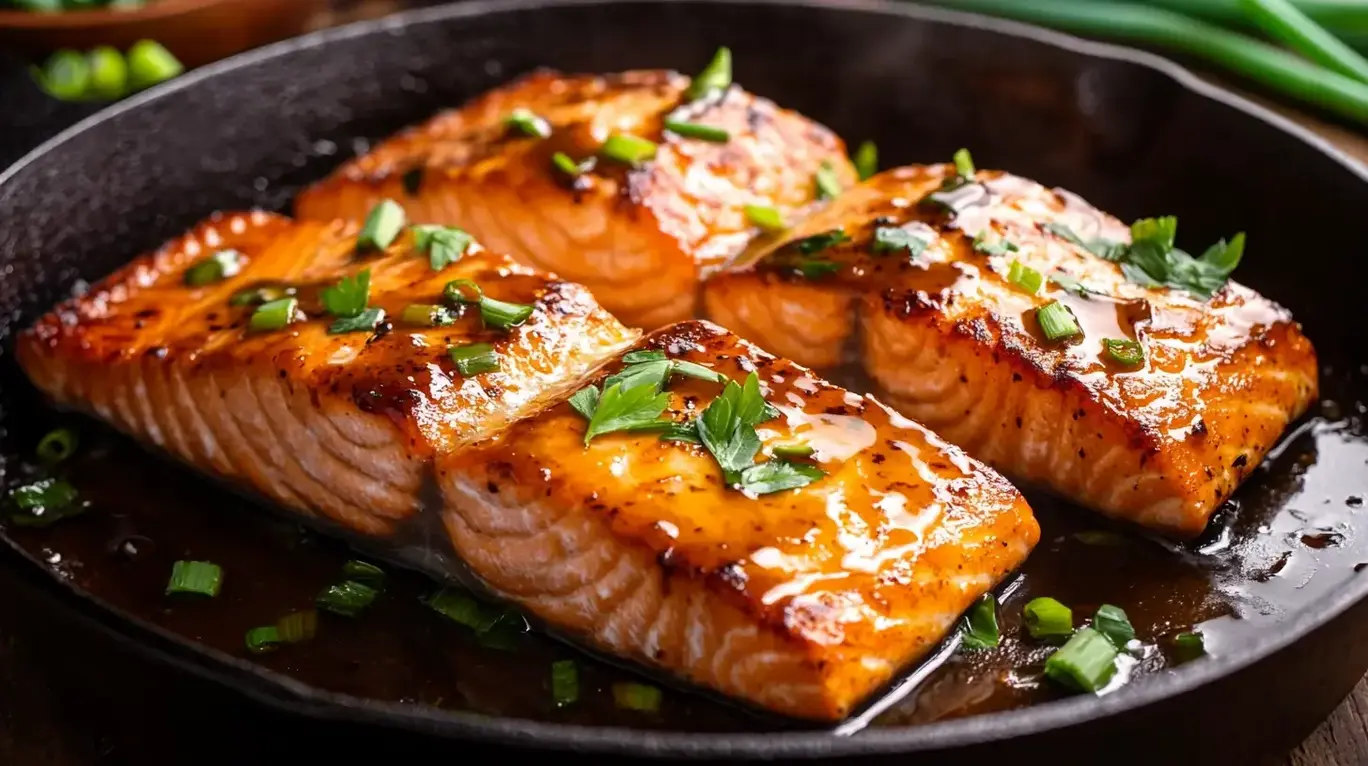
- Roasted Meats: It’s a classic partner for roast chicken, beef, or pork.
- Grilled Proteins: Serve alongside grilled steak, burgers, or chicken breasts.
- Holiday Feasts: A must-have on the Thanksgiving or Christmas table alongside turkey or ham.
- Hearty Salads: For a lighter meal, pair it with a crisp green salad topped with grilled chicken or shrimp.
Common Mistakes to Avoid
To ensure your Cheesy Potatoes turn out perfectly every time:
- Uneven Slices: If your potato slices are too thick or vary greatly in thickness, they won’t cook evenly. Some might be mushy while others remain hard.
- Over-salting: Remember that French onion soup is salty. Taste your sauce before adding extra salt.
- Not Covering: Not covering the casserole during the initial baking phase can lead to dried-out edges and undercooked centers.
- Using Pre-shredded Cheese: As mentioned, this cheese often contains anti-caking agents that can make your sauce less smooth.
- Skipping the Test: Always test for potato tenderness with a fork or knife before declaring it done.
Storing and Reheating Your Masterpiece
Leftovers are a delicious bonus!
- Storage: Cool the casserole completely and store it in an airtight container in the refrigerator for up to 3-4 days.
- Reheating: For the best results, reheat covered in a 350°F (175°C) oven until heated through. You can also gently reheat individual portions in the microwave. The crispy onion topping will lose some of its crispness upon refrigeration and reheating.
- Freezing: This dish freezes reasonably well, though the texture of the potatoes might become slightly softer upon thawing. It’s best to freeze before adding the crispy fried onions. Thaw in the refrigerator overnight, then bake until heated through.
Your New Go-To Comfort Side Dish!
This Cheesy Potatoes recipe is more than just a side dish; it’s an experience. The harmonious blend of creamy potatoes, savory French onion flavor, and the delightful crunch of fried onions creates a culinary masterpiece that’s surprisingly simple to achieve. Whether you’re feeding a hungry family, hosting a dinner party, or simply craving something incredibly comforting, this casserole is sure to be a hit. Don’t be intimidated by making your own fried onions; they truly elevate the dish and are easier than you think! Give this recipe a try and prepare for rave reviews. What are you waiting for? Gather your ingredients and get ready to make the creamiest, cheesiest potatoes your family will ever taste!
Frequently Asked Questions
***Can I make this ahead of time?***
Yes! You can assemble the casserole up to a day in advance. Store it covered in the refrigerator. You may need to add a few extra minutes to the baking time to ensure it heats through completely. It’s best to add the crispy fried onions just before serving.
***What kind of potatoes are best?***
Russet potatoes are ideal due to their high starch content, which makes them wonderfully creamy and fluffy when baked. Yukon Gold potatoes are a good second choice that will also yield a creamy result.
***Can I use regular milk instead of condensed soup?***
While you can substitute the condensed soup with a mixture of broth and cream and spices, it won’t have the same deep, concentrated flavor. The condensed soup is a key flavor component that’s hard to replicate exactly, but the suggested substitute in the ingredients section will provide a delicious alternative.
***My potatoes are still hard after baking. What went wrong?***
Ensure your potato slices are thin and uniform (about 1/8 to 1/4 inch). Also, make sure the casserole was covered during the initial baking phase to allow steam to cook the potatoes through. If they are still tough, continue baking, covered or uncovered, until tender.
***Can I make this dairy-free?***
Yes, with some substitutions! Use a plant-based milk (like unsweetened almond or soy), dairy-free sour cream or a creamy cashew-based sauce, and a plant-based shredded cheese alternative. You’ll need to ensure your condensed soup substitute is also dairy-free.

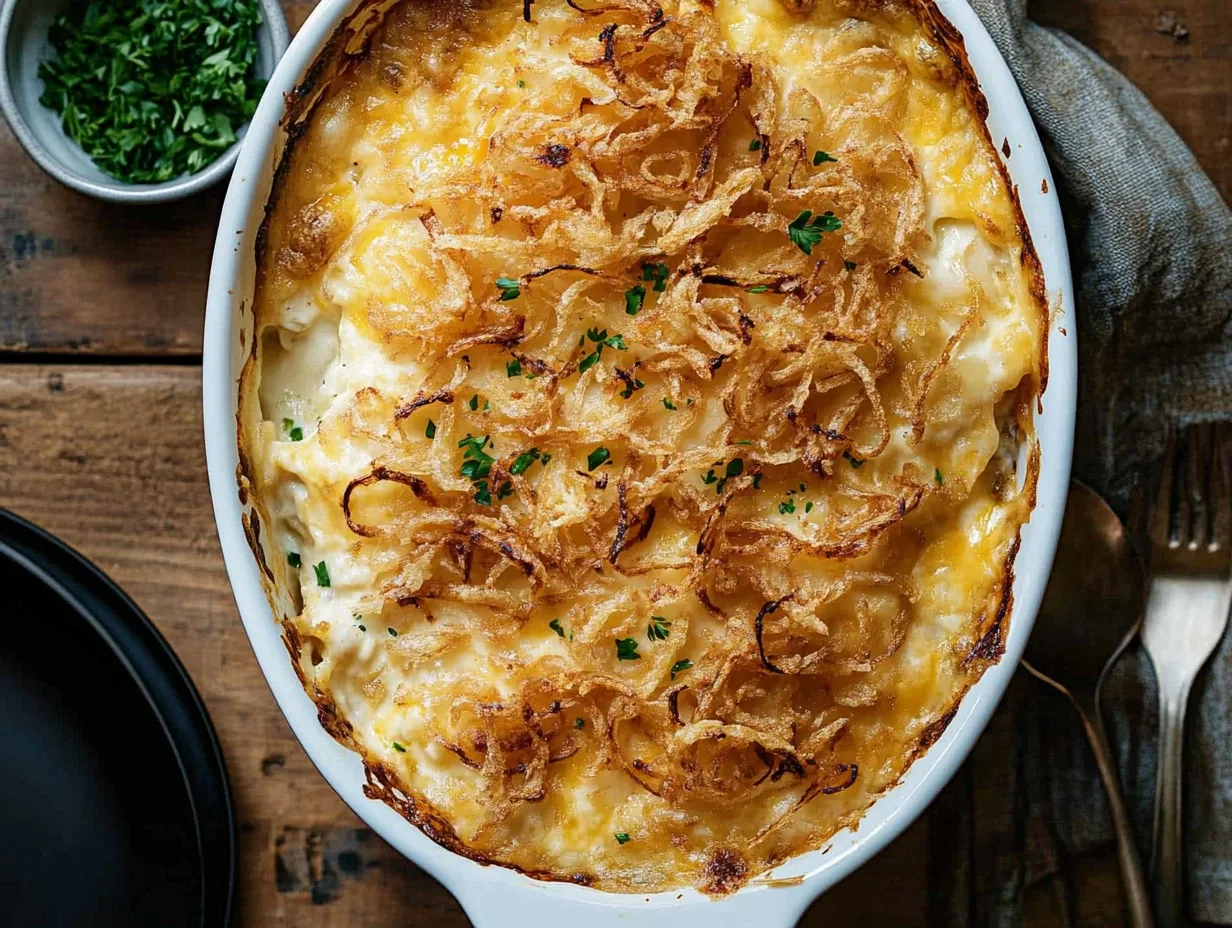
French Onion Funeral Potatoes
Description
A comforting, cheesy casserole with a rich French onion flavor, topped with crispy homemade fried onions. Perfect for gatherings, holidays, or a hearty family dinner!
Ingredients
- 32 ozfrozen cubed hash browns, thawed1/4 cup(1/2 stick /57 g) unsalted butter, melted2 cups(226 g) sharp cheddar cheese, shredded1 1/2 cups(345 g) sour cream
- 1/4 cup(1/2 stick /57 g) unsalted butter, melted2 cups(226 g) sharp cheddar cheese, shredded1 1/2 cups(345 g) sour cream
- 2 cups(226 g) sharp cheddar cheese, shredded1 1/2 cups(345 g) sour cream
- 1 1/2 cups(345 g) sour cream
- 1/4 cup(1/2 stick /57 g) unsalted butter1small yellow onion, diced2 tspgarlic, minced1/4 cup(31 g) all-purpose flour1 tspkosher salt1/2 tspblack pepper1/2 tspcayenne pepper1/2 tspdried mustard1/2 cup(120 g) chicken broth, room temperature1/2 cup(122.5 g) whole milk, room temperature
- 1small yellow onion, diced2 tspgarlic, minced1/4 cup(31 g) all-purpose flour1 tspkosher salt1/2 tspblack pepper1/2 tspcayenne pepper1/2 tspdried mustard1/2 cup(120 g) chicken broth, room temperature1/2 cup(122.5 g) whole milk, room temperature
- 2 tspgarlic, minced1/4 cup(31 g) all-purpose flour1 tspkosher salt1/2 tspblack pepper1/2 tspcayenne pepper1/2 tspdried mustard1/2 cup(120 g) chicken broth, room temperature1/2 cup(122.5 g) whole milk, room temperature
- 1/4 cup(31 g) all-purpose flour1 tspkosher salt1/2 tspblack pepper1/2 tspcayenne pepper1/2 tspdried mustard1/2 cup(120 g) chicken broth, room temperature1/2 cup(122.5 g) whole milk, room temperature
- 1 tspkosher salt1/2 tspblack pepper1/2 tspcayenne pepper1/2 tspdried mustard1/2 cup(120 g) chicken broth, room temperature1/2 cup(122.5 g) whole milk, room temperature
- 1/2 tspblack pepper1/2 tspcayenne pepper1/2 tspdried mustard1/2 cup(120 g) chicken broth, room temperature1/2 cup(122.5 g) whole milk, room temperature
- 1/2 tspcayenne pepper1/2 tspdried mustard1/2 cup(120 g) chicken broth, room temperature1/2 cup(122.5 g) whole milk, room temperature
- 1/2 tspdried mustard1/2 cup(120 g) chicken broth, room temperature1/2 cup(122.5 g) whole milk, room temperature
- 1/2 cup(120 g) chicken broth, room temperature1/2 cup(122.5 g) whole milk, room temperature
- 1/2 cup(122.5 g) whole milk, room temperature
- 2large yellow onions, thinly sliced (about4 cupsonions)4 cups(32 oz) vegetable oil1/2 tspkosher salt
- 4 cups(32 oz) vegetable oil1/2 tspkosher salt
- 1/2 tspkosher salt
Instructions
- 1️⃣Preheat the Oven:Preheat the oven to 350°F (175°C).Spray a 9×13-inch baking dish with nonstick spray.2️⃣Prepare the Potato Mixture:In a large bowl, combine the hash browns, melted butter, shredded cheese, and sour cream. Mix well and set aside.3️⃣Make the Sauce:In a medium, non-stick skillet over medium heat, melt the butter.Add the diced onion and cook until softened, about 3-5 minutes. Add the garlic and cook for 1 more minute.Stir in the flour, kosher salt, black pepper, cayenne pepper, and dried mustard. Cook for another minute.Gradually whisk in the chicken broth and milk, whisking continuously until smooth.Continue cooking, whisking often, until the sauce thickens.4️⃣Combine and Bake:Pour the prepared sauce into the potato mixture and mix until well combined.Spread the mixture evenly into the prepared baking dish.Bake for 45-50 minutes, or until the casserole is bubbly and heated through.5️⃣Prepare the Fried Onions:Line a large baking sheet with two layers of paper towels and set aside.Heat the vegetable oil in a large saucepan over high heat until it reaches 350°F (175°C).Working in batches, fry 1 cup of sliced onions at a time in the hot oil. Fry, stirring occasionally, until the onions are pale golden brown, about 2-5 minutes per batch.Using a slotted spoon or fine mesh strainer, transfer the fried onions to the prepared baking sheet.Sprinkle the fried onions with kosher salt while they are still warm, tossing to coat evenly.6️⃣Top and Serve:Once the casserole has baked for 45-50 minutes, remove it from the oven.Sprinkle the crispy fried onions evenly over the top of the hot casserole.Serve immediately and enjoy!
- Preheat the oven to 350°F (175°C).Spray a 9×13-inch baking dish with nonstick spray.2️⃣Prepare the Potato Mixture:In a large bowl, combine the hash browns, melted butter, shredded cheese, and sour cream. Mix well and set aside.3️⃣Make the Sauce:In a medium, non-stick skillet over medium heat, melt the butter.Add the diced onion and cook until softened, about 3-5 minutes. Add the garlic and cook for 1 more minute.Stir in the flour, kosher salt, black pepper, cayenne pepper, and dried mustard. Cook for another minute.Gradually whisk in the chicken broth and milk, whisking continuously until smooth.Continue cooking, whisking often, until the sauce thickens.4️⃣Combine and Bake:Pour the prepared sauce into the potato mixture and mix until well combined.Spread the mixture evenly into the prepared baking dish.Bake for 45-50 minutes, or until the casserole is bubbly and heated through.5️⃣Prepare the Fried Onions:Line a large baking sheet with two layers of paper towels and set aside.Heat the vegetable oil in a large saucepan over high heat until it reaches 350°F (175°C).Working in batches, fry 1 cup of sliced onions at a time in the hot oil. Fry, stirring occasionally, until the onions are pale golden brown, about 2-5 minutes per batch.Using a slotted spoon or fine mesh strainer, transfer the fried onions to the prepared baking sheet.Sprinkle the fried onions with kosher salt while they are still warm, tossing to coat evenly.6️⃣Top and Serve:Once the casserole has baked for 45-50 minutes, remove it from the oven.Sprinkle the crispy fried onions evenly over the top of the hot casserole.Serve immediately and enjoy!
- Spray a 9×13-inch baking dish with nonstick spray.
- 2️⃣Prepare the Potato Mixture:In a large bowl, combine the hash browns, melted butter, shredded cheese, and sour cream. Mix well and set aside.3️⃣Make the Sauce:In a medium, non-stick skillet over medium heat, melt the butter.Add the diced onion and cook until softened, about 3-5 minutes. Add the garlic and cook for 1 more minute.Stir in the flour, kosher salt, black pepper, cayenne pepper, and dried mustard. Cook for another minute.Gradually whisk in the chicken broth and milk, whisking continuously until smooth.Continue cooking, whisking often, until the sauce thickens.4️⃣Combine and Bake:Pour the prepared sauce into the potato mixture and mix until well combined.Spread the mixture evenly into the prepared baking dish.Bake for 45-50 minutes, or until the casserole is bubbly and heated through.5️⃣Prepare the Fried Onions:Line a large baking sheet with two layers of paper towels and set aside.Heat the vegetable oil in a large saucepan over high heat until it reaches 350°F (175°C).Working in batches, fry 1 cup of sliced onions at a time in the hot oil. Fry, stirring occasionally, until the onions are pale golden brown, about 2-5 minutes per batch.Using a slotted spoon or fine mesh strainer, transfer the fried onions to the prepared baking sheet.Sprinkle the fried onions with kosher salt while they are still warm, tossing to coat evenly.6️⃣Top and Serve:Once the casserole has baked for 45-50 minutes, remove it from the oven.Sprinkle the crispy fried onions evenly over the top of the hot casserole.Serve immediately and enjoy!
- In a large bowl, combine the hash browns, melted butter, shredded cheese, and sour cream. Mix well and set aside.3️⃣Make the Sauce:In a medium, non-stick skillet over medium heat, melt the butter.Add the diced onion and cook until softened, about 3-5 minutes. Add the garlic and cook for 1 more minute.Stir in the flour, kosher salt, black pepper, cayenne pepper, and dried mustard. Cook for another minute.Gradually whisk in the chicken broth and milk, whisking continuously until smooth.Continue cooking, whisking often, until the sauce thickens.4️⃣Combine and Bake:Pour the prepared sauce into the potato mixture and mix until well combined.Spread the mixture evenly into the prepared baking dish.Bake for 45-50 minutes, or until the casserole is bubbly and heated through.5️⃣Prepare the Fried Onions:Line a large baking sheet with two layers of paper towels and set aside.Heat the vegetable oil in a large saucepan over high heat until it reaches 350°F (175°C).Working in batches, fry 1 cup of sliced onions at a time in the hot oil. Fry, stirring occasionally, until the onions are pale golden brown, about 2-5 minutes per batch.Using a slotted spoon or fine mesh strainer, transfer the fried onions to the prepared baking sheet.Sprinkle the fried onions with kosher salt while they are still warm, tossing to coat evenly.6️⃣Top and Serve:Once the casserole has baked for 45-50 minutes, remove it from the oven.Sprinkle the crispy fried onions evenly over the top of the hot casserole.Serve immediately and enjoy!
- 3️⃣Make the Sauce:
- In a medium, non-stick skillet over medium heat, melt the butter.Add the diced onion and cook until softened, about 3-5 minutes. Add the garlic and cook for 1 more minute.Stir in the flour, kosher salt, black pepper, cayenne pepper, and dried mustard. Cook for another minute.Gradually whisk in the chicken broth and milk, whisking continuously until smooth.Continue cooking, whisking often, until the sauce thickens.4️⃣Combine and Bake:Pour the prepared sauce into the potato mixture and mix until well combined.Spread the mixture evenly into the prepared baking dish.Bake for 45-50 minutes, or until the casserole is bubbly and heated through.5️⃣Prepare the Fried Onions:Line a large baking sheet with two layers of paper towels and set aside.Heat the vegetable oil in a large saucepan over high heat until it reaches 350°F (175°C).Working in batches, fry 1 cup of sliced onions at a time in the hot oil. Fry, stirring occasionally, until the onions are pale golden brown, about 2-5 minutes per batch.Using a slotted spoon or fine mesh strainer, transfer the fried onions to the prepared baking sheet.Sprinkle the fried onions with kosher salt while they are still warm, tossing to coat evenly.6️⃣Top and Serve:Once the casserole has baked for 45-50 minutes, remove it from the oven.Sprinkle the crispy fried onions evenly over the top of the hot casserole.Serve immediately and enjoy!
- Add the diced onion and cook until softened, about 3-5 minutes. Add the garlic and cook for 1 more minute.Stir in the flour, kosher salt, black pepper, cayenne pepper, and dried mustard. Cook for another minute.Gradually whisk in the chicken broth and milk, whisking continuously until smooth.Continue cooking, whisking often, until the sauce thickens.4️⃣Combine and Bake:Pour the prepared sauce into the potato mixture and mix until well combined.Spread the mixture evenly into the prepared baking dish.Bake for 45-50 minutes, or until the casserole is bubbly and heated through.5️⃣Prepare the Fried Onions:Line a large baking sheet with two layers of paper towels and set aside.Heat the vegetable oil in a large saucepan over high heat until it reaches 350°F (175°C).Working in batches, fry 1 cup of sliced onions at a time in the hot oil. Fry, stirring occasionally, until the onions are pale golden brown, about 2-5 minutes per batch.Using a slotted spoon or fine mesh strainer, transfer the fried onions to the prepared baking sheet.Sprinkle the fried onions with kosher salt while they are still warm, tossing to coat evenly.6️⃣Top and Serve:Once the casserole has baked for 45-50 minutes, remove it from the oven.Sprinkle the crispy fried onions evenly over the top of the hot casserole.Serve immediately and enjoy!
- Stir in the flour, kosher salt, black pepper, cayenne pepper, and dried mustard. Cook for another minute.
- Gradually whisk in the chicken broth and milk, whisking continuously until smooth.Continue cooking, whisking often, until the sauce thickens.4️⃣Combine and Bake:Pour the prepared sauce into the potato mixture and mix until well combined.Spread the mixture evenly into the prepared baking dish.Bake for 45-50 minutes, or until the casserole is bubbly and heated through.5️⃣Prepare the Fried Onions:Line a large baking sheet with two layers of paper towels and set aside.Heat the vegetable oil in a large saucepan over high heat until it reaches 350°F (175°C).Working in batches, fry 1 cup of sliced onions at a time in the hot oil. Fry, stirring occasionally, until the onions are pale golden brown, about 2-5 minutes per batch.Using a slotted spoon or fine mesh strainer, transfer the fried onions to the prepared baking sheet.Sprinkle the fried onions with kosher salt while they are still warm, tossing to coat evenly.6️⃣Top and Serve:Once the casserole has baked for 45-50 minutes, remove it from the oven.Sprinkle the crispy fried onions evenly over the top of the hot casserole.Serve immediately and enjoy!
- Continue cooking, whisking often, until the sauce thickens.4️⃣Combine and Bake:Pour the prepared sauce into the potato mixture and mix until well combined.Spread the mixture evenly into the prepared baking dish.Bake for 45-50 minutes, or until the casserole is bubbly and heated through.5️⃣Prepare the Fried Onions:Line a large baking sheet with two layers of paper towels and set aside.Heat the vegetable oil in a large saucepan over high heat until it reaches 350°F (175°C).Working in batches, fry 1 cup of sliced onions at a time in the hot oil. Fry, stirring occasionally, until the onions are pale golden brown, about 2-5 minutes per batch.Using a slotted spoon or fine mesh strainer, transfer the fried onions to the prepared baking sheet.Sprinkle the fried onions with kosher salt while they are still warm, tossing to coat evenly.6️⃣Top and Serve:Once the casserole has baked for 45-50 minutes, remove it from the oven.Sprinkle the crispy fried onions evenly over the top of the hot casserole.Serve immediately and enjoy!
- 4️⃣Combine and Bake:
- Pour the prepared sauce into the potato mixture and mix until well combined.Spread the mixture evenly into the prepared baking dish.Bake for 45-50 minutes, or until the casserole is bubbly and heated through.5️⃣Prepare the Fried Onions:Line a large baking sheet with two layers of paper towels and set aside.Heat the vegetable oil in a large saucepan over high heat until it reaches 350°F (175°C).Working in batches, fry 1 cup of sliced onions at a time in the hot oil. Fry, stirring occasionally, until the onions are pale golden brown, about 2-5 minutes per batch.Using a slotted spoon or fine mesh strainer, transfer the fried onions to the prepared baking sheet.Sprinkle the fried onions with kosher salt while they are still warm, tossing to coat evenly.6️⃣Top and Serve:Once the casserole has baked for 45-50 minutes, remove it from the oven.Sprinkle the crispy fried onions evenly over the top of the hot casserole.Serve immediately and enjoy!
- Spread the mixture evenly into the prepared baking dish.Bake for 45-50 minutes, or until the casserole is bubbly and heated through.5️⃣Prepare the Fried Onions:Line a large baking sheet with two layers of paper towels and set aside.Heat the vegetable oil in a large saucepan over high heat until it reaches 350°F (175°C).Working in batches, fry 1 cup of sliced onions at a time in the hot oil. Fry, stirring occasionally, until the onions are pale golden brown, about 2-5 minutes per batch.Using a slotted spoon or fine mesh strainer, transfer the fried onions to the prepared baking sheet.Sprinkle the fried onions with kosher salt while they are still warm, tossing to coat evenly.6️⃣Top and Serve:Once the casserole has baked for 45-50 minutes, remove it from the oven.Sprinkle the crispy fried onions evenly over the top of the hot casserole.Serve immediately and enjoy!
- Bake for 45-50 minutes, or until the casserole is bubbly and heated through.
- 5️⃣Prepare the Fried Onions:Line a large baking sheet with two layers of paper towels and set aside.Heat the vegetable oil in a large saucepan over high heat until it reaches 350°F (175°C).Working in batches, fry 1 cup of sliced onions at a time in the hot oil. Fry, stirring occasionally, until the onions are pale golden brown, about 2-5 minutes per batch.Using a slotted spoon or fine mesh strainer, transfer the fried onions to the prepared baking sheet.Sprinkle the fried onions with kosher salt while they are still warm, tossing to coat evenly.6️⃣Top and Serve:Once the casserole has baked for 45-50 minutes, remove it from the oven.Sprinkle the crispy fried onions evenly over the top of the hot casserole.Serve immediately and enjoy!
- Line a large baking sheet with two layers of paper towels and set aside.Heat the vegetable oil in a large saucepan over high heat until it reaches 350°F (175°C).Working in batches, fry 1 cup of sliced onions at a time in the hot oil. Fry, stirring occasionally, until the onions are pale golden brown, about 2-5 minutes per batch.Using a slotted spoon or fine mesh strainer, transfer the fried onions to the prepared baking sheet.Sprinkle the fried onions with kosher salt while they are still warm, tossing to coat evenly.6️⃣Top and Serve:Once the casserole has baked for 45-50 minutes, remove it from the oven.Sprinkle the crispy fried onions evenly over the top of the hot casserole.Serve immediately and enjoy!
- Heat the vegetable oil in a large saucepan over high heat until it reaches 350°F (175°C).
- Working in batches, fry 1 cup of sliced onions at a time in the hot oil. Fry, stirring occasionally, until the onions are pale golden brown, about 2-5 minutes per batch.Using a slotted spoon or fine mesh strainer, transfer the fried onions to the prepared baking sheet.Sprinkle the fried onions with kosher salt while they are still warm, tossing to coat evenly.6️⃣Top and Serve:Once the casserole has baked for 45-50 minutes, remove it from the oven.Sprinkle the crispy fried onions evenly over the top of the hot casserole.Serve immediately and enjoy!
- Using a slotted spoon or fine mesh strainer, transfer the fried onions to the prepared baking sheet.Sprinkle the fried onions with kosher salt while they are still warm, tossing to coat evenly.6️⃣Top and Serve:Once the casserole has baked for 45-50 minutes, remove it from the oven.Sprinkle the crispy fried onions evenly over the top of the hot casserole.Serve immediately and enjoy!
- Sprinkle the fried onions with kosher salt while they are still warm, tossing to coat evenly.
- 6️⃣Top and Serve:Once the casserole has baked for 45-50 minutes, remove it from the oven.Sprinkle the crispy fried onions evenly over the top of the hot casserole.Serve immediately and enjoy!
- Once the casserole has baked for 45-50 minutes, remove it from the oven.Sprinkle the crispy fried onions evenly over the top of the hot casserole.Serve immediately and enjoy!
- Sprinkle the crispy fried onions evenly over the top of the hot casserole.
- Serve immediately and enjoy!
Notes
Make it Ahead:Prepare the casserole (without the fried onions) a day in advance, cover, and refrigerate. Bake when ready and top with freshly fried onions.Cheese Variations:Swap sharp cheddar for Gruyère, Monterey Jack, or a mix for added depth.Shortcut Option:Use store-bought French-fried onions for a quicker topping.
Cheese Variations:Swap sharp cheddar for Gruyère, Monterey Jack, or a mix for added depth.Shortcut Option:Use store-bought French-fried onions for a quicker topping.
Shortcut Option:Use store-bought French-fried onions for a quicker topping.
“`