Table of Contents
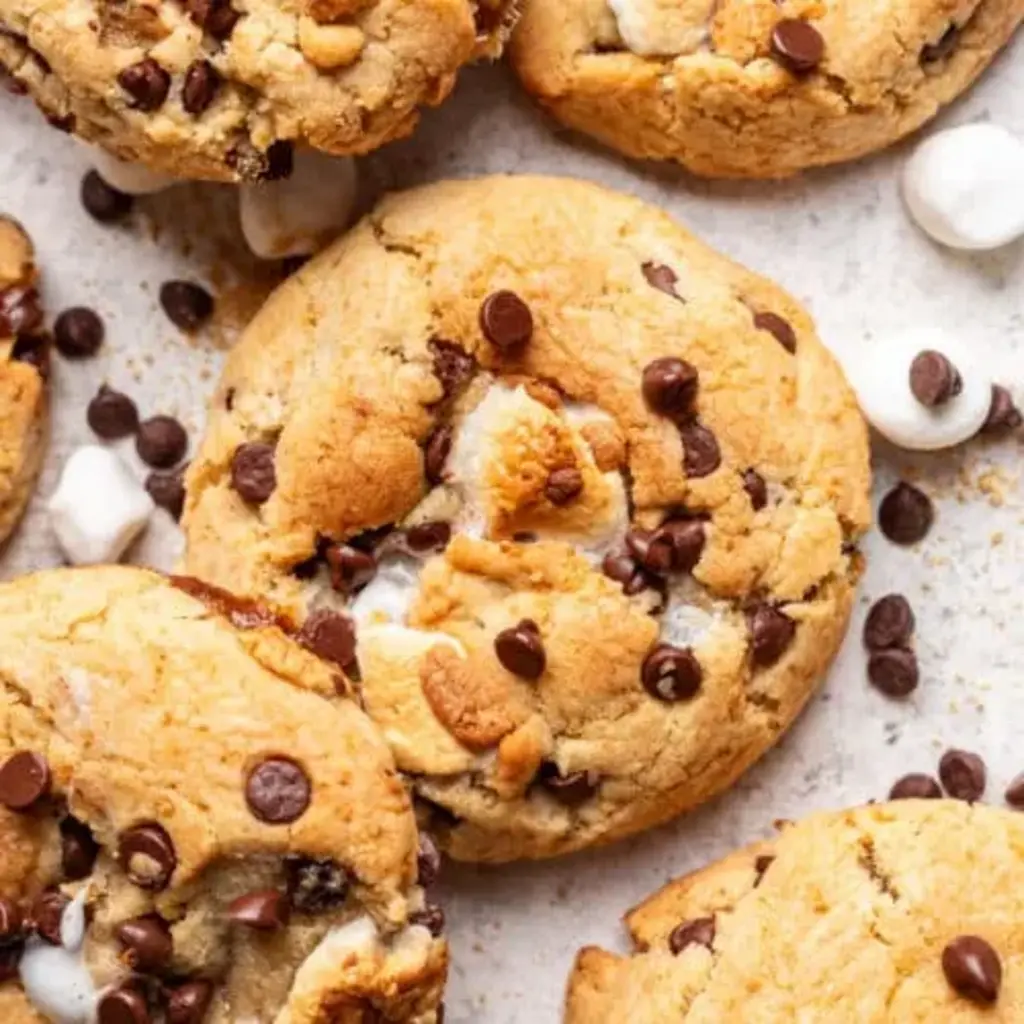
S’mores Cookies Recipe – 30-Minute Campfire Cookies with Perfectly Gooey Marshmallows
I still remember the first time I tasted s’mores as a kid—not around a campfire in the Adirondacks, but on a rooftop in Marrakech, where my mother had toasted marshmallows over a tiny charcoal brazier and sandwiched them between sesame crackers. That smoky-sweet bite stayed with me. Now, living in New York City, I’ve turned that memory into these quick and easy s’mores cookies: soft, buttery cookies studded with melty chocolate chips, gooey marshmallow bits, and crunchy graham cracker crumbs. This easy s’mores cookies recipe captures the soul of a campfire treat in under 30 minutes, no fire pit required.
The first time you pull a tray of these marshmallow chocolate cookies from the oven, you’ll understand why they’ve become my most-requested recipe at every dinner party and bake sale. The kitchen fills with the warm scent of toasted marshmallow and cocoa—deeply nostalgic, irresistibly cozy. The edges are crisp and golden, the centers soft and pillowy, and every bite delivers that classic s’mores trio: crunchy graham, rich chocolate, and airy marshmallow. There’s a reason this flavor combination has stood the test of time.
I developed this campfire cookies recipe to solve the two biggest problems home bakers face: marshmallows that melt into puddles and cookies that spread into flat discs. My French pastry training taught me the importance of ingredient temperature and dough structure, while my Moroccan roots remind me that the best food brings people together. In this post, I’ll share my tested technique for keeping marshmallows intact, plus the one rookie mistake that ruins the texture. Let’s bake something unforgettable.
Why This S’mores Cookies Recipe Is the Best
The Flavor Secret. Most s’mores cookies recipes rely on whole graham crackers stirred into the dough, which turn soft and lose their snap. I take a different approach: I use fine graham cracker crumbs in the dough itself and reserve a handful to press onto the tops before baking. This creates a gentle crunch in every bite without overwhelming the cookie. The chocolate chips are mini semisweet—small enough to distribute evenly but bold enough to stand up to the sweet marshmallow. It’s a balance I learned from years of pairing bold North African spices with delicate French pastry—every element must earn its place.
Perfected Texture. The key to a cookie that’s crisp at the edges and tender in the center lies in how you handle the butter. I microwave it just until melted—never hot—then whisk it with the sugars until the mixture looks like wet sand. This technique, called the “creamed butter shortcut,” gives you the chew of a chilled dough without the waiting time. The marshmallows are halved and stirred in at the very end, so they stay suspended in the dough rather than sinking to the bottom. Every cookie bakes up with pockets of melted marshmallow and a soft, bakery-style crumb.
Foolproof & Fast. This is the kind of recipe I turn to on a busy Tuesday night when I need a dessert that feels special but takes almost no effort. The dough comes together in one bowl with a whisk and a spatula—no stand mixer required. From start to finish, you’re looking at about 22 minutes. Even if you’ve never made cookies from scratch before, the visual cues I’ve included (the way the dough should look, how the cookies should appear when they come out of the oven) will guide you to perfect results. I’ve tested this recipe with home bakers of all skill levels, and it works every single time.
S’mores Cookies Recipe Ingredients
I pick up my butter and eggs from the Union Square Greenmarket on Saturday mornings—the dairy from a family farm in Hudson Valley makes a real difference in flavor. The graham cracker crumbs remind me of the simple pantry cookies my grandmother used to make in Fez. Every ingredient here has a job to do, and together they create that unmistakable s’mores magic.
Ingredients List
- ½ cup butter (1 stick, unsalted)
- ½ cup granulated sugar
- ¼ cup light brown sugar (packed)
- 1 teaspoon vanilla extract
- 1 large egg (room temperature)
- 1 cup all-purpose flour (spooned and leveled)
- ½ teaspoon baking soda
- ¼ teaspoon salt
- ½ cup mini semisweet chocolate chips
- ½ cup mini marshmallows (halved)
- ¼ cup graham cracker crumbs (plus extra for topping)
Ingredient Spotlight
Butter: Unsalted butter gives you control over the salt level. I use European-style butter (like Plugrà or Kerrygold) for its higher fat content, which produces a richer flavor and a softer crumb. If you only have salted butter, reduce the added salt to ⅛ teaspoon. The butter should be melted and slightly warm—not hot—so it emulsifies properly with the sugar.
Graham Cracker Crumbs: I use store-bought fine crumbs (like Kinnikinnick or Nabisco) for convenience. If you prefer whole graham crackers, crush about 3–4 full sheets in a zip-top bag with a rolling pin until you have fine crumbs with a few small pebbly bits for texture. Do not use the coarse crumbs meant for cheesecake crusts—they are too large and will make the cookies crumbly.
Mini Marshmallows: Mini marshmallows are smaller than regular ones, so they distribute more evenly and melt at a slower rate. Jet-Puffed brand works well. I cut each mini marshmallow in half with kitchen scissors—this creates more surface area for browning without causing the marshmallow to disappear into the dough. Do not use jumbo marshmallows; they create large air pockets and uneven baking.
Chocolate Chips: Mini semisweet chips are ideal because they melt quickly and spread their flavor throughout the dough without overwhelming the other ingredients. You can substitute milk chocolate chips for a sweeter cookie, or dark chocolate (60–70%) for a deeper, more sophisticated flavor. If using regular-sized chips, chop them roughly so they distribute evenly.
| Original Ingredient | Best Substitution | Flavor / Texture Impact |
|---|---|---|
| Butter (unsalted) | Salted butter (reduce added salt) | Slightly saltier flavor; softer dough |
| Mini semisweet chocolate chips | Roughly chopped dark chocolate (60–70%) | Richer, less sweet; irregular melted pools |
| Graham cracker crumbs | Crushed digestive biscuits or speculoos | More spice flavor (speculoos); less sweet |
| Mini marshmallows | Marshmallow creme (2 tbsp, swirled in) | Gooier, no browned spots; harder to shape |
How to Make S’mores Cookies — Step-by-Step
This easy s’mores cookies recipe comes together in one bowl and bakes in under 15 minutes. Follow these steps, and you’ll have warm, gooey cookies that taste like a campfire in the best possible way.
Step 1: Melt the Butter
Place ½ cup butter in a microwave-safe bowl and microwave for about 40 seconds. Whisk until the butter is completely melted and smooth. It should be warm but not steaming hot—if it’s too hot, let it cool for 1 minute before proceeding.
💡 mia’s Pro Tip: Microwave butter in 10-second bursts after the first 40 seconds to avoid splattering. If you accidentally get it too hot, stir in one tablespoon of cold water and let it sit for 2 minutes.
Step 2: Mix Wet Ingredients
Add ½ cup granulated sugar and ¼ cup packed light brown sugar to the melted butter. Whisk vigorously for about 45 seconds until the mixture looks like wet sand and has slightly lightened in color. Stir in 1 teaspoon vanilla and 1 large egg until fully incorporated and smooth.
⚠️ Common Mistake to Avoid: Adding the egg when the butter is too hot will scramble it. Test with your finger—the mixture should feel warm, not hot, before you add the egg.
Step 3: Add Dry Ingredients
Add 1 cup all-purpose flour, ½ teaspoon baking soda, and ¼ teaspoon salt. Stir with a spatula or wooden spoon until just combined—a few streaks of flour are fine. Do not overmix, or the cookies will become tough. The dough should be soft and a little sticky but still hold together when pressed.
💡 mia’s Pro Tip: Properly measure your flour by spooning it into the measuring cup and leveling off the top with a knife. Scooping directly from the bag packs in up to 25% more flour, which makes cookies dry and dense.
Step 4: Fold In Mix-Ins
Gently fold in ½ cup mini chocolate chips, ½ cup halved mini marshmallows, and ¼ cup graham cracker crumbs. Fold just until evenly distributed—about 8 to 10 strokes. The dough will look bumpy and uneven, which is exactly what you want.
⚠️ Common Mistake to Avoid: Overfolding melts the marshmallows into the dough, creating a sticky mess and flat cookies. Fold gently and stop as soon as the mix-ins are evenly scattered.
Step 5: Scoop and Bake
Preheat the oven to 350°F. Line a baking sheet with parchment paper. Scoop out 3 tablespoons of dough (a medium cookie scoop works perfectly) and place the mounds about 2 inches apart on the sheet. Optional: press a few extra graham cracker crumbs and one mini marshmallow half onto the top of each cookie for a prettier finish.
Bake for 10 to 15 minutes, or until the cookies are set around the edges and puffy in the center. They will look slightly underbaked in the middle—that’s exactly what you want. Let them cool on the baking sheet for 5 minutes before transferring to a wire rack.
💡 mia’s Pro Tip: For perfectly gooey marshmallows, pull the cookies out of the oven when the marshmallows are puffed and lightly golden on top. If the marshmallows have turned deep brown, they’ve melted too much and will deflate into hard disks as they cool.
| Step | Action | Duration | Key Visual Cue |
|---|---|---|---|
| 1 | Melt butter | 40 sec | Butter is liquid, warm, not bubbling |
| 2 | Mix wet ingredients | 2 min | Mixture looks like wet sand, slightly lighter |
| 3 | Add dry ingredients | 1 min | Dough is soft, slightly sticky, no flour streaks |
| 4 | Fold in mix-ins | 30 sec | Mix-ins evenly distributed, dough bumpy |
| 5 | Scoop and bake | 10–15 min | Edges set, center puffy, marshmallows golden |
Serving & Presentation
These s’mores cookies are at their absolute best when served warm, about 10 minutes after they come out of the oven. The marshmallows are still stretchy, the chocolate is melted, and the graham cracker crumbs add a gentle crunch. I like to arrange them on a wooden board or a rustic ceramic platter—something that reminds me of the hand-painted tagines my mother used to serve weekend feasts on in Marrakech.
For a truly indulgent dessert, sandwich two cookies with a square of dark chocolate and a toasted marshmallow, then place the whole thing back in the oven for 2 minutes to create an over-the-top s’mores cookie sandwich. My NYC friends go wild for this when I serve it at my apartment in Chelsea. A cold glass of milk or a scoop of vanilla bean ice cream on the side turns these cookies into a full-blown dessert experience.
| Pairing Type | Suggestions | Why It Works |
|---|---|---|
| Side Dish | Fresh berries, sliced bananas, apple slices | Bright acidity cuts through rich chocolate and marshmallow |
| Sauce / Dip | Warm chocolate sauce, caramel sauce, peanut butter drizzle | Extra decadence; peanut butter adds salty contrast |
| Beverage | Cold milk, hot cocoa, coffee, chai latte, cold brew | Creamy or bold drinks balance the cookie’s sweetness |
| Garnish | Flaky sea salt, extra graham cracker crumbs, mint sprig | Salt enhances chocolate; mint adds freshness |
Make-Ahead, Storage & Reheating
Between my pastry classes and my food blog, I rarely have time to bake cookies fresh for every occasion. That’s why I always prep a double batch of this s’mores cookies recipe on Sunday afternoons. The dough freezes beautifully, and the baked cookies stay soft for days when stored properly. Here’s my tested system for keeping them at their best.
| Method | Container | Duration | Reheating Tip |
|---|---|---|---|
| Refrigerator | Airtight container with paper towel | Up to 5 days | Microwave 10 seconds or oven at 300°F for 5 min |
| Freezer | Freezer-safe bag or container, layers separated by parchment | Up to 3 months | Thaw at room temp 30 min, then warm 5 min at 300°F |
| Make-Ahead | Scooped dough balls on parchment-lined tray, covered | Up to 3 days in fridge; 3 months in freezer | Bake frozen dough +2 minutes; no need to thaw |
To keep these marshmallow chocolate cookies fresh and chewy, add a slice of bread to the storage container—the cookies will absorb moisture from the bread rather than drying out. Swap the bread slice every 2 days. If the cookies have lost their softness, a quick 5-second zap in the microwave brings back the gooey texture. Just be careful not to overheat, or the marshmallows will turn into hard little rocks.
For make-ahead convenience, I scoop the dough into balls, place them on a parchment-lined tray, and freeze until solid (about 1 hour). Then I transfer the frozen dough balls to a zip-top bag. When a craving hits, I bake them straight from frozen, adding 2 to 3 minutes to the baking time. The cookies come out exactly as tender as fresh-made—perfect for unexpected guests or late-night dessert emergencies.
Variations & Easy Swaps
One of the things I love most about this s’mores cookies recipe is how easily it adapts to different tastes and dietary needs. Over the years, I’ve developed several variations that keep the soul of the original while adding new layers of flavor. Here are my favorites.
| Variation | Key Change | Best For | Difficulty Impact |
|---|---|---|---|
| Dark Chocolate Sea Salt | Swap mini chips for chopped 70% dark chocolate; top with flaky sea salt | Adults who love sophisticated sweet-salty desserts | No change |
| Gluten-Free | Use 1:1 gluten-free flour blend; confirm graham crumbs are GF | Gluten-sensitive bakers; potlucks with mixed diets | Easy |
| Peanut Butter S’mores | Reduce butter to 6 tbsp; add ¼ cup creamy peanut butter | Peanut butter lovers; lunchbox treats | Easy (mix PB with butter before sugar) |
Dark Chocolate Sea Salt Variation
For a more grown-up take on these graham cracker cookies, replace the mini semisweet chips with ½ cup of roughly chopped 70% dark chocolate. The irregular pieces create pools of intense, bittersweet chocolate throughout the cookie. Just before baking, sprinkle a tiny pinch of flaky sea salt (I use Maldon) on top of each dough ball. The salt amplifies the chocolate and balances the sweetness of the marshmallow—a technique I picked up at a pastry workshop in Paris. This version is my go-to for dinner party desserts.
Gluten-Free Variation
To make these campfire cookies gluten-free, substitute the all-purpose flour with a high-quality 1:1 gluten-free flour blend that contains xanthan gum (I recommend Bob’s Red Mill 1-to-1 Baking Flour). Also check that your graham cracker crumbs are certified gluten-free—Kinnikinnick makes a great GF option. The cookies will be slightly more delicate and spread a tiny bit more, so chill the dough for 15 minutes before scooping. The flavor remains spot-on, and the texture is nearly indistinguishable from the original. My gluten-sensitive friends request these every time I bring cookies to the Bryant Park picnic.
Peanut Butter S’mores Variation
This variation was born on a rainy Sunday when I was testing recipes for a New York City bake sale. Reduce the butter to 6 tablespoons and add ¼ cup creamy peanut butter (I use Skippy natural) along with the sugars. Whisk until smooth before adding the egg. The peanut butter adds richness and a savory note that plays beautifully with the chocolate and marshmallow. For an extra peanut butter punch, press a few peanut butter chips onto the tops of the cookies before baking. This version disappears fastest at every event I bring it to.
How do you keep s’mores cookies from spreading too much while baking?
To keep your s’mores cookies from spreading into flat discs, start with properly measured flour—spoon it into the cup and level it off. The dough should be soft but not greasy. Chilling the dough for 20 minutes before baking firms up the butter and solidifies the structure. Additionally, make sure your baking sheet is cool when you place the dough on it; a hot sheet causes immediate spreading. Use parchment paper rather than greased baking spray, which can encourage overspread. Finally, bake at 350°F, not a higher temperature, so the cookies set gradually rather than melting outward.
What is the best way to keep the marshmallows from melting completely in s’mores cookies?
Mini marshmallows are your best friend here—they are smaller and contain less moisture than jumbo marshmallows, so they melt more slowly. Cut each mini marshmallow in half with kitchen scissors; this exposes more surface area for toasting without causing the marshmallow to disappear into the dough. Fold them in at the very end of mixing, using just 8 to 10 gentle strokes, and avoid overmixing. For extra insurance, press a few marshmallow halves onto the tops of the cookie dough balls just before baking—they will puff up and brown beautifully while the interior marshmallows stay soft and gooey.
Can I use graham cracker crumbs instead of whole graham crackers in s’mores cookies?
Absolutely. In fact, I recommend using fine graham cracker crumbs rather than whole crackers for this recipe. Store-bought crumbs (look for them in the baking aisle near the pie crust ingredients) are consistently fine and distribute evenly throughout the dough, creating a uniform texture without large chunks that can make the cookies crumbly. If you prefer to make your own from whole graham crackers, place 3 to 4 full sheets in a zip-top bag and crush them with a rolling pin until you have a mix of fine crumbs and small pebbly bits. Avoid using the coarse crumbs sold for cheesecrusts—they are too large and will result in crumbly, fragile cookies.
How should I store s’mores cookies to keep them fresh and chewy?
Store baked s’mores cookies in an airtight container at room temperature for up to 3 days. To maintain their soft, chewy texture, add a slice of fresh bread to the container—the cookies will absorb moisture from the bread rather than drying out. Switch the bread slice every 2 days. If you need to store them longer, refrigerate for up to 5 days, but warm them in a 300°F oven for 5 minutes before serving to restore softness. For longer storage, freeze the baked cookies or scooped dough balls for up to 3 months. Baked cookies should be wrapped individually in plastic wrap and placed in a freezer bag; dough balls can be frozen on a tray and transferred to a bag.
Can I make s’mores cookies without an electric mixer?
Yes, and I actually prefer it that way. This easy s’mores cookies recipe is designed to be made by hand with just a whisk and a rubber spatula. The butter is melted rather than creamed, which means you don’t need a stand mixer or hand mixer at all. Whisk the melted butter and sugars together until the mixture looks like wet sand—about 45 seconds of vigorous whisking. Then stir in the egg and vanilla, and finally fold in the dry ingredients and mix-ins with a spatula. The dough comes together in under 5 minutes, and you avoid overmixing, which is one of the most common causes of tough cookies.
What size marshmallows work best in s’mores cookies?
Mini marshmallows are the ideal size for s’mores cookies. They are small enough to distribute evenly throughout the dough without creating large air pockets, and they melt at a controlled rate that leaves you with gooey pockets rather than empty holes. I recommend cutting each mini marshmallow in half with sharp kitchen scissors—this creates more surface area for toasting and ensures the marshmallows don’t sink to the bottom of the cookie. Avoid using jumbo marshmallows, which melt into large sticky patches that can cause the cookies to spread unevenly and create hollow spaces as they deflate.
Can I use milk chocolate chips instead of semisweet in s’mores cookies?
Absolutely, and it will give you a sweeter, creamier cookie. Milk chocolate chips are milder than semisweet, so the overall flavor profile shifts toward the marshmallow and graham cracker notes. If you prefer a richer chocolate presence, use a 60-70% dark chocolate bar roughly chopped into small chunks—the irregular shapes melt into beautiful pools of chocolate. For the best of both worlds, use a mix of milk and dark chips. Just keep in mind that milk chocolate chips tend to be softer and may spread slightly more when melted, so you might want to chill the dough for 15 minutes before baking if you’re using them exclusively.
Why did my s’mores cookies turn out flat and greasy?
Flat, greasy cookies are almost always caused by one of three issues: overly hot butter, too little flour, or a hot baking sheet. If your butter was too hot when you added the egg, the emulsion can break, resulting in greasy dough. Make sure the butter is just warm, not steaming. Second, double-check your flour measurement—scooping directly from the bag packs in too much flour, but using too little (or not spooning and leveling) leaves the dough understructured. Third, always start with a cool baking sheet; if you reuse a hot sheet, the dough begins spreading before the oven heat sets the structure. Chilling the dough for 20 minutes before baking also helps prevent flat cookies.
Share Your Version!
I love seeing how you make these s’mores cookies your own. Did you try the dark chocolate sea salt twist? Or did you go all-in with the peanut butter variation? Maybe you discovered a new combination I haven’t even thought of yet. Drop a comment below with your star rating and let me know how they turned out—your feedback helps other home bakers in our community know what works and what to try next.
When you make this easy s’mores cookies recipe, snap a photo and share it on Instagram or Pinterest. Tag me @exorecipes so I can feature your creations on my stories. I read every single comment and tag, and I answer every question about the recipe. The best part of this job is hearing that a cookie I developed in my tiny NYC kitchen brought a smile to someone’s face—whether it’s a kid having their first s’mores experience or a grown-up craving a taste of summer. From my NYC kitchen to yours — I hope this recipe brings as much warmth to your table as it does to mine. — mia 🧡
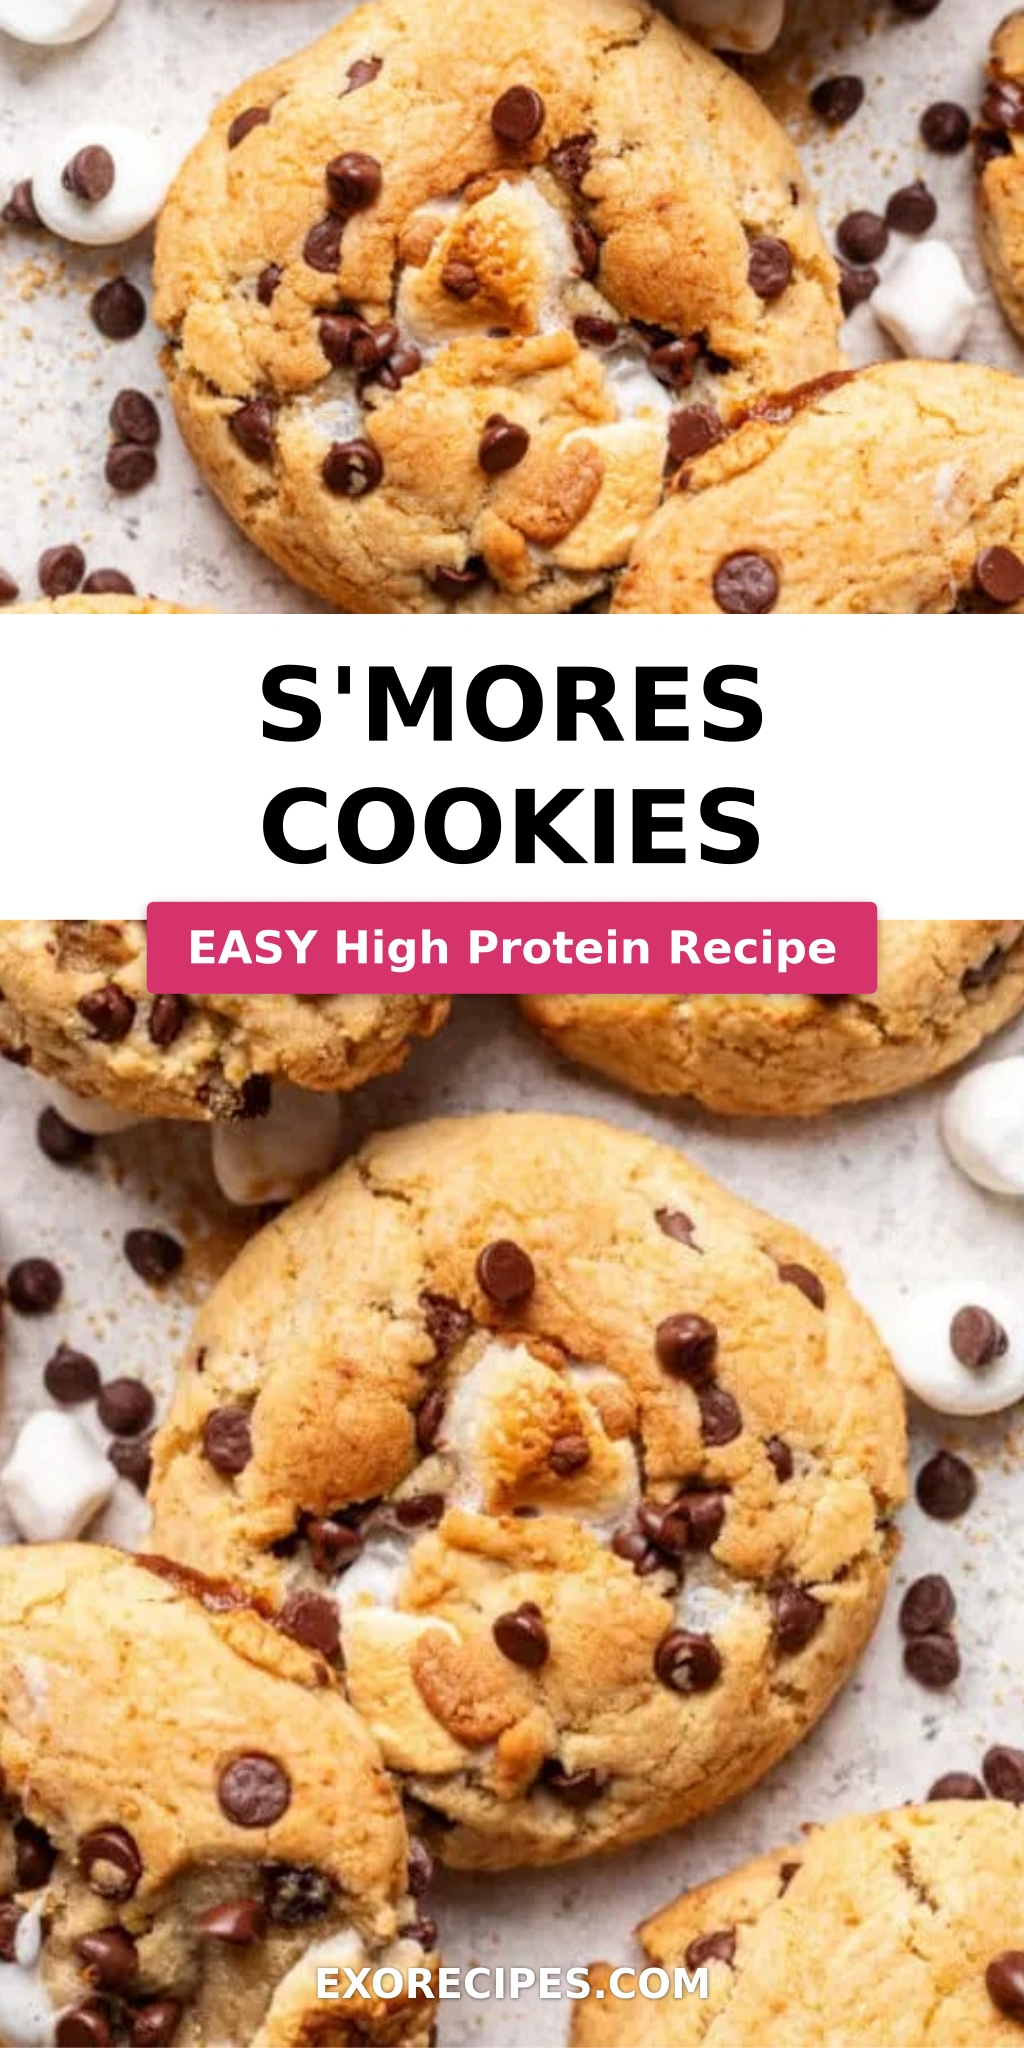
Love This Recipe? Save It to Pinterest!
If you enjoyed this S’mores Cookies recipe, don’t let it get lost in your browser tabs! 😄 Pin it now so you can find it again anytime — and explore hundreds more tried-and-tested recipes waiting for you on my Pinterest boards.
👉 Follow mia on Pinterest @exorecipe
📌 Pin this recipe · 🔁 Re-pin your favorites · 💬 Tag me when you make it — I love seeing your creations!
💬 Did you make these S’mores Cookies? I’d love to hear how they turned out! Leave a star rating or comment below. — mia 🧡

S’mores Cookies
Description
S’mores cookies are soft cookies with melty marshmallows, chocolate chips, and graham cracker crumbs that take less than 30 minutes to make.
Ingredients
- ½ cup butter
- ½ cup granulated sugar
- ¼ cup light brown sugar (packed)
- 1 teaspoon vanilla extract
- 1 large egg
- 1 cups all-purpose flour
- ½ teaspoon baking soda
- ¼ teaspoon salt
- ½ cup mini semisweet chocolate chips
- ½ cup mini marshmallows (halved)
- ¼ cup graham cracker crumbs
Instructions
- Preheat the oven to 350 F.
- Microwave the butter for about 40 seconds. Whisk until the butter is completely melted.
- Add the sugars, and mix until well-combined.
- Stir in vanilla and egg until incorporated.
- Add the flour, baking soda, and salt. Please read the recipe note about properly measuring flour.
- Mix dough until just combined. Dough should be soft and a little sticky but not overly sticky.
- Stir in chocolate chips, mini marshmallows, and graham cracker crumbs.
- Scoop out 3 tablespoons of dough (medium cookie scoop) and place 2 inches apart on baking sheet.
- Bake for 10-15 minutes, or until cookies are set. They will be puffy and still look a little underbaked in the middle.
Nutrition
- Calories: 258 kcal
- Sugar: 18 g
- Fat: 12 g
- Carbohydrates: 34 g
- Protein: 3 g
Tried This Recipe? Leave a Comment!
Did you make this recipe? I’d love to hear how it turned out! Please leave a comment and a rating below. Your feedback helps other home cooks and supports cheerychop.com!
For more delicious inspiration, follow me on Pinterest!