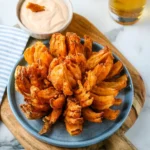
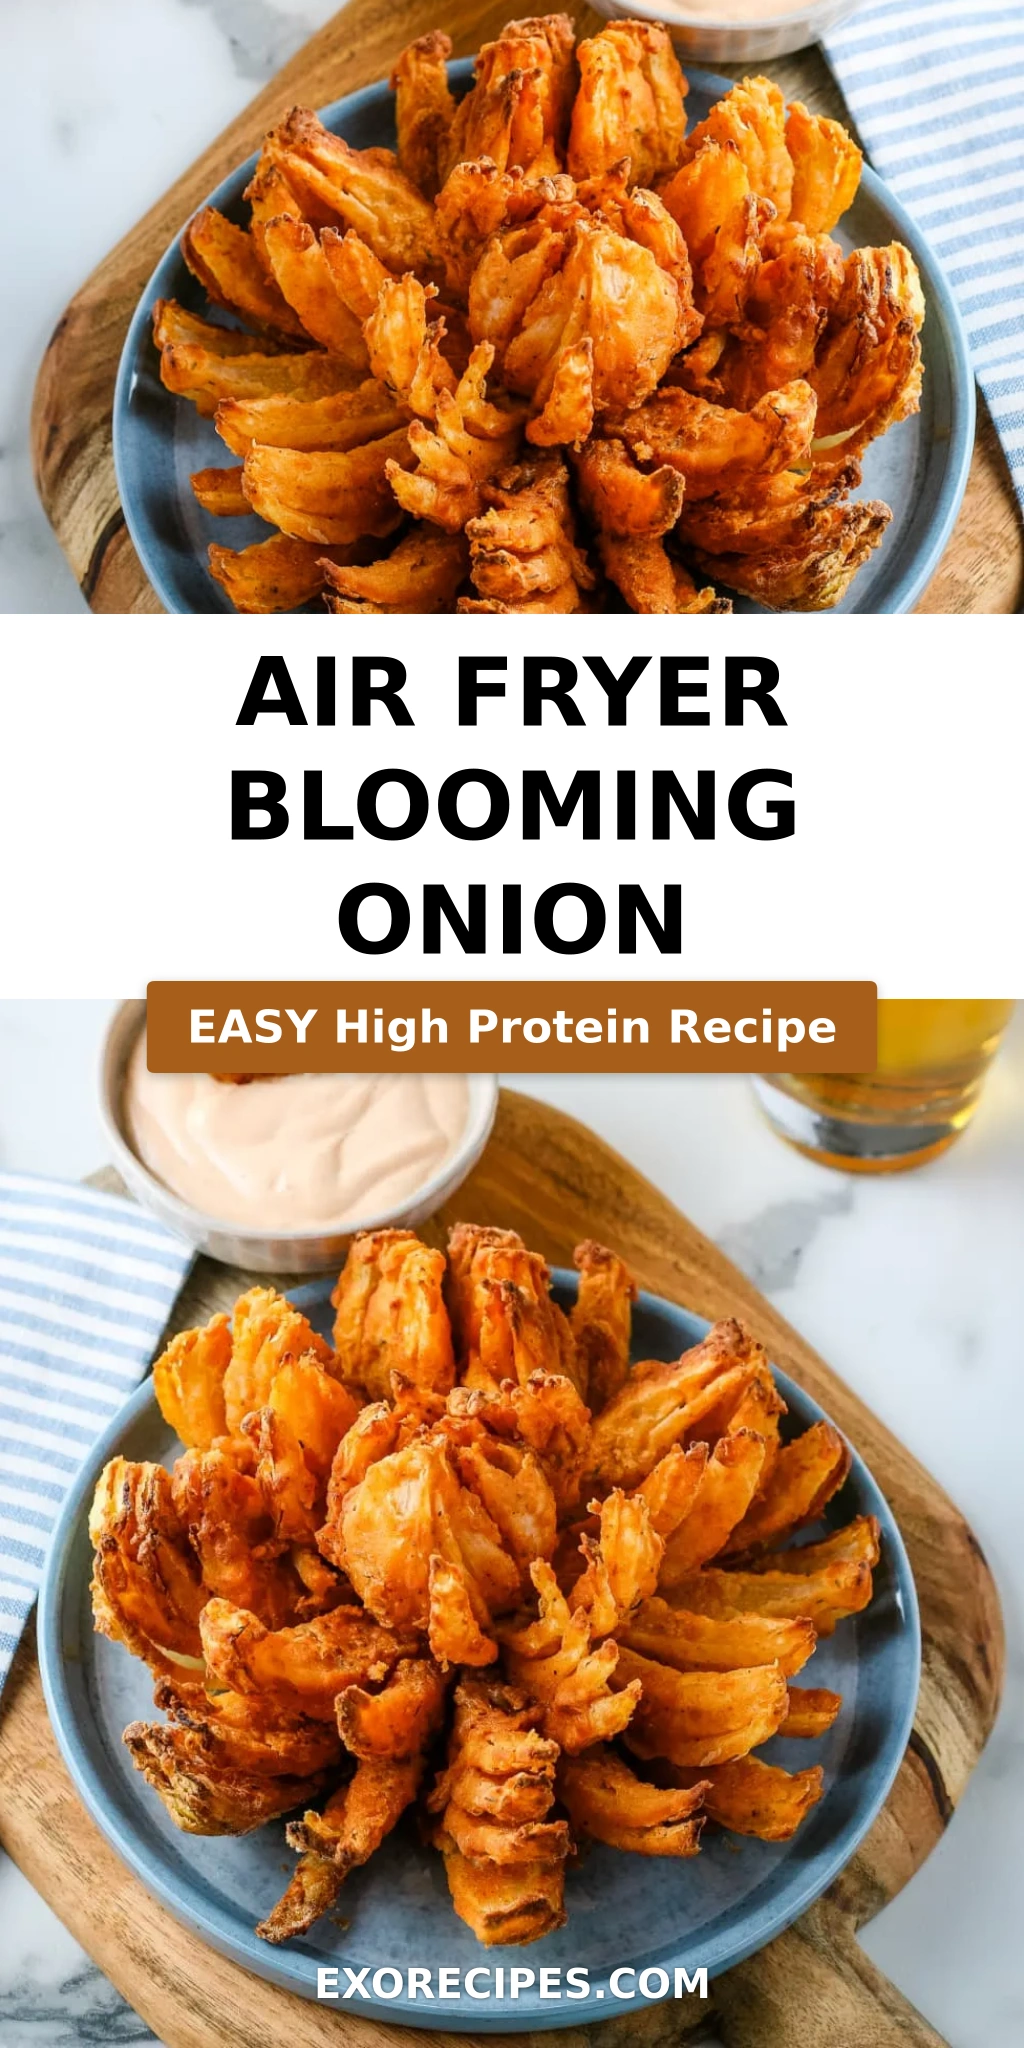
Creamy Mushroom Chicken in 30 Minutes | Quick & Easy Dinner

Creamy Mushroom Chicken: One-Pan Wonder for a Quick Dinner

⚖️
Difficulty
Easy
⏲️
Prep Time
10

mins

🕒
Cook Time
20

mins

⏱️
Total Time
30

mins

🍽️
Servings
4

Growing up in my mother’s bustling kitchen in Marrakech, I learned the magic of transforming simple ingredients into culinary masterpieces. We’d often have dishes that were rich, flavorful, and surprisingly quick to prepare, perfect for our lively family dinners. This creamy mushroom chicken recipe reminds me so much of that spirit – it’s a dish that feels luxurious and comforting, yet comes together in about half an hour, making it a true weeknight hero. It’s the kind of one pan creamy mushroom chicken that I always turn to when I crave something deeply satisfying without a lot of fuss.

Imagine this: tender, pan-seared chicken cutlets, perfectly golden, nestled in a velvety, garlicky sauce studded with earthy mushrooms. The aroma alone is enough to make your mouth water – a symphony of savory notes from the mushrooms, the pungent warmth of garlic, and the subtle tang of lemon and Dijon. I love how the cream sauce coats every piece, creating a truly decadent experience. This easy creamy chicken and mushrooms dish is a testament to how French techniques, like building a classic pan sauce, can be beautifully simplified for home cooks.

What makes this recipe truly special is its elegant simplicity. I’ve refined it over years of cooking to ensure maximum flavor with minimal effort. We’ll unlock a depth of flavor in the mushrooms by getting a good sear, a trick I picked up at culinary school in Paris. I’ll also share a little secret for achieving that extra-velvety sauce texture that’s just divine. And don’t worry, I’ll guide you through one common mistake that can leave your chicken dry; we *don’t* want that!

Why This Creamy Mushroom Chicken Recipe Is the Best

The secret to this recipe’s incredible flavor lies in building layers of taste, starting with perfectly seared chicken for that crucial depth of savory goodness. My French training emphasized the importance of *saisir* – searing – not just for color, but for the Maillard reaction that creates irresistible umami. Then, we caramelize the mushrooms to coax out their natural sweetness and earthy notes, a step often rushed but vital for a truly delicious outcome. This focus on technique, inspired by my Parisian mentors, elevates this simple dish into something truly restaurant-worthy, all within your home kitchen.

As a professional cook, achieving a creamy, luscious sauce without it breaking or feeling too heavy is an art. I achieve this by using the right ratio of heavy cream and carefully reducing the pan liquids, incorporating lemon juice and Dijon mustard at the right stage to add brightness and emulsify the sauce. This balance prevents the sauce from being cloying and keeps the chicken moist and tender. It’s a technique that ensures a velvety smooth finish every single time, a hallmark of *haute cuisine* adapted for your everyday table.

Beyond the flavor and texture, this creamy mushroom chicken recipe is designed for ease and speed. It’s a one-pan wonder, meaning significantly less cleanup, which is a godsend for busy weeknights. I often think of my New York City friends juggling careers and families; they need recipes that are reliable, quick, and crowd-pleasing. This dish fits the bill perfectly, proving that gourmet-quality meals don’t have to be complicated or time-consuming. It’s a foolproof recipe that even beginner cooks can master on their first try.

Creamy Mushroom Chicken Ingredients

When I’m in NYC, I love grabbing my produce from the Union Square Greenmarket or a local specialty shop. For this recipe, good quality mushrooms are key, and I often find beautiful cremini or shiitake mushrooms there. My mother always stressed using the freshest ingredients, and that philosophy has stayed with me. This dish is a perfect example of how simplicity and fresh components come together to create pure comfort food.

Ingredients List

  • 2 large chicken breasts
  • Salt & pepper (to taste)
  • All-purpose flour (for dredging)
  • 2 tablespoons olive oil
  • 2 tablespoons unsalted butter
  • 12 ounces mushrooms (cremini or white mushrooms recommended), sliced
  • 1/4 teaspoon Italian seasoning
  • 3 cloves garlic, minced
  • 1/2 cup low-sodium chicken broth
  • 1/2 teaspoon fresh lemon juice
  • 1/2 teaspoon Dijon mustard
  • 1 cup heavy whipping cream

Ingredient Spotlight

Chicken Breasts: I prefer using large, boneless, skinless chicken breasts for this recipe. When shopping in the US, look for plump, firm breasts. To ensure even cooking and tenderness, I always slice them horizontally into thinner cutlets. This drastically reduces the risk of the chicken drying out, a common issue with thicker cuts. A good butcher can often do this for you, or it’s a simple five-minute task at home.

Mushrooms: Cremini (baby bella) mushrooms are my go-to for their robust, earthy flavor and firm texture that holds up well to cooking. White button mushrooms are a good, accessible alternative. When buying mushrooms, make sure they are firm, dry, and free of bruises or slimy spots. Avoid pre-sliced mushrooms, as they tend to dry out more quickly in the package.

Heavy Whipping Cream: This is absolutely essential for achieving that signature creamy texture. Don’t substitute with half-and-half or milk, as they won’t provide the same richness or stability to the sauce. The high fat content in heavy cream ensures a smooth, emulsified sauce that coats the chicken beautifully. For a dairy-free option, a good quality full-fat coconut cream can work, though it will impart a subtle coconut flavor.

Original IngredientBest SubstitutionFlavor / Texture Impact
Chicken BreastsBoneless, skinless chicken thighsThighs are more forgiving and might remain moister, but they may require slightly longer cooking time and have a richer flavor.
Cremini MushroomsShiitake mushrooms or a mix of wild mushroomsShiitake mushrooms offer a deeper, smokier flavor. Wild mushrooms provide more complex, woodsy notes. Adjust seasonings accordingly.
Heavy Whipping CreamFull-fat coconut cream (unsweetened)Will impart a slight coconut flavor and may change the final color to a warmer ivory. Ensure it’s unsweetened for savory dishes.

How to Make Creamy Mushroom Chicken — Step-by-Step

This easy creamy chicken and mushrooms recipe is designed for success, even if you’re new to cooking. Just follow these simple steps, and you’ll have a beautiful, flavorful dish ready in no time!

Step 1: Prepare the Chicken

First, trim any excess fat from your chicken breasts. Then, slice each breast in half horizontally to create four thinner cutlets. You want them to be about 1/2 inch thick. Season them generously on both sides with salt and pepper, then lightly dredge each cutlet in flour, shaking off any excess. This light coating helps create a beautiful golden crust and thickens the sauce slightly.

💡 mia’s Pro Tip: For an even coating of flour, place it in a shallow dish and press the chicken into it – this ensures the sides are coated too. Don’t skip the flour; it’s key to a rich sauce!

Step 2: Sear the Chicken

Heat the olive oil in a large, oven-safe skillet (cast iron is ideal) over medium-high heat. Once the oil is shimmering and hot, carefully add the floured chicken cutlets in a single layer. Don’t overcrowd the pan; cook in batches if necessary. Sear for about 4-5 minutes per side, until they are deeply golden brown and cooked through. Remove the chicken from the skillet and set it aside on a clean plate.

Step 3: Cook the Mushrooms

Add the butter to the same skillet. Once melted, add the sliced mushrooms and Italian seasoning. Cook, stirring occasionally, for about 7-10 minutes. You want to let the mushrooms release their water, then cook off, allowing them to brown and get a nice sear. This browning process is crucial for developing their deep, savory flavor. Don’t rush this step!

⚠️ Common Mistake to Avoid: Cooking mushrooms in a crowded pan or too quickly. This steams them instead of searing them, resulting in limp, watery mushrooms. Make sure the pan is hot and give them space, letting them brown undisturbed for a few minutes at a time.

Step 4: Create the Sauce Base

Once the mushrooms are nicely seared, remove them from the skillet and add them to the plate with the chicken. Pour in the chicken broth, scraping up any browned bits (fond) from the bottom of the pan – this is where so much flavor is! Add the minced garlic, fresh lemon juice, and Dijon mustard. Stir everything together and let it simmer and reduce by about half, which should take about 3-4 minutes. This concentrates the flavors brilliantly.

Step 5: Finish the Sauce and Dish

Pour the heavy whipping cream into the skillet. Bring the sauce to a gentle simmer. Return the seared chicken and sautéed mushrooms to the pan. Let everything simmer together for another 5 minutes, or until the chicken is cooked through and the sauce has thickened to your desired consistency. Taste and adjust seasoning with salt and pepper as needed. For a low carb mushroom chicken dinner, ensure your chicken broth is low in carbs and avoid serving with high-carb sides.

💡 mia’s Pro Tip: If your sauce seems too thin after simmering, you can create a slurry with 1 teaspoon of cornstarch mixed with 2 teaspoons of cold water. Whisk it into the simmering sauce and cook for another minute until thickened. For a lighter option, use half-and-half instead of cream, but the sauce won’t be quite as rich.

StepActionDurationKey Visual Cue
1Prepare & dredge chicken5 minsChicken cutlets evenly coated in flour.
2Sear chicken8-10 mins (4-5 per side)Deep golden brown crust on both sides.
3Sauté mushrooms7-10 minsMushrooms are browned and slightly shrunken.
4Deglaze & reduce sauce base3-4 minsLiquid reduced by half, scraps from pan lifted.
5Finish sauce & simmer5 minsSauce is creamy, slightly thickened, chicken cooked through.

Serving & Presentation

This creamy mushroom chicken is a showstopper that looks as good as it tastes. I love serving it directly from the skillet, family-style, making for a cozy and inviting meal. For a more elegant presentation, especially for guests, plate the chicken cutlets and spoon the luscious mushroom sauce generously over the top. A sprinkle of fresh parsley or chives adds a beautiful pop of color and freshness, complementing the rich sauce.

In my New York City life, I find this dish pairs wonderfully with a simple side that can soak up that incredible sauce. Think beyond just pasta; a velvety mashed cauliflower or creamy polenta offers a luxurious base. For those looking for a lighter, low-carb option, steamed asparagus or sautéed green beans are perfect. My mother always served hearty dishes with a simple, crisp salad dressed with a light vinaigrette to balance the richness, a tradition I continue to this day.

Pairing TypeSuggestionsWhy It Works
Side DishMashed potatoes, egg noodles, cauliflower mash, steamed riceThese provide a wonderful base to soak up the creamy sauce. Egg noodles offer a classic pairing, while cauliflower mash is a low-carb alternative.
Sauce / DipExtra garlic bread for dipping!The sauce is so good, you’ll want to sop up every last drop.
BeverageCrisp Pinot Grigio, unoaked Chardonnay, or a light-bodied Pinot Noir. For non-alcoholic, sparkling cider.A dry white wine cuts through the richness of the cream sauce. Pinot Noir offers a light fruitiness that complements the mushrooms.
GarnishFresh chopped parsley, chives, or a sprinkle of Parmesan cheeseAdds a fresh, herbaceous contrast to the rich, savory dish. Parsley is classic, while chives offer a delicate oniony note.

Make-Ahead, Storage & Reheating

As a busy New Yorker, I love recipes that can be prepped ahead or stored well. This creamy mushroom chicken is fantastic for meal prep! You can make the entire dish and store it, or even cook the chicken and mushrooms separately and combine them with the sauce when reheating to keep the chicken extra tender.

MethodContainerDurationReheating Tip
RefrigeratorAirtight container3–4 daysGently reheat on the stovetop over low heat, stirring occasionally. Add a splash of broth or cream if the sauce has thickened too much.
FreezerFreezer-safe containerUp to 2 monthsThaw in the refrigerator overnight. Reheat gently on the stovetop as above. The sauce might separate slightly upon thawing, but whisking will help emulsify it again.
Make-AheadComponents stored separately or combinedUp to 2 days in advance if fully cookedIf storing fully cooked, reheat as above. If storing components, reheat sauce and chicken/mushrooms separately then combine.

For reheating, I find the stovetop is best for cremypasta sauces like this. A gentle simmer ensures the sauce doesn’t break and the chicken stays tender. If you plan to reheat very frequently, consider slightly undercooking the chicken in the final step, as it will continue to cook during reheating. This method is a lifesaver when you want a delicious, home-cooked meal after a long day in the city.

Variations & Easy Swaps

VariationKey ChangeBest ForDifficulty Impact
Keto / Low CarbServe without or with low-carb sides; ensure broth is low-carb.Dietary restrictions, grain-free diets.Easy – no recipe changes needed for the main dish.
Gluten-FreeUse gluten-free flour for dredging; ensure broth is GF.Celiac disease, gluten sensitivity.Easy – direct substitution of flour.
Dairy-FreeUse full-fat coconut cream and dairy-free butter.Lactose intolerance, dairy allergies.Easy – direct substitution of cream and butter.

Keto Creamy Mushroom Chicken

For a delicious low-carb mushroom chicken dinner, simply follow the recipe as is, ensuring your chicken broth is low in carbs. The heavy cream is already keto-friendly. Serve this over cauliflower mash, zucchini noodles, or a bed of sautéed spinach. This adaptation keeps all the rich, comforting flavors you love while fitting perfectly into a ketogenic lifestyle. It’s a testament to how versatile this creamy chicken recipe can be.

Gluten-Free & Dairy-Free Creamy Mushroom Chicken

Making this gluten-free is super simple: just swap the all-purpose flour for a gluten-free all-purpose flour blend when dredging the chicken. For a dairy-free version, use a good quality dairy-free butter substitute and replace the heavy whipping cream with full-fat, unsweetened coconut cream. While coconut cream adds a subtle tropical note, it creates a wonderfully rich and creamy sauce and keeps it entirely dairy-free. It’s a testament to how readily this dish adapts.

Spicy Creamy Mushroom Chicken

Want to add a little heat? My Moroccan heritage inspires many of my flavor twists! For a spicy kick, add 1/4 teaspoon of red pepper flakes along with the minced garlic in Step 4. You could also add a finely chopped jalapeño or even a pinch of cayenne pepper. This adds a wonderful warmth and complexity to the creamy sauce, turning it into a truly zesty dish perfect for those who enjoy a bit of spice.

How do you keep the chicken from drying out in creamy mushroom chicken?

The key is to not overcook it! By slicing the chicken breasts horizontally into thinner cutlets, you drastically reduce the cooking time, minimizing the chance of drying out. Also, searing them in a hot pan for just the right amount of time before finishing them in the sauce ensures they remain tender. Don’t cook them beyond a safe internal temperature of 165°F (74°C), and remember they continue to cook slightly in the hot sauce.

Can I use heavy cream instead of cream of mushroom soup for creamy mushroom chicken?

Absolutely! This recipe *uses* heavy cream to create the creamy sauce from scratch, rather than relying on canned cream of mushroom soup. This gives you much more control over the flavor and texture, resulting in a fresher, more refined sauce. Canned soups can often be high in sodium and contain various additives, whereas making the sauce with fresh cream, broth, and aromatics is far superior and yields a dish that tastes truly homemade.

What is the best way to thicken the sauce for creamy mushroom chicken?

The primary way the sauce thickens in this recipe is through reduction – simmering the chicken broth and cream allows the liquid to evaporate, concentrating the flavors and naturally thickening the sauce. The flour used for dredging the chicken also contributes a bit. If you find your sauce is still too thin, you can create a slurry by mixing 1 teaspoon of cornstarch (or arrowroot powder for a paleo option) with 2 teaspoons of cold water, then whisking it into the simmering sauce until it thickens.

What side dishes go well with creamy mushroom chicken?

This dish is incredibly versatile! For a classic comfort meal, serve it with fluffy mashed potatoes, buttery egg noodles, or rice, all of which are perfect for soaking up that luscious sauce. If you’re looking for lighter or low-carb options, steamed asparagus, roasted broccoli, sautéed green beans, or a simple cauliflower mash are excellent choices. A crisp salad with a light vinaigrette also offers a refreshing contrast to the richness of the chicken.

Can I use chicken thighs instead of breasts?

Yes, absolutely! Boneless, skinless chicken thighs are a fantastic substitute for chicken breasts. Thighs are naturally more forgiving and tend to stay incredibly moist, even if slightly overcooked. They also offer a richer flavor profile. You might need to cook them a minute or two longer than chicken breasts to ensure they are fully cooked through. Simply follow the same searing and simmering steps, and you’ll have a delicious creamy mushroom chicken.

How long does creamy mushroom chicken last in the fridge?

Properly stored in an airtight container in the refrigerator, this creamy mushroom chicken will stay fresh for about 3 to 4 days. The flavors meld beautifully over time, making leftovers almost as good as the first meal. When reheating, it’s best to do so gently on the stovetop over low heat, stirring occasionally. You may need to add a splash of broth or cream if the sauce has thickened considerably from refrigeration. Avoid microwaving, as it can sometimes make the chicken texture a bit rubbery.

Can I make creamy mushroom chicken dairy-free?

Yes, you can easily make this recipe dairy-free! For the butter, use a good quality dairy-free butter alternative. The most crucial swap is for the heavy whipping cream; I recommend using full-fat, unsweetened coconut cream. It yields a wonderfully thick and luscious sauce. While it imparts a very subtle coconut flavor, it works beautifully with the mushrooms and chicken. Ensure your broth is also dairy-free. This adaptation is perfect for those with lactose intolerance or dairy allergies.

What kind of mushrooms are best for this recipe?

Cremini mushrooms, also known as baby bella mushrooms, are my favorite for this dish. They offer a wonderful balance of earthy flavor and a firm texture that stands up well to the cooking process. White button mushrooms are also a very accessible and delicious option. If you’re feeling adventurous, a mix of shiitake and oyster mushrooms can add even more complexity to the dish. Just ensure they are sliced evenly for consistent cooking.

Share Your Version!

I truly hope you love this easy creamy mushroom chicken recipe as much as I do! It’s a dish that brings a little bit of comfort and everyday elegance to the table. I’d be thrilled to see your creations, so please leave a star rating and a comment below if you try it. If you share a photo on Instagram or Pinterest, be sure to tag me @exorecipes – I love seeing what you’ve made!

And tell me, what’s your favorite way to enjoy this creamy chicken? Do you prefer it with a classic side like noodles, or do you lean towards a low-carb adaptation? I’m always curious to hear how you make these recipes your own!

From my NYC kitchen to yours — I hope this recipe brings as much warmth to your table as it does to mine. — mia 🧡

📌

Love This Recipe? Save It to Pinterest!

If you enjoyed this Creamy Mushroom Chicken recipe, don’t let it get lost in your browser tabs! 😄 Pin it now so you can find it again anytime — and explore hundreds more tried-and-tested recipes waiting for you on my Pinterest boards.

👉 Follow mia on Pinterest @exorecipe

📌 Pin this recipe · 🔁 Re-pin your favorites · 💬 Tag me when you make it — I love seeing your creations!

Print

clock clock iconcutlery cutlery iconflag flag iconfolder folder iconinstagram instagram iconpinterest pinterest iconfacebook facebook iconprint print iconsquares squares iconheart heart iconheart solid heart solid icon

Creamy Mushroom Chicken

  • Author: Chef Mia

Description

This creamy mushroom chicken recipe has the most deliciously tender pan-fried chicken smothered in a garlicky mushroom sauce! It’s quick and easy and can be on your table in half an hour.


Ingredients

Scale
  • 2 large chicken breasts
  • Salt & pepper (to taste)
  • Flour (for dredging)
  • 2 tablespoons olive oil
  • 2 tablespoons butter
  • 12 ounces mushrooms (try cremini or white mushrooms) (sliced)
  • 1/4 teaspoon Italian seasoning
  • 3 cloves garlic (minced)
  • 1/2 cup chicken broth
  • 1/2 teaspoon lemon juice
  • 1/2 teaspoon Dijon mustard
  • 1 cup heavy/whipping cream

Instructions

  1. Cut your chicken breasts in half lengthwise to make four thinner cutlets. Season them with salt & pepper then coat them in flour.
  2. Add the oil to a skillet over medium-high heat.
  3. Once the pan's hot, add the chicken. Cook it for 4-5 minutes/side until golden. Once this step is done, take the chicken out of the pan and set it aside.
  4. Add the butter to the pan. Let it melt, then add the mushrooms and Italian seasoning. Cook the mushrooms, stirring occasionally, until the water has been released, it cooks off, and they get a nice sear.
  5. Take the mushrooms out of the pan (ok to put them on the same plate as the chicken).
  6. Add the garlic, chicken broth, lemon juice, and Dijon mustard to the pan. Give it a good stir until the mustard dissolves, and let it reduce by half (about 3-4 minutes).
  7. Add the cream to the pan, along with the chicken and mushrooms. Let the chicken cook for another 5 minutes or so until it's cooked through and the sauce has thickened a bit. Season with salt & pepper as needed.


Nutrition

  • Calories: 482 kcal
  • Sugar: 3 g
  • Fat: 37 g
  • Carbohydrates: 9 g
  • Protein: 29 g


Creamy Mushroom Chicken

k">

Tried This Recipe? Leave a Comment!

Did you make this recipe? I’d love to hear how it turned out! Please leave a comment and a rating below. Your feedback helps other home cooks and supports cheerychop.com!

For more delicious inspiration, follow me on Pinterest!

30-Min Marry Me Chicken Pasta – Creamy & Irresistible

Marry Me Chicken Pasta: Quick, Easy, and Dreamy One-Pot Meal

⚖️
Difficulty
Easy
⏲️
Prep Time
10 mins
🕒
Cook Time
20 mins
⏱️
Total Time
30 mins
🍽️
Servings
4

Growing up in my mother’s colorful kitchen in Marrakech, spices were the soul of every dish. We’d simmer tagines for hours, filling the air with aromas that promised comfort and joy. When I moved to Paris to hone my culinary skills, I learned the art of refining flavors, mastering sauces, and creating elegance. Now, here in New York City, I love blending those warm, aromatic roots with the city’s dynamic pulse. This Marry Me Chicken Pasta is a perfect example – it’s a dish born from simplicity and elevated with a creamy, sun-dried tomato-kissed sauce that reminds me of both home and my sophisticated training. It’s designed to be your next go-to recipe, a true testament to how humble ingredients can create something truly magical. I can’t wait for you to try this incredibly easy Marry Me Chicken Pasta recipe!

Imagine this: tender bite-sized chicken pieces, perfectly cooked pasta, all enveloped in a luscious, velvety sauce that’s both rich and bright. The creamy garlic parmesan base is studded with sweet, concentrated sun-dried tomatoes, offering bursts of tangy sweetness. A hint of Italian seasoning, a subtle whisper of smoked paprika, and a pinch of red pepper flakes add layers of complexity without overpowering the delicate balance. This easy one pot chicken pasta is more than just a meal; it’s an experience. The aroma alone will have everyone rushing to the table, eager for that first, unforgettable bite. It’s the kind of dinner that makes you feel like you’re dining out, even on a Tuesday night.

What makes this particular version so special? I’ve adapted a classic idea to fit our busy lives, ensuring you get maximum flavor with minimum fuss. The secret lies in building flavors quickly in one pan and using a chef’s trick to ensure the sauce emulsifies perfectly. I’ll share a key tip to lock in that incredible creaminess and a common pitfall to avoid that can leave your pasta tasting dull. Get ready for a creamy chicken pasta recipe that’s so good, it might just be the reason you propose to your dinner plans! This is the best chicken pasta dinner you’ll make all week.

Why This Marry Me Chicken Pasta Recipe Is the Best

As a professional cook, I’ve encountered countless pasta dishes, but this Marry Me Chicken Pasta has a special place in my heart. It perfectly balances richness with vibrant flavors, making it irresistible. My unique approach, inspired by the layered sauces of Paris and the bold spices of my Moroccan heritage, ensures a depth of flavor that’s truly remarkable. You’ll find that the combination of sun-dried tomatoes and a hint of smoked paprika creates a nuanced taste profile that’s both comforting and sophisticated, setting it apart from other creamy pasta recipes.

The texture of this pasta is nothing short of sublime. I use a little reserved pasta water, a technique I learned early on, to help emulsify the creamy sauce, binding it beautifully to the pasta and chicken. This creates a luscious, coating consistency that’s rich without being heavy. It’s all about the science of cooking, ensuring every component works in harmony for a perfectly balanced, deeply satisfying meal. This isn’t just boiling pasta and tossing it with sauce; it’s culinary craftsmanship made simple.

One of the biggest wins for this recipe is its sheer simplicity. In just about 30 minutes, you can have a restaurant-worthy meal on the table. It’s designed to be incredibly forgiving, making it perfect for beginner cooks or those nights when you’re short on time but craving something truly delicious. The one-pan method minimizes cleanup, leaving you more time to enjoy your meal and less time scrubbing pots. This easy one pot chicken pasta truly delivers on flavor, speed, and ease.

Marry Me Chicken Pasta Ingredients

When I’m developing a recipe, I always think about what’s accessible and fresh. For this Marry Me Chicken Pasta, I often pick up my produce at the Union Square Greenmarket here in NYC, especially the sun-dried tomatoes and fresh basil. If I’m feeling a bit nostalgic, I’ll grab some exotic spices from a shop in the West Village. My mother always said the best dishes start with the best ingredients, and I carry that philosophy with me. You can find all of these pantry staples at your local grocery store.

Ingredients List

  • 8 oz dried pasta of choice (half standard box)
  • 1 Tablespoon olive oil
  • ½ cup onion (finely chopped)
  • 3-4 cloves garlic (minced)
  • 1 Tablespoon butter
  • 1 pound chicken breasts (cut into bite-size pieces)
  • ½ teaspoon EACH Italian seasoning, smoked paprika, red pepper flakes, garlic powder, salt, pepper
  • 1 cup heavy cream
  • ½ cup parmesan cheese grated
  • ½ cup sun-dried tomatoes (chopped)
  • Fresh basil leaves (for garnish, optional)

Ingredient Spotlight

Heavy Cream: The backbone of our luscious sauce, heavy cream provides richness and a velvety texture. Select a good quality, full-fat heavy cream for the best results. If you can’t find it, heavy whipping cream is an excellent substitute. However, using half-and-half will result in a thinner sauce, so you might need to reduce it for a bit longer to achieve the desired consistency. The difference is that heavy cream has a higher fat content, making the sauce richer and more stable.

Sun-Dried Tomatoes: These little gems are flavor powerhouses, offering a concentrated burst of sweet-tart tomato flavor. I like to use oil-packed sun-dried tomatoes, as they are more tender and flavorful, and the oil can even be used in cooking. If using dry-packed, you’ll need to rehydrate them in warm water or broth before chopping. A good substitute for sun-dried tomatoes could be roasted red peppers, which offer a similar sweetness but a slightly different texture. They won’t have the same chewy bite, but they bring a wonderful sweetness to the sauce.

Parmesan Cheese: Freshly grated Parmesan cheese melts beautifully into the sauce, adding a nutty, salty depth. Always opt for a block of real Parmesan cheese (like Parmigiano-Reggiano) and grate it yourself just before using. Pre-grated cheese often contains anti-caking agents that can prevent it from melting smoothly. For a similar nutty and savory flavor, Pecorino Romano is a fantastic alternative, though it’s often saltier, so keep that in mind when seasoning.

Original IngredientBest SubstitutionFlavor / Texture Impact
Heavy CreamHeavy Whipping CreamVery similar; slightly less rich.
Sun-Dried TomatoesRoasted Red Peppers (jarred)Softer texture, slightly less intense flavor, still sweet.
Parmesan CheesePecorino RomanoSharper, saltier, nuttier flavor. Use slightly less.
Chicken BreastsChicken Thighs (boneless, skinless)More tender and flavorful, may take slightly longer to cook.

How to Make Marry Me Chicken Pasta — Step-by-Step

Don’t be intimidated! This recipe comes together quickly, and I’ll guide you through each simple step. It’s designed for success, even on your busiest evenings.

Step 1: Cook the Pasta

Bring a large pot of generously salted water to a rolling boil over medium-high heat. Add your pasta and cook according to package directions until it’s perfectly al dente – tender but still with a slight bite. Before draining, carefully reserve about ½ cup of the starchy pasta water. This liquid gold is key to creating a silky sauce. Drain the pasta well.

💡 mia’s Pro Tip: Don’t skimp on salting the pasta water! It should taste like the sea. This is your first chance to season the pasta itself, ensuring it’s flavorful from the inside out, not just relying on the sauce.

Step 2: Sauté the Aromatics

While your pasta is doing its thing, grab a large-duty pan or Dutch oven and heat 1 tablespoon of olive oil over medium-high heat. Add your finely chopped onion and sauté for about 2-3 minutes, until it starts to soften and become translucent. This step builds a sweet aromatic base for our sauce.

Step 3: Cook the Chicken

Add the butter to the pan with the onions. Once melted, add the minced garlic and sauté for just 30 seconds until fragrant, being careful not to burn it. Now, add your bite-sized chicken pieces and sprinkle them with the Italian seasoning, smoked paprika, red pepper flakes, garlic powder, salt, and pepper. Sauté, stirring occasionally, for about 3-5 minutes, until the chicken pieces are beautifully browned on all sides and cooked through.

⚠️ Common Mistake to Avoid: Overcrowding the pan when cooking the chicken. If your pan is too full, the chicken will steam instead of sauté, and you won’t get that lovely golden-brown sear, which adds so much flavor. Cook the chicken in batches if necessary.

Step 4: Create the Sauce

Pour in the heavy cream and the reserved ½ cup of pasta water. Stir in the grated Parmesan cheese and the chopped sun-dried tomatoes. Bring this mixture to a gentle simmer, stirring constantly, and let it cook for 3-4 minutes. The sauce will start to thicken beautifully. Taste it and adjust the salt and pepper as needed – the Parmesan adds saltiness, so be mindful!

Step 5: Combine and Serve

Add the drained pasta directly into the pan with the creamy sauce. Toss everything together gently until the pasta is beautifully coated. If the sauce seems a little too thick, add another tablespoon or two of the reserved pasta water to loosen it up. Garnish with fresh chopped basil leaves, if desired, for a pop of color and freshness. Serve immediately and watch everyone fall in love at first bite!

StepActionDurationKey Visual Cue
1Cook Pasta & Reserve Water~10 minsAl dente pasta, ½ cup water reserved.
2Sauté Onions2-3 minsOnions softened and translucent.
3Cook Chicken & Aromatics4-9 minsChicken browned and cooked through.
4Create Sauce3-4 minsSauce simmers and begins to thicken.
5Combine & Serve1 minPasta fully coated in sauce.

Serving & Presentation

This Marry Me Chicken Pasta is a star on its own and truly shines when served immediately after it’s tossed. For a restaurant-quality presentation, I love to swirl the pasta into shallow bowls, making sure to get a good amount of chicken and sun-dried tomatoes in each serving. A generous sprinkle of freshly grated Parmesan cheese right before it hits the table adds a final touch of savory goodness. Don’t forget those fresh basil leaves – they truly elevate the dish with a burst of color and herbaceous aroma, reminiscent of the fresh herbs I use in my garden here in NYC.

Pairing this creamy pasta is all about complementing its rich flavors without overwhelming them. A simple side salad with a light vinaigrette is always a winner. Think crisp romaine or peppery arugula. For something a bit more substantial, some crusty garlic bread is perfect for soaking up any extra sauce. And to drink? A crisp white wine like a Pinot Grigio or Sauvignon Blanc cuts through the richness beautifully, or for a non-alcoholic option, sparkling water with a lemon wedge would be delightful. It’s all about balance!

Pairing TypeSuggestionsWhy It Works
Side DishSimple Green Salad with Lemon Vinaigrette, Garlic Bread, Steamed AsparagusThe freshness and slight acidity of a salad balance the creaminess. Garlic bread provides a delightful crunch and soaks up sauce. Asparagus offers a fresh, slightly bitter contrast.
Sauce / DipExtra Grated Parmesan cheese on the side, a dollop of ricotta cheeseEnhances the savory notes. Ricotta adds an extra layer of creaminess and a different textural element.
BeverageCrisp White Wine (Pinot Grigio, Sauvignon Blanc), Sparkling Water with LemonThe acidity of white wine cuts through the rich cream sauce. Light, refreshing.
GarnishFresh Basil, Fresh Parsley, Red Pepper Flakes (for extra heat)Basil adds aromatic freshness. Parsley offers a milder herbaceous note. Red pepper flakes provide a welcome kick of heat.

Make-Ahead, Storage & Reheating

As a busy New Yorker, I know the importance of planning ahead. While this Marry Me Chicken Pasta is best enjoyed fresh, it’s quite resilient. I often make extra during the weekend so I can have a delicious lunch or quick dinner during the week. The key is how you store and reheat it to preserve that creamy magic.

MethodContainerDurationReheating Tip
RefrigeratorAirtight container3 daysGentle reheating on the stovetop over low heat is best to avoid drying out.
FreezerFreezer-safe airtight container or heavy-duty freezer bagsUp to 2 monthsThaw overnight in the refrigerator first. Reheat as above. Texture might be slightly softer.
Make-AheadComponents separate: Cook pasta, sauté chicken, make sauce separately. Store in airtight containers.1 day in advanceCombine and heat gently on the stovetop just before serving. Add a splash of cream or pasta water if needed.

When reheating on the stovetop, add a splash of milk or chicken broth if the sauce seems a bit thick or dry. Stirring constantly over low heat helps to re-emulsify the sauce and restore its creamy texture without breaking it. Microwaving is an option, but be sure to cover the dish and stir halfway through to ensure even heating and prevent the sauce from becoming oily. I find the stovetop method yields the best results, keeping the pasta al dente and the sauce luxurious.

Variations & Easy Swaps

VariationKey ChangeBest ForDifficulty Impact
Spicy Marry MeAdd more red pepper flakes, a pinch of cayenne, or a diced jalapeño with the onions.Those who love a kick!Easy
Gluten-Free/Dairy-FreeUse GF pasta; sub coconut cream/cashew cream for heavy cream; nutritional yeast for Parmesan.Dietary restrictions.Easy – direct swaps.
Seasonal BurstAdd frozen peas near the end, or sautéed zucchini/spinach with the chicken.Adding more veggies!Easy.

Spicy Marry Me Chicken Pasta

For those who like a little heat, don’t shy away from adding more chili elements! I sometimes add a finely minced serrano pepper along with the garlic, or a generous pinch of red pepper flakes to the chicken seasoning. If you want to emulate a Moroccan tagine spice profile, a tiny pinch of ground ginger can add a wonderful warmth. This variation is fantastic for livening up a weeknight meal and is super simple to execute.

Gluten-Free and Dairy-Free Options

Making this recipe accessible for everyone is important to me. For a gluten-free version, simply swap out the pasta for your favorite gluten-free variety – lentil or chickpea pasta can also add extra protein! To make it dairy-free, I’ve tested using full-fat canned coconut milk or a good quality cashew cream instead of heavy cream. For the Parmesan, nutritional yeast provides a surprisingly cheesy, umami flavor. The results are remarkably close to the original, with just a subtly different flavor profile.

Seasonal Twist with Spring Vegetables

In the spring and summer, I love to incorporate fresh seasonal vegetables found at the NYC markets. A handful of fresh peas, added in the last minute of cooking the sauce, brings a pop of sweetness and color. Similarly, sautéing some thinly sliced zucchini or a few handfuls of fresh spinach with the chicken adds extra nutrients and a lovely freshness. This makes the dish even more vibrant and delicious, perfect for lighter fare.

What is the best substitute for sun-dried tomatoes in Marry Me Chicken Pasta?

If you don’t have sun-dried tomatoes on hand, roasted red peppers are a fantastic substitute. Jarred roasted red peppers offer a similar sweetness and bright flavor, although their texture will be softer and less chewy. You can chop them finely and add them to the sauce just as you would the sun-dried tomatoes. They’ll give your creamy chicken pasta a lovely, slightly different, delicious twist. Another option could be using high-quality tomato paste for a more concentrated tomato flavor, though this will alter the texture significantly.

Can I make Marry Me Chicken Pasta with heavy cream instead of half-and-half?

Absolutely! In fact, the recipe calls for heavy cream, which is preferred for its higher fat content. Heavy cream creates the richest, most luxurious, and stable sauce. If you only have half-and-half, you can certainly use it, but your sauce might be a bit thinner. To compensate, you might need to simmer it for an extra minute or two to reduce and thicken. Just be watchful to prevent it from becoming greasy. Using a bit of the reserved pasta water will still help create a beautiful emulsion.

How do you prevent the chicken from drying out in Marry Me Chicken Pasta?

The secret to tender, juicy chicken lies in a few key steps. First, cut the chicken into uniform, bite-sized pieces so they cook evenly and quickly. Second, don’t overcook the chicken! Sauté it just until it’s browned on the outside and cooked through – usually 3-5 minutes. Since it will continue to cook slightly in the warm sauce, it’s better to err on the side of slightly underdone in the pan. Also, ensure your pan is hot enough for a good sear, which locks in moisture.

What is the best pasta shape to use for Marry Me Chicken Pasta?

While many pasta shapes work well, I find that shapes with nooks and crannies are best for holding onto this creamy sauce. Penne, rigatoni, fusilli, or farfalle are excellent choices because their ridges and curves trap the rich sauce, ensuring you get a delightful bite of creamy goodness with every forkful. Even standard spaghetti or linguine can work if you twirl it well, but tubular or spiral shapes are certainly ideal for maximizing sauce adherence in this dreamy, creamy chicken pasta.

Can I make this pasta dish vegetarian?

You absolutely can make this a vegetarian delight! Simply omit the chicken. To add more substance and protein, consider adding hearty mushrooms (like cremini or shiitake) sautéed with the onions, or incorporate a can of drained and rinsed cannellini beans or chickpeas into the sauce when you add the pasta water. You could also add more sun-dried tomatoes or some roasted vegetables like broccoli or asparagus to make the dish more robust and satisfying without the meat.

How do I make the sauce thicker if it’s too thin?

If your sauce comes out thinner than you’d like, don’t worry! The simplest fix is to let it simmer gently for a few more minutes uncovered. Stirring occasionally will help it reduce and thicken naturally. You can also create a slurry by whisking together 1 teaspoon of cornstarch or flour with 2 teaspoons of cold water until smooth, then stirring it into the simmering sauce. Let it cook for another minute or two until thickened. Remember the pasta also releases starch as it cooks, which helps thicken the sauce.

Can I add other vegetables to this pasta?

Definitely! This recipe is wonderfully versatile. In addition to the spinach or peas I mentioned for variations, you could add sautéed mushrooms, roasted bell peppers, or even some blanched asparagus. If using quick-cooking vegetables like spinach or peas, add them towards the end of the sauce cooking time just to warm through and retain their bright color and texture. Heartier vegetables like mushrooms or zucchini can be sautéed with the onions and chicken.

How long does this pasta dish last in the refrigerator?

Marry Me Chicken Pasta is best enjoyed fresh, but leftovers can be stored in an airtight container in the refrigerator for up to 3 days. When reheating, it’s crucial to do so gently. I highly recommend reheating it on the stovetop over low heat with a splash of milk or broth to help rehydrate the sauce and prevent it from becoming dry or greasy. This method helps retain the creamy texture better than microwaving.

Share Your Version!

I truly hope this Marry Me Chicken Pasta recipe brings as much joy and deliciousness to your table as it does to mine. If you make it, please consider leaving a star rating and a comment below – your feedback means the world to me! I also love seeing your culinary creations, so snap a photo and tag me on Instagram or Pinterest (@chefrecipes2). I can’t wait to see how you put your own spin on this creamy, dreamy pasta!

From my NYC kitchen to yours — I hope this recipe brings as much warmth to your table as it does to mine. — mia 🧡

📌

Love This Recipe? Save It to Pinterest!

If you enjoyed this Marry Me Chicken Pasta recipe, don’t let it get lost in your browser tabs! 😄 Pin it now so you can find it again anytime — and explore hundreds more tried-and-tested recipes waiting for you on my Pinterest boards.

👉 Follow mia on Pinterest @chefrecipes2

📌 Pin this recipe · 🔁 Re-pin your favorites · 💬 Tag me when you make it — I love seeing your creations!

Print

clock clock iconcutlery cutlery iconflag flag iconfolder folder iconinstagram instagram iconpinterest pinterest iconfacebook facebook iconprint print iconsquares squares iconheart heart iconheart solid heart solid icon

Marry Me Chicken Pasta

  • Author: Chef Mia

Description

This 30 Minute Marry Me Chicken Pasta is Quick, easy and SO good! A combination of tender pasta and juicy chicken pieces are smothered in a creamy garlic parmesan sundried tomato sauce that is out of this world! You’re going to want to add this to your regular dinner rotation.


Ingredients

Scale
  • 8 oz dried pasta of choice (half standard box)
  • 1 Tablespoon olive oil
  • ½ cup onion (finely chopped)
  • 34 cloves garlic (minced)
  • 1 Tablespoon butter
  • 1 pound chicken breasts (cut into bite-size pieces)
  • ½ teaspoon EACH Italian seasoning, smoked paprika, red pepper flakes, garlic powder, salt, pepper
  • 1 cup heavy cream
  • ½ cup parmesan cheese grated
  • ½ cup sun-dried tomatoes (chopped)
  • basil leaves (for garnish)

Instructions

  1. Place a large pot of salted water on medium-high heat, add pasta, and cook until al dente. Reserve ½ cup of pasta water before draining.
  2. While the pasta is cooking, heat 1 tablespoon olive oil in a large heavy-duty pan over medium-high. Add the onion and cook for 2-3 minutes or until softened.
  3. Add the garlic and butter and sauté for 30 seconds, then add the chicken and seasoning. Sauté for 3-5 minutes or until chicken pieces are browned and cooked through.
  4. Stir in the heavy cream, reserved pasta water, parmesan cheese, and sun-dried tomatoes. Bring to a simmer and cook for 3-4 minutes. Taste and adjust salt to taste.
  5. Toss the cooked pasta into the pan and stir to combine. Garnish with fresh chopped basil if desired. Serve immediately.


Nutrition

  • Calories: 463 kcal
  • Sugar: 6 g
  • Fat: 24 g
  • Carbohydrates: 37 g
  • Protein: 27 g


Marry Me Chicken Pasta

k">

Tried This Recipe? Leave a Comment!

Did you make this recipe? I’d love to hear how it turned out! Please leave a comment and a rating below. Your feedback helps other home cooks and supports cheerychop.com!

For more delicious inspiration, follow me on Pinterest!

Creamy Rotel Pasta with Ground Beef – Easy Weeknight Dinner

Creamy Rotel Pasta with Ground Beef for Cozy Weeknight Dinners – The Ultimate Weeknight Comfort

⚖️
Difficulty
Easy
⏲️
Prep Time
10 mins
🕒
Cook Time
25 mins
⏱️
Total Time
35 mins
🍽️
Servings
4-6

New York City is my playground, a vibrant tapestry of flavors that constantly inspires me. Yet, even in this bustling metropolis, there are nights when all I crave is the simple, soul-warming comfort of home. This creamy Rotel pasta with ground beef is exactly that – a dish that wraps you in a warm hug, reminiscent of my mother’s kitchen in Morocco, but with a bold, zesty kick that feels distinctly New York. Forget complicated techniques; this easy Rotel pasta recipe is designed for those busy weeknights when you need a delicious meal on the table fast, using ingredients you likely already have.

Imagine a luscious, velvety sauce coating perfectly cooked pasta, studded with savory ground beef, all infused with the subtle heat and tang of tomatoes and green chilies. The aroma alone is enough to make your stomach rumble – a comforting blend of savory beef, creamy cheese, and a hint of spice that’s utterly irresistible. It’s a dish that looks as good as it tastes, with a beautiful orange-hued sauce and tempting chunks of beef peeking through. My culinary training in Paris taught me the art of sauce-making, and I’ve adapted those finesse techniques to create a foolproof, decadent sauce here that’s both rich and wonderfully balanced.

What sets my recipe apart? It’s all about achieving that perfect creamy consistency without sacrificing flavor or taking extra time. I’ve learned from years in professional kitchens that the right balance of ingredients and a few smart steps can elevate a simple dish into something extraordinary. I’ll share a pro tip on building incredible flavor in the beef and a common mistake to avoid that can make your pasta sauce taste flat. This creamy ground beef pasta is more than just a meal; it’s a culinary shortcut to pure comfort that even beginner cooks can master with confidence.

Why This Rotel Pasta Recipe Is the Best

The true magic of this Rotel pasta recipe lies in its inspired simplicity, a concept I often draw upon, whether I’m experimenting with North African spices or classic French pastry. The unique angle here is the marriage of accessible, pantry-staple ingredients with a touch of chef-level technique for maximum flavor payoff. Rotel, often seen as a straightforward canned good, becomes the star, its zesty depth beautifully enhanced by cream cheese and cheddar for a sauce that’s both rich and wonderfully tangy. This isn’t just a dump-and-stir meal; it’s a thoughtfully crafted dish that delivers restaurant-quality taste with minimal fuss, perfect for impressing yourself and your family on a busy evening.

Achieving that perfect, velvety sauce texture is crucial for a dish like this creamy ground beef pasta. My approach ensures the sauce emulsifies beautifully, coating every strand of pasta without becoming oily or separated. We achieve this by carefully incorporating the cream cheese and broth, gently heating without boiling, which allows the cheese to melt smoothly into the savory base. This technique, honed through countless hours in my Parisian culinary training, prevents any grittiness and creates a luscious mouthfeel that’s simply divine. It’s the difference between a good pasta dish and an unforgettable one, transforming humble ingredients into a luxurious experience.

I understand the pressures of weeknight dinners in a city like New York, where time is a precious commodity. That’s why this recipe is designed to be utterly foolproof. The steps are straightforward, the ingredients are readily available in any US supermarket, and the total cooking time is under an hour. Even if your culinary experience is limited, you’ll find yourself confidently creating this delicious, comforting meal. I’ve specifically tested this recipe to be forgiving, ensuring that whether you’re a seasoned home cook or just starting, you’ll achieve a fantastic result every single time.

Creamy Rotel Pasta with Ground Beef Ingredients

When I’m crafting a dish like this, I love visiting the Union Square Greenmarket here in NYC for inspiration, but for this particular recipe, the beauty is in its pantry-friendliness. These are the kind of ingredients that make a weeknight meal magical without a special trip to the store. My mother always said the best meals come from love and good ingredients, and she’d be proud of how these simple items come together for an incredibly comforting Rotel pasta recipe.

Ingredients List

  • 8 oz Elbow Macaroni (Feel free to use any pasta shape you love.)
  • 1 lb Ground Beef (Substitute with ground turkey or chicken for a lighter option.)
  • 2 tbsp Olive Oil (Can be swapped for canola oil if preferred.)
  • 1 tsp Garlic Powder (Fresh minced garlic can kick it up a notch.)
  • 1 tsp Onion Powder (Replace with finely diced fresh onion for extra texture.)
  • 1 tsp Salt (Adjust to taste for perfect seasoning.)
  • 1 tsp Pepper (Adjust to taste for perfect seasoning.)
  • 1 can Diced Tomatoes with Green Chilies (Rotel) (If unavailable, use plain diced tomatoes with spices.)
  • 8 oz Cream Cheese (Consider sour cream for a tangy twist.)
  • 1 cup Beef Broth (Keep it vegetarian by using vegetable broth instead.)
  • 1 cup Shredded Cheddar Cheese (Feel free to substitute with Monterey Jack or a dairy-free alternative.)

Ingredient Spotlight

Ground Beef: I typically reach for 80/20 ground beef from a reputable butcher or my local Whole Foods for a good balance of flavor and fat. When browning, make sure not to overcrowd the pan; cook in batches if necessary to ensure it gets nice and crispy, not steamed. For a lighter twist, ground turkey or chicken works wonderfully, though you might need to add a touch more seasoning to boost the flavor.

Diced Tomatoes with Green Chilies (Rotel): This is the heart of our flavor profile! The combination of tomatoes and mild green chilies provides a tangy, slightly spicy base that’s incredibly satisfying. You can find various heat levels of Rotel in most US grocery stores – I usually opt for the mild or original. If you can’t find Rotel, simply use a can of diced tomatoes (plain or fire-roasted) and add a pinch of cayenne pepper or a finely diced jalapeño for that essential kick.

Cream Cheese: This is my secret weapon for achieving that luxurious, velvety sauce texture without any fuss. It melts beautifully into the broth and tomatoes, creating a stable, creamy base that coats the pasta perfectly. For a tangier, lighter sauce, you could try using an equal amount of full-fat sour cream, or even Greek yogurt, though whisk it in gently off the heat to prevent curdling. A dairy-free cream cheese alternative also works well for those with sensitivities.

Original IngredientBest SubstitutionFlavor / Texture Impact
Ground BeefGround Turkey or ChickenLighter flavor, may require more seasoning. Texture is similar.
Diced Tomatoes with Green Chilies (Rotel)Canned Diced Tomatoes + pinch of cayenne pepper or 1/2 tsp chili powderSlightly less spice, more dominant tomato flavor. Adjust heat to your preference.
Cream CheeseFull-fat Sour Cream or Greek YogurtTangier, slightly lighter sauce. Whisk in gently off-heat to prevent separation. May require slightly more cheese to achieve similar thickness.
Elbow MacaroniPenne, Rotini, or FarfalleShapes with nooks and crannies hold sauce beautifully. Cooking time may vary slightly.
Cheddar CheeseMonterey Jack, Colby Jack, or Pepper JackMilder or spicier profile. Shredded melts easily for a creamy finish.

How to Make Creamy Rotel Pasta with Ground Beef — Step-by-Step

Grab your apron! This is going to be a delicious and quick culinary adventure.

Step 1: Cook the Macaroni

Bring a large pot of generously salted water to a rolling boil. Add 8 ounces of elbow macaroni and cook according to package directions until it’s perfectly al dente – you want a slight bite. This usually takes about 7-8 minutes. Once cooked, drain the pasta well and set it aside. Don’t rinse it; the starch helps the sauce cling!

💡 mia’s Pro Tip: Always salt your pasta water generously! It should taste like the sea. This is your one chance to season the pasta itself, which makes a huge difference in the final dish.

Step 2: Brown the Ground Beef

In the same pot you used for the pasta (less washing, more winning!), heat 2 tablespoons of olive oil over medium heat. Add 1 pound of ground beef. Break it up with your spoon and cook, stirring occasionally, until it’s beautifully browned and no pink remains, about 5-7 minutes. If you’re using leaner beef, you might not have much fat, but if there’s excess, carefully drain most of it off to avoid a greasy sauce.

⚠️ Common Mistake to Avoid: Overcooking the ground beef until it’s dry and crumbly. You want it browned and juicy, not desiccated. Don’t cook it much longer than necessary once it’s browned.

Step 3: Season the Beef

Once the beef is browned, stir in 1 teaspoon each of garlic powder, onion powder, salt, and pepper. Cook for just 1 minute more, stirring constantly. This brief toasting of the spices helps to bloom their aromas and infuse them directly into the meat, creating a much richer flavor base for your sauce.

Step 4: Create the Creamy Sauce

Pour in one 10-ounce can of diced tomatoes with green chilies (Rotel), undrained. Add 8 ounces of softened cream cheese (cut into cubes for easier melting) and 1 cup of beef broth. Stir everything together over medium-low heat until the cream cheese is completely melted and the sauce is smooth and wonderfully creamy. Keep stirring, scraping the bottom of the pot to ensure nothing sticks.

💡 mia’s Pro Tip: Soften your cream cheese at room temperature for about 30 minutes before starting. It will melt much more quickly and smoothly into the sauce, preventing any lumps.

Step 5: Combine and Melt

Return the drained cooked macaroni to the pot with the creamy sauce. Add 1 cup of shredded cheddar cheese. Stir gently but thoroughly until the cheddar cheese is completely melted and evenly coats the pasta and the beef. The sauce should be thick enough to cling beautifully to every piece of macaroni.

Step 6: Serve Hot

Dish the creamy Rotel pasta with ground beef into individual bowls. For a pop of freshness and color, I love garnishing mine with freshly chopped cilantro or parsley, reminiscent of the vibrant herbs I use back home in Morocco. Serve immediately while it’s hot and utterly comforting.

StepActionDurationKey Visual Cue
1Cook Macaroni7-8 minsAl dente
2Brown Beef5-7 minsFully browned
3Season Beef1 minFragrant
4Make Sauce3-5 minsSmooth & creamy
5Combine & Melt2-3 minsFully coated pasta
6ServeHot & inviting

Serving & Presentation

This creamy Rotel pasta with ground beef is a hearty meal all on its own, but in my NYC food scene, presentation is everything! I love serving it in rustic, shallow bowls that showcase the rich color of the sauce. A sprinkle of fresh, finely chopped parsley or cilantro adds a lovely contrast and a hint of freshness, much like the vibrant garnishes we use in Moroccan tagines. For a richer, more decadent feel, a dollop of sour cream or a sprinkle of extra shredded cheese on top never hurts, especially on a chilly New York evening.

Pairing this dish is all about complementing its creamy, savory, and slightly spicy profile. Think of simple, fresh sides that cut through the richness. A crisp green salad with a bright vinaigrette, perhaps with some thinly sliced red onion and cucumber, would be wonderful. Roasted root vegetables, like carrots and parsnips, provide a touch of sweetness. And for beverages, a crisp lager or a dry rosé would be delightful. In my home, we might serve this with a side of crusty bread to sop up every last bit of that glorious sauce, a simple pleasure from any culture.

Pairing TypeSuggestionsWhy It Works
Side DishSimple Green Salad with Lemon Vinaigrette; Roasted Broccoli; Garlic BreadCuts through richness, adds freshness, or complements savory notes.
Sauce / DipExtra Sour Cream or Greek Yogurt; Avocado SlicesAdds cooling creaminess or a contrasting texture and healthy fats.
BeverageCrisp Lager; Dry Rosé; Unsweetened Iced TeaBalances the creaminess and spice with refreshment.
GarnishFresh Cilantro or Parsley; Sliced Jalapeños (for extra heat); Crushed Red Pepper FlakesAdds freshness, color, and adjustable spice levels.

Make-Ahead, Storage & Reheating

As a busy New Yorker, I know the value of a meal that can be prepped ahead. This creamy Rotel pasta with ground beef is a fantastic candidate for meal prep. You can cook the pasta and the meat mixture separately and store them, then combine and add cheese when you’re ready to serve. It’s a lifesaver for those days when cooking feels like a marathon.

MethodContainerDurationReheating Tip
RefrigeratorAirtight container3-4 daysReheat gently on the stovetop over low heat, adding a splash of milk or broth if it seems too thick. Alternatively, microwave in short bursts, stirring in between.
FreezerFreezer-safe container or heavy-duty freezer bag2-3 monthsThaw in the refrigerator overnight. Reheat on the stovetop as described above. The texture might be slightly less vibrant than fresh, but still delicious!
Make-AheadSeparate containers for pasta and sauce mixtureUp to 2 days before servingGently reheat the sauce mixture on the stovetop, then add the cooked pasta and shredded cheese. Stir until melted and combined.

When reheating on the stovetop, I find it best to use a non-stick skillet over low heat. Add a tablespoon or two of water, milk, or beef broth to the sauce mixture, stir it gently, and let it warm through. This helps re-create that creamy consistency that can sometimes thicken too much upon cooling. Avoid high heat, as that can cause the sauce to break or the pasta to become mushy.

Variations & Easy Swaps

VariationKey ChangeBest ForDifficulty Impact
Spicy Rotel PastaUse Rotel labeled “Hot” or add extra diced jalapeños/serranos.Those who love a good kick!Same
Gluten-Free / Dairy-FreeUse gluten-free pasta and a dairy-free cream cheese/cheddar alternative.Dietary restrictions.Same
Quick Veggie BoostSauté diced bell peppers and onions with the beef, or stir in a can of drained black beans or corn.Adding more nutrients and texture.Same

Spicy Rotel Pasta

For those who crave a bit more heat, this variation is for you! If you can handle the spice, opt for the “Hot” version of Rotel, or add a finely diced fresh jalapeño or serrano pepper when you brown the beef. A pinch of cayenne pepper could also be added to the spice mix. This elevates the dish to a level I sometimes enjoy after a fiery Moroccan meal, offering a delightful warmth that lingers.

Gluten-Free and Dairy-Free Options

Living in NYC means catering to all sorts of dietary needs, and this creamy Rotel pasta is surprisingly adaptable. Simply swap out the regular elbow macaroni for your favorite gluten-free pasta – brown rice or lentil-based pasta works wonderfully. For dairy-free, I’ve tested a good quality dairy-free cream cheese and shredded cheddar – you’ll get a similar creamy texture, though the cheesy flavor might be slightly less pronounced. Ensure your broth is also dairy-free if needed.

Quick Veggie Boost

Sometimes, I like to sneak in extra vegetables without much effort. Sautéing diced bell peppers (any color!) or onions alongside the ground beef adds a lovely sweetness and extra nutrients. You could also stir in a can of drained black beans or corn towards the end of cooking the sauce for added texture and fiber. It’s a simple way to make this weeknight favorite even more wholesome, reflecting the fresh produce I often find at my local farmers market.

What is the best way to brown ground beef for creamy Rotel pasta without it becoming dry?

To ensure your ground beef is flavorful and moist, start by using a good quality beef with about 15-20% fat content. Don’t overcrowd the pan; cook the beef in batches if necessary to allow it to brown properly rather than steam. Break up the meat as it cooks, but avoid constant stirring until it’s mostly browned. Drain off most of the excess fat before adding other ingredients, but leave a little behind for flavor. Cooking it just until browned, rather than for an extended period, is key to preventing dryness.

Can I substitute the Rotel with regular diced tomatoes and add my own spices?

Absolutely! If you can’t find Rotel or want more control over the spice level, substituting with regular diced tomatoes is perfectly fine. Use one 14.5-ounce can of diced tomatoes (plain or fire-roasted are great options). To replicate the flavor and slight heat of Rotel, I recommend adding about 1/2 teaspoon of chili powder or a generous pinch of cayenne pepper to the sauce along with the tomatoes. You can also finely mince a small piece of fresh jalapeño or green chili to add for an extra zest.

How long should I simmer the creamy Rotel pasta to get the best flavor?

In this recipe, we don’t actually simmer the sauce for an extended period. The cream cheese and cheddar cheese melt beautifully into the Rotel and beef broth to create a wonderfully creamy sauce almost immediately once heated gently. You’ll want to heat it just long enough for the cheeses to fully melt and combine smoothly, which typically takes about 3-5 minutes over medium-low heat. Over-simmering can sometimes cause the dairy to break or the sauce to become too thick. The flavors meld wonderfully in this short time.

What type of pasta works best for holding the creamy Rotel sauce with ground beef?

Elbow macaroni is a classic choice because its small, curved shape is perfect for catching and holding onto creamy sauces. However, any short pasta shape with nooks, crannies, or ridges will work beautifully. Think penne, rotini, fusilli, farfalle (bow-ties), or shells. These shapes are excellent for trapping bits of ground beef and ensuring every bite is loaded with that delicious, cheesy sauce. Avoid long, thin pastas like spaghetti, as they don’t hold dense sauces quite as well.

Can I make this Creamy Rotel Pasta with Ground Beef recipe vegetarian?

Yes, this recipe is very easily adaptable to be vegetarian! To make it vegetarian, simply skip the ground beef entirely. You can add extra vegetables like sautéed mushrooms, zucchini, bell peppers, or onions to give the dish more substance and texture. For the liquid, swap the beef broth for vegetable broth. The creamy cheese sauce base with Rotel will still be incredibly delicious and satisfying, making for a hearty meatless meal.

How do I prevent the cheese sauce from becoming oily or separating?

The key to a stable cheese sauce, especially with cream cheese, is gentle heating and proper emulsification. Make sure your cream cheese is softened; this helps it melt smoothly without needing excessive heat. When adding the cheddar cheese, do so off the heat or over very low heat, stirring constantly until just melted. Using full-fat cheeses also helps create a more stable emulsion. If it does start to look a bit oily, a tiny splash of milk or broth and brisk stirring can often bring it back together.

Share Your Version!

I truly hope you fall in love with this Creamy Rotel Pasta with Ground Beef as much as I do. It’s a dish that brings me so much comfort and joy, and I’d be thrilled to hear about your experience making it! Please leave a star rating and a comment below to share your thoughts. If you snap a photo of your creation, tag me on Instagram or Pinterest (@exorecipe) – I absolutely adore seeing how my recipes come to life in your kitchens!

From my NYC kitchen to yours — I hope this recipe brings as much warmth to your table as it does to mine. — mia 🧡

📌

Love This Recipe? Save It to Pinterest!

If you enjoyed this Creamy Rotel Pasta with Ground Beef recipe, don’t let it get lost in your browser tabs! 😄 Pin it now so you can find it again anytime — and explore hundreds more tried-and-tested recipes waiting for you on my Pinterest boards.

👉 Follow mia on Pinterest @chefrecipes2

📌 Pin this recipe · 🔁 Re-pin your favorites · 💬 Tag me when you make it — I love seeing your creations!

Print

clock clock iconcutlery cutlery iconflag flag iconfolder folder iconinstagram instagram iconpinterest pinterest iconfacebook facebook iconprint print iconsquares squares iconheart heart iconheart solid heart solid icon

Creamy Rotel Pasta with Ground Beef for Cozy Weeknight Dinners

  • Author: Chef Mia

Description

Savor the comforting warmth of Creamy Rotel Pasta with Ground Beef, perfect for quick and delightful weeknight dinners.


Ingredients

Scale
  • 8 oz Elbow Macaroni (Feel free to use any pasta shape you love.)
  • 1 lb Ground Beef (Substitute with ground turkey or chicken for a lighter option.)
  • 2 tbsp Olive Oil (Can be swapped for canola oil if preferred.)
  • 1 tsp Garlic Powder (Fresh minced garlic can kick it up a notch.)
  • 1 tsp Onion Powder (Replace with finely diced fresh onion for extra texture.)
  • 1 tsp Salt (Adjust to taste for perfect seasoning.)
  • 1 tsp Pepper (Adjust to taste for perfect seasoning.)
  • 1 can Diced Tomatoes with Green Chilies (Rotel) (If unavailable, use plain diced tomatoes with spices.)
  • 8 oz Cream Cheese (Consider sour cream for a tangy twist.)
  • 1 cup Beef Broth (Keep it vegetarian by using vegetable broth instead.)
  • 1 cup Shredded Cheddar Cheese (Feel free to substitute with Monterey Jack or a dairy-free alternative.)

Instructions

  1. Bring a large pot of salted water to a boil and cook the elbow macaroni until al dente, about 7-8 minutes. Once done, drain and set aside.
  2. In the same pot, heat olive oil over medium heat. Add the ground beef, cooking until browned, around 5-7 minutes. Drain any excess fat.
  3. Stir in garlic powder, onion powder, salt, and pepper. Cook for 1 minute, allowing the spices to blend into the meat.
  4. Pour in the Rotel, adding softened cream cheese and beef broth. Stir until smooth and creamy.
  5. Return the cooked macaroni to the pot. Add shredded cheddar cheese, stirring until melted and well coated.
  6. Dish into bowls and garnish with fresh cilantro or parsley if desired. Serve hot.


Nutrition

  • Calories: 450 kcal
  • Sugar: 4 g
  • Fat: 20 g
  • Carbohydrates: 45 g
  • Protein: 25 g


Creamy Rotel Pasta with Ground Beef for Cozy Weeknight Dinners

Easy No-Bake Peanut Butter Rice Krispie Balls

Peanut Butter Balls with Rice Krispies: Easy No-Bake Chocolate Covered Delight

⚖️
Difficulty
Easy
⏲️
Prep Time
15 mins
🕒
Cook Time
30 mins
⏱️
Total Time
45 mins
🍽️
Servings
24

There are some recipes that are just pure joy in edible form, and these Peanut Butter Balls with Rice Krispies are absolutely one of them. I first discovered a similar treat at a bustling market in Marrakesh during a trip with my mother, where vendors skillfully crafted these sticky, sweet delights. The combination of nutty peanut butter and crispy cereal coated in rich chocolate always transports me back. Now, living in New York City, I’ve perfected my own no-bake peanut butter balls recipe, blending that nostalgic charm with the efficiency needed for a busy urban life. It’s a simple yet magical recipe, perfect for any occasion, and I can’t wait for you to try my version of these easy peanut butter balls.

Imagine biting into a perfectly spherical treat: the satisfying crunch of Rice Krispies cereal immediately gives way to a dense, creamy peanut butter center, all enrobed in a shell of smooth, decadent chocolate. The saltiness of the peanut butter beautifully balances the sweetness of the chocolate and the subtle malty notes of the cereal. It’s a symphony of textures and flavors that can only be described as utterly addictive. It reminds me of the meticulous sauce work I learned in Paris – how seemingly simple ingredients can create complex satisfying results. The aroma alone, a blend of roasted peanuts and melting chocolate, is enough to make your kitchen feel like the coziest spot in the city.

What makes my rendition of these no-bake peanut butter balls truly special is its simplicity without compromising on taste or texture. I’ve streamlined the process so you can achieve that perfect, melt-in-your-mouth bite with minimal effort. You’ll discover a key technique for achieving that beautiful chocolate shell and learn about a common pitfall that can lead to crumbly balls. I’m excited to share these insights, gathered from years in professional kitchens and countless home baking adventures, to ensure your homemade batch is an absolute triumph. Get ready for a simple, delightful dessert that will become a family favorite in no time.

Why This Peanut Butter Balls with Rice Krispies Recipe Is the Best

The secret to these incredible no-bake peanut butter balls lies in the perfect balance of ingredients and a touch of professional technique. My background, blending Moroccan comforts with Parisian precision, truly shines here. I’ve found that using a specific ratio of creamy peanut butter to softened butter creates a base that is both rich and cohesive, ensuring a delightful flavor profile. This isn’t just about mixing ingredients; it’s about understanding how they interact to create something truly special. The addition of vanilla extract, a whisper learned from my pastry training in France, elevates the nutty notes and adds a layer of depth that makes these truly irresistible.

Achieving that ideal texture – a delightful chewiness from the peanut butter and cereal mixture, contrasted with a crisp chocolate shell – is all about the folding technique and the temperature control of the chocolate. I’ll guide you on how to gently incorporate the Rice Krispies cereal so you retain their signature crunch, preventing a soggy or dense ball. Furthermore, my method for melting chocolate ensures a smooth, glossy coating every time, setting up beautifully without cracking or blooming. This attention to detail, something a true chef values, ensures your easy peanut butter balls have a professional finish.

For busy home cooks and anyone new to baking, this recipe is an absolute dream. It’s entirely no-bake, meaning no turning on the oven for hours, which is perfect for those hot New York City summer days or when you need a quick dessert fix. With just a few common pantry staples, you can whip up a batch of these delightful peanut butter balls with rice krispies in under an hour. The steps are straightforward, and the results are incredibly rewarding, making it an ideal recipe for kids to help with or for last-minute potluck contributions.

Peanut Butter Balls with Rice Krispies Ingredients

When I first started creating this recipe, I’d scour the aisles of my local Union Square Greenmarket for the freshest peanut butter and seasonal chocolate, though most of my pantry staples are now sourced from my favorite NYC stores, ensuring quality and flavor. If you’re on the West Coast, you’ll find similar quality ingredients in your local farmers’ markets. My mother in Morocco always emphasized using the best of what’s available, and that philosophy guides my cooking today.

Ingredients List

  • 2 cups peanut butter (creamy or crunchy)
  • ½ cup salted butter, softened
  • 2 teaspoons vanilla extract
  • 2 cups powdered sugar
  • 3½ cups Rice Krispies cereal
  • 20 ounces chocolate melting wafers (milk, semi-sweet, or dark)

Ingredient Spotlight

Peanut Butter: This is the star of the show! I recommend using a good quality commercial peanut butter like Jif or Skippy, as they often contain stabilizers that help achieve the best texture for no-bake treats. Creamy peanut butter will give you a smoother ball, while crunchy will add an extra textural element. If you can find a natural peanut butter without added oils, ensure it’s well-stirred for optimal consistency. I often find the best selection at my local grocery store in Manhattan.

Butter: Unsalted, softened butter is crucial for binding the peanut butter mixture and ensuring it’s pliable enough to roll. Using salted butter, as called for in this recipe, adds a wonderful little salty kick that balances the sweetness. Make sure it’s truly softened, not melted – this means leaving it at room temperature for about an hour. Proper softening ensures it creams beautifully with the peanut butter without making the mixture too greasy.

Rice Krispies Cereal: This provides that signature crunch and light texture, making the balls less dense and more delightful. The key is to fold them in gently at the end to avoid crushing them too much, preserving their iconic crispiness. Any brand of puffed rice cereal will work, but the classic Kellogg’s Rice Krispies are my go-to for that nostalgic snap, crackle, and pop!

Chocolate Melting Wafers: I opt for melting wafers (also known as candy melts or compound chocolate) because they are formulated to set up smoothly and firmly without the need for tempering. This is a chef’s shortcut that makes making chocolate-covered treats at home so much easier. You can find these in various colors and flavors at craft stores or well-stocked grocery stores. Semi-sweet is my personal favorite for a classic chocolate peanut butter taste.

Original IngredientBest SubstitutionFlavor / Texture Impact
Peanut Butter (creamy/crunchy)Almond Butter or Sunflower Seed ButterMaintains similar texture; flavor change; nut-free for sunflower seed butter.
Salted ButterUnsalted Butter + ¼ tsp SaltSlightly less salty, but the salt still enhances flavor.
Powdered SugarFinely Ground Granulated Sugar + CornstarchWill result in a slightly grittier texture if not ground very fine.
Chocolate Melting WafersGood Quality Chocolate Chips (with a tiny bit of coconut oil)Will likely require tempering or may not set as firmly, leading to a softer coating.

How to Make Peanut Butter Balls with Rice Krispies — Step-by-Step

Follow these simple steps to create a batch of irresistible no-bake peanut butter balls that will disappear in minutes!

Step 1: Combine Wet Ingredients

In a large mixing bowl, combine the 2 cups of peanut butter, ½ cup of softened salted butter, and 2 teaspoons of vanilla extract. Beat these together with an electric mixer or a sturdy whisk until the mixture is smooth and fully incorporated. You want a creamy, cohesive base before adding the dry ingredients.

💡 mia’s Pro Tip: Make sure your butter is truly softened but not melted. If it’s too cold, it won’t incorporate well; if it’s melted, your mixture will be too greasy and harder to handle later.

Step 2: Add Powdered Sugar

Gradually add the 2 cups of powdered sugar, ½ cup at a time, mixing on low speed (or by hand) after each addition. This prevents a cloud of sugar from dustings your kitchen and ensures it incorporates evenly into the peanut butter mixture. Continue mixing until it’s just combined and the mixture starts to thicken considerably.

⚠️ Common Mistake to Avoid: Don’t dump all the powdered sugar in at once! This can create a huge mess and make it difficult to mix evenly. Adding it in stages ensures a smooth, well-combined dough.

Step 3: Fold in Cereal

Gently fold in the 3½ cups of Rice Krispies cereal using a spatula or wooden spoon. Be careful not to crush the cereal too much; you want to maintain its crispiness. Once the cereal is evenly distributed throughout the thick peanut butter mixture, spoon portions onto a parchment-lined baking sheet using a medium cookie scoop (about 1.5 tablespoons each). This ensures uniform size for even setting.

Step 4: Shape the Balls

Once you have your portions scooped, gently roll each one between your palms to smooth out any rough edges and create neat, uniform balls. This step is important for ensuring they dip cleanly into the chocolate. Place the shaped balls back onto the parchment-lined baking sheet, ensuring they aren’t touching.

💡 mia’s Pro Tip: If the mixture feels too sticky to handle, lightly dust your hands with a bit more powdered sugar or chill the mixture for 10-15 minutes before shaping.

Step 5: Melt the Chocolate

Melt the 20 ounces of chocolate melting wafers in a deep, wide-mouth cup or bowl suitable for dipping. Microwave in 30-second intervals, stirring well after each period, until the chocolate is completely smooth and pourable. Stirring is key to ensuring even melting and preventing scorching.

Step 6: Dip the Balls

Dip each peanut butter ball into the melted chocolate one at a time using a fork or a dipping tool. Allow any excess chocolate to drip back into the bowl for a clean finish. Carefully place the chocolate-coated balls back onto the parchment-lined baking sheet. Work relatively quickly as the chocolate can start to set.

⚠️ Common Mistake to Avoid: Overheating the chocolate can make it seize up or become dull. Stick to short microwave intervals and stir constantly. If the chocolate gets too thick during dipping, microwave it for another 10-15 seconds.

Step 7: Finish and Harden

Continue dipping the remaining balls, reheating the chocolate as needed to maintain a smooth consistency. Once all balls are dipped, let them sit at room temperature for about 30 minutes until the chocolate has hardened. For a quicker set, pop the baking sheet into the refrigerator for about 15 minutes until the chocolate is firm.

StepActionDurationKey Visual Cue
1Combine Peanut Butter, Butter, Vanilla2-3 minsSmooth, creamy, fully combined mixture.
2Mix in Powdered Sugar5-7 minsThick, dough-like consistency.
3Fold in Rice Krispies Cereal2 minsEvenly distributed cereal, mixture holds shape.
4Scoop and Roll Balls10 minsUniform, smooth balls without cracks.
5Melt Chocolate2-3 minsSmooth, glossy, easily pourable chocolate.
6Dip Balls in Chocolate10-15 minsEvenly coated balls, excess chocolate dripped off.
7Harden Chocolate15-30 minsFirm, solid chocolate coating.

Serving & Presentation

These no-bake peanut butter balls are perfectly delightful on their own, but I love presenting them as part of a larger dessert spread. For a NYC-style brunch, I’ll arrange them alongside miniature pastries and fresh fruit. In my mother’s tradition, a small dollop of sweetened condensed milk or a drizzle of honey can add an extra touch of sweetness, reminiscent of the flavors found in our Moroccan kitchens. They also make a beautiful addition to a cookie tray for holidays or special gatherings, adding a comforting, familiar crunch and creamy texture that guests always adore.

Pairing TypeSuggestionsWhy It Works
Side DishMiniature fruit tarts, rich brownies, or classic sugar cookies.Complements the sweetness and texture without overpowering the peanut butter balls.
Sauce / DipRaspberry coulis, caramel sauce, or a dusting of sea salt flakes.Adds a contrasting flavor profile and visual appeal, enhancing the overall dessert experience.
BeverageA strong cup of coffee, a glass of cold milk, or a spiced herbal tea (like Moroccan mint tea).The richness of the coffee or tea cuts through the sweetness, while milk provides a classic, comforting pairing.
GarnishA light drizzle of contrasting chocolate (white chocolate on dark), finely chopped peanuts, or edible gold leaf.Adds a touch of elegance and visual interest, making them stand out on any platter.

Make-Ahead, Storage & Reheating

With my busy New York life, make-ahead recipes are my lifesavers! These peanut butter balls with rice krispies are perfect for preparing a day or two in advance, or even freezing for later. They hold their shape and flavor beautifully, making them ideal for spontaneous dessert needs or planned events. Simply follow the recipe, allow them to set completely, and then store them according to the guidelines below.

MethodContainerDurationReheating Tip
RefrigeratorAirtight container or sealed bag.Up to 7 days.Serve chilled or bring to room temperature for 15-20 minutes.
FreezerFreezer-safe airtight container or bag, with parchment between layers.Up to 3 months.Thaw overnight in the refrigerator, then bring to room temperature for 30 minutes.
Make-AheadStore as above.Can be made up to 3 days in advance.Assemble and dip the day before serving for best texture.

If you’ve frozen these beauties, plan ahead for thawing. The best method, in my opinion, is to let them come to room temperature slowly. Take them out of the freezer and place them in an airtight container in your refrigerator overnight. This prevents condensation from forming on the chocolate. Once they’re fully chilled, leave them on the counter for about half an hour to reach perfect serving temperature. This ensures the chocolate coating remains smooth and the interior stays perfectly chewy.

Variations & Easy Swaps

While this classic peanut butter balls with rice krispies recipe is perfect as is, it’s always fun to experiment with flavors! My culinary journey has taught me to embrace creativity, whether it’s adding a North African spice to a French pastry or a unique twist to an American classic. Here are a few variations I love to make in my NYC kitchen.

VariationKey ChangeBest ForDifficulty Impact
Cinnamon SpiceAdd 1 tsp ground cinnamon to the peanut butter mixture.Fall gatherings, warm dessert lovers.No change.
White Chocolate DrizzleDrizzle melted white chocolate over the hardened dark chocolate coating.Festive occasions, aesthetic appeal.Minor added step; requires careful drizzling.
Add-insFold in ¼ cup mini chocolate chips or crushed pretzels with the Rice Krispies.Snackers, texture enthusiasts.No change.

Cinnamon Spice Peanut Butter Balls

For a warm, comforting twist, I love adding a teaspoon of ground cinnamon to the initial peanut butter and butter mixture. This subtly transforms the flavor profile, adding a cozy spice that pairs wonderfully with the peanut butter and chocolate. It’s a simple nod to some of the aromatic spices used in Moroccan baking, elevating these cookies to something truly special. This variation is particularly delightful during the autumn months.

Gluten-Free & Dairy-Free Option

To make these peanut butter balls gluten-free (they already are, inherently!) and dairy-free, you’ll need a couple of swaps. Use a dairy-free butter alternative (like a vegan butter stick or coconut oil, though coconut oil can slightly alter the flavor) and ensure your chocolate melting wafers are certified dairy-free and vegan. This modification is fantastic for accommodating guests with dietary restrictions, and the texture remains surprisingly similar. I’ve tested this with great success in my NYC apartment kitchen.

Seasonal Flavor Twist

During the holidays, I sometimes incorporate a hint of peppermint extract (just ½ teaspoon to start) into the peanut butter mixture or dip them in dark chocolate and then add a sprinkle of crushed candy canes. For a more elegant touch, inspired by Parisian patisseries, I might gently fold in some finely chopped candied orange peel with the Rice Krispies. These small changes make for wonderfully festive and unique treats.

How do you keep Peanut Butter Balls with Rice Krispies from falling apart?

The key to preventing these no-bake peanut butter balls from falling apart is in the consistency of your base mixture. Ensure you use softened, but not melted, butter and that the powdered sugar is fully incorporated. If the mixture seems too dry and crumbly, you can try adding a tiny bit more softened butter (about ½ teaspoon at a time). If it’s too wet, a tablespoon of powdered sugar can help. Rolling them firmly between your palms also helps create a more cohesive ball before dipping them in chocolate.

Can I use creamy peanut butter instead of crunchy for Peanut Butter Balls with Rice Krispies?

Absolutely! You can use either creamy or crunchy peanut butter for this recipe. Creamy peanut butter will result in a smoother interior for your peanut butter balls with Rice Krispies, while crunchy peanut butter will add an extra textural element with the peanut pieces throughout the center. Both options will yield delicious results, so choose whichever you prefer or have on hand. I find that good quality commercial peanut butters work best due to their stabilizers.

How long do Peanut Butter Balls with Rice Krispies need to chill in the fridge?

If you choose to refrigerate your chocolate-covered peanut butter balls for faster setting, they typically only need about 15 to 20 minutes. You’ll know they’re ready when the chocolate coating is firm to the touch and no longer sticky. Leaving them in longer is perfectly fine and won’t harm them. Alternatively, they can be left at room temperature to harden, which usually takes about 30-60 minutes, depending on the ambient temperature of your kitchen.

What is the best way to melt chocolate for dipping Peanut Butter Balls with Rice Krispies?

For dipping, the easiest and most reliable method is using chocolate melting wafers (or candy melts) and a microwave. Place them in a microwave-safe bowl and heat in 30-second intervals, stirring thoroughly between each one. This prevents the chocolate from burning. You want it to become completely smooth and pourable. If using regular chocolate chips, you might need to add a teaspoon of coconut oil or vegetable shortening and melt over a double boiler for a smoother, glossier finish that sets better.

Can I make these peanut butter balls without Rice Krispies?

Yes, you can absolutely make these peanut butter balls without Rice Krispies, but they will be a different kind of treat! If you omit the Rice Krispies, you’ll have a dense, rich peanut butter fudge ball. You might need to adjust the powdered sugar slightly, as the cereal adds bulk. For a similar textural element, you could try adding finely chopped nuts or even mini chocolate chips into the peanut butter mixture instead. The overall consistency and flavor profile will change, but it will still be a delicious, no-bake confection.

Why are my chocolate-dipped peanut butter balls cracking?

Cracking in the chocolate coating usually happens for a few reasons. If you’re using regular chocolate chips and not properly tempering them, they can contract too much as they cool, leading to cracks. Using chocolate melting wafers, which are designed to set without tempering, is usually the best bet for avoiding this. Another cause can be a significant temperature difference between the cold peanut butter ball and the warm chocolate, or the chocolate cooling too quickly. Ensure your balls are at room temperature before dipping, and work in a moderately warm environment.

Can I double this recipe for Peanut Butter Balls with Rice Krispies?

Yes, you can absolutely double this recipe for Peanut Butter Balls with Rice Krispies. This recipe is quite scalable. You’ll want to increase all ingredients proportionally. Be mindful that doubling the mixture might require a larger mixing bowl and more surface area to lay out the balls to set. If you’re making a very large batch, ensure you have enough space in your refrigerator or on your countertops for all the trays. The cooking and setting times should remain largely the same.

What kind of peanut butter is best for these balls?

For these no-bake peanut butter balls, I strongly recommend using a standard commercial peanut butter like Jif or Skippy. These types of peanut butters contain oils and stabilizers that help them maintain a smooth, consistent texture when mixed with other ingredients like butter and sugar. Natural peanut butters, which tend to separate or have a runnier consistency, can make the mixture too soft and difficult to roll and shape properly. If you must use natural, ensure it’s very well stirred and perhaps chill the mixture thoroughly.

Share Your Version!

I truly hope you’ll try making these easy Peanut Butter Balls with Rice Krispies! They’re such a simple, satisfying treat that always brings smiles. If you do make them, please consider leaving a star rating and your thoughts in the comment section below – it helps me know what you love! And if you share photos of your culinary creations on Instagram or Pinterest, please tag me @exorecipe; I absolutely adore seeing what you make in your kitchens. What’s your favorite type of chocolate for dipping these delightful treats, and why?

From my NYC kitchen to yours — I hope this recipe brings as much warmth to your table as it does to mine. — mia 🧡

📌

Love This Recipe? Save It to Pinterest!

If you enjoyed this Peanut Butter Balls with Rice Krispies recipe, don’t let it get lost in your browser tabs! 😄 Pin it now so you can find it again anytime — and explore hundreds more tried-and-tested recipes waiting for you on my Pinterest boards.

👉 Follow mia on Pinterest @chefrecipes2

📌 Pin this recipe · 🔁 Re-pin your favorites · 💬 Tag me when you make it — I love seeing your creations!

Print

clock clock iconcutlery cutlery iconflag flag iconfolder folder iconinstagram instagram iconpinterest pinterest iconfacebook facebook iconprint print iconsquares squares iconheart heart iconheart solid heart solid icon

Peanut Butter Balls with Rice Krispies

  • Author: Chef Mia

Description

These Rice Krispie Peanut Butter Balls are a sweet and salty no-bake treat that’s made with only 6 ingredients in just 45 minutes! Great for potlucks and cookie trays!


Ingredients

Scale
  • 2 cups peanut butter (creamy or crunchy)
  • ½ cup salted butter (softened)
  • 2 teaspoons vanilla extract
  • 2 cups powdered sugar
  • 3½ cups rice krispies cereal
  • 20 ounces chocolate melting wafers

Instructions

  1. In a large bowl, beat together 2 cups peanut butter, ½ cup salted butter, and 2 teaspoons vanilla extract until fully combined.
  2. Add 2 cups powdered sugar (½ cup at a time), mixing a little between each addition so it doesn't make a mess.
  3. Fold in the 3½ cups rice krispies cereal and portion the mixture out onto a parchment-lined baking sheet with a medium cookie scoop.
  4. Roll the balls between your palms to smooth them out.
  5. Melt 20 ounces chocolate melting wafers in a deep wide-mouth cup or bowl at 30-second intervals, stirring between each one, until fully melted.
  6. Dip the balls in the melted chocolate one at a time, letting any excess chocolate drip off, then placing back on the parchment.
  7. Reheat the chocolate if it begins getting too cool and thick, then finish dipping the balls.
  8. Let the balls sit at room temperature until the harden or pop them in the fridge for 15 minutes.


Nutrition

  • Calories: 324 kcal
  • Sugar: 24 g
  • Fat: 22 g
  • Carbohydrates: 31 g
  • Protein: 6 g


Peanut Butter Balls with Rice Krispies

k">

Tried This Recipe? Leave a Comment!

Did you make this recipe? I’d love to hear how it turned out! Please leave a comment and a rating below. Your feedback helps other home cooks and supports cheerychop.com!

For more delicious inspiration, follow me on Pinterest!

Air Fryer Salmon Bites with Lemon Garlic Butter

“`html

Air Fryer Salmon Bites (Lemon Garlic Butter): Quick and Bursting with Flavor

⚖️
Difficulty
Easy
⏲️
Prep Time
5 mins
🕒
Cook Time
7 mins
⏱️
Total Time
12 mins
🍽️
Servings
2-4

Living in a bustling city like New York, where time is often a precious commodity, I’ve learned to appreciate recipes that deliver maximum flavor with minimum fuss. This recipe for Air Fryer Salmon Bites with Lemon Garlic Butter is a prime example. Growing up in my mother’s kitchen in Morocco, we always emphasized fresh ingredients and vibrant, layered flavors. While her tagines simmered for hours, I’ve adapted that appreciation for quick, impactful meals for my modern life. These salmon bites capture that essence – they’re incredibly fast to prepare, making them perfect for a weeknight dinner or an impressive appetizer. The star of the show, of course, is the juicy salmon elevated by a punchy lemon garlic butter sauce, all cooked to tender perfection in the air fryer.

Imagine bite-sized pieces of salmon, perfectly cooked, offering a melt-in-your-mouth texture with crisp edges, all bathed in a glistening, fragrant sauce. The aroma that fills your kitchen as these cook is simply divine: the bright tang of lemon, the warm depth of garlic, and the rich, subtle sweetness of butter. It’s a symphony of flavors that reminds me of the fresh seafood markets along the Moroccan coast, combined with the sophisticated simplicity I learned during my culinary training in Paris. Served hot, they’re a vibrant burst of taste and color, promising a satisfying meal that’s both healthy and utterly delicious. Each bite is a testament to how simple ingredients, treated with care, can create something truly special.

What sets my approach apart is a focus on achieving that perfect balance between speed and genuine culinary quality. I’ve fine-tuned the cooking time and temperature in the air fryer to ensure the salmon stays incredibly moist and tender, never dry. You’ll discover a key technique in my instructions that guarantees the sauce stays with the salmon, infusing every bite with flavor. I also want to highlight a common mistake many home cooks make that can lead to bland or rubbery salmon – ensuring you don’t overcook it, even by a minute! This recipe is designed to be forgiving, yielding restaurant-quality results in under 15 minutes, proving that healthy, delicious food doesn’t need to be complicated.

Why This Air Fryer Salmon Bites Recipe Is the Best

The secret to these incredible Air Fryer Salmon Bites lies in the simplicity of the lemon garlic butter sauce. It’s inspired by classic French techniques I mastered in Paris – emulsifying butter with acid and aromatics to create a sauce that’s rich yet bright. This isn’t just melted butter; it’s a carefully balanced infusion that clings beautifully to the salmon, creating a flavor so intense and satisfying it feels like a special occasion, even on a Tuesday night. The addition of fresh garlic and lemon juice cuts through the richness, making each bite feel both indulgent and refreshing.

Achieving that perfect texture is paramount. In my professional culinary training, we learned the importance of precise cooking times and temperatures for delicate proteins like salmon. The air fryer is a marvel for this, creating a convection effect that cooks the salmon evenly and quickly. My specific instruction to use a liner and avoid overcrowding ensures each bite gets plenty of hot air circulation, resulting in tender, flaky interiors and just the slightest hint of crispness on the outside – never dry or tough. It’s a method perfected to yield consistent, delightful results every single time.

This recipe is truly foolproof, even for beginner cooks. The steps are straightforward, and the ingredients are readily available at any US grocery store. The air fryer does most of the work, making cleanup a breeze. It’s the ultimate quick meal solution when you’re short on time but craving something healthy and satisfying. You get all the flavor and satisfaction of a gourmet dish without the stress or the long prep time, making it a staple in my busy New York kitchen and hopefully, in yours too.

Air Fryer Salmon Bites Ingredients

When I’m in New York, I love popping into my local farmers market on the weekends – the quality of the produce and seafood is unparalleled. For this recipe, I always seek out the freshest salmon. If the market isn’t an option, my go-to is a good quality, well-sourced salmon from my local Whole Foods or a trusted fishmonger. This recipe is built on simple, high-quality ingredients that let the salmon shine, much like how my mother used spices sparingly in Morocco to highlight the main protein, ensuring every element has a purpose.

Ingredients List

  • 1 pound skinless salmon filet (cut into 1-inch cubes)
  • ½ teaspoon kosher salt
  • ¼ teaspoon freshly ground black pepper
  • 3 tablespoons melted butter
  • 1 tablespoon lemon juice (freshly squeezed is best!)
  • 3 garlic cloves (minced)

Ingredient Spotlight

Salmon: For the best results, I recommend using a good quality salmon filet. Look for vibrant color and firm flesh. King salmon or Atlantic salmon (farmed or wild, depending on your preference and availability) are excellent choices. If you can’t find skinless, you can easily remove it yourself after cooking, though skinless is generally preferred for these bites to ensure even cooking and prevent any chewiness. When buying, always check for a fresh, mild aroma – avoid anything with a strong, ‘fishy’ smell.

Lemon Juice: Freshly squeezed lemon juice is crucial here. It provides a bright, zesty counterpoint to the richness of the butter and salmon. Bottled lemon juice can be quite harsh and lacks the nuanced flavor of fresh. If you absolutely must use bottled, opt for a high-quality one, but know that the vibrant zing will be somewhat diminished. I often use Meyer lemons when they’re in season here in NYC for a slightly sweeter, more floral note.

Garlic: Fresh minced garlic is essential for that pungent, aromatic kick. It infuses the butter with its savory depth. While garlic powder can be used in a pinch, it won’t provide the same fresh, sharp flavor. If using garlic powder, I’d suggest starting with about ½ teaspoon and tasting, as its flavor is more concentrated and can become overpowering if not used judiciously. Always mince your fresh garlic finely for even distribution.

Original IngredientBest SubstitutionFlavor / Texture Impact
Skinless SalmonFor consistent quality, any firm, flaky white fish like cod or halibut could work, though it will have a different flavor profile.Less richness and omega-3s; texture will be more delicate and less oily.
Fresh Lemon JuiceHigh-quality bottled lemon juice or lime juice.Slightly less bright or fresh flavor; lime offers a different citrus note.
Fresh Minced GarlicGarlic powder (start with 1/2 tsp).Less pungent, fresh aroma; powder can be more concentrated and less complex.
Melted ButterOlive oil or avocado oil.A slightly different flavor profile; olive oil can be more robust. Ensure it’s good quality.

How to Make Air Fryer Salmon Bites (Lemon Garlic Butter) — Step-by-Step

Making these lemon garlic butter salmon bites is a breeze, perfect for even the busiest schedule. Just follow these simple steps!

Step 1: Season the Salmon

Start by prepping your salmon. Pat the 1-inch cubes of skinless salmon dry with a paper towel. This helps the seasoning adhere better and promotes a nice texture. Place the salmon in a medium mixing bowl and season generously with ½ teaspoon of kosher salt and ¼ teaspoon of freshly ground black pepper. Toss gently to ensure each piece is lightly coated. This initial seasoning is the foundation of flavor.

💡 mia’s Pro Tip: For the best flavor infusion, season the salmon at least 5 minutes before adding the sauce. This gives the salt a chance to start drawing out some moisture, which then reabsorbs the seasoning, making the fish more flavorful.

Step 2: Add the Sauce

To the same mixing bowl you used for seasoning the salmon (no need to wash it!), add the 3 tablespoons of melted butter, 1 tablespoon of freshly squeezed lemon juice, and 3 cloves of minced garlic. Toss everything together gently until the salmon cubes are evenly coated in the garlicky lemon butter mixture. Ensure every piece is nestled in that delicious sauce.

Step 3: Air Fry the Salmon

This is where the magic happens! Place a liner in the basket of your air fryer. Parchment paper liners designed for air fryers work perfectly and are crucial to prevent the delicious sauce from dripping through the basket holes. Arrange the salmon bites in a single layer in the lined basket, making sure not to overcrowd them. If necessary, cook in two batches to ensure even cooking. Air fry at 400°F (200°C) for 5 to 7 minutes. The exact time will depend on your air fryer model and the size of your salmon cubes.

💡 mia’s Pro Tip: Try not to crowd the salmon. If needed, cook in two batches. This ensures hot air can circulate around each piece, resulting in perfectly cooked bites. And there’s no need to shake the basket halfway through for this recipe – the sauce stays put and cooks the salmon beautifully.

Step 4: Serve Them Up

Once the salmon bites are cooked – they should be opaque and flake easily with a fork – carefully remove them from the air fryer. Serve them immediately with your favorite sides, such as roasted vegetables, fluffy rice, or a fresh green salad. They are also incredible topped on grain bowls or macro bowls for a healthy, satisfying meal. Don’t forget to drizzle any remaining garlic lemon butter from the bottom of the air fryer basket over the top for an extra burst of flavor!

⚠️ Common Mistake to Avoid: Overcooking the salmon! Salmon cooks very quickly, especially in an air fryer. Start checking for doneness around 5 minutes. Overcooked salmon will be dry and rubbery. Remember, the residual heat will continue to cook them slightly after you remove them from the air fryer.

StepActionDurationKey Visual Cue
1Season Salmon2 minsSalmon cubes evenly coated in salt & pepper.
2Add Sauce1 minSalmon cubes fully coated in lemon garlic butter.
3Air Fry5-7 minsSalmon bites opaque, flaky, with a slight sheen.
4Serve1 minReady to be plated and enjoyed immediately.

Serving & Presentation

These lemon garlic butter salmon bites are incredibly versatile. For a quick weeknight meal, I love serving them alongside simple steamed asparagus or a vibrant quinoa salad. They transform a basic salad into something truly special, adding protein and incredible flavor that takes it from a side dish to a main event. In my Paris chef days, we often served small, perfectly cooked portions of fish as an appetizer with a delicate sauce – these bites capture that elegance in a casual, approachable way. A sprinkle of fresh parsley or dill just before serving adds a pop of color and freshness that’s both beautiful and delicious.

For a more substantial meal, imagine these atop a bed of creamy polenta or nestled into a hearty macro bowl with roasted sweet potatoes, avocado, and a drizzle of that glorious lemon garlic butter sauce. The contrast between the tender salmon and the creamy polenta or the hearty grains is divine. If serving as an appetizer, a small dish of extra lemon wedges on the side is always appreciated, allowing guests to add an extra zing if they wish. These bites are designed to be adaptable, fitting seamlessly into any dining occasion.

Pairing TypeSuggestionsWhy It Works
Side DishRoasted Asparagus, Steamed Broccoli, Quinoa Pilaf, Wild RiceThe freshness and earthiness of vegetables, or the nutty grains, complement the richness of the salmon without overpowering it.
Sauce / DipExtra Lemon Garlic Butter reduced from pan drippings, Tzatziki, Garlic AioliEnhances the existing flavors or provides a cool, creamy contrast to the warm, savory salmon.
BeverageCrisp Sauvignon Blanc, Dry Rosé, Sparkling Water with LemonThe acidity cuts through the richness of the butter and salmon, cleansing the palate.
GarnishFresh Parsley, Dill, Chives, Lemon ZestAdds a final touch of freshness, color, and aromatic complexity.

Make-Ahead, Storage & Reheating

As a busy New Yorker, I often rely on quick meal prep solutions. While these salmon bites are best enjoyed fresh from the air fryer, they store and reheat surprisingly well. I often make a double batch on Sunday to add to lunches throughout the week. This ensures I always have a healthy, protein-packed option ready to go, saving me from unhealthy takeout choices when I’m facing a packed schedule. Simply cook them as directed and let them cool completely before storing.

MethodContainerDurationReheating Tip
RefrigeratorAirtight container2-3 daysGentle reheating in a skillet or air fryer at a lower temp (around 300°F/150°C) for a few minutes.
FreezerFreezer-safe bag or container, ideally flash-frozen first1-2 monthsThaw in the refrigerator overnight, then reheat in skillet or air fryer.
Make-AheadAirtight container (refrigerated)1 day before servingReheat just before serving to maintain best texture.

When reheating, I always opt for a low-and-slow approach in a skillet with a touch of olive oil or butter, or a brief spin in the air fryer at a lower temperature. This helps to gently warm the bites through without overcooking them, preserving that desirable tender texture. Avoid microwaving if possible, as it can make the salmon a bit rubbery. If you’re adding them to a salad or bowl, they can often be enjoyed cold or at room temperature directly from the fridge, which is a fantastic quick lunch option!

Variations & Easy Swaps

VariationKey ChangeBest ForDifficulty Impact
Spicy Moroccan-InspiredAdd ½ tsp smoked paprika and ¼ tsp cayenne pepper to the sauce.Adding a kick to the flavor profile.Easy
Gluten-Free & Dairy-Free FriendlySwap butter for olive oil or avocado oil; use a dairy-free butter alternative. Ensure all other ingredients are naturally free of gluten and dairy.Dietary restrictions while maintaining great flavor.Easy
Herbed Lemon TwistAdd 1 tablespoon of fresh chopped dill or parsley to the sauce.Adding fresh, garden flavors.Easy

Spicy Moroccan-Inspired

Channeling my Moroccan heritage, I love to add a touch of heat and smoky depth to these bites. Stirring in some smoked paprika and a pinch of cayenne pepper to the lemon garlic butter sauce is my secret. The paprika brings a beautiful color and earthy notes, while the cayenne adds a pleasant warmth that complements the richness of the salmon. This variation evokes the vibrant spice markets of Marrakech and makes for a wonderfully addictive appetizer or a flavorful addition to any meal.

Gluten-Free & Dairy-Free Friendly

For those with dietary needs, these salmon bites are incredibly adaptable. Simply swap the melted butter for a good quality olive oil or avocado oil. You can also use a dairy-free butter alternative if you prefer. The lemon and garlic flavors are naturally gluten-free and dairy-free, so they shine through beautifully. This swap ensures everyone can enjoy these delicious bites, making them a perfect option for gatherings with mixed dietary requirements. The texture will be slightly lighter, but the flavor remains robust.

Herbed Lemon Twist

Adding fresh herbs is a simple yet effective way to elevate these salmon bites. My personal favorites are fresh dill or parsley, finely chopped and stirred into the lemon garlic butter sauce just before coating the salmon. Dill adds a bright, slightly anise-like flavor that pairs wonderfully with fish, while parsley provides a clean, peppery freshness. I love picking up fresh herbs from Union Square’s farmers market here in NYC – their fragrance is incredible and truly elevates the dish, making it feel even more vibrant and gourmet.

How long should I cook air fryer salmon bites with lemon garlic butter to keep them tender?

To ensure your air fryer salmon bites remain tender and moist, I recommend cooking them at 400°F (200°C) for 5 to 7 minutes. The key is to watch them closely as air fryers can vary. They are done when they turn opaque and flake easily with a fork. Importantly, avoid overcooking them, as even a minute too long can result in a drier texture. Start checking at the 5-minute mark.

What is the best type of salmon to use for air fryer salmon bites?

For these air fryer salmon bites, I find that a good quality, skinless Atlantic or King salmon filet works best. These varieties are rich, fatty, and hold up well to quick cooking, ensuring a tender and flavorful result. Look for vibrant color and a fresh aroma. If you can only find salmon with skin, it’s easily removed after cooking, but skinless is preferred for even cooking and bite-sized portions.

Can I substitute fresh garlic with garlic powder in lemon garlic butter salmon bites?

Yes, you can substitute fresh garlic with garlic powder in a pinch. However, the flavor will be less potent and fresh. I recommend starting with about ½ teaspoon of garlic powder and tasting the mixture before coating the salmon. Fresh garlic provides a brighter, more pungent aroma and flavor that truly enhances the lemon butter sauce. Garlic powder offers a more mellow, concentrated taste that’s quite different.

How do I prevent air fryer salmon bites from sticking to the basket?

To prevent your air fryer salmon bites from sticking and ensure the sauce doesn’t drip through, using a liner is key! I highly recommend using parchment paper liners specifically designed for air fryers. Alternatively, you can lightly brush the air fryer basket with oil before placing the salmon. This creates a non-stick surface, making cleanup a breeze and ensuring your delicious salmon bites come out perfectly intact.

Can I make these salmon bites ahead of time?

While these salmon bites are best enjoyed fresh, you can absolutely make them ahead. Cook them as directed and allow them to cool completely. Store them in an airtight container in the refrigerator for up to 2-3 days. For reheating, I suggest a quick, gentle warm-up in a skillet or back in the air fryer at a lower temperature (around 300°F/150°C) for a few minutes to preserve their tender texture.

What is the best way to cut salmon for salmon bites?

For salmon bites, aim to cut the salmon filet into uniform 1-inch cubes. This ensures that all the pieces cook evenly in the air fryer. Using a sharp knife and cutting against the grain will result in more tender bites. Make sure the salmon is chilled but not frozen, making it firmer and easier to cut cleanly. Uniformity is key for consistent cooking results.

Can I use frozen salmon for this recipe?

It’s best to use fresh or thawed salmon for this recipe. If you must use frozen salmon, ensure it is completely thawed before cutting and cooking. Thawing typically involves placing the frozen salmon in the refrigerator overnight. Using partially frozen salmon can lead to uneven cooking, where the outside might overcook before the inside is done, affecting the texture negatively.

Share Your Version!

I truly hope you enjoy making and devouring these Air Fryer Salmon Bites as much as I do! If you try this recipe, please consider leaving a star rating and a comment below – your feedback means the world to me. And if you share a photo of your delicious creation on Instagram or Pinterest, don’t forget to tag me @exorecipe; I absolutely love seeing your culinary adventures come to life! I’m always curious to know, did you try adding any of your favorite herbs to the lemon garlic butter sauce?

From my NYC kitchen to yours — I hope this recipe brings as much warmth to your table as it does to mine. — mia 🧡

📌

Love This Recipe? Save It to Pinterest!

If you enjoyed this Air Fryer Salmon Bites recipe, don’t let it get lost in your browser tabs! 😄 Pin it now so you can find it again anytime — and explore hundreds more tried-and-tested recipes waiting for you on my Pinterest boards.

👉 Follow mia on Pinterest @chefrecipes2

📌 Pin this recipe · 🔁 Re-pin your favorites · 💬 Tag me when you make it — I love seeing your creations!

“`

Print

clock clock iconcutlery cutlery iconflag flag iconfolder folder iconinstagram instagram iconpinterest pinterest iconfacebook facebook iconprint print iconsquares squares iconheart heart iconheart solid heart solid icon

Air Fryer Salmon Bites (Lemon Garlic Butter)

  • Author: Chef Mia

Description

These salmon bites, coated in lemony garlic butter, are the quick and easy salmon dinner you didn’t know you needed. Top them on salads, bowls, or veggies for endless meal variety throughout the week!


Ingredients

Scale
  • 1 pound skinless salmon filet (cut into 1-inch cubes)
  • ½ teaspoon kosher salt
  • ¼ teaspoon freshly ground black pepper
  • 3 tablespoons melted butter
  • 1 tablespoon lemon juice
  • 3 garlic cloves (minced)

Instructions

  1. Season the salmon. Add the salmon to a mixing bowl and season with salt and pepper. Toss to combine.
  2. Add the sauce. To the same mixing bowl, add the butter, lemon juice, and garlic. Toss to combine.
  3. Air fry the salmon. Place a liner in the basket of the air fryer (this is key to prevent the sauce from falling through). Add the salmon along with the sauce to the lined basket and air fry at 400°F (200°C) for 5 to 7 minutes. Pro tip: Try not to crowd the salmon. If needed, cook in two batches. And there's no need to shake halfway through.
  4. Serve them up. Serve the salmon bites with your favorite sides or top on a salad or macro bowl. And don't forget to drizzle the remaining garlic lemon butter on top!


Nutrition

  • Calories: 241 kcal
  • Sugar: 0.1 g
  • Fat: 16 g
  • Carbohydrates: 1 g
  • Protein: 23 g


Air Fryer Salmon Bites (Lemon Garlic Butter)