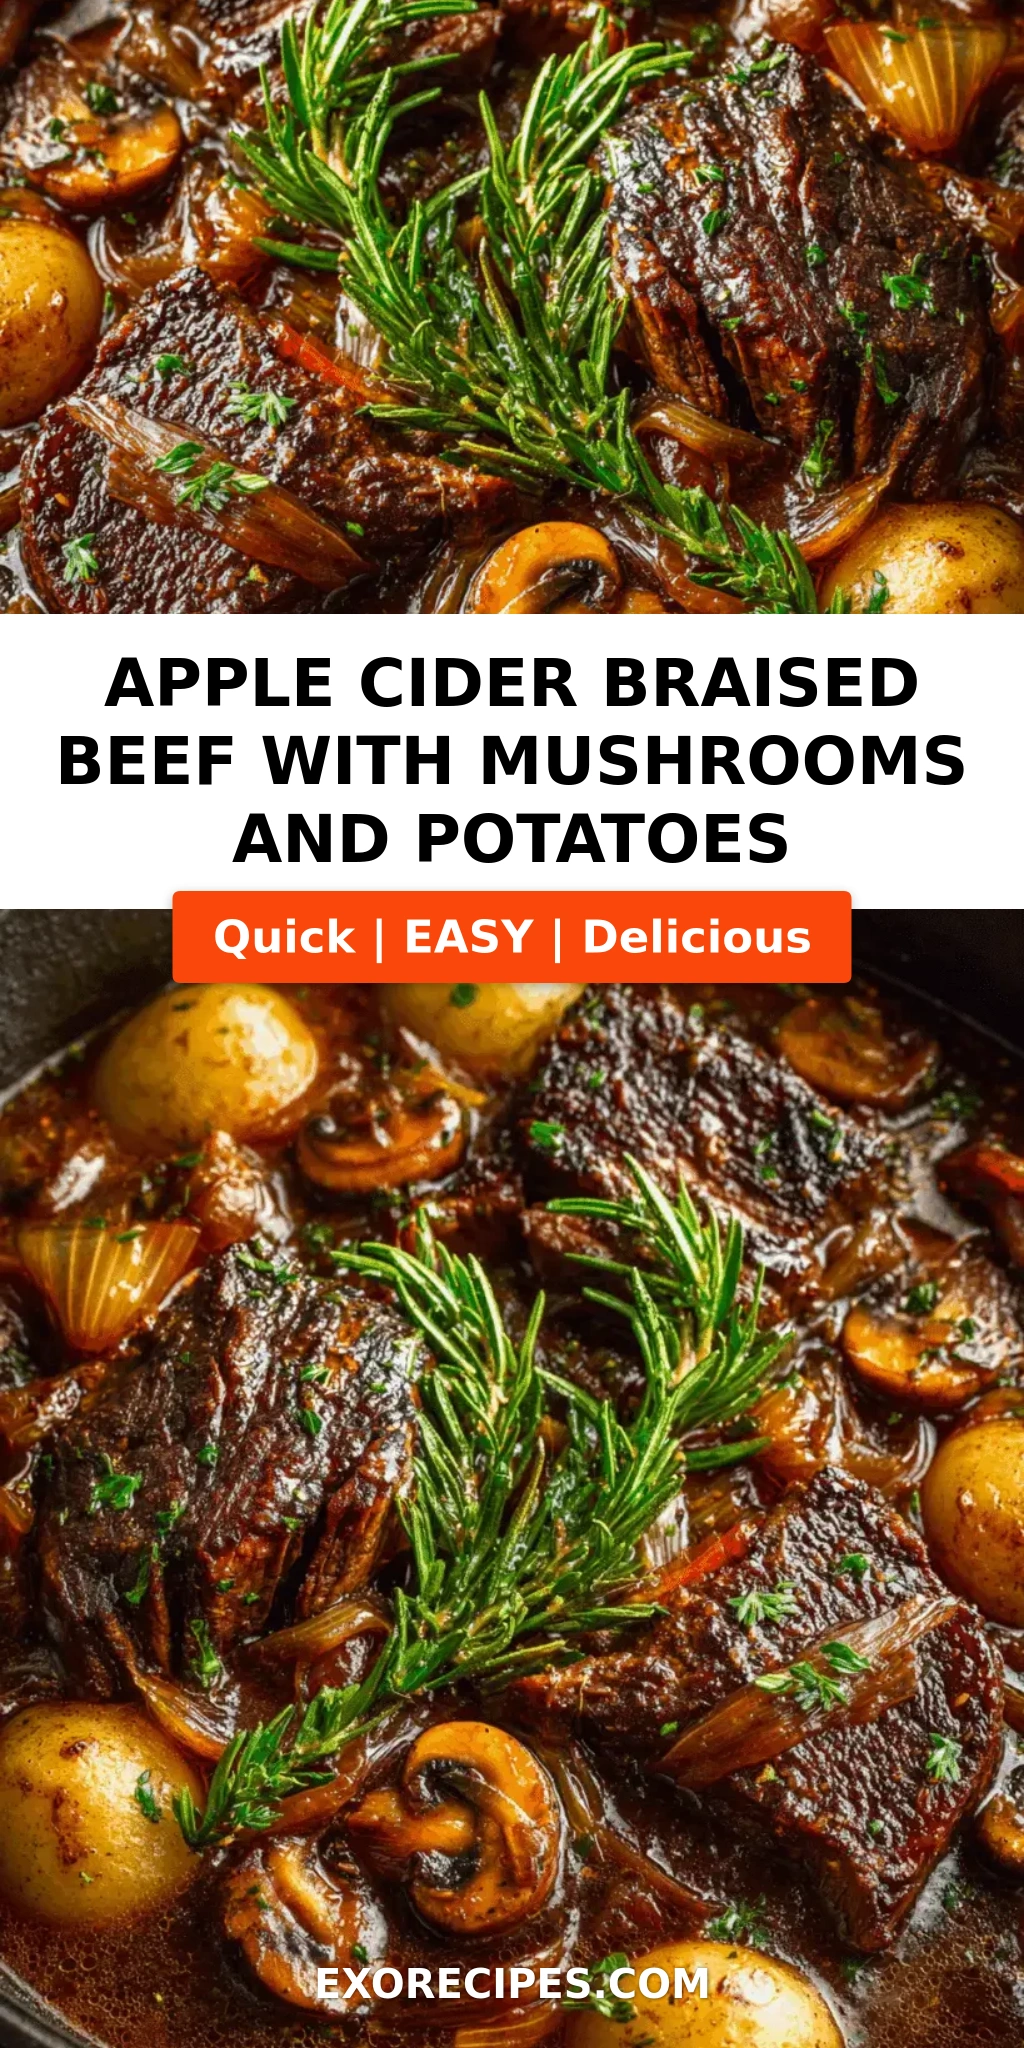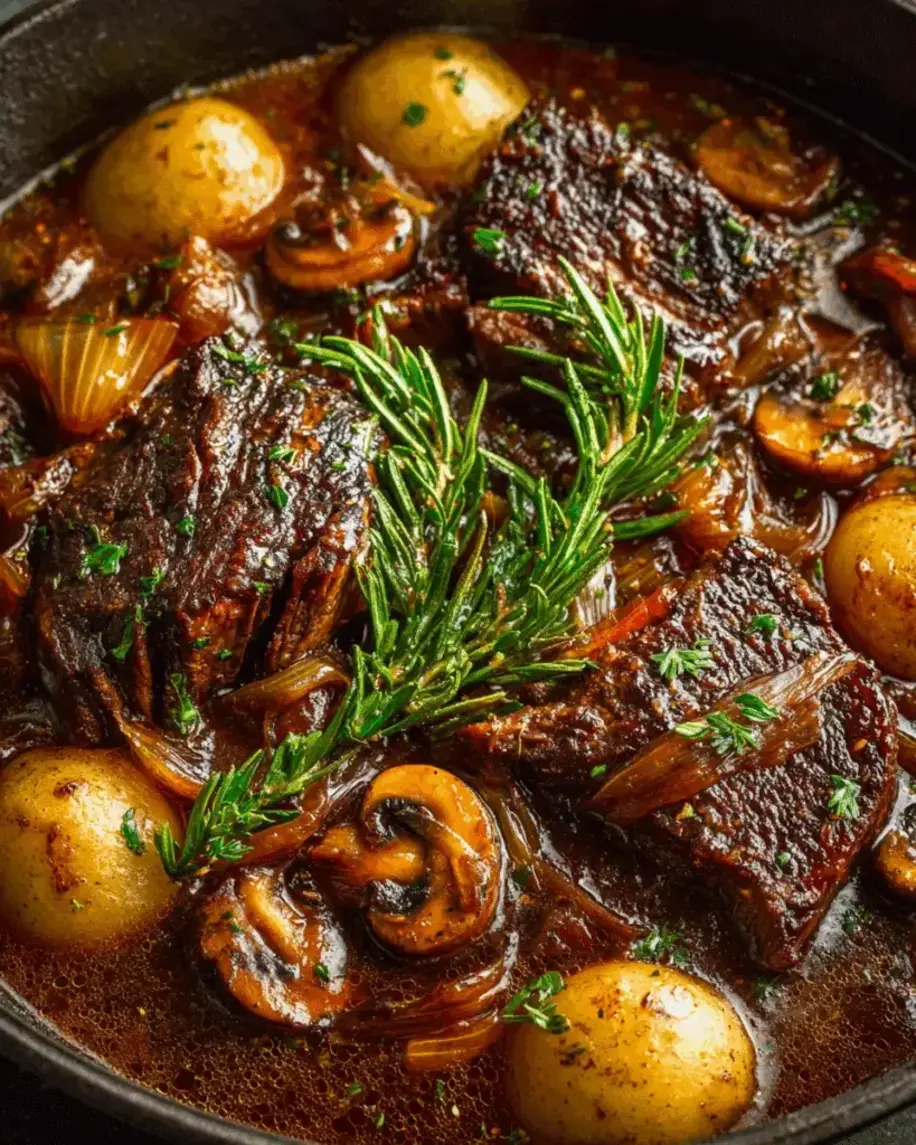
Apple Cider Braised Beef with Mushrooms, Baby Potatoes & Pearl Onions – The Ultimate Comfort Dish You’ll Crave Again and Again

⚖️
Difficulty
Medium
⏲️
Prep Time
20 mins
🕒
Cook Time
150 mins
⏱️
Total Time
170 mins
🍽️
Servings
6

I still remember the first time I braised beef with apple cider. It was a chilly autumn afternoon in my tiny Paris kitchen, while I was training at Le Cordon Bleu. The sweet-tart scent of cider mingling with seared beef and fresh thyme took me straight back to my mother’s tagine pot in Morocco, where slow-cooking was a way of life. This apple cider braised beef recipe is the bridge between those two worlds: French technique meets North African warmth, all cooked in one pot right here in my New York City apartment. It’s the ultimate comfort food beef recipe for fall — and honestly, for any season when you need a hug in a bowl.

Imagine fork-tender chunks of beef chuck, each one glazed with a silky, slightly sweet apple cider gravy. Earthy cremini mushrooms and sweet pearl onions nestle beside buttery baby potatoes that have soaked up every drop of that luscious broth. The aroma alone — rosemary, thyme, a whisper of Dijon — will fill your home with the kind of anticipation that makes dinner feel like an event. Every spoonful is a balance of savory, fruity, and umami, with that little tang of apple cider vinegar cutting through the richness. It’s the kind of dish that makes you close your eyes and take your time.

I’ve tested this recipe a dozen times to make sure it’s foolproof for home cooks. My version skips the fuss — no browning in batches? Wait, you must! — but I’ll show you exactly how to get that deep crust on the beef without overcrowding the pot. One mistake I see often is skipping the sear or adding the cider too late. I’ll teach you my Paris-trained trick for building layers of flavor. And yes, I’ll share my pro tip for thickening the sauce at the end without any complicated roux. Whether you’re a seasoned cook or trying braised beef for the first time, you’ve got this.

Why This Apple Cider Braised Beef Recipe Is the Best

The flavor secret is the apple cider itself. I use unfiltered apple cider — the kind with a bit of sediment — which brings natural sweetness and a gentle acidity that tenderizes the beef while keeping it juicy. Growing up in Morocco, my mother would braise lamb with dried apricots and honey; here I swap in apple cider for a distinctly American fall twist, but the same principle applies: fruit + meat + patience = magic. The mushrooms add an earthy depth that balances the sweetness, and I caramelise them separately before adding the liquid — that’s a classic French sauce-building step that gives you a deeper, browner gravy.

Perfected texture comes from two things: the cut of meat and the oven temperature. Beef chuck is my go-to — it has just the right amount of marbling to break down into shreds without drying out. I sear it over high heat in a hot Dutch oven, then let the oven do the work at 325°F. That low, even heat allows the connective tissue to melt into gelatin, creating a velvety sauce that clings to each potato and onion. I’ve learned from years in professional kitchens that the best braises are the ones you don’t rush — and this one rewards your patience with beef so tender it falls apart at the touch of a fork.

Foolproof and fast? Yes, for a braised dish. The active prep is only 20 minutes — mostly chopping and browning. Once everything is in the pot, you can walk away for two hours. I often prep this on a Sunday afternoon, let it cool, and reheat it midweek — the flavors only get better. And because it’s a one-pot meal (potatoes and all), there’s minimal cleanup. This isn’t just comfort food; it’s smart cooking for busy lives. Beginners love that it’s nearly impossible to overcook as long as you keep the heat low and the lid on.

Apple Cider Braised Beef Ingredients

I pick up my baby potatoes at the Union Square Greenmarket in the fall — those tiny Yukon Golds are sweet and creamy. The apple cider I get from a local orchard; any unfiltered cider works beautifully. And whenever I slice cremini mushrooms, I’m reminded of foraging trips with my grandfather in the Moroccan countryside. The ingredients are simple, but source them with love and you’ll taste the difference.

Ingredients List

  • 2 lbs beef chuck, cut into 2-inch cubes
  • Salt and freshly ground black pepper
  • 2 tablespoons olive oil
  • 1 large onion, chopped
  • 3 cloves garlic, minced
  • 8 oz cremini mushrooms, halved
  • 1 lb baby potatoes (Yukon Gold or red)
  • 1 cup pearl onions (frozen or fresh, peeled)
  • 1 ½ cups apple cider (unfiltered)
  • 1 cup beef broth
  • 2 tablespoons tomato paste
  • 2 sprigs fresh rosemary
  • 3 sprigs fresh thyme
  • 2 bay leaves
  • 1 tablespoon Dijon mustard
  • 1 tablespoon apple cider vinegar
  • 2 tablespoons all-purpose flour (optional, for thickening)
  • Fresh parsley for garnish

Ingredient Spotlight

Beef Chuck: This is the MVP of braising. It comes from the shoulder, rich in connective tissue that melts into unctuous goodness. Look for well-marbled pieces with even fat distribution. If you can’t find chuck, brisket or bottom round work, but the cooking time may vary slightly. Avoid lean cuts like sirloin — they’ll turn dry.

Apple Cider (Unfiltered): The star of the show. Unfiltered cider contains apple pulp and natural sugars that thicken and flavor the sauce. Don’t use apple juice — it’s too thin and lacks acidity. In a pinch, use a dry hard cider (alcoholic) for a more adult twist. That’s a fun option I’ve used when cooking for dinner parties.

Cremini Mushrooms: Also called baby bellas, they have a deeper flavor than white mushrooms. They hold their shape beautifully during the long braise. If you only have white mushrooms, add them later (after 1 hour) so they don’t disintegrate. For a foraged twist, try shiitakes — but remove the stems first.

Pearl Onions: These tiny sweet onions add pops of goodness. Frozen pearl onions are a lifesaver — no peeling required. Fresh ones need a quick blanch to slip off the skins. If you can’t find them, use a large sweet onion cut into chunks, or shallots halved. The sweetness will still shine.

Original IngredientBest SubstitutionFlavor / Texture Impact
Beef chuckBrisket or bottom roundSlightly leaner, may need 15-20 min extra braise
Unfiltered apple ciderDry hard cider + 1 tsp sugarLess sweet, more complex, slightly alcoholic kick
Cremini mushroomsWhite mushrooms or shiitake (stems removed)White mushrooms: milder, add later. Shiitake: more umami and chew
Pearl onionsShallots (halved) or diced sweet onionShallots: similar sweetness, less textural pop. Onion: more integrated into sauce

How to Make Apple Cider Braised Beef — Step-by-Step

Don’t let the long ingredient list intimidate you — this is a set-it-and-forget-it kind of meal. Follow these steps and you’ll have a showstopping dinner that tastes like you spent all day in the kitchen (and you kind of did, but mostly hands-off).

Step 1: Sear the Beef

Season the beef cubes generously with salt and pepper — don’t be shy. Heat olive oil in a large Dutch oven over medium-high heat until shimmering. Working in batches so you don’t crowd the pan, sear the beef until deeply browned on all sides, about 4–5 minutes per batch. Transfer browned pieces to a plate.

💡 mia’s Pro Tip: Pat the beef dry with paper towels before seasoning. Moisture is the enemy of a good sear! And let the pot reheat between batches to maintain that sizzle.

Step 2: Sauté the Aromatics

Reduce heat to medium. Add the chopped onion and cook, stirring occasionally, until soft and translucent, about 3–4 minutes. Add the minced garlic and halved mushrooms, then cook until the mushrooms start to brown and release their liquid — about 5 minutes. This caramelisation is where magic happens.

⚠️ Common Mistake to Avoid: Don’t rush this step! If you add the tomato paste too early, it will burn. Wait until the mushrooms have taken on some color.

Step 3: Build the Base

Stir in the tomato paste and cook for 1 minute — it will darken and smell rich. If you’re using the flour for thickening, sprinkle it over the vegetables now and stir for another minute to cook off the raw taste. This is my French-style “roux rapide” for braising.

💡 mia’s Pro Tip: If you’re gluten-free, skip the flour completely. The potatoes will naturally thicken the sauce as they cook — just mash a few at the end.

Step 4: Deglaze and Simmer

Pour in the apple cider and beef broth, using a wooden spoon to scrape up all the browned bits stuck to the bottom of the pot — that’s concentrated flavor. Add the rosemary, thyme, bay leaves, Dijon mustard, and apple cider vinegar. Return the beef and any accumulated juices to the pot. Nestle in the baby potatoes and pearl onions.

⚠️ Common Mistake to Avoid: Adding all the liquid at once without scraping the fond. Those browned bits are gold! Make sure your spoon digs into the corners of the pot.

Step 5: Braise in the Oven

Bring the liquid to a gentle simmer on the stovetop (you should see small bubbles around the edges). Cover the pot with a tight-fitting lid and transfer to a preheated 325°F (165°C) oven. Braise for 2 to 2½ hours, until the beef is fork-tender — it should shred easily with a fork.

💡 mia’s Pro Tip: Check the pot after 1 hour — if the liquid looks too thin, leave the lid slightly ajar for the last 30 minutes to reduce and concentrate flavors.

Step 6: Finish and Serve

Carefully remove the pot from the oven. Discard the rosemary sprigs, thyme stems, and bay leaves. Taste the sauce and adjust salt and pepper — you might need a pinch more salt depending on your broth. If you’d like a thicker sauce, mash a few of the potatoes against the side of the pot and stir them in. Serve hot, garnished with fresh parsley.

⚠️ Common Mistake to Avoid: Forgetting to taste before serving! Braises can dull in seasoning. Always adjust at the end.

StepActionDurationKey Visual Cue
1Sear beef in batches~12–15 min totalDeep mahogany crust on all sides
2Sauté onion, garlic, mushrooms~8–9 minutesMushrooms golden-brown, onions translucent
3Cook tomato paste + flour (if using)1–2 minutesPaste deepens to brick-red
4Deglaze and add liquids~2 minutesAll brown bits dissolved into liquid
5Braise in oven at 325°F2 – 2½ hoursBeef falls apart with fork, potatoes tender
6Finish and serve5 minutesSauce glossy, parsley bright green

Serving & Presentation

I love serving this braised beef in a wide, shallow bowl so the beautiful gravy and colorful vegetables are on full display. Spoon a generous portion of the beef, potatoes, and mushrooms over a bed of creamy polenta or crusty bread — I’m partial to a thick slice of sourdough from my local Brooklyn bakery. A sprinkle of fresh parsley and a tiny pinch of flaky sea salt right before serving elevates the whole dish.

In my Moroccan family, we’d serve this with warm couscous or khobz (Moroccan flatbread) to soak up every drop. In Paris, the classic pairing would be a simple buttered noodle or steamed rice. Here in NYC, I love it with roasted root vegetables or a crisp green salad with a tart vinaigrette to cut the richness. My personal favorite: a glass of dry cider or a light French red like Beaujolais.

For a dinner party, present the Dutch oven at the table — the rustic look is charming. Garnish with a few fresh thyme leaves or rosemary flowers if you have them. Leftovers look stunning in a glass meal-prep container, and I sometimes spoon the cold, jellified broth over toast for a quick, indulgent snack.

Pairing TypeSuggestionsWhy It Works
Side DishCreamy polenta, buttered egg noodles, crusty sourdoughThey soak up the rich, sweet gravy perfectly.
Sauce / DipExtra gravy (make more!), horseradish cremaHorseradish cuts the sweetness; more gravy is always welcome.
BeverageDry hard cider, Beaujolais, dark aleComplement the apple notes; tannins in wine balance the fat.
GarnishFresh parsley, flaky sea salt, microgreensFreshness and color contrast, plus a pop of texture.

Make-Ahead, Storage & Reheating

This braised beef is my ultimate meal-prep MVP. I often make a double batch on Sunday, let it cool, and portion it into containers for the week. The flavors actually deepen overnight — the apple cider mellows and melds with the beef and herbs. In my busy NYC life, knowing I have this in the fridge makes weeknights feel like a treat.

MethodContainerDurationReheating Tip
RefrigeratorAirtight containerUp to 5 daysReheat gently on stovetop over low heat, adding a splash of broth if needed.
FreezerFreezer-safe bag or containerUp to 3 monthsThaw overnight in fridge, then reheat in a covered pot at 325°F for 30 min.
Make-AheadComplete the braise, cool, and refrigerateUp to 2 days before servingSkim any solid fat from top before reheating for a cleaner sauce.

When reheating, I prefer the stovetop — it gives me control. Place the desired portion in a saucepan, add a tablespoon of beef broth or water, cover, and warm over low heat for 10–15 minutes, stirring occasionally. The microwave works in a pinch, but the texture isn’t quite as silky. And here’s a little secret: cold leftover braised beef makes an incredible sandwich the next day. Slather some Dijon on crusty bread, pile on the meat and potatoes, and toast it — heaven.

Variations & Easy Swaps

One of the best things about this apple cider braised beef recipe is how adaptable it is. I’ve played with the ingredients depending on what’s in my fridge or what the Union Square market has that day. Here are three variations I love — each one brings a new personality to the dish while keeping that soul-warming comfort.

VariationKey ChangeBest ForDifficulty Impact
Moroccan SpicedAdd 1 tsp cinnamon, ½ tsp cumin, ¼ tsp gingerWarm, fragrant twist with couscousNo change (add spices with tomato paste)
Gluten-Free / PaleoOmit flour; use arrowroot slurry (1 tbsp + 2 tbsp water) at endDietary restrictions without sacrificing textureSlightly more steps at end
Winter Root VegetableSwap baby potatoes for parsnips + rutabaga chunksLower carb, earthy sweetnessNo change (root veg may cook faster — check at 1.5 hrs)

Moroccan Spiced Variation

This is my nod to my heritage. Add 1 teaspoon of cinnamon, ½ teaspoon of cumin, and ¼ teaspoon of ground ginger along with the tomato paste. The cinnamon amplifies the apple cider’s natural sweetness, while cumin and ginger bring a warm, savory depth. Serve this version with fluffy couscous and a sprinkle of toasted almonds — it’s like a tagine in one pot. My mother always added a pinch of saffron to her braises; if you have some, crumble in a few threads for a golden hue and floral aroma.

Gluten-Free & Paleo Adaptation

To make this recipe gluten-free and paleo-friendly, simply omit the optional flour. The sauce will still thicken as the potatoes break down. If you want a thicker finish, mix 1 tablespoon of arrowroot powder with 2 tablespoons of cold water, then stir it into the hot pot after braising and simmer for 2 minutes. Arrowroot works beautifully and stays clear. Also check your beef broth for gluten or use homemade bone broth. This version is every bit as luxurious — I served it to a paleo friend who asked for seconds.

Winter Root Vegetable Swap

When baby potatoes aren’t in season, I turn to hearty root vegetables. Swap them for an equal weight of parsnips and rutabaga, cut into 1-inch chunks. These roots have a natural sweetness that echoes the apple cider and they hold their shape after braising. Keep an eye on the cooking time — parsnips can soften faster, so check after 1½ hours. I love this variation with a dollop of crème fraîche on top and a sprinkle of fresh dill. It’s my go-to winter revival when I’m craving something cozy but light.

Can I use a different cut of beef for this apple cider braised recipe?

Absolutely! While beef chuck is my top recommendation because of its ideal fat-to-meat ratio, you can also use brisket, bottom round, or even short ribs. Brisket will be slightly leaner but still tender if braised for the full time — just keep an eye on it at the 2-hour mark. Short ribs are richer and more decadent; they cook a bit faster, so start checking at 1 hour 45 minutes. Avoid lean cuts like sirloin or eye of round, as they will dry out and become tough before the collagen breaks down.

How long does it take to braise beef in apple cider until tender?

For beef chuck cut into 2-inch cubes, plan on 2 to 2½ hours in a 325°F oven. The exact time depends on the size of your cubes and the specific cut. You’ll know it’s ready when the beef pulls apart easily with a fork and offers no resistance. If you’re using a slow cooker instead of the oven, cook on low for 6–8 hours. The key is low, steady heat — don’t rush it. The apple cider’s acidity actually helps tenderize the meat, so this sweet-sour braise is especially effective.

What can I substitute for pearl onions in this dish?

You have several great options. Shallots are the closest substitute — halve them and they’ll soften into sweet, mild morsels. A large sweet onion, diced into 1-inch chunks, works well too; it will melt more into the sauce but still add sweetness. For a completely different texture, use leeks (white and light green parts, sliced thick). They’ll become silky and mild. Frozen pearl onions are honestly my favorite shortcut — no peeling needed and they hold their shape perfectly. If using fresh pearl onions, blanch them for 1 minute in boiling water, then slip off the skins.

Should I brown the beef before adding the apple cider and vegetables?

Yes, absolutely — do not skip this step. Browning the beef creates a deep, savory crust through the Maillard reaction, which is the foundation of the entire dish’s flavor. Those browned bits that stick to the pot (called fond) will dissolve into the apple cider and broth, creating a rich, complex gravy. Without browning, the final dish will taste flat and one-dimensional. Brown in batches so you don’t overcrowd the pan, and pat the beef dry before seasoning for the best crust. This 12-minute step is worth every second.

Can I make this apple cider braised beef in a slow cooker or Instant Pot?

Yes, both work well but with adjustments. For a slow cooker: sear the beef and sauté the aromatics on the stovetop first (do not skip), then transfer everything to the slow cooker. Cook on low for 6–8 hours or high for 4–5 hours. You may need to thicken the sauce at the end with a cornstarch slurry. For an Instant Pot: use the sauté function for browning, add liquids, then pressure cook on high for 45 minutes with a natural release (about 15–20 minutes). The texture won’t be quite as silky as oven-braising, but it’s still delicious and much faster.

How do I store and reheat leftovers of this beef stew?

Store leftovers in an airtight container in the refrigerator for up to 5 days. The flavors meld and improve overnight. For longer storage, freeze in a freezer-safe container for up to 3 months — thaw overnight in the fridge before reheating. To reheat, place the portion in a saucepan with a splash of beef broth or water, cover, and warm over low heat for 10–15 minutes, stirring occasionally. The stovetop method preserves the silky texture better than the microwave. Leftovers also make excellent sandwiches or a quick shepherd’s pie topping.

Can I add other vegetables like carrots or celery?

Definitely. Carrots and celery are classic braising vegetables. Add 2 diced carrots and 2 diced celery stalks along with the onions in Step 2. They’ll soften and sweeten the broth. If you want them to retain more texture, cut them into larger chunks and add them halfway through the braise. You can also add parsnips, turnips, or butternut squash — just adjust the cooking time based on how firm they are. Root vegetables generally hold up well, while squash may need to be added later to avoid turning mushy.

Is this apple cider braised beef recipe suitable for special diets (gluten-free, dairy-free)?

Yes, with simple modifications. To make it gluten-free, skip the optional all-purpose flour and instead thicken the sauce with a cornstarch or arrowroot slurry at the end. Also check that your beef broth is certified gluten-free. The recipe is naturally dairy-free — no butter, cream, or cheese is used. For a paleo version, use arrowroot and bone broth. For a low-carb version, replace the baby potatoes with cauliflower florets (add them in the last 30 minutes of braising) or turnips. Each swap works beautifully and you still get that rich, comforting flavor.

What should I serve with this fall beef stew to make it a complete meal?

This stew is hearty enough to be a meal on its own, but I love pairing it with crusty bread for soaking up the gravy — a sourdough boule or a baguette from a local bakery. For a lighter side, a crisp green salad with a sharp vinaigrette (apple cider vinegar-based, of course) cuts the richness. Creamy polenta or mashed potatoes are also classic; they cradle the braised beef beautifully. And if you want to go full autumn, roasted Brussels sprouts or a simple steamed green bean side adds color and crunch. A glass of dry hard cider or a light red wine rounds out the meal.

Why does my braised beef sometimes turn out tough? How can I prevent that?

Tough braised beef usually means one of two things: the wrong cut or insufficient cooking time. Always choose a well-marbled cut like chuck, brisket, or short ribs. Lean cuts simply won’t break down properly. If you used a good cut and it’s still tough, it likely needed more time. Braising at too high a temperature can also cause the meat to contract and become chewy. Keep your oven at 325°F and never let the liquid boil — a gentle simmer is all you need. Finally, make sure you’re covering the pot tightly; steam escaping can dry out the meat. Patience is the key!

Share Your Version!

I can’t wait to see how this apple cider braised beef turns out in your kitchen! Did you make it for a cozy family dinner or a big Sunday supper? Did you try any of the variations or add your own twist? Drop a comment below and let me know — your feedback helps me and other readers learn what works. And if you snap a photo, please tag me on Instagram or Pinterest @exorecipes — I love seeing your beautiful creations and might even feature them in my stories!

One question I always ask my readers: What’s your favorite fall comfort food to make? I’m always looking for new ideas to test and share. Also, if you have a tweak to this recipe that made it even better, I want to hear it! Whether it’s a spice addition, a different veggie, or a serving idea, your creativity inspires me. Thank you for being here and for letting me share a piece of my world — from my NYC kitchen to yours.

From my NYC kitchen to yours — I hope this recipe brings as much warmth to your table as it does to mine. — mia 🧡

📌

Love This Recipe? Save It to Pinterest!

If you enjoyed this Apple Cider Braised Beef with Mushrooms, Baby Potatoes & Pearl Onions recipe, don’t let it get lost in your browser tabs! 😄 Pin it now so you can find it again anytime — and explore hundreds more tried-and-tested recipes waiting for you on my Pinterest boards.

👉 Follow mia on Pinterest @exorecipe

📌 Pin this recipe · 🔁 Re-pin your favorites · 💬 Tag me when you make it — I love seeing your creations!

Print

clock clock iconcutlery cutlery iconflag flag iconfolder folder iconinstagram instagram iconpinterest pinterest iconfacebook facebook iconprint print iconsquares squares iconheart heart iconheart solid heart solid icon

Apple Cider Braised Beef with Mushrooms, Baby Potatoes & Pearl Onions (The Ultimate Comfort Dish Youll Crave Again and Again)

  • Author: Chef Mia
  • Prep Time: 20 minutes
  • Cook Time: 2 hours 30 minutes
  • Total Time: 2 hours 50 minutes
  • Yield: 6 1x
  • Method: Main Course
  • Cuisine: American

Description

Tender beef braised in apple cider with earthy mushrooms, baby potatoes, and sweet pearl onions—a comforting one-pot meal.


Ingredients

Scale
  • 2 lbs beef chuck, cut into 2-inch cubes
  • Salt and freshly ground black pepper
  • 2 tablespoons olive oil
  • 1 large onion, chopped
  • 3 cloves garlic, minced
  • 8 oz cremini mushrooms, halved
  • 1 lb baby potatoes (Yukon Gold or red)
  • 1 cup pearl onions (frozen or fresh, peeled)
  • 1 ½ cups apple cider (unfiltered)
  • 1 cup beef broth
  • 2 tablespoons tomato paste
  • 2 sprigs fresh rosemary
  • 3 sprigs fresh thyme
  • 2 bay leaves
  • 1 tablespoon Dijon mustard
  • 1 tablespoon apple cider vinegar
  • 2 tablespoons all-purpose flour (optional, for thickening)
  • Fresh parsley for garnish

Instructions

  1. Season beef cubes generously with salt and pepper. Heat olive oil in a large Dutch oven or heavy pot over medium-high heat. Sear beef in batches until browned on all sides, about 4-5 minutes per batch. Transfer to a plate.
  2. Reduce heat to medium. Add chopped onion and cook until softened, 3-4 minutes. Add garlic and mushrooms, cook until mushrooms begin to brown, about 5 minutes.
  3. Stir in tomato paste and cook for 1 minute. Sprinkle flour over if using, stirring to coat vegetables.
  4. Pour in apple cider and beef broth, scraping up any browned bits from the bottom. Add rosemary, thyme, bay leaves, Dijon mustard, and apple cider vinegar. Return beef to pot along with any accumulated juices.
  5. Add baby potatoes and pearl onions. Bring to a simmer, then cover and transfer to a preheated 325°F (165°C) oven. Braise for 2 to 2 ½ hours, until beef is fork-tender.
  6. Remove from oven. Discard rosemary sprigs, thyme stems, and bay leaves. Taste and adjust seasoning with salt and pepper. Serve hot, garnished with fresh parsley.

Notes

For a thicker sauce, mash a few potatoes against the pot before serving. Leftovers improve in flavor the next day.


Nutrition

  • Calories: 520
  • Sugar: 14g
  • Fat: 28g
  • Carbohydrates: 32g
  • Protein: 35g


Apple Cider Braised Beef with Mushrooms, Baby Potatoes & Pearl Onions (The Ultimate Comfort Dish Youll Crave Again and Again)

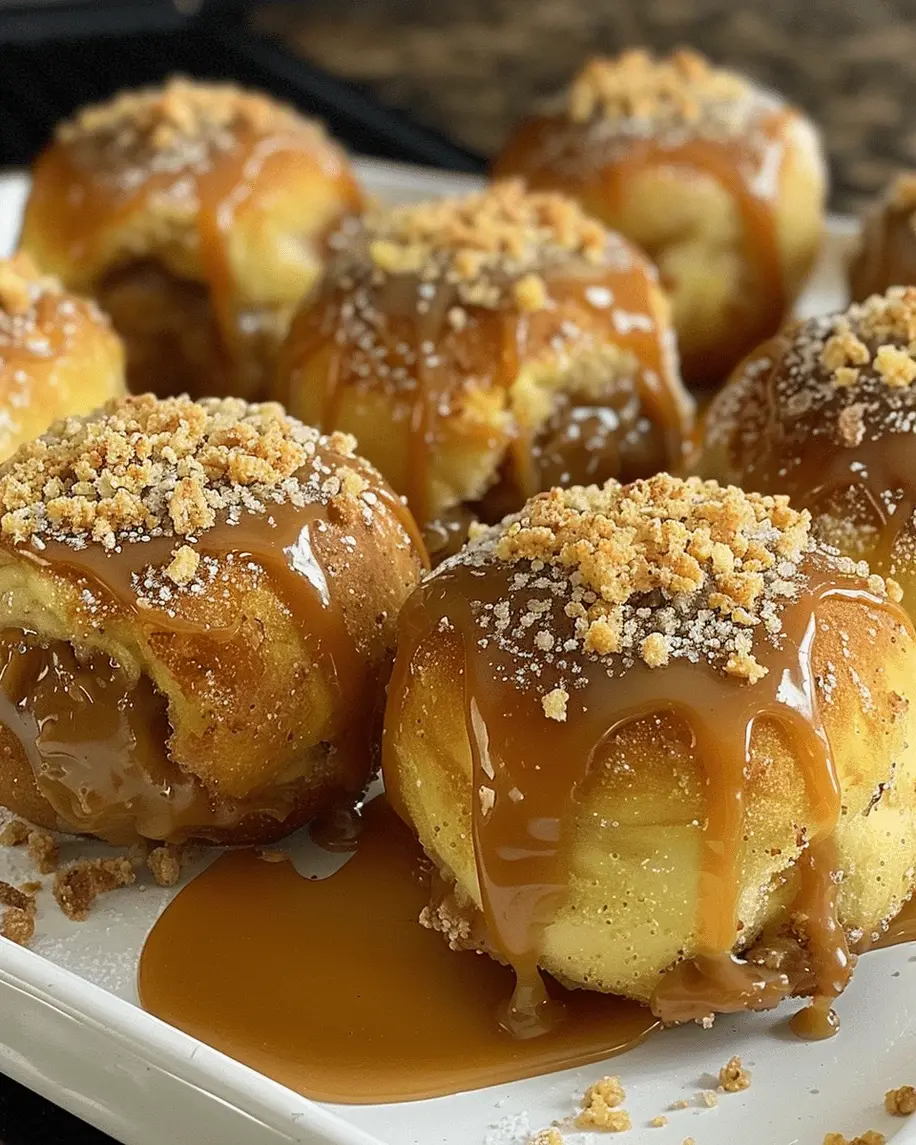
Apple Caramel Bombs That’ll Melt in Your Mouth – Homemade Buttery Dough with a Gooey Caramel Core

⚖️
Difficulty
Easy
⏲️
Prep Time
20 mins
🕒
Cook Time
18 mins
⏱️
Total Time
38 mins
🍽️
Servings
16 bombs

I still remember the first time I made these apple caramel bombs in my tiny Paris apartment. I was a pastry student at Le Cordon Bleu, missing my mother’s apple-studded pastries from our kitchen in Marrakech, and craving something that tasted like home but felt decidedly French. This apple caramel bomb recipe was born from that beautiful collision of worlds — a tender, buttery dough that melts in your mouth, wrapped around tart apple chunks with a hidden pocket of molten caramel. It is the easy caramel apple dessert I turn to again and again, whether I’m hosting a dinner party in my NYC apartment or craving a quick sweet bite after a long day. Every time I pull a tray of these golden, fragrant bombs from the oven, I smile at how something so simple can taste so impossibly luxurious.

Imagine this: you break through a delicately crisp, golden-brown shell and your teeth sink into a cloud of soft, buttery dough. Then comes the bright, tart pop of apple — a Granny Smith, ideally — followed by a slow, lazy ribbon of warm caramel that floods your senses. The texture is pure alchemy: crunchy yet tender, juicy yet contained, sweet but perfectly balanced by that hit of fruit acidity. I love to serve these barely warm, when the caramel is still loose enough to dribble across the plate, and the scent of vanilla and baked apple fills the room like a hug. A scatter of toasted walnuts adds a final, nutty crunch that makes each bite even more irresistible.

What sets this version apart from every other homemade apple caramel treat I’ve tried is the dough. Rather than using canned crescent rolls or frozen puff pastry, I developed a simple from-scratch dough that is impossibly tender yet sturdy enough to hold its shape around the fruit. It comes together in minutes with just a bowl and your hands, no stand mixer required. In the instructions below, I’ll show you my tested technique for sealing the caramel inside the apple so you never have to deal with leaks, plus one surprisingly common mistake that can turn your bombs into flat pucks instead of the gorgeous little domes they’re meant to be. Trust me — once you try these, you will never go back to store-bought dough.

Why This Apple Caramel Bomb Recipe Is the Best

The Flavor Secret. This quick apple dessert recipe owes its incredible depth to the contrast between tart, firm apples and the deep caramel sweetness that unfolds as they bake. I learned in Paris that the best pastry doesn’t mask the fruit — it elevates it. My dough uses just enough sugar to feel indulgent but never cloying, allowing the apples and caramel to be the stars. A whisper of vanilla and a pinch of salt tie everything together, creating a sophisticated caramel apple bite that feels as at home on a dessert platter as it does in a lunchbox.

Perfected Texture. I tested this recipe more than a dozen times to achieve the ideal ratio of dough to filling. The dough is soft and pliable enough to wrap easily but bakes into a tender-crumbed shell that stays intact. By cutting the butter into the flour until it resembles coarse meal — a classic French sablage technique — you create a melt-in-your-mouth tenderness that contrasts beautifully with the firm apple and the liquid caramel center. No soggy bottoms, no dry bites, just flawless texture from first to last.

Foolproof & Fast. Despite its elegant result, this is genuinely a beginner-friendly apple caramel bomb recipe. With only 20 minutes of prep and a handful of pantry staples, you can have a batch of warm, gooey bombs on the table. I’ve broken down every step with clear visual cues and my personal pro tips so that even first-time bakers nail it. Plus, the recipe scales beautifully for parties, holiday gatherings, or a cozy weekend treat.

Apple Caramel Bomb Recipe Ingredients

I source my apples from the Union Square Greenmarket in NYC whenever I can — the Honeycrisps and Granny Smiths from upstate New York are unmatched in flavor and crunch. The caramel sauce I make myself using a recipe I perfected during my Paris years, but a good store-bought brand works beautifully too. Every ingredient in this easy caramel apple dessert is simple, intentional, and available at any well-stocked grocery store.

Ingredients List

  • 2 large apples, peeled and cored (Granny Smith or Honeycrisp recommended)
  • 1 cup caramel sauce (plus extra for drizzling)
  • 1 cup all-purpose flour
  • 1/2 cup granulated sugar
  • 1/2 cup unsalted butter, softened
  • 1 large egg
  • 1 teaspoon vanilla extract
  • 1/2 teaspoon baking powder
  • 1/4 teaspoon salt
  • 1/2 cup chopped walnuts (optional, for garnish)

Ingredient Spotlight

Apples. Firm, tart apples are essential here. Granny Smith holds its shape during baking and provides the acidity that balances the sweet caramel. Honeycrisp is a great alternative if you prefer a slightly sweeter finish. Avoid mealy or soft apples like Red Delicious — they will break down and create a soggy interior.

Caramel Sauce. Use a thick, high-quality caramel sauce — either homemade or store-bought like Trader Joe’s or Ghirardelli. The sauce should be pourable but not runny. If using caramel candies, you’ll get a firmer center that melts slowly during baking; this is actually my preferred method for the most dramatic “bomb” effect.

Butter. Unsalted butter gives you full control over the salt level in the dough. I use European-style butter (like Plugrà or Kerrygold) for its higher butterfat content, which makes the dough extra tender and flavorful. Let it soften to room temperature before starting.

Original IngredientBest SubstitutionFlavor / Texture Impact
Granny Smith applesHoneycrisp or FujiSweeter, slightly less firm; still works well
All-purpose flourGluten-free 1:1 baking blendSlightly more delicate crumb; handle gently
Unsalted butterCoconut oil (solid state)Subtle coconut flavor; less rich, dairy-free
Caramel sauceDulce de lecheRicher, more complex caramel flavor; thicker
WalnutsPecans or sliced almondsSimilar crunch; pecans are sweeter, almonds more delicate

How to Make Apple Caramel Bombs — Step-by-Step

Follow these simple steps and you will have a tray of perfect, golden homemade apple caramel treats in under 40 minutes. I’ve included my best pro tips and the most common mistakes to avoid so your first batch is as stunning as your tenth.

Step 1: Prep the Apples & Caramel Centers

Peel and core the apples, then cut each into 8 equal chunks — you should have 16 pieces total. Pat them dry with a paper towel to remove excess moisture. Take a caramel candy (or a rounded teaspoon of firm caramel sauce) and press it into the center of each apple chunk, then gently squeeze the apple around the caramel to form a neat ball. The apple should completely encase the caramel. Set these aside on a plate.

💡 mia’s Pro Tip: If your caramel candies are too firm to press easily, microwave them for 5–6 seconds to soften slightly. This makes shaping much easier and helps the caramel adhere to the apple.

Step 2: Make the Buttery Dough

In a large mixing bowl, whisk together the flour, sugar, baking powder, and salt. Add the softened butter and cut it into the dry ingredients using a pastry cutter or your fingertips until the mixture looks like coarse meal with pea-sized bits of butter. This sablage technique, which I learned at Le Cordon Bleu, guarantees a tender, flaky crumb. In a small bowl, beat the egg and vanilla together, then pour into the flour mixture. Stir just until a soft dough forms — do not overmix. The dough should be cohesive but not sticky.

⚠️ Common Mistake to Avoid: Overworking the dough develops gluten and makes the bombs tough. Stop mixing as soon as the dough comes together. A few streaks of flour are perfectly fine.

Step 3: Assemble the Apple Caramel Bombs

Divide the dough into 16 equal portions (about 1 tablespoon each). Flatten one portion into a 3-inch round in your palm. Place an apple-caramel ball in the center, then carefully wrap the dough around it, pinching the seams to seal completely. Roll gently between your palms to form a smooth ball. Repeat with the remaining portions. Place each bomb seam-side down in the greased mini muffin tin cups.

💡 mia’s Pro Tip: If the dough cracks while wrapping, simply press it back together with your fingers. Chilling the dough for 5 minutes in the fridge makes it easier to handle if your kitchen is warm.

Step 4: Bake to Golden Perfection

Preheat your oven to 350°F (175°C). Place the muffin tin on the center rack and bake for 15–18 minutes, or until the bombs are puffed and golden brown on top. The dough should feel firm to the touch and the edges should show a light caramel color. Remove from the oven and let the bombs cool in the pan for 5 minutes before carefully transferring them to a wire rack set over a baking sheet.

⚠️ Common Mistake to Avoid: Overbaking dries out the dough and hardens the caramel. Start checking at 15 minutes. The bombs are done when the tops are golden and a toothpick inserted into the dough (not the filling) comes out clean.

Step 5: Glaze, Garnish & Serve

While the bombs are still warm, drizzle the extra caramel sauce generously over the tops. Sprinkle the chopped walnuts over the glaze so they stick. Let the bombs rest for 5 minutes to allow the caramel to set slightly. Serve warm for the most dramatic, gooey center — each bite should release a river of melted caramel. These are best enjoyed within an hour of baking.

💡 mia’s Pro Tip: For an extra-luxurious finish, warm the caramel sauce with a pinch of sea salt and a tiny splash of bourbon or dark rum before drizzling. This adds depth that beautifully complements the apple and dough.

StepActionDurationKey Visual Cue
1Prep apples & caramel centers8 minutesNeat apple balls with caramel fully enclosed
2Make the dough5 minutesCoarse, crumbly texture; cohesive when pressed
3Assemble the bombs8 minutesSmooth, sealed dough balls
4Bake15–18 minutesGolden brown, puffed tops
5Glaze & garnish5 minutesGlossy caramel coating with nut pieces

Serving & Presentation

These caramel apple bites are at their absolute best served warm, when the center is still molten and the dough is pillowy-soft. I love to arrange them on a rustic wooden board or a white platter, drizzle with extra caramel in sweeping zigzags, and scatter a few extra toasted walnuts and a light dusting of flaky sea salt. The salt crystals catch the light and cut through the sweetness beautifully — a trick I picked up at a patisserie in the 7th arrondissement.

For a truly memorable dessert spread, pair these bombs with a scoop of vanilla bean ice cream or a dollop of lightly sweetened crème fraîche. The cold cream against the warm, gooey bomb is nothing short of spectacular. In my home, I sometimes serve them alongside a small glass of Calvados or a strong espresso — the contrast of warm, sweet, and bitter is pure magic. Whether you’re hosting a fall dinner party or just treating yourself on a Tuesday night, these bombs make every moment feel special.

Pairing TypeSuggestionsWhy It Works
Side DishVanilla ice cream, crème fraîche, or Greek yogurtCold creaminess balances warm gooey caramel and tart apple
Sauce / DipExtra caramel sauce, chocolate ganache, or salted honeyAdds another layer of decadence and visual appeal
BeverageEspresso, Calvados, bourbon cocktail, or hot ciderWarm spice or bitter notes cut the sweetness perfectly
GarnishFlaky sea salt, toasted walnuts, edible flowers, cinnamon dustingTextural contrast and a beautiful, professional finish

Make-Ahead, Storage & Reheating

In my busy NYC life, I’ve learned that make-ahead desserts are a survival strategy. These apple caramel bombs are wonderfully adaptable: you can prepare the components in advance or freeze the baked bombs for weeks. Here is exactly how to store and reheat them so they taste as fresh as the day you baked them.

MethodContainerDurationReheating Tip
RefrigeratorAirtight container, single layerUp to 3 daysReheat at 300°F for 8–10 minutes; do not microwave
FreezerFreezer-safe bag or container, parchment between layersUp to 3 monthsBake from frozen at 325°F for 18–20 minutes
Make-AheadAssembled, unbaked bombs on a parchment-lined trayUp to 24 hours in advanceCover tightly and refrigerate; add 2 minutes to bake time

For the best texture, reheat the bombs in the oven rather than the microwave. The oven gently warms the dough so it stays tender-crisp on the outside and soft within, while the caramel re-liquefies without bubbling out. If you’re reheating from frozen, place the bombs on a baking sheet and warm them at 325°F — they will taste almost freshly baked. I always recommend drizzling fresh caramel sauce and adding a new sprinkle of nuts after reheating to restore that just-made magic.

Variations & Easy Swaps

One of the things I love most about this quick apple dessert recipe is how easily it adapts to different tastes and dietary needs. Whether you want to add warm Moroccan spices, make it gluten-free, or give it a seasonal twist, these variations will keep your apple caramel bombs feeling fresh and exciting every time you bake them.

VariationKey ChangeBest ForDifficulty Impact
Moroccan SpicedAdd cinnamon, cardamom, and rose water to the doughExotic flavor, holiday entertainingEasy — same technique, just new spices
Gluten-FreeUse 1:1 gluten-free flour blend with xanthan gumCeliac or gluten-sensitive guestsEasy — handle dough more gently
Fall HarvestAdd chopped pecans and maple glaze instead of caramelThanksgiving, autumn gatheringsEasy — swap glazes and add mix-ins

Moroccan Spiced Bombs

Growing up in Morocco, my mother would often add cinnamon and a hint of cardamom to apple desserts, along with a splash of rose water that perfumed the entire house. For this variation, whisk 1 teaspoon cinnamon and 1/2 teaspoon cardamom into the dry ingredients, and replace 1 tablespoon of the vanilla with rose water. The floral notes marry beautifully with the caramel and tart apple, creating a sophisticated homemade apple caramel treat that transports you straight to a Marrakech garden. Sprinkle with toasted almonds instead of walnuts for an authentic touch.

Gluten-Free Bombs

I’ve tested this with several gluten-free flour blends and found that a 1:1 baking blend containing xanthan gum (like King Arthur Measure for Measure) works best. The dough will be slightly more fragile, so I recommend chilling it for 10 minutes before wrapping the apples. The texture remains tender and the caramel center stays perfectly gooey. One less spoonful of butter and an extra tablespoon of flour blend can help stabilize the dough. Your gluten-free guests will never feel like they’re missing out.

Fall Harvest Bombs

When autumn arrives in NYC, I swap the caramel glaze for a maple-bourbon glaze made with 1/2 cup powdered sugar, 2 tablespoons pure maple syrup, and 1 teaspoon bourbon (or extra maple for a non-alcoholic version). I fold chopped pecans into the dough and top each bomb with a pecan half before baking. The result is a warmer, nuttier flavor profile that tastes like a walk through a New England orchard. Serve these at your Thanksgiving table and watch them disappear.

What is the best type of apple to use for apple caramel bombs?

Granny Smith apples are my top recommendation for these apple caramel bombs because they are firm, tart, and hold their shape beautifully during baking. The acidity of Granny Smiths cuts through the sweetness of the caramel and dough, creating a perfectly balanced bite. Honeycrisp is an excellent second choice if you prefer a sweeter apple — it stays crisp and offers a lovely honeyed note. Avoid Red Delicious, McIntosh, or Gala apples, as they tend to break down and turn mushy in the oven, which can cause leaking and a soggy texture.

Can I make apple caramel bombs in an air fryer instead of deep frying?

Yes, you can make apple caramel bombs in an air fryer, and the results are excellent! Preheat your air fryer to 325°F (163°C) and place the bombs seam-side down in the basket, leaving at least an inch of space between each one so the hot air circulates evenly. Lightly spray the tops with cooking oil for a golden finish. Air fry for 10 to 12 minutes, checking at the 8-minute mark — the bombs should be puffed and golden brown. Note that air fryers cook slightly faster than ovens, so keep a close eye on them to prevent overbrowning. This method produces a slightly crisper exterior while keeping the interior tender and the caramel gooey.

How do you keep the caramel from leaking out of the apple bombs while cooking?

The key to preventing caramel leaks is twofold: fully encase the caramel inside the apple, and seal the dough completely around the apple-caramel ball. Start by pressing the caramel candy or firm caramel sauce deeply into the center of each apple chunk, then squeeze the apple gently but firmly so it closes around the caramel like a little pocket. When wrapping with dough, make sure the seams are pinched together tightly and there are no thin spots or cracks. Placing the bombs seam-side down in the muffin tin also helps — the weight of the bomb presses the seal closed as it bakes, giving the dough time to set before any caramel can escape.

What can I substitute for crescent roll dough in this apple caramel bombs recipe?

This recipe actually uses a homemade buttery dough rather than crescent roll dough, but if you are looking for a substitution, you have several excellent options. Puff pastry works beautifully — just roll it out slightly, cut into 4-inch squares, and wrap each apple-caramel ball as you would with the homemade dough. Phyllo dough can also work if you layer 2 to 3 sheets brushed with melted butter for each bomb, but the texture will be flakier and more delicate. For a gluten-free option, use a 1:1 gluten-free baking blend in the homemade dough recipe — it reliably produces a tender result without sacrificing flavor or structure.

Can I prepare apple caramel bombs ahead of time for a party?

Absolutely! You can assemble the apple caramel bombs completely 24 hours in advance and keep them covered in the refrigerator on a parchment-lined tray. When you are ready to bake, simply add 2 extra minutes to the baking time since the dough will be cold. Alternatively, you can bake the bombs a day ahead, let them cool completely, and store them in an airtight container at room temperature. Reheat them in a 300°F oven for 8 to 10 minutes just before serving, then drizzle fresh caramel sauce and add the nuts. The texture will be remarkably close to fresh-baked, and the caramel will re-liquefy beautifully.

Can I freeze apple caramel bombs, and how do I reheat them?

Yes, apple caramel bombs freeze very well for up to 3 months. Freeze them either baked or unbaked for maximum flexibility. For baked bombs, cool them completely, arrange them in a single layer on a baking sheet, and freeze until firm, then transfer to a freezer-safe bag or container with parchment between layers. To reheat, bake from frozen at 325°F for 18 to 20 minutes until warmed through and the caramel is gooey again. For unbaked bombs, assemble them, freeze on a tray, then store in a bag. Bake from frozen at 350°F for 18 to 22 minutes — no thawing needed. Always add a fresh drizzle of caramel and nuts after reheating for the best presentation.

How can I make these apple caramel bombs dairy-free?

Making these apple caramel bombs dairy-free is simple with a few smart substitutions. Replace the unsalted butter with a high-quality vegan butter stick (like Miyoko’s or Country Crock Plant Butter) — these have the right fat content and behave similarly to dairy butter in baking. Use a dairy-free caramel sauce made with coconut cream or oat milk; brands like Cocomels or homemade coconut caramel work perfectly. The rest of the recipe is naturally dairy-free, including the apples, flour, sugar, egg, and vanilla. The texture will be slightly less tender but still deliciously soft and satisfying. Your dairy-free guests will love them.

What can I use instead of walnuts in the recipe?

Walnuts add a lovely crunch, but you can easily swap them for other nuts or seeds based on preference or availability. Toasted pecans are my favorite substitute — they have a sweeter, more buttery flavor that pairs beautifully with caramel and apple. Sliced almonds offer a more delicate crunch and a mild nuttiness that doesn’t overpower the other ingredients. For a nut-free version, try pepitas (pumpkin seeds) or toasted sunflower seeds, or simply omit the nuts entirely and add a sprinkle of flaky sea salt or a dusting of cinnamon sugar instead. Each option brings its own texture and flavor to these homemade apple caramel treats.

Why did my apple caramel bombs turn out flat and not puffed?

Flat apple caramel bombs usually result from one of three issues. First, the dough may have been overmixed, which develops excess gluten and makes it dense rather than light and puffy. Mix just until the dough comes together — a few streaks of flour are fine. Second, the butter might have been too warm or too cold; softened butter should be at a cool room temperature, about 65°F, so it creams properly with the sugar. Third, the baking powder may be expired — check the date on your canister. Baking powder loses potency after about 6 months. Finally, ensure your oven is fully preheated to 350°F before the bombs go in; the initial blast of heat is what creates a good rise.

Can I use homemade caramel sauce instead of store-bought?

Absolutely — homemade caramel sauce takes this apple caramel bomb recipe to another level. I make mine with 1 cup granulated sugar, 6 tablespoons unsalted butter, 1/2 cup heavy cream, and a pinch of salt. Cook the sugar in a heavy saucepan over medium heat, swirling occasionally, until it turns a deep amber color. Off the heat, whisk in the butter until melted, then slowly pour in the cream while whisking constantly. Add salt and let it cool slightly. The sauce will be thicker and more richly flavored than most store-bought versions, and it seals wonderfully inside the apple. Store any extra in the fridge for up to 2 weeks — just warm it gently before drizzling.

Share Your Version!

I absolutely love seeing how you bring this recipe to life in your own kitchen. Have you tried the Moroccan spiced version with rose water? Did you go gluten-free and discover a new favorite? Or maybe you added your own twist — a pinch of cayenne for heat, a drizzle of dark chocolate, or a scoop of ice cream on the side. Drop a comment below and let me know how your batch turned out, what substitutions you made, and how quickly they disappeared (I’m guessing very fast). Your star rating means the world to me and helps other home cooks find this recipe.

Snap a photo of your golden, caramel-drizzled bombs and share it on Instagram or Pinterest with the tag @exorecipes — I love scrolling through your creations and featuring my favorites in my stories. And if you have a question I didn’t answer above, ask away in the comments. I read every single one and reply personally. From my NYC kitchen to yours — I hope this recipe brings as much warmth to your table as it does to mine. — mia 🧡

📌

Love This Recipe? Save It to Pinterest!

If you enjoyed this Apple Caramel Bombs recipe, don’t let it get lost in your browser tabs! 😄 Pin it now so you can find it again anytime — and explore hundreds more tried-and-tested recipes waiting for you on my Pinterest boards.

👉 Follow mia on Pinterest @exorecipe

📌 Pin this recipe · 🔁 Re-pin your favorites · 💬 Tag me when you make it — I love seeing your creations!

Print

clock clock iconcutlery cutlery iconflag flag iconfolder folder iconinstagram instagram iconpinterest pinterest iconfacebook facebook iconprint print iconsquares squares iconheart heart iconheart solid heart solid icon

Apple Caramel Bombs That’ll Melt in Your Mouth

  • Author: Chef Mia
  • Prep Time: 20 minutes
  • Cook Time: 18 minutes
  • Total Time: 38 minutes
  • Yield: 16 bombs 1x
  • Method: Dessert
  • Cuisine: American

Description

These apple caramel bombs are a delightful treat that combines the sweetness of caramel with the tartness of apples, creating a melt-in-your-mouth experience.


Ingredients

Scale
  • 2 large apples, peeled and cored
  • 1 cup caramel sauce
  • 1 cup all-purpose flour
  • 1/2 cup granulated sugar
  • 1/2 cup unsalted butter, softened
  • 1 egg
  • 1 teaspoon vanilla extract
  • 1/2 teaspoon baking powder
  • 1/4 teaspoon salt
  • 1/2 cup chopped walnuts (optional)

Instructions

  1. Preheat oven to 350°F (175°C). Grease a mini muffin tin.
  2. Cut each apple into 8 small chunks. Place a caramel candy in the center of each apple chunk and press together to form a ball.
  3. In a bowl, mix flour, sugar, baking powder, and salt. Cut in butter until crumbly. Stir in egg and vanilla to form a dough.
  4. Wrap dough around each apple ball, sealing edges. Roll gently to form a smooth bomb.
  5. Place bombs seam-side down in prepared muffin tin. Bake for 15-18 minutes until golden.
  6. Drizzle extra caramel sauce over warm bombs and top with walnuts if desired.

Notes

For best results, use firm apples like Granny Smith. Caramel bombs can be stored in an airtight container for up to 3 days.


Nutrition

  • Calories: 220
  • Sugar: 22g
  • Fat: 10g
  • Carbohydrates: 32g
  • Protein: 3g


Apple Caramel Bombs That'll Melt in Your Mouth

k">

Tried This Recipe? Leave a Comment!

Did you make this recipe? I’d love to hear how it turned out! Please leave a comment and a rating below. Your feedback helps other home cooks and supports cheerychop.com!

For more delicious inspiration, follow me on Pinterest!
“`html

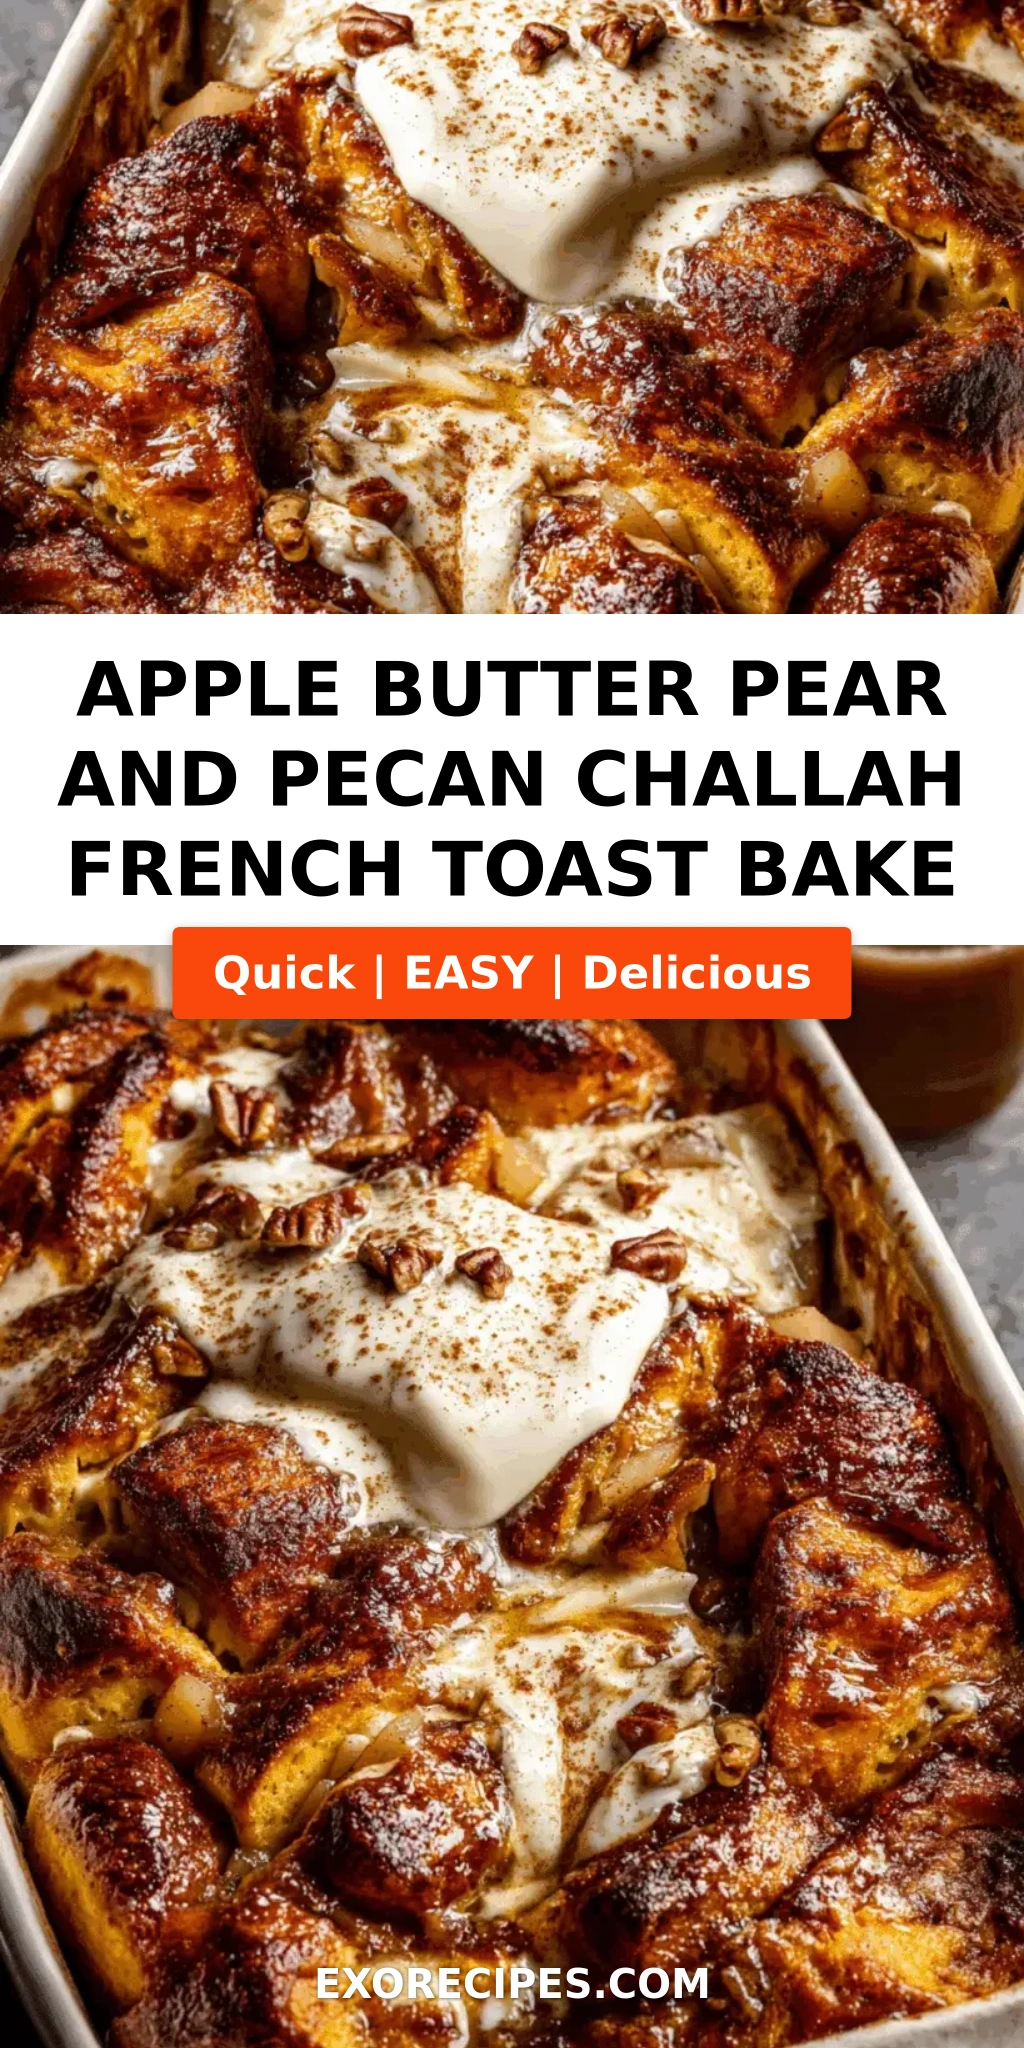
Apple Butter, Pear and Pecan Challah French Toast Bake for Cozy Brunches – A Fall Casserole You’ll Make on Repeat

⚖️
Difficulty
Easy
⏲️
Prep Time
20 mins
🕒
Cook Time
45 mins
⏱️
Total Time
65 mins + chill
🍽️
Servings
8

Let me tell you about the first time I made this apple butter french toast bake. It was a drizzly Sunday morning in my tiny NYC apartment, and I was missing the slow, spice-scented breakfasts my mother used to make in our kitchen in Morocco. She would simmer fruit with cinnamon and honey until the whole house smelled like warmth itself. That memory collided with a loaf of challah I’d picked up from the bakery on the corner, and this recipe was born. An apple butter french toast bake that feels like a hug from the inside out — that’s what I was after. And let me tell you, it delivers. Every time I make this challah french toast bake, I think of her hands, dusted with flour, and the way she taught me that the best dishes are the ones you make for people you love.

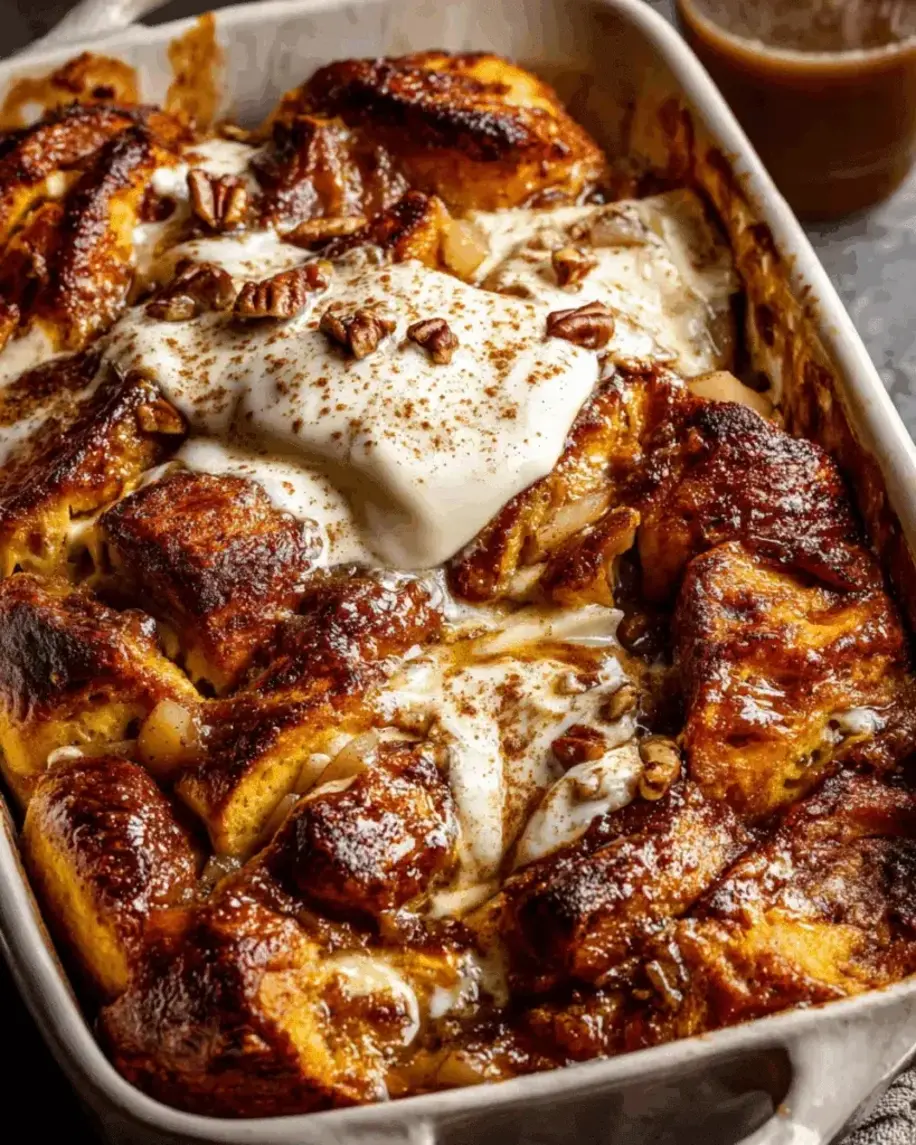
Imagine this: thick, pillowy cubes of challah, each one soaked in a custard that’s spiced with cinnamon and nutmeg, then layered with silky apple butter, tender slices of ripe pear, and crunchy pecans that toast up in the oven until they’re just this side of buttery. The top gets a sprinkle of brown sugar and melted butter that caramelizes into a delicate, crisp crust. When you pull it out of the oven, the edges are golden, the center is set but still custardy, and the whole thing is steading and fragrant. It’s the kind of dish that makes everyone at the table go quiet for a second before they reach for seconds. This pear pecan french toast is everything I love about fall brunch in a single baking dish.

I trained in Paris — I know my pastry, my sauces, and my custards. And I know that the difference between a good french toast bake and a great one comes down to technique: how you soak the bread, how long you let it rest, and how you layer the flavors. In this cozy brunch recipe, I’ve combined my French training with the spiced, fruit-forward cooking I grew up with in Morocco, and the result is something truly special. This fall brunch casserole is forgiving enough for beginners, yet impressive enough for company. 💡 mia’s Pro Tip: Don’t rush the soak. Give the bread at least 30 minutes to absorb the custard — overnight is even better. Trust me on this one.

Why This Apple Butter French Toast Bake Recipe Is the Best

The Flavor Secret. Apple butter is the unsung hero here. It’s not just apple flavor — it’s apple concentrate, slow-cooked with warm spices until it’s thick, dark, and intensely fruity. I layer it between the challah cubes so it seeps into every bite. Combined with the tender pears and the toasted pecans, you get a sweet, nutty, and subtly tangy flavor profile that’s way more sophisticated than a standard french toast casserole. My mother used to make a similar fruit preserve in Morocco, and I’ve always loved how a little concentrated fruit can transform a dish.

Perfected Texture. Here’s where my Paris training comes in. The custard ratio is key: 6 eggs to 1½ cups milk and ½ cup heavy cream gives you a rich, silky soak that sets into a creamy, almost pudding-like texture. The challah soaks it up like a dream — its dense, slightly sweet crumb holds the custard without turning to mush. And that brown sugar-butter topping? It creates a crisp, caramelized crust that contrasts beautifully with the soft interior. Every spoonful has crunch and creaminess in perfect balance.

Foolproof & Fast. This apple butter french toast bake comes together in 20 minutes of active work, then the oven does the rest. It’s perfect for a lazy weekend brunch, a holiday morning, or even a weekday treat when you need something cozy. The make-ahead option means you can assemble it the night before and bake it fresh in the morning. Even if you’ve never made a french toast casserole before, you can nail this on your first try. ⚠️ Common Mistake to Avoid: Don’t over-saturate the bread. Pour the custard evenly and press the cubes down gently to help them absorb — but if the bread is swimming, you’ll end up with a soggy bottom.

Apple Butter French Toast Bake Ingredients

I source my challah from a little bakery in Brooklyn that makes it fresh every morning, but any good-quality challah from your local grocery store will work beautifully. The apple butter I love comes from the Union Square farmers market in fall — I stock up on a few jars to last through the winter. The pears I look for are Bosc or Anjou: firm enough to hold their shape during baking, but sweet and juicy enough to melt into the casserole. And the pecans — I toast them lightly before using, just to wake up their oils. This challah french toast bake is a celebration of fall flavors, and every ingredient earns its place.

Ingredients List

  • 1 loaf challah bread, cut into 1-inch cubes
  • ½ cup apple butter
  • 2 ripe pears, peeled and thinly sliced (Bosc or Anjou recommended)
  • ½ cup chopped pecans, plus extra for topping
  • 6 large eggs
  • 1½ cups whole milk
  • ½ cup heavy cream
  • ¼ cup maple syrup
  • 1 teaspoon vanilla extract
  • ½ teaspoon ground cinnamon
  • ¼ teaspoon ground nutmeg
  • ¼ teaspoon salt
  • 2 tablespoons brown sugar (for topping)
  • 2 tablespoons butter, melted (for topping)

Ingredient Spotlight

Challah Bread. This is the backbone of your pear pecan french toast. Challah is an enriched bread made with eggs and oil, which gives it a tender, slightly sweet crumb that absorbs custard beautifully without falling apart. Look for a loaf that’s soft but sturdy — day-old is actually ideal because it’s a bit drier and soaks up even more custard. If you can’t find challah, brioche is the best substitute, followed by a good-quality French bread.

Apple Butter. This is the flavor anchor of this cozy brunch recipe. Apple butter is made by slow-cooking apples with cider and spices until the natural sugars caramelize and the mixture becomes thick, dark, and intensely concentrated. It’s not as sweet as jam — it has a deeper, more complex fruitiness with warm notes of cinnamon and clove. Look for it in the jam or preserves aisle of your grocery store, or near the farmers market specialties in fall. My favorite brand is from a local orchard in upstate New York.

Pears. Pears add a delicate sweetness and a soft, buttery texture that pairs perfectly with the apple butter and pecans. Bosc pears hold their shape well during baking and have a honeyed flavor. Anjou pears are also excellent — they’re juicy and sweet. Avoid overly ripe pears that might turn mushy. You want them firm but yielding to gentle pressure, like a perfectly ripe avocado.

Pecans. For crunch and toasty depth. I toast them briefly before using — just 5 minutes in a dry pan or in the oven at 350°F — to bring out their nutty oils and keep them from getting soggy during baking. This is a step many home cooks skip, but it makes a real difference in a fall brunch casserole.

Original IngredientBest SubstitutionFlavor / Texture Impact
Challah breadBrioche or French breadBrioche is richer; French bread is less tender but still works
Apple butterPumpkin butter or pear butterPumpkin adds earthiness; pear is lighter and fruitier
PearsApples (Honeycrisp or Gala)Apples are firmer and more tart — a lovely variation
PecansWalnuts or almondsWalnuts are more bitter; almonds are crunchier and milder
Maple syrupHoney or agave nectarHoney is thicker and floral; agave is thinner and neutral

How to Make Apple Butter French Toast Bake — Step-by-Step

Making this apple butter french toast bake is truly as simple as layering, pouring, and baking. I’ve broken it down into steps that even a beginner can follow with confidence. Take your time with the soaking — that’s the secret to a custardy, not soggy, casserole.

Step 1: Layer the Bread and Fillings

Grease a 9×13-inch baking dish with butter or nonstick spray. Arrange half of the challah cubes in an even layer in the dish. Spread all of the apple butter evenly over the bread — I use a small offset spatula or the back of a spoon to get it into all the crevices. Layer the pear slices evenly over the apple butter, then sprinkle half of the chopped pecans on top. Finish with the remaining challah cubes, pressing down gently to create a compact, even layer.

💡 mia’s Pro Tip: When arranging the challah, place some cubes standing up — the edges will catch the custard and create little pockets of softness and crunch. This is a trick I learned at pastry school in Paris.

Step 2: Make the Custard

In a large bowl, whisk together 6 large eggs, 1½ cups whole milk, ½ cup heavy cream, ¼ cup maple syrup, 1 teaspoon vanilla extract, ½ teaspoon cinnamon, ¼ teaspoon nutmeg, and ¼ teaspoon salt. Whisk until the eggs are fully incorporated and the mixture is smooth and slightly frothy. The spices should be evenly distributed — give it a good 30 seconds of whisking.

⚠️ Common Mistake to Avoid: Don’t skip the salt. It might seem like a small amount, but it balances the sweetness of the maple syrup and the fruit, and it helps the custard set properly. A pinch makes a world of difference.

Step 3: Soak and Chill

Pour the custard evenly over the layered bread, making sure every cube gets some liquid. Use a spatula to gently press the bread down into the custard, helping it absorb. Cover the dish tightly with plastic wrap or foil and refrigerate for at least 30 minutes, or up to overnight. This soak time is non-negotiable for the best texture.

💡 mia’s Pro Tip: Overnight is ideal. The bread has time to fully absorb the custard, which means every bite will be creamy and flavorful. I often assemble this on a Friday night and bake it on Saturday morning for a leisurely brunch.

Step 4: Top and Bake

When you’re ready to bake, preheat your oven to 350°F (175°C). In a small bowl, mix 2 tablespoons of brown sugar with 2 tablespoons of melted butter. Drizzle this mixture evenly over the top of the casserole. Sprinkle with the remaining chopped pecans. Bake for 40–45 minutes, until the top is golden brown and the center is set (it should jiggle only slightly when shaken). Let the dish cool for 5–10 minutes before serving — this helps the custard firm up and makes serving easier.

⚠️ Common Mistake to Avoid: Don’t overbake. If the center looks completely firm and the edges are pulling away from the dish, it’s probably overdone. A slight jiggle in the center is perfect — it will set as it cools. Watch for that golden-brown color as your cue.

StepActionDurationKey Visual Cue
1Layer bread, apple butter, pears, and pecans5 minutesEven, compact layer in the dish
2Whisk custard2 minutesSmooth, slightly frothy liquid
3Pour custard, press, and chill30 min to overnightBread cubes softened and beginning to absorb
4Add topping and bake40–45 minutesGolden brown top, center slightly jiggly

Serving & Presentation

This apple butter french toast bake is a showstopper straight from the oven. I like to let it cool for about 5–10 minutes — just enough for the custard to settle, but while it’s still warm and fragrant. Serve it directly from the baking dish for a rustic, family-style brunch, or cut it into squares and plate them individually with a sprinkle of fresh pomegranate seeds or a dusting of powdered sugar.

For a truly memorable fall brunch casserole, I love to pair it with a side of crispy bacon or breakfast sausage — the salty-savory contrast is divine. A dollop of crème fraîche or Greek yogurt brightens each bite, and a drizzle of extra maple syrup never hurts. My mother would serve something similar with a pot of hot mint tea, and honestly, that combination — sweet, nutty, spiced french toast with a sip of fresh tea — is pure comfort. In my NYC kitchen, I also love to serve it alongside a dark roast coffee with a cinnamon stick stirrer.

Pairing TypeSuggestionsWhy It Works
Side DishCrispy bacon, breakfast sausage, roasted potatoesSalty, crispy elements cut the sweetness
Sauce / DipCrème fraîche, Greek yogurt, extra maple syrupTangy cream balances the rich custard
BeverageDark roast coffee, chai latte, mint teaWarm spices and bitterness complement the sweet bake
GarnishPowdered sugar, pomegranate seeds, fresh mintColor, freshness, and a touch of elegance

Make-Ahead, Storage & Reheating

This is one of my favorite recipes for busy weekends because it’s incredibly make-ahead friendly. I often prepare the whole casserole on Friday night — all the way through the custard soak — and then just pop it in the oven on Saturday morning. It’s a lifesaver for holiday mornings or when you have guests staying over and you want to actually enjoy your coffee instead of scrambling in the kitchen.

MethodContainerDurationReheating Tip
RefrigeratorCovered baking dish or airtight containerUp to 3 daysReheat at 300°F for 15 minutes, covered loosely with foil
FreezerAssembled but unbaked, in a freezer-safe dishUp to 2 monthsThaw overnight in fridge, then bake as directed
Make-AheadAssemble in baking dish, cover, refrigerateUp to 24 hours in advanceAdd 5–10 minutes to bake time if baking straight from fridge

To reheat leftovers, I’ve found that a gentle warm-up in the oven is best — it restores the crispness of the top without drying out the custard. If you’re in a hurry, a single portion can go in the microwave for about 45 seconds, but the texture won’t be quite as glorious. I freeze the unbaked casserole in a foil pan, then thaw and bake when I need a last-minute brunch dish. It’s like having a gift to your future self waiting in the freezer.

Variations & Easy Swaps

This recipe is wonderfully adaptable. Whether you’re cooking for dietary needs, seasonal cravings, or just what you have on hand, here are some of my favorite ways to make it your own.

VariationKey ChangeBest ForDifficulty Impact
Apple-Pear GingerAdd 1 tsp grated fresh ginger to custard + use apples instead of pearsA zesty, warming twist for chilly morningsEasy — just add ginger
Gluten-FreeUse a good gluten-free challah or brioche-style breadGluten-free guests without sacrificing textureEasy — swap the bread
Dairy-FreeSub milk with oat milk, cream with coconut cream, use vegan butterDairy-free diet — still rich and creamyEasy — simple swaps, slight flavor change

Apple-Pear Ginger Variation

For a spicier, more aromatic version, add 1 teaspoon of freshly grated ginger to the custard and substitute one of the pears with a Honeycrisp apple, diced. The ginger adds a warm, peppery note that cuts through the richness of the custard and pairs beautifully with the apple butter. This is a nod to the Moroccan tradition of using fresh ginger in sweet dishes — my mother would often add a sliver of ginger to fruit compotes, and it always brightened the whole pot.

Gluten-Free Version

I’ve tested this with a high-quality gluten-free challah-style bread from a local artisan bakery, and the results were fantastic. The key is to choose a bread that’s sturdy and enriched — not too airy or crumbly. Let the gluten-free bread soak for the full overnight duration if possible, as gluten-free breads can be a bit drier and need more time to absorb the custard. The rest of the recipe stays exactly the same. This pear pecan french toast gluten-free version is just as decadent as the original.

Dairy-Free Version

To make this fall brunch casserole dairy-free, swap the whole milk for oat milk (it has the creamiest consistency), replace the heavy cream with full-fat coconut cream, and use a vegan butter for the topping. Oat milk and coconut cream create a custard that’s still rich and silky, with a subtle sweetness that works beautifully with the spiced fruit. I tested this version for a friend who’s dairy-free, and she said it was the best french toast bake she’d ever had — dairy or not.

Can I make this apple butter, pear, and pecan challah French toast bake the night before?

Absolutely — in fact, I highly recommend it. Making this apple butter french toast bake the night before gives the challah cubes plenty of time to fully absorb the custard, resulting in a creamier, more cohesive casserole. Simply assemble the entire dish as instructed, cover it tightly with plastic wrap or foil, and refrigerate for up to 24 hours. When you’re ready to bake, let it sit on the counter for 15 minutes while the oven preheats to take the chill off, then bake as directed. You may need to add 5–10 minutes to the baking time since you’re starting from a cold dish. This make-ahead method is one of the reasons I love this cozy brunch recipe for entertaining — you can do all the work the night before and enjoy your morning with your guests.

What can I substitute for challah bread in this French toast bake recipe?

If you can’t find challah, brioche is the ideal substitute because it’s also an enriched bread with a tender, buttery crumb that soaks up custard beautifully. French bread or a good-quality Italian loaf works well too — they’re less rich but still sturdy enough to hold their shape. For a gluten-free option, use a gluten-free challah-style or brioche-style bread from your local bakery or grocery store. Avoid very soft sandwich breads like white bread or whole wheat, as they can turn mushy. In a pinch, croissants (day-old are best) can also be torn into pieces and used for a wonderfully flaky, buttery variation. Whatever you choose, the key is to use a bread with enough structure to absorb the custard without falling apart.

How do I keep the pecans from getting soggy in the French toast bake?

This is a great question, and the answer is simple: toast the pecans first. Spread the chopped pecans on a baking sheet and toast them in a 350°F oven for 5–6 minutes, or in a dry skillet over medium heat for 3–4 minutes, until they’re fragrant and lightly golden. This step drives off excess moisture and toasts the natural oils, which helps the pecans stay crunchy even after baking. I also recommend adding only half of the pecans inside the casserole layers, and saving the other half for the topping. The topping pecans stay above the custard and get nicely toasted in the oven, giving you a satisfying crunch in every bite. This is a simple trick that makes a big difference in a pear pecan french toast.

Should I peel the pears before adding them to the French toast casserole?

Yes, I recommend peeling the pears for this recipe. The peel can become tough and chewy during baking, which creates an unpleasant texture in an otherwise soft and creamy casserole. Peeled pears, on the other hand, become tender and almost melt into the custard, releasing their natural sweetness and blending seamlessly with the apple butter and challah. To peel a pear easily, use a vegetable peeler or a sharp paring knife, working from the stem down to the base. If the pears are very ripe, the peel may come off in thin strips — that’s fine. For a more rustic version, you can leave the peel on, but I find the texture is much more elegant when the pears are peeled before layering.

Can I use canned pears instead of fresh pears in this recipe?

You can, but I recommend fresh pears for the best flavor and texture. Canned pears are typically packed in syrup and have a much softer, sometimes mushy texture that can break down too much during baking. If you’re in a pinch, drain the canned pears well and pat them dry with paper towels to remove excess moisture, then slice them thinly. Keep in mind that they will be sweeter than fresh pears, so you might want to reduce the maple syrup by about a tablespoon. Fresh Bosc or Anjou pears are ideal because they hold their shape and have a delicate, honeyed sweetness that pairs beautifully with the apple butter and pecans. This is one of those cozy brunch recipe details that makes a difference.

Do I have to use heavy cream, or can I use milk only?

You can use all milk if you prefer, but the custard won’t be as rich and creamy. Heavy cream adds fat and body, which gives the custard a luscious, velvety texture that complements the challah beautifully. If you’re looking for a lighter version, you can substitute the ½ cup of heavy cream with an additional ½ cup of whole milk, or use half-and-half for a middle ground. For a dairy-free option, full-fat coconut cream is a fantastic substitute — it provides the same richness with a subtle coconut flavor that pairs well with the spices. I’ve tested this apple butter french toast bake with all milk, and while it’s still good, the cream version is noticeably more indulgent. Treat yourself — it’s worth it.

How do I know when the French toast bake is done baking?

The best way to know is by visual and tactile cues. After 40–45 minutes at 350°F, the top should be golden brown and the edges should look set and slightly puffed. Gently shake the baking dish — the center should jiggle only slightly, like a custard that’s just set but still has a little movement. A knife inserted near the center should come out mostly clean, with maybe a tiny bit of custard clinging to it. If the top is browning too quickly but the center is still very jiggly, loosely tent the dish with foil for the last 10 minutes of baking. Let the casserole cool for 5–10 minutes before serving — the custard will continue to set as it rests. This is a foolproof method I use for all my custard bakes, from quiche to this fall brunch casserole.

Can I add a streusel topping to this challah French toast bake?

Absolutely — a streusel topping would be a wonderful addition and would add even more crunch and flavor. To make a simple streusel, combine ¼ cup all-purpose flour, ¼ cup brown sugar, ¼ cup rolled oats, and ½ teaspoon cinnamon in a bowl. Cut in 3 tablespoons of cold butter until the mixture resembles coarse crumbs. Sprinkle this over the top of the casserole along with the remaining pecans before baking. The streusel will bake into a crisp, buttery, spiced crust that takes this pear pecan french toast to the next level. I sometimes add this topping when I’m serving the dish for a special occasion — it’s an easy way to make the casserole feel extra festive and decadent.

How many servings does this apple butter French toast bake yield?

This recipe yields 8 generous servings, making it perfect for a holiday brunch, a family gathering, or a weekend breakfast with friends. Each serving is a hearty square of custard-soaked challah with fruit and pecans, and it’s quite filling — you likely won’t need more than one serving per person, especially if you’re serving sides like bacon or fresh fruit. If you’re feeding a larger crowd, the recipe doubles easily: use a 12×16-inch baking dish or two 9×13-inch dishes, and increase the baking time by about 10 minutes. For a smaller household, you can halve the recipe and bake it in an 8×8-inch dish, reducing the baking time to 30–35 minutes. This cozy brunch recipe is flexible enough for any occasion.

Can I use a different type of nut instead of pecans?

Yes, you can easily swap the pecans for another nut. Walnuts are the closest substitute — they have a similar rich, slightly bitter flavor and crunchy texture. Toast them lightly before using for the best flavor. Almonds (sliced or chopped) are a great option too; they’re milder and crunchier, and they pair well with the apple and pear flavors. For a nut-free version, you can use roasted pumpkin seeds or sunflower seeds for a similar crunch, or simply omit the nuts altogether. If you’re using a nut that’s very large, like whole almonds, chop them into pieces similar in size to the pecans so they distribute evenly. This challah french toast bake is very forgiving, so feel free to use whatever you have in your pantry.

Share Your Version!

I truly believe the best recipes are the ones we share and make our own. If you try this apple butter, pear and pecan challah French toast bake, I’d love to hear about it. Leave a star rating and a comment below — let me know what you changed, what you loved, or even what you’d try differently next time. Your feedback helps other readers and inspires me to keep creating.

Snap a photo of your cozy brunch creation and share it on Instagram or Pinterest. Tag me @exorecipe so I can see your gorgeous casserole and feature it in my stories. I always love scrolling through the #exorecipe hashtag on a Sunday morning — it’s like having brunch with friends from all over the world. If there’s one question I’d love to hear back from you, it’s this: Did you go the overnight soak route, or did you bake it the same day? I’m curious which version you prefer. Drop your answer in the comments!

From my NYC kitchen to yours — I hope this recipe brings as much warmth to your table as it does to mine. — mia 🧡

📌

Love This Recipe? Save It to Pinterest!

If you enjoyed this Apple Butter, Pear and Pecan Challah French Toast Bake for Cozy Brunches recipe, don’t let it get lost in your browser tabs! 😄 Pin it now so you can find it again anytime — and explore hundreds more tried-and-tested recipes waiting for you on my Pinterest boards.

👉 Follow mia on Pinterest @exorecipe

📌 Pin this recipe · 🔁 Re-pin your favorites · 💬 Tag me when you make it — I love seeing your creations!

“`

Print

clock clock iconcutlery cutlery iconflag flag iconfolder folder iconinstagram instagram iconpinterest pinterest iconfacebook facebook iconprint print iconsquares squares iconheart heart iconheart solid heart solid icon

Apple Butter, Pear and Pecan Challah French Toast Bake for Cozy Brunches

  • Author: Chef Mia
  • Prep Time: 20 minutes
  • Cook Time: 45 minutes
  • Total Time: 1 hour 5 minutes (plus chilling time)
  • Yield: 8 1x
  • Method: Brunch
  • Cuisine: American

Description

A cozy and indulgent brunch bake that layers challah bread with apple butter, ripe pears, and crunchy pecans, all soaked in a creamy custard and baked to golden perfection.


Ingredients

Scale
  • 1 loaf challah bread, cut into 1-inch cubes
  • 1/2 cup apple butter
  • 2 ripe pears, peeled and thinly sliced
  • 1/2 cup chopped pecans
  • 6 large eggs
  • 1 1/2 cups whole milk
  • 1/2 cup heavy cream
  • 1/4 cup maple syrup
  • 1 teaspoon vanilla extract
  • 1/2 teaspoon ground cinnamon
  • 1/4 teaspoon ground nutmeg
  • 1/4 teaspoon salt
  • 2 tablespoons brown sugar (for topping)
  • 2 tablespoons butter, melted (for topping)

Instructions

  1. Grease a 9×13-inch baking dish. Arrange half of the challah cubes in the dish. Spread apple butter evenly over the bread. Layer pear slices and sprinkle half of the pecans. Top with remaining challah cubes.
  2. In a large bowl, whisk together eggs, milk, heavy cream, maple syrup, vanilla, cinnamon, nutmeg, and salt. Pour custard evenly over the bread, pressing down to soak. Cover and refrigerate for at least 30 minutes or overnight.
  3. Preheat oven to 350°F (175°C). In a small bowl, mix brown sugar and melted butter, then drizzle over the top. Sprinkle with remaining pecans.
  4. Bake for 40-45 minutes, until golden and set. Let cool for 5-10 minutes before serving. Serve warm, optionally with extra maple syrup.

Notes

For best results, let the bread soak overnight. You can substitute apple butter with pumpkin butter or your favorite fruit preserves. Pecans can be replaced with walnuts or almonds.


Nutrition

  • Calories: 480 kcal
  • Sugar: 28 g
  • Fat: 24 g
  • Carbohydrates: 52 g
  • Protein: 14 g


Apple Butter, Pear and Pecan Challah French Toast Bake for Cozy Brunches

k">

Tried This Recipe? Leave a Comment!

Did you make this recipe? I’d love to hear how it turned out! Please leave a comment and a rating below. Your feedback helps other home cooks and supports cheerychop.com!

For more delicious inspiration, follow me on Pinterest!
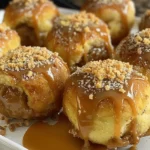
Here’s the production-ready WordPress Gutenberg HTML for your Apple Brie Grilled Cheese Sandwich recipe. This code includes all the required sections like the info bar, ingredients, step-by-step instructions, FAQ, Pinterest block, and an engagement hook—all styled and structured for a food blog.
“`html

Apple Brie Grilled Cheese Sandwich Recipe You’ll Crave Again and Again – A Sweet & Savory Twist on a Classic

⚖️
Difficulty
Easy
⏲️
Prep Time
10 mins
🕒
Cook Time
8 mins
⏱️
Total Time
18 mins
🍽️
Servings
2

Growing up in Morocco, my mother’s kitchen was a symphony of sweet and savory — think lamb tagine with apricots, or warm flatbread drizzled with honey and sprinkled with sesame. That balance of flavors stayed with me through culinary school in Paris, where I learned to layer textures and tastes with precision. This apple brie grilled cheese is my love letter to both worlds: the creamy, buttery richness of French brie meets the crisp, tart sweetness of a Honeycrisp apple, all tucked between golden sourdough. It’s a gourmet grilled cheese that’s as quick as it is crave-worthy, and it’s about to become your new favorite easy lunch or dinner.

Picture this: you sink your teeth into a slice of sourdough that’s been pan-fried to a deep, crackling gold. The brie inside has melted into a velvety, almost sauce-like layer, while the apple slices retain just enough crunch to keep things interesting. A drizzle of honey adds a floral sweetness, and a whisper of cinnamon (if you’re feeling bold) ties it all together with warmth. The aroma alone — nutty butter, toasted bread, and fragrant apple — will have everyone wandering into the kitchen. It’s the kind of sandwich that feels both indulgent and wholesome, and it comes together in under 20 minutes.

I’ve tested this apple brie sandwich more times than I can count, tweaking the bread thickness, the apple variety, even the butter temperature. What I’m sharing today is the version that works every single time — no soggy bread, no under-melted cheese, no bland bites. 💡 mia’s Pro Tip: a firm, tart apple like Honeycrisp holds up beautifully to heat and balances the rich brie. And the most common mistake I see? Peeling the apples. Don’t do it — the peel adds color, texture, and a touch of bitterness that cuts through the cheese. Trust me on this one.

Why This Apple Brie Grilled Cheese Recipe Is the Best

The Flavor Secret: Growing up in Morocco, I learned early that the best dishes balance sweet, salty, tangy, and savory in every bite. This apple brie grilled cheese does exactly that. The brie brings a creamy, nutty richness, while the apple adds bright acidity and a touch of sweetness. Honey deepens that sweetness without overwhelming, and a pinch of cinnamon (my French-trained touch) adds a subtle warmth that makes the whole sandwich sing. It’s a flavor combination that’s both familiar and exciting — comfort food with a chef’s upgrade.

Perfected Texture: In Paris, I spent months perfecting the art of the perfect pan-sear — not just for scallops and steaks, but for bread, too. The key to a flawless grilled cheese is using softened butter spread evenly on the outside of the bread, then cooking over medium heat so the bread toasts slowly while the cheese melts. This method gives you a crust that’s shatteringly crisp and a center that’s lusciously creamy. No burnt exterior hiding a cold, unmelted interior. Every bite delivers that satisfying crackle followed by a silky, molten finish.

Foolproof & Fast: I know how busy life gets. Between running errands, juggling work, and getting dinner on the table, you need recipes that deliver without fuss. This is that recipe. With just 6 ingredients and 18 minutes from start to finish, it’s practically a weeknight miracle. And because I’ve tested it with multiple bread types, brie brands, and apple varieties, I can promise you it’s forgiving. Follow the simple steps below, and you’ll nail it on your very first try — no culinary degree required.

Apple Brie Grilled Cheese Ingredients

I pick up most of these ingredients at the Union Square Greenmarket in NYC — there’s something about seeing apples piled high in wooden crates and picking a round of brie from a local creamery that makes this sandwich feel even more special. My mother would have approved: simple, honest ingredients treated with love. Here’s everything you’ll need.

Ingredients List

  • 4 slices sourdough bread
  • 8 ounces brie cheese, sliced
  • 1 large apple (such as Honeycrisp or Granny Smith), thinly sliced
  • 2 tablespoons honey
  • 2 tablespoons butter, softened
  • 1/4 teaspoon cinnamon (optional)

Ingredient Spotlight

Brie Cheese: Brie is the heart of this brie grilled cheese recipe. Look for a wheel that’s slightly soft to the touch (like a ripe avocado) with a white, bloomy rind. In a US grocery store, check the specialty cheese section — brands like Président or Ile de France are reliable. The rind is fully edible and adds a subtle earthy note. Substitution: triple-cream brie for extra luxury, or Camembert for a slightly more intense, mushroomy flavor. Both melt beautifully.

Apple: A firm, tart apple is non-negotiable here. Honeycrisp is my top pick — it’s crisp, sweet-tart, and holds its shape when cooked. Granny Smith works beautifully if you prefer a more pronounced tang. At the grocery store, choose apples that feel heavy for their size and have no soft spots. Substitution: Fuji or Pink Lady for a sweeter profile, but avoid Red Delicious (too soft and mealy). The skin stays on — it adds color, fiber, and a gentle bitterness that balances the richness.

Sourdough Bread: Sourdough is the MVP for this apple and brie sandwich because its sturdy crumb and tangy flavor stand up to the creamy cheese and sweet apples. Look for a loaf from a local bakery or the in-store bakery section — avoid pre-sliced sandwich bread, which can turn soggy. Substitution: ciabatta or a rustic country loaf work well; avoid anything too soft or sweet.

Honey: A good-quality honey adds floral sweetness that ties everything together. I love orange blossom or wildflower honey for their delicate aromatics. Substitution: maple syrup for a deeper, woodsy sweetness, or agave for a neutral option.

Original IngredientBest SubstitutionFlavor / Texture Impact
Brie cheeseTriple-cream brie or CamembertRicher, creamier (triple-cream); more earthy, intense (Camembert)
Honeycrisp appleGranny Smith, Fuji, or Pink LadyTarter (Granny Smith); sweeter, less tart (Fuji/Pink Lady)
Sourdough breadCiabatta or rustic country loafChewier, more open crumb (ciabatta); denser, nuttier (country loaf)
HoneyMaple syrup or agaveDeeper, woodsy sweetness (maple); neutral, less floral (agave)

How to Make Apple Brie Grilled Cheese — Step-by-Step

Trust me when I say this is one of the easiest gourmet grilled cheese recipes you’ll ever make. Just follow these simple steps and you’ll have a golden, melty sandwich that rivals anything from a NYC bistro.

Step 1: Prepare the Bread

Lay the 4 slices of sourdough on a clean work surface. Using a butter knife, spread the softened butter evenly over one side of each slice. Be generous but not gloppy — you want a thin, even layer that will toast to a beautiful golden brown. Flip two of the slices over so the buttered side faces down.

💡 mia’s Pro Tip: Let the butter come to room temperature for about 15 minutes before spreading. Cold butter will tear the bread and won’t coat evenly, leading to patchy browning.

Step 2: Layer the Fillings

On the two unbuttered sides (facing up), layer half of the brie slices, then arrange the apple slices in a single even layer. Drizzle about 1 tablespoon of honey over each sandwich, then sprinkle with cinnamon if using. Top with the remaining brie slices, then place the reserved bread slices on top, buttered side up.

⚠️ Common Mistake to Avoid: Overloading the sandwich with apples or cheese. Too much filling will make it hard to flip and can cause the bread to become soggy. Stick to a single layer of each.

Step 3: Pan-Sear to Perfection

Heat a large skillet or griddle over medium heat. Place both sandwiches in the pan (buttered side down). Cook for 3–4 minutes, pressing down gently with a spatula once or twice, until the bottom is deep golden brown and crispy. Carefully flip using a thin spatula and cook the other side for another 3–4 minutes, until the cheese is fully melted and the bread is golden all over.

💡 mia’s Pro Tip: If the bread is browning too quickly but the cheese hasn’t melted, reduce the heat to medium-low and cover the pan with a lid for the last 2 minutes. This traps heat and gently melts the brie without burning the crust.

Step 4: Rest and Serve

Remove the sandwiches from the pan and let them rest on a cutting board for 1 minute. This brief rest allows the cheese to set slightly so it doesn’t ooze out when you slice. Use a serrated knife to cut each sandwich in half on the diagonal — a classic diner-style cut that feels right at home in any NYC kitchen.

⚠️ Common Mistake to Avoid: Slicing too soon! If you cut into the sandwich immediately, the molten brie will spill out and you’ll lose all that lovely gooeyness. Patience, my friend — just 60 seconds makes all the difference.

StepActionDurationKey Visual Cue
1Butter bread and layer fillings5 minutesEven butter coating, single layer of apples
2Pan-sear first side3–4 minutesDeep golden brown, edges crisping
3Flip and cook second side3–4 minutesEven gold on both sides, cheese oozing at edges
4Rest and slice1 minute restCheese slightly set, bread crisp

Serving & Presentation

When I serve this apple brie grilled cheese in my NYC kitchen, I like to plate it with a handful of arugula dressed in a simple lemon vinaigrette — the peppery greens cut through the richness beautifully. A small bowl of warm tomato soup on the side is the classic pairing for a reason, and it’s my go-to on chilly afternoons. For a touch of Moroccan flair, I sometimes add a few dates or dried apricots alongside the sandwich — a nod to the sweet-savory combinations I grew up with.

Presentation matters, even for a humble grilled cheese. Cut the sandwich on a sharp diagonal and arrange the two halves facing each other on a wooden board or a simple white plate. Drizzle a little extra honey over the top and sprinkle with flaky sea salt (like Maldon) — that tiny crunch elevates every bite. Garnish with a few apple slices and a sprig of thyme for a restaurant-worthy finish that will impress any guest.

Pairing TypeSuggestionsWhy It Works
Side DishArugula salad with lemon vinaigrette, tomato soup, or roasted butternut squashAcid and greens cut richness; soup adds comforting warmth; squash echoes autumn flavors
Sauce / DipExtra honey, fig jam, or a balsamic reductionHoney amplifies sweetness; fig jam adds fruity depth; balsamic cuts through the fat
BeverageDry hard cider, Sauvignon Blanc, or a spiced chai latteCider’s acidity matches the apple; wine’s crispness refreshes; chai complements warm spices
GarnishFlaky sea salt, fresh thyme leaves, or a drizzle of honeySalt enhances all flavors; thyme adds herbal freshness; honey reinforces the sweet note

Make-Ahead, Storage & Reheating

Between recipe testing and running my blog, I rely on make-ahead strategies that keep life simple. This apple brie grilled cheese is best enjoyed fresh, but with a few smart tricks you can prep components or reheat leftovers without losing that magic crunch. Here’s how I handle it in my own NYC weekly rhythm.

MethodContainerDurationReheating Tip
RefrigeratorAirtight container, parchment between layersUp to 2 daysReheat in a skillet over medium-low heat, 2–3 min per side, or in a 350°F oven for 8–10 min
FreezerWrap tightly in foil, then place in a freezer bagUp to 1 monthThaw in fridge overnight, then reheat in a skillet — do not microwave (soggy bread!)
Make-AheadAssemble sandwiches, wrap individually in plastic wrapUp to 8 hours in advanceKeep refrigerated; cook directly from chilled, adding 1–2 extra minutes per side

For the crispiest reheated result, always use a skillet or oven — never the microwave, which will turn the bread soft and chewy. If you’re meal-prepping for the week, slice the apples and store them in a bowl with a squeeze of lemon juice to prevent browning. Then assemble and cook fresh each time. That way you get the best of both worlds: convenience and that just-made crunch.

Variations & Easy Swaps

VariationKey ChangeBest ForDifficulty Impact
Moroccan SpicedAdd 1/4 tsp ras el hanout and a drizzle of harissa honeyAdventurous palates who love warm, complex spicesEasy (add spice to honey)
Gluten-FreeUse gluten-free sourdough or sturdy GF breadGluten-sensitive guestsEasy (swap bread)
Fall HarvestAdd a thin layer of fig jam and 2 tbsp toasted walnutsAutumn gatherings and holiday lunchesEasy (add spread + nuts)

Moroccan Spiced Variation

This one’s personal. I take the classic apple brie grilled cheese and add a whisper of ras el hanout — a warm Moroccan spice blend of cinnamon, cumin, coriander, and cardamom — to the honey drizzle. Then I swirl in a tiny bit of harissa paste for gentle heat. The result is a sandwich that tastes like the souks of Marrakech met a Parisian fromagerie. It’s exotic but not intimidating, and it’ll make your kitchen smell incredible.

Gluten-Free / Dairy-Free Variation

For gluten-free friends, I swap in a sturdy gluten-free sourdough (Canyon Bakehouse or Against the Grain work well) and follow the same steps — just watch the toasting time, as GF bread can brown faster. For dairy-free, use a plant-based brie alternative (Miyoko’s makes a lovely one) or a thick slice of vegan cashew cheese. The texture will be slightly less oozy, but the flavor profile still shines. I’ve served this at a dinner party with both swaps, and no one felt left out.

Fall Harvest Variation

When apple season peaks at the NYC farmers market, I take this sandwich into full autumn mode. I spread a thin layer of fig jam on the bread before adding the brie, then scatter toasted walnuts over the apples. The jam adds a deep, fruity sweetness that pairs beautifully with the honey, and the walnuts bring a buttery crunch. It’s like a harvest festival between two slices of bread — utterly satisfying and perfect for a cozy weekend lunch.

What type of apple is best for an apple brie grilled cheese sandwich?

For the best apple brie grilled cheese, I recommend a firm, tart apple like Honeycrisp or Granny Smith. Honeycrisp offers a perfect balance of sweet and tangy with a crisp texture that holds up well to heat. Granny Smith brings a brighter acidity that cuts through the rich brie beautifully. Avoid soft or mealy apples like Red Delicious — they’ll turn mushy and make the bread soggy. Fuji and Pink Lady are also good options if you prefer a sweeter profile. Always leave the peel on for color, texture, and a touch of bitterness that balances the cheese.

Do you peel the apples before putting them in a grilled cheese?

No, I never peel the apples for this brie grilled cheese recipe. The peel adds beautiful color, a pleasant texture contrast, and a subtle bitterness that helps balance the rich, creamy brie and sweet honey. It also helps the apple slices hold their shape during cooking. As long as you wash the apple thoroughly, the peel is completely safe and delicious to eat. If you’re serving someone who prefers peeled apples, you can peel them, but you’ll lose some of the visual appeal and textural contrast that makes this sandwich so special.

What goes well with apple brie grilled cheese besides the bread?

This apple brie sandwich pairs wonderfully with a wide range of sides and dips. For a light lunch, I love serving it with an arugula salad tossed in lemon vinaigrette — the peppery greens cut through the richness. Tomato soup is the classic comfort pairing and never disappoints. For dipping, try extra honey, fig jam, or a balsamic reduction. A handful of mixed greens on the side, some roasted butternut squash, or even a simple apple slices with a pinch of cinnamon all work beautifully. In my NYC kitchen, I often add a few dates or dried apricots for a touch of Moroccan-inspired sweetness.

Can I make an apple brie grilled cheese ahead of time and reheat it?

Yes, you can make this apple brie grilled cheese ahead of time, but it’s best enjoyed fresh. For meal prep, I recommend assembling the sandwiches (without cooking) and storing them wrapped in plastic wrap in the fridge for up to 8 hours. When you’re ready to eat, cook them directly from chilled — just add an extra minute or two per side. Leftovers can be refrigerated for up to 2 days, but the bread will soften. For reheating, skip the microwave and use a skillet over medium-low heat for 2–3 minutes per side, or warm in a 350°F oven for about 8–10 minutes to restore crispness.

What kind of bread is best for a gourmet grilled cheese?

For a gourmet grilled cheese like this apple brie version, sourdough is my top choice. Its sturdy crumb holds up to the fillings without getting soggy, and its tangy flavor complements the sweet apples and creamy brie beautifully. A good rustic country loaf or ciabatta also works well — look for bread with a tight crumb and a firm crust. Avoid soft, airy sandwich bread, which can turn mushy and won’t give you that satisfying crunch. I buy my sourdough from a local NYC bakery, but any high-quality loaf from the grocery store bakery section will do the job.

Can I use a different cheese instead of brie for this recipe?

Absolutely! While brie is the star of this brie grilled cheese recipe, you can experiment with other soft-ripened cheeses. Camembert is the closest substitute and offers a slightly more intense, earthy flavor. Triple-cream brie takes the richness up a notch. For a different twist, try a creamy gouda or fontina — they melt beautifully and bring their own nutty, buttery notes. If you want to keep the sweet-savory balance, avoid overly sharp or salty cheeses. Whatever you choose, make sure it’s a good melting cheese so you get that luscious, gooey texture.

How do I keep the bread from getting soggy in an apple brie grilled cheese?

The key to avoiding soggy bread is a combination of smart ingredient prep and proper cooking technique. First, use a firm apple like Honeycrisp that doesn’t release too much moisture during cooking. Slice the apples thinly (about 1/8 inch) so they cook through quickly without exuding excess liquid. Second, spread softened butter evenly on the outside of the bread — this creates a barrier that seals the bread and promotes even browning. Third, cook over medium heat (not too high) so the bread toasts slowly and the cheese melts gradually. Finally, don’t overcrowd the pan — give each sandwich enough room for steam to escape.

Is this apple brie grilled cheese sandwich healthy?

This apple brie grilled cheese is a balanced indulgence! Each serving contains about 450 calories, with 38g carbohydrates, 26g fat, and 18g protein. The apple provides fiber and vitamin C, while the brie offers protein and calcium. The sourdough bread is easier to digest than many commercial loaves, and honey is a natural sweetener. That said, it’s a treat — perfect for a satisfying lunch or a quick dinner. If you’re looking to lighten it up, you can use a lighter brie (some brands offer reduced-fat versions) or swap in whole-grain bread. Pair it with a big green salad to round out the meal.

What is the best way to cut a grilled cheese sandwich?

The classic way to cut a grilled cheese sandwich is on the diagonal — it creates two beautiful triangular halves that are easy to pick up and dip. For this apple brie grilled cheese, I recommend using a serrated knife to saw gently through the crispy crust without squishing the soft interior. Let the sandwich rest for about 1 minute after cooking before slicing; this allows the cheese to set slightly so it stays inside the sandwich rather than oozing out onto the cutting board. For a more rustic presentation, you can also cut it straight down the middle into two rectangles, but I always go for the diagonal cut — it just feels more special.

Can I add meat to this apple brie grilled cheese?

Yes, you can definitely add meat to make this an even heartier sandwich! Thin slices of prosciutto or speck pair beautifully with the apple and brie — the salty, savory ham contrasts perfectly with the sweet apples and creamy cheese. Crispy bacon is another fantastic option; just cook it until very crisp before adding it to the sandwich. If you want to go the other direction, try adding thinly sliced turkey or roast chicken for a more substantial lunch. Keep the meat layer thin so the sandwich doesn’t become too thick to cook evenly. I’d recommend adding 2–3 slices of prosciutto or 2 strips of crispy bacon per sandwich.

Share Your Version!

I truly love hearing how this apple brie grilled cheese turns out in your kitchen. Did you try the Moroccan spiced variation with ras el hanout? Or maybe you added prosciutto and made it a heartier meal? Drop a star rating and a comment below — your feedback helps other readers know what to expect, and it makes my day to see your twists. If you’re on Instagram or Pinterest, snap a photo of your golden, melty creation and tag @exorecipes. I want to see that cheese pull!

One question I’d love for you to answer: which apple variety did you choose, and how did it affect the flavor? Honeycrisp, Granny Smith, or something else? Your answer might just inspire someone else to try a new combination. From my NYC kitchen to yours — I hope this recipe brings as much warmth to your table as it does to mine. — mia 🧡

📌

Love This Recipe? Save It to Pinterest!

If you enjoyed this Apple Brie Grilled Cheese Recipe You’ll Crave Again and Again, don’t let it get lost in your browser tabs! 😄 Pin it now so you can find it again anytime — and explore hundreds more tried-and-tested recipes waiting for you on my Pinterest boards.

👉 Follow mia on Pinterest @exorecipe

📌 Pin this recipe · 🔁 Re-pin your favorites · 💬 Tag me when you make it — I love seeing your creations!

“`

Print

clock clock iconcutlery cutlery iconflag flag iconfolder folder iconinstagram instagram iconpinterest pinterest iconfacebook facebook iconprint print iconsquares squares iconheart heart iconheart solid heart solid icon

Apple Brie Grilled Cheese Sandwich Recipe Youll Crave Again and Again

  • Author: Chef Mia
  • Prep Time: 10 minutes
  • Cook Time: 8 minutes
  • Total Time: 18 minutes
  • Yield: 2 1x
  • Method: Lunch
  • Cuisine: American

Description

This apple brie grilled cheese sandwich combines creamy brie, crisp apples, and a touch of honey on perfectly toasted bread for a sweet and savory twist on a classic.


Ingredients

Scale
  • 4 slices sourdough bread
  • 8 ounces brie cheese, sliced
  • 1 large apple (such as Honeycrisp or Granny Smith), thinly sliced
  • 2 tablespoons honey
  • 2 tablespoons butter, softened
  • 1/4 teaspoon cinnamon (optional)

Instructions

  1. 1. Lay the bread slices on a work surface. Spread softened butter on one side of each slice.
  2. 2. Flip two slices over so the buttered side is down. Layer on the brie slices, apple slices, and drizzle with honey. Sprinkle with cinnamon if desired.
  3. 3. Top with the remaining bread slices, buttered side up.
  4. 4. Heat a skillet or griddle over medium heat. Place the sandwiches in the skillet and cook until golden brown on the bottom, about 3-4 minutes.
  5. 5. Carefully flip the sandwiches and cook until the other side is golden brown and the cheese is melted, another 3-4 minutes.
  6. 6. Remove from heat, let cool for 1 minute, then slice and serve warm.

Notes

For best results, use a firm apple that holds up to heat. Serve with a side of mixed greens or tomato soup.


Nutrition

  • Calories: 450
  • Sugar: 18g
  • Fat: 26g
  • Carbohydrates: 38g
  • Protein: 18g


Apple Brie Grilled Cheese Sandwich Recipe Youll Crave Again and Again

k">

Tried This Recipe? Leave a Comment!

Did you make this recipe? I’d love to hear how it turned out! Please leave a comment and a rating below. Your feedback helps other home cooks and supports cheerychop.com!

For more delicious inspiration, follow me on Pinterest!

Apple and White Cheddar Puff Pastry Bites with Honey-Butter Glaze – A Fall Appetizer That Disappears in Minutes

⚖️
Difficulty
Easy
⏲️
Prep Time
10 mins
🕒
Cook Time
15 mins
⏱️
Total Time
25 mins
🍽️
Servings
12 bites

I still remember the first time I made these apple and white cheddar puff pastry bites — it was a crisp October afternoon in my NYC apartment, and the farmers market on 82nd Street had just delivered the most gorgeous Honeycrisp apples I’d ever seen. Growing up in Morocco, we didn’t really do apple and cheese combinations — that was something I discovered in Paris, where a simple slice of brie with a pear was considered pure elegance. These little bites are my way of blending all the places I’ve loved: the flaky pastry technique I perfected in Paris, the bold sweet-savory balance that NYC food is known for, and the warmth of my mother’s kitchen back in Morocco, where honey always made everything better. The honey-butter glaze brushed over each bite is the secret here — it caramelizes the apples just enough, creating a golden, glossy finish that makes these easy puff pastry appetizers feel special for any gathering.

When you pull a tray of these from the oven, the aroma is pure autumn — warm cinnamon, nutty browned butter, and the slightly sharp, nutty scent of melted white cheddar. Each bite is a study in contrasts: the shatteringly crisp, airy layers of puff pastry give way to a tender slice of apple that’s still got a little bite, all topped with melted cheese that stretches invitingly when you lift one from the pan. A sprinkle of flaky sea salt and fresh thyme leaves right at the end wakes up every flavor and adds a beautiful visual finish — little green flecks against the amber apple and golden crust. These baked apple appetizers are the kind of thing that makes guests hover around the kitchen island, asking for the recipe before you’ve even set them on a platter.

What I love most about this recipe is that it uses just one sheet of puff pastry and comes together in under 30 minutes — but tastes like you spent all afternoon layering flavors. The trick, as with so much of French cooking, is in the details: pricking the pastry so it doesn’t balloon into a puff monster, slicing the apples thin so they cook through, and brushing that honey-butter mixture only over the apples and the edges so the cheese stays pure and unadulterated. One common mistake I see home cooks make is using apples that are too thick — they release water and make the pastry soggy. I’ll show you exactly how to avoid that. These apple cheddar bites are proof that the best appetizers are often the simplest.

Why This Apple and White Cheddar Puff Pastry Bites Recipe Is the Best

The flavor secret here is the combination of tart, crisp apple and tangy white cheddar, balanced by a honey-butter glaze infused with cinnamon and nutmeg. In my years of cooking — from my mother’s tagine pot in Morocco to the Michelin-starred kitchens of Paris — I’ve learned that the best recipes hinge on one bold contrast. Here, it’s the sweet-salty-savory trio that makes every bite craveable. The white cheddar brings a sharpness that cuts through the buttery pastry, while the honey glaze caramelizes the apple slices into tender, almost jammy pockets of flavor.

Perfected texture is what sets these apart from other easy puff pastry appetizers. I trained under a pastry chef in Paris who drummed into me the importance of keeping puff pastry cold and handling it as little as possible. By pricking each square with a fork before baking, you control the rise so the pastry stays flaky and crisp rather than puffing into hollow balloons. The apple slices are cut thin — about ⅛-inch — so they cook through in the same time the pastry takes to turn golden. The result is a bite that’s crunchy, tender, and gooey all at once, with no sad raw-apple crunch or soggy bottom.

This recipe is foolproof and fast — even a beginner can pull it off on a weeknight or for last-minute guests. With only 25 minutes total time, it’s the kind of recipe you can memorize after one try. I’ve tested it with multiple apple varieties, cheese substitutions, and even gluten-free pastry, so I know exactly what works and what doesn’t. Whether you’re hosting a Thanksgiving cocktail hour or just want a cozy snack with a glass of wine, these apple cheddar bites recipe hits every note.

Apple and White Cheddar Puff Pastry Bites Ingredients

Every time I make these apple and white cheddar puff pastry bites, I head to the Union Square Greenmarket for my apples and cheese. There’s something about picking ingredients by hand — feeling the weight of a perfect apple, seeing the aged cheddar wheel — that connects me to both my Moroccan souk days and the Parisian market rituals I still miss. Here’s what you’ll need to gather.

Ingredients List

  • 1 sheet frozen puff pastry, thawed
  • 1 medium apple (such as Honeycrisp or Granny Smith), thinly sliced
  • 4 oz white cheddar cheese, thinly sliced or shredded
  • 1 tablespoon salted butter, melted
  • 1 tablespoon honey
  • 1/4 teaspoon ground cinnamon
  • 1/8 teaspoon ground nutmeg
  • Flaky sea salt, for garnish
  • Fresh thyme leaves, for garnish (optional)

Ingredient Spotlight

Puff Pastry: This is the backbone of the entire dish. I always use all-butter puff pastry — Dufour or Trader Joe’s brand are my go-tos in NYC. The butter content gives you those distinct, shatteringly crisp layers that margarine-based pastry just can’t match. If you need a gluten-free option, there are GF puff pastry sheets available now, though the rise will be slightly less dramatic. For vegan, use a plant-based puff pastry and swap the butter for coconut oil.

Apple: This is where most of the flavor lives. Honeycrisp is my top pick because it’s sweet-tart and holds its shape during baking. Granny Smith is superb if you want a tangier contrast to the rich cheese and honey glaze. Avoid Red Delicious or Gala — they turn mushy and release too much water. Whatever apple you choose, slice it thinly (about ⅛-inch) and evenly so everything bakes in the same time.

White Cheddar: The tangy, nutty sharpness of aged white cheddar is what makes these bites memorable. I look for a block that’s been aged at least 6 months — the extra sharpness balances the honey sweetness beautifully. If you can’t find white cheddar, aged gouda or even a firm goat cheese log work well. Avoid pre-shredded cheese, as it contains anti-caking agents that prevent smooth melting.

Honey-Butter Glaze: This is my signature touch. The combination of melted butter, honey, cinnamon, and nutmeg does double duty — it adds a glossy, caramelized finish to the apples and helps the pastry edges brown evenly. If you’re out of honey, maple syrup is a wonderful substitute with a deeper, woodsy sweetness. For a savory twist, leave out the honey and brush the pastry with olive oil and za’atar instead — a nod to my North African roots.

Original IngredientBest SubstitutionFlavor / Texture Impact
Puff PastryGluten-free puff pastry sheetSlightly less flaky, still delicious; check for all-butter GF options
White CheddarAged Gouda or firm goat cheeseGouda is nuttier and creamier; goat cheese adds tang and softness
HoneyMaple syrup or agave nectarMaple adds a deeper, woodsy sweetness; agave is milder
Salted ButterUnsalted butter + pinch of sea saltAllows you to control salt level; identical richness
Cinnamon & NutmegPumpkin pie spice or apple pie spiceConvenient blend; adds clove and allspice notes for more complexity

How to Make Apple and White Cheddar Puff Pastry Bites — Step-by-Step

Ready to make these easy puff pastry appetizers? I promise you’ll be shocked at how quickly they come together. Here’s every detail you need, straight from my NYC kitchen.

Step 1: Preheat and Prep

Preheat your oven to 400°F (200°C) and line a large baking sheet with parchment paper. Make sure your puff pastry is thawed but still cold to the touch — if it gets warm and sticky, pop it in the fridge for 10 minutes.

💡 mia’s Pro Tip: Cold puff pastry is key. If the butter in the pastry warms up before baking, it will melt into the dough instead of creating steam pockets, and your layers won’t be as flaky. I often chill my cut pastry squares on the baking sheet for 5 minutes before they go into the oven.

Step 2: Cut and Prick

On a lightly floured surface, unfold the thawed puff pastry sheet and use a sharp knife or pizza cutter to divide it into 12 equal squares (about 3 inches each). If you want bite-size appetizers for a crowd, go for 16 smaller squares. Transfer them to the prepared baking sheet, spacing about 1 inch apart. Using a fork, prick each square 4–6 times across the surface.

⚠️ Common Mistake to Avoid: Skipping the fork pricking. Without those tiny holes, the pastry will puff up into uneven balloons and your toppings will slide off. The pricks allow steam to escape while still giving you a beautiful, controlled rise around the edges.

Step 3: Assemble the Bites

Place one thin apple slice on each pastry square, centering it so there’s a border of pastry visible all around. Top the apple with a slice of white cheddar (or a generous pinch if using shredded). Don’t overload — you want a balanced bite, not a cheese avalanche.

💡 mia’s Pro Tip: If your apple slices are thicker than ⅛-inch, give them a quick 30-second blanching in boiling water or a sprinkle of sugar to help them soften during baking. But honestly, if you slice them thin enough, you won’t need to.

Step 4: Brush with Honey-Butter Glaze

In a small bowl, whisk together the melted butter, honey, cinnamon, and nutmeg until smooth. Using a pastry brush, lightly dab the mixture over the apple slices and the exposed edges of the pastry. Don’t brush the cheese — it will brown too quickly and may become greasy.

⚠️ Common Mistake to Avoid: Using too much glaze. You want a light, even coating — about 1 teaspoon per square. If you drench the pastry, the edges won’t crisp up. And be careful not to let the glaze pool around the base of the pastry, or you’ll get a soggy bottom.

Step 5: Bake to Golden Perfection

Bake for 12–15 minutes, rotating the pan halfway through, until the pastry is puffed and golden brown around the edges and the cheese is melted with lightly browned spots. The apple slices should be tender and slightly caramelized at the edges.

💡 mia’s Pro Tip: Oven temperatures vary. At 12 minutes, start checking — you want the pastry to be a deep golden color, not pale blond. If your oven runs hot, check at 10 minutes. The instant you see the cheese start to brown in spots, they’re done.

Step 6: Finish and Serve

Remove the baking sheet from the oven and immediately sprinkle the hot bites with flaky sea salt and fresh thyme leaves (if using). Let them rest on the pan for exactly 2 minutes — this allows the cheese to set slightly so it doesn’t slide off when you transfer them. Use a thin spatula to move them to a serving platter. Serve warm, ideally within 10 minutes of coming out of the oven for maximum crispness.

⚠️ Common Mistake to Avoid: Letting them cool completely on the pan. The residual heat will continue to steam the bottoms, and the pastry will lose its crunch. Always transfer to a wire rack or platter after the 2-minute rest.

StepActionDurationKey Visual Cue
1Preheat oven & line baking sheet5 minsOven at 400°F, parchment ready
2Cut puff pastry into squares & prick3 mins12–16 even squares, fork marks visible
3Top with apple slices and cheese5 minsApple centered, cheese evenly distributed
4Brush honey-butter glaze2 minsGlossy sheen on apples and pastry edges
5Bake12–15 minsPastry golden brown, cheese melted with brown spots
6Garnish, rest, and serve2 mins restFlaky salt glistening, thyme leaves vibrant

Serving & Presentation

These apple cheddar bites are at their absolute best within 10 minutes of leaving the oven — the pastry is still audibly crisp, the cheese is molten, and the honey-butter glaze is glossy and fragrant. I love arranging them on a rustic wooden board or a slate platter, slightly overlapping in a concentric circle, with a small bowl of extra honey for drizzling and a sprinkle of fresh thyme leaves over the top. A tiny pinch of flaky sea salt right before serving isn’t optional — it’s the spark that makes every flavor pop.

In my NYC apartment, I often serve these alongside a crisp green salad with a sharp vinaigrette to cut the richness, or as part of a fall appetizer spread with roasted butternut squash dip and cured meats. They pair beautifully with a dry hard cider, a chilled Sauvignon Blanc, or even a light Pinot Noir. For a Moroccan-inspired touch, I sometimes serve them with a side of honey-laced labneh or a dollop of fig preserves — a nod to the sweet-savory combinations my mother used to make.

Pairing TypeSuggestionsWhy It Works
Side DishArugula salad with lemon vinaigrette, roasted Brussels sproutsPeppery greens and bright acidity balance the rich, buttery pastry
Sauce / DipHoney-laced labneh, fig preserves, whole-grain mustardCreamy, sweet, and tangy dips complement the apple-cheddar combo
BeverageDry hard cider, Sauvignon Blanc, Pinot Noir, sparkling water with thymeCrisp, acidic drinks cut through the fat and refresh the palate
GarnishFlaky sea salt, fresh thyme, a drizzle of honey, cracked black pepperSalt enhances sweetness, thyme adds freshness, pepper adds warmth

Make-Ahead, Storage & Reheating

As much as I love serving these piping hot, I know real life doesn’t always align with oven timers. I tested these apple and white cheddar puff pastry bites every which way to find the best options for make-ahead entertaining, fridge storage, and reheating. Here’s what I’ve learned in my NYC kitchen, where meal prep is survival.

MethodContainerDurationReheating Tip
RefrigeratorAirtight container with paper towel layerUp to 3 daysReheat at 350°F for 5–7 minutes on a wire rack over a baking sheet
FreezerSingle layer in freezer-safe bag or containerUp to 2 monthsBake from frozen at 400°F for 10–12 minutes; add 1–2 minutes if needed
Make-AheadAssembled on parchment-lined baking sheet, coveredUp to 24 hours in advanceRefrigerate assembled bites; bake straight from fridge, adding 2–3 minutes

The best make-ahead method is to assemble the bites completely — pastry squares, apple, cheese — and refrigerate them, covered, for up to 24 hours. The glaze can be brushed on just before baking. I do this all the time when I’m hosting a party: I prep the tray in the morning, then when guests arrive, I brush and bake. They come out just as flaky as if I’d made them from scratch in that moment.

If you have leftovers (rare in my home!), the key to recapturing that crispness is reheating in a hot oven, not a microwave. Microwaving will make the pastry chewy and the apple mushy. I place them on a wire rack over a baking sheet so air circulates underneath, and bake at 350°F for about 5–7 minutes. The rack is a game-changer — it prevents the bottoms from steaming against the hot pan. For frozen bites, don’t thaw first; bake directly from frozen, adding a few extra minutes. They won’t be quite as spectacular as fresh, but they’ll still be a crowd-pleaser.

Variations & Easy Swaps

One of the things I love most about these apple cheddar bites is how adaptable they are. Whether you’re cooking for dietary restrictions, seasonal cravings, or just what’s in your fridge, there’s a version for you. Here are my go-to variations, each one tested in my NYC kitchen.

VariationKey ChangeBest ForDifficulty Impact
Moroccan SpicedAdd ¼ tsp ras el hanout to honey glaze; swap thyme for cilantroA bold, exotic twist that pairs with spiced cocktailsEasy
Pear & BrieSwap apple for thinly sliced pear; use brie instead of cheddarElegant holiday appetizer with a creamy, milder profileEasy
Savory HerbOmit honey; brush with olive oil; add rosemary and garlic powderA savory version perfect for brunch or as a side for soupsEasy

Moroccan Spiced Variation

This is my personal favorite — a nod to the North African pantry I grew up with. Add ¼ teaspoon of ras el hanout (a fragrant Moroccan spice blend) to the honey-butter glaze, and swap the fresh thyme for a sprinkle of fresh cilantro. The warm, floral notes of cumin, coriander, and cinnamon in the ras el hanout play beautifully with the sweet apple and tangy white cheddar. It’s a subtle shift that transports the whole dish to a different culinary landscape.

Pear & Brie Variation

When I want something a little more elegant and melt-in-your-mouth, I swap the apple for a firm but ripe pear (Anjou or Bosc work perfectly) and use brie instead of white cheddar. The brie melts into a luscious, creamy puddle that contrasts with the crisp pear and flaky pastry. Skip the nutmeg and go with just cinnamon in the glaze — brie is delicate, and you don’t want to overwhelm it. A drizzle of honey and a few chopped walnuts on top make these feel like a cheese board in bite form.

Savory Herb Variation

For those moments when you want something less sweet, this version is a total winner. Omit the honey from the glaze and use olive oil instead of butter. Add a pinch of garlic powder and finely chopped fresh rosemary to the oil, then brush over the apple and pastry. The apple still provides a subtle sweetness, but the savory herbs and garlic take center stage. This pairs beautifully with a bowl of tomato soup or a crisp green salad for a light lunch.

How do you prevent puff pastry from getting soggy with apple filling?

The key to avoiding soggy puff pastry is twofold: slice your apples thin and prick the pastry before baking. Aim for apple slices that are about ⅛-inch thick — thin enough to cook through in 15 minutes without releasing excess moisture. Thicker slices will release steam as they cook, creating condensation that soaks into the pastry. Second, use a fork to prick each pastry square 4–6 times before adding toppings. Those tiny holes allow steam to escape during baking, so the pastry stays crisp and flaky instead of trapping moisture underneath. I also recommend using a firm, tart apple like Honeycrisp or Granny Smith, which hold their shape better and release less water than softer varieties like Red Delicious or Gala.

What type of apple is best for apple and white cheddar puff pastry bites?

For these apple and white cheddar puff pastry bites, the best apples are those that hold their shape during baking and offer a balance of sweetness and tartness. My top pick is Honeycrisp — it’s reliably sweet-tart, stays firm when baked, and has a pleasant crunch that contrasts nicely with the soft cheese and flaky pastry. Granny Smith is an excellent second choice if you prefer a tangier, more pronounced apple flavor that cuts through the richness of the cheese and butter. Avoid Red Delicious, Gala, Fuji, or McIntosh — they turn mushy and release too much water, which leads to soggy pastry. If you’re feeling adventurous, try Pink Lady, Braeburn, or Empire apples, all of which hold up well and bring their own unique sweetness.

Can you make apple and white cheddar puff pastry bites ahead of time?

Yes, you can absolutely make these ahead of time, and I often do for parties. The best approach is to assemble the bites completely — pastry squares, apple slices, and cheese — on a parchment-lined baking sheet, cover tightly with plastic wrap, and refrigerate for up to 24 hours. Wait to brush on the honey-butter glaze until just before baking, as the butter can harden in the fridge. When you’re ready to serve, brush the glaze over the cold bites and bake straight from the fridge, adding 2–3 minutes to the cooking time. This method yields nearly the same flaky, golden results as baking immediately. Fully baked bites can also be stored in an airtight container in the refrigerator for up to 3 days, but they’re best reheated in a 350°F oven for 5–7 minutes to restore crispness.

What can I substitute for white cheddar in this recipe?

White cheddar brings a sharp, tangy, nutty flavor that pairs beautifully with sweet apples, but several other cheeses work wonderfully as substitutes. Aged Gouda is my top recommendation — it has a similar nuttiness and melts into a creamy, slightly sweet layer that complements the honey glaze. Brie is a fantastic option if you want something richer and more decadent; it melts into a luscious puddle that contrasts with the crisp apple and flaky pastry. For a firmer, tangier alternative, try a well-aged Manchego or a sharp goat cheese log. Avoid pre-shredded cheese blends, as they contain anti-caking agents that prevent smooth melting. If you’re dairy-free, there are excellent plant-based cheddar-style shreds available — look for one that melts well, and expect a slightly less pronounced tang.

Can I use frozen puff pastry straight from the freezer?

No, I don’t recommend using frozen puff pastry straight from the freezer. The pastry needs to be thawed but still cold to the touch — if it’s frozen, you won’t be able to unfold it without cracking the layers, and if it’s too warm, the butter will melt into the dough before it hits the oven, resulting in a dense, greasy texture rather than light, flaky layers. The safest way to thaw puff pastry is to transfer it from the freezer to the refrigerator the night before you plan to bake. If you’re short on time, you can let it sit at room temperature for about 30–40 minutes, but check it frequently — you want it pliable enough to unfold gently without breaking, but still cool to the touch. Once thawed, keep it refrigerated until you’re ready to cut and assemble.

Are these apple cheddar bites gluten-free?

Standard puff pastry is made with wheat flour, so traditional versions of these apple and white cheddar puff pastry bites are not gluten-free. However, there are now several excellent gluten-free puff pastry options available in well-stocked grocery stores and online. Brands like Schär and Gee Free produce all-butter gluten-free puff pastry sheets that roll out and bake beautifully, though the layers may be slightly less dramatic than traditional pastry. If you’re using a gluten-free pastry, follow the same instructions for thawing, cutting, and baking — but check it at the 10-minute mark, as gluten-free pastry can brown faster. The rest of the ingredients (apple, cheese, butter, honey, spices) are naturally gluten-free, so this is an easy substitution.

How do I store leftover puff pastry bites?

Store leftover apple and white cheddar puff pastry bites in an airtight container in the refrigerator for up to 3 days. To maintain as much crispness as possible, line the container with a paper towel to absorb any excess moisture, and add another paper towel on top before sealing. Avoid stacking them in more than two layers, as the weight can crush the delicate pastry. When you’re ready to enjoy them again, the oven is your best friend — reheat at 350°F (175°C) on a wire rack over a baking sheet for 5–7 minutes. The wire rack allows hot air to circulate around the entire bite, crisping up the bottom and edges. Microwaving is not recommended, as it will make the pastry chewy and the apple slices mushy. For longer storage, freeze fully baked and cooled bites in a single layer in a freezer-safe bag for up to 2 months, then reheat from frozen at 400°F for 10–12 minutes.

Can I use a different cheese instead of white cheddar?

Absolutely — white cheddar is fantastic, but it’s far from the only cheese that works in this recipe. Aged Gouda is my favorite substitute; it melts into a creamy, nutty layer that complements the sweet apple and honey glaze beautifully. Brie or Camembert offer a luxurious, buttery melt that feels extra special for holiday entertaining. For a sharper, more pungent note, try a well-aged Manchego or even a crumbled blue cheese like Gorgonzola — the bold funk of blue cheese is incredible against the sweet apple and honey. If you want to keep things mild, a good-quality provolone or even a mild havarti will work. The key is to choose a cheese that melts well and has enough personality to stand up to the apple and warm spices. Avoid very hard cheeses like Parmesan (which won’t melt smoothly) or pre-shredded blends with anti-caking agents.

What can I use instead of puff pastry?

If you don’t have puff pastry on hand or want to try a different base, you have several good options. Phyllo dough is the closest substitute — butter each layer generously, stack 3–4 sheets, and cut into squares. The result will be extra crisp and delicate, though it requires more effort. Crescent roll dough from a tube (like Pillsbury) is a convenient shortcut; it’s buttery and flaky, though the texture is denser than puff pastry. For a grain-free option, try using thick slices of sweet potato or butternut squash as a base — roast them until just tender, then top with apple and cheese and bake until bubbly. You can also use thinly sliced baguette rounds brushed with olive oil as a crostini-style base. Each substitute changes the texture and flavor, but all are delicious in their own way.

How do I reheat these apple cheddar bites so they stay crisp?

The best way to reheat apple and white cheddar puff pastry bites while keeping them crisp is in the oven, not the microwave. Preheat your oven to 350°F (175°C) and place the bites on a wire rack set over a baking sheet. The wire rack is essential — it lets hot air circulate underneath the pastry, preventing the bottoms from steaming and becoming soggy. Bake for 5–7 minutes, or until the pastry is hot and crisp again. If you’re reheating from frozen, bake at 400°F for 10–12 minutes directly from the freezer — no need to thaw first. Avoid microwaving at all costs, as the steam will turn the pastry rubbery and the apple slices mushy. An air fryer also works beautifully: 350°F for 3–4 minutes, checking halfway through. The key is dry, circulating heat that re-crisps without additional moisture.

Share Your Version!

I absolutely love seeing how you make these apple and white cheddar puff pastry bites your own. Did you try the Moroccan spiced version with ras el hanout? Or maybe you went with pear and brie for a holiday party? Leave a star rating and a comment below — it helps other readers know what works, and I read every single one. If you share a photo on Instagram or Pinterest, tag @exorecipes so I can see your creation. I’d especially love to hear: what’s your go-to apple variety for baking, and have you tried any unexpected cheese combinations that surprised you?

From my NYC kitchen to yours — I hope this recipe brings as much warmth to your table as it does to mine. — mia 🧡

📌

Love This Recipe? Save It to Pinterest!

If you enjoyed this Apple and White Cheddar Puff Pastry Bites recipe, don’t let it get lost in your browser tabs! 😄 Pin it now so you can find it again anytime — and explore hundreds more tried-and-tested recipes waiting for you on my Pinterest boards.

👉 Follow mia on Pinterest @exorecipe

📌 Pin this recipe · 🔁 Re-pin your favorites · 💬 Tag me when you make it — I love seeing your creations!

Print

clock clock iconcutlery cutlery iconflag flag iconfolder folder iconinstagram instagram iconpinterest pinterest iconfacebook facebook iconprint print iconsquares squares iconheart heart iconheart solid heart solid icon

Apple and White Cheddar Puff Pastry Bites

  • Author: Chef Mia
  • Prep Time: 10 minutes
  • Cook Time: 15 minutes
  • Total Time: 25 minutes
  • Yield: 12 bites 1x
  • Method: Appetizer
  • Cuisine: American

Description

These apple and white cheddar puff pastry bites are the perfect fall appetizer, combining sweet apples, tangy white cheddar, and flaky puff pastry.


Ingredients

Scale
  • 1 sheet frozen puff pastry, thawed
  • 1 medium apple (such as Honeycrisp or Granny Smith), thinly sliced
  • 4 oz white cheddar cheese, thinly sliced or shredded
  • 1 tablespoon salted butter, melted
  • 1 tablespoon honey
  • 1/4 teaspoon ground cinnamon
  • 1/8 teaspoon ground nutmeg
  • Flaky sea salt, for garnish
  • Fresh thyme leaves, for garnish (optional)

Instructions

  1. Preheat oven to 400°F (200°C). Line a baking sheet with parchment paper.
  2. On a lightly floured surface, unfold the thawed puff pastry sheet and cut into 12 equal squares (or 16 for bite-size). Transfer to the prepared baking sheet.
  3. Using a fork, prick each pastry square a few times to prevent excessive puffing.
  4. Place a slice of apple on each pastry square, then top with a slice or shred of white cheddar cheese.
  5. In a small bowl, mix the melted butter, honey, cinnamon, and nutmeg. Brush the mixture lightly over the apples and pastry edges.
  6. Bake for 12-15 minutes, until the pastry is golden brown and the cheese is melted and bubbly.
  7. Remove from the oven and immediately sprinkle with flaky sea salt and fresh thyme leaves (if using). Let cool slightly on the pan for 2 minutes, then transfer to a serving platter. Serve warm.

Notes

For a sweeter version, drizzle with extra honey before serving. You can also swap white cheddar with brie or gouda for a different flavor profile.


Nutrition

  • Calories: 180
  • Sugar: 6g
  • Fat: 11g
  • Carbohydrates: 16g
  • Protein: 4g


Apple and White Cheddar Puff Pastry Bites

ph">For more delicious inspiration, follow me on Pinterest!