Table of Contents
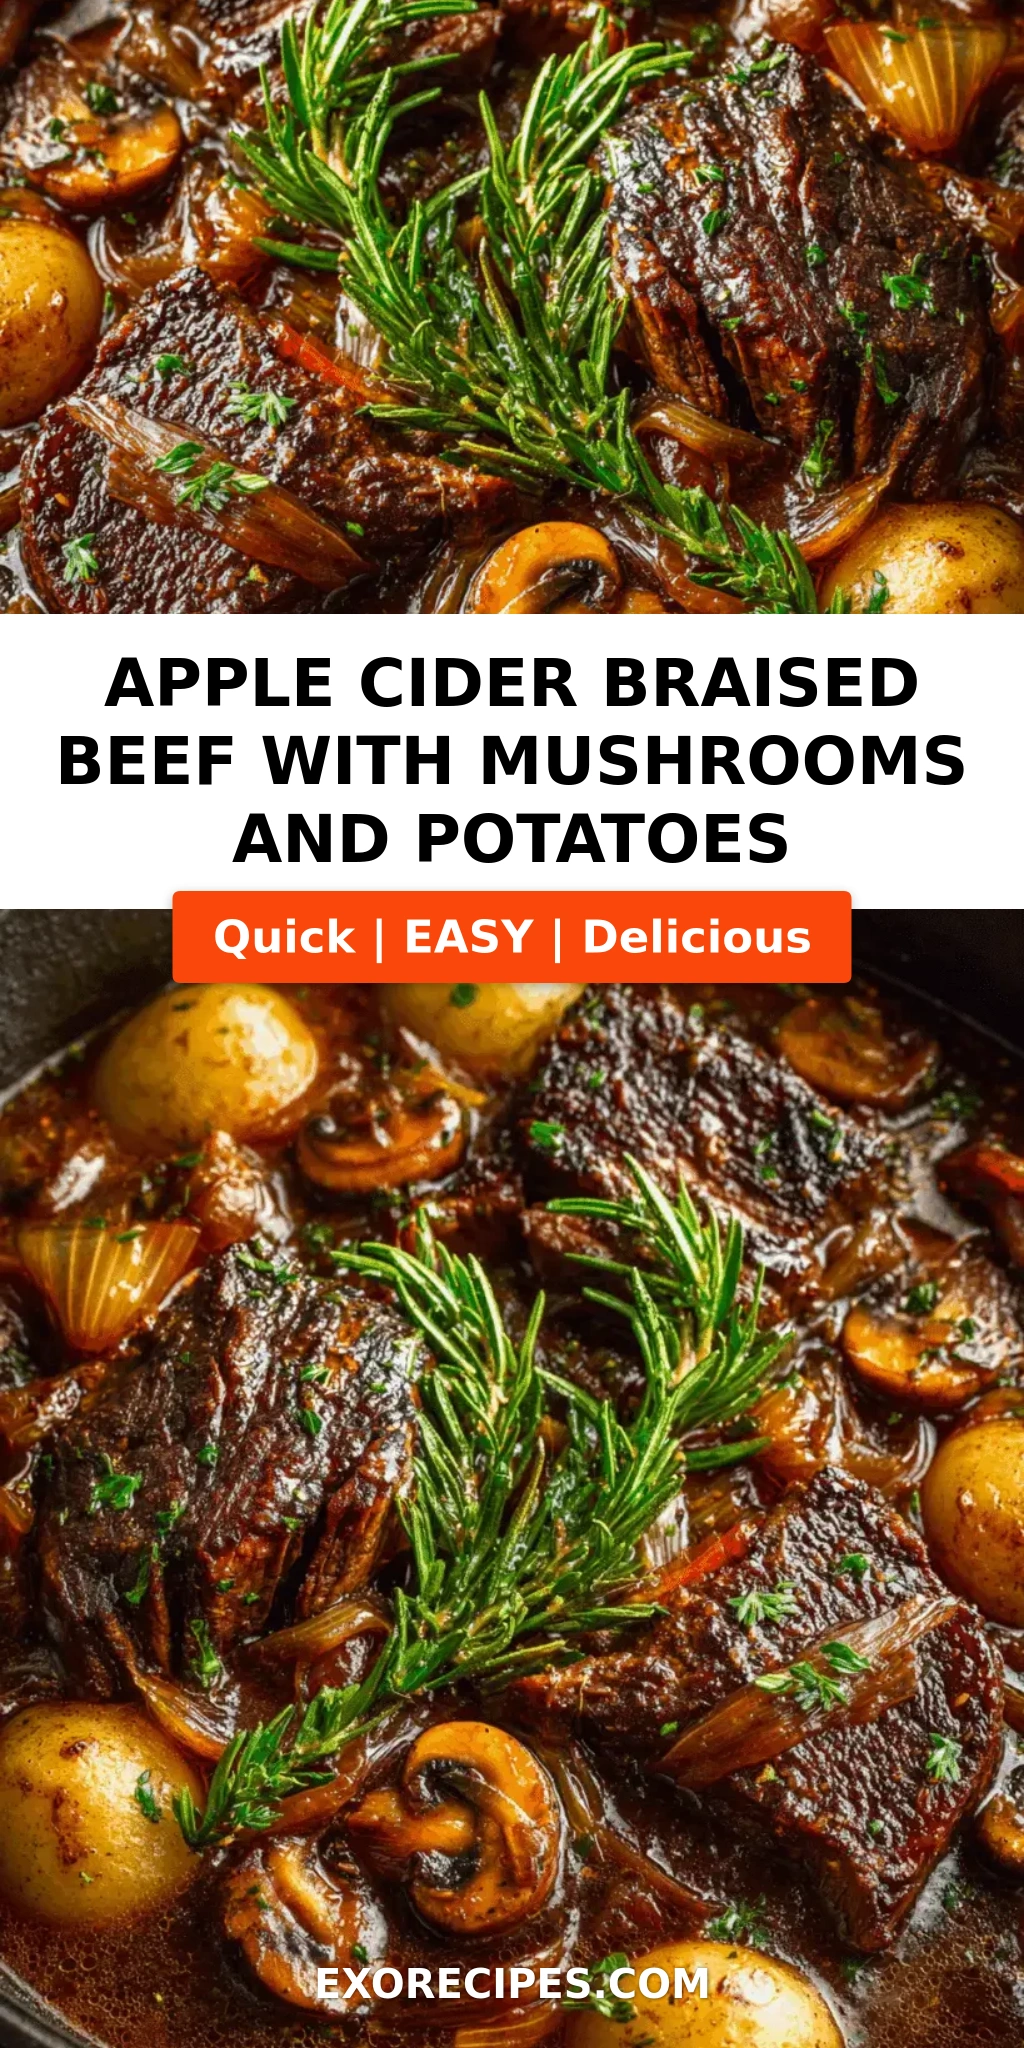
Apple Cider Pot Roast with Potatoes – A Cozy Fall One-Pot Meal
Growing up in Morocco, my mother would slow-cook lamb with preserved lemons and saffron until the meat fell apart like a whisper. Years later, after training at Le Cordon Bleu in Paris and settling into my NYC kitchen, I began chasing that same tenderness — but with a decidedly American autumn twist. This apple cider pot roast is the result: fork-tender beef chuck braised low and slow in a bath of fresh apple cider, aromatic herbs, and a touch of Dijon mustard. It’s the kind of fall pot roast recipe that makes your whole apartment smell like a cozy orchard on a crisp October afternoon. The first time I made this Dutch oven pot roast for a dinner party, my guests actually asked for the recipe before they finished their first bite. That’s when I knew I had something special.
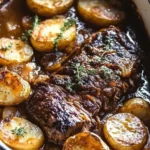
Imagine a thick, fork-tender slice of beef sitting in a pool of silky, apple-kissed gravy, surrounded by baby potatoes that have soaked up all that savory-sweet braising liquid. The carrots are tender but not mushy, the broth has a gentle tang from apple cider vinegar, and every bite carries a hint of thyme and rosemary. The apple cider doesn’t make it sweet — instead, it brings a warm, round acidity that balances the richness of the beef. It’s comfort food with a chef’s touch. My Paris training taught me the power of a proper braise: sear hard, deglaze thoroughly, and let time do the heavy lifting. That same philosophy lives in this pot roast with potatoes, and it’s why the texture comes out perfect every time.
What makes my version stand out? I use a technique I learned in Paris — a quick mustard-and-tomato paste stir before adding the liquid — which adds incredible depth and helps the gravy thicken naturally. I also finish the dish with a drizzle of good apple cider vinegar just before serving to brighten the whole pot. One common mistake home cooks make is skipping the sear or rushing the browning. Don’t. That brown crust is pure flavor. 💡 mia’s Pro Tip: If you want a thicker gravy without a slurry, mash a few of the cooked potatoes into the braising liquid at the end — it’s a trick my French chef instructor used, and it works beautifully.
Why This Apple Cider Pot Roast Recipe Is the Best
The flavor secret lies in the apple cider and Dijon mustard combination. The cider adds natural sweetness and acidity that tenderizes the beef, while the mustard gives the sauce a subtle, creamy sharpness. Growing up in Morocco, I learned how a single acidic element can transform a braise — whether it’s preserved lemon or a splash of cider vinegar. Here, that same principle creates a sauce that’s complex, balanced, and absolutely unforgettable. Every time I make this Dutch oven pot roast, I’m reminded of how simple ingredients, treated with respect, can produce something truly magical.
The texture is perfected by a two-stage cooking process I picked up in Paris: braise the meat alone for the first 2 hours, then add the vegetables for the final hour. This ensures the beef becomes meltingly tender without the vegetables turning to mush. The potatoes and carrots cook in the enriched liquid just long enough to absorb flavor while holding their shape. My chef instructor in Paris always said, “Let the meat cook alone first — it needs all the attention.” She was right. This apple cider beef recipe follows that principle, and the result is a pot roast where every component shines.
And it’s foolproof for beginners. Braising is the most forgiving cooking method — it practically does the work itself. As long as you bring the liquid to a gentle simmer before covering and transferring to the oven, and keep the temperature low at 325°F, you can’t go wrong. I’ve taught this fall pot roast recipe to friends who never cook beef, and every single one of them nailed it on the first try. The Dutch oven does the rest. This is the kind of meal that makes you look like a hero with very little active effort.
Apple Cider Pot Roast Ingredients
I buy my beef chuck from the Union Square Greenmarket in NYC — the farmers there know me by name and always save me a well-marbled roast. The apple cider comes from a local orchard upstate that presses it fresh every September. There’s something about using ingredients that have a story, whether it’s the spices from my mother’s souk in Marrakech or the produce from my neighborhood market. Here’s everything you’ll need for this pot roast with potatoes.
Ingredients List
- 3 to 4 pounds beef chuck roast
- 2 tablespoons olive oil
- 1 large onion, chopped
- 4 cloves garlic, minced
- 1 cup apple cider
- 1 cup beef broth
- 2 tablespoons apple cider vinegar
- 2 tablespoons tomato paste
- 1 tablespoon Dijon mustard
- 3 sprigs fresh thyme
- 2 sprigs fresh rosemary
- 2 bay leaves
- 1 teaspoon salt
- 1/2 teaspoon black pepper
- 1 1/2 pounds baby potatoes, halved
- 4 large carrots, peeled and cut into chunks
Ingredient Spotlight
Beef Chuck Roast: This is the king of braising cuts. It comes from the shoulder area and has enough marbling to keep the meat moist and tender during the long cook. In US grocery stores, look for a roast with even fat distribution. If you can’t find chuck, use brisket or bottom round — but chuck gives the best flavor-to-tenderness ratio. One tested substitution: boneless short ribs work beautifully, though they cook slightly faster. The texture will be even richer, with a deeper beefy flavor.
Apple Cider: Fresh, unfiltered apple cider is ideal for this apple cider pot roast. It has a cloudy appearance and a bright, tangy-sweet flavor that supermarket apple juice just can’t match. Look for it in the refrigerated section at farmers markets or specialty grocers. If you must substitute, use fresh-pressed apple juice (not from concentrate) and add 1 extra tablespoon of apple cider vinegar to replicate the tang. The flavor will be less complex, but still delicious.
Dijon Mustard: This French staple adds a mellow heat and creamy texture to the braising liquid. It helps emulsify the sauce and gives it a velvety finish. I always use Maille or a good-quality French Dijon. For a substitute, use whole-grain mustard for texture, or stone-ground mustard for a similar flavor profile. Avoid yellow mustard — it’s too sharp and acidic for this dish and will throw off the balance.
Baby Potatoes: Yukon Gold or red baby potatoes hold their shape beautifully during braising. Their waxy texture means they won’t fall apart, and they absorb the apple-cider-infused broth like little sponges. If you only have large potatoes, cut them into 1½-inch chunks. Russets will work in a pinch but tend to break down more, which can thicken the gravy — not necessarily a bad thing! Sweet potatoes can also be used for a sweeter variation, though they’ll soften faster so add them 20 minutes later.
| Original Ingredient | Best Substitution | Flavor / Texture Impact |
|---|---|---|
| Beef Chuck Roast | Boneless Short Ribs | Richer, more intense beef flavor; slightly faster cook time |
| Apple Cider | Fresh apple juice + 1 tbsp extra cider vinegar | Less complex sweetness, still tangy; slightly thinner sauce |
| Dijon Mustard | Whole-grain mustard | Similar sharpness with added texture from mustard seeds |
| Baby Potatoes | Large Yukon Gold cut into chunks | Same buttery texture; slightly different visual presentation |
How to Make Apple Cider Pot Roast — Step-by-Step
Trust me when I say this Dutch oven pot roast is easier than it looks. Follow these steps, and you’ll have a showstopper of a meal that tastes like you spent all day in the kitchen — when really, the oven did most of the work.
Step 1: Preheat and Season
Preheat your oven to 325°F (165°C). While it heats, pat the beef chuck roast dry with paper towels — this is crucial for getting a good sear. Season generously on all sides with salt and pepper. Don’t skimp; most of that seasoning will stay in the pan and flavor the final sauce.
💡 mia’s Pro Tip: Let the seasoned roast sit at room temperature for 20 minutes before searing. This ensures the meat cooks evenly and the center doesn’t stay cold when it hits the hot pan.
Step 2: Sear the Roast
Heat olive oil in a large Dutch oven over medium-high heat until it shimmers. Carefully place the roast in the hot oil and sear for 3-4 minutes per side, without moving it, until a deep brown crust forms. Turn using tongs and repeat on all sides, including the ends. Remove the roast to a plate and set aside.
⚠️ Common Mistake to Avoid: Moving the meat too early. If you try to flip it and it sticks, it’s not ready — let it cook another minute until it releases naturally. That brown crust is pure flavor.
Step 3: Sauté the Aromatics
Reduce the heat to medium. Add the chopped onion to the pot and cook, stirring occasionally, for about 5 minutes until softened and translucent. Add the minced garlic and cook for 1 minute more, until fragrant. If the pot looks dry, add a splash of the beef broth to loosen any browned bits.
💡 mia’s Pro Tip: Don’t rush this step. Properly softened onions build the sweet, savory foundation of the entire braise. I learned this in Paris — patience with aromatics pays off tenfold.
Step 4: Build the Braising Liquid
Stir in the apple cider, beef broth, apple cider vinegar, tomato paste, and Dijon mustard. Use a wooden spoon to scrape up all those deeply browned bits from the bottom of the pot — that’s where the flavor lives. Bring the mixture to a simmer, stirring to combine everything into a smooth, fragrant sauce.
⚠️ Common Mistake to Avoid: Adding the liquid cold. Always bring it to a simmer before returning the meat to the pot. A gradual temperature change keeps the meat tender and prevents it from seizing up.
Step 5: Return the Roast and Braise
Return the seared roast to the pot along with the fresh thyme, rosemary, and bay leaves. The liquid should come about halfway up the sides of the meat — if it doesn’t, add a bit more broth or water. Bring to a gentle simmer, then cover the pot tightly with the lid and transfer to the preheated oven. Braise for 2 hours.
💡 mia’s Pro Tip: Place a piece of parchment paper under the lid before covering — this helps create an extra-tight seal and locks in moisture. It’s a French technique that makes a real difference in the tenderness of the meat.
Step 6: Add the Vegetables
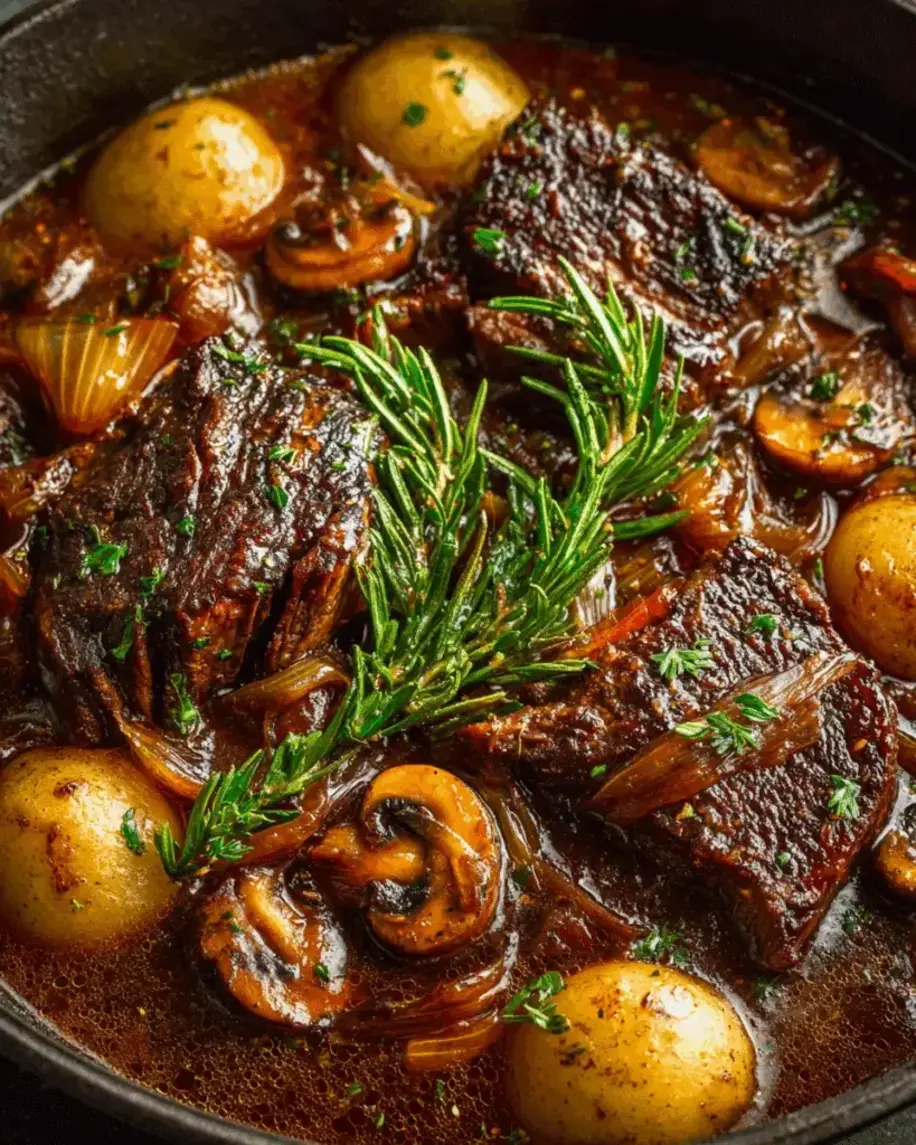
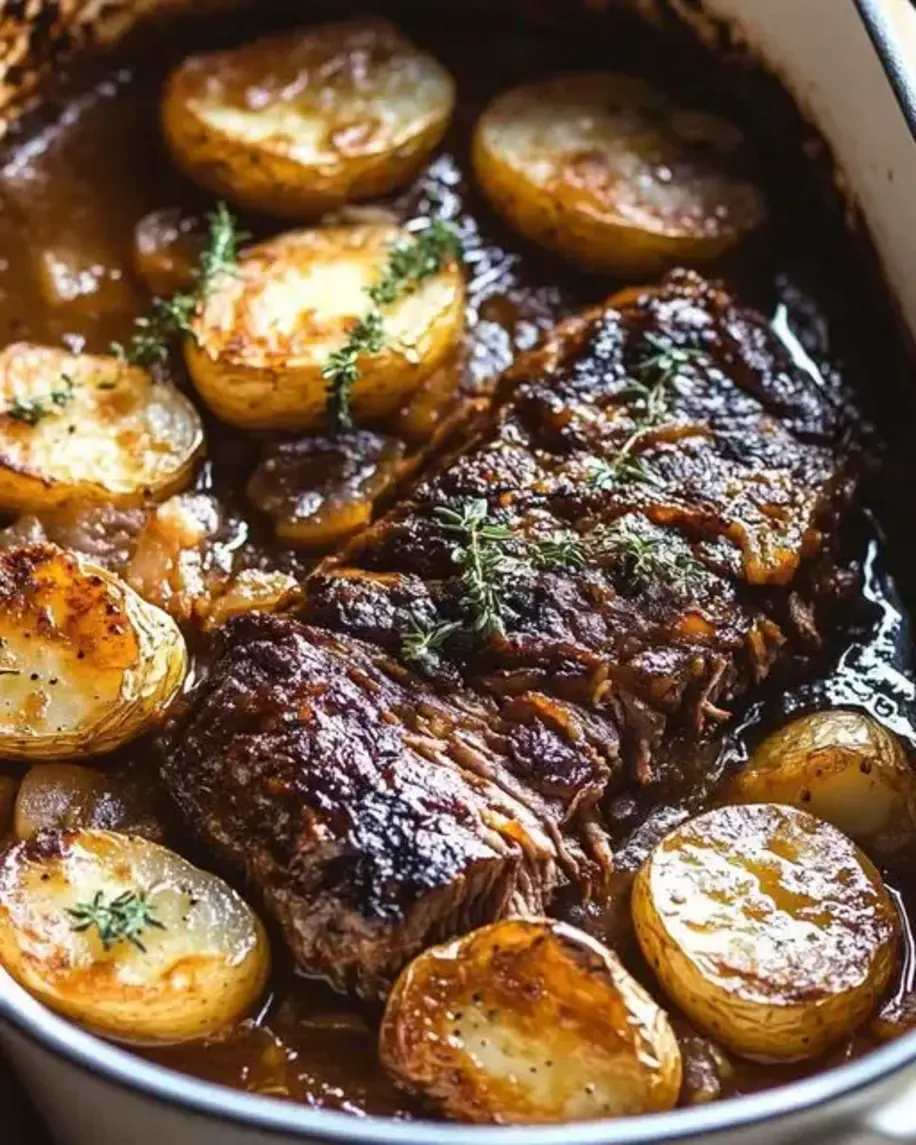
After 2 hours, carefully remove the pot from the oven. Add the halved baby potatoes and carrot chunks around the roast, tucking them into the liquid. Cover again and return to the oven for another 45 minutes to 1 hour, until the meat is fork-tender and the vegetables are cooked through. The roast should shred easily with a fork when it’s ready.
⚠️ Common Mistake to Avoid: Adding vegetables at the beginning. They’ll turn to mush. The two-stage addition I learned in Paris ensures perfectly cooked meat and vegetables that still have structure.
Step 7: Rest and Serve
Remove the pot from the oven. Discard the herb sprigs and bay leaves. Let the roast rest in the liquid for 10 minutes — this allows the juices to redistribute and makes slicing much easier. Transfer the roast to a cutting board and slice against the grain into thick pieces. Serve with the potatoes and carrots, spooning generous amounts of the braising liquid over the top.
💡 mia’s Pro Tip: For a restaurant-quality finish, drizzle a tiny bit of fresh apple cider vinegar over the sliced meat just before serving. It wakes up all the flavors and adds a bright, clean note that balances the richness.
| Step | Action | Duration | Key Visual Cue |
|---|---|---|---|
| 1 | Season and rest roast | 20 minutes | Salt visibly coating the surface, meat at room temp |
| 2 | Sear roast on all sides | 12–16 minutes | Deep mahogany brown crust, meat releases easily |
| 3 | Sauté onion and garlic | 6 minutes | Onions translucent, garlic fragrant |
| 4 | Deglaze and build sauce | 3 minutes | Browned bits dissolved, sauce simmering evenly |
| 5 | Braise meat (first stage) | 2 hours | Meat is fork-tender at edges, liquid gently bubbling |
| 6 | Add vegetables, braise again | 45–60 minutes | Potatoes tender, carrots can be pierced with a fork |
| 7 | Rest, slice, and serve | 10 minutes resting | Meat slices cleanly, juices run clear |
Serving & Presentation
I love serving this apple cider pot roast straight from the Dutch oven at the table — it feels so warm and generous. Arrange the sliced beef in the center of a large platter, surrounded by the potatoes and carrots. Spoon plenty of the braising liquid over the top, letting it pool around the meat. A sprinkle of fresh thyme leaves or a few chopped parsley adds a bright green contrast that makes the dish look as good as it tastes. In my NYC apartment, I often serve this with a crusty baguette to soak up every last drop of the gravy — a habit I picked up from my Paris days.
For a Moroccan-inspired twist, I sometimes dust the finished dish with a pinch of cinnamon and a handful of toasted slivered almonds before serving. It’s a nod to my mother’s kitchen, and the warm spice pairs beautifully with the apple cider. If you’re hosting a fall dinner party, this dish pairs wonderfully with a simple arugula salad dressed with lemon and olive oil, or roasted Brussels sprouts with balsamic glaze. The richness of the pot roast with potatoes calls for sides that are bright, acidic, or slightly bitter to balance the meal.
When it comes to beverages, a medium-bodied red wine like a Côtes du Rhône or a fruity Zinfandel is my go-to. For a non-alcoholic option, I love serving sparkling apple cider with a splash of ginger beer — it mirrors the apple flavor in the dish and adds a festive touch. Leftovers (if you have any) make incredible sandwiches the next day: pile the shredded beef onto toasted sourdough with a smear of Dijon and a handful of arugula.
| Pairing Type | Suggestions | Why It Works |
|---|---|---|
| Side Dish | Arugula salad, roasted Brussels sprouts, crusty bread | Bright acidity and bitterness cut the richness of the beef |
| Sauce / Dip | Extra braising liquid, Dijon mustard, horseradish cream | Enhances and complements the savory-sweet flavor |
| Beverage | Côtes du Rhône, fruity Zinfandel, sparkling apple cider | Wine mirrors the fruit notes; cider echoes the apple flavor |
| Garnish | Fresh thyme, parsley, toasted almonds, cinnamon dusting | Adds color, texture, and a subtle flavor contrast |
Make-Ahead, Storage & Reheating
This apple cider pot roast is one of those meals that actually tastes better the next day — the flavors meld and deepen overnight. Living in NYC with a busy schedule, I often make this on a Sunday and enjoy it throughout the week. Here’s how to store and reheat it so it tastes as glorious as the day you made it.
| Method | Container | Duration | Reheating Tip |
|---|---|---|---|
| Refrigerator | Airtight container with liquid | Up to 4 days | Reheat gently on stovetop over low heat, covered, adding a splash of broth if needed |
| Freezer | Freezer-safe container or zip-top bag | Up to 3 months | Thaw overnight in fridge, then reheat in a 300°F oven for 25–30 minutes, covered |
| Make-Ahead | Dutch oven (cooled, covered) | 2 days in advance | Cook fully, cool, refrigerate in the pot. Reheat slowly on stovetop — flavors improve! |
One of my favorite things about this fall pot roast recipe is how the fat solidifies on top when chilled — it makes it incredibly easy to remove if you want a leaner sauce. Just lift off the hardened fat layer before reheating. When I meal-prep this for busy weeknights, I shred the beef and store it separately from the vegetables and liquid. That way, I can reheat just what I need without the vegetables getting too soft. In NYC, where time is always scarce, this kind of efficiency is a lifesaver.
For the best reheated texture, I avoid the microwave — it tends to toughen the meat. Instead, I warm leftovers in a covered Dutch oven or heavy skillet over low heat, adding a splash of beef broth or water to restore the sauce consistency. The low, slow reheating mimics the original braise and keeps everything tender and luscious. If you’re reheating from frozen, let it thaw in the fridge overnight first for the best results.
Variations & Easy Swaps
One of the joys of a good pot roast with potatoes recipe is how adaptable it is. Over the years, I’ve tested dozens of variations — some inspired by my Moroccan roots, others by my French training, and a few born from happy accidents in my NYC kitchen. Here are my favorite ways to change up this apple cider pot roast.
| Variation | Key Change | Best For | Difficulty Impact |
|---|---|---|---|
| Moroccan Spiced | Add 1 tsp cinnamon, 1 tsp cumin, and ½ tsp ginger | Warm, exotic flavor; pairs with couscous | No change — just add spices with the broth |
| Gluten-Free | Use gluten-free Dijon; thicken with potato mash | Celiac or gluten sensitivity | No change — naturally gluten-free with simple swaps |
| Winter Root Veg | Replace half the potatoes with parsnips and celery root | Extra earthiness and seasonal variety | No change — just swap veggies |
Moroccan Spiced Variation
This is my personal favorite — a nod to my mother’s kitchen in Marrakech. When I add the braising liquid, I also stir in 1 teaspoon of ground cinnamon, 1 teaspoon of ground cumin, and ½ teaspoon of ground ginger. The cinnamon amplifies the apple cider’s natural sweetness, while the cumin and ginger add warmth and complexity. I finish the dish with a handful of toasted slivered almonds and fresh cilantro instead of parsley. Serve it over fluffy couscous or with warm flatbread to soak up the spiced gravy. It’s a beautiful fusion of North African soul and American comfort food.
Gluten-Free and Dairy-Free Version
This apple cider pot roast is naturally gluten-free and dairy-free as written — but there are two things to check. First, some Dijon mustards contain gluten as a thickener, so read the label or use a certified gluten-free brand like Maille. Second, if you want to thicken the gravy, skip the cornstarch (which is usually gluten-free but can be processed with wheat) and instead mash a few of the cooked potatoes directly into the sauce. This French technique gives a silky, naturally thickened gravy without any added starch. It’s a trick I’ve used for years, and it works flawlessly. All the other ingredients — beef, olive oil, apple cider, vinegar, fresh herbs — are naturally free of gluten and dairy.
Winter Root Vegetable Swap
When I’m shopping at the Union Square Greenmarket in late fall, I can’t resist the gorgeous parsnips, celery root, and turnips. For a wintery variation, replace half the baby potatoes with peeled and chunked parsnips and celery root. Parsnips add a sweet, peppery note that echoes the apple cider, while celery root brings an earthy, celery-like depth. The cooking time stays the same, and the visual result is stunning — creamy white and golden vegetables nestled alongside the dark, rich beef. This swap makes the dish feel even more seasonal and special for holiday gatherings.
What is the best cut of beef to use for apple cider pot roast?
For this apple cider pot roast, beef chuck roast is hands down the best choice. It comes from the shoulder area and has abundant marbling that renders during the long braise, keeping the meat incredibly moist and tender. Look for a chuck roast with even fat distribution — about 3 to 4 pounds is ideal. If you can’t find chuck, brisket or bottom round are good alternatives, though they may cook slightly faster or leaner. Boneless short ribs also work beautifully and provide an even richer, more intense beef flavor. Whatever you choose, make sure it’s a cut meant for low-and-slow cooking. Lean cuts like sirloin or tenderloin will dry out and toughen, so avoid those for this Dutch oven pot roast.
Can I substitute apple cider with apple juice in this pot roast recipe?
Yes, you can substitute apple cider with apple juice, but there are a few things to keep in mind. Fresh-pressed apple juice (not from concentrate) works best — it has more flavor than the shelf-stable kind. Since apple juice is typically sweeter and less tangy than cider, I recommend adding an extra tablespoon of apple cider vinegar to the braising liquid to restore some acidity and balance. The flavor will be slightly less complex, but the dish will still be delicious. If possible, look for unfiltered apple juice, which has more body and flavor. Avoid apple juice with added sugars or artificial flavors — they can make the sauce cloying and throw off the savory profile of this fall pot roast recipe.
How long should I cook apple cider pot roast with potatoes in a slow cooker?
To make this apple cider pot roast in a slow cooker, follow the same initial steps — sear the beef and sauté the aromatics — then transfer everything to the slow cooker. Cook on LOW for 8 to 10 hours or on HIGH for 4 to 5 hours. Add the potatoes and carrots during the last 2 hours of cooking on LOW, or the last 1 hour on HIGH, to prevent them from turning to mush. The key difference with slow cooker braising is that you won’t get as much evaporation, so the sauce may be thinner. At the end, you can remove the meat and vegetables and simmer the liquid on the stovetop for 10–15 minutes to thicken it, or stir in a cornstarch slurry. This is a great hands-off method for busy days when you want that Dutch oven pot roast flavor without watching the oven.
Should I sear the meat before adding it to the apple cider pot roast?
Absolutely — searing the meat is a crucial step for this apple cider pot roast. Searing creates a deep brown crust through the Maillard reaction, which adds layers of savory, umami flavor that you simply can’t get from just simmering the meat. Those browned bits that stick to the bottom of the pot are pure gold — they dissolve into the braising liquid and create a rich, complex gravy. Without searing, the pot roast will taste flat and one-dimensional. Heat your Dutch oven over medium-high heat with olive oil until it shimmers, then sear the roast for 3–4 minutes per side without moving it. Let it form a crust before flipping. This step takes only about 12 minutes and makes all the difference between a good pot roast and a truly memorable one.
Can I make this apple cider pot roast without a Dutch oven?
Yes, you can! If you don’t have a Dutch oven, use a heavy-bottomed oven-safe pot or a deep cast iron skillet with a tight-fitting lid. The key is to use a pot that can go from stovetop to oven and has a lid that seals well. If your pot doesn’t have a lid, you can cover it tightly with heavy-duty aluminum foil. Alternatively, you can cook this entirely on the stovetop over the lowest possible heat — just check the liquid level occasionally and add a splash of broth if needed. For slow cooker or Instant Pot versions, sear the meat first in a separate pan, then transfer to the appliance. The Dutch oven is ideal because it distributes heat evenly and retains moisture, but this pot roast with potatoes is forgiving enough to work in many different vessels.
How do I thicken the gravy for apple cider pot roast?
There are two excellent ways to thicken the gravy for this apple cider pot roast. The first is the classic cornstarch slurry: mix 1 tablespoon of cornstarch with 2 tablespoons of cold water, then stir it into the simmering braising liquid after removing the meat and vegetables. Let it cook for 2–3 minutes until thickened. The second method — my personal favorite, learned in Paris — is to remove about ½ cup of the cooked potatoes, mash them with a fork, and stir them back into the sauce. This adds body and a silky texture without altering the flavor. You can also simply simmer the uncovered liquid on the stovetop for 10–15 minutes to reduce and concentrate it naturally. Whichever method you choose, taste and adjust the seasoning afterward.
Can I add other vegetables to this apple cider pot roast with potatoes?
Absolutely! This fall pot roast recipe is very adaptable when it comes to vegetables. In addition to the baby potatoes and carrots, try adding parsnips, celery root, turnips, or sweet potatoes — just cut them into similar-sized chunks so they cook evenly. Mushrooms are also wonderful; add them along with the onions for extra umami. If you want to include more delicate vegetables like green beans or peas, add them during the last 10–15 minutes of cooking so they stay vibrant and tender-crisp. I often add a handful of pearl onions along with the potatoes for a classic French touch. Just be mindful of the total volume — don’t overcrowd the pot, or the vegetables will steam instead of braise. Stick to about 2 to 2½ pounds of vegetables total.
How do I know when the apple cider pot roast is done?
The best test for doneness is the fork test: the meat should be fork-tender, meaning you can easily pierce it with a fork and it shreds or pulls apart with minimal effort. The internal temperature should reach at least 200°F to 205°F for optimal tenderness — this allows the connective tissue to break down completely. The vegetables should be easily pierced with a fork but still hold their shape. Visually, the braising liquid will have reduced slightly and become richer in color. When you slice the roast, the meat should be moist and not dry. If it still offers resistance, cover and cook for another 15–20 minutes and test again. Remember that every roast is slightly different, so trust the fork test over the timer.
Can I prepare this apple cider pot roast ahead of time for a dinner party?
Yes, and I actually recommend it! This apple cider pot roast is an ideal make-ahead dish for entertaining. Prepare it completely up to 2 days in advance, let it cool, and refrigerate it right in the Dutch oven (covered once cool). The flavors meld and deepen overnight, making it even more delicious. When you’re ready to serve, simply remove any solidified fat from the surface, then reheat gently on the stovetop over low heat, covered, until the meat is heated through. You can also reheat it in a 300°F oven for 25–30 minutes. I often make this for weekend dinner parties — it takes the pressure off so I can enjoy my guests instead of being stuck in the kitchen. Just before serving, give it a final taste and adjust the seasoning, then garnish fresh and bring it to the table in the Dutch oven for a beautiful presentation.
What should I serve with apple cider pot roast for a complete meal?
This pot roast with potatoes and carrots is already a complete one-pot meal, but I love adding a few simple sides to round it out. A bright, acidic salad — like arugula with lemon vinaigrette or a shaved fennel and apple salad — cuts through the richness beautifully. Crusty sourdough or a warm baguette is essential for sopping up every bit of that apple-cider gravy. For a more elevated presentation, serve the pot roast over creamy polenta or mashed potatoes (yes, more potatoes — they soak up the sauce gorgeously). Roasted Brussels sprouts with balsamic glaze or a simple steamed green vegetable like haricots verts add color and nutrition. For wine, a medium-bodied red like a Côtes du Rhône, a fruity Zinfandel, or even a dry Riesling pairs wonderfully with the apple cider notes.
Share Your Version!
I absolutely love hearing from you — it’s my favorite part of being a food blogger. When you make this apple cider pot roast, let me know how it turns out! Did you try the Moroccan spice twist? Did you add extra vegetables? Did your family scrape the pot clean? Leave a star rating and a comment below — every single one makes my NYC kitchen feel a little less lonely and a lot more connected to yours.
And please, snap a photo and share it on Instagram or Pinterest and tag me @exorecipes. I love seeing your creations, and I often share my favorites on my stories. If you have a question about a substitution or a technique, drop it in the comments — I read every single one and answer as quickly as I can. Cooking is a conversation, and I’m so glad you’re here.
From my NYC kitchen to yours — I hope this recipe brings as much warmth to your table as it does to mine. — mia 🧡
Love This Recipe? Save It to Pinterest!
If you enjoyed this Apple Cider Pot Roast with Potatoes recipe, don’t let it get lost in your browser tabs! 😄 Pin it now so you can find it again anytime — and explore hundreds more tried-and-tested recipes waiting for you on my Pinterest boards.
👉 Follow mia on Pinterest @chefrecipes2
📌 Pin this recipe · 🔁 Re-pin your favorites · 💬 Tag me when you make it — I love seeing your creations!
🍂 Did you make this Apple Cider Pot Roast?
I’d love to hear how it turned out! Drop a comment below, share a photo, or tag @exorecipes on social media. Your feedback helps me create better recipes for you — and it makes my day every single time. 🧡
⭐️ ⭐️ ⭐️ ⭐️ ⭐️ Tap a star to rate this recipe!
Apple Cider Pot Roast with Potatoes
- Prep Time: 20 minutes
- Cook Time: 3 hours 15 minutes
- Total Time: 3 hours 35 minutes
- Yield: 6 servings 1x
- Method: Main Course
- Cuisine: American
Description
This Apple Cider Pot Roast is a comforting one-pot meal featuring tender beef braised in apple cider with potatoes, carrots, and aromatic herbs. Perfect for a cozy autumn dinner.
Ingredients
- 3 to 4 pounds beef chuck roast
- 2 tablespoons olive oil
- 1 large onion, chopped
- 4 cloves garlic, minced
- 1 cup apple cider
- 1 cup beef broth
- 2 tablespoons apple cider vinegar
- 2 tablespoons tomato paste
- 1 tablespoon Dijon mustard
- 3 sprigs fresh thyme
- 2 sprigs fresh rosemary
- 2 bay leaves
- 1 teaspoon salt
- 1/2 teaspoon black pepper
- 1 1/2 pounds baby potatoes, halved
- 4 large carrots, peeled and cut into chunks
Instructions
- Preheat the oven to 325°F (165°C).
- Season the beef chuck roast generously with salt and pepper on all sides.
- Heat olive oil in a large Dutch oven over medium-high heat. Sear the roast for 3-4 minutes per side until browned. Remove and set aside.
- Add the chopped onion to the pot and cook until softened, about 5 minutes. Add the minced garlic and cook for another minute.
- Stir in the apple cider, beef broth, apple cider vinegar, tomato paste, and Dijon mustard, scraping up any browned bits from the bottom.
- Return the roast to the pot along with the thyme, rosemary, and bay leaves. Bring the liquid to a simmer.
- Cover the pot and transfer to the oven. Braise for 2 hours.
- After 2 hours, add the baby potatoes and carrots around the roast. Cover and continue braising for another 45 minutes to 1 hour, until the meat is fork-tender and vegetables are cooked.
- Remove the pot from the oven. Discard the herb sprigs and bay leaves. Let the roast rest for 10 minutes before slicing.
- Serve the sliced roast with the potatoes and carrots, spooning some of the braising liquid over the top.
Notes
For a thicker gravy, remove the roast and vegetables, then simmer the braising liquid on the stovetop with a cornstarch slurry (1 tablespoon cornstarch mixed with 2 tablespoons water) until thickened.
Nutrition
- Calories: 520 kcal
- Sugar: 12 g
- Fat: 28 g
- Carbohydrates: 30 g
- Protein: 38 g

Tried This Recipe? Leave a Comment!
Did you make this recipe? I’d love to hear how it turned out! Please leave a comment and a rating below. Your feedback helps other home cooks and supports cheerychop.com!