No Bake Pumpkin Cheesecake: A Creamy, Easy Fall Dessert

easy pumpkin cheesecake, no bake cheesecake, pumpkin spice cheesecake, no bake fall desserts, quick pumpkin cheesecake

No Bake Pumpkin Cheesecake: A Creamy and Easy Fall Dessert

If you’re a fan of fall flavors, no bake pumpkin cheesecake is a dessert that needs to be on your radar. Combining the warm spices of pumpkin pie with the rich, creamy texture of cheesecake, this dessert delivers everything you love about autumn, without the need for an oven.

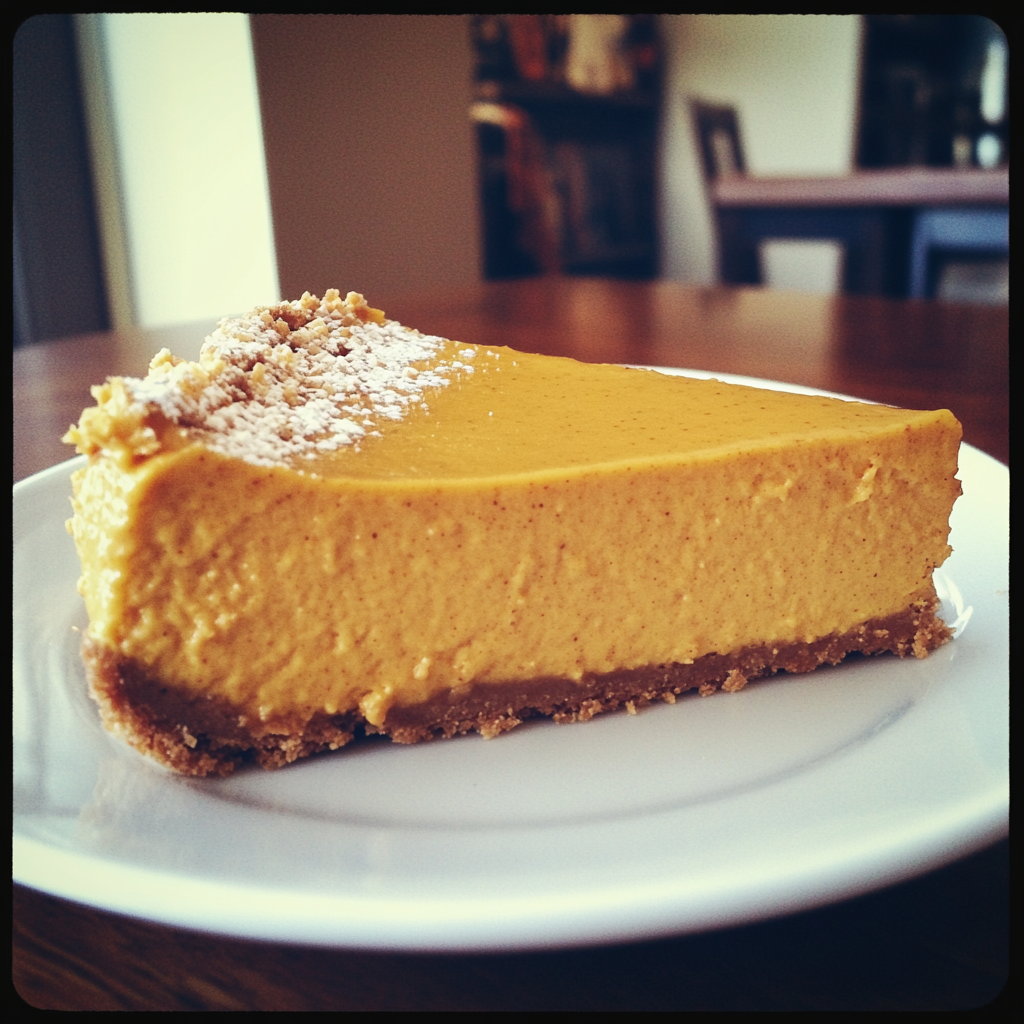
No bake desserts are perfect for busy holiday schedules or when you simply don’t want to spend too much time in the kitchen. With a smooth pumpkin-flavored cheesecake filling nestled on top of a crunchy graham cracker crust, this dessert is sure to be a crowd-pleaser at your next gathering.

For a comforting pairing, you could try serving this cheesecake with our Slow Cooker Magic: Unveiling the Ease of Crock Pot Baked Ziti, a hearty main course perfect for cooler months.


Why No Bake Pumpkin Cheesecake Is the Perfect Dessert

No bake pumpkin cheesecake has become a go-to dessert for the fall season, and it’s easy to see why:

  • Easy and Time-Saving: No need to turn on the oven, making it great for last-minute desserts.
  • Perfect for Holidays: This dessert is a Thanksgiving favorite, but it’s also ideal for any fall gathering.
  • Rich in Fall Flavors: The combination of pumpkin, spices, and cream cheese makes for a perfectly balanced treat.
  • Versatile: Customize it with your favorite toppings or tweak the recipe to suit dietary needs.

For more ideas on comforting, homemade dishes, check out our The Ultimate Comfort Food: Crockpot Potato Soup with Hashbrowns, which is another easy-to-make comfort dish perfect for fall.


Ingredients for No Bake Pumpkin Cheesecake

To make no bake pumpkin cheesecake, you will need:

  • Graham Cracker Crust: You can use store-bought or make your own by mixing crushed graham crackers with melted butter.
  • Pumpkin Puree: Canned pumpkin puree works best for consistency, but homemade puree can also be used.
  • Cream Cheese: Softened, for a smooth texture.
  • Pumpkin Pie Spice: A blend of cinnamon, nutmeg, and cloves that adds depth to the pumpkin flavor.
  • Whipped Cream: Folded into the mixture for a light and airy texture.
  • Sugar: Granulated sugar to balance the cream cheese and pumpkin.
  • Optional Add-Ins: Vanilla extract, caramel sauce, or chopped pecans for added texture and flavor.

How to Make No Bake Pumpkin Cheesecake

Here’s how to create this delicious no bake pumpkin cheesecake step by step:

1. Prepare the Crust

  • Mix crushed graham crackers with melted butter and press into the bottom of a springform pan. Refrigerate while you make the filling.

2. Make the Cheesecake Filling

  • In a large bowl, beat the softened cream cheese and sugar until smooth. Add the pumpkin puree, pumpkin pie spice, and vanilla extract, and beat again until combined.

3. Fold in the Whipped Cream

  • Gently fold the whipped cream or Cool Whip into the mixture until it’s fully incorporated.

4. Assemble the Cheesecake

  • Pour the pumpkin cheesecake filling over the graham cracker crust and smooth the top with a spatula.

5. Chill

  • Refrigerate the cheesecake for at least 4 hours, or overnight, for best results.

6. Serve

  • Top with whipped cream, caramel sauce, or chopped pecans before serving.

For a delightful treat to serve alongside, consider our Homemade Fried Donuts to add variety to your dessert table.


Variations of No Bake Pumpkin Cheesecake

While the classic recipe is delicious, there are several ways to customize your no bake pumpkin cheesecake:

1. Gluten-Free Pumpkin Cheesecake

  • Use gluten-free graham crackers for the crust to make this dessert accessible for everyone.

2. Vegan Pumpkin Cheesecake

  • Replace the cream cheese with a vegan alternative and use coconut whipped cream for a plant-based version.

3. Spiced Pumpkin Cheesecake

  • Add extra cinnamon or nutmeg to the filling for an even spicier fall flavor.

4. Oreo Crust Pumpkin Cheesecake

  • Swap the graham cracker crust for crushed Oreos to give the cheesecake a rich, chocolatey base.

5. Mini Pumpkin Cheesecakes

  • Make individual cheesecakes in muffin tins for a fun, portable dessert option.

For more decadent ideas, check out our No Peek Beef Tips: The Ultimate Comfort Food You’ve Been Missing for a hearty main course that complements this cheesecake perfectly.


How to Store, Freeze, and Serve No Bake Pumpkin Cheesecake

No bake pumpkin cheesecake is a make-ahead dessert that stores well, making it ideal for holiday prep.

Storing

  • Store the cheesecake in the refrigerator for up to 5 days. Keep it covered to prevent it from drying out.

Freezing

  • You can freeze the cheesecake for up to 2 months. Wrap it tightly in plastic wrap and aluminum foil before freezing. Thaw overnight in the refrigerator before serving.

Serving

  • Serve cold with a dollop of whipped cream or caramel drizzle for extra sweetness. For best results, let the cheesecake sit at room temperature for 10 minutes before slicing.

Nutritional Information and Healthier Adjustments

No bake pumpkin cheesecake can be made healthier with a few simple swaps:

  • Calories: One slice typically contains around 300-400 calories.
  • Healthier Options: Use low-fat cream cheese or Greek yogurt to reduce the fat content. You can also cut down on the sugar by using a sugar substitute like Stevia or monk fruit.

To lighten it up further, you could use a lighter whipped topping or skip the graham cracker crust.


FAQs About No Bake Pumpkin Cheesecake

1. Can I use fresh pumpkin instead of canned pumpkin?

  • Yes, but be sure to cook and puree the pumpkin until smooth. Fresh pumpkin may have more moisture, so you may need to strain it before adding it to the cheesecake mixture.

2. How long does no bake pumpkin cheesecake need to chill?

  • Ideally, chill the cheesecake for at least 4 hours, but overnight is best to ensure it sets properly.

3. Can I freeze no bake pumpkin cheesecake?

  • Absolutely! Wrap the cheesecake tightly in plastic wrap and foil, and freeze for up to 2 months.

4. What can I use instead of graham crackers for the crust?

  • You can use gingersnaps, Oreos, or digestive biscuits for different flavors and textures.

5. Is no bake pumpkin cheesecake gluten-free?

  • The filling is naturally gluten-free, but you will need to use gluten-free graham crackers or another gluten-free crust option.

Serving Suggestions and Pairings

No bake pumpkin cheesecake is a versatile dessert that pairs well with a variety of drinks and side dishes:

  • Serve it with a hot cup of pumpkin spice latte, apple cider, or chai tea for a full fall experience.
  • Top the cheesecake with whipped cream, chopped pecans, or caramel sauce for added flavor and texture.

For another easy no-bake treat, try our No Bake Banana Pudding Cheesecake, a light and refreshing dessert perfect for summer or fall.


Conclusion: Why No Bake Pumpkin Cheesecake Should Be Your Go-To Fall Dessert

No bake pumpkin cheesecake is a fall favorite for good reason. It’s easy to make, requires no baking, and combines all the best flavors of autumn in one creamy, dreamy dessert. Whether you’re hosting a holiday dinner or simply craving a slice of something sweet, this cheesecake is sure to satisfy.

With its versatility and simplicity, no bake pumpkin cheesecake is the perfect dessert to keep in your recipe rotation. Whether you’re new to no-bake desserts or a seasoned baker, this recipe will become a staple in your fall baking lineup.

For more no-bake inspiration, check out our Easy No Bake Banana Split Cheesecake Recipe for a refreshing twist on classic flavors.

Easy Vegetable Soup Recipe: Nutritious, Comforting, and Packed with Flavor

healthy vegetable soup, homemade vegetable soup, vegetable broth soup, simple vegetable soup, quick vegetable soup recipe

Vegetable Soup Recipe: Nutritious and Easy Comfort in a Bowl

There’s nothing quite like a bowl of vegetable soup to warm you up on a cold day or provide a quick, wholesome meal when you’re on the go. Loaded with a variety of vegetables and herbs, this dish is highly versatile and can be tailored to your preferences or whatever ingredients you have on hand.

Not only is vegetable soup packed with flavor, but it’s also a nutritious powerhouse. Rich in vitamins, minerals, and fiber, it’s a perfect addition to any meal plan. Whether you’re following a vegan or vegetarian diet or simply looking to incorporate more veggies into your meals, this soup fits the bill.

For another comforting, hearty dish, try our Slow Cooker Magic: Unveiling the Ease of Crock Pot Baked Ziti, which pairs perfectly with a light soup like this.


Why You Should Make This Vegetable Soup Recipe

This vegetable soup recipe stands out because of its simplicity and health benefits:

  • Nutrient-Packed: Full of essential vitamins and fiber.
  • Customizable: Swap out ingredients depending on what you have at home.
  • Great for Leftovers: Soup is easy to make in bulk and stores well for later meals.
  • Easy to Make: This recipe requires basic ingredients and minimal effort.

Looking for more soup recipes? Check out our The Ultimate Comfort Food: Crockpot Potato Soup with Hashbrowns, which offers another comforting, easy-to-make soup option.


Ingredients for Vegetable Soup

To make this classic vegetable soup, you’ll need:

  • Olive oil: For sautéing the vegetables.
  • Onion, carrots, and celery: These form the base of the soup’s flavor.
  • Garlic: Adds a fragrant depth to the soup.
  • Vegetable or chicken broth: Enhances the flavors and serves as the liquid base.
  • Canned tomatoes: For richness and acidity.
  • Potatoes: Provide bulk and heartiness.
  • Green beans and corn: Add texture and color.
  • Herbs (thyme, parsley, bay leaf): Essential for seasoning.
  • Salt and pepper: To taste.

Feel free to add other vegetables like zucchini, spinach, or kale for more variety.


How to Make Vegetable Soup: Step-by-Step Guide

Here’s a quick guide on how to make this vegetable soup recipe:

1. Sauté the Vegetables

  • Heat the olive oil in a large pot over medium heat. Add the onions, carrots, and celery. Sauté for 5-7 minutes until softened.

2. Add Garlic and Herbs

  • Stir in the garlic, thyme, and bay leaf. Cook for another 1-2 minutes until fragrant.

3. Add Tomatoes and Broth

  • Pour in the diced tomatoes and broth. Bring the mixture to a boil, stirring occasionally.

4. Add Potatoes and Simmer

  • Add the potatoes and reduce the heat to a simmer. Let the soup cook for 15-20 minutes, or until the potatoes are tender.

5. Add Green Beans and Corn

  • Add the green beans and corn during the last 5 minutes of cooking. Season the soup with salt and pepper.

6. Serve

  • Ladle the soup into bowls and garnish with fresh parsley. For an extra burst of flavor, squeeze a little lemon juice over the top.

If you’re looking for an alternative hearty dish, our No Peek Beef Tips: The Ultimate Comfort Food You’ve Been Missing pairs well with vegetable soup, especially on cooler days.


Variations of Vegetable Soup

One of the best things about vegetable soup is how easily it can be modified. Here are some popular variations:

1. Creamy Vegetable Soup

  • Add a splash of cream or coconut milk to make the soup richer and creamier.

2. Spicy Vegetable Soup

  • Add red pepper flakes or a dash of hot sauce for a spicier kick.

3. Protein-Packed Vegetable Soup

  • Add cooked chickpeas, lentils, or beans for added protein and fiber.

4. Instant Pot or Slow Cooker Vegetable Soup

  • For convenience, make this soup in an Instant Pot (cooks in about 10 minutes under pressure) or slow cooker (set on low for 6-8 hours).

5. Vegetable Soup with Pasta or Rice

  • Stir in cooked pasta or rice for a more filling version of this soup.

For another vegetable-based recipe, you might enjoy our Garlic Bacon Kale Recipe, which pairs well as a side dish with your soup.


How to Store, Reheat, and Freeze Vegetable Soup

This soup is perfect for meal prep or leftovers. Here’s how to store and reheat it:

Storing

  • Store leftover soup in an airtight container in the fridge for up to 4 days.

Reheating

  • Reheat the soup on the stovetop over medium heat, adding a bit more broth or water if needed to loosen the soup.

Freezing

  • Freeze the soup in portion-sized containers for up to 3 months. Allow the soup to cool completely before freezing.

Nutritional Benefits and Health Adjustments

Vegetable soup is incredibly healthy and easy to adjust to fit your dietary needs:

  • Low-Calorie: Each serving of this vegetable soup is under 200 calories.
  • High Fiber: Loaded with fiber from vegetables like potatoes, carrots, and green beans.
  • Low Sodium: Use low-sodium broth to reduce the sodium content.
  • Vegan-Friendly: Swap the chicken broth for vegetable broth to make this recipe vegan.

To make the soup even healthier, consider reducing the olive oil or adding extra vegetables like kale, spinach, or zucchini.


FAQs About Vegetable Soup

1. Can I make this soup in an Instant Pot or slow cooker?

  • Yes, both methods work well! For the Instant Pot, cook on high pressure for 10 minutes. In a slow cooker, let it simmer on low for 6-8 hours.

2. Can I use frozen vegetables in this soup?

  • Absolutely! Frozen vegetables work perfectly in this recipe. Add them directly to the pot without thawing.

3. Can I make this soup vegan?

  • Yes! Simply use vegetable broth instead of chicken broth.

4. How can I make the soup thicker?

  • You can mash some of the vegetables or add a slurry of flour and water for a thicker consistency.

5. How long can I store vegetable soup?

  • You can store it in the fridge for up to 4 days or freeze it for up to 3 months.

Serving Suggestions for Vegetable Soup

This versatile soup pairs beautifully with a variety of sides:

  • Serve with crusty bread or garlic bread for dipping.
  • Top with freshly grated Parmesan cheese for extra flavor.
  • Pair with a side salad for a light, balanced meal.

For a refreshing drink pairing, try our Elevate Your Summer with Orange Creamsicle Moonshine, which complements the earthy tones of vegetable soup.


Conclusion: Why Vegetable Soup Is a Must-Have in Your Recipe Collection

Vegetable soup is a classic dish that belongs in every home cook’s repertoire. It’s easy to make, incredibly versatile, and packed with nutrients. Whether you’re looking for a cozy winter meal or a light summer dish, this soup is adaptable to any season.

With endless variations and the ability to customize it based on what you have on hand, this vegetable soup recipe is one you’ll come back to time and again.

For more soup ideas, explore our Embracing Autumn: A Bowl of Hearty Chicken Chili, another warm and comforting option perfect for cooler days.

Greek Style Lemon Roasted Potatoes: A Tangy and Crispy Side Dish

lemon garlic potatoes, Greek roasted potatoes, Mediterranean potatoes, tangy lemon potatoes, lemon oregano potatoes

Greek Style Lemon Roasted Potatoes: A Mediterranean Delight

If you’re looking for a side dish that’s packed with flavor and incredibly easy to prepare, Greek style lemon roasted potatoes are the perfect option. This Mediterranean-inspired dish combines simple ingredients like potatoes, lemon, garlic, and herbs to create a bright and savory side that pairs perfectly with grilled meats, seafood, or a fresh salad.

These lemon roasted potatoes have become a staple in Greek cuisine, often served alongside lamb or chicken souvlaki, but their versatility makes them an ideal accompaniment to a variety of meals. They are crisp on the outside and tender on the inside, with a tangy lemon flavor that adds freshness to every bite.

For another comforting dish that pairs well with these potatoes, check out our Slow Cooker Magic: Unveiling the Ease of Crock Pot Baked Ziti, which brings hearty, cheesy flavors to your dinner table.


Why You Should Try Greek Lemon Roasted Potatoes

This traditional Greek side dish stands out for several reasons:

  • Bold Mediterranean Flavors: The combination of lemon, garlic, and olive oil brings brightness and depth to the roasted potatoes.
  • Simple and Healthy: Using olive oil and fresh ingredients like lemon zest and oregano makes this dish nutritious without sacrificing flavor.
  • Perfect Side for Any Meal: It’s an ideal side dish for weeknight dinners, family gatherings, or holiday feasts.

For more Mediterranean-inspired meals, check out our Discover the Joy of Homemade Pineapple Soft Serve Ice Cream, a tropical dessert that offers a refreshing finish to your meal.


Ingredients for Greek Style Lemon Roasted Potatoes

To make Greek lemon roasted potatoes, you will need the following ingredients:

  • Potatoes: Use starchy potatoes like Russet or Yukon Gold, which absorb the flavors better.
  • Lemon Juice and Zest: The star ingredient that brings tanginess and freshness to the dish.
  • Garlic: Adds a savory, earthy flavor.
  • Olive Oil: The base of the sauce, adding richness and helping the potatoes crisp up.
  • Oregano: A classic Greek herb that pairs perfectly with lemon and garlic.
  • Chicken Broth: Optional, but adding it to the roasting pan helps the potatoes stay moist and infuses them with extra flavor.
  • Salt and Pepper: For seasoning.

How to Make Greek Style Lemon Roasted Potatoes: Step-by-Step Guide

Here is a simple step-by-step guide to making Greek lemon roasted potatoes:

1. Preheat the Oven

  • Preheat your oven to 400°F (200°C).

2. Prepare the Potatoes

  • Peel and cut your potatoes into wedges. Yukon Gold or Russet potatoes work best for this recipe because of their ability to absorb flavors.

3. Make the Lemon-Garlic Marinade

  • In a large bowl, combine olive oil, lemon juice, lemon zest, minced garlic, oregano, salt, and pepper. Mix well.

4. Toss the Potatoes

  • Add the potato wedges to the marinade and toss until they are evenly coated. Ensure that every wedge is well-covered for maximum flavor.

5. Add Broth (Optional)

  • If you are using chicken broth, pour it into the bottom of the baking dish. This will keep the potatoes moist and add a rich, savory flavor.

6. Roast the Potatoes

  • Spread the potatoes in a single layer on a baking sheet or roasting pan. Bake for 45 minutes to an hour, turning halfway through to ensure even browning.

7. Garnish and Serve

  • Remove the potatoes from the oven and garnish with extra lemon zest and fresh parsley. Serve hot.

For a different take on potatoes, try our Mom’s Fried Potatoes and Onions, which uses a skillet to create crispy, flavorful potatoes with sweet onions.


Variations of Greek Lemon Roasted Potatoes

Although Greek lemon roasted potatoes are delicious as they are, there are several variations you can try to switch things up:

1. Vegan Lemon Potatoes

  • Swap chicken broth with vegetable broth for a vegan-friendly version.

2. Spicy Lemon Potatoes

  • Add red pepper flakes or cayenne pepper to the marinade for a spicy kick.

3. Herb-Roasted Lemon Potatoes

  • Add additional herbs like thyme, rosemary, or dill for an extra layer of flavor.

4. Lemon and Feta Potatoes

  • Once the potatoes are roasted, sprinkle crumbled feta cheese on top. The creamy and salty feta pairs beautifully with the tangy lemon.

5. Crispy Lemon Potatoes

  • For extra crispy potatoes, roast them at a higher temperature (425°F) or broil them for the last few minutes of cooking.

If you love crispy textures, our The Ultimate Guide to Making Crispy Chicken Strips at Home offers tips on how to achieve the perfect crunch with chicken.


How to Store and Reheat Greek Lemon Roasted Potatoes

Storing

  • Store leftovers in an airtight container in the refrigerator for up to 3 days.

Reheating

  • Reheat the potatoes in a 350°F (175°C) oven for 10-15 minutes. You can also reheat them in a skillet with a little olive oil for extra crispiness.

Freezing

  • To freeze, place the roasted potatoes in a freezer-safe container for up to 1 month. Reheat in the oven, adding fresh lemon juice and olive oil to refresh the flavor.

Nutritional Information and Healthier Adjustments

Greek lemon roasted potatoes are naturally healthier compared to other roasted potatoes due to the use of olive oil and fresh herbs.

  • Calories: One serving of these potatoes contains approximately 300 calories.
  • Fat: Olive oil adds healthy fats that are good for heart health.
  • Carbohydrates: Potatoes are a great source of complex carbs, providing energy without refined sugars.

For a lighter version, reduce the amount of olive oil or skip the chicken broth. You can also mix in roasted vegetables like carrots or zucchini for added nutrients.


FAQs About Greek Style Lemon Roasted Potatoes

1. Can I use other types of potatoes?

  • Yes! Yukon Gold and Russet potatoes are recommended, but red potatoes or fingerlings also work well for this recipe.

2. What can I serve with Greek lemon roasted potatoes?

  • These potatoes pair well with grilled meats, lamb, chicken souvlaki, or fish. They are also great with a simple Greek salad or roasted vegetables.

3. How can I prevent the potatoes from drying out?

  • Adding chicken broth or vegetable broth to the roasting pan helps keep the potatoes moist. Be sure to toss the potatoes in plenty of olive oil to prevent them from drying.

4. Can I make this dish vegan?

  • Absolutely! Simply swap the chicken broth for vegetable broth or water, and use all plant-based ingredients.

5. How do I make the potatoes crispier?

  • Roast them at a higher temperature (425°F) or broil them for the last few minutes to achieve a crispier exterior.

Serving Suggestions for Greek Lemon Roasted Potatoes

These lemon roasted potatoes are the perfect side dish for a variety of meals:

  • Grilled Meats: Serve alongside roasted lamb, grilled chicken, or fish for a full Mediterranean-inspired meal.
  • Greek Salad: Pair with a classic Greek salad of cucumbers, tomatoes, olives, and feta for a light, refreshing meal.
  • Vegetarian Options: These potatoes also work well with vegetarian mains like spanakopita or roasted vegetable medleys.

For more potato-based sides, you might want to try our Loaded Potato Skins recipe, which offers a heartier, cheesy alternative to these lemony potatoes.


Conclusion: Why Greek Style Lemon Roasted Potatoes Belong in Your Recipe Rotation

Greek style lemon roasted potatoes are not only easy to make but are also packed with bold, bright flavors that elevate any meal. With their crispy exterior and tender, lemon-infused interior, they are a versatile side dish that complements a wide range of mains, from grilled meats to vegetarian options. Whether you’re serving them for a casual dinner or a festive holiday meal, these potatoes are sure to be a crowd-pleaser.

Looking for more comforting side dishes? Check out our One Pan Pork Chops and New Potatoes, which combines tender pork with flavorful roasted potatoes for a complete, hearty meal.

Quick and Easy 20 Minute Lemon Pasta Recipe: Fresh and Zesty

lemon garlic pasta, quick lemon pasta, easy lemon pasta recipe, lemon spaghetti, pasta with lemon sauce

20 Minute Lemon Pasta: A Zesty and Quick Weeknight Meal

When life gets busy, and you need a quick, delicious dinner, 20 minute lemon pasta is the answer. With simple ingredients and minimal cooking time, this dish brings bright, zesty flavors to your table in no time. Whether you’re a pasta lover looking for a light meal or want something easy but sophisticated for a dinner party, lemon pasta hits all the right notes. This easy recipe also allows you to customize the dish with protein or vegetables for a more complete meal.

For another simple but flavorful meal option, check out our Slow Cooker Magic: Unveiling the Ease of Crock Pot Baked Ziti, which is perfect for those who love pasta but want to try a rich, hearty version.


Why You Should Try 20 Minute Lemon Pasta

This lemon pasta is more than just a quick meal. It’s packed with fresh flavors that make it a great weeknight go-to. Here’s why:

  • Quick Cooking: You can whip up this pasta dish in just 20 minutes, making it ideal for busy schedules.
  • Bright and Fresh Flavors: The tangy lemon juice and zest bring a light, citrusy burst that pairs perfectly with a garlic-infused sauce.
  • Healthy Ingredients: Made with whole ingredients like olive oil, garlic, and lemon, this dish is a healthier option compared to heavy cream-based pasta sauces.

If you’re in the mood for more fresh and light recipes, try our The Ultimate Comfort Food: Crockpot Potato Soup with Hashbrowns, which offers a rich, hearty soup that complements the lightness of lemon pasta.


Ingredients You Need for 20 Minute Lemon Pasta

To make this lemon pasta, you’ll need the following ingredients:

  • Pasta: Spaghetti, linguine, or angel hair works best for this recipe. They cook quickly and hold the sauce well.
  • Lemon Juice and Zest: The star ingredients for this dish, giving it a bright, tangy flavor.
  • Garlic: Adds depth and richness to the sauce.
  • Olive Oil or Butter: For the base of the sauce, contributing richness and smoothness.
  • Parmesan Cheese: Adds a creamy, savory element that balances the tartness of the lemon.
  • Salt and Pepper: For seasoning.
  • Optional: Fresh basil, red pepper flakes for a little heat, or ricotta for added creaminess.

Step-by-Step Guide: How to Make 20 Minute Lemon Pasta

Making 20 minute lemon pasta is incredibly easy. Just follow these steps:

1. Boil the Pasta

  • Bring a pot of salted water to a boil and cook the pasta according to the package instructions. Be sure to reserve about 1 cup of pasta water before draining.

2. Prepare the Lemon Garlic Sauce

  • While the pasta cooks, heat olive oil (or butter) in a large pan over medium heat. Add minced garlic and cook for 1-2 minutes, until fragrant.
  • Add lemon juice, zest, salt, and pepper. Stir and let the mixture simmer for 2-3 minutes.

3. Toss the Pasta with the Sauce

  • Add the cooked pasta to the pan with the lemon sauce. Toss well to coat the pasta evenly.
  • Gradually add reserved pasta water until the sauce reaches your desired consistency.

4. Add Parmesan Cheese

  • Sprinkle in Parmesan cheese and toss until the sauce becomes creamy and the pasta is fully coated.

5. Serve

  • Garnish with more lemon zest, extra Parmesan, and freshly cracked black pepper. For an added touch, you can sprinkle fresh basil or red pepper flakes on top.

Looking for more zesty, citrusy dishes? Check out our Elevate Your Summer with Orange Creamsicle Moonshine, a refreshing drink that pairs wonderfully with light meals like this pasta.


Popular Variations of 20 Minute Lemon Pasta

This lemon pasta is delicious on its own, but you can easily modify the recipe to suit your tastes:

1. Creamy Lemon Pasta

  • Add a splash of heavy cream or ricotta to the lemon sauce for a richer, creamier texture.

2. Spicy Lemon Pasta

  • For a kick of heat, add red pepper flakes or a drizzle of chili oil while sautéing the garlic.

3. Lemon Shrimp Pasta

  • Add sautéed shrimp to make this a protein-packed meal. Simply cook the shrimp in the same pan after making the sauce.

4. Vegan Lemon Pasta

  • Use vegan butter and a plant-based Parmesan alternative for a dairy-free version.

5. Lemon Ricotta Pasta

  • Serve the pasta over a dollop of whipped ricotta for an extra creamy and tangy dish.

How to Store, Reheat, and Serve 20 Minute Lemon Pasta

If you have leftovers or want to make this ahead of time, here’s how to store and reheat lemon pasta:

Storing

  • Store any leftover pasta in an airtight container in the refrigerator for up to 3 days.

Reheating

  • Reheat the pasta on the stovetop with a splash of water or olive oil to refresh the sauce. You can also microwave it, but be sure to stir well to keep the pasta from drying out.

Serving Suggestions

  • Serve your lemon pasta with a side of garlic bread, a fresh green salad, or grilled chicken for a more complete meal.

For another pasta option that’s easy to make, try our One Pot Sausage Spinach Pasta, a hearty and flavorful dish that’s perfect for busy weeknights.


Nutritional Information and Healthier Adjustments

Lemon pasta is relatively light compared to other pasta dishes, but there are still ways to make it healthier:

  • Calories: A serving of this pasta is around 450-500 calories, depending on the ingredients used.
  • Fat: By using olive oil instead of butter, you can reduce saturated fat.
  • Healthier Adjustments: Swap the Parmesan for nutritional yeast to make it vegan or reduce calories, or use whole-wheat pasta for added fiber.

FAQs About 20 Minute Lemon Pasta

1. Can I make lemon pasta vegan?

  • Yes! Substitute the butter with vegan butter and use a plant-based Parmesan alternative or nutritional yeast.

2. What’s the best type of pasta to use for lemon pasta?

  • Long pasta like spaghetti or linguine works best because it holds the sauce well, but any pasta can be used.

3. How can I add protein to this dish?

  • Grilled chicken, shrimp, or even salmon pair beautifully with the citrusy flavors of lemon pasta.

4. Can I make lemon pasta ahead of time?

  • Yes, but be sure to reserve extra pasta water for reheating to keep the sauce creamy.

5. How can I make the lemon flavor less intense?

  • Reduce the amount of lemon juice or add a little sugar or honey to balance out the acidity.

Conclusion: Why 20 Minute Lemon Pasta is Perfect for Any Occasion

20 minute lemon pasta is the ultimate go-to for a quick, flavorful, and satisfying meal. With fresh ingredients and just 20 minutes of your time, this dish proves that you don’t need complex recipes to enjoy a delicious dinner. Whether you’re cooking for yourself, your family, or guests, lemon pasta is sure to impress.

For more easy dinner ideas, check out our Rediscovering Comfort with Sour Cream and French Fried Onion Pork Chops, a savory and hearty dish that’s perfect for pairing with light sides like lemon pasta.

Crispy Popcorn Shrimp: Easy Recipe for Perfectly Crunchy Shrimp

fried popcorn shrimp, crunchy shrimp bites, crispy shrimp recipe, homemade popcorn shrimp, panko popcorn shrimp

Crispy Popcorn Shrimp: The Ultimate Appetizer for Any Occasion

If you’re looking for the perfect crowd-pleaser, look no further than crispy popcorn shrimp. This bite-sized snack is a favorite for parties, game days, and even family dinners. Coated in a crunchy breading and fried to golden perfection, popcorn shrimp combines the best of both worlds—delicious seafood flavor with the satisfying crunch of fried food.

Popcorn shrimp are easy to make at home, and the best part is, you can control the seasoning and customize the recipe to your liking. Whether you like your shrimp spicy or mild, these shrimp are a guaranteed hit. For more delicious seafood dishes, check out our Discover the Secret to Perfectly Crispy Seafood, which includes a recipe for a crispy seafood batter that works on shrimp, fish, and more.


Why Homemade Crispy Popcorn Shrimp is Better

Sure, you can buy popcorn shrimp in the frozen aisle, but making them at home is easier than you think, and the results are so much better. Homemade versions are healthier, fresher, and can be tailored to your taste preferences. Here are a few reasons why making popcorn shrimp at home is the way to go:

  • Healthier Ingredients: You can use high-quality shrimp and choose a healthier frying oil or even bake them.
  • Customization: Want your shrimp extra crispy or with a spicy kick? You can easily adjust the recipe.
  • No Preservatives: Unlike store-bought options, homemade popcorn shrimp is free from unnecessary additives or preservatives.

For another seafood delight, you might want to try our Juicy Bacon-Wrapped Jalapeño Popper Chicken, which features a crispy exterior and a rich, flavorful filling.


Ingredients for Crispy Popcorn Shrimp

The key to great popcorn shrimp is in the breading. Here’s what you’ll need to get that perfect crunch:

Shrimp:

  • Small Shrimp (36/40 count): Peeled and deveined, leaving the tail off for easy eating.

Breading:

  • Flour: Helps the breading stick to the shrimp.
  • Eggs: Acts as a binding agent.
  • Panko Breadcrumbs: For that signature crunch.
  • Cornmeal (optional): Adds extra texture to the breading.

Seasonings:

  • Paprika, garlic powder, cayenne pepper, salt, and pepper for seasoning the breading.

Frying:

  • Oil: Vegetable or canola oil for frying.

Step-by-Step Guide: How to Make Crispy Popcorn Shrimp

Making crispy popcorn shrimp is simple with these easy steps:

1. Prep the Shrimp

  • Start by peeling and deveining the shrimp. Make sure to pat them dry to remove any excess moisture, as this helps the breading stick better.

2. Prepare the Breading

  • In one bowl, mix flour and seasonings. In a second bowl, whisk the eggs, and in a third bowl, add the panko breadcrumbs (and cornmeal if you’re using it).

3. Coat the Shrimp

  • Dredge the shrimp in the seasoned flour, then dip them in the egg wash, and finally coat them in the panko breadcrumbs.

4. Fry the Shrimp

  • Heat oil to 350°F (175°C) in a deep fryer or skillet. Fry the shrimp in batches for about 2-3 minutes or until golden brown.
  • Transfer the fried shrimp to a paper towel-lined plate to drain excess oil.

5. Serve

  • Serve your crispy popcorn shrimp with dipping sauces like cocktail sauce, tartar sauce, or a spicy aioli.

For a heartier seafood dish, try our Crispy Bacon Grilled Cheese with Caramelized Onions, which pairs wonderfully with popcorn shrimp for a satisfying meal.


Popular Variations of Crispy Popcorn Shrimp

The great thing about popcorn shrimp is that it’s versatile and adaptable. Here are some variations to try:

1. Coconut Popcorn Shrimp

  • Add shredded coconut to the breadcrumb mixture for a tropical twist.

2. Spicy Popcorn Shrimp

  • Add cayenne pepper or hot sauce to the egg wash for an extra kick.

3. Air-Fried Popcorn Shrimp

  • Skip the oil and use an air fryer to cook your shrimp at 400°F for 10-12 minutes for a healthier version.

4. Baked Popcorn Shrimp

  • If you prefer to bake your shrimp, coat them in breading and bake at 400°F for 10-12 minutes, flipping halfway through.

5. Gluten-Free Popcorn Shrimp

  • Use gluten-free breadcrumbs and flour to make a gluten-free version.

For more appetizer ideas, check out our recipe for Mini Pineapple Coconut Milk Cheesecakes, which offer a sweet contrast to the savory popcorn shrimp.


How to Store, Reheat, and Freeze Crispy Popcorn Shrimp

Whether you’re preparing for a party or just making an extra batch for later, popcorn shrimp can be stored and reheated easily:

Storing:

  • Store leftover shrimp in an airtight container in the refrigerator for up to 3 days.

Reheating:

  • Reheat the shrimp in a 350°F oven for 5-7 minutes or in an air fryer to bring back the crispiness.

Freezing:

  • To freeze, place uncooked breaded shrimp on a baking sheet and freeze. Once frozen, transfer to a freezer bag for up to 3 months.

Cooking from Frozen:

  • Fry or bake the shrimp directly from frozen. Just add an extra 3-5 minutes to the cooking time.

Nutritional Information and Healthier Adjustments

While crispy popcorn shrimp is traditionally fried, there are ways to make this dish healthier without sacrificing flavor.

  • Lower-Calorie Options: Baking or air-frying the shrimp reduces the calorie content.
  • Gluten-Free: Use gluten-free breadcrumbs for a gluten-free alternative.
  • Lighter Breading: Try using whole wheat breadcrumbs or almond flour for a lower-carb option.

Popcorn shrimp is rich in protein thanks to the shrimp, but frying adds fat. Consider using avocado oil for frying, which is a healthier alternative to vegetable oil.


FAQs About Crispy Popcorn Shrimp

1. Can I Use Frozen Shrimp?

  • Yes, frozen shrimp works just fine. Just be sure to thaw and pat them dry before breading.

2. How Can I Make My Popcorn Shrimp Extra Crispy?

  • Double coat the shrimp by dredging them in flour, egg wash, and then panko. Also, make sure your oil is at the correct temperature before frying.

3. What Dipping Sauces Pair Well with Popcorn Shrimp?

  • Popcorn shrimp is delicious with cocktail sauce, tartar sauce, or a spicy mayo.

4. Can I Freeze Cooked Popcorn Shrimp?

  • Yes, cooked popcorn shrimp can be frozen. Just make sure to reheat them in the oven or air fryer to restore the crispy texture.

5. Is There a Healthier Way to Fry Popcorn Shrimp?

  • Air frying or baking is a great way to make popcorn shrimp healthier without losing the crunch.

Serving Suggestions for Crispy Popcorn Shrimp

Popcorn shrimp is versatile and can be served in many ways:

  • As an Appetizer: Pair with dipping sauces like cocktail sauce or tartar sauce.
  • As a Main Dish: Serve alongside french fries or a light salad for a complete meal.
  • For a Party: Serve in small bowls or cups for easy, mess-free eating.

For another comforting snack, pair your popcorn shrimp with our Cheesy Bacon Jalapeño Corn Dip for a spicy, cheesy accompaniment.


Conclusion: Why You Should Try Making Crispy Popcorn Shrimp at Home

Crispy popcorn shrimp is a versatile dish that’s easy to make at home and is sure to be a hit with friends and family. Whether you’re frying, baking, or air-frying, these bite-sized shrimp are crispy, flavorful, and satisfying. Plus, with endless customization options, you can tailor the recipe to suit your taste. Make a batch today, and don’t forget to check out our other comfort food recipes, like The Ultimate Comfort Food Crockpot Potato Soup, which pairs perfectly with these shrimp for a cozy meal.