Classic Chicken Fettuccine Alfredo Recipe: Rich, Creamy, and Delicious

creamy chicken alfredo, homemade chicken fettuccine alfredo, easy alfredo pasta, chicken alfredo pasta, classic chicken Alfredo

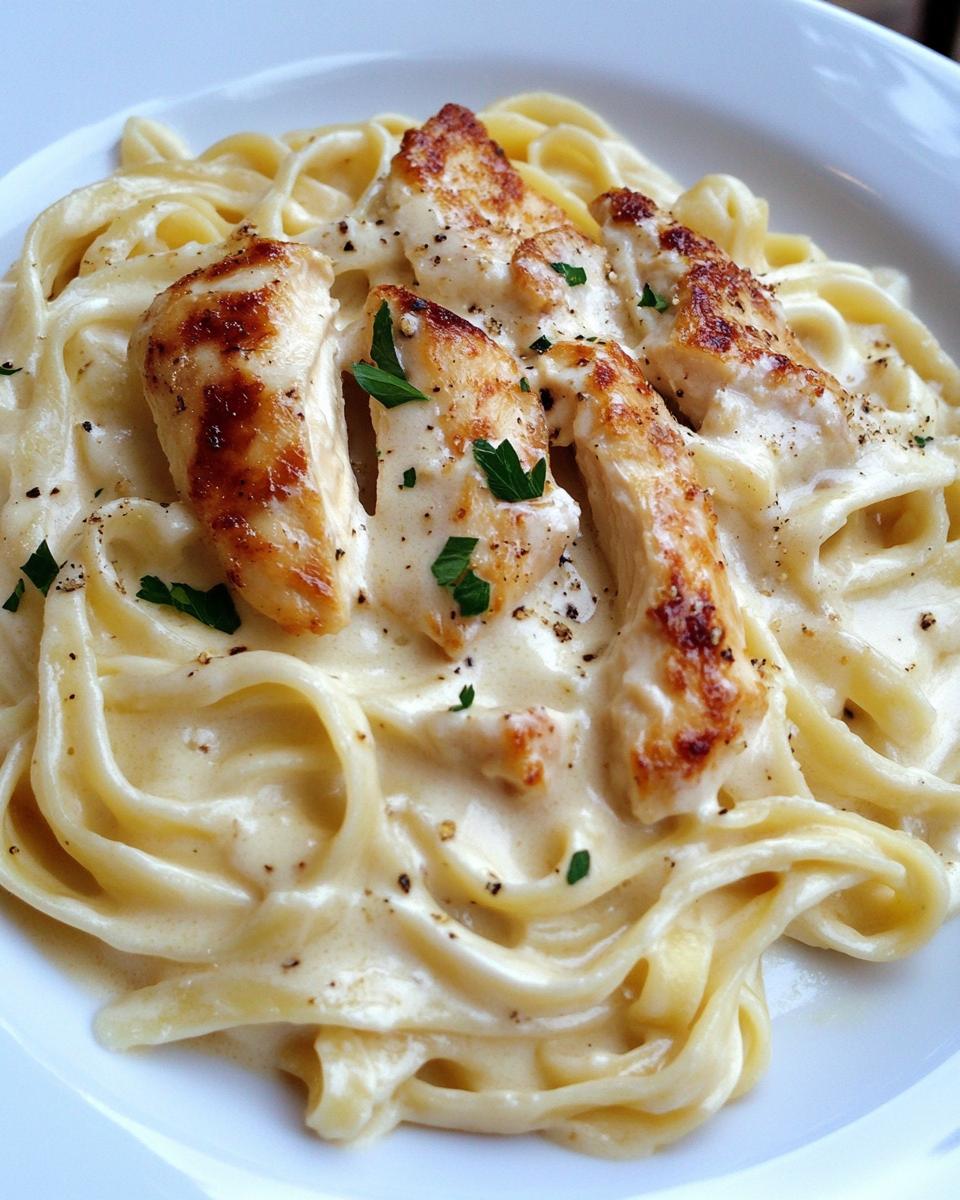
Chicken Fettuccine Alfredo: A Classic Comfort Dish

When it comes to creamy, indulgent pasta dishes, chicken fettuccine alfredo is a classic that tops the list. This dish combines tender chicken, rich Alfredo sauce, and perfectly cooked fettuccine for a meal that is both satisfying and delicious. Whether you’re cooking for a family dinner or preparing something special for guests, this easy recipe will guide you through creating the perfect chicken fettuccine alfredo at home.

For more comfort food ideas, check out Crockpot Potato Soup with Hashbrowns or Slow Cooker Baked Ziti, which are great additions to your meal rotation.

Key Ingredients for Chicken Fettuccine Alfredo

To create the perfect chicken fettuccine alfredo, you’ll need the following ingredients:

  • Fettuccine pasta: A long, flat pasta that pairs beautifully with the creamy Alfredo sauce.
  • Chicken breasts: Boneless, skinless chicken breasts, seasoned and cooked to perfection.
  • Alfredo sauce: Made from a blend of butter, heavy cream, garlic, and Parmesan cheese for richness.
  • Garlic: Adds depth of flavor to the sauce.
  • Seasonings: Salt, pepper, and optional Italian herbs like oregano or basil.
  • Parmesan cheese: Freshly grated for the best flavor and texture.
  • Butter: Used for both cooking the chicken and in the Alfredo sauce.

Optional ingredients include:

  • Spinach or broccoli: To add some greenery and balance the richness of the dish.
  • Lemon juice: A splash of lemon juice can brighten up the flavor.
  • Red pepper flakes: For those who like a little kick in their Alfredo.

For more inspiration on comforting dishes, take a look at Sour Cream and French Fried Onion Pork Chops, another dish that pairs well with creamy pasta recipes.

Step-by-Step Instructions for Chicken Fettuccine Alfredo

Preparation Time:

15 minutes

Cook Time:

30 minutes

Servings:

4-6 servings

Instructions:

  1. Cook the fettuccine: Bring a large pot of salted water to a boil. Add the fettuccine and cook until al dente, according to package instructions. Drain and set aside.
  2. Cook the chicken: Season chicken breasts with salt, pepper, and Italian herbs. Heat a large skillet over medium heat, adding butter and a drizzle of olive oil. Cook the chicken until golden brown and cooked through, about 4-5 minutes per side. Remove from heat and let it rest before slicing.
  3. Make the Alfredo sauce: In the same skillet, add a little more butter and sauté minced garlic until fragrant. Pour in heavy cream and bring to a simmer. Stir in freshly grated Parmesan cheese, whisking until smooth and creamy. Season with salt and pepper.
  4. Combine everything: Toss the cooked fettuccine into the Alfredo sauce, stirring to coat evenly. Slice the chicken and add it on top. Garnish with extra Parmesan and fresh parsley, if desired.
  5. Serve: Serve the chicken fettuccine alfredo immediately, pairing it with garlic bread or a fresh salad.

For more simple pasta dishes, try Dorito Chicken Casserole, which offers a crunchy, cheesy twist on classic flavors.

Tips for Perfect Chicken Fettuccine Alfredo

  • Use freshly grated Parmesan: Pre-grated cheese doesn’t melt as smoothly and can result in a grainy sauce.
  • Cook pasta al dente: Overcooked pasta will absorb too much sauce and become mushy.
  • Simmer sauce slowly: Low heat ensures the Alfredo sauce remains creamy without separating.

Popular Variations of Chicken Fettuccine Alfredo

Chicken fettuccine alfredo is incredibly versatile. Here are a few variations you can try:

  • Shrimp Fettuccine Alfredo: Swap the chicken for shrimp for a seafood version.
  • Vegetarian Alfredo: Skip the chicken and add sautéed mushrooms, spinach, or broccoli for a meatless option.
  • Cajun Chicken Alfredo: Add Cajun seasoning to the chicken and sauce for a spicy, flavorful twist.
  • Baked Chicken Fettuccine Alfredo: Once the pasta and sauce are combined, transfer the mixture to a baking dish. Top with extra Parmesan and bake at 350°F for 10-15 minutes until bubbly and golden.
  • Healthy Alfredo: For a lighter option, use half-and-half instead of heavy cream and add more vegetables.

If you’re looking for more pasta ideas, check out Slow Cooker Chicken and Gravy Over Noodles, which offers a hearty and delicious alternative to traditional Alfredo dishes.

Nutritional Information and Healthier Alternatives

Nutritional Breakdown (per serving):

  • Calories: 750
  • Fat: 45g
  • Carbohydrates: 60g
  • Protein: 35g

Healthier Alternatives:

  • Use whole wheat pasta: Swap regular fettuccine for whole wheat to add fiber and nutrients.
  • Lighten up the sauce: Replace heavy cream with half-and-half or a mixture of milk and Greek yogurt for a lower-calorie option.
  • Add vegetables: Stir in sautéed spinach, broccoli, or peas to increase the nutritional value.

For a lighter alternative, try Kentucky Butter Cake, a dessert that pairs well with a rich pasta dish like Alfredo.

Serving Suggestions for Chicken Fettuccine Alfredo

Chicken fettuccine alfredo is a rich dish that pairs well with lighter sides and fresh flavors. Here are some serving ideas:

  • Garlic bread: A classic accompaniment that helps soak up the creamy sauce.
  • Caesar salad: The crisp lettuce and tangy dressing of a Caesar salad contrast perfectly with the richness of the pasta.
  • Roasted vegetables: Serve with roasted asparagus, Brussels sprouts, or broccoli for a healthier side.
  • Wine pairing: A crisp white wine like Chardonnay or Pinot Grigio complements the richness of the sauce.

For a sweet finish, try Pineapple Soft Serve Ice Cream, a light dessert that refreshes the palate after a rich meal.

How to Store, Reheat, and Freeze Chicken Fettuccine Alfredo

Storing Leftovers:

  • Store leftover chicken fettuccine alfredo in an airtight container in the fridge for up to 3 days.

Reheating Instructions:

  • Reheat leftovers in a skillet over low heat, adding a splash of milk or cream to restore the sauce’s creamy texture.

Freezing Tips:

  • Alfredo sauce does not freeze well due to its high dairy content, but you can freeze the cooked chicken and pasta separately. Thaw overnight in the fridge and reheat gently with fresh sauce.

Frequently Asked Questions (FAQs)

Can I make chicken fettuccine alfredo without cream?

Yes, you can use milk or half-and-half as a substitute for heavy cream. The sauce will be lighter but still creamy. For best results, you may want to thicken the sauce with a small amount of cornstarch.

What kind of chicken should I use?

Boneless, skinless chicken breasts or thighs are ideal for fettuccine alfredo. You can also use rotisserie chicken for a quicker meal.

How can I prevent the sauce from separating?

Simmer the sauce over low heat and gradually add the Parmesan cheese to avoid curdling. Stir constantly and avoid overheating.

Can I use other pasta shapes?

Yes, while fettuccine is traditional, you can substitute it with penne, spaghetti, or linguine if you prefer.

Easy Cobbler Recipe: A Quick and Delicious Dessert for Any Occasion

quick cobbler, simple fruit cobbler, easy peach cobbler, fast cobbler recipe, homemade cobbler, cobbler with any fruit

Easy Cobbler: The Perfect Dessert for Any Occasion

Whether you’re in the mood for a summer fruit cobbler or a hearty fall treat, cobblers are the perfect way to use up fresh or frozen fruit with minimal effort. Cobblers are beloved for their simplicity, requiring just a few ingredients and a short prep time. This easy cobbler recipe is versatile and works with a variety of fruits like peaches, berries, apples, or cherries.

If you’re looking for more comforting dessert options, check out The Ultimate Comfort Food: Crockpot Potato Soup with Hashbrowns and Slow Cooker Magic: Unveiling the Ease of Crock Pot Baked Ziti.

What is a Cobbler?

Cobblers are a traditional baked dessert that typically consists of a fruit filling covered by a biscuit, cake, or dough topping. The topping can be crumbly or more dough-like, and it bakes into a golden crust that complements the sweet, tender fruit. Cobblers differ from pies in that they don’t have a bottom crust, making them easier to prepare and less time-consuming.

Cobblers are often served warm and topped with ice cream or whipped cream, making them the ultimate crowd-pleasing dessert. If you’re in the mood for a sweet breakfast treat, you may also want to explore Sheetpan Pancakes: A Simple Breakfast Delight for something quick and satisfying.

Key Ingredients for Easy Cobbler

For an easy cobbler recipe, you’ll need just a few basic ingredients:

  • Fruit: Fresh, frozen, or canned fruit can be used. Peaches, berries, apples, or cherries work well.
  • Sugar: Granulated sugar is used to sweeten both the fruit and the topping.
  • Flour: All-purpose flour provides structure to the topping.
  • Baking powder: This helps the cobbler topping rise.
  • Butter: Adds richness and helps create a golden, crisp topping.
  • Milk or cream: Used to bring the topping together.
  • Spices: Cinnamon, nutmeg, or vanilla extract can enhance the flavor of the fruit filling.

Optional ingredients include lemon juice for tartness, cornstarch to thicken the fruit, and ice cream or whipped cream for serving.

If you’re looking for a savory dish to pair with this dessert, you might enjoy Rediscovering Comfort: Sour Cream and French Fried Onion Pork Chops, which adds a rich, savory complement to your meal.

How to Make Easy Cobbler

Preparation Time:

15 minutes

Cook Time:

40-45 minutes

Servings:

6-8 servings

Instructions:

  1. Prepare the fruit: In a large bowl, combine your fruit of choice with sugar, spices, and lemon juice if using. Stir until the fruit is well-coated.
  2. Make the topping: In a separate bowl, whisk together the flour, sugar, baking powder, and a pinch of salt. Cut in the butter using a fork or pastry cutter until the mixture resembles coarse crumbs. Stir in milk or cream until a thick batter forms.
  3. Assemble the cobbler: Spread the fruit mixture evenly into a greased baking dish. Drop spoonfuls of the topping over the fruit, spreading it out slightly but leaving gaps for the fruit to peek through.
  4. Bake: Bake at 350°F for 40-45 minutes or until the topping is golden brown and the fruit filling is bubbling.
  5. Serve: Let the cobbler cool slightly before serving. Serve warm with a scoop of vanilla ice cream or whipped cream for the best experience.

For more side dish ideas, check out Creamy Garlic Parmesan Chicken: A Symphony of Flavors, which pairs beautifully with cobbler for a complete meal.

Tips for the Perfect Cobbler

  • Use ripe fruit: Ripe fruit provides the best flavor and natural sweetness. If your fruit is under-ripe, you may need to add extra sugar.
  • Thicken the filling: For juicier fruits like berries or peaches, adding a tablespoon or two of cornstarch can help thicken the filling and prevent it from becoming too runny.
  • Don’t overmix the topping: For a light, fluffy topping, mix the dough just until combined. Overmixing can make the topping dense.
  • Bake until golden: The cobbler is done when the topping is golden brown and the fruit is bubbling around the edges.

If you’re a fan of easy, hearty meals, try No Peek Beef Tips: The Ultimate Comfort Food You’ve Been Missing for a savory dish that contrasts nicely with the sweetness of cobbler.

Popular Cobbler Variations

Cobblers can be customized with various fruits and toppings, making them a versatile dessert. Here are some popular variations:

  • Peach Cobbler: A classic Southern dish made with fresh, frozen, or canned peaches.
  • Berry Cobbler: Use a combination of blueberries, blackberries, and raspberries for a vibrant and sweet-tart cobbler.
  • Apple Cobbler: Spiced with cinnamon and nutmeg, apple cobbler is perfect for fall.
  • Cherry Cobbler: Made with tart cherries, this cobbler pairs well with a sweet biscuit topping.
  • Mixed Fruit Cobbler: Combine several types of fruit, such as peaches, berries, and apples, for a flavorful and colorful dessert.

For a fun, crunchy variation of classic dishes, you may want to explore Dorito Chicken Casserole: A Crunchy Twist on Comfort Food.

Nutritional Information and Healthier Alternatives

Nutritional Breakdown (per serving):

  • Calories: 280
  • Fat: 12g
  • Carbohydrates: 40g
  • Protein: 3g

Healthier Alternatives:

  • Use whole wheat flour: Swap out some of the all-purpose flour for whole wheat flour to add fiber and nutrients.
  • Reduce the sugar: Opt for a natural sweetener like honey or maple syrup instead of granulated sugar.
  • Use dairy-free alternatives: Replace butter with coconut oil or a vegan margarine, and use almond milk or oat milk for the batter.

For another light yet delicious dessert option, try Kentucky Butter Cake: A Slice of Southern Comfort.

Serving Suggestions for Cobbler

Cobblers are incredibly versatile and can be served in a variety of ways:

  • Top with ice cream: Vanilla ice cream is the classic accompaniment for a warm cobbler.
  • Add whipped cream: For a lighter option, serve with a dollop of freshly whipped cream.
  • Enjoy with breakfast: Leftover cobbler makes a delicious breakfast, especially when paired with yogurt or a sprinkle of granola.

For a more filling brunch, you might enjoy pairing this cobbler with Chicken Bacon Ranch Potatoes: Your New Favorite Comfort Dish.

How to Store, Reheat, and Freeze Cobbler

Storing Leftovers:

  • Store leftover cobbler in an airtight container in the refrigerator for up to 3 days.

Reheating Instructions:

  • Reheat cobbler in a 350°F oven for 10-15 minutes, or microwave individual portions for 30 seconds until warm.

Freezing Tips:

  • Cobbler can be frozen either baked or unbaked. If unbaked, assemble the cobbler and freeze before baking. Thaw overnight in the fridge, then bake as directed.

Frequently Asked Questions (FAQs)

Can I make cobbler with frozen fruit?

Yes, you can use frozen fruit for cobbler. Make sure to thaw the fruit and drain any excess liquid before adding it to the filling to prevent a soggy cobbler.

Do I need to peel the fruit for cobbler?

It depends on the fruit. Peaches and apples should be peeled, while berries and cherries do not require peeling.

What’s the difference between cobbler and pie?

Cobblers do not have a bottom crust, whereas pies do. Cobblers are typically easier and quicker to make than pies since they only have a topping.

Can I make cobbler in advance?

Yes, you can prepare the fruit filling and the topping separately in advance. Assemble and bake the cobbler just before serving for the best texture.

Easy Home Fries Recipe: Crispy, Flavorful, and Perfect for Breakfast

crispy home fries, skillet home fries, breakfast potatoes, pan-fried potatoes, simple home fries recipe

Easy Home Fries: Crispy, Flavorful, and Perfect for Breakfast

If you’re looking for a delicious and simple way to prepare potatoes for breakfast, home fries are the perfect solution. They are crispy on the outside, tender on the inside, and bursting with flavor. Whether you’re serving them with eggs, bacon, or on their own, this easy home fries recipe will become a staple in your kitchen.

Home fries are a versatile dish that can be customized to suit your taste. By adding onions, bell peppers, or even cheese, you can elevate the flavor profile and make this dish your own. If you’re a fan of comfort food, don’t forget to check out The Ultimate Comfort Food: Crockpot Potato Soup with Hashbrowns or Slow Cooker Magic: Unveiling the Ease of Crock Pot Baked Ziti for more comfort food inspiration.

Key Ingredients for Easy Home Fries

Here are the essential ingredients you’ll need to make crispy and flavorful home fries:

  • Potatoes: Russet potatoes work best for home fries due to their starchy nature, which helps create a crispy texture.
  • Onions: Caramelized onions add a sweet and savory depth to the dish.
  • Cooking fat: Use a combination of olive oil and butter for the best flavor.
  • Seasonings: Salt, pepper, garlic powder, paprika, and fresh herbs like rosemary or thyme.
  • Optional ingredients: Bell peppers, cheese, or bacon can enhance the taste of your home fries.

For another great breakfast idea, check out Sheetpan Pancakes: A Simple Breakfast Delight, which is perfect for serving alongside home fries.

Step-by-Step Instructions for Making Home Fries

Preparation Time:

15 minutes

Cook Time:

30 minutes

Servings:

4 servings

Instructions:

  1. Prep the potatoes: Wash, peel, and dice the potatoes into small cubes, ensuring uniform size for even cooking.
  2. Parboil the potatoes: In a large pot of salted water, parboil the diced potatoes for 5-7 minutes until they begin to soften. Drain and set aside.
  3. Cook the onions: In a large skillet, heat olive oil and butter over medium heat. Add the chopped onions and sauté until golden brown and caramelized.
  4. Fry the potatoes: Add the parboiled potatoes to the skillet with the onions. Spread them in an even layer and let them cook without stirring for a few minutes to develop a crispy crust.
  5. Season and flip: Sprinkle garlic powder, paprika, salt, and pepper over the potatoes. Flip the potatoes occasionally to ensure even browning on all sides.
  6. Add optional ingredients: If using bell peppers, bacon, or cheese, add them in the last few minutes of cooking for added flavor.
  7. Serve hot: Once the potatoes are golden and crispy, remove them from the skillet and serve immediately.

For more side dish ideas, try Rediscovering Comfort: Sour Cream and French Fried Onion Pork Chops, a delicious accompaniment to home fries.

Tips for Perfect Home Fries

  • Use starchy potatoes: Russet potatoes provide the best texture for crispy home fries.
  • Parboil for texture: Parboiling the potatoes helps them cook evenly and develop a crispy exterior while maintaining a soft interior.
  • Use a cast-iron skillet: A cast-iron skillet ensures even heating and a perfectly crisp finish.
  • Don’t overcrowd the pan: Fry the potatoes in batches if necessary to avoid overcrowding, which can result in soggy fries.

For a twist on this classic dish, try Italian Stromboli: Rolling Up Comfort in Every Bite, another savory recipe perfect for breakfast or brunch.

Popular Variations of Home Fries

Home fries can be customized in various ways to suit your personal preferences. Here are some popular variations:

  • Oven-Baked Home Fries: For a healthier option, bake the potatoes in the oven at 400°F for 20-25 minutes, tossing halfway through for even crisping.
  • Spicy Home Fries: Add cayenne pepper or a splash of hot sauce for a spicy kick.
  • Cheesy Home Fries: Stir in shredded cheese, like cheddar or Monterey Jack, in the last few minutes of cooking for cheesy goodness.
  • Herb-Infused Home Fries: Toss the potatoes with fresh herbs like rosemary, thyme, or parsley for an aromatic twist.
  • Loaded Home Fries: Top with sour cream, chives, and crispy bacon for a loaded version.

For another comfort food favorite, check out Creamy Garlic Parmesan Chicken: A Symphony of Flavors, which pairs beautifully with crispy home fries.

Nutritional Information and Healthier Alternatives

Nutritional Breakdown (per serving):

  • Calories: 250
  • Fat: 10g
  • Carbohydrates: 35g
  • Protein: 4g

Healthier Alternatives:

  • Use sweet potatoes: Substitute regular potatoes with sweet potatoes for added fiber and vitamins.
  • Reduce the fat: Opt for olive oil instead of butter to reduce the saturated fat content.
  • Oven-bake instead of frying: Baking reduces the need for excessive oil, making the dish healthier.

For a sweet treat after your savory home fries, try Kentucky Butter Cake: A Slice of Southern Comfort for dessert.

Serving Suggestions for Home Fries

Home fries are incredibly versatile and can be served in many ways:

  • Classic breakfast: Serve home fries alongside scrambled eggs, bacon, and toast for a hearty breakfast.
  • Brunch special: Pair them with a breakfast casserole or quiche for a brunch spread.
  • Loaded fries: Top home fries with sour cream, salsa, and guacamole for a loaded version perfect for lunch or dinner.
  • As a side: Home fries make an excellent side dish for burgers, grilled chicken, or steak.

For more breakfast inspiration, explore Reinventing Breakfast with Pancake Muffins: A Delightful Morning Surprise for a sweet complement to your home fries.

How to Store, Reheat, and Freeze Home Fries

Storing Leftovers:

  • Store leftover home fries in an airtight container in the refrigerator for up to 3 days.

Reheating Instructions:

  • Reheat home fries in the oven or air fryer at 350°F for 5-7 minutes to restore their crispiness.

Freezing Tips:

  • Freeze home fries in a single layer on a baking sheet before transferring them to a freezer-safe bag. To reheat, simply place them directly into a hot skillet or oven.

Frequently Asked Questions (FAQs)

Can you make home fries with leftover potatoes?

Yes, using leftover boiled or baked potatoes is a great way to reduce food waste and makes the frying process quicker.

How do you keep home fries crispy?

To keep home fries crispy, avoid overcrowding the pan and cook them in batches. Ensure the potatoes are dry before frying to prevent sogginess.

Do you need to peel the potatoes for home fries?

Peeling the potatoes is optional. Keeping the skin on adds texture and nutrients to the dish.

What’s the difference between home fries and hash browns?

Home fries are made with diced or cubed potatoes, while hash browns use shredded potatoes. Home fries are often cooked with onions and seasonings, whereas hash browns are typically fried as a single patty or loose pile.

Common Mistakes to Avoid

  • Skipping the parboil step: Not parboiling the potatoes can lead to unevenly cooked fries.
  • Overcrowding the pan: Overcrowding prevents the potatoes from crisping properly. Fry in batches if necessary.
  • Not seasoning enough: Be generous with seasoning to bring out the full flavor of the potatoes.

Conclusion

Home fries are a classic breakfast side dish that everyone loves. With the right techniques, you can achieve crispy, golden potatoes that are packed with flavor. Whether you serve them with eggs and bacon, load them up with toppings, or enjoy them on their own, home fries are a must-have in any breakfast or brunch lineup.

For more delicious recipes, don’t miss Slow Cooker Chicken and Gravy Over Noodles: The Ultimate Comfort Food, a dish that pairs wonderfully with a side of home fries.

Best Pumpkin Chocolate Chip Cookies: Soft, Chewy, and Full of Fall Flavor

pumpkin cookies, pumpkin spice chocolate chip cookies, fall cookies, easy pumpkin cookies, chewy pumpkin cookies

Pumpkin Chocolate Chip Cookies: A Perfect Fall Treat

When fall rolls around, there’s nothing better than cozying up with warm, soft pumpkin chocolate chip cookies. These cookies perfectly combine the rich flavors of pumpkin spice with the indulgence of chocolate chips, making them a popular choice for autumn baking. Whether you’re preparing for Halloween, Thanksgiving, or just craving a sweet treat, pumpkin chocolate chip cookies are always a hit.

For more cozy fall recipes, check out The Ultimate Comfort Food: Crockpot Potato Soup with Hashbrowns or Slow Cooker Magic: Unveiling the Ease of Crock Pot Baked Ziti for delicious and hearty meal ideas.

Key Ingredients for Pumpkin Chocolate Chip Cookies

Creating the perfect pumpkin chocolate chip cookie is easy with just a few essential ingredients. Here’s what you need:

  • Pumpkin purée: This adds moisture and a distinct fall flavor to the cookies.
  • Spices: Use a combination of cinnamon, nutmeg, and pumpkin pie spice for that classic fall aroma.
  • Butter: Provides richness and helps create a tender cookie.
  • Sugar: A mix of brown sugar and granulated sugar gives these cookies sweetness and a soft, chewy texture.
  • Chocolate chips: Semi-sweet chocolate chips pair perfectly with the subtle sweetness of pumpkin.
  • Eggs: They help bind the dough and give it structure.
  • Flour: All-purpose flour works well for a balanced texture.
  • Optional ingredients:
    • Nuts: Add chopped pecans or walnuts for extra crunch.
    • Vanilla extract: Enhances the flavor profile of the cookies.

For more baking inspiration, don’t forget to try No Peek Beef Tips: The Ultimate Comfort Food You’ve Been Missing for a hearty, satisfying dinner.

Step-by-Step Instructions for Pumpkin Chocolate Chip Cookies

Preparation Time:

15 minutes

Cook Time:

12-15 minutes

Servings:

About 24 cookies

Instructions:

  1. Preheat the oven to 350°F (175°C). Line a baking sheet with parchment paper or a silicone baking mat.
  2. Mix the dry ingredients: In a medium bowl, whisk together the flour, baking soda, salt, and spices (cinnamon, nutmeg, and pumpkin pie spice).
  3. Cream the butter and sugars: In a large bowl, beat together the softened butter, brown sugar, and granulated sugar until light and fluffy.
  4. Add the wet ingredients: Mix in the pumpkin purée, eggs, and vanilla extract until fully incorporated.
  5. Combine the wet and dry ingredients: Slowly add the flour mixture to the wet ingredients, mixing just until combined.
  6. Fold in the chocolate chips: Gently stir in the chocolate chips and any optional nuts.
  7. Scoop and bake: Drop spoonfuls of dough onto the prepared baking sheet, leaving space between each cookie. Bake for 12-15 minutes, or until the edges are golden brown.
  8. Cool and enjoy: Allow the cookies to cool on the baking sheet for 5 minutes before transferring them to a wire rack to cool completely.

Tips for Perfect Pumpkin Chocolate Chip Cookies

  • Use pumpkin purée, not pie filling: Pumpkin pie filling contains added sugar and spices, which can throw off the balance of flavors.
  • Chill the dough: If you want thicker cookies, chill the dough for 30 minutes before baking. This helps prevent the cookies from spreading too much.
  • Don’t overbake: Pumpkin cookies tend to be softer due to the moisture content. Bake until the edges are set but the centers are still soft for the perfect texture.

For additional baking tips, explore Perfect Ribeye Steak Recipe: Master the Art of Steak Cooking, which teaches how to achieve the perfect steak—a great savory complement to these cookies.

Popular Variations of Pumpkin Chocolate Chip Cookies

While classic pumpkin chocolate chip cookies are always a crowd-pleaser, there are many delicious variations to try:

  • Gluten-Free Pumpkin Chocolate Chip Cookies: Substitute all-purpose flour with a gluten-free flour blend to accommodate dietary needs.
  • Vegan Pumpkin Chocolate Chip Cookies: Replace butter with coconut oil and use a flax egg (1 tablespoon ground flaxseed + 3 tablespoons water) instead of eggs for a vegan version.
  • White Chocolate Pumpkin Cookies: For a sweeter twist, replace semi-sweet chocolate chips with white chocolate chips.
  • Pumpkin Oatmeal Chocolate Chip Cookies: Add oats to the dough for a heartier texture and flavor.
  • Pumpkin Chocolate Chip Cookie Bars: Press the dough into a baking pan and bake as bars for an easier, crowd-sized treat.

Nutritional Information and Healthier Alternatives

Nutritional Breakdown (per serving):

  • Calories: 150
  • Fat: 8g
  • Carbohydrates: 20g
  • Protein: 2g

Healthier Alternatives:

  • Reduce sugar: Use less sugar or replace it with a natural sweetener like maple syrup or coconut sugar.
  • Substitute flour: Use whole wheat flour for added fiber and nutrients.
  • Cut back on fat: Replace some of the butter with applesauce for a lower-fat version.

For more healthy comfort food options, check out Chicken Bacon Ranch Potatoes: Your New Favorite Comfort Dish, which offers a tasty, comforting meal for any occasion.

Serving Suggestions for Pumpkin Chocolate Chip Cookies

Pumpkin chocolate chip cookies are perfect for various occasions. Here’s how you can serve them:

  • With hot beverages: Serve these cookies alongside hot chocolate, pumpkin spice lattes, or chai tea for a cozy treat.
  • Holiday dessert trays: Make these cookies part of a dessert spread for Thanksgiving or Halloween.
  • Gift idea: Package them in decorative boxes or bags for a thoughtful homemade gift.

You can also pair these cookies with Kentucky Butter Cake: A Slice of Southern Comfort for a complete dessert lineup at your next gathering.

How to Store, Reheat, and Freeze Pumpkin Chocolate Chip Cookies

Storing:

  • Store cooled cookies in an airtight container at room temperature for up to 5 days.

Freezing:

  • Freeze baked cookies in an airtight container for up to 3 months. Alternatively, freeze cookie dough balls and bake as needed.

Reheating:

  • Warm cookies in the microwave for 10-15 seconds to enjoy a fresh-from-the-oven texture.

Frequently Asked Questions (FAQs)

Can you make pumpkin chocolate chip cookies without eggs?

Yes, you can substitute eggs with flax eggs (1 tablespoon ground flaxseed + 3 tablespoons water) or applesauce (¼ cup per egg).

Why are my pumpkin cookies cakey?

Pumpkin adds extra moisture to the dough, which can create a cakey texture. To make them less cakey, reduce the baking soda or use more butter.

Can I freeze pumpkin chocolate chip cookies?

Yes, pumpkin chocolate chip cookies freeze well. Store them in an airtight container or ziplock bag for up to 3 months.

How can I make my cookies chewier?

For chewier cookies, increase the amount of brown sugar and chill the dough before baking.

Common Mistakes to Avoid

  • Using pumpkin pie filling: This has added sugar and spices that can overpower the flavor of the cookies.
  • Overmixing the dough: Overmixing can result in tough cookies, so mix just until the ingredients are combined.
  • Not chilling the dough: If you skip chilling the dough, the cookies may spread too much and become thin.

Conclusion

Pumpkin chocolate chip cookies are a must-bake treat for the fall season. With their warm spices and rich chocolate flavor, they are perfect for any occasion, whether it’s a family gathering, a holiday celebration, or just an afternoon snack. Don’t hesitate to experiment with the variations and serve these cookies with your favorite fall beverages for the ultimate indulgence.

For more delicious recipes and baking ideas, check out Dorito Chicken Casserole: A Crunchy Twist on Comfort Food.

Bacon Wrapped Chicken Recipe: Juicy, Crispy, and Easy to Make

chicken wrapped in bacon, easy bacon chicken, bacon chicken recipe, bacon wrapped chicken breast, crispy bacon chicken

Bacon Wrapped Chicken: Juicy, Crispy, and Bursting with Flavor

Bacon wrapped chicken is a classic dish that combines the savory, smoky flavor of bacon with tender, juicy chicken. It’s the perfect recipe for weeknight dinners, family gatherings, or special occasions. The beauty of this dish lies in its simplicity—just a few ingredients, and you’re set for a meal that everyone will love. In this article, you’ll learn how to make the perfect bacon wrapped chicken and explore a variety of delicious variations and side dishes to serve with it.

If you’re a fan of comfort food, check out The Ultimate Comfort Food: Crockpot Potato Soup with Hashbrowns, which pairs wonderfully with bacon-wrapped chicken for a hearty meal. Or, for a pasta option, try Slow Cooker Magic: Unveiling the Ease of Crock Pot Baked Ziti.

Key Ingredients for Bacon Wrapped Chicken

Making this dish requires minimal ingredients but delivers maximum flavor. Here’s what you’ll need:

  • Chicken breasts or thighs: Boneless and skinless work best.
  • Bacon: Regular cut is ideal because it wraps easily around the chicken.
  • Seasonings: Garlic powder, onion powder, paprika, salt, and pepper.
  • Optional ingredients:
    • Cheese: Stuff the chicken with mozzarella or cream cheese for added flavor.
    • Herbs: Fresh rosemary or thyme for an aromatic touch.
    • Honey or maple syrup: A drizzle of sweetness adds a lovely contrast to the savory bacon.

For more dinner inspiration, don’t miss No Peek Beef Tips: The Ultimate Comfort Food You’ve Been Missing, another crowd-pleaser perfect for family meals.

Step-by-Step Instructions for Bacon Wrapped Chicken

Preparation Time:

15 minutes

Cook Time:

30 minutes

Servings:

4 servings

Instructions:

  1. Preheat your oven to 400°F (200°C).
  2. Season the chicken: Start by seasoning the chicken breasts with garlic powder, onion powder, paprika, salt, and pepper. This will give the chicken a flavorful base.
  3. Wrap with bacon: Take 2 to 3 strips of bacon per chicken breast and wrap them tightly around the chicken, securing the ends underneath. You can also use toothpicks to secure the bacon.
  4. Bake the chicken: Place the bacon-wrapped chicken in a baking dish and bake for 25-30 minutes, or until the internal temperature of the chicken reaches 165°F (74°C). If you prefer crispier bacon, turn on the broiler for the last 5 minutes of cooking.
  5. Rest before serving: Let the chicken rest for a few minutes before slicing to retain moisture.

Pro tip: If you want extra crispy bacon, you can partially cook the bacon for 5 minutes before wrapping the chicken.

Tips for Perfect Bacon Wrapped Chicken

  • Pre-cook the bacon: This ensures the bacon becomes crispy without overcooking the chicken.
  • Use a meat thermometer: To avoid dry chicken, check for an internal temperature of 165°F.
  • Tuck in the bacon ends: Keep the bacon from unwrapping during cooking by tucking the ends underneath or securing them with toothpicks.

For more tips and tricks, visit Perfect Ribeye Steak Recipe: Master the Art of Steak Cooking for a steak-cooking guide that pairs beautifully with bacon-wrapped chicken.

Popular Variations of Bacon Wrapped Chicken

While the classic version is always a hit, you can switch things up with these variations:

  • Cheese-Stuffed Bacon Wrapped Chicken: For a creamy twist, stuff the chicken breasts with mozzarella or cream cheese before wrapping them in bacon.
  • BBQ Bacon Wrapped Chicken: Brush the chicken with barbecue sauce before baking for a smoky, tangy flavor.
  • Honey Garlic Bacon Wrapped Chicken: Drizzle honey and garlic over the bacon before cooking for a sweet and savory combination.
  • Spicy Bacon Wrapped Chicken: Sprinkle cayenne pepper or hot sauce for a bit of heat.

These variations make this dish incredibly versatile, perfect for impressing guests or just spicing up a regular dinner.

Nutritional Information and Healthier Alternatives

Nutritional Breakdown (per serving):

  • Calories: 400
  • Protein: 30g
  • Fat: 25g
  • Carbohydrates: 5g

Healthier Alternatives:

  • Use turkey bacon: Lower in fat but still packed with flavor.
  • Opt for chicken thighs: A more flavorful and juicier alternative to chicken breasts.
  • Reduce sodium: Use low-sodium bacon and seasonings to reduce the overall sodium content.

For more comfort food inspiration, consider Chicken Bacon Ranch Potatoes: Your New Favorite Comfort Dish, another great side dish option for bacon-wrapped chicken.

Serving Suggestions for Bacon Wrapped Chicken

Bacon wrapped chicken pairs beautifully with a variety of side dishes. Here are a few suggestions:

  • Mashed potatoes: Creamy mashed potatoes provide a comforting, neutral base.
  • Roasted vegetables: Try roasted Brussels sprouts or carrots for a healthy balance.
  • Salads: A fresh green salad with a light vinaigrette cuts through the richness of the bacon.

For dessert, you can serve Kentucky Butter Cake: A Slice of Southern Comfort for a sweet finish to your savory meal.

How to Store, Reheat, and Freeze Bacon Wrapped Chicken

Storing Leftovers:

  • Store bacon wrapped chicken in an airtight container in the refrigerator for up to 3 days.

Reheating:

  • Reheat in the oven at 350°F for 10-15 minutes or in the microwave for a quicker option.

Freezing:

  • You can freeze bacon wrapped chicken before or after cooking. To freeze before cooking, wrap the chicken tightly in plastic wrap and store in a freezer-safe bag. Thaw in the refrigerator overnight before baking.

Frequently Asked Questions (FAQs)

How long should you cook bacon wrapped chicken in the oven?

Bake at 400°F for 25-30 minutes or until the chicken reaches an internal temperature of 165°F.

Can you cook bacon wrapped chicken in an air fryer?

Yes, air fry at 375°F for 15-20 minutes, flipping halfway through for even cooking.

Do you need to pre-cook the bacon before wrapping chicken?

While not necessary, pre-cooking the bacon for 5-7 minutes ensures it will be crispy after baking.

Can you freeze bacon wrapped chicken before cooking?

Yes, simply wrap the uncooked chicken in plastic and foil before freezing. Thaw in the fridge overnight before cooking.

Common Mistakes to Avoid

  • Not pre-cooking the bacon: Leads to undercooked, chewy bacon.
  • Overcooking the chicken: Results in dry, tough chicken. Always use a meat thermometer.
  • Skipping the seasoning: Ensure both the chicken and bacon are seasoned for full flavor.

Conclusion

Bacon wrapped chicken is a simple yet delicious dish that combines the best of both worlds: crispy bacon and tender chicken. Whether you’re making it for a special occasion or just a weeknight dinner, this dish never disappoints. With so many variations, you can easily tailor it to your personal taste.

For more amazing comfort food recipes, don’t forget to check out Slow Cooker Chicken and Gravy Over Noodles: The Ultimate Comfort Food and Dorito Chicken Casserole: A Crunchy Twist on Comfort Food for more meal ideas.