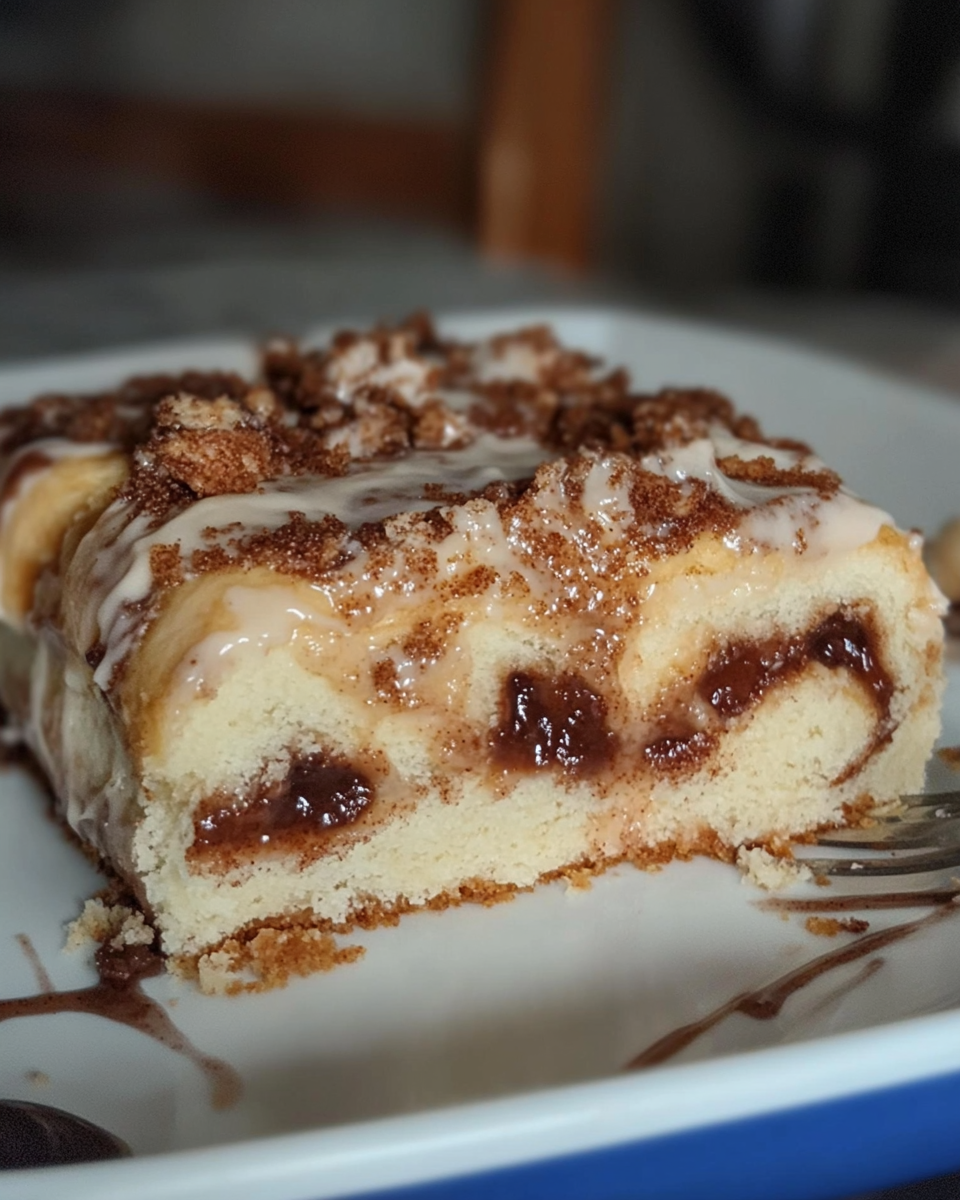
Puppy Chow

Making Puppy Chow for the first time is a revelation in its ease and the joy it brings, much like rediscovering a cherished memory from childhood. It’s a snack that’s as fun to make as it is to eat, and its preparation is ripe for customization. You can add in variations such as using different types of cereal, adding a dash of cinnamon or vanilla to the powdered sugar, or even mixing in some nuts or pretzels for extra crunch.

Unveiling the Magic of Puppy Chow

Puppy Chow, a simple concoction of cereal, chocolate, peanut butter, and powdered sugar, holds a special place in the pantheon of American snacks. Its origins, while somewhat nebulous, are deeply rooted in the tradition of homemade treats that are easy to make, delicious to eat, and effortless to share. Discovering the process of making Puppy Chow is akin to uncovering a culinary treasure, a recipe that transforms everyday ingredients into something transcendent.

The Recipe: A Gateway to Nostalgia

The standard recipe for Puppy Chow is deceptively simple, requiring just a few ingredients: Chex cereal, chocolate chips, peanut butter, butter, vanilla extract, and powdered sugar. The process involves melting the chocolate, peanut butter, and butter together, coating the cereal in this rich mixture, and then dusting it with powdered sugar. Yet, within this simplicity lies the magic of Puppy Chow—it’s a treat that evokes nostalgia, harking back to childhood memories of bake sales, after-school snacks, and family gatherings.

The Cultural Tapestry of Puppy Chow

Puppy Chow is more than just a snack; it’s a cultural artifact that reflects the American spirit of innovation and community. Found at church functions, school events, and family picnics across the country, it represents a shared culinary heritage that transcends age, background, and region. The snack’s playful name and the communal joy it inspires make it a unique element of American food culture, a sweet treat that carries with it stories of fellowship and creativity.

The First-Time Experience: A Culinary Revelation

Making Puppy Chow for the first time is a revelation, a moment of culinary awakening that surprises with its simplicity and delights with its flavor. It’s an experience that many recall with fondness, wondering why they hadn’t attempted it sooner given its ease and the joy it brings. This process is not just about following a recipe; it’s an act of creation that connects the maker to a larger tradition of homemade treats and the pleasures of simple cooking.

The Joy of Sharing

Perhaps the most gratifying aspect of making Puppy Chow is the opportunity it presents for sharing. This snack, by its very nature, is meant to be distributed, passed from hand to hand, and enjoyed in the company of others. It embodies the idea that food is more than sustenance; it’s a medium of connection, a way to express care, and an avenue for creating memories. Packing up a batch of Puppy Chow as a gift or serving it at a gathering is an act of communal joy, a small gesture that fosters bonds and spreads happiness.

Customization: A Canvas for Creativity

While the traditional recipe for Puppy Chow is beloved, the snack also serves as a canvas for creativity. Adventurous cooks can experiment with different types of cereal, incorporate various flavors of chocolate, or add ingredients like nuts, dried fruit, or pretzels for added texture and taste. Each variation not only personalizes the snack but also contributes to its evolving tradition, allowing individuals to put their stamp on a classic and share their innovations with others.

Puppy Chow in the Digital Age

In the digital age, Puppy Chow continues to captivate imaginations and taste buds, finding new life on social media platforms and food blogs. It’s a subject of endless fascination, with videos, photos, and articles celebrating its creation, customization, and consumption. This digital proliferation has introduced Puppy Chow to new audiences, ensuring its place in the pantheon of beloved snacks for generations to come.

Conclusion: More Than Just a Snack

In the end, Puppy Chow represents more than just a confection; it’s a symbol of the joy of cooking, the warmth of sharing, and the beauty of simplicity. Making Puppy Chow for the first time is not just an act of preparation but a rite of passage, a culinary adventure that delights the senses and warms the heart. It reminds us that some of the most profound pleasures in life come from the simplest acts: mixing, sharing, and savoring food made with love. As we indulge in the sweet, crunchy bites of Puppy Chow, we partake in a shared culinary heritage that celebrates the simple, the homemade, and the delicious, weaving together the tastes of yesterday, the joys of today, and the memories of tomorrow.

FAQs

1. What is Puppy Chow?

Puppy Chow, also known as Muddy Buddies, is a popular American snack made by coating cereal (usually Chex or a similar brand) in a mixture of melted chocolate, peanut butter, and butter, then dusting the coated cereal with powdered sugar. It’s a sweet, crunchy treat enjoyed at parties, gatherings, or as a casual snack.

2. Can I use different types of chocolate?

Yes, you can use different types of chocolate based on your preference. While semi-sweet chocolate chips are commonly used, milk chocolate, dark chocolate, or even white chocolate are excellent alternatives that can add unique flavors to your Puppy Chow.

3. Is there a peanut butter alternative I can use?

For those with nut allergies or preferences, you can substitute peanut butter with sunflower seed butter, almond butter, or any nut butter alternative of your choice. These substitutes offer a similar texture and help maintain the creamy coating of the cereal.

4. How do I prevent the powdered sugar from clumping?

To prevent clumping, ensure that the chocolate-coated cereal has cooled slightly before adding the powdered sugar. Additionally, using a large resealable plastic bag to shake the mixture can help evenly coat the cereal without clumping. If clumps do form, you can use a sieve to shake out the excess powdered sugar.

5. Can Puppy Chow be made gluten-free?

Absolutely! To make gluten-free Puppy Chow, ensure that you use a gluten-free cereal. Many brands offer gluten-free options that work perfectly with this recipe. Also, check the labels on your chocolate, peanut butter, and powdered sugar to ensure they’re gluten-free.

6. How should Puppy Chow be stored?

Puppy Chow should be stored in an airtight container at room temperature. It can last for up to a week when stored properly. Avoid refrigerating, as the moisture can affect the crunchiness of the cereal and cause the powdered sugar coating to become soggy.

7. Can I add extras to my Puppy Chow?

Yes, Puppy Chow is highly customizable. Feel free to add mix-ins like M&M’s, pretzel pieces, nuts, or dried fruit after coating the cereal with powdered sugar. These add-ins can add extra texture and flavor to the snack.

8. How can I make a large batch for a party?

To make a large batch, simply double or triple the recipe ingredients. Use a larger bowl for mixing and maybe work in batches to ensure that each piece of cereal is evenly coated with the chocolate mixture and powdered sugar.

9. Is there a way to reduce the sweetness of Puppy Chow?

If you find Puppy Chow too sweet, you can reduce the amount of powdered sugar used for coating. Alternatively, you can use a bittersweet chocolate instead of semi-sweet or milk chocolate to balance the sweetness.

10. Can Puppy Chow be made in advance?

Yes, Puppy Chow is an excellent make-ahead snack. Since it stores well at room temperature for up to a week, you can prepare it a few days in advance of any event or gathering, making it a convenient option for busy hosts.

Print
clock clock iconcutlery cutlery iconflag flag iconfolder folder iconinstagram instagram iconpinterest pinterest iconfacebook facebook iconprint print iconsquares squares iconheart heart iconheart solid heart solid icon

Puppy Chow

  • Author: Chef Emy

Description

For those who haven’t yet discovered the joy of making Puppy Chow at home, here’s a quick and easy recipe to get you started:


Ingredients

Scale
  • 9 cups Chex cereal (rice or corn variety works best)
  • 1 cup semi-sweet chocolate chips
  • 1/2 cup smooth peanut butter
  • 1/4 cup butter
  • 1 teaspoon vanilla extract
  • 1 1/2 cups powdered sugar

Instructions

  1. Prepare the Cereal: Measure out the Chex cereal into a large bowl and set aside.

  2. Melt the Chocolate Mixture: In a microwave-safe bowl, combine the chocolate chips, peanut butter, and butter. Microwave on high for 1 minute, then stir. Continue microwaving in 30-second intervals, stirring in between, until the mixture is smooth and well combined. Stir in the vanilla extract.

  3. Coat the Cereal: Pour the chocolate mixture over the cereal, using a spatula or spoon to gently toss and coat the cereal evenly.

  4. Dust with Sugar: Transfer the coated cereal to a large resealable plastic bag. Add the powdered sugar, seal the bag, and shake well until each piece is coated with sugar.

  5. Cool and Enjoy: Spread the Puppy Chow out on a baking sheet lined with parchment paper or wax paper to cool. Once cooled, store in an airtight container.


Notes

Making Puppy Chow for the first time is a revelation in its ease and the joy it brings, much like rediscovering a cherished memory from childhood. It’s a snack that’s as fun to make as it is to eat, and its preparation is ripe for customization. You can add in variations such as using different types of cereal, adding a dash of cinnamon or vanilla to the powdered sugar, or even mixing in some nuts or pretzels for extra crunch.

Homemade meatball subs with corn on the cob

Creating a culinary masterpiece for a family dinner doesn’t always require hours of preparation or exotic ingredients. Sometimes, the most heartwarming and satisfying meals come from combining simple, beloved recipes with a touch of home-cooked care. In this exploration of comfort food, we dive into the art of crafting homemade meatball subs accompanied by the sweet, summery delight of corn on the cob—a meal that promises not just to satiate hunger but to kindle joy and nostalgia.

The Anatomy of a Meatball Sub

The meatball sub is a testament to the beauty of Italian-American cuisine, a fusion of flavors that speaks to the soul. It begins with the meatballs, a blend of ground meat—often a mix of beef and pork for depth of flavor—breadcrumbs, Parmesan cheese, and herbs. Each ingredient in the meatball has a role: the meats provide juiciness and flavor, the breadcrumbs and egg bind the mix, the cheese adds a salty, umami kick, and the herbs offer freshness. Baked to perfection, these meatballs become the heart of the sub, embodying both the robustness of Italian cuisine and the comfort of an American classic.

But what is a sub without its bread? The choice of hoagie or sub rolls is crucial—they must be sturdy enough to hold the meatballs and sauce yet tender enough to bite into easily. The bread acts as a canvas, absorbing the flavors of the marinara sauce and the melted mozzarella, creating a harmonious blend of textures and tastes.

The marinara sauce, with its rich tomato base and blend of herbs, brings a vibrant acidity that cuts through the richness of the meat and cheese, brightening the overall flavor profile of the sandwich. And when the mozzarella melts over the meatballs and sauce, it stretches into strings of gooey goodness, a visual and tactile delight that promises pure satisfaction in every bite.

The Sweet Counterpart: Corn on the Cob

While the meatball sub dazzles with its complexity of flavors, the corn on the cob offers a sweet, simple counterbalance. This humble side dish, with its bright yellow kernels, brings a touch of summer to the meal, a reminder of picnics and barbecues under sunny skies. Cooking corn on the cob to just the right tenderness—where the kernels pop juicily in the mouth—is a testament to the beauty of simplicity in cooking. Whether boiled to preserve its natural sweetness or grilled to add a smoky char, corn on the cob is a versatile side that complements the meatball sub with its freshness and simplicity.

More Than Just a Meal

But this combination of meatball subs and corn on the cob is more than just a meal; it’s an experience, a journey through flavors and textures. It’s a conversation starter, a reason to gather around the table and share stories, laughter, and memories. This meal invites customization and experimentation, encouraging cooks to adjust herbs, try different cheeses, or add their signature touches to the recipes.

In preparing this meal, we engage in the act of creation, not just of food but of moments. We weave together the threads of tradition and innovation, crafting a dish that resonates with the past while embracing the present. It’s a celebration of cultural fusion, of the ways in which cuisine can transcend boundaries and become a universal language of love and connection.

Culinary Creativity and Personal Touches

The beauty of these dishes lies in their ability to be personalized. From the choice of meat for the meatballs to the herbs mixed into the marinara sauce, every step of the preparation process invites personalization. Perhaps it’s a sprinkle of chili flakes for heat, a touch of honey in the marinara for sweetness, or a garnish of fresh basil for a pop of color and flavor—these small touches make the meal uniquely yours.

Moreover, the act of serving this meal becomes an expression of care. Plating the subs with attention to detail, arranging the corn on the cob alongside, perhaps with a pat of butter melting over its warm surface, transforms the dining table into a canvas, the meal into art. It’s an offering of nourishment, not just for the body but for the soul, a testament to the power of food to bring comfort, joy, and togetherness.

FAQs

1. What kind of meat is best for the meatballs?

The best meat for meatballs is a mix of ground beef and pork. The beef provides a rich flavor, while the pork adds fat, which makes the meatballs tender and juicy. However, you can use all beef, turkey, or chicken based on personal preference or dietary restrictions.

2. Can I make the meatballs ahead of time?

Yes, you can prepare the meatballs ahead of time. You can either freeze them raw or cook them and then freeze. To use, simply thaw overnight in the refrigerator if they’re cooked, or cook directly from frozen, adjusting the cooking time as needed.

3. How can I prevent my meatballs from falling apart?

To prevent meatballs from falling apart, ensure you have enough binders in your mixture, such as breadcrumbs and egg. Additionally, avoid overmixing the meat, as this can make the meatballs tough and lead to them falling apart during cooking.

4. What can I use instead of marinara sauce?

If you don’t have marinara sauce, you can use any tomato-based pasta sauce as a substitute. Alternatively, a quick sauce can be made with canned tomatoes, garlic, onion, and herbs simmered until thickened.

5. How do I know when the corn on the cob is done cooking?

Corn on the cob is done when the kernels are tender and juicy. If boiling, this typically takes about 7-10 minutes. If grilling, look for a slight char on the kernels and a brighter yellow color, which usually takes about 10 minutes over medium heat.

6. Can I make these subs vegetarian?

Yes, for a vegetarian version, you can use plant-based ground meat substitutes to make the meatballs. Follow the same recipe, adjusting seasonings as needed to complement the substitute used.

7. How can I store and reheat leftovers?

Store leftover meatball subs wrapped in foil or in an airtight container in the refrigerator for up to 3 days. Reheat in the oven at 350°F until warm. Corn on the cob can be stored in the fridge for up to 3 days and reheated in the microwave, or cut off the cob and used in salads or other dishes.

8. Can I use something other than mozzarella for the cheese?

Absolutely! While mozzarella is traditional for its meltiness and mild flavor, you can use other cheeses like provolone, cheddar, or a blend of Italian cheeses for different flavors and textures.

9. How can I add more flavor to my meatball subs?

To enhance the flavor, consider adding chopped fresh herbs to the meatball mixture, such as parsley or basil. You can also incorporate finely minced garlic or onion for depth. A sprinkle of red pepper flakes can add a bit of heat to the marinara sauce.

10. Is there a gluten-free option for the bread?

Yes, there are many gluten-free bread options available that can be used as substitutes for traditional hoagie rolls. Look for gluten-free sub rolls or baguettes at your local grocery store, or make your own gluten-free bread for a homemade touch.

Conclusion

In the end, the magic of homemade meatball subs with corn on the cob lies not just in their flavors but in the stories they tell—the tales of cultural melding, of family traditions, and of the simple pleasures of eating together. This meal reminds us that some of the most profound experiences come from the simplest sources, and that cooking, at its heart, is an act of love. So, as we savor each bite, let us remember the love infused in every ingredient, every stir of the sauce, and every slice of bread, and let that love spread from our kitchens to our tables and beyond, nurturing our connections and filling our hearts with warmth and joy.

Print
clock clock iconcutlery cutlery iconflag flag iconfolder folder iconinstagram instagram iconpinterest pinterest iconfacebook facebook iconprint print iconsquares squares iconheart heart iconheart solid heart solid icon

homemade meatball subs with corn on the cob

  • Author: Chef Emy

Description

Homemade meatball subs with corn on the cob make for a hearty, satisfying dinner that combines the rich, savory flavors of Italian-inspired cuisine with the sweet, fresh taste of classic American side dishes. Here’s how you can prepare this delicious meal from scratch.


Ingredients

Scale
  • For the Meatballs:
    • 1 lb ground beef or a mix of beef and pork
    • 1/4 cup breadcrumbs
    • 1/4 cup grated Parmesan cheese
    • 1 egg
    • 2 cloves garlic, minced
    • 1 teaspoon Italian seasoning
    • Salt and pepper, to taste
  • For the Subs:
    • Hoagie rolls or sub rolls
    • 1 cup marinara sauce (homemade or store-bought)
    • 1 cup shredded mozzarella cheese
    • Fresh basil leaves (optional)
    • Corn on the Cob

      Ingredients:

      • Fresh corn on the cob, husks and silk removed

Instructions

  1. Preheat your oven to 375°F (190°C) for the meatballs and 400°F (200°C) for toasting the subs.

  2. Make the Meatballs:

    • In a large bowl, combine the ground meat, breadcrumbs, Parmesan, egg, minced garlic, Italian seasoning, salt, and pepper. Mix until well combined but do not overmix to keep the meatballs tender.
    • Form the mixture into small balls, about 1 inch in diameter, and place them on a baking sheet lined with parchment paper.
    • Bake in the preheated oven for about 20-25 minutes, or until they’re cooked through.
  3. Prepare the Marinara Sauce:

    • While the meatballs are baking, warm up the marinara sauce in a saucepan over medium heat. You can add some extra Italian seasoning or minced garlic for more flavor if you like.
  4. Assemble the Subs:

    • Slice the hoagie rolls open and lay them on a baking sheet.
    • Once the meatballs are done, spoon several meatballs along with some marinara sauce into each roll.
    • Sprinkle generously with shredded mozzarella cheese.
    • Place the subs in the 400°F (200°C) oven and bake until the cheese is melted and bubbly, about 5-10 minutes.
  5. Serve:

    • Garnish the meatball subs with fresh basil leaves if desired and serve hot.

Corn on the Cob

Ingredients:

  • Fresh corn on the cob, husks and silk removed

Instructions:

  1. Boil the Corn:

    • Bring a large pot of salted water to a boil.
    • Add the corn cobs to the boiling water and cook for about 7-10 minutes, depending on the size of the corn and your preferred level of tenderness.
  2. Grill the Corn (Optional):

    • For a smoky flavor, you can also grill the corn. Preheat your grill to medium-high heat.
    • Brush the corn with a little bit of butter or olive oil and season with salt.
    • Grill the corn, turning occasionally, until it’s slightly charred on all sides, about 10 minutes.
  3. Serve:

    • Serve the corn on the cob hot, with butter and a sprinkle of salt, or your favorite seasonings.

Notes

Combining the comforting, rich flavors of meatball subs with the sweet freshness of corn on the cob creates a balanced and delightful meal that’s perfect for a cozy dinner. Enjoy the process of making this meal as much as you’ll enjoy eating it, knowing that you’re creating something special that’s sure to be a hit with family and friends.

Banana pudding

In the realm of classic desserts, few dishes hold a candle to the comforting allure of banana pudding. This quintessential treat, with its layers of creamy pudding, ripe bananas, and crunchy vanilla wafers, not only delights the palate but also evokes a sense of nostalgia, whisking us back to the cherished memories of family gatherings, Sunday dinners, and impromptu kitchen feasts. The beauty of banana pudding lies not just in its simplicity and the harmony of its flavors but also in its ability to tell a story, to be a vessel of tradition, and to serve as a testament to the simple joy of homemade desserts.

The Origins of Banana Pudding

To fully appreciate banana pudding, one must delve into its rich history, tracing back to the United States in the late 19th century. Though the exact origins are debated, it’s widely accepted that banana pudding, as we know it today, began to gain popularity with the advent of commercially produced vanilla wafers. These wafers, along with the increased availability of bananas, inspired home cooks and professional chefs alike to create what would become a beloved dessert across the country.

The earliest recipes called for layers of sponge cake or ladyfingers, bananas, custard, and a topping of meringue or whipped cream, baked to perfection. Over time, vanilla wafers replaced the sponge cake, adding a delightful crunch that contrasted beautifully with the creamy custard and the soft, sweet bananas. This evolution reflects not just changes in availability and preference but also the creativity and adaptability of American home cooking.

The Anatomy of Banana Pudding

At its core, banana pudding is a marvel of balance and texture. The process begins with the pudding, a velvety custard made from milk, eggs, sugar, and vanilla. This foundational layer sets the stage for the dessert, providing a rich and creamy base that complements the other elements. Cooking the pudding from scratch, as opposed to using instant mixes, imparts a depth of flavor and a sense of authenticity to the dish, making it all the more special.

The bananas, ripe yet firm, are sliced and layered between the pudding and wafers, adding a natural sweetness and a tender bite that contrasts with the smoothness of the custard. The choice of banana, often a matter of personal preference or availability, can subtly influence the dessert’s flavor profile, making each rendition of banana pudding unique.

Vanilla wafers, the final key component, offer a textural counterpoint to the creaminess of the pudding and the softness of the bananas. As the dessert chills, the wafers absorb moisture from the pudding, softening into a cake-like consistency that melds seamlessly with the other layers, creating a symphony of textures and flavors in every bite.

A Canvas for Creativity

One of the most appealing aspects of banana pudding is its versatility. While the basic elements remain constant, the dessert offers ample opportunity for customization and experimentation. From the addition of spices such as cinnamon or nutmeg to the custard, to the incorporation of different types of cookies or biscuits in place of vanilla wafers, there are endless ways to put a personal spin on this classic dish.

The topping, too, invites creativity. Traditional recipes often call for a meringue, baked until golden and fluffy, or a layer of whipped cream, light and airy. However, contemporary variations might include a sprinkle of crushed wafers, a drizzle of caramel or chocolate sauce, or even a dusting of cocoa powder, allowing each cook to tailor the dessert to their tastes and occasion.

More Than Just a Dessert

Beyond its deliciousness, banana pudding carries with it a sense of heritage and home. It’s a dish that transcends its humble origins to become a staple at celebrations and gatherings, a comfort food that speaks of love, care, and the joy of sharing. Preparing banana pudding, especially for loved ones, is an act of communion, a way to connect over shared flavors and memories.

Moreover, the act of making banana pudding from scratch, from whisking the custard to layering the ingredients, is a meditative and rewarding process. It’s a celebration of the art of cooking, an affirmation of the beauty found in taking time to create something by hand, something that feeds not just the body but also the soul.

A Legacy of Sweetness

In today’s fast-paced world, where convenience often trumps quality, banana pudding stands as a reminder of the value of homemade. It’s a dish that encourages us to slow down, to savor the moment, and to indulge in the simple pleasures that make life sweet. Each spoonful is a testament to the enduring appeal of banana pudding, a dessert that, despite its simplicity, remains a beloved favorite, a comfort, and a joy.

FAQs

1. Can I use instant pudding instead of making it from scratch?

Yes, you can use instant pudding as a time-saving alternative. However, making the pudding from scratch gives you more control over the flavor and texture, and many find that the homemade version tastes richer and more satisfying.

2. How ripe should the bananas be for banana pudding?

The bananas should be ripe but firm. If they’re too green, they’ll be hard and not as sweet. If they’re too ripe, they might become mushy in the pudding. Look for bananas with a bright yellow color and minimal brown spots.

3. Can I make banana pudding without vanilla wafers?

While vanilla wafers are traditional, you can substitute them with another type of cookie or biscuit. Graham crackers, shortbread, or even chocolate chip cookies can be used for a different twist on the classic recipe.

4. How long does banana pudding last in the fridge?

Banana pudding can last in the fridge for 2-3 days. Cover it with plastic wrap or store it in an airtight container to keep it fresh. Note that the bananas may brown, and the wafers will soften over time.

5. Can banana pudding be frozen?

Freezing banana pudding is not recommended. The texture of the bananas and the custard can change once frozen and then thawed, potentially becoming watery or grainy.

6. What’s the best way to prevent the bananas from browning?

To prevent bananas from browning too quickly, you can lightly coat the banana slices in lemon juice or pineapple juice. This adds a slight citrus flavor but effectively slows down the oxidation process.

7. Can I make banana pudding dairy-free?

Yes, you can make dairy-free banana pudding by using plant-based milk (like almond milk, coconut milk, or soy milk) and a dairy-free whipped topping. Ensure the vanilla wafers or alternative cookies are also dairy-free.

8. Is it possible to make banana pudding gluten-free?

To make gluten-free banana pudding, ensure your vanilla wafers or substitute cookies are gluten-free. Also, check that your thickening agent (if using flour) is a gluten-free option, such as cornstarch or a gluten-free flour blend.

9. How can I thicken my pudding if it’s too runny?

If your pudding is too runny, you can thicken it by cooking it a bit longer on the stove, allowing the custard to reduce and thicken. Make sure to stir constantly to prevent burning. If it’s still not thick enough, a little cornstarch slurry (cornstarch mixed with cold water) can help thicken it without altering the flavor significantly.

10. Can I add other flavors to my banana pudding?

Absolutely! Feel free to experiment with flavors. Adding a layer of peanut butter, drizzling caramel or chocolate sauce, or mixing in a bit of cinnamon or nutmeg to the pudding can add a delightful twist to the classic recipe.

Print
clock clock iconcutlery cutlery iconflag flag iconfolder folder iconinstagram instagram iconpinterest pinterest iconfacebook facebook iconprint print iconsquares squares iconheart heart iconheart solid heart solid icon

Banana pudding

  • Author: Chef Amy

Description

Banana pudding is a classic dessert that combines the creamy sweetness of pudding with the fresh flavor of bananas and the crunchy texture of vanilla wafers. Here’s a simple and delicious recipe to make this beloved treat from scratch.


Ingredients

Scale
  • For the Pudding:

    • 2/3 cup sugar
    • 1/4 cup all-purpose flour
    • A pinch of salt
    • 3 cups whole milk
    • 3 large eggs
    • 2 teaspoons vanilla extract
  • Layers and Topping:

    • 4 ripe bananas, sliced
    • 1 box of vanilla wafers (about 11 oz)
    • Optional: whipped cream or meringue topping
    • Optional: additional banana slices and vanilla wafers for garnish

Instructions

  1. Make the Pudding:

    • In a medium saucepan, mix the sugar, flour, and salt. Gradually stir in the milk until smooth.
    • Cook over medium heat, stirring constantly, until the mixture thickens and boils. Continue to cook and stir for 2 more minutes.
    • In a separate bowl, lightly beat the eggs. Gradually stir in a small amount of the hot milk mixture to temper the eggs. Then, slowly pour the egg mixture back into the saucepan, stirring constantly.
    • Cook and stir over low heat for 2 minutes; do not boil. Remove from heat and stir in the vanilla extract. Let the pudding cool slightly.
  2. Layer the Dessert:

    • In a 9×13 inch dish (or a similar size), place a layer of vanilla wafers, covering the bottom of the dish.
    • Add a layer of sliced bananas over the wafers.
    • Pour half of the pudding over the bananas and smooth it out to cover them.
    • Repeat the layers with the remaining wafers, bananas, and pudding.
  3. Chill:

    • Cover and refrigerate the banana pudding for at least 4 hours, or until it’s set and cold. This allows the flavors to meld together and the wafers to soften into a cake-like texture.
  4. Serve:

    • Just before serving, add a dollop of whipped cream or a meringue topping if desired. Garnish with additional banana slices and vanilla wafers for a decorative touch.

Notes

Optional Meringue Topping:

If you prefer a traditional meringue topping:

  • Beat 3 egg whites with a pinch of cream of tartar until soft peaks form.
  • Gradually add 6 tablespoons of sugar and continue beating until stiff peaks form and the sugar is dissolved.
  • Spread over the pudding, sealing the edges, and bake at 350°F (175°C) for 10-12 minutes or until the meringue is golden brown.

This banana pudding recipe is a delightful blend of textures and flavors, perfect for any occasion. The creamy pudding, fresh bananas, and crisp wafers come together to create a dessert that’s both comforting and irresistible. Whether it’s for a family gathering, a special occasion, or a simple treat, banana pudding is sure to be a hit.

Homemade Picadillo with Flour tortillas

Embarking on a culinary journey often means more than just preparing meals; it’s about weaving stories, traditions, and flavors into the fabric of our daily lives. Among the myriad recipes that exemplify the fusion of culture and taste, Homemade Picadillo with Flour Tortillas stands out as a testament to the rich culinary heritage of Latin America. This dish, with its simple yet profound flavors, invites us into a world where every ingredient tells a story, and every meal is a celebration of life.

The Soul of Picadillo

At its heart, Picadillo is a humble yet versatile dish that has found its way into the kitchens and hearts of many across Latin America and beyond. Its essence lies in the combination of ground meat—usually beef—cooked with tomatoes, onions, and an array of spices and ingredients that vary from one region to another. This dish is a mirror reflecting the diversity of Latin American cuisine, with each variation offering a glimpse into the history and cultural influences of its people. From the addition of raisins and olives in the Cuban version to the incorporation of potatoes and carrots in the Mexican rendition, Picadillo serves as a canvas for culinary creativity.

The Warmth of Homemade Flour Tortillas

No serving of Picadillo is complete without the comforting embrace of flour tortillas. These soft, warm rounds of dough are more than just a vehicle for the stew; they are a symbol of the hands-on approach to cooking that defines traditional food preparation. Making flour tortillas from scratch is an act of love—a process that, despite its simplicity, requires patience and care. The ritual of mixing the dough, rolling it out into thin discs, and cooking them to perfection on a hot griddle is a reminder of the joys of homemade cooking. It’s a practice that connects us to generations past, who valued the art of making food from the heart.

A Culinary Symphony

Bringing together Picadillo and flour tortillas is like orchestrating a symphony of flavors. The spiciness of the meat, the tanginess of the tomatoes, and the briny kick of olives and capers in the Picadillo find their balance in the soft, neutral palette of the tortillas. This combination is not just about taste; it’s about creating an experience that engages all the senses. The aroma of spices filling the kitchen, the texture of the stew contrasted with the soft tortillas, and the vibrant colors of the dish come together to create a feast for the eyes and the palate.

The Art of Sharing

In many ways, Homemade Picadillo with Flour Tortillas is more than just a meal; it’s an invitation to gather, share, and connect. This dish is often served family-style, with a large pot of Picadillo at the center of the table and a stack of warm tortillas for everyone to enjoy. It’s a way of cooking that encourages conversation, laughter, and the sharing of stories. In this sense, the dish transcends its ingredients, becoming a medium for social connection and cultural exchange.

A Journey Through Time

Cooking Homemade Picadillo with Flour Tortillas is also a journey through time, offering a connection to the past that is both profound and personal. Each step in the preparation process, from chopping the onions to kneading the dough, is a link in a chain that stretches back through generations. It’s a way of preserving traditions and keeping the memory of ancestors alive in the flavors and aromas of the dish. This act of cooking, then, becomes a tribute to those who came before us, a way of honoring our heritage and roots.

The Universal Language of Food

Ultimately, Homemade Picadillo with Flour Tortillas speaks the universal language of food—a language that transcends borders, cultures, and time. It reminds us that, despite our differences, there is more that unites us than divides us. Food has the power to bring people together, to create bonds of friendship and understanding. In sharing this dish, we share a part of ourselves, offering a taste of our history, our culture, and our love.

As we enjoy Homemade Picadillo with Flour Tortillas, let us remember the stories embedded in each bite, the hands that have prepared similar meals over centuries, and the power of food to connect us to each other and to the world around us. This dish is a celebration of the rich tapestry of human experience, a reminder of the simple pleasures that make life so flavorful. So, let’s take this recipe as an invitation to explore, to taste, and to cherish the diverse culinary heritage that shapes our world.

Conclusion

In the narrative of Homemade Picadillo with Flour Tortillas, each ingredient carries with it a parcel of history, a snippet of cultural identity, and a dash of personal memory. The ground beef, simmering in its juices, melds with the robust flavors of tomatoes, onions, and garlic, creating a foundation that is both rich and comforting. This mixture, seasoned with the earthy warmth of cumin and the aromatic bouquet of oregano, becomes a testament to the indigenous and colonial influences that have shaped Latin American cuisine. The addition of green olives and capers introduces a Mediterranean touch, a nod to the Spanish legacy that permeates the culinary traditions of the region. Meanwhile, the optional raisins, offering a hint of sweetness, echo the Moorish influence on Spanish cooking, further enriching the dish’s complex flavor profile.

The process of making flour tortillas from scratch is equally evocative, a ritual that spans cultures and continents. The act of mixing flour, water, salt, and fat to create a dough is a universal practice, found in various forms around the world. Yet, in the context of Latin American cuisine, the flour tortilla holds a special place. It is a symbol of mestizaje, a blend of indigenous and European traditions, transformed into something uniquely new and wholly authentic. Rolling out the tortillas and cooking them on a hot griddle becomes a meditative practice, a moment to connect with the tactile pleasure of cooking and the satisfaction of creating something by hand.

Serving Homemade Picadillo with Flour Tortillas is an act of communal joy. It is a dish best enjoyed in the company of others, where the act of sharing food becomes an expression of love and friendship. Each tortilla, filled with the savory goodness of the Picadillo, becomes a parcel of shared experience, a moment of connection that transcends the mere act of eating. It is in these moments that we are reminded of the power of food to bring us together, to create a sense of belonging and community.

In conclusion, Homemade Picadillo with Flour Tortillas is more than just a recipe; it is a celebration of the rich mosaic of human culture. It invites us to explore the depth of flavors, the stories behind the ingredients, and the joy of sharing a meal with others. Through this dish, we are offered a glimpse into the heart of Latin American culinary traditions, a journey that is both deliciously satisfying and profoundly meaningful. So, let us embrace the spirit of this dish, allowing it to inspire us to cook with passion, eat with gratitude, and share with generosity. In doing so, we partake in a global feast that celebrates the diversity, creativity, and connection that food so beautifully embodies.

FAQs

1. What is Picadillo?

Picadillo is a traditional Latin American and Caribbean dish that typically consists of ground meat (usually beef), tomatoes, and various other ingredients that can include onions, peppers, olives, capers, and raisins. It’s known for its rich, savory flavor and is often served with rice, beans, or tortillas.

2. Can I use a different type of meat for Picadillo?

Absolutely! While beef is traditional, you can easily substitute it with ground turkey, chicken, or pork based on your preference or dietary needs. Each type of meat will bring a unique flavor to the dish.

3. How can I make this recipe vegetarian or vegan?

To make a vegetarian or vegan version of Picadillo, substitute the ground meat with a plant-based alternative like lentils, quinoa, or a meat substitute product. Adjust the cooking time accordingly, and ensure all other ingredients are suitable for your dietary preferences.

4. Are there any shortcuts for making flour tortillas?

While homemade flour tortillas are recommended for their flavor and texture, you can use store-bought tortillas if you’re short on time. Look for high-quality, fresh tortillas from a local bakery or the refrigerated section of your grocery store for the best taste.

5. Can I freeze leftover Picadillo?

Yes, Picadillo freezes very well. Cool the cooked Picadillo to room temperature, then transfer it to a freezer-safe container or zip-top bag. It can be frozen for up to 3 months. Thaw overnight in the refrigerator and reheat on the stove or in the microwave.

6. How long can I store homemade flour tortillas?

Homemade flour tortillas can be stored in an airtight container or plastic bag at room temperature for up to 2 days. For longer storage, refrigerate them for up to a week or freeze for up to 2 months. Reheat on a dry skillet or in the microwave wrapped in a damp paper towel.

7. Can I add spices to the flour tortillas for more flavor?

Certainly! Feel free to incorporate spices such as garlic powder, onion powder, or herbs like cilantro into the flour mixture for your tortillas. This can add an extra layer of flavor to complement the Picadillo.

8. What are some serving suggestions for Picadillo with Flour Tortillas?

Picadillo with Flour Tortillas can be enjoyed in many ways. Serve it as a taco filling, use it for burritos, or simply enjoy it as a hearty stew with tortillas on the side for dipping. Garnishes such as cheese, sour cream, avocado, and fresh cilantro can also enhance the dish.

9. Is it possible to make this dish ahead of time?

Yes, both Picadillo and flour tortillas can be made ahead of time. Picadillo can be refrigerated for up to 3 days or frozen, and tortillas can be made a day in advance and stored in an airtight container.

10. How can I make my flour tortillas soft and pliable?

The key to soft and pliable tortillas is not overcooking them. Cook each tortilla on a hot skillet just until it starts to show brown spots, about 30 seconds to 1 minute per side. Keeping them wrapped in a clean kitchen towel after cooking will also help keep them soft.

Print
clock clock iconcutlery cutlery iconflag flag iconfolder folder iconinstagram instagram iconpinterest pinterest iconfacebook facebook iconprint print iconsquares squares iconheart heart iconheart solid heart solid icon

Homemade Picadillo with Flour tortillas

  • Author: Chef Emy

Description

Let’s create a simple yet delicious recipe for Homemade Picadillo served with Flour Tortillas, capturing the essence of traditional Latin American flavors with the joy of homemade cooking


Ingredients

Scale
  • 1 lb (450g) ground beef
  • 1 large onion, finely chopped
  • 3 cloves garlic, minced
  • 2 tomatoes, diced
  • 1/2 cup green olives, sliced
  • 2 tablespoons capers
  • 1/4 cup raisins (optional)
  • 1 teaspoon cumin
  • 1 teaspoon dried oregano
  • Salt and pepper to taste
  • 2 tablespoons olive oil
  • 1/2 cup water or beef broth

Homemade Flour Tortillas Recipe

Ingredients:

  • 2 cups all-purpose flour
  • 1/2 teaspoon baking powder
  • 1/2 teaspoon salt
  • 1/4 cup lard or vegetable shortening
  • 3/4 cup warm water

Instructions

  1. Prepare the Base: In a large skillet, heat the olive oil over medium heat. Add the chopped onion and minced garlic, sautéing until they are soft and fragrant, about 3-5 minutes.
  2. Brown the Beef: Increase the heat to medium-high and add the ground beef to the skillet. Cook, breaking it apart with a spoon, until the beef is browned and no longer pink.
  3. Add Flavor: Stir in the diced tomatoes, green olives, capers, and raisins (if using). Season the mixture with cumin, oregano, salt, and pepper. Mix well to combine all the ingredients.
  4. Simmer: Add the water or beef broth to the skillet. Reduce the heat to low, cover, and let the Picadillo simmer for about 20 minutes, or until the liquid is mostly absorbed and the flavors are well blended.
  5. Adjust Seasonings: Taste the Picadillo and adjust the seasonings if necessary. Keep it warm while you prepare the flour tortillas.

Homemade Flour Tortillas

Instructions:

  1. Mix Dry Ingredients: In a large mixing bowl, combine the flour, baking powder, and salt.
  2. Add Fat: Work the lard or shortening into the flour mixture with your hands until it resembles coarse crumbs.
  3. Incorporate Water: Gradually add the warm water, stirring until a dough forms. Knead the dough on a lightly floured surface for about 2 minutes until it’s smooth and elastic.
  4. Rest the Dough: Cover the dough with a clean kitchen towel and let it rest for at least 15 minutes. This allows the gluten to relax and makes the dough easier to roll out.
  5. Form Tortillas: Divide the dough into 12 equal pieces. Roll each piece into a ball, then flatten with a rolling pin into a thin circle about 6 inches in diameter.
  6. Cook Tortillas: Heat a large skillet or griddle over medium-high heat. Place one tortilla in the skillet and cook for about 30 seconds to 1 minute on each side, or until the tortilla puffs up and gets some brown spots. Keep the cooked tortillas warm by wrapping them in a clean cloth while you cook the remaining tortillas.

Notes

Serving Suggestions: Serve the warm Picadillo with the freshly made flour tortillas. Allow everyone to fill their tortillas with the Picadillo, and offer toppings such as shredded cheese, diced avocado, or a dollop of sour cream for extra flavor.

This recipe for Homemade Picadillo with Flour Tortillas is not only a culinary delight but also an invitation to explore the rich flavors and traditions of Latin American cuisine right in your own kitchen.