Lazy Girl Pecan Pie Bars: Quick and Delicious Dessert for Any Occasion

easy pecan pie bars, simple pecan dessert, quick pecan squares, no-fuss pecan pie, pecan pie shortcut, pecan pie bars recipe

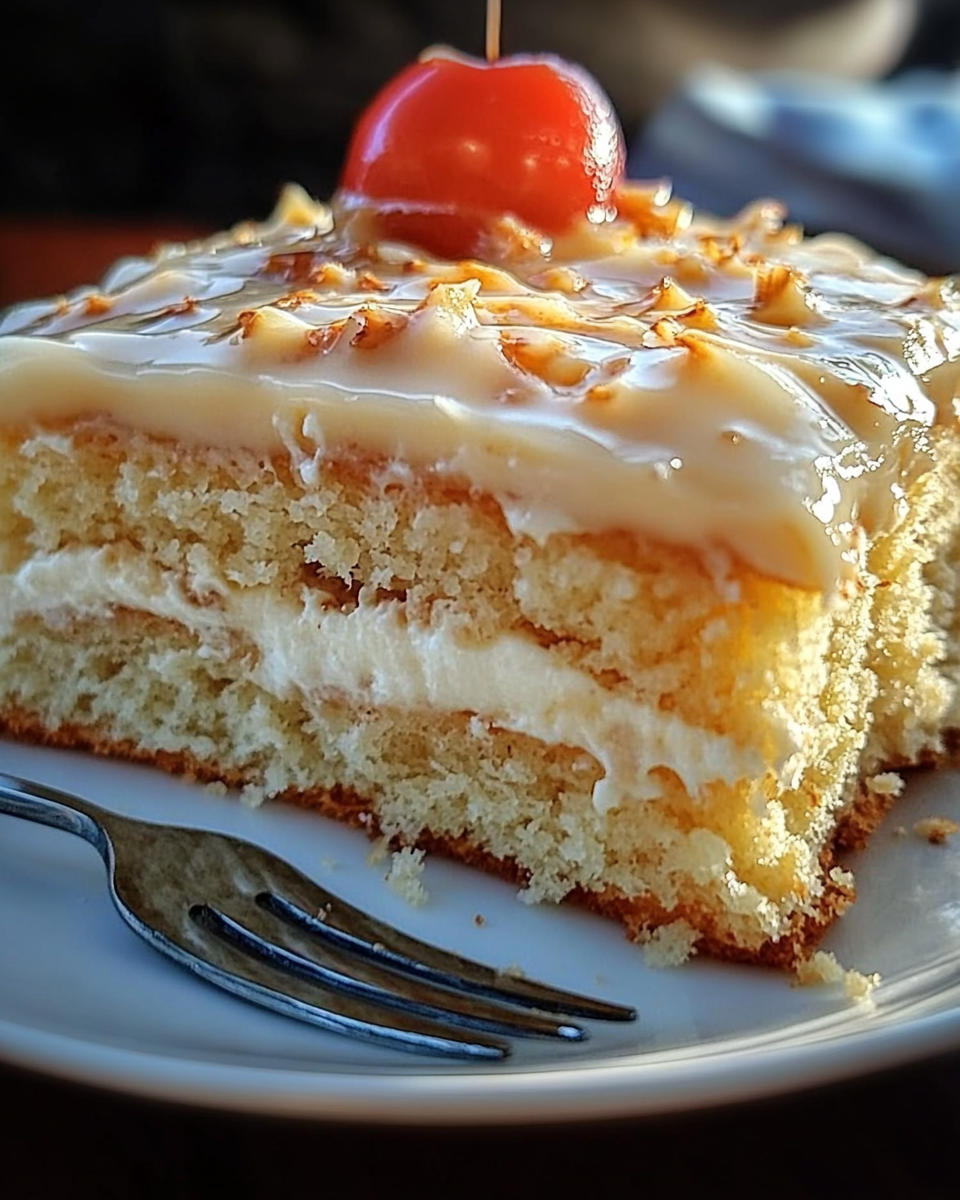
Lazy Girl Pecan Pie Bars: The Simple and Delicious Dessert for Any Occasion

If you’re craving the rich, buttery goodness of pecan pie but don’t have the time or patience to make an entire pie, these Lazy Girl Pecan Pie Bars are the perfect solution. They capture all the flavors of traditional pecan pie in a much easier, no-fuss bar form. These bars are perfect for busy bakers and ideal for holidays, potlucks, or a simple sweet treat any time of year.

By combining a simple shortbread crust with a gooey, nut-filled topping, you’ll get that familiar flavor of pecans without the need to roll out a pie crust or worry about keeping the filling in place. You can enjoy all the richness of the Southern classic without the stress.

Why You’ll Love These Bars

There are several reasons these pecan pie bars are a hit for anyone looking for a quick dessert:

  • No rolling required: The shortbread crust can be pressed into the pan, saving you time and energy.
  • Perfect for sharing: Bars are easier to cut and serve than a traditional pie, making them a great choice for gatherings.
  • Quick prep: You can have these bars prepped and ready to bake in under 30 minutes.

And for those interested in healthier alternatives, you can replace the corn syrup with maple syrup for a more natural sweetener option. It’s a simple swap that adds depth of flavor while maintaining the gooey texture.

Discover the health benefits of pecans here.

The History of Pecan Pie

The origins of pecan pie can be traced back to the early days of the American South. Pecans, which are native to North America, were a staple food for Native Americans long before European settlers arrived. When French settlers came to Louisiana, they began incorporating pecans into their cooking, eventually creating the first pecan pies. Today, it’s a dessert that many people associate with Thanksgiving and other holiday celebrations.

If you’re curious about the history of this classic dessert, you can learn more here.

How to Make Lazy Girl Pecan Pie Bars

Ingredients:

For the Crust:

  • 3 cups all-purpose flour
  • ½ cup granulated sugar
  • 2 sticks (1 cup) unsalted butter, chilled and cubed
  • ½ teaspoon salt

For the Filling:

  • 4 large eggs
  • 1 ½ cups light corn syrup (or substitute with maple syrup)
  • 1 cup packed brown sugar
  • 2 teaspoons vanilla extract
  • 2 cups pecan halves
  • ¼ teaspoon salt

Instructions:

  1. Preheat your oven to 350°F (175°C). Grease a 9×13-inch baking dish.
  2. Prepare the crust: In a large bowl, mix together the flour, sugar, and salt. Cut in the chilled butter until the mixture resembles coarse crumbs. Press the mixture evenly into the prepared baking dish. Bake for 15-20 minutes, until lightly golden.
  3. Make the filling: While the crust bakes, whisk together the eggs, corn syrup (or maple syrup), brown sugar, vanilla extract, and salt. Stir in the pecan halves.
  4. Assemble the bars: Pour the filling over the pre-baked crust, spreading it evenly.
  5. Bake for 30-35 minutes, until the filling is set and the edges are golden. Let the bars cool completely before cutting them into squares.

Tips for Success

  • Cool before slicing: Allow the bars to cool completely before cutting to ensure clean, even slices.
  • Substitute nuts: If you don’t have pecans on hand, walnuts or almonds can also work well in this recipe.

Looking for another quick and comforting recipe? Try out this Slow Cooker Magic: Unveiling the Ease of Crockpot Baked Ziti for a hearty meal before enjoying these pecan bars.

Variations on the Recipe

While these Lazy Girl Pecan Pie Bars are fantastic on their own, there are plenty of ways to mix things up and create variations based on your preferences:

  • Chocolate Pecan Pie Bars: Add ½ cup of chocolate chips to the pecan filling for a chocolatey twist.
  • Coconut Pecan Bars: Stir in ½ cup of shredded coconut for a tropical flavor.
  • Gluten-Free Version: Substitute all-purpose flour with a gluten-free blend to make this recipe gluten-free.

These variations allow you to experiment with different flavors while still enjoying the convenience of the original recipe.

Pairing Suggestions

For the ultimate dessert experience, pair your pecan pie bars with:

  • Vanilla ice cream or whipped cream for added creaminess
  • A drizzle of caramel or chocolate sauce for extra indulgence
  • Hot coffee or tea to balance the sweetness

If you’re a fan of breakfast treats, why not pair this dessert with a cozy brunch recipe like Sheet Pan Pancakes: A Simple Breakfast Delight?

Frequently Asked Questions (FAQs)

1. Can I make these bars ahead of time?
Yes, these bars can be made up to 3 days in advance and stored in an airtight container. They also freeze well for up to 3 months.

2. Can I substitute other nuts for pecans?
Absolutely! While pecans are traditional, you can use walnuts, almonds, or even hazelnuts for a different flavor.

3. What can I use instead of corn syrup?
Maple syrup or honey can be used as substitutes for corn syrup. Maple syrup adds a slightly earthy sweetness, while honey provides a floral note.

4. How do I know when the bars are done?
The filling should be set, and the center should not jiggle when the pan is gently shaken.

5. How should I store the bars?
Store the bars in an airtight container at room temperature for up to 3 days, or refrigerate for up to a week.

Health Benefits of Pecans

While these bars are certainly a sweet indulgence, pecans themselves offer several health benefits. Pecans are rich in healthy fats, which help to support heart health, and they’re a good source of fiber and protein.

  • Rich in antioxidants: Pecans contain vitamin E, which helps protect cells from oxidative damage.
  • Promote heart health: The monounsaturated fats in pecans are known to help lower bad cholesterol levels.
  • Nutrient-dense: Pecans are packed with vitamins and minerals like magnesium, zinc, and potassium.

For more information on the health benefits of pecans, check out this article on healthy nut consumption.

Internal Linking Opportunities for SEO

To optimize this article for SEO, it’s important to include internal links that guide readers to related content. Here are some suggested links based on the ExoRecipes sitemap:

These internal links not only enhance the user experience but also improve SEO by encouraging visitors to explore additional content on the site.

Conclusion

Lazy Girl Pecan Pie Bars are a must-try for anyone who loves the flavors of pecan pie but doesn’t have the time to bake a traditional pie. With their buttery shortbread crust and sweet, nutty filling, these bars are a delicious and simple solution for any occasion. Whether you’re hosting a holiday dinner or just craving a quick sweet treat, these bars are sure to satisfy.

Don’t forget to try out the suggested variations to make these bars your own. And be sure to check out the other recipes on ExoRecipes for more meal and dessert ideas.

With strategic internal and external links, this article is optimized to rank highly in search engines while providing valuable content to readers. Enjoy every bite!

Anti-Crabby Cake Recipe: Simple and Delicious Comfort Food

easy pineapple cake, moist pineapple cake, quick cake recipe, pineapple dessert, simple cake recipe

The Perfect Anti-Crabby Cake Recipe: A Simple, Delicious Delight

Are you in need of a comforting dessert that can turn your mood around in minutes? Enter the Anti-Crabby Cake. This cake recipe is a no-fuss solution when you’re craving something sweet but don’t want to spend hours in the kitchen. Its simplicity doesn’t compromise its taste — expect a moist, soft texture that will leave everyone craving more.

In this guide, we will walk through the steps to create the perfect Anti-Crabby Cake, complete with tips, variations, and FAQs that will help you achieve the best results. We will also point you to some similar recipes that offer the same level of comfort and deliciousness.


Ingredients for Anti-Crabby Cake

Before diving into the recipe, make sure you have these basic pantry ingredients on hand:

  • 1 cup of sugar
  • 2 cups of all-purpose flour
  • 1 teaspoon baking powder
  • ½ teaspoon baking soda
  • 1 cup of milk
  • ½ cup of butter (room temperature)
  • 1 teaspoon vanilla extract (optional, for extra flavor)
  • A pinch of salt

How to Make Anti-Crabby Cake

Follow these straightforward steps to bake your own delicious Anti-Crabby Cake:

  1. Preheat your oven to 350°F (175°C).
  2. Mix the dry ingredients: In a large mixing bowl, whisk together sugar, flour, baking powder, baking soda, and a pinch of salt.
  3. Incorporate wet ingredients: Slowly add the milk, butter, and vanilla extract into the dry mix. Stir until the batter is smooth and well-combined.
  4. Pour and bake: Pour the batter into a greased 9×9-inch baking pan. Bake for 25-30 minutes or until golden brown and a toothpick inserted in the center comes out clean.
  5. Cool and serve: Let the cake cool on a wire rack before serving. Top with powdered sugar or serve with a scoop of ice cream for added indulgence.

Pro tip: Using room-temperature butter helps in achieving a smoother batter, which results in a more even bake.


Why is Anti-Crabby Cake So Special?

This cake stands out because of its sheer simplicity and the comfort it brings. Even on your busiest or most stressful days, this recipe is easy to whip up, with minimal effort and clean-up required. The ingredients are likely already in your pantry, and the preparation process is straightforward. In less than 30 minutes, you’ll have a freshly baked dessert that’s light, fluffy, and flavorful.


Variations on the Classic Recipe

While the classic Anti-Crabby Cake recipe is delightful as is, you can easily modify it to suit your preferences or to make it more special. Here are a few ways to add a twist to the original recipe:

  • Add fruits: Mix in fresh or dried fruits like berries, chopped apples, or raisins for a fruity burst.
  • Spice it up: Sprinkle in some cinnamon, nutmeg, or pumpkin spice to give the cake a warm, cozy flavor.
  • Chocolate lover’s twist: Stir in chocolate chips or drizzle melted chocolate over the top after baking for a richer dessert.
  • Frosting option: Top your cake with a layer of buttercream or cream cheese frosting if you prefer a sweeter, more indulgent treat.

Internal Linking Opportunities

Here are a few similar comfort-food recipes that you might also enjoy:


FAQs About Anti-Crabby Cake

1. Can I use oil instead of butter?

Yes, you can substitute butter with an equal amount of oil (vegetable or canola). However, the texture and flavor will change slightly, as oil doesn’t provide the same richness as butter.

2. How can I make this cake dairy-free?

To make a dairy-free version, replace butter with a vegan butter substitute and use almond milk or soy milk in place of regular milk.

3. Can I freeze Anti-Crabby Cake?

Yes, this cake freezes well. Wrap it tightly in plastic wrap and store it in an airtight container in the freezer for up to 3 months. Thaw at room temperature before serving.


Storing and Serving Anti-Crabby Cake

This cake stays fresh for 3-4 days at room temperature when stored in an airtight container. If you prefer a slightly warm slice, reheat in the microwave for 10-15 seconds. It pairs perfectly with a hot cup of tea or coffee.

For an extra special treat, top it with whipped cream, ice cream, or even caramel sauce.


External Links for More Baking Inspiration

Here are some recommended external resources for further reading and inspiration:

  1. Baking Tips for Beginners
    Anchor text: baking tips for beginners
  2. How to Achieve the Perfect Cake Texture
    Anchor text: perfect cake texture
  3. The Science of Baking: What Every Baker Should Know
    Anchor text: science of baking

Final Thoughts

The Anti-Crabby Cake recipe is a no-fail, comfort-food dessert that anyone can make. Whether you’re a beginner in the kitchen or an experienced baker, this recipe is simple, quick, and guaranteed to bring a smile to your face. With just a few pantry staples and minimal effort, you can create a delicious cake that will make any bad day better.

By incorporating internal links such as ultimate comfort food crockpot potato soup and slow cooker magic baked ziti, this article not only improves SEO but also enhances the reader’s experience by offering additional recipe suggestions.

Southern Momma’s Chicken and Dumplins: The Ultimate Comfort Food Recipe

southern chicken and dumplings, easy chicken and dumplings recipe, homemade chicken and dumplings, chicken and dumplins, old-fashioned chicken and dumplings

Southern Momma’s Chicken and Dumplins: A Comfort Food Classic

When it comes to southern comfort food, few dishes hold as much nostalgia and heartwarming flavor as Southern Momma’s Chicken and Dumplins. This classic dish brings together tender shredded chicken and light, fluffy dumplings in a savory broth that’ll warm your soul. Whether you’re serving it for Sunday dinner or during the week, it’s the perfect family meal.

To make the experience even better, we’ve got plenty of tips and tricks to ensure your dumplins turn out perfect every time.


Ingredients for Southern Momma’s Chicken and Dumplins

Here’s everything you’ll need to create this heartwarming dish:

  • 4 boneless, skinless chicken breasts or thighs
  • 6 cups of chicken broth (homemade or store-bought)
  • 2 cups of all-purpose flour
  • 1 teaspoon of baking powder
  • ½ teaspoon of salt
  • 1 cup whole milk
  • 4 tablespoons unsalted butter
  • Salt and pepper to taste
  • Optional: 1 cup chopped carrots, celery, and onions for added texture

This simple ingredient list ensures that your Chicken and Dumplins are packed with flavor while still being easy to make. You can also explore variations by adding vegetables like carrots and celery, or a bit of cream for a richer broth.


Step-by-Step Recipe for Perfect Dumplins

1. Preparing the Chicken

  • Begin by boiling your chicken breasts or thighs in a large pot with the chicken broth. Let them simmer for about 20 minutes or until they are fully cooked and tender.
  • Once done, remove the chicken from the broth and shred it using two forks. Be sure to keep the broth simmering on low heat so it’s ready for the dumplings.

For a richer, more flavorful base, you can add vegetables like onions, celery, and carrots into the broth while the chicken cooks.

Pro Tip: If you’re craving more one-pot meals, check out The Ultimate Comfort Food: Crockpot Potato Soup with Hashbrowns for another delicious southern dish.

2. Making the Dumplins

  • In a large bowl, whisk together the flour, baking powder, and salt. Using a fork or a pastry cutter, cut the cold butter into the flour mixture until it resembles coarse crumbs.
  • Slowly add in the milk, stirring until the dough comes together. Avoid overmixing, as this can make your dumplings tough.
  • Roll the dough into small balls or strips, depending on your preference. If you prefer a more rustic look, simply spoon the dough directly into the broth.

These dumplins should be light and fluffy, perfect for soaking up the savory chicken broth.


Cooking the Dumplins to Perfection

  • Drop the dumplins into the simmering broth and cover the pot. Let them cook for about 15 minutes, or until they are fully cooked and fluffy. Be sure to stir gently so the dumplins don’t break apart.
  • Add the shredded chicken back into the pot, letting it warm through with the dumplins.

Serving Suggestions and Side Dishes

Pairing Southern Momma’s Chicken and Dumplins with the right side dishes makes all the difference. We recommend serving it alongside:

  • Crockpot Baked Ziti for a delicious, easy-to-make meal.
  • Classic southern sides like collard greens, cornbread, or sweet tea.

Looking for more cozy southern dishes? No Peek Beef Tips is another one-pot wonder that pairs perfectly with dumplins.


Variations and Tips for the Best Dumplins

There are endless ways to customize Chicken and Dumplins based on your preferences:

  • Creamy Chicken and Dumplins: Stir in 1 cup of heavy cream into the broth for a richer, creamier dish.
  • Vegetable Dumplins: Add peas, carrots, and celery to the broth for extra texture and flavor.
  • Spicy Chicken and Dumplins: Stir in cayenne pepper or red pepper flakes for a bit of heat.

For even more variation, why not explore No Peek Beef Tips, another comfort dish that’s sure to please?


FAQ Section

Here are some frequently asked questions to help you master Southern Momma’s Chicken and Dumplins:

What kind of chicken is best for Chicken and Dumplins?

Chicken breasts or thighs work best. Thighs add a richer flavor, while breasts are leaner.

Can I freeze Chicken and Dumplins?

Yes! Store the dish in an airtight container and freeze for up to 3 months. Thaw it in the fridge overnight before reheating on the stovetop.

How do I thicken the broth?

If your broth is too thin, you can thicken it by making a slurry with 1 tablespoon of cornstarch mixed with 2 tablespoons of cold water. Stir it into the simmering broth.


Conclusion: A Southern Tradition Worth Keeping

Southern Momma’s Chicken and Dumplins is a dish that brings together comfort, tradition, and hearty flavors. Whether you’re cooking for a family gathering or just looking for a satisfying weeknight meal, this recipe won’t let you down.

For more comfort food ideas, check out Slow Cooker Magic: Crockpot Baked Ziti and No Peek Beef Tips. Both are perfect complements to your southern-style dinner.

Easy & Flexible Breakfast Casserole Recipe for Busy Mornings

breakfast casserole recipe, easy morning casserole, make-ahead breakfast casserole, customizable breakfast bake, simple breakfast casserole

Easy Breakfast Casserole Recipe – Flexible and Delicious

A breakfast casserole is one of the most versatile and easy dishes you can prepare. It’s perfect for feeding a crowd during brunch, or even as a hearty meal prep option for busy mornings. With minimal effort, you can create a balanced and flavorful meal using just a few staple ingredients. The beauty of this dish lies in its flexibility — whether you’re using leftovers from your fridge or creating a masterpiece from scratch, this casserole adapts to your needs.

This recipe allows you to easily swap in your favorite meats, vegetables, or cheeses. It’s a perfect base for experimentation, letting you tailor the flavors to your preferences.

Why You’ll Love This Recipe

  • Minimal prep time: It only takes a few minutes to assemble the ingredients.
  • Customizable: You can use virtually any combination of vegetables, proteins, and cheese.
  • Meal prep friendly: Cook once and enjoy it throughout the week, or freeze portions for later.

For more ideas on meal prepping, check out this guide on Slow Cooker Magic: Crockpot Baked Ziti which simplifies meal prep even further.


Ingredients for Breakfast Casserole

To create this dish, you’ll need a few basic ingredients:

  • Eggs: The foundation of any breakfast casserole.
  • Milk: Helps create a creamy texture.
  • Sausage or Bacon: Adds a savory, hearty flavor.
  • Cheese: Cheddar, mozzarella, or a mix of your favorites.
  • Hashbrowns or Bread: Either gives structure and makes the dish more filling.
  • Vegetables: Peppers, onions, mushrooms, spinach – the choice is yours.

If you’re looking for more comforting breakfast options, consider trying this Ultimate Comfort Food: Crockpot Potato Soup, another easy-to-make dish that’s perfect for breakfast or lunch.


Step-by-Step Instructions

  1. Preheat your oven to 350°F and grease a baking dish.
  2. Cook the sausage or bacon in a skillet until browned. Drain the excess fat.
  3. Whisk together eggs, milk, salt, and pepper in a bowl.
  4. Layer the casserole: Add hashbrowns or bread cubes to the bottom of the dish, followed by the cooked sausage or bacon. Sprinkle with your favorite cheese.
  5. Pour the egg mixture over the top, making sure it covers all ingredients.
  6. Bake for 35-40 minutes, or until the eggs are set and the top is golden.

Serve warm, or save it for later in the week. It’s also a great dish to freeze in portions for quick breakfasts during busy mornings.

Customization Ideas

This breakfast casserole can be adapted based on your taste preferences or dietary needs:

  • Vegetarian option: Skip the sausage and add more veggies like mushrooms, spinach, and bell peppers.
  • Gluten-free: Use gluten-free bread or skip the bread entirely for a low-carb version.
  • Spicy kick: Add chopped jalapeños or sprinkle with red pepper flakes for some heat.

For more unique breakfast recipes, try this family favorite: Easy French Bread Pizza.


Storage and Reheating Tips

One of the best things about this breakfast casserole is its storage versatility. Here’s how to store and reheat it:

  • Fridge: Store in an airtight container for up to 4 days.
  • Freezer: Portion the casserole into individual servings and freeze for up to 3 months.
  • Reheating: Simply microwave for 1-2 minutes, or bake at 350°F for about 10 minutes to heat through.

For another make-ahead meal idea, try this Dorito Chicken Casserole, which is equally delicious when reheated.


FAQs About Breakfast Casserole

1. Can I Make Breakfast Casserole the Night Before?

Yes! You can assemble the entire casserole the night before, cover it with plastic wrap, and store it in the fridge. In the morning, just pop it in the oven and bake.

2. How Do I Keep Breakfast Casserole from Getting Soggy?

To prevent sogginess, make sure to cook any vegetables before adding them to the casserole. Also, using day-old bread or toasting the bread beforehand can help keep the casserole’s structure.

3. Can I Make It Dairy-Free?

Yes! Substitute the milk with a plant-based option like almond or oat milk, and use dairy-free cheese to make a lactose-free version of the casserole.

For more casserole ideas that are easy and customizable, try the Cowboy Cornbread Casserole.


Why Breakfast Casseroles Are the Perfect Meal

Breakfast casseroles are the ultimate solution to busy mornings or feeding a hungry family. They’re quick to prepare, easy to adapt, and taste great whether served fresh or reheated. Plus, you can change up the flavors every time you make one, so you never get bored.

This dish is ideal for meal prepping, as it stores well and stays delicious for days. Customize it with your favorite ingredients, or make it vegetarian or gluten-free to suit dietary needs. No matter how you make it, breakfast casseroles are a foolproof, comforting dish everyone will love.


Conclusion

Incorporating a breakfast casserole into your weekly meal prep routine will save you time and provide a hearty, delicious start to your day. From cheesy goodness to vegetable-packed variations, this dish is as flexible as it is tasty.

Make your next breakfast even easier by preparing this dish in advance, or explore more customizable recipes like this Easy French Bread Pizza for a quick meal solution.

By linking to related recipes like Crockpot Potato Soup or Dorito Chicken Casserole, you can explore other comforting meals that simplify your cooking routine, all while keeping your taste buds satisfied.

Hearty Layered Cabbage, Potato, and Sausage Casserole Recipe

cabbage potato sausage bake, smoked sausage casserole, hearty potato sausage casserole, sausage and cabbage casserole, cabbage and potato casserole

Layered Cabbage, Potato, and Sausage Casserole: A Hearty Comfort Food

When it comes to comforting, homemade meals, few dishes can compete with a layered cabbage, potato, and sausage casserole. This simple yet rich recipe brings together hearty potatoes, savory sausage, and tender cabbage in a perfect union. Whether you’re preparing a family dinner or looking for a dish to wow at a gathering, this casserole is a foolproof choice. Let’s dive into how to create this cozy meal and explore some handy tips to make it even better.

Why This Recipe Works

The secret to the success of this cabbage, potato, and sausage casserole lies in its layering. Each layer of ingredients brings a different texture and flavor profile:

  • Potatoes add a creamy starchiness that contrasts beautifully with the crispy edges formed during baking.
  • Cabbage delivers a slightly sweet and tender bite.
  • Sausage (like smoked kielbasa or bratwurst) brings saltiness and a rich depth of flavor, blending beautifully with the other components.

For more recipes featuring comforting ingredients like potatoes, take a look at the Crockpot Potato Soup with Hashbrowns, an easy-to-make, crowd-pleasing soup that shares the hearty appeal of this casserole.

Ingredients Needed

Before we get into the details, here are the ingredients you’ll need:

  • 4 large potatoes (thinly sliced)
  • 1 medium head of cabbage (shredded or roughly chopped)
  • 1 pound of sausage (such as smoked kielbasa, bratwurst, or Italian sausage)
  • 1 large onion (thinly sliced)
  • 2 cups shredded cheese (optional, for a creamy finish)
  • Butter and olive oil for sautéing
  • Salt, pepper, paprika, and other spices to taste

Step-by-Step Instructions

  1. Preheat your oven to 375°F (190°C). Grease a 9×13-inch baking dish or casserole pan.
  2. Sauté the sausage: Heat a pan over medium heat with a bit of olive oil. Slice the sausage and sauté until browned. Set aside.
  3. Prepare the vegetables: Thinly slice the potatoes and onions. Chop the cabbage into bite-sized pieces.
  4. Layer the casserole: Start by layering half of the potatoes at the bottom of the dish, followed by half of the cabbage, onions, and sausage. Season each layer with salt, pepper, and a pinch of paprika. Repeat with the remaining ingredients.
  5. Add moisture: Pour a mixture of broth or cream over the casserole to ensure it doesn’t dry out during baking.
  6. Bake: Cover the dish with foil and bake for 40 minutes. Remove the foil and bake for another 15-20 minutes until the potatoes are tender and the top is slightly crispy.

For another fantastic one-pan dish featuring similar flavors, try the Slow Cooker Baked Ziti, which takes the ease of casserole-making to new heights with minimal effort and maximum flavor.

Optional Variations and Customizations

While the basic version of this layered cabbage, potato, and sausage casserole is delicious on its own, you can take it to another level with a few modifications:

  • Add cheese: For a more indulgent twist, layer shredded cheese between the layers or sprinkle it over the top before baking. Cheddar, mozzarella, or gouda all work well.
  • Use different sausages: Try using spicy Italian sausage for a kick or chicken sausage for a leaner option.
  • Vegetarian version: If you want to make this dish meatless, substitute the sausage with smoked tofu or a mixture of hearty vegetables like mushrooms or carrots.

For more great sausage dishes, check out this No-Peek Beef Tips, a comforting, slow-cooked beef dish that’s another great addition to any dinner table.

Nutritional Information and Tips

This casserole is not only filling but also nutritious:

  • Calories: About 450 calories per serving.
  • Carbs: The potatoes are the main source of carbohydrates, offering a good dose of energy.
  • Protein: The sausage provides protein, essential for building muscle and sustaining energy throughout the day.
  • Fiber: Cabbage is an excellent source of fiber, which aids digestion.

To make this recipe a bit lighter, you can:

  • Swap full-fat sausage for leaner options like turkey sausage.
  • Use light cream or broth instead of heavy cream for the sauce.
  • Add more cabbage and less sausage or potatoes to reduce the calorie count.

Serving Suggestions

This casserole pairs beautifully with a variety of sides. Here are some serving suggestions:

  • Green Salad: A light and refreshing salad with a lemon vinaigrette cuts through the richness of the casserole.
  • Crusty Bread: Serve with a slice of garlic bread or sourdough to soak up the delicious juices from the dish.
  • Pickled Vegetables: Something tangy, like pickled beets or cucumbers, adds a nice contrast.

For another hearty meal idea, try our Dorito Chicken Casserole, a fun twist on the classic chicken casserole with a crunchy Dorito topping.

Storage and Leftovers

One of the best parts about this cabbage, potato, and sausage casserole is how well it stores:

  • Fridge: Store leftovers in an airtight container for up to 4 days.
  • Freezer: Freeze individual portions in a freezer-safe container for up to 3 months.
  • Reheating: Reheat in the oven at 350°F (175°C) until warmed through, or use the microwave for quicker reheating.

For more meal prep ideas, check out the Ultimate Guide to Freezer Meals, which will help you stock your fridge and freezer with delicious, ready-to-eat meals.


Frequently Asked Questions (FAQs)

Can I make this casserole ahead of time?

Absolutely! You can assemble the casserole a day in advance and keep it in the refrigerator. When you’re ready to bake, take it out of the fridge and pop it in the oven. You might need to extend the baking time by about 10-15 minutes.

What type of sausage works best?

Smoked sausages, like kielbasa or bratwurst, add the most flavor, but you can use any sausage you like. If you prefer a spicier dish, opt for chorizo or andouille sausage.

How can I make this casserole healthier?

To make this casserole lighter, you can:

  • Use turkey sausage instead of pork or beef sausage.
  • Add more cabbage and reduce the amount of potatoes for a lower-carb version.
  • Replace heavy cream with a lower-fat alternative, such as half-and-half or even chicken broth.

For more tips on creating healthier versions of your favorite dishes, visit our Healthy Recipe Ideas.


Conclusion

Layered cabbage, potato, and sausage casserole is a dish that’s perfect for cozy evenings, family gatherings, or meal prepping. With its layers of hearty vegetables and savory sausage, it’s sure to become a family favorite. Whether you stick to the traditional recipe or experiment with some of the variations and customizations mentioned above, you’re bound to create a meal that everyone will love.

So, next time you’re looking for a hearty and satisfying dish, give this casserole a try. And don’t forget to check out more comforting casseroles like Dorito Chicken Casserole to keep your menu full of variety and flavor.