Cinnamon Sugared Doughnut Drops Recipe: Irresistible Sweet Treats for Any Occasion

mini doughnuts, cinnamon sugar doughnuts, fried doughnut bites, homemade doughnut drops, sugared doughnuts

Cinnamon Sugared Doughnut Drops: The Ultimate Homemade Delight

Nothing beats the smell of freshly fried doughnuts coated in cinnamon sugar. These bite-sized treats, known as cinnamon sugared doughnut drops, have taken over kitchens as a quick and satisfying dessert that everyone loves. Whether you’re preparing them for a cozy family brunch or simply craving a sweet snack, this recipe is a must-try for any dessert enthusiast.

This article will walk you through how to make these delicious doughnut drops, with plenty of tips, flavor variations, and health considerations to ensure you can enjoy them at their best. Let’s dive into the world of doughnut perfection.


What Are Cinnamon Sugared Doughnut Drops?

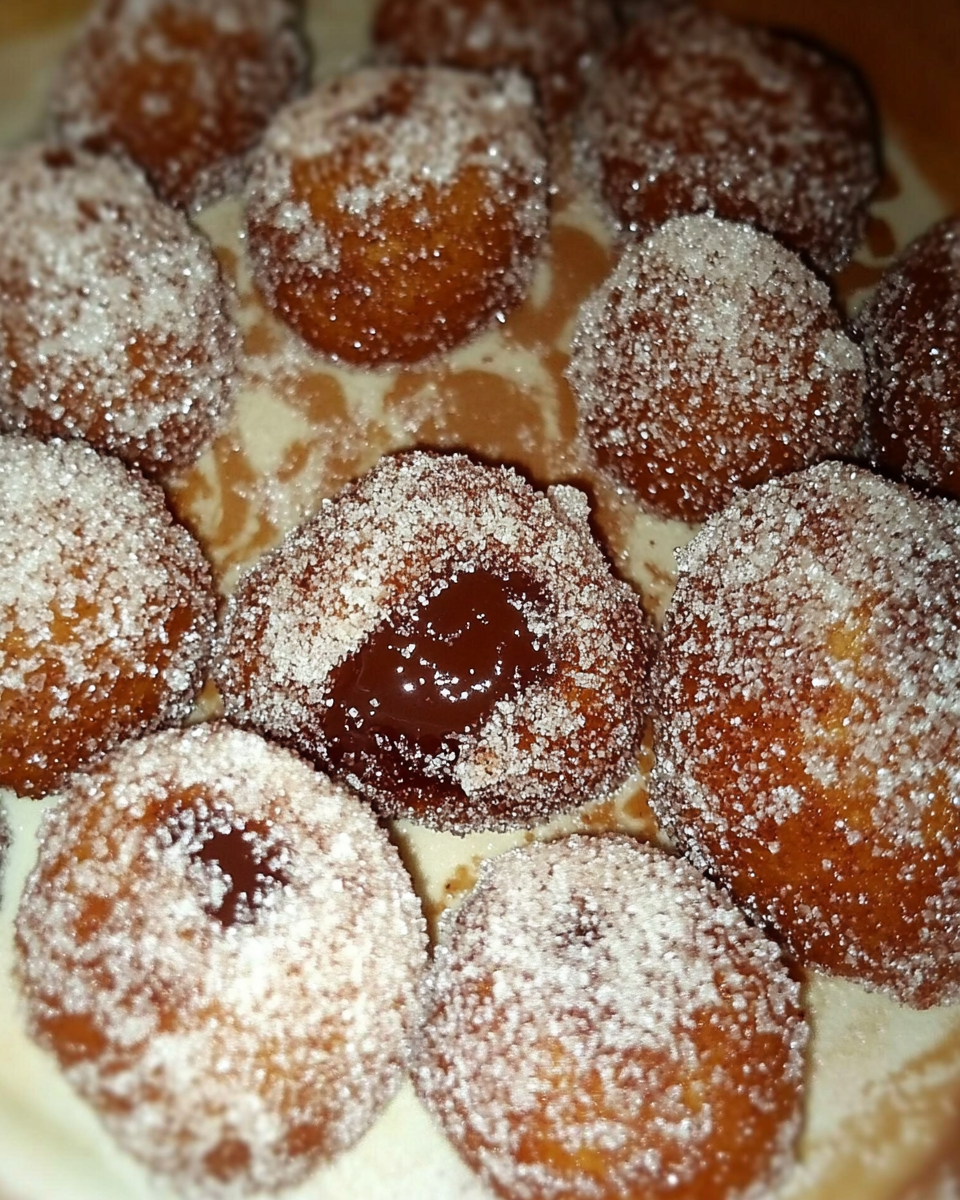
Cinnamon sugared doughnut drops are small, bite-sized doughnuts that are deep-fried until golden brown and then rolled in a mixture of cinnamon and sugar. Unlike traditional doughnuts, which are often large and filled with cream or jam, these mini delights are perfect for a quick snack or a shareable treat. They have a crunchy exterior with a soft, fluffy center, creating a balance of textures that make them irresistibly delicious.


Ingredients You’ll Need

To make these cinnamon sugared doughnut drops, you will need a few basic ingredients that you probably already have in your kitchen:

  • 1 ½ cups all-purpose flour
  • ⅓ cup sugar
  • 2 teaspoons baking powder
  • ½ teaspoon salt
  • ¼ teaspoon cinnamon
  • ¼ teaspoon nutmeg
  • ½ cup milk
  • 1 egg
  • 2 tablespoons oil (vegetable or canola oil)
  • ½ teaspoon vanilla extract
  • Oil for frying (canola or vegetable oil recommended)
  • ½ cup sugar (for rolling)
  • 1 teaspoon cinnamon (for rolling)

These ingredients create the classic cinnamon sugar flavor that pairs perfectly with the fried doughnut drops. If you’re looking to add a twist to this classic recipe, consider using pumpkin spice, powdered sugar, or even a chocolate glaze for a unique spin.


How to Make Cinnamon Sugared Doughnut Drops: A Step-by-Step Guide

Preparation Time:

  • Prep time: 10 minutes
  • Cook time: 15-20 minutes
  • Total time: 30 minutes

Instructions:

  1. Prepare the Oil
    Heat about 2-3 inches of oil in a deep saucepan to 375°F (190°C). You can use a deep-fry thermometer to monitor the temperature, ensuring the oil is hot enough to create a golden crust but not too hot to burn the doughnuts.
  2. Mix the Dry Ingredients
    In a medium bowl, whisk together the flour, sugar, baking powder, salt, cinnamon, and nutmeg. These spices bring out the warmth and sweetness of the doughnuts.
  3. Combine the Wet Ingredients
    In another bowl, mix the milk, egg, vanilla extract, and oil. Slowly pour this mixture into the dry ingredients, stirring until just combined. Be careful not to overmix, as this could make the dough tough.
  4. Fry the Doughnut Drops
    Using a teaspoon, carefully drop small portions of dough into the hot oil. Fry the doughnut drops for about 1-1 ½ minutes per side or until they turn golden brown. Use a slotted spoon to remove them from the oil and place them on a paper towel to drain excess oil.
  5. Coat in Cinnamon Sugar
    In a small bowl, mix the sugar and cinnamon for coating. While the doughnut drops are still warm, roll them in the mixture to ensure the coating sticks perfectly.
  6. Serve and Enjoy!
    These doughnut drops are best enjoyed warm. You can serve them with coffee, hot chocolate, or even a scoop of ice cream for a delightful dessert experience.

Variations to Try

While the classic cinnamon sugar coating is always a hit, you can also try these delicious variations:

  • Pumpkin Spice Doughnut Drops: Add ½ cup of canned pumpkin to the wet ingredients and replace the cinnamon and nutmeg with 1 teaspoon of pumpkin pie spice.
  • Powdered Sugar Coating: Instead of rolling in cinnamon sugar, dust the doughnut drops with powdered sugar for a lighter, sweeter flavor.
  • Chocolate Dipped Doughnut Drops: Melt some chocolate and dip half of each doughnut drop into the chocolate, letting it set before serving.

For more creative breakfast ideas, check out sheet pan pancakes for an easy way to elevate your morning meal!


Why Are These Doughnut Drops So Irresistible?

One of the key reasons cinnamon sugared doughnut drops are so popular is their texture. The combination of crispy, fried dough on the outside and a soft, pillowy inside makes each bite incredibly satisfying. Plus, the addition of cinnamon and sugar creates a flavor profile that is both warm and comforting, making it hard to stop at just one!

Moreover, because they are small and bite-sized, these doughnut drops are perfect for sharing at parties, brunches, or family gatherings. You can easily make a large batch in under 30 minutes, making them an ideal treat for any occasion.

Want more comforting recipes? You might enjoy crockpot potato soup with hashbrowns for another hearty dish that’s perfect for a chilly day.


Health Considerations and Nutritional Information

While these doughnut drops are undeniably delicious, they are deep-fried, which can add a significant amount of fat and calories. However, there are ways to make them a bit healthier if you’re watching your calorie intake:

  • Baking Instead of Frying: While frying gives the doughnuts their characteristic crunch, you can bake them in the oven at 375°F for about 10-12 minutes, flipping them halfway through.
  • Alternative Sweeteners: Swap the regular sugar in the recipe for coconut sugar or a natural sweetener like honey for a lower glycemic option.
  • Healthier Oils: Instead of using canola or vegetable oil, try frying the doughnut drops in avocado oil, which has a higher smoke point and contains healthier fats.

For more health-conscious recipes, consider checking out creamy broccoli and parmesan noodles, a delicious yet nutritious dish for those seeking balance.


Frequently Asked Questions

Q: Can I bake the doughnut drops instead of frying them?
A: Yes, you can bake them, although the texture will be slightly different. To bake, preheat the oven to 375°F and bake the doughnut drops for 10-12 minutes, flipping halfway through.

Q: What type of oil is best for frying doughnuts?
A: Canola or vegetable oil works best because they have a high smoke point and don’t impart much flavor to the doughnuts. Alternatively, peanut oil can also be used for a slightly nuttier taste.

Q: How do I store leftover doughnut drops?
A: Store any leftover doughnut drops in an airtight container at room temperature for up to two days. To reheat, place them in the oven for a few minutes to regain their crispiness.

Q: Can I make the doughnut dough ahead of time?
A: Yes, you can prepare the dough a few hours ahead of time and store it in the fridge until you’re ready to fry. However, for the best texture, it’s recommended to fry the doughnuts as soon as possible after preparing the dough.


The Science Behind Perfect Doughnut Drops

Understanding the science of cooking can help you perfect these doughnut drops every time. One of the most important aspects of frying doughnuts is maintaining the correct oil temperature. If the oil is too hot, the doughnuts will cook too quickly on the outside but remain raw in the middle. If it’s not hot enough, they will absorb too much oil and become greasy.

Additionally, the use of baking powder in the recipe helps the dough rise and creates a fluffy texture. The combination of baking powder with the high heat of frying causes the dough to expand rapidly, giving the doughnut drops their signature lightness.

For more on the science of frying, check out The Science Behind Perfect Doughnuts to understand the chemistry involved in making the perfect fried treat.


Perfect Pairings: How to Serve Cinnamon Sugared Doughnut Drops

While these doughnut drops are delicious on their own, there are plenty of ways to serve them that can elevate the experience:

  • Coffee or Hot Chocolate: The sweetness of the doughnut drops pairs perfectly with a hot cup of coffee or rich hot chocolate, especially on a cold day.
  • Ice Cream: Serve the doughnut drops warm with a scoop of vanilla ice cream for an indulgent dessert.
  • Fruit Compote: A tangy fruit compote made from berries or apples can cut through the sweetness of the doughnuts, offering a more balanced flavor profile.

For more serving inspiration, consider pairing these treats with a bowl of taco soup on a chilly day, creating the ultimate comfort food experience. You can find a great recipe for this at The Ultimate Taco Casserole.


Conclusion

Cinnamon sugared doughnut drops are the perfect sweet treat for any occasion. Easy to make and universally loved, they bring together the best aspects of fried dough and warm, sweet flavors. Whether you stick to the classic cinnamon sugar coating or experiment with flavor variations, you’ll find these doughnut drops to be an irresistible addition to your dessert repertoire.

So, why not give them a try today? You’ll love the results, and they might just become your new go-to recipe for family gatherings, brunches, or simple, everyday indulgence.

Savory Smoked Sausage and Potatoes Recipe: A Hearty One-Pan Meal

smoked sausage and potatoes skillet, sausage potato dinner, sausage and potato recipes, smoked kielbasa and potatoes

Savory Smoked Sausage and Potatoes: A Hearty, Comforting Dish

Savory smoked sausage and potatoes is a classic dish that marries the smokiness of sausage with the tender richness of potatoes. It’s a quick, easy-to-make recipe perfect for busy weeknights or leisurely weekend brunches. Whether you’re preparing it in a cast-iron skillet or baking it in the oven, this one-pan dish satisfies cravings while keeping preparation and cleanup simple.

History of Smoked Sausage and Potatoes

The pairing of smoked sausage and potatoes has deep culinary roots, spanning from European to American traditions. Sausage, a way to preserve and flavor meat, has been combined with hearty vegetables like potatoes for centuries. It’s no wonder that smoked sausage and potatoes have become staples in comfort food, especially in countries like Germany and Poland, where sausages like kielbasa reign supreme. Potatoes, native to the Andes and spread across the globe, are beloved for their versatility and ability to complement rich, smoky meats. Together, these ingredients offer a flavorful, filling, and nutrient-rich meal that can be adapted to countless variations.

You can find some great insights into pairing sausages with different dishes at Best Ways to Cook Smoked Sausage, where you’ll explore how different types of sausages contribute to the depth of flavor in this dish.

Nutritional Value of Smoked Sausage and Potatoes

Smoked sausage offers a high-protein punch but is also rich in fats and sodium, which contributes to its savory flavor. The potatoes balance the meal with their carbohydrate content, providing energy and bulk. This dish also supplies a range of nutrients, including vitamins C and B6 from the potatoes and essential minerals like iron and potassium. However, the dish can be high in sodium, so if you’re looking to make a healthier version, consider opting for low-sodium or leaner sausage alternatives.

Nutritional Breakdown:

  • Smoked sausage (depending on the type) can provide between 200-300 calories per serving.
  • Potatoes offer complex carbohydrates, which digest slower than simple carbs, keeping you fuller longer.
  • Adding vegetables like bell peppers, onions, or greens can boost the fiber and nutrient content while making the dish more balanced.

For a deeper dive into the nutritional benefits of potatoes, visit Nutritional Benefits of Potatoes.

Choosing the Right Smoked Sausage

Smoked sausage comes in many varieties, from kielbasa to andouille and chorizo. Each offers distinct flavors:

  • Kielbasa: A Polish sausage that’s mildly flavored with garlic, perfect for a traditional take on this dish.
  • Andouille: A spicier, Cajun sausage often used in gumbo and jambalaya, which adds heat to your meal.
  • Chorizo: A Spanish or Mexican sausage with bold flavors from paprika and spices, ideal for a more intense flavor profile.

Choosing the right sausage depends on the level of heat and smokiness you prefer. Andouille and chorizo are great for those who enjoy a little kick, while kielbasa provides a more traditional, family-friendly flavor.

Potato Varieties and Preparation Tips

When preparing this dish, the type of potato matters. Different varieties will affect the texture and flavor of your meal:

  • Yukon Gold: Creamy and buttery, these potatoes hold up well in skillets and roasting.
  • Red Potatoes: Firm and waxy, they maintain their shape during cooking, making them ideal for roasting or boiling.
  • Russet Potatoes: Starchy and fluffy, they’re perfect for mashed or baked dishes but can also work in this recipe if cut into smaller chunks for faster cooking.

Before adding potatoes to your skillet or oven, consider how you want them to complement the dish. If you’re looking for crispy, golden edges, roasting or pan-frying with a little oil works wonders. For a softer texture, parboiling the potatoes before finishing them in the skillet ensures tenderness.

Step-by-Step Recipe for Savory Smoked Sausage and Potatoes

This simple, one-pan dish can be made in less than 30 minutes, perfect for busy evenings. Here’s a step-by-step guide:

Ingredients:

  • 4 medium Yukon Gold potatoes, sliced thin
  • 12 oz of smoked sausage (kielbasa, chorizo, or andouille)
  • 1 large onion, sliced
  • 2 cloves of garlic, minced
  • 2 bell peppers (optional), sliced
  • 2 tbsp of olive oil
  • 1 tsp paprika
  • Salt and pepper to taste
  • Fresh parsley for garnish

Instructions:

  1. Heat the skillet: Add olive oil to a large skillet over medium heat.
  2. Brown the sausage: Slice the smoked sausage into rounds and cook for about 5 minutes until browned. Remove from skillet.
  3. Cook the potatoes: In the same skillet, add the sliced potatoes and cook for about 10 minutes until they start to soften. Stir occasionally to prevent sticking.
  4. Add vegetables: Add the sliced onion, bell peppers, and garlic. Cook for another 5-7 minutes, stirring until the vegetables are softened.
  5. Combine and season: Return the sausage to the skillet and mix everything together. Season with paprika, salt, and pepper.
  6. Serve and garnish: Sprinkle fresh parsley on top and serve hot.

For a complete meal, consider pairing this dish with a side salad or crusty bread.

Flavor Variations and Add-ins

One of the best things about this recipe is its adaptability. You can easily add other vegetables or flavor enhancers to suit your tastes. Here are a few ideas:

  • Cheese: Add shredded cheddar or Parmesan for a creamy twist.
  • Spices: For extra flavor, try adding smoked paprika, cayenne pepper, or even a bit of cumin.
  • Vegetables: Mix in mushrooms, zucchini, or spinach for added nutrients and color.
  • Sauce: A drizzle of BBQ sauce or a spoonful of Dijon mustard mixed with cream can take the flavor to the next level.

Cooking Methods: Stove vs. Oven vs. Grill

There are several ways to prepare savory smoked sausage and potatoes, each with its unique texture and flavor:

  • Stove-Top: This method provides the fastest cooking time and gives a crispy texture to both the potatoes and sausage.
  • Oven-Baked: For a more hands-off approach, transfer your sausage and potatoes to the oven. Bake at 400°F for about 20-25 minutes, stirring halfway through for even cooking.
  • Grilled: If you want an extra smoky flavor, cook the sausage on the grill and add grilled potatoes as a side.

Each method brings out different aspects of the dish. For a family-style dinner, oven-baking may be the easiest, while grilling is perfect for summer BBQs.

Serving Suggestions

This hearty dish pairs well with various sides:

  • A crisp green salad with vinaigrette helps balance the richness of the sausage and potatoes.
  • For extra indulgence, serve with garlic bread or a buttered baguette.
  • Consider pairing with mustard, hot sauce, or sour cream for dipping.

Frequently Asked Questions (FAQs)

1. Can I substitute sweet potatoes? Yes! Sweet potatoes add a slightly sweeter flavor that pairs beautifully with smoked sausage, particularly spicier varieties like andouille or chorizo.

2. What is the best sausage for this recipe? The best sausage depends on your flavor preference. Kielbasa is mild and traditional, while andouille and chorizo offer spicier alternatives.

3. Can I make this dish ahead of time? Absolutely. You can prepare the dish in advance and store it in the refrigerator for up to three days. Reheat in a skillet or oven before serving.

4. How do I make this dish healthier? To reduce the fat and sodium content, opt for turkey or chicken sausage and limit the use of salt. You can also add more vegetables to lighten up the meal.

Internal Linking Opportunities

Based on the content from ExoRecipes, here are some excellent internal links to include:

Conclusion

Smoked sausage and potatoes are a versatile, crowd-pleasing dish that’s perfect for any occasion. With the right sausage and potato pairing, plus a few additional veggies and spices, you can create a meal that’s both satisfying and quick to prepare. Whether you make it on the stovetop, bake it in the oven, or cook it on the grill, this dish is sure to become a regular in your home-cooked meal rotation.

Easy Oven Baked Rice: Foolproof, Fluffy, and Delicious Every Time

oven baked rice, baked rice recipe, easy rice recipe, fluffy baked rice, rice cooking in oven, no-fail rice recipe, baked rice with broth

Easy Oven Baked Rice: A Foolproof Recipe for Perfectly Cooked Rice Every Time

Rice is a versatile staple in countless cuisines, but cooking it perfectly on the stovetop can sometimes be tricky. Enter oven baked rice, a method that yields fluffy, evenly cooked rice every time, with minimal effort. By using the oven’s even heat distribution, you can say goodbye to undercooked or soggy rice and hello to a perfect side dish.

In this guide, we’ll walk you through the steps to make easy oven baked rice, offer some fun variations, and share expert tips for ensuring the best results every time. Whether you’re looking to meal prep or make a simple, hands-off side dish, oven baked rice will become your go-to method.

Looking for more easy side dishes? Be sure to check out our Slow Cooker Baked Ziti—a hearty, comforting meal that’s perfect for weeknights.


Ingredients for Easy Oven Baked Rice

To make the best oven baked rice, you’ll need just a few simple ingredients:

  • 1 cup white rice (long-grain or jasmine)
  • 2 cups water or broth (vegetable or chicken)
  • 1 tablespoon butter or olive oil
  • ½ teaspoon salt

Ingredient Notes:

  • Rice: For oven baked rice, long-grain varieties like jasmine or basmati work best. Avoid short-grain varieties as they can become too sticky.
  • Liquid: Using broth instead of water will add more flavor to the rice. Opt for low-sodium broth to control salt levels.
  • Butter: A small amount of butter or olive oil helps prevent the rice from sticking together and adds richness to the flavor.

If you enjoy simple yet flavorful recipes, you might also like our Crockpot Potato Soup for another comforting dish that’s easy to prepare.


Step-by-Step Guide to Making Oven Baked Rice

Step 1: Preheat the Oven

Preheat your oven to 350°F (175°C). Make sure your oven is fully heated before placing the rice inside for even cooking.

Step 2: Rinse the Rice

Rinse the rice under cold water to remove excess starch, which helps prevent it from becoming too sticky. Drain the rice thoroughly before transferring it to a baking dish.

Step 3: Combine Ingredients

In a 9×13 baking dish, combine the rice, water (or broth), butter, and salt. Stir everything together to ensure the rice is evenly coated.

Step 4: Cover and Bake

Tightly cover the baking dish with aluminum foil to trap the steam, which is essential for cooking the rice evenly. Bake for 30 to 35 minutes, or until all the liquid is absorbed and the rice is tender.

Step 5: Fluff and Serve

Once the rice is cooked, remove the foil and fluff the rice with a fork. Serve immediately, or let it cool slightly for meal prep.

For a similar comfort food idea, you might want to try our recipe for No Peek Beef Tips, which is equally simple and flavorful.


Oven Baked Rice Recipe Variations

One of the great things about oven baked rice is how easily it can be customized. Here are a few variations to suit different tastes:

Butter Baked Rice

For a richer, creamier result, add a few extra tablespoons of butter before baking. The butter will melt into the rice, adding a luxurious texture and flavor.

Garlic Herb Rice

Add garlic and herbs like thyme or rosemary for a fragrant and savory side dish. Simply sauté the garlic before combining it with the rice, and sprinkle the herbs in before baking.

Spanish-Style Baked Rice

For a Spanish twist, mix in tomato sauce, bell peppers, onion, and cumin. This variation pairs beautifully with grilled meats or tacos for a flavorful meal.

Oven Baked Brown Rice

To make brown rice, follow the same method, but increase the baking time to 50-60 minutes and add ½ cup more water. Brown rice takes longer to cook but offers a chewier texture and more fiber.


Tips for Perfect Oven Baked Rice

  • Accurate Liquid-to-Rice Ratio: A common mistake is using too much or too little liquid. Stick to a 2:1 ratio of liquid to rice for perfectly cooked grains.
  • Tight Seal: Covering the dish tightly with foil is key to trapping the steam, which is necessary for even cooking.
  • Fluff, Don’t Stir: Use a fork to fluff the rice after baking rather than stirring it. This prevents the grains from becoming mushy.

For more tips on cooking perfect rice, see our guide to Crockpot Chicken and Gravy here.


Serving Suggestions for Oven Baked Rice

Oven baked rice is a versatile side dish that can accompany a variety of meals. Here are some serving ideas:

  • With Grilled Meats: Serve alongside grilled chicken, steak, or pork chops for a simple but satisfying dinner.
  • As a Base for Rice Bowls: Top the rice with grilled vegetables, avocado, black beans, and a drizzle of yogurt or salsa for a healthy rice bowl.
  • Paired with Curries: Baked rice works wonderfully with creamy curries like chicken tikka masala or vegetable curry.

Looking for more sides to complement your meal? Try our Kentucky Butter Cake for a sweet treat to round out your meal.


FAQs About Oven Baked Rice

1. Can I use broth instead of water for baked rice?

Absolutely! Using vegetable, chicken, or beef broth instead of water adds depth of flavor to the rice. Make sure to adjust the salt content accordingly, as some broths can be salty.

2. How long does oven baked rice last in the fridge?

Baked rice can be stored in an airtight container in the refrigerator for 3-5 days. It’s perfect for meal prep and reheats well in the microwave.

3. Can I freeze oven baked rice?

Yes, you can freeze oven baked rice in individual portions. To reheat, thaw the rice in the fridge overnight and microwave it with a splash of water to bring back its moisture.

4. What is the ideal rice-to-water ratio for baked rice?

The general rule is 1 cup of rice to 1 ½ to 2 cups of water or broth. The exact amount may vary slightly depending on the type of rice you use.

5. Can I bake rice without using foil?

Using foil or a tightly fitting lid is essential to trap steam. Without it, the rice may not cook evenly, resulting in undercooked or crunchy grains.


Conclusion: Why You Should Try Oven Baked Rice

Oven baked rice is a foolproof, hands-off method for cooking rice that guarantees perfectly fluffy grains every time. Whether you’re making a simple side dish or preparing for a week of meal prep, baking your rice is easy, reliable, and incredibly versatile.

With endless flavor possibilities and minimal active cooking time, this method is ideal for busy families or anyone looking to simplify their kitchen routine. Try adding your favorite spices or using broth to elevate the dish, and don’t forget to pair it with other comforting meals like our Slow Cooker Baked Ziti.

The Best Tuna Salad Recipe: Easy, Healthy, and Delicious

classic tuna salad, easy tuna salad, healthy tuna salad, tuna salad sandwich, tuna salad with mayo, tuna salad without mayo, avocado tuna salad

Tuna Salad Recipe: A Classic Dish with Modern Twists

Tuna salad is a timeless dish that has been a staple in kitchens for decades. Whether you’re looking for a quick, nutritious lunch or a delicious dinner option, tuna salad provides the perfect balance of flavor, protein, and versatility. Not only is it simple to make, but it also lends itself to endless variations depending on your preferences. In this guide, we’ll explore the classic tuna salad recipe, introduce some fun variations, and offer expert tips to ensure your tuna salad is always delicious.

In addition to the basic recipe, we’ll also look at how you can pair tuna salad with different sides and accompaniments, making it a truly adaptable meal. For another simple and comforting dish, you might want to try the Crockpot Potato Soup with Hashbrowns, a recipe perfect for cold days.

Ingredients for Classic Tuna Salad

To make a delicious tuna salad, you will need the following ingredients:

  • 1 can tuna, drained (preferably packed in water)
  • ¼ cup mayonnaise (or Greek yogurt for a lighter option)
  • 1 tablespoon dijon mustard
  • 1 stalk celery, finely chopped
  • ¼ cup red onion, finely chopped
  • 1 tablespoon lemon juice
  • Salt and pepper to taste
  • Optional: capers, dill pickles, chopped parsley for extra flavor

Ingredient Tips

  • Tuna: Opt for chunk light tuna packed in water for a lighter salad. Tuna in oil can be used for a richer taste but may require less mayonnaise.
  • Mayonnaise Substitutes: For a healthier twist, use Greek yogurt or a combination of yogurt and mayo. Avocado is another creamy alternative that adds healthy fats.
  • Seasonings: Freshly squeezed lemon juice brightens the salad and balances the richness of the mayo, while salt and pepper enhance the overall flavor.

For another quick and easy comfort dish, check out this Slow Cooker Baked Ziti, a perfect hearty meal for any time of the week.


How to Make the Best Tuna Salad

Follow these simple steps to create a perfect tuna salad:

Step 1: Prepare the Tuna

Drain the canned tuna thoroughly to prevent the salad from becoming too watery. Flake the tuna into small pieces with a fork in a mixing bowl.

Step 2: Add Creamy Ingredients

Stir in the mayonnaise (or Greek yogurt), dijon mustard, and lemon juice. These ingredients will bind the salad together and give it a creamy texture. If you prefer a lighter salad, use more yogurt than mayo or even go mayo-free by substituting with avocado.

Step 3: Add Crunchy Vegetables

Mix in the finely chopped celery and red onion. These ingredients provide a satisfying crunch and freshness that balances the creamy texture of the salad.

Step 4: Season and Serve

Season with salt, pepper, and any additional herbs or seasonings. Stir everything together until well combined. Let the salad chill in the fridge for at least 30 minutes to allow the flavors to meld together. Serve as a sandwich, on crackers, or over a bed of greens for a light meal.

Pro Tip: To add an extra layer of flavor, mix in some capers or dill pickles for a briny, tangy kick. You can also garnish with fresh parsley or basil for a pop of color.


Popular Variations of Tuna Salad

One of the great things about tuna salad is its versatility. You can easily adjust the ingredients to suit your tastes or dietary preferences. Here are a few popular variations:

Mediterranean Tuna Salad

This variation is perfect if you’re a fan of Mediterranean flavors. Add chopped cucumbers, cherry tomatoes, olives, and crumbled feta cheese to the tuna salad base. Drizzle with a bit of olive oil and a sprinkle of oregano for a fresh, tangy flavor profile.

Avocado Tuna Salad

Replace the mayonnaise with mashed avocado for a creamy and nutritious alternative. The avocado adds healthy fats and a smooth texture, making the salad even more filling. For extra flavor, add a squeeze of lime juice and some cilantro.

Spicy Tuna Salad

For a spicy twist, mix in a teaspoon of sriracha or your favorite hot sauce. Add jalapeños for an extra kick, and consider topping your tuna salad sandwich with pepper jack cheese.

Tuna Salad Sandwich

The classic tuna salad sandwich never goes out of style. Simply spread the salad on whole-grain bread, top with lettuce, tomatoes, and sliced pickles. For a healthier option, swap the bread for a whole-wheat wrap or serve the tuna salad in a lettuce wrap.

If you’re a fan of easy meals, you might also like our No Peek Beef Tips Recipe, a dish that practically cooks itself while you tend to other tasks.


Tips for Perfecting Your Tuna Salad

  • Drain the Tuna Well: Always drain the tuna thoroughly to avoid a watery salad. If you’re using tuna packed in oil, press it between paper towels to absorb excess oil.
  • Balance the Creaminess: Adjust the ratio of mayonnaise (or substitutes) to your liking. If you prefer a lighter salad, start with a smaller amount and add more as needed.
  • Fresh Ingredients: Always use fresh ingredients, especially when it comes to vegetables like celery and onions. This adds a crisp texture that complements the creamy tuna mixture.
  • Season Well: Don’t skimp on the seasoning. A good pinch of salt and freshly cracked pepper can elevate the flavor significantly.

Serving Suggestions for Tuna Salad

Tuna salad is incredibly versatile and can be served in several different ways, depending on your preference. Here are some serving ideas:

  • Classic Tuna Salad Sandwich: Serve your tuna salad on toasted bread with lettuce, tomatoes, and pickles for a satisfying sandwich.
  • Tuna Salad Wraps: For a lighter option, serve the tuna salad in whole-wheat wraps or lettuce cups.
  • Over Greens: Serve the tuna salad over a bed of mixed greens, spinach, or arugula for a nutritious, low-carb meal.
  • With Crackers: Tuna salad also works great as a dip for crackers or as a topping for cucumber slices.

For those looking for hearty, one-pot meals, check out this recipe for Slow Cooker Baked Ziti—an easy, comforting meal that’s great for weeknights.


FAQs About Tuna Salad

1. What is the best type of tuna to use for tuna salad?

The most popular choice for tuna salad is chunk light tuna packed in water. This type is lighter in calories and has a milder taste. Solid white albacore is also a great option for those who prefer a firmer texture.

2. How long does tuna salad last in the fridge?

Tuna salad can be stored in an airtight container in the refrigerator for 3 to 4 days. Be sure to give it a stir before serving to redistribute the moisture.

3. Can I make tuna salad without mayonnaise?

Yes! You can substitute Greek yogurt, mashed avocado, or even a light vinaigrette for mayonnaise. These options provide different flavors and textures while reducing fat and calories.

4. Is tuna salad safe to freeze?

While tuna salad can technically be frozen, it’s not recommended. The texture of the tuna and mayonnaise may change once thawed, making the salad watery and less appetizing.


Conclusion: Why You Should Make Your Own Tuna Salad

Homemade tuna salad is an easy, healthy, and versatile dish that you can customize to suit your preferences. Whether you stick to the classic recipe or experiment with different variations, you’ll have a nutritious meal in minutes. With endless ways to serve it—on sandwiches, wraps, or salads—tuna salad is a go-to option for busy lunches or simple dinners.

For even more easy and delicious meal ideas, take a look at the Kentucky Butter Cake, a dessert that’s as indulgent as it is simple to make. Happy cooking!

Quick Broccoli Pasta: A Simple and Delicious Weeknight Dinner

easy broccoli pasta, fast broccoli pasta recipe, broccoli garlic pasta, vegetarian broccoli pasta, broccoli pasta dish, simple broccoli pasta

Quick Broccoli Pasta: A Simple, Delicious, and Nutritious Meal

Quick Broccoli Pasta is the perfect solution for busy weeknights when you want a meal that is both quick and healthy. This dish combines tender broccoli florets with perfectly cooked pasta and a light garlic and olive oil sauce, creating a delightful and nutritious meal that everyone in the family will enjoy. In this article, we’ll walk you through how to make this dish, explore some variations, and provide tips for storing and reheating.

Broccoli is not only packed with vitamins and fiber but also adds a satisfying crunch and flavor to pasta dishes. Combining broccoli with pasta creates a balanced, flavorful dish that can be customized with different ingredients to suit your preferences. For those looking for a delicious, easy-to-make dinner, this Quick Broccoli Pasta recipe is your go-to choice.

Ingredients for Quick Broccoli Pasta

To make the most delicious Quick Broccoli Pasta, you’ll need the following ingredients:

  • 8 oz pasta (penne, fusilli, or spaghetti)
  • 2 cups broccoli florets, chopped
  • 2 cloves garlic, minced
  • 3 tablespoons olive oil
  • ¼ cup Parmesan cheese (grated)
  • ½ teaspoon red pepper flakes (optional)
  • Salt and pepper to taste
  • Optional: lemon zest for a fresh citrusy kick

For a more substantial dish, you can add some grilled chicken or tofu to your broccoli pasta. Alternatively, try adding pine nuts for some crunch or basil for a burst of fresh herb flavor.

Here’s a quick guide on different broccoli pasta variations that can inspire you to experiment with this dish.


Step-by-Step Guide to Making Quick Broccoli Pasta

Step 1: Cooking the Pasta and Blanching the Broccoli

  • Begin by boiling a large pot of salted water. Add your pasta and cook according to package instructions until it is al dente. With about 3-4 minutes left on the pasta timer, toss in the broccoli florets to blanch them. This ensures that the broccoli is tender but still vibrant in color.

Step 2: Preparing the Garlic and Olive Oil Sauce

  • While the pasta and broccoli are cooking, heat olive oil in a skillet over medium heat. Add minced garlic and sauté until fragrant, being careful not to burn it. You can add a pinch of red pepper flakes at this point for some heat, if desired.

Step 3: Combining Pasta, Broccoli, and Sauce

  • Drain the pasta and broccoli, reserving ½ cup of the pasta water. Add the drained pasta and broccoli to the skillet with the garlic and olive oil. Toss to coat everything evenly, adding a bit of the reserved pasta water if the mixture looks dry. Sprinkle with Parmesan cheese and toss again.

Step 4: Final Touches and Serving

  • Adjust seasoning with salt, pepper, and a dash of lemon zest for extra brightness. Serve immediately, with additional Parmesan and olive oil drizzled on top if desired. You can also sprinkle toasted pine nuts for added crunch or garnish with fresh basil.

This recipe can be prepared in just under 20 minutes, making it perfect for busy nights. For more detailed tips on how to speed up the cooking process, visit this cooking guide.


Recipe Variations for Quick Broccoli Pasta

Quick Broccoli Pasta is a flexible recipe that can be customized to suit your taste or dietary needs. Here are some popular variations:

  • Vegan Broccoli Pasta: Omit the Parmesan and substitute with nutritional yeast or a vegan cheese alternative to keep this dish completely plant-based.
  • Creamy Broccoli Pasta: Add a splash of heavy cream or a spoonful of ricotta cheese to create a creamy sauce.
  • Spicy Broccoli Pasta: Increase the heat by adding more red pepper flakes or even some chili oil for a spicy kick.
  • Broccoli and Shrimp Pasta: Sauté shrimp in the same garlic and olive oil mixture, adding an extra layer of protein and flavor.

For another variation with a creamy texture, you can also check out this Creamy Garlic Parmesan Chicken for inspiration on adding creamy elements to your dish.


Tips for Perfecting Your Quick Broccoli Pasta

  • Broccoli Texture: To achieve the perfect texture for your broccoli, make sure you don’t overcook it. Blanching for just a few minutes will give the broccoli a tender bite while retaining its bright green color.
  • Using Pasta Water: Reserve some of the starchy pasta water to create a smoother sauce. This helps bind the ingredients together and prevents the dish from drying out.
  • Cheese Options: While Parmesan is the classic choice, you can experiment with Pecorino Romano or Asiago for a different flavor profile.

Serving Suggestions for Quick Broccoli Pasta

Quick Broccoli Pasta pairs well with various side dishes and accompaniments, such as:

  • Garlic Bread: A side of warm, crusty garlic bread is always a great complement to pasta dishes.
  • Fresh Green Salad: Serve alongside a simple green salad with a lemon vinaigrette to lighten up the meal.
  • Roasted Vegetables: Add some roasted cherry tomatoes or asparagus to bring more veggies into the dish.

For additional ideas on what to serve with your pasta, you might enjoy this Crockpot Baked Ziti recipe, which offers hearty, comfort food inspiration.


Storing and Reheating Quick Broccoli Pasta

Leftover Quick Broccoli Pasta can be stored in an airtight container in the fridge for up to 3 days. When reheating, add a splash of water or olive oil to bring back the sauce’s moisture. Reheat over low heat on the stovetop or in the microwave in 30-second intervals, stirring between each interval to avoid overheating.

While it’s best eaten fresh, you can freeze this dish for up to 1 month. To freeze, place the cooled pasta in a freezer-safe container and thaw in the fridge overnight before reheating.


FAQs About Quick Broccoli Pasta

1. Can I make this recipe gluten-free?

Yes! Simply use gluten-free pasta to accommodate gluten intolerance. Most gluten-free pasta brands work well in this recipe without altering the taste or texture.

2. Can I use frozen broccoli instead of fresh?

Absolutely! If using frozen broccoli, thaw it before adding it to the pasta. Cook it for 1-2 minutes less than fresh broccoli to prevent overcooking.

3. What type of pasta works best for this recipe?

Short pasta varieties like penne, fusilli, or farfalle are excellent choices, as they hold the sauce well. However, long pasta like spaghetti or linguine can also work, depending on your preference.

4. Can I add meat to this dish?

Yes, this recipe pairs well with grilled chicken, shrimp, or Italian sausage for a protein boost.


Conclusion: Why You Should Try Quick Broccoli Pasta

Quick Broccoli Pasta is a delicious, versatile dish that you can whip up in no time. With just a few simple ingredients, you can create a satisfying meal that is both nutritious and comforting. Whether you’re a pasta lover or looking for a quick, healthy dinner idea, this recipe has something for everyone.

The best part about this dish is how customizable it is. You can easily adjust it to fit your dietary needs or spice it up with different flavor combinations. Try it today and enjoy a meal that’s as easy to make as it is to enjoy!

For more pasta inspiration and weeknight meals, explore our guide to Crockpot Baked Ziti and discover even more ways to bring comfort food to your table.