Southern Banana Pudding Recipe: A Classic Dessert with a Homemade Twist

traditional banana pudding, homemade banana pudding, Southern dessert recipe, banana pudding from scratch, best banana pudding

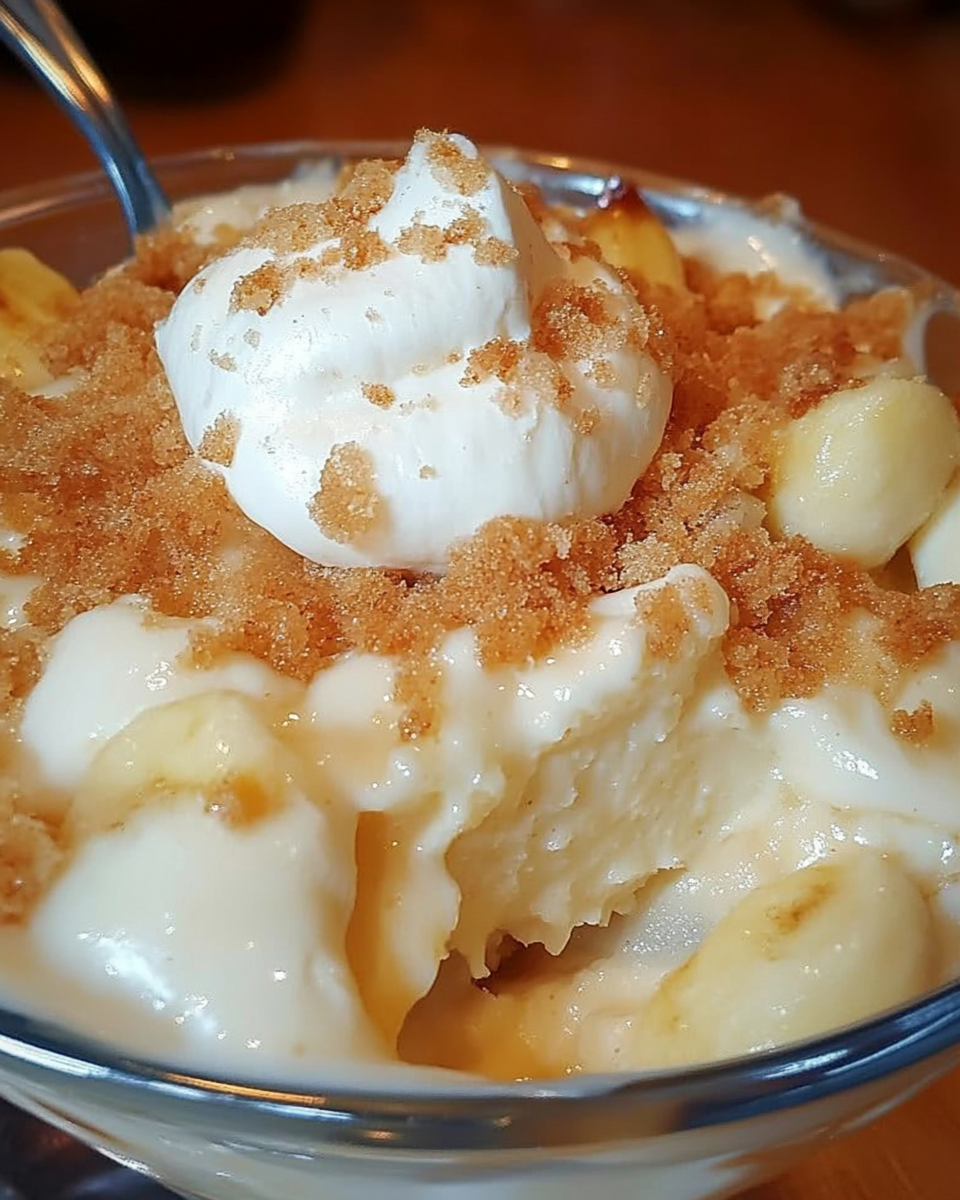
Southern Banana Pudding: A Classic Southern Delight

Southern banana pudding is a beloved dessert that brings back memories of family gatherings, Sunday suppers, and church potlucks. With its layers of creamy custard, fresh bananas, crunchy vanilla wafers, and fluffy meringue or whipped cream, it’s a dessert that’s both comforting and nostalgic. Here, we’ll walk you through how to make the perfect Southern banana pudding, along with variations and tips to ensure your pudding turns out perfectly every time.


Ingredients for Southern Banana Pudding

To get started, gather the following ingredients:

  • Ripe bananas: 4-6 bananas, depending on size
  • Vanilla wafers: 1 box (about 11 ounces)
  • Egg yolks: 4 large yolks (for the custard)
  • Sugar: 1 cup
  • Milk: 2 cups (whole milk or 2% preferred)
  • All-purpose flour: 3 tablespoons (to thicken the custard)
  • Vanilla extract: 1 teaspoon
  • Butter: 2 tablespoons (adds richness to the custard)
  • Egg whites: 4 (for meringue, if desired)

For a savory pairing, try serving your banana pudding after a comforting main dish like Slow Cooker Magic: Unveiling the Ease of Crock-Pot Baked Ziti. The creamy and hearty ziti balances the sweetness of banana pudding.


Step-by-Step Recipe for Southern Banana Pudding

Preparation Time:

  • Prep Time: 20 minutes
  • Cook Time: 10 minutes
  • Chill Time: 2-3 hours (optional for cold pudding)

Instructions:

  1. Prepare the Custard
    In a saucepan, combine sugar and flour. Gradually stir in milk, then cook over medium heat, stirring constantly until the mixture thickens. In a separate bowl, lightly beat the egg yolks. Slowly whisk in about a quarter of the hot milk mixture to temper the eggs, then pour the egg mixture back into the pan. Cook for another 2-3 minutes, then remove from heat and stir in butter and vanilla.
  2. Layer the Pudding
    In a serving dish or a trifle bowl, arrange a layer of vanilla wafers, followed by a layer of sliced bananas. Pour a layer of custard over the bananas and wafers. Repeat the layering process until all ingredients are used, finishing with a custard layer.
  3. Make the Meringue (Optional)
    If you prefer a traditional meringue topping, beat the egg whites until soft peaks form, then gradually add sugar and beat until stiff peaks form. Spread the meringue over the top layer of custard.
  4. Bake or Chill
    If you’re using meringue, bake the pudding at 350°F (175°C) for 10-15 minutes, or until the meringue is golden brown. If not using meringue, you can chill the pudding for 2-3 hours to serve it cold.

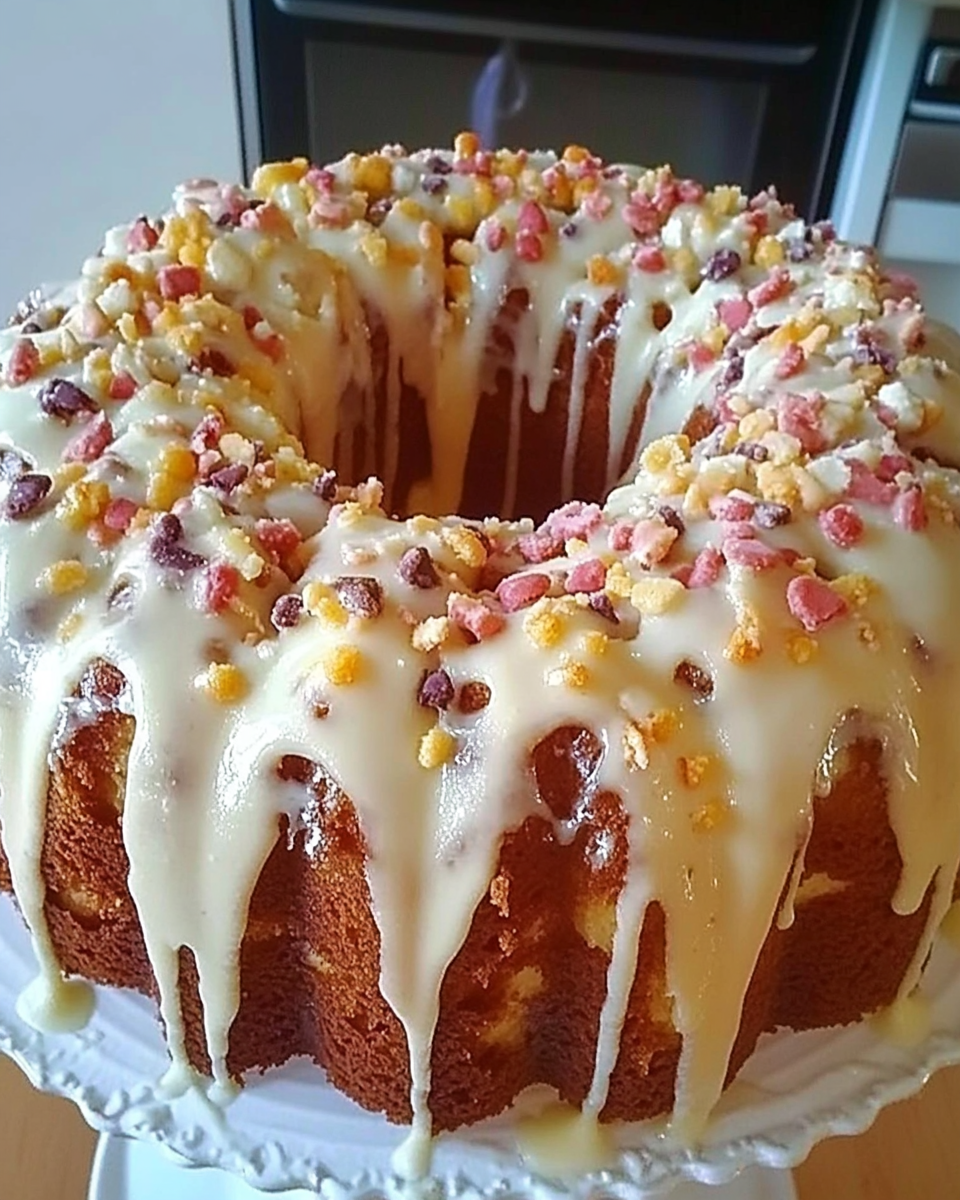
For another dessert option that’s just as satisfying, check out Kentucky Butter Cake: A Slice of Southern Comfort, a rich and moist cake that pairs well with Southern meals.


Tips for Perfect Southern Banana Pudding

  • Choosing the Right Bananas: Use bananas that are ripe but not overripe. Overripe bananas can become too mushy in the pudding.
  • Preventing Browning: To keep the bananas from browning, lightly toss the banana slices in lemon juice before adding them to the pudding.
  • Thickening the Custard: Make sure to cook the custard long enough for it to thicken properly. A runny custard can make the pudding too soupy.

Variations of Southern Banana Pudding

  • No-Bake Banana Pudding: Use instant vanilla pudding mix and whipped topping for a quicker version.
  • Banana Pudding Pie: Add the ingredients to a graham cracker crust or vanilla wafer crust to turn your pudding into a pie.
  • Caramel Banana Pudding: Drizzle caramel sauce between the layers for a richer, more decadent flavor.
  • Layered Banana Pudding Parfaits: Make individual servings in mason jars or glasses for a beautiful presentation.

Nutritional Information and Healthier Alternatives

Per serving (based on 10 servings):

  • Calories: 280
  • Fat: 12g
  • Carbohydrates: 40g
  • Protein: 4g

For a lighter option, substitute whole milk with 2% or skim milk, and reduce the sugar content. You can also use sugar-free pudding mix and low-fat whipped topping.


Storage and Freezing Tips

  • Storing Leftovers: Keep banana pudding in the refrigerator for up to 3 days. Ensure it’s covered tightly to prevent the bananas from browning.
  • Freezing Banana Pudding: While banana pudding can be frozen, the texture of the bananas may change upon thawing. If you do freeze it, thaw it in the refrigerator and add a fresh layer of bananas before serving.
  • Reheating Meringue-Topped Pudding: If you’ve topped the pudding with meringue, it’s best to serve it immediately. If reheating, warm it in the oven for a few minutes to refresh the meringue.

For more storage-friendly dishes, try The Ultimate Comfort Food: Crockpot Potato Soup with Hashbrowns, a dish that pairs well with banana pudding and is easy to store and reheat.


FAQs About Southern Banana Pudding

Q: Can banana pudding be served warm or cold?
A: Southern banana pudding is typically served chilled, but some versions with meringue topping are enjoyed warm straight from the oven.

Q: What can I use instead of vanilla wafers?
A: If you don’t have vanilla wafers, graham crackers, shortbread cookies, or even ladyfingers are great alternatives.

Q: How do I keep banana pudding from getting watery?
A: Ensure the custard is thick enough before layering it with the bananas and wafers. Also, letting the pudding chill properly helps maintain its consistency.

Q: Can I make banana pudding ahead of time?
A: Yes! Banana pudding can be made the night before and stored in the fridge, allowing the flavors to meld and the wafers to soften.


Internal Linking Opportunities

For readers interested in more comforting dessert recipes, check out:

Homemade King Hawaiian Rolls or Loaf: Sweet and Fluffy Perfection

sweet Hawaiian rolls, homemade Hawaiian bread, King’s Hawaiian bread recipe, pineapple rolls recipe, Hawaiian bread loaf

Homemade King Hawaiian Rolls or Loaf: A Sweet and Savory Delight

King Hawaiian rolls are a favorite for their soft, fluffy texture and slightly sweet flavor. Making these rolls at home is both rewarding and delicious. Whether you are baking them as individual rolls or shaping them into a loaf, the homemade version is even better than the store-bought kind. Let’s dive into a detailed recipe, tips, and variations for the perfect homemade King Hawaiian rolls or loaf.


Ingredients for Homemade King Hawaiian Rolls

Here’s what you need to make soft, sweet, and buttery Hawaiian rolls or loaf:

  • All-purpose flour: 4 cups (for structure)
  • Pineapple juice: ¾ cup (adds a subtle sweetness)
  • Brown sugar: ¼ cup (gives depth to the sweetness)
  • Butter: ½ cup, softened (for richness and flavor)
  • Eggs: 2 large (adds moisture and structure)
  • Active dry yeast: 2 ¼ teaspoons (to make the dough rise)
  • Salt: 1 teaspoon (balances the sweetness)
  • Milk: ½ cup (adds moisture)

For a hearty dinner pairing, check out The Ultimate Comfort Food: Crockpot Potato Soup with Hashbrowns to serve alongside your rolls.


Step-by-Step Instructions for King Hawaiian Rolls

Preparation Time:

  • Prep Time: 20 minutes
  • Rise Time: 1-2 hours
  • Bake Time: 20-25 minutes

Step-by-Step Guide:

  1. Activate the Yeast
    In a bowl, combine warm milk (about 110°F), a tablespoon of sugar, and the yeast. Let it sit for about 5-10 minutes until it becomes frothy.
  2. Mix the Dough
    In a large mixing bowl, combine the flour, brown sugar, and salt. Add the pineapple juice, softened butter, eggs, and the yeast mixture. Mix until the dough comes together.
  3. Knead the Dough
    Transfer the dough to a floured surface and knead for about 8-10 minutes until smooth and elastic.
  4. First Rise
    Place the dough in a greased bowl, cover with a damp cloth, and let it rise in a warm place for about 1-2 hours, or until it doubles in size.
  5. Shape the Rolls or Loaf
    Punch down the dough and divide it into equal-sized rolls or shape it into a loaf. Place them into a greased baking dish or loaf pan.
  6. Second Rise
    Cover the shaped dough and let it rise for another 30-45 minutes.
  7. Bake the Rolls
    Preheat your oven to 350°F (175°C). Brush the tops with melted butter and bake for 20-25 minutes, or until golden brown.

For an additional savory side, try pairing your Hawaiian rolls with Slow Cooker Magic: Unveiling the Ease of Crock-Pot Baked Ziti.


Variations of King Hawaiian Rolls

  • Honey Hawaiian Rolls: Substitute part of the sugar with honey for a deeper sweetness.
  • Whole Wheat Hawaiian Rolls: Use half whole wheat flour for a healthier version.
  • Mini Hawaiian Sliders: Shape the dough into smaller rolls for sliders—perfect for parties.
  • Gluten-Free Hawaiian Rolls: Use gluten-free flour for a gluten-free option.

For a fun dessert twist, try Kentucky Butter Cake: A Slice of Southern Comfort to serve after your meal.


Tips for Success

  • Use Room Temperature Ingredients: Ensures even mixing and smooth dough.
  • Knead the Dough Properly: Proper kneading is crucial for soft, fluffy rolls. You can use the “windowpane test” to check if the dough is ready.
  • Don’t Overproof: Overproofing will make the rolls deflate. Watch the dough closely during the rising stages.

Nutritional Information and Healthier Alternatives

Per serving (based on 12 rolls):

  • Calories: 200
  • Fat: 6g
  • Carbohydrates: 35g
  • Protein: 5g

To make a lighter version, reduce the butter and use a sugar substitute to lower calories without sacrificing flavor.


Storage and Freezing Tips

  • Storing Fresh Rolls: Store at room temperature for up to 3 days in an airtight container.
  • Freezing Rolls: You can freeze baked rolls for up to 3 months. Thaw at room temperature and warm them in the oven before serving.
  • Reheating Rolls: Reheat in the oven at 300°F (150°C) for 5-10 minutes to bring back the softness.

Frequently Asked Questions (FAQs)

Q: What makes King Hawaiian Rolls sweet?
A: The sweetness comes from pineapple juice and brown sugar, which give the rolls their signature flavor.

Q: Can I make Hawaiian rolls without pineapple juice?
A: Yes, you can substitute with orange juice or milk for a different flavor profile.

Q: Why is my dough not rising?
A: If your dough isn’t rising, check the yeast to ensure it’s fresh, and ensure your rising environment is warm enough.

Q: How do I make these rolls gluten-free?
A: Use a 1:1 gluten-free flour blend, making sure it’s designed for yeast breads to ensure the best texture.

Q: Can I make the rolls ahead of time?
A: Yes! You can refrigerate the dough after the first rise and bake it the next day.


Internal Linking Opportunities

To help readers explore more great recipes, consider adding internal links like:

Italian Creme Bundt Cake Recipe: A Decadent and Easy Dessert

Italian cream cake, coconut Bundt cake, cream cheese Bundt cake, Italian Bundt cake recipe, Italian dessert

Italian Creme Bundt Cake Recipe: A Rich and Decadent Dessert for Any Occasion

An Italian Creme Bundt Cake offers a rich and decadent treat, perfect for celebrations or special occasions. With its velvety texture, the blend of coconut and pecans, and a luxurious cream cheese frosting, this cake is a twist on the classic Italian cream cake, adapted into a simple Bundt form. Below, you will find an easy-to-follow recipe, tips for achieving the perfect cake, and a few variations to experiment with.


Ingredients for Italian Creme Bundt Cake

To create the best Italian Creme Bundt Cake, you’ll need the following ingredients:

  • Butter: 1 cup, softened, to add richness to the batter.
  • Sugar: 2 cups of granulated sugar for sweetness.
  • Cream Cheese: 8 oz, softened, for that smooth and tangy flavor.
  • Eggs: 5 large eggs, at room temperature.
  • All-Purpose Flour: 3 cups, providing the structure of the cake.
  • Buttermilk: 1 cup, adding moisture and a slight tang.
  • Vanilla Extract: 2 teaspoons for classic flavor.
  • Coconut: 1 cup of sweetened shredded coconut for texture and flavor.
  • Pecans: 1 cup of chopped pecans, adding crunch.

For a comforting meal to serve before dessert, consider pairing this cake with The Ultimate Comfort Food: Crockpot Potato Soup with Hashbrowns, a savory side that balances the sweetness of the cake.


Step-by-Step Recipe for Italian Creme Bundt Cake

Preparation Time:

  • Prep Time: 25 minutes
  • Cook Time: 1 hour
  • Total Time: 1 hour and 25 minutes

Step-by-Step Guide:

  1. Preheat the Oven
    Preheat your oven to 325°F (160°C) and generously grease and flour a Bundt pan to prevent sticking.
  2. Cream the Butter and Sugar
    In a large mixing bowl, cream the butter, sugar, and cream cheese until light and fluffy. This step ensures a tender and moist cake.
  3. Add the Eggs
    Beat in the eggs one at a time, making sure each egg is fully incorporated before adding the next. This helps create a smooth batter.
  4. Mix the Dry Ingredients
    In a separate bowl, whisk together the flour and baking soda. Gradually add the dry ingredients to the creamed mixture, alternating with the buttermilk.
  5. Fold in the Coconut and Pecans
    Gently fold in the shredded coconut and chopped pecans to avoid overmixing, which can result in a dense cake.
  6. Bake the Cake
    Pour the batter into the prepared Bundt pan and bake for 60-70 minutes, or until a toothpick inserted into the center comes out clean.
  7. Cool the Cake
    Allow the cake to cool in the pan for 15 minutes, then invert onto a wire rack to cool completely.

To add another comforting side to the table, you can try Slow Cooker Magic: Unveiling the Ease of Crock-Pot Baked Ziti, a hearty and savory meal that contrasts beautifully with the sweetness of the cake.


Tips for Success

  • Room Temperature Ingredients: Ensure the butter, eggs, and cream cheese are at room temperature to create a smooth batter that bakes evenly.
  • Greasing the Bundt Pan: Use butter or non-stick spray to coat the pan thoroughly. This prevents the cake from sticking when you remove it.
  • Don’t Overmix: When adding the coconut and pecans, gently fold them in to avoid overmixing, which can make the cake dense.

Cream Cheese Frosting for Italian Creme Bundt Cake

The creamy and tangy frosting is the perfect complement to the richness of the cake.

  • Cream Cheese: 8 oz, softened.
  • Butter: ½ cup, softened.
  • Powdered Sugar: 3-4 cups, depending on your preferred sweetness.
  • Vanilla Extract: 1 teaspoon.
  • Heavy Cream: 1-2 tablespoons for thinning, if necessary.
  1. Mix the Frosting
    Beat the cream cheese and butter until smooth. Gradually add the powdered sugar, one cup at a time, and beat until fully combined.
  2. Add Vanilla and Cream
    Stir in the vanilla extract and add heavy cream to achieve your desired consistency.
  3. Frost the Cake
    Once the cake has completely cooled, spread the frosting over the top and sides of the cake. Alternatively, you can drizzle the frosting over the cake for a more rustic look.

Variations of Italian Creme Bundt Cake

  • Lemon Italian Creme Bundt Cake: Add the zest of one lemon and 2 tablespoons of lemon juice to the batter for a fresh citrus twist.
  • Chocolate Italian Creme Bundt Cake: Mix in ½ cup of cocoa powder and ½ cup of chocolate chips to turn this into a decadent chocolate version.
  • Nut-Free Option: Simply omit the pecans for those with nut allergies, and consider adding more coconut for extra texture.

For more inspiration, check out Kentucky Butter Cake: A Slice of Southern Comfort, another rich and buttery cake recipe that offers a different flavor profile.


Serving Suggestions

  • With Coffee or Tea: Italian Creme Bundt Cake pairs wonderfully with a hot cup of coffee or tea, making it a great choice for brunch or dessert.
  • Special Occasions: This cake is perfect for holidays, birthdays, or any gathering where you want to impress guests with a rich, elegant dessert.
  • With Fresh Fruit: Serve slices of the cake with fresh strawberries or a berry compote to add a refreshing contrast to the rich flavors.

FAQs About Italian Creme Bundt Cake

Q: What makes Italian Creme Bundt Cake different from regular Bundt cakes?
A: The inclusion of coconut, pecans, and cream cheese frosting sets it apart, giving it a unique texture and flavor profile.

Q: Can I make this cake ahead of time?
A: Yes! Italian Creme Bundt Cake can be made a day in advance and stored in an airtight container to keep it moist.

Q: How do I prevent the cake from sticking to the Bundt pan?
A: Properly grease and flour your Bundt pan, ensuring all crevices are coated, or use a high-quality non-stick spray.

Q: Can I freeze the cake?
A: Yes, the cake can be frozen for up to 3 months. Be sure to wrap it tightly in plastic wrap and foil. Frost the cake after it has thawed completely.


Nutritional Information

Here’s a breakdown of the nutritional content per serving (based on 12 servings):

  • Calories: 450
  • Fat: 24g
  • Carbohydrates: 55g
  • Protein: 6g
  • Fiber: 2g

To reduce the calories, consider using a light cream cheese frosting or reduce the sugar in the batter.


Storage and Reheating

  • Storing Leftovers: Keep leftover cake in an airtight container at room temperature for up to 3 days, or refrigerate for up to a week.
  • Freezing the Cake: Wrap individual slices in plastic wrap and foil, then freeze for up to 3 months. Thaw at room temperature before serving.
  • Reheating: Reheat individual slices in the microwave for 10-15 seconds for a warm and fresh-out-of-the-oven taste.

Internal Linking Opportunities

For readers who enjoyed this cake recipe, here are a few other comfort food recipes from ExoRecipes that would pair perfectly:

Old-Fashioned Poultry Stuffing Recipe: A Classic Holiday Favorite

traditional stuffing recipe, classic poultry stuffing, holiday stuffing, Thanksgiving stuffing, homemade poultry stuffing

Old-Fashioned Poultry Stuffing Recipe: A Classic for Your Holiday Table

An old-fashioned poultry stuffing recipe brings a traditional touch to any holiday meal. Made with simple ingredients like bread, vegetables, broth, and savory seasonings, this dish pairs perfectly with roasted chicken or turkey, especially during Thanksgiving or Christmas. Whether you prefer to bake it inside the bird or separately, this hearty dish is packed with flavor. In this guide, you’ll find step-by-step instructions, helpful tips, variations, and more. Plus, we’ll include internal links to some other recipes that complement this stuffing.


Ingredients for Old-Fashioned Poultry Stuffing

The key to any good stuffing is using quality ingredients that blend together to create a flavorful and moist dish.

  • Bread: You’ll need about 10 cups of cubed stale bread, such as white or sourdough.
  • Butter: ½ cup of unsalted butter to sauté the vegetables and add richness.
  • Onions and Celery: 2 onions and 3-4 stalks of celery, chopped for the aromatic base.
  • Poultry Seasoning: 2 teaspoons of poultry seasoning (blend of sage, thyme, and rosemary).
  • Chicken Broth: 2-3 cups to moisten the stuffing and give it depth of flavor.
  • Eggs: 2 eggs to help bind the ingredients.
  • Salt and Pepper: To taste, for seasoning.

For more comforting sides, you can check out this recipe for The Ultimate Comfort Food: Crockpot Potato Soup with Hashbrowns, a dish that goes perfectly with poultry stuffing during a family meal.


Step-by-Step Instructions

Preparation Time

  • Prep Time: 20 minutes
  • Cook Time: 40-50 minutes
  • Total Time: 1 hour 10 minutes

Step-by-Step Guide:

  1. Prepare the Bread
    Start by cutting the bread into 1-inch cubes. Spread them out on a baking sheet and toast in a 300°F oven for 10-15 minutes to dry them out, which helps prevent sogginess.
  2. Sauté the Vegetables
    In a large skillet, melt the butter over medium heat. Add the chopped onions and celery, and sauté until softened, about 8-10 minutes.
  3. Mix the Stuffing Base
    In a large mixing bowl, combine the toasted bread cubes, sautéed vegetables, and poultry seasoning. Toss to evenly distribute the ingredients.
  4. Add Broth and Eggs
    Whisk the eggs and chicken broth together, then pour over the bread mixture. Gently toss until the bread absorbs the liquid. The stuffing should be moist but not too wet.
  5. Bake the Stuffing
    Transfer the stuffing mixture to a greased baking dish. Cover with foil and bake in a preheated 350°F oven for 30 minutes. Remove the foil and bake for an additional 15-20 minutes to crisp up the top.

You might also enjoy serving this stuffing with Slow Cooker Magic: Unveiling the Ease of Crock-Pot Baked Ziti, another comforting dish perfect for family gatherings.


Tips for Perfect Stuffing

  • Use Stale Bread: For the best texture, always use stale or toasted bread so it can absorb the broth without becoming mushy.
  • Don’t Overmix: Gently toss the ingredients to ensure the stuffing stays light and fluffy.
  • Adjusting the Moisture: If the stuffing feels too dry, add more broth before baking. If it’s too wet, bake uncovered for longer to let it dry out.

Variations on Traditional Poultry Stuffing

Stuffing is a versatile dish that can be adapted to different tastes. Here are some variations you might want to try:

  • Sausage Stuffing: Add cooked, crumbled sausage for extra flavor and richness.
  • Cornbread Stuffing: Swap out white bread for cornbread to give it a Southern twist.
  • Fruit and Nut Stuffing: Add chopped apples, dried cranberries, or pecans for sweetness and texture.

For a unique side dish that pairs well with this stuffing, check out No-Peek Beef Tips: The Ultimate Comfort Food, another savory dish that can complement your holiday table.


FAQs About Poultry Stuffing

Q: What’s the difference between stuffing and dressing?
A: Stuffing is traditionally cooked inside the bird, while dressing is baked separately in a dish.

Q: Can I make stuffing ahead of time?
A: Yes, you can prepare the stuffing the day before and bake it right before serving.

Q: How do I keep stuffing from getting soggy?
A: Use stale bread, and be careful not to add too much broth. Bake the stuffing uncovered during the last 15 minutes to crisp up the top.

Q: Can I make gluten-free stuffing?
A: Yes, simply use gluten-free bread in place of traditional bread for a delicious gluten-free stuffing.


Nutritional Information

Here’s a general idea of the nutritional content for a typical serving of old-fashioned poultry stuffing:

  • Calories: 250
  • Fat: 12g
  • Carbohydrates: 30g
  • Protein: 6g
  • Fiber: 2g

For a lighter option, try reducing the butter or using low-sodium chicken broth.


Serving Suggestions

This classic poultry stuffing pairs well with various dishes, making it a versatile side for any meal.

  • Serve with Roasted Turkey or Chicken: Stuffing is traditionally served alongside a roasted turkey or chicken, especially during holiday meals.
  • Pair with Vegetables: Serve with roasted carrots, Brussels sprouts, or green beans to complete your dinner.

To complete your meal, consider adding Kentucky Butter Cake: A Slice of Southern Comfort for dessert. Its rich, buttery flavor is the perfect complement to savory stuffing.


Storage and Reheating Tips

  • Storing Leftovers: Keep leftover stuffing in an airtight container in the refrigerator for up to 3 days.
  • Freezing: You can freeze stuffing for up to 3 months. To reheat, thaw it overnight in the fridge and bake at 350°F until heated through.
  • Reheating: Reheat leftovers in the oven to keep them crispy, or use the microwave for a quicker option.

Internal Linking Opportunities

For readers who enjoyed this stuffing recipe, we recommend trying these other comfort food recipes from ExoRecipes:


Conclusion

This old-fashioned poultry stuffing recipe is the perfect addition to any holiday meal. With simple ingredients and easy preparation, it’s a classic dish that will delight your guests. Whether you bake it inside the bird or serve it as a side dish, stuffing remains a beloved comfort food for generations.

Traditional German Kuchen Recipe: Sweet, Fruity, and Delicious

traditional German cake, fruit Kuchen, German sweet bread, streusel Kuchen, butter Kuchen, German dessert recipe

German Kuchen: A Delicious Tradition Brought to Your Kitchen

German Kuchen is a traditional cake enjoyed in many German-speaking households, often served during special occasions or alongside coffee. This versatile dessert can be sweet or savory and has numerous variations depending on the region and personal preferences. In this article, we will explore the origins of German Kuchen, break down the key ingredients, provide a detailed step-by-step recipe, and suggest creative variations. We’ll also link to some internal recipes that complement this dessert perfectly, offering a complete guide to baking and enjoying German Kuchen.


Ingredients for Traditional German Kuchen

To make a classic German Kuchen, you’ll need the following ingredients:

  • Flour: 4 cups of all-purpose flour or bread flour for a lighter texture.
  • Sugar: 1 cup of granulated sugar, plus more for topping.
  • Butter: ½ cup of unsalted butter, softened.
  • Eggs: 2 large eggs to enrich the dough.
  • Yeast: 1 packet of active dry yeast for leavening.
  • Milk: 1 cup of warm milk to activate the yeast.
  • Salt: A pinch to balance the sweetness.
  • Cinnamon: 1 teaspoon for a warm flavor, especially in the streusel topping.
  • Optional toppings: Cherries, apples, cottage cheese, or custard, depending on your preferred variation.

For a side dish or a complementary meal, consider serving Kuchen with The Ultimate Comfort Food: Crockpot Potato Soup with Hashbrowns, as its savory profile balances the sweet dessert perfectly.


Step-by-Step Instructions for German Kuchen

Preparation Time:

  • Prep Time: 20 minutes
  • Cook Time: 30-40 minutes
  • Total Time: 1 hour plus rise time

Step-by-Step Guide:

  1. Activate the Yeast
    In a large bowl, combine the warm milk, yeast, and a teaspoon of sugar. Let the mixture sit for 5-10 minutes until foamy, indicating that the yeast is active.
  2. Mix the Dough
    In another bowl, whisk together the flour, sugar, and salt. Add the eggs, softened butter, and yeast mixture. Mix until the dough comes together.
  3. Knead the Dough
    Transfer the dough to a floured surface and knead for about 8-10 minutes until smooth and elastic. If the dough is too sticky, add more flour gradually.
  4. First Rise
    Place the dough in a greased bowl, cover with a clean towel, and let it rise in a warm place for 1-2 hours or until doubled in size.
  5. Shape the Kuchen
    Once the dough has risen, roll it out and transfer it to a greased baking sheet or Kuchen pan. Press the dough evenly into the pan.
  6. Add Toppings
    For a traditional Butter Kuchen, sprinkle the dough with cinnamon sugar and add pats of butter on top. For a Fruit Kuchen, arrange sliced apples or cherries on the dough and sprinkle with sugar and cinnamon.
  7. Bake the Kuchen
    Preheat your oven to 350°F (175°C). Bake the Kuchen for 30-40 minutes, or until the top is golden and the edges are crisp.

For another easy and comforting meal, you could try Slow Cooker Magic: Unveiling the Ease of Crock-Pot Baked Ziti, which pairs well with a sweet dessert like Kuchen.


Tips for Success

Here are some tips to ensure your German Kuchen turns out perfectly every time:

  • Choosing the Right Toppings: Use fruits that are in season for the best flavor. Apples and cherries are traditional, but plums or peaches can also be delicious.
  • Proofing the Dough: Ensure that the dough rises properly by keeping it in a warm, draft-free place. Covering it with a damp towel can help.
  • Baking Time: Keep an eye on the Kuchen as it bakes. The dough should be golden and crispy on the edges but still soft in the center.

Variations of German Kuchen

Kuchen is incredibly versatile, with countless variations. Here are a few popular types:

  • Butter Kuchen: A rich version topped with butter and cinnamon sugar.
  • Streusel Kuchen: Featuring a crumbly streusel topping made from flour, butter, and sugar.
  • Fruit Kuchen: Topped with seasonal fruits like cherries, apples, or plums.
  • Cheese Kuchen: Similar to cheesecake, made with a cottage cheese topping.

If you’re looking for another dessert that balances fruit with a rich base, consider making Caramel Apple Pecan Dump Cake, which pairs perfectly with a slice of traditional Kuchen.


Nutritional Information

Here’s a basic breakdown of the nutritional content for German Kuchen per serving (based on 8 servings):

  • Calories: 350
  • Fat: 15g
  • Carbohydrates: 45g
  • Sugar: 20g
  • Protein: 6g

For a healthier version, you can reduce the sugar or use whole wheat flour. Adding more fruits like apples or pears can also increase the nutritional value.


Serving Suggestions

Kuchen can be served warm or at room temperature. Here are some ideas for how to enjoy it:

  • With Coffee or Tea: Kuchen is traditionally served with a hot beverage, making it the perfect afternoon treat.
  • With Ice Cream: A scoop of vanilla ice cream turns this classic dessert into an indulgent experience.
  • For Breakfast or Dessert: Kuchen works well as a breakfast pastry or as a dessert after a hearty meal.

Another great option to serve alongside Kuchen is Kentucky Butter Cake: A Slice of Southern Comfort, which adds a rich and buttery contrast.


FAQs About German Kuchen

Q: Can I make a gluten-free version of Kuchen?
A: Yes, you can substitute all-purpose flour with a gluten-free baking blend. Make sure the blend contains xanthan gum for the best texture.

Q: Can I make Kuchen without yeast?
A: Some recipes use baking powder instead of yeast for a quicker rise. The texture will be more like a traditional cake than a bread.

Q: What fruits can I use for Fruit Kuchen?
A: Apples, cherries, plums, and apricots are traditional, but you can use any seasonal fruit.

Q: How do I store leftover Kuchen?
A: Kuchen can be stored in an airtight container at room temperature for up to 3 days or in the refrigerator for up to a week.

Q: Can I freeze Kuchen?
A: Yes, Kuchen freezes well. Wrap individual slices tightly in plastic wrap and store them in a freezer-safe bag for up to 3 months.


Internal Linking Opportunities

If you enjoyed making German Kuchen, try some of these other comforting dessert recipes from ExoRecipes:


Conclusion

German Kuchen is a timeless and versatile dessert that can be enjoyed by people of all ages. Whether you prefer a sweet, buttery Butter Kuchen or a fruit-filled Streusel Kuchen, this recipe is sure to impress. With the right ingredients, a little patience, and some creativity, you can bring a taste of Germany into your kitchen.