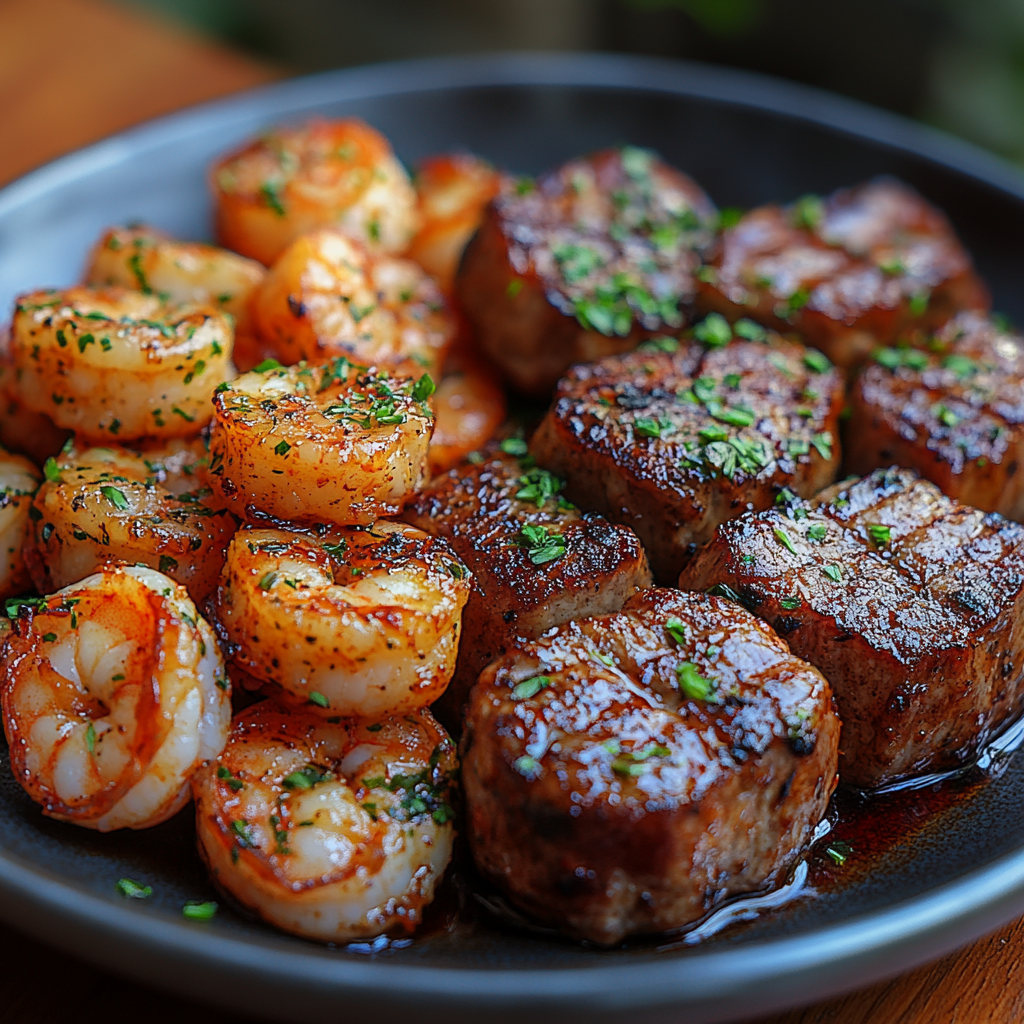
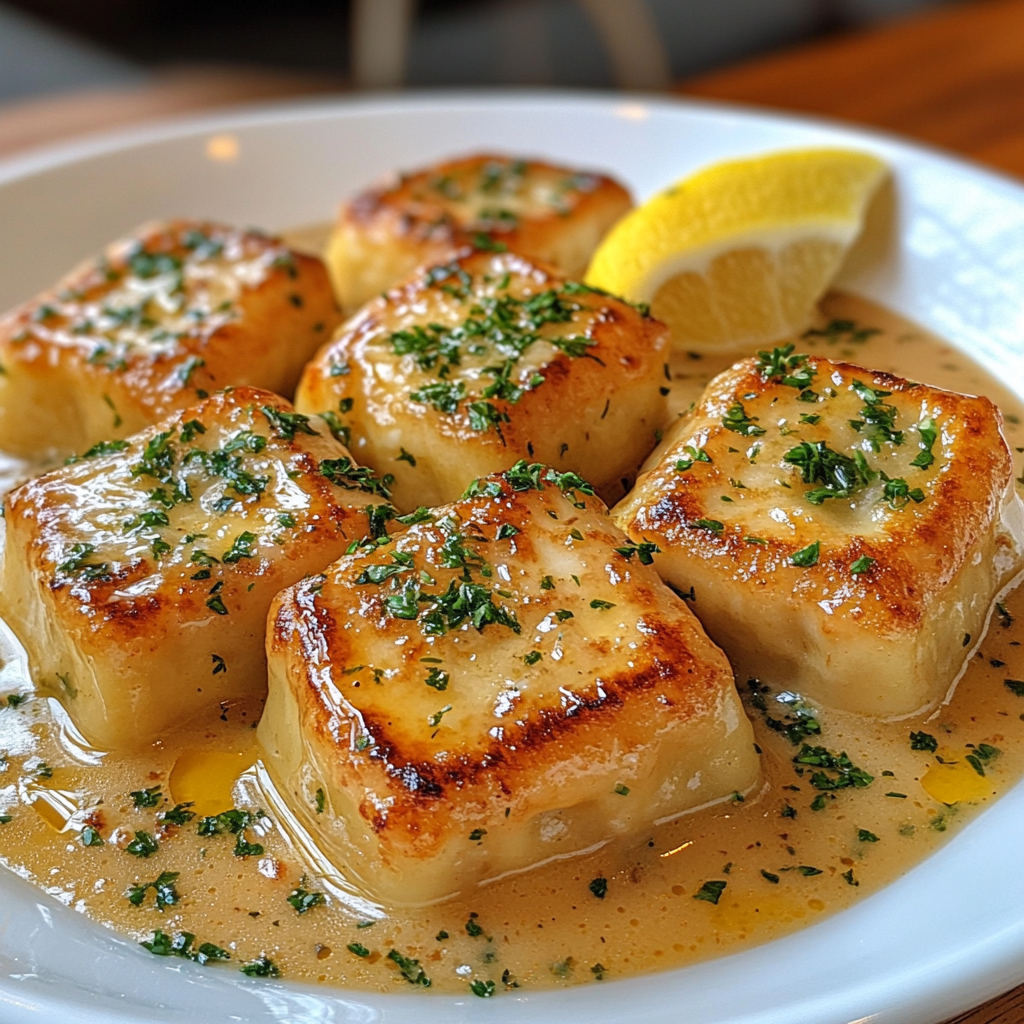
Would You Eat These Savory Steak Bites and Shrimp? A Delicious Surf & Turf Recipe

Garlic butter steak and shrimp, surf and turf recipe, steak bites and shrimp skillet, steak and shrimp dinner, savory shrimp and steak bites, steak and seafood meal

Would You Eat These Savory Steak Bites and Shrimp?

Nothing satisfies quite like a dish that combines juicy, flavorful steak bites with succulent shrimp. Whether you’re planning a casual weeknight dinner or a special occasion meal, this surf-and-turf pairing promises a burst of flavors and a memorable experience for anyone who tries it. Let’s dive into how to create this mouthwatering meal at home, along with essential tips, side suggestions, and answers to frequently asked questions.

Why This Dish is the Perfect Flavor Combination

Combining steak and shrimp isn’t just about the protein boost; it’s about balancing rich, savory notes from steak with the delicate sweetness of shrimp. The contrast of textures – the steak’s juicy bite and the shrimp’s tender flesh – creates an irresistible meal.

If you love garlic butter steak recipes, you may find this dish especially tempting. There’s a unique satisfaction that comes from a well-prepared steak, and by pairing it with shrimp, you elevate the meal to a gourmet level. To learn about perfect steak techniques, consider our Perfect Ribeye Steak Recipe to master the nuances of steak preparation.

Ingredients and Equipment for Perfect Steak Bites and Shrimp

Essential Ingredients

To make the best savory steak bites and shrimp, here’s what you’ll need:

  • Steak: Opt for tender cuts like sirloin or ribeye.
  • Shrimp: Go for large or jumbo shrimp, preferably fresh or thawed frozen.
  • Seasonings: Garlic, butter, salt, pepper, and fresh herbs like parsley.
  • Optional: Worcestershire sauce or Cajun seasoning for a spicy twist.

Equipment Needed

  • Cast-iron skillet for perfect searing
  • Tongs for flipping without piercing the meat
  • Sharp knife for cutting steak into bite-sized pieces
  • Meat thermometer for achieving your preferred doneness

For more side ideas, visit our Garlic Rosemary Steak and Potatoes Skillet page, a perfect pairing for this meal.

Preparing Your Steak Bites and Shrimp: Step-by-Step Guide

Step 1: Marinate for Flavor

Begin by marinating your steak and shrimp. A basic marinade with olive oil, garlic, and a hint of lemon juice works well. Let it sit for 15-20 minutes for optimal flavor absorption.

  • Pro Tip: Worcestershire sauce or a touch of lemon herb sauce adds extra depth to your steak without overwhelming the shrimp’s natural sweetness.

Step 2: Sear the Steak Bites

  • Preheat your skillet over medium-high heat with a touch of oil.
  • Add the steak bites in a single layer, ensuring each piece has contact with the skillet for that perfect crust.
  • Cook for about 2-3 minutes on each side for medium-rare, adjusting based on your preference. Use a meat thermometer to check doneness, aiming for an internal temperature of around 135°F for medium-rare.

Step 3: Sauté the Shrimp

In the same skillet, add more butter and garlic. Sauté the shrimp for 1-2 minutes on each side or until they’re opaque. The garlic butter will bring out a lovely, rich flavor, enhancing the shrimp’s delicate sweetness.

Step 4: Combine and Serve

Return the steak bites to the skillet, gently tossing them with the shrimp to blend flavors. Sprinkle fresh parsley over the top for a vibrant finish.


Serving Suggestions: Perfect Pairings for Steak Bites and Shrimp

While steak bites and shrimp shine on their own, adding sides can round out the meal beautifully. Here are a few classic pairings:

  • Garlic Mashed Potatoes: Creamy and savory, this side complements the steak’s flavor profile.
  • Roasted Vegetables: Try broccoli, bell peppers, or asparagus for added nutrition and a splash of color.
  • Fresh Bread or Garlic Knots: An excellent way to sop up any remaining garlic butter.

For inspiration, check out our Ultimate Comfort Food recipes that would be a great warm addition alongside this dish.


Frequently Asked Questions

1. What are some alternative seasonings for steak bites and shrimp?

  • If you’re interested in diversifying the flavors, Cajun seasoning or chimichurri sauce are excellent choices that bring a zesty kick.

2. Can I cook the steak and shrimp together?

  • While it’s possible, it’s recommended to cook them separately to avoid overcooking the shrimp. Steak requires a longer sear, whereas shrimp cooks quickly. Combining them at the end in a garlic butter sauce creates a harmonized flavor without compromising texture.

3. What’s the best way to achieve the perfect crust on steak bites?

  • Ensure your skillet is hot before adding steak. This sear locks in the juices, providing that golden-brown crust. Avoid overcrowding the pan, as this can lead to steaming rather than searing.

4. What are other good sides to serve with this dish?

5. Can I make this dish ahead?

  • While steak and shrimp are best fresh, you can prepare components like the marinade or sides in advance. Simply reheat in a hot skillet with a bit of butter before serving.

Health and Nutritional Benefits of Steak Bites and Shrimp

This dish is not only delicious but also packed with nutrients:

  • High Protein: Both steak and shrimp offer high-quality protein essential for muscle repair and energy.
  • Low Carb: This is an ideal keto-friendly meal if served with low-carb sides.
  • Rich in Iron and Omega-3s: Steak is an iron powerhouse, while shrimp contributes heart-healthy omega-3 fatty acids.

For alternative protein-rich comfort dishes, see our Classic Beef Stew Recipe.


Elevating Your Steak and Shrimp Dish: Tips for the Perfect Dinner

  1. Use Fresh Ingredients: Fresh shrimp and a quality cut of steak make a significant difference in taste and texture.
  2. Choose the Right Skillet: Cast iron retains heat well, which is essential for achieving a good sear.
  3. Balance Seasonings: Avoid overpowering the shrimp with heavy steak seasonings. Lightly coat shrimp to keep their delicate flavor intact.

Creative Variations

  • Garlic Parmesan: Add a sprinkle of Parmesan cheese right before serving for a twist on traditional garlic butter.
  • Asian Fusion: Swap butter for sesame oil, and add a dash of soy sauce and ginger for an Asian-inspired version.
  • Spicy Cajun: Rub the steak bites with Cajun seasoning for a spicy kick that complements the shrimp’s sweetness.

Final Thoughts: Why Steak Bites and Shrimp Are Worth Trying

There’s something undeniably delightful about a meal that balances savory steak with tender shrimp. The textural contrast, combined with the richness of garlic butter, makes this a satisfying dish worth adding to your culinary repertoire. Whether you’re cooking to impress or simply craving a delicious dinner, these steak bites and shrimp are sure to deliver.

Try pairing this dish with our Slow Cooker Chicken and Gravy Over Noodles for a hearty family meal, or serve alongside a Family Favorite Easy French Bread Pizza for a casual yet delicious dinner spread.

For more recipes and meal inspirations, browse our extensive recipe collection on ExoRecipes, where comfort food meets innovative twists. Enjoy your meal, and remember – the best dishes are often the simplest, made with quality ingredients and a sprinkle of creativity.

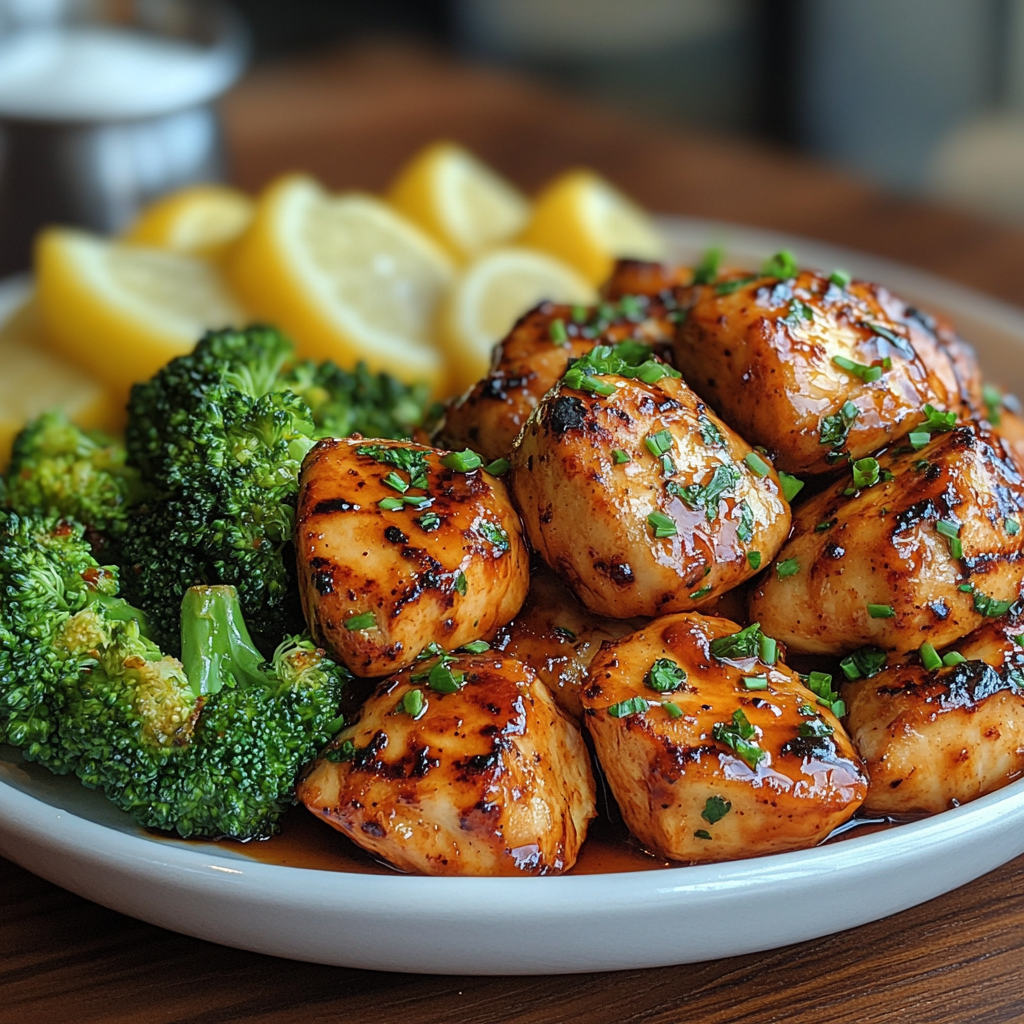
Bourbon Chicken with Broccoli: A Sweet and Savory Skillet Favorite

bourbon chicken stir-fry, chicken with bourbon glaze, sweet bourbon chicken, broccoli chicken recipe, skillet bourbon chicken

Bourbon Chicken with Broccoli: A Flavorful Weeknight Dinner

Bourbon Chicken with Broccoli offers a unique blend of sweetness and savory flavors that makes it a family favorite. This dish is ideal for weeknight dinners, bringing the rich taste of bourbon together with the crunch of broccoli. Not only is it easy to prepare, but it also provides a balanced meal that’s both satisfying and nutritious.

If you’re in search of another flavorful one-pan dinner, check out our Slow Cooker Chicken and Gravy Over Noodles for a comforting, hearty option.

Ingredients for Bourbon Chicken with Broccoli

This recipe calls for simple ingredients that, when combined, create a complex, savory dish. Here’s what you’ll need:

Core Ingredients

  • Chicken Thighs or Breasts: These are the main protein and provide a tender, juicy base.
  • Bourbon: The key to this recipe’s unique flavor, bourbon adds warmth and a subtle sweetness.
  • Soy Sauce and Brown Sugar: These create a rich, balanced glaze with a hint of sweetness.
  • Garlic and Ginger: These aromatics add depth and complexity.
  • Broccoli: A healthy addition that adds a crunchy texture and bright color to the dish.

To create a complete meal, consider pairing this dish with Greek Style Lemon Roasted Potatoes, which add a fresh, Mediterranean-inspired flavor.

Step-by-Step Recipe Guide for Bourbon Chicken with Broccoli

Step 1: Marinating the Chicken

  • Prepare the Marinade: In a bowl, combine soy sauce, bourbon, brown sugar, garlic, and ginger.
  • Marinate the Chicken: Add chicken pieces to the marinade, ensuring each piece is well-coated. Let it sit for at least 30 minutes or overnight for the best flavor.

For more marinade ideas, visit our Perfect Ribeye Steak Recipe to explore the art of flavor infusion.

Step 2: Cooking the Chicken

  • Heat Oil in a Skillet: Over medium heat, cook the marinated chicken until it’s golden brown on both sides.
  • Set Chicken Aside: Remove the chicken from the skillet once browned, setting it aside while you prepare the sauce.

For a similar cooking method, try our Garlic Bacon Kale, a simple yet flavorful side that complements the rich bourbon glaze.

Step 3: Making the Bourbon Sauce

  • Add Sauce Ingredients: In the same skillet, add any leftover marinade, a splash of extra bourbon, and additional soy sauce and brown sugar to taste.
  • Simmer: Let the sauce thicken slightly, stirring to avoid burning.

Step 4: Cooking the Broccoli and Combining Everything

  • Prepare Broccoli: Steam or blanch the broccoli until tender-crisp.
  • Combine with Chicken: Add the chicken back to the skillet, tossing it in the sauce with the broccoli until everything is well-coated.

If you enjoy dishes with a touch of sweetness, consider pairing this with our Spicy Pineapple Jalapeño Chutney to add a sweet and spicy twist.

Customizing Your Bourbon Chicken with Broccoli

Flavor Variations and Add-Ins

  • Honey or Maple Syrup: For a slightly sweeter taste, add a drizzle of honey or maple syrup to the sauce.
  • Add Vegetables: Red bell peppers, carrots, and onions add color and additional nutrients.
  • Spice It Up: Red pepper flakes or fresh chili add a kick that balances the dish’s sweetness.

If you enjoy experimenting with flavors, check out our Sheet Pan Pancakes for an easy way to add fruits or spices to classic dishes.

Side Dish Suggestions

  • Rice or Quinoa: Serve the bourbon chicken over rice or quinoa to soak up the sauce.
  • Garlic Bread: A slice of garlic bread is perfect for enjoying every bit of the sauce.

Nutritional Insights and Health Benefits

Nutritional Profile of Key Ingredients

  • Chicken: A lean protein, chicken is rich in essential nutrients and supports muscle health.
  • Broccoli: Packed with vitamins C and K, fiber, and antioxidants, broccoli is a nutritious addition to this meal.

For a nutrient-packed dessert option, try our Heavenly Peanut Butter Jelly Cheesecake for a sweet treat that provides a mix of protein and indulgence.

Healthier Alternatives

  • Lower Sugar Option: Reduce the brown sugar or replace it with a natural sweetener.
  • Use Low-Sodium Soy Sauce: For a lower sodium dish, opt for a low-sodium soy sauce.

Expert Tips for Perfecting Bourbon Chicken with Broccoli

  1. Don’t Overcook the Broccoli: Keep the broccoli tender-crisp to maintain its vibrant color and texture.
  2. Adjust Sauce Consistency: For a thicker sauce, let it simmer longer; if it becomes too thick, add a splash of chicken broth.
  3. Control the Bourbon Flavor: Add bourbon gradually to prevent it from overpowering the dish.

For more sauce-crafting tips, visit our Perfect Brown Gravy Guide to master rich, balanced flavors in your cooking.

FAQs About Bourbon Chicken with Broccoli

Can I Make This Recipe Without Bourbon?

Yes, you can replace the bourbon with apple juice or chicken broth for a non-alcoholic version while retaining a similar sweetness.

What’s the Best Way to Store Leftovers?

Store leftovers in an airtight container in the refrigerator for up to three days. Reheat in a skillet to maintain flavor and texture.

How Do I Make the Sauce Thicker?

To thicken the sauce, add a cornstarch slurry (1 teaspoon cornstarch mixed with 1 tablespoon cold water) to the skillet and stir until the sauce reaches your desired consistency.

For more storage and reheating tips, check out Momma’s Creamy Baked Macaroni and Cheese, which includes helpful guidelines for keeping pasta dishes fresh.

Storage, Reheating, and Serving Tips

  • Storage: Keep leftovers in the fridge in a sealed container for up to three days.
  • Reheating: Reheat in a skillet over medium-low heat to avoid drying out the chicken.
  • Serving Ideas: Garnish with fresh herbs, like parsley or green onions, and serve with rice, quinoa, or crusty bread.

For a similar dish with vibrant flavors, try our 20-Minute Lemon Pasta, which pairs well with the bourbon chicken.

Conclusion

Bourbon Chicken with Broccoli is a fantastic dish for anyone who loves bold, savory flavors. The combination of bourbon, garlic, ginger, and broccoli creates a meal that’s both delicious and nourishing. This easy-to-make recipe is perfect for busy weeknights or as a tasty addition to your meal prep rotation.

For another one-skillet chicken dinner idea, don’t miss our Garlic Rosemary Steak and Potatoes Skillet, which offers rich flavors and ease of preparation.

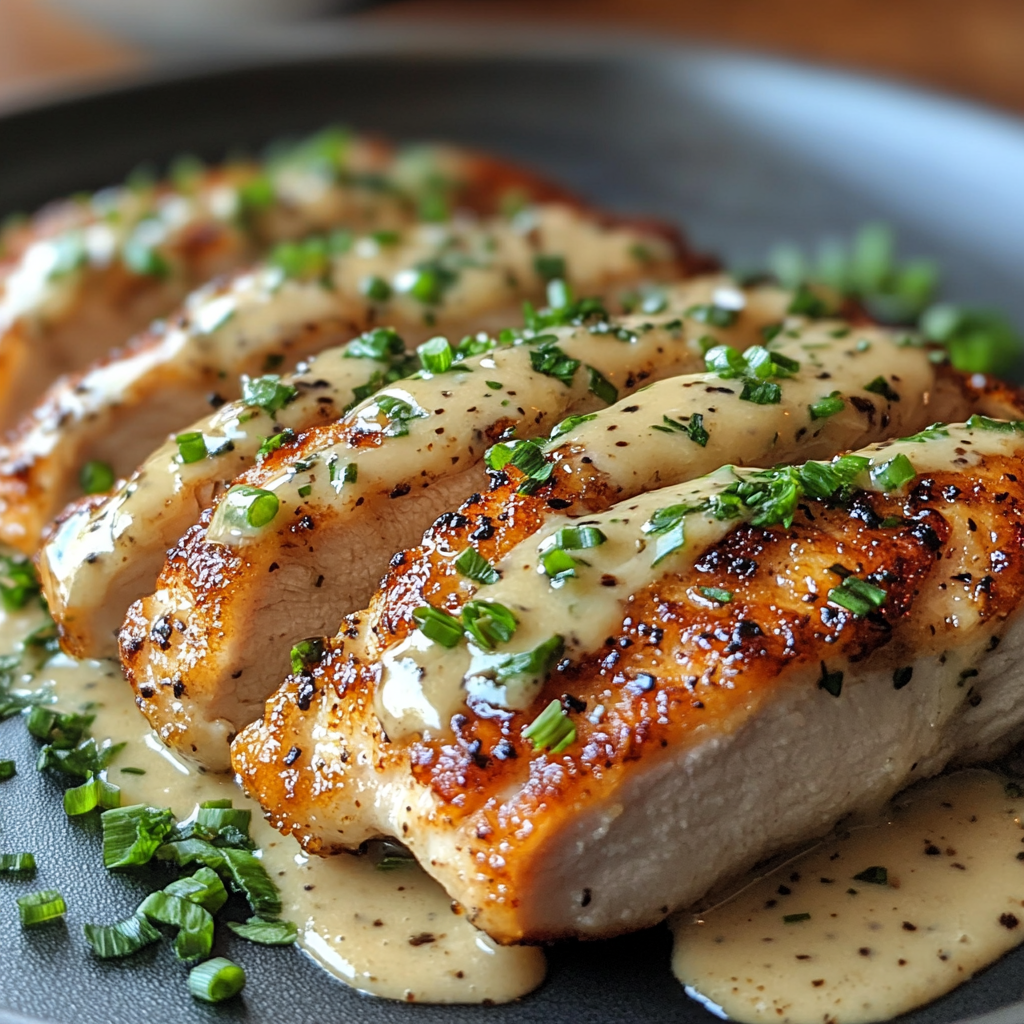
Crispy Chicken with Creamy Dijon Sauce: A Deliciously Tangy Dinner Recipe

Dijon mustard chicken, tangy chicken sauce, creamy mustard chicken, crispy chicken dinner, savory Dijon sauce

Crispy Chicken with Creamy Dijon Sauce: A Flavorful Comfort Meal

Crispy chicken coated with a rich, tangy creamy Dijon sauce is a comforting dish that combines satisfying textures and flavors. Perfect for family dinners or special occasions, this recipe promises to elevate any meal. With its golden crust and velvety sauce, it’s bound to become a favorite in your culinary repertoire.

For other comforting meal ideas, consider our One-Pot Creamy Broccoli and Parmesan Noodles for a delightful vegetarian option.

Ingredients for Crispy Chicken with Creamy Dijon Sauce

This recipe features essential ingredients that add depth and layers of flavor to each bite. Let’s break down what you’ll need.

Core Ingredients

  • Chicken Breasts or Thighs: The foundation of this dish, chicken provides a lean protein base, crispy on the outside, juicy on the inside.
  • Dijon Mustard: Known for its tangy, sharp taste, Dijon mustard is the key ingredient in the creamy sauce.
  • Heavy Cream and Butter: These add a smooth, rich texture to the sauce, balancing the tanginess of the mustard.
  • Garlic and Shallots: Essential aromatics that bring depth and savoriness to the sauce.
  • Breadcrumbs or Flour: Used to coat the chicken for that irresistible crispiness.
  • Chicken Broth: Adds moisture and depth to the sauce, enhancing the flavor.

For more crispy dishes, check out our Ultimate Guide to Making Crispy Chicken Strips at Home, which shares tips for achieving a golden crust every time.

Step-by-Step Recipe Guide for Crispy Chicken with Creamy Dijon Sauce

Step 1: Preparing the Chicken for Coating

  • Season the Chicken: Begin by patting the chicken dry, then season with salt and pepper.
  • Coat with Flour or Breadcrumbs: Dip each piece of chicken into a mix of flour (or breadcrumbs) for a crispy exterior.

Step 2: Cooking the Chicken for a Crispy Texture

  • Shallow Fry in a Skillet: Heat a few tablespoons of oil in a large skillet over medium-high heat. Shallow fry the chicken for about 4-5 minutes per side or until it turns golden and crispy.

For other skillet recipes, explore Garlic Rosemary Steak and Potatoes Skillet for another hearty meal idea.

Step 3: Making the Creamy Dijon Sauce

  • Prepare the Base: In the same skillet, melt a bit of butter and sauté minced garlic and shallots until fragrant.
  • Add Dijon Mustard and Cream: Stir in the Dijon mustard, followed by heavy cream and chicken broth. Let the sauce simmer to thicken slightly, stirring occasionally.

Step 4: Combining and Serving

  • Return Chicken to the Sauce: Place the crispy chicken back in the skillet, spooning the sauce over it to coat.
  • Serve Hot: Garnish with fresh herbs like parsley or thyme and serve immediately.

For a meal rich in flavor, consider pairing this with Garlic Bacon Kale as a hearty side.

Customizing Your Crispy Chicken with Creamy Dijon Sauce

Flavor Variations and Add-Ins

  • Add Mushrooms: Sauté sliced mushrooms in the sauce for an earthy flavor.
  • Lemon Zest or Juice: Adding a touch of lemon brightens up the dish and pairs well with the creamy sauce.
  • Use Whole Grain Mustard: Substitute some Dijon with whole grain mustard for added texture and flavor.

To experiment with different flavors, try our Spicy Pineapple Jalapeño Chutney, which can add a sweet, spicy contrast to creamy chicken dishes.

Side Dish Pairings

  • Mashed Potatoes: Creamy mashed potatoes are the perfect companion to soak up the rich Dijon sauce.
  • Steamed Green Beans: For a lighter side, green beans add color and a fresh contrast to the meal.

Nutritional Insights and Health Benefits

Nutritional Profile of Key Ingredients

  • Chicken: A high-protein, low-fat source, chicken supports muscle health and provides essential nutrients.
  • Dijon Mustard: Contains antioxidants and may aid digestion.
  • Cream and Butter: Although high in fat, they contribute to a satisfying and rich mouthfeel.

If you’re interested in balancing your diet with more nutrient-dense sides, check out our Healthy Avocado Egg Salad Roll-Ups, a fresh, nutrient-packed alternative.

Healthier Alternatives

  • Lighten the Sauce: Use half cream and half milk or substitute cream with Greek yogurt for a lower-fat option.
  • Use Olive Oil for Frying: Instead of butter, try frying in olive oil for a lighter, heart-healthy option.

Expert Tips for Perfecting Crispy Chicken with Creamy Dijon Sauce

  1. Achieving a Crisp Coating: Pat the chicken dry before coating for a better crust.
  2. Control Sauce Thickness: Adjust the cream and broth amounts to reach your desired consistency.
  3. Balance Flavors: Taste as you go—Dijon mustard can be strong, so add gradually and adjust to preference.

For more sauce-making tips, explore our Perfect Brown Gravy Guide to master the art of rich, flavorful sauces.

FAQs About Crispy Chicken with Creamy Dijon Sauce

Can I Use Chicken Thighs Instead of Breasts?

Yes, chicken thighs are a great option, adding more juiciness and flavor due to their higher fat content.

How Should I Store Leftovers?

Store leftovers in an airtight container in the refrigerator for up to two days. Reheat in a skillet to maintain the crispy texture.

How Can I Thicken the Sauce?

If you’d like a thicker sauce, add a bit of cornstarch mixed with cold water to the sauce as it simmers.

Is Dijon Sauce Suitable for Freezing?

Creamy sauces may not freeze well, but you can freeze the chicken separately and make fresh sauce upon reheating.

For more FAQs on working with cream-based sauces, visit Momma’s Creamy Baked Macaroni and Cheese, which includes tips for achieving the perfect creamy texture.

Storage, Reheating, and Serving Tips

  • Storage: Place chicken and sauce in separate containers to preserve the crispiness. Store in the refrigerator for up to two days.
  • Reheating: Reheat the chicken in an oven at 350°F for 10 minutes, adding the sauce afterward to avoid sogginess.
  • Serving Suggestions: Serve with fresh herbs, crusty bread, and a side of mashed potatoes or a green salad.

For more storage ideas and meal-prep tips, see our Ultimate Comfort Food Guide.

Conclusion

“Crispy Chicken with Creamy Dijon Sauce” combines the best of both worlds—crispy, tender chicken and a rich, tangy sauce. Perfect for cozy dinners and special occasions alike, this dish is versatile and easy to adapt. Serve with a side of mashed potatoes, green beans, or your favorite bread to enjoy a comforting and satisfying meal.

For more comforting chicken recipes, don’t miss our Savory Chicken Cordon Bleu Meatloaf, a unique twist on classic flavors.

Lobster Ravioli in a Zesty Lemon Butter Sauce: A Gourmet Pasta Dish

lobster pasta with lemon butter, gourmet seafood ravioli, creamy lemon sauce for pasta, zesty seafood pasta, lobster lemon butter ravioli

Lobster Ravioli in a Zesty Lemon Butter Sauce: A Gourmet Delight

Lobster Ravioli in a Zesty Lemon Butter Sauce offers an indulgent combination of flavors, balancing the richness of lobster with the bright acidity of lemon. This recipe is perfect for a special dinner, providing a restaurant-quality dish you can easily make at home.

For a side dish that complements this recipe, try Greek Style Lemon Roasted Potatoes, bringing a Mediterranean twist that pairs beautifully with seafood.

Ingredients for Lobster Ravioli in Zesty Lemon Butter Sauce

The ingredients for this dish highlight simple yet flavorful elements that make the lobster ravioli shine. Here’s everything you need to bring this meal together.

Core Ingredients

  • Lobster Ravioli: Fresh or frozen lobster ravioli serve as the main ingredient. If you’re feeling ambitious, homemade ravioli can add a personal touch.
  • Butter and Lemon: Butter gives the sauce its richness, while lemon adds the zest and acidity to balance the flavors.
  • Garlic and Shallots: These aromatics build the sauce’s flavor base.
  • Heavy Cream (Optional): For a richer texture, add a splash of heavy cream to the sauce.
  • Herbs: Fresh parsley or basil adds a pop of color and herbal notes to the sauce.

If you love garlic-flavored dishes, check out our Garlic Bacon Kale for a simple yet savory side that complements the buttery sauce.

Step-by-Step Recipe Guide for Lobster Ravioli in Lemon Butter Sauce

Step 1: Preparing the Lemon Butter Sauce

  • Melt Butter and Add Garlic and Shallots: In a saucepan, melt butter over medium heat. Add minced garlic and chopped shallots, stirring until they turn golden.
  • Add Lemon and Herbs: Stir in lemon juice, zest, and fresh parsley, allowing the flavors to meld together.

Step 2: Cooking the Ravioli

  • Boil the Ravioli: Prepare the ravioli according to the package instructions, ensuring they’re cooked to al dente to prevent overcooking.
  • Drain and Set Aside: Drain the ravioli, reserving a small amount of pasta water to thin the sauce if necessary.

For more pasta inspiration, consider our Mastering Spaghetti Carbonara, a classic Italian recipe that highlights creamy textures.

Step 3: Combining Ravioli with Lemon Butter Sauce

  • Add Ravioli to Sauce: Gently toss the cooked ravioli in the lemon butter sauce, adding a splash of reserved pasta water if the sauce needs thinning.
  • Garnish and Serve: Plate the ravioli, garnishing with additional lemon zest, fresh parsley, and Parmesan cheese.

Customizing Your Lobster Ravioli in Lemon Butter Sauce

Flavor Variations and Add-Ins

  • Add White Wine: Adding white wine to the sauce introduces a depth of flavor that pairs well with the lobster.
  • Spice it Up: Red pepper flakes or a dash of cayenne bring a hint of spice to contrast the richness.
  • Use Shrimp Ravioli: Substitute lobster ravioli with shrimp-filled pasta for a twist on the seafood flavor profile.

To add a touch of sweetness and spice, consider serving this dish with Spicy Pineapple Jalapeño Chutney for a unique flavor pairing.

Perfect Pairings and Side Dishes

  • Serve with Garlic Bread: A slice of garlic bread is perfect for soaking up the lemon butter sauce.
  • Fresh Green Salad: A light salad with arugula, cucumber, and a lemon vinaigrette complements the richness of the ravioli.

For another zesty dish, check out our 20-Minute Lemon Pasta, a quick and refreshing recipe that highlights the versatility of lemon in pasta.

Nutritional Insights and Health Benefits

Nutritional Breakdown of Key Ingredients

  • Lobster: A lean protein source with low calories and a rich supply of vitamins and minerals like B12 and zinc.
  • Lemon: High in vitamin C and antioxidants, lemons support immune health and provide a bright flavor without added calories.
  • Butter: While high in fat, butter in moderation enhances flavor and provides essential fat-soluble vitamins.

Healthier Alternatives

  • Lighten the Butter: Use half the amount of butter and replace the other half with olive oil for a lighter fat content.
  • Use Low-Fat Cream: Substitute heavy cream with a lighter cream option or omit it entirely.
  • Pair with Cauliflower Rice: For a low-carb meal, swap pasta with cauliflower rice while keeping the lemon butter sauce as a topping.

Expert Tips for Perfecting Lobster Ravioli in Lemon Butter Sauce

  1. Avoid Overcooking Ravioli: Lobster ravioli can become mushy if overcooked. Aim for al dente for the best texture.
  2. Balance the Lemon Flavor: Adding lemon juice gradually helps control the acidity, preventing it from overpowering the dish.
  3. Use Fresh Herbs: Fresh parsley, basil, or chives elevate the flavor and add color.

For more culinary insights, check out our Ultimate Guide to Perfect French Bread Pizza, where we share tips on balancing flavors and achieving the ideal texture.

FAQs About Lobster Ravioli in Lemon Butter Sauce

Can I Use Frozen Lobster Ravioli?

Yes, frozen lobster ravioli works perfectly. Thaw before cooking or cook directly from frozen, following the package instructions.

What’s the Best Way to Store Leftovers?

Store leftovers in an airtight container in the fridge for up to two days. Reheat gently to avoid overcooking the pasta and separating the sauce.

How Do I Thicken or Thin the Sauce?

For a thicker sauce, add a bit of grated Parmesan cheese. If it’s too thick, thin with reserved pasta water.

Can I Substitute the Lobster with Another Seafood?

Absolutely. Shrimp or crab meat are great substitutes that work well with lemon butter sauce.

For more tips on storing pasta dishes, visit our Homemade Mac and Cheese Casserole page, which includes best practices for keeping pasta fresh.

Storage, Reheating, and Serving Tips

  • Storage: Place leftovers in an airtight container and refrigerate for up to two days.
  • Reheating: Reheat on the stovetop over low heat, adding a splash of cream or butter to restore the sauce’s creaminess.
  • Serving Suggestions: Serve with lemon wedges, extra herbs, and crusty bread for a complete meal.

For a similar creamy, comforting meal, try our One-Pot Creamy Broccoli and Parmesan Noodles.

Conclusion

Lobster Ravioli in a Zesty Lemon Butter Sauce is an impressive dish that’s surprisingly easy to make. With the richness of lobster and a bright lemony sauce, this meal is ideal for celebrations or when you simply want a gourmet experience at home. Paired with a light salad or a side of garlic bread, it’s sure to impress any guest.

For another lobster recipe, explore our Crab Brûlée Recipe, a unique seafood dish perfect for any seafood lover’s repertoire.

Garlic Butter Lobster and Scallops: A Luxurious Seafood Recipe

buttery lobster and scallops, garlic seafood recipe, lobster and scallops dinner, seafood with garlic butter, rich garlic butter sauce

Garlic Butter Lobster and Scallops: An Elegant Seafood Feast

Indulge in the luxurious flavors of Garlic Butter Lobster and Scallops, a dish that pairs the richness of lobster and scallops with the savory notes of garlic and butter. Perfect for date nights or special occasions, this recipe is surprisingly easy to make and adds a gourmet touch to any meal.

For another seafood favorite, try our Crispy Popcorn Shrimp, a crowd-pleaser that’s equally delicious and fun to make at home.

Ingredients for Garlic Butter Lobster and Scallops

Each ingredient in this dish plays a role in building the flavors, ensuring each bite is filled with a delicate balance of buttery richness and seafood sweetness.

Core Ingredients

  • Lobster Tails: The star of this dish, lobster offers a delicate sweetness that pairs well with garlic butter.
  • Scallops: Known for their tender texture, scallops absorb the garlic butter while adding a subtle oceanic flavor.
  • Butter and Garlic: Melted butter with fresh garlic brings a warm, savory aroma that complements the seafood perfectly.
  • Fresh Herbs: Parsley or chives add a fresh pop of color and flavor.

For another garlic butter-based dish, try our Garlic Rosemary Steak and Potatoes Skillet, perfect if you’re craving a hearty surf-and-turf experience.

Step-by-Step Recipe Guide for Garlic Butter Lobster and Scallops

Step 1: Preparing the Garlic Butter Sauce

  • Melt Butter and Add Garlic: In a small skillet, melt the butter over medium heat and add minced garlic, stirring until it turns golden brown.
  • Add Fresh Herbs and Lemon Juice: Mix in chopped parsley and a splash of lemon juice to balance the richness of the butter.

Step 2: Cooking the Lobster

  • Prepare the Lobster Tails: Split each lobster tail lengthwise and season lightly with salt and pepper.
  • Grill or Broil the Lobster: Grill or broil the lobster tails, brushing them with garlic butter throughout the cooking process to keep them moist and flavorful.

For more grilling tips and delicious seafood pairings, explore Honey Garlic Butter Roasted Carrots, which make a perfect side dish for rich seafood meals.

Step 3: Searing the Scallops

  • Dry the Scallops: Pat scallops dry to ensure a golden crust forms when they’re seared.
  • Sear in Hot Skillet: Sear each scallop for 2-3 minutes per side in a hot skillet with a small amount of garlic butter, cooking until a crispy, caramelized crust develops.

Step 4: Finishing Touches

  • Drizzle Remaining Garlic Butter: Drizzle the remaining garlic butter over the lobster and scallops.
  • Garnish and Serve: Add extra lemon slices or fresh herbs for garnish, serving immediately for the best texture and flavor.

Customizing Your Garlic Butter Lobster and Scallops

Flavor Variations and Add-Ins

  • White Wine Reduction: Add white wine to the garlic butter for an added layer of depth.
  • Spice It Up: Red pepper flakes or paprika can bring a hint of spice that balances the butter’s richness.
  • Use Shrimp: If scallops aren’t available, swap them for shrimp to enjoy similar textures and flavors.

To explore more unique flavors, check out our Spicy Pineapple Jalapeño Chutney, which brings a fiery-sweet element to seafood or poultry dishes.

Nutritional Insights and Health Benefits

Nutritional Profile of Key Ingredients

  • Lobster: Rich in protein and low in fat, lobster is a nutritious seafood choice that’s high in essential nutrients like vitamin B12 and zinc.
  • Scallops: Known for their low-calorie, high-protein content, scallops are also a great source of omega-3 fatty acids, supporting heart health.
  • Butter and Garlic: While butter provides healthy fats in moderation, garlic is known for its antioxidant and anti-inflammatory benefits.

If you’re looking to pair this dish with a health-conscious side, try Greek Style Lemon Roasted Potatoes, which offers a light, zesty complement to the richness of the garlic butter.

Healthier Alternatives

  • Light Butter or Olive Oil: For a lighter version, substitute half of the butter with olive oil.
  • Lemon Zest: For added flavor without calories, use lemon zest instead of extra butter in the sauce.
  • Serve with a Light Salad: Pair with a fresh green salad to add fiber and additional nutrients.

Expert Tips for Perfecting Garlic Butter Lobster and Scallops

  1. Dry the Scallops: Ensuring scallops are dry before searing will create a better crust.
  2. Avoid Overcooking: Both lobster and scallops can become tough when overcooked, so keep a close eye on cooking times.
  3. Infuse Butter with Garlic Slowly: Let the garlic simmer gently in butter for a mellow, flavorful sauce without bitterness.

For more expert seafood tips, check out Ultimate Guide to Perfect French Bread Pizza, where timing and ingredient preparation are key to great texture and flavor.

FAQs About Garlic Butter Lobster and Scallops

Can I Make This Dish with Frozen Lobster or Scallops?

Yes, both can be used, but make sure they’re fully thawed and patted dry before cooking to ensure the best texture.

What’s the Best Way to Store Leftovers?

Store leftover lobster and scallops in an airtight container in the fridge for up to two days. Reheat gently in a skillet to prevent overcooking.

Can I Make This Recipe Without Garlic?

Yes, while garlic enhances the dish, you can use shallots or herbs for a milder flavor.

Should I Use Fresh or Frozen Scallops?

Fresh scallops are ideal, but if frozen is more convenient, make sure to thaw and dry them thoroughly.

For more FAQs on handling seafood, visit our Mastering Crispy Popcorn Shrimp page, where we discuss techniques for prepping and cooking seafood.

Storage, Reheating, and Serving Tips

  • Storage: Keep leftovers in the refrigerator in an airtight container for up to two days.
  • Reheating: Reheat in a skillet over low heat with a small amount of butter to prevent the seafood from becoming rubbery.
  • Serving Suggestions: Pair with steamed vegetables, garlic mashed potatoes, or crusty bread to soak up the sauce.

For more storage and meal-prep tips, see our Ultimate Guide to Comfort Food for ideas on storing and reheating hearty dishes.

Conclusion

Garlic Butter Lobster and Scallops is an indulgent, satisfying dish that showcases the rich flavors of seafood and garlic butter. Perfect for impressing guests or enjoying a special meal at home, this recipe is easy to make and offers customizable options. Whether served with a fresh salad or a side of potatoes, this dish is sure to become a favorite.

For a complete surf-and-turf meal, consider pairing this with Perfect Ribeye Steak for an unforgettable dining experience.