Very Berry Cheesecake Salad – Easy, Creamy Fruit Salad Recipe

berry cheesecake fruit salad, berry cream cheese salad, no-bake cheesecake salad, mixed berry salad, creamy berry dessert, berry dessert salad

Very Berry Cheesecake Salad: A Sweet, Creamy Treat for Any Occasion

The Very Berry Cheesecake Salad is a delightful fusion of creamy cheesecake flavors with the natural sweetness of fresh berries. Perfect for summer picnics, holiday gatherings, or anytime you want a quick, refreshing dessert, this no-bake berry salad is incredibly easy to make. The balance of cream cheese, whipped topping, and a medley of berries creates a dessert that’s both visually stunning and deliciously satisfying.

If you’re in the mood for more berry-inspired desserts, take a look at our Strawberry Freezer Pie for another fruity, no-bake option to keep you cool during warm months.


Ingredients for Very Berry Cheesecake Salad

To make this simple yet delicious dessert, gather the following ingredients:

  • Cream Cheese: Softened, for a creamy base.
  • Whipped Topping: Adds lightness to the cream cheese mixture.
  • Assorted Fresh Berries: Strawberries, blueberries, raspberries, and blackberries work best.
  • Powdered Sugar: Adds sweetness to the cheesecake mixture.
  • Vanilla Extract: Enhances the flavor.
  • Optional Additions: Mini marshmallows, graham cracker crumbs, or even sliced bananas for added texture.

For more tips on incorporating fresh fruits into desserts, check out our guide on using fresh fruits in salads, like our Apple Cranberry Walnut Salad.


Step-by-Step Guide to Making Very Berry Cheesecake Salad

1. Prepare the Cheesecake Mixture

  1. In a large bowl, beat the cream cheese until smooth and creamy.
  2. Add powdered sugar and vanilla extract, mixing until well combined.
  3. Gently fold in the whipped topping to create a light, fluffy texture.

2. Add the Fresh Berries

  1. Rinse and gently pat the berries dry to prevent excess moisture.
  2. Add the berries into the cheesecake mixture and fold them in carefully to avoid crushing them.

3. Final Assembly and Optional Toppings

  1. For added sweetness and texture, mix in mini marshmallows or graham cracker crumbs.
  2. Serve chilled and garnish with extra berries or mint leaves for presentation.

For another simple dessert that’s ready in minutes, try our recipe for Raspberry Lemon Bars.


Tips for Perfect Berry Cheesecake Salad

Creating the perfect Very Berry Cheesecake Salad is all about maintaining a balance of flavors and textures. Here are some essential tips:

  • Choose Fresh, Firm Berries: Fresh berries hold up better and give the salad a vibrant color.
  • Chill Before Serving: Letting the salad chill for about 30 minutes helps the flavors meld together.
  • Adjust Sweetness to Taste: You can adjust the powdered sugar depending on how sweet you want the salad.

Delicious Variations of Very Berry Cheesecake Salad

This cheesecake salad is easy to customize based on personal preferences. Here are some exciting variations:

1. Tropical Cheesecake Salad

  • Add tropical fruits like pineapple, mango, or kiwi for a tropical twist.

2. Chocolate Berry Cheesecake Salad

  • Fold in chocolate chips or drizzle with chocolate syrup for a dessert-like touch.

3. Nutty Berry Cheesecake Salad

  • Add toasted almonds or pecans for a delightful crunch.

4. Banana Berry Cheesecake Salad

  • Slice in fresh bananas to add extra sweetness and creaminess.

If you enjoy creamy desserts, explore our No-Bake Banana Pudding Cheesecake for another indulgent, fruit-filled dessert.


Serving and Storage Tips

Serving Suggestions

  • In Individual Cups: Serve in small parfait or mason jars for a more elegant presentation.
  • Garnished with Mint or Extra Berries: Add a pop of color with fresh mint leaves or extra berries on top.

Storage Tips

Store any leftovers in an airtight container in the refrigerator for up to 2 days. Avoid keeping it too long as the berries may start to release juices, making the salad watery.

If you’re looking for more storage tips, especially for delicate ingredients like cream cheese, visit our Tips for Storing Baked Goods.


Frequently Asked Questions (FAQs)

Can I make Very Berry Cheesecake Salad in advance?

Yes, you can prepare the cheesecake mixture a day ahead and add the berries just before serving to keep them fresh.

What other fruits can I add to Very Berry Cheesecake Salad?

Aside from berries, you can add pineapple, sliced bananas, or even apples for a mix of textures and flavors.

Can I use frozen berries?

Frozen berries may add too much moisture and cause the salad to be watery. Fresh berries are highly recommended for the best texture and flavor.

How long does Very Berry Cheesecake Salad last in the fridge?

The salad will last up to 2 days in the fridge but is best enjoyed within a day of making it.


Nutritional Information and Healthier Alternatives

A serving of Very Berry Cheesecake Salad contains about 200 calories, depending on the ingredients used. Here are some tips for a lighter version:

  • Swap Greek Yogurt for Cream Cheese: Greek yogurt can create a tangy base with fewer calories.
  • Use Sugar-Free Whipped Topping: Reduces the sugar content without sacrificing flavor.
  • Skip the Marshmallows: Omitting the marshmallows cuts down on added sugars.

Easy Homemade Coconut Macaroons Recipe – Perfect Chewy Treats

simple coconut macaroons, chewy coconut cookies, easy coconut macaroon recipe, homemade macaroons, quick coconut macaroons, coconut cookies

Easy Homemade Coconut Macaroons: A Simple Guide

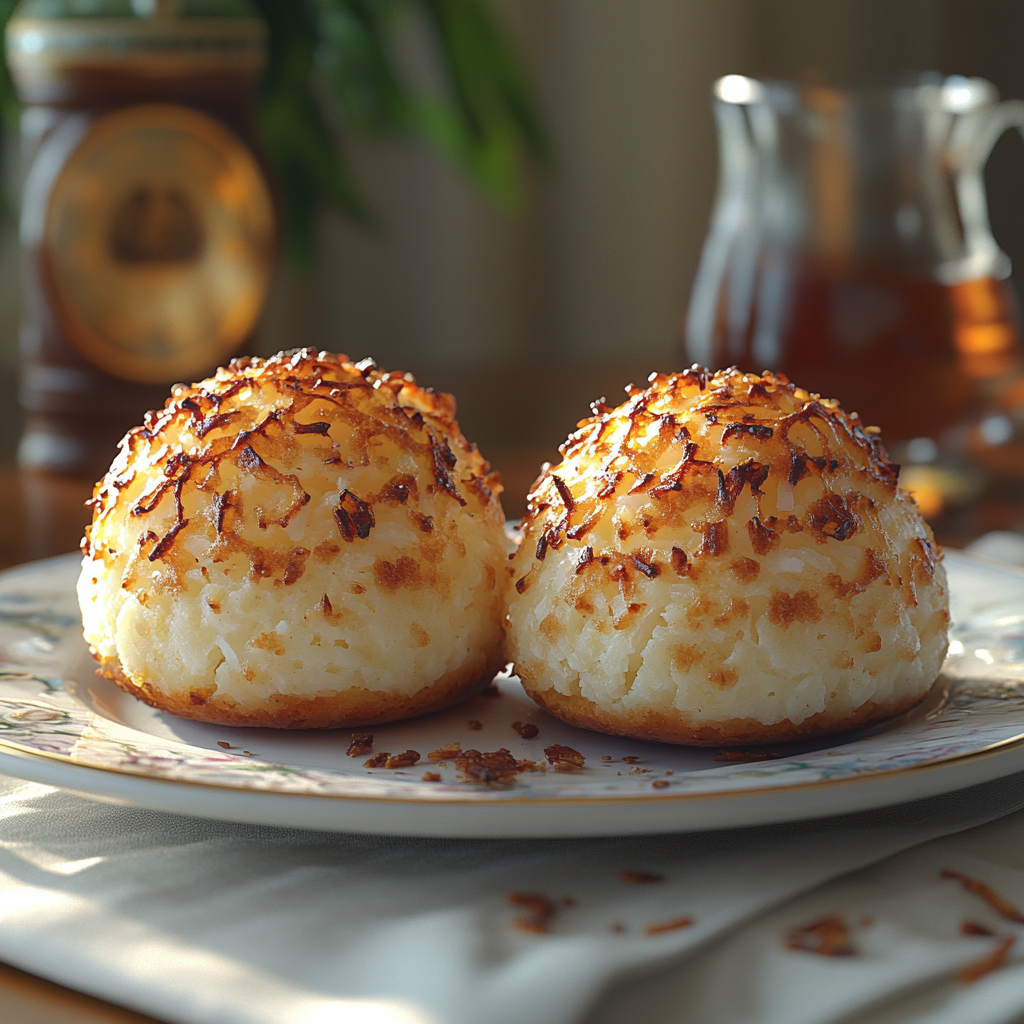
Homemade coconut macaroons are a delightful treat for anyone who loves the sweet, chewy goodness of coconut desserts. With just a few ingredients, you can whip up a batch of these delicious, lightly toasted cookies in no time. Perfect for holiday gatherings, as a quick dessert, or as an afternoon snack, these macaroons are versatile and easily customized.

The simplicity of this recipe makes it ideal for beginners, while also providing room for customization for those looking to add a personal touch. If you’re looking to pair these macaroons with a warm beverage, consider The Ultimate Comfort Food: Crockpot Potato Soup for a cozy and satisfying combination.


Ingredients for Coconut Macaroons

To create the perfect batch of coconut macaroons, start with these simple ingredients:

  • Sweetened shredded coconut: Adds the signature flavor and texture.
  • Sweetened condensed milk: Binds the ingredients together and provides richness.
  • Egg whites: Whipped to add volume and a light, airy texture.
  • Vanilla extract: For an extra layer of sweetness.
  • Optional add-ins: Consider almond extract or lemon zest for a twist.

For more tips on how to select the best coconut for baking, check out this Guide to Using Coconut in Baking.


Step-by-Step Guide to Making Coconut Macaroons

1. Prepare the Mixture

  1. In a large mixing bowl, combine the shredded coconut, sweetened condensed milk, and vanilla extract.
  2. In a separate bowl, beat the egg whites until stiff peaks form. This step helps to give the macaroons their airy texture.
  3. Gently fold the egg whites into the coconut mixture.

2. Shape and Bake

  1. Preheat the oven to 325°F (163°C) and line a baking sheet with parchment paper.
  2. Scoop the mixture onto the baking sheet, forming small mounds.
  3. Bake for about 20-25 minutes, or until the edges are golden brown.

3. Cool and Serve

Allow the macaroons to cool on the baking sheet for a few minutes before transferring them to a wire rack to cool completely. This helps them set and prevents crumbling.

For additional dessert inspiration, take a look at our Mini Pineapple Upside-Down Cakes for another easy and fun recipe.


Tips for Perfect Coconut Macaroons

  • Avoid Overmixing: When folding in the egg whites, be gentle to maintain the airy texture.
  • Use Fresh Ingredients: Fresh coconut and quality condensed milk make a noticeable difference in flavor.
  • Monitor the Baking Time: Keep an eye on the macaroons to avoid over-browning.

If you’re interested in a savory addition to your baking day, consider pairing these macaroons with The Ultimate Guide to Perfect French Bread Pizza for a balanced sweet and savory combination.


Delicious Variations on Classic Coconut Macaroons

Making coconut macaroons your own is easy. Here are some popular variations:

1. Chocolate-Dipped Coconut Macaroons

  • Melt chocolate and dip the bottoms of the macaroons, letting them harden on parchment paper.

2. Almond Coconut Macaroons

  • Add almond extract to the mixture or top each macaroon with an almond before baking.

3. Lemon Zest Coconut Macaroons

  • Incorporate lemon zest or a dash of lemon extract for a refreshing twist.

4. Healthier Coconut Macaroons

  • Swap out sweetened coconut for unsweetened and use sugar-free sweetened condensed milk for a lower-sugar option.

Serving and Storing Coconut Macaroons

Serving Ideas

Coconut macaroons are perfect on their own or paired with a cup of coffee or tea. For an elegant presentation, drizzle with chocolate or serve with a scoop of vanilla ice cream.

Storage Tips

Store the macaroons in an airtight container at room temperature for up to 3 days, or refrigerate for up to a week. For longer storage, they can be frozen for up to 3 months.

For more tips on keeping baked goods fresh, see How to Store Baked Goods.


Frequently Asked Questions

Can I Make Coconut Macaroons Without Eggs?

Yes! Some variations skip egg whites altogether, using sweetened condensed milk as the primary binder.

What Type of Coconut Works Best?

Sweetened shredded coconut provides the best texture, but unsweetened coconut can be used for a less sweet version.

How Do I Keep My Macaroons from Spreading?

Make sure to beat the egg whites until stiff peaks form, as this will help the macaroons hold their shape.

Can I Freeze Coconut Macaroons?

Yes, coconut macaroons freeze well! Simply place them in an airtight container and freeze for up to three months.


Nutritional Information and Healthier Alternatives

Each macaroon contains approximately 100 calories, 6g of fat, and 9g of sugar. For a lighter version, consider:

  • Using unsweetened shredded coconut to reduce sugar.
  • Swapping for low-fat sweetened condensed milk for fewer calories.
  • Experimenting with sugar-free sweeteners if you prefer a sugar-free version.

For a healthier twist on classic desserts, check out our low-sugar dessert options that offer the same satisfying taste without the extra sugar.

Easy Oreo Dirt Cake Recipe – Perfect No-Bake Dessert for Any Occasion

dirt cake recipe, no-bake Oreo dessert, Oreo pudding cake, dirt pudding, gummy worm dirt cake, easy dirt cake, Oreo dessert ideas

Oreo Dirt Cake: The Ultimate No-Bake Dessert Recipe

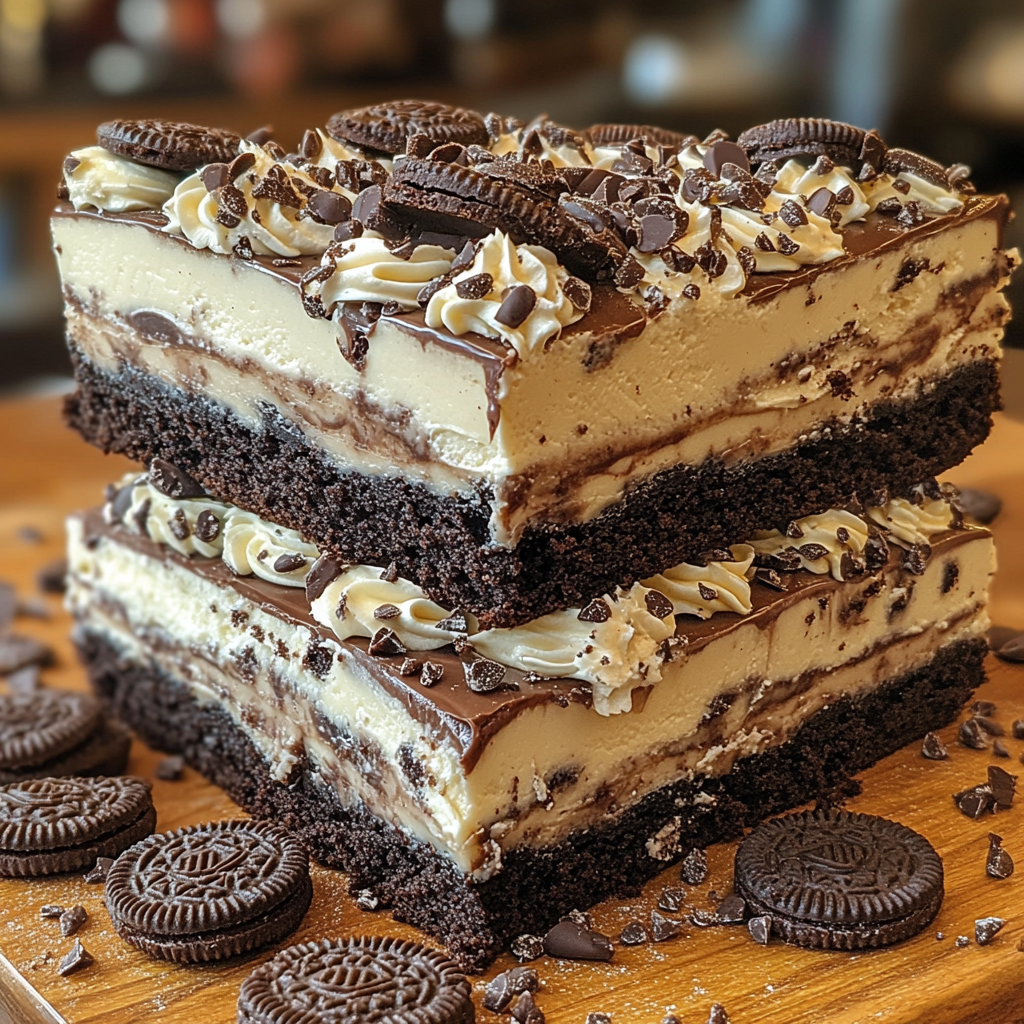
Oreo Dirt Cake is a classic, no-bake dessert that brings out the kid in everyone. With layers of crushed Oreos, creamy pudding, and gummy worms for decoration, it’s easy to see why this treat is so popular for family gatherings, birthday parties, and even Halloween. The best part? It’s incredibly simple to make and requires no baking.

This versatile dessert can be dressed up or down and is perfect for those who want to create a dessert that looks as fun as it tastes. If you’re looking for another delicious dessert to try, check out our S’mores Jars for a campfire-inspired treat in a jar!


Ingredients for Oreo Dirt Cake

To create this easy, no-bake dessert, gather the following ingredients:

  • 1 package of Oreos: Crushed to create the “dirt” layer.
  • 8 oz cream cheese: Softened for a creamy layer.
  • 1/2 cup butter: Adds richness to the creamy layer.
  • 1 cup powdered sugar: For sweetness.
  • 2 boxes of chocolate pudding mix: For a rich, chocolatey base.
  • 3 cups milk: To mix with the pudding.
  • 1 tub of whipped topping (Cool Whip): For a fluffy, smooth texture.
  • Gummy worms: Optional but perfect for adding a playful element.

For a deeper look at no-bake desserts, explore our No-Bake Banana Pudding Cheesecake for another fun and easy recipe.


How to Make Oreo Dirt Cake

Step 1: Prepare the Pudding

  1. In a large bowl, whisk together the chocolate pudding mix and milk until smooth.
  2. Allow it to set for a few minutes in the refrigerator while you prepare the other layers.

Step 2: Make the Cream Cheese Layer

  1. In a separate bowl, beat together the softened cream cheese, butter, and powdered sugar until smooth.
  2. Fold in the whipped topping to create a light, fluffy texture.

Step 3: Assemble the Layers

  1. Crushed Oreos: Begin by spreading a layer of crushed Oreos on the bottom of your dish.
  2. Cream Cheese Layer: Add a thick layer of the cream cheese mixture on top of the crushed Oreos.
  3. Pudding Layer: Spread the pudding evenly over the cream cheese layer.
  4. Final Oreo Layer: Top with another layer of crushed Oreos to resemble dirt.

Tips for the Perfect Oreo Dirt Cake

Creating the perfect Oreo Dirt Cake can be as simple or intricate as you like. Here are some tips for achieving a flawless dessert:

  • Use Fresh Ingredients: Ensure your cream cheese is softened for easy mixing, and use fresh milk for the best pudding consistency.
  • Chill Thoroughly: Allow the assembled dessert to chill in the refrigerator for at least an hour before serving.
  • Layer in Clear Cups for Single Servings: Oreo Dirt Cups are perfect for parties and easy to serve!

For a comforting savory dish to pair with dessert, try our Crockpot Potato Soup for a warming addition to any meal.


Creative Variations on Oreo Dirt Cake

One of the best parts about Oreo Dirt Cake is its flexibility. Here are a few ways to put your own spin on this dessert:

1. Mint Oreo Dirt Cake

  • Use mint-flavored Oreos and add a drop of mint extract to the cream cheese layer.

2. Halloween-Themed Dirt Cake

  • Add gummy worms, candy bones, or edible tombstones for a spooky Halloween twist.

3. Vegan Oreo Dirt Cake

  • Substitute dairy-free cream cheese, almond milk, and vegan whipped topping to make a vegan-friendly version.

For more holiday-inspired ideas, check out our recipe for Mini Pineapple Upside-Down Cakes.


Frequently Asked Questions (FAQs)

Can I make Oreo Dirt Cake in advance?

Yes, Oreo Dirt Cake can be prepared a day ahead and kept in the refrigerator. Just wait to add any gummy decorations until right before serving to prevent them from becoming soggy.

What’s the best way to crush Oreos for Dirt Cake?

You can crush Oreos by placing them in a zip-top bag and smashing them with a rolling pin or pulsing them in a food processor.

How long does Oreo Dirt Cake last?

Oreo Dirt Cake will keep for up to 3-4 days in the refrigerator. Be sure to cover it tightly to maintain freshness.

Can I freeze Oreo Dirt Cake?

Freezing is not recommended as it can alter the texture of the pudding and whipped topping.

Can I use other cookies besides Oreos?

Yes! Chocolate graham crackers or other chocolate cookies can also work well as a substitute.


Healthier Versions and Nutritional Info

Each serving of Oreo Dirt Cake can contain significant calories from the cream cheese, butter, and whipped topping. Here are a few ways to lighten it up:

  • Use Reduced-Fat Cream Cheese: For a slightly lighter cream cheese layer.
  • Swap for Sugar-Free Pudding: Helps reduce the sugar content without sacrificing flavor.
  • Try Low-Fat Whipped Topping: This can lower the fat content.

If you’re interested in creating more balanced dessert options, check out our guide to making lighter sweets with ingredients like fresh fruit or Greek yogurt.

Ultimate Guide to Avocado Toast – Easy Recipes and Tasty Toppings

healthy avocado toast, avocado toast recipes, easy avocado toast, best toppings for avocado toast, nutritious avocado breakfast

Avocado Toast: A Simple Yet Versatile Meal Option

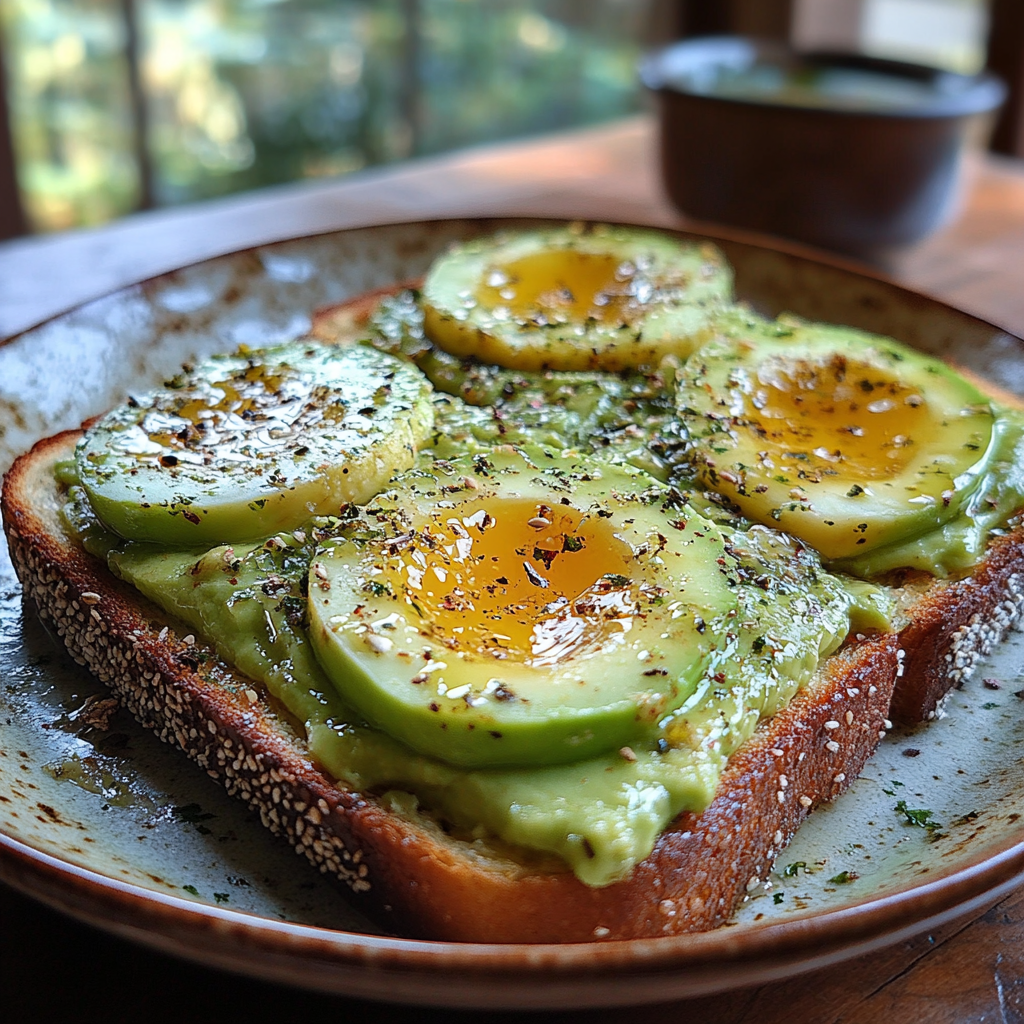
Avocado toast has grown in popularity, becoming a staple for breakfast and brunch around the world. This delicious, creamy snack is easy to make, healthy, and adaptable to countless flavors. By combining ripe avocados, a few seasonings, and quality bread, you can create a balanced dish that fits a variety of dietary preferences and meal plans.

Rich in healthy fats and fiber, avocado toast is as nutritious as it is tasty. Adding variety to this simple dish is easy, with toppings like tomatoes, smoked salmon, or even berries. For more insights into quick and delicious meal options, check out Sheetpan Pancakes for another breakfast alternative.


Ingredients for the Perfect Avocado Toast

To create the ideal avocado toast, focus on fresh, quality ingredients that enhance the texture and flavor:

  • Bread: Choose hearty options like sourdough, multigrain, or rye for texture.
  • Avocado: Ripe Hass avocados provide a creamy base.
  • Seasonings: Salt, pepper, lemon or lime juice, and optional red pepper flakes or herbs.
  • Optional Additions: Olive oil, garlic, or balsamic glaze.

Step-by-Step Recipe for Classic Avocado Toast

  1. Toast the Bread: Start by toasting your bread to a golden crisp.
  2. Prepare the Avocado: Slice, pit, and scoop the avocado. Mash it with a fork, adding salt, pepper, and lemon juice to taste.
  3. Assemble: Spread the avocado mixture onto the toast and finish with additional seasonings or toppings.

For tips on storing avocados to maintain freshness, see The Ultimate Avocado Preservation Hack.


Delicious Avocado Toast Variations

Making avocado toast your own is all about experimenting with flavors. Here are some popular versions that offer different textures and tastes:

1. Mediterranean Style

  • Toppings: Sliced tomatoes, feta cheese, olives, and a sprinkle of oregano.
  • Flavor Profile: Adds a tangy, briny note perfect for Mediterranean cuisine lovers.

2. Spicy Avocado Toast

  • Toppings: Chili flakes, sriracha drizzle, or sliced jalapeños.
  • Flavor Profile: For those who like a little heat, this version pairs well with a cool yogurt dressing on the side.

3. Smoked Salmon Avocado Toast

  • Toppings: Smoked salmon, red onion, capers, and dill.
  • Flavor Profile: Adds a savory, salty flavor that’s rich in omega-3s.

Discover how to pair this recipe with other appetizers for a balanced brunch menu.


Health Benefits of Avocado Toast

Nutritional Profile of Avocados

Avocados are packed with monounsaturated fats, which are heart-healthy and help with satiety. They’re also rich in potassium, fiber, and vitamins C, E, and B6. Avocado toast can be tailored to fit various dietary needs, whether keto, vegan, or gluten-free.

Why Avocado Toast is a Balanced Meal

Combining avocados with whole-grain bread creates a balanced meal with healthy fats, fiber, and protein (if you add toppings like eggs or cheese).


Creative Toppings for Avocado Toast

Adding different toppings can make your avocado toast more exciting and nutritious:

  • Eggs: A fried or poached egg adds protein and richness.
  • Microgreens: Boosts flavor and adds a fresh, green texture.
  • Herbs and Spices: Fresh herbs like basil, cilantro, or parsley, along with spices like cumin or turmeric.
  • Cheese: Crumbled feta, goat cheese, or grated parmesan for a savory kick.

If you’re a fan of savory breakfasts, you might enjoy trying out our Kentucky Butter Cake for a twist on traditional breakfast fare.


FAQs About Avocado Toast

Is Avocado Toast Healthy?

Yes, avocado toast provides essential nutrients, including fiber and healthy fats. Adjusting toppings can make it even more nutrient-dense.

What Kind of Bread is Best for Avocado Toast?

Choose sturdy breads like sourdough or multigrain, which can hold up to creamy avocado and additional toppings.

How Can I Prevent My Avocado From Browning?

Use lemon or lime juice on your avocado to slow down the oxidation process.

Can I Make Avocado Toast Ahead of Time?

For best freshness, prepare avocado toast just before eating. You can mash the avocado and store it with lemon juice in an airtight container for up to a day.

Can Avocado Toast Fit a Low-Calorie Diet?

Yes, by controlling portions and adding low-calorie toppings, avocado toast can fit within a calorie-controlled meal plan.


Tips for Perfect Avocado Toast

  • Select Ripe Avocados: Choose avocados that yield slightly to gentle pressure.
  • Season Generously: Don’t be shy with salt and pepper, as avocados can be mild in flavor.
  • Add a Crunchy Element: Sprinkle seeds like sesame, chia, or sunflower for added texture.

Fun Facts and History of Avocado Toast

Avocado toast gained popularity in California in the early 2000s and quickly became a social media sensation. Its vibrant green color and endless topping possibilities made it a hit among food lovers and influencers alike.

Today, avocado toast is a global phenomenon and is found in cafes, restaurants, and home kitchens worldwide. It’s celebrated for its simplicity, nutritional benefits, and aesthetic appeal.

For a twist on traditional avocado toast, explore Dunkaroo Dip as a fun and nostalgic addition to your snack rotation.

Festive Cranberry Pistachio Shortbread Cookies Recipe – Perfect Holiday Treat

holiday shortbread cookies, cranberry pistachio cookies, festive shortbread, holiday baking, Christmas shortbread cookies, nutty cranberry cookies

Cranberry Pistachio Shortbread Cookies: The Perfect Holiday Treat

For holiday gatherings, Cranberry Pistachio Shortbread Cookies stand out as a festive, delicious treat. With vibrant green pistachios and red cranberries, these cookies capture the spirit of the season. Made with a buttery shortbread base, they’re both visually appealing and easy to make. Whether you’re preparing a cozy family dessert or packaging treats for gifting, these cookies bring the best of homemade holiday baking to your kitchen.

These cookies are not only visually appealing but also satisfyingly flavorful. The tartness of cranberries combined with the richness of pistachios creates a perfectly balanced cookie. If you’re ready to explore more holiday flavors, you may want to try Orange Creamsicle Moonshine for a holiday twist!


Ingredients Needed for Cranberry Pistachio Shortbread Cookies

  • All-Purpose Flour: Provides structure for the cookies.
  • Unsalted Butter: Adds rich flavor and ensures a tender crumb.
  • Powdered Sugar: Sweetens without making the cookies too dense.
  • Dried Cranberries: Offers a tart contrast to the buttery base.
  • Pistachios: Adds a nutty taste and a pop of color.
  • Vanilla Extract: Enhances flavor with a sweet aroma.

For a detailed guide on handling nuts in recipes, visit this baking techniques guide.


Step-by-Step Guide to Making Cranberry Pistachio Shortbread Cookies

1. Prepare the Dough

  • Mix Butter and Sugar: Cream together butter and powdered sugar until smooth.
  • Add Flour and Vanilla: Slowly incorporate flour and a dash of vanilla extract to create a dough.
  • Fold in Cranberries and Pistachios: Gently fold in the cranberries and pistachios for even distribution.

2. Shape and Chill the Dough

To prevent spreading during baking, shape the dough into a log, wrap in plastic, and chill for at least an hour.

3. Slice and Bake

Once chilled, slice the log into rounds. Bake at 350°F for 12-15 minutes, until the edges are lightly golden.


Tips for Perfect Cranberry Pistachio Shortbread Cookies

Achieving the perfect balance of flavors in your Cranberry Pistachio Shortbread Cookies can be easy with these tips:

  • Chill Thoroughly: Chilling the dough prevents the cookies from spreading too much.
  • Even Distribution of Nuts and Cranberries: Mix thoroughly to ensure each cookie has a balanced taste.
  • Avoid Overmixing: Overworking the dough can lead to tough cookies.

For more holiday cookie tips, check out this Holiday Cookie Guide.


Variations of Cranberry Pistachio Shortbread Cookies

  • White Chocolate Drizzle: Add a festive touch by drizzling melted white chocolate over the cooled cookies.
  • Orange Zest Addition: For a citrusy twist, add a teaspoon of orange zest to the dough.
  • Almond Flour Substitute: Swap half of the all-purpose flour with almond flour for a nuttier, softer cookie.

You may also enjoy variations like the classic Raspberry Lemon Bars for additional holiday inspiration.


Serving and Storing Cranberry Pistachio Shortbread Cookies

Serving Suggestions

Arrange these cookies on a holiday platter for a colorful display. They pair well with warm drinks like hot chocolate or tea.

Storing Tips

To maintain their freshness, store the cookies in an airtight container. They can last up to a week at room temperature or be frozen for up to three months.


Frequently Asked Questions

Can I Use Fresh Cranberries Instead of Dried?

Fresh cranberries contain more moisture and may alter the texture of the cookies. It’s recommended to use dried cranberries for this recipe.

How Do I Store the Dough for Later Use?

The dough can be stored in the fridge for up to two days or frozen for up to three months. Be sure to wrap it tightly in plastic wrap.

What If I Don’t Have Pistachios?

You can substitute pistachios with almonds or pecans. Learn more about nut substitutions in holiday baking here.

Can I Add a Different Flavor?

Absolutely! Almond or lemon extract can provide a unique twist.


Nutritional Information and Healthier Alternatives

Each cookie contains approximately 90 calories, with about 5 grams of fat. For a lower-calorie option, consider reducing the sugar or swapping half the butter with applesauce for added moisture.